

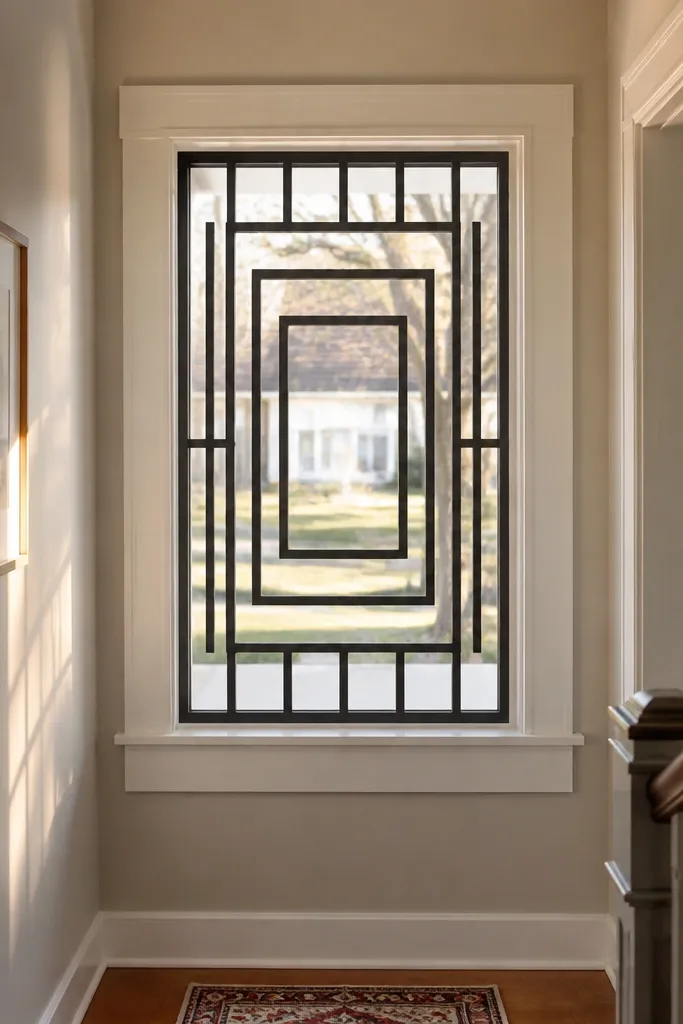
1. Matte-Black Square Grid with 2-Inch Spacing

This is the easiest modern look to get right because it’s just repetition. A square grid makes the window read structured and architectural, and it photographs well from inside or outside. Use it when you want security coverage without adding visual weight. Keep the spacing consistent at about 2 inches so the pattern looks deliberate rather than “random bars.” Matte black also hides minor surface imperfections better than glossy paint.
Start by cutting a rectangle frame from 1 in flat bar or square tube to match your window opening size plus a 1/2 in overlap on all sides. Then lay out vertical and horizontal bars with 2 in spacing on the outside face of the frame and tack-weld or clamp them in place. Finish by filling the corners cleanly, grinding welds lightly, sanding the whole grill smooth, priming with metal primer, and spraying 2 light coats of matte black enamel.
Editor's noteUse painter’s tape lines on the frame to mark bar positions before any welding — it keeps the grid perfectly even.
Skip thisDon’t mix bar widths — one thicker bar among thin ones makes the whole grill look DIY.
2. Vertical Slat Grill with One Center Accent Line
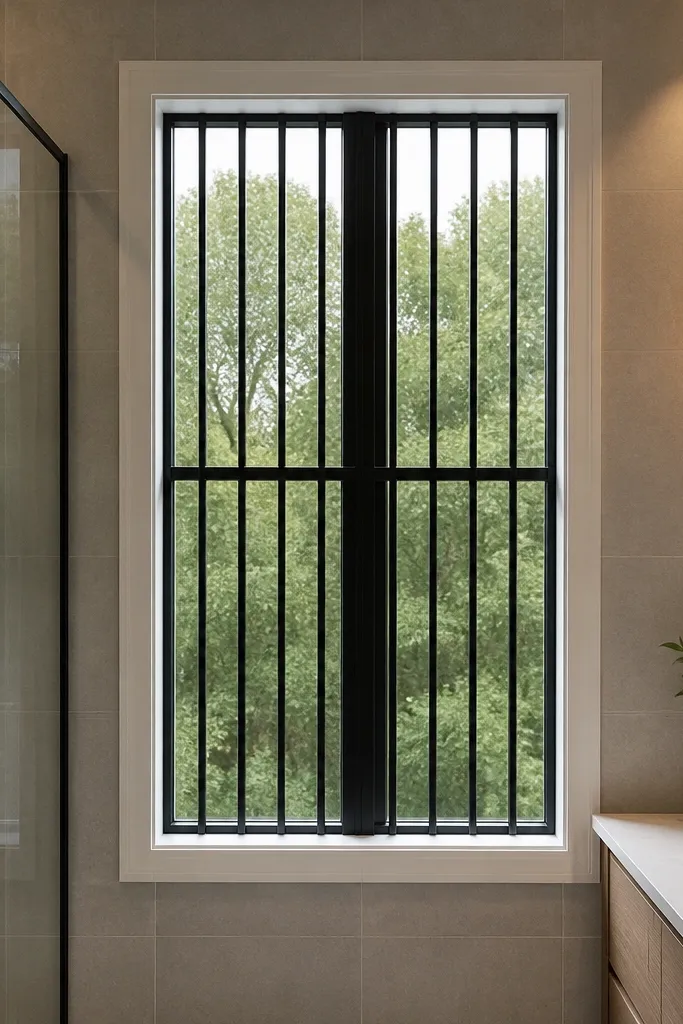
Vertical slats give you a modern, narrow “shadow line” look. The single center accent bar adds direction and keeps the design from feeling too plain. This is a strong pick for narrow windows or bathrooms because it still feels airy while blocking direct access. The trick is spacing: keep slats uniform so the window framing looks crisp, not busy. It’s also budget-friendly because you’re mostly cutting straight pieces.
Build a simple perimeter frame first with square tube. Cut vertical bars so you have equal gaps — aim for 1 3/4 to 2 inches between centers depending on your security needs. Weld or bolt the vertical bars to the frame, then add one thicker center bar (like 3/4 in tube or a wider flat bar) aligned with the window center. Grind, sand, prime, and spray matte black or charcoal for a clean finish.
Before cutting, mark your bar count on paper and add 1 extra bar so you can adjust spacing without wasting time.
Skip wide gaps — they make the grill look “decorative” instead of solid.
3. Chevron V-Pattern Using Flat Bar Fins
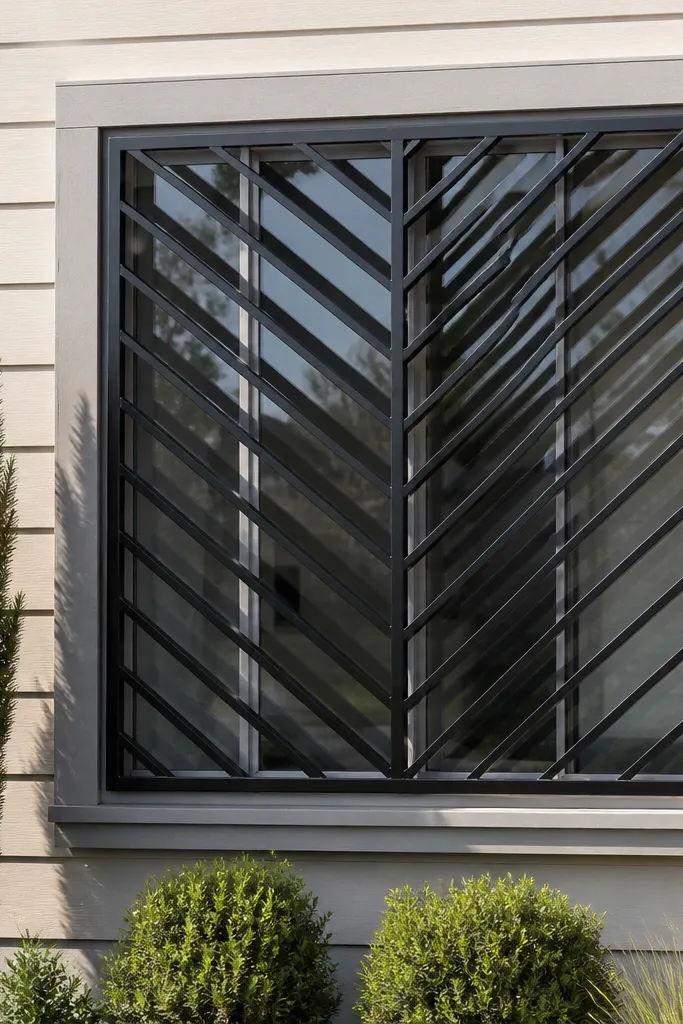
Chevron patterns look modern because the eye reads movement and structure, not ornament. Flat bar fins create a crisp V shape that catches light cleanly. This design works best when the window is wider than it is tall, like living room or front facade windows. It also hides small weld inconsistencies better because the pattern breaks up straight-line imperfections. If you want “modern but not boring,” this is one of the best budget options.
Start with a perimeter frame and decide your chevron height — a common look is 6 to 8 inches per V row. Cut identical flat bar pieces for the V legs and dry-fit them on a flat surface to confirm the angle before welding. Weld in rows from the bottom up, keeping the V tips aligned to a center line. Grind lightly, sand smooth, prime, then spray with matte black enamel.
Editor's noteClamp a straight 2x4 along your center alignment so every V tip hits the same spot.
Skip thisDon’t freehand angles — one off cut makes the chevrons look crooked fast.
4. Half-Grid with Diagonal Corner Bracing
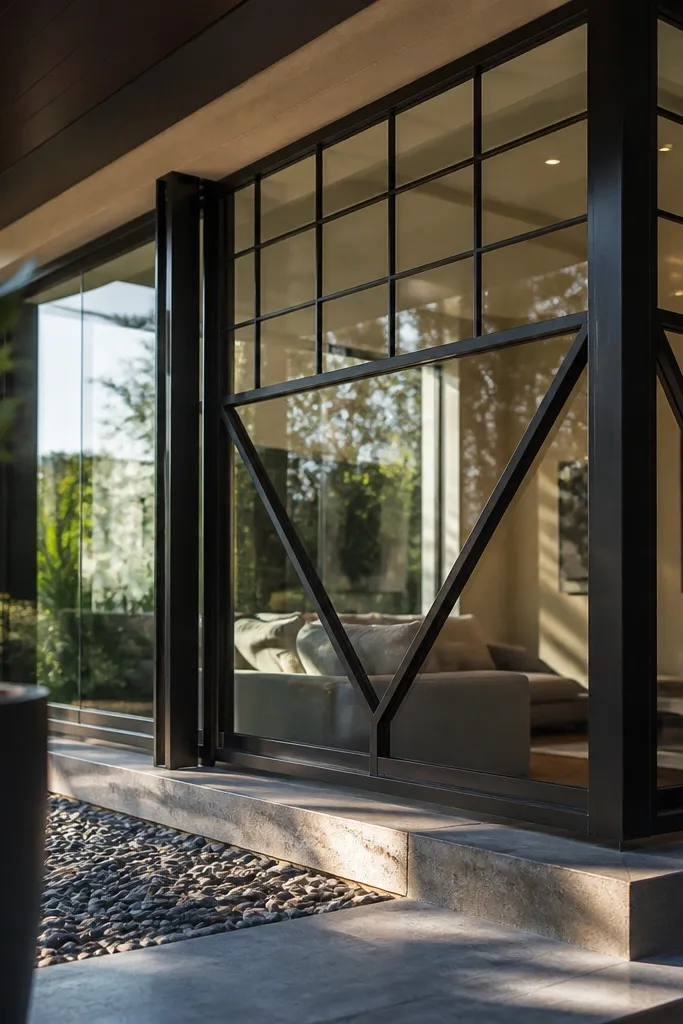
This design looks intentional because it mixes a clean grid with structural diagonals. The diagonal corner bracing adds a modern “engineered” vibe without filling the whole window with metal. Use it when you want security but also want the grill to feel lighter. It’s budget-friendly because you only need diagonals in two corners plus a partial grid. The result reads modern, not decorative clutter.
Frame the window opening with square tube. Add a grid only on the top half or left half using evenly spaced bars, then place two diagonals in the remaining corners to form an X-like tension effect. Weld the diagonals first, then connect them with the partial grid bars so everything ties into the perimeter frame. Grind, sand, prime, and spray two thin top coats to keep edges sharp.
Measure diagonals with a tape measure along the bar path, not straight across — it prevents fit surprises.
Don’t put diagonals at random angles — choose one consistent angle and repeat it.
5. Minimal Rectangle Frame with Inner "Lattice" Lines
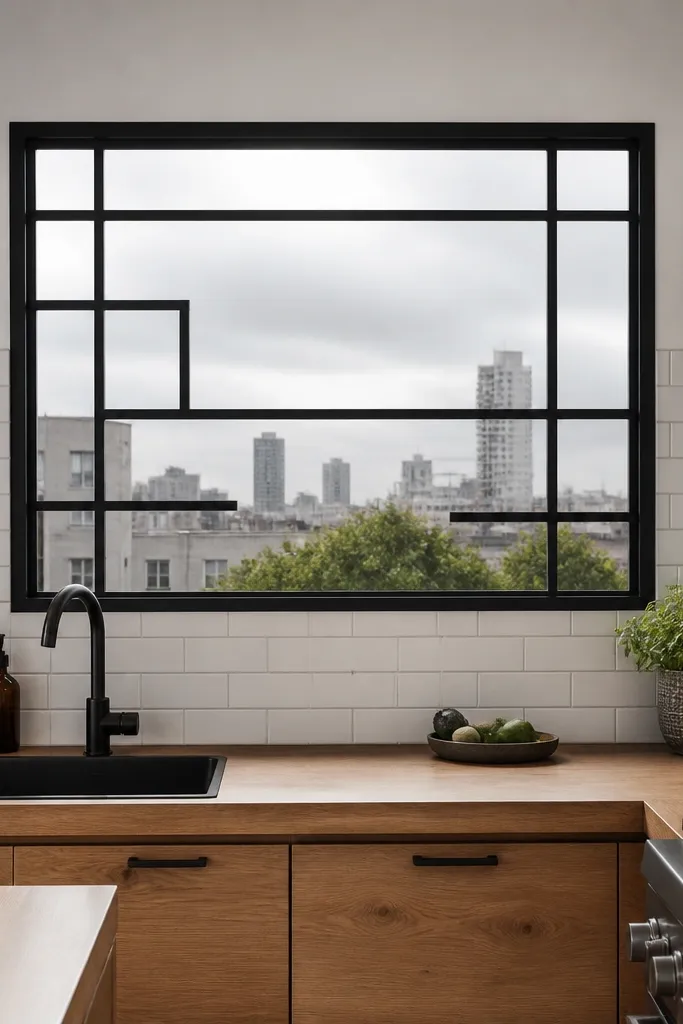
If you want modern and airy, this is the design. It uses a thin outer rectangle and a few internal lines that suggest structure without covering the whole window with bars. The look is clean, especially on farmhouse-modern or industrial interiors. It also helps you keep costs down because the amount of steel is lower than full grids. Photograph it from outside — the negative space is what makes it feel high-end.
Build a perimeter frame from slimmer square tube or narrow flat bar. Mark two vertical inner lines and one horizontal inner line, spacing them evenly inside the perimeter. Weld those internal lines in place, then add two small corner connectors so the pattern feels “framed” rather than floating. Sand, prime, and spray matte black, paying attention to edges so the thin lines stay crisp.
Use 3-4 tack welds per internal line, then check squareness before final welds.
Don’t overbuild the lattice — too many internal bars kills the airy modern look.
6. Rounded Corner Frame with Straight Crossbars
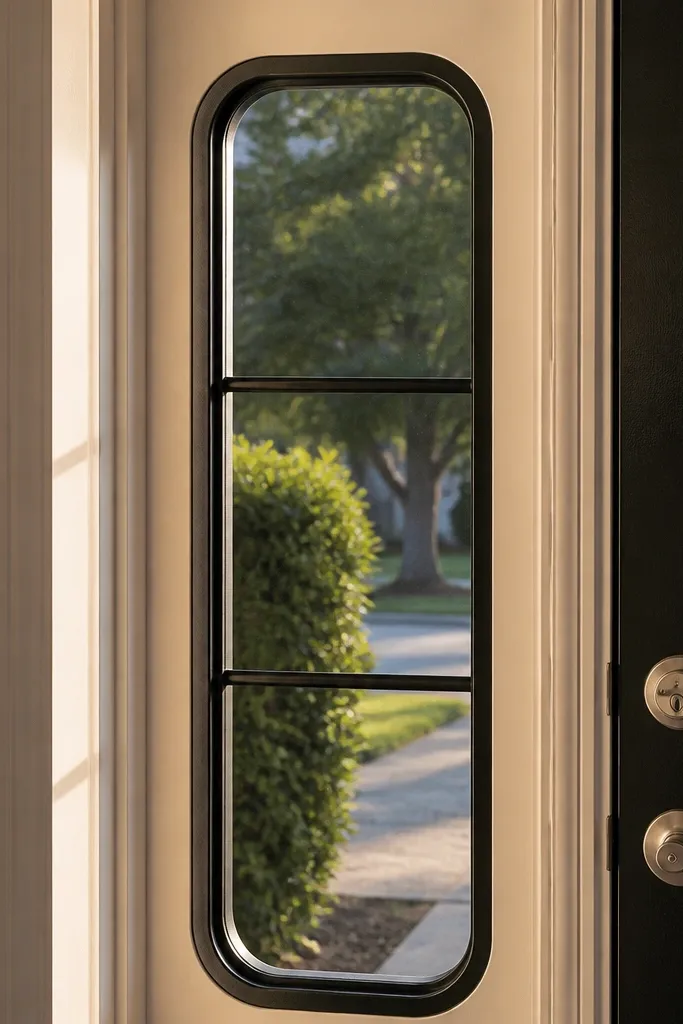
Rounded corners soften the whole grill and instantly move it into “modern” territory. The straight crossbars keep it secure and readable. This works especially well on windows with rounded trim or on entry doors that already have gentle curves. You don’t need to bend metal perfectly — you can use prefabricated corner segments or weld short pieces into a smooth arc. The key is keeping the arc consistent so it looks intentional.
Start by creating an outer frame with rounded corners using short curved segments or by welding multiple short straight cuts into a smooth curve. Keep the bar thickness consistent and align the curve so it sits centered on the window opening. Add two or three straight crossbars depending on window height, spaced evenly. Grind, sand, prime, and spray matte charcoal or black enamel for a clean finish that hides curve weld joints.
Use a flexible tape measure to set your rounded corner radius before cutting any segments.
Don’t leave curve weld lumps — they show through paint and make the arc look messy.
7. Two-Tier Bar Layout with Offset Middle Row
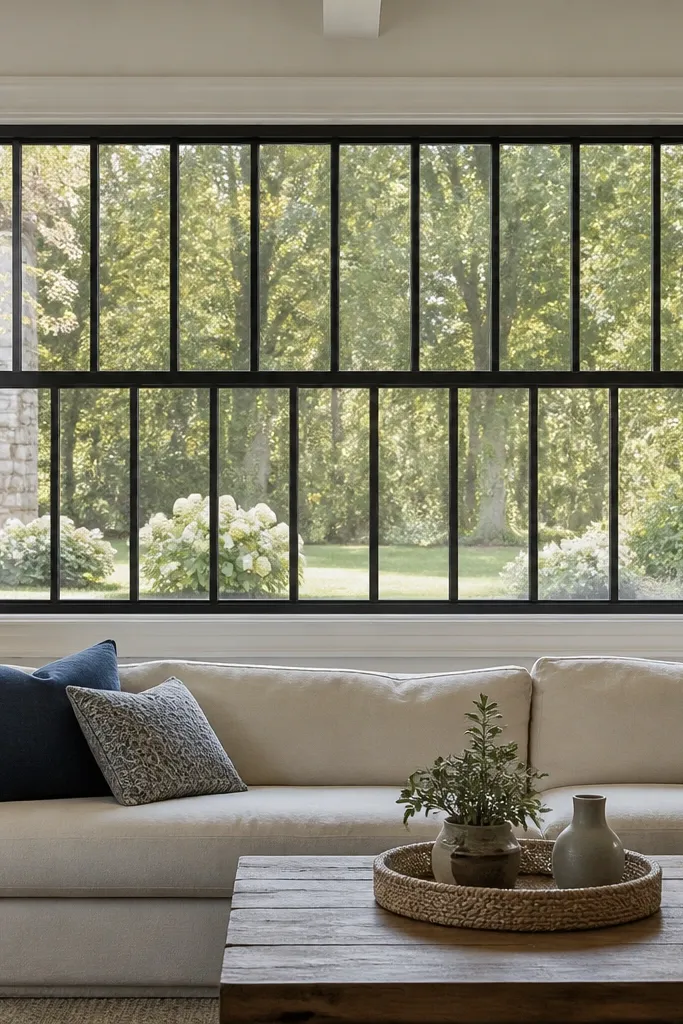
This one looks modern because it breaks the “everything is aligned” rule in a controlled way. You get a clean top and bottom bar rhythm, then an offset middle row that adds depth. It looks great on larger windows where a standard grid feels too flat. It also reduces the number of bars while still covering the opening. If you want a design that feels custom without custom metalwork, this is the move.
Frame the window opening with square tube. Install vertical bars in the top third and bottom third with uniform spacing, then add a middle third with bars offset by about half a bar width. For example, if spacing between centers is 2 inches, offset the middle row by 1 inch. Weld everything to the perimeter frame, grind smooth, prime, and spray matte black.
Editor's noteDry-fit the offset row first and stand back — if the offset feels too large, reduce it to 1/3 spacing.
Skip thisDon’t rely on eyeballing offsets — mark positions with tape or a jig so the offset is consistent.
8. Staggered Horizontal Bars with Vertical End Caps
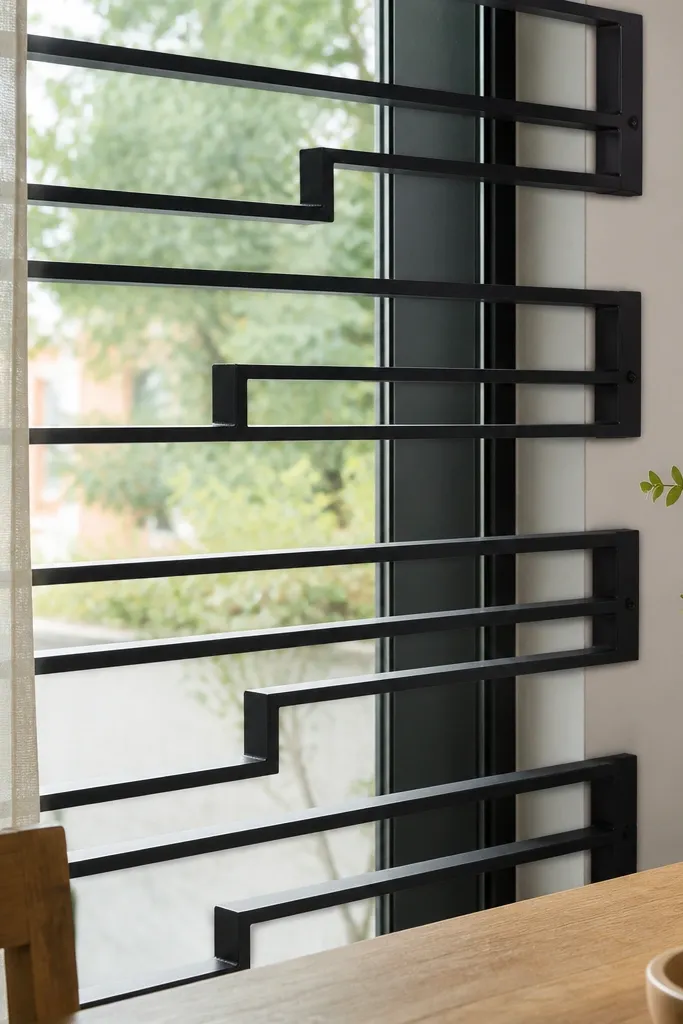
Horizontal bars feel more contemporary than vertical slats when the window has wide proportions. Staggering them adds motion and makes the grill look designed, not assembled. Vertical end caps give it a finished frame so the pattern doesn’t look like separate pieces. This is a good budget choice because you’re cutting fewer long pieces and keeping the layout simple. Matte black makes the staggered edges read sharp.
Build a perimeter rectangle frame. Cut horizontal bars and weld them in two staggered layers so the gaps don’t line up — aim for a half-bar offset. Add stronger vertical end caps by using thicker tube or flat bar at both sides, welding them to the perimeter and the ends of the staggered bars. Grind, sand, prime, and apply two light coats of black enamel.
Editor's noteUse the same spacer blocks for every gap so the stagger stays even across the window width.
Skip thisSkip thick-to-thin transitions — changing thickness mid-bar makes the stagger look accidental.
9. Open Center Rectangle with Perimeter Security Bars
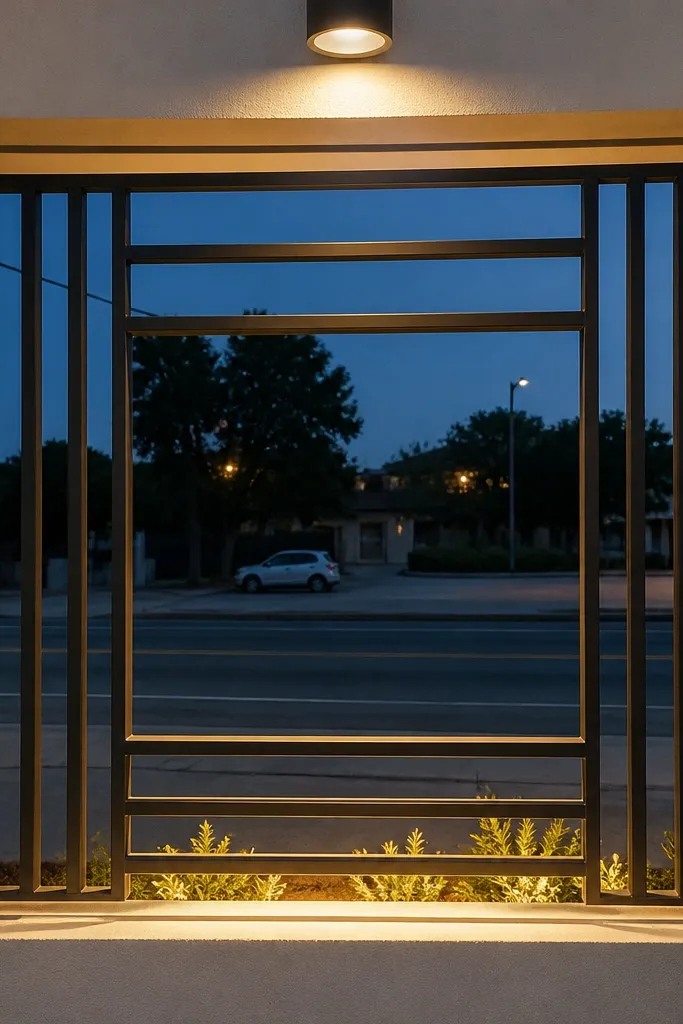
This design keeps a lot of negative space while still giving you a secure perimeter. It’s photogenic because it looks like a modern frame within a frame. Use it for windows where you want to preserve the view and avoid a heavy look. The perimeter security bars also make it easier to mount and distribute load. It’s one of the best “modern minimal” options for small budgets.
Create a thick perimeter frame from square tube. Inside it, weld an inner rectangle made from slimmer bar stock, leaving a gap between inner and outer frames so it reads like a clean border. Add two or three cross connectors between the inner and outer frames to prevent flex. Finish with sanding, metal primer, and matte black spray paint.
Editor's noteKeep the inner rectangle centered and leave an even border gap on all sides so it looks symmetrical.
Skip thisDon’t make the inner rectangle too close to the outer frame — it collapses the visual separation.
10. Modern "Sunburst" Corners with Straight Center Bars
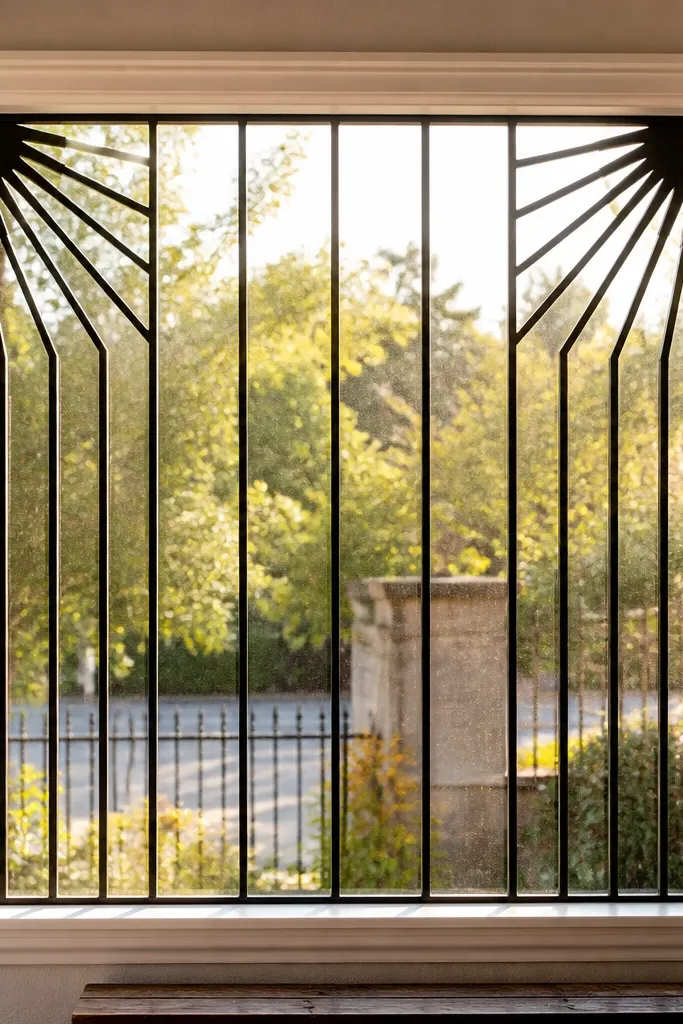
Sunburst corners add a design hit without covering the whole window in complex work. You get the modern sparkle at the corners, while the center stays simple with straight bars for security. This looks especially good on front windows where you want something more interesting than a grid. It also hides welds at the corners because the radiating pattern breaks up the eye. Keep the rays short and consistent for a clean look.
Start with a perimeter frame and two or three straight vertical center bars. Then build corner sunbursts using short flat bar pieces radiating from a small corner point toward the perimeter, like 6 rays per corner. Weld the rays only at their ends so the middle lines stay clean and uniform. Grind, sand, prime, and spray matte black with careful edge coverage.
Mark each ray length with a scrap template so all rays end at the same perimeter line.
Don’t add sunbursts to every corner plus a full grid — it turns into clutter fast.
11. Diagonal Frame Band with Vertical Bars Behind It
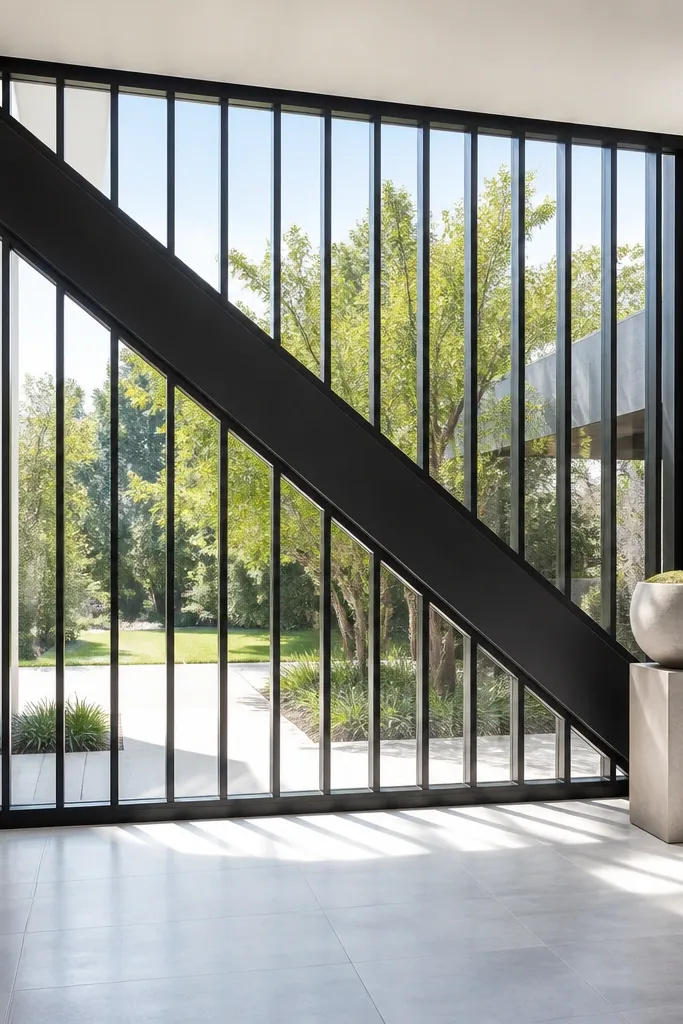
This design looks layered, which reads modern in photos. A diagonal band gives movement while vertical bars keep it secure and structured. It works well for larger windows because the diagonal band becomes the focal line. You also get a budget win: you’re only adding one diagonal element rather than building a full diagonal lattice. Matte black makes the diagonal band edges look crisp and intentional.
Build a perimeter frame. Add vertical bars spaced evenly across the window. Then weld a diagonal band across the front — for example, a strip of flat bar running from bottom-left to top-right, aligned with the frame. Weld the diagonal band to the perimeter and to a few vertical bars so it feels attached, not stuck on. Sand, prime, and spray matte black.
Editor's noteUse a chalk line pulled tight across the window face to set the diagonal band angle before welding.
Skip thisDon’t weld the diagonal band to every vertical bar — it warps the alignment if the metal heats unevenly.
12. Square Frame + Interior "T" Crossbars

T crossbars look modern because they create clear geometry and a strong visual rhythm. The T shape guides the eye across the window without needing a full grid. This is a great option when you want pattern without dense metal. It also hides slight spacing errors because each T reads as a unit. Keep the T sizes consistent and the whole grill looks designed.
Start with a square perimeter frame. Cut vertical bars and weld them at equal spacing, then add horizontal crosspieces that form the top of each T at the same height. Build a consistent T height by measuring from the bottom frame and using a stop block so every crosspiece lands perfectly. Grind, sand, prime, and spray matte black enamel.
Clamp a scrap bar across the tops of the verticals to keep all T heights aligned before you weld.
Avoid uneven T heights — it makes the pattern look sloppy even with good paint.
13. Black Steel + Silver Spacers for Two-Tone Look
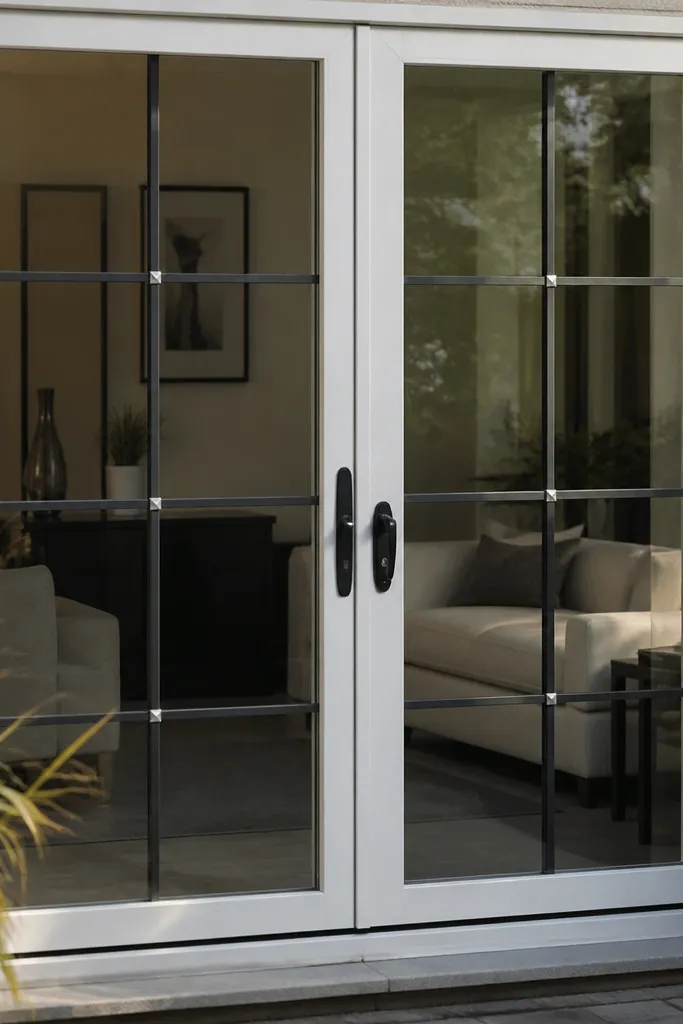
Two-tone grilles look modern because they add contrast at the connection points. The trick is using small spacers or washers so the intersections catch light even when the rest is matte. This design is budget-friendly because you’re not buying fancy metal — you’re using standard hardware and paint. It also looks intentional from both sides. If you want your cheap window grill design modern to look “designed,” this is one of the clearest ways.
Use a square grid layout as your base with equal spacing. At each intersection, insert small metal spacers or washers between bars before welding or bolting so you get a tiny separation. After assembly, sand and prime everything — then mask and spray black on the bars and silver on the spacer zones. Remove masking after the final coat cures for clean separation.
Editor's noteUse painter’s tape plus thin plastic sheet to mask the spacer line so you don’t get black bleed into silver zones.
Skip thisDon’t use glossy silver — it looks cheap next to matte black. Choose satin or dull metal paint.
14. Matte Black Vertical Bars with Micro-Perforated Center Panel
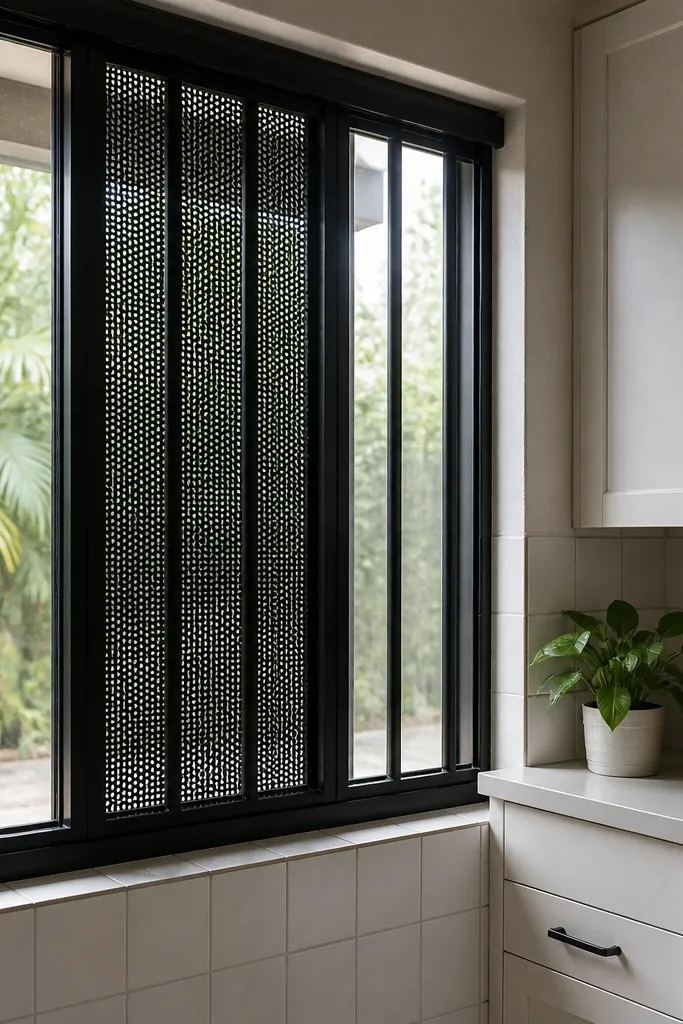
A micro-perforated center panel makes a grill look modern without needing complex cutting. The vertical bars keep the security feel, while the perforated panel adds texture and interest. This is a great choice for privacy-focused rooms because the perforations break direct line of sight. It looks sharp in daylight and adds depth in photos. Budget stays reasonable if you use a pre-cut perforated sheet.
Build the perimeter frame and weld vertical bars at equal spacing. Cut a perforated sheet panel to fit the center opening and weld or bolt it behind the bar grid so it sits recessed. Keep the perforated panel edges aligned and seal the edges with primer so rust doesn’t creep under paint. Sand, prime, then spray matte black on the whole assembly.
Recess the perforated panel slightly so it doesn’t sit proud and snag dust during cleaning.
Don’t skip priming the perforated sheet — raw edges rust fast under paint.
15. Open Box Pattern with Vertical Side Rails
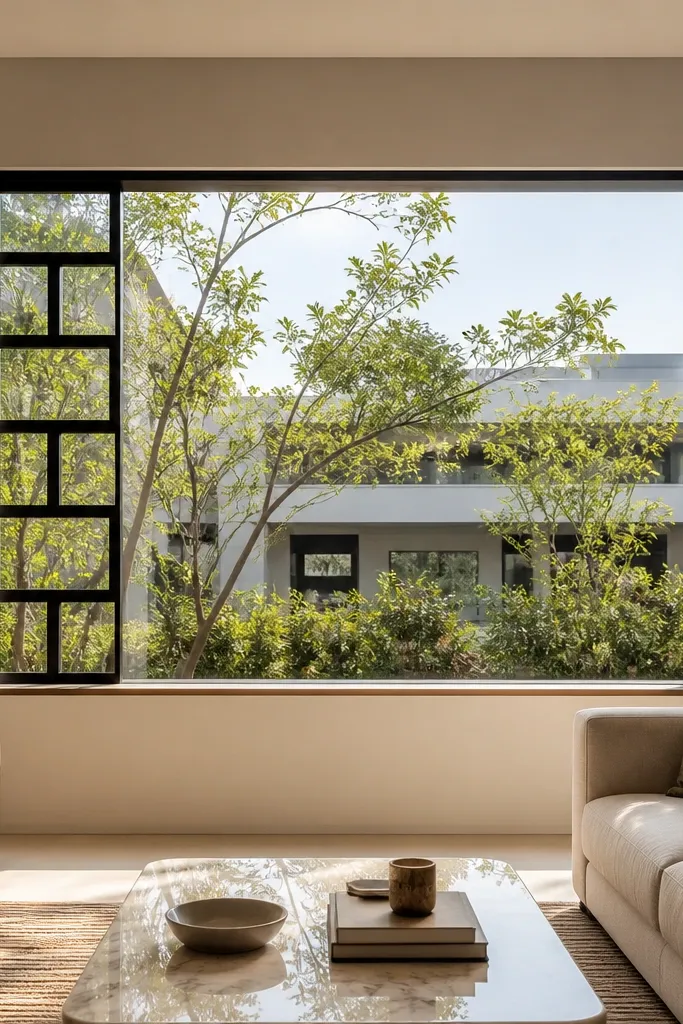
Open box patterns look modern because they create a clean grid of negative space. Vertical side rails make the design feel structured and help it read as one piece. This is a strong option for wide windows because you can stack multiple open boxes across the height. It also lowers material use compared to full bars, so it stays budget-friendly. The open rectangles give you a sleek, contemporary look.
Start with a perimeter frame. Add two solid vertical side rails, then mark box sections across the middle using horizontal bars to create the top and bottom edges of each open rectangle. Weld the horizontal edges to the side rails and perimeter so each box is contained. Finish by sanding, priming, and spraying matte black.
Use the same number of box sections as your window height allows so spacing stays consistent.
Don’t make the boxes uneven — a single short section makes the whole rhythm feel off.
16. Single-Line Arch Top with Straight Lower Grid
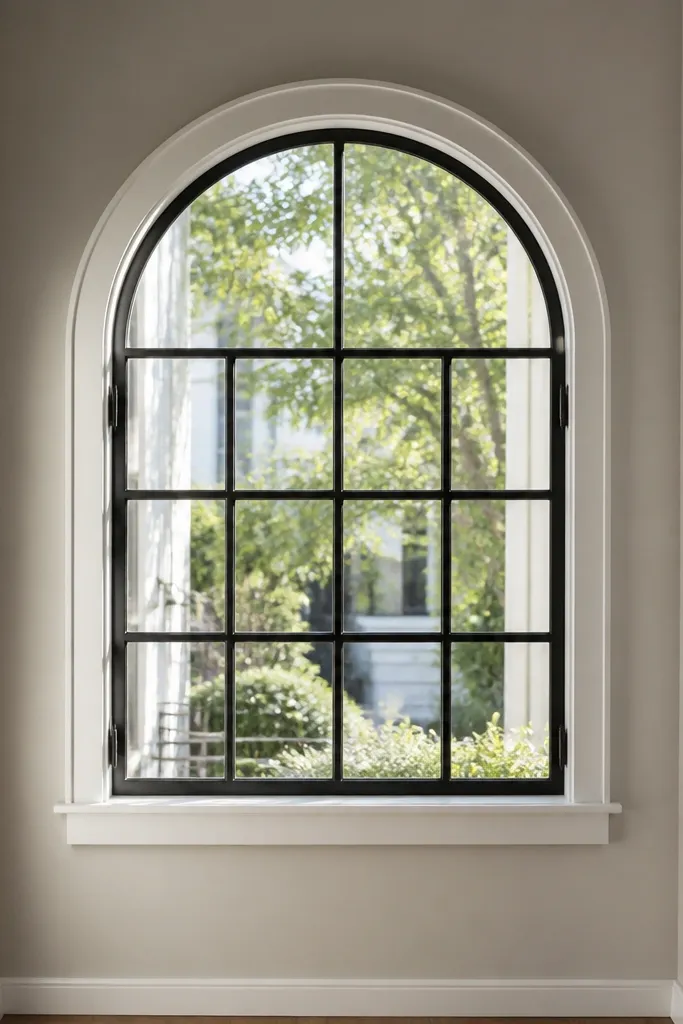
A single arch at the top reads classic-meets-modern when the rest stays straight. The lower grid gives security, and the arch gives a focal point without ornate scrolls. This works well on windows that have an arched feature or on homes with front door arches. It’s budget-friendly because you’re only bending or assembling one curved section. Keep the arch subtle — too tall and it turns decorative.
Build a rectangular lower frame and add a simple grid inside it with consistent spacing. For the arch, weld a curved strip or segmented arc to the top of the frame, then connect the arch to two vertical uprights. Keep the arch radius consistent and align it to the window centerline. Grind, sand, prime, and spray matte black for a clean, unified finish.
If you’re using segmented arc pieces, aim for small steps so the curve looks smooth after sanding.
Don’t add extra curls under the arch — it brings the look back to dated scrollwork.
17. Archless Roman-Style Columns with Vertical Slats
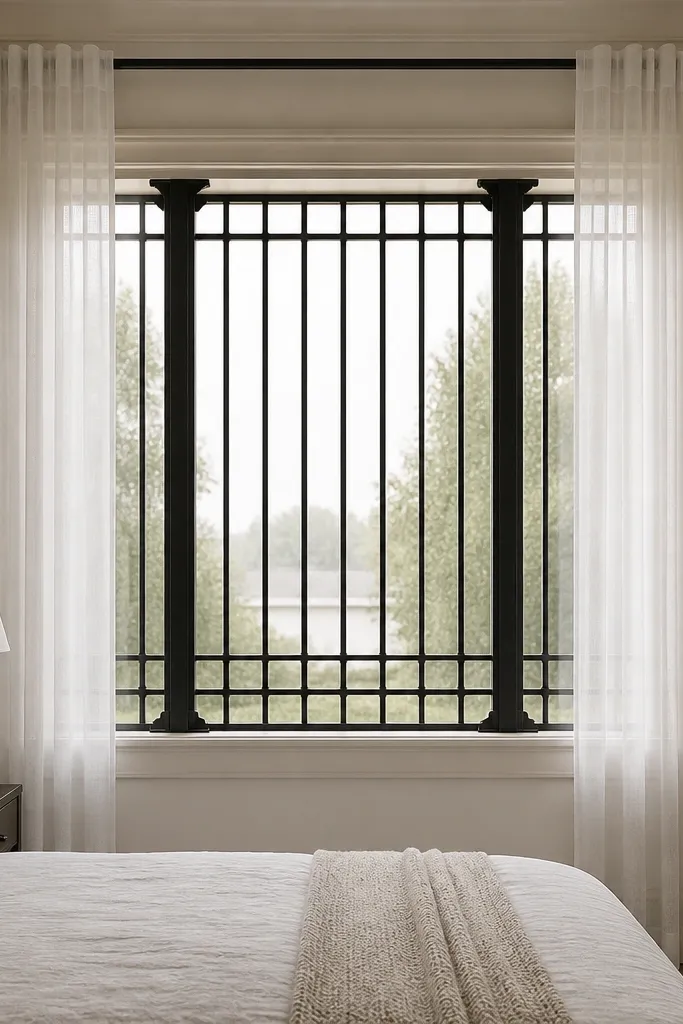
You can borrow the “columns” idea without ornate carving. Two thicker vertical column frames on the sides, plus slim slats in the middle, creates a modern architectural look. It’s photogenic because it has strong symmetry and a clear focal zone. This design is also practical: you control security with the slats while keeping metal use lower than a full grid. It looks great on entry windows and living room glass.
Build a perimeter frame, then add two thicker vertical frames inside — left and right columns — using square tube. Fill the center area with slim vertical slats spaced evenly. Weld all parts into the perimeter so the columns feel anchored. Sand, prime, then spray matte charcoal or black enamel.
Editor's noteUse a spacer jig for slat spacing so every gap matches even after welding pulls the bars slightly.
Skip thisSkip decorative caps on the columns — caps push this toward old-school design fast.
18. Front-Facing "Frame Within a Frame" with Cross Braces
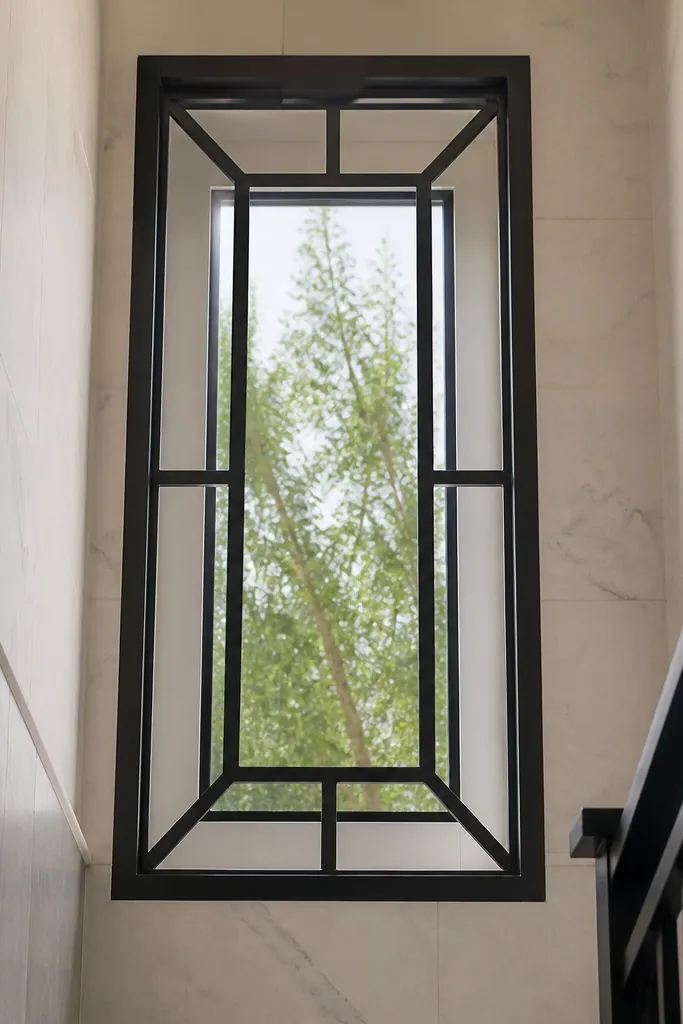
This is a clean modern approach because it creates layered depth. The inner frame makes the grill look designed, and cross braces keep it from feeling like a flat sheet of metal. It’s a strong pick for windows where you want a premium look without ornate metalwork. The braces also help resist flex, so the grill feels sturdier. Budget stays reasonable because you use straight bars and a simple layout.
Create an outer perimeter frame and a smaller inner frame set back about 1/2 in. Connect the inner and outer frames with cross braces at each corner and one in the center to prevent wobble. Weld, then grind the brace joints so edges stay smooth. Sand everything, prime with metal primer, and spray matte black enamel in two thin coats.
Editor's noteKeep the inner frame centered by measuring from both sides before final welding.
Skip thisDon’t skip cross braces — a two-frame design without connectors flexes and looks cheap.
19. Diagonal Ladder with Solid Border
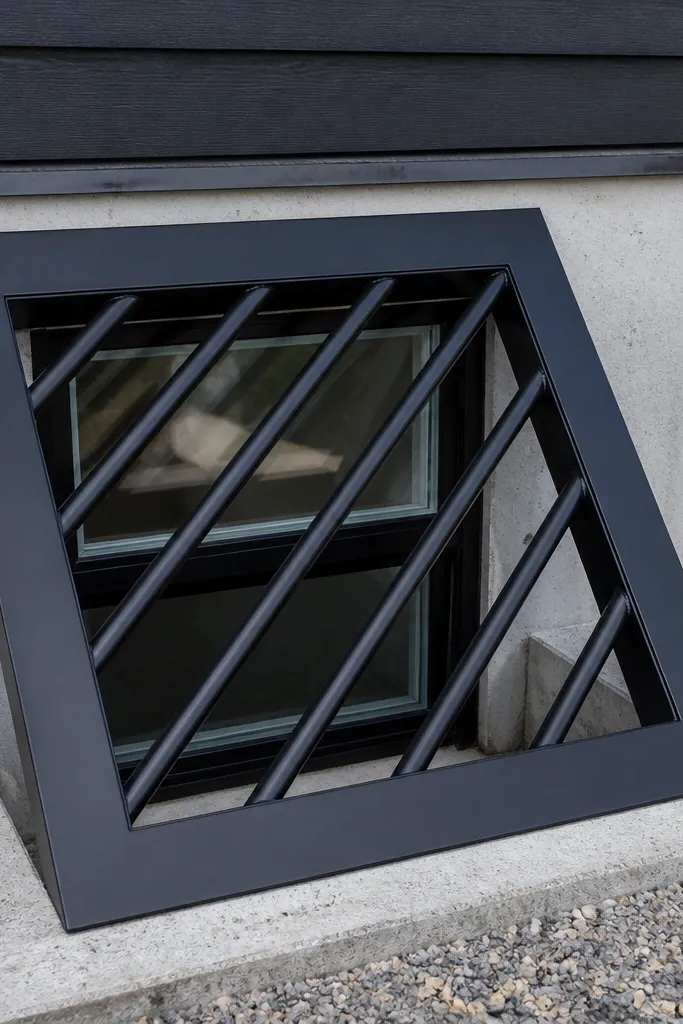
Diagonal ladder rungs look modern because they create a repeating pattern with strong direction. The thick solid border makes it feel intentional and gives you a finished edge. This is a good alternative to chevrons when you want something more structured. It also uses fewer bars than a full grid while still covering the opening. The look is bold in exterior lighting and reads well in photos.
Build a thick perimeter frame first. Add two diagonal rails from bottom-left to top-right and bottom-right to top-left, then install ladder rungs as shorter bars connecting the rails at equal spacing. Keep rung spacing consistent, like every 4 to 5 inches, so it looks designed. Weld, grind, sand, prime, and spray matte black.
Use a square jig or framing square against your perimeter to keep the diagonal rails from drifting.
Don’t make the rails too thin — thin diagonals warp and the ladder looks wavy.
20. Micro-Grid with Vertical Accent Bars Every 4 Inches

This is how you get a “modern custom” look without going expensive. A micro-grid gives the surface texture, then thicker vertical accents break it up so it doesn’t look like a generic cage. The accents also help the design read cleanly at a distance. It’s ideal for street-facing windows where you want privacy and security but still want it to look good. Matte black keeps everything cohesive and hides weld marks.
Frame the opening and install a tight grid using thin bar stock and small spacing — aim for around 1 inch gaps between bars if your metal size allows. Then add thicker vertical accent bars every 4 inches across the width by welding them to the perimeter and crossing grid lines. Keep the accent bars aligned to a centerline so the pattern looks symmetrical. Grind, sand, prime, and spray matte black with two light coats.
Cut grid bars in batches and label them by length so you don’t mix sizes mid-build.
Don’t go too tight if you’re mounting by welding — cramped bars heat unevenly and pull out of square.



