
1. Framed Fabric Panel with No-Sew Tuck Corners
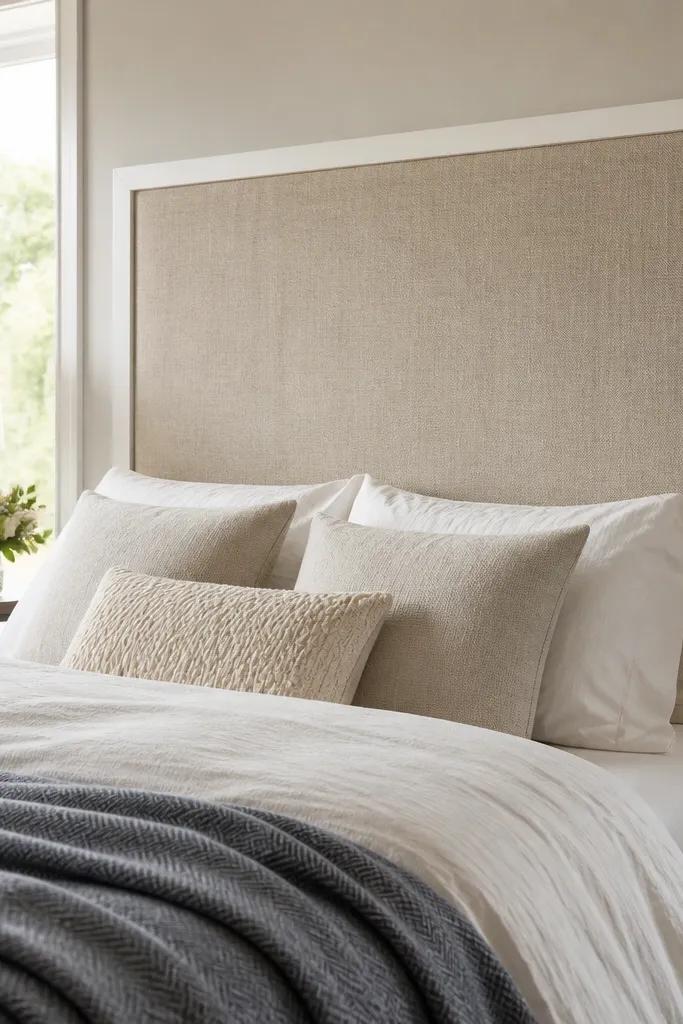
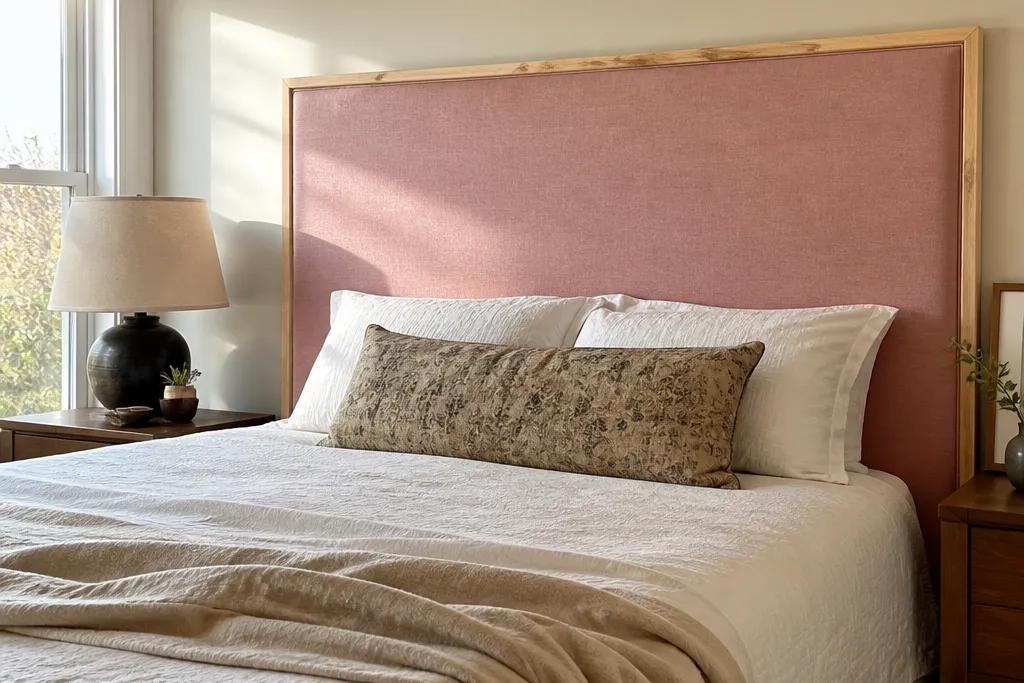
This is the fastest way to get a “real headboard” look without upholstery skills. The framed border makes it look custom even if the inside is just fabric stretched over a board. It’s especially good for cheap budget DIY headboard ideas because you can use a thrifted sheet, curtain, or upholstery remnant and still get a clean, tailored surface. The fabric face hides minor board imperfections and gives you that soft, cozy look that photographs well in daylight.
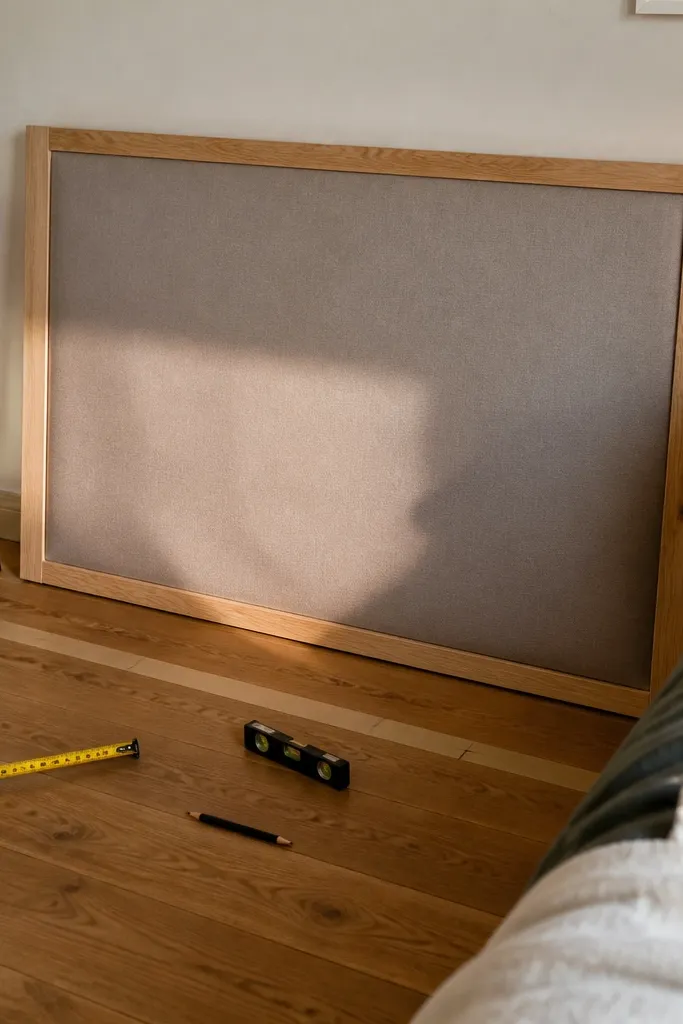
Start with a plywood panel cut to your target width and height (use your mattress width as a guide, then add 2-4 inches total for overhang). Build a simple frame around it using 1x2 pine or MDF strips, mitered or butted at the corners, and glue plus 1-inch brad nails to lock it. Stretch fabric over the plywood, pull it tight from the center outward, and tack it to the back using a staple gun. Finish by adding corner blocks if you want a more “tailored” edge, then stain or paint the frame and seal it with a clear topcoat.
Editor's noteIron the fabric first and use a fabric glue stick or spray adhesive in the center so the pull stays even before stapling.
Skip thisDon’t stretch fabric loosely — wrinkles on the face read instantly in photos.
2. Plywood Slat Headboard with Stained Chevron Face
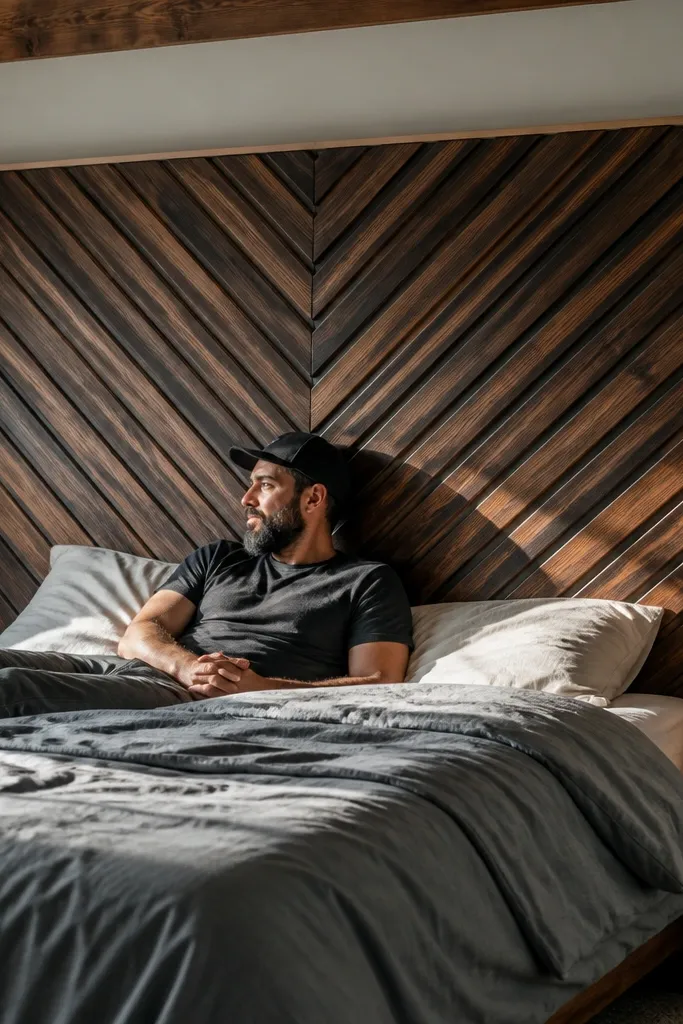
If you want a headboard that looks designer without upholstery, slats are the move. A chevron pattern creates strong diagonal lines that stand out in pictures and makes a plain wall look styled. You’re using cheap wood strips, but the stained finish gives depth and makes the pattern feel intentional. This works great in modern, Scandinavian, and farmhouse rooms because the texture is visible and the color is controlled.
Cut a plywood base panel and mark a centerline. Rip thin strips (about 1x2s or 1x1.5s depending on how bold you want the lines) and dry-fit them in a chevron layout, then glue and nail them down one at a time. Keep spacing consistent by using scrap wood shims as spacers. Sand the slats flush at the front edge, then stain in one direction for uniform tone, wipe off excess, and let it cure. Mount by attaching cleats to the back and screwing through cleats into your bed frame or wall brackets.
Editor's noteUse painter’s tape to mask the plywood edges before staining so you get crisp lines where the base meets the slats.
Skip thisDon’t guess the chevron angle — mark and test-fit on the floor first so it stays symmetrical.
3. Thrifted Shutter Headboard with Whitewash + Clear Coat
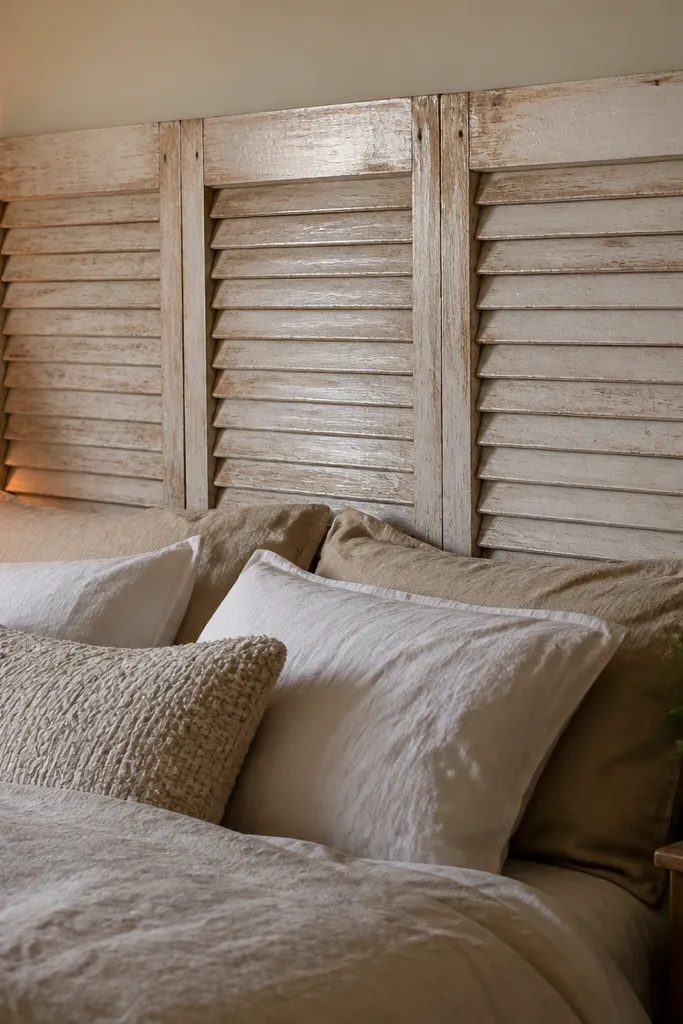
A salvaged shutter headboard is cheap budget DIY headboard ideas gold because the texture is already there. The slats and panel shapes create visual rhythm, and the whitewash keeps it airy instead of heavy. This style looks great in cottages, rentals, and rooms that need character without a ton of measuring. From a camera angle, the repeating lines make the headboard look “designed,” even if you’re using something secondhand.
Find shutters that are close to your bed width. If needed, brace them together with a backer strip — use 1x3 wood screwed across the back where the shutter stiles meet. Clean the shutters, fill dents with wood filler, then sand smooth enough that you can paint without lumps. Apply a whitewash mix (white acrylic paint thinned with water, then wipe back), let it dry, then seal with a clear water-based topcoat. Attach mounting brackets to the back and secure to the wall using anchors rated for your wall type or to a bed frame using screws through the backer.
Editor's noteDo a test whitewash on scrap wood first so you get the exact opacity you want.
Skip thisDon’t skip sealing — unsealed whitewash rubs off and looks chalky after a few months.
4. Foam + Linen Channel Tuft Look with Buttonless Top Stitching
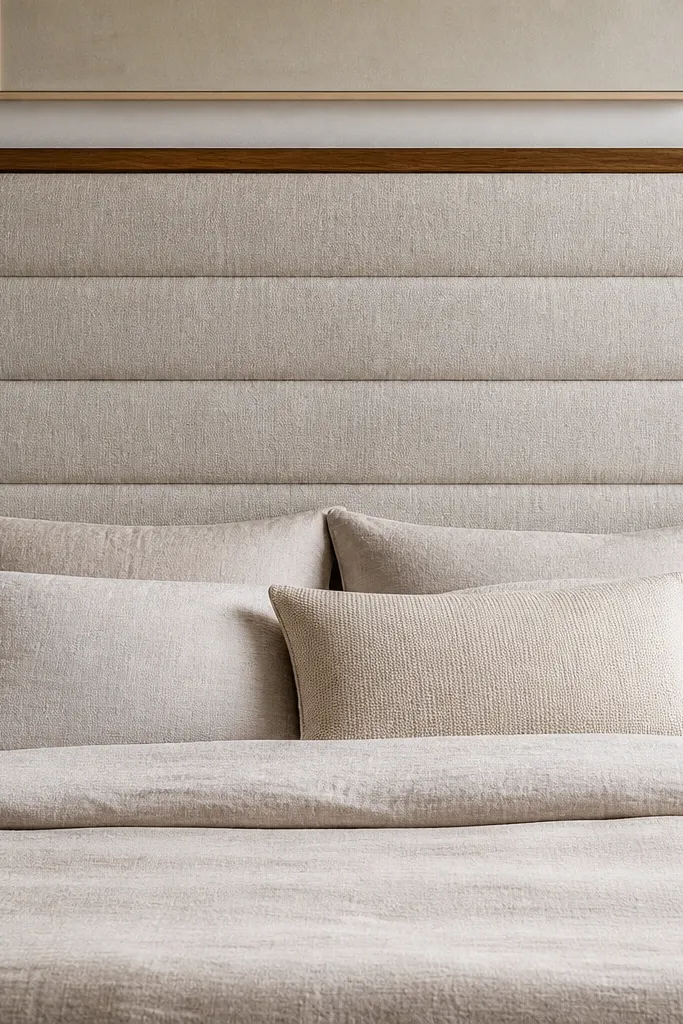
This one gives you the tufted look without buying buttons or doing deep tufting. Foam padding makes it plush, and channel lines create that expensive upholstered vibe. It photographs beautifully because the channels catch light differently across the surface. If you want a soft headboard but hate the idea of full upholstery, this is a realistic compromise that still looks high-end.
Cut a foam layer (about 1-1.5 inches thick) to your headboard size, then glue it to a plywood or MDF base. Stretch linen or a heavy cotton fabric over the front and staple it on the back, pulling tight so the face stays smooth. Mark channel lines with chalk, then use a long upholstery needle and strong thread to stitch channels across the face, pinning the thread path to keep it straight. Add a second fabric layer behind if you want a cleaner back finish. Mount with cleats so the weight is supported evenly.
Editor's noteUse a chalk line tool or laser level for the stitch marks so channels stay perfectly level.
Skip thisDon’t use thin fabric — it will show foam bumps and look messy.
5. Shiplap Accent Headboard with Matte Black Frame
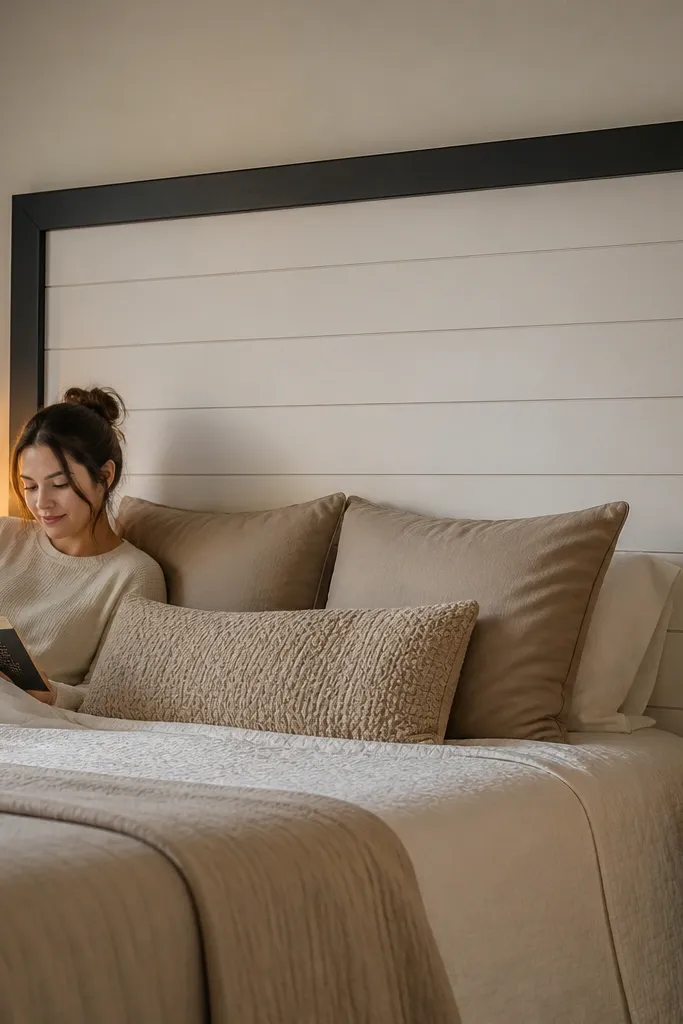
Shiplap is a fast way to get texture that reads from across the room, and the matte black frame makes it feel modern. You get that clean board pattern without needing fancy carpentry. This is ideal if your bedroom already has neutral bedding and you want the headboard to be the focal point. It also hides small wall imperfections because the frame creates a defined boundary.
Cut a plywood base to your headboard size. Attach 1x4 shiplap boards across the face, starting from the bottom and working up, using wood glue and small finishing nails. Frame the edges with 1x3 boards cut to size, then sand everything flush at the front edges. Prime and spray or brush matte black paint on the frame and seal with a clear topcoat. Mount by screwing cleats into the back and securing to your bed frame or wall anchors.
Editor's noteDry-fit the shiplap boards first and sand any tongue-and-groove bulges so the face stays flat.
Skip thisDon’t over-sand the texture away — you need the board grooves to show.
6. Pegboard + Fabric Overlay for a Modern Grid Look

Pegboard gives you a built-in grid, so you don’t have to measure fancy geometry. Add a fabric overlay and you get a soft front with a crisp pattern visible at the edges and through tension points. This looks especially good in bright rooms because the grid creates clean lines without being bulky. It’s one of the better cheap budget DIY headboard ideas when you want “graphic” style without upholstery.
Cut pegboard to your headboard size (or buy sheets cut to size). Screw a backing frame around the pegboard using 1x2 lumber so it doesn’t flex. Stretch fabric over the front and staple it to the back frame, pulling tight to keep it smooth. Trim the edges with thin wood trim to hide staples. Paint the trim or the pegboard edges in a matching color, then mount using French cleats for a sturdy, level hang.
Editor's noteUse a heavy fabric like canvas so it doesn’t sag between tension points.
Skip thisDon’t staple directly into bare pegboard — it can tear and the fabric will loosen.
7. Wallpaper-Paneled Headboard with Wood Trim Border
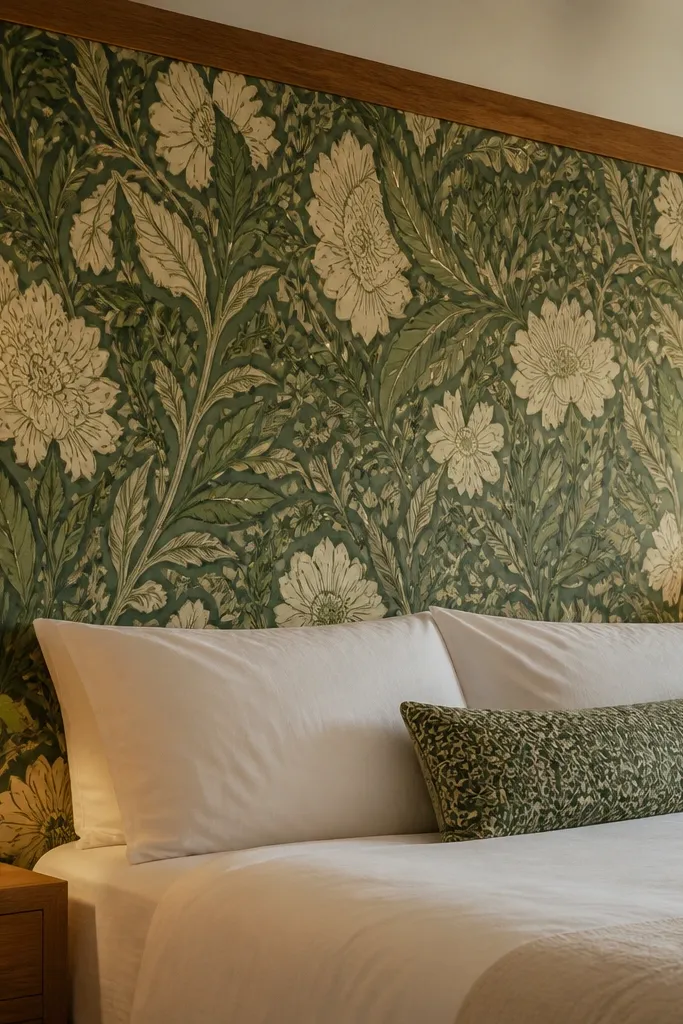
Wallpaper turns a cheap plywood panel into a statement piece fast. The look is photogenic because patterns pop under bed lighting and daylight, and the wood trim makes the design feel intentional instead of temporary. This is perfect when you want cheap budget DIY headboard ideas that look curated without spending on fabric yardage. Pick a wallpaper with a strong motif and keep the border simple so the pattern does the work.
Cut plywood or MDF to headboard size and sand smooth. Prime it with a primer made for wallpaper adhesion, then apply wallpaper using a fine brush along the edges and a smoothing tool for bubbles. Trim the wallpaper flush with a sharp utility knife once it’s set. Add a thin wood trim border (like 1x2s) around the edges using wood glue and brad nails, then seal the wallpaper with a clear topcoat made for coated wallpaper or a decoupage sealer. Mount using cleats and level it before the final screws.
Choose wallpaper with big elements so the design stays readable from across the room.
Don’t use a glossy topcoat that creates glare — you want pattern clarity, not shine.
8. Upholstered Faux Leather with Button Snap Strips
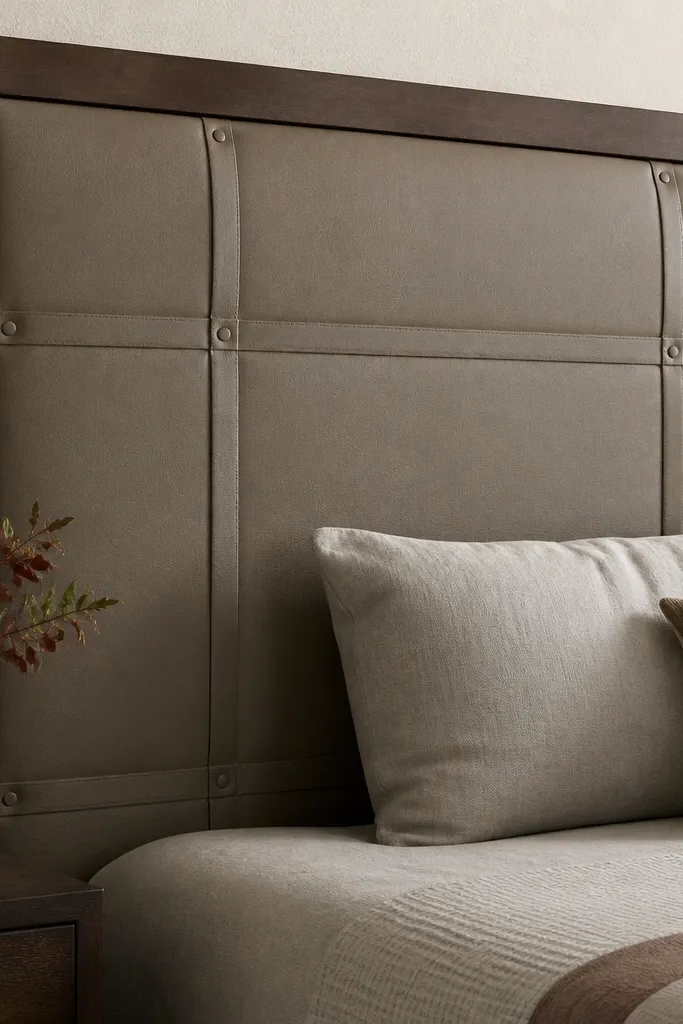
This is a “clean upholstery” look that doesn’t require full button tufting. Faux leather (or vinyl) gives you that smooth, tailored surface, and the snap strips create a structured rhythm. It’s great for modern rooms and for people who want a headboard that wipes clean. In photos, the tension lines and sheen difference read as premium even on a budget.
Build a plywood base, then glue 3/4-inch foam to the front. Wrap faux leather tightly over the foam and staple to the back, trimming excess. Mark horizontal lines and install snap strips using snap tape or fabric snaps set with a snap tool so the “buttons” look straight. Add a fabric backing layer on the rear if you want it neat. Finish the edges with matching trim and mount with cleats to keep the face supported.
Editor's noteUse a walking foot on a sewing machine only if you’re adding any binding; otherwise stick to stapling for cleaner edges.
Skip thisDon’t stretch vinyl too hard — it can warp or cause puckering along the snaps.
9. Barn Door Panel Headboard from 1x6 Boards
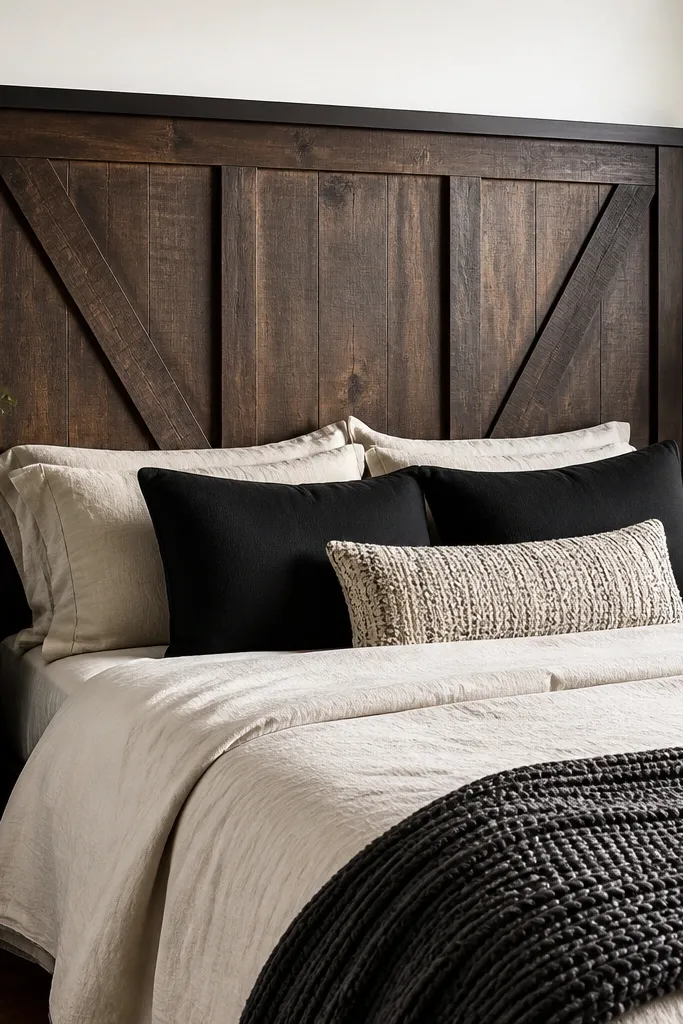
If you like rustic but want it to look sharp, this barn door-inspired panel works. The raised panels create depth, and a dark stain makes the grain look expensive. You can keep it cheap by using common 1x6 boards and a simple frame design. This headboard looks great in rooms with black accents, wood floors, or neutral bedding, and the panel shadows show up clearly in photos.
Cut a rectangular frame from 1x6 boards and build it flat on the floor. Add two or three raised panels inside using thinner boards cut to fit, glued and nailed into the frame. Sand edges so corners feel smooth, then stain with a dark brown or espresso tone. Seal with polyurethane so it doesn’t get scuffed from pillows. Add two wall cleats or a bed-frame mounting system on the back and hang level.
Use painter’s tape as a guide for panel alignment so the raised sections line up evenly.
Don’t leave rough saw marks — the raised panels will show them in every photo.
10. Reclaimed Fence Slat Headboard with Charcoal Finish
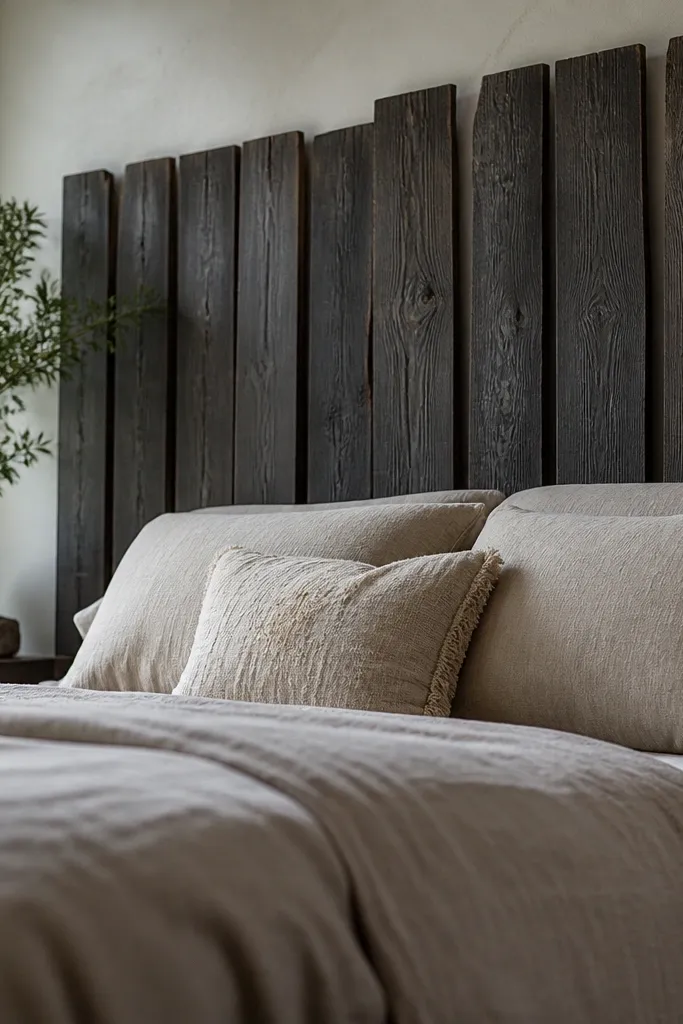
Weathered fence wood already has character, and a charcoal finish makes it look intentional instead of messy. The slat spacing creates a breathable texture that looks good with linen bedding. This is one of the more photogenic cheap budget DIY headboard ideas because the wood grain variation shows through the stain. It’s also a great route if you want a bigger headboard without paying for new lumber.
Collect slats and cut them to consistent lengths, then sort by color so you can place light and dark pieces evenly. Build a backer rectangle from plywood and screw slats into it using pre-drilled holes to prevent splitting. Fill any large gaps with wood filler, then sand lightly to remove splinters. Apply a charcoal wood stain or paint-stain mix, wipe off excess for a textured look, and seal with a clear topcoat. Mount with French cleats for a stable hang and to keep the face straight.
Editor's noteLay the slats out on the floor first and take a quick photo — it helps you see balance before you commit to screwing.
Skip thisDon’t seal too early — patchy moisture can cause blotches in stain.
11. Macrame Knot Curtain Headboard on a Straight Bar
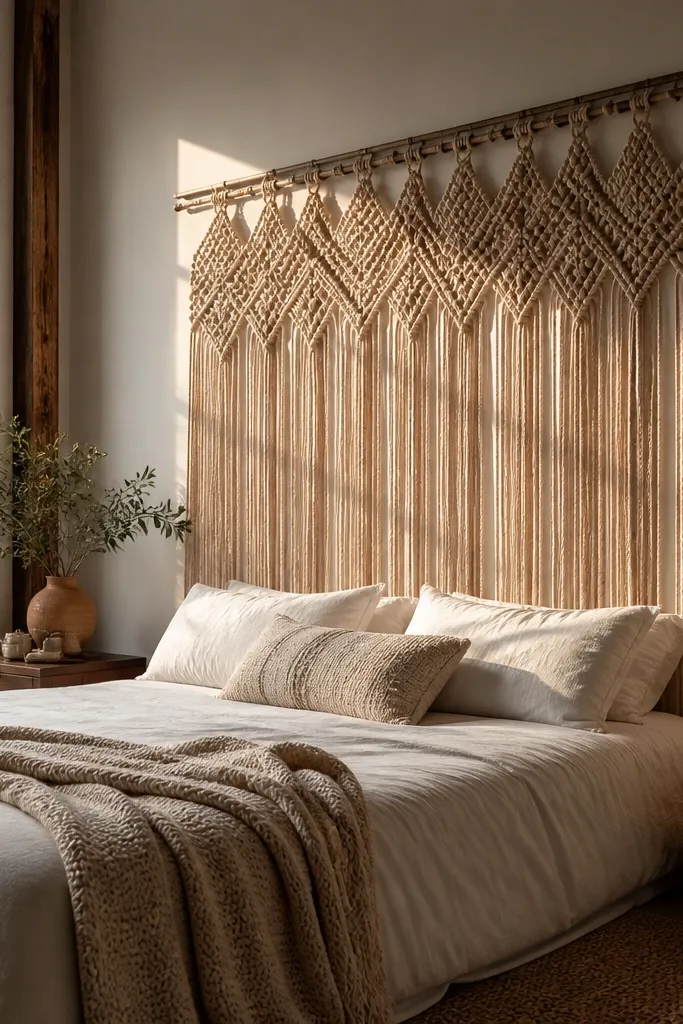
This one is cheap budget DIY headboard ideas for people who want softness and movement without permanent construction. A macrame curtain or panel hung on a straight bar looks airy and artistic, and it frames the bed like a textile wall. It photographs well because shadows from the knots show up even with simple lighting. If your bedroom feels too hard or too minimal, this adds warmth fast.
Buy a macrame panel or curtain that’s wide enough to cover your bed width. Mount two wall brackets to a sturdy board or directly to studs, then hang a wooden dowel or metal bar across the brackets. If the macrame has a rod pocket, slide the dowel through; if it has loops, tie the loops to the dowel at even spacing. Add a simple fabric backing behind the macrame if you want a more opaque look. Level the bar before tightening everything so the textile hangs straight.
Editor's noteUse two small binder clips hidden at the bottom edge to keep the macrame from drifting.
Skip thisDon’t hang it too high — if it sits above the pillows, the texture won’t read.
12. Corkboard Headboard with Painted Border
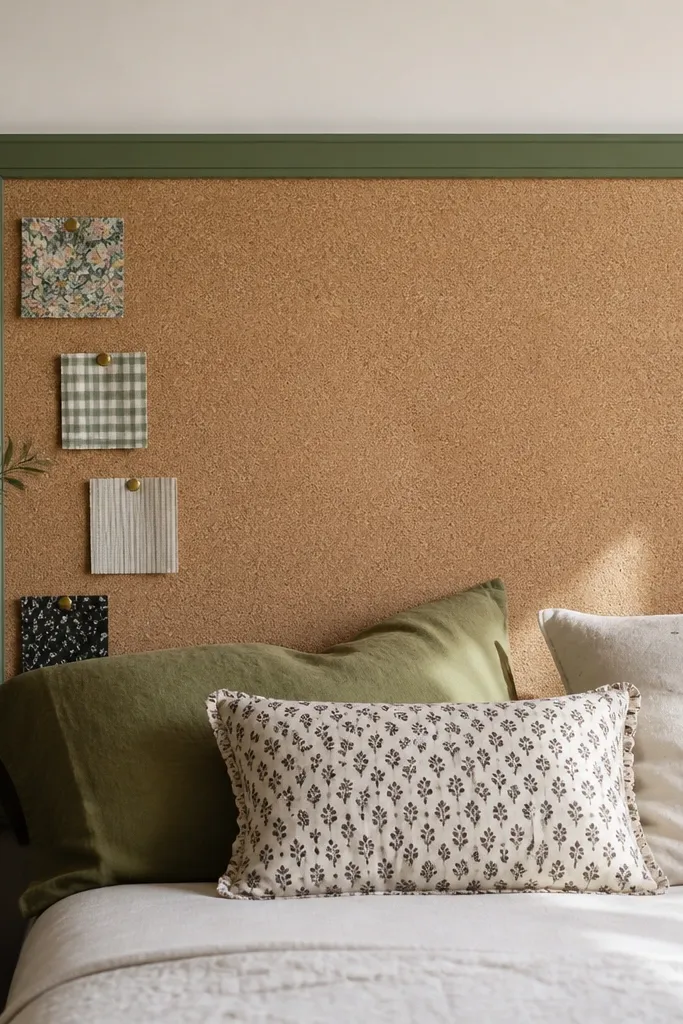
Corkboard is cheap, light, and it gives you a textured surface that looks intentional once it’s framed. A painted border turns it from “office” into bedroom decor, and you can add pinned fabric or small photos for personalization. It’s one of the best budget-friendly options when you want something that’s easy to mount and easy to adjust. The cork texture also hides tiny dents and makes the face look interesting in close-ups.
Cut corkboard to headboard size and back it with a thin plywood sheet for rigidity. Build a frame from 1x2 lumber and attach it around the corkboard using glue and brads. Paint the frame in a color that matches your room — matte black, deep green, or warm white all work. Seal the cork lightly with a clear matte sealant so it’s easier to clean. Mount using cleats on the back, and avoid driving screws through cork — drill through the plywood backing for clean attachment.
Editor's noteUse a matte paint finish on the frame so the cork texture stays the star.
Skip thisDon’t pin heavy items directly without checking the cork thickness — it can compress.
13. Cardboard + Fabric Sculpted Panels for a Lightweight Look
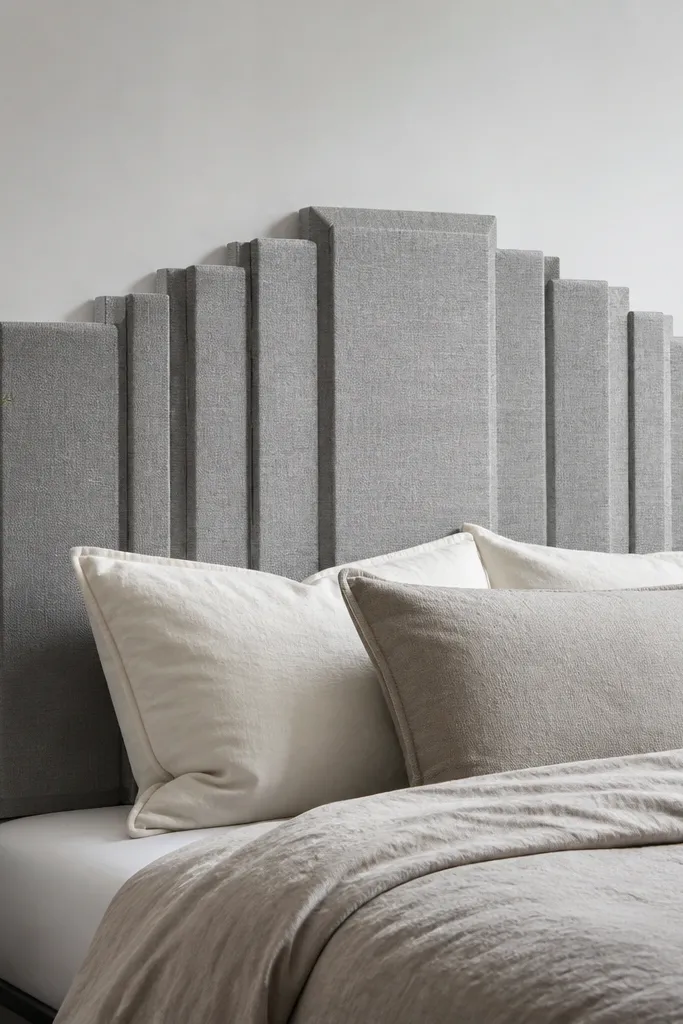
This is a weird-but-effective trick for cheap budget DIY headboard ideas when you want bold shape without heavy wood. You can sculpt geometric ridges using layered cardboard, cover it with fabric, and get a 3D look that’s light enough to hang. It’s perfect for renters because it can mount with fewer structural demands. In photos, the ridges cast shadows that make the headboard look more expensive than it is.
Sketch a simple geometric pattern and cut cardboard layers into repeated shapes (use 6-10 layers for firm ridges). Glue layers together and build a flat backer from a thin plywood sheet or foam board. Cover with batting for smoother edges, then wrap fabric tightly and staple on the back. Add a fabric border or trim strips so the edges look clean. Mount with a cleat or two wall brackets, and make sure the backing is rigid so the ridges don’t warp.
Seal the cardboard edges with a thin layer of Mod Podge before fabric so it doesn’t soften later.
Don’t skip batting — fabric over raw cardboard looks lumpy.
14. Accordion Folding Screen Headboard Hack
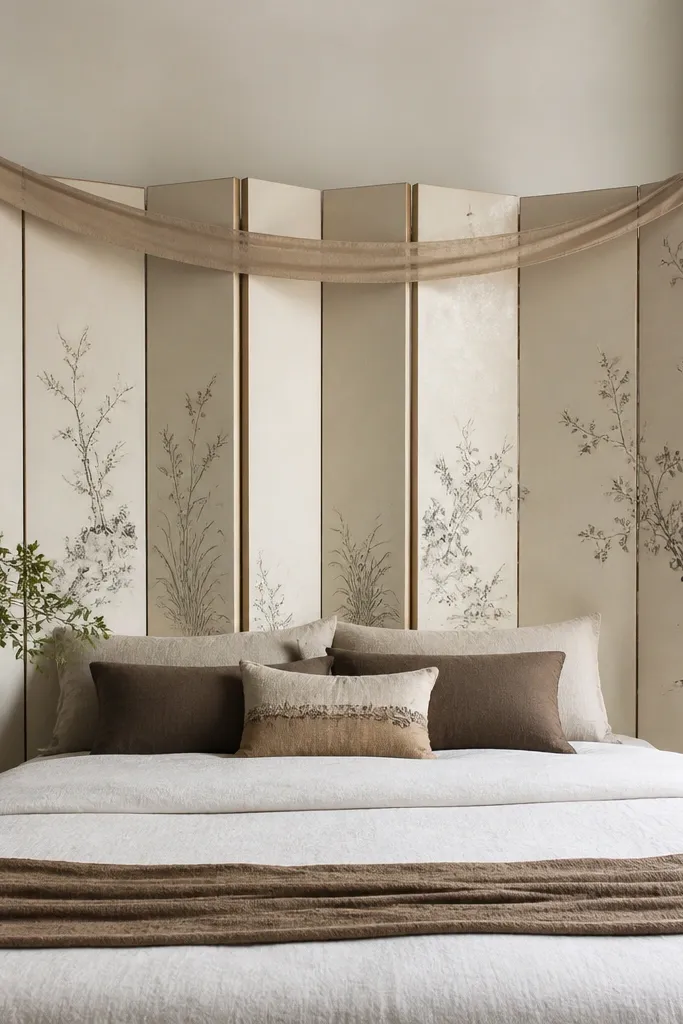
A folding screen is a photogenic headboard because the panels create instant height and shape. You can make it look intentional by choosing a matching color and adding a simple fabric or paint finish. This is one of the easiest budget options because you’re not building from scratch — you’re styling and upgrading. It works best in temporary setups, guest rooms, and apartments where you don’t want to anchor into studs.
Use a folding screen with 3-5 panels and measure so it covers the bed width. Sand any glossy finish lightly, then paint it with a satin or matte enamel. If you want a softer look, staple fabric to the back side of each panel using a thin batting layer. Tie the screen to the bed frame with discreet straps if it moves when you sit up. Place it centered and adjust the angle so it doesn’t bow — then secure the bottom edges if your floor is slippery.
Editor's notePaint the screen legs too; leaving hardware visible makes it look like a prop.
Skip thisDon’t let it sit too wide — screen panels that extend past the bed look messy.
15. Cheap Pallet Wood Headboard with Clean Edge Banding
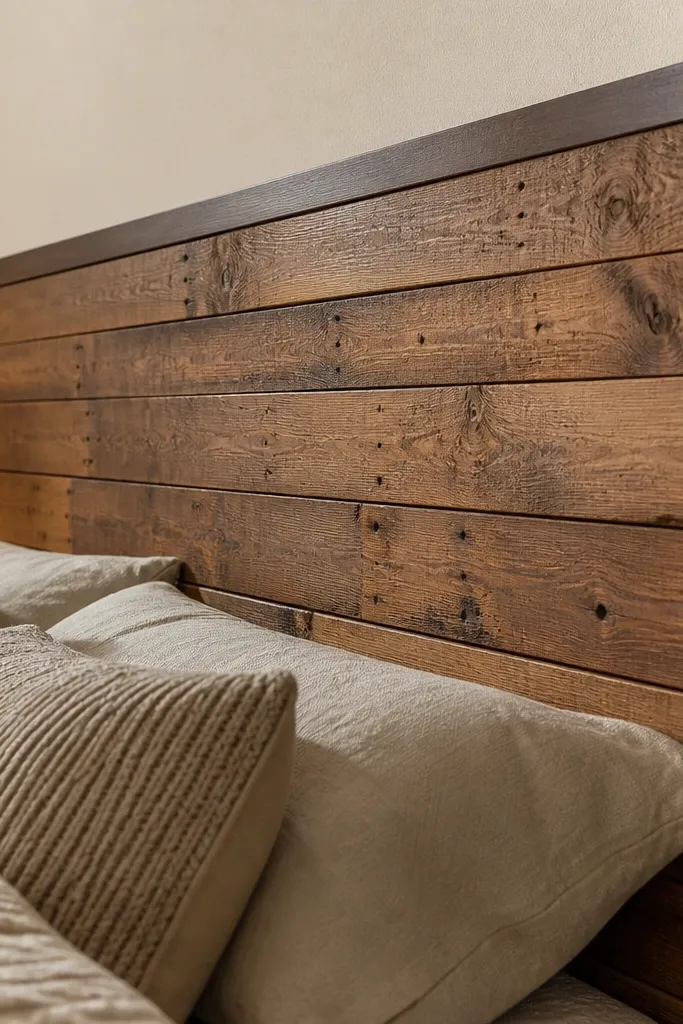
Pallet wood can look amazing, but only if you fix the biggest problem: rough edges and uneven boards. When you sand, align, and add edge banding, it turns into a structured wood headboard with character. The grain variation is the point, and a dark stain makes it look cohesive instead of chaotic. This headboard fits rustic, industrial, and modern rooms with warm lighting.
Dismantle pallets carefully or buy pre-sanded pallet boards if you can. Cut boards to a consistent height and build a back frame from 1x3 lumber so the front stays flat. Sand aggressively at the front edges, then add edge banding strips to hide splinters and uneven cuts. Stain in one direction, wipe evenly, and seal with polyurethane. Mount with cleats screwed into the back frame so the headboard doesn’t twist.
Editor's noteUse a random-orbit sander with 120-grit then 180-grit so it feels smooth where pillows touch.
Skip thisDon’t skip edge banding — the raw pallet edges look cheap up close.
16. Painted Wood Panel Grid with 2-inch Squares
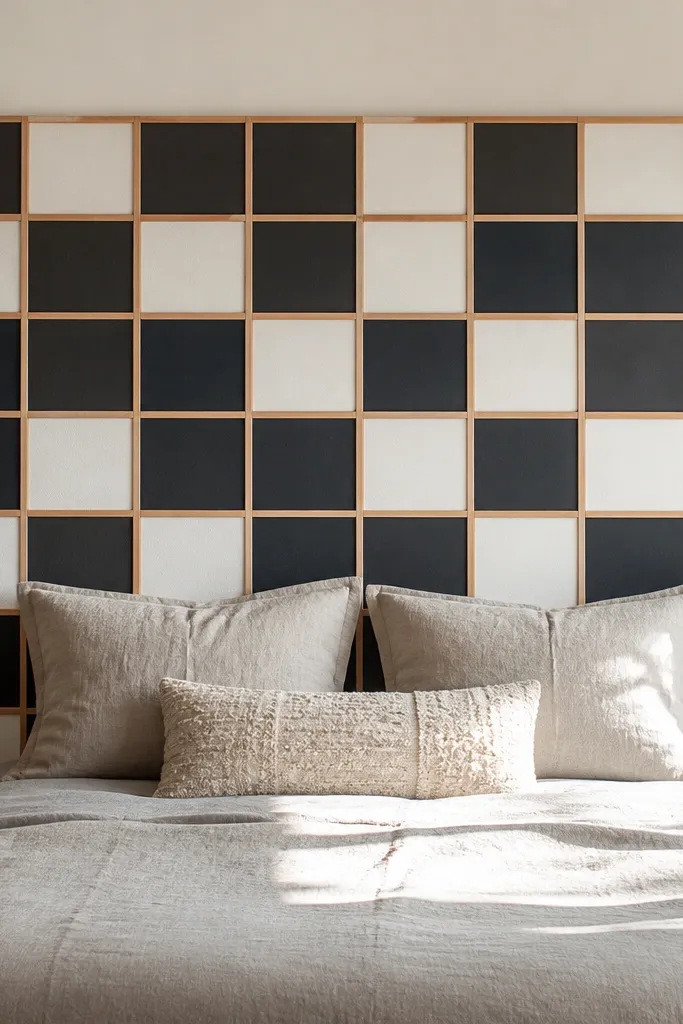
A grid headboard is clean, modern, and it looks crisp in photos because the lines are graphic. The trick is using small consistent square spacing so it doesn’t look accidental. You can do it on a budget using plywood and thin wood strips, then paint in two colors for contrast. This works in minimalist rooms where you want structure without a lot of texture.
Cut a plywood base to your headboard size and sand it smooth. Prime and paint the base one color, then install thin strips (like 1/2-inch wood lattice strips) to form 2-inch squares. Glue and nail the strips so the grid is perfectly square to the edges. Paint the strips a contrasting color, then lightly sand any drips and touch up. Mount using French cleats so it hangs flat and level.
Use a framing square to check corners before the glue sets — grids look wrong fast when they’re even slightly off.
Don’t freehand the spacing — measure and mark the strip placement every row.
17. Upcycled Denim Quilt Panels on Foam Backer
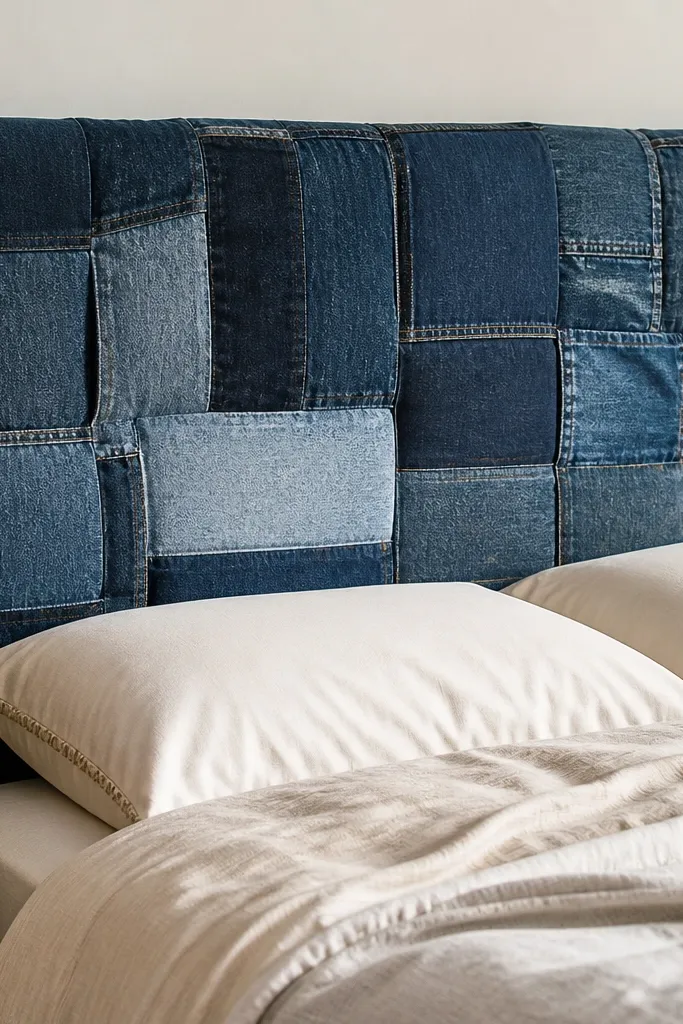
Denim patchwork gives you visible texture and a lived-in aesthetic that still looks styled. It’s great for cheap budget DIY headboard ideas because you can use thrifted jeans or scrap denim and stitch or glue it into panels. The foam backer makes it comfortable against pillows, and the seams catch light for a photogenic surface. It looks best with warm lighting and simple bedding so the texture stays the focus.
Cut a foam backer to headboard size (about 1 inch thick) and glue it to a plywood base. Create a patchwork top by cutting denim pieces into rectangles and arranging them with a consistent seam gap. Fuse or stitch strips together, then wrap the finished quilt top over the foam and staple to the back. Add a simple trim border so the edges look finished. Mount with cleats and seal any rough denim edges with a fabric fray guard.
Choose denim with similar weights so some panels don’t puff more than others.
Don’t use super stretchy jersey knits — they sag over foam and look uneven.
18. Lath + Rope Wall Mount Headboard Look
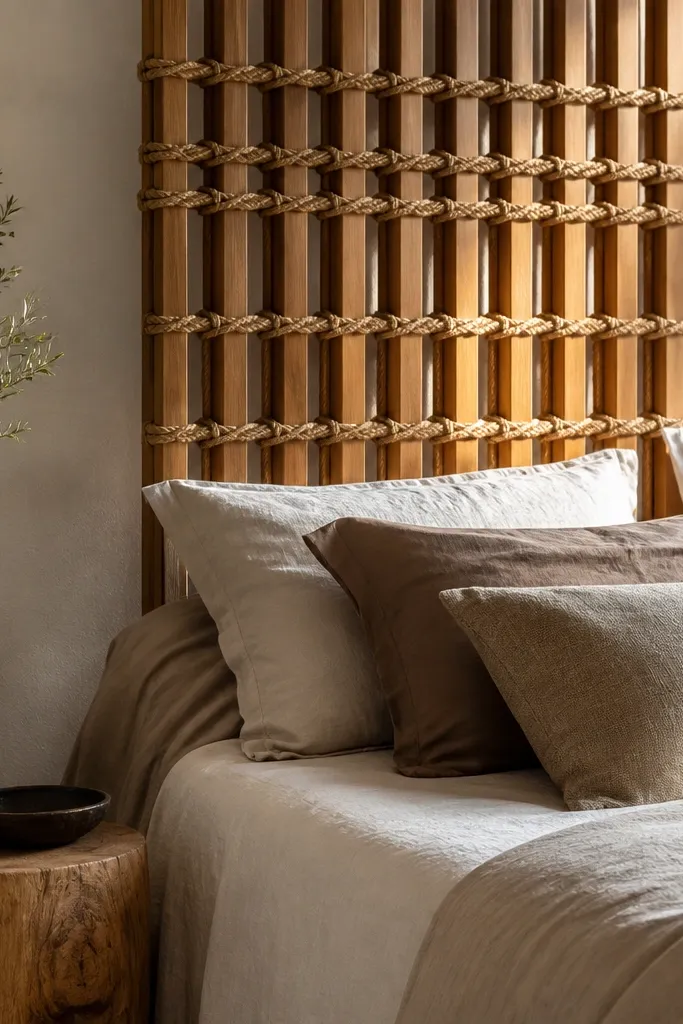
This creates a sculptural headboard look using thin wood laths and rope, which keeps costs low. The rope adds visible texture and color, and the laths create a rhythm behind pillows without needing a big upholstered surface. It’s a good option when you want a headboard that looks handmade but still clean. In photos, the rope shadows and natural wood tones look warm and intentional.
Cut several thin laths to headboard height and build a simple top and bottom frame from 1x2 lumber. Drill small holes in the top and bottom rails at consistent spacing. Thread rope through the holes and tie laths in place, then tighten until the face is straight. Wrap the back with a thin fabric or cardboard sheet so you don’t see rope knots from the front. Mount with two wall brackets or a cleat system so the whole piece stays level and secure.
Editor's notePaint or stain the rails first, then tie rope afterward so the rope doesn’t get messy.
Skip thisDon’t tie at random spacing — the front needs consistent intervals to look designed.
19. Peel-and-Stick 3D Wall Panel Headboard on a Base Frame
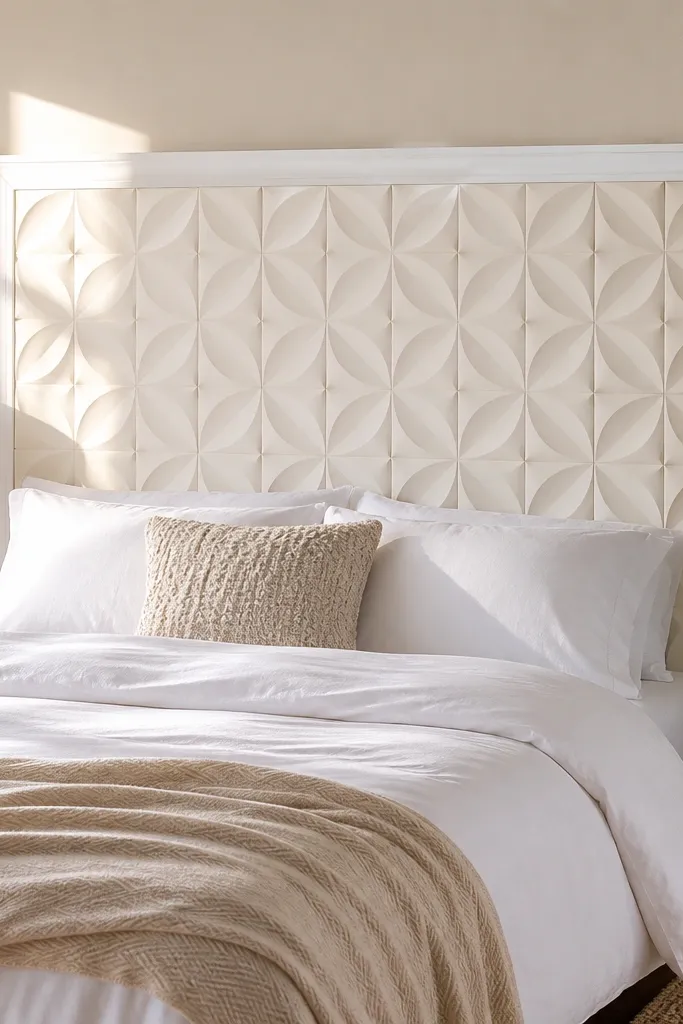
3D peel-and-stick wall panels turn plain plywood into a high-contrast headboard in a single afternoon. The relief pattern reads clearly in photos because it creates shadows, even in flat light. This is a strong pick for cheap budget DIY headboard ideas when you want a bold look without painting complicated textures. Keep the color simple — white, cream, or a soft sage — and the pattern does the work.
Cut plywood to headboard size and build a thin back frame (like 1x2s) so the panel doesn’t flex. Clean and dry-fit the 3D panels, then peel and stick starting from the center to keep the pattern aligned. Use a plastic smoothing tool to press down and remove air pockets. Trim edges with a sharp utility knife. Prime and paint only if the panel material needs it, then seal if required by the panel instructions. Mount with cleats so the headboard is supported evenly.
Warm the adhesive with a hair dryer before sticking so it bonds better to the base.
Don’t mount on dusty plywood — the adhesive will lift at the corners.
20. Woven Rattan Mat Headboard with Wood Trim
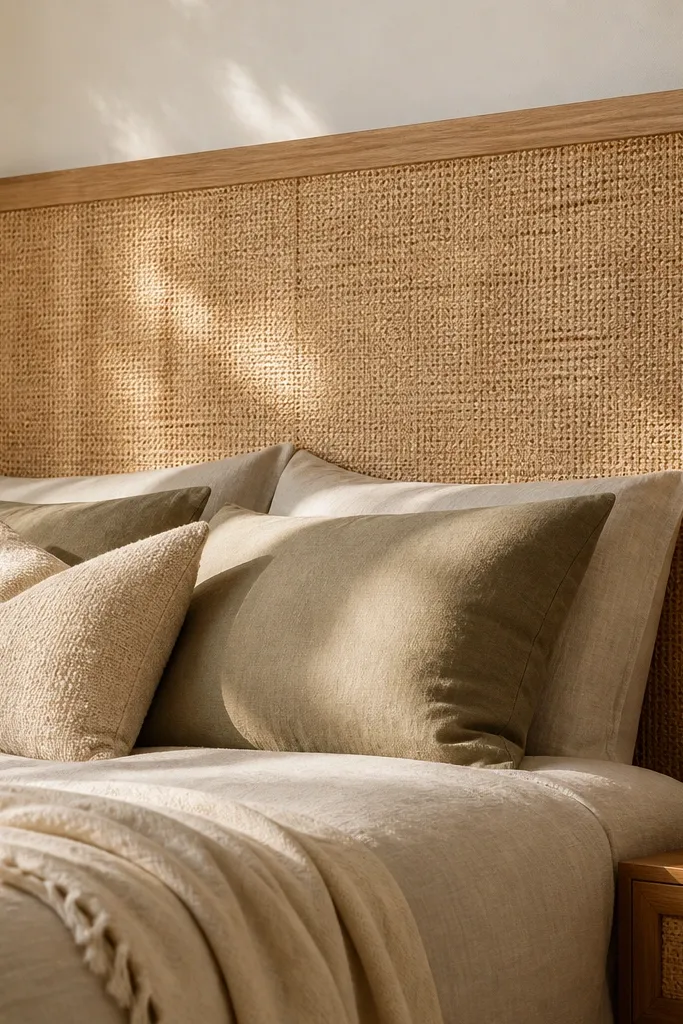
A rattan mat gives you airy texture and a natural look that photographs great with neutral bedding. The trick is framing it so the edges look clean and the mat stays flat. This works well for cheap budget DIY headboard ideas because mats are usually cheaper than fabric yards, and the texture is already consistent. It adds warmth without making the room feel heavy, especially if you choose a light wood trim.
Pick a rattan mat close to your headboard size and cut a plywood base to match. Build a simple rectangular frame from light wood strips and screw the frame onto the plywood base. Glue the mat to the plywood using a flexible adhesive, pressing it into the frame edges. Wrap the back edges with a thin fabric strip to hide glue lines. Finish the frame with a clear coat or light stain, then mount with cleats.
Mist the mat lightly with water before gluing if it’s curled — it relaxes and lays flatter.
Don’t use rigid glue that seeps through — it can harden and stain the rattan.



