
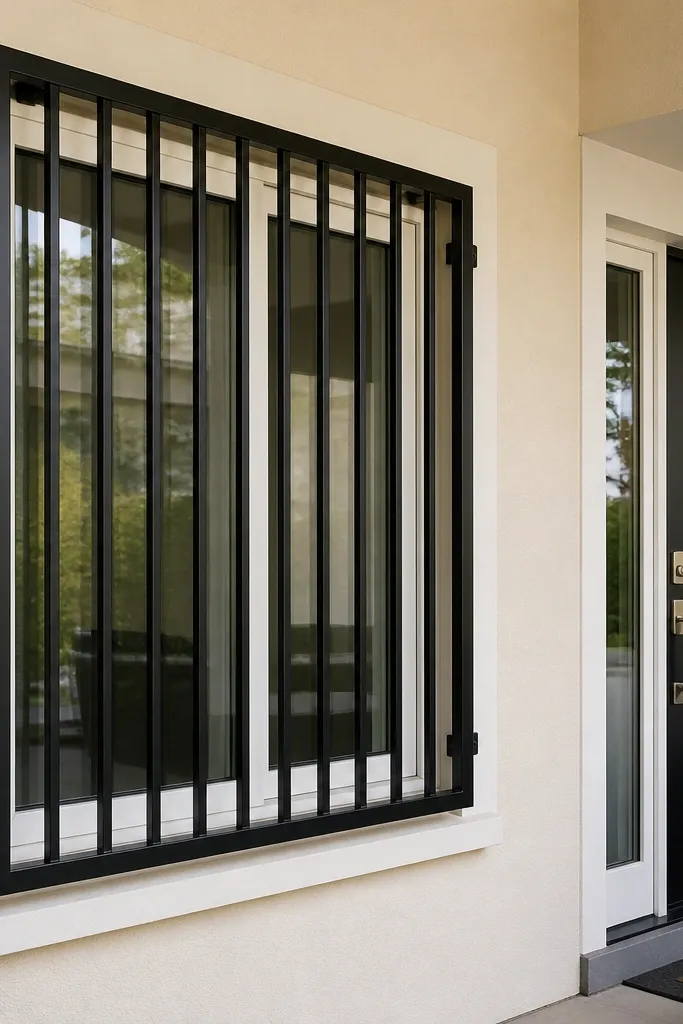
1. Slim Vertical Grid with Clean 10mm Reveal
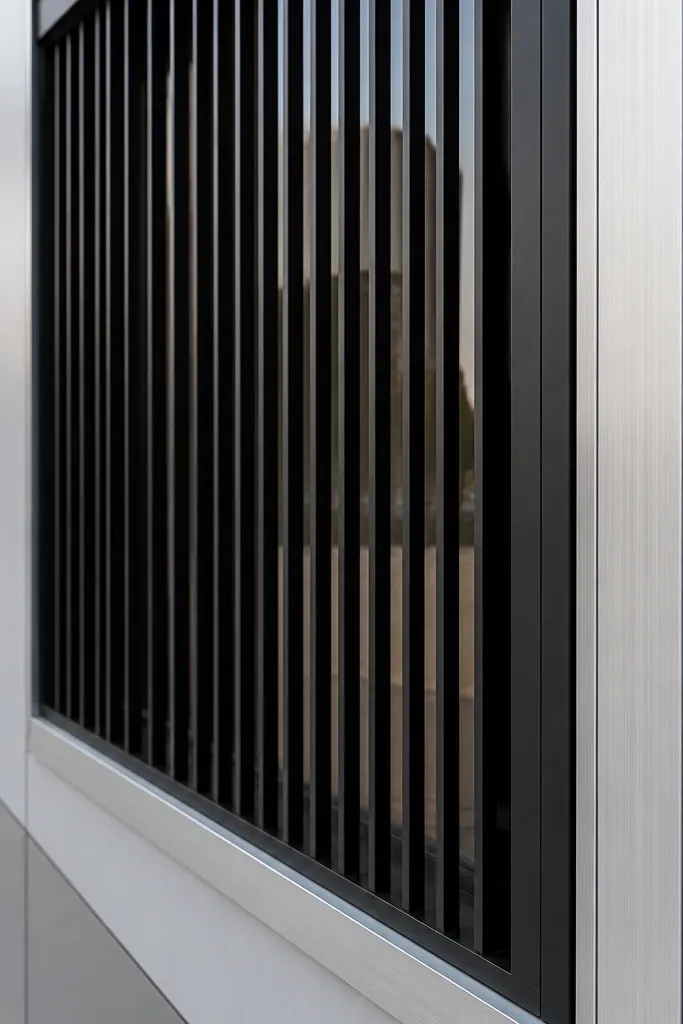
This design is modern because it’s basically a grid with discipline. The thin verticals create a calm rhythm, and the frame edges stay straight so the whole thing looks intentional from the sidewalk. It’s also the fastest way to get a “designed” look without relying on fancy shapes. Use it on single windows, sidelights, or a row of windows where you want everything to match. Expect a straightforward build that still photographs well because the shadows from each bar are even.
Start by measuring the window opening and decide on a 10mm reveal all the way around the grill. Cut a rectangular frame from 25x3 mm flat bar or 15x15 mm tube, then mark and cut vertical bars so spacing is equal (for example, 60-70 mm gaps for a small window). Tack or clamp everything square, then attach the verticals to the frame with welds or metal brackets and screws. Sand sharp edges, prime metal, and paint in two thin coats for a smooth matte look.
Use a template strip of scrap wood with marks for bar spacing so every gap is the same.
Don’t eyeball spacing — even a 5mm mismatch shows in daylight photos.
2. Matte Black X-Brace Center Panel
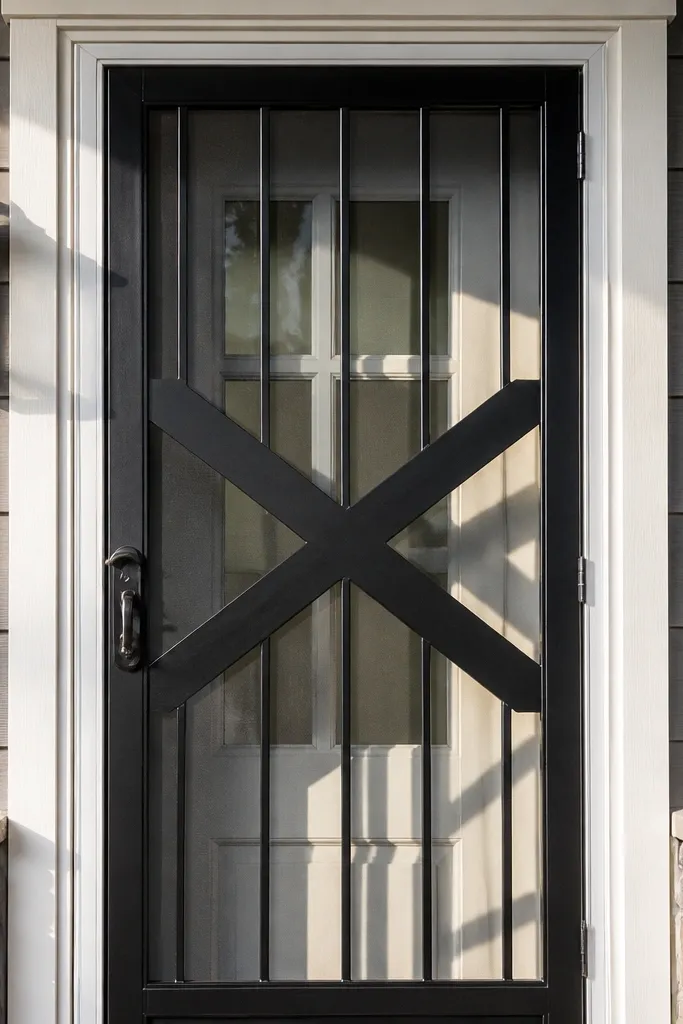
An X brace gives you one bold graphic element without turning the whole grill into a busy pattern. From a distance, the X reads like a single symbol, and the rest of the bars can stay simple. This is a great choice if you want modern but still want visual interest when the window is closed and dark inside. It works especially well on medium-sized windows where you have enough surface area for the X to sit cleanly. The shadow lines from the diagonal braces look crisp when the finish is matte black.
Build a rectangular frame first, then add a simple vertical grid inside it (thin vertical bars or fewer horizontals). Cut two diagonal pieces so they cross at the center point of the opening, leaving equal margins to the frame. Secure the diagonals at each crossing with welds or corner brackets, then add two short horizontal bars near the top and bottom if you want extra structure. Prime and paint with matte black, and keep paint off the screw heads until they’re sealed in with a thin second coat.
Measure the center cross by marking the exact midpoint on the frame edges, not by guessing the “middle.”
Don’t make the X too wide — if it touches corners, it looks like a repair patch instead of a design.
3. Two-Row Herringbone with Narrow Corners
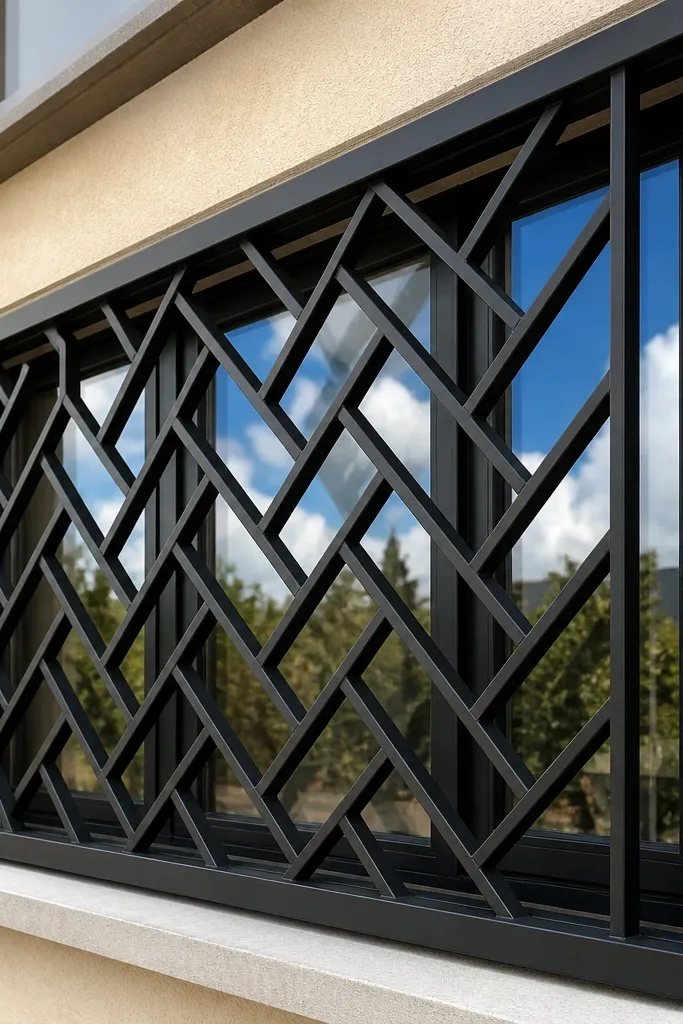
Herringbone looks modern when it’s restrained. This version uses two rows of angled bars so the pattern stays readable and doesn’t turn into a wall of clutter. The narrow corners keep the design tight and architectural, which is what makes it feel “modern” instead of vintage. It also gives you a nice texture under sunlight — each angled bar casts a different shade. This is a good fit for windows where you want a decorative center without losing airflow.
Start with a rectangular frame and add four vertical stiles spaced evenly. Cut angled bars for two rows so each bar leans in alternating directions, creating a clear herringbone. The key is repeatable angles: use a miter saw set to a consistent bevel angle and cut all pieces from the same template. Clamp the two rows in place, secure them at intersections, then add a thin horizontal bar at the top and bottom to lock alignment before painting.
Dry-fit every angled bar first and mark the exact order; herringbone errors look obvious once painted.
Don’t use thick bar stock — heavy pieces make herringbone look bulky and old.
4. Horizontal Ladder with Vertical Ends
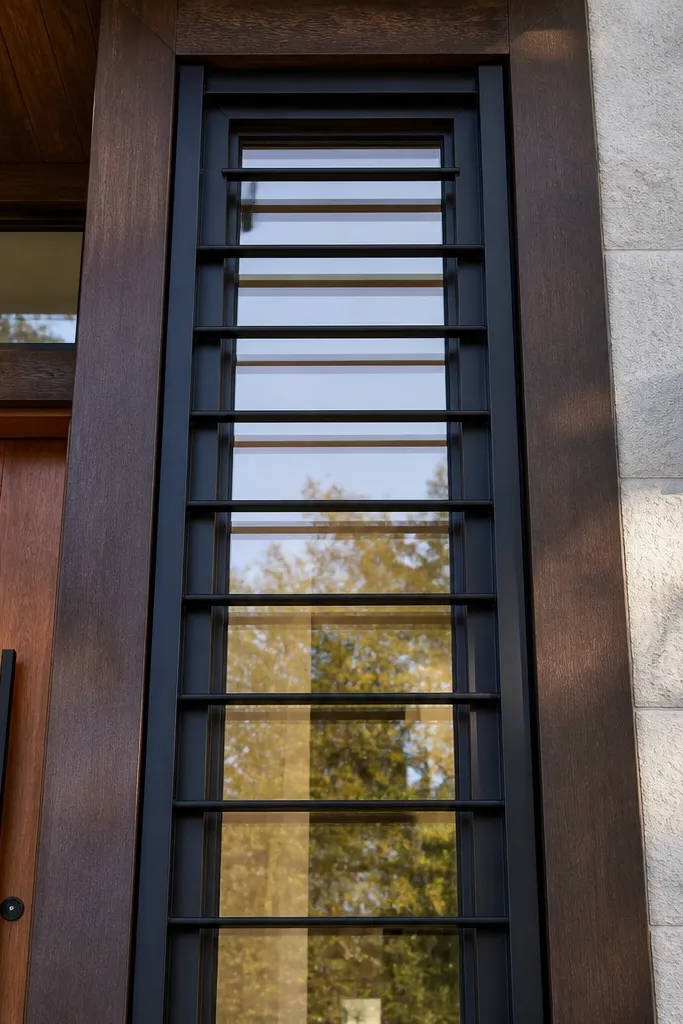
This design reads like a ladder: horizontal rungs create the modern structure, while vertical end posts keep it framed and sharp. It’s visually simple but still looks designed because the rung lines are parallel and evenly spaced. Use it on long windows or doors with sidelights where a grid can feel too heavy. The horizontal bars also give a clean look in photos because they align with the horizon lines of the building. Keep the ends crisp and you’ll get that boutique storefront vibe.
Editor's noteUse a laser level or a long spirit level for the first rung — if it’s off, the whole grid looks off.
Measure the window opening height and decide how many rungs you want, then space them evenly (example: 6 rungs with 70-90 mm spacing). Build a frame from square tube, then install two vertical end posts first. Add the horizontal rungs across between the ends, using a right-angle jig or clamps to keep them level. Finish by priming and painting matte black or charcoal, focusing on smooth edges at the corners.
Skip thisSkip random rung heights; one uneven bar ruins the clean modern rhythm.
5. Minimal Border with Centered Scroll-Free Corners
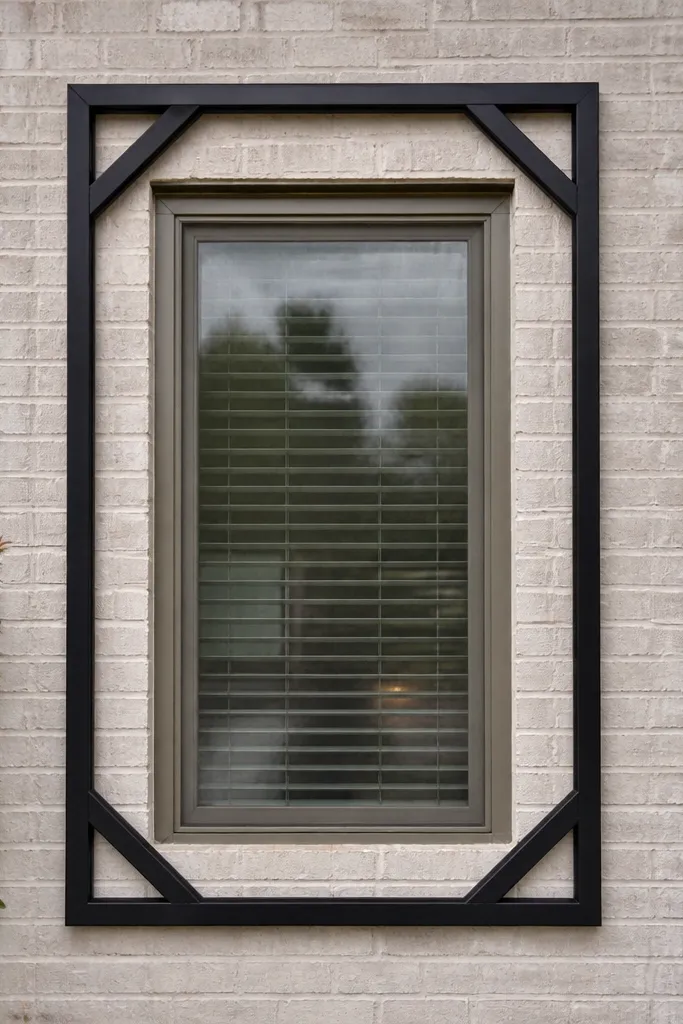
If you hate scrollwork but still want something decorative, this is the answer. The grill uses a minimal border and simple corner accents made from short angled pieces. It looks modern because it avoids old-school curls and keeps the geometry tight. The corner accents add a little personality without turning the whole panel into a pattern wall. This is perfect for apartments, row houses, and any place where you want security plus a clean exterior. It also stays budget-friendly because it uses fewer cuts.
Cut a slim rectangular border frame, then add two or three internal vertical bars so it doesn’t look empty. For corner accents, cut four small L-shaped pieces from flat bar and attach them at each corner inside the frame with screws or welds. Keep the corner pieces consistent in size so the design feels intentional. Prime and paint, then seal with a thin clear coat if you’re in a wet climate to prevent peeling at edges.
Pre-drill holes for screw attachment before painting so you don’t crack paint where the fasteners bite.
Don’t add too many corner bits — two accents per corner look clean; five looks like clutter.
6. Arch Top Frame with Vertical Bars

An arched top instantly makes a window look designed, even when the bars are simple. This works because the arch creates a strong silhouette while the vertical bars keep it modern and not too ornate. It’s a great choice for front facades where you have older architectural shapes but want the grill to feel current. The matte finish makes the arch line look crisp instead of decorative. Build it with slim steel so it stays light visually.
Start with a flat-top frame and plan where the arch begins, usually about the top 1/3 of the opening. Cut the arch using a template from cardboard or thin plywood and transfer it to steel for a smooth curve. Attach vertical bars from the bottom frame up to the arch, keeping spacing even. Weld or bracket the verticals to the arch curve, then sand, prime, and spray-paint matte black in two coats.
Use thin bar stock for the arch — thick steel curves look heavy and cheap fast.
Don’t skip sanding the curve — rough edges show hard in close-up photos.
7. Center Diamond Grid with Outer Rectangle
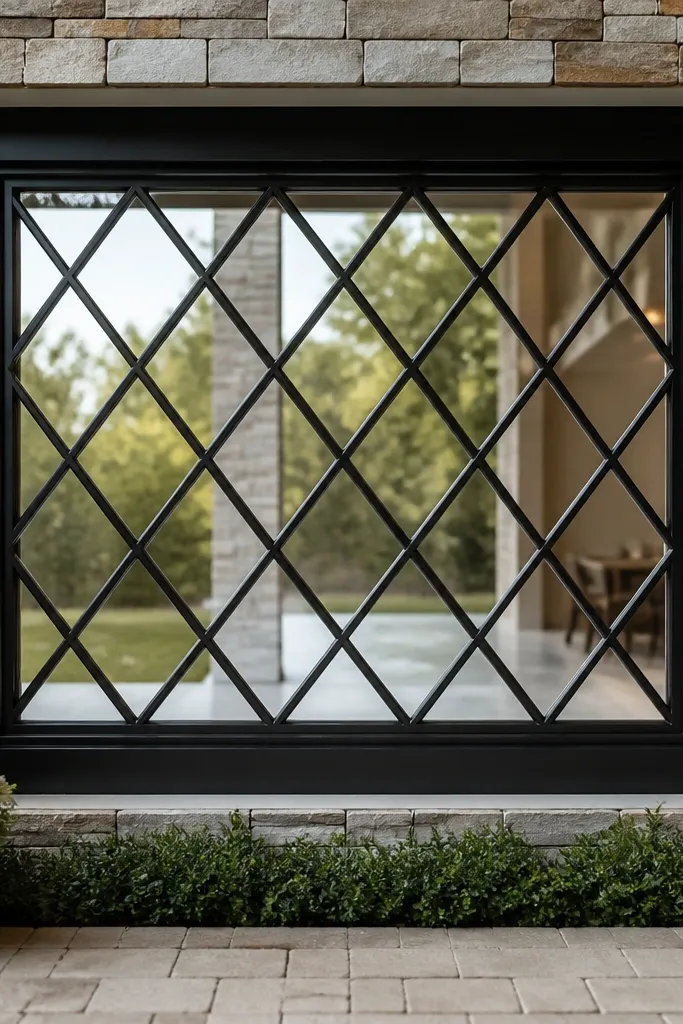
Diamonds look modern when they’re confined to the center and surrounded by a simple border. The outer rectangle keeps the whole design grounded, while the diamond grid gives you that geometric punch. This is a strong choice for medium and large windows because the pattern has room to breathe. It also photographs well because each diamond catches light differently as the sun angle changes. Use matte charcoal or black to make the diamonds look crisp instead of shiny.
Editor's noteMark the diamond corners with a light pencil on masking tape stuck to the frame — it keeps your layout visible while you clamp.
Build an outer rectangular frame first. Inside it, place a smaller rectangle where you’ll create diamonds using angled bars or by rotating a square grid concept with diagonal supports. Cut four diagonal bars that form the diamond edges and add vertical or horizontal connectors so the diamonds don’t sag. Secure everything, then prime and paint, checking from the side for any bar that bows.
Skip thisDon’t let the diamond center shift off the frame — the asymmetry shows immediately.
8. Box Frame with Two Slim Vertical Columns
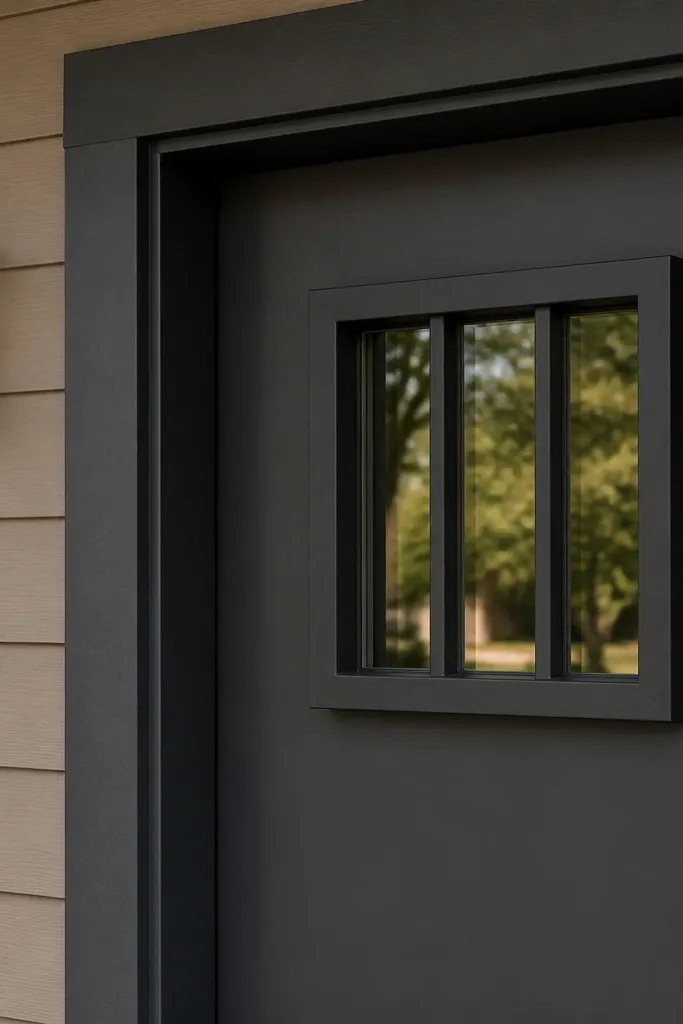
This is the “quiet modern” design: a simple box frame plus two slim vertical columns. It works when you want security without blocking the view too much, and it looks clean on small windows. The negative space is doing the heavy lifting, so it has to be precise. This style also works well if your window already has decorative trim — the grill should not compete. Matte black makes the frame look like part of the architecture instead of a separate cage.
Cut a rectangular frame from 25x3 mm flat bar, then decide your column width and spacing (example: two columns each 25 mm wide, spaced 100-130 mm apart). Attach the two vertical columns inside the frame using welds or brackets. Add two short horizontal spacers if you need extra rigidity, but keep them thin so the design stays airy. Prime and paint, and make sure the frame sits square so the gaps look even on all sides.
For small windows, keep the frame thickness consistent; changing thickness makes it look handmade.
Don’t add extra bars “just because” — the empty space is the look.
9. Grid with Centered Vertical Spikes
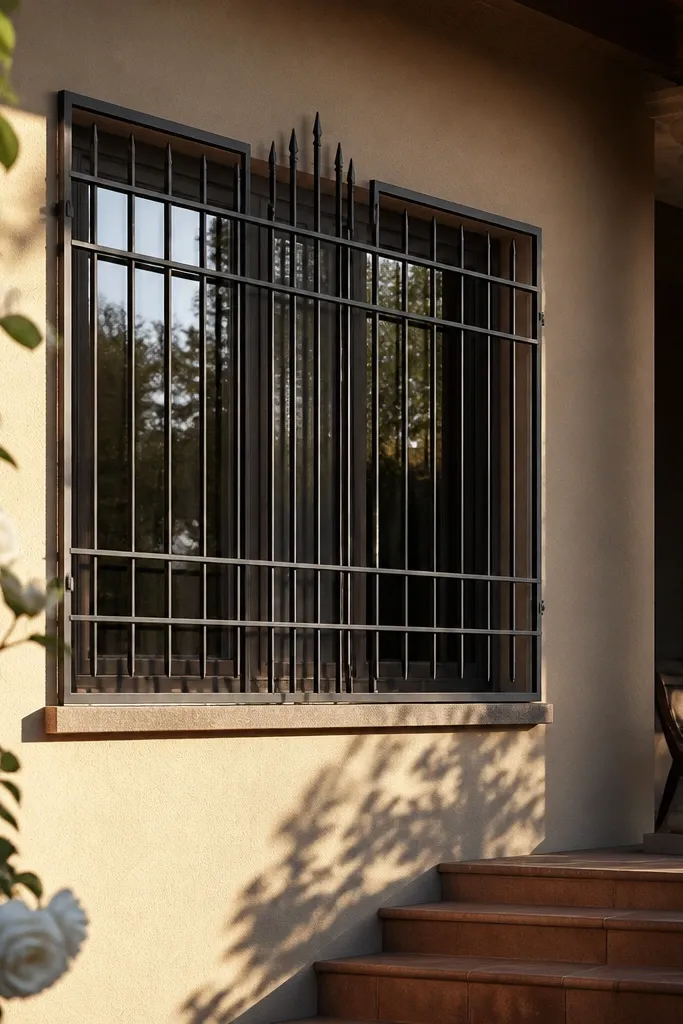
Spikes are modern when they’re controlled. This design uses a basic grid, then adds a center set of taller vertical pieces that create a focal point without heavy ornament. It looks good on wide windows because the center spikes anchor the composition. The look is dramatic in photos because the taller pieces create deeper shadows. It’s also a smart way to make a budget build feel custom without complex cutting.
Editor's noteUse a stop block on your cutting jig so all spike lengths match exactly.
Start with a rectangular frame and build a simple interior grid using equal-spaced vertical bars and a couple of horizontal supports. Cut three or five vertical “spikes” that extend above and below the center grid area by a fixed amount, like 80-100 mm. Position them evenly in the center, then secure at intersections so they don’t wobble. Paint matte black, and keep the spike tops aligned so they form a straight visual line.
Skip thisDon’t make spikes uneven; one short spike ruins the symmetry and modern feel.
10. Tall Window Frame with Crossbars at 1/3 Intervals
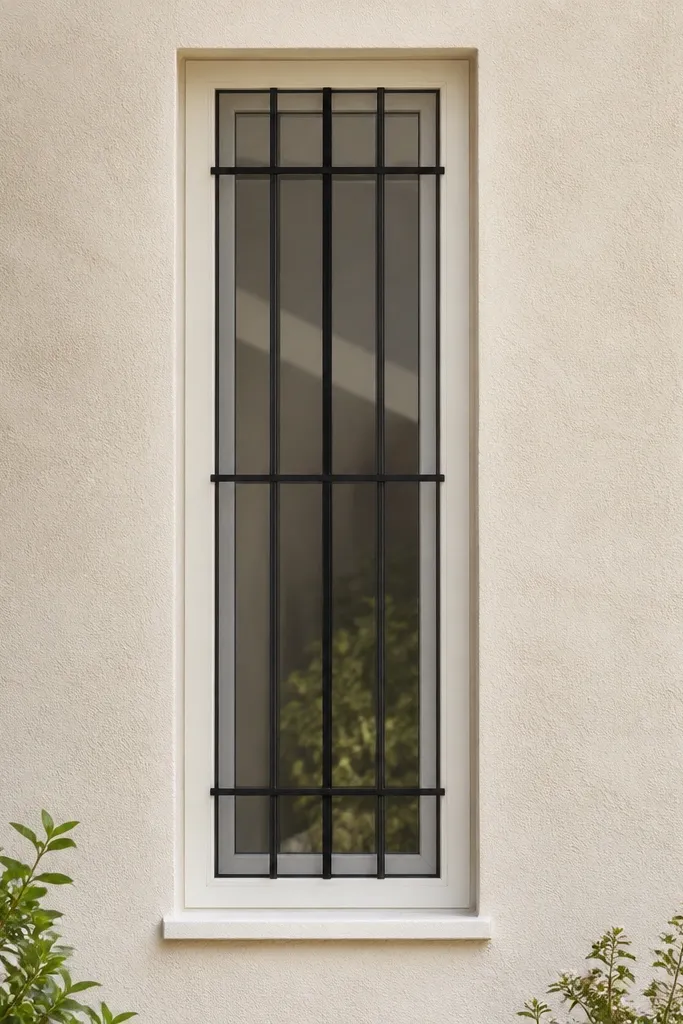
On tall windows, a standard grid can look heavy. This design places a few horizontal crossbars at measured intervals, then uses vertical bars to keep it secure and airy. The composition feels modern because the horizontals are intentional and evenly spaced. It also lets you match the window’s proportions — tall frames look taller when the bars aren’t too numerous. The best part is that it’s still simple to build with straight cuts and accurate spacing. Photos look clean because you get strong parallel lines.
Measure the total grill height and mark two points that split it into three equal sections. Build the outer frame, then install vertical bars with even spacing across the full height. Add two horizontal crossbars at the marked 1/3 and 2/3 points, ensuring each crossbar is level. Secure everything, then sand and paint matte black with two thin coats for crisp edges.
Clamp a long straight level across the frame before drilling — it prevents “bar drift” during assembly.
Don’t crowd the center with extra bars; tall designs need breathing room.
11. Rounded Corner Frame with Vertical Rails
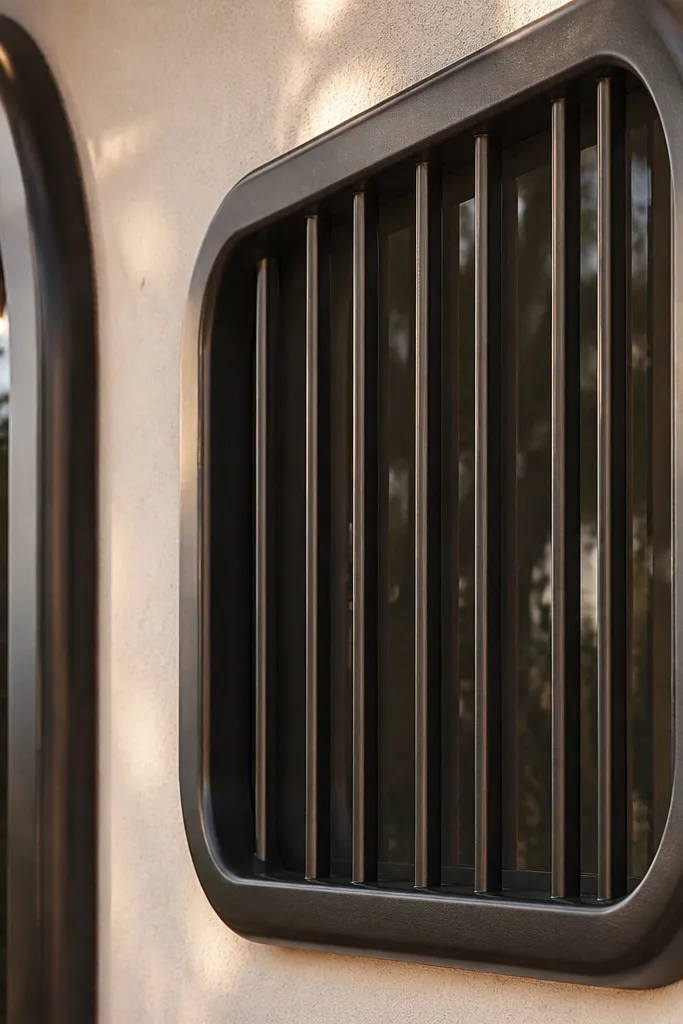
Rounded corners make a grill look more designer than contractor. Keep the rest simple: vertical rails, a slim frame, and clean paint. This works on modern homes because it softens the geometry without adding scrollwork. It’s also a nice fit for entryways where you want the grill to match other rounded elements like porch rails or door hardware. Matte black helps the curve look intentional instead of improvised. In daylight, the rounded corners catch light smoothly and look premium.
Editor's noteGrind the corner welds flush before priming; paint will show every ridge on rounded shapes.
Start with a flat rectangular frame outline, then create rounded corners by bending or cutting corner pieces from flat bar. If bending is hard, make four corner segments with angled cuts that approximate a curve, then weld them and grind smooth. Install vertical rails evenly spaced inside the frame, using a jig to keep the tops aligned with the rounded curve. Prime and paint, and check the corners from multiple angles to make sure the curve is smooth.
Skip thisDon’t leave a visible seam at the corners — it kills the modern look.
12. Two-Layer Grill Effect with Offset Inner Grid
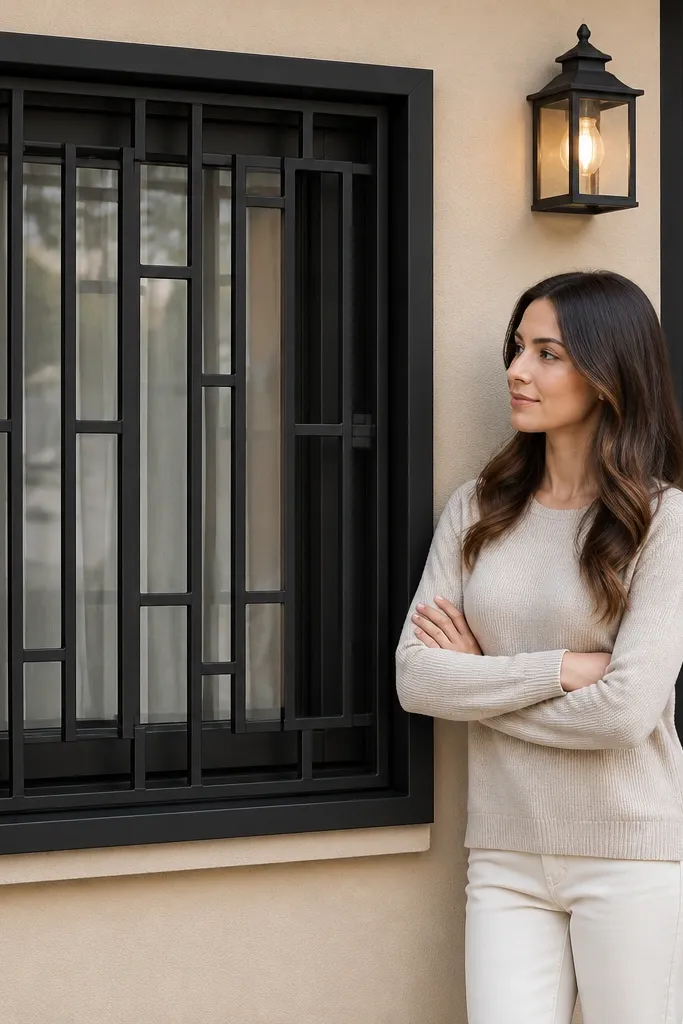
The two-layer look is how you fake depth without complicated fabrication. You build an outer frame, then mount an inner grid slightly offset back from it. From the street, the inner grid creates a shadow border and makes the grill look thicker and more expensive. This is a strong pick for budget window grill design modern because depth is what makes it feel “designed.” It also photographs well because the layers show up even when the window is dark. Keep the inner grid simple — no curls, no heavy patterns.
Editor's noteUse identical spacer lengths at all four corners to keep the shadow gap even.
Build the outer frame first and mount it to your wall or window framing plan later. Create the inner grid from slim bars and mount it using spacers so it sits 15-25 mm behind the outer frame. Use four to six spacers evenly spaced so the inner grid is flat and doesn’t warp. Align the inner grid so it’s centered, then secure with bolts or welds. Prime both layers and paint the entire assembly matte black.
Skip thisDon’t make the offset gap random; uneven gaps look sloppy immediately.
13. Chevron Bottom Border with Vertical Main Bars
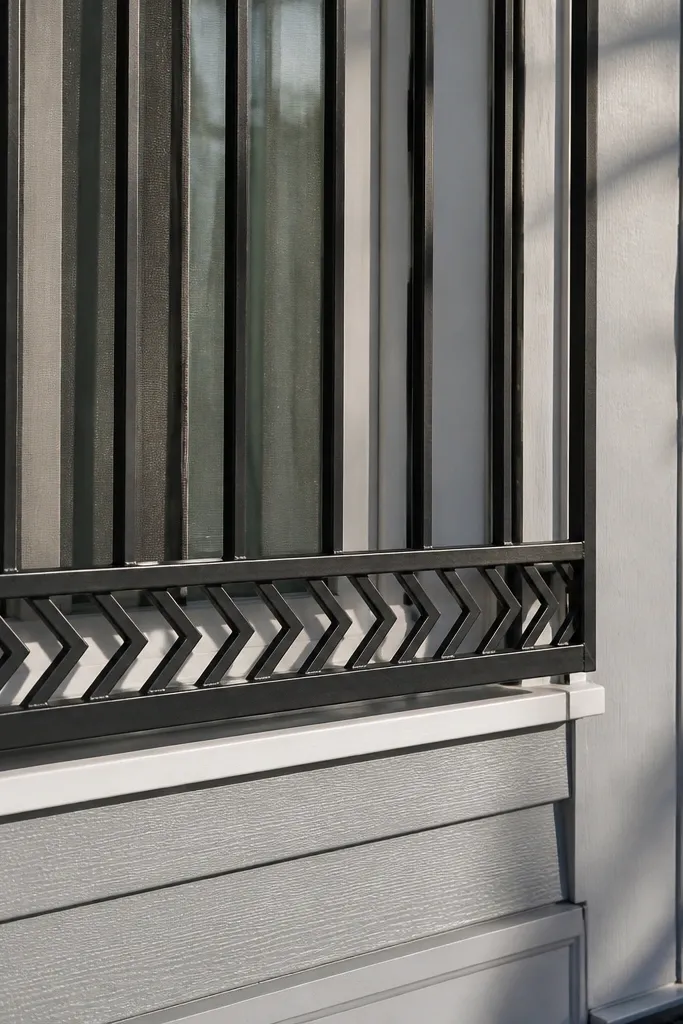
Chevron works best when you limit it to one strip. This design keeps the main area modern with vertical bars, then adds a chevron bottom border for personality. It looks intentional because the chevron is a single graphic band, not a full-frame pattern. This is great for windows near doors where the bottom edge is visible and catches light. The chevron also hides minor imperfections in the lower area because the pattern draws attention down there.
Build a rectangular frame and install vertical bars evenly spaced through the main panel. Reserve a bottom strip height, like 120-180 mm, where you’ll build the chevron using angled pieces. Cut two sets of angled segments that meet in V shapes, then secure them to the frame and to a thin horizontal support bar. Prime and paint matte black, and keep the chevron points sharp by filing edges before painting.
Dry-fit chevron segments on a flat surface so the points meet exactly before you clamp to the window frame.
Don’t extend chevron too high — it makes the whole grill look busy.
14. Vertical Bars with Thin Center Horizontal Line
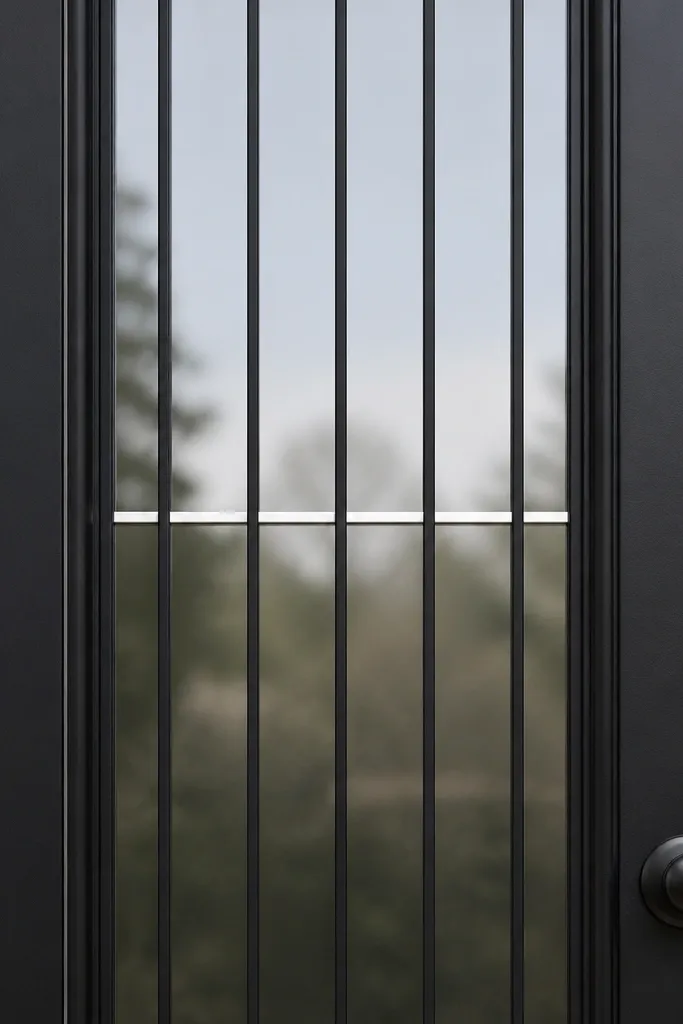
This is the cleanest modern option: mostly vertical bars, with one thin horizontal line to create a graphic break. It looks good on narrow windows and on wide windows where you want the grill to feel light. The single line also helps visually center the window and makes the pattern feel designed instead of purely functional. Matte black keeps it crisp. If you’re trying to keep costs down, this design uses fewer parts and still looks sharp in photos.
Editor's noteMark the center height using a measuring tape from both top and bottom — confirm both readings match.
Cut a slim rectangular frame and add evenly spaced vertical bars. Choose one horizontal bar thickness smaller than the verticals, then place it exactly at the window center height. Secure the horizontal bar to the verticals with welds or metal clips so it can’t twist. Sand, prime, and paint matte black, making sure the horizontal line stays straight and level before the paint fully dries.
Skip thisDon’t use the same thickness for the horizontal line if you want the modern, graphic look.
15. Square Tube Frame with Diagonal Corner Brackets
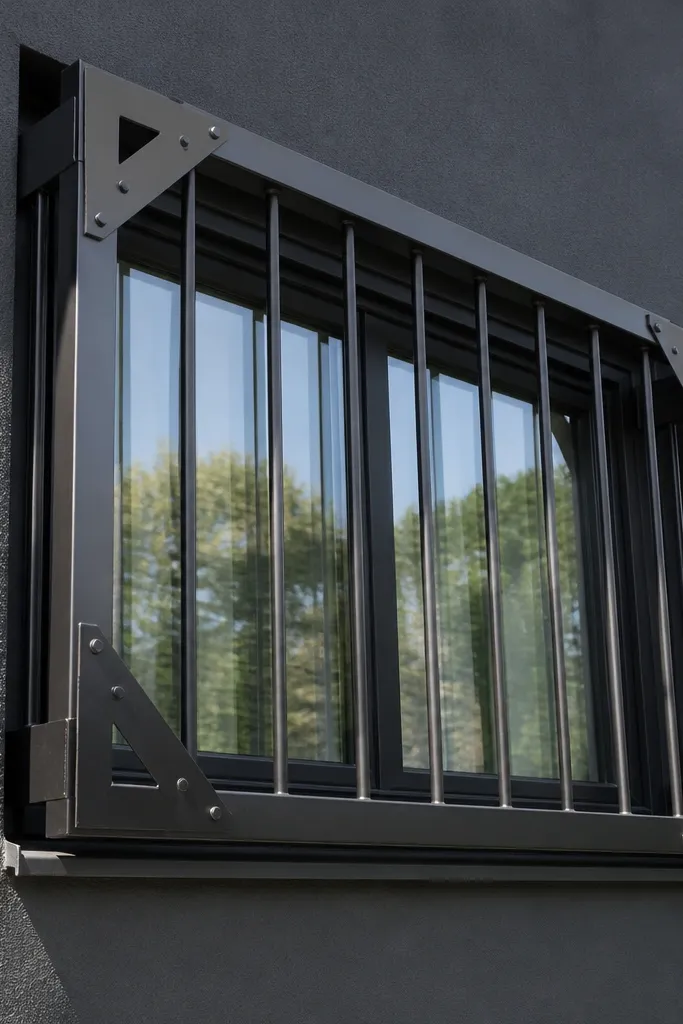
Diagonal corner brackets make the grill feel engineered. You keep the middle open with vertical bars or even a simple grid, while the corners add geometry that reads modern. This design is also practical because corner braces add stiffness, so the grill stays straight over time. It’s a smart pick for larger windows where a flimsy frame would flex. In photos, the diagonal corners create shadow contrast that looks intentional. Use matte black or dark charcoal so the braces don’t look too shiny.
Build a square tube outer frame sized to your window opening and plan the reveal. Add vertical bars inside if you need extra security, then install diagonal corner brackets by cutting two short braces per corner and securing them at a consistent angle. Clamp the frame flat during assembly so corners don’t pull out of square when you attach braces. Prime and paint, and check the grill on a flat surface for wobble before mounting.
Paint after assembly, not before — it’s easier to touch up welds and screw points cleanly.
Don’t skip checking for twist on a flat floor — a twisted grill looks bad even if the pattern is pretty.
16. Perforated Look Using Small Flat Bar Squares
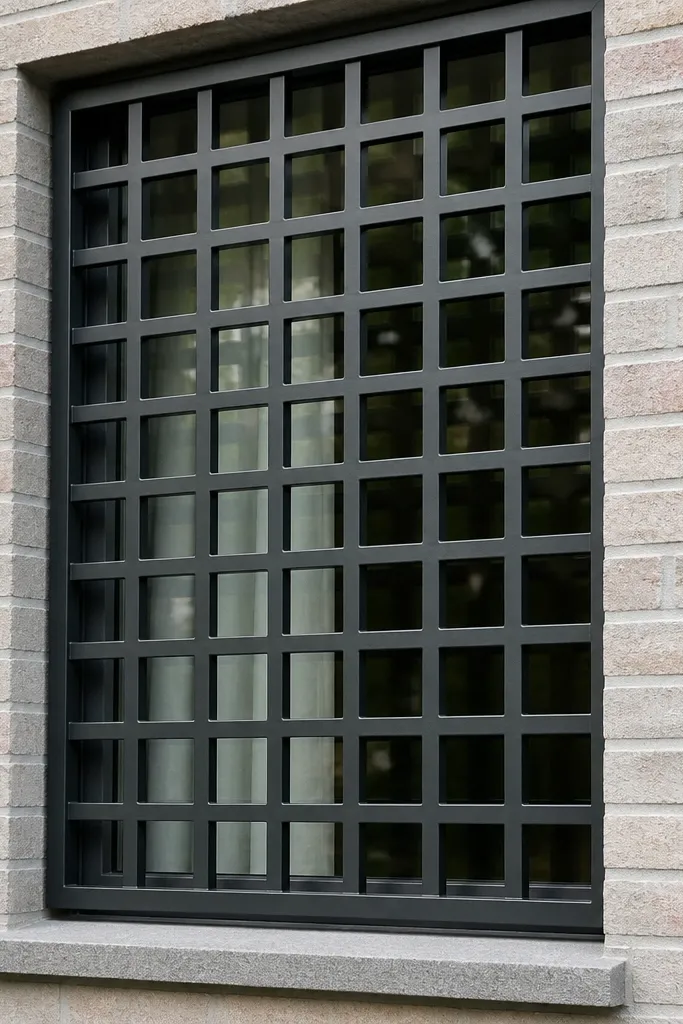
A perforated look is modern when the “holes” are defined by small square blocks. This idea uses a grid of tiny square segments so the window area feels patterned but still open enough to see through. It looks great because the repeating squares create a texture, and matte paint keeps the blocks from reflecting light like metal scrap. This is a good choice when you want a more decorative surface without complicated curves. It also works well on larger windows because the pattern density reads as intentional design.
Start with a rectangular frame and add a regular grid of thin vertical and horizontal supports. Then attach small square pieces at each intersection using welds or screws, keeping each square aligned by using a spacer template. Use the same square size across the panel, like 20x20 mm blocks, and keep spacing consistent. Prime thoroughly, especially around the edges of the small blocks, then paint two even coats to avoid patchiness.
Label your square pieces by size and keep them in one pile so you don’t mix dimensions mid-build.
Don’t leave gaps between squares — uneven block fit makes the whole thing look DIY rushed.
17. Center Vertical Strip with Side Open Lanes
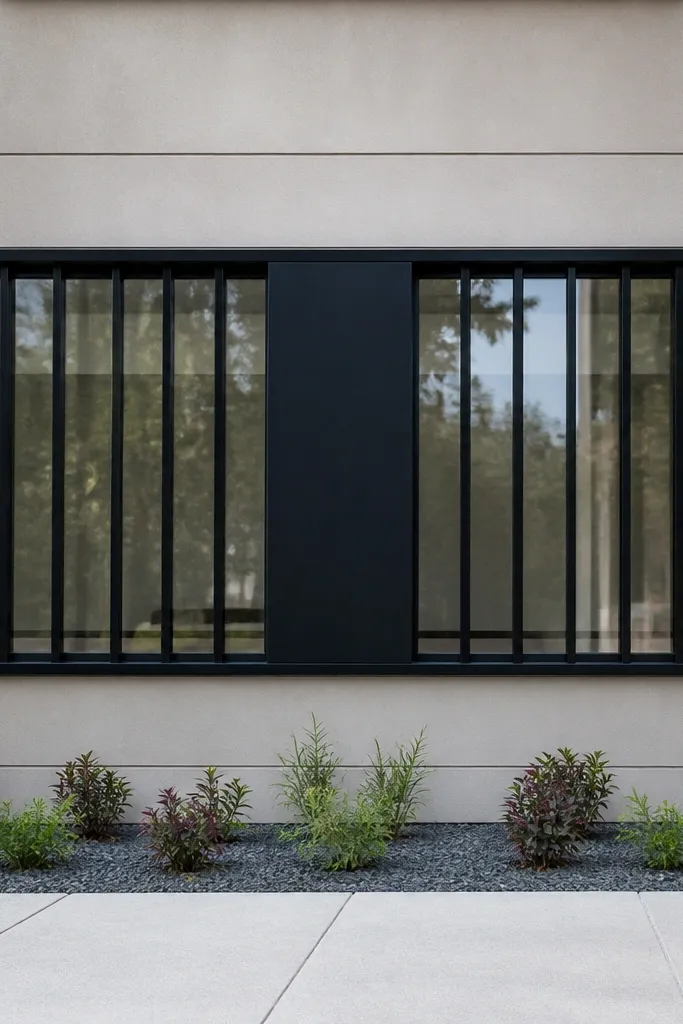
This design uses negative space in a deliberate way. You build a thick center strip for the main look, then leave wider lanes on both sides with fewer bars. It reads modern because it’s graphic and not overly busy, and it keeps the view less blocked. This style is especially good for modern facades where you want security but don’t want a full cage feel. Matte finish helps it look like a single architectural element. The best part is it’s simple to build with fewer cuts and less material.
Editor's noteUse the same bar spacing template for both sides so the lanes match.
Cut a rectangular frame and install one thick center strip using 25-30 mm wide flat bar or tube. Add two side lanes by placing fewer vertical bars on each side, spaced evenly within their lane widths. Use one horizontal bar near the top and one near the bottom to keep everything rigid and aligned. Prime and paint, and keep the center strip perfectly centered so the symmetry looks intentional.
Skip thisDon’t vary the lane widths — asymmetry makes it look like a repair.
18. Modern Diamond Frame Border
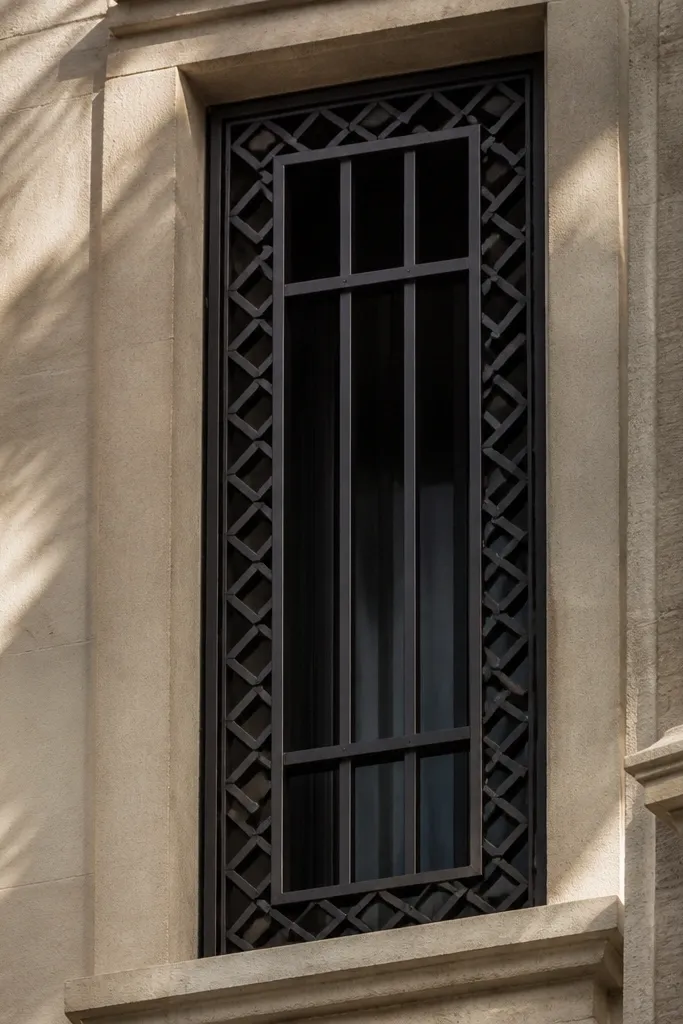
This one is all about the border. Instead of a plain rectangle frame, you create a diamond-shaped border pattern around the inside, while keeping the interior bars simple. It looks modern because the border is geometric and the interior stays readable. This design works well when your window has a strong vertical profile and you want the grill to add structure without clutter. The diamond border also creates different shadow angles, which makes it pop in photos. Keep the interior bars slim so the border stays the focus.
Build a standard outer rectangle frame first. Inside it, create an inner border by cutting diagonal pieces that form a diamond perimeter, then connect those diagonals with short horizontal and vertical segments so it stays rigid. Fill the interior with a slim vertical grid or a few vertical bars for security. Clamp the whole assembly square, weld or bracket the connections, then prime and paint matte black.
Use a paper template for the diamond border so the angles match on both sides before cutting steel.
Don’t overfill the interior — the border design needs space to read.
19. Top Half Panel with Cross Grid, Bottom Half Vertical
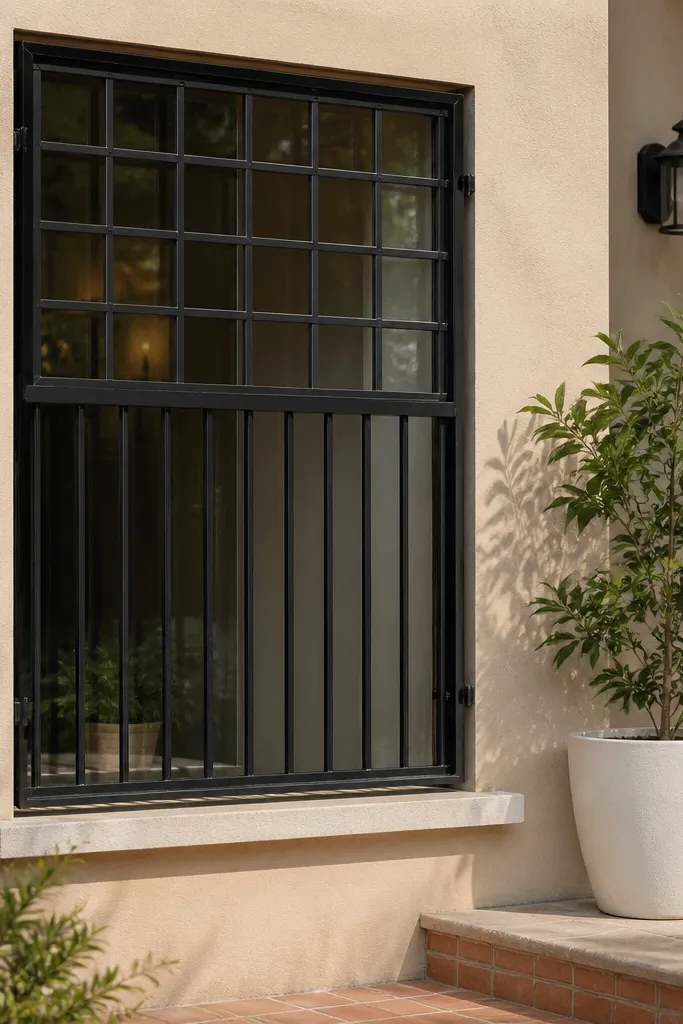
This split design gives you two looks in one without making the whole grill complicated. The top half cross grid adds structure and visual weight where the eye naturally goes first. The bottom half vertical bars keep it lighter and modern, and they still provide security. It’s a smart choice for windows that get partial coverage from curtains or awnings, because you still get the decorative effect above. In photos, the split creates a clean horizontal boundary that looks architectural. Matte black keeps both textures consistent.
Measure the window height and decide a split line around the middle or slightly above, like 55/45. Build the frame and vertical bars for the bottom half first. For the top half, add diagonals or cross grid bars so you get an X-lattice effect, then secure all intersections. Check alignment along the split line, sand, prime, and paint two coats matte black.
Before paint, run a straightedge across the split line to confirm it’s perfectly level.
Don’t make the cross grid too dense; it should read as a pattern band, not a full cage.
20. Single Center Square with Side Vertical Bars
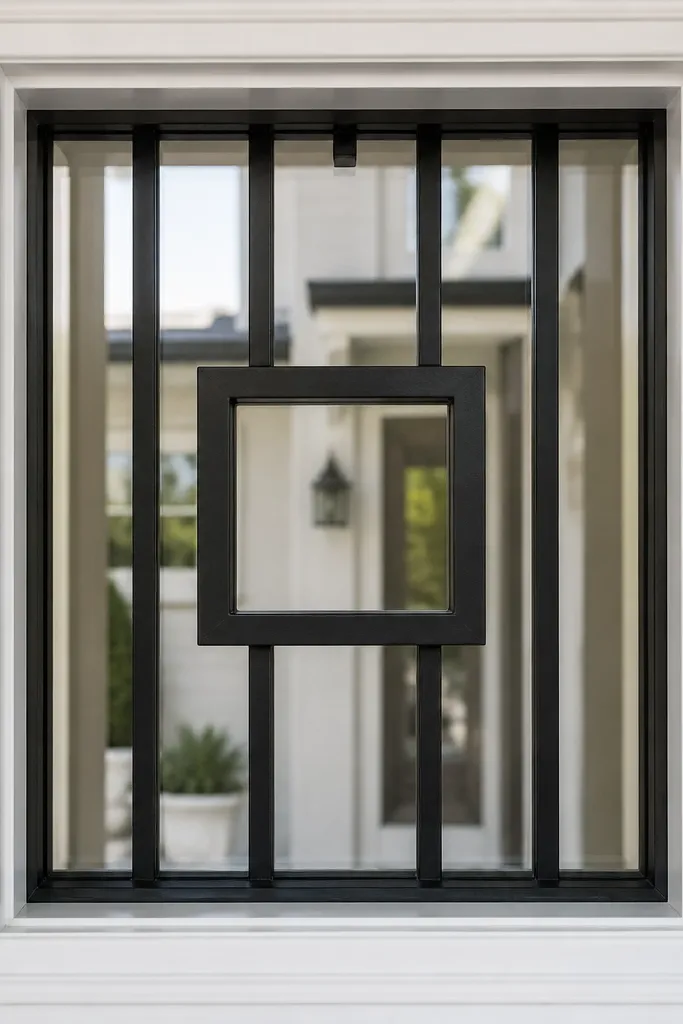
A single center square is a modern graphic trick: it frames the window view without filling the whole panel. The side vertical bars keep the grill secure and airy, and the center square becomes the design focal point. This is perfect for smaller windows where full patterns look crowded. It also photographs well because the square outline creates a clear shape against the window opening. Matte black makes the center square look crisp and intentional. This design is budget-friendly because it uses fewer parts than a full grid.
Cut a rectangular outer frame and add vertical bars on the left and right sides with equal spacing. Then build a smaller square outline in the center using two horizontal and two vertical strips, sized so it sits evenly in the opening. Secure the center square to the vertical bars so it doesn’t move independently. Prime and paint, and keep the square corners sharp by grinding welds flush before top coat.
Center the square using measurements from both sides, not from one side only.
Don’t use rounded rod for the square outline — sharp edges look modern; rounded rod reads older.



