
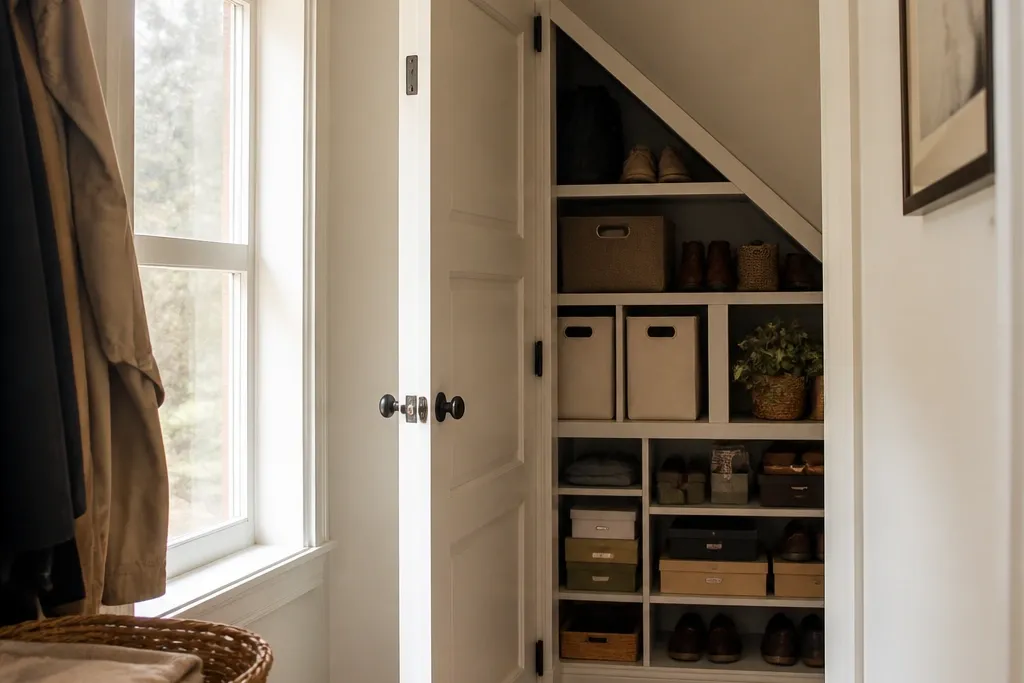
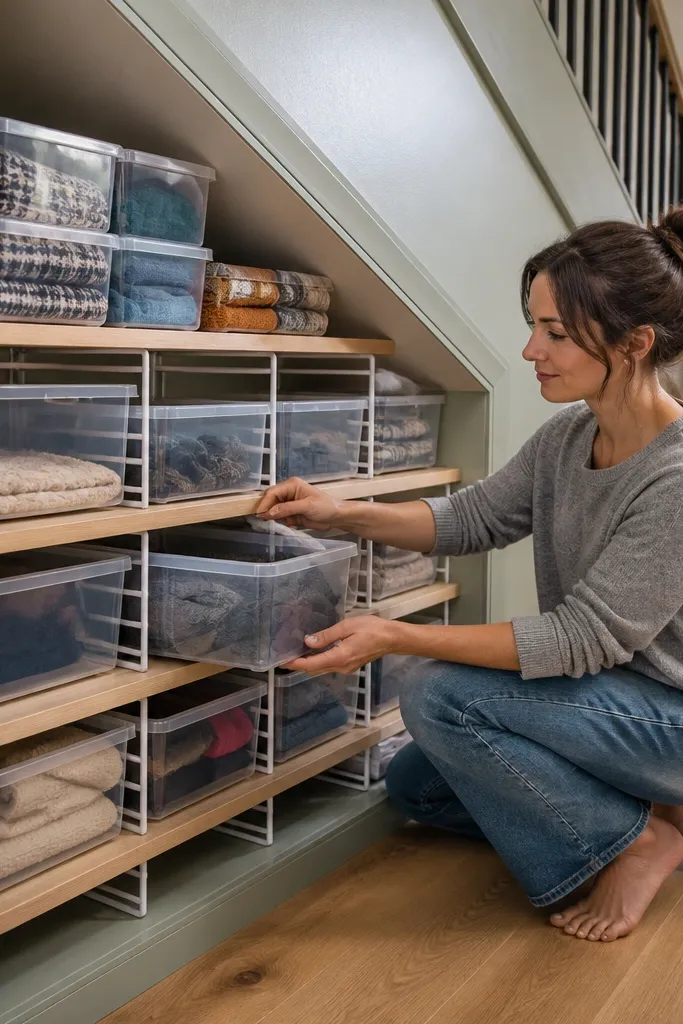
1. Shallow Shoe Wall With Framed Cubby Grid
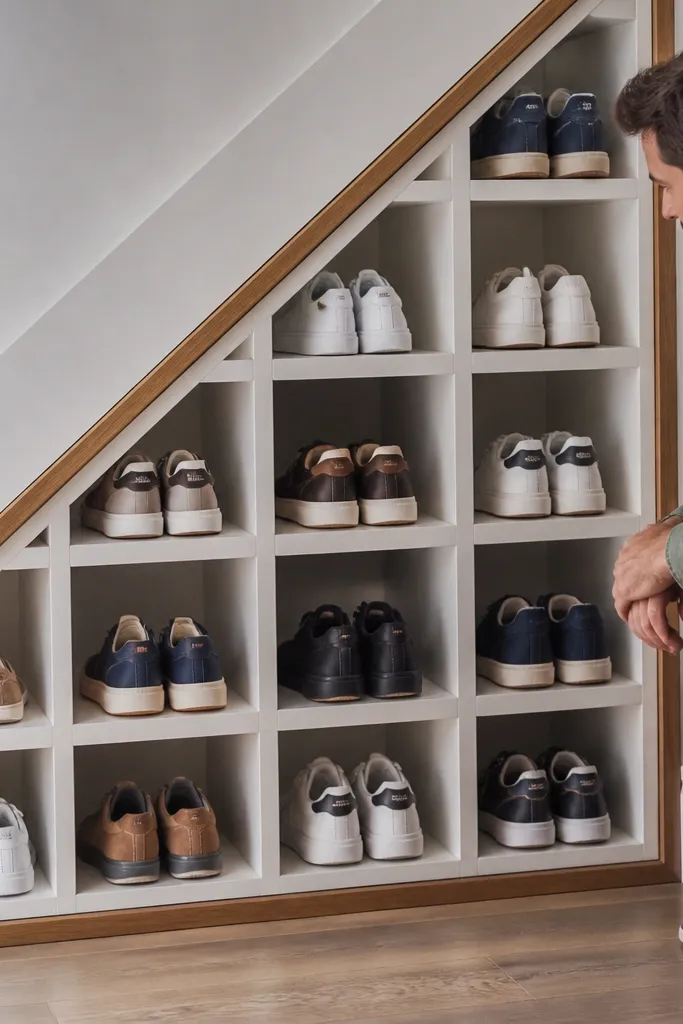
This is the cleanest way to solve the “where do shoes go” problem under a staircase. The framed cubby grid makes every shoe pair feel intentional, and the consistent square openings look crisp even when the ceiling slopes. Use shallow compartments (about 8-10 inches deep) so you don’t lose the whole run to depth. Paint the interior a slightly darker shade than the trim so the cubbies read as separate boxes instead of one flat wall. Add a simple mat or runner at the bottom so the area looks finished and hides scuffs.
Editor's noteUse 1/2-inch plywood for the carcass and add 3/4-inch face trim so the grid edges catch light.
Step 1: Measure the narrowest width and build a plywood box frame with 12-inch or 16-inch centers, keeping each cubby opening at least 6 inches wide. Cut backer panels to fit the slope gaps and screw them to studs or solid blocking behind the drywall. Step 2: Install face trim to create a grid look, then add a bottom base rail about 3 inches tall. Step 3: Prime and paint with a durable satin (cabinet enamel or trim paint), then add small label strips on the inside of each cubby front.
Skip thisAvoid open cubbies with no base rail — shoes slide and the bottom area always looks unfinished.
2. Pull-Out Trash and Recycling Drawer
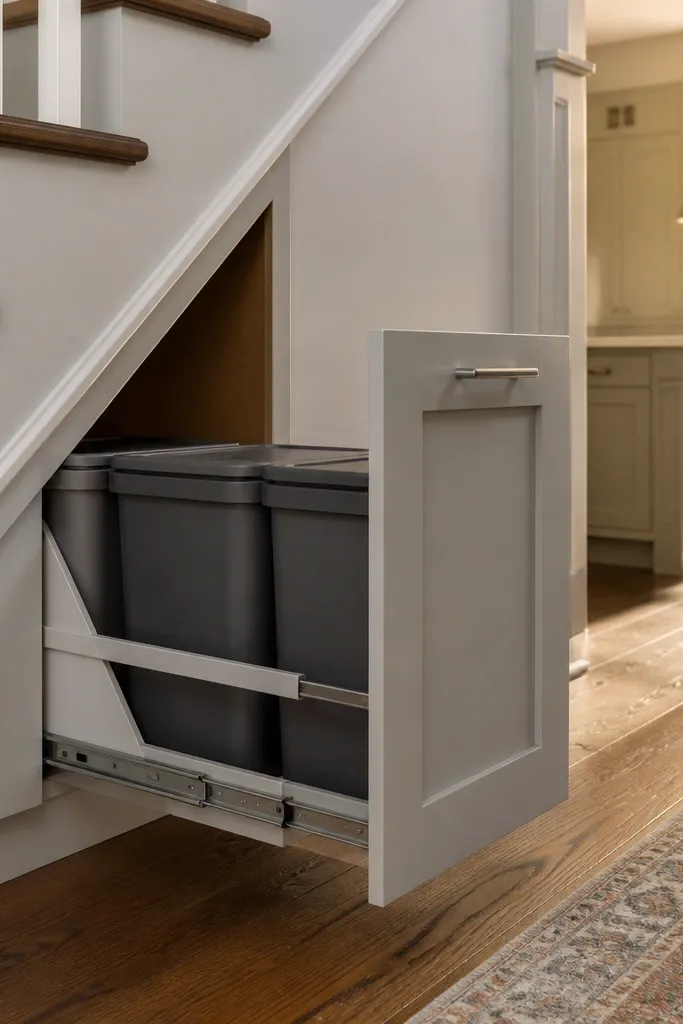
If your under-stairs storage is currently a junk pocket, this turns it into something tidy and photogenic. A pull-out trash drawer keeps bins hidden but still easy to grab, so the space stays visually clean. The look is all in the cabinet face: a smooth painted door panel with matching handles and a neat drawer reveal line. Use two bins spaced evenly so the front stays symmetrical. Add a small shelf above for extra bags or gloves, and the whole section reads like one designed unit.
Step 1: Choose two bins that match in width and height, then build a drawer box sized to fit them with at least 1/4-inch clearance on each side for smooth movement. Mount side rails for full-extension slides, then attach the drawer face to the front of the box. Step 2: Install a fixed top shelf or a short rail above the drawer so you don’t store bags loose. Step 3: Paint the face and shelf, then add magnetic stops or soft-close slides so the drawer doesn’t slam.
Add a thin rubber strip on the bin base so they don’t rattle against the drawer walls.
Skip undersized drawer depth — if bins scrape when pulled, the face will get scuffed and look rough fast.
3. Drawer-Under-Bench Entry Seat With Hidden Storage
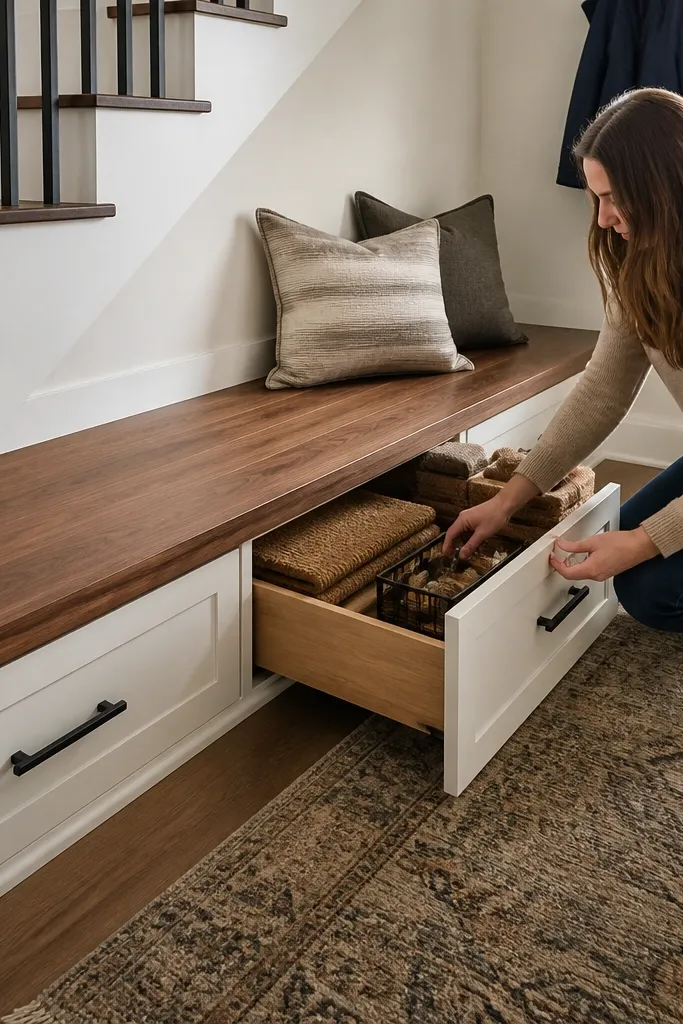
A bench front makes under-stairs storage look like intentional furniture, not a DIY afterthought. The drawers underneath keep the inside hidden while the top gives you a place to sit while tying shoes. This works especially well when the stair underside creates a low clearance zone that’s awkward for tall shelves. Go for a two-drawer setup so each drawer has enough height for folded items, small bags, or spare accessories. The seat top can be a simple plywood panel with a durable finish so it looks polished in photos.
Step 1: Build a bench frame from 2x2 or 2x3 lumber, set the top height to your comfort (often 17-19 inches from floor to seat), and anchor into studs or solid blocking. Step 2: Install two drawer boxes on full-extension slides, then cap the bench with a plywood seat top. Step 3: Add trim around the drawer openings to create clean shadow lines, then seal the seat top with water-resistant varnish or a hard-wearing paint system.
Use a 1/8-inch reveal between drawer face and trim so the lines stay straight after paint.
Don’t skip anchoring — a bench that wobbles ruins the look and makes drawers bind.
4. Tall Door Cabinet for Seasonal Bins
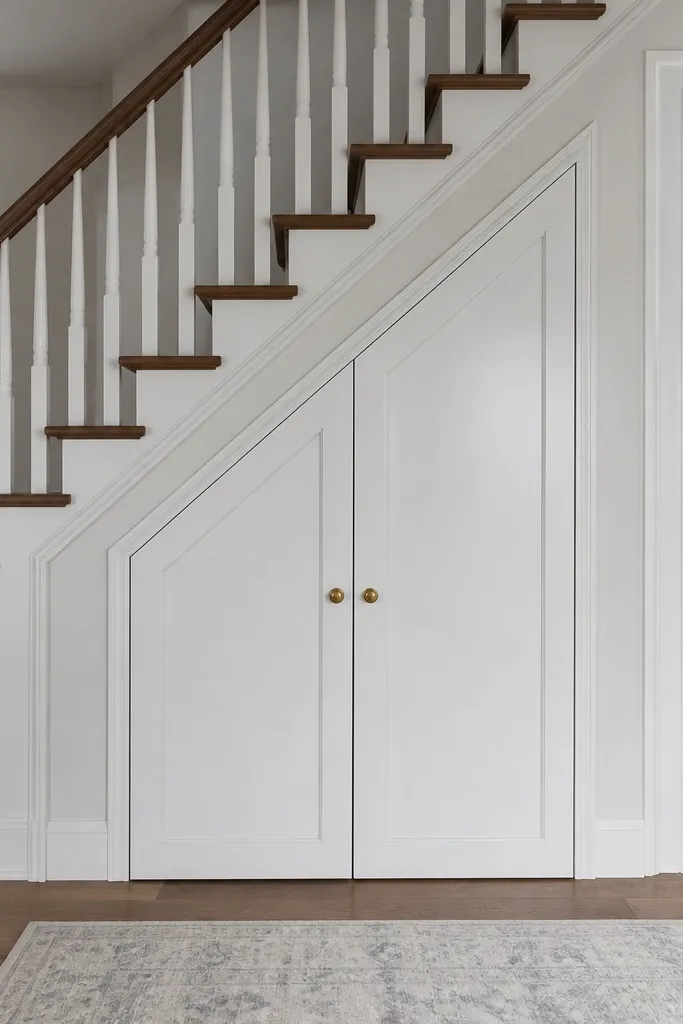
When you want under-stairs storage to look calm, doors beat open shelves every time. A tall cabinet with two doors hides bulky seasonal bins and keeps dust off everything you only need a few times a year. The look comes from panel lines and consistent trim, not from fancy hardware. Use a simple door style with inset panels or shaker-style frames for a clean, modern feel. If the ceiling slopes, build the cabinet to the full width at the top and taper the inside shelves with spacers so bins still sit flat.
Editor's noteUse a consistent reveal gap (about 1/8-inch) around the doors so light hits the edges evenly.
Step 1: Cut cabinet sides from 3/4-inch plywood, then build an upper and lower rail that follow the slope so the doors sit flush. Step 2: Install fixed shelves using 3/4-inch adjustable shelf pins or build one shelf plus one removable shelf for bin height flexibility. Step 3: Add soft-close hinges and a magnetic latch, then paint everything with satin trim paint for a furniture-like finish.
Skip thisDon’t mount doors directly to drywall without blocking — alignment will drift and doors will look crooked.
5. Slanted Ceiling Cubby Row With Trimmed Ends
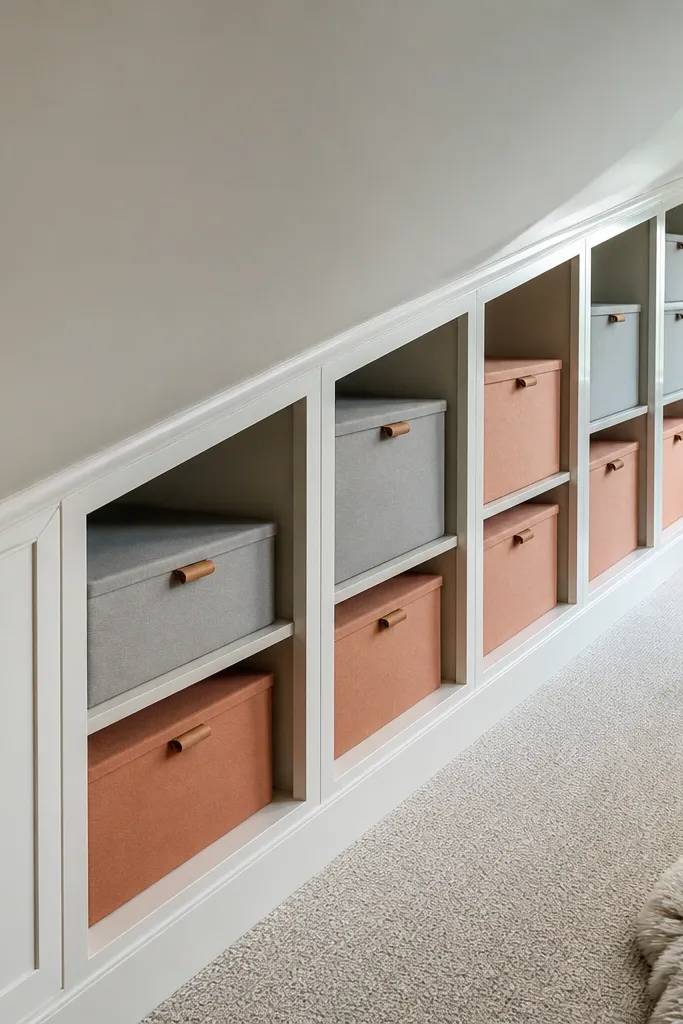
This solves the “my ceiling slope ruins the shelf line” problem and turns it into a design feature. Instead of fighting the angle, you cut the cubby tops to match and finish the ends with trim so each opening looks framed. The result is photogenic because the geometry is intentional — clean rectangles that follow the architecture. Use shallow shelves inside so items don’t disappear and the space looks bright. A single color palette keeps it cohesive: painted plywood, matching trim, and simple hardware.
Editor's noteCut a cardboard template for the slope once, then trace it for every cubby so the angles stay consistent.
Step 1: Draw the slope line on the wall and transfer it onto plywood for each cubby top. Cut top pieces at the angle so every cubby ceiling matches the stair underside. Step 2: Assemble the box frame, then add face trim around each opening to create a consistent border. Step 3: Sand edges, prime, and paint, then install small backer strips to stop items from sliding out.
Skip thisAvoid leaving raw cut edges on the slope — they look unfinished and catch dust.
6. Wallpaper-Backed Gift Wrap Shelf Nook
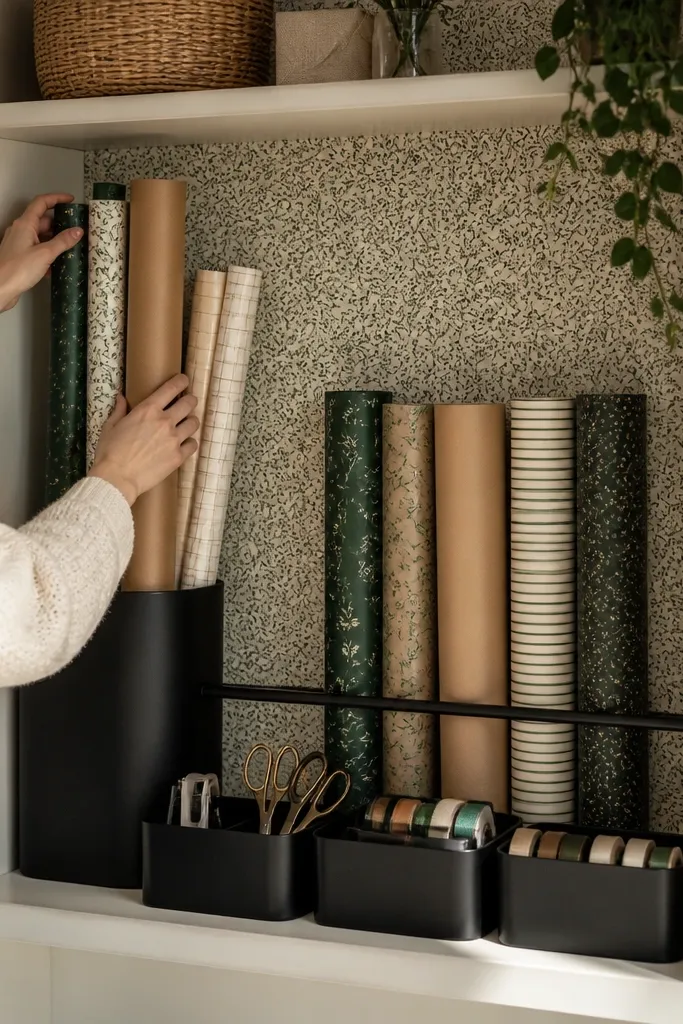
This is the prettiest way to store wrapping paper without it turning into a crumpled mess. A shelf nook with a wallpaper back panel gives instant visual contrast while the front stays tidy with a simple rail or door. Roll wrapping paper vertically in a tube holder, and store tape, scissors, and ribbon in small bins that match the shelf color. The space reads like a mini station, not storage clutter. Use matte wallpaper because it hides scuffs, and seal the shelf surface with a clear coat so it cleans easily.
Step 1: Build a shallow shelf frame from 3/4-inch plywood and install a back panel wide enough to cover the wall area. Step 2: Apply wallpaper to the back panel first, let it fully set, then attach the panel to the shelf frame. Step 3: Add a front rail (about 1.5 inches tall) to keep bins in place, then mount a vertical tube holder on the side.
Seal the shelf edges with polyurethane so tape residue wipes off without staining the paint.
Don’t wallpaper over uneven drywall — it bubbles at the edges and looks sloppy.
7. Pegboard Tool Station Under the Stairs
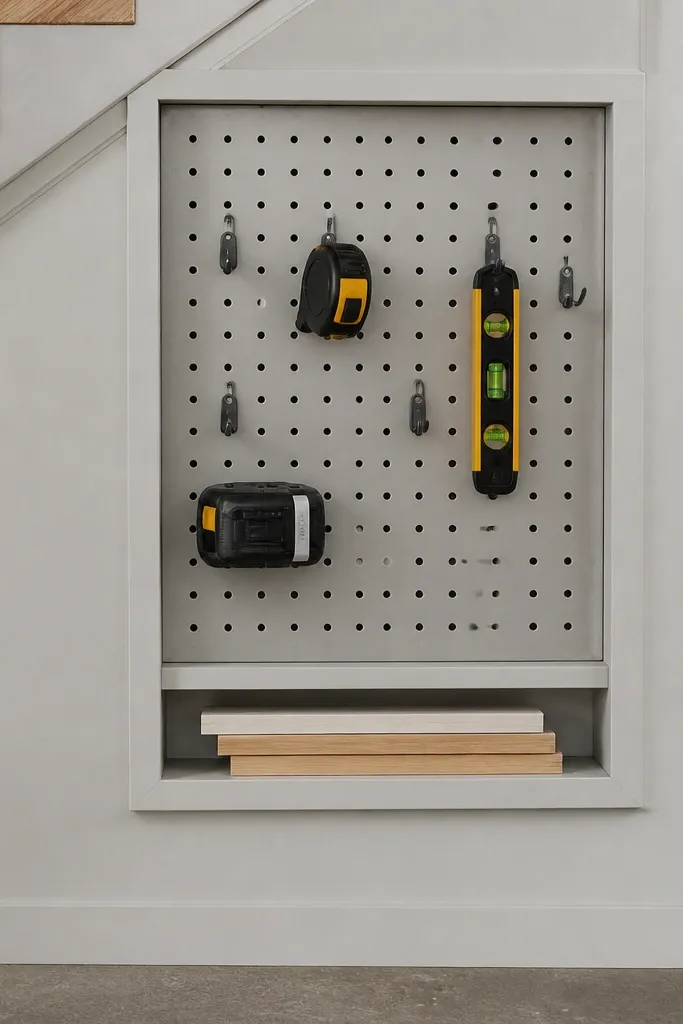
If your under-stairs area is where tools go to disappear, pegboard fixes that fast and looks great. It creates a clean grid that photographs well, plus it’s flexible if your tool collection changes. The trick is to frame the pegboard like a cabinet face so it doesn’t look like a temporary sheet tacked up. Add small storage bins below for screws, tape measures, and chargers, and mount a slim shelf for a cordless drill. This setup is especially good for narrow under-stairs runs.
Editor's noteUse a mix of pegboard hooks and a few “peg accessories” like a drill holder so the look stays organized.
Step 1: Mount 2x2 cleats level to the studs, then screw a framed pegboard panel to the cleats using spacers to keep it straight. Step 2: Add a lower shelf from 3/4-inch plywood and attach bin rails or small cleats to hold containers. Step 3: Paint the frame and any trim, then install hooks and peg accessories before loading tools so everything lines up.
Skip thisAvoid cheap thin pegboard — it bows and makes hooks sit crooked.
8. Glass-Front Display Cabinet for Small Decor
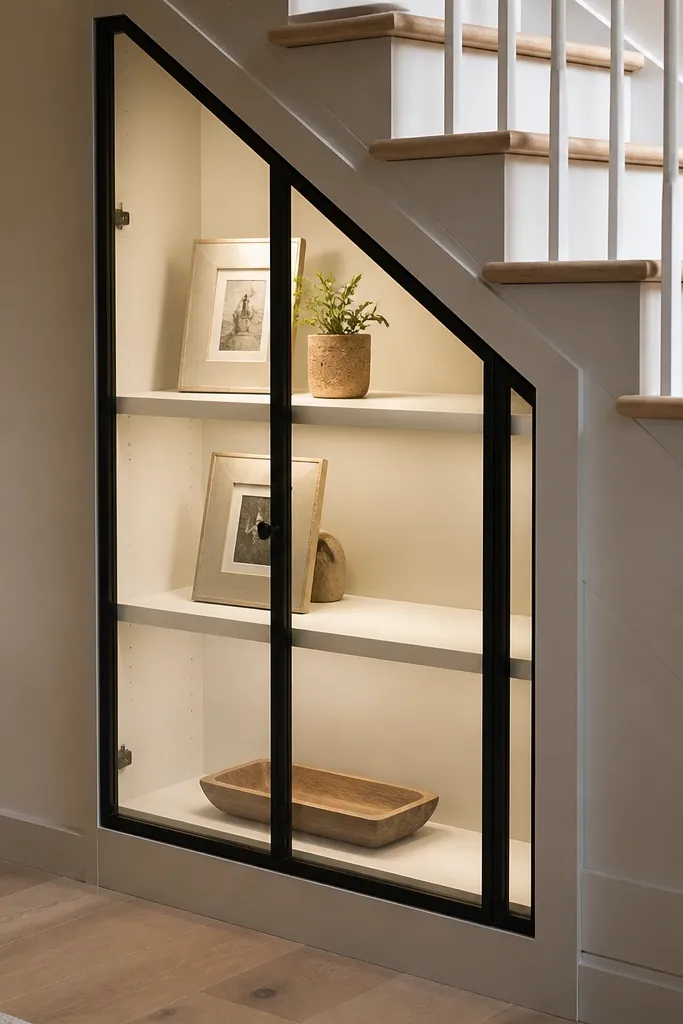
This turns under-stairs storage into a display area, which is the easiest way to make the space look expensive in photos. Glass-front doors let light bounce and show a curated set of items like picture frames, small plants, or seasonal decor. Build it with a simple cabinet box and focus on the door frame — that’s where the style lives. Use interior LED puck lights if you want extra glow, but keep the wiring neat with a hidden switch. The shelves should be shallow enough to keep items from looking crowded.
Editor's notePick one interior finish (matte paint or warm stain) so the display doesn’t look like mixed storage.
Step 1: Build a cabinet frame from 3/4-inch plywood, then install adjustable shelves with shelf pin holes spaced 1-inch apart. Step 2: Make door frames from thin wood strips, then fit tempered glass panels and seal the edges with clear glazing tape. Step 3: Mount the doors with soft-close hinges, install optional puck lights inside, and add a warm-toned stain or paint for the cabinet interior.
Skip thisSkip acrylic alternatives if you want a crisp look — scratches show fast and ruin the glass-door effect.
9. Railing-Style Hanging Hooks With Closed Lower Drawer
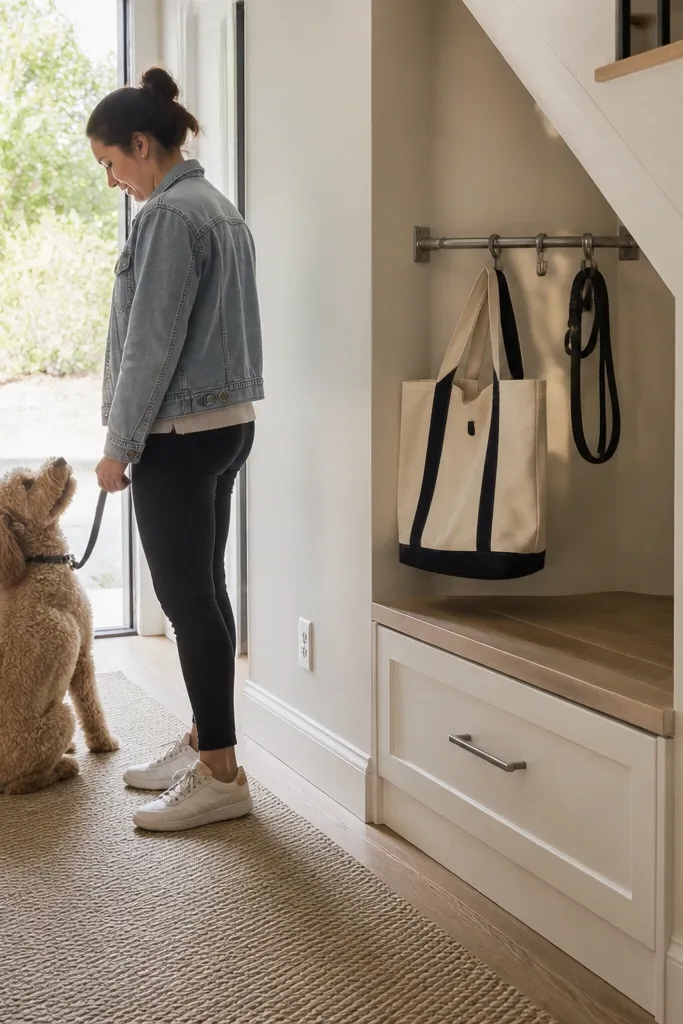
This is a smart hybrid: open vertical organization on top, hidden storage below. Hanging hooks are great for bags, dog leashes, or coats, but the lower drawer keeps the mess out of sight. The look is clean when you use a single rail bar and matching hooks, then frame the drawer with the same trim as the hooks area. It works well when the underside of the stairs gives you a usable height for hanging but not enough space for tall cabinets. Keep hooks spaced evenly and add small baskets inside the drawer for smaller items.
Editor's noteUse a rail with rounded ends so bags don’t snag and the hardware looks finished.
Step 1: Find studs above and install a strong horizontal rail (metal or wood) at a height that matches what you hang. Step 2: Build a lower drawer cabinet under the rail using 3/4-inch plywood and full-extension slides, then add a drawer face with matching hardware. Step 3: Paint or stain the rail surround and drawer trim so the two sections look like one unit.
Skip thisDon’t mount hooks straight to drywall — the whole rail will loosen and pull the look down.
10. Corner-Style L-Shaped Shelves With Matching Trim
When your under-stairs space wraps a corner, L-shaped shelves are the only way to use the footprint without wasting the dead side. The aesthetic comes from matching trim at both runs so the shelves look like built-in furniture. Use a two-tone approach: paint the back panel a soft neutral and keep shelves a clean white or warm wood tone. This makes small items look intentional and stops the space from turning into a shadowy corner. Keep each shelf run at a consistent depth so the geometry reads well.
Step 1: Measure both walls and cut two shelf runs with matching side panels, then dry-fit to confirm the slope doesn’t force uneven gaps. Step 2: Install the back panels first, then screw shelf boards into cleats along the walls. Step 3: Add face trim to the outer edges and paint everything, then mount small shelf stops to keep items from sliding.
Cut all shelf boards from the same sheet to keep tone consistent across the L-shape.
Avoid varying shelf depths — it makes the whole unit look accidental.
11. Linen and Cleaning Closet With Slatted Door
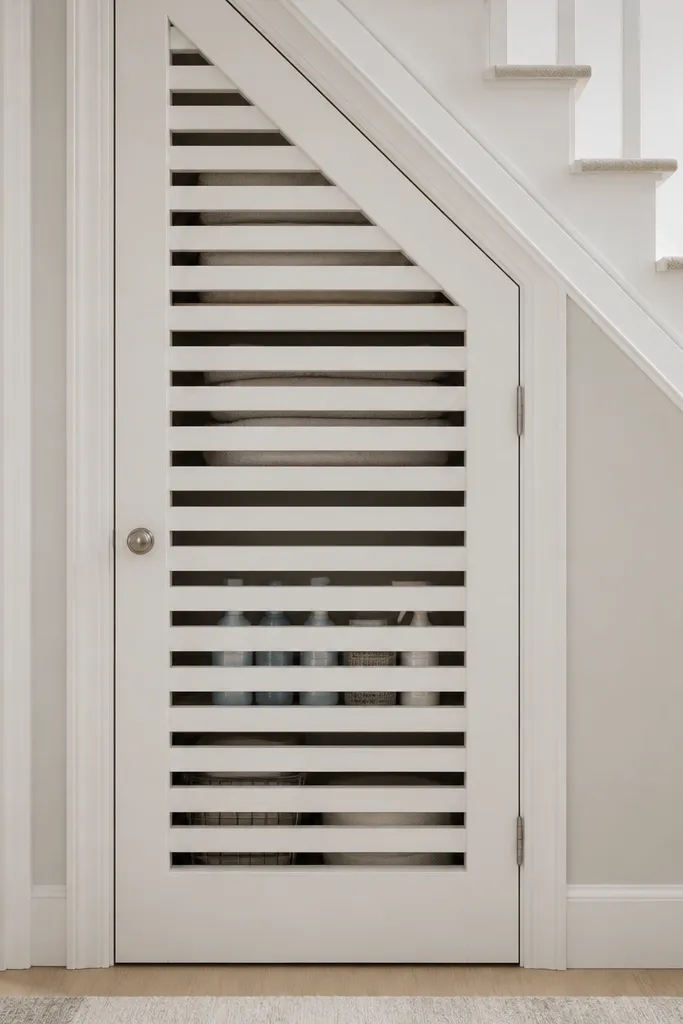
Slatted doors look airy and expensive without requiring glass or complex hardware. This style works great for linens, cleaning supplies, and extra household basics because you still get airflow while keeping items contained. The look depends on the door frame and the spacing between slats — keep it consistent and use one wood tone. Inside, use labeled baskets so the slatted door reads like a tidy closet. It’s also a good choice when you want to avoid the “boxy cabinet” look under the stairs.
Step 1: Build a closet box from 3/4-inch plywood and install one or two shelves inside, sized to your baskets. Step 2: Construct a slatted door frame and attach slats with equal spacing, then sand and finish the door before hanging. Step 3: Install hinges and a simple magnetic catch, then add baskets and labels inside for a clean visual grid.
Use pre-finished slats or sand to 180 grit so the door looks smooth, not rough.
Don’t use random-width slats — uneven spacing makes the door look DIY in a bad way.
12. Cabinet With Lift-Up Top for Vacuum and Bulk Storage
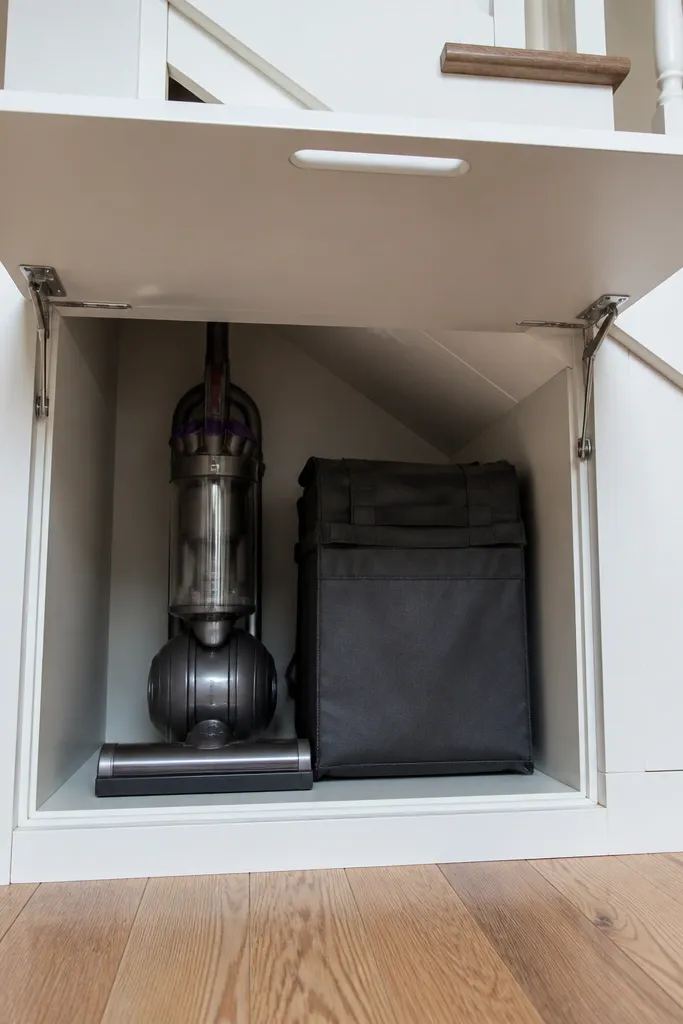
A lift-up top is one of the best ways to hide awkward tall items like a vacuum, bulky seasonal bags, or floor tools while keeping the outside clean. The aesthetic is all about the top panel: flat, painted, with a neat seam and a handle that matches the rest of the hardware. This idea works when the ceiling slope limits tall shelves but you still have enough depth for a contained box. Inside, it’s simple storage with a big opening, so loading and unloading is fast. Add a small side shelf for attachments so everything belongs to the cabinet.
Step 1: Build a cabinet box and install a fixed back and base, leaving an open front for the lift panel. Step 2: Cut the lift-up top panel to cover the opening with a consistent gap, then attach it using gas struts or a strong hinge system. Step 3: Paint the exterior and install a handle, then add a small side shelf or hooks inside for vacuum attachments.
Use gas struts matched to the panel weight so it lifts smoothly and doesn’t slam.
Skip using weak hinges — a heavy top panel will droop and the seam will look messy.
13. Peg + Bin Combo for Mail, Keys, and Leashes
This is the “entry station” version of under-stairs storage, and it looks good because it’s organized in layers. Pegboard at eye level holds keys, small bags, and leashes, while small bins below keep mail and accessories contained. The visual payoff is the clean grid and matching labels, which makes the space feel styled instead of cluttered. Use a light color palette for the pegboard and bins so the area stays bright under the stairs. If you have a narrow run, this still works because pegboard is compact and modular.
Editor's noteUse label tape with consistent font and size so it looks intentional, not like temporary handwriting.
Step 1: Mount a framed pegboard to studs or blocking, then add a lower shelf and bin ledge using 1x2 cleats. Step 2: Install hooks for keys and a couple of larger hooks spaced for leashes, then add bin labels on the front edges. Step 3: Seal painted surfaces with a wipeable finish, then load items by category so the visual order stays consistent.
Skip thisDon’t overload hooks — if every hook has something, the station turns into a pile.
14. Hidden Larder With Pull-Out Pantry Shelf
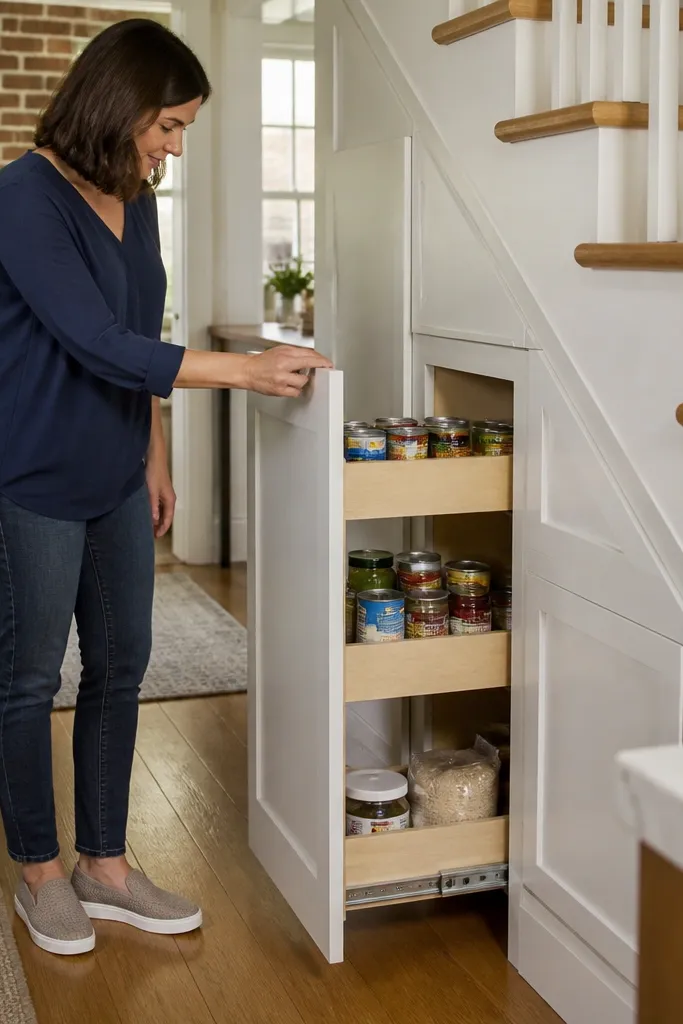
A pull-out pantry shelf gives you actual usable storage without building a full cabinet face. It’s ideal for under-stairs areas where the width is decent but the height is limited by the stair structure. The look is clean because the shelf disappears behind a simple door or face panel. Use a two-level pull-out so you can store pantry basics like oils, baking supplies, or snacks in a neat stack. This is a budget-friendly build that still looks like a planned feature because the hardware is hidden and the lines stay straight.
Step 1: Build a narrow cabinet box or face frame, then install a pull-out platform using drawer slides sized for the load. Step 2: Add a fixed top divider and a second pull-out shelf level so items don’t sit too high. Step 3: Install a front door or a hinged panel, then paint to match the surrounding trim for a built-in look.
Use a slide rated for at least 75 pounds so the shelf doesn’t start to sag after months of use.
Avoid flimsy side panels — the shelf will rack and the face will look out of alignment.
15. Fabric Curtain Storage With Built-In Track Rail
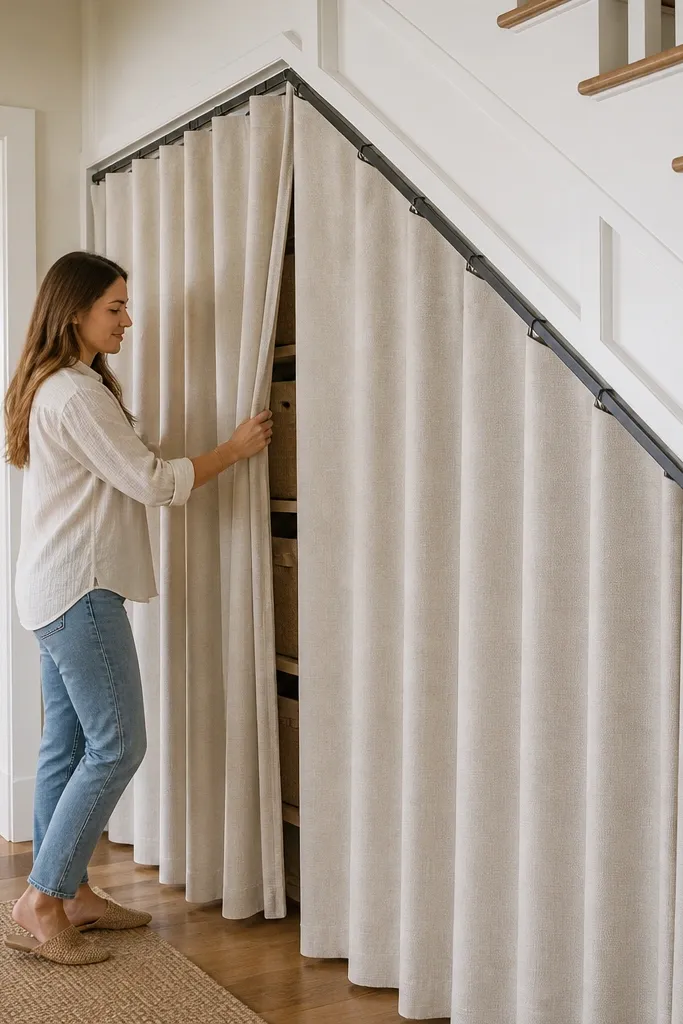
Curtains are the fastest way to make under-stairs storage look styled when you have an uneven, hard-to-frame shape. A built-in track rail gives you straight lines, and the fabric softens the space so it looks warm instead of boxy. This works for toys, blankets, or seasonal items where you want quick access without building complex doors. Choose a thick cotton or linen blend so it holds shape and looks good in photos. The frame should be painted clean and square so the curtain reads like part of the architecture.
Editor's noteUse black or oil-rubbed hardware for the track so it doesn’t glare and looks intentional.
Step 1: Build a simple shelf frame or side rails, then install a track rail above the opening anchored into studs. Step 2: Hang a curtain panel wide enough to overlap both sides, then hem the bottom to hit just above the shelf line. Step 3: Add a small inner valance strip or trim board so the track isn’t visible and the edges look finished.
Skip thisAvoid thin, see-through fabric — it shows clutter and makes the whole area look messy.
16. Backlit Cabinet Niche With Floating Shelf for Decor
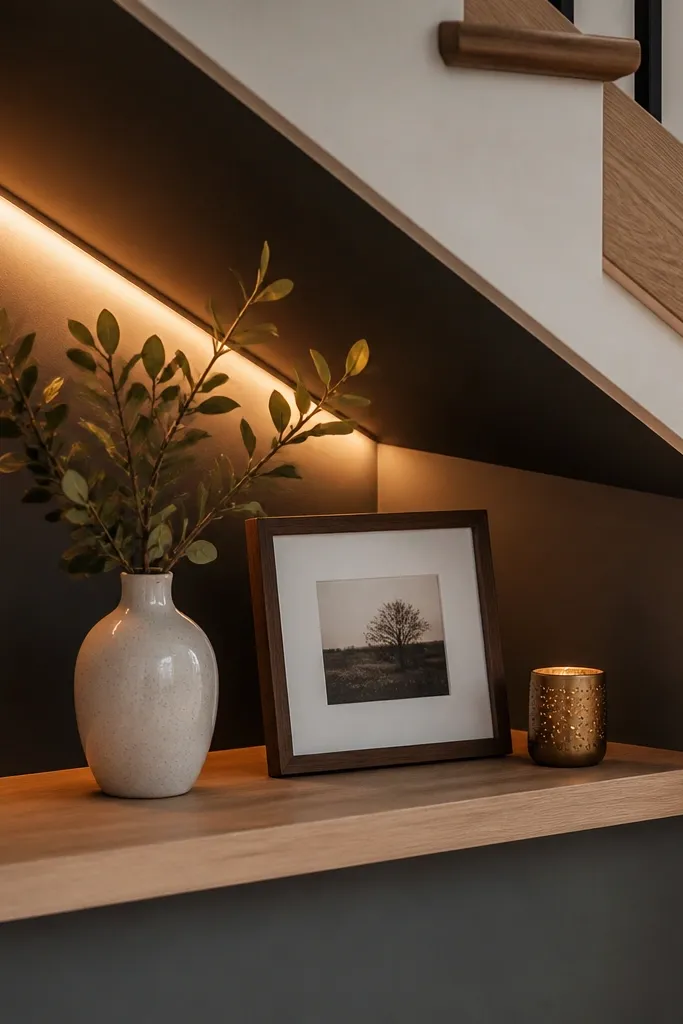
If you want under-stairs storage to look like a boutique setup, add a small niche with backlighting and a floating shelf. This is not about hiding everything — it’s about making the space look curated while still storing the practical stuff nearby. The warm glow makes the niche photogenic and helps the area look larger under the stair. Keep the shelf small and clean, then place a few decor pieces that match in tone. Use a simple cabinet back panel with a cable route you can hide, and you’ll get a polished look without complicated carpentry.
Editor's noteUse a diffuser strip and keep the LEDs at least 1 inch back from the shelf edge for an even glow.
Step 1: Build a small back panel recess from plywood and install a floating shelf using concealed brackets anchored into studs. Step 2: Install LED strip lighting behind the panel with a diffuser so you don’t see bright dots, then route the power to an outlet or switch. Step 3: Paint or stain the niche, then mount the shelf and add a small lip to stop items from sliding.
Skip thisSkip visible wiring — it kills the clean, intentional look fast.
17. Cabinet Face With Hidden Charging Station
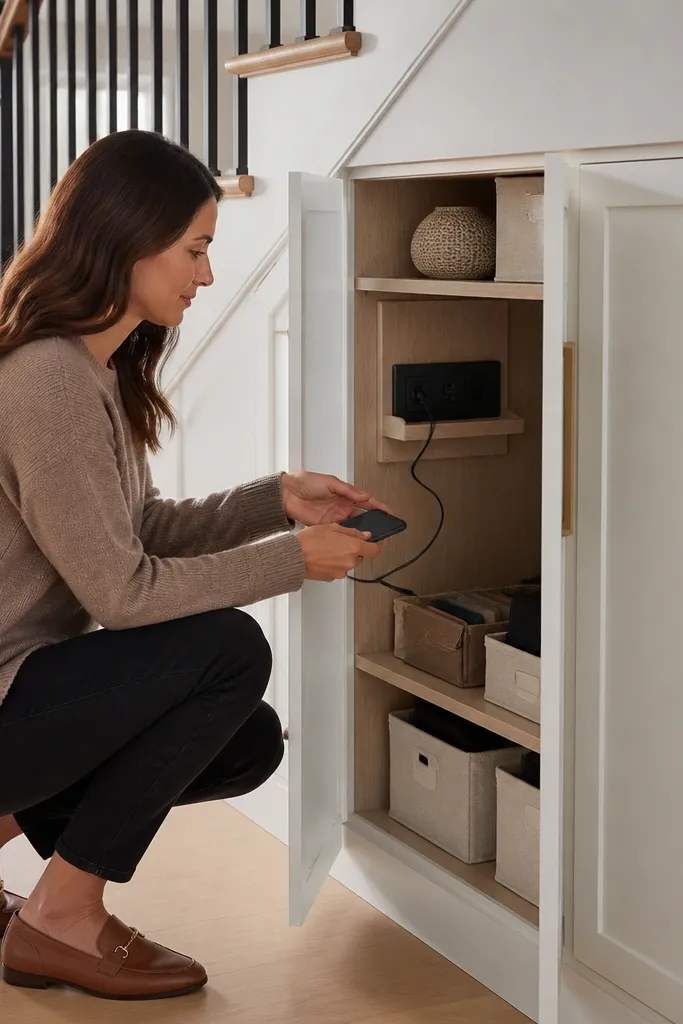
This is the most practical “looks clean” storage idea for under stairs: hide the charging clutter in a cabinet face. You get a tidy charging station for phones, tablets, or a cordless tool battery, while the rest of the cabinet stores everyday essentials in bins. The aesthetic is smooth cabinet fronts and a neat cable path that doesn’t snake across shelves. Use a small charging panel mounted inside near the back with a cable pass-through to a single charging area. Add a small shelf below for a charging tray so the station looks deliberate.
Step 1: Build a shallow cabinet with a front face panel and a fixed shelf for the charging tray. Step 2: Cut a pass-through hole in the back panel for a power cable, mount a multi-port charging station inside, and secure cables with adhesive cable clips. Step 3: Install a small charging tray on the shelf front edge and paint/finish the cabinet to match your trim.
Use a removable cable cover or a hinged access plate so you can swap chargers without tearing everything apart.
Avoid loose cables inside — they snag and make the cabinet interior look messy even if the outside looks fine.
18. Wood Slat Storage Doors With Magnetic Catch
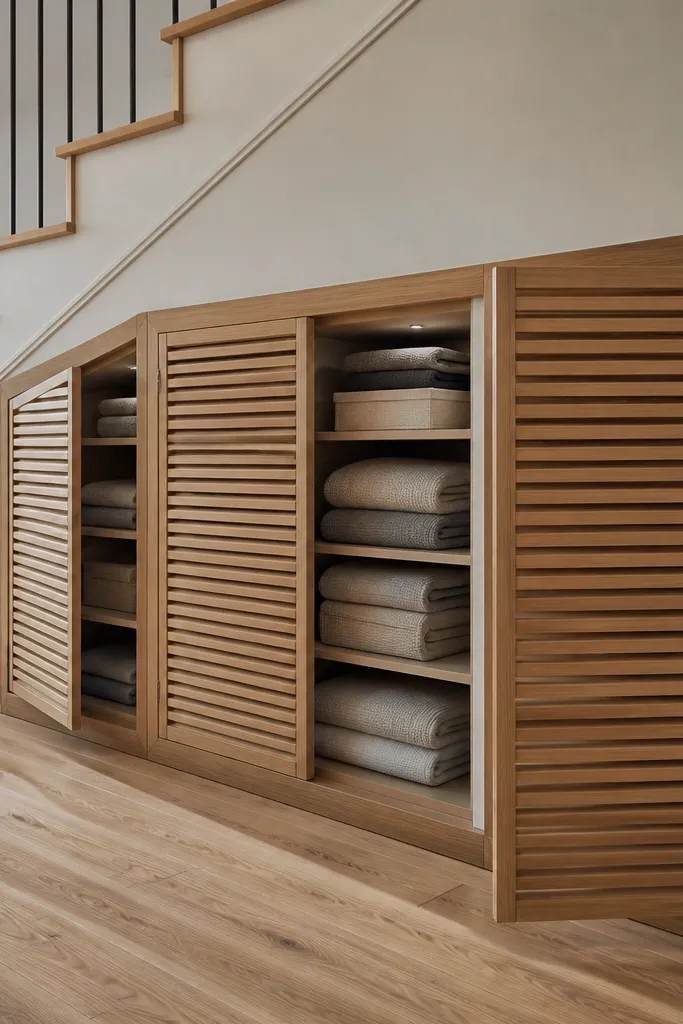
Wood slat doors are a gorgeous middle ground between open shelves and full solid doors. They hide clutter, but you still get airflow and visual texture that makes the space feel designed. This idea works when you have a long run of storage and want it to look cohesive. Build the cabinet interior with simple shelves, then use slat doors for the front. The slats create a rhythmic pattern under the staircase, which is exactly what makes this kind of storage look good in photos.
Step 1: Build the interior shelves and cabinet frame from 3/4-inch plywood, then leave a consistent door opening with a 1/8-inch reveal. Step 2: Construct matching slat door panels using a frame and evenly spaced slats, then attach with a hidden hinge system. Step 3: Finish the slats with stain and clear matte topcoat, then install magnetic catches aligned so doors close flush.
Stain the slats before assembly so you get even coverage on edges and end grain.
Don’t use random slat sizes — keep width and spacing consistent across every door.
19. Under-Stairs Pantry Pull-Out Baskets With Labels
Wire baskets on pull-outs look tidy and make items easy to grab, which is why they photograph well. The trick is to keep the face panel clean and use consistent spacing so the baskets line up like a system. You get airflow around items, which is great for snacks, small household supplies, and even pet treats. Add labels at the basket front so the storage looks styled instead of chaotic. This works best in under-stairs areas where you have enough width for baskets and can mount slides straight into studs.
Step 1: Install a cabinet face frame and mount full-extension drawer slides at the same height on both sides. Step 2: Fit wire baskets to the drawer box so they pull out smoothly, then add a stop so baskets don’t tip. Step 3: Paint the face and install a simple label strip on each basket front, then load items by category for the final look.
Choose baskets with matching finish and wire pattern so the front looks uniform across the run.
Avoid mixing basket sizes randomly — it creates uneven gaps that scream “DIY pile.”
20. Framed Mirror + Shoe Bench Combo
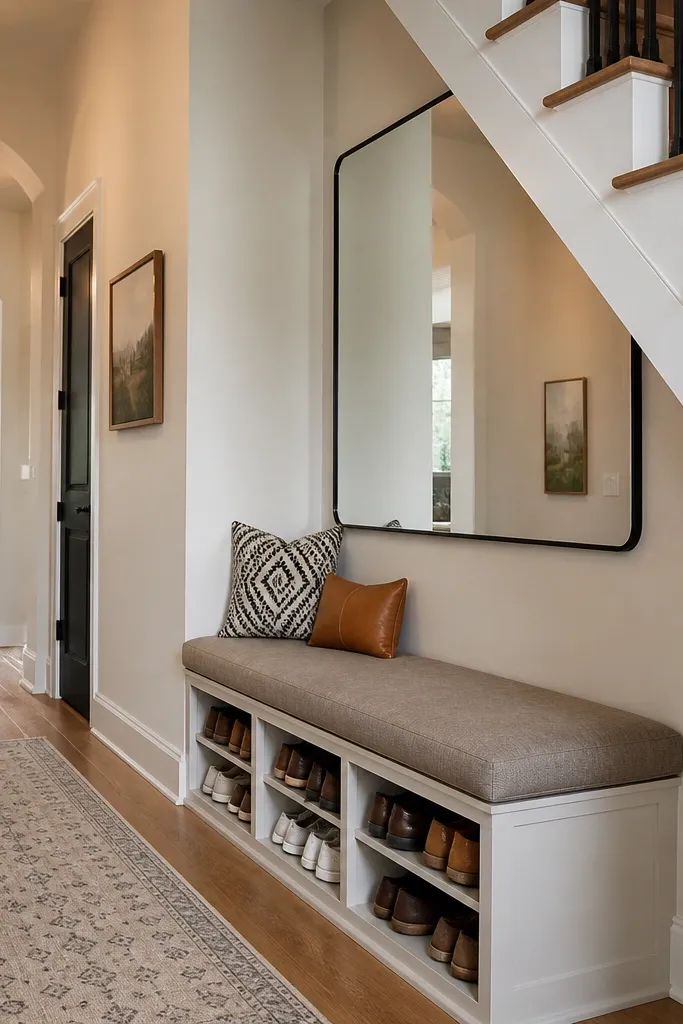
A mirror under the stairs instantly makes the whole area feel bigger and brighter, and it turns storage into a functional entry moment. Pair it with a shoe bench or a low cubby base so the mirror has something solid and neat below it. The visual payoff is the framed mirror — it creates a focal point that makes the storage read like furniture. Keep the bench face clean with a painted finish and simple hardware so the mirror doesn’t compete with clutter. This is ideal for narrow entries where you want storage but also need a place to check yourself.
Editor's noteUse a mirror with a thin frame and dark backing to reduce glare and keep it looking crisp.
Step 1: Build a low base frame under the stairs with either cubbies or a drawer front, keeping the top clear for the mirror. Step 2: Mount a framed mirror into studs or use a French cleat so it hangs straight and stays secure. Step 3: Paint the base in satin, then add a runner or mat on top of the bench so it looks intentional.
Skip thisSkip a proper mounting method — a loose mirror looks unsafe and makes the whole area feel careless.



