
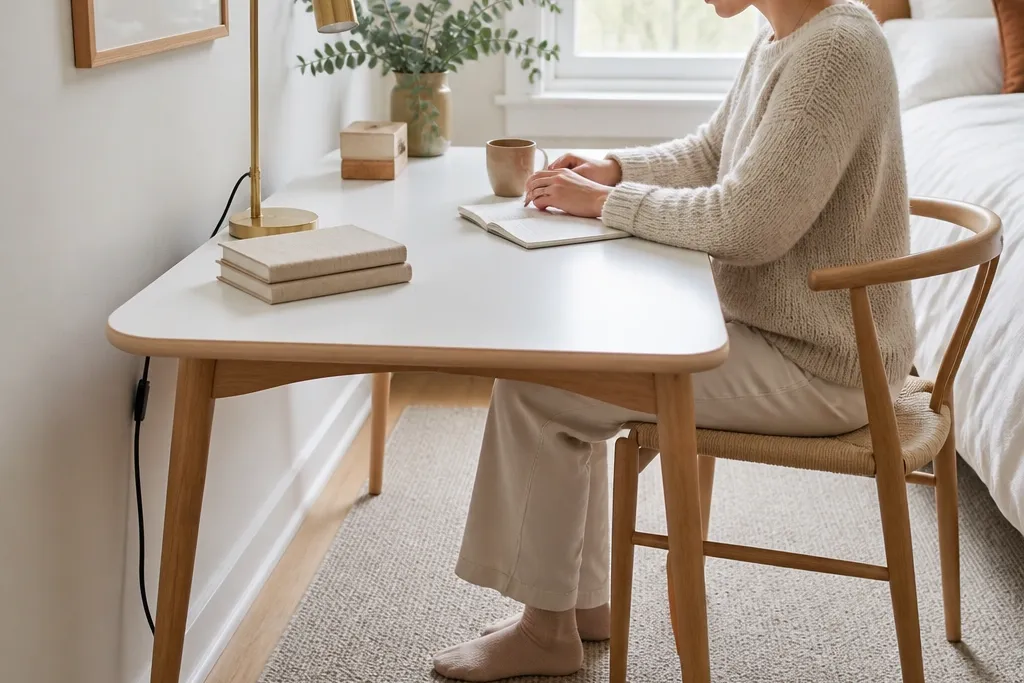

1. Satin White Desk With Rounded Edge Trim
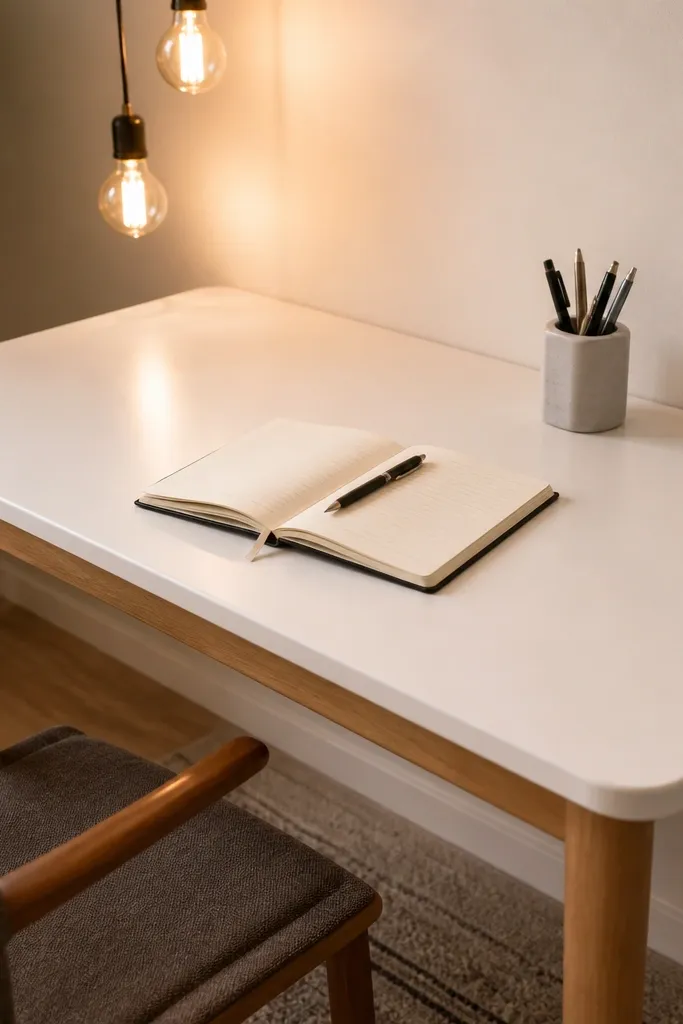
Start with a 120 x 55 cm tabletop (plywood or MDF) and sand it to 180 grit. Apply two thin coats of primer made for wood, then two coats of satin cabinet paint, sanding lightly between coats. Install rounded edge trim on the front and sides, then attach legs with metal corner brackets rated for furniture weight. Finish by sealing the top with a clear satin topcoat if you used paint meant for walls instead of cabinets.
This look is clean, bright, and easy to photograph because the tabletop stays uniform. A satin white top hides minor wood grain and looks smooth under warm bulbs. Rounded edge trim makes it feel furniture-grade instead of “cut plywood.” Pair it with light wood legs or simple tapered metal legs so the whole setup feels airy, not heavy.
Skip thisDon’t skip sanding between paint coats — that’s where the “cheap” look comes from.
Editor's noteUse a foam roller for the topcoat to avoid brush streaks on white.
2. Walnut-Effect Laminate Top With Black Hairpin Legs
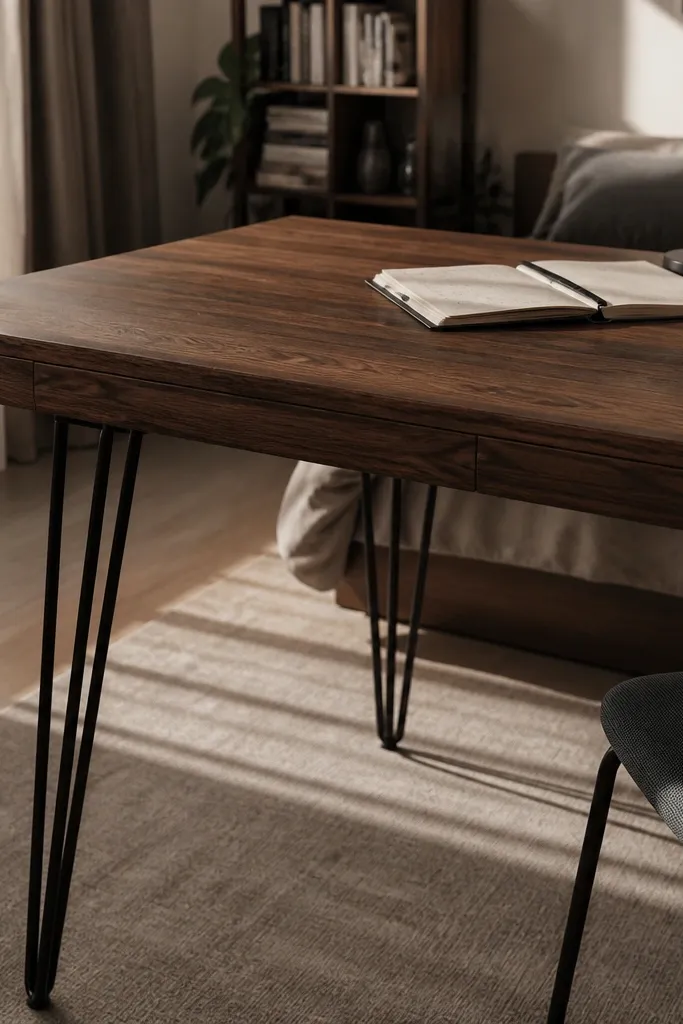
Buy a pre-finished laminate sheet or a ready laminate board cut to 120 x 55 cm. Attach a 2 x 2 cm frame under the edges (pine battens work) so the top has something to screw into. Mount hairpin legs with heavy-duty bolts through the frame, keeping the legs centered for symmetry. Seal the exposed edge with edge banding or a strip of matching laminate and trim it flush with a sharp utility knife.
Walnut-effect laminate gives you the warm wood look without paying for real walnut boards. The black hairpin legs add contrast and make the desk look modern and light. This combination photographs well because the grain pattern adds texture while the legs keep the lines crisp. It’s also fast: you’re mostly assembling, not building from scratch.
Skip thisDon’t rely on screws straight into chipboard — use a frame under the top.
Editor's noteMark leg positions with a square so both sides sit at the same angle.
3. Natural Oak Veneer Look Desk With Clear Water-Based Sealer

If you like warm, calm desks, a clear sealer over oak-tone veneer or veneer sheets is the move. The grain catches light in a way paint can’t, and it makes even a basic design feel intentional. Keep the hardware minimal and use light-colored legs so the wood stays the focus. This is a great route for budget Study Table Ideas because veneer sheets are cheaper than full boards but still look real.
Sand your base plywood to 180 grit, then wipe dust with a damp cloth and let it dry. Apply oak-tone veneer or use a veneer-look sheet cut to size and press it down firmly. Seal with a water-based clear polyurethane in thin coats, sanding lightly with 320 grit between coats. Use rounded corner sanding blocks so the edges look smooth rather than sharp and splintery.
Test your sealer on a scrap first — clear coats can shift warmth slightly.
Don’t flood the surface — thin coats prevent streaks and bubbles.
4. Two-Tone Desk Top: White Front With Oak Backing

Cut a tabletop base to 120 x 55 cm and add a 5-7 cm high front panel from plywood or MDF. Cover the main top with oak-tone laminate or veneer-look board, then paint the front panel with satin white cabinet paint. Seal the painted panel with clear satin topcoat. Build a simple frame from 2 x 2 cm lumber and attach legs with brackets, then align the white front panel so it overhangs evenly.
Two-tone desks look designer because the eye reads layers, not a single flat slab. A white front panel feels bright and clean for writing, while an oak-toned back keeps the room warm. This is a smart budget approach: you’re using wood look where it matters most and saving money with paint where it’s forgiving. It also hides small scuffs on the front edge.
Skip thisDon’t paint over dusty surfaces — you’ll get peeling at the color boundary.
Editor's noteUse painter’s tape to create a crisp color line before painting the front panel.
5. Floating Desk Look With Hidden Brackets

A floating desk instantly reads sleek because there are no legs to break the line. It’s also great for tight rooms because the visual footprint stays small. For budget Study Table Ideas, you can get the look with heavy-duty wall brackets and a thick tabletop that doesn’t sag. Add a slim shelf underneath and the desk stays airy but functional.
Pick a tabletop size around 100-120 x 45-55 cm and aim for 3 cm thickness for stiffness. Find wall studs and mount two or three heavy-duty brackets spaced evenly under the tabletop. Pre-drill pilot holes and screw the tabletop down from above so the hardware stays hidden. Finish the front edges with rounded trim or a thick edge band so the underside doesn’t look raw.
Sand the underside too — you’ll see it when you get close to the wall.
Don’t mount into drywall anchors only — use studs or rated anchors for the load.
6. Rattan-Trim Desk With White Top
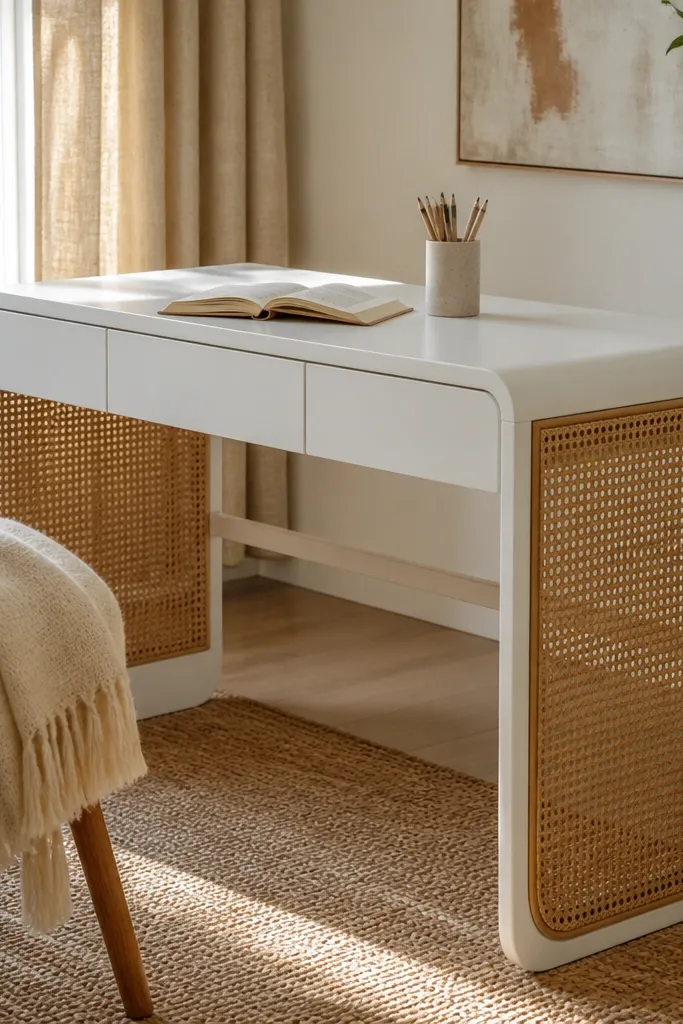
Build a simple rectangle frame from 2 x 2 cm lumber and attach a 12-18 mm plywood top. Paint the top and frame with satin white cabinet paint and let it cure. Cut rattan trim strips and attach them with wood glue plus small brad nails or upholstery tacks into the frame edges. Clear-seal the rattan lightly so it handles dust and minor bumps without fraying.
Rattan trim adds texture and a cozy, airy vibe without needing expensive furniture. The trick is using it as an accent border, not wrapping the whole desk in rattan. A white top keeps it bright and makes the trim stand out. This look works well in bedrooms and reading corners because the texture softens the room.
Skip thisDon’t over-glue — glue squeeze-out shows through light paint.
Editor's noteUse rattan trim that has a flat back so it sits flush on the frame.
7. Dark Walnut Paint Desk With Brass Handles
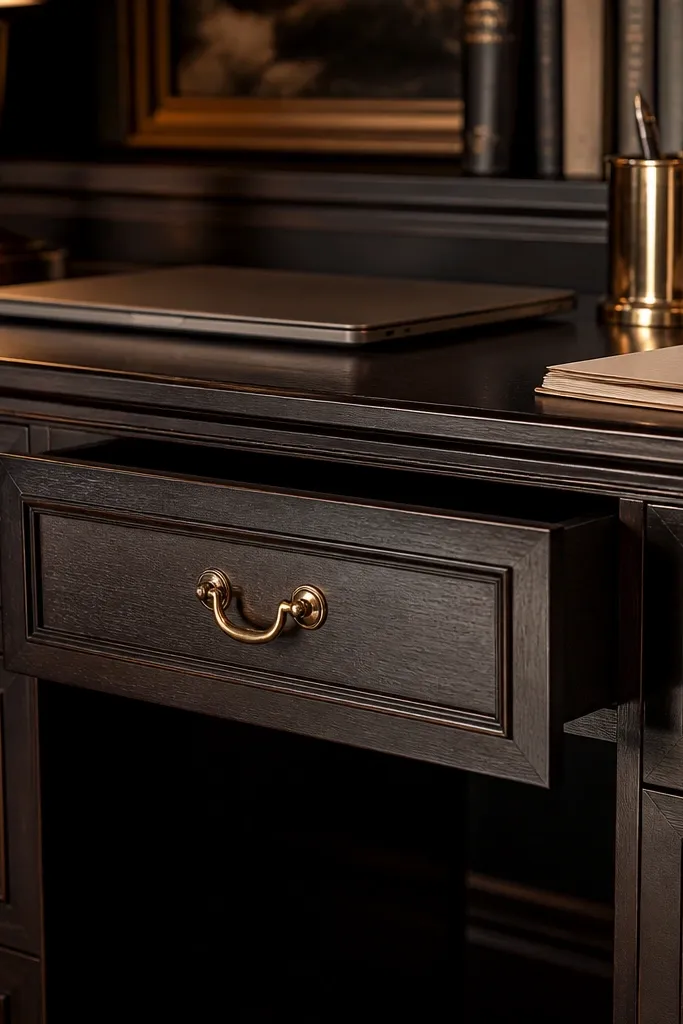
Dark walnut paint gives that moody, grown-up desk look even if your materials are basic plywood. Brass hardware adds warm reflections that make the desk feel “designed.” Add one or two drawers so the surface stays clear, and the desk looks tidy in photos. This is budget-friendly because paint and hardware upgrades are cheaper than buying solid wood.
Start with a 110-120 cm wide top and a drawer unit beneath made from plywood boxes or a ready drawer kit. Paint the wood with a dark walnut tone enamel or a custom mix, then seal with satin clear coat. Install brass bar pulls or cup pulls centered on the drawer fronts. Build a simple apron frame around the drawer unit and attach legs or a base panel so the desk looks grounded.
Choose hardware size based on drawer width: 96-128 mm pulls look right on medium drawers.
Don’t use glossy paint — it shows every mark and fingerprints.
8. Linen-Cord Desk Organizer Shelf Underlay
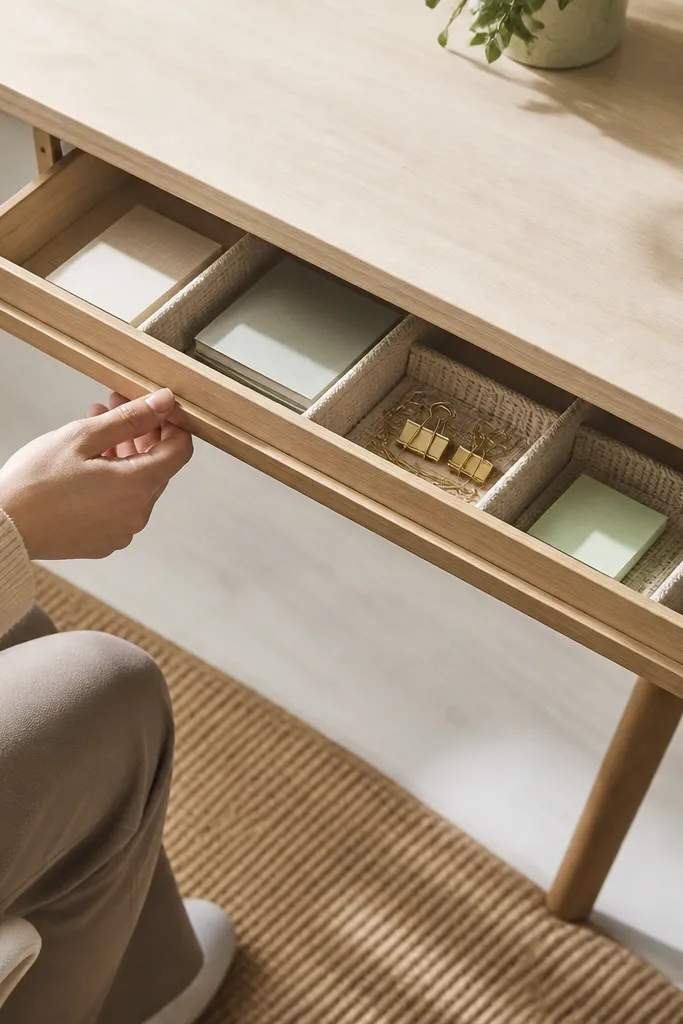
Use a simple desk base (even a table top on legs) and add a 25-30 cm wide under-shelf beneath the front edge. Cut two vertical slots or drill holes for cord attachment, then weave linen cord into a simple grid for dividers. Attach the shelf with two side brackets so it’s level. Paint or stain the underside of the shelf to match the desk, then finish with a clear matte seal.
This one is about the look under the tabletop. A slim shelf with linen cord dividers keeps supplies visible but styled, so your desk reads curated instead of messy. The top stays clean, while the under-storage adds charm. It works best when your desk already has a simple top — you’re upgrading the aesthetic with a soft, textured organizer.
Skip thisDon’t hang cords too low — your knees will hit it and it ruins the function.
Editor's noteKeep the cord grid spacing around 10-12 cm so notebooks and rulers fit neatly.
9. Cement-Gray Top With Light Pine Legs
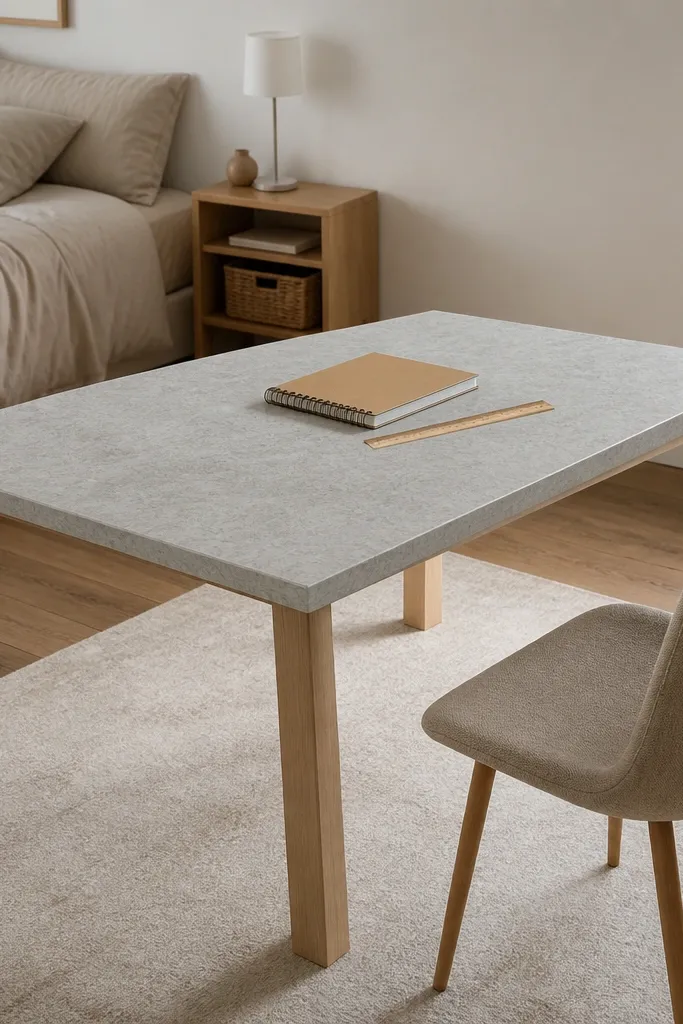
Cement-gray tops look modern and calm, especially when paired with light pine legs that keep the desk from feeling heavy. A speckled or textured finish adds visual interest without clutter. This style is great for study setups with light walls and neutral bedding colors. It also hides tiny scratches better than glossy finishes.
Build a plywood tabletop and sand to 180 grit. Apply a cement-gray chalk paint or specialty concrete-look paint in thin coats, then seal with matte or satin clear coat. Add light pine legs or simple tapered legs and stain them with a natural pine tone sealer. For a more “cement” look, sprinkle a tiny amount of fine pigment on the wet topcoat and let it dry evenly.
Use a raking light from the side when you finish — it shows uneven texture fast.
Don’t use high-gloss clear coat — it flattens the concrete look.
10. Book-Ledge Desk With Built-In Shelf Rail

A book-ledge desk looks smart because it turns storage into a visual frame. The shelf rail keeps books upright, so your desk always looks styled even when you’re mid-project. It also gives you a place for a reading lamp and pen cup without crowding the main writing space. This works in small bedrooms because it adds vertical function.
Start with a 100-120 x 50-55 cm tabletop. Build a front rail shelf 10-12 cm deep using 12 mm plywood and attach it under the front edge with pocket screws. Add two side supports so the rail doesn’t wobble. Finish the rail and top with the same paint or stain so the desk reads as one piece, not an add-on.
Use a matte topcoat so glare doesn’t bounce off the shelf rail.
11. Pegboard Desk Back Wall With Color-Coordinated Hooks
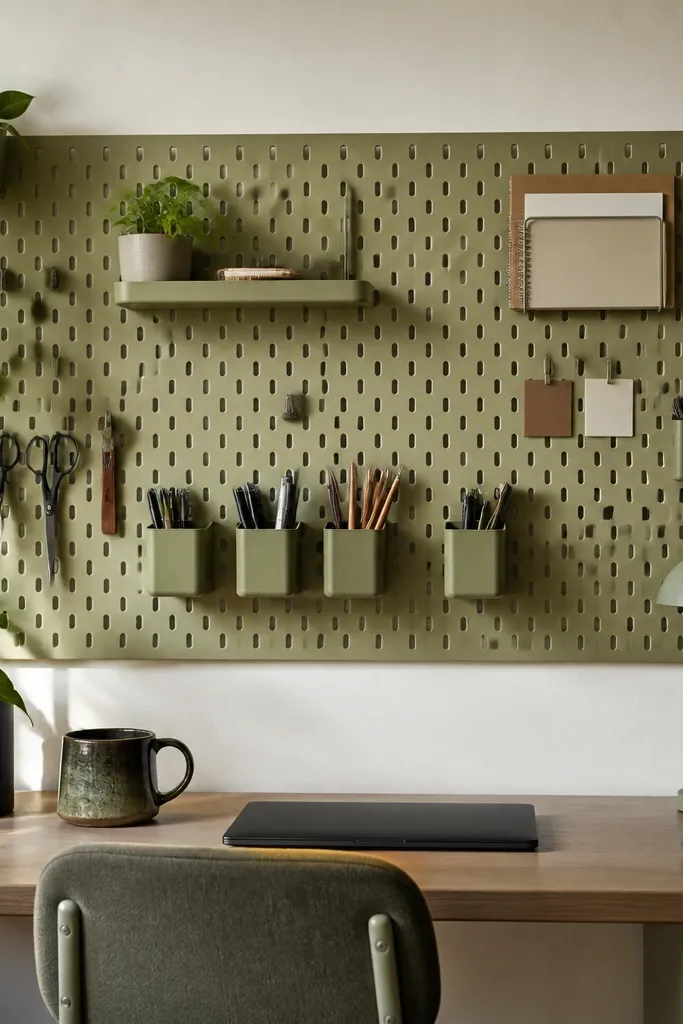
A pegboard behind the desk makes the whole setup look intentional because it creates a structured background. When your hooks and clips are one color family, it looks clean instead of busy. This is one of the best budget Study Table Ideas for people who have lots of small tools — pens, scissors, sticky notes — because you can keep them off the tabletop while still displaying them.
Mount pegboard to the wall at desk height, leaving 5-8 cm clearance behind the tabletop edge. Use a level and mark studs or use rated anchors for stability. Paint the pegboard frame in a matching color (black, white, or warm gray) if you want it to look polished. Attach hooks and clip rails, then route cords to a single point using cable clips.
Group tools by height: short items on the bottom half, long items on the top to avoid visual clutter.
Don’t place pegboard too high — you’ll reach constantly and the setup will feel annoying.
12. Slim Standing Desk Look With Adjustable Legs

Standing desk silhouettes look modern and “office-like,” and you can fake that look on a budget with adjustable legs and a clean top. The aesthetic comes from straight lines and consistent edge thickness. Add a cable tray under the top and you’ll get a tidy, premium feel even with simple materials. This idea is best if you study at home and want posture-friendly height changes.
Use a pre-cut tabletop panel around 120 x 50 cm and attach adjustable legs according to the manufacturer’s hole pattern. Add a narrow cable tray across the underside with screws into the leg frame. Sand and seal the top with satin polyurethane or satin paint depending on your look. Install a small back lip strip (1-2 cm) to keep notebooks from sliding when you change height.
Before mounting the top, test the height range and confirm the cable tray doesn’t hit the floor.
Don’t choose legs with wobbly feet — wobble ruins the “dreamy” feel fast.
13. IKEA-Style Drawer Unit Upgrade With Painted Top
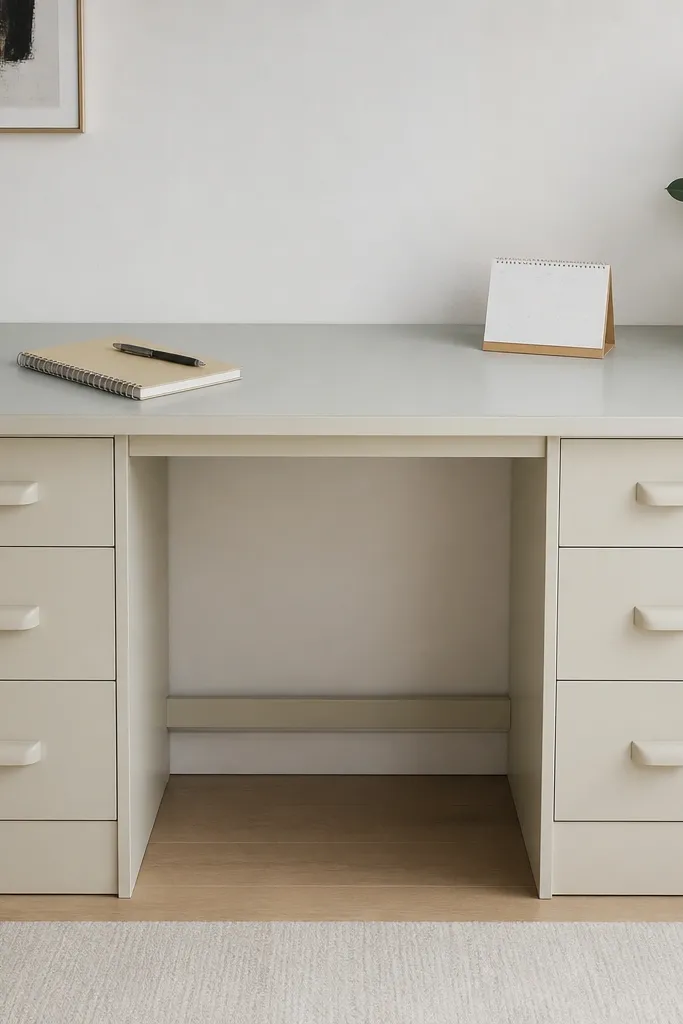
This look is about stacking a crisp drawer front under a smooth top. Even if the drawer unit is basic, a painted tabletop and matching pulls make it look like a designed piece. The desk reads tidy because drawers hide the mess. It also gives you a clean front view, which is what most desk photos capture.
Use a ready drawer unit or build a simple drawer cabinet from plywood with one or two drawer boxes. Fill and sand the top surface, then paint it in a satin finish and seal with a clear topcoat. Swap drawer pulls for a matching metal finish and keep them centered. Add a top lip strip so the tabletop aligns perfectly and doesn’t shift.
Choose drawer pulls that match your lamp or chair hardware for a coherent look.
Don’t paint over loose hardware — remove pulls first so edges stay crisp.
14. Pegboard Drawer Front Desk With White Cabinet Paint
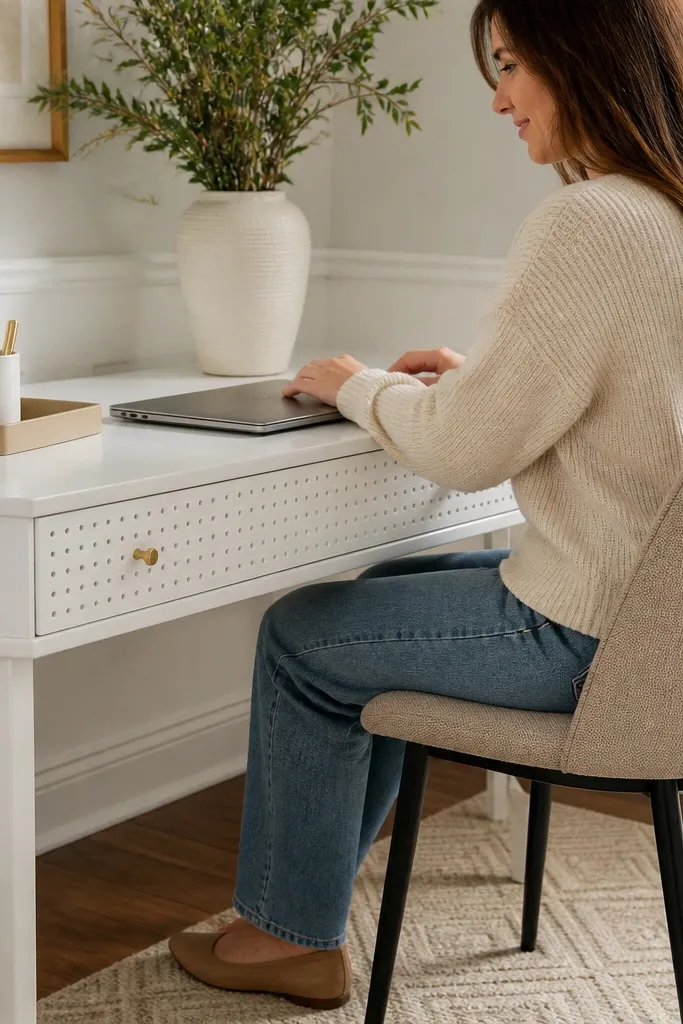
Pegboard-style panels on a drawer front look clever because they add pattern without cluttering the tabletop. White paint keeps the pattern crisp, and it feels modern. This design works well for small study spaces where you want a focal point behind the desk. It’s also a good way to recycle a plain drawer unit and make it look custom.
Start with a drawer cabinet and remove the drawer front. Cut a pegboard panel to the drawer front size and attach it behind a thin frame so it’s flat. Paint the pegboard and frame with white cabinet paint, then seal lightly. Reinstall the drawer front panel and add simple knobs centered on the panel so it’s easy to open.
Use a fine-tip paintbrush for pegboard edges so they don’t look messy.
Don’t leave pegboard unsealed — dust builds up fast on the holes.
15. Cane Webbing Side Panel Desk
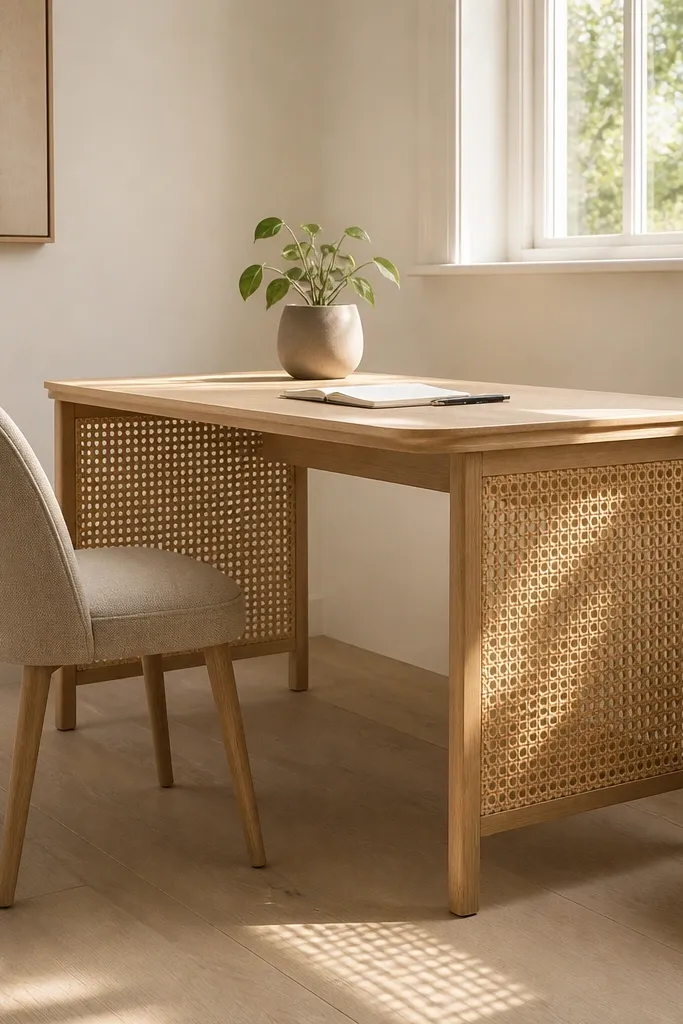
Cane or rattan-style side panels make a desk look airy because they add texture without adding bulk. The tabletop can be simple and still look elevated when the sides have that woven pattern. This is perfect if you want a breezy, Scandinavian feel but don’t want to paint everything. The woven side panels also hide small storage items when you add baskets inside.
Build a desk frame from wood and keep the side openings rectangular. Cut cane webbing panels to fit the openings and attach them with a thin wooden trim around the edges. Paint the frame in a light neutral (warm white or pale beige) and seal the tabletop. Place small fabric baskets inside the side openings and keep the tabletop clear for the clean look.
Pull the cane tight before tacking so the pattern stays straight.
Don’t use loose cane — sagging panels look messy in daylight.
16. Edge-Banded Plywood Desk With Two-Layer Stain
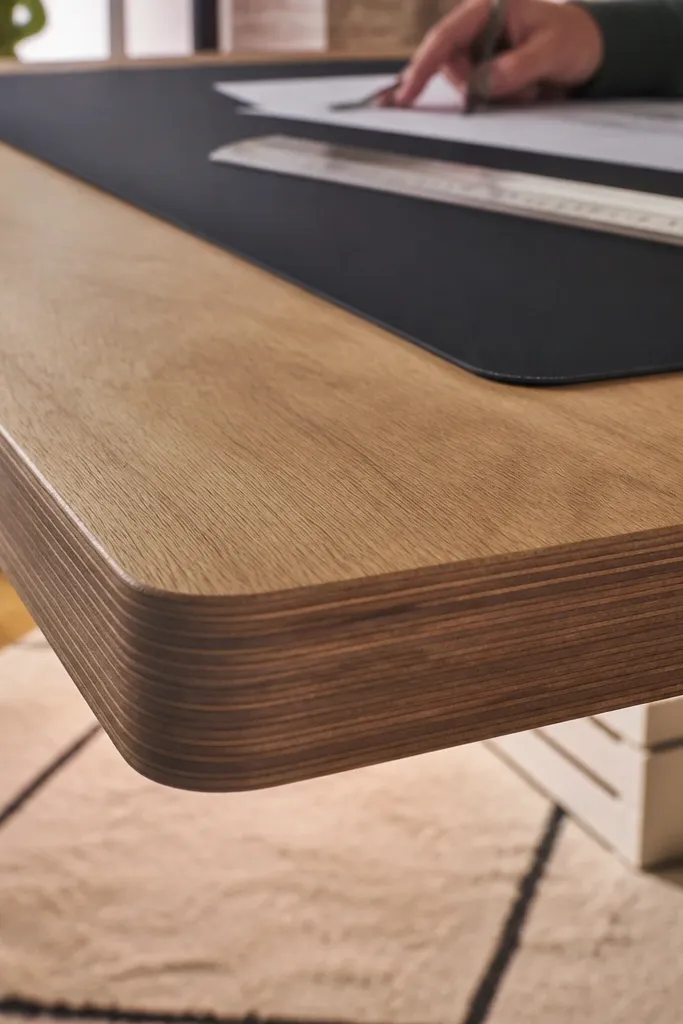
Sand plywood to 180 grit, then apply a pre-stain conditioner if the plywood is blotchy. Stain with a medium tone, let it dry, then apply a second lighter wash stain to even out color. Edge band all sides with iron-on veneer banding and trim flush. Seal with a satin clear coat in two thin layers.
This is for people who like wood but hate the look of raw plywood edges. Edge banding makes the desk look like it came from a store, and a two-layer stain gives depth without expensive materials. The desk looks warm and “real” because the finish sits evenly across the top. Pair with simple black or dark brown legs for a balanced contrast.
Skip thisDon’t skip edge banding — unfinished edges ruin the whole budget look.
Editor's noteUse a cloth stain applicator and keep the strokes consistent to avoid patchiness.
17. White Board Wall Desk With Shelf-Ledge
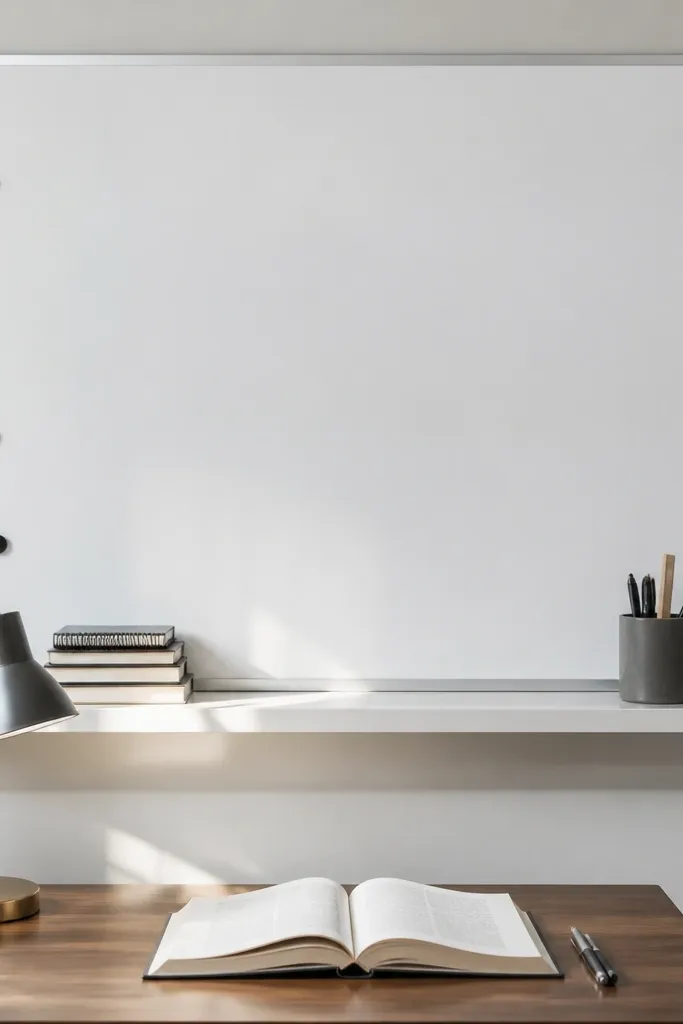
A whiteboard behind the desk makes the whole workspace look organized and intentional. It also lets you keep your study plan visible without covering the tabletop. The shelf ledge below holds a notebook stack and pen cup, so the desk stays photogenic even when you’re actively working. This is a budget-friendly aesthetic because you’re using a single sheet as a backdrop.
Mount a whiteboard panel on the wall at desk height, aligned with the center of your tabletop. Build or use a desk with a 10-15 cm shelf under the front edge. Paint and seal the tabletop, then add a small rail lip so paper doesn’t slide off. Use low-profile storage bins in matching colors to keep the board area clean.
Choose markers that match your color theme — the board looks better when the ink color is consistent.
Don’t place the board too high — you’ll crop your desk look and it gets awkward to write.
18. Black Steel Frame Desk With Light Oak Top
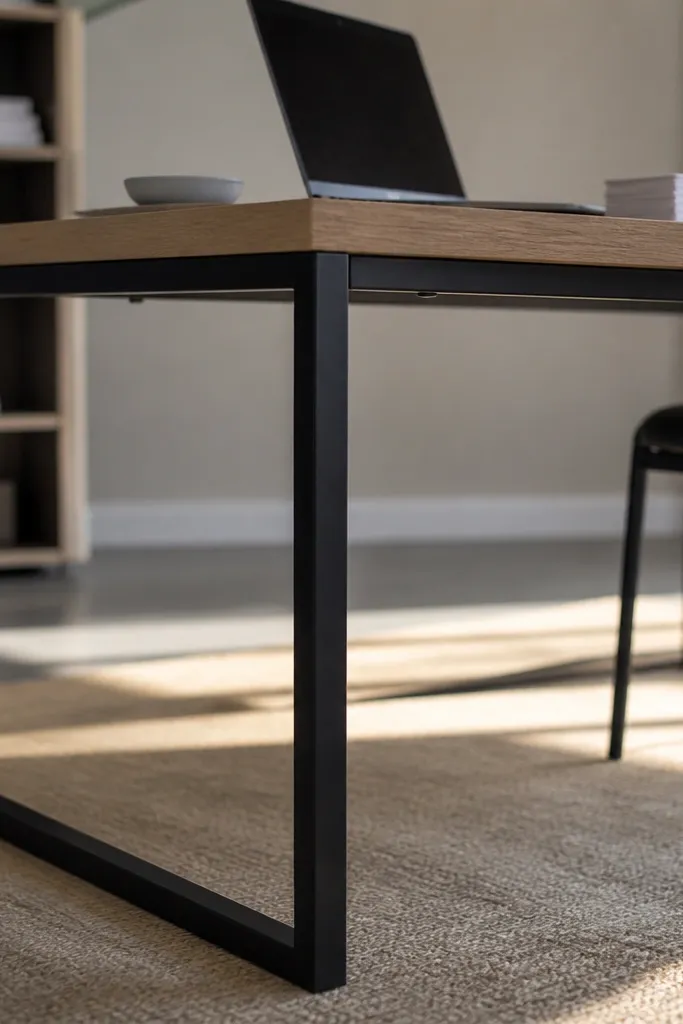
Use a pre-made metal frame or assemble from square steel tubing and cut the top supports to match your tabletop size (120 x 55 cm works well). Sand and paint the steel with a durable matte black spray. Attach the oak-tone tabletop panel using bolts through top brackets. Seal the wood top with satin clear coat and add a thin felt strip where the top meets the frame.
A black steel frame makes the desk feel modern and sturdy, while a light oak top keeps it warm. This contrast is what makes the setup look expensive even when the materials are budget. It also gives you a clean silhouette with visible lines — great for small spaces because it doesn’t visually block the room like a solid base. Add a thin cable tray for the polished look.
Skip thisDon’t skip steel paint — raw metal marks and rust ruin the look.
Editor's noteUse rubber washers under bolts to prevent rattling and edge wear.
19. Built-In Desk Into Window Niche With Floating Shelves
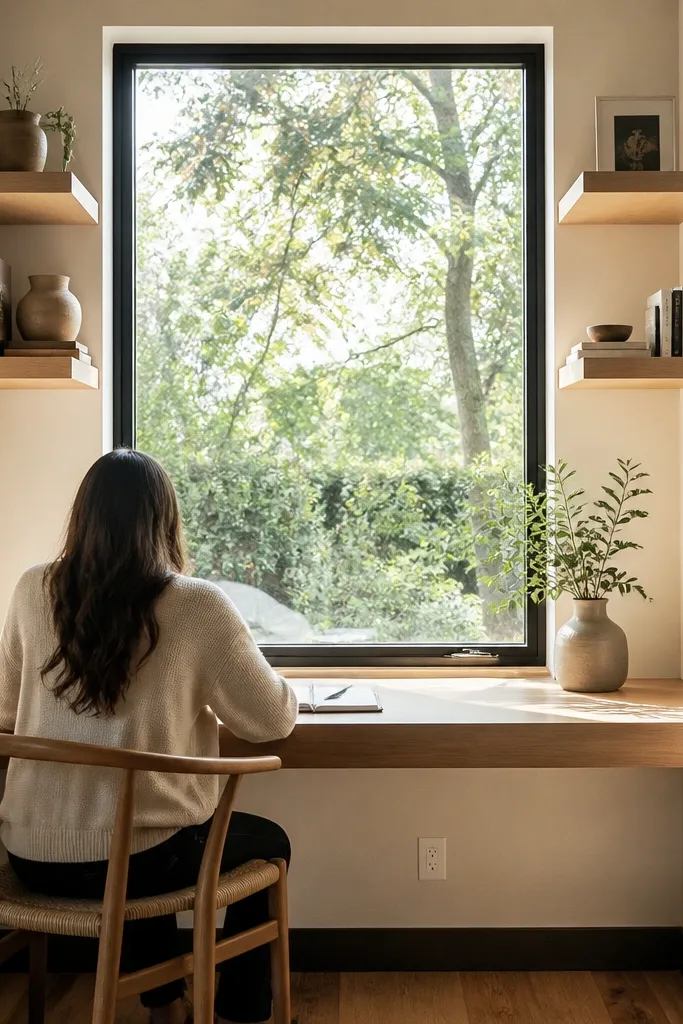
A window-niche desk is dreamy because daylight does half the decorating work. Build a tabletop to fit the niche and add floating shelves above for books and small decor. For budget Study Table Ideas, the niche framing can be simple: plywood box, clean paint, and a sealed top. Keep the decor minimal so the window light stays the hero.
Measure the niche width and build a tabletop that leaves 2-3 cm clearance on each side. Use plywood for the base and brace it with corner supports. Paint the sides in satin white or warm gray, then seal the tabletop with satin polyurethane. Add two floating shelves using wall brackets anchored into studs and keep shelf depth around 18-22 cm so it doesn’t crowd the window.
Install a wall outlet near the niche for a single cable drop.
Don’t block the window — keep the desk height low enough for comfortable seated viewing.
20. Shiplap-Front Desk With Painted Top
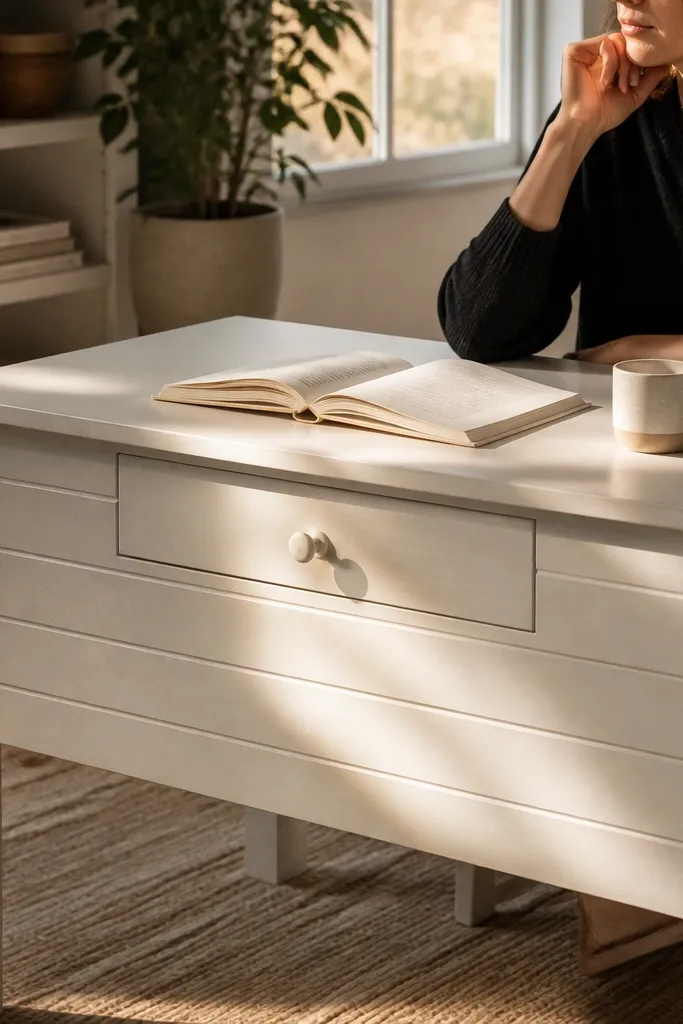
Build a desk base with a front panel frame and attach shiplap boards cut to the front size. Paint the shiplap panel with satin white, then paint or seal the tabletop with your chosen finish. Install a drawer or a cabinet door below the shiplap section using hinges or drawer slides. Finish edges with a thin trim strip to keep the front looking straight and intentional.
Shiplap on the front panel gives that cottage-meets-modern look without needing expensive cabinetry. The texture reads cozy in photos, and the painted top keeps the writing area clean. If your room is plain, this adds character fast. It’s also a strong choice if you want storage hiding behind a simple door or drawer.
Skip thisDon’t leave the shiplap unfinished — unsealed grooves catch dust and look dull.
Editor's noteCut shiplap boards so the seams line up at eye level for a cleaner look.
21. Patchwork Contact Paper Desktop With Clear Seal
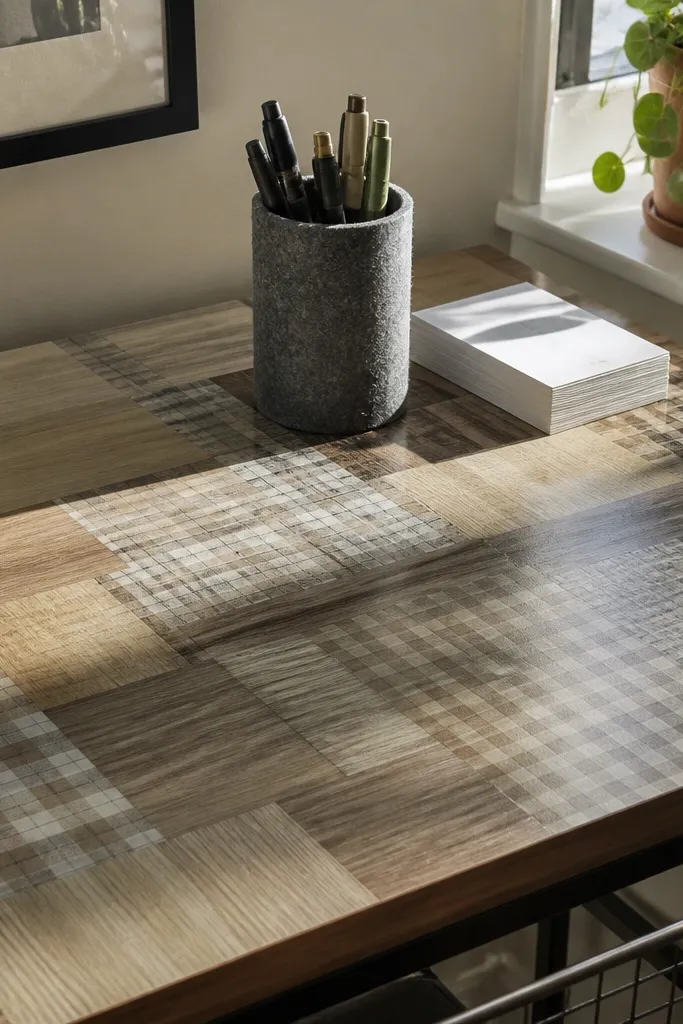
Sand and clean the tabletop thoroughly, then measure and cut contact paper panels to fit each section. Apply slowly from one edge, using a plastic card to push out air bubbles. Trim the edges with a sharp blade and seal the entire surface with a clear water-based protective coat in thin layers. For best results, do two light coats and avoid heavy pooling near corners.
Patchwork contact paper is a fast way to get an aesthetic desktop without building a new surface. Choose patterns that look cohesive: small checks, muted stripes, or a wood-grain mix in one color family. Then seal it with clear coat so it looks like a finished tabletop, not a temporary wrap. This is one of the quickest budget Study Table Ideas when you want a big visual change today.
Skip thisDon’t apply contact paper over rough spots — it highlights every bump.
Editor's noteUse a matte clear coat if you want the patchwork to look softer and less glossy.
22. Terracotta Accent Desk With Light Beech Top
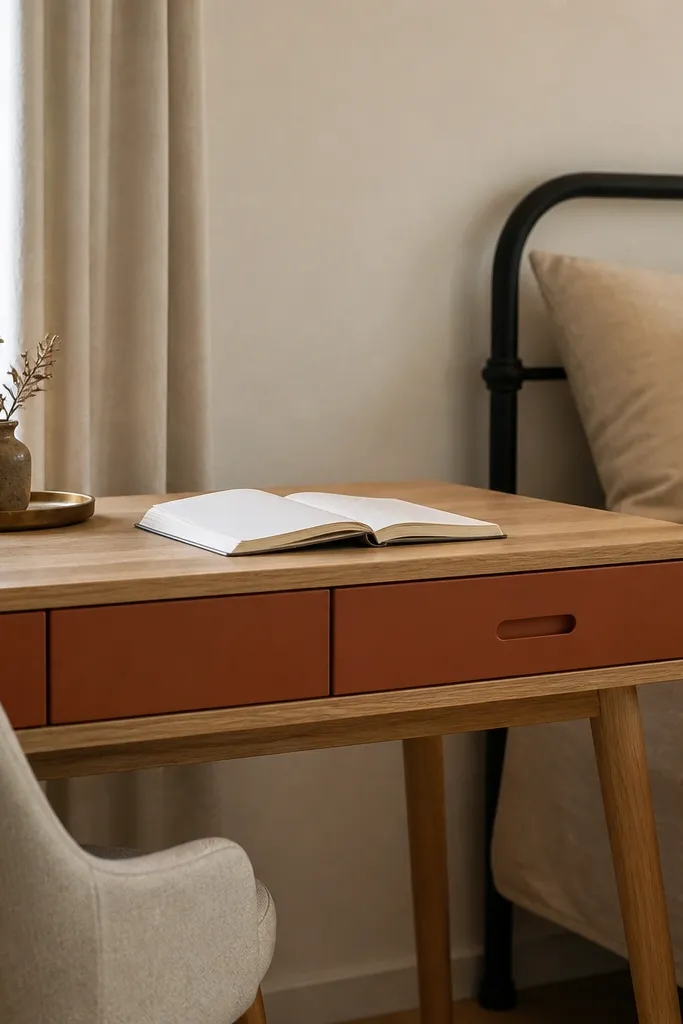
Start with a light wood or light laminate tabletop and keep it sealed. Paint a single drawer front or side panel terracotta using satin acrylic or cabinet paint, then clear-seal it. Install matching hardware in brushed brass or matte black to tie the color together. Attach the drawer unit to the desk base and check alignment so the terracotta panel sits straight.
Terracotta accents add warmth and make your desk look styled without going full boho. Keep the main top light beech or light oak tone, then paint only a drawer front or side panel terracotta. The color pops in daylight and looks great with cream walls and beige bedding. This idea is budget-friendly because you’re painting a small surface area, not the whole desk.
Skip thisDon’t mix too many accent colors — terracotta needs one hardware finish.
Editor's noteChoose terracotta that leans warm orange, not red — it looks more modern with wood.
23. Oversized Desk Tray Insert For A Clean Top
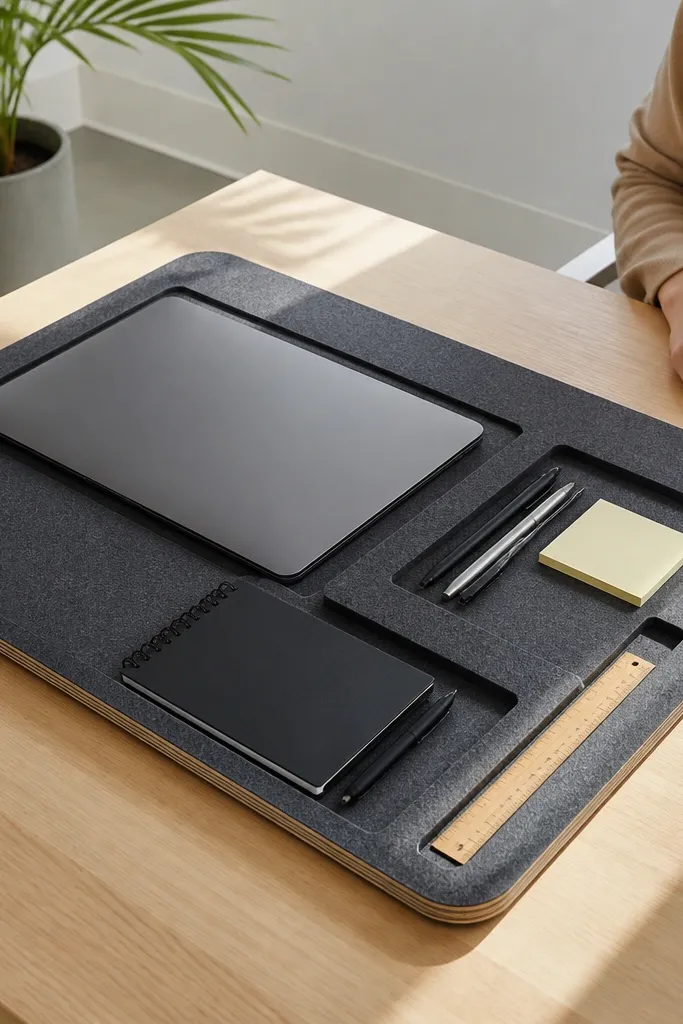
A desk tray insert makes the tabletop look instantly organized because everything has a boundary. The top stays clear, and your supplies look intentional instead of scattered. You can build the tray from plywood and cover it with matching laminate or felt for a soft look. This is one of the best budget Study Table Ideas for people who study with lots of pens, sticky notes, and paper stacks.
Measure your desk top and plan a tray area that fits your most-used items, usually 40-60 cm wide. Cut a shallow plywood tray frame (around 3-4 cm deep) and glue or screw it into a recessed opening in the tabletop. Cover the tray base with laminate for easy wiping or felt for a softer aesthetic. Sand and seal the tray edges so they don’t chip where your hands reach.
Make the tray lip 2 cm thick so it feels sturdy and looks designed from the front.
Don’t make the tray too deep — you’ll hide items and it defeats the tidy look.
24. Ladder Shelf Desk Combo With Bookshelf Back

Build a ladder shelf using two vertical side rails and three to five horizontal rungs, each around 18-22 cm deep. Secure the ladder to the wall with brackets and anchor into studs. Place a tabletop in front and attach it to the ladder rails using corner brackets. Finish the wood with a satin stain or satin paint and add cable clips along the back rails.
A ladder shelf behind the desk gives you vertical storage and a strong visual frame. It makes the desk look built-in, even if it’s assembled from basic lumber. The aesthetic comes from repeated spacing and clean shelf depth. This setup suits students who need books visible and want the workspace to look like a designed study corner.
Skip thisDon’t overload shelf depth — deep shelves look heavy and cluttered fast.
Editor's noteKeep rung spacing even, around 22-26 cm, so the bookshelf looks symmetrical.
25. Rounded Corner Desk With Fold-Down Support
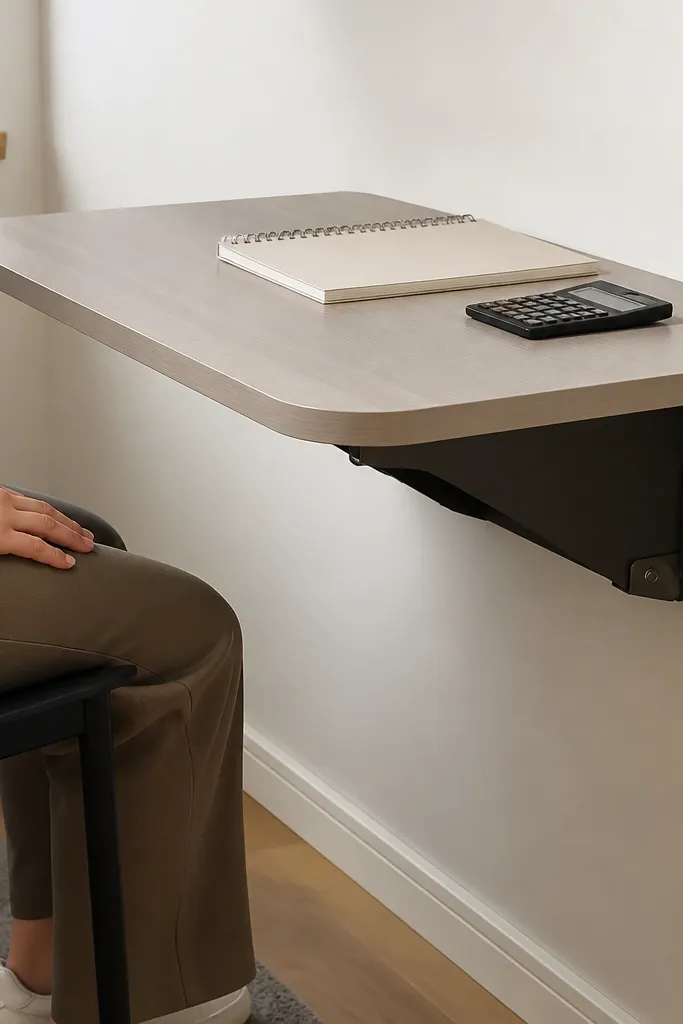
Rounded corners make a desk feel softer and more modern, and fold-down supports make it flexible for small rooms. This is a smart budget option when your study area needs to be compact and tidy. The look is clean because the desk footprint stays neat when folded or partially tucked. It also photographs well because the corners don’t show harsh plywood cuts.
Cut a tabletop panel around 80-100 x 45-55 cm and round the corners with a jigsaw template or a large bowl. Build a base with a folding support leg mechanism and attach it with hinges and a locking bracket. Sand the edges to 220 grit and seal with satin clear coat or paint. Mount a wall cleat so the desk can be supported when folded down for storage.
Use a rubber door stop where the desk meets the wall so it closes quietly and doesn’t chip paint.
Don’t skip edge sealing — rounded corners are where chipping shows first.
26. Monochrome Desk With Black-and-White Vinyl Top
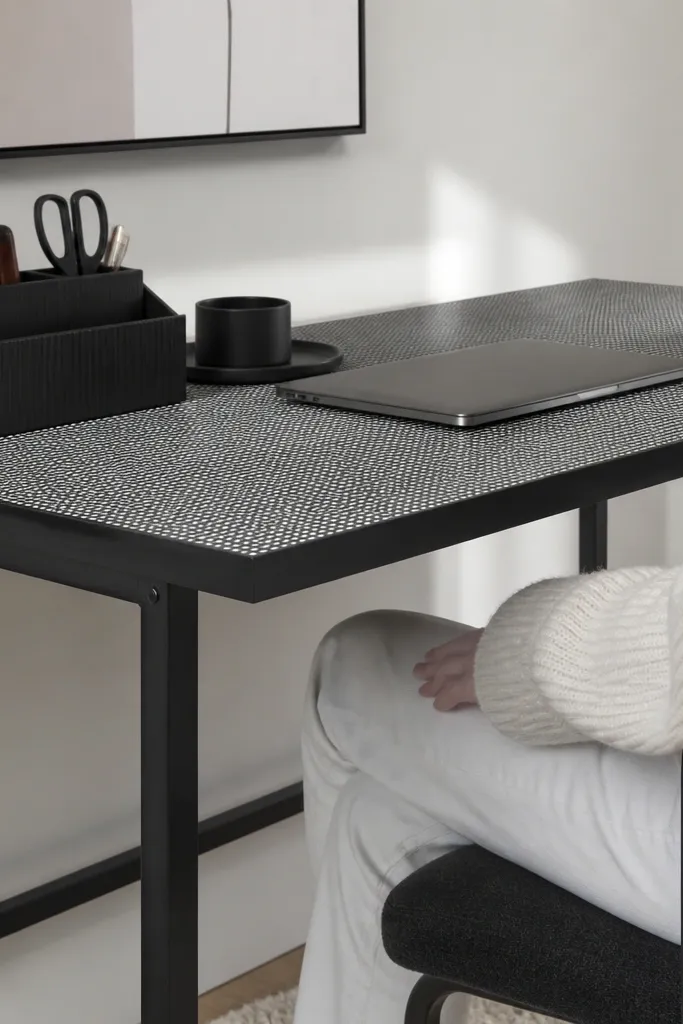
Sand and clean the tabletop, then apply black-and-white vinyl in one smooth layer, trimming edges flush. Seal it with a clear protective topcoat made for vinyl or use a compatible polyurethane designed for coated surfaces. Mount the tabletop on a simple frame with black legs and metal corner brackets. Finish all screw holes with wood filler and paint them to match so the top looks uninterrupted.
Monochrome desktops look sharp and graphic, which is exactly what makes a budget desk look designed. Use a vinyl pattern with clear contrast — thin stripes, subtle marble, or small graphic dots — and keep the rest of the desk simple. Add black metal legs and a white wall for maximum pop. It’s a good choice for people who want a modern aesthetic without complicated carpentry.
Skip thisDon’t use a low-quality vinyl that wrinkles — wrinkles show even under matte lighting.
Editor's noteChoose a vinyl pattern that aligns visually at the front edge so it doesn’t look crooked.
27. Color-Blocked Desk Base With Neutral Top
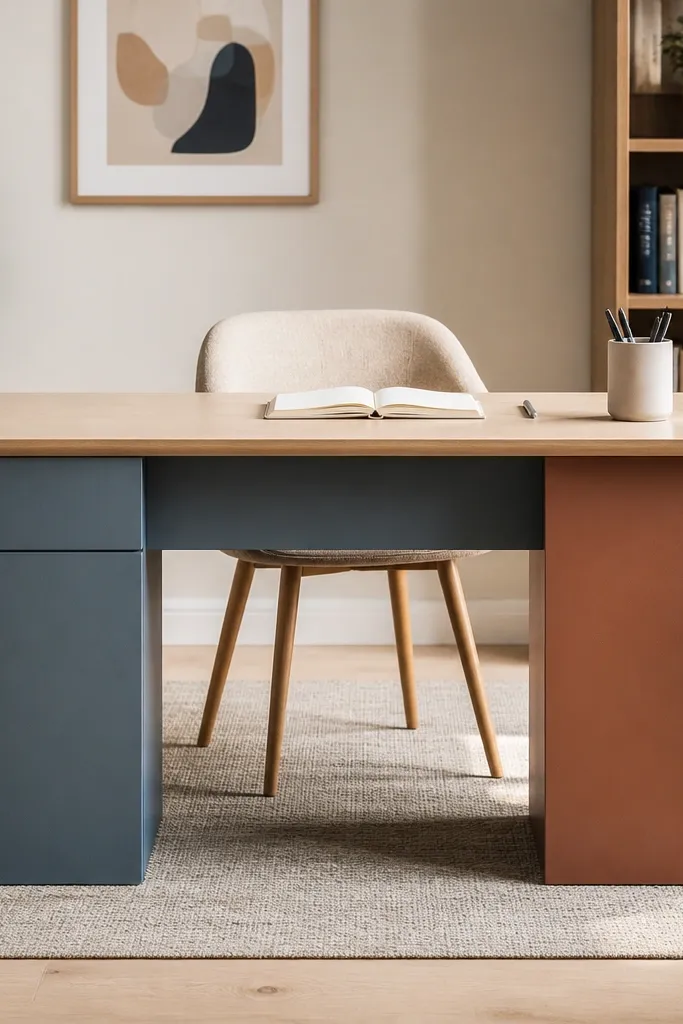
Build a standard desk frame from lumber and add two removable base panels on the front sides. Paint the panels in two complementary muted colors using satin cabinet paint. Keep the tabletop neutral and seal it with satin clear coat. Install the panels with screws so you can swap colors later without rebuilding the whole desk.
Color-blocking the base makes the desk look playful while keeping the tabletop calm for studying. Pick one neutral top finish (white, light oak, or gray) and paint only the base panels in two muted tones. This keeps the desk from looking chaotic, and it gives you a focal point under the shelves or wall art. It’s budget-friendly because paint is cheap and the build stays simple.
Skip thisDon’t paint the tabletop base — keep the neutral area clean for easier styling.
Editor's noteMask panel edges with painter’s tape and remove tape while paint is still slightly wet for crisp lines.
28. Warm Gray Desk With Floating Drawer Stack

A warm gray desk with a floating drawer stack looks tidy and modern because the drawers sit cleanly under the surface. The aesthetic comes from the consistent color and the gap between drawers and floor, which keeps the desk from looking bulky. This setup works for students who need storage but still want a light, minimal look. It also photographs well because the front view stays uncluttered.
Make a warm gray tabletop from plywood and paint it in satin with a clear topcoat. Build a drawer stack from two or three shallow drawer units and mount them to a back rail so there’s a small air gap to the floor. Use metal drawer slides rated for the drawer weight and align everything before tightening. Add two side supports so the stack doesn’t twist when you pull drawers.
Keep drawer heights consistent so the front reads like one block.
Don’t mount drawers directly to thin plywood without a back rail — it loosens over time.
29. Large Cork Pinboard Desk Backdrop With Shelf

A cork pinboard behind the desk makes the space feel organized and cozy, and it adds a texture wall that looks great in photos. Pinboards also let you keep study notes visible without covering the tabletop. Add a small shelf above or beside it for a lamp so the setup has layers. This is budget-friendly because cork sheets are cheap and you’re building a functional backdrop.
Cut cork sheets to the wall area behind the desk and attach using a strong adhesive or frame it with thin wooden strips. Add a shelf above with two brackets anchored into studs. Paint or stain the shelf front to match the desk tabletop finish. Seal the cork edges with a thin trim strip so it looks clean and doesn’t shed crumbs.
Use a mix of push pins and clips in one metal finish so the board looks styled, not random.
Don’t use a cork sheet without trimming — frayed edges look messy fast.
30. Reclaimed-Board Look Desk With Whitewashed Finish
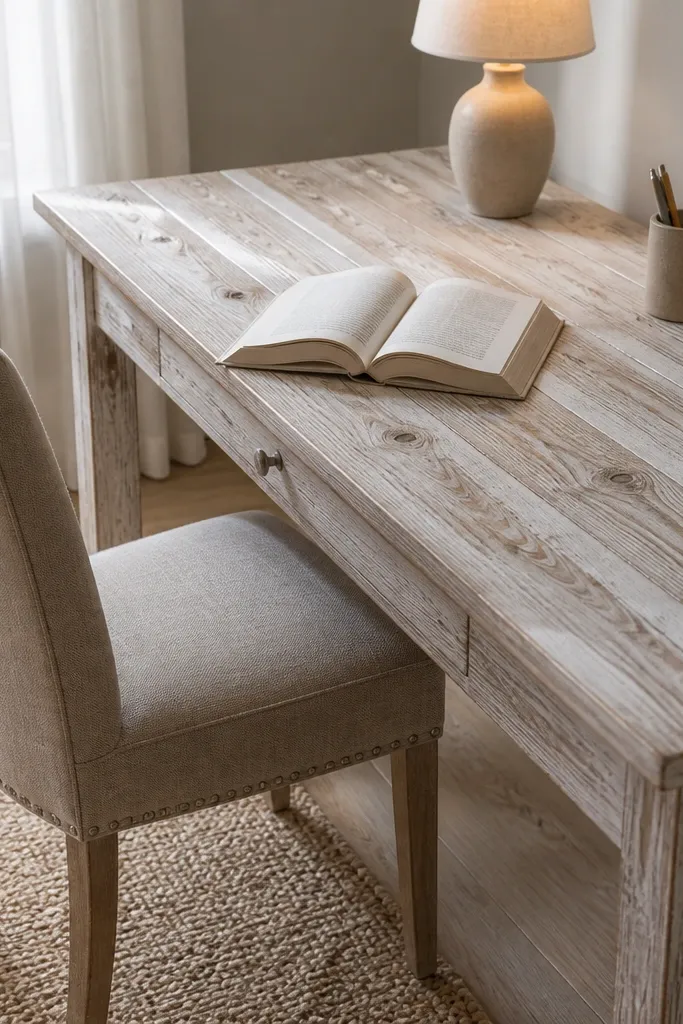
A whitewashed reclaimed-board look is aesthetic because the grain and texture show through, but the color stays light and airy. It works especially well in rooms that already have warm whites and natural textures. The desk reads cozy without feeling dark. You can get the look using reclaimed-looking boards or by distressing new wood lightly, then whitewashing and sealing.
Sand boards to 150-180 grit and lightly distress edges with sandpaper to soften corners. Apply a whitewash stain mix (thin white paint with water) and wipe it back so grain stays visible. Seal with satin polyurethane in two coats. Build a simple base with straight legs and attach the top with screws through cleats under the surface.
Whitewash looks best with a satin seal — it keeps the grain from going plastic-looking.
Don’t over-whitewash — if the grain disappears, you lose the whole aesthetic.



