

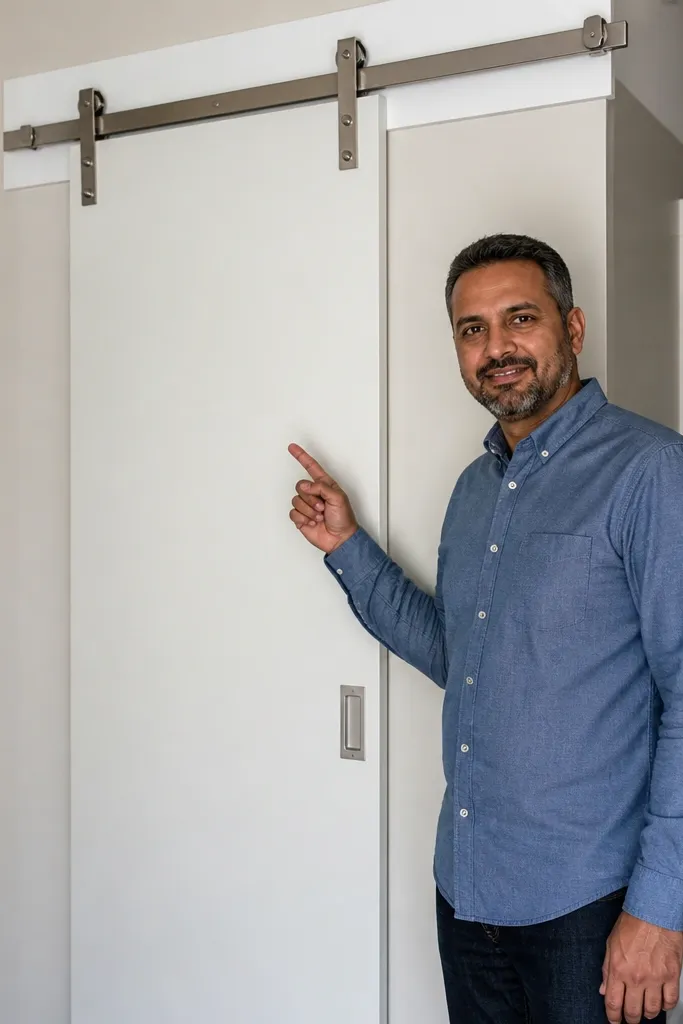
1. Matte White Flush Door with Black Header Box
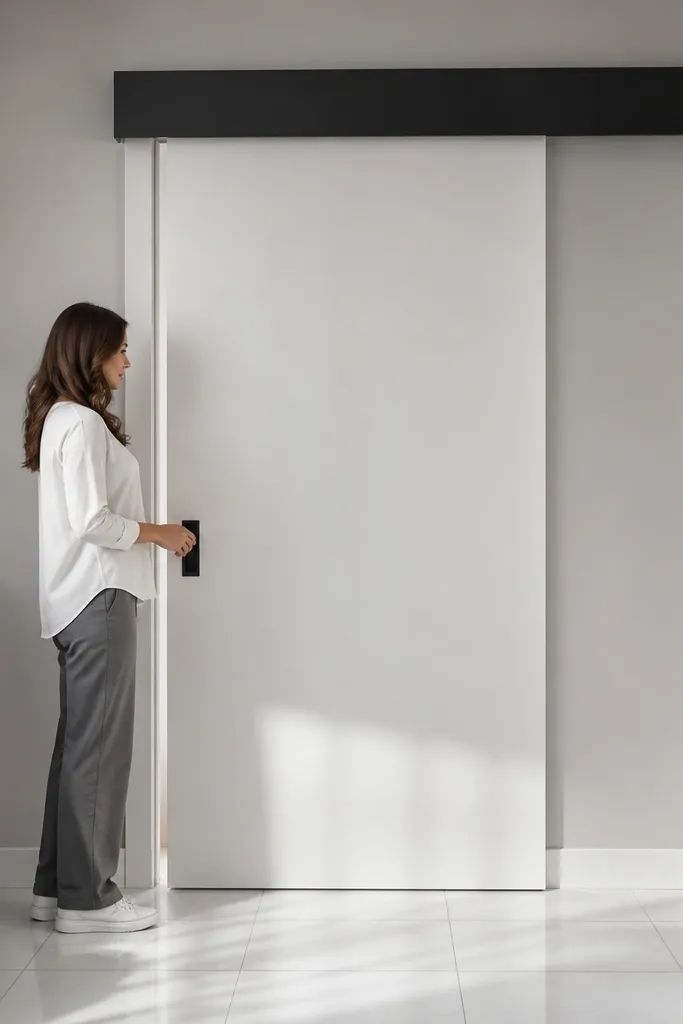
This design is modern because it removes visual noise. A flush door panel reads smooth and architectural, and the black header box anchors the look so the track feels intentional. Use it for closets, laundry rooms, or any doorway where you want a clean, calm surface. The door face stays simple, so you can keep the budget on materials and spend it on straight, crisp trim lines and a durable paint finish. Expect a straightforward build with a big payoff in how “finished” the space looks.
Start by cutting a 3/4 in plywood panel to your door size, then add a thin frame around the edges only if your opening needs a stronger border. Build a simple header box from 1x lumber and 1/4 in plywood; the box should cover the track and leave a 1/16 in shadow gap around the door edge. Prime with a bonding primer, then spray or roll matte white paint in two coats, letting each coat dry fully. Install the track level, then mount the header box after you confirm the door clears the wall and overlaps evenly.
Use a foam roller for the face and a small angled brush for the edges to keep the finish smooth.
Skip gloss — it makes cheap panel edges and roller marks show up fast.
2. Charcoal Stain Door with White Oak-Effect Trim Grid
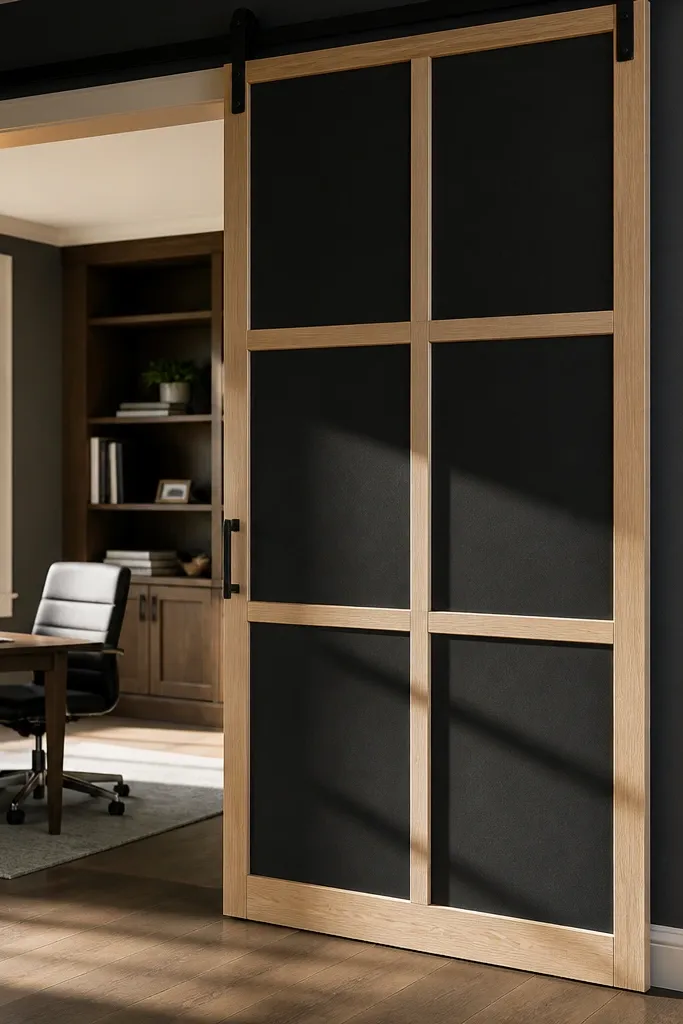
Sand the 3/4 in plywood smooth, then apply a charcoal stain for a muted tone rather than a black. After the stain dries, topcoat with a matte or satin clear so the grid trim doesn’t get patchy. Cut light trim strips (1 in wide is a clean start) and attach them with wood glue plus brad nails; keep the grid spacing consistent by using a scrap spacer. Finally, install the track and add door stops so the grid lines line up when the door closes.
A grid pattern makes a budget door look designed, not assembled. The contrast between charcoal-stained panels and light trim reads modern and adds depth without complicated hardware. This one works great for offices and entry-adjacent rooms where you want the door to look like a feature. You’re using simple applied strips, so your cost stays in the wood and finish, not in custom machining. The look is also forgiving — minor variations in trim spacing still read as intentional grid lines.
Skip thisDon’t stain over oily plywood — wipe with denatured alcohol first if the surface feels slick.
Editor's notePre-finish the trim strips before attaching them; it reduces edge blotching.
3. Black Metal Frame Door with Clear Acrylic Panel
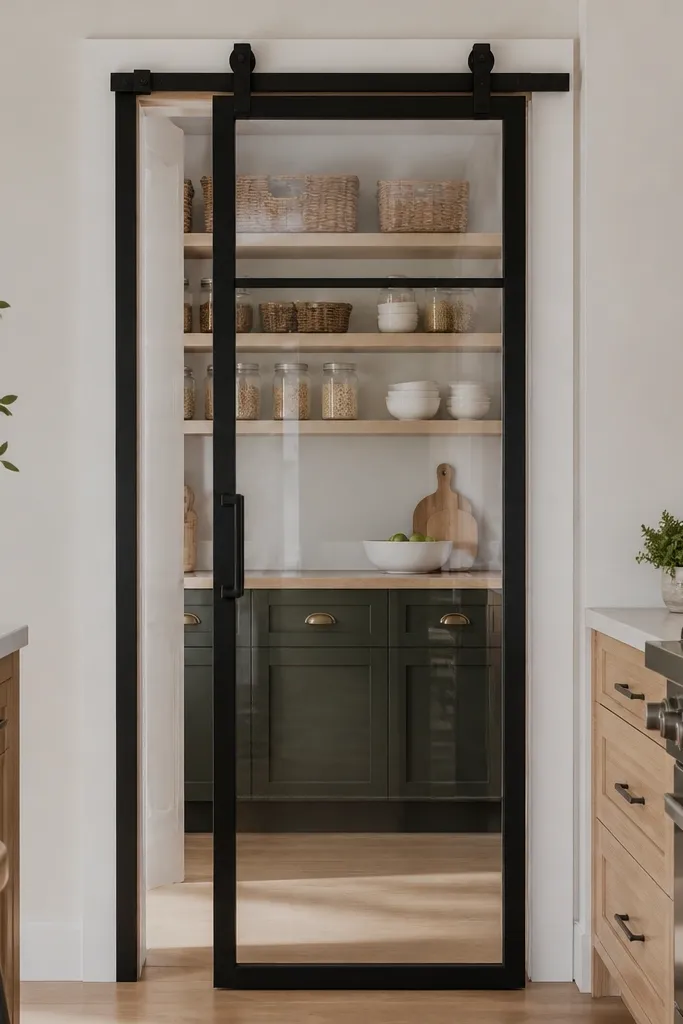
Build a rectangular frame from black powder-coated metal tube or paint-ready steel tube, sized so the acrylic sits with a small gap. Cut acrylic to fit and leave at least 1/8 in clearance on all sides so it won’t bind with temperature changes. Attach the acrylic using small frame clips or a gasket tape, not screws directly through the sheet. Mount the finished frame to a simple track system with a roller kit designed for sliding doors, then add a floor guide to stop wobble.
This is a modern “see-through” door look that keeps rooms feeling open. A black metal frame makes it read industrial-modern, and a clear panel keeps the space bright. Use it when you need privacy but still want light transfer — think pantry doors, office partitions, or laundry access. The build is budget-friendly because you can use basic square metal tube and a pre-measured acrylic sheet instead of expensive glass. It also photographs well because the frame creates strong lines.
Skip thisDon’t drill acrylic without a proper bit and slow speed — cracks happen fast.
Editor's noteUse acrylic edge polish and a clear gasket tape to prevent squeaks and reduce glare spots.
4. Two-Tone Slab Door with Walnut Edge Band
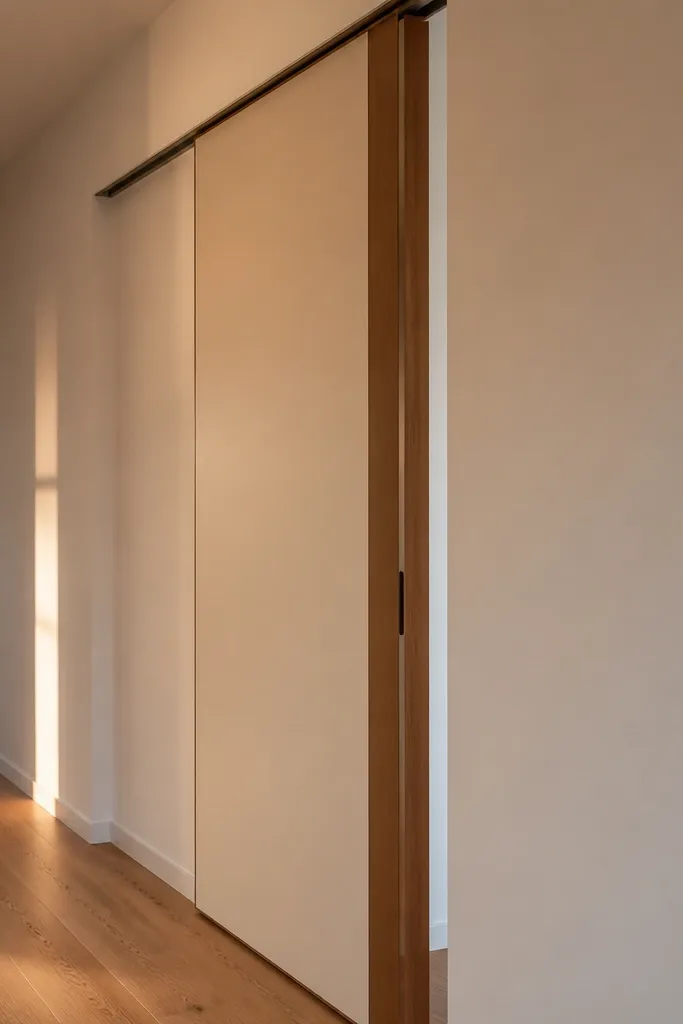
Two-tone doors look high-end because your eye reads the edge as intentional design. The cream slab keeps it modern and bright, while the walnut edge band adds contrast and warmth. This design works for bedrooms, bathrooms, and any hallway where you want the door to blend with trim. It’s also one of the best budget sliding door designs for hiding minor imperfections: the edge band covers small chips and rough cuts. You’ll spend most of your money on finish and trim, not on complex joinery.
Cut a 3/4 in plywood door panel and sand the face smooth. Paint the face with a durable trim paint (satin looks clean) and let it cure fully. Add a walnut-look band using real veneer tape or thin solid strips around all edges; glue and clamp or nail lightly, then fill nail holes with wood filler that matches the band. Install the track, then set door stops so the band aligns evenly with the frame when closed.
Sand between paint coats with 220 grit lightly to avoid a rough edge under the band.
Don’t rush the paint cure — edge band adhesion suffers on soft paint.
5. Vertical Slat Door with Narrow Spacing
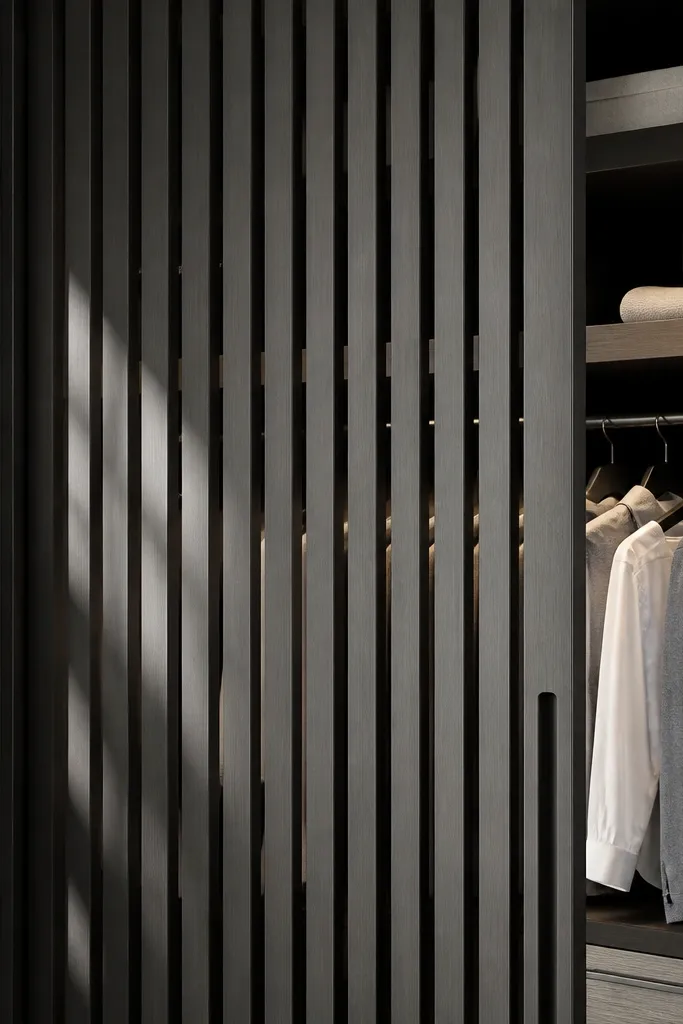
Vertical slats create a modern rhythm and make a budget door look like it belongs in a catalog. Narrow spacing feels contemporary, while the slats break up the flat surface so the door doesn’t look plain. This is a good choice for closets where you want airflow and a little visual texture. The look is also forgiving because tiny spacing differences read as character rather than errors. Build it with lightweight strips so you don’t end up with a heavy door that drags on the track.
Frame a backer panel from 1/2 in plywood, then attach 1x2 strips (or 1x1-1/4 depending on your desired spacing) vertically across it. Keep spacing consistent using a thin spacer strip and glue plus brads. Add a top and bottom rail that hides the ends of the slats for a clean edge line. Prime and paint or stain, then mount the door to a sliding track that matches the door thickness and weight.
Use a brad nailer with shallow depth so you don’t blow out slat edges.
Avoid wide slats on small openings — they make the door look bulky and unfinished.
6. Herringbone Panel Door on a Simple Frame
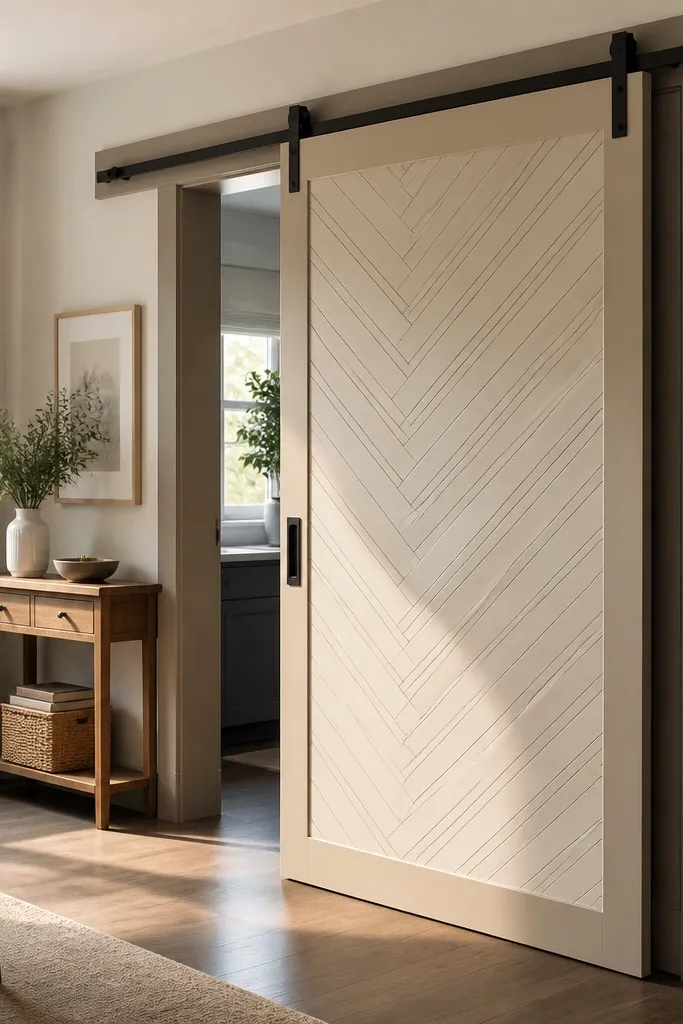
Herringbone reads modern when it’s tight and controlled. Instead of covering the whole door in complicated joinery, you can create a herringbone face panel on top of a simple frame. This design looks great in entryways and dining rooms because the pattern catches light as the door moves. It’s budget-friendly because you’re using thin strips, not expensive full planks. The key is keeping the pattern scale consistent so it looks intentional, not random.
Build a door frame from 1x material, then cut a base face from 1/4 in plywood. Cut thin strips (like 1/4 x 1/2 in) and lay them in a herringbone pattern using painter’s tape to hold alignment while you glue. Once dry, sand the face lightly so the pattern looks flush, then apply stain or paint. Install the door using rollers rated for the panel weight, and add a floor guide so the herringbone face doesn’t swing out.
Mark a center line and build outward — it keeps the pattern symmetric when the door closes.
Don’t skip a final sanding pass — raised strip edges make the finish look sloppy.
7. Shiplap-Style Horizontal Planks with Wide Reveal
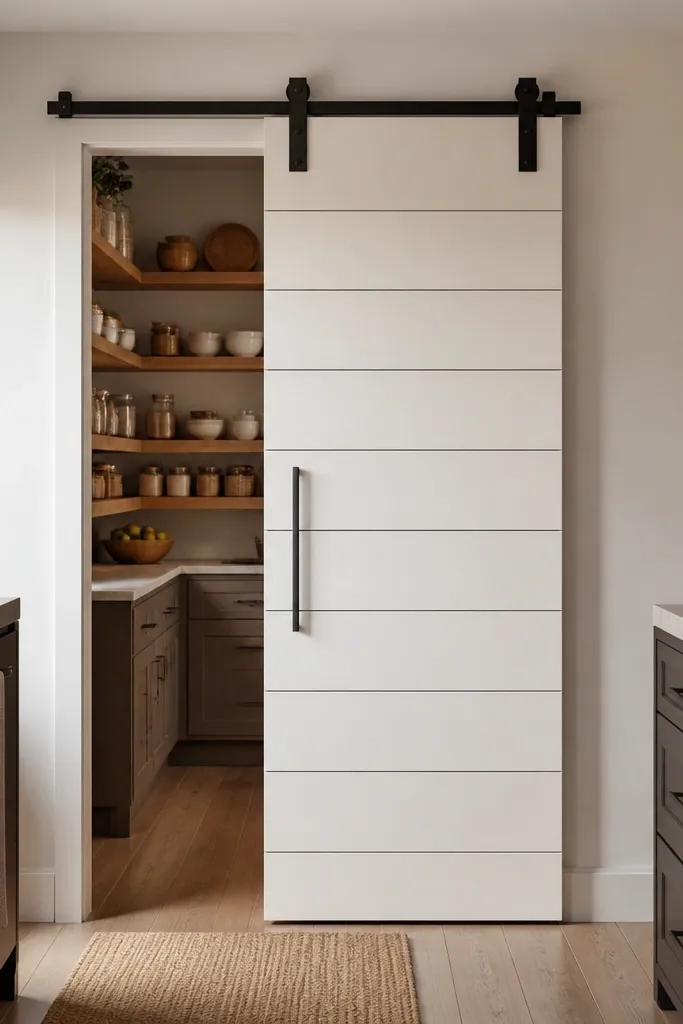
Horizontal plank lines can look modern when the reveal is wide and the border is simple. This is a smart option if you like the farmhouse vibe but want it to read cleaner. The door adds texture without needing glass or metal work. It also helps hide slight warps because the finish covers small edge gaps. Use it in kitchens, mudrooms, and kids' rooms where you want something durable and visually interesting.
Cut a door panel base from 3/4 in plywood, then attach horizontal strips around 1x3 or 1x4 depending on your reveal width. Leave a consistent gap between strips by using a spacer strip cut to your reveal measurement (for example, 1/8 in). Add a border frame around the perimeter so the door looks like a single slab. Paint in a satin finish or stain and clear coat, then mount to a track and set stops to keep the border line straight.
Pre-sand strip edges before assembly — it prevents rough ridges under paint.
Don’t use thin trim that flexes — it creates uneven plank shadows.
8. Matte Black Screen Door Look with Fabric Panel
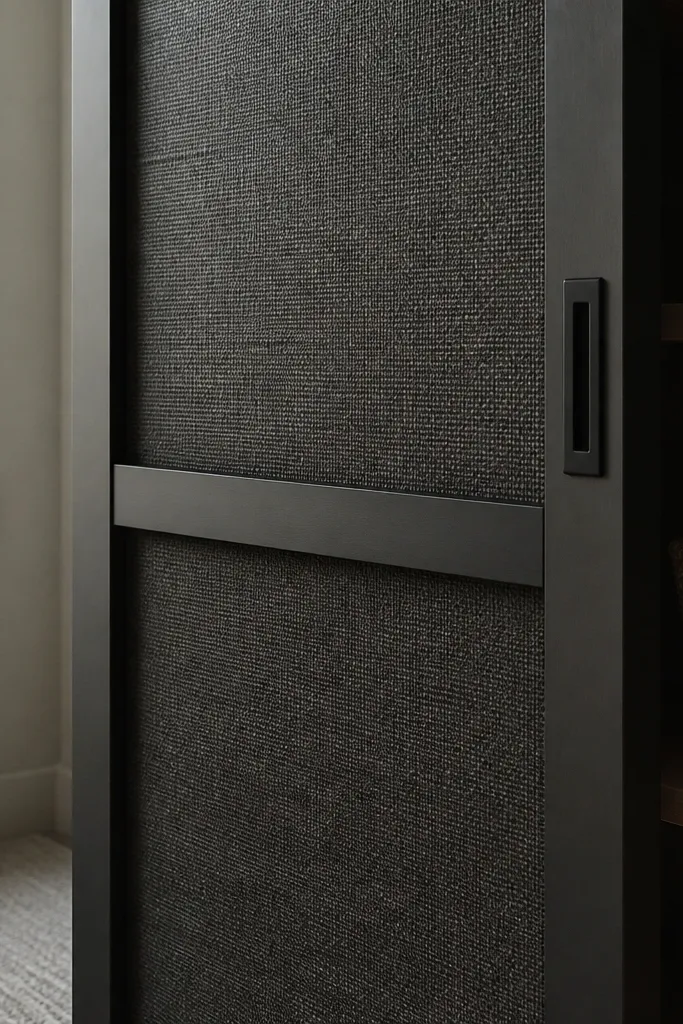
Build a black frame from thin plywood or metal strips, keeping the opening size small enough that fabric stays taut. Stretch woven fabric over the opening and secure it with a staple gun on the back side, then trim excess. Add corner blocks so the frame looks squared and intentional. Hang it on a sliding track with rollers suitable for light doors, then install a floor guide to stop side-to-side sway.
A fabric panel in a black frame gives you a modern “soft” look without glass. It’s great for a closet door where you want privacy and light diffusion. The black frame keeps the door crisp, and the woven center texture makes it photogenic. This is also one of the easiest budget sliding door designs because you’re not finishing a full wood panel surface. The door can be lighter too, which helps the track performance.
Skip thisDon’t pick stretchy knit fabric — it baggy-waves once it warms up.
Editor's noteChoose tightly woven fabric so it doesn’t sag after a few weeks of temperature swings.
9. Rift-Sawn Look Door Using Veneer Wrap
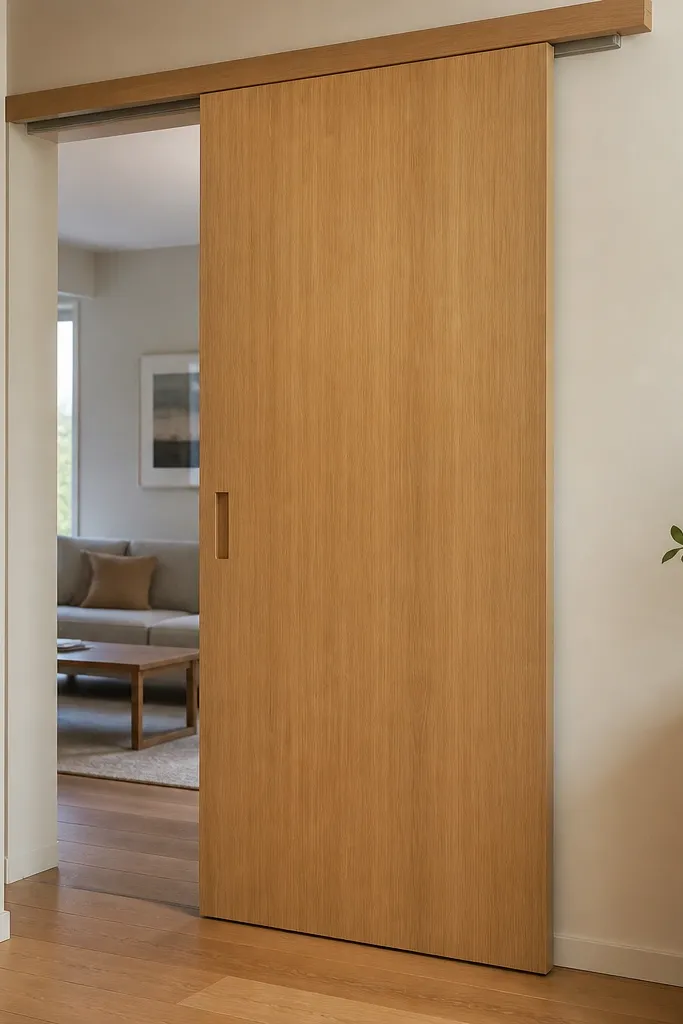
Start with a smooth 3/4 in plywood door face so the veneer doesn’t telegraph dents. Apply veneer wrap using contact adhesive or heat-activated veneer adhesive, working slowly and trimming edges cleanly. Press with a roller and then trim with a sharp knife so the seam line stays straight. Seal with a clear matte or satin coat, then install the door and add stops to keep the seam aligned when closed.
You can fake expensive millwork by using veneer wrap that gives a straight grain direction. This design looks modern because the grain lines are clean and the door surface stays flat. It’s a good choice when you want the door to blend with existing wood floors or trim. The veneer also makes the door feel more “real” than paint alone, especially under natural light. For budget builds, veneer is one of the fastest ways to get a premium look without buying solid lumber.
Skip thisDon’t veneer over rough edges — you’ll see every sanding ripple through the finish.
Editor's noteUse a guide board clamped along your trim line so your veneer edge stays straight.
10. Clear Glass Insert with Black Bead Trim
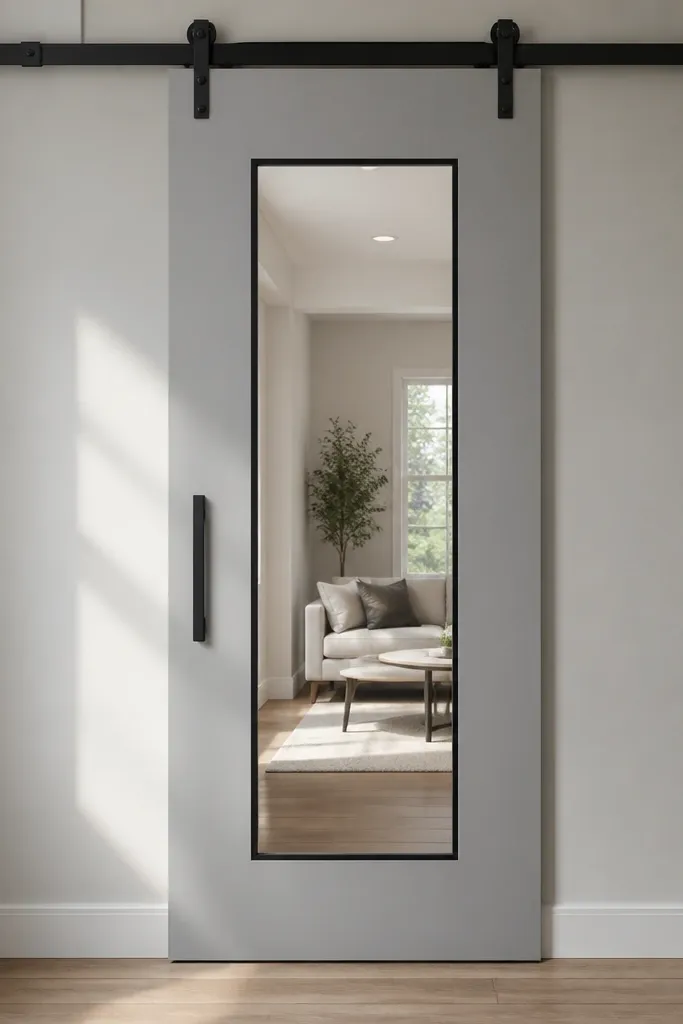
Cut a 3/4 in plywood door panel and mark a rectangle opening for the glass insert. Build a simple inner frame from thin strips and mount it so the glass sits recessed by about 1/4 in. Use tempered glass or acrylic glazing panel and secure it with glazing tape and small retaining beads. Paint the surrounding frame matte black, then install your sliding hardware and add a floor guide so the glass area doesn’t drift.
A single glass insert makes the whole door look architectural. The modern part is the thin black bead trim around the glass, not the door itself. This works well for offices and hallways where you want visibility without opening the door. It’s also a good budget sliding door design because you can use a smaller glass panel instead of full glass sheets. The look is crisp and photogenic because the light passes through the clear center.
Skip thisSkip glazing tape — glass clatter makes even a pretty door feel cheap.
Editor's notePaint the frame before installing glass so you can get clean edges around the opening.
11. Two-Panel Sliding Door with Center Vertical Groove
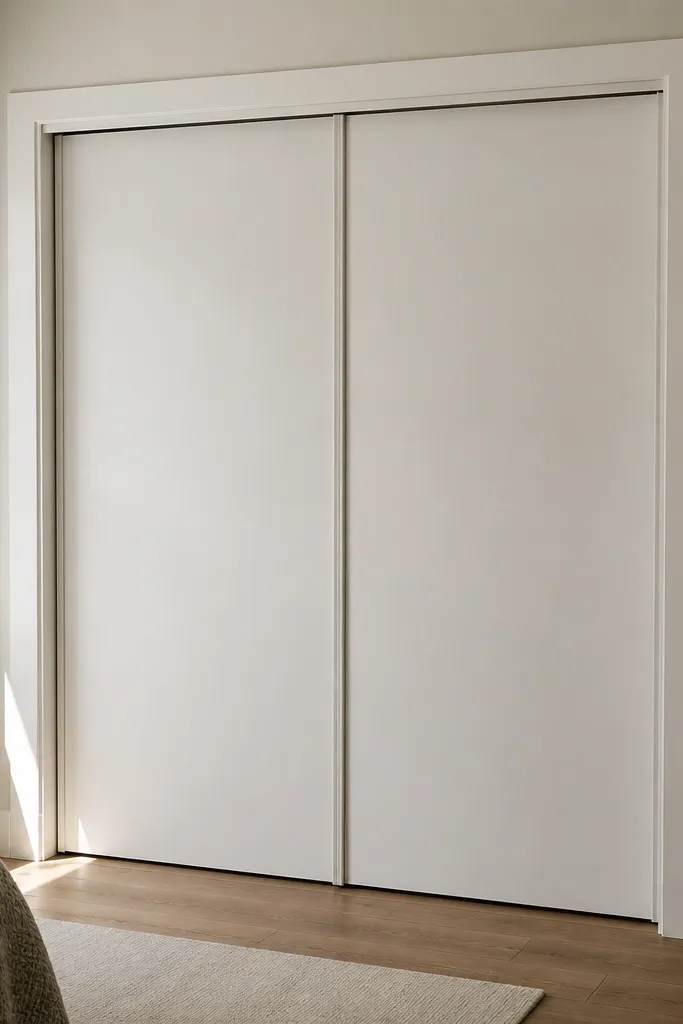
This design looks modern because it has a strong center reference line. Two panels keep the door from looking like a flat slab, and the vertical groove adds depth. It’s great for wider openings where a single panel feels too plain. The groove also hides small panel edge gaps, so budget materials look cleaner. Finish it in matte white or a warm gray and add a dark groove strip for contrast.
Cut your door face from 3/4 in plywood, then apply a center groove strip that’s about 1/2 in wide and 1/4 in thick. Create the “two-panel” look by adding applied trim lines on each side of the groove, keeping the trim width consistent. For a crisp seam, use a straight edge and cut the groove trim so it sits flush. Prime and paint, then mount the door to the track and set stops so both panel edges align evenly when closed.
Use a router bit only if you’re comfortable — otherwise, applied strips keep the build simple.
Don’t make the groove strip too thick — it can look clunky at a distance.
12. Oversized Pocket-Style Door with Exposed Track Cover
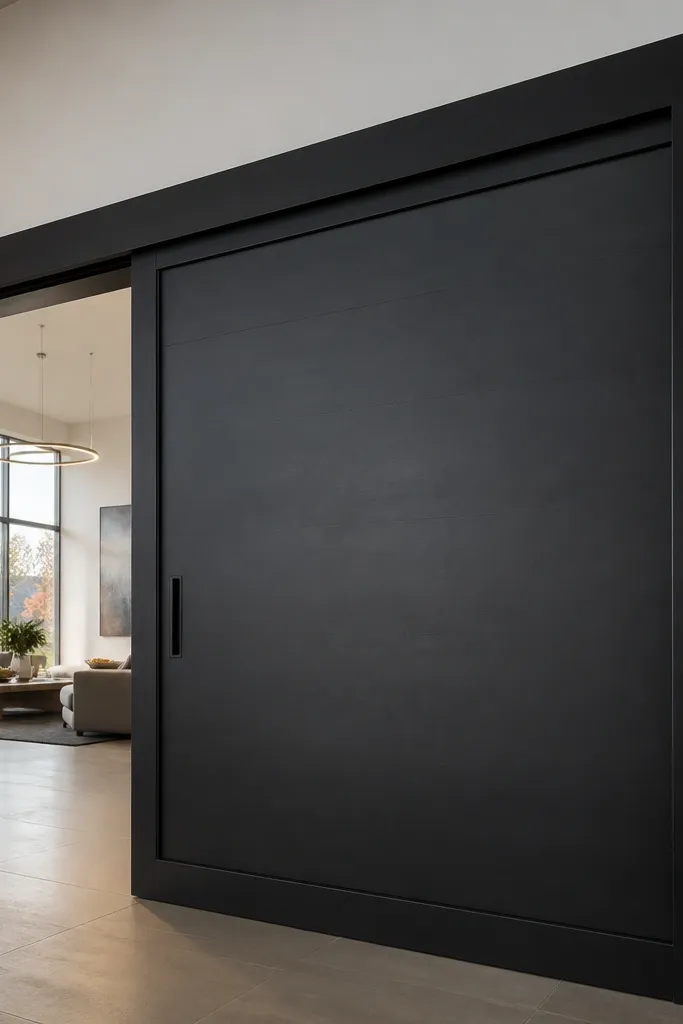
Cut a door panel sized so it overlaps the opening by at least 2 in when closed. Build a perimeter frame from 1x material to create a thick border, then attach it around the panel face. Construct a track cover from sheet goods so it forms a box that lines up with the top of the frame. Install the track first, then slide the door on and mark stop points so the frame border sits evenly at both ends.
If you want modern but hate the look of a standard rail, this style makes the track part of the design. A thick-looking frame border makes the door feel custom, and the track cover keeps the hardware from looking messy. This is a strong option for large openings because it creates a bold visual block. The door reads “designed” even when the materials are simple plywood and trim. You’ll also get better privacy because the frame border overlaps the opening more cleanly.
Skip thisDon’t mount the cover before confirming door clearance — you’ll be stuck trimming it later.
Editor's noteAdd a thin felt strip to the inside edge of the frame border to reduce rattles.
13. Rustic Wood Door with Modern Corner Brackets
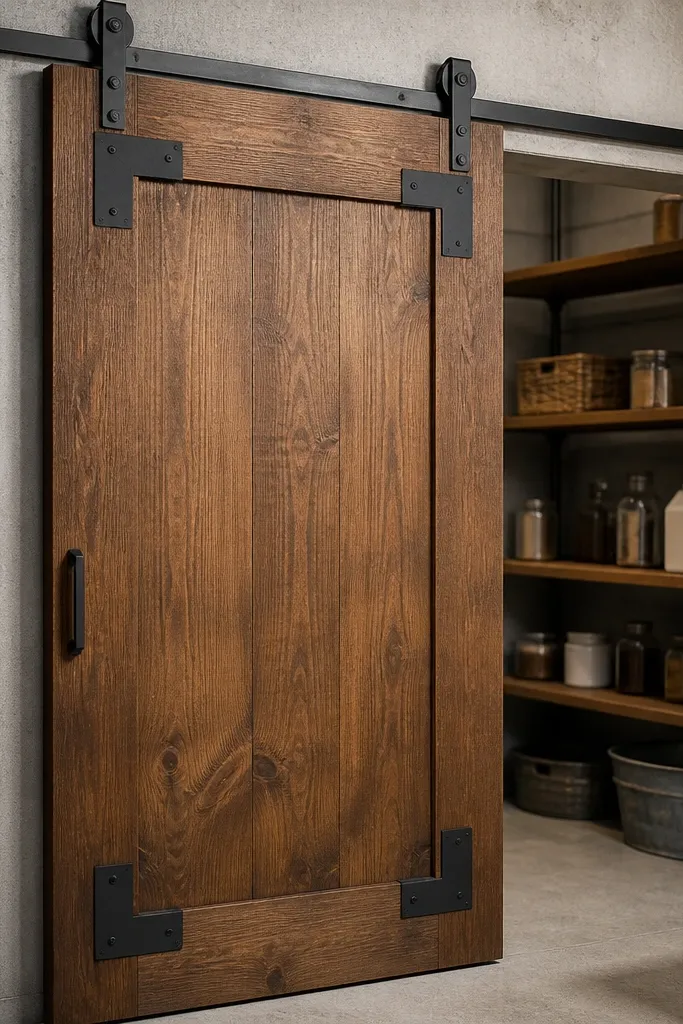
Make a simple 3/4 in plywood door face and stain it with a medium brown or walnut tone, then seal with satin clear. Add two or four corner brackets on the front face aligned to the frame border. Use a straightedge and level to place brackets symmetrically so it looks design-led. Install the track with a roller kit that matches the door thickness, then add a floor guide for straight travel.
This is rustic wood that looks modern because the hardware is clean and minimal. A stained slab door with a simple panel center stays warm, while black corner brackets add graphic structure. It’s a great fit for entry closets, basements, and utility rooms where you want durability and a little edge. The brackets also help visually hide the door’s frame lines so the whole thing reads like one piece. This is budget friendly because you’re not building complex joinery — you’re dressing a simple panel with intentional hardware.
Skip thisDon’t place brackets randomly — off-center hardware makes the whole door look DIY in a bad way.
Editor's noteUse matte black hardware paint if you buy raw brackets; it matches modern trim better than shiny metal.
14. Louvered Door with Angled Slats for Light Control
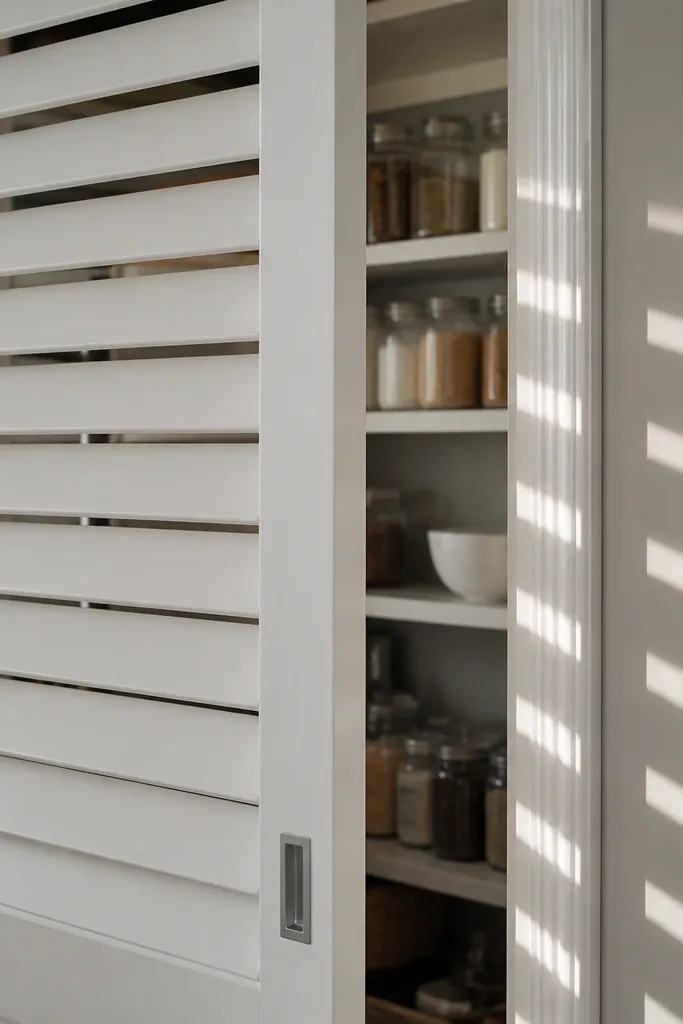
Build a rectangular frame from 1x material and attach a backer panel or cross braces so the louvers stay aligned. Cut slats to width and attach them at a set angle using a jig made from scrap plywood — clamp the jig to keep every slat angle identical. Sand and finish the frame and slats together so the color matches across edges. Mount on a track and add a floor guide; louvers can catch on side-to-side drift if the track isn’t straight.
Angled louvers look modern and they control light more than vertical slats. This design adds movement to the door surface because the slats cast shadows when the door is half open. Use it for pantries, utility rooms, or any space where you want airflow and a softer privacy level. It’s budget sliding door design because you can build the louver frame from basic strips and keep the door thickness reasonable. The result looks custom because the slat angle is consistent and the border is clean.
Skip thisDon’t skip braces behind the slats — the door flexes and the louvers start to look uneven.
Editor's noteMake a quick angle jig from scrap and test it on one slat before you commit to the full batch.
15. Matte Gray Door with Brass-Trim Panel Edges
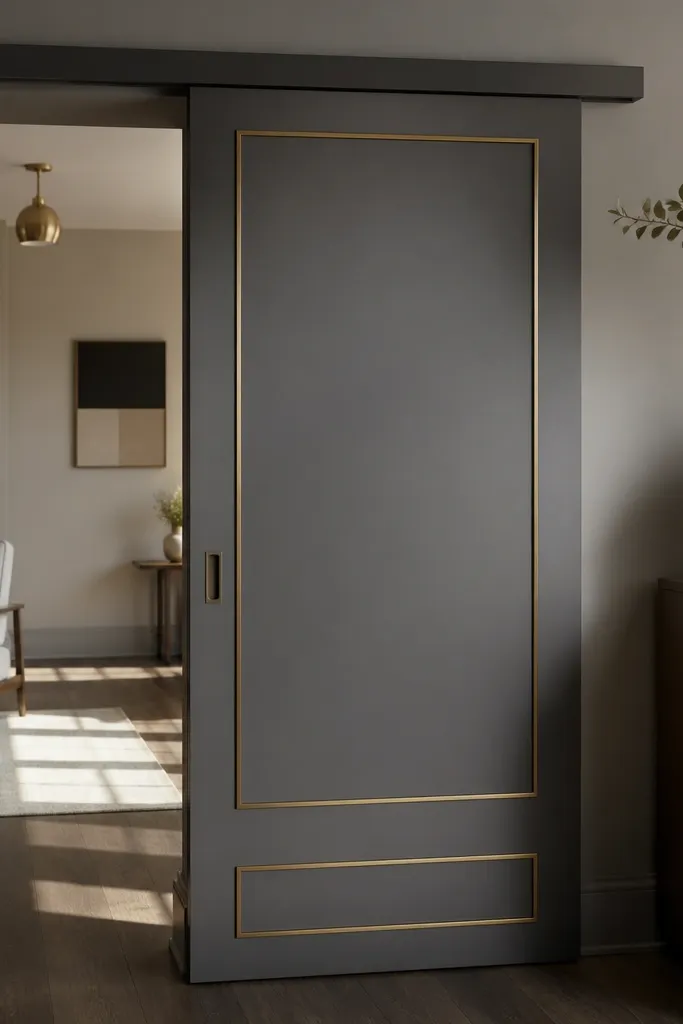
Start with a 3/4 in plywood door face and paint it matte gray after priming. Add thin brass-look trim strips along panel lines using screws with countersunk holes or heavy-duty adhesive rated for trim. Keep the trim width consistent and use painter’s tape to mask the paint edge so you get sharp lines. Install the door on a track, then adjust the rollers until the brass lines sit straight when closed.
This design uses color discipline and a single metal accent. Matte gray on the door face keeps it modern, and thin brass trim lines make it look like tailored millwork. It’s especially good if your room already has brass lighting or handles — the door ties the hardware story together. The build stays budget because the brass detail is narrow and decorative, not a full metal frame. It also photographs well because the trim catches light without being reflective like polished chrome.
Skip thisDon’t use thick trim — it can overpower a small doorway and look like a costume.
Editor's noteUse a laser level or long straight level for trim placement; brass lines reveal every angle mistake.
16. Offset Sliding Door with Asymmetrical Panel Layout
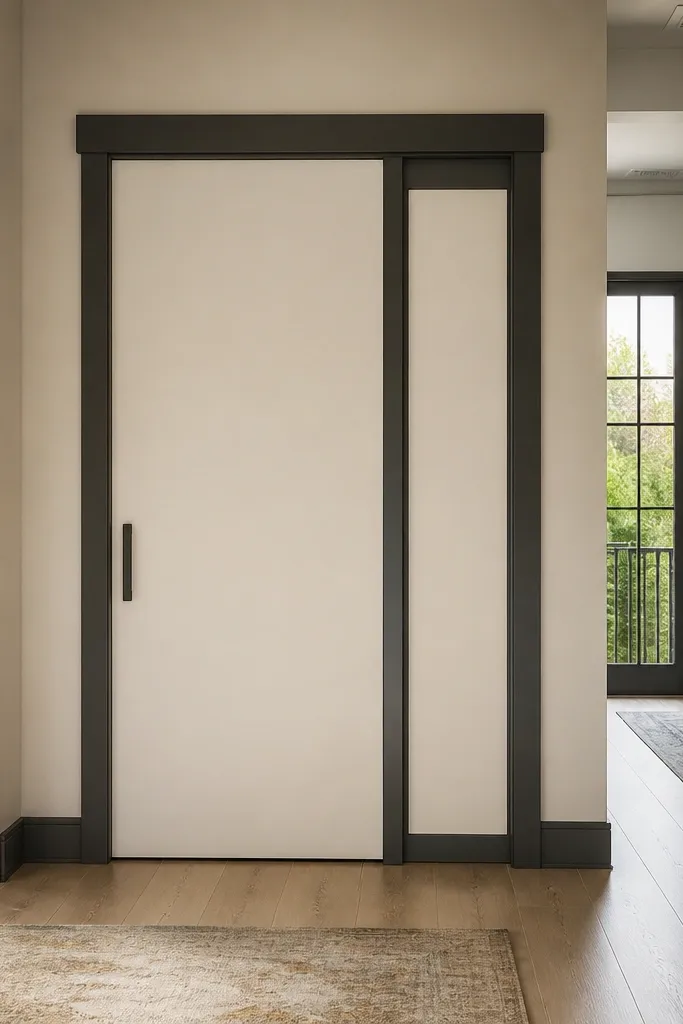
Asymmetry looks modern fast because it breaks the “boxy” expectation. This door uses an off-center panel layout — one larger rectangle and one smaller accent — framed by simple trim. It works for contemporary living rooms and hallways where you want something more graphic than a standard flush slab. Budget materials hold up because the design is in the trim geometry, not in expensive inlays. The payoff is strong: the door looks styled even with basic plywood.
Cut your base door panel from 3/4 in plywood and paint or stain it first. Mark an asymmetrical layout with a pencil and straightedge, then add trim rectangles using 1x strips or cut MDF trim. Keep the gap between trim pieces consistent so the design reads intentional. Install the track, mount the door, and adjust the stop positions so the asymmetrical pattern stays aligned when fully closed.
Make a paper template of the panel layout and tape it to the door before cutting trim.
Avoid centering everything “because it feels safe” — the whole point is the offset.
17. Slim Wood Frame Door with Recessed Center Panel
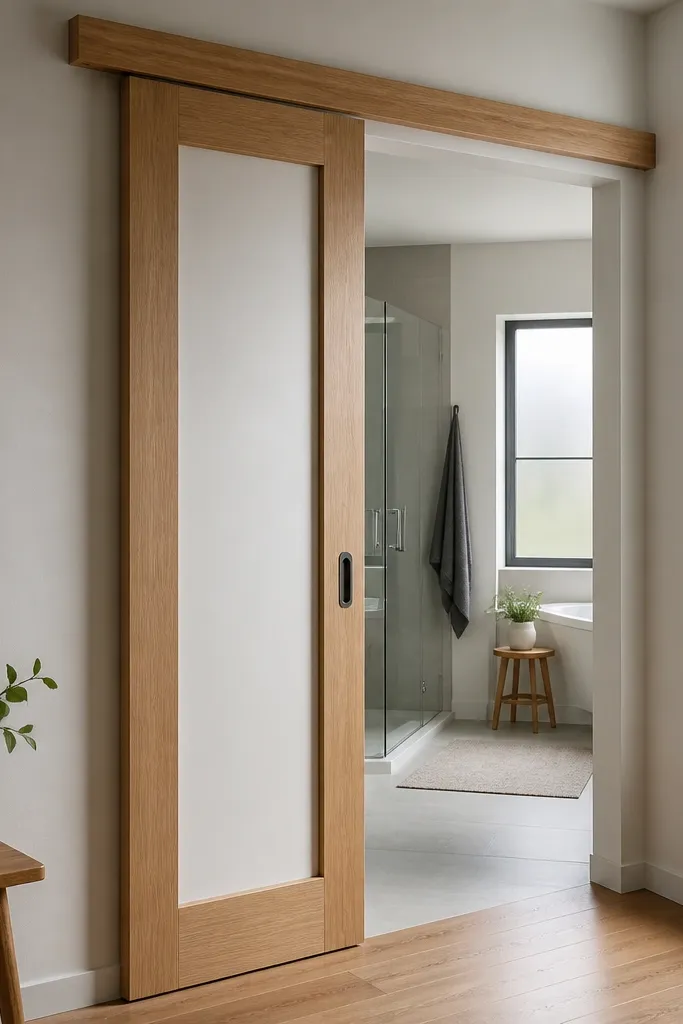
A recessed center panel makes the door look custom because it creates shadow depth. The slim frame keeps it modern, and the recessed area can be painted a different color or left natural for contrast. This works well for bathrooms and bedrooms because it looks clean from multiple angles and doesn’t depend on hardware being hidden. It also hides minor surface flaws: the recessed center is less likely to show sanding marks than a fully flat face. This is a solid budget sliding door design because it uses simple carpentry and finish.
Cut a door base from 3/4 in plywood, then route or build a recessed center panel area about 1/4 in deep. Frame the recess edges with slim trim strips, keeping the frame width consistent around all sides. Paint the frame and recess separately if you want two-tone — mask edges carefully. Install the door on a track, then set stops so the recess aligns neatly with the wall opening and doesn’t leave a wide gap.
If routing feels intimidating, build the recess with a glued-down panel insert instead of a router pocket.
Don’t make the recess too shallow — the shadow effect disappears.
18. Panel Door with Diagonal Corner Blocks
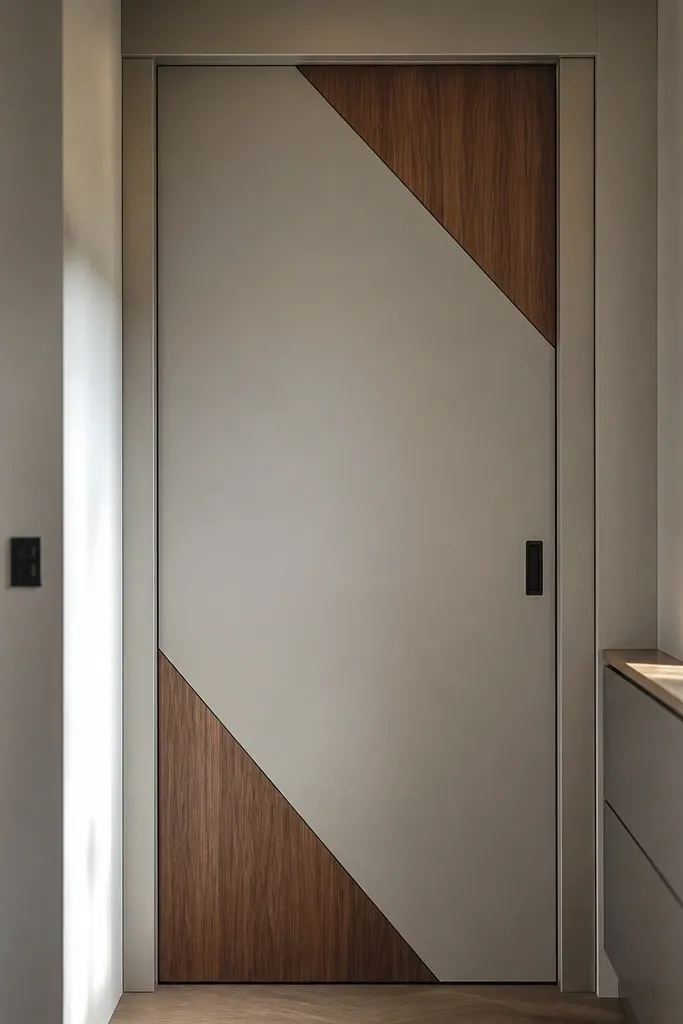
Build a simple flush door panel from 3/4 in plywood and paint it your base color. Cut two diagonal corner blocks per side (small triangles or angled rectangles) and attach them with wood glue and brads, keeping angles identical. Fill nail holes, then paint or prime the blocks the contrasting color. Install the track and adjust roller height so the door closes with a consistent reveal around all edges.
Diagonal corner blocks add a modern graphic hit without needing complex joinery. The base door can be simple and flat, while the contrasting corner blocks create a “designed” look. This is a good pick for small spaces because the graphic lines pull the eye and make the door feel intentional. You can also use this style to match existing wall accents — just copy the color. It’s budget friendly since the blocks are small and you can cut them from MDF or scrap wood.
Skip thisDon’t eyeball angles — diagonal blocks show every mistake immediately.
Editor's noteUse a speed square to keep the diagonal cut angle consistent across every block.
19. Matte Wood Door with Recessed Pull Channel
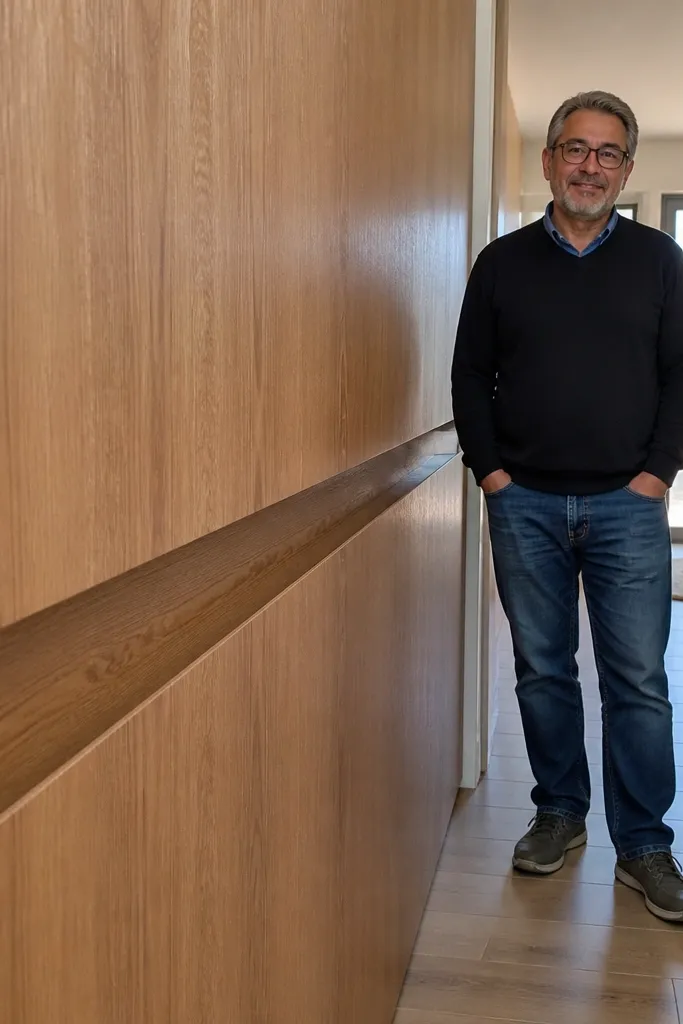
Cut a 3/4 in plywood door panel and finish it with stain or paint plus a clear topcoat. Add a recessed pull channel by routing a shallow groove (about 1/4 in deep) or building it from a glued-in strip insert. Sand the groove edges smooth so it feels good to touch. Mount the door to the track and make sure the channel doesn’t interfere with stops or the wall trim when the door slides.
A recessed pull channel makes the door look sleek because there’s no hardware sticking out. The channel also makes the door easier to use when you’re brushing past it in a hallway. This style works with natural wood finishes, especially if you keep the rest of the door simple. It looks modern because the pull line is straight, centered, and clean. Budget sliding door designs often get derailed by ugly handles — this fixes that.
Skip thisSkip the topcoat — bare wood grooves get grubby fast.
Editor's noteSand the pull edges to 220 grit after routing so your fingers don’t catch.
20. Color-Blocked Door with Oversized Frame Border
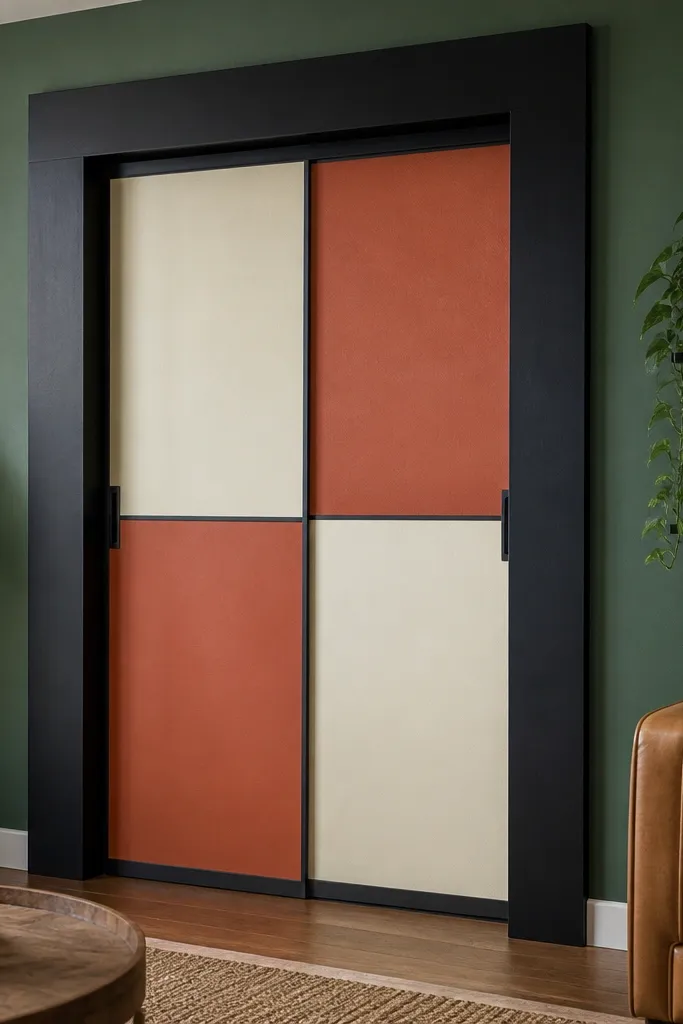
Cut a door base from 3/4 in plywood and apply a base paint color. Add an oversized perimeter frame using 1x material, then mask and paint interior blocks in your second color. Use painter’s tape with a burnishing tool to keep tape lines sharp, then remove tape while paint is still slightly tacky. Install the track and add stops so the border overlaps evenly and the color lines stay aligned when closed.
Color-blocking makes a sliding door look modern even when the build is simple. The oversized frame border gives you a strong silhouette, and the interior blocks add graphic impact. This is the best style to copy if you want your door to match a room accent color, like a deep green or terracotta wall. It also hides uneven panel edges because the border is the visual priority. Build it with plywood and trim so you’re not paying for custom doors.
Skip thisDon’t use too many colors — two interior colors plus the frame keeps it modern.
Editor's noteDo a test panel with the same tape and paint — it tells you if the tape lifts paint lines.



