
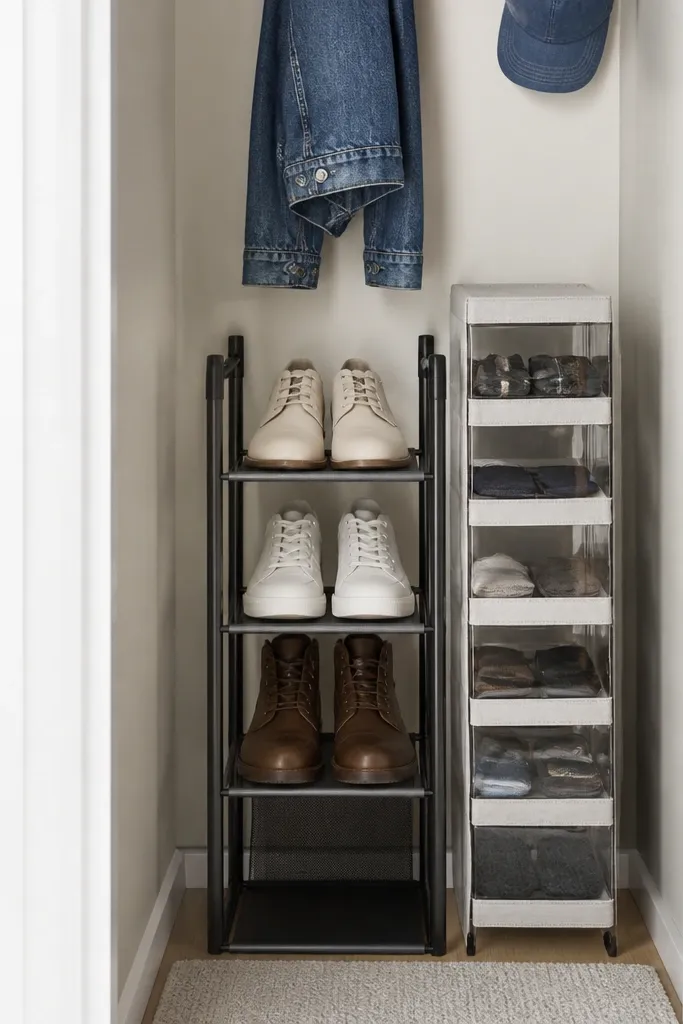
1. Vertical Boot Slots With a Simple Front Frame
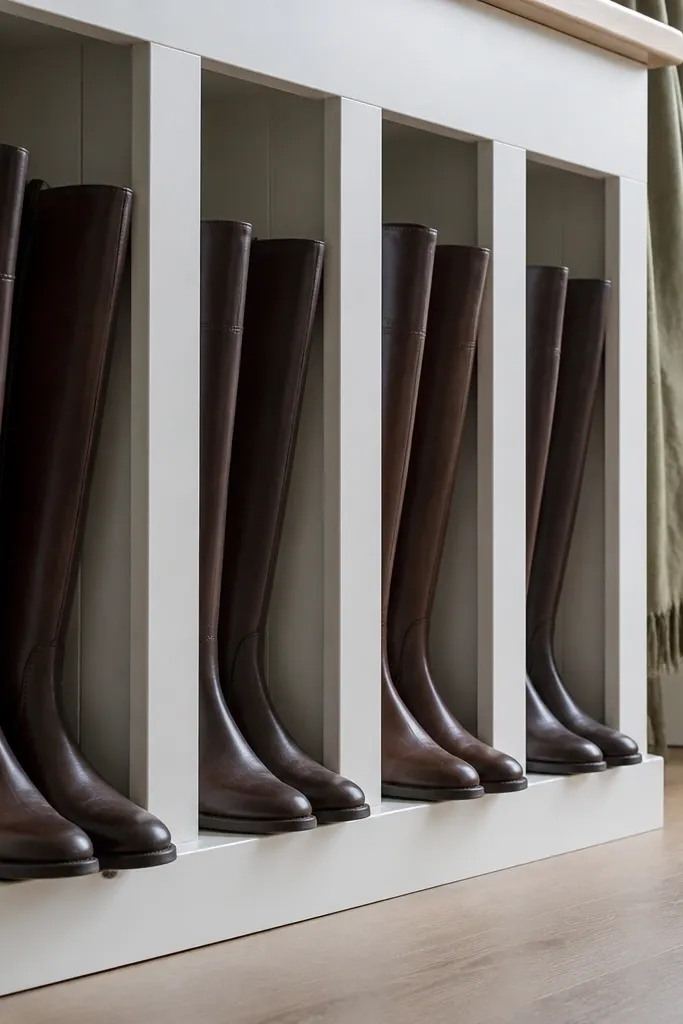
This is the cleanest way to store boots in a small space because the shafts stay upright and the toe boxes line up. The look is very “built-in” even if you’re using basic materials. Make the slots narrow enough that boots don’t sway, but wide enough that you can slide them in without bending the leather. A front frame is what makes it photogenic — it creates a crisp border that hides the rough edges inside. This works best in entryways, hall closets, or behind a door where you can mount a tall panel.
Editor's noteUse felt or a thin rubber strip on the inner divider edges so leather doesn’t scuff and the boot slides in quietly.
Cut a backing panel from 3/4-inch plywood to your desired width and height, then mark 6 equal slot openings. Use 1/2-inch plywood strips as slot dividers and keep each slot width about your biggest boot width plus 0.5 inch. Screw the dividers into the backing panel, then add a 1x2 front frame (miter corners for a neater look). Sand edges smooth, then paint or stain and seal with a wipeable topcoat. Mount it using French cleats or heavy-duty wall anchors if you’re going into studs.
Skip thisDon’t make slots based on shoe size alone — boot shafts vary wildly in width.
2. 2-Tier Wall Shelf With Toe-First Angle Inserts
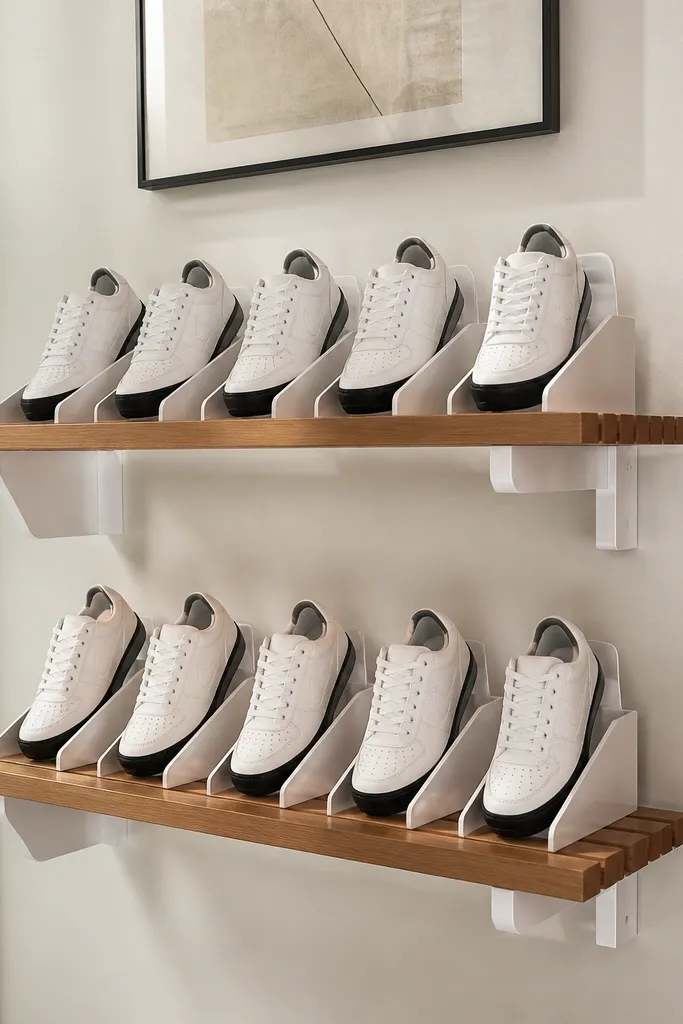
Floating shelves look good fast, and the angle inserts make them work better than flat shelves. Shoes sit toe-first with the soles slightly supported, so you don’t get that collapsed, slanted pile. This design is photogenic because you see a neat row of toes and consistent spacing across the shelves. It’s also a great way to store daily pairs without hiding them in bins. Put it near a door or in a hallway where people naturally face the shelves when they step in.
Editor's noteLightly sand and round the edges of the inserts so shoes don’t catch and scrape.
Build two shelves from 3/4-inch plywood, each about 16-18 inches deep and 24-36 inches long. Cut angled inserts from scrap plywood at a 20-25 degree angle so the shoe toe rests and the heel doesn’t drop. Screw the inserts to the back edge of each shelf and keep the spacing wide enough for your biggest sneaker. Mount the shelves with stud brackets and level them carefully, then finish with paint plus clear poly for scuff resistance.
Skip thisSkip thin particleboard — it chips at screws and looks cheap in close-up.
3. Under-Bench Shoe Drawers Using a Simple Track
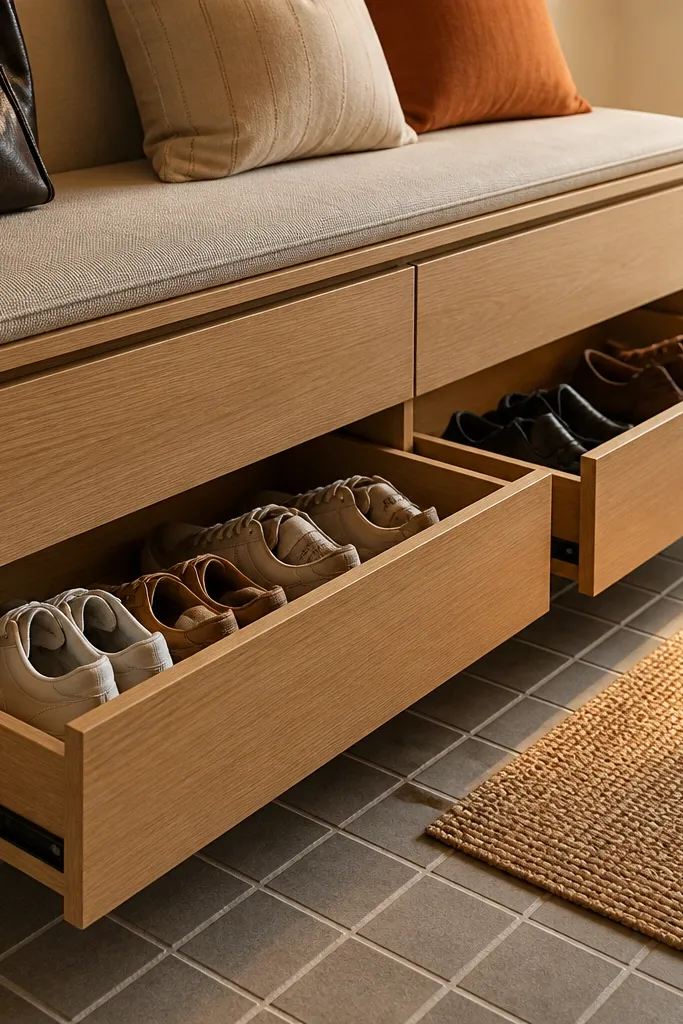
If your entryway has a bench, the “under” space is prime real estate. Drawers hide the mess, but you still get a structured look because drawer fronts create a clean horizontal rhythm. This works especially well for small spaces where open shelves make the area feel cluttered. The biggest win is airflow: you can leave the drawer slightly vented or add a thin slat base so shoes don’t sit in a damp box. Build this if you want storage that looks tidy even when shoes are unorganized.
Editor's noteUse a removable divider panel inside each drawer so you can switch between sneakers and flats without rebuilding.
Measure the bench opening and build two drawer boxes from 1/2-inch plywood with the front height matching your shoe height needs. Install side rails using inexpensive drawer slides rated for at least 75 pounds. Add a slatted base or drill a line of 1/4-inch ventilation holes spaced 1 inch apart. Attach drawer fronts and add a simple pull handle centered on each face. Finish the drawer faces with paint and seal the plywood edges so scuffs wipe clean.
Skip thisDon’t run drawers too low — if the bottom hits debris or wet floors, shoes get gross fast.
4. Over-the-Door Shoe Organizer With a Rigid Frame
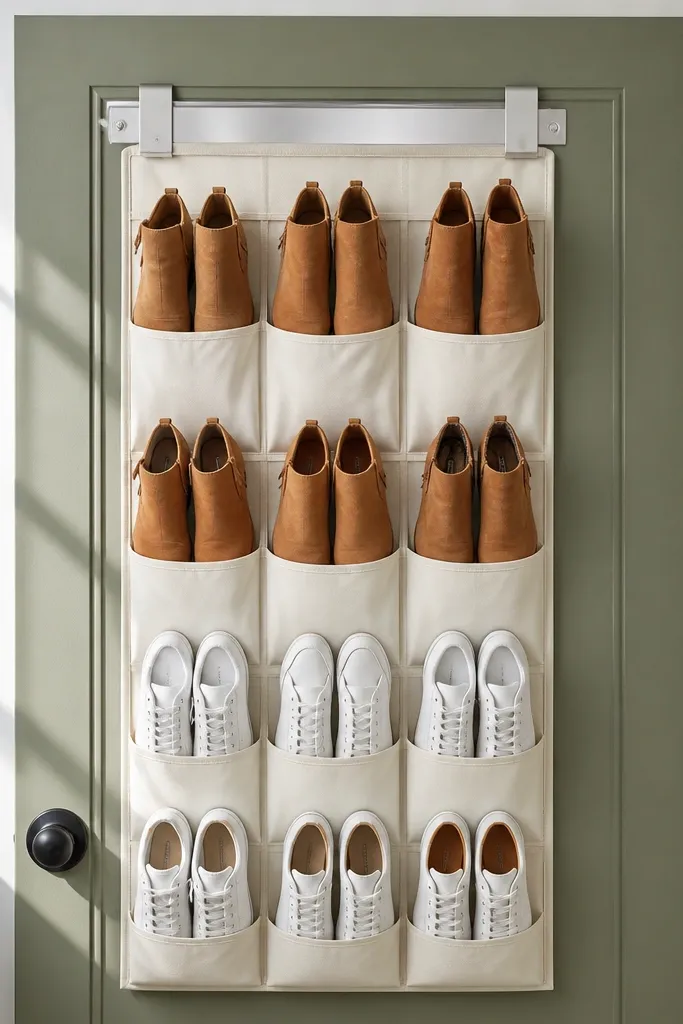
Store shoes on the back of a door and keep them looking orderly by adding a rigid top bar. Most soft organizers sag after a few months, and that makes the whole thing look messy. A framed version keeps each pocket aligned so you get straight lines and consistent spacing. It’s perfect for renters because you can mount without drilling into walls if you use the door mount hardware. The look is clean because the top bar acts like a visual anchor.
Buy an over-the-door organizer or use fabric pockets, then add a 1x3 top bar with screws through the organizer’s top seam. Make sure the bar is long enough to sit flat on the door hangers. Reinforce pocket bottoms with thin plastic or a sealed wood strip so they don’t stretch. Use small grommets or hook-and-loop straps so each pocket stays taut. Finish the bar with paint and a clear coat for wipeability.
Label pocket rows with small white vinyl dots so you can keep pairs together without rummaging.
Don’t hang it too high — if shoes slide out, you’ll end up with floor piles.
5. Ladder-Style Wall Rack With Removable Bins
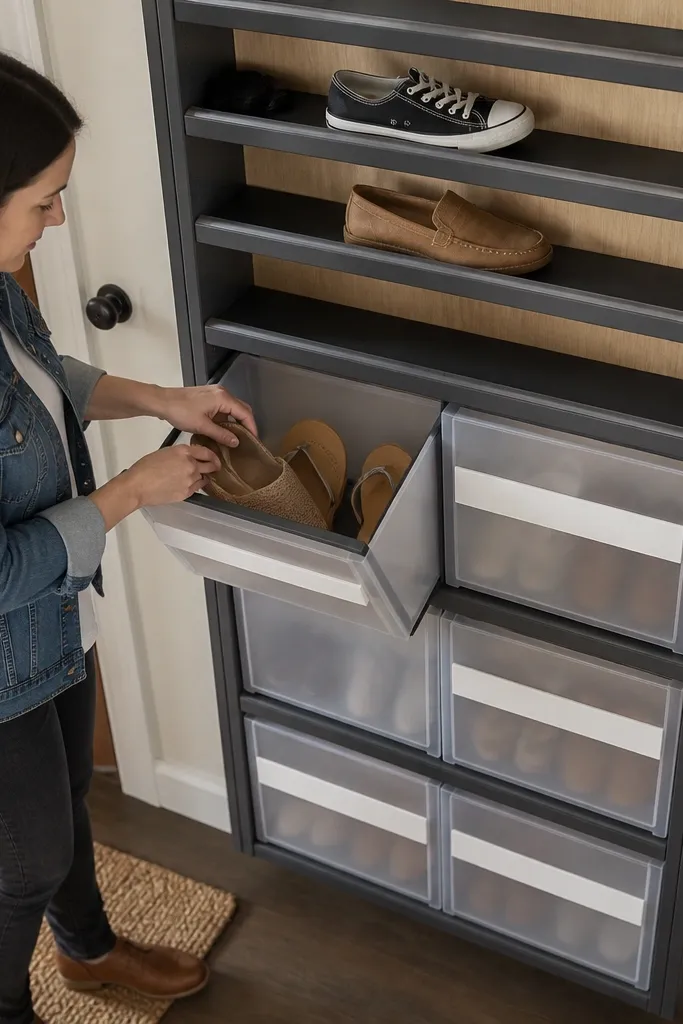
A ladder rack looks intentional because the rungs create a repeating pattern, and it’s easy to scale for small spaces. Use the upper rungs for open storage of daily pairs, then add removable bins below to hide bulk. This combo is photogenic because you get a mix of visible shoes and clean, uniform bin faces. It also solves the “where do I put extras?” problem without turning your entryway into a closet. Mount it in a narrow hallway where you want vertical storage that doesn’t swallow floor space.
Editor's noteChoose bin fronts in the same color as the frame so the whole rack reads as one piece.
Cut two side rails from 1x3 or 2x2 lumber and mark rung spacing based on your shoe height. Build rung supports that let you slide bins in and out, or screw bin brackets directly to the rails. Use wire or plywood bin boxes with a front lip so they don’t pull free. Sand and paint the ladder frame first, then install bins last so everything aligns. Mount into studs using two hang points per side rail.
Skip thisAvoid wide rungs — shoes flop if the support surface is too small.
6. Cedar-Slat Shoe Wall With Open Cubby Rows
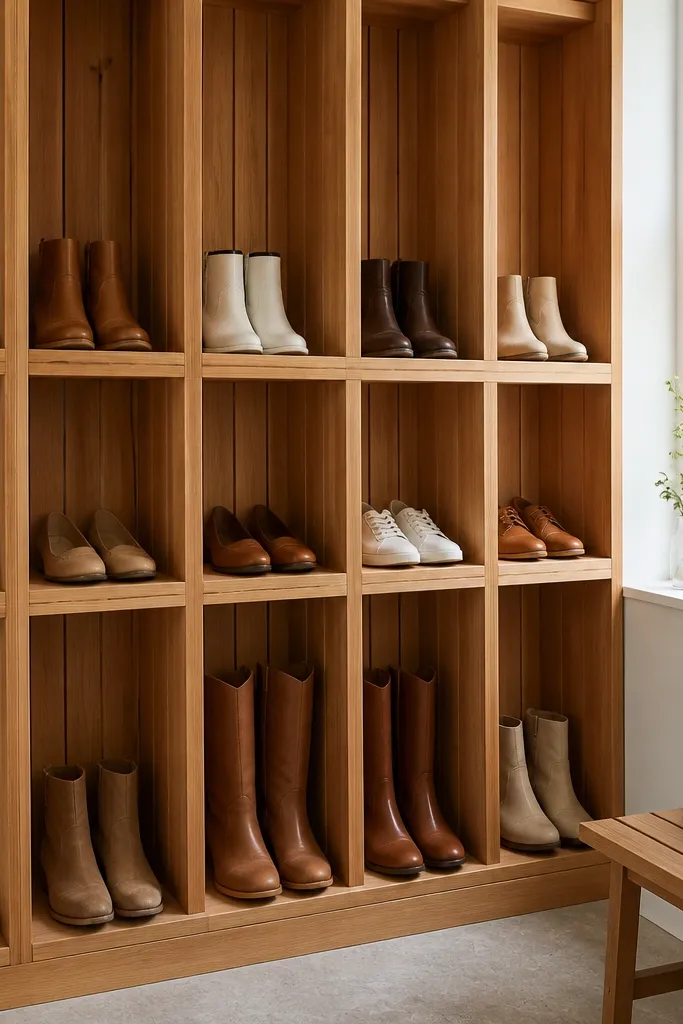
A slat wall makes shoe storage feel like decor instead of storage. Open cubbies show off the shapes of your shoes, and the wood slats create a warm, clean texture that looks good in photos. Cedar slats also help with odor control, and the open design keeps shoes from trapping moisture. This is best when you want a “display” look for sneakers, flats, and sandals. Put it on a wall where you can stand back and see the grid — that’s where it wins visually.
Editor's noteKeep cubby depth around 10-12 inches for most sneakers so they don’t stick out visually.
Cut a backing panel and attach cedar slats as a grid, spacing cubbies to fit your widest shoe plus 0.5 inch. Use 1x2 slats for the vertical dividers and 1x2 or 1x3 for horizontal shelves if you want stronger support. Leave the cubbies open — no doors — so air moves through. Sand lightly, then seal cedar with a clear matte finish. Mount with corner brackets and check level at the top before screwing the bottom.
Skip thisDon’t seal with a glossy finish — scuffs show up and it looks plasticky.
7. Pegboard Shoe Grid With Color-Matched Peg Hooks
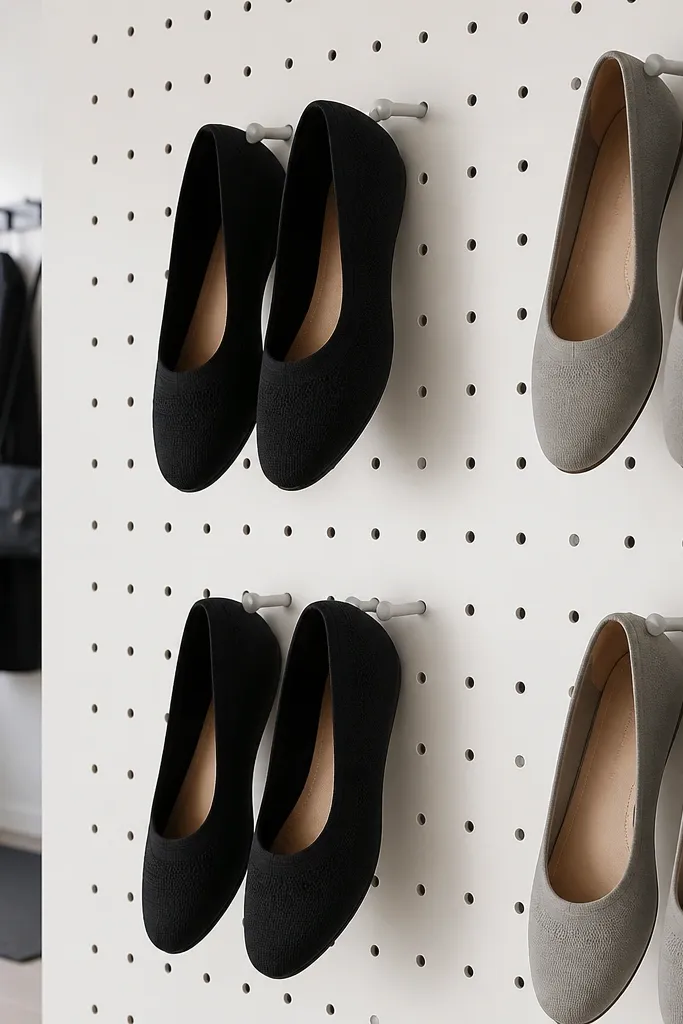
Pegboard turns shoe storage into a graphic pattern, which is exactly why it looks good. You hang shoes by the sides or use small brackets so each pair sits upright and spaced. This works best for sneakers, flats, and slip-ons where you can grip the upper area without damaging leather. The pegboard grid gives you control over spacing, so the whole wall stays neat. Use it in a laundry room entry nook or a small closet area where you want a tidy “system” vibe.
Editor's noteUse the same hook color across the board for a cleaner look than mixing metal finishes.
Mount pegboard to studs and paint it matte white or a soft neutral before installing hooks. Add peg hooks or small metal brackets spaced 6-8 inches apart so shoes don’t touch. For each pair, use two hooks per shoe to keep it upright and prevent twisting. Add a bottom ledge strip if you want extra support. Seal the hooks area if you’re using a humid space so metal doesn’t rust.
Skip thisSkip heavy shoes on thin hooks — if the hook bends, everything starts falling and looks chaotic.
8. Stacked Clear Bin Towers With Label Bands
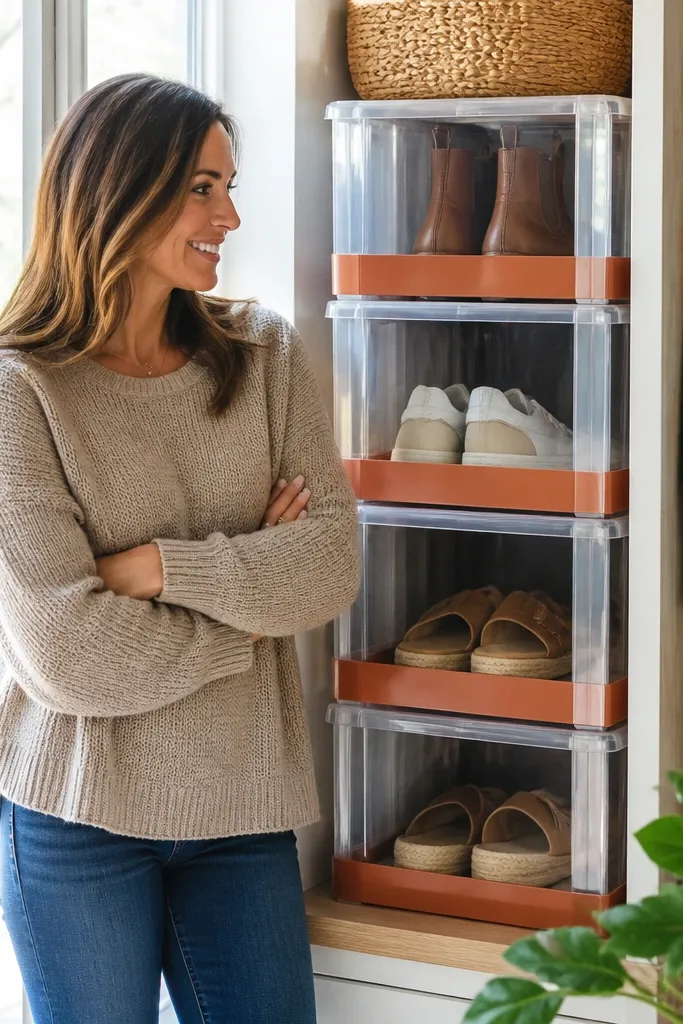
Clear bins look modern, and the trick is making them look ordered, not like a storage closet. Stack them vertically in a tight tower so each bin holds one shoe type and you can see what’s inside. Label bands keep the grid feeling intentional, and it’s also faster when you’re grabbing boots in winter. This is a strong option for small spaces because it uses height, not floor. Choose bins with matching lids so the tower line stays straight.
Editor's noteUse labels by category (winter boots, flats, workout) instead of names so you don’t have to re-label when you rotate pairs.
Pick bins that are the same height and width so the tower has clean edges. Measure the space width and build a simple base from plywood or a ready-made shelf so bins sit level. Stack bins and secure them with small L-brackets screwed into the base and the bin lip. Add label bands on the front using vinyl or printed stickers placed consistently at the same height. Finish by adding a matching trim strip so the tower looks like furniture.
Skip thisDon’t store damp shoes in clear bins — condensation fogs them and looks dirty.
9. Pivoting Shoe Rack Inside a Closet Corner
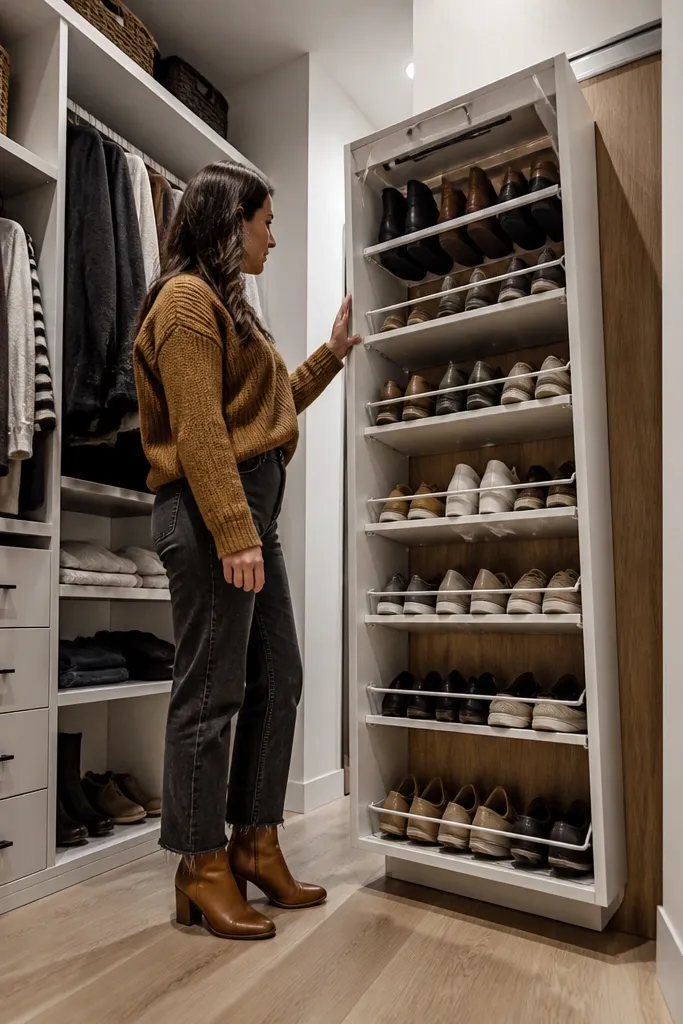
A pivoting rack is a space-saver because you store shoes in a corner and retrieve them without digging through piles. The look is neat because the rack face stays aligned with the closet wall when closed. This works great when floor space is tight and you don’t want open shelves collecting dust. Choose this if you have a closet with a corner that’s wasted. It’s also the most “designed” option because the hardware creates a clean reveal.
Editor's noteAdd a magnetic catch at the closed position so it doesn’t drift open when you’re walking by.
Build a rectangular rack frame from 1x2 lumber sized to your closet corner, then mount it with heavy-duty hinges to a back panel. Add internal dividers so each slot fits one pair, with slot widths set to your widest shoe plus 0.5 inch. Install a stop block so the rack opens to a consistent angle and doesn’t swing too far. Add a front face panel or trim so the closed look stays clean. Sand and paint the frame, then test the swing before loading shoes.
Skip thisDon’t skip the stop block — without it, racks sag and slots shift over time.
10. Modular Cubby Bench Top With Removable Inserts
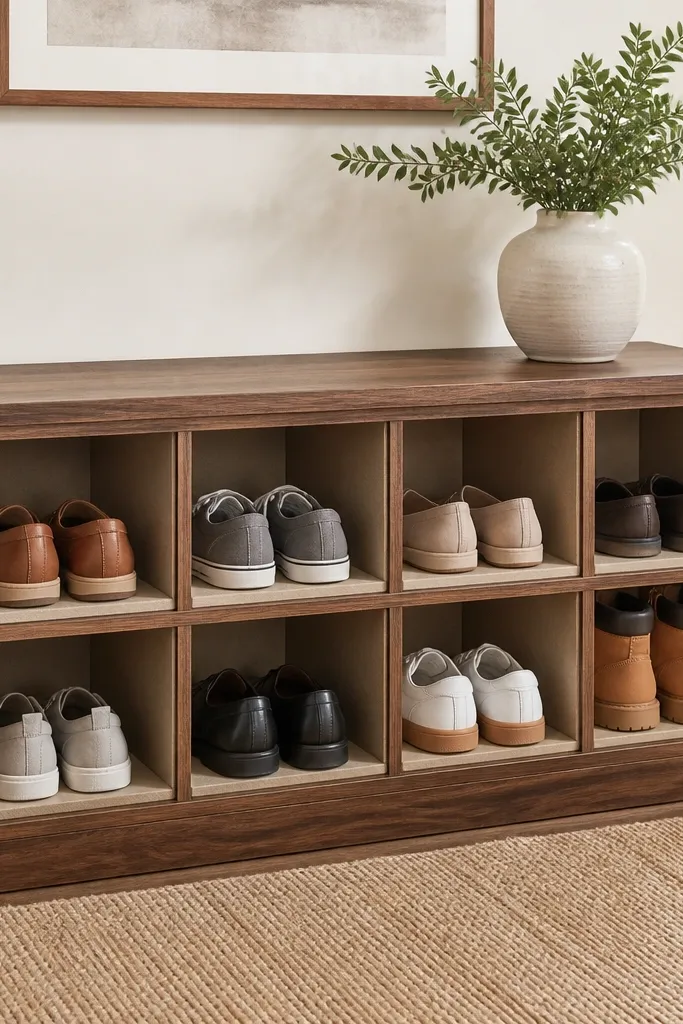
A cubby bench top looks like furniture, not storage, and it’s a smart move for small entries. The removable inserts keep shoes from scraping the wood and make cleaning easy. You get a tidy grid on the outside, but the inside stays flexible when your shoe rotation changes. This is great for households because everyone can grab from their cubby without moving other pairs. Put it in a mudroom, entry nook, or at the foot of a closet.
Build a bench frame from 2x2 lumber and top it with a grid of cubbies using 3/4-inch plywood dividers. Cut cubby inserts from sealed plywood or melamine sheets so they slide in and out cleanly. Keep insert depth shallow for neat alignment — around 8-10 inches works well for most shoes. Add an upholstered bench seat on top if you want extra comfort, then sand and paint everything. Install rubber feet under the bench so it doesn’t slide on hard floors.
Use melamine for inserts if scuffs are a worry — it wipes clean fast.
Avoid deep cubbies — shoes disappear and the top face looks messy when you open it.
11. Rope-Edge Wall Shelf With Fabric Dust Covers
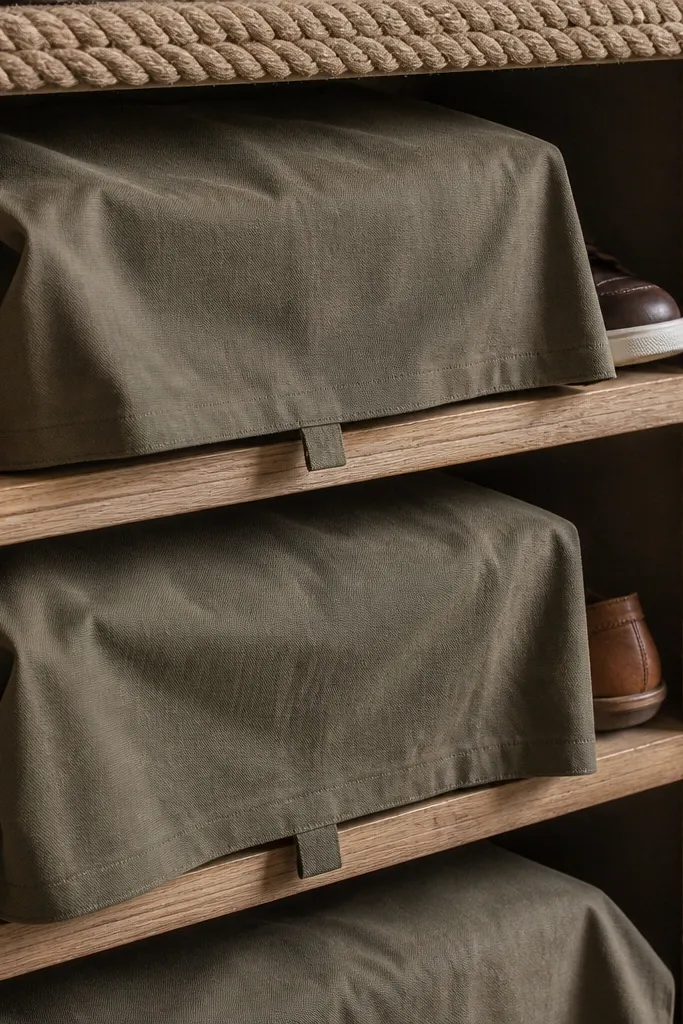
This one looks handmade in a good way. The rope trim gives you a visible, tactile border that makes the shelf look styled, and the fabric covers hide shoes when you want the space to look calmer. It’s also a practical fix for dusty shoes because the covers stop grit from settling on everything. Use it when you want open storage but hate the visual clutter of visible mismatched pairs. Great for small apartments where the entry area doubles as a living space.
Build a simple rectangular shelf from plywood and wrap the edges with rope using a strong wood glue and staples. Make two fabric dust covers sized to slide or Velcro over the shelf openings. Add a hidden dowel or small cleat inside the shelf so the covers line up. Paint or stain the shelf, then seal the top surface. Mount into studs and keep the shelf depth around 10-12 inches for a neat shoe row.
Choose canvas fabric and pre-wash it so it doesn’t shrink later and pull the cover out of shape.
Skip slick fabric — it slides off and defeats the whole “tidy look” point.
12. Pegboard + Shoe Sleds for Slanted Storage
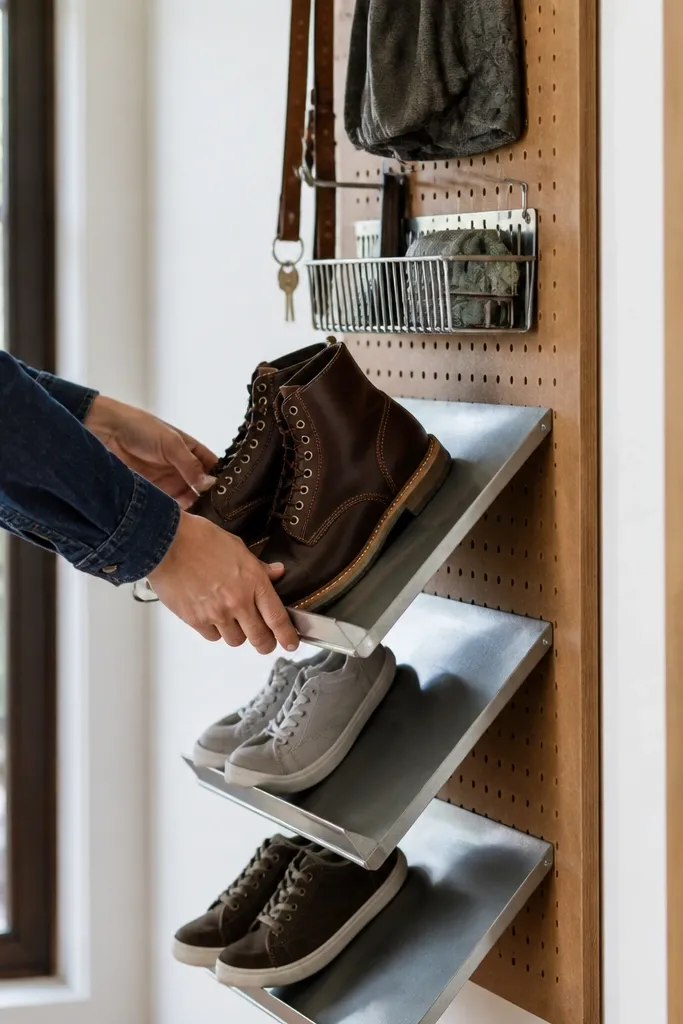
Slanted storage keeps shoes from sitting flat and looking like a pile, and pegboard lets you adjust spacing without rebuilding. The sled shelves support the outsole at a slight angle, so shoes look tidy and stay upright. This is a great option for small spaces because each sled takes only a few inches of vertical room. It also looks graphic because you get a repeating pattern of slanted boards on the pegboard. Put it in a closet wall or near an entry where you can install at eye level.
Editor's noteMake all sled shelves the same length so the wall pattern stays crisp.
Mount pegboard to studs and paint it matte so the wood and shoes pop. Cut small sled shelves from 1/2-inch plywood and attach a front lip so shoes don’t slide forward. Use brackets or strong pegboard hooks to hold each sled at a slight angle. Space sleds so the toe edges line up across rows. Finish sleds with a wipeable clear coat and test sliding with an empty shoe before loading a whole pair.
Skip thisDon’t make sleds too steep — shoes slide off and you’ll stop using the system.
13. Slim Closet-Side Hanging Boot Rack
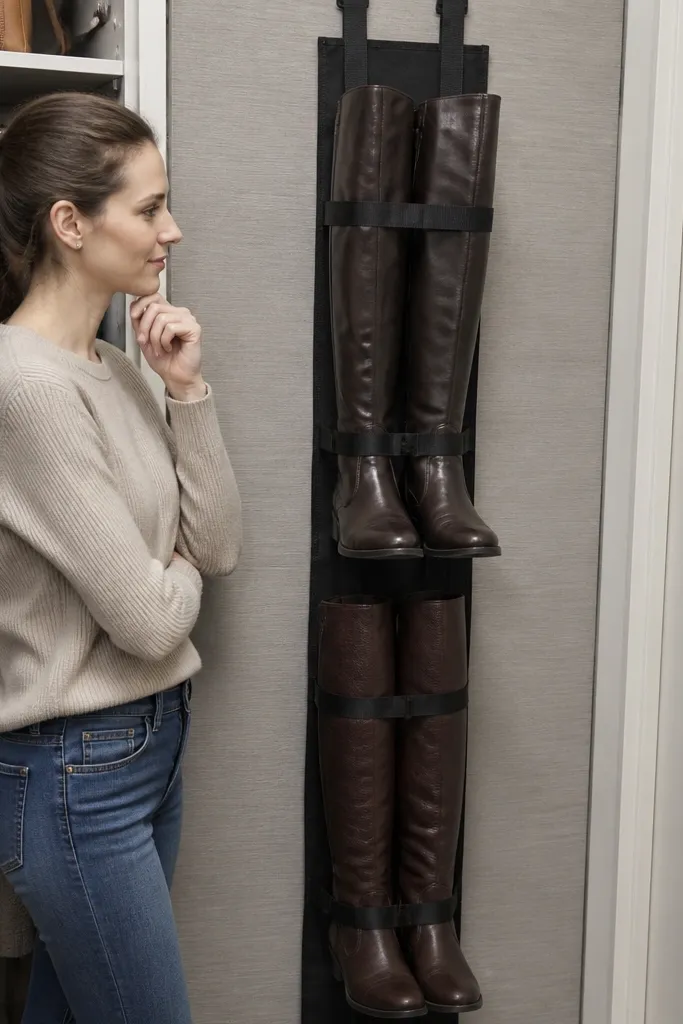
For narrow closets, a side-hanging boot rack keeps boots off the floor and prevents that boot-leaning disaster. The look stays clean because boots hang in a line with consistent spacing, and the straps create a neat vertical rhythm. This is the best option when you want to store only boots and a few tall pairs without building a full wall unit. It’s also renter-friendly if you use hardware that mounts to studs. Choose this when your closet is tight and you need every inch.
Install two vertical rails along the closet side using 1x2 lumber screwed into studs. Attach boot straps made from webbing or reinforced fabric, spacing them so boot shafts sit straight and don’t overlap. Add a bottom stop shelf or a thin ledge to catch the boot toe so it doesn’t swing. Keep strap lengths adjustable with buckles so you can fit different boot sizes. Finish the rails with paint and seal so scuffs wipe off.
Use webbing with a matte finish — it looks cleaner than shiny straps and doesn’t reflect light.
Don’t mount rails without finding studs — closet sides flex and straps slide.
14. Pegboard Drawer Organizer for Sneakers and Flats
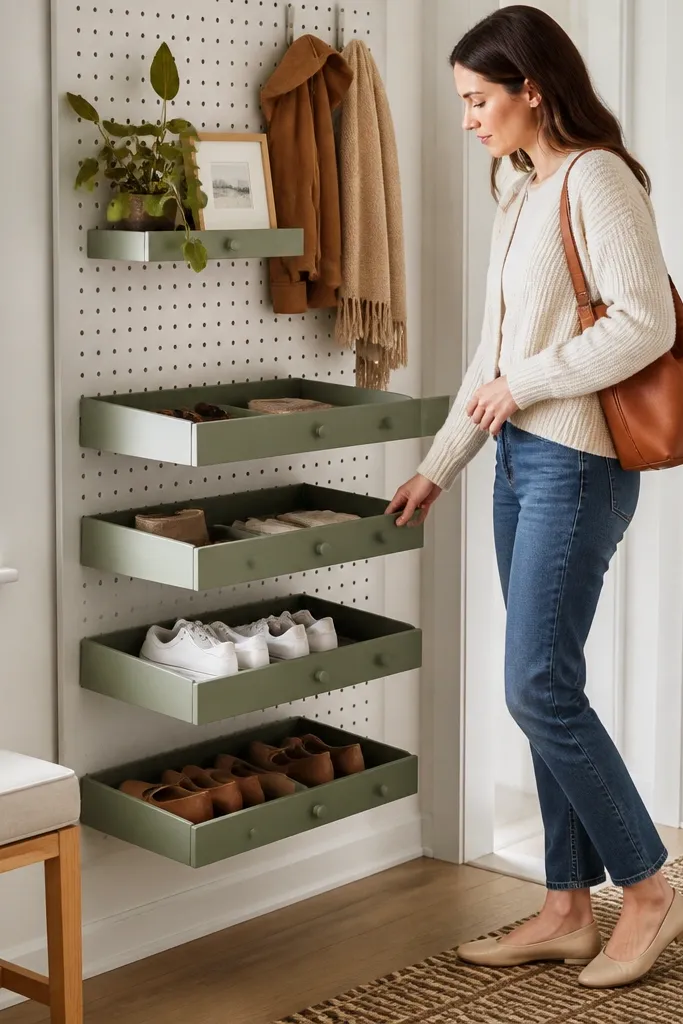
This is a “small space, big order” idea because it turns pegboard into a tray system. Shallow pull-out trays keep sneakers and flats visible and separated, which makes the area look curated instead of cluttered. The tray faces can be painted the same color for a cohesive look. It’s also easy to reconfigure — add or move trays as your shoe lineup changes. This works best in closets, utility rooms, or a narrow entry wall where you can mount pegboard.
Editor's noteUse drawer slides rated for light furniture loads and test one tray with two shoes before committing to the full set.
Mount pegboard to studs and paint it matte. Build shallow trays from 1/2-inch plywood with a front lip and screw small drawer slides to the tray sides. Attach matching slide brackets to the pegboard using reinforced plates so the weight sits securely. Space trays so each shoe pair fits without touching adjacent trays. Seal trays with clear coat or paint so scuffs wipe clean.
Skip thisDon’t use trays that are too deep — shoes tip forward and the front looks messy.
15. Rustic Pallet-Style Shoe Cubby Wall Panel
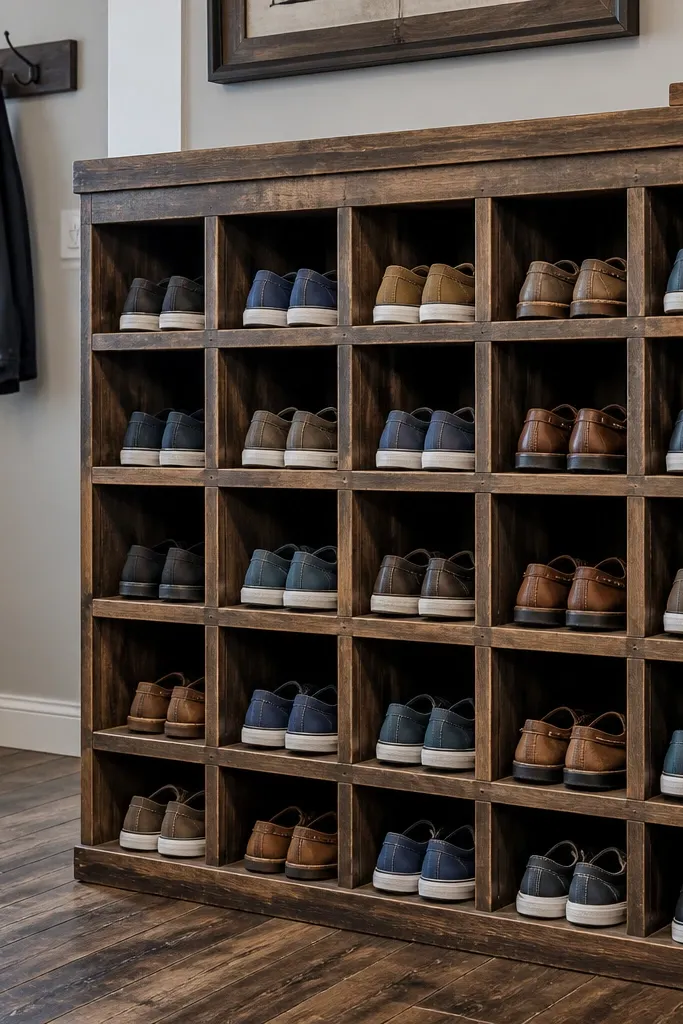
This one looks intentionally rustic while still staying structured. The cubbies are what matter: each compartment has the same width, so the wall reads as a grid instead of a random scrap-wood project. It’s photogenic because you see clean box shapes and consistent shadows between cubbies. It works well for sneakers, sandals, and everyday shoes that don’t need tall support. Use it on a feature wall near the door where you want storage to look like decor.
Disassemble a pallet carefully and sort boards by thickness so the cubbies stay even. Cut 3/4-inch plywood backing and build a grid of dividers based on your widest shoe size plus 0.5 inch. Nail and glue dividers, then add a frame border around the outside edges. Sand all faces, then stain only the wood faces and seal with matte topcoat. Mount with cleats or directly to studs using screws through the border frame.
Sort boards so all cubby fronts match in color tone after sanding — that’s what makes it look planned.
Avoid leaving pallet nails or rough splinters — they catch socks and make the finish look sloppy.



