
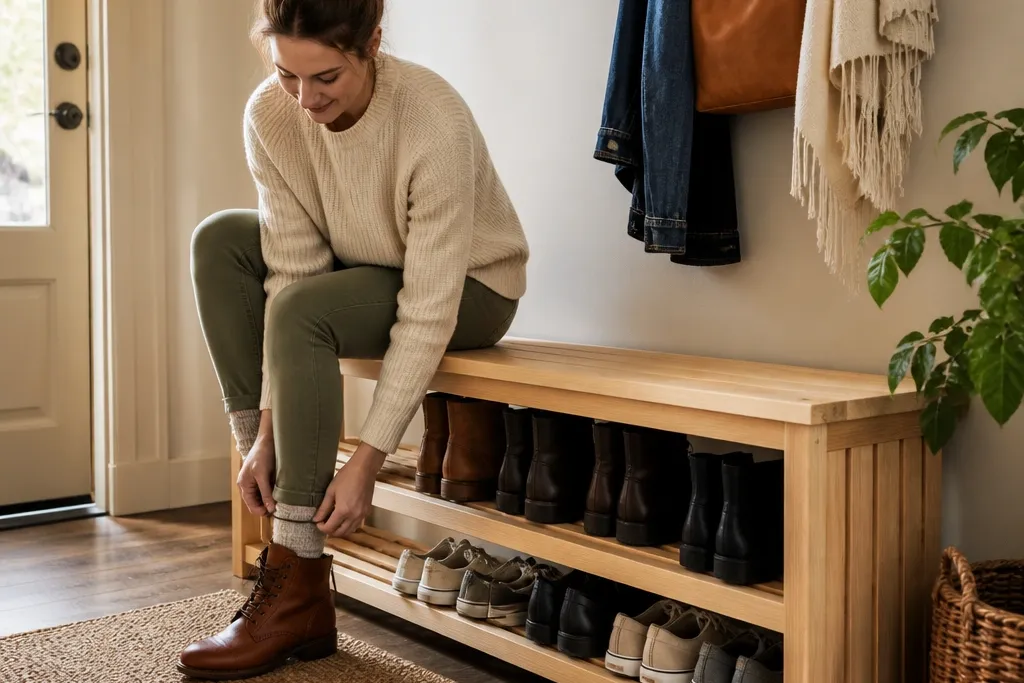

1. Pine slat rack with floating toe-kicks
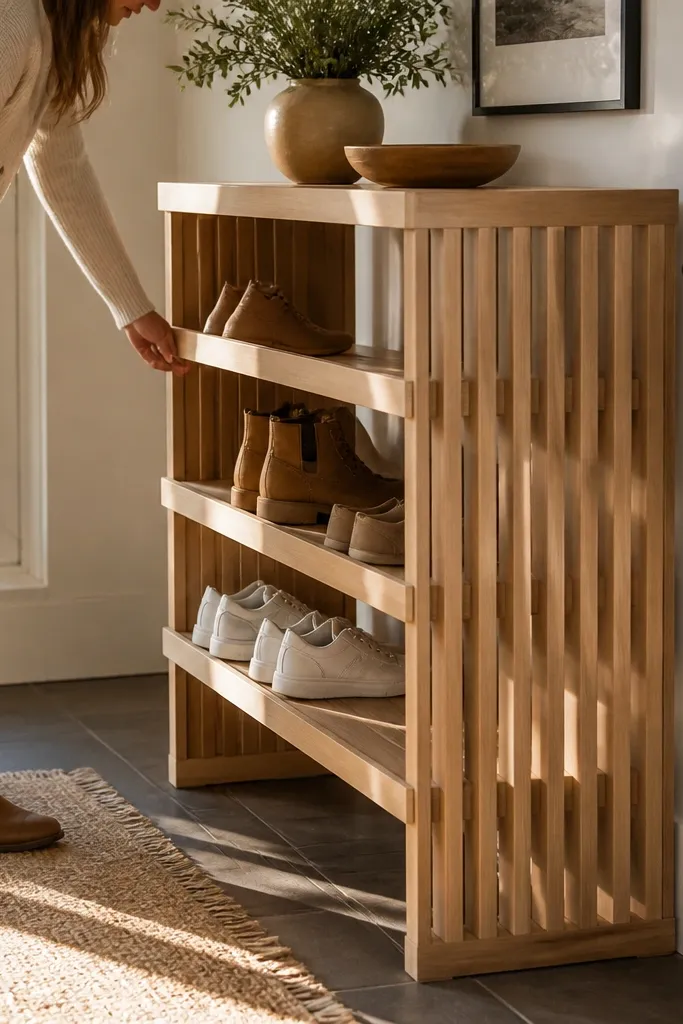
This is the kind of shoe rack that looks like it belongs in a catalog because the slats create neat vertical lines and each row gets a tiny toe-kick that stops shoes from sliding forward. The toe-kick also makes the rack feel intentional instead of like a shelf with shoes shoved on it. Use it in entryways or hallways where you want shoes visible but tidy. It works best for sneakers, flats, and low boots because the open slat spacing lets you see colors without the mess.
Cut four 1x2 pine uprights to your chosen height, then cut slats from 1x3 or 1x2 boards so each row has slats spaced about 2 inches apart. Build a simple rectangular frame with 1x3 rails for the shelves, then add a shallow toe-kick board under each row that’s about 1.5 inches tall. Sand everything to 180 grit, stain or paint, then screw the slat panels onto the rails so the structure stays square while you load shoes.
Pre-drill every screw hole and countersink slightly so the pine doesn’t split and the face stays smooth.
Don’t make the toe-kick too short — shoes will creep forward and the rack will look sloppy fast.
2. Wire cube shoe rack with fabric-liner sides
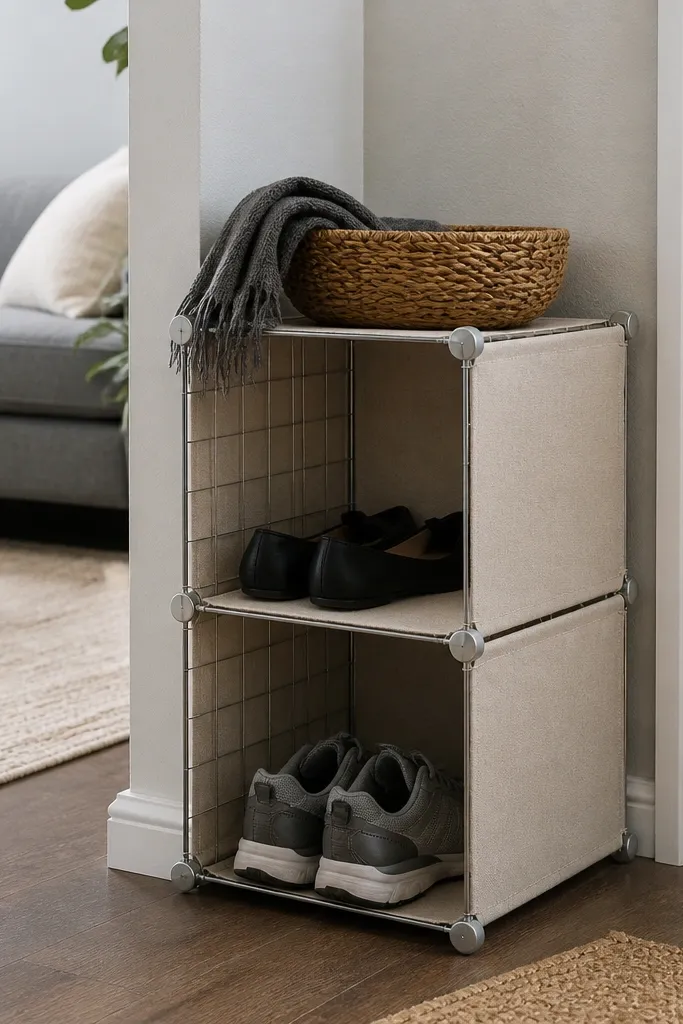
Wire racks are cheap and light, but they can look messy because you see everything — the soles, dust, and random clutter. Adding a fabric liner turns it into a clean, styled organizer that looks softer than bare metal. This is a great option for small apartments because you can slide it into a corner and still keep the visual lines tight. It’s best for everyday shoes that you’ll grab quickly, since fabric liners help hide the ugly bottom details.
Buy a stackable wire cube rack or a single cube unit, then measure each face panel to cut fabric slightly larger than the opening. Glue or staple fabric onto thin backing boards (even foam board works), then attach the panels to the rack using zip ties or small hooks. Finish by adding a flat shelf board on top if you want a landing spot for keys or a tray for small items.
Use washable fabric and choose a neutral like cream, taupe, or black so the liner doesn’t fight your shoes.
Skip stretchy fabric that sags — it makes the rack look uneven within a week.
3. 3-tier pallet plank rack with charred edges
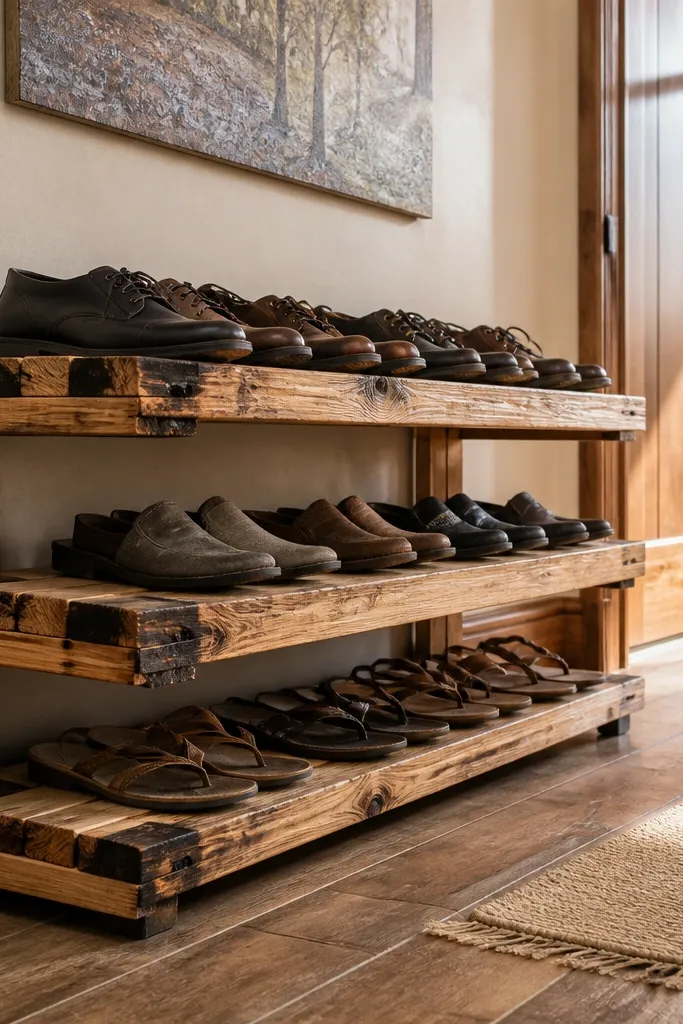
Pallet wood looks rough until you control the finish. Char the edges lightly and keep the faces sanded — you get that farmhouse contrast that photographs well from across the room. This rack is tough enough for multiple pairs and it looks great in kitchens turned entry zones or rustic living spaces. It’s especially good for boots and sneakers because the plank spacing can be set to hold different shapes without crushing them.
Disassemble a pallet and pick three straight plank lengths for the tiers and two side beams for the frame. Build a box frame with screws and wood glue, then cut plank supports so each tier has consistent spacing, around 7-8 inches between tiers for boots. Sand the faces to 150-180 grit, char the edges quickly with a torch, and seal with a matte clear coat so it stays clean.
Seal after charring, not before, so the finish doesn’t get sticky or patchy.
Don’t use unknown pallets that smell like chemicals — pick clean, stamped pallets and air them out.
4. Reclaimed door slab shoe rack with vertical hooks
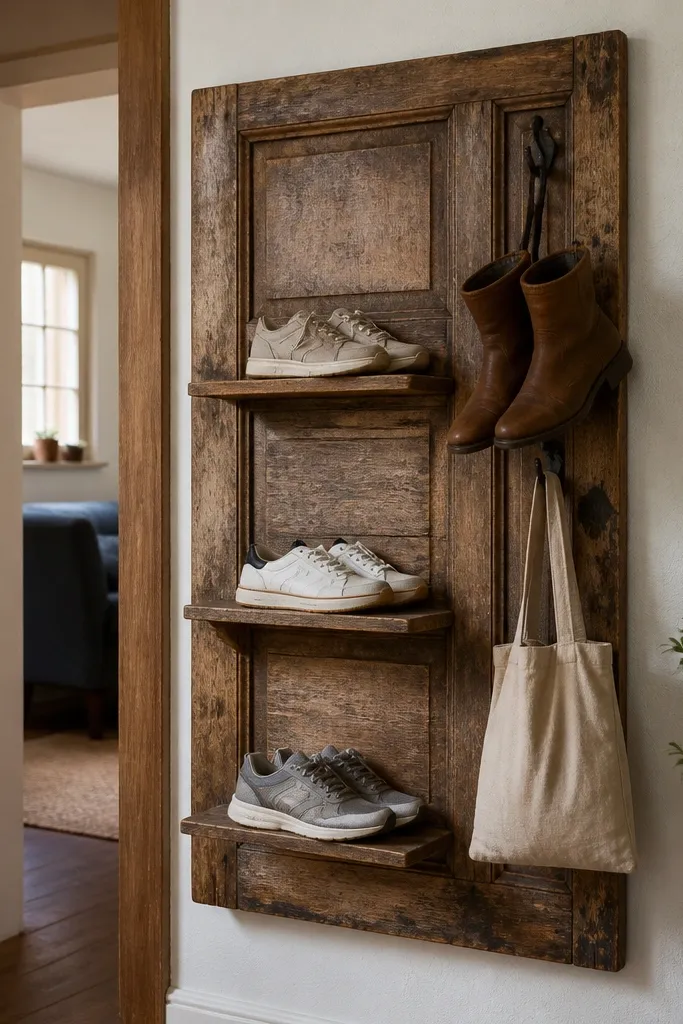
This is the statement option: a door slab gives you instant texture and a built-in grid vibe. Add vertical hooks and narrow shelves and you get two storage modes — shoes sit on the shelves, and bags or boot shafts hang on hooks. The look is dramatic because the door paneling creates natural lines that make the rack feel architectural. Works in entryways, mudrooms, and hallways where you want one big piece instead of a bunch of small organizers.
Cut the door slab to the height you want, then remove any hardware and sand the surface. Mark shelf positions so the openings are staggered: one row for sneakers around 6 inches tall, another for boots around 12-14 inches. Attach narrow cleats for shelves, screw in the shelves, then mount a line of hooks above each shelf using pilot holes and a level.
Use a matte black clear coat on the door if you want it to look modern instead of rustic-heavy.
Don’t hang it without wall anchors — a door slab racks out fast under shoe weight.
5. Drawer-front shoe rack with hidden compartments
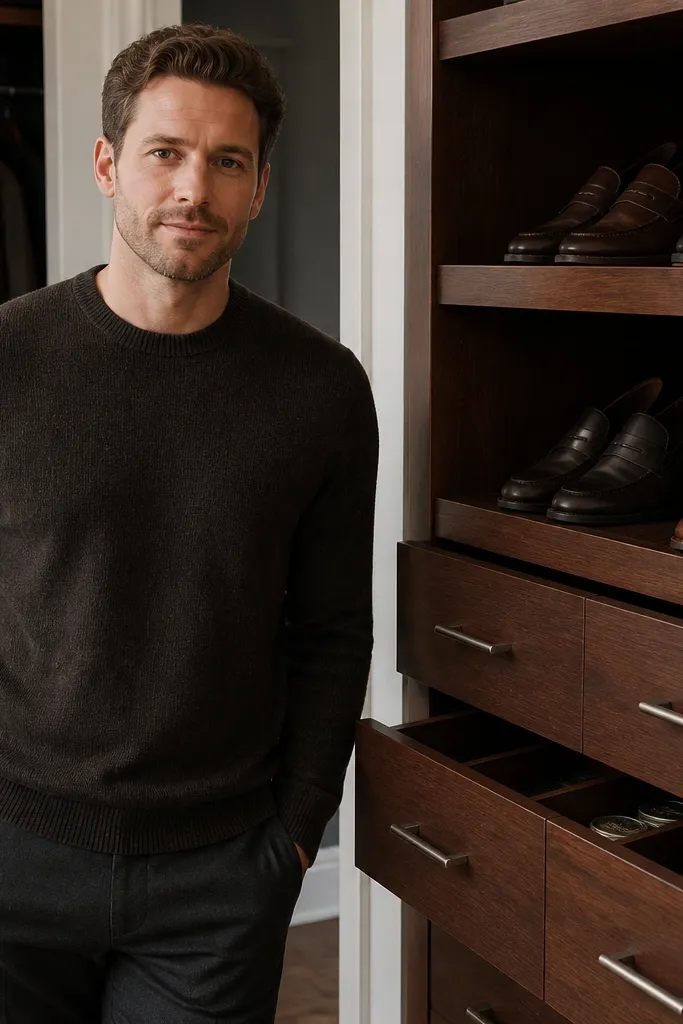
Drawer fronts make shoe storage look like furniture, not a storage bin. The open shelves handle shoes you use daily, and the hidden compartments let you stash odds and ends like boot creams or backup insoles. The visual payoff is the matching hardware and the clean, repeated shapes. Best for bedrooms and closets where you want shoes visible but you also want the clutter hidden.
Build a simple plywood frame with three open shelves, then cut the drawer fronts to match the frame openings for the lower compartment. Install hinges on the drawer fronts for the hidden section and use magnetic catches so they close quietly. Sand edges, prime, and paint the fronts the same color as the frame, then add pulls for that furniture look.
Editor's noteUse 1/2-inch plywood for the frame so the drawer fronts stay aligned and don’t sag.
Skip thisDon’t skip a test-fit of the drawer front spacing — drawer hardware looks crooked instantly in photos.
6. Corner ladder shoe rack with two shelf planks
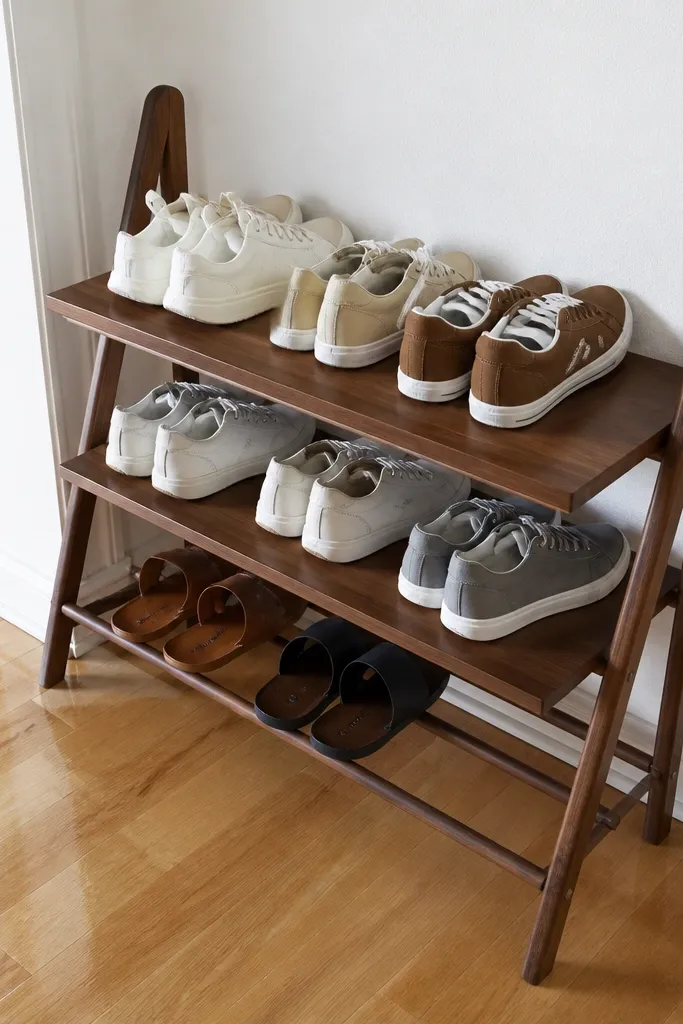
A ladder-style rack is photogenic because it creates vertical rhythm and gives shoes a “display” feel. Put it in a corner so you use dead space and keep the floor open. This version uses two strong horizontal planks for sneaker rows and leaves the side rungs for flats or sandals. It’s a good choice if your shoes are mostly flat and you want a clean, airy look.
Cut two ladder side pieces and attach rungs spaced about 8 inches apart so shoes sit without wobbling. Add two thick shelf planks across the middle at about 10 inches from the floor so sneakers sit level. Sand, then stain or paint the ladder, and anchor the unit to studs with two brackets at the top.
Editor's noteUse rubber pads on the feet — they stop sliding and protect your floor finish.
Skip thisDon’t rely on rungs alone for heavy boots — the shelf planks carry the weight better.
7. Stacked bookcase-style rack with angled shoe lip
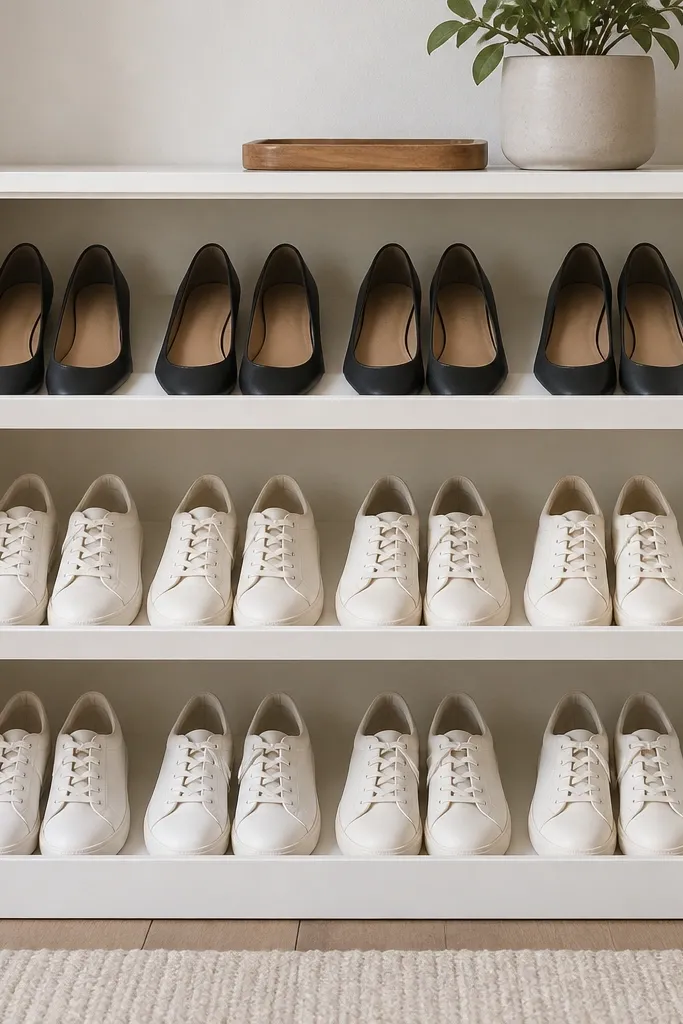
Shoes look better when they’re tilted slightly so toes point outward and pairs don’t slump. This mini bookcase style does that with an angled lip on each shelf, which also makes it easier to grab without digging. The look is clean and modern because it’s boxy and symmetrical. It’s best for flats, sneakers, and low-top shoes where you want a crisp, organized display.
Build a small plywood bookcase frame with three columns and three rows, then cut shelf boards for each row. Add an angled lip by screwing a narrow strip at about a 15-20 degree angle along the front edge of each shelf. Paint everything white or a soft greige, then seal with a satin top coat so it wipes clean.
Editor's noteCut shelf lips with the same angle using a stop block so every row looks identical.
Skip thisSkip gloss paint — it shows scuffs and fingerprints more than satin.
8. PVC pipe frame with wood slat top and baskets
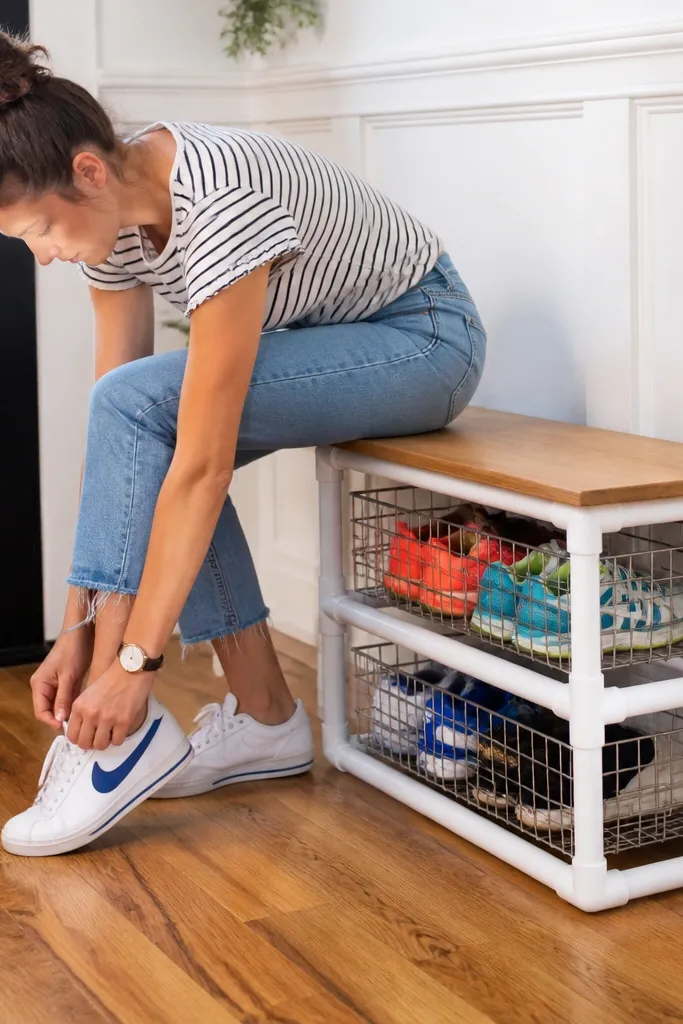
PVC looks cheap if you leave it raw, but framed correctly it looks sleek and clean. This rack uses PVC for the structure and wood slats for the top surface, then adds baskets so you can keep shoes contained while still showing colors. It’s great for small entries because it’s lightweight and easy to rearrange. Use it when you want a minimal look and you don’t mind shoes sitting in shallow baskets rather than standing open.
Cut PVC into four vertical legs and connect with elbow and tee fittings to build a rectangular frame, keeping corners square. Add a wood slat top for stability and to give you a place for a tray. Install basket supports by tying or screwing small brackets to the frame rails, then set baskets on the supports and secure them with zip ties so they don’t slide.
Sand PVC lightly before painting and use a bonding primer so the finish doesn’t chip.
Don’t make the baskets too deep — shoes will hide and the rack won’t look tidy.
9. Shoe rack from picture rails with a front-facing grid
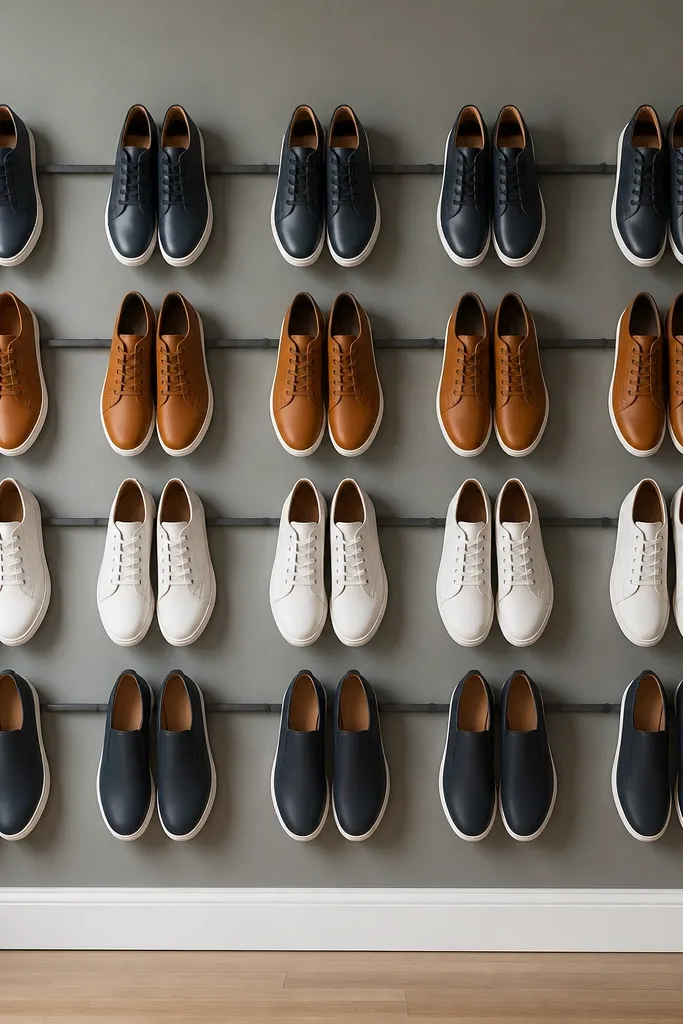
Picture rails are underrated for shoe storage because they create a clean grid without heavy construction. You mount horizontal rails across a wall, then hang small front-facing supports that keep shoes upright. The result looks like a designed wall feature, not a closet afterthought. This works best for compact shoe collections like flats, sandals, and low sneakers.
Install two or three picture rails on wall studs, spacing them so each shelf line sits about 7-8 inches apart. Create shoe supports from thin wood strips or metal brackets and attach them to the rails so shoes sit with the toe facing outward. Add a simple backing board or frame trim so the wall behind doesn’t look messy, then paint everything the same matte color.
Use a level and mark stud locations — crooked rails make the whole rack look off instantly.
Don’t hang supports without checking load — thin strips can bend under boot weight.
10. Cinder block + wood top shoe rack with stain-and-seal finish
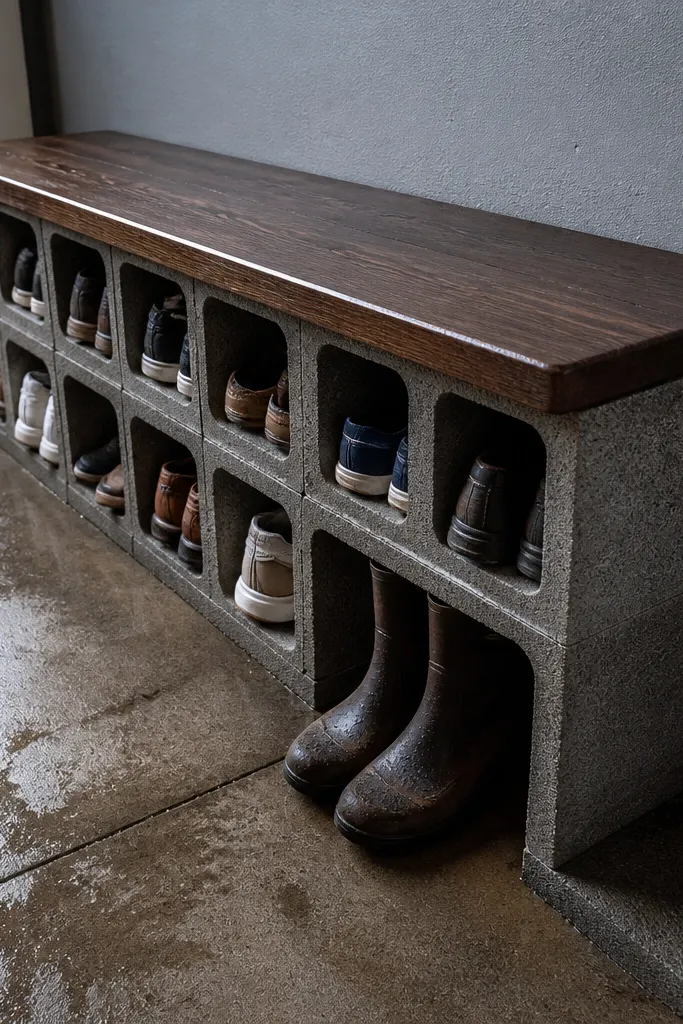
Cinder blocks look industrial, but with a stained wood top and clean layout they become a modern entry feature. The block openings hold shoes upright and let air flow, which helps after rainy days. This is one of the fastest builds that still looks intentional because the blocks give you built-in geometry. Best for sneakers, sandals, and shoes that can handle open storage without getting scuffed by dust.
Choose blocks with consistent hole sizes and arrange them in a tight grid, leaving space for your longest shoe length. Cut a wood top board spanning the width and secure it with screws and wood blocks or brackets. Sand, stain, and seal the wood so it wipes clean, then place shoes directly into the openings with the toe pointing the same direction.
Editor's noteAdd felt pads or rubber feet under the blocks to protect floors and reduce sliding.
Skip thisDon’t skip sealing the wood top — water spots and scuffs show quickly.
11. Sliding pallet crate shoe rack on casters
If you want your shoe storage to look like furniture, build it into a crate with a sliding front. Casters keep it easy to move for cleaning, and the crate walls stop shoes from spilling forward. It’s also photogenic because you get a chunky frame and a clean front panel line. This works best for families who need quick access and want shoes contained behind a single face.
Build a crate frame from pallet wood, square the corners, and install a front panel that slides on side rails. Add two or three internal dividers so shoes sit in neat rows, then mount casters to the bottom corners. Sand the front face smooth, apply stain or paint, and finish with a clear coat so it handles daily use.
Editor's noteUse drawer slides or metal channel rails for the sliding front so it doesn’t bind.
Skip thisDon’t make the dividers too tight — wet shoes swell and will jam the front.
12. Round dowel shoe rack with standing sandals display
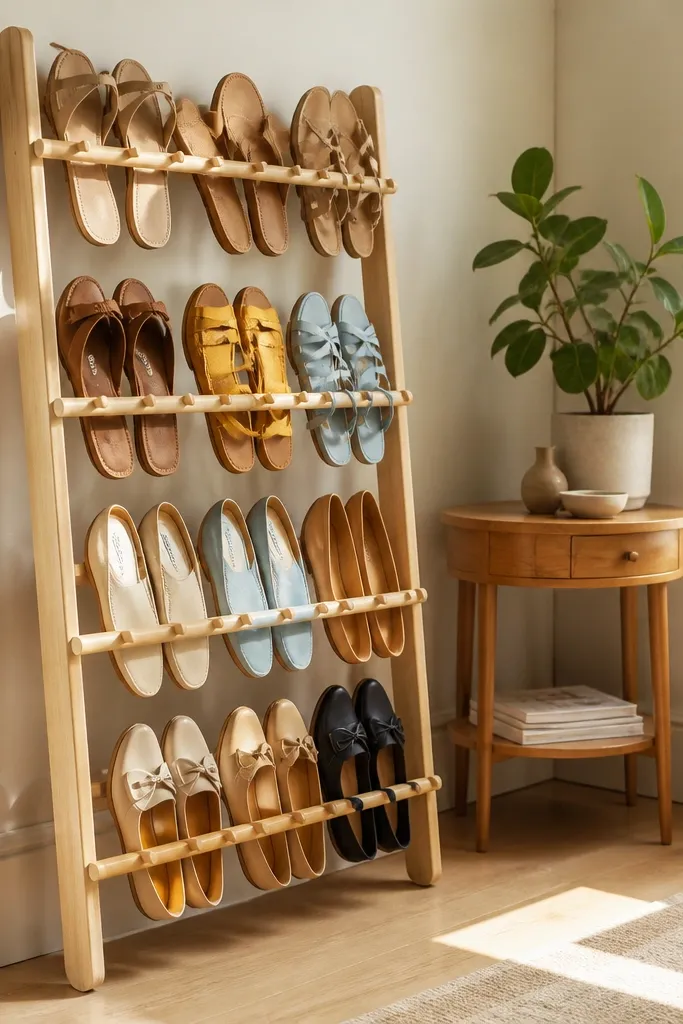
This one looks airy and styled because the round dowels create soft curves instead of harsh shelf edges. It’s perfect for sandals and flats because the open structure lets you see straps and colors. The rack is also easy to photograph because it doesn’t hide the details of your shoes. Put it in a sunny corner or near a mirror where the display is part of the room.
Build a simple rectangular frame from plywood, then drill evenly spaced holes for dowels, about 1 inch diameter. Insert dowels so they form a grid inside the frame, and add a backer board so shoes don’t fall through. Sand and paint the frame and dowels, then place sandals so the heel rests against the dowel grid.
Editor's noteDrill holes with a drill press or a steady guide so dowels sit straight and the grid looks clean.
Skip thisSkip a backer board — without it, straps slip and the display looks messy fast.
13. Pegboard shoe rack with paint-matched hooks
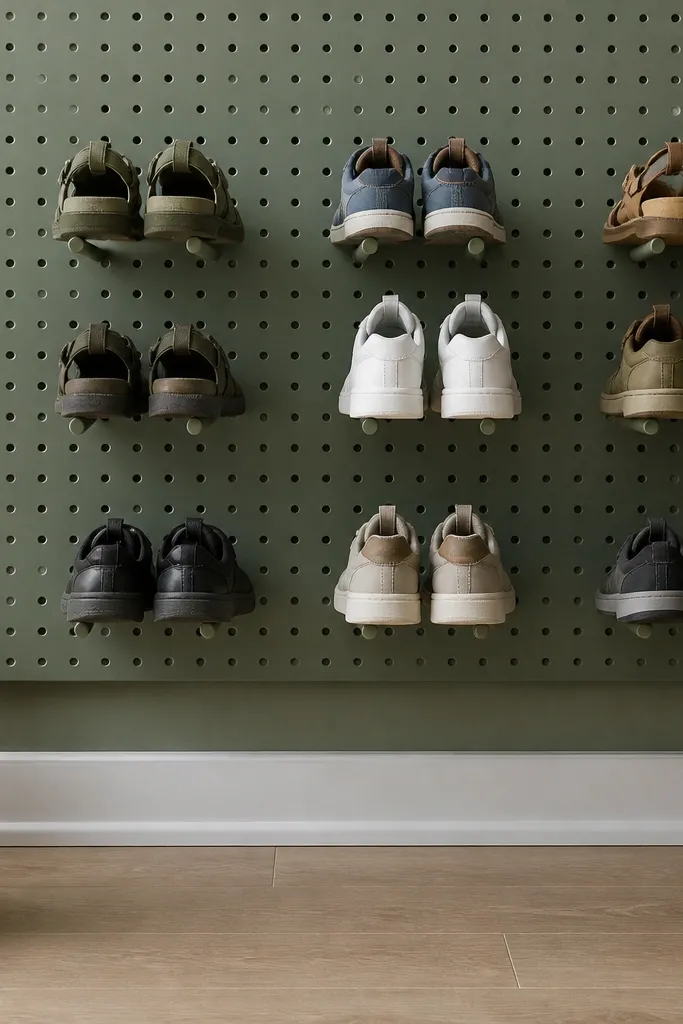
Pegboard gives you that gallery-wall look and it’s one of the most flexible budget shoe rack ideas because you can change hook spacing as your collection changes. Paint the pegboard and hooks the same color so it looks intentional instead of like craft storage. This design works best for sneakers on their sides, sandals, and flats that hang cleanly. It’s also great for entryways where you want to keep shoes off the floor but still visible.
Mount pegboard to studs with a solid backing strip behind the top edge, then mark horizontal hook rows based on shoe height. Use heavy-duty peg hooks and hang shoes so the toe angles slightly downward for grip. Paint pegboard and hooks, then add a small bottom ledge board if you want sneakers to sit more stable than hanging.
Use a matte paint on pegboard — it hides scuffs and keeps colors looking calm in daylight.
Don’t mount pegboard only to drywall anchors — shoe weight pulls it loose over time.
14. Upright plywood shoe rack with hidden angle supports
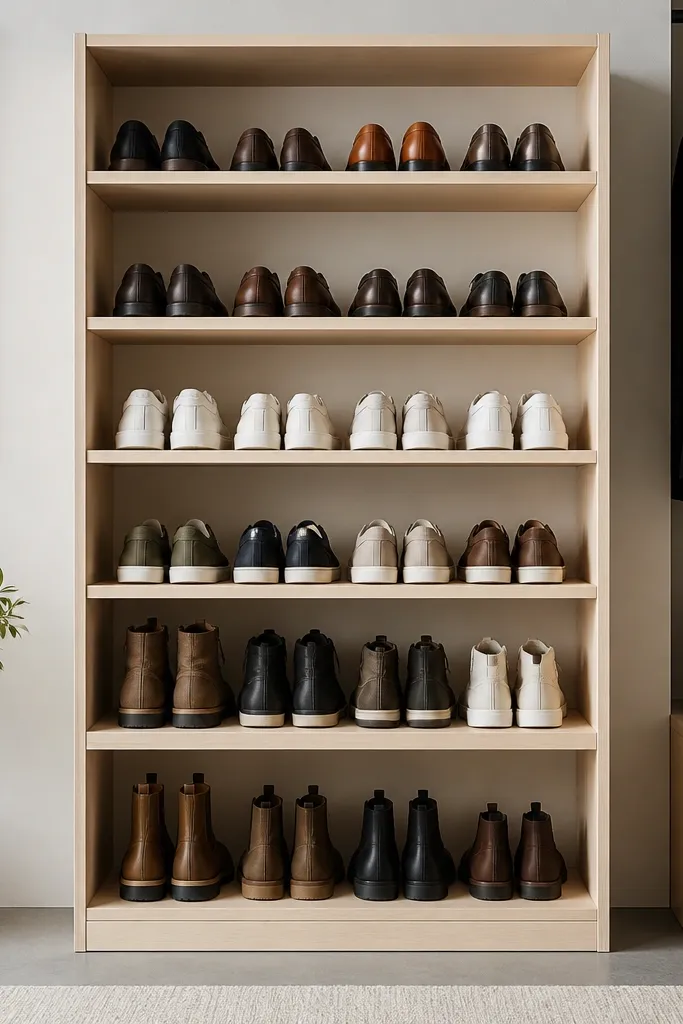
This is a clean, modern rack that hides the messy joinery inside. The angled supports keep shoes upright and aligned, so the front looks calm and the back does the work. If you want a design that looks like it came from a furniture store, this is the direction: smooth plywood faces, consistent lines, and no exposed hardware. It’s best for sneakers, flats, and low boots since the angle supports keep shape without crushing.
Cut two upright plywood side panels and a set of shelf boards to build a narrow frame, then add internal angle braces using triangular scraps. Space shelves so each row has about 7 inches of vertical clearance for sneakers and 10-12 inches for low boots. Glue and screw the internal supports first, then attach the shelf boards, sand edges, and finish with paint or a clear matte sealer.
Round over the front edges slightly (even a small 1/8 inch radius) so it looks softer and feels better to handle.
Don’t leave raw plywood edges — they chip and look unfinished in every photo.
15. 2x4 frame shoe rack with slatted back and front panel
This rack looks solid because it has a real frame. The slatted front panel hides some visual clutter while still letting you see shoe colors. It’s a smart pick for entries where people kick off shoes fast and you want the rack to hold up without wobbling. The look is bold and architectural, and it photographs well from the side because the slats create depth.
Build a rectangular frame using 2x4 lumber, then add internal shelf supports spaced for your shoe heights. Install a slatted front panel using thin strips, leaving gaps that align with shoe rows so shoes don’t catch. Add a slatted back or cross brace so the rack doesn’t sway, sand everything smooth, then paint the frame and stain the slats if you want contrast.
Editor's noteClamp the frame square before drilling — crooked frames make the slats look off even if the shelves are straight.
Skip thisSkip cheap screws — use structural screws so the rack stays tight under daily use.
16. Vintage suitcase shoe rack with flip-down top
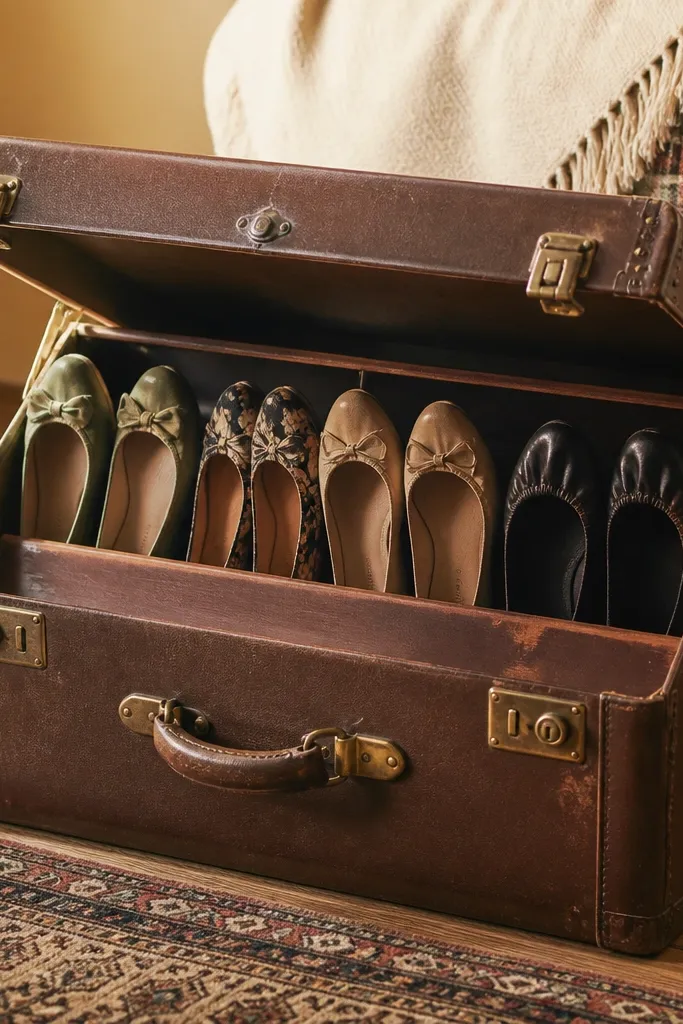
Suitcases look cute, but the build only works if you control the opening and support the shoes so they don’t tip. This idea gives you a compact storage box with a flip-down top that becomes a lid and a display face. It’s great for seasonal shoes or a small daily rotation. The look is instantly photogenic because the suitcase texture and hardware read like decor, not storage.
Find a sturdy vintage suitcase and reinforce the base with a sheet of plywood inside using screws. Add a divider board so you get two rows or two compartments, then attach a hinge and latch setup to the lid if it doesn’t already have one. Line the inside with fabric or felt so shoes don’t scuff, then seal the exterior with a clear protective coat.
Editor's noteUse felt on the divider edges — it keeps straps from squeaking and prevents wear.
Skip thisDon’t store heavy boots in a flimsy suitcase — reinforce the base or it will bow.
17. Industrial pipe rack with plywood grid backing
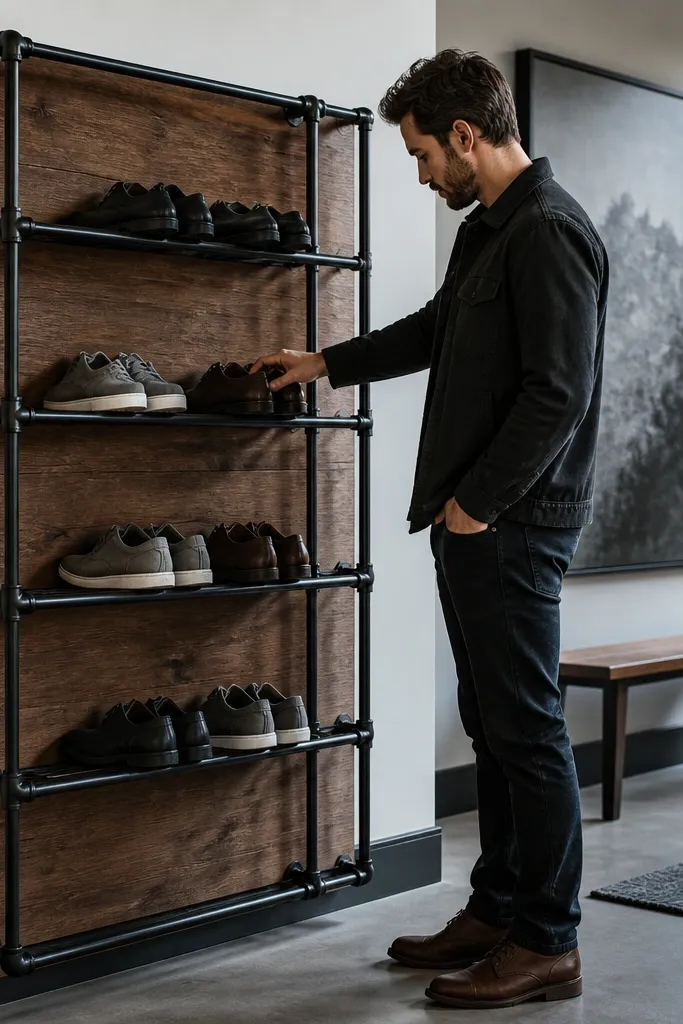
Industrial pipe racks look expensive because the geometry is clean and the frame reads as intentional structure. A plywood grid backing makes it look even more designed by giving the rack a solid visual plane behind the shoes. This is one of the best budget shoe rack ideas if you like a modern, masculine entry style. It works for sneakers, flats, and boots as long as you space the shelves correctly and use sturdy wood planks.
Build a rectangular frame using black iron pipe fittings and cut plywood shelves to fit between the pipes. Add a backer board behind the shoes or install a thin plywood grid so the shoes sit against something stable. Sand and paint the wood shelves, then bolt the shelves to the pipe frame with flange fittings so everything stays square.
Editor's notePaint the pipe frame before assembly if you want fewer drips and a smoother black finish.
Skip thisDon’t leave the back open without a backer — shoes lean and the row alignment falls apart.
18. Built-in look shoe rack using floor-to-ceiling tension rods
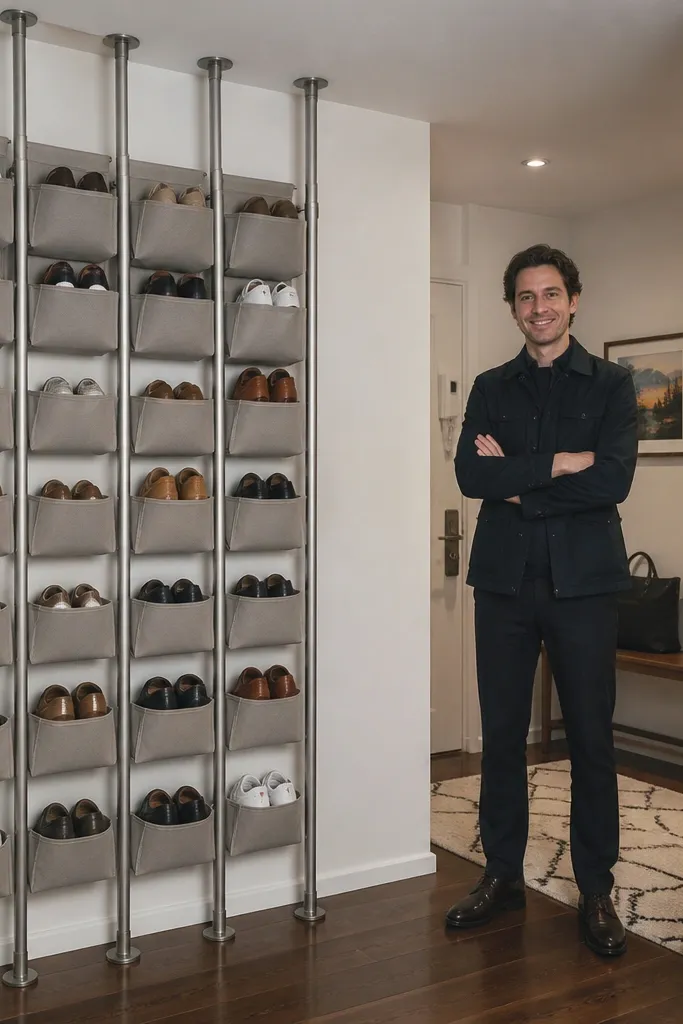
This is how you get a built-in look without carpentry. Tension rods create vertical rails, and you hang fabric shelves or shoe organizers so the column stays straight and tidy. The look is surprisingly clean because it’s all vertical lines and consistent shelf height. It’s best for apartments, renters, and anyone who wants to store a small shoe rotation without drilling into every wall. Use it in closets, laundry rooms, or behind doors.
Measure the height between floor and ceiling or between two solid points, then install tension rods with brackets for extra stability. Hang fabric shoe shelves at fixed heights, starting around 8 inches for low shoes and 12-14 inches for boots. Add a back strap or hook so the fabric doesn’t bow, then tighten rods until the unit feels firm.
Editor's noteUse shelves with rigid panels or stiff backing so the front edge stays flat on camera.
Skip thisDon’t overstuff the top shelf — pressure makes the fabric sag and the whole column looks uneven.
19. Step-style shoe rack with alternating open and closed faces
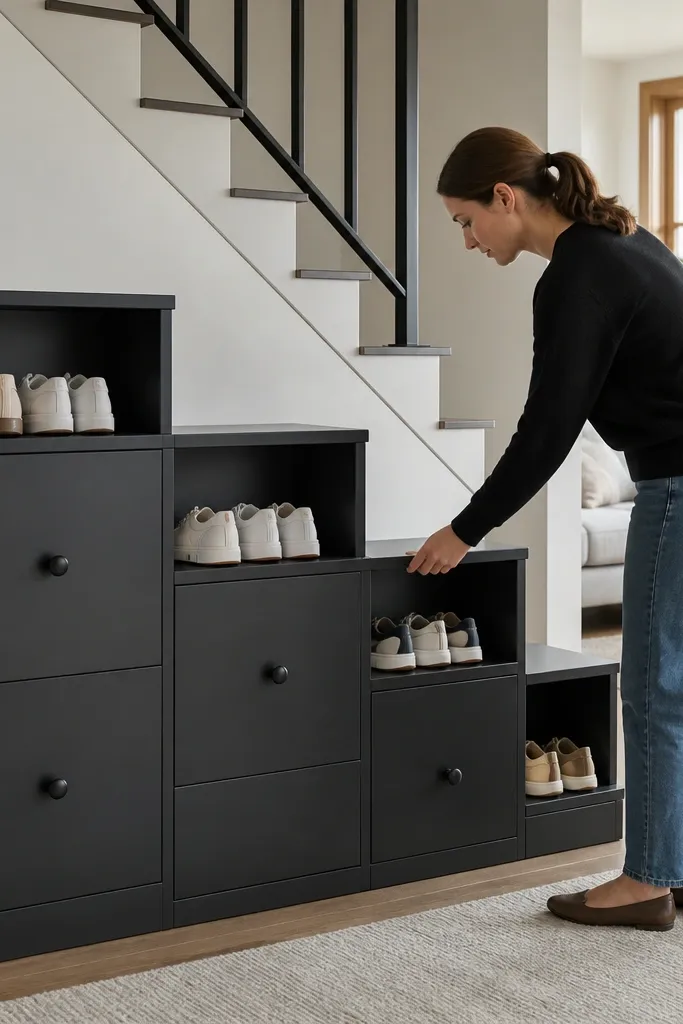
A step-style rack looks dynamic because each row sits at a slightly different height, and that makes the shoes feel like a designed display. Adding a few closed faces (small cabinet doors or hinged fronts) lets you hide scuffed pairs or shoe care items while keeping your best-looking shoes up front. This is a great pick if you want your rack to look like furniture and you don’t want to see everything at once. Works best for sneakers and flats, plus short boots if the middle rows have enough height.
Build a stepped plywood carcass with two or three levels, then add shelf boards where you want open rows. For closed sections, cut small door panels and install hinges with magnetic catches so the doors shut flush. Sand, paint the carcass, and install a simple handle style that matches your hardware elsewhere in the room.
Use the same door style across every closed section so the pattern looks intentional.
Skip mismatched door sizes — tiny differences show up in photos as “DIY weird.”
20. Magnetic strip shoe rack for metal-capped styles
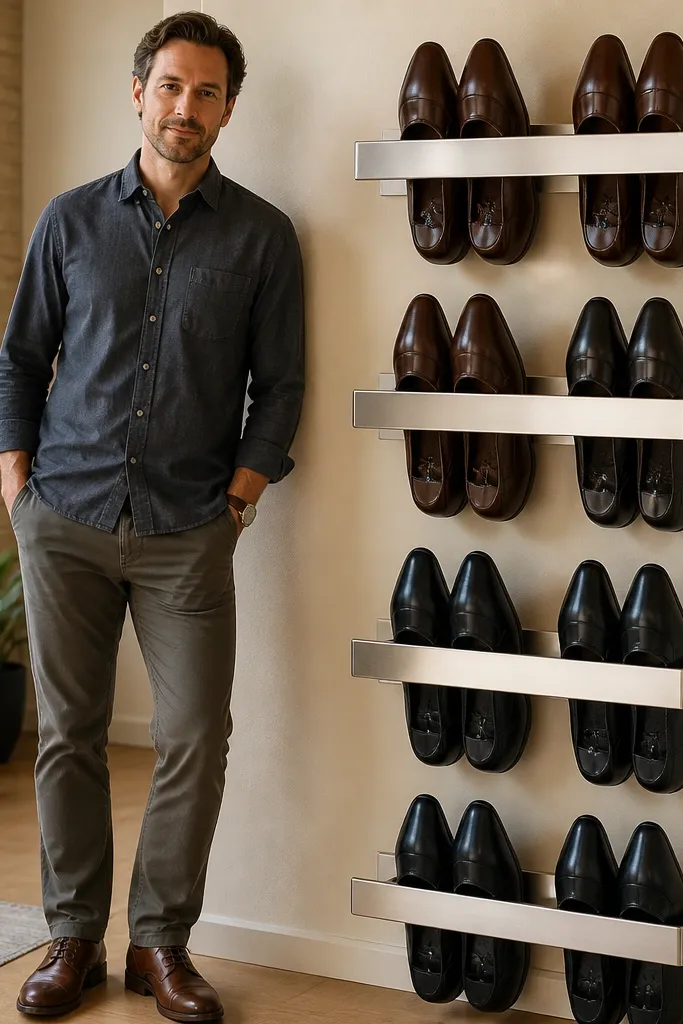
This is a clever aesthetic trick: if your shoes have metal loops or you attach small metal tabs to the heel, a magnetic strip can hold them in neat rows. The look is minimal and graphic because shoes line up in straight vertical bands. It’s best for a small collection of shoes you rotate often, and it works great in a tight entry where floor space is scarce. The visual payoff is crisp alignment — shoes stay upright without leaning on each other.
Mount a long magnetic strip to studs at about 18-24 inches from the floor, then add a narrow base shelf below for shoes that need extra support. Attach small metal tabs to the inner heel area of each shoe or use existing metal loops if you have them. Arrange shoes so the toe angles slightly outward, and use a short felt bumper where the shoe touches the wall to prevent scuffs.
Paint the base shelf and add a thin felt edge so the setup looks clean and doesn’t scrape shoes.
Don’t use this for heavy boots — magnets can’t replace structural support.



