
1. Slim Walnut Shelf + Brass Mug Rail Wall Station
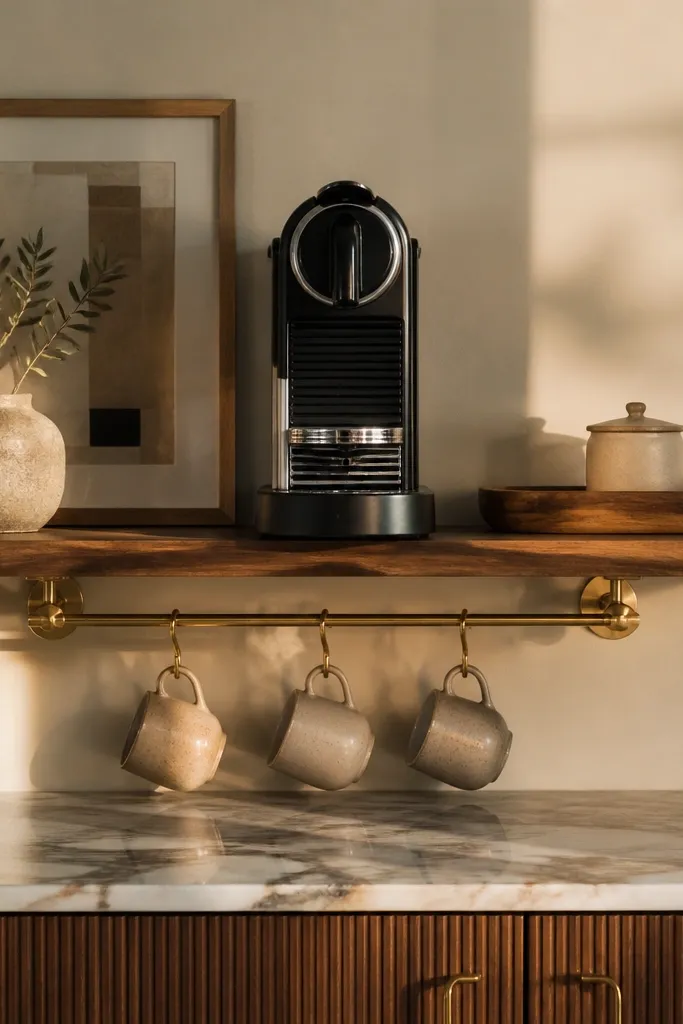
This is the “clean café wall” look without building a full cabinet. A single slim walnut shelf gives you a warm, photogenic base, while a brass mug rail instantly makes the station feel styled. Center the Nespresso machine on the shelf so the drip area sits in the middle and the visual weight is balanced. Add a small tray under the machine for used pods and spills — it’s the kind of detail that keeps the counter looking crisp even on busy mornings. This setup works best in kitchens where you want to keep the station off the main counter but still have everything within arm’s reach.
Start by cutting a shelf board to match your machine width plus 6 inches total (3 inches extra on each side). Mount the shelf with two heavy-duty wall brackets, then attach a brass mug rail under the shelf lip using short screws. Place the Nespresso machine centered on a thin anti-slip mat so it doesn’t slide while you open the lever. Finally, add a shallow catch tray on the shelf behind or beneath the machine and paint or stain the shelf if you’re not using pre-finished wood.
Use a felt or silicone anti-slip sheet under the machine — it stops micro-movement and reduces rattling noise.
Don’t mount the mug rail too high or your mugs will block the machine controls.
2. White Floating Shelf with Black Cord Channel Coffee Bar
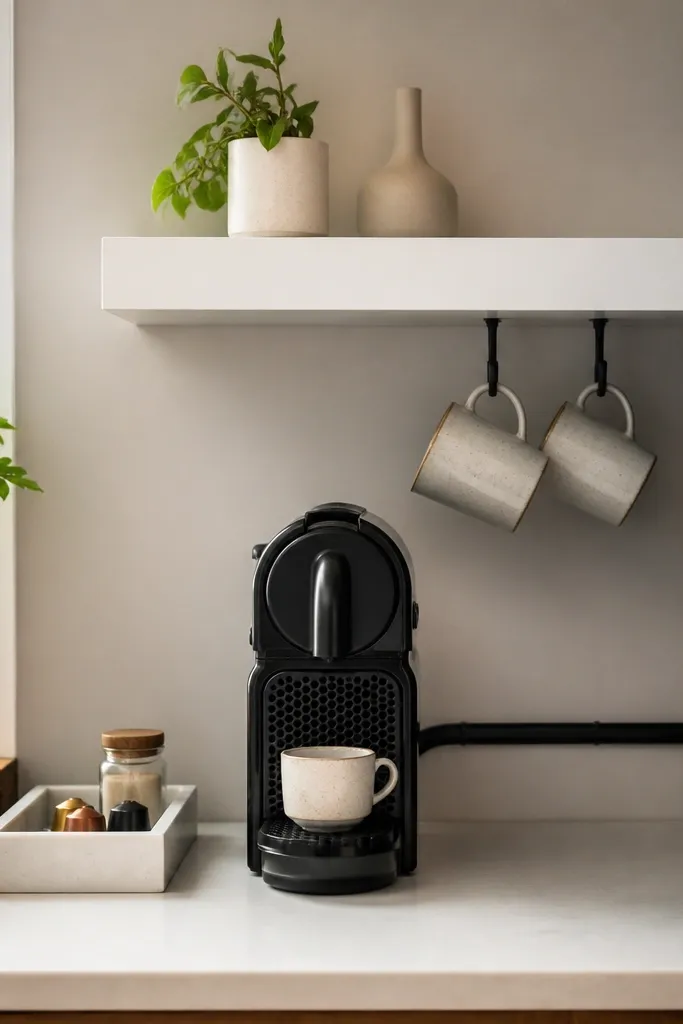
If you hate seeing cables and clutter, this is the look. A white floating shelf keeps everything bright and modern, while a black cord channel makes the back of the station look intentional in photos. The station is designed around clean negative space: machine centered, cups aligned, and a small ingredient tray tucked at one end. It also hides the “day two mess” because you can quickly wipe the shelf surface and the cord cover keeps stray bits from collecting behind the machine. This setup suits small kitchens and renters because you can mount it with minimal carpentry.
Pick a shelf depth of about 10 to 12 inches so mugs fit without overhang. Install a black cord channel along the wall or under-shelf area before you place the machine, then route the power through the channel so it doesn’t hang. Set the machine on a silicone mat and keep the drip tray area clear of items. Add a small black tray or a white ceramic canister on the far side for pods or sugar and keep everything within the shelf footprint.
Pre-drill for the cord channel and use a level — tiny crookedness shows up immediately on a white background.
Don’t stack pods on the shelf edge; it breaks the clean line and makes the station look crowded.
3. Repurposed Dresser Drawer Pod Organizer + Countertop Nespresso Station
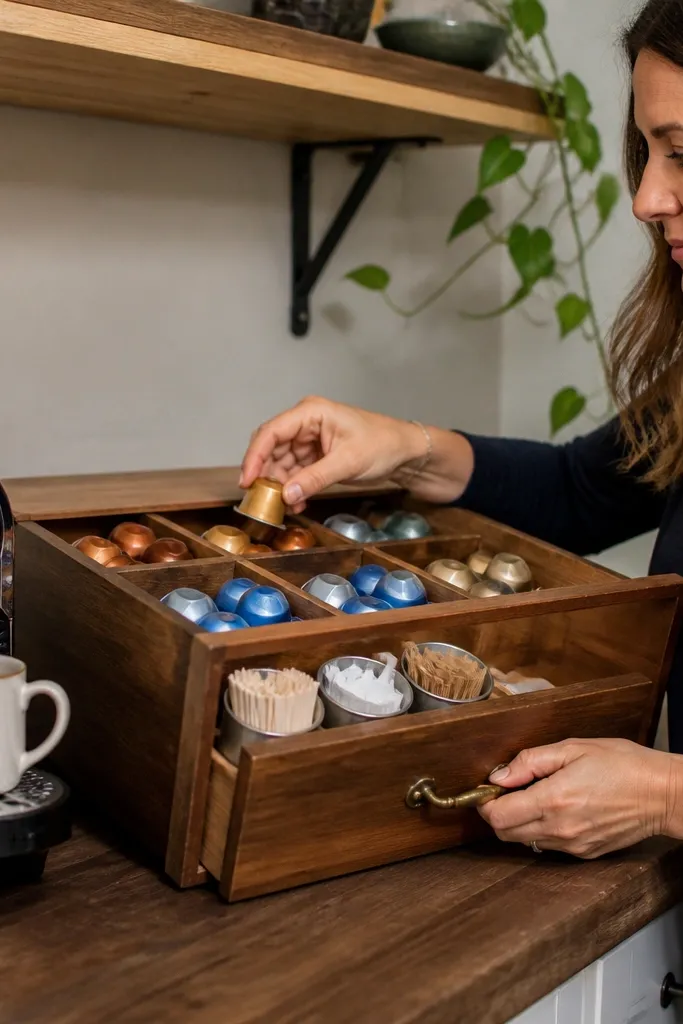
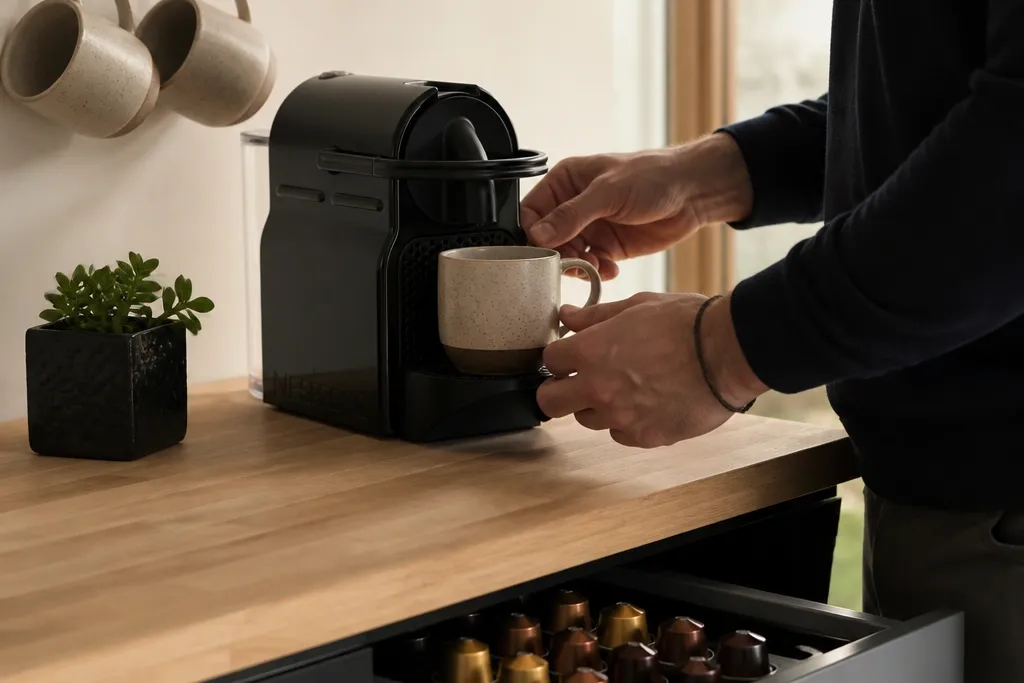
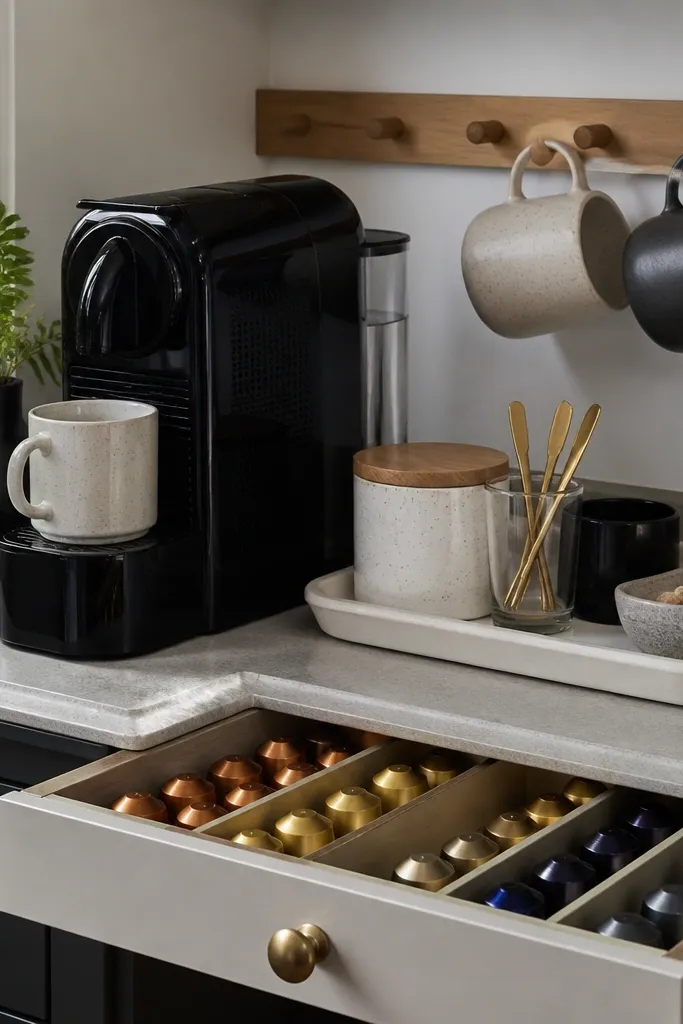
This idea solves the real problem: pods are always scattered, and countertop storage looks messy. A repurposed drawer gives you a built-in container for pods, stir sticks, and sweeteners while keeping the counter surface clear. Pair it with a simple countertop station — machine on one side, small tray on the other — and you get a tidy workflow. The drawer front looks vintage and charming, but the inside stays practical. It’s great for kitchens that already have wood furniture and need one more piece that matches the room.
Remove the drawer from an old dresser and sand the inside. Measure your pod count and install small dividers using thin wood strips or foam board, so each row holds a pod type. Paint or stain the drawer interior and let it dry fully. Place the Nespresso machine on the countertop with a silicone mat under it, then position the drawer unit right beside the machine and add a shallow tray for used pods and cups.
Editor's noteLabel dividers with small paper tags behind clear tape — they stay readable and don’t smear like marker.
Skip thisDon’t skip sanding and sealing the drawer; cheap paint can chip under daily pod handling.
4. Countertop Cabinet Door Coffee Station with Hidden Storage
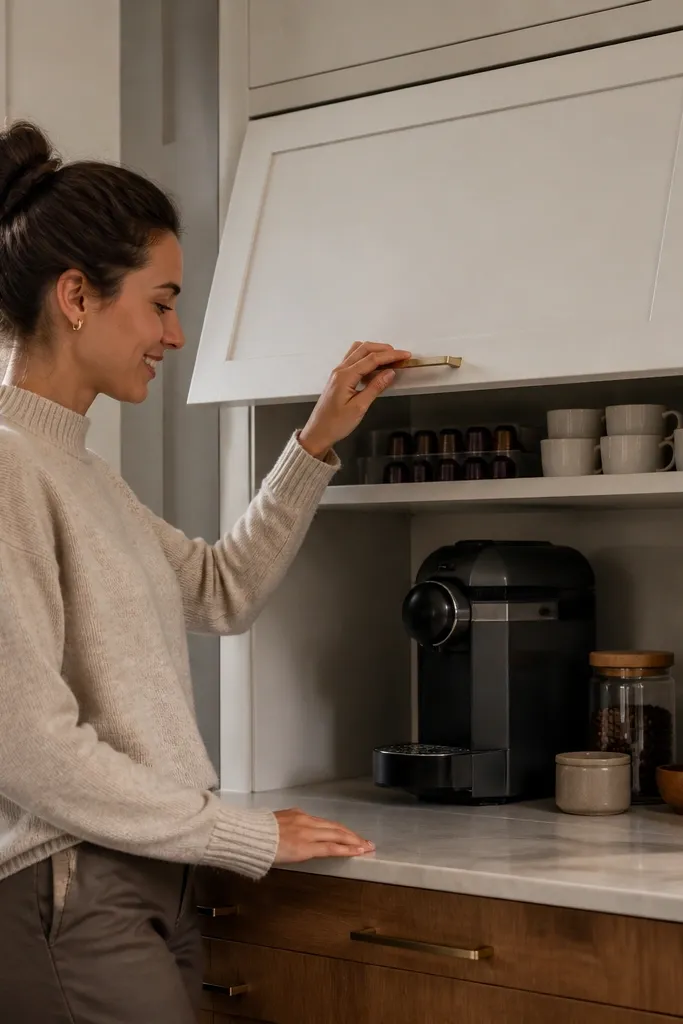
This is the “everything disappears” setup, and it looks expensive even when it’s DIY. A cabinet door (or a simple hinged panel) over the machine area hides pods, extra cups, and loose accessories when you’re not using it. When the door is open, you get a clear work zone with a clean backdrop for photos. The key visual trick is keeping the door and frame finishes consistent with your kitchen cabinet hardware. This is ideal if your kitchen counter is busy and you want the coffee station to look like a built-in.
Build a simple base cabinet box or use a small pre-made cabinet and install a hinged door panel over the machine zone. Cut a shelf or platform inside for the machine to sit on, leaving clearance around the water tank. Add a pull-out bin or a small tray inside for pods so they stay contained. Install a magnetic latch on the door and add a cable routing hole or notch so the power cord isn’t pinched.
Add a small magnetic catch and a soft-close hinge if you can — the door feels smoother and stays aligned.
Don’t block access to the water tank; if you have to move the door every time, the station stops being convenient.
5. Black Metal Frame + Reclaimed Wood Tray Coffee Station
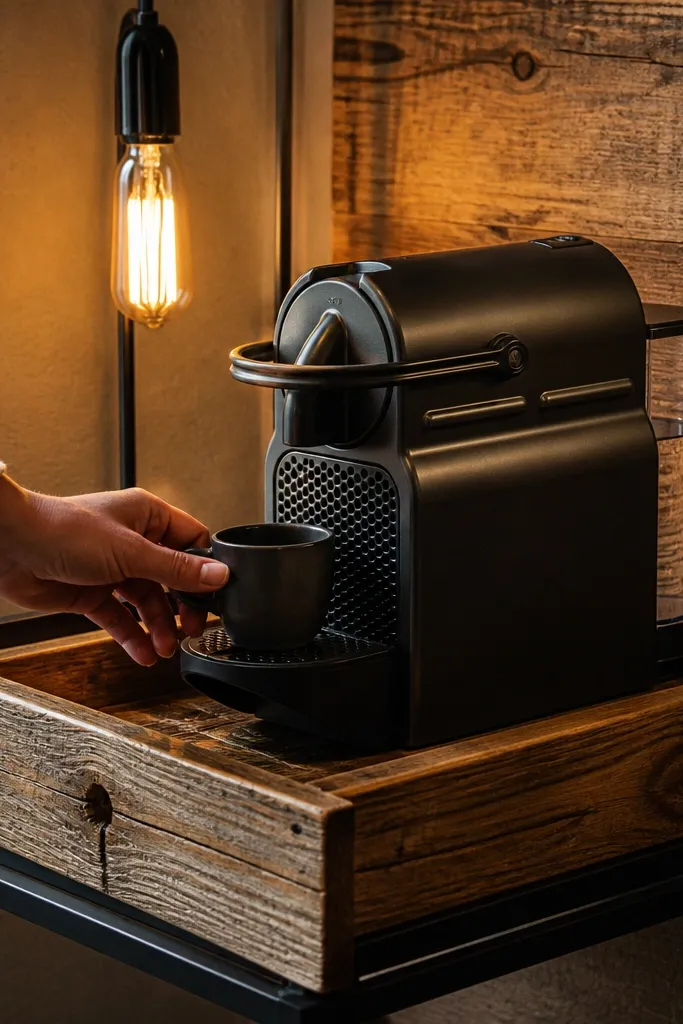
This one looks like a modern bar cart setup but stays anchored. A black metal frame gives you sharp lines, and reclaimed wood adds texture that photographs beautifully under warm light. Put the Nespresso machine on a recessed wood tray so spills and drips stay contained. The visual win is the contrast: dark metal, warm wood, and the machine centered like a display. This works great in kitchens with industrial touches, or anywhere you want the station to feel like a dedicated coffee corner instead of a random countertop area.
Build or buy a simple metal frame with a top surface that can hold a tray — aim for a footprint a few inches wider than the machine. Use a reclaimed wood board as a tray and add a raised lip (about 1/2 inch) around the edges. Seal it with food-safe clear coat and let it cure. Set the machine on the tray with a silicone mat and add a small cup rack or hooks on the side of the frame.
Use felt pads between the tray and metal frame so the wood doesn’t rattle and the tray stays stable.
Don’t use an unsealed reclaimed board; drips soak in and leave dark spots.
6. Bamboo Cutting Board Backplate with Jute Cup Hooks
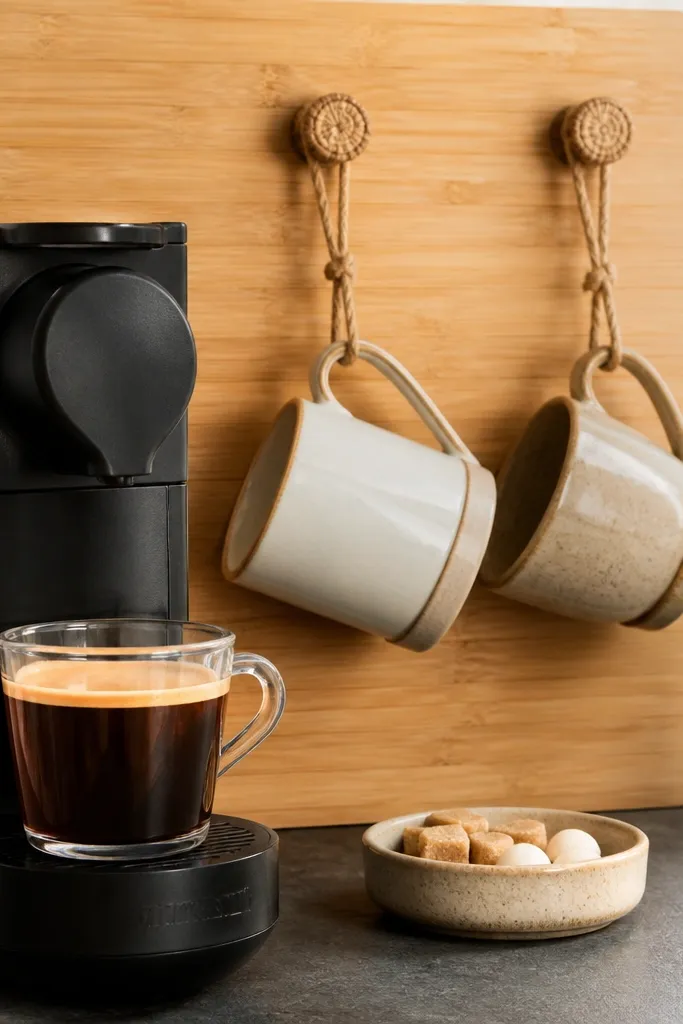
This is a warm, cottage-modern look that still feels organized. A bamboo cutting board backplate gives you a natural backdrop behind the machine, so the station looks cohesive instead of scattered. Add jute cup hooks or simple hooks with natural twine so mugs hang in a way that’s visible and easy to grab. The backplate also protects the wall from splashes and makes wipe-downs simple. This setup is perfect for people who want a coffee station that looks cozy without turning into a clutter zone.
Hang or place a large bamboo cutting board behind the machine area, centered with the machine. Install a small rail or individual hooks on the board’s top edge for mug handles. Place the Nespresso machine on a drip tray mat, then add a small organizer tray on the counter for pods and sweeteners. Seal the bamboo with a food-safe finish if it’s unfinished, and keep the hooks tightened so they don’t slip over time.
Use removable adhesive pads or wall-safe anchors for the hooks if you rent, then swap positions without damaging the wall.
Don’t hang mugs too low; keep handles above the machine line so you can open it without bumping cups.
7. Two-Tier Corner Nook Coffee Station with Lazy-Susan Pods
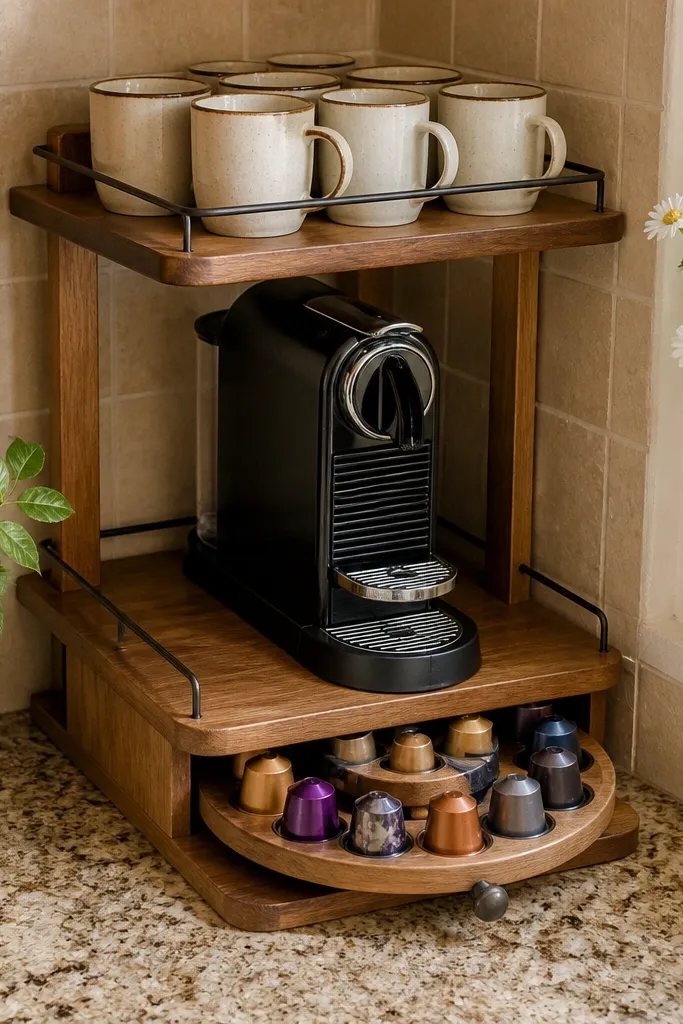
Corners are wasted space unless you build for them. A two-tier corner setup lets you keep mugs at eye level and pods within reach, without blocking pathways. Put a small Lazy Susan in the lower tier for pods — it’s visually tidy because the pods stay contained in a circle instead of spilling into bins. The top tier can hold a small canister set for sugar and stir sticks, keeping the look intentional. This is a strong choice for narrow kitchens where you need storage that doesn’t eat counter width.
Measure the corner and build a compact L-shaped base or use corner shelves with a stable back. Mount or attach the top shelf so it sits about 14 to 16 inches above the lower shelf surface. Place the Lazy Susan on the lower tier and secure it so it doesn’t wobble. Mount a small peg rail or hook strip on the side for mugs, then set the Nespresso machine on the corner shelf area with a non-slip mat and a drip tray liner.
Editor's noteUse a clear acrylic Lazy Susan insert for pods so the labels stay readable and the whole circle looks neat.
Skip thisDon’t crowd the corner with too many items; keep the shelf surfaces to three zones max.
8. Glass + Chrome Countertop Canister Trio Pod Station
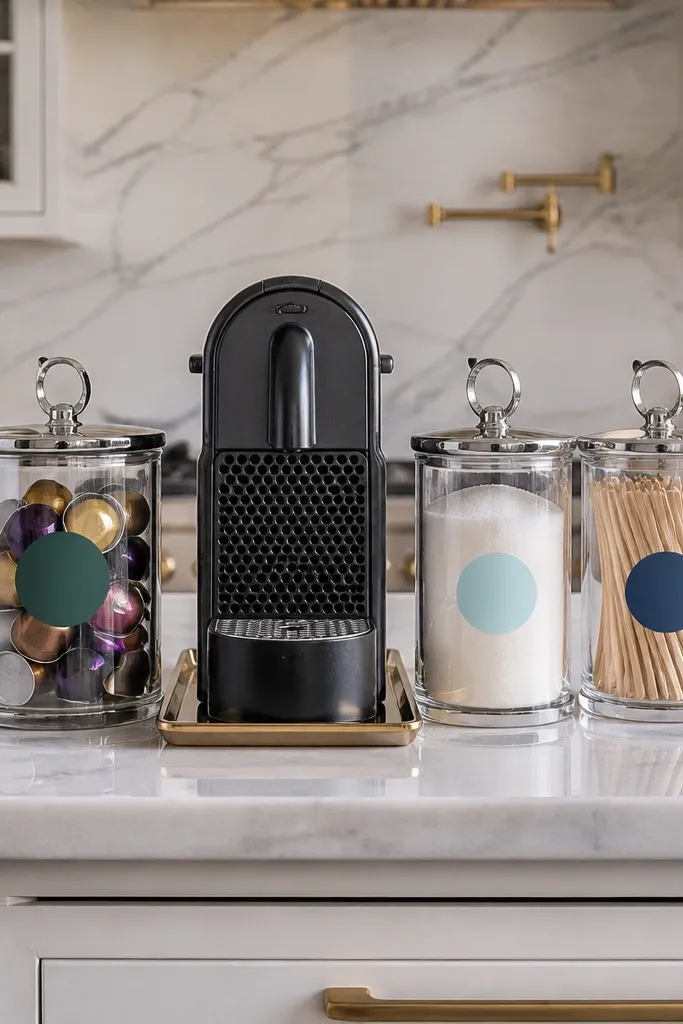
If you want your station to look like a boutique display, this is it. Use three identical glass canisters with chrome lids for pods, sugar, and stir sticks. The uniform shapes make the whole station feel curated, and glass shows the contents in a satisfying way. Keep the Nespresso machine centered and use a matching chrome tray under the machine to catch drips and make the setup look intentional. This works best when you have enough counter space for a compact trio, and it makes your morning routine feel organized because everything has a labeled home.
Choose canisters that are the same height and diameter so they line up visually. Fill the pod canister with a pod organizer insert or stack pods neatly so lids close without crushing. Place the machine on a chrome tray or a wipeable mat and keep the canisters on one side in a tight row. Add a small spoon rest or a mini tray for used spoons so the station doesn’t get messy between drinks.
Editor's noteLabel with white vinyl stickers and a black marker line inside each label — the contrast reads well in photos.
Skip thisDon’t use mixed heights for canisters; uneven stacking makes the station look accidental.
9. Pegboard Coffee Station with Color-Coded Pod Labels
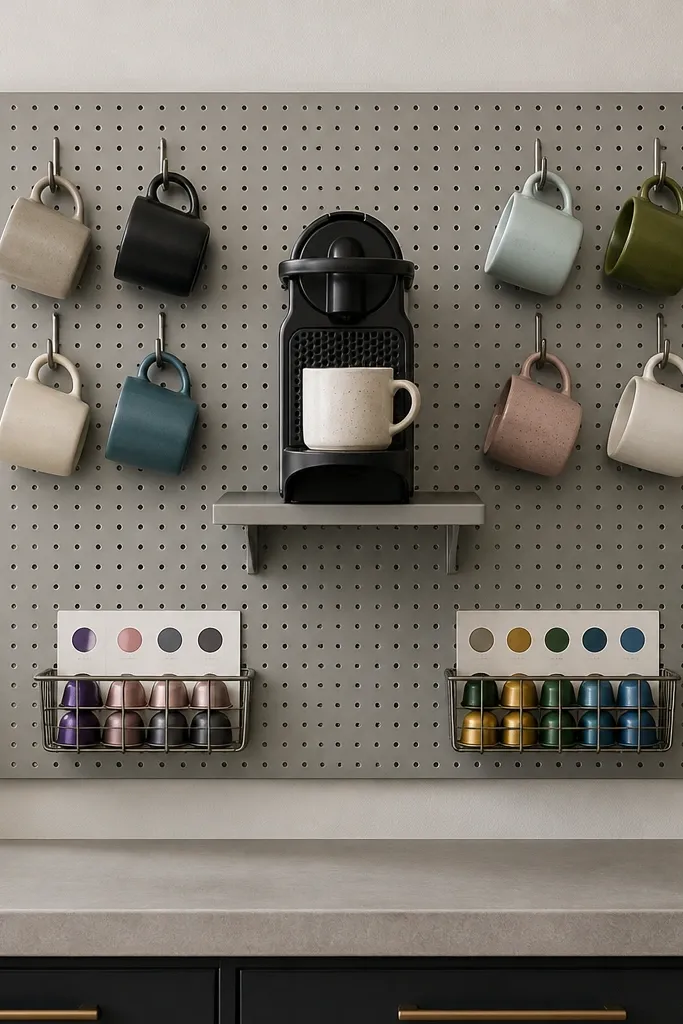
Pegboard is the fastest way to make an adjustable coffee station that looks good because it’s grid-based. Mount a small shelf for the Nespresso machine and add hooks for mugs, plus two tiny baskets for pods and accessories. The look is clean because the items line up on the pegboard holes. Color-coding the pod labels makes the station feel effortless to use, and it also looks great in daylight. This setup is ideal for people who want a station that can change as their pod collection changes.
Install a pegboard panel on the wall or a board-mounted frame sized to your space. Add a mini shelf platform where the Nespresso machine will sit, using metal shelf brackets that can handle weight. Hang mug hooks and add two wire baskets for pods and accessories. Label each basket with a color-coded sticker set and keep pod types separated so the station stays photo-tidy.
Use a white pegboard with black hooks for the crispest look; it reads clean in photos.
Don’t hang mugs directly above the machine controls where you’ll bump them every time.
10. DIY Acrylic Pod Drawer Stack on a Small Rolling Cart
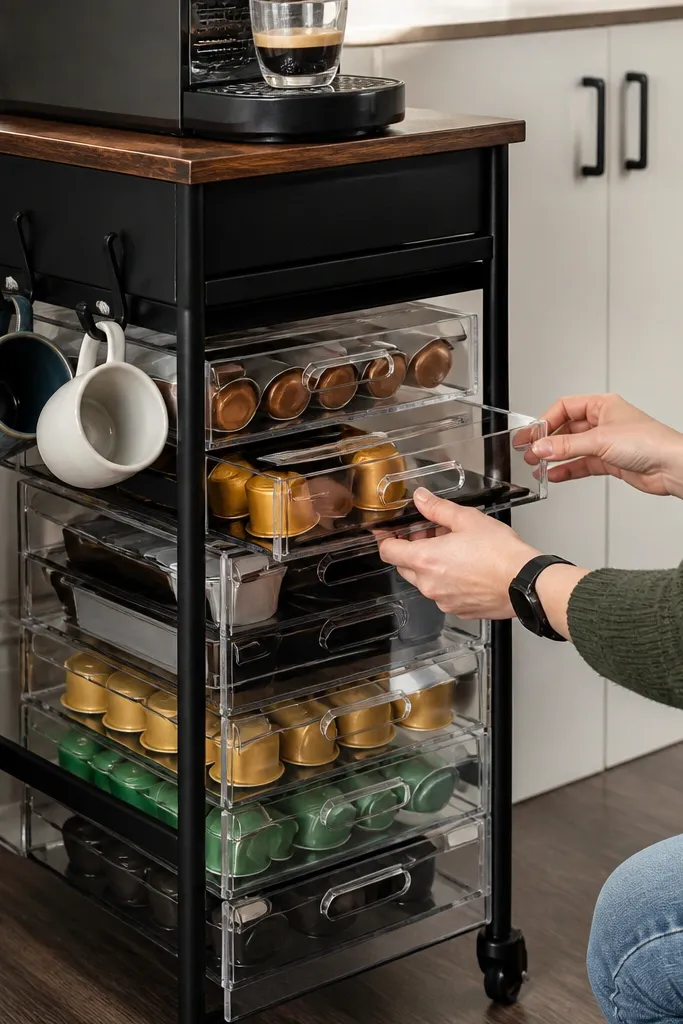
A rolling cart makes your Nespresso station feel like a mobile coffee bar, and acrylic drawers keep it looking tidy. Clear drawers show pod labels and make it easy to find what you want without digging. Pair that with a small hook strip for mugs so cups hang neatly and don’t take up shelf space. The cart also lets you move the station away from sunlight or clutter when you clean. This works well for rentals and anyone who doesn’t want to mount anything to the wall.
Choose a small rolling cart with at least two shelves and a top surface wide enough for the Nespresso machine. Mount a hook strip under the top shelf edge for mug handles. Build a stack of acrylic drawer organizers or use clear drawer trays sized to fit the cart shelf — secure them so they don’t slide. Set the machine on a silicone mat and add a shallow tray under it to catch drips. Keep cords tied and routed to the back leg using a cable tie or velcro strap.
Put the acrylic drawers on the side away from the sink splash zone so you don’t get water spots on them.
Don’t overload the cart with decor; keep it functional and clean or it starts looking like storage.
11. Walnut Slat Backdrop with Hidden Cup Rail
A slat backdrop turns a basic coffee station into something that looks like a built-in. Walnut slats create a warm texture behind the machine, and they hide small wall imperfections. The trick is using a cup rail that’s partially concealed so the station looks sleek — cups hang in a neat row without cluttering the front. Add one matching tray for pods and one for accessories so everything stays aligned with the slat lines. This is a strong choice for homeowners who want a premium look but still want to keep the build simple.
Cut slats (about 1x2 inch strips) and space them evenly on a backing board, then stain or seal the slats. Attach the slat panel behind where the machine will sit, centered and level. Install a cup rail or hook strip behind the slat line so mug handles hang cleanly without blocking the machine. Mount the machine on a wipeable platform and place a tray at the bottom aligned with the slats for a clean front view.
Use a matte clear coat on walnut; it looks better under kitchen light than glossy finishes.
Don’t use widely spaced slats if you plan to store pods on the wall; the visual gaps make it look messy.
12. Tile-Top Tray Table with Matching Spoon Rest
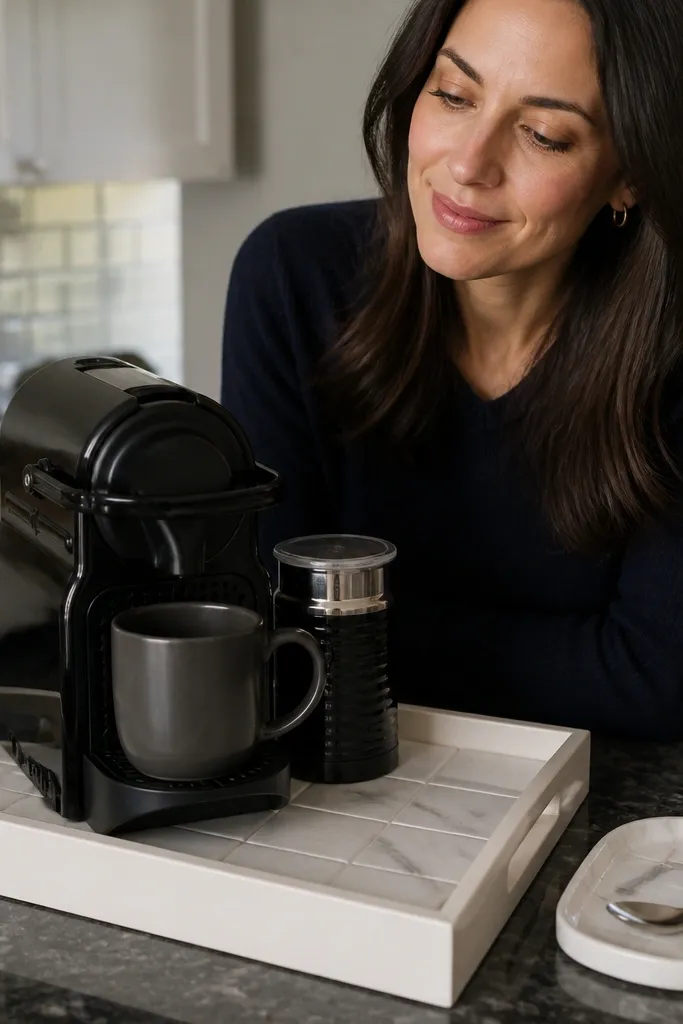
A small tile-top tray table gives you a high-end look and makes spills easier to clean. The tile surface stays crisp and doesn’t show water stains as quickly as wood. Build the station around a removable tray so you can wipe everything in one pass. Add a matching spoon rest in the same tone as the tray to keep the front clean. This idea is good for renters because you can place it anywhere on the counter without permanent changes to your kitchen.
Find or build a small table with a flat tile or tile-like surface around 16 to 24 inches wide. Add a silicone mat under the Nespresso machine for grip. Mount a small spoon rest on the side of the tray table using adhesive or screws, then keep pods stored in a separate container so the front stays uncluttered. Finally, add a drip catch tray under the machine and wipe the tile surface before styling cups.
Choose grout color that matches your kitchen hardware; dark grout lines look cleaner in photos than white grout.
Don’t set loose sugar packets on the table; they break the clean tile look fast.
13. Monochrome Black Station with Magnetic Spice Strip
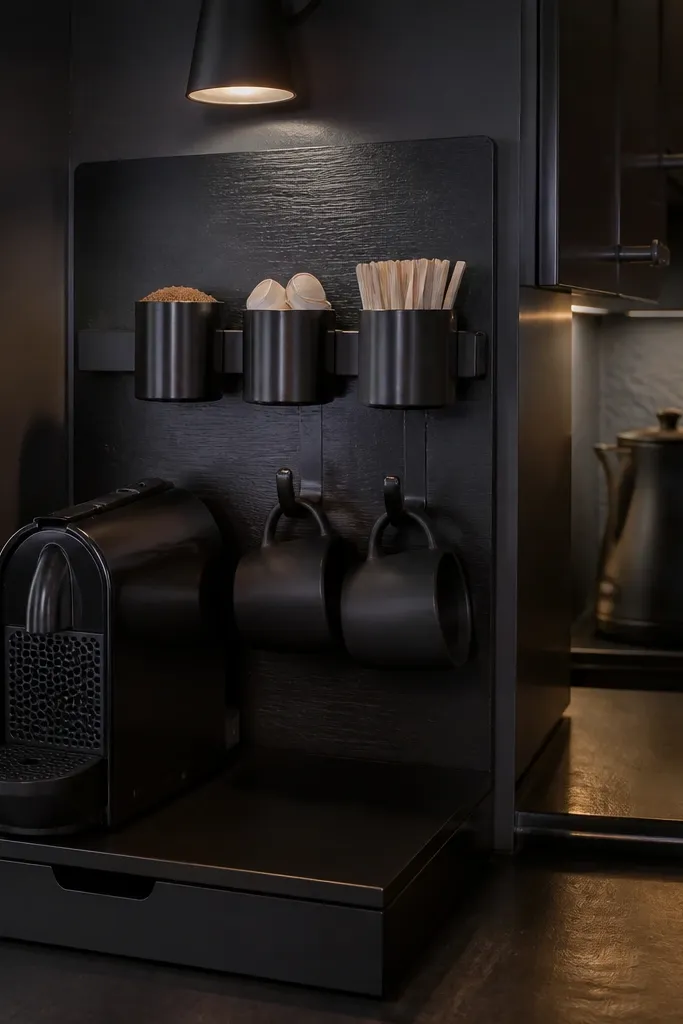
Monochrome stations look sharp because every object shares the same visual weight. Paint a small wooden board black, mount a magnetic strip on it, and attach small metal jars for sweeteners and stir sticks. Keep the Nespresso machine on top with a black tray beneath so drips stay contained. Use black hooks for mugs so everything lines up. This works especially well in kitchens with black faucets, black appliances, or dark countertops.
Paint a board black and let it cure fully, then mount it to the wall or use it as a countertop backdrop. Install a magnetic strip and attach small metal jars for sugar, cinnamon, or stir sticks. Place the Nespresso machine centered on the board with a non-slip mat. Add a black tray under the machine and hang mugs on black hooks on the sides.
Use clear jars with black lids so you keep the monochrome look but still see what’s inside.
Don’t mix matte and glossy finishes; it makes the station look patchy.
14. White Shaker Cabinet Mini Unit with Open Shelf for Pods
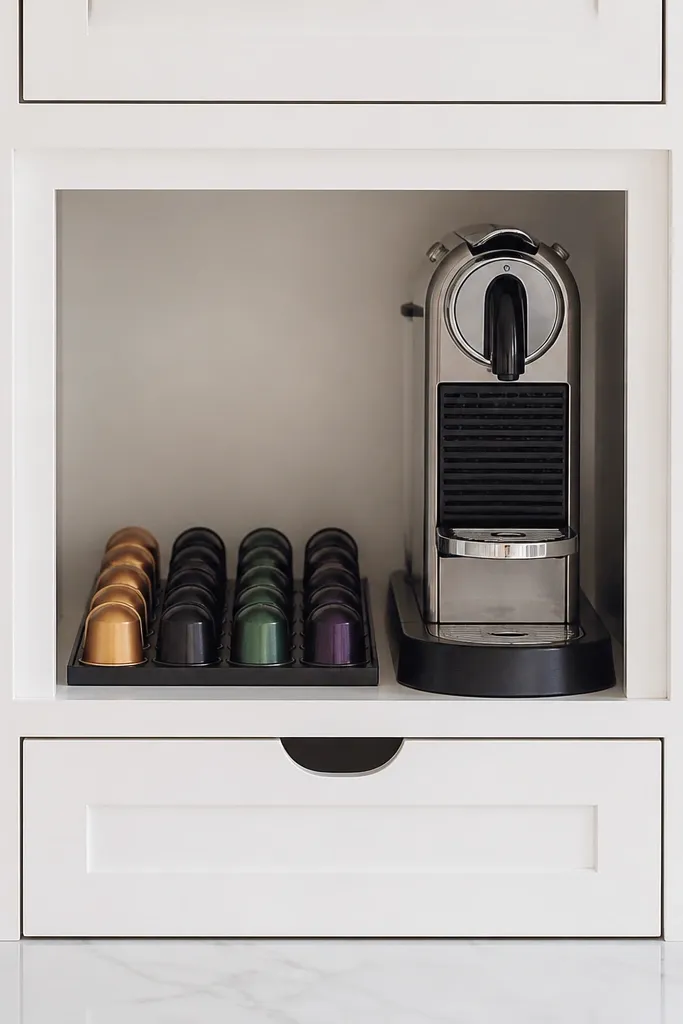
A mini shaker-style cabinet gives you instant “built-in” energy. The open shelf can hold pods in a neat row, while the lower space stores extra cups and cleaning tools out of sight. The look is clean because the cabinet lines frame the machine like a product display. White also hides small stains better than light wood, so the station stays photogenic longer between deep cleans. This is a great choice for people who want their coffee station to feel like furniture, not a countertop add-on.
Use a small cabinet unit with shaker doors or build one from pre-cut panels. Install a shelf inside at a height that lets the Nespresso machine sit securely without blocking the water tank. Put an open shelf section or remove one panel so pods can be seen and accessed quickly. Add a simple pod holder on the open shelf and route the cord through a small notch at the back.
Use drawer liners inside the cabinet — they stop pod scratches and keep the wood looking new.
Don’t place pods on the door where they swing and tilt; it makes the station look messy in seconds.
15. Rustic Whitewashed Wood Crate with Side-by-Side Pod Bins
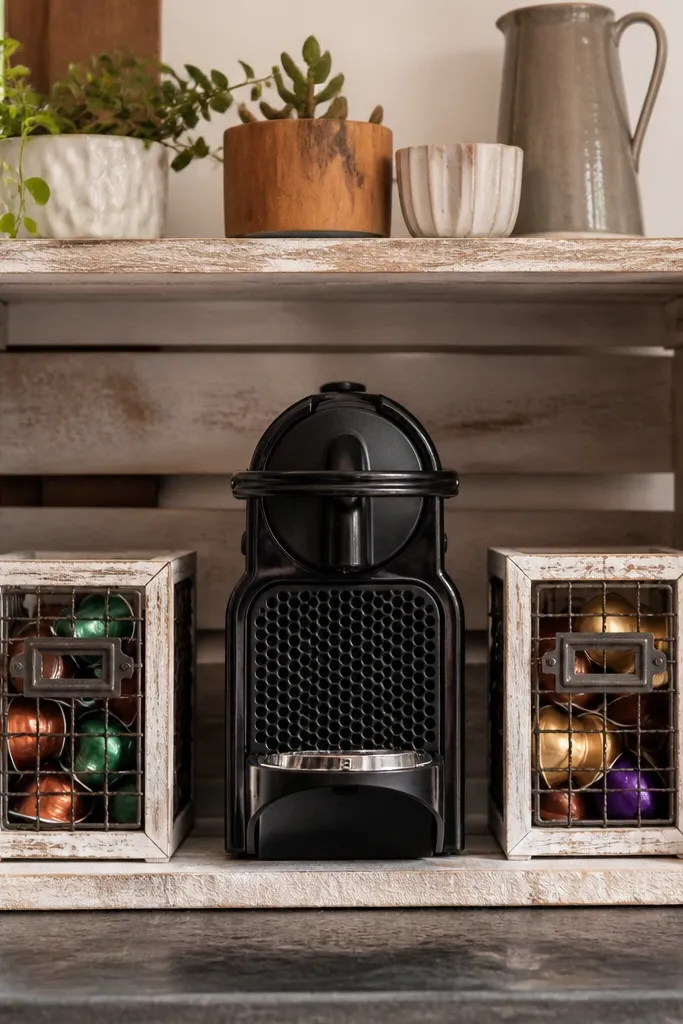
A whitewashed wood crate frames the station and gives you that rustic-cozy look without turning into clutter. Put the Nespresso machine on a wipeable base inside the crate, and add two matching pod bins on either side so pods stay visible but controlled. The crate edges hide the messy cords and make everything look intentional. This is perfect for farmhouse kitchens or anyone who likes warm wood tones but still wants the station to look organized in photos.
Build a simple crate frame using boards and secure it so it sits flat on the counter. Whitewash the wood and seal it so it wipes clean. Place the Nespresso machine on a silicone mat inside the crate and keep the drip tray area clear. Add two pod bins inside the crate — one for lighter roasts and one for darker roasts — and keep sugar packets in a small container on the back edge.
Editor's noteUse matching bin sizes even if you mix brands; the uniform silhouette is what makes it look styled.
Skip thisDon’t overfill the bins; pods should sit level, not piled.
16. Matte Ceramic Mug Wall + Floating Tray Shelf Station
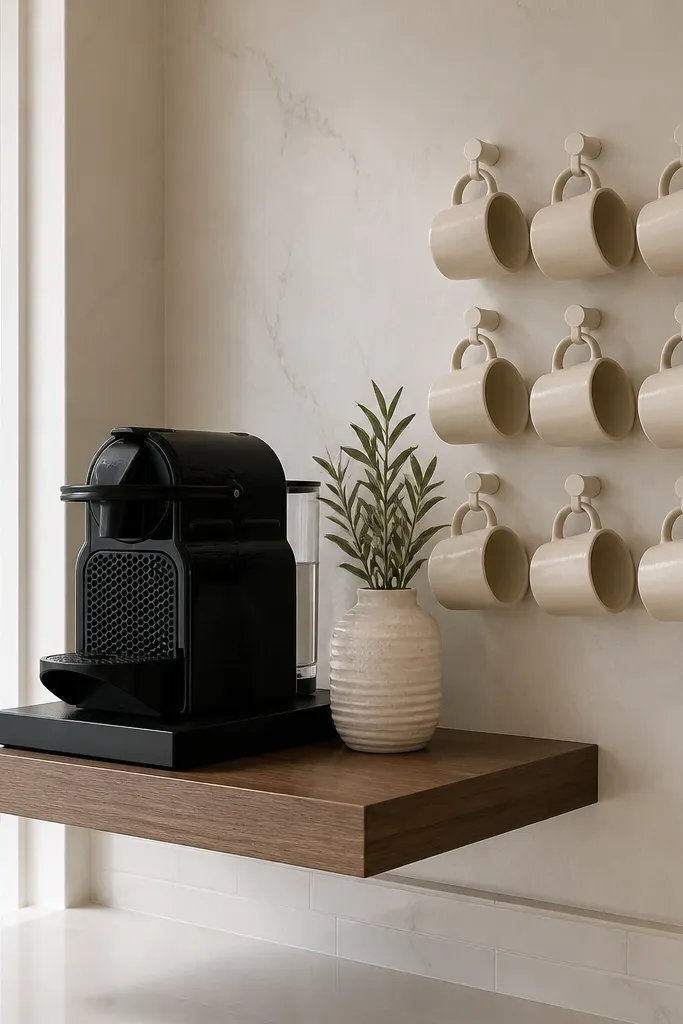
This station looks clean because it treats mugs like decor, not random cups. Install a small tray shelf for the Nespresso machine and add a mug wall using matte ceramic hooks or simple ceramic knobs. Choose mug colors that match your kitchen palette — think cream mugs with a black machine, or pale blue mugs with white walls. The floating tray shelf keeps the machine aligned and makes the station look airy. This is a great choice if your counter is already packed and you want the coffee zone to feel lighter.
Mount a floating shelf at a height where the machine top sits comfortable for pouring and lifting pods. Add a mug hook line below or beside the shelf so mugs hang in a neat cluster. Place the machine on a tray or wipeable mat and keep one small accessory tray for spoons and sweeteners. Arrange mugs in matching spacing and use a small drip mat under the machine for easy cleanup.
Stick to two mug colors max; too many colors makes the station look like a mug collection, not a coffee bar.
Don’t hang mugs so tightly they clink every time you grab one.
17. Marble-Look Contact Paper Backdrop with Brass Tray Front
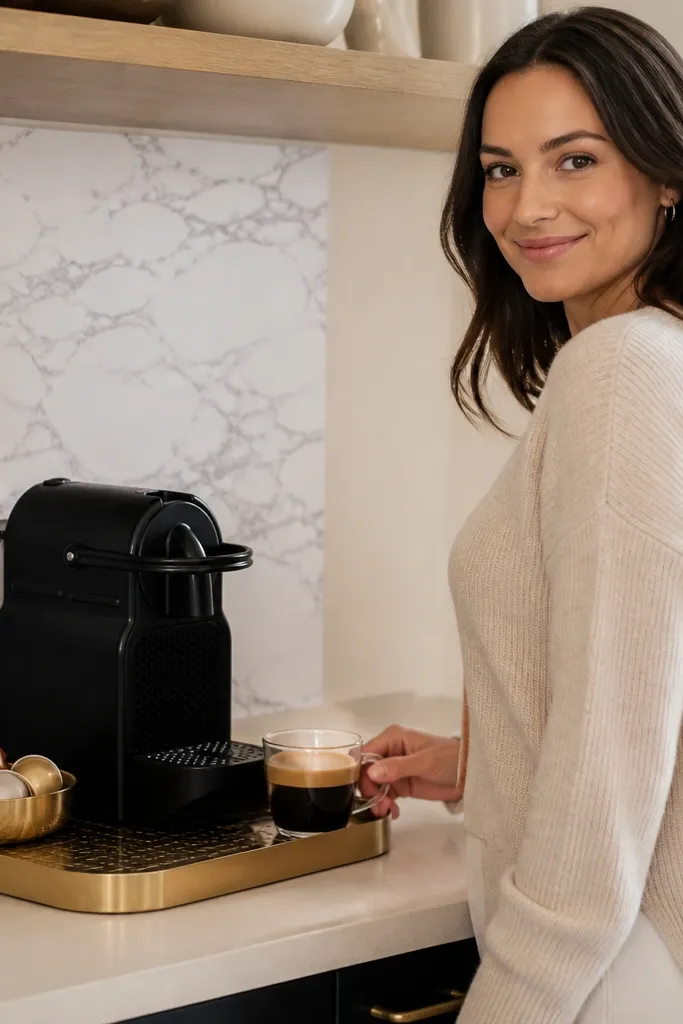
If you want that high-end marble look without paying for marble, use marble-look contact paper as the backdrop. Pair it with a brass tray in front so the station looks polished and warm. Keep the pod storage simple: a small brass or white pod holder so the labels stay visible. The backdrop makes the station pop in photos because it creates contrast behind the machine and cups. This is a solid choice for renters and anyone who wants a quick visual upgrade with minimal tools.
Cut marble-look contact paper to the exact width of your station wall area and wipe the surface clean before applying. Smooth it from the center outward to avoid bubbles and trim the edges precisely. Place a brass tray under the machine and use a silicone mat under the machine feet. Add a small pod holder and a spoon rest on the tray so everything stays in the same brass line.
Use a plastic squeegee or an old gift card to press edges tight so the paper doesn’t lift at corners.
Don’t apply contact paper over greasy residue; it will peel and look bad fast.
18. MDF Paint-and-Frame Coffee Station with Clear Pod Organizer Slot
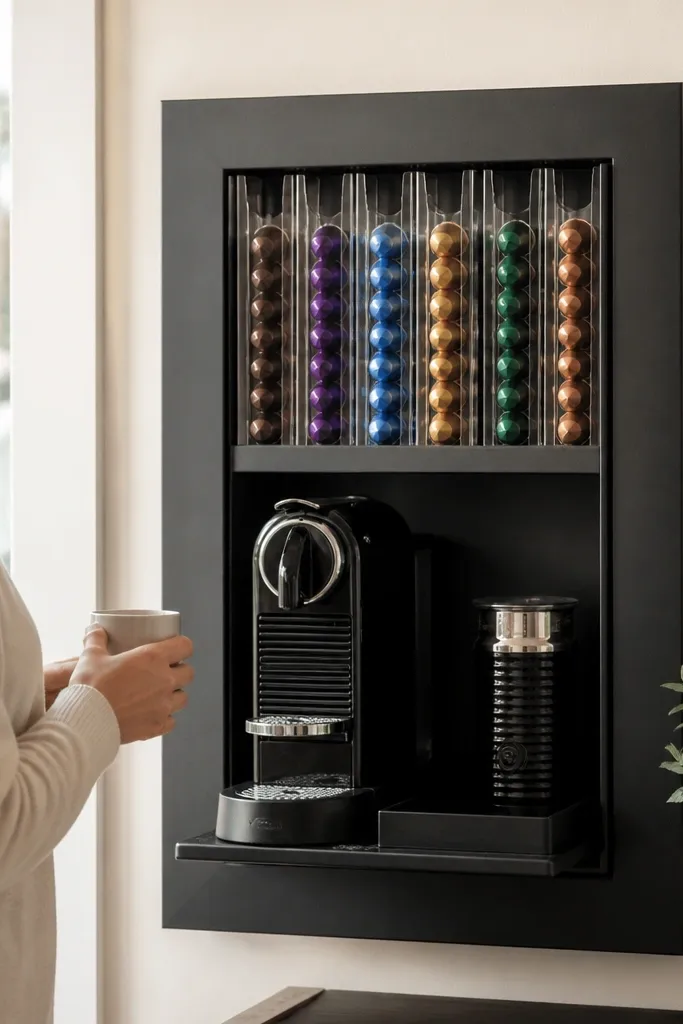
This is the “structured, modern” build that looks like a store fixture. A painted MDF frame gives crisp edges and a consistent background. Add a clear pod organizer slot to keep pods visible but contained — the station stays neat even when you’re rushing. This setup also makes it easy to change the pod lineup later because the organizer holds the shapes. Paint it in a kitchen-friendly satin finish and keep hardware consistent for a clean look. It’s best for people who can measure carefully and want a more built-in aesthetic than open shelving.
Cut MDF to form a simple rectangular frame around the machine area, leaving a centered opening for the Nespresso. Sand, fill screw holes, and paint with satin cabinet paint. Install the clear pod organizer slot on the side or lower portion of the frame using screws and anchors. Mount the frame to the wall or place it on a base, then set the machine on a non-slip mat inside the opening. Finish by adding a drip tray liner and a small accessory tray on the bottom ledge.
Editor's noteUse a foam roller for paint to reduce streaks and keep the finish smooth on camera.
Skip thisDon’t skip priming MDF; unprimed boards soak paint unevenly.
19. Dark Denim Counter Wrap with Wooden Cup Stand
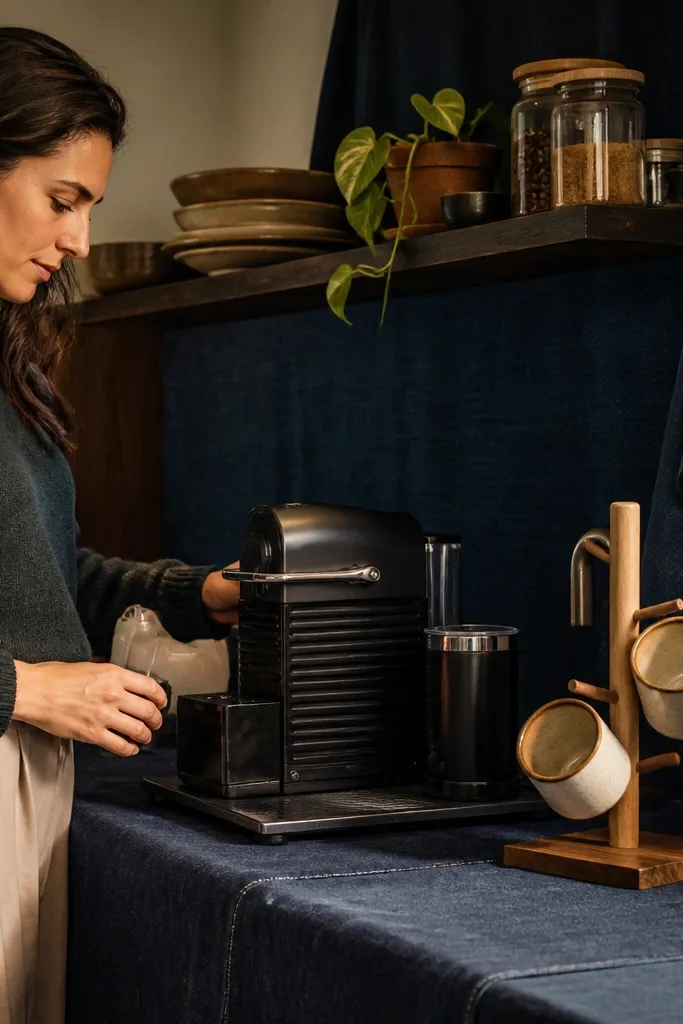
This is a surprisingly photogenic idea: a dark denim backdrop makes your station look styled without needing expensive furniture. Drape denim behind the machine and secure it so it stays flat, then build a simple wooden cup stand in front or beside. The denim hides small scuffs and gives a rich, matte background that makes white cups and the Nespresso machine stand out. Add a small wooden tray for pods to keep the front surface clean. This works best in kitchens with neutral walls or warm wood cabinets.
Cut denim fabric to the width and height of your station wall area, then hem the edges or use fabric tape for a clean border. Mount two small hooks or a thin rod to hold the top edge taut and flat. Add a wooden cup stand using a small board and dowels or a purchased cup rack, then place the Nespresso machine on a tray mat on the counter. Keep pods in a shallow wooden tray or a fabric-lined bin so they don’t spill onto the denim area.
Editor's noteSpray fabric-safe matte finish after tightening so it doesn’t catch light glare in photos.
Skip thisDon’t let the denim sag; wrinkles read messy next to the crisp machine.
20. Stained Oak Ladder Shelf Coffee Bar with Hanging Pod Baskets
This coffee station fixes the biggest Nespresso problem — pods end up stacked in drawers and the bar looks messy fast. A ladder shelf gives you height without taking much wall space, and the hanging wire baskets keep pods visible so you can grab what you want in two seconds. The stained oak front and dark metal baskets look expensive next to the Nespresso machine, even when the build is simple. It also hides the ugly stuff because you can tuck the machine base and cord behind the lower shelf. This suits kitchens with narrow walls, renters who want a statement but not a big cabinet, and anyone who likes a “display first” setup instead of a closed-off coffee station.
Buy a small ladder-style shelf frame (about 24-30 in tall) or build one from 1x2 oak boards cut into two side rails and 3-4 rungs. Stain the oak with a medium tone like “golden oak” then seal with two coats of water-based polyurethane so coffee spills wipe off. Mount two short black metal basket hangers under the top two rungs, and hang wire pod baskets sized to hold a single layer of Nespresso sleeves (aim for roughly 6-7 in wide baskets). Set the Nespresso machine on the middle shelf, then add a 1x2 oak “stop” strip on the shelf front so the machine can’t creep forward when you pull cups. Finish by routing the power cord down the wall behind the lower shelf and adding a small felt pad under the machine base to stop vibration.
Pre-drill everything into the oak and use washers under the basket hanger screws — it keeps the shelf from splitting and makes the baskets sit level.
Don’t hang the baskets from the shelf surface without a hanger bracket — screws alone loosen over time and the baskets tilt.



