
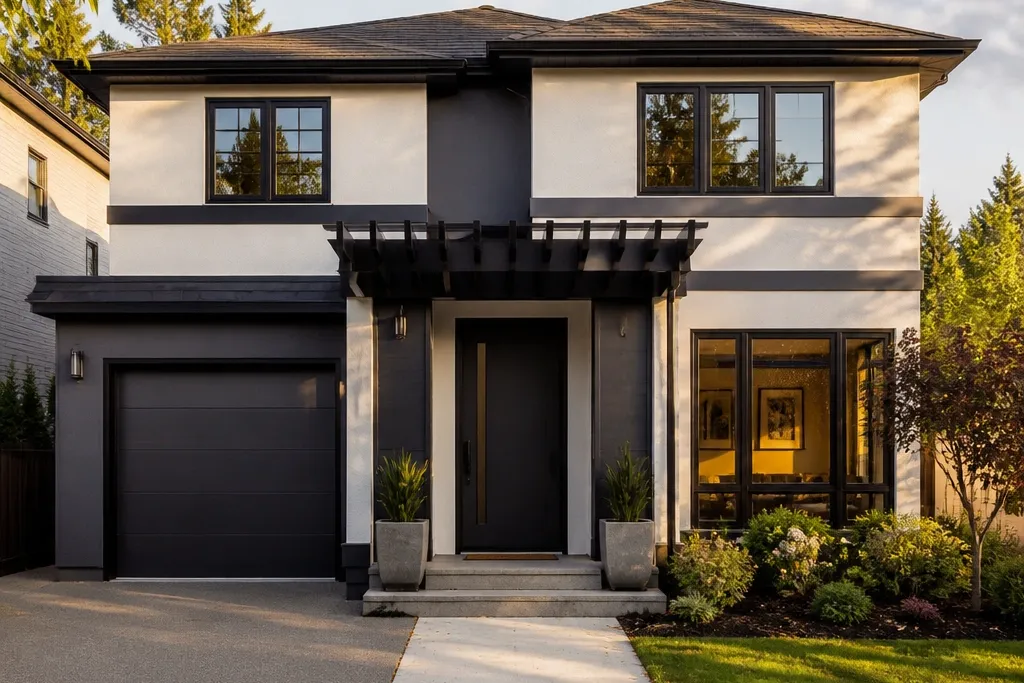
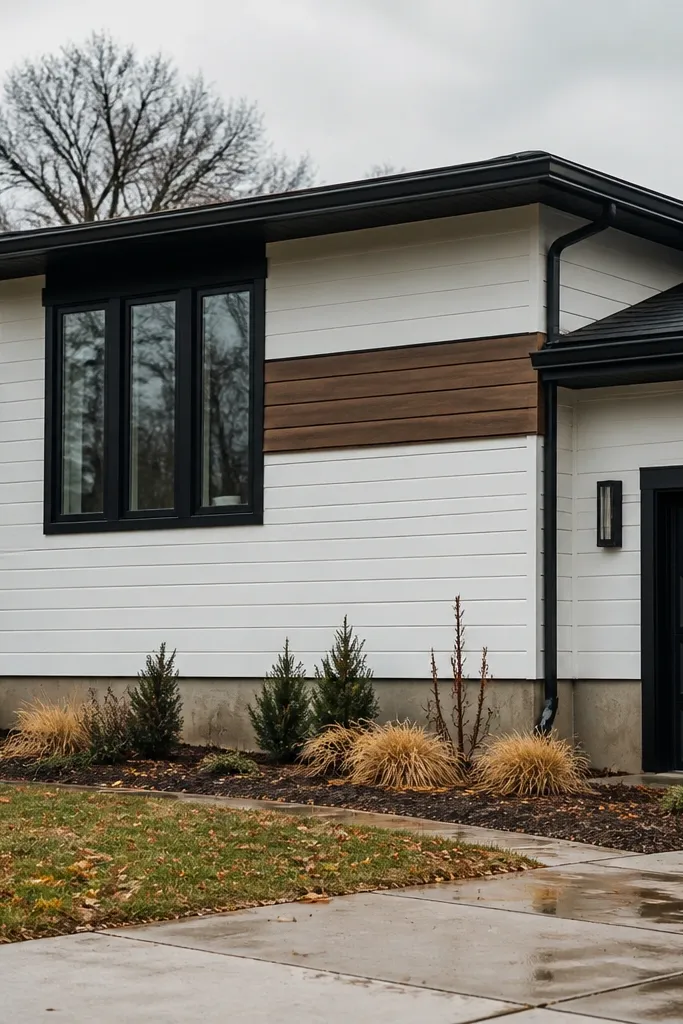
1. Two-tone fiber cement with a crisp horizontal garage band
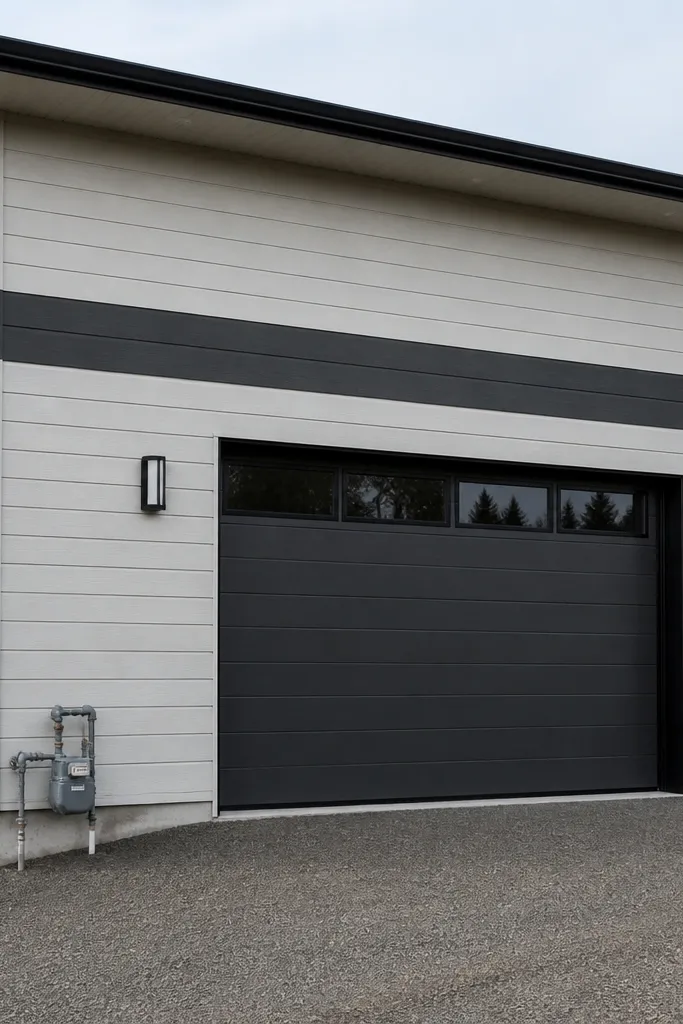
This is one of the cleanest ways to make a facade look modern without changing the whole house. The horizontal band gives you an instant “designed” line, while the two-tone palette keeps it from looking like random DIY patches. Use fiber cement panels for the main cladding and a contrasting charcoal band to create a strong visual break. In daylight, matte finishes on both colors make the edges look sharp and reduce glare in photos. Skill level is moderate because you’re installing panels and managing long straight layout lines, but the steps are repeatable and the results are very photogenic.
Start by measuring your facade and deciding the band height relative to the garage opening, aiming for a consistent top and bottom line across the width. Install a level ledger board for the band using exterior-rated screws and confirm it’s perfectly straight with a long level or laser. Then fasten fiber cement panels for the band, using proper spacing and leaving room for expansion at edges. Finish by priming and painting with an exterior paint rated for fiber cement, and seal all cut edges with a compatible sealer before the final coat.
Editor's noteSnap a chalk line for the band and re-check every 2-3 feet — small errors compound over a long garage wall.
Skip thisDon’t paint over unsealed cut fiber cement edges; they’ll drink water and stain.
2. Charcoal slat screen over the entry porch
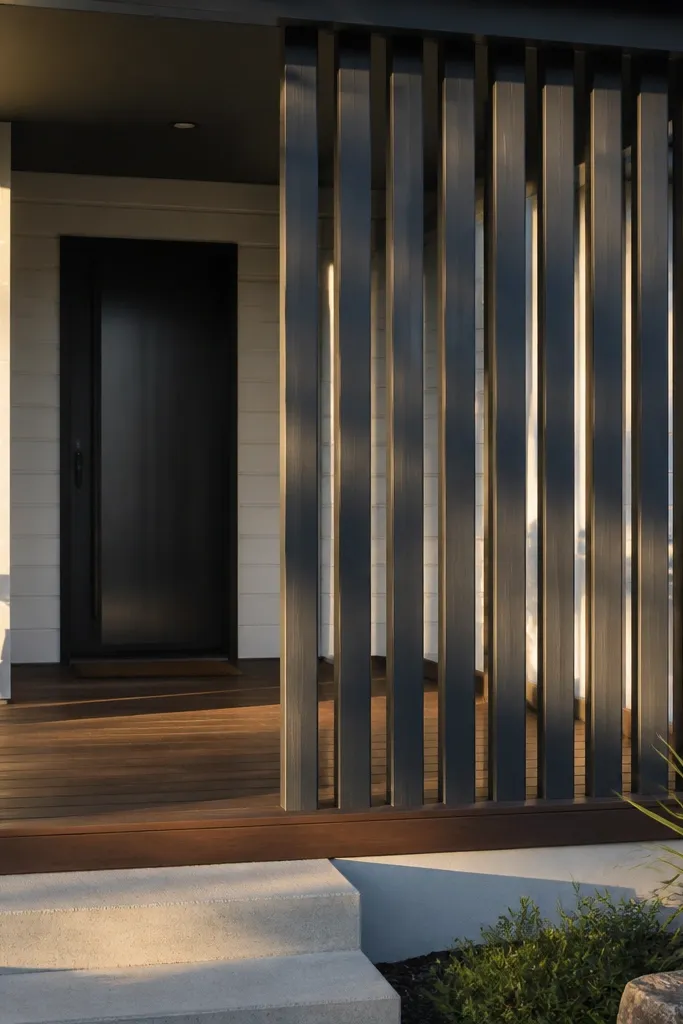
A slat screen is one of the fastest ways to make an entry feel modern because it adds vertical rhythm without clutter. The slats create shadow and depth, so the facade looks more expensive even when the base house is simple. Keep the screen focused on the entry zone — between the porch columns or as a freestanding frame at the door. A charcoal finish reads modern against warm siding or light stucco. This project suits porches, small entry alcoves, and narrow front elevations where you want impact without covering the entire house.
Build a rectangular frame from treated lumber or aluminum angle, sized to cover the porch opening and leave a small gap from siding for airflow. Space slats evenly (for a modern look, aim for 2 to 3 inches between slats depending on your slat width), then fasten them to the frame with exterior screws. Apply a weatherproof primer and a matte exterior paint in charcoal, or use pre-finished boards if you want faster drying. Install the frame with corrosion-resistant mounts, checking plumb at the corners before you tighten everything down.
Editor's noteUse a scrap spacer block to keep slat spacing identical; the eye catches uneven gaps immediately.
Skip thisDon’t run slats tight to the ground or trap moisture — leave a small clearance and seal top surfaces.
3. Wood-look composite board-and-batten accent strip
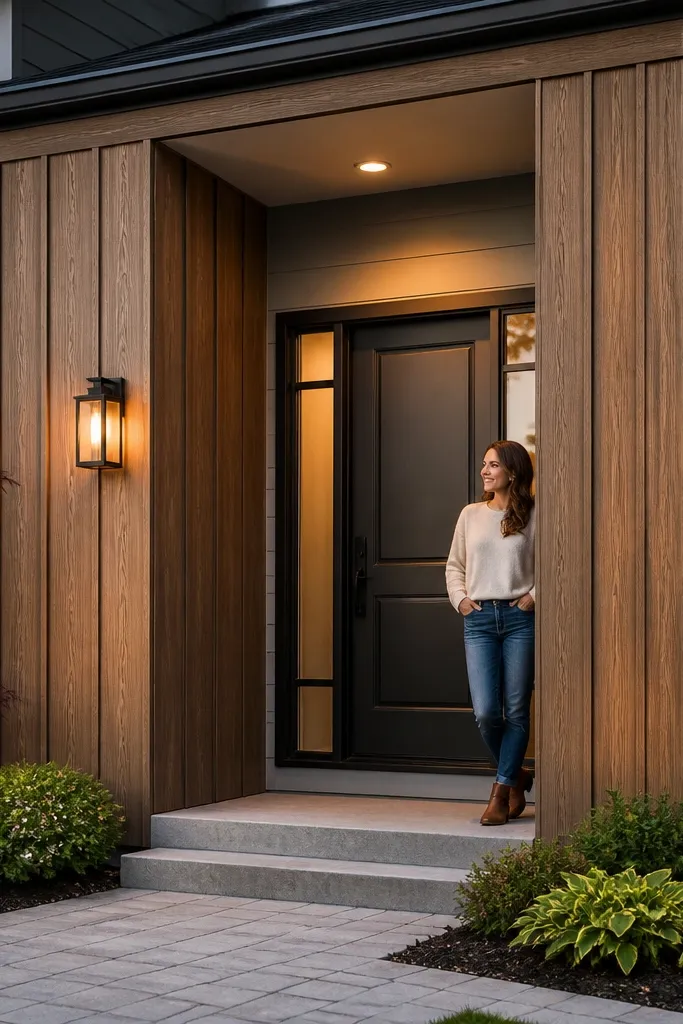
Board-and-batten reads modern when you control the proportions and use a clean color. Instead of doing it across the entire house, limit it to a single accent strip: a full-height section around the entry or a tall panel next to the garage. Wood-look composite boards look better than raw wood in harsh weather because they resist warping and have consistent texture. The vertical lines add height and make the facade feel more structured. This is a good DIY project for homeowners who want a high-end look but don’t want to replace all siding.
Pick an accent width that matches your window or door layout, then mark the section lines with a level and painter’s tape. Install vertical base battens first using exterior-rated screws into studs or solid backing, keeping them plumb. Add the flat board panels between battens, then trim the edges with J-channel or corner trim so cuts look intentional. Prime and paint or use pre-finished composite, and seal all trim joints at the top to prevent water intrusion.
Use a laser or a long level for the first batten — the rest will follow and you won’t fight crooked lines later.
Avoid skinny battens that look off-scale; keep thickness and spacing consistent with the facade height.
4. Modern window trim frames with 1-inch reveals
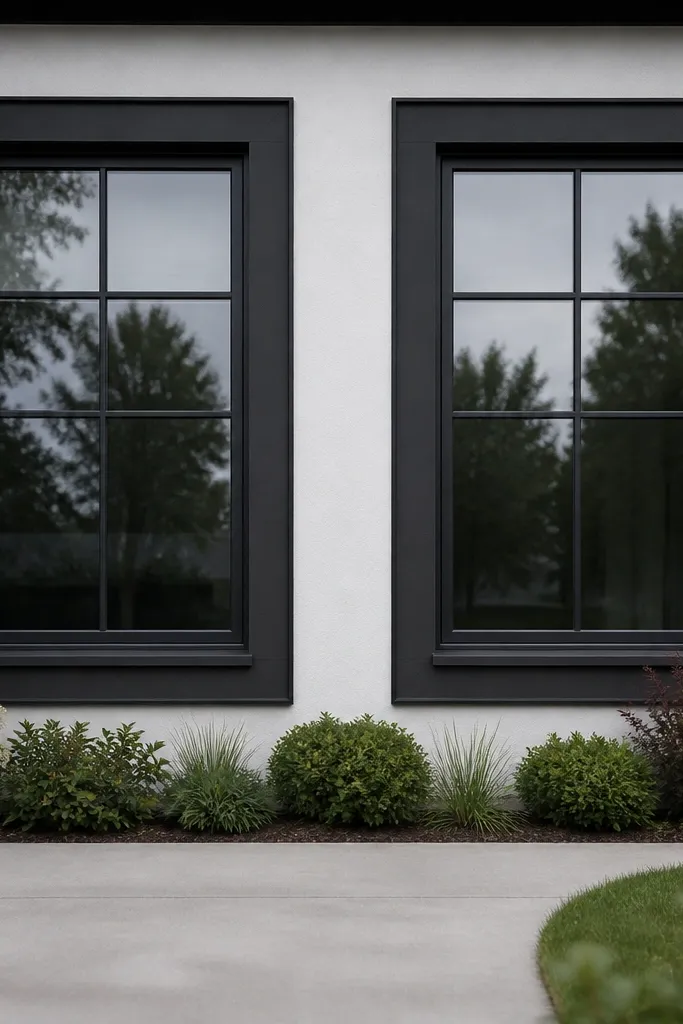
If your windows are visually “buried” in the facade, adding a trim frame with a deliberate reveal creates instant modern structure. The key is the reveal gap: a consistent 1-inch shadow line around the opening makes everything look engineered. Use dark trim (matte black or deep charcoal) against light siding or stucco so the lines pop. This project is ideal when you can’t change cladding but you can add trim. It also photographs well because the contrast highlights the geometry.
Measure each window and decide your frame dimensions, leaving a uniform reveal gap on all sides. Install horizontal and vertical trim pieces using exterior trim boards and backer shims so the reveal stays even. Miter corners cleanly or use pre-made corner blocks to keep the lines sharp. Seal joints with exterior caulk rated for trim, then prime and paint the trim in a matte exterior finish.
Editor's noteDry-fit the frame pieces and mark screw locations before you start — it prevents shifting and keeps your reveal consistent.
Skip thisDon’t rely on flexible caulk to fix uneven trim lines; it only hides gaps, not crooked geometry.
5. Full-height entry door surround with flat-panel siding
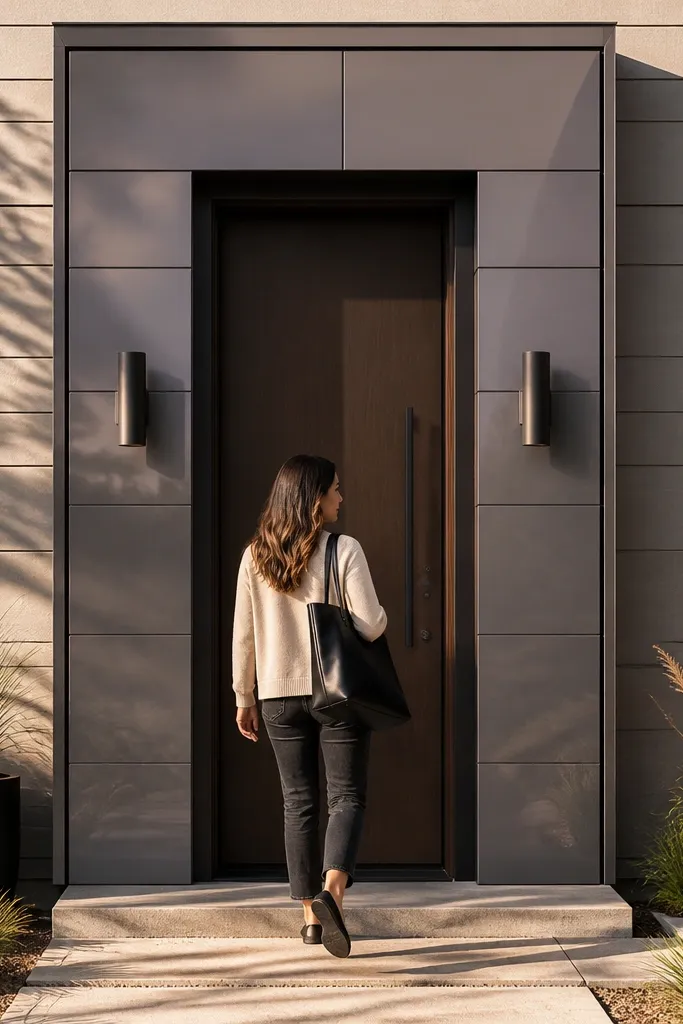
A door surround is the fastest way to make an entry look designed because it gives the door a “stage.” For a modern look, use flat-panel cladding around the door instead of decorative molding. Keep the surround in a slightly different tone or the same tone with a darker trim outline for subtle contrast. This approach helps if your entry has mismatched trim or a recessed door that looks unfinished. It’s also budget-friendly because you’re building a framed zone rather than re-cladding the whole front.
Remove any loose trim around the door and check the framing is straight and solid. Build a rectangle frame around the door opening and cover it with flat exterior boards, leaving consistent gaps at edges. Add corner trim and a clean header piece above the door, then seal seams with exterior caulk and flashing tape where the top meets the facade. Prime and paint, and keep the finish matte so the panel edges read crisp.
Editor's noteUse a straight 2x4 edge guide when installing the side panels so your vertical lines stay true.
Skip thisAvoid skipping flashing tape at the top — water finds the smallest seam and ruins paint.
6. Boxy planter wall as a facade divider
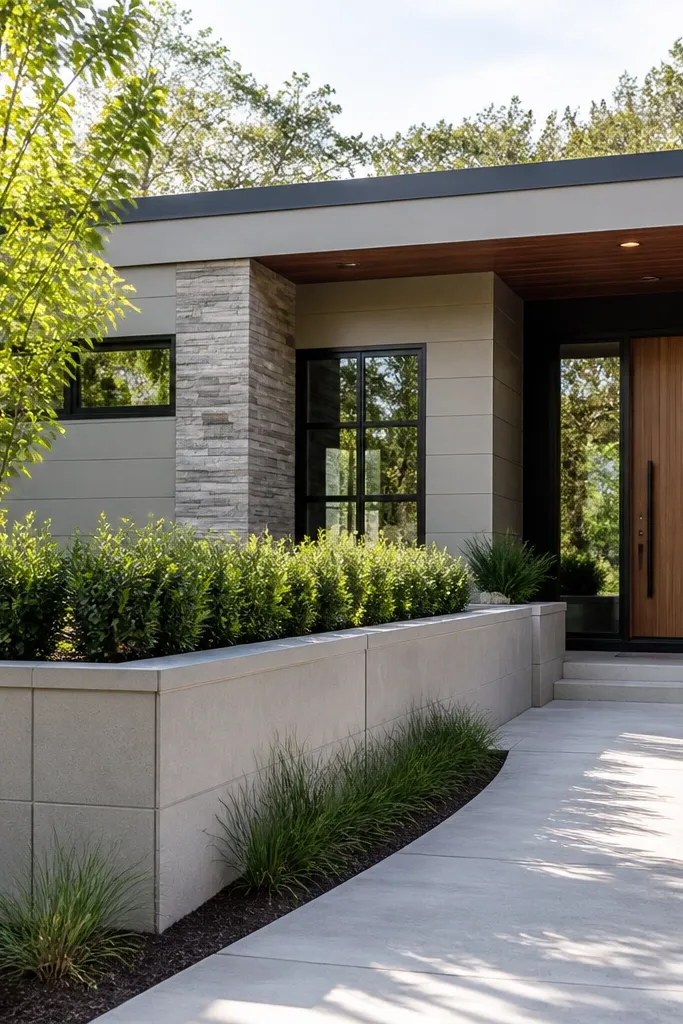
A planter wall can make a facade look modern because it adds a clean boundary and a strong horizontal base line. It’s also practical: you hide awkward grade changes, shape the entry approach, and get greenery without complicated landscaping. Build it with weatherproof materials so it looks like an architectural feature, not a random raised bed. This works best for wide front yards, homes with blank foundation walls, or elevations that need a focal line near the sidewalk. The look is photogenic because the blocks create sharp edges and shadow bands.
Set out the length and height of the planter wall so it aligns with the entry or garage base line, then dig a shallow trench for leveling. Build the structure using rot-resistant blocks or a poured form with a waterproof liner, leaving a drainage layer at the bottom. Install a top cap board or stone veneer for a crisp edge, then add a soil barrier and drainage holes. Finish with exterior paint or sealant compatible with the block/liner, and choose plants with consistent height for a tidy look.
Editor's noteUse a drainage sock and gravel layer — it keeps roots healthy and prevents messy leaks on the facade.
Skip thisDon’t use plain soil against masonry without a liner; water damage shows up fast.
7. Cement board + metal corner bands for a sharp industrial look
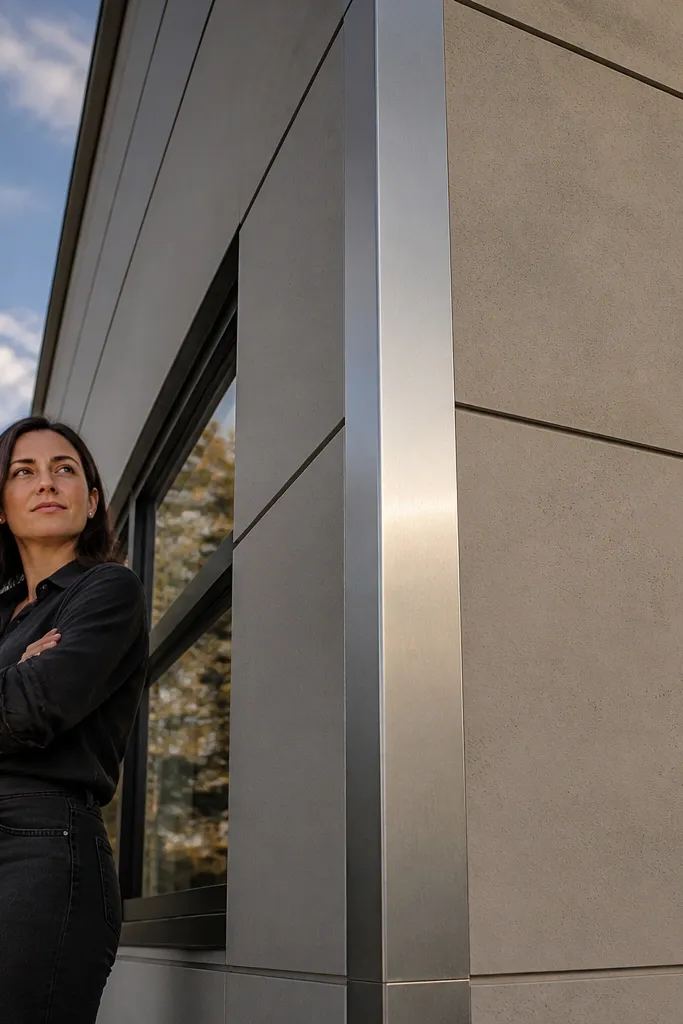
Corner bands are a modern detail that makes even simple cladding look intentional. The trick is to keep the metal band narrow and consistent, then align it with your window trim so everything feels planned. Cement board gives you a smooth, paintable surface, while the metal adds crisp light reflection without turning the facade into a disco. This is a great choice when your current corners look rounded, damaged, or mismatched. Budget-wise, you’re buying a small amount of metal trim and doing finish work, not full replacement siding.
Install cement board panels on the facade section you’re updating, fastened over solid backing and sealed at seams. Add metal corner trim bands by marking plumb lines and screwing the trim to the board with corrosion-resistant fasteners. Prime and paint the cement board with an exterior primer and a topcoat matched to your trim palette. Seal every metal-wood or metal-board joint with exterior caulk, then check for gaps with a bright flashlight.
Editor's noteUse painter’s tape as a guide for paint edges around the metal bands so you don’t get fuzzy lines.
Skip thisDon’t leave metal bands unsealed at the ends — water creeps under and stains the paint.
8. Light stucco + dark window mullion illusion with trim bars
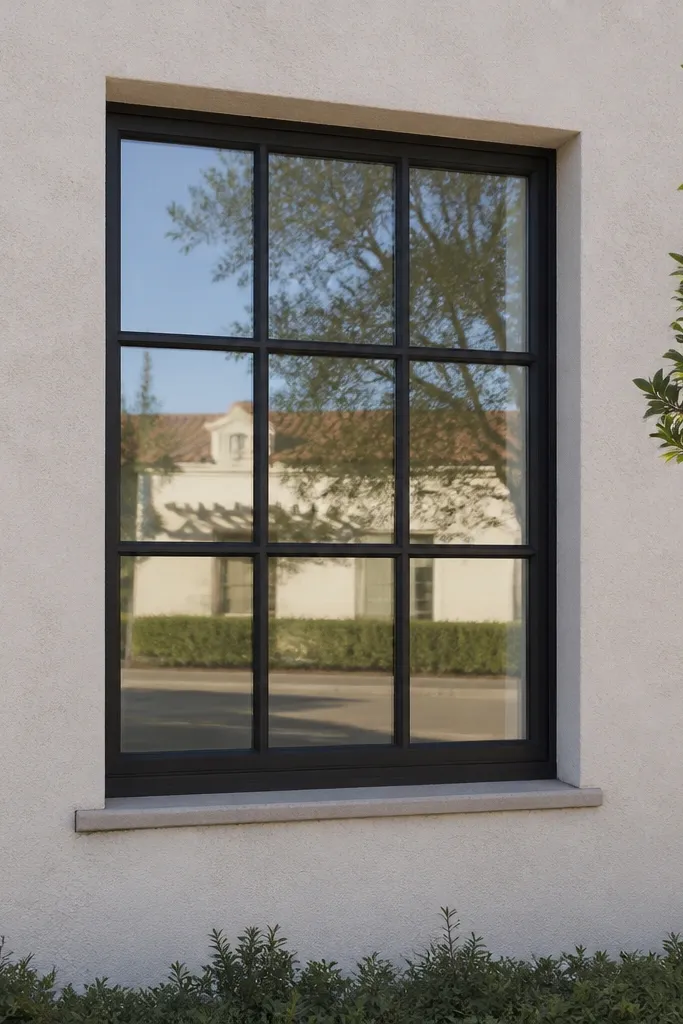
You can fake modern window mullions with trim bars, and it looks real from the street when spacing is consistent. The modern trick is to create a grid that matches your existing window proportions, not random lines. Use dark, matte trim bars on light stucco or painted siding to create crisp shadows. This is perfect when you want a modern facelift but your windows are staying put. It’s also a good option for rentals where full window replacement is off the table.
Clean and lightly sand the stucco or trim area around each window so caulk adheres. Mark the mullion layout with a tape measure and pencil, using equal spacing from the window edges. Cut trim bars and install them with exterior construction adhesive plus small exterior screws where hidden. Fill gaps with exterior caulk, then prime and paint to match your facade trim color.
Use a square to keep mullions perpendicular; even a 1/4-inch tilt shows up instantly.
Don’t install trim bars directly over dusty surfaces; adhesion fails and corners lift.
9. Pergola-style slat roof over the entry with steel-black finish
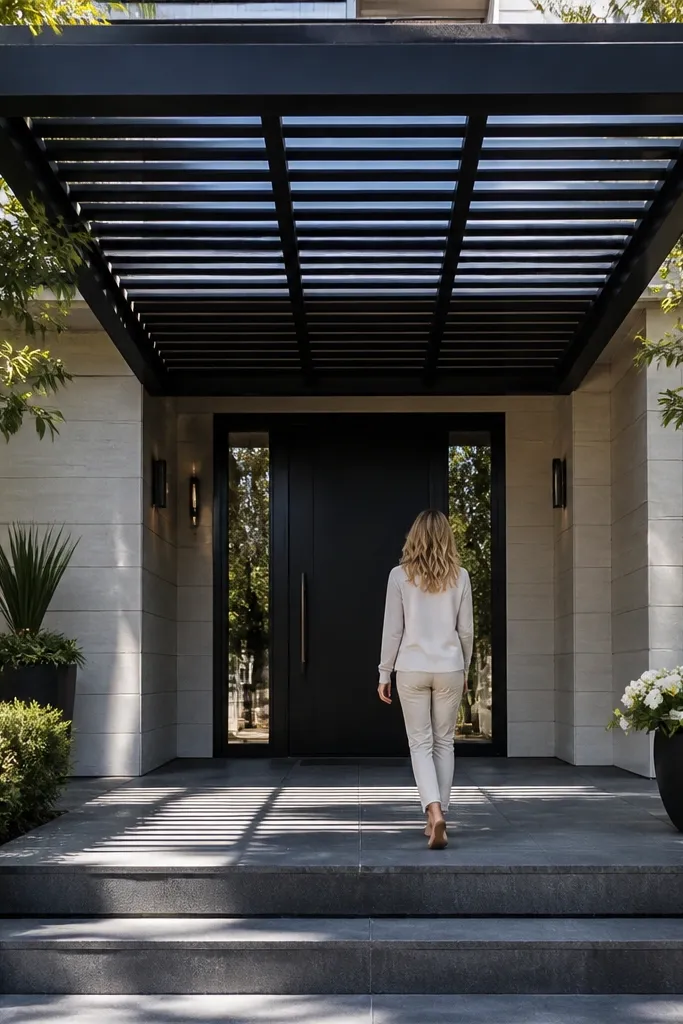
A simple slat roof frame over the entry makes the whole facade feel more architectural. Modern pergola lines are clean and boxy, and the slats add texture without blocking all light. Choose steel-black or deep charcoal so it looks sharp against light siding. This works when your entry is too exposed or the facade needs a stronger focal point. It also gives you a place to mount exterior lighting and house numbers at the right height for curb appeal.
Design a flat or slightly pitched frame that sits above the door, ensuring you follow local clearance rules and don’t interfere with gutters. Build the frame from treated lumber or steel-black metal tubing, then add evenly spaced slats across the top. Install the frame into structural points, not just trim boards, and use weatherproof sealants at connection points. Finish by painting metal parts and sealing wood, then mount house numbers and a small exterior light fixture on the frame.
Editor's notePre-drill holes in slats to prevent splitting and keep the spacing even.
Skip thisAvoid attaching into siding only; you need solid framing for a safe, straight structure.
10. Diagonal accent panel using wood-look composite sheets
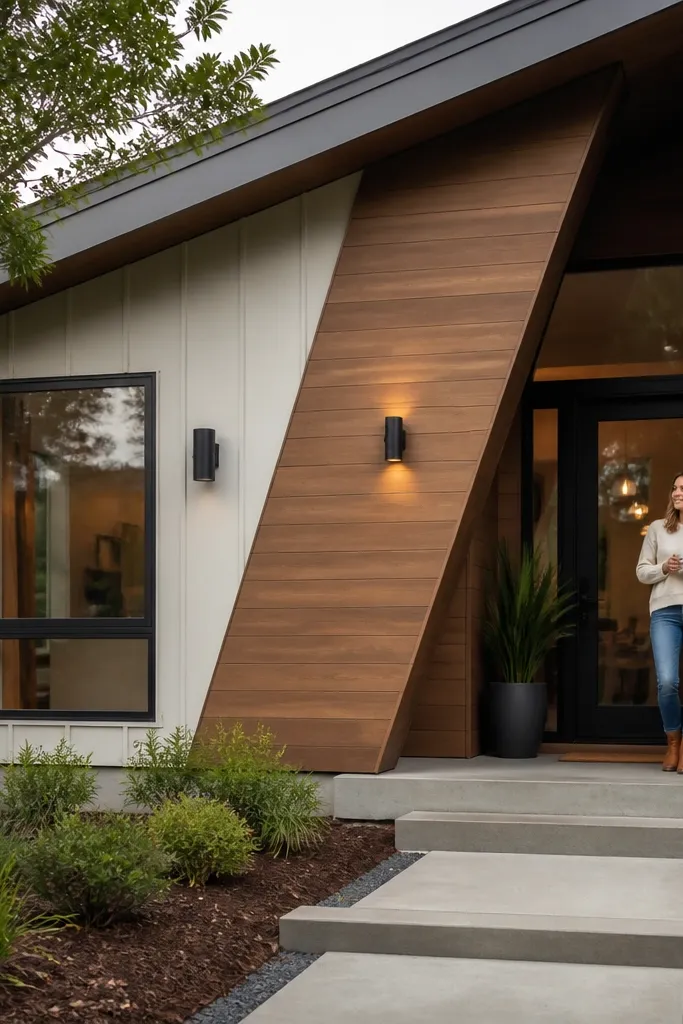
Diagonal accents look modern because they break the usual vertical/horizontal pattern on a typical house. Keep it to one panel — next to the entry, above a window group, or on a blank wall section. Wood-look composite sheets give you a consistent surface and resist weathering, so the diagonal line stays crisp over time. Pair the panel with simple trim in matte black for that architectural look. This project is bold and very photogenic because the diagonal creates a strong focal point in photos from the sidewalk.
Pick a wall section with enough flat area and measure the panel so it aligns with existing openings or trim lines. Install two straight border rails first, then cut the composite sheet for a clean diagonal fit between them. Fasten the sheet to solid backing with exterior screws, and seal the edges with compatible trim sealant. Prime and paint any exposed fasteners, then install corner trim so the panel edges look finished.
Editor's noteUse a guide jig for your diagonal cuts; freehand diagonal edges look amateur fast.
Skip thisDon’t choose a diagonal that crosses a window or door frame — it makes the facade feel busy.
11. Horizontal shiplap-style siding band for a clean modern rhythm
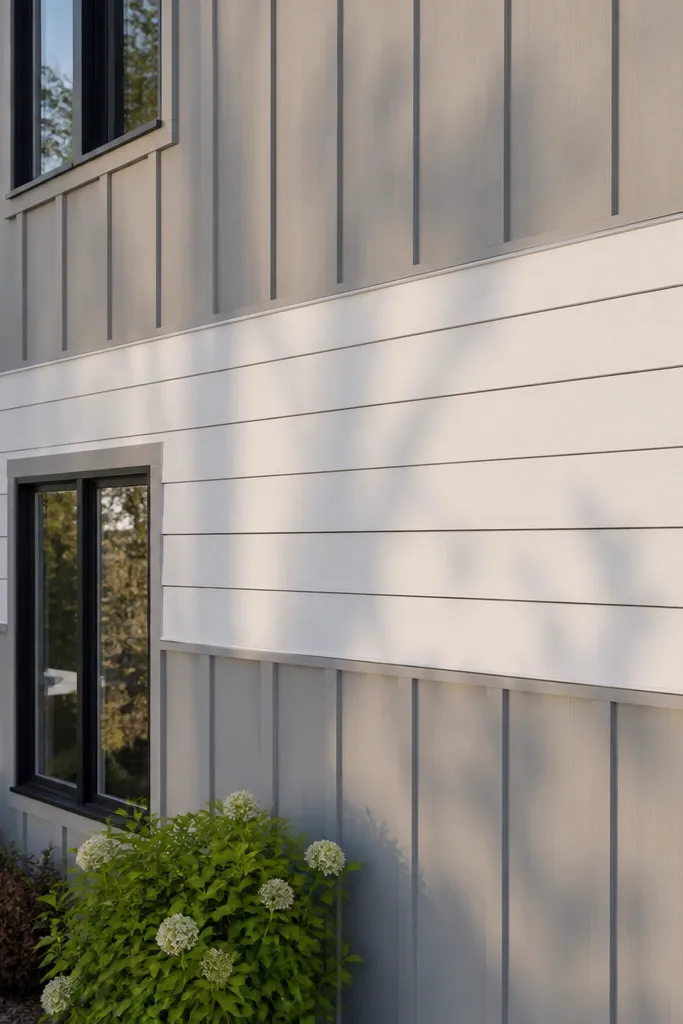
A horizontal shiplap-style band is a modern rhythm trick that works when your house is mostly vertical siding or brick. You’re adding a clear line change, which makes the facade feel designed instead of leftover materials. Use exterior-grade boards or a shiplap panel system, and keep the band height consistent across the facade. The look is photogenic because the repeated lines catch light and create subtle shadow. This is a practical budget move because you only need to install a band, not re-side the whole home.
Mark the band height using a level and confirm it lines up with windows and the garage base. Install a level starter strip and a backing board so the band sits flat and straight. Add boards with consistent gaps using spacers, then trim the ends with corner trim so the edges look crisp. Caulk seams lightly where needed, then prime and paint in a matte finish that matches your facade palette.
Pick a paint color that’s one step darker than your main wall for a modern contrast without looking harsh.
Don’t skip checking for level across the whole run; one low spot ruins the entire rhythm.
12. Brick veneer or stone veneer entry plinth
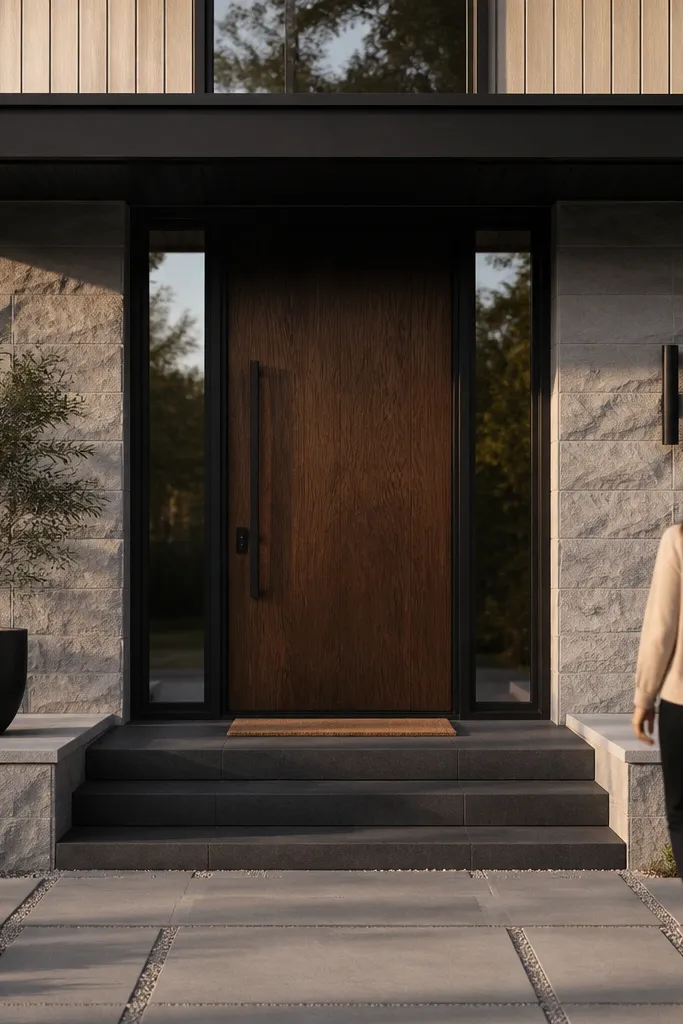
A veneer plinth around the entry makes the door feel grounded and intentional. Modern facades often rely on a heavier base — stone or brick — to balance lighter upper cladding. Keep the veneer area tight: the wall portion below the entry and the sides of the steps or landing. Choose a flat-faced stone veneer for clean lines and a modern texture. This idea is worth it because it changes the entry’s look more than painting ever will, and it still stays budget-friendly compared to full masonry.
Prep the surface by removing loose paint and cleaning dirt, then install a weather-resistant barrier if you’re over wood or older siding. Apply a thinset mortar and lay stone or brick veneer from the bottom up, using spacers for consistent joints. Cut pieces around door edges and corners with a wet saw or angle grinder made for masonry, then wipe mortar smears before it sets. Finish with a matching sealant if your veneer requires it, and caulk the top edges carefully to prevent water entry.
Editor's noteDry-lay a few rows on the ground first so you pick a consistent color variation and joint pattern.
Skip thisAvoid stacking heavy wet mortar too thick; it causes veneer to slide and joints to look uneven.
13. Metal panel siding with vertical ribs on one facade section
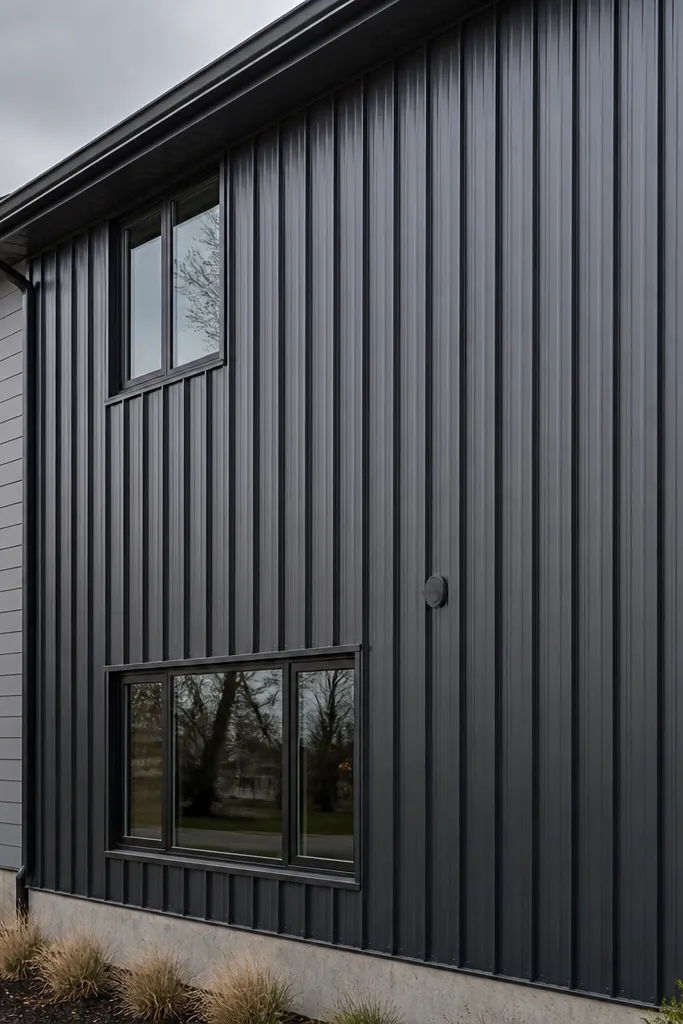
Metal panels with vertical ribs look modern immediately because the texture is architectural, not decorative. Use them on one section — a tall wall next to the garage, a strip around the entry, or a side elevation you can see from the street. The ribs catch light and create depth even in overcast weather. Budget-wise, you only buy metal for the accent zone, not the entire house. This is a DIY-friendly choice if you can follow straight layout lines and use proper flashing — the look comes from precision.
Choose a panel system made for exterior installation with matching trim and flashing. Mark your layout lines and install backing or furring strips so the panels sit flat and fasten into solid material. Start at the bottom and work up, overlapping panels per manufacturer instructions, then install corner trim and edge flashing. Seal fastener heads with the provided washers, and paint if required or leave the factory finish if it’s pre-coated.
Editor's noteUse a chalk line and check squareness at the corners — metal panels telegraph crooked lines more than wood.
Skip thisDon’t skip flashing where panels meet trim and windows; water will find the seam.
14. Matte black exterior paint refresh with trim line cleanup
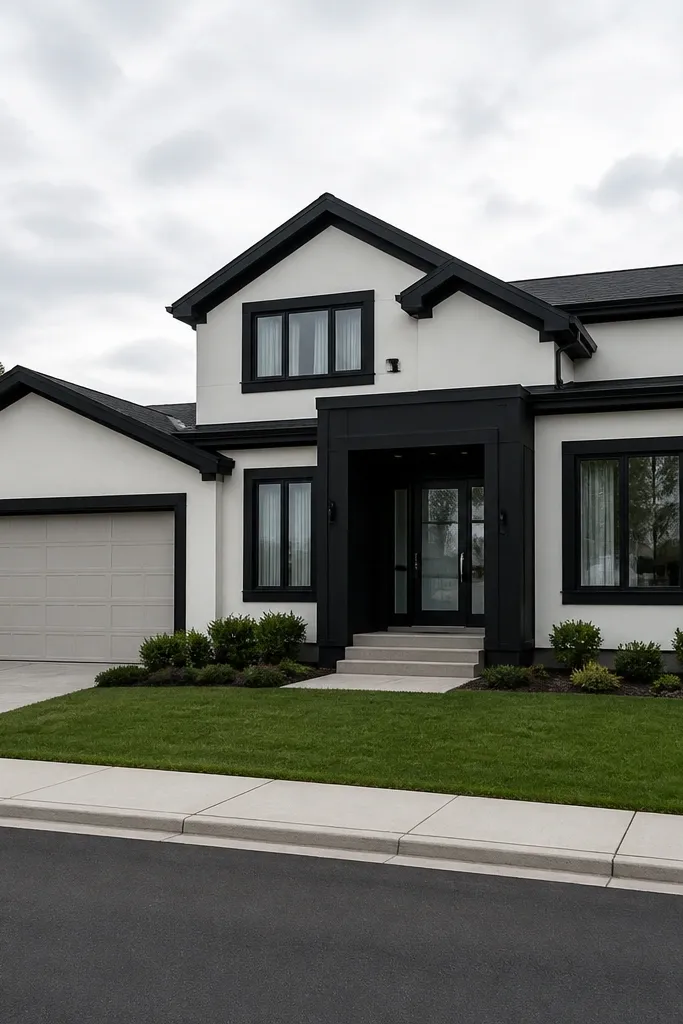
Sometimes the most budget-modern move is fixing the trim line and paint system so the facade reads clean. A matte black trim palette around windows, garage edges, and the entry surround makes the geometry obvious. If your facade is already mostly neutral, switching to consistent black trim and repainting in the right sheen makes it look like a planned modern exterior. This is also one of the easiest projects to photograph well because matte paint hides surface glare and makes edges crisp. It suits homeowners who want a fast update and can commit to good prep and two coats.
Wash the entire facade, scrape peeling paint, and sand glossy areas so primer bonds. Mask trim lines carefully and apply an exterior primer rated for the existing surface, then paint with a matte exterior trim paint for the black elements. For clean lines, use painter’s tape and remove it while the paint is still slightly tacky so edges don’t tear. Seal joints around windows and doors with a paintable exterior caulk, then touch up any missed spots with a small brush.
Use a foam roller for large flat trim areas; it keeps the finish even and reduces roller marks.
Don’t paint over chalky surfaces without priming; black trim stains and peels fast.
15. Board-and-batten porch ceiling with black beams
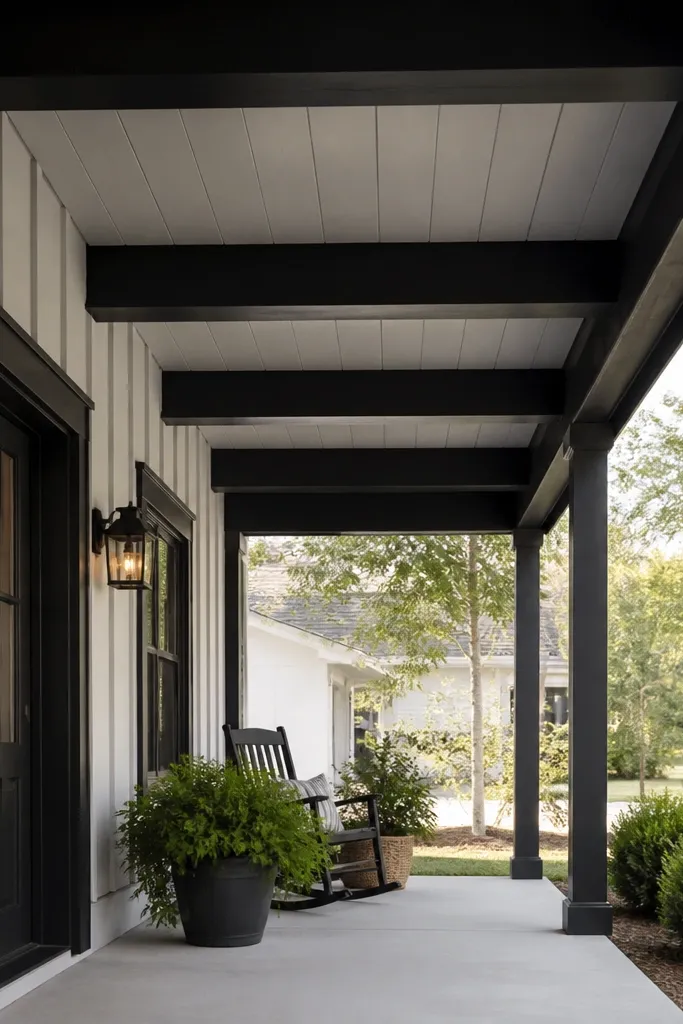
A modern facade isn’t only the walls. The porch ceiling is a big piece of what the camera sees when someone stands on the sidewalk, and a board-and-batten ceiling makes the entry look finished. Pair light ceiling boards with black beams or a black perimeter trim so the structure reads bold. This works best on covered porches where you can mount boards under the roofline. It’s a budget upgrade because you’re working in a small area with easy framing access. The result feels architectural and adds depth to the entry even if your siding stays the same.
Inspect the porch ceiling framing and add blocking where needed so fasteners land solidly. Install a perimeter border first, then attach vertical boards with consistent spacing using spacers. Add black beams or trim pieces across the ceiling to create strong horizontal structure, then caulk edges and fill screw holes. Prime and paint ceiling boards with a finish rated for covered exterior or use exterior-rated paint, since porch ceilings still see humidity and temperature swings.
Editor's noteMark board spacing on a scrap strip and use it as a repeatable gap gauge across the whole ceiling.
Skip thisAvoid skipping paintable caulk at perimeter edges; those gaps collect moisture and look messy.
16. Simple vertical wood slats on a blank side wall
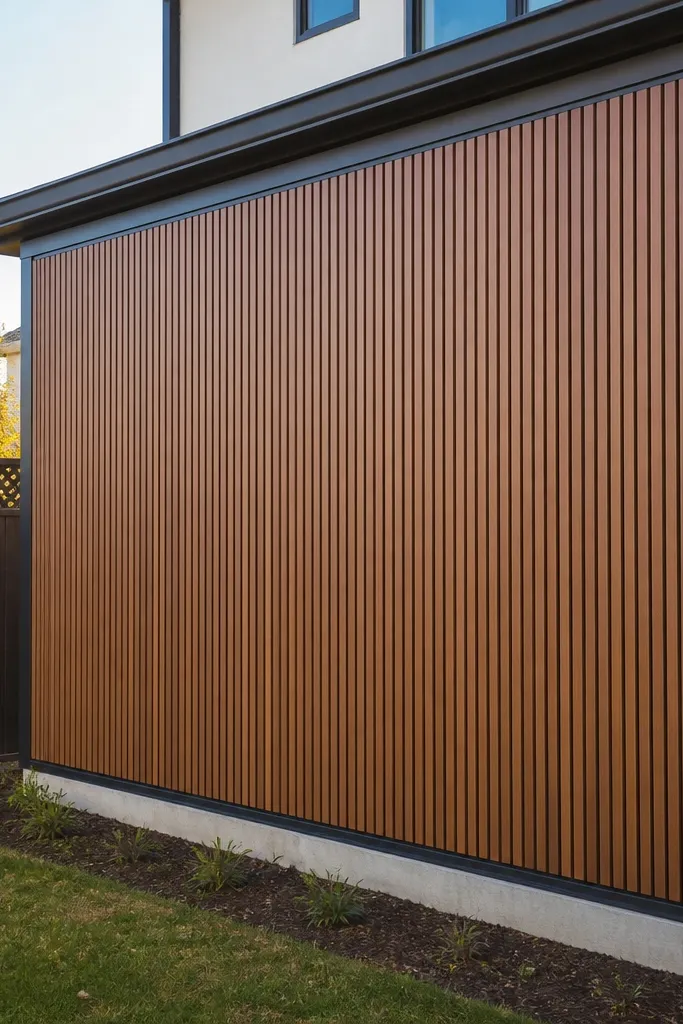
If your facade has a blank section that looks unfinished, vertical slats can turn it into a modern feature fast. Keep the slats aligned and use a warm stain or pre-finished wood-look product so it reads clean instead of rustic. A dark trim border makes the slat wall look like it belongs to the house design. This works especially well on side elevations visible from the driveway or corner view. It’s also a budget-friendly way to add texture without re-siding the whole house.
Choose a section width and mark a plumb rectangle on the wall, leaving space for trim on both sides. Install horizontal furring strips first for solid fastening, then attach vertical slats with consistent spacing using a spacer block. Use exterior screws and pre-drill to prevent splitting, then stain or paint the slats with an exterior finish system. Install corner and edge trim after the slats are complete so the perimeter looks crisp.
Editor's noteUse the same slat orientation across the whole run and rotate boards in advance to minimize tone differences.
Skip thisDon’t use mixed-width slats; variation reads messy at street distance.
17. Raised base skirt panel to modernize the foundation look
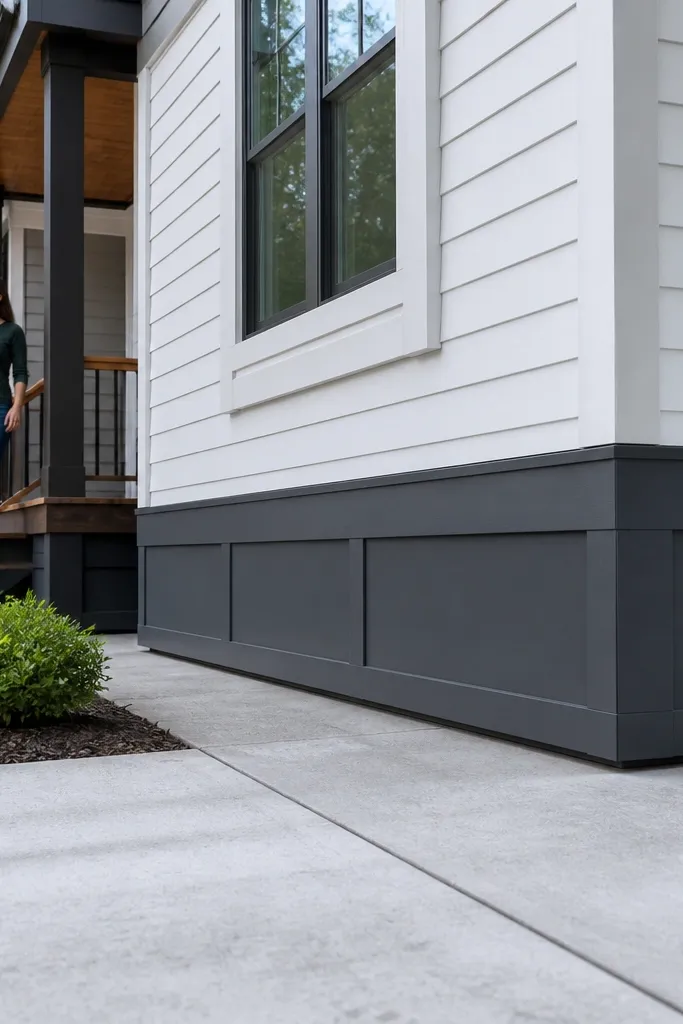
A foundation skirt panel changes the way the whole house “sits” on the ground. If your lower facade looks uneven, stained, or visually too tall, adding a clean base line makes the upper cladding look more balanced. Use a dark gray or charcoal panel system for a modern, grounded look. This also hides ugly foundation transitions and gives you a tidy edge for landscaping. It’s a budget idea because you’re adding one band of material at the bottom, not rebuilding the facade.
Measure the length of the front elevation and decide the skirt height, aiming for a consistent band around windows and door openings. Install a level starter strip anchored into studs or solid framing, then attach the skirt panels using exterior-rated fasteners. Cut panels cleanly around doors and windows, and use corner trim to keep edges straight. Prime and paint if required, and caulk the top edge where the skirt meets the wall for water protection.
Editor's noteKeep the skirt height consistent with the window sill line — matching those horizontal references looks intentional.
Skip thisDon’t fasten into loose masonry without proper anchors; panels will loosen and gaps will appear.
18. Garage door surround with matching trim and side light panels
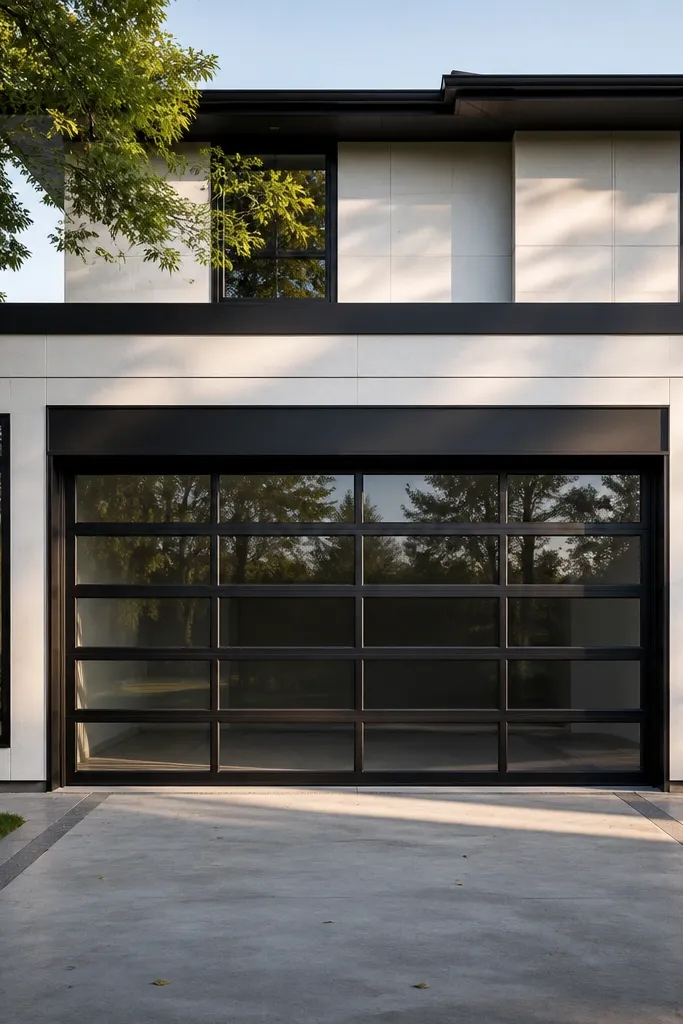
Garage doors can make a modern facade look dated because they’re big and visually flat. Framing the garage door with matching trim lines and adding side light panels gives it structure and makes the house read like a single design. Use dark trim and a clean surround that aligns with window trim heights. If your garage has a side door or nearby window, tie the surround to those lines so the whole front feels organized. This works well on most homes because it’s a focused upgrade on the dominant facade element.
Measure the garage door opening and mark a surround rectangle that aligns with window trim heights on the facade. Install corner trim pieces and long top and side trim boards using exterior fasteners into solid backing. Add small side light panels if your design allows space, using exterior panels and weatherproof seals. Prime and paint all trim in matte black or deep charcoal, and seal joints around the surround to prevent water entry.
Editor's noteStand back and check alignment from the driveway; a surround that’s level up close can still look off from far away.
Skip thisAvoid over-thick decorative trim; modern surrounds look clean and measured, not chunky.
19. Stained wood slat accent around the porch stairs
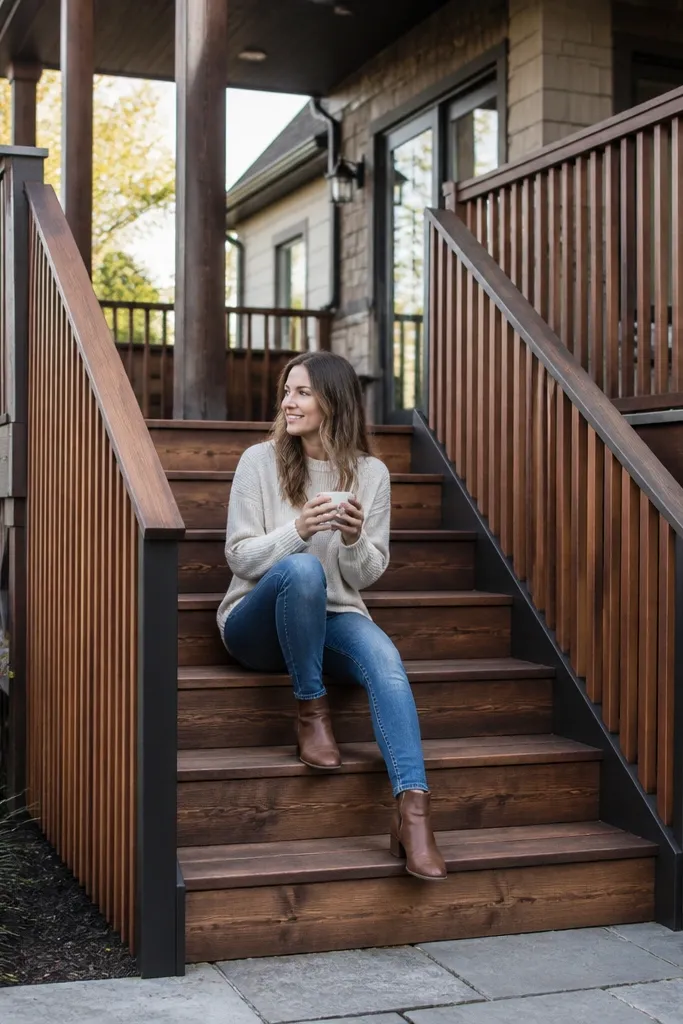
Porch stairs often look like an afterthought, which kills the modern look. A slat accent around the stairs adds depth and clean vertical rhythm where people actually look when they approach. Stain the slats in a warm tone that matches outdoor wood items like railings or the deck. Keep the color consistent and use dark trim around edges so the whole stair area looks framed. This works on homes with small front stoops, step landings, and porch openings that feel visually “open” or unfinished.
Measure the stair landing and side runs, then plan a rectangular slat frame that covers the visible face area. Install treated backing boards and a top rail so slats attach securely and stay aligned. Add vertical slats with consistent spacing, then stain with an exterior stain system and topcoat if required for your climate. Finish by sealing the top edges and adding dark trim trim pieces at the perimeter to hide messy cuts.
Editor's noteUse a stain pad or rag method on slats for even coverage and fewer streaks than a brush.
Skip thisDon’t leave raw end grain exposed; seal ends or water will wick in and lift the finish.
20. Modern mailbox wall with panel recess and house-number ledge
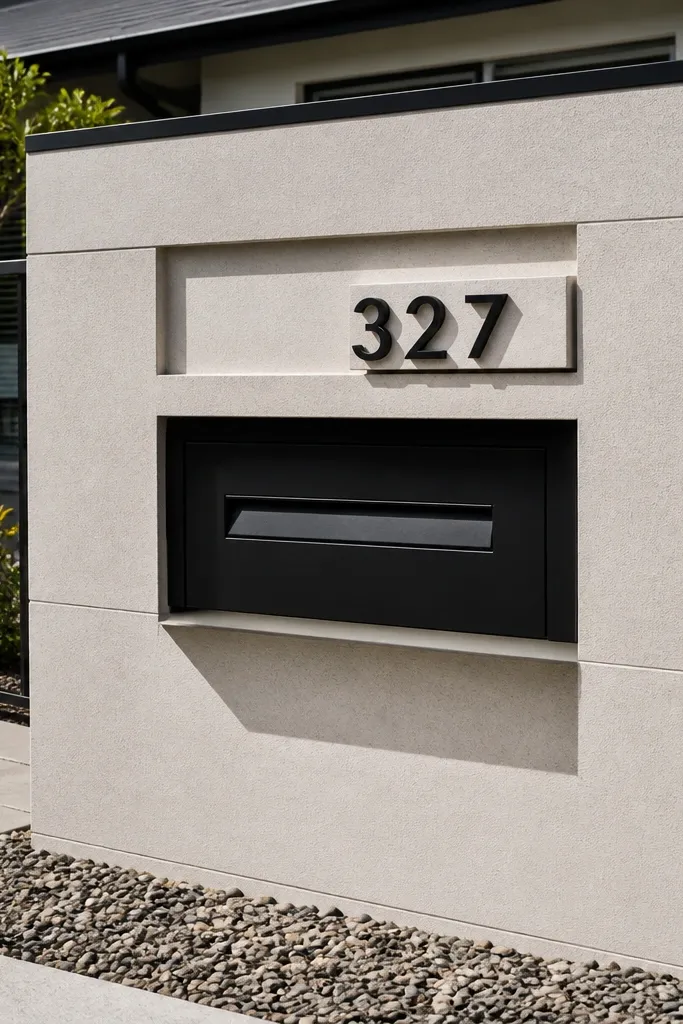
A modern facade doesn’t stop at the house line — the mailbox area is part of the curb photo. Building a small mailbox wall with a recessed panel and a dedicated house-number ledge makes the entry feel designed. Use matte black trim and a light cladding panel so the geometry reads clean from the street. This is budget-friendly because it’s a small build with big visual payoff, and it’s easier to keep straight than big wall projects. It suits homes with a detached mailbox setup or a basic post-and-box that looks out of place.
Choose your mailbox unit first, then build a simple framed panel wall around it with exterior plywood or cement board. Create a recessed opening so the mailbox sits back and the trim frame looks intentional. Install a horizontal ledge just above or below the mailbox for the house numbers, then add side trim and corners for clean edges. Prime and paint the panels and trim, and seal all seams with exterior caulk to prevent moisture around the mailbox.
Editor's noteMount numbers on a separate ledge plate so you can swap them without repainting the panel.
Skip thisDon’t bolt the mailbox through unsealed wood; water runs along fasteners and stains the cladding.



