

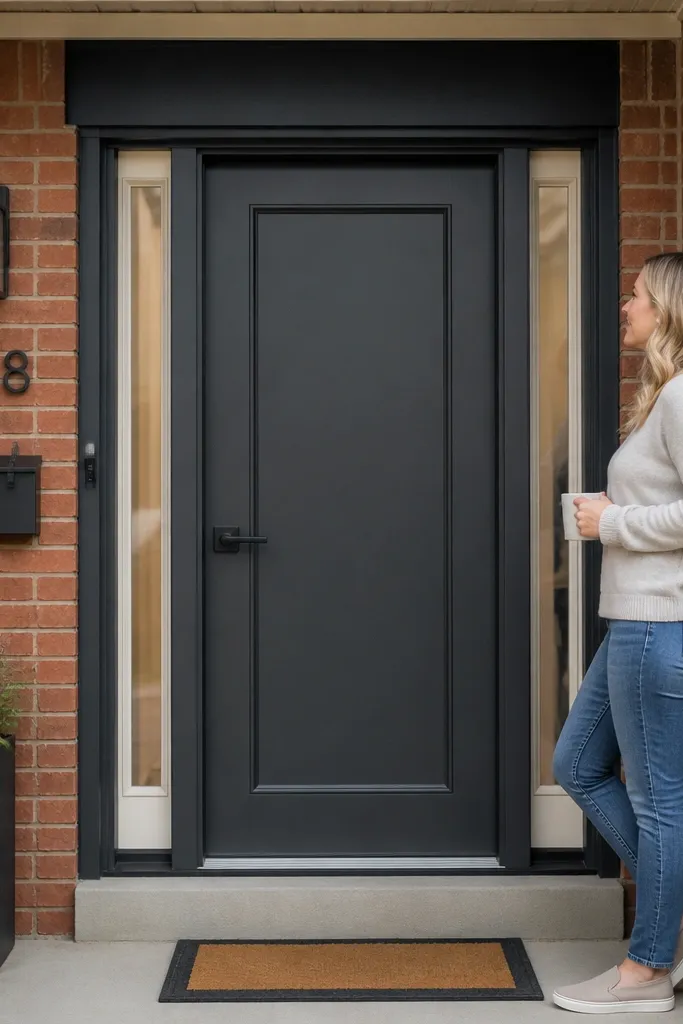
1. Matte Black Slab With 2-Inch Flat Trim Frame
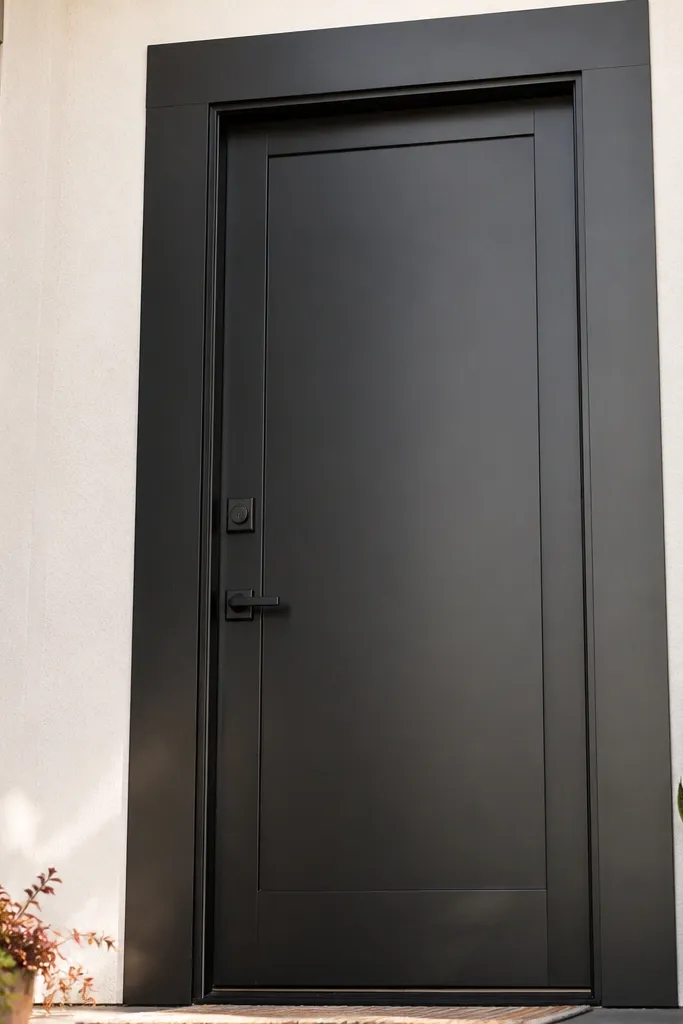
Start by buying or building a door slab that fits your opening, then remove the old door and label the hinge positions. Cut trim boards to match the opening, aiming for 2-inch face width on both sides and top, and keep miters tight at corners. Install trim to the existing frame with exterior-rated screws, then leave a small shadow gap (about 1/8 inch) between trim and door edge so the line stays crisp. Prime the door, paint with exterior matte black, and finish by reinstalling hardware at a consistent height with fresh screws.
This is the cleanest modern budget main door design entrance look because it uses one color, one frame thickness, and straight edges. A matte black slab makes the hardware and house numbers read clearly, especially in daylight. The 2-inch flat trim creates a visual “picture frame” around the door, which makes even a basic door slab look designed. Use a scuff-resistant exterior matte paint so the surface stays even and doesn’t turn shiny around the handle area.
Skip thisAvoid satin or gloss black if your door surface has dents; matte hides them and keeps the look modern.
Editor's noteUse painter’s tape to mask a 1/8-inch line where trim meets door so the black paint doesn’t bleed and blur the edge.
2. Warm Walnut Door With Black Craftsman-Style Hardware
Start by sanding the door surface to a uniform finish, using 120 grit then 180 grit, and vacuum dust thoroughly. Apply a walnut-toned exterior stain in thin coats, then wipe back consistently so you don’t get blotchy edges. Seal with an exterior clear topcoat in satin so the door doesn’t glare. Finally, install a black lever handle and deadbolt, centering them on the door stile so the lines match the door geometry.
Wood-tone doors look modern when the grain direction is consistent and the hardware is bold. A warm walnut stain (not gray-brown) makes the entrance feel inviting while still reading “current.” Pairing it with black hardware adds contrast and keeps the design from looking old-fashioned. If your existing frame is light, this look also disguises mismatched trim because the door becomes the focal point.
Skip thisSkip gray “weathered” stains; they read dated on main entrances unless your house trim is already cool-toned.
Editor's noteWhen staining, stain the edges first; they dry faster and need the same attention to avoid a darker rim.
3. White Door With Charcoal Shiplap Panels and Matte Finish
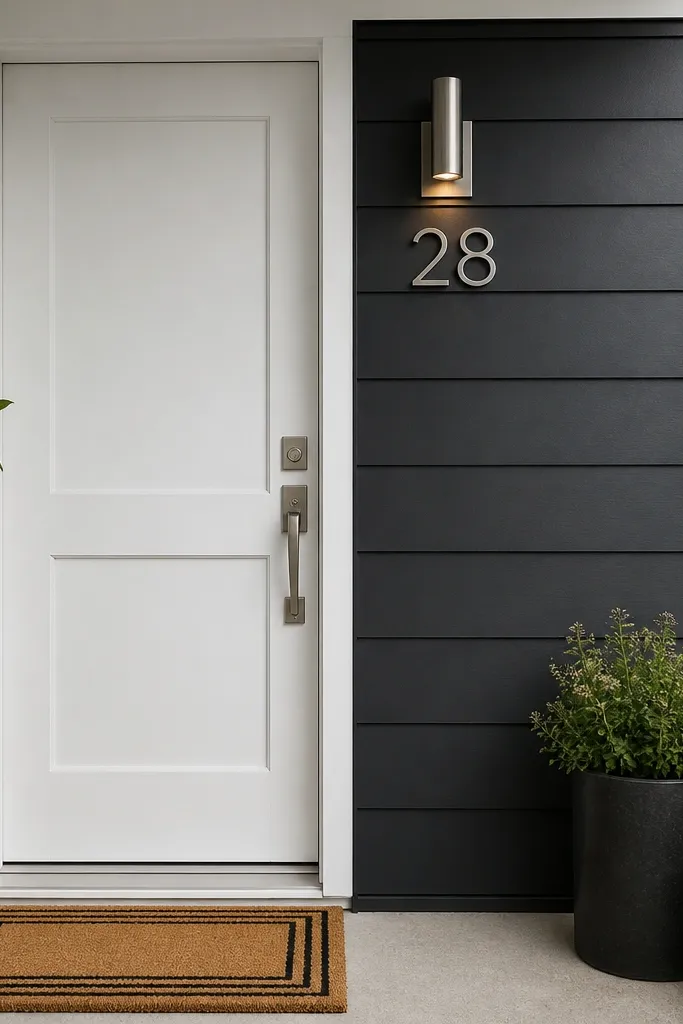
Start by marking a panel rectangle on the door, leaving a consistent border (about 2 inches) around the edges. Install thin shiplap boards vertically within the rectangle, spacing them evenly and fastening into the door’s backing. Fill nail holes, sand smooth, prime, then paint the door border white and the panel area charcoal. Finish with matte black hardware and install a house number plate that matches the charcoal tone.
This design is modern because it uses a single contrasting panel color and repeats a clean line pattern. Shiplap-style grooves add depth without needing expensive glass or metalwork. Keeping the door itself white and the panel area charcoal makes the entry look designed even if your hardware is basic. Choose matte finishes so the grooves catch light softly instead of reflecting harsh highlights.
Skip thisDon’t leave shiplap edges unsealed; raw wood edges soak paint unevenly and make the lines look messy.
Editor's noteUse a 2-inch wide painter’s tape strip as a visual guide for your panel border so the charcoal area stays perfectly straight.
4. Two-Tone Door: Black Top Half, Warm Off-White Bottom
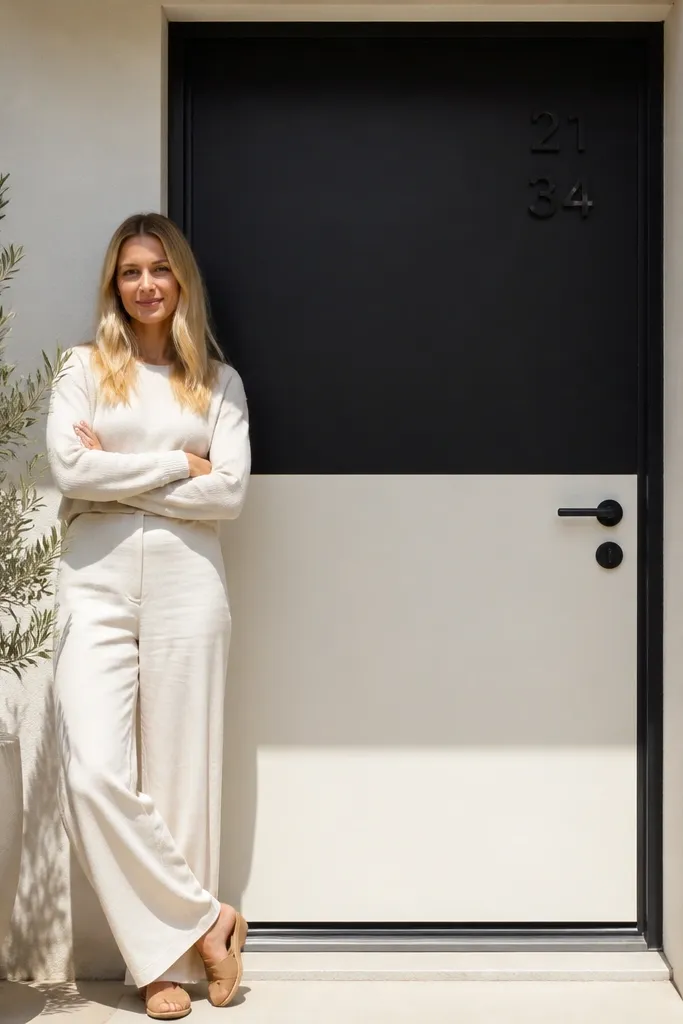
Start by masking a horizontal line across the door at the height you want, usually around mid-door with a little margin for sightlines. Prime the full door, then paint the bottom section warm off-white first, let it cure, and remove tape carefully. Tape again along the split line and spray or roll the top section matte black in thin, even coats. After cure, add hardware and consider a matching black kickplate or simple number box.
Two-tone doors look modern when the split line is razor-straight and the colors are deliberate. Matte black on top gives weight, while warm off-white on the bottom feels clean and welcoming. This is a great budget main door design entrance choice when you want change but don’t want to add trim complexity. It also hides minor door surface imperfections because matte paint blends better than glossy coatings.
Skip thisAvoid using bright pure white if your exterior walls are warm; it will look like a sticker on the door.
Editor's noteUse a 1-inch foam roller for the flat areas; it reduces streaks and keeps the paint even.
5. Modern Vertical Slat Door With Pine Slats and Clear Seal
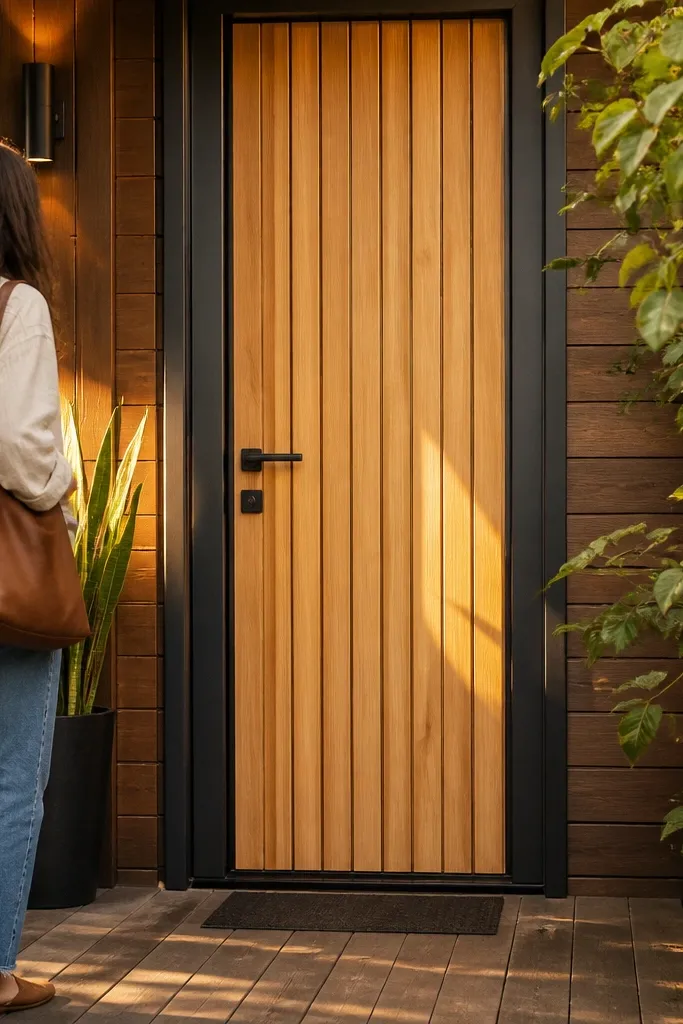
Vertical slats read modern because they create long lines that pull the eye upward. Clear satin over pine slats gives that clean, airy look without needing expensive hardwood. This works especially well for budget main door design entrance setups where you want warmth but don’t want the door to feel heavy. The key is spacing and finish — even gaps and a smooth seal make it look intentional.
Start by choosing slat thickness (about 1/2 to 3/4 inch works well) and spacing (use 1/4 inch gaps for a crisp look). Build or attach slats to a door panel backing so the slats are straight before you fasten anything permanently. Sand the whole surface smooth, seal with exterior primer, then apply a clear satin exterior topcoat in two coats. Install black or brushed brass hardware so it matches the warm wood tone.
Dry-fit slats with the exact spacer you’ll use, then clamp and check from both sides before final fastening.
Don’t skip sealing the slat edges — the edges are where weathering starts and where the modern look breaks first.
6. Charcoal Panel Door With Square Inset Moulding
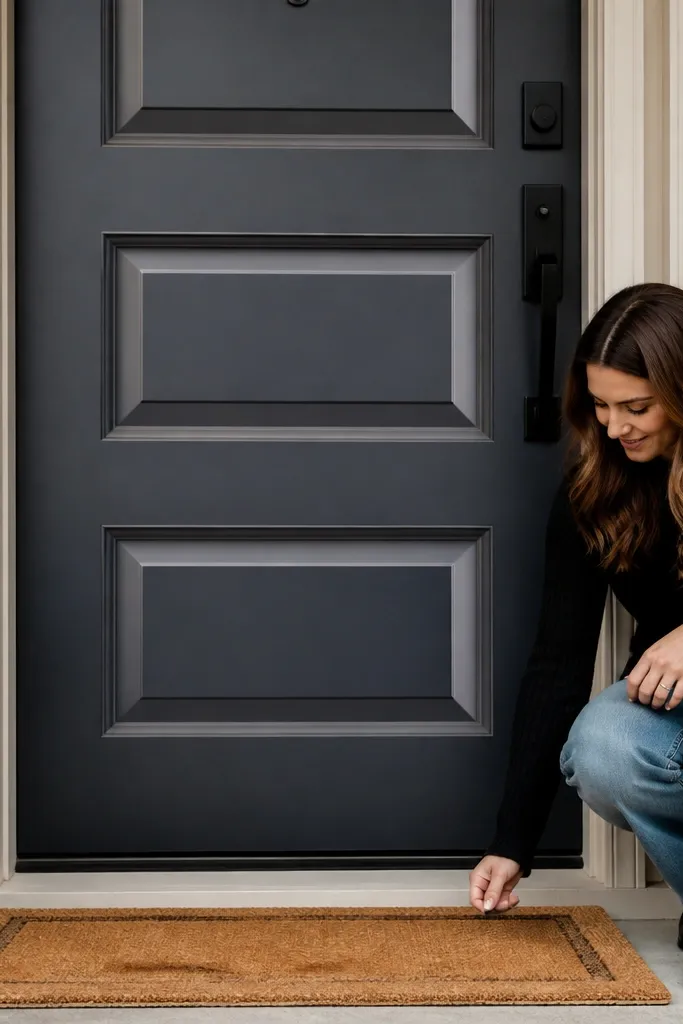
Start by marking a central square or rectangle inset on the door, leaving a border of about 2 inches around it. Cut moulding strips to form the inset frame and attach them using small finish nails or exterior-rated construction adhesive plus brad nails. Fill gaps, sand flush, then prime and paint the door charcoal and the moulding a contrasting white (or warm light gray). Install hardware at standard height and add a small door knocker plate if you want extra visual weight.
Square inset moulding turns a plain slab into a modern panel door without buying a fancy door system. The contrast between charcoal and a light trim color makes the geometry pop, especially near the doormat where people approach. This is a strong option for a budget main door design entrance because you can build the pattern with basic moulding strips. Keep everything crisp and straight — that’s what makes it feel modern instead of “crafty.”
Skip thisAvoid thick, chunky moulding — it reads farmhouse fast on a modern door.
Editor's noteUse a fine brad nailer or pre-drill small holes; you avoid splitting the moulding and keep the lines clean.
7. Matte Olive Door With Brushed Nickel Hardware
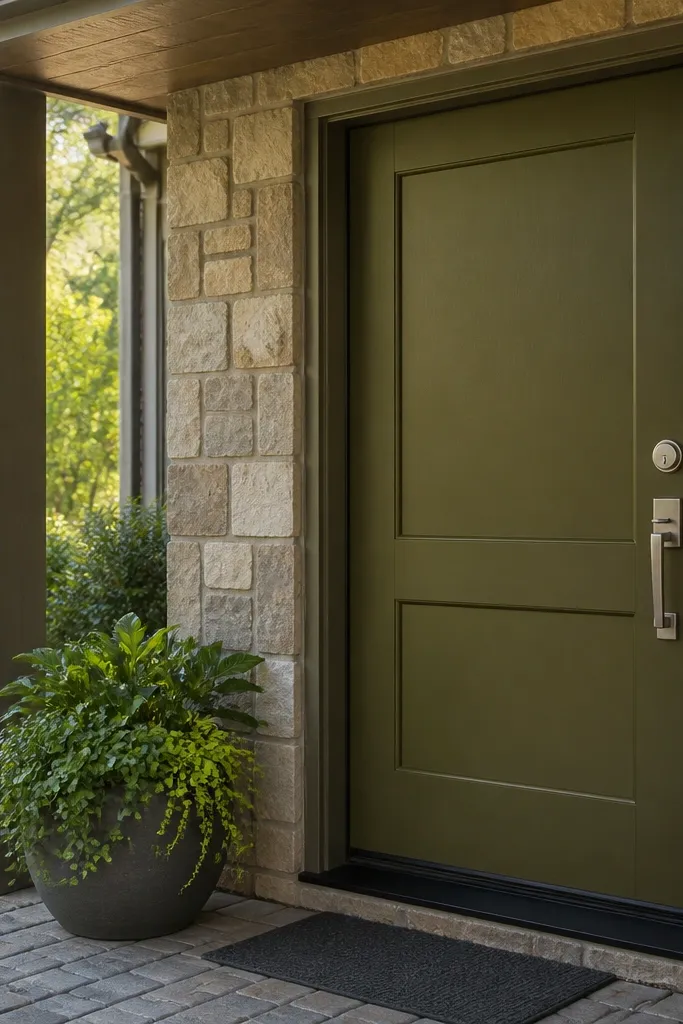
Olive looks modern because it’s muted but not gray, and it plays nicely with natural stone and wood siding. Pair it with brushed nickel or satin stainless hardware for a softer contrast than black. This look works when your entrance is surrounded by greenery or warm materials — the door color becomes the anchor. It’s also forgiving: matte paint hides minor wear and touch-ups blend better than glossy finishes.
Start by cleaning the door thoroughly, then sand scuffed spots to a smooth, dull surface. Prime with exterior bonding primer, then roll on matte olive exterior paint in two coats, keeping a steady direction on each coat. Install a brushed nickel lever handle and deadbolt, centering them on the door stile so the hardware aligns with the door’s vertical lines. If you need extra design, add a simple rectangular address plaque in a matching nickel tone.
Buy a sample pot and test it on the door in shade and sun — olive can shift depending on your siding undertone.
Don’t pair olive with antique bronze hardware; it pushes the look toward older styles.
8. Black Door With Clear Glass Insert and Thin Trim
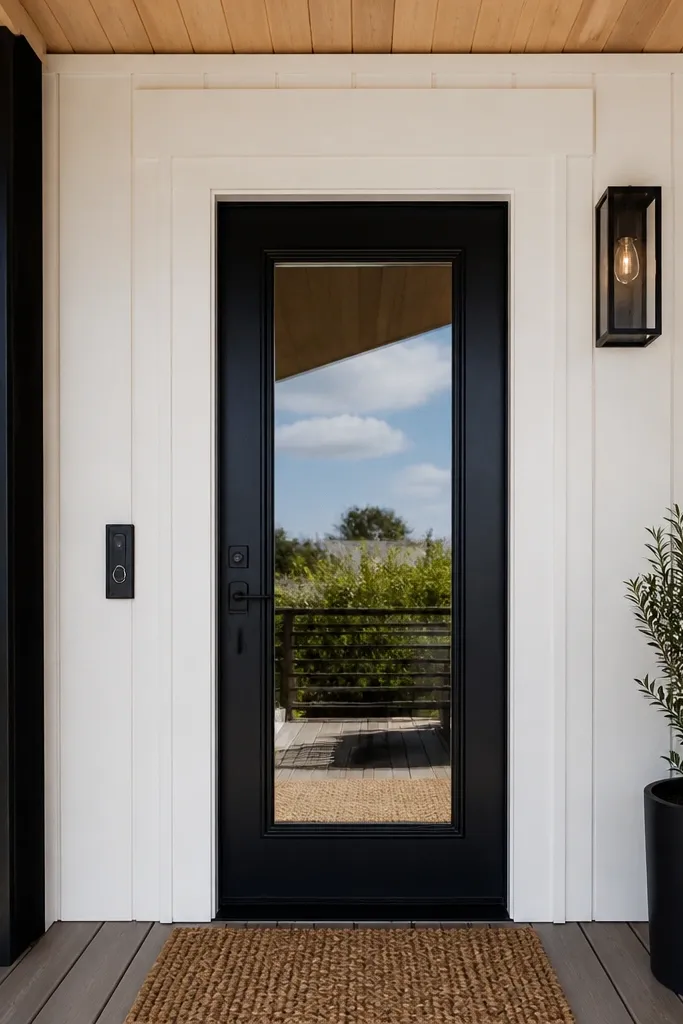
Start by choosing a glass opening size that fits your door — a rectangle about 10 to 14 inches tall looks right on many standard doors. Remove the door panel section where the insert will go, then dry-fit a frame and check for even reveals. Install the glass using glazing tape and a thin trim ring, then secure with screws into the door backing. Prime and paint the door black, then finish by installing hardware and an exterior-rated weather seal around the insert area.
A glass rectangle makes the entry feel modern because it adds a clean, reflective plane. Thin trim around the glass keeps it from looking like a storm door panel. For budget main door design entrance projects, you can use a pre-made glass insert kit or build a simple frame and mount it carefully. The result is photogenic — light moves through the glass and makes your door look “finished,” not improvised.
Skip thisSkip tempered-glass spec checks; for exterior doors, use glass rated for exterior use.
Editor's noteUse glazing tape instead of caulk as your first seal — it flexes with temperature changes and reduces cracking.
9. White Door With Horizontal Slat Accent Strip
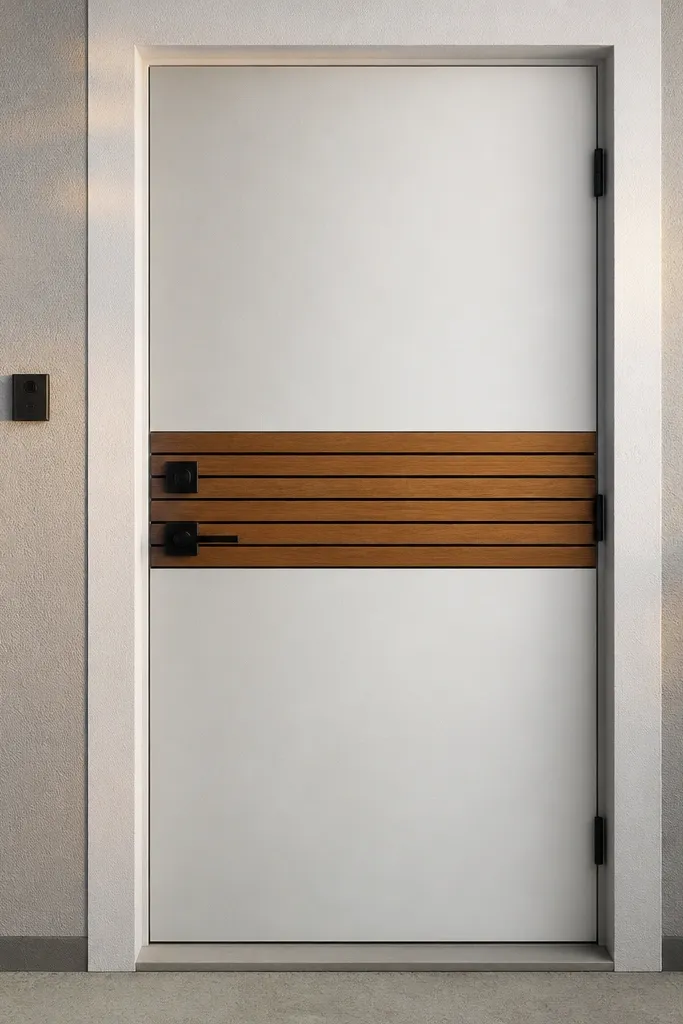
Start by deciding the band height, usually around the middle of the door, and mark it with painter’s tape. Cut boards to match your band width and attach them to the door using construction adhesive plus small screws into the backing. Sand the band flush, then stain the slats in a warm tone and seal with satin exterior clear. Prime and paint the door white (two coats), then install black hardware and a simple matching peephole trim.
This is a modern trick: add movement in one place, not everywhere. A single horizontal slat accent band creates a strong line and makes the door look intentional even when the rest is simple. It’s budget-friendly because you only build one small section, and it looks great in photos where the camera catches side light. Choose a warm wood tone for the slat so the white stays crisp without feeling sterile.
Skip thisDon’t run the band too close to the top or bottom; it visually shrinks the door.
Editor's noteStain and seal the slats before attaching if you want the smoothest, most even finish on edges.
10. Gray Door With Wood Veneer Rectangle and Black Frame
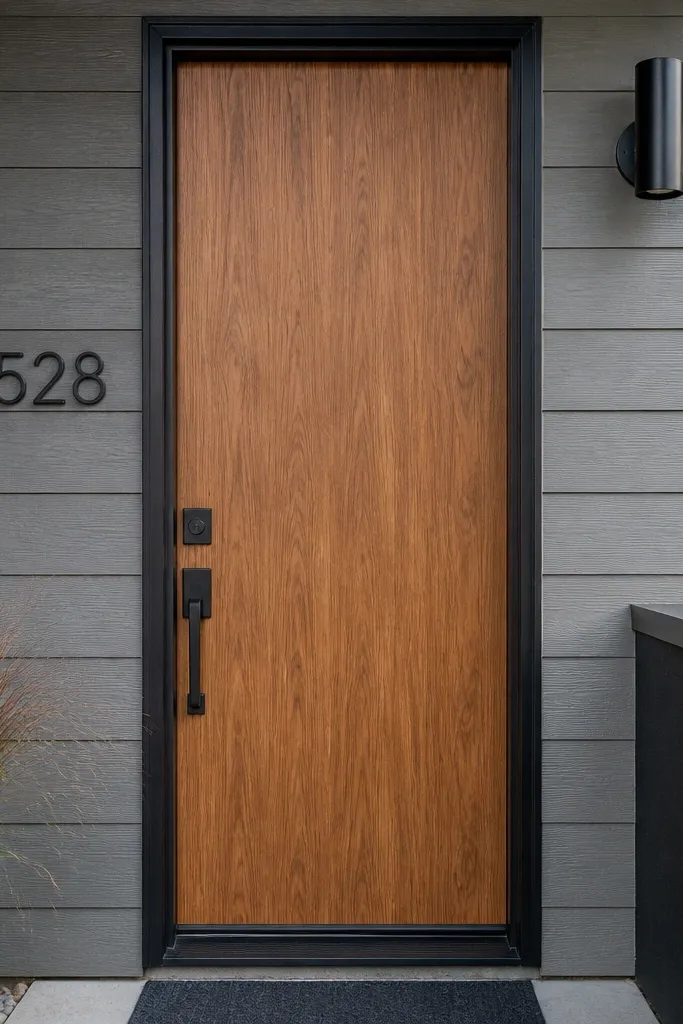
Start by sanding and priming the door, then paint it a medium exterior gray matte. Cut a rectangle of wood veneer or a thin wood panel and mount it onto the door with contact adhesive, keeping edges perfectly square. Frame the rectangle using thin black trim strips, mitered and glued, then fill tiny seams with wood filler. Seal the veneer with exterior-rated clear topcoat, then install hardware and a matching house number plate in black.
This look uses a “gallery” concept: one wood rectangle framed in black on a calm gray door. The veneer gives warmth and texture without the cost of solid wood panels, and the black frame makes it look architectural. It’s a strong budget main door design entrance option when you want modern but not cold. The best part is the geometry — people read it as custom because the lines are clean.
Skip thisDon’t leave veneer unsealed; it will dull and curl at edges after weather exposure.
Editor's noteUse a straightedge and a sharp utility knife to trim veneer edges; dull blades create frayed corners that show up in photos.
11. Rust Red Door With Simple Steel Planter-Style Numbers
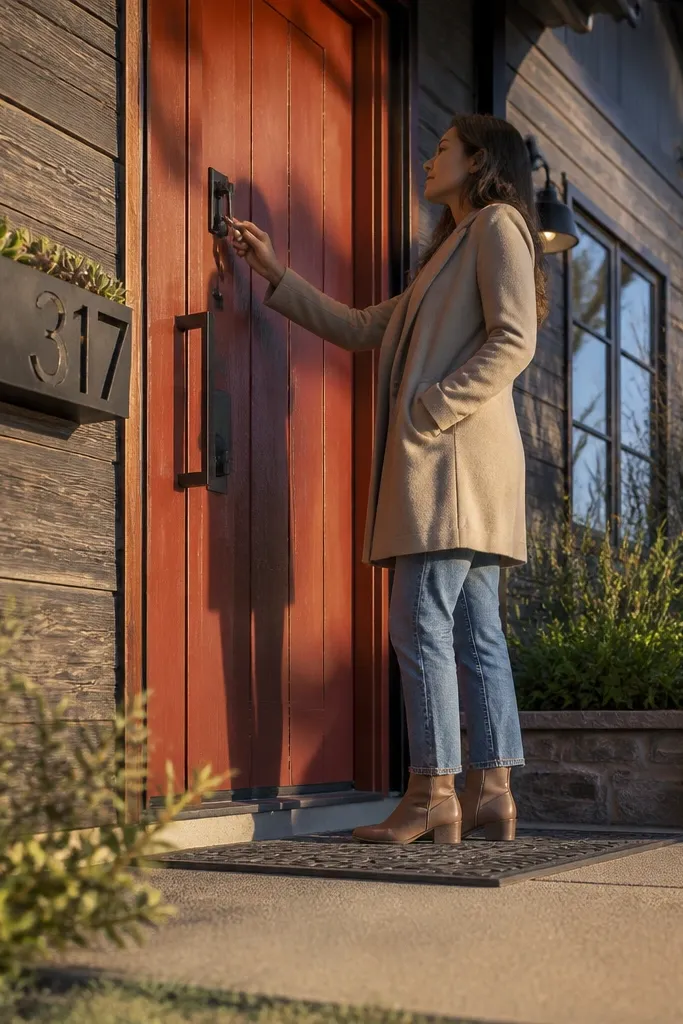
Start by choosing an exterior rust red paint with a matte or eggshell sheen, then prime and paint the door in two coats. Install black or brushed nickel hardware, and keep the handle line centered on the door stile. Mount a minimalist steel address plate or numbers on the door near eye level, using exterior screws and a template to keep spacing even. Finish by sealing around any drilled holes with exterior caulk to prevent water intrusion.
Rust red works on modern entrances when it’s a muted, earthy tone and paired with clean hardware. The real design move here is using a minimalist number display that matches the door hardware color. This makes the entry feel styled even if you keep the door surface flat. If you want a budget main door design entrance that still looks high-end in daylight, this color + hardware contrast does it.
Skip thisAvoid bright cherry red; it looks trendy for a season and then dates quickly.
Editor's notePre-mark number screw points with painter’s tape and a small awl so you don’t misalign the plate after paint.
12. Dark Teak Veneer Door With Vertical Metal Pull Strips
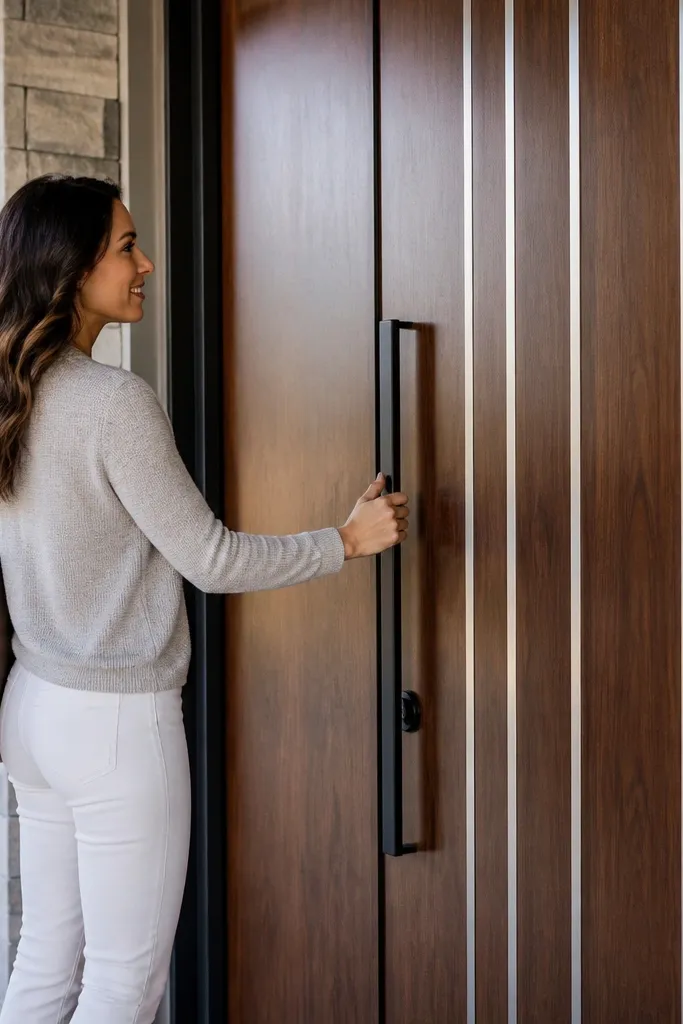
Start by prepping the door and applying a dark teak stain, then seal with exterior satin clear. Mark two vertical strip positions, usually about 8 to 10 inches apart, centered on the door. Attach metal pull strips using countersunk screws or strong construction adhesive rated for exterior use. Install a simple matching handle, then check that all hardware lines up vertically from top to bottom.
Metal pull strips make a door look modern because they add linear shine against a warm wood surface. A dark teak veneer (or dark-toned stain on solid wood) gives depth without needing a full custom slab. This look is great for a budget main door design entrance because you can achieve the “designed” feel with narrow metal strips and careful spacing. Keep the rest minimal — one or two strips only.
Skip thisDon’t add more than two strips; three or more starts to look decorative instead of architectural.
Editor's noteIf you use screws, drill pilot holes and countersink lightly so the strip sits flat and doesn’t catch water in the gap.
13. Two-Panel Door With Raised Middle Rectangle
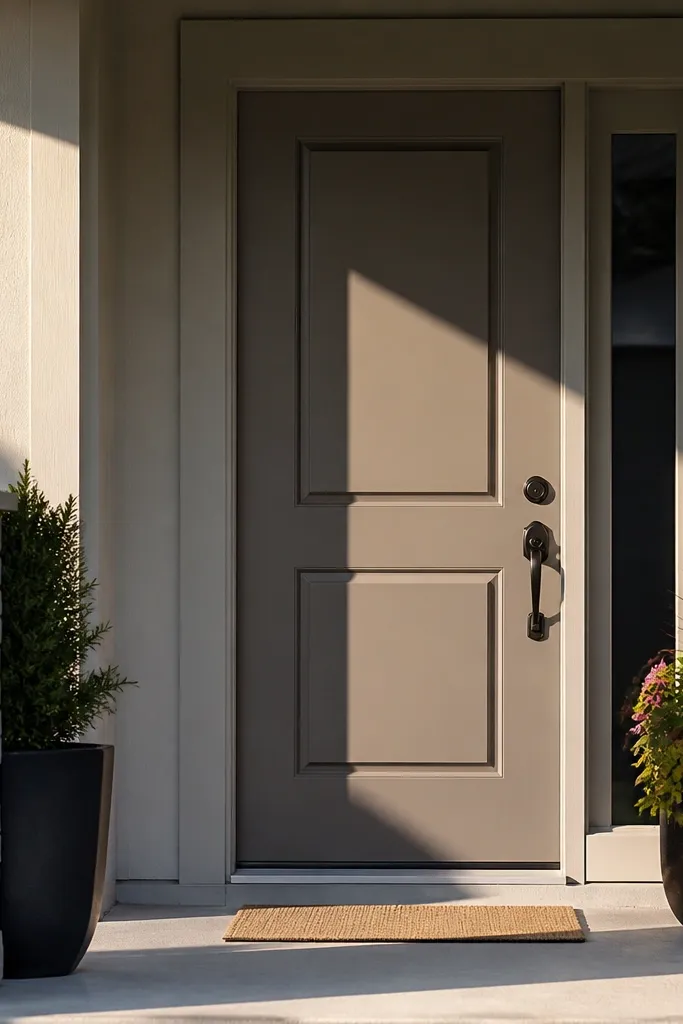
Start by removing the door slab or working flat on a sawhorse, then measure the rectangle placement. Cut a rectangle base from 1/2-inch exterior-rated plywood, and create a shallow frame around it so it sits raised by about 1/2 to 3/4 inch. Attach the rectangle to the door with construction adhesive plus screws into backing boards. Prime everything, then paint the door and panel in contrasting matte colors, finishing with hardware aligned to the centerline.
A raised middle rectangle is one of the most convincing modern panel looks because it creates shadow depth without adding lots of materials. You get texture and dimension that reads well in photos, especially with side lighting. This works for budget main door design entrance projects because you can build the raised panel using thin plywood or MDF and cover it with a durable exterior finish. The look feels custom, even if your original door was plain.
Skip thisAvoid leaving raw edges on the raised panel; they will swell and ruin the crisp rectangle over time.
Editor's noteUse a router or sand block to soften the panel edges slightly so it doesn’t look like a box stuck on the door.
14. Matte White Door With Black Hinge Side Accent
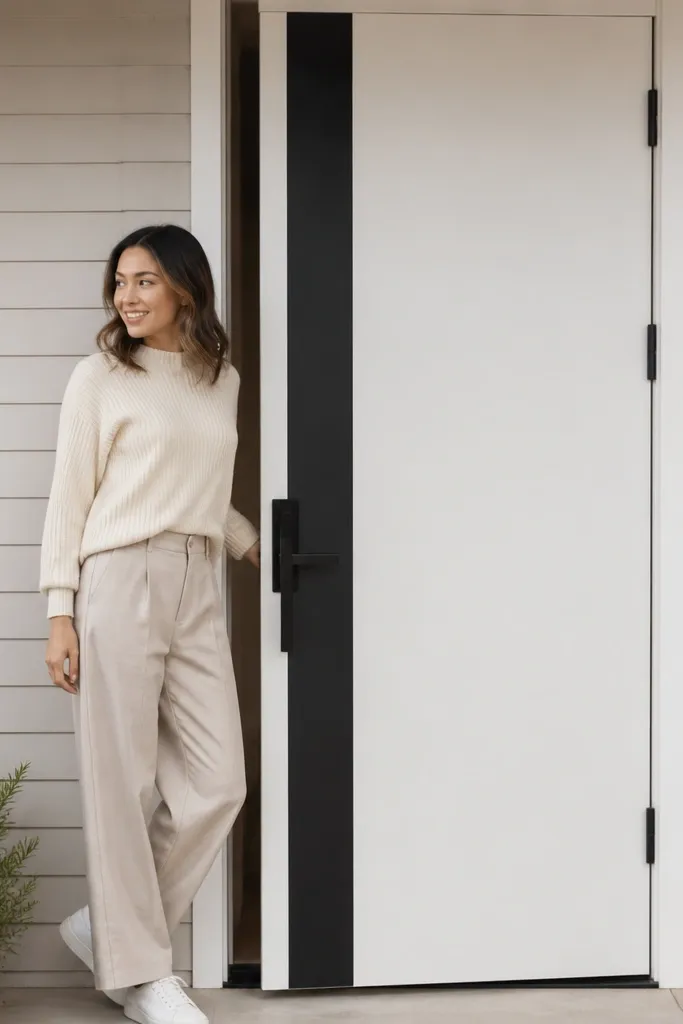
This is a modern minimalist move: add one vertical accent near the hinge side to create a strong line. It makes the door look taller and more intentional, and it costs less than replacing the entire door or building a full surround. The contrast of white and black also makes your hardware look planned rather than random. For a budget main door design entrance, this is a great option when your frame is already decent and you just need styling.
Start by cleaning and sanding the door surface, then paint the door matte white. Cut a narrow exterior trim strip in black — about 3/4 to 1 inch wide — and place it along the hinge-side edge with even spacing from the door frame. Attach the strip with exterior-rated adhesive and a few finishing nails if needed, then fill nail holes and touch up paint. Install hardware in black so the accent line and hardware align visually.
Measure from the same reference point on both sides so the accent strip doesn’t drift and make the door look off-center.
Don’t cover existing weatherstripping with the accent strip; keep the seal functional.
15. Charcoal Door With Wide Surround and 1/4-Inch Shadow Gap
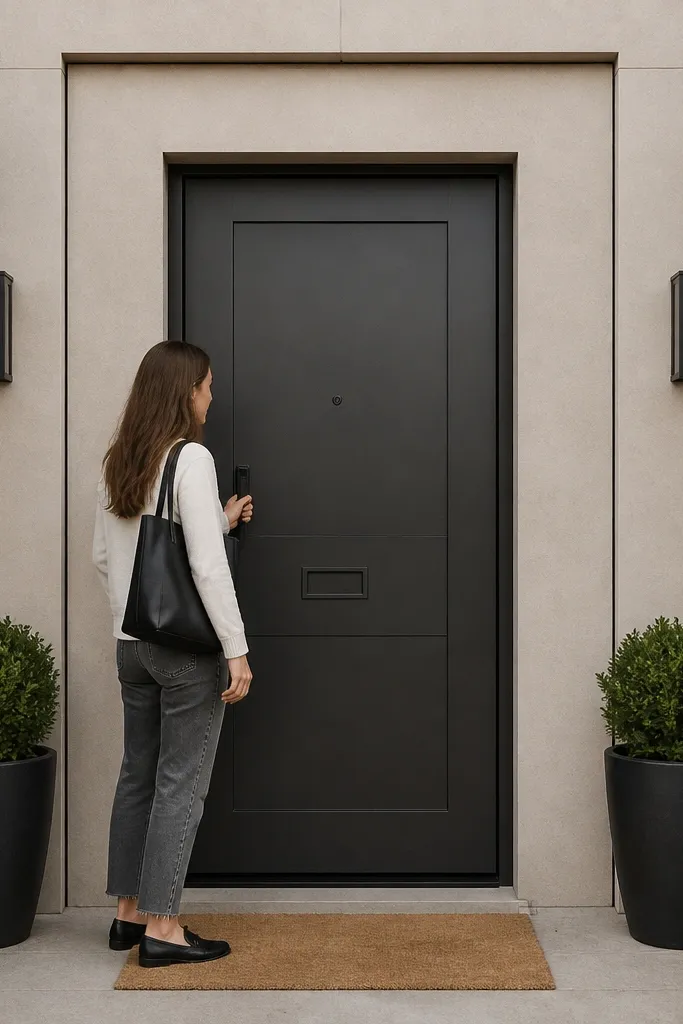
Start by removing the existing trim carefully and checking for flatness around the opening. Build a new surround using straight boards cut to your opening dimensions, aiming for about 3 to 4 inches total surround face width. Install the surround leaving a 1/4-inch shadow gap between the surround and door edge so the line stays visible. Prime and paint everything with exterior-rated paint, then reinstall the door and hardware after the trim cures.
A wide surround with a shadow gap turns a standard door into a modern entrance instantly. The gap is what sells it — it creates a crisp line that looks like a custom door system. Choose a charcoal door and a lighter surround for contrast, or keep both monochrome and use sheen differences. This is one of the best budget main door design entrance options when your door slab is fine but your frame trim looks thin or outdated.
Skip thisAvoid using caulk to hide uneven trim; it turns into a visible mess after paint and weather.
Editor's noteShim behind the surround boards as you screw them down; the shadow gap only looks perfect when the trim is dead flat.
16. Wood Frame Door With Black Center Panel
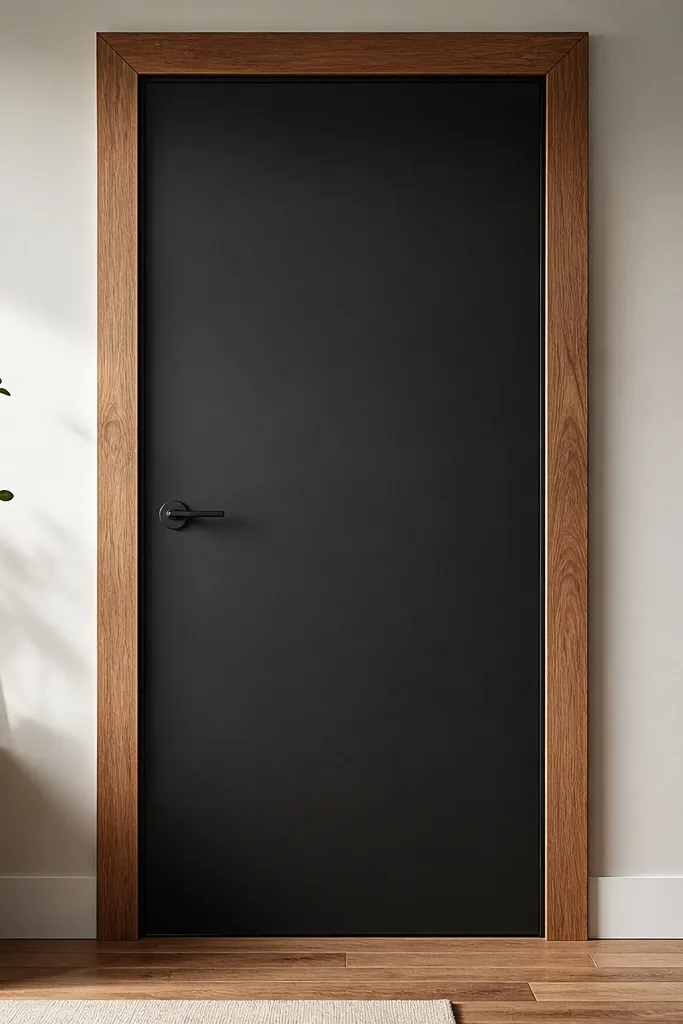
Start with a plain door slab, then build a wood frame on top of it using thin boards for the border, typically 1 to 1 1/2 inches wide. Cut the black center panel area, install a flat panel backing, and attach a thin sheet or plywood panel as the black face. Prime the black panel and paint it matte black, then stain and seal the wood frame. Finish by installing hardware and a matching door knocker or house number plate within the black center area.
This look mixes warmth and modern contrast by using a wood border around a black center panel. It reads custom because the frame creates an inner picture frame, and the black panel gives weight. It’s a strong budget main door design entrance idea if you want the door to feel designer without buying a full glass system. Keep the wood tone warm and the panel matte so the center doesn’t glare.
Skip thisDon’t use glossy black; it shows every fingerprint and weather spot.
Editor's noteSand the border frame edges after staining; it keeps the corners from looking rough through the finish.
17. Modern Glass Door With Frosted Stripe and Black Outline
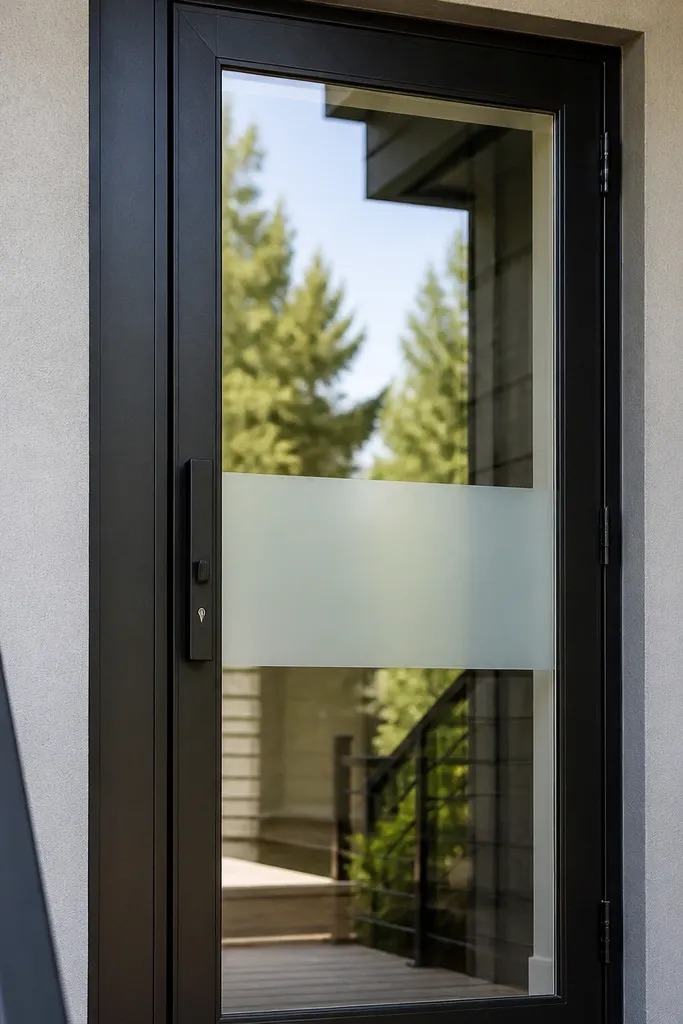
Start with a door that has a glass insert large enough for a stripe, then clean the glass with isopropyl alcohol. Measure the stripe height and width, then apply a frosted vinyl film strip centered on the glass. Add a thin black vinyl outline or paint-stable border film around the stripe for the graphic look. Finish by sealing edges and installing exterior-rated hardware and weather seals around the glass frame.
A frosted stripe on otherwise clear glass adds modern privacy without blocking light. The black outline makes the stripe feel intentional and graphic rather than accidental. This is photogenic because outdoor light cuts through the glass, and it looks current from the curb. For a budget main door design entrance, you can use a glass panel door and apply a vinyl frosted stripe that’s easy to replace if it gets damaged.
Skip thisDon’t apply film over dirty glass; it will peel at the edges within a season.
Editor's noteUse a squeegee and apply film in sections; trapped bubbles show up as dull spots when the sun hits.
18. Sage Green Door With White Trim and Black Hardware
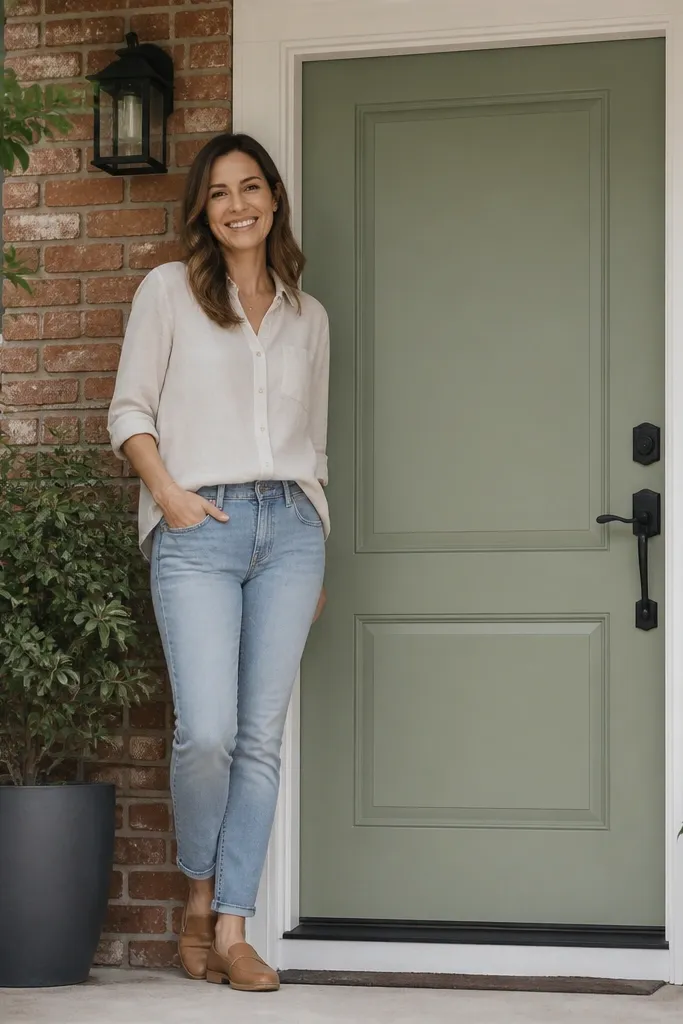
Start by sanding and priming the door, then paint the door sage green in two coats. Add white trim border panels using thin exterior trim boards around the door edges, keeping the border width around 1 1/2 to 2 inches. Miter corners cleanly and use exterior adhesive plus nails. Paint the trim white, let it cure, then install black hardware and mount a centered house number plate.
Sage green reads modern when you keep the trim bright white and the hardware black. The color is soft but still distinct, and it looks great against brick, stone, and light siding. This design works for budget main door design entrance projects because you can keep the door slab simple and focus on paint, trim width, and hardware contrast. The white trim frames the door like a modern storefront entry.
Skip thisDon’t choose a sage that’s too gray; it can look muddy next to warm brick.
Editor's noteUse a foam brush for trim edges so you don’t get ridges that catch light.
19. Matte Charcoal Door With Vertical Recessed Channels
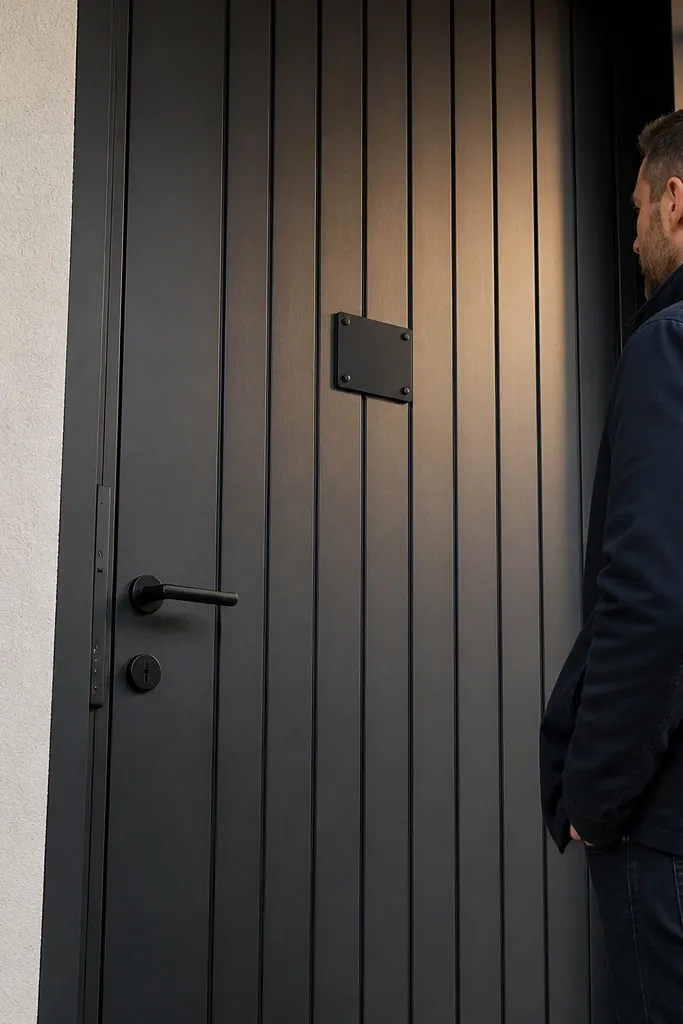
Start by planning the number of channels and their spacing, typically 3 to 5 vertical channels with even gaps. Use thin strips of wood as temporary guides, then cut shallow grooves using a router or a door-safe groove tool, staying consistent in depth. Clean dust, fill any rough spots, and prime the door. Paint the door with exterior matte charcoal, then install hardware and use a simple, centered number plate so the channels stay the main feature.
Recessed channels make a door look engineered. Even if the door is plain, grooves create shadow lines that feel modern and architectural. Matte charcoal is the right base because it deepens the shadows and makes channels look sharper. This is a budget main door design entrance option when you want a premium look without glass or metal inserts. The only “premium” part you pay for is time — channel layout and sanding matters.
Skip thisAvoid uneven channel depth; shallow spots make the whole door look DIY.
Editor's noteTest your groove depth on a scrap board first so you don’t cut too deep and weaken the door surface.
20. Black Door With White "Floating" Panel Borders
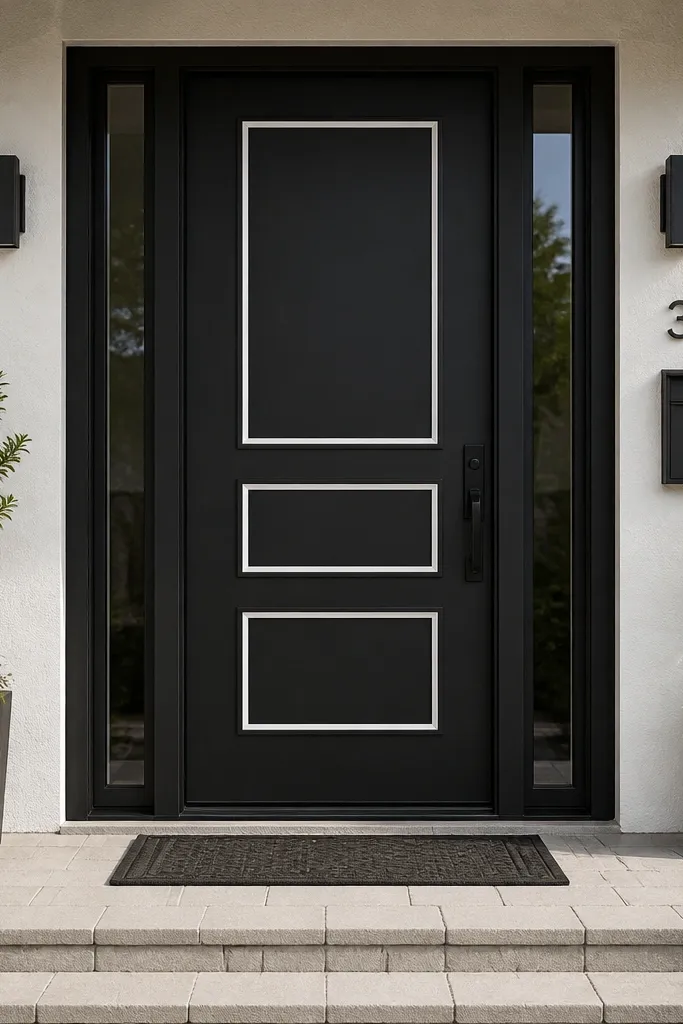
Start by painting or staining the door base matte black and letting it cure. Cut thin trim strips and assemble two or three rectangular borders on the door surface, keeping them symmetrical and leaving a small “floating” gap around 1/8 inch between rectangles and door edge. Attach trim with exterior adhesive and finish nails, then fill tiny nail holes and touch up paint. Prime and paint the trim white, then install hardware and a centered peephole ring in black or chrome.
Floating panel borders are modern because they create layered depth without a complicated pattern. The black base makes the white borders look crisp, and the layered effect reads high-end in photos. You can build this by adding thin trim rectangles that sit on top of the door skin, leaving a tiny gap for shadow. It’s a great budget main door design entrance choice when you want a dramatic look but you don’t want to replace the whole door.
Skip thisDon’t use thick trim for floating borders; it looks chunky and less modern.
Editor's noteUse a spacer block the same thickness as your desired gap so every border rectangle sits perfectly off the door face.



