
1. Angled Triangle Corner Shelf with Black Brackets
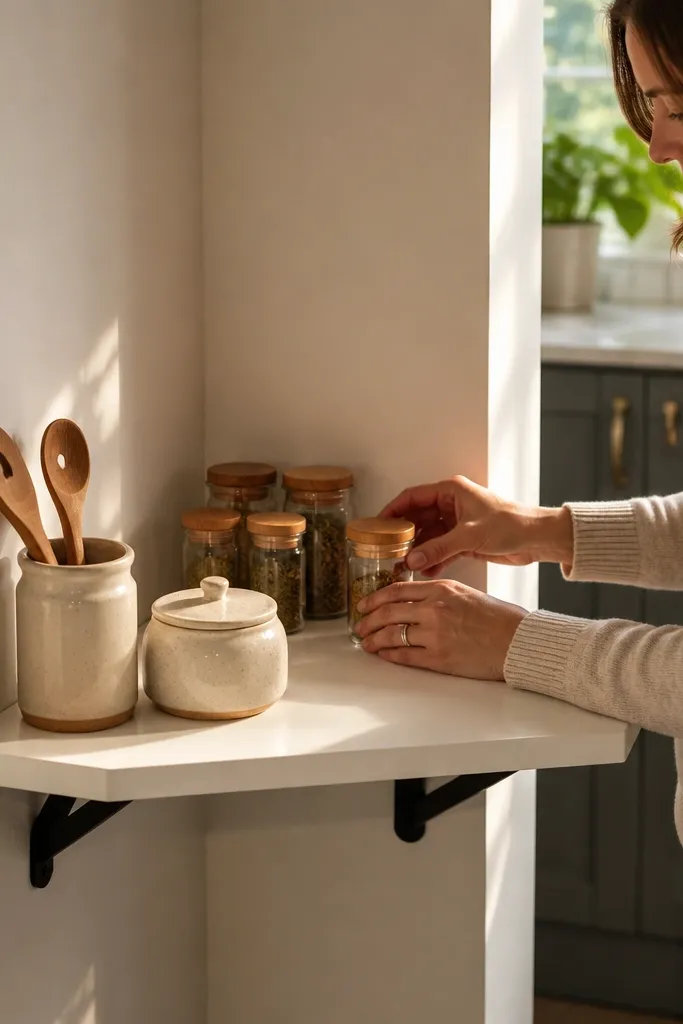
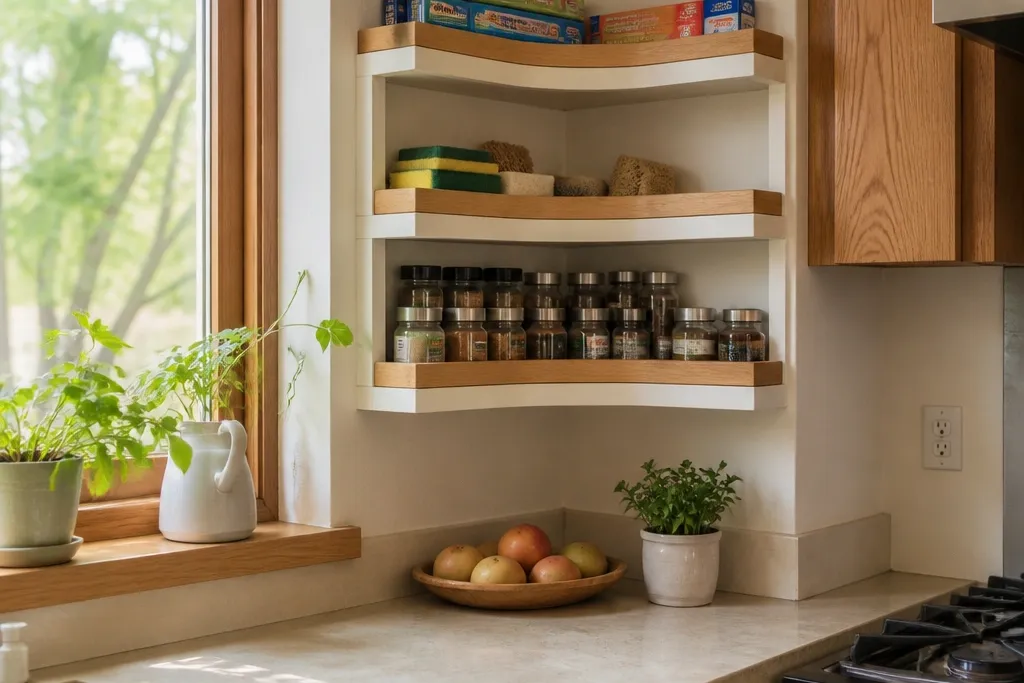
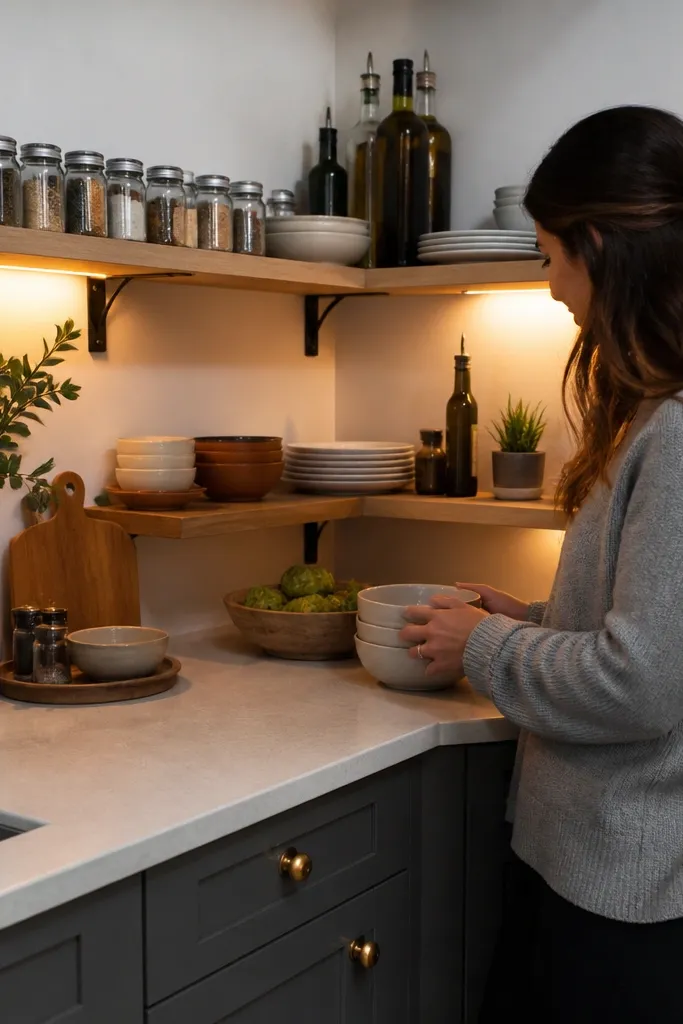
This is the cleanest way to make a corner feel intentional. The angled face gives you more usable surface than a flat shelf tucked into the corner, and it visually breaks up the corner so it doesn’t look empty or awkward. Use a matte paint finish in warm white or soft cream for a kitchen that stays light, then pair it with black brackets for contrast. The look is bold but simple — you can build it in a weekend and it still feels like a store-bought corner unit. It’s best for spices, small oils, and everyday items you want to grab fast.
Cut a triangular shelf from 3/4-inch plywood or solid wood with one corner that fits snugly in the corner. Dry-fit it first, then mark bracket locations so each bracket lands on a stud or a properly rated anchor spot. Sand all edges, paint or stain, and seal if you’re using stain. Mount the brackets level, then screw the shelf down so the angled surfaces meet cleanly. Add a second shelf at a lower height if you want a two-tier look, keeping the spacing about 10-14 inches for jar height.
Paint the shelf faces before installing so you don’t get brush marks around the bracket edges.
Don’t mount brackets only to drywall — it will sag once jars start stacking.
2. Floating L-Bridge Shelf Spanning Two Walls
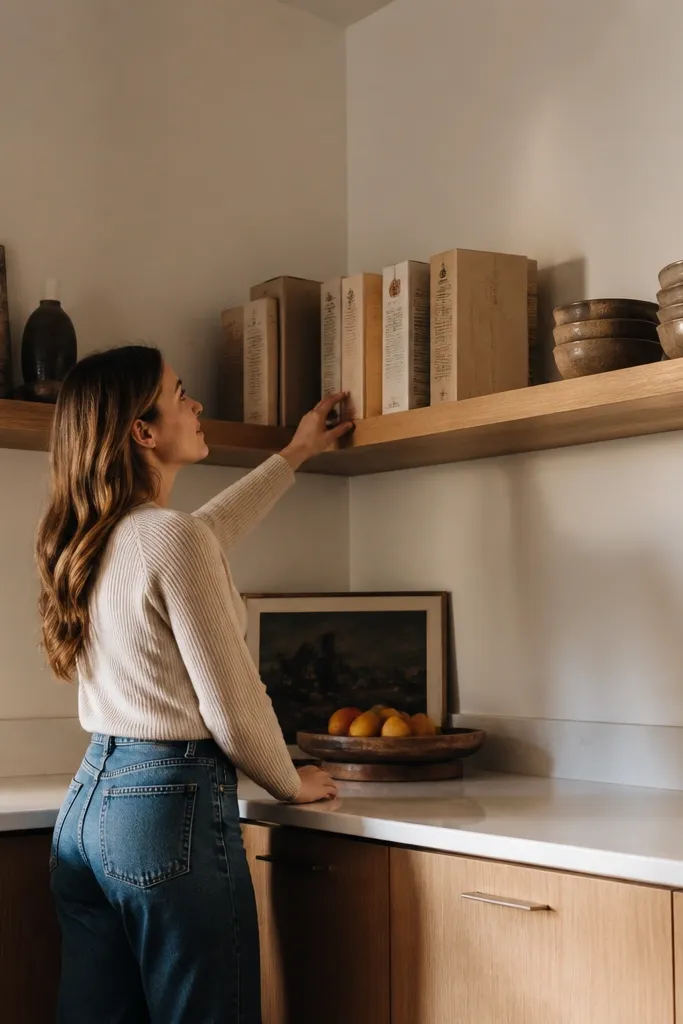
If you want the corner to look built-in without building a full cabinet, do a floating bridge shelf. It creates a long, uninterrupted line across the corner, which looks modern and keeps the space visually open. Because the shelf spans two walls, it’s also great for holding taller items like cereal boxes or a small cutting board stand. Keep the shelf finish consistent with your cabinet color — warm oak against white cabinets looks especially good. This style is ideal for kitchens where the corner is visible from the main walkway.
Choose a shelf length that covers both walls by at least 6 inches on each side so it doesn’t feel like a tiny ledge. Use a 3/4-inch thick board and add internal cleats or a concealed support rail anchored into studs. Mark level lines across both walls at your desired height, then pre-drill through the board into the cleats/support rail. Install the support hardware first, then screw the shelf board on and countersink screws if you’re going for a smooth look. Finish with a topcoat that resists kitchen grime, then add a simple lip or small backstop strip if you’re storing jars.
Editor's noteUse a level laser line across both walls before you cut anything — floating shelves show every off-angle.
Skip thisSkip super-thin shelf boards; they flex and make the floating look cheap.
3. Picture-Frame Corner Shelves with Beveled Trim
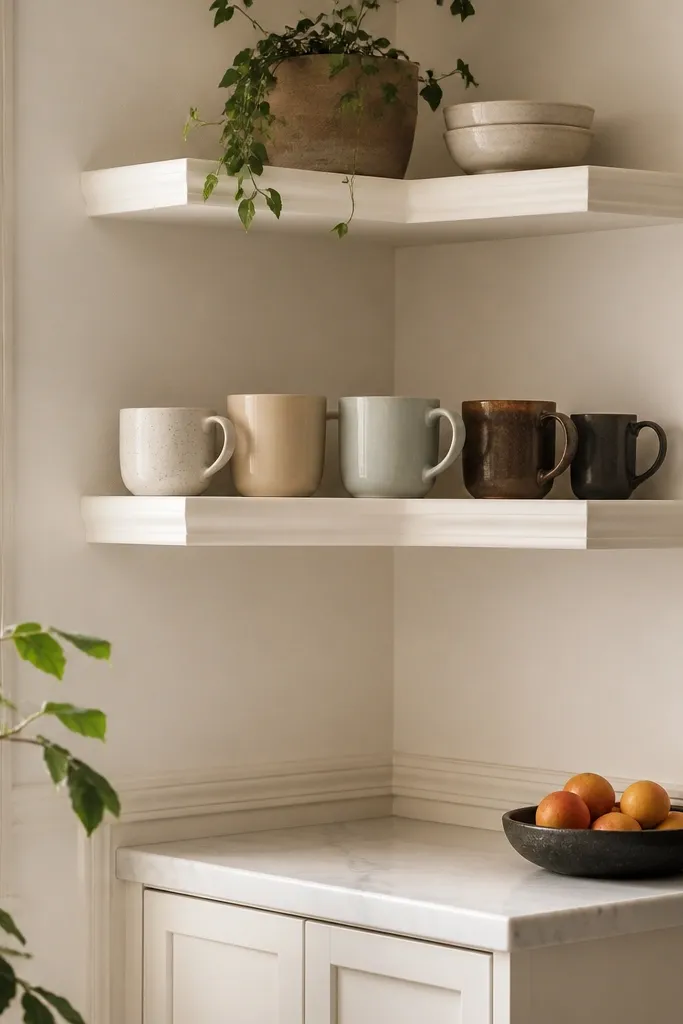
This one makes budget kitchen corner shelves look like custom millwork. The picture-frame border gives the shelf a finished edge and makes the corner feel styled even when it’s not fully loaded. Use thin beveled trim (about 1/2-inch wide) around a simple plywood shelf and paint everything the same color as your walls or slightly warmer than your cabinets. The look is crisp, photogenic, and it hides minor wall gaps. It’s best for displaying a few nice jars or a small plant pot on top, not for heavy bulk storage.
Build each shelf as a plywood base cut to fit the corner, then glue and nail the trim frame around it after you’ve sanded the base smooth. Cut the trim corners at 45 degrees for clean angles, then fill nail holes and sand flush. Decide your shelf height spacing by jar sizes: keep the top shelf about 15 inches from the bottom shelf for most spice jars. Mount with a back cleat or two side cleats anchored into studs, then screw the framed shelf to the cleats from underneath. Seal and paint the whole frame, then install small stops at the back edge if you want extra jar security.
Use a caulk line where the frame meets the wall so the corner looks tight even if your walls aren’t perfect.
Don’t skip filling and sanding the trim seams; you’ll see them immediately under kitchen light.
4. Two-Tier Corner Ladder Shelf in Light Oak
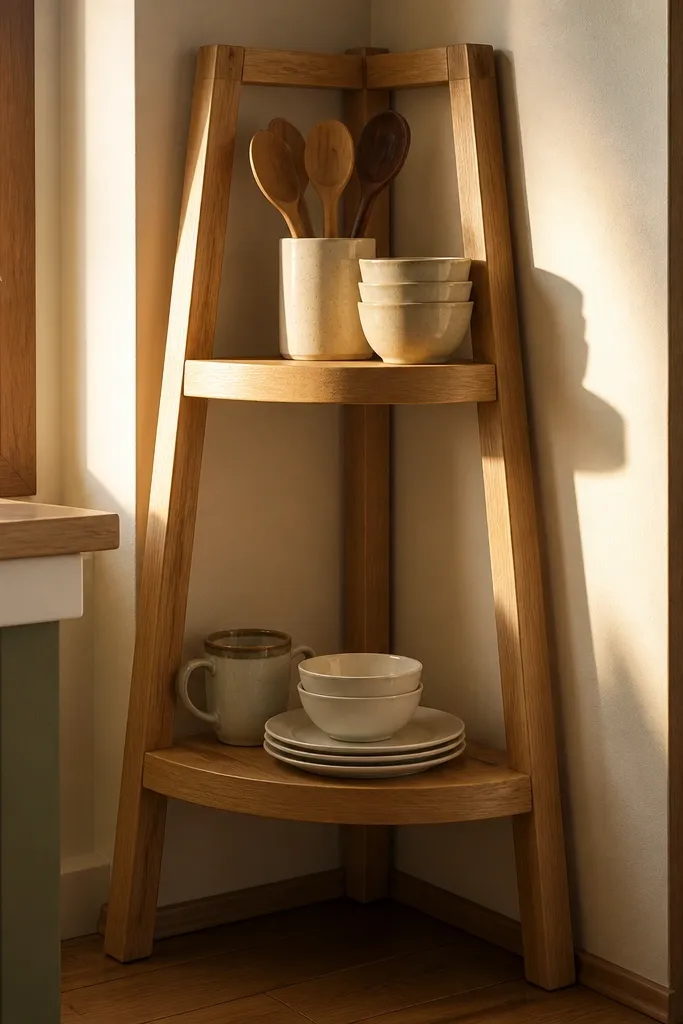
A ladder-style corner shelf looks airy, which matters in kitchens where corners already feel tight. The side rails create a strong visual shape, and the shelves look like they’re floating in space even when they’re sturdy. Finish it in light oak stain with a satin topcoat so it photographs warm instead of yellow. This style is great for a coffee corner, tea storage, or a small row of matching mugs on the lower shelf. It also hides clutter because you can keep the top tier curated and the bottom tier functional.
Cut two side rails from 3/4-inch wood and add two or three horizontal rungs depending on your design, but keep it to two shelves for a clean look. Use pocket holes or strong wood screws to attach rungs so the structure is rigid without bulky brackets. Sand everything to 180 grit, stain evenly, then seal with two thin coats of satin polyurethane. Position in the corner and mark where the rails hit studs; drill pilot holes and anchor with wood screws. Level the shelves, then add a back lip strip at least 1 inch tall if you’re storing jars.
Editor's noteStain with a foam brush or rag and wipe evenly in one direction to avoid blotchy ladder rails.
Skip thisDon’t rely on friction-only placement; ladder shelves need wall anchoring in kitchens.
5. Corner Shelf with a Built-In Spice Rail Lip
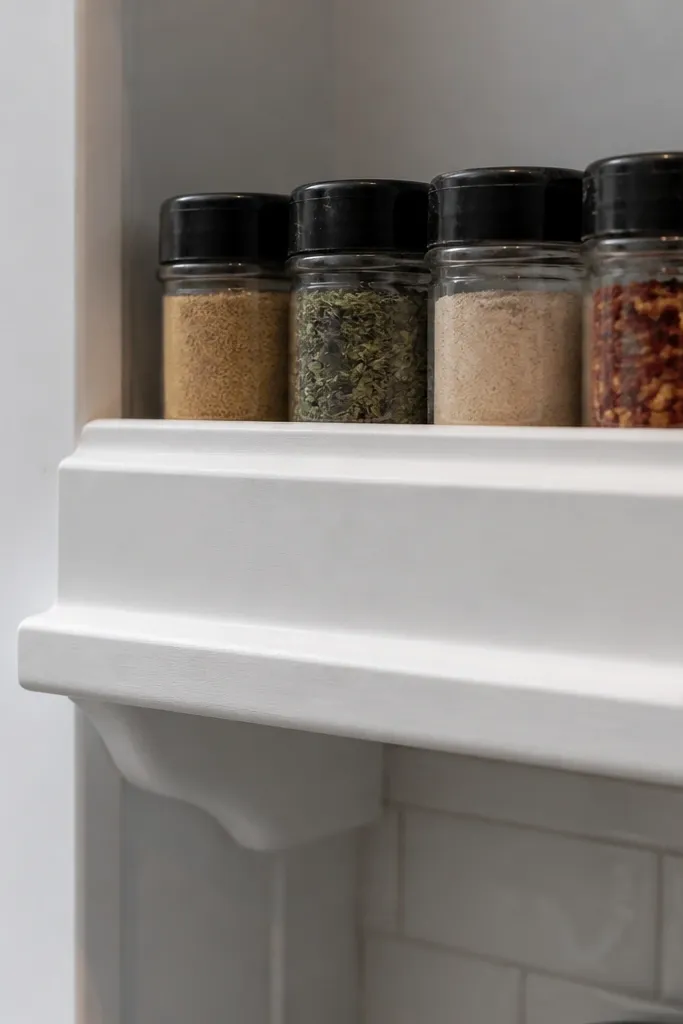
If your corner storage always turns into a jar pile, add a front lip that actually organizes. This design keeps jars from sliding forward and makes the shelf look tidy even when you’re stocking it quickly. The lip also frames the contents, so the corner reads like a designed spice station. Paint the base shelf in a clean matte tone and keep the lip either the same color or a contrasting black for a graphic look. It’s ideal for kitchens where the corner sits near the stove or prep area.
Build a corner shelf base from 3/4-inch material, then add a 1-inch tall front lip using a second strip glued and screwed along the front edge. For the lip, aim for a thickness that lets jars sit stable without rocking, usually about 3/4-inch thick strip or a wider strip with a rounded top. Sand, paint, and let it cure fully before installing. Mount the shelf to studs with a ledger cleat under the back edge so the shelf stays level. Add optional backstop blocks at each end if you want jars to stop in the same spot every time.
Round the top of the lip slightly with sandpaper so labels don’t get scuffed when you slide jars in.
Don’t make the lip too tall; it blocks sightlines and makes jar access annoying.
6. Shiplap-Style Corner Shelves with Whitewash Finish
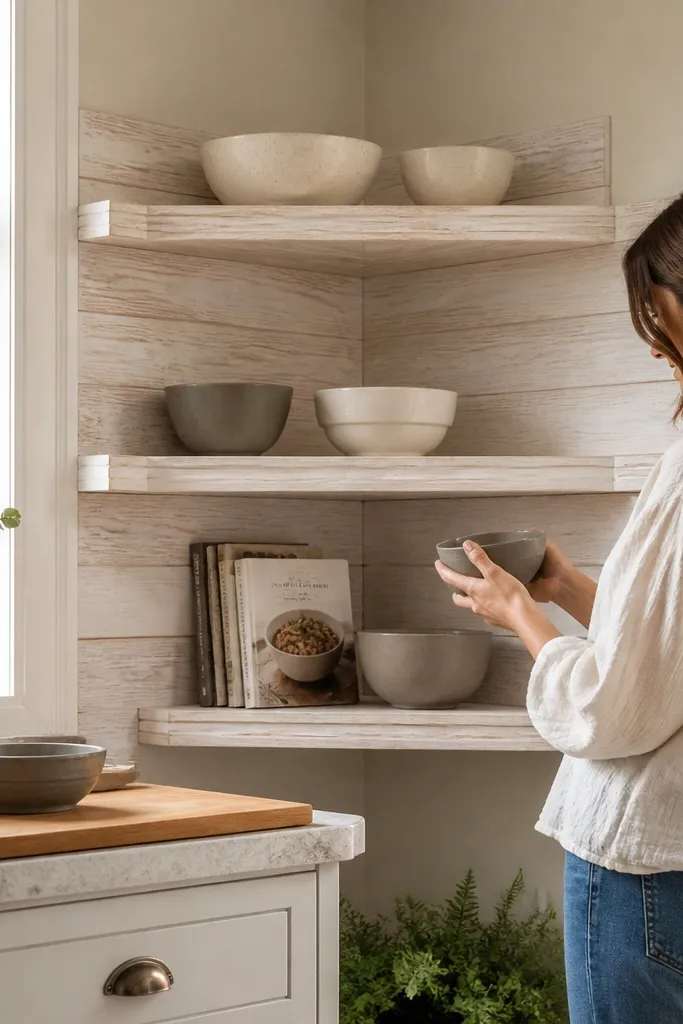
Shiplap-style shelving looks cozy and intentional, even when it’s built from budget plywood and thin strips. The repeating lines make the corner visually textured, which looks great in photos and in real life because it breaks up flat wall space. Whitewash keeps it bright without looking like harsh plastic white. This is a good choice if your kitchen already has warm wood floors or light cabinetry and you want the corner to match the house vibe. Use it for dishes, small decor, or a couple of baskets that hide clutter.
Choose a shelf base in 3/4-inch plywood, then cut thin strips (about 1/2-inch wide) to glue across the face in a shiplap pattern. Leave small gaps between strips if you want a more traditional look; keep gaps consistent so it looks neat. Sand the face smooth, then apply whitewash stain or paint thinned with water, wiping back to control how much wood grain shows. Seal with a clear matte topcoat. Mount the shelf with a back cleat anchored to studs, then install at a height where baskets sit above counter splash zones.
Editor's noteDo a test whitewash on scrap first — the same stain behaves differently on plywood vs solid wood.
Skip thisDon’t skip sealing; kitchens stain quickly and unsealed whitewash can look uneven.
7. Wire Basket Corner Shelves with Matching Front Hooks
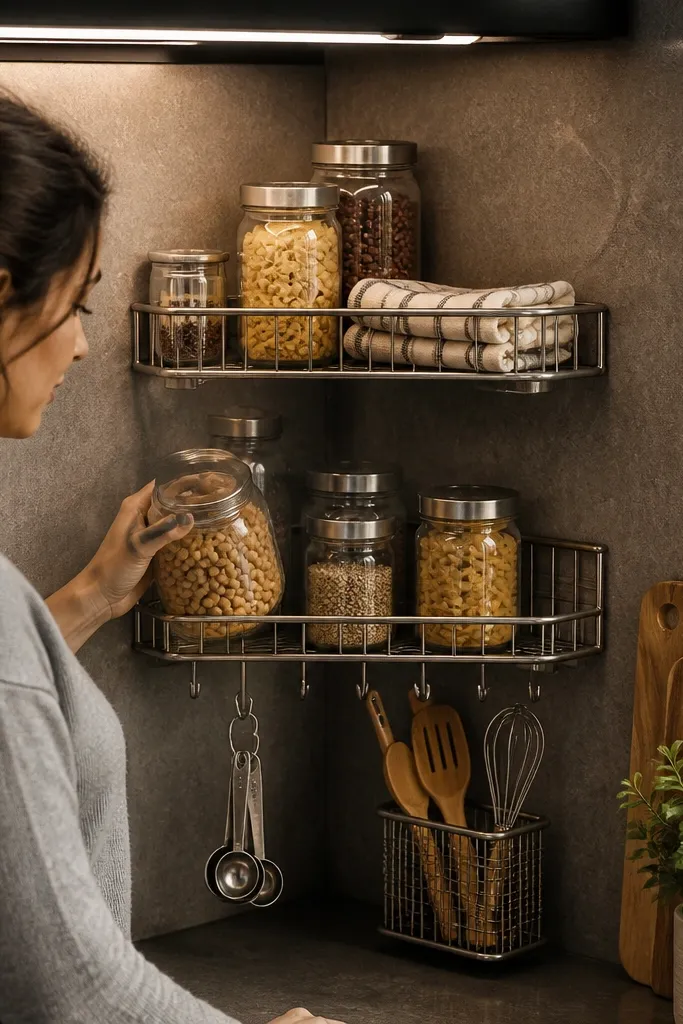
This is a smart-looking way to hide mess while keeping everything visible. Wire baskets let you see what you have, and they handle kitchen humidity better than plain wood shelves. The front hooks add a functional styling point: hang measuring spoons, a towel, or a small utensil caddy right at the corner. Finish the shelf board in a matte color, then use baskets in black or brushed steel for a clean contrast. It’s perfect for dish scrubbers, extra towels, and grab-and-go tools.
Build or buy a corner shelf platform from 3/4-inch wood, then attach two basket mounting rails to the top so baskets sit level. Use shelf brackets or a cleat anchored into studs for the main shelf support. Install the baskets by screwing through the basket frame into your rails, then attach small hooks to the front edge using threaded inserts or sturdy screws. Paint or stain the wood first, then mount baskets after the finish is dry to avoid residue on metal. Add a small back edge strip if you want baskets to stay from shifting when you pull items out.
Choose baskets with flat bottoms so they don’t wobble on slightly uneven wood tops.
Avoid glossy painted shelves; fingerprints and water spots show up fast.
8. Recessed Corner Shelf Niche with Thin Back Panel
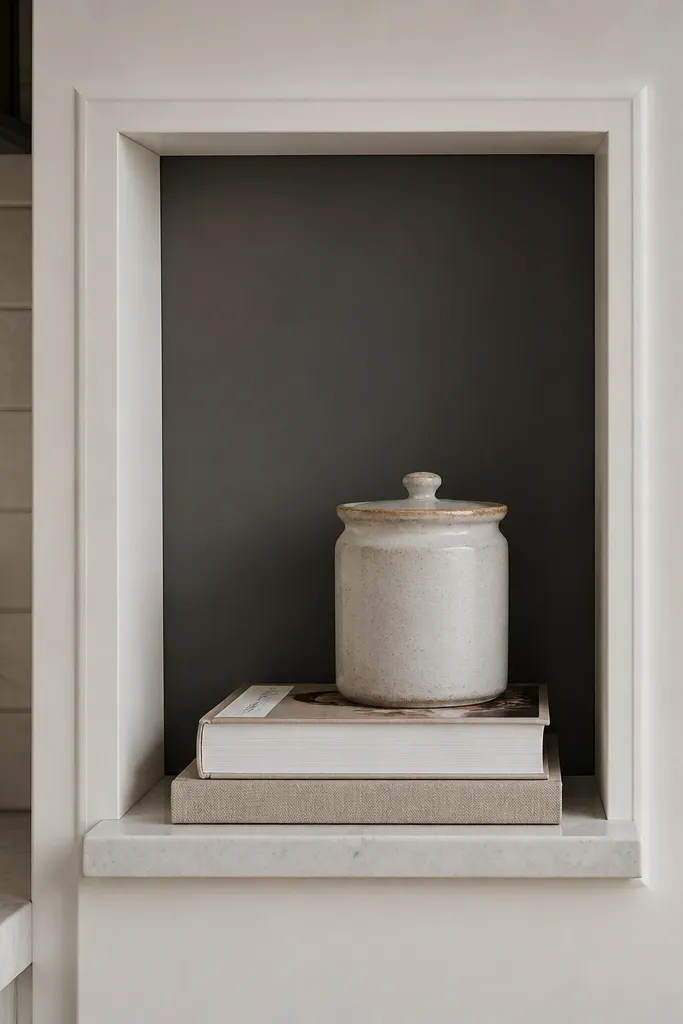
A recessed niche makes the corner look built-in, not added. Even a small shelf recess changes the whole corner vibe because it creates shadow lines and depth. Add a thin back panel in a contrasting color like charcoal or warm gray so the shelf contents pop. This style is best for one to two shelves that hold a few curated items, not for heavy storage. The niche look photographs really well because the lighting creates a clean frame.
Mark a rectangular cutout area on the corner wall or on a wall panel system, leaving at least 1 inch of material around the edges for strength. Cut the niche opening carefully, then install a thin back panel (like 1/4-inch plywood) that’s screwed to studs or solid backing. Add shelf boards inside with side supports or a back cleat so they sit square to the opening. Prime and paint the niche back panel and shelf edges before final mounting if you’re painting. Seal the shelf boards with a topcoat, then test-fit your jars and decor before you close up any gaps.
Use painter’s tape to mark shelf level lines inside the niche so you don’t chase crooked angles after painting.
Don’t recess too deep; deeper niches trap dust and make the corner harder to clean.
9. Corner Shelf with Marble-Look Contact Paper Top
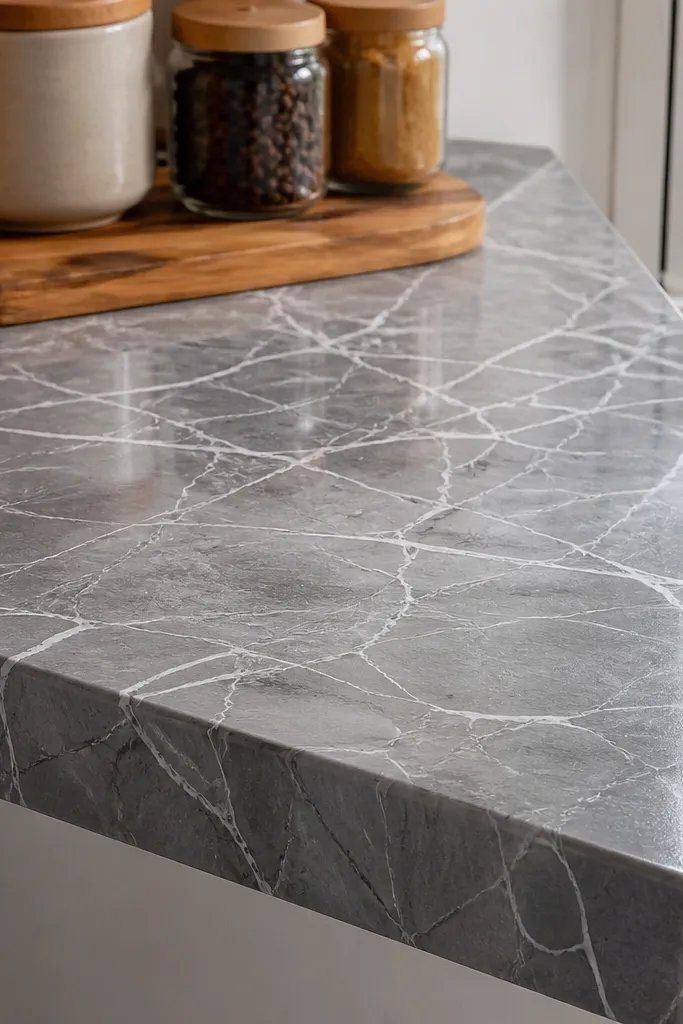
This is the budget move that looks like you spent more. Put marble-look contact paper on the top surface of a simple corner shelf board, then seal the edges with clear coat so it’s easier to wipe down. The pattern makes the shelf look expensive and gives a clean, glossy contrast to matte wall paint. It’s great for a coffee station corner where you want a tidy surface for a small tray, sugar jar, and cups. Use it on lighter shelves so the pattern reads crisp instead of busy.
Start with a smooth 3/4-inch board and sand it to 220 grit so contact paper sticks without bumps. Cut the marble-look contact paper to size with a 1-inch margin, then apply slowly from one edge using a plastic squeegee. Trim the edges with a sharp utility knife and seal the perimeter with a thin bead of clear silicone or clear coat on top of the paper edge. Mount the shelf with a cleat anchored into studs, and add a small back lip strip so items don’t slide off. Let the sealant cure fully before using the shelf.
Warm the contact paper slightly with a hair dryer so it conforms to corners cleanly.
Don’t seal over dust or grease — it traps under the paper and creates bubbles.
10. Two-Box Corner Shelf with Matching Lidded Bins
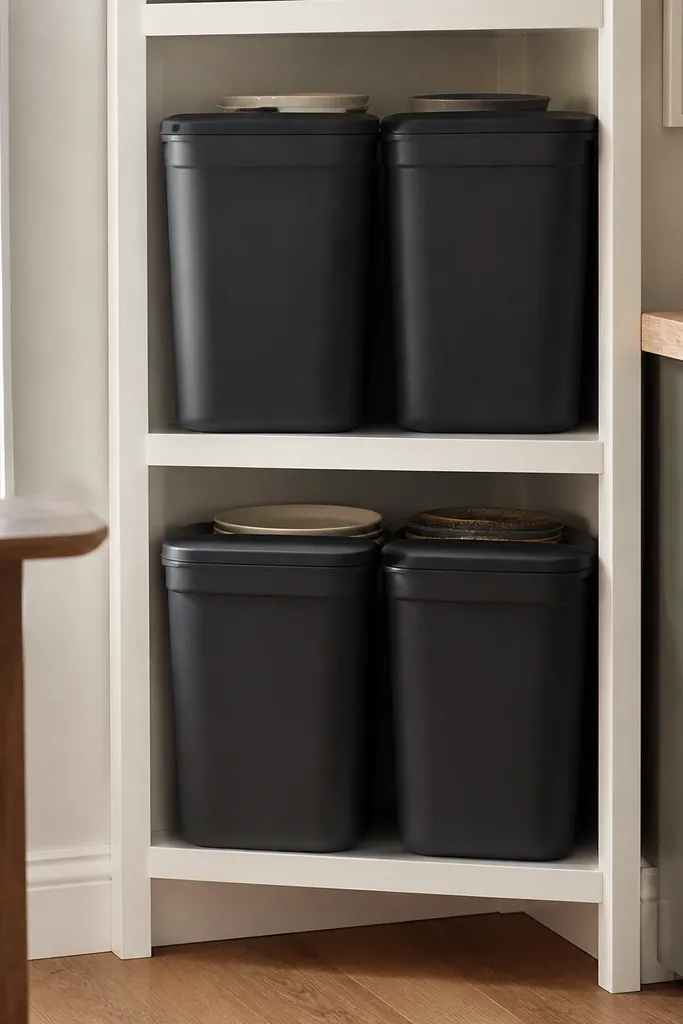
If you want open shelves but hate seeing clutter, build cubbies that hold lidded bins. The shelf frame makes the corner look structured, and the bins keep the visual noise down. Choose bin colors that match your kitchen textiles — black bins with white shelves look sharp, and muted beige bins look calmer. This style works when you store batteries, plastic bags, foil, or extra sponges. It’s also a great corner solution for renters because it hides what you don’t want on display.
Build a corner shelf frame from 3/4-inch lumber with two cubby openings sized to your bins. Measure your bin dimensions and subtract 1/8 inch for smooth fit, then cut the frame pieces accordingly. Add a back cleat and side supports so the frame is solid, then mount to studs. Install shelf boards for the top of each cubby if needed, and paint the entire frame. Once dry, place bins in, then add a simple front lip (about 1/2-inch) so bins don’t slide forward.
Editor's noteUse bins that stack with matching lids; the lids make the corner look finished even when the bin is full.
Skip thisDon’t oversize the cubbies — loose bins look messy and tip forward.
11. Corner Shelf with Reversible Stain and Paint Accent Back
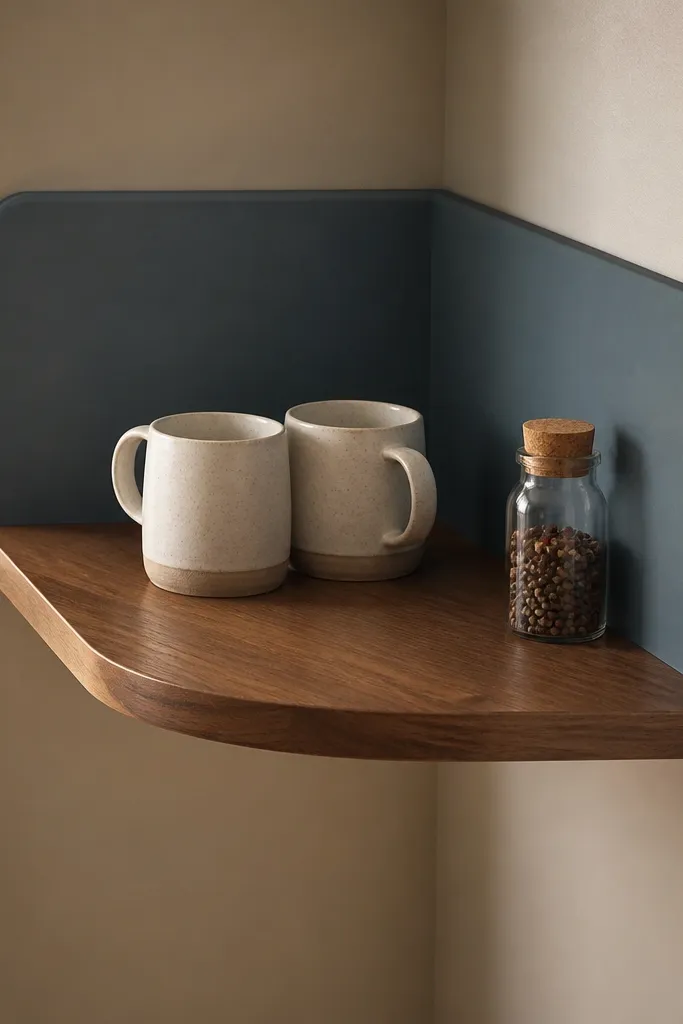
This is a clean way to add color without painting your whole kitchen. Keep the shelf board in natural oak or walnut stain, then paint a thin back panel at the corner in a muted green, dusty blue, or deep clay. The contrast makes the shelf look styled and keeps the contents readable. It’s perfect for a corner that sits near a window where light changes through the day. You get a designer look with minimal materials.
Cut a stained shelf board from 3/4-inch wood and sand to 180-220 grit for even color. Cut a back panel from 1/4-inch plywood and paint it after priming, using a small foam roller for a smooth finish. Install a back cleat on the wall, then screw the back panel to the cleat and side edges so it sits straight in the corner. Mount the shelf board onto cleats or brackets aligned with the back panel. Seal the stained shelf board with satin clear coat and let everything cure before styling.
Use painter’s tape along the shelf edge before painting the back panel so you get a crisp line.
Don’t use flat paint on shelf surfaces — it stains and scuffs fast.
12. Galvanized Cup Rail Corner Shelf for Utensils
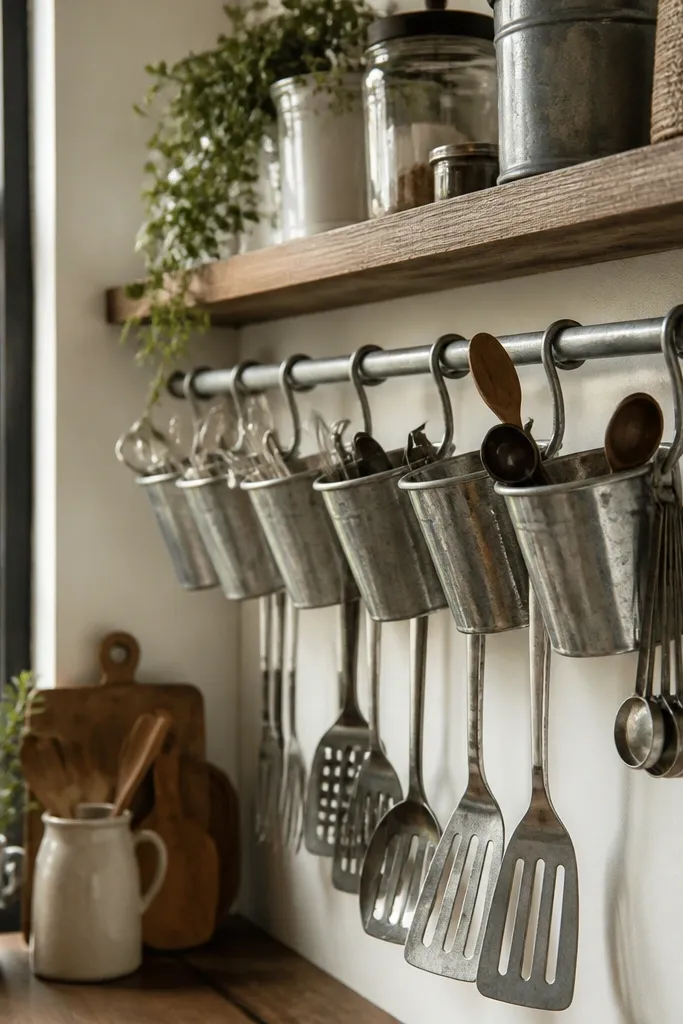
This is the corner shelf look that makes kitchens feel organized instantly. Instead of storing everything on the shelf, you mount small cups under a rail so you can hang spatulas, keep dry utensils, or store tea bags in smaller containers. The galvanized metal look reads industrial but still clean, especially paired with a light wood shelf. It’s great for corners near the stove where you want tools within arm’s reach. This setup also photographs well because the cups create a repeating pattern.
Install a horizontal rail board (or metal rail) under a corner shelf bracket line, sized to fit your cups. Choose galvanized cups with mounting holes, then mark spacing so they line up evenly. Mount the main shelf to studs with sturdy brackets or a cleat, then attach the rail to the shelf underside. Screw cups into the rail using the cup’s hardware and check each cup is level. Seal the shelf top with clear coat, then add a small back stop strip so cups don’t swing if you bump them.
Editor's noteHang your cups before final tightening so you can adjust spacing without re-drilling holes.
Skip thisDon’t mount cups too close to the wall — utensil handles snag.
13. Corner Shelf with DIY Tile Insert Back Panel
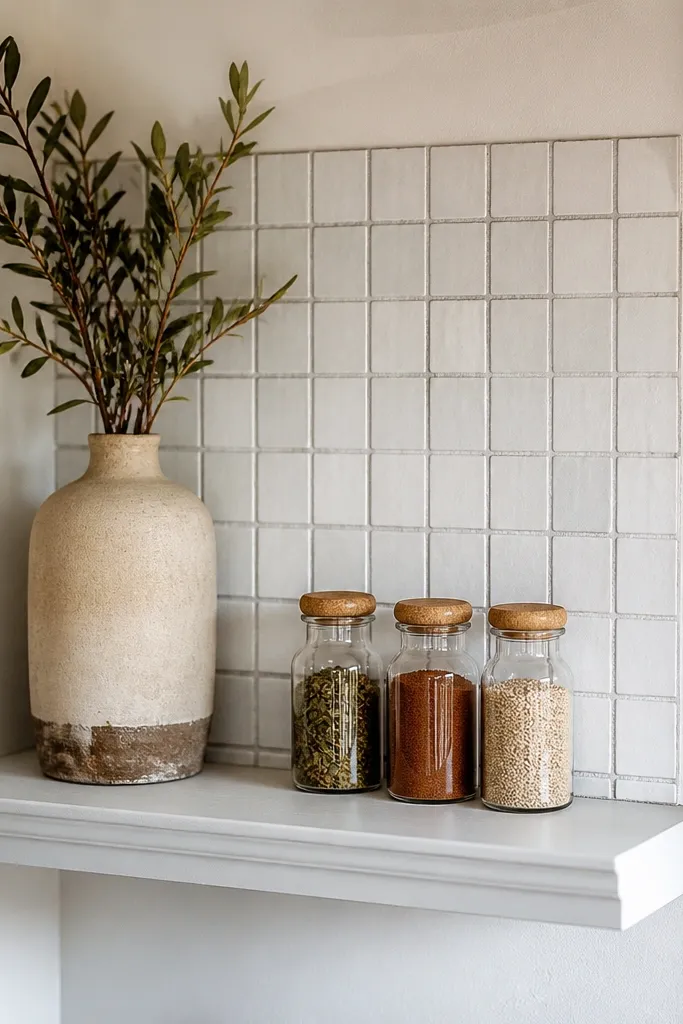
Tile makes the corner feel finished and wipes clean, which matters in kitchens. Use a small tile insert behind the shelf to create a focal point without tiling the whole backsplash. Keep the shelf board simple and paint it clean white or soft gray so the tile pattern does the work. This style is especially good for kitchens with a simple backsplash already; it ties the corner to the existing tile colors. Store a few matching jars or a small plant, and the tile background makes everything look intentional.
Cut a back panel backing board from 1/4-inch plywood to fit the corner area behind the shelf. Apply thinset or tile adhesive to the backing and press tiles into place, using spacers for consistent grout lines. Let it set, then grout and seal the grout if you’re using porous grout. Mount the shelf board to a cleat or brackets anchored to studs, then screw the tiled back panel to the wall and/or cleats around it. Seal the shelf board with a wipeable topcoat and make sure the tile edges are fully cured before use.
Editor's notePre-plan grout color; a warm gray grout looks better with wood tones than stark white in most kitchens.
Skip thisDon’t tile over weak drywall without proper backer — it cracks around shelf mounts.
14. Slim Corner Shelf Stack with Spacers for Jars
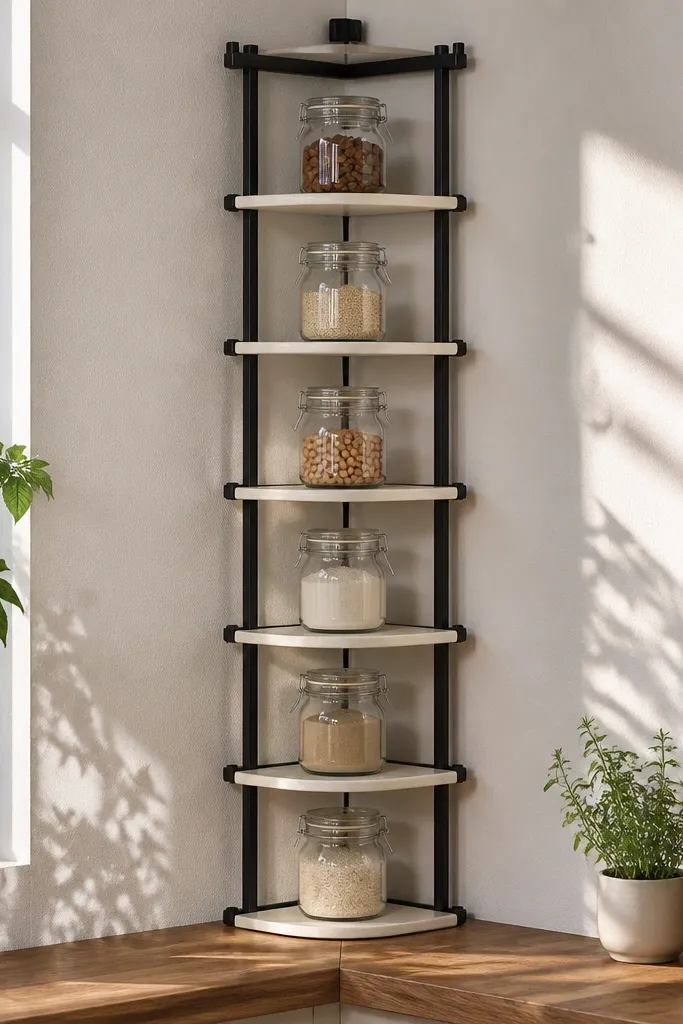
This is the best option when you need organization but you don’t want a bulky corner unit. Slim shelves stack vertically, and the small gaps between them make jars line up like a display. It looks clean because each level is consistent, and the corner stays light instead of heavy. Use a matte black frame or painted wood for the bracket structure, then keep shelf boards in matching color. It’s ideal for spice jars, baking supplies, or small decor that you want visible.
Choose shelf board thickness of 3/4-inch and cut multiple boards to the same width and depth, usually 10-12 inches deep for a corner. Build side supports with vertical spacers or cleats so the shelf spacing stays identical across levels. Mark the mounting height and screw the side supports into studs or rated anchors. Install the shelves from the top down so the boards sit flush on the spacers, then check each shelf is level with a bubble level. Finish by painting or staining all boards and sealing with satin clear coat.
Editor's noteUse a jig for spacing between shelves — even a 1/4-inch drift looks sloppy on stacked levels.
Skip thisDon’t stack shelves too close; jars need clearance for lids and labels.
15. Reclaimed Wood Corner Shelf with Dark Stain and Satin Coat

Dark stained wood on a kitchen wall reads expensive because the grain shows and the corner becomes a focal point. This is one of the best budget kitchen corner shelves ideas if you already like rustic touches but want it clean, not messy. Choose a wood that has character but sand it until it feels smooth; rough reclaimed boards look uneven under kitchen light. Pair it with simple black brackets so the shelf looks grounded. Use it for a small selection of mugs, a cutting board stack, or a neat basket.
Pick boards that are at least 3/4-inch thick and wide enough to cover the corner side without gaps. Sand to 180-220 grit, then apply a dark stain in thin coats and wipe off excess so the color doesn’t go blotchy. Seal with satin polyurethane in two coats, sanding lightly between coats with 220 grit. Mount using brackets into studs, placing one bracket near each stud line for stability. Add a back cleat if you want extra anti-wobble and to keep the shelf from rocking.
Wipe stain in one direction and keep a wet edge — the difference shows up fast on dark colors.
Don’t skip sealing; kitchen humidity will dull the finish quickly.
16. Corner Shelf with Brass Pipe Support Frame
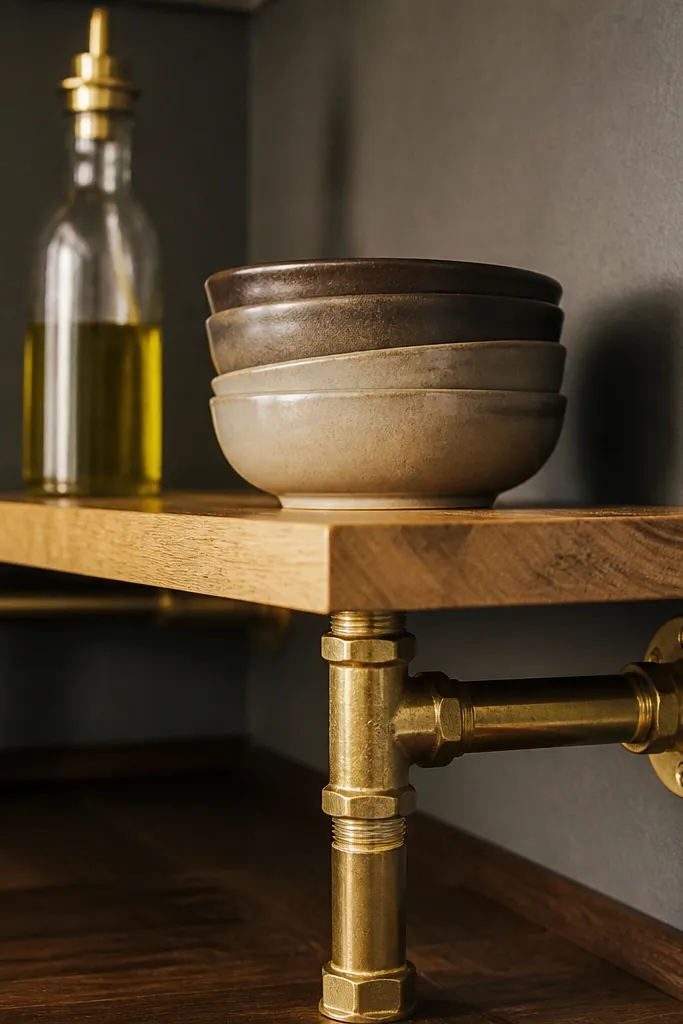
A small brass pipe frame makes a corner look like a real design, not a DIY afterthought. The metal lines are visible and photogenic, and they add warmth without needing a cabinet door. Use a light wood shelf board and pair it with brushed brass or aged brass pipe fittings for a soft, premium look. This setup works well for kitchens with modern hardware where brass already shows in faucets or cabinet pulls. Store coffee supplies, mugs, or a single row of matching jars.
Cut two shelf boards from 3/4-inch wood to the corner dimensions and drill holes for pipe attachment if needed. Build a pipe frame with elbows that match the corner angle, then assemble the vertical and horizontal sections so the frame is square. Anchor the frame to studs with mounting flanges, then screw the shelf boards to the pipe supports using wood screws into drilled holes or metal inserts. Sand and stain or paint the wood boards before assembly so you don’t miss edges. Seal with satin topcoat, then check the frame is level before final tightening.
Use a metal tape measure and double-check pipe lengths; a 1/2-inch mismatch makes shelves sit crooked.
Don’t overtighten fittings into wood; it can split the board around screw points.
17. Corner Shelf with Pegboard Side Panels
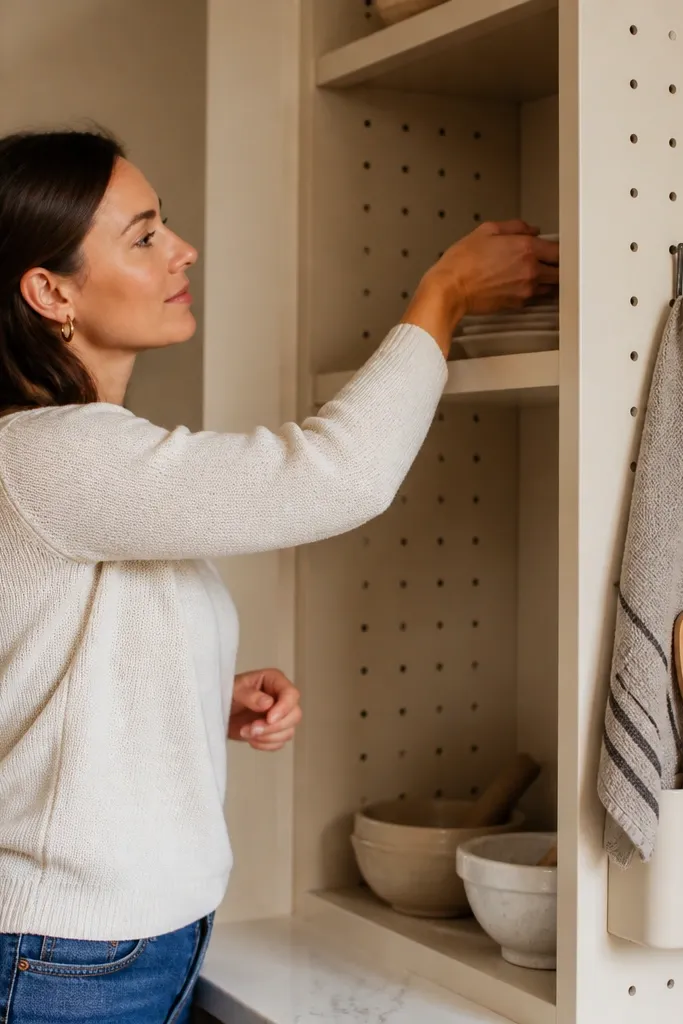
Pegboard side panels make a corner shelf usable beyond just stacking items. The pegboard gives you a place for hooks and small holders, so the corner stays organized and visually tidy. It also adds texture that looks good in photos — small holes create a subtle pattern. Use a painted pegboard panel in the same color as your wall trim or a contrasting color like sage. This style is great for storing spatulas, measuring cups, and small baskets while keeping the shelf surface clear.
Cut pegboard panels to fit the corner side areas and paint them after priming. Build a shelf frame or use a cleat system anchored into studs for the shelf board. Attach pegboard panels to the wall with screws into studs or with rated anchors if needed. Install hooks and small holders on the pegboard before mounting the shelf if it’s easier to reach. Mount the shelf board to cleats or brackets, then add a shallow backstop so items don’t slip into the corner gap.
Editor's notePaint pegboard with thin coats and let it dry fully before adding hooks so the holes stay crisp.
Skip thisDon’t mount pegboard on weak anchors if you plan to hang heavier tools.
18. Corner Floating Shelf with Tapered Wooden Dowels
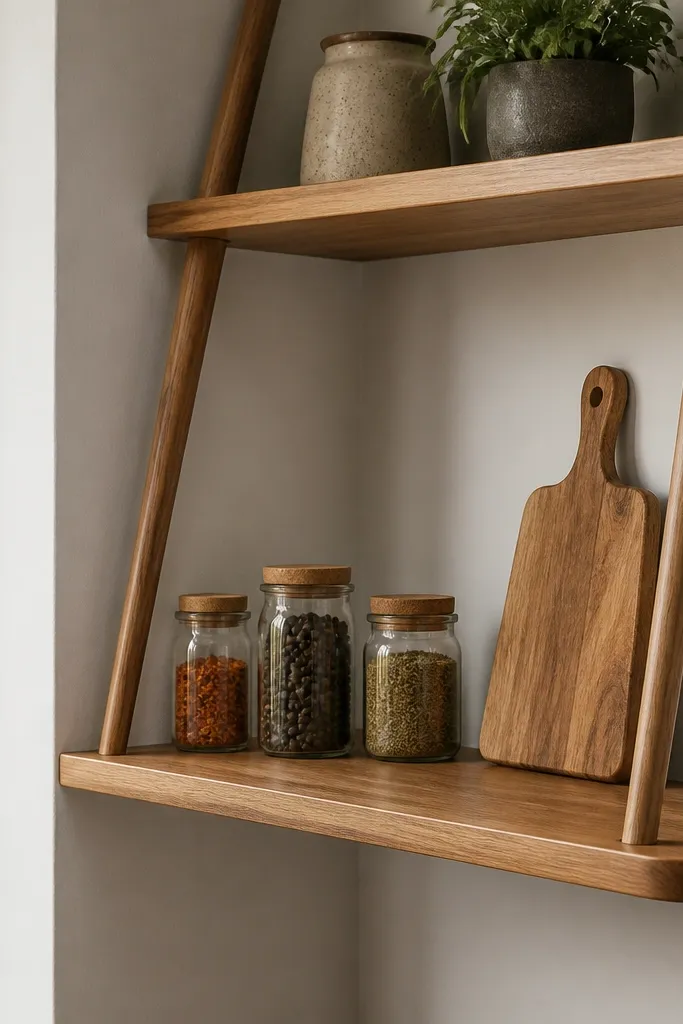
Tapered dowel supports look clever and warm, and they hide the mechanical feel of brackets. The corner reads like a designed piece because the supports create a rhythm of diagonal lines, especially when you use a consistent wood tone. This is a great budget kitchen corner shelves idea when you want a clean floating appearance but still need real strength. Use the shelf for small items like oils, cookbooks that don’t weigh much, or a tidy plant pot. The dowels also let you keep the shelf thickness visually chunky without expensive hardware.
Cut shelf boards to size from 3/4-inch stock and sand smooth. Drill matching holes in the shelf underside for dowel supports at consistent spacing, then drill matching holes into a back cleat or into studs through a hidden mounting plate. Cut tapered dowels from hardwood dowel stock and test-fit each dowel so it sits snug without forcing. Glue dowels into the shelf or cleat, then screw the hidden mounting plate into studs. Sand any glue squeeze-out, then stain or paint the shelf and dowels together for a unified look.
Editor's noteDry-fit with dowels only, then mark alignment lines so all dowels land straight before glue.
Skip thisDon’t glue without test-fitting; a single misaligned dowel makes the shelf look off.
19. Corner Shelf with Fold-Down Tabletop for Prep
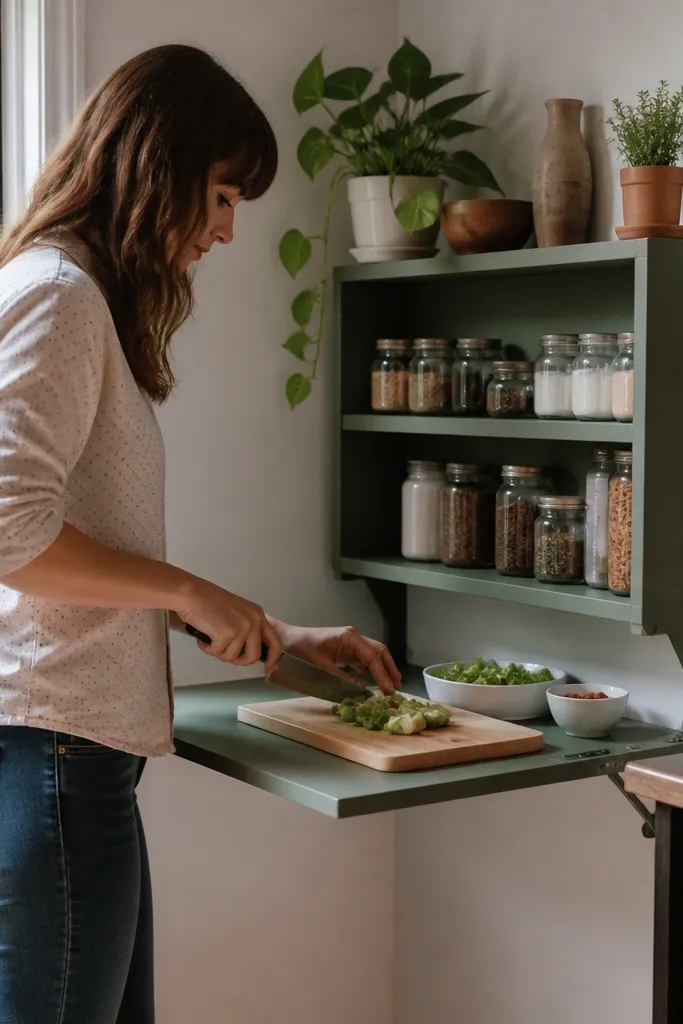
This is the corner shelf idea that actually changes how you use the kitchen. A fold-down tabletop tucked into a corner shelf gives you extra prep space when you need it and disappears when you don’t. It looks clean because the fold hardware can be painted to match and the tabletop can be finished like your shelves. Use it for cutting small ingredients, setting down a hot tray with a heat-safe mat, or holding a bowl while you prep. It’s great for small kitchens where corners are otherwise dead space.
Build a corner shelf frame that’s strong enough to support the fold-down weight, anchored into studs with a back cleat and side supports. Choose a fold-down bracket kit rated for tabletop loads and mount it to the frame at the correct height so the tabletop swings without hitting trim. Attach a 3/4-inch tabletop board, add a durable finish like sealed polyurethane, and install a small latch so it stays flat while folding. When closed, the tabletop should sit flush or nearly flush to keep the corner looking tidy. Add a small stop strip so it doesn’t swing too far and scrape the wall.
Editor's noteUse a hinge kit with a soft-close or friction adjustment so the tabletop doesn’t slam.
Skip thisDon’t mount fold-down hardware only to drywall; the leverage is real.
20. Corner Shelf with Soft Edge Rounded Front
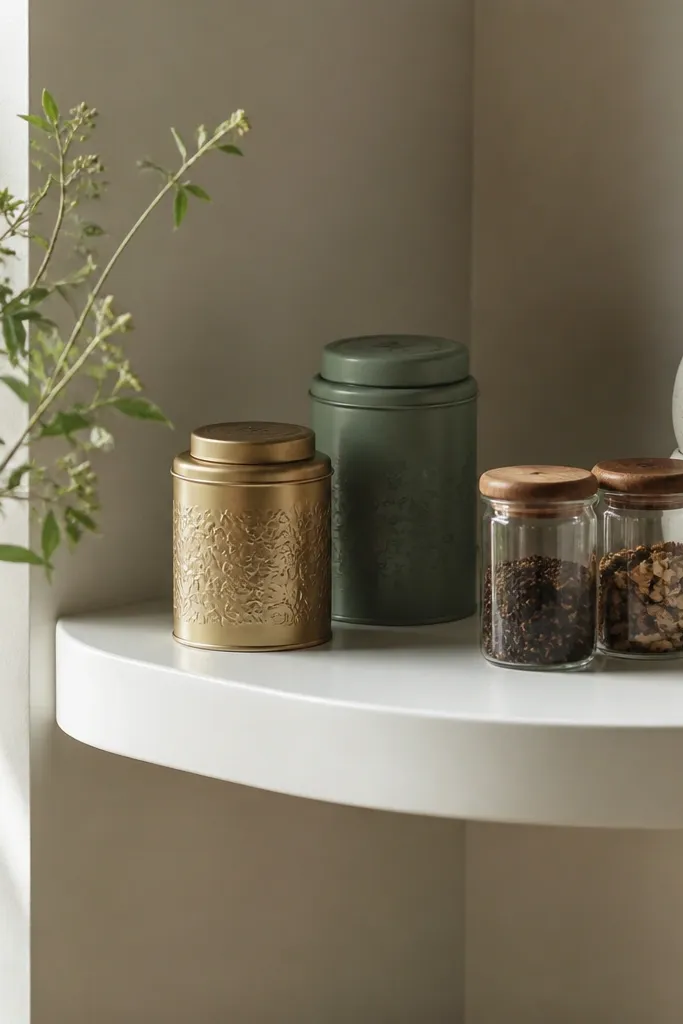
Soft edges make a corner shelf feel less harsh and more furniture-like. A rounded front edge looks good when you run your hand past it and it also reduces scuffs from daily use. Pair that with a satin paint finish and simple hidden mounting brackets for a sleek look that doesn’t scream “hardware store.” This style is perfect if your kitchen has kids or lots of foot traffic and you want corners that don’t catch bags or elbows. It also looks polished in photos because the lines are gentle, not angular.
Start with a 3/4-inch board, then route or sand a gentle roundover on the front edge using a 1/4-inch roundover bit or equivalent sanding. Sand everything smooth, then apply primer and two coats of satin cabinet paint. Mount with a back cleat anchored into studs so the shelf looks truly clean from the front. Install at a height where the rounded edge sits above clutter and below cabinet bottoms if you have upper storage. Add a small back lip strip if you’re storing jars so items don’t slide toward the corner seam.
Sand the routed edge after priming; paint fills tiny tooling marks and reveals rough spots.
Skip a back lip if you store jars; rounded edges increase the slide risk.



