
1. Pegboard Tool Rail With Matching Hanging Blocks
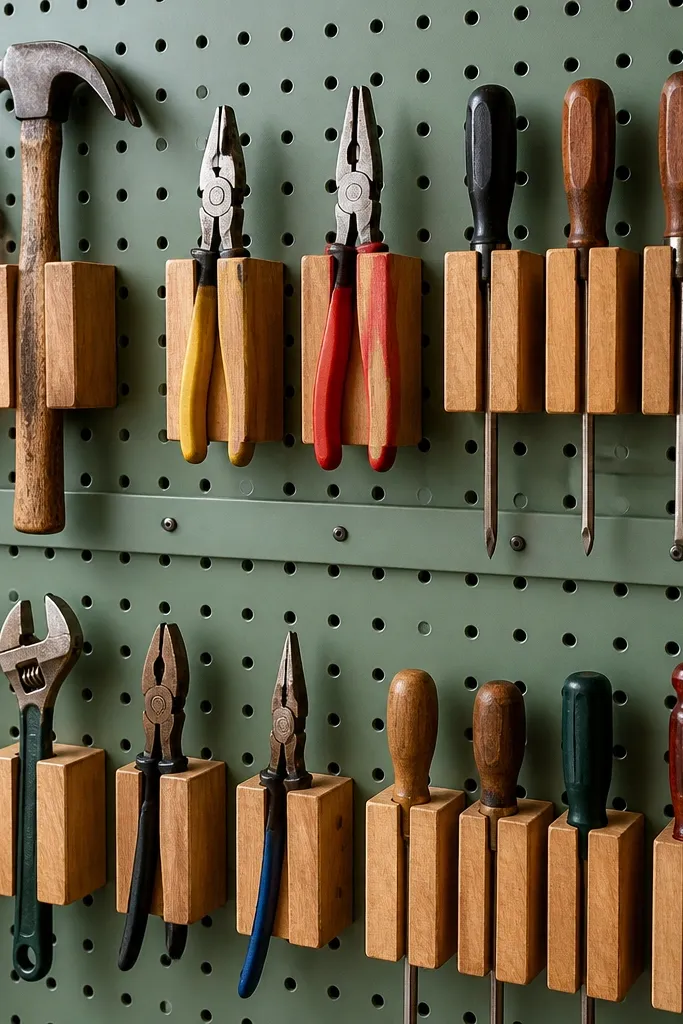
This setup makes tools look organized because every item hangs from a dedicated slot instead of scattered hooks. You get a clean grid behind it, so the wall reads like a system, not a clutter board. Use painted pegboard and uniform wood blocks so the visual noise drops. It’s also practical: you can move blocks as your tool list changes without rebuilding the whole wall.
Start by marking a centered layout on 1/4 in pegboard, then attach a level metal rail (or wood cleat) across the top. Cut identical hanging blocks from 3/4 in plywood, drill matching peg holes, and screw them to the rail so they line up. Finally, label each block with a label maker strip and hang your most-used tools at eye level.
Paint the pegboard first, then drill — it hides raw edges and looks cleaner.
Skip random hook heights; mixed spacing makes the wall look messy even when it’s functional.
2. Corner Shelf Stack for Paint Cans and Solvents
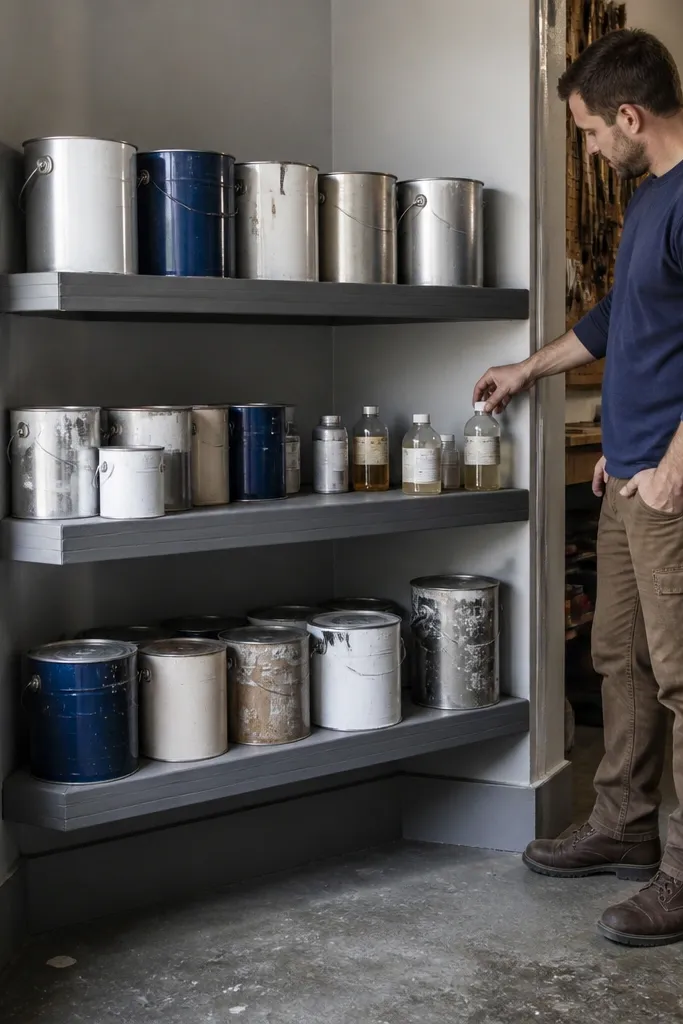
Corner storage is the fastest way to reclaim space without blocking the garage door area. This shelf stack keeps paint cans and small solvent bottles off the floor, which makes the garage look tidier immediately. The look is straight lines and repeatable can placement. Add a shallow front lip so drips stay on the shelf, not on the wall or floor.
Build two shelves from 3/4 in plywood cut to fit your corner, leaving about 1/2 in clearance from the walls for easy leveling. Use L-brackets or corner cleats anchored to studs, then add a 1 in drip lip strip along the front edge. Sand, prime, and paint the wood in a semi-gloss finish that wipes clean.
Editor's noteUse a slightly thicker front lip than the side rails so small drips don’t creep under the can.
Skip thisDon’t mount directly to drywall; anchor to studs or use proper masonry anchors.
3. Drawer-Front Hardware Grid on a Workbench Side
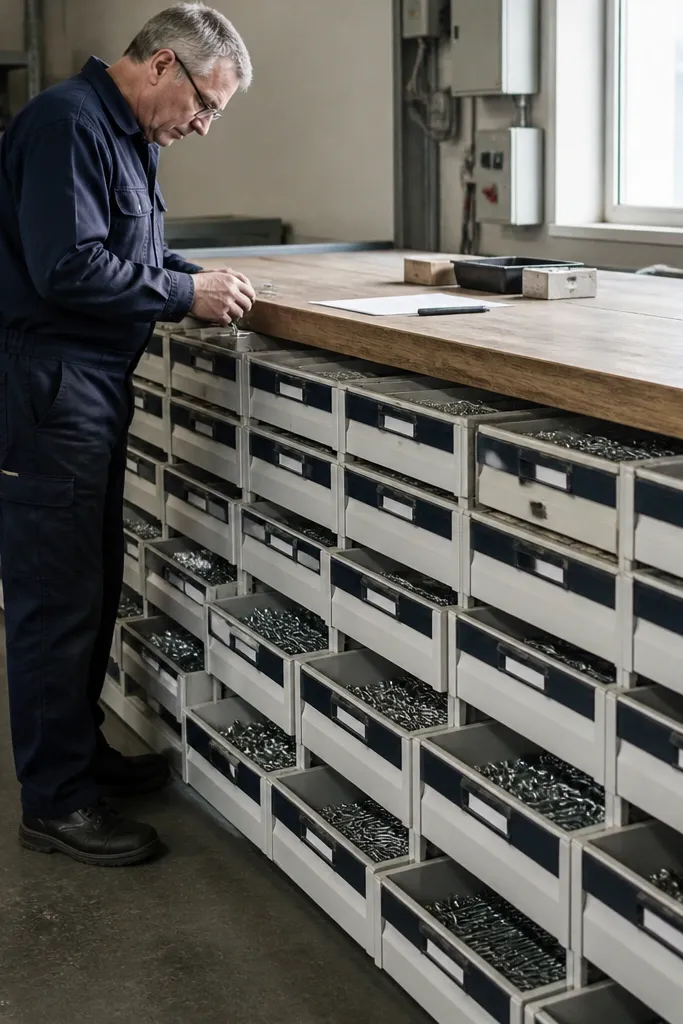
Small hardware is where garages look chaotic, because it’s usually stored in mixed piles. A hardware grid with drawer fronts turns chaos into a tidy wall of little boxes. The visual payoff is huge: you see exactly what you have, and the front labels keep it looking orderly. It also reduces time searching, since you can scan the drawer faces like a parts bin.
Cut a frame from 2x2 lumber or 1x2 rails to match your bench height, then screw it to the side of the workbench. Install drawer slides (full-extension) and build shallow boxes using 1/4 in plywood sides and 3/4 in front panels. Add drawer labels on the front panel, and seal the inside with a clear coat so spills wipe up.
Editor's noteSet drawer depth so common bolts and washers sit flat without stacking too high.
Skip thisDon’t make drawers too deep; deep drawers hide items and kill the scan-at-a-glance benefit.
4. Vertical Bike Rack With Clean Strap Guides

A bike leaning in a corner looks messy fast. A vertical rack puts it upright with controlled contact points, so your floor stays clear and the garage looks intentional. Add strap guides so the bike sits in the same place every time — fewer scratches, fewer awkward re-leaning moments. The look is clean metal lines against a painted wall.
Find the studs and mount two upright brackets with a top cross bar to support the frame. Add a cradle strap system using wide webbing and metal eye bolts, positioned to hold the down tube and rear wheel area. Finish by checking clearance to the door track and sanding any rough bracket edges before painting.
Editor's noteUse rubberized strap material where it touches the bike frame to prevent scuffing.
Skip thisSkip wall mounts that only grab drywall — it looks fine until the bike shifts.
5. Slat-Wall Shelf System With Removable Bins
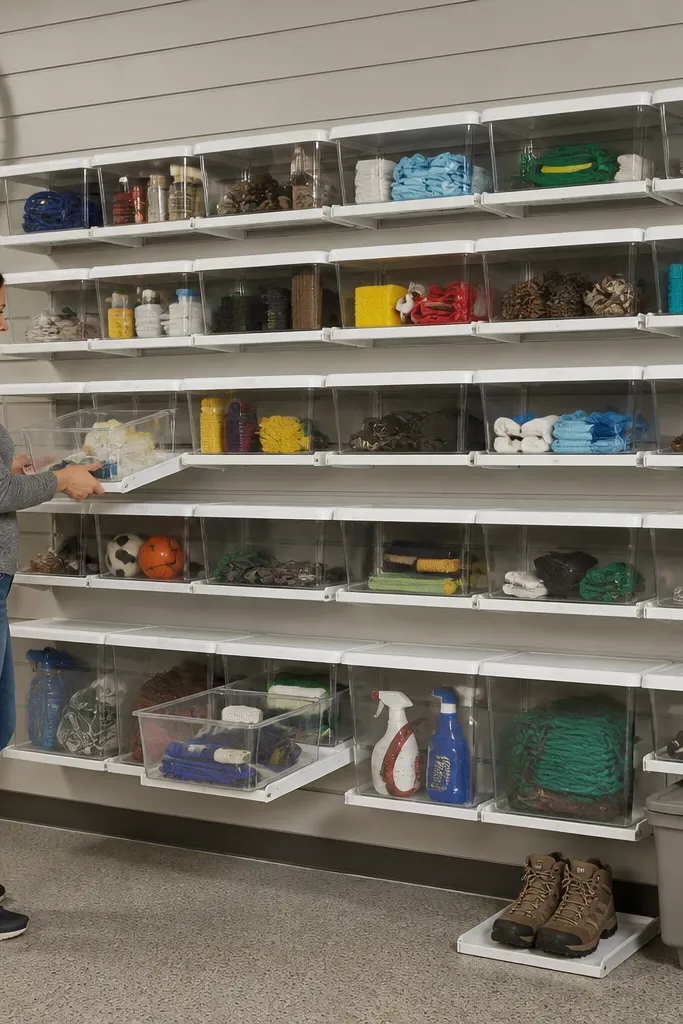
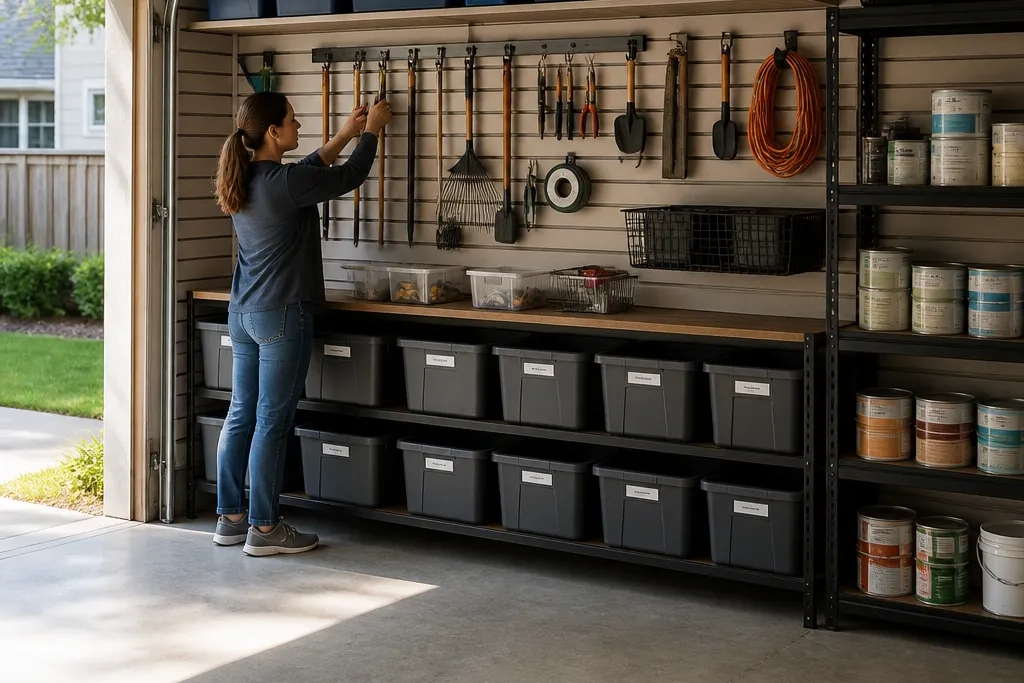
Slat-wall storage looks sharp because the wall becomes a grid you can build on. Removable bins keep the garage flexible while still looking organized. This is one of the best Budget Garage Storage Organization setups for renters or anyone who changes tools seasonally. You get a clean, modern look and you can rearrange everything without patching the wall.
Install slat-wall boards with screws into studs at a consistent spacing, then mount shelf rails at your chosen heights. Choose bins that match in width and add simple label tabs on the front. Add a top shelf for bulky items and keep the bin row for smaller stuff so the wall stays visually consistent.
Editor's noteBuy one bin size first and build the wall around it — matching sizes make it look designed.
Skip thisDon’t mix bin heights on the same rail; it turns the wall into a patchwork.
6. Long-Handled Tool Wall Rack With Pegboard Ends
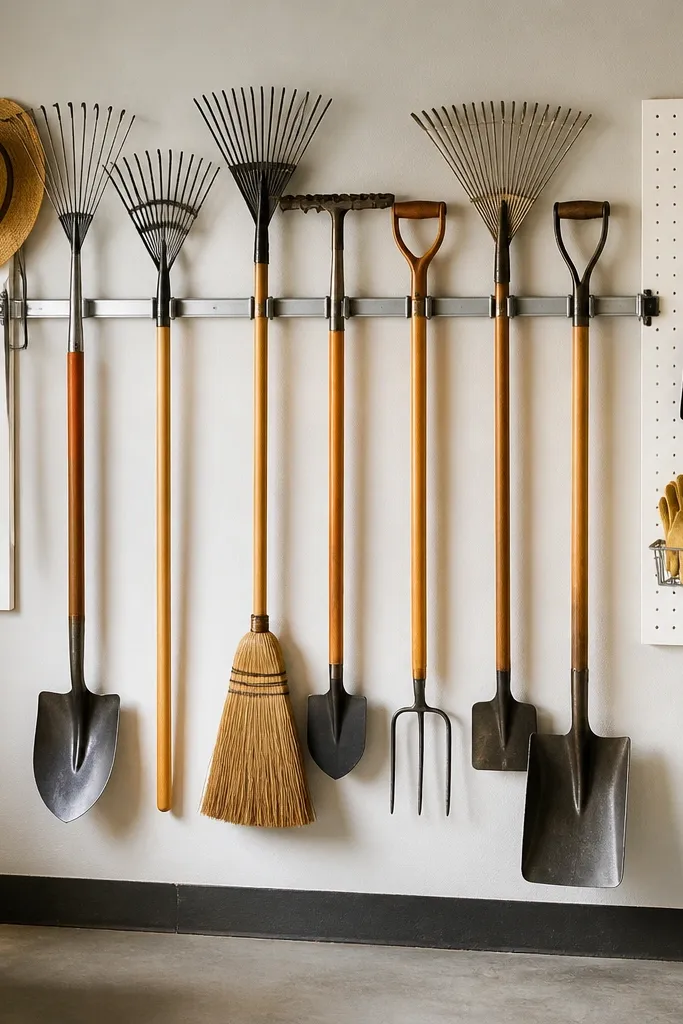
This rack makes rakes, shovels, and brooms look like part of a system instead of hanging wherever they fit. The pegboard ends give you a tidy border and a place for small accessories like gloves. It’s photogenic because the tools line up in parallel, and the wall stays flat and clean. You also stop the floor from becoming a storage shelf.
Cut a backer panel from 3/4 in plywood and mount it to studs at a height that keeps tool heads off the floor. Install two rows of angled supports made from scrap wood, spaced to match each tool handle diameter. Finish by attaching small pegboard side panels for hangers and then paint the whole unit for a unified look.
Editor's noteUse foam pipe insulation on the support contact points to prevent scratches and reduce rattling.
Skip thisDon’t store handles with the heads down — it drips debris onto the floor.
7. Wall-Mounted Cable Reel Shelf for Chargers and Power Strips
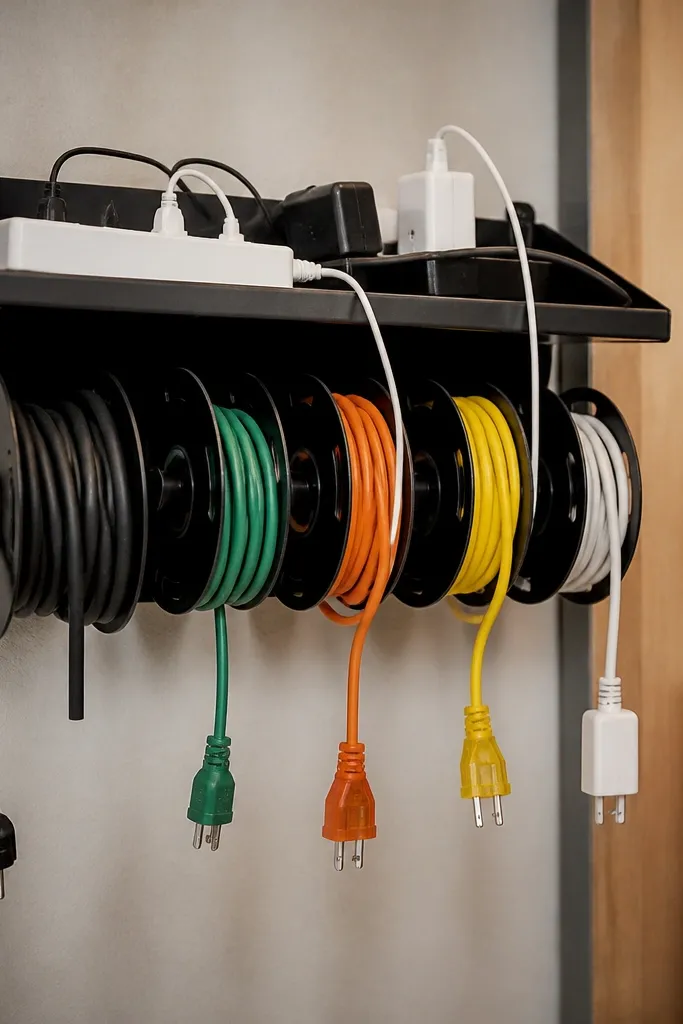
Cord storage is where garages look messy even when everything else is tidy. This wall-mounted shelf keeps power strips and chargers visible but controlled, with cords coiled neatly instead of tangled loops. Cable reels make the look consistent and make it easy to pull one cord without dragging the rest. It’s a small project that cleans up the visual clutter fast.
Mount a shallow plywood shelf to studs, leaving room underneath for a power strip and small bins. Add cable reels or simple spool hooks and attach them in a row, then route each cord through a guide so it winds cleanly. Finish by adding a label to each reel and using zip ties to keep the cord length consistent.
Editor's noteKeep cords coiled to the same length using a short Velcro strap — it looks uniform.
Skip thisSkip “just tuck it behind the shelf” — cords will end up in a knot.
8. DIY Bin Tower for Cleaning Supplies With Color-Coded Labels
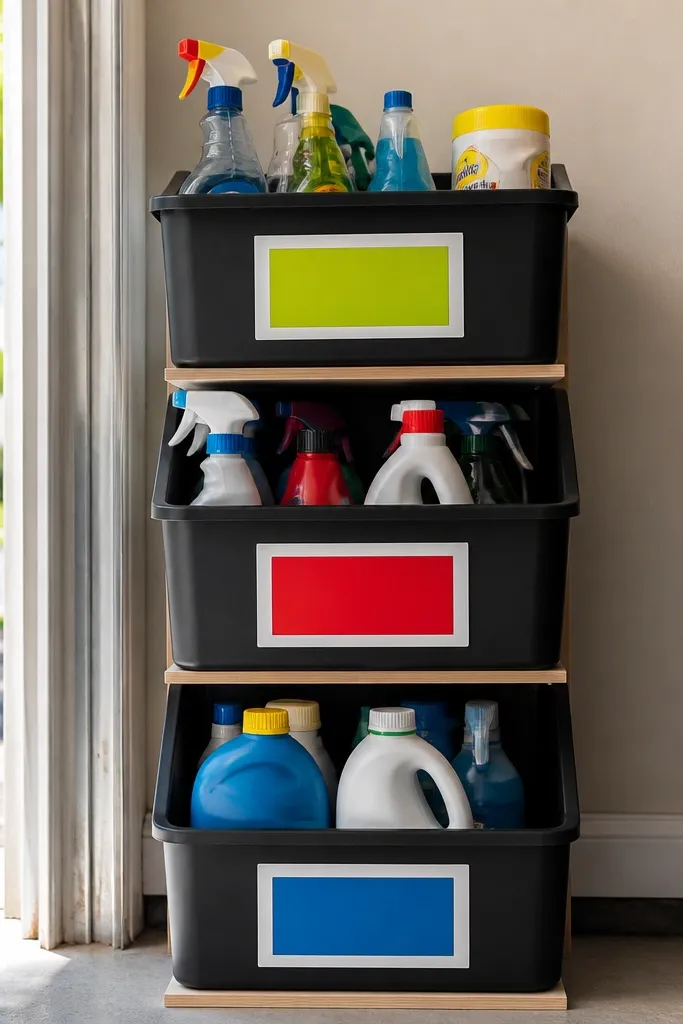
A bin tower makes cleaning products look intentional instead of random bottles on shelves. The tower format keeps everything upright and visible, which makes weekly restocking faster. Color-coded labels improve the look and the workflow: you can tell which bin is for degreaser, glass, or floor cleaner at a glance. This is one of the simplest Budget Garage Storage Organization builds that still looks “done.”
Build a narrow cabinet frame from 1x2s and plywood panels, then install two or three fixed shelves or a series of bin ledges. Use clear or uniform-front bins so the tower stays photogenic. Label each bin with tape color and a short word, then anchor the cabinet to studs with anti-tip brackets.
Editor's noteUse semi-gloss paint on the cabinet so you can wipe spray residue off easily.
Skip thisDon’t leave bins unanchored; a bumped tower turns into a spill.
9. Workbench Peg Rail for Tape, Bits, and Small Parts
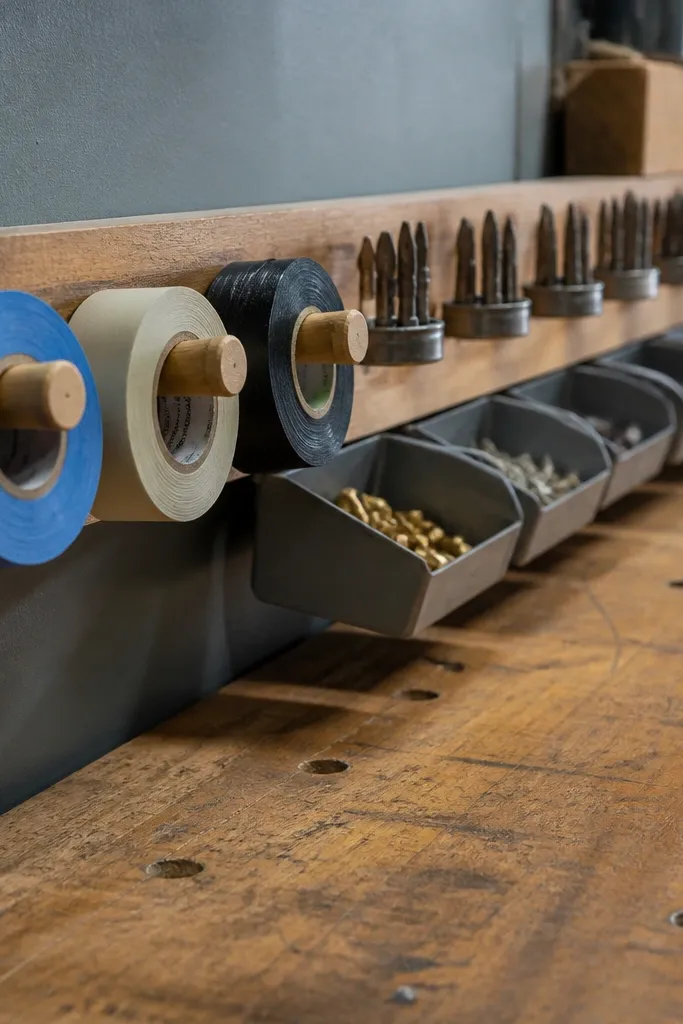
This rail is about making the workbench surface look clean. Instead of stacks of tape and loose bits, you hang them in a row where you use them. It creates a tidy band of storage that looks intentional in photos and in real life. The best part is the workflow: you grab, use, and hang it back in seconds.
Mount a narrow pegboard strip or a metal peg rail under the top edge of your workbench, anchored to studs or solid framing. Drill holes or add peg hooks for tape dispensers and small bit holders, then screw a shallow tray at one end for loose items like washers. Label the tray and hooks so the return spot is obvious.
Set the rail height so your hand can reach without leaning — it keeps you from leaving items on the bench.
Skip oversized hooks; big hooks waste space and make the rail look cluttered.
10. Slanted Lumber Rack With End-Stop Guides
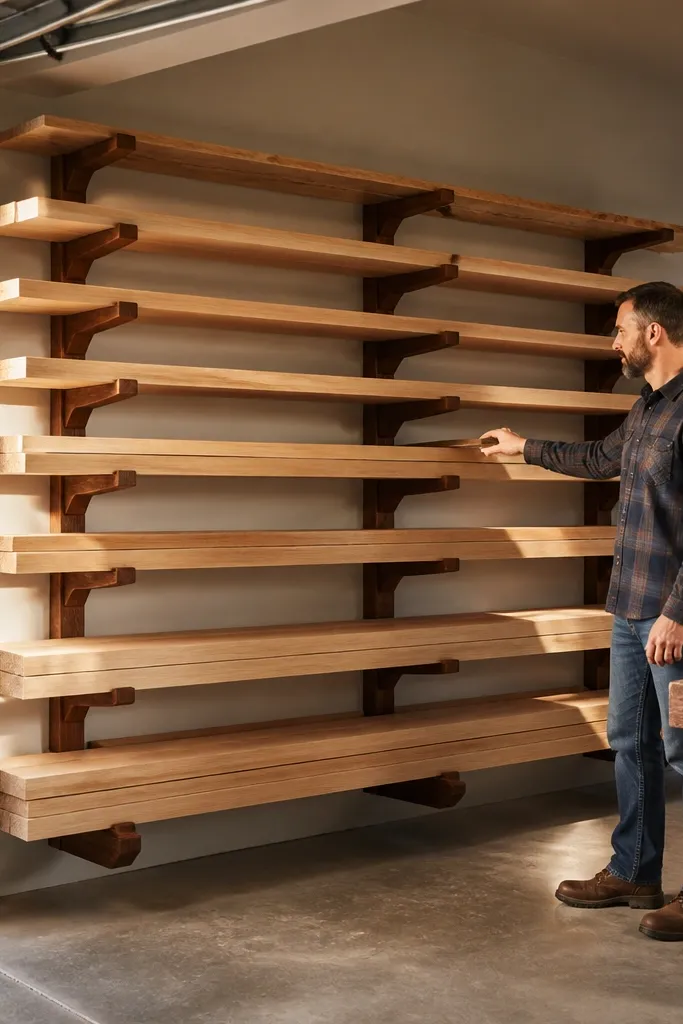
Lumber storage looks ugly when boards lean randomly or bow under their own weight. A slanted rack keeps boards supported and stacked with equal spacing, so the garage wall looks clean and the boards stay straight. End-stop guides keep each stack from drifting, which means your rack stays photogenic even after a busy build day. You also reduce the “search for the right length” problem.
Build a base from two side rails and a backer panel from plywood, then add a slanted top support so boards rest at a consistent angle. Install end stops made from scrap wood blocks and screw them into the side rails at measured spacing. Anchor the rack into studs and add a top drip edge if the area gets splashed.
Sand the contact edges and add a thin coat of clear sealer to reduce splintering.
Don’t stack boards directly on rough wood; it catches dust and makes the rack look dirty fast.
11. Wall-Mounted Step-Tool Shelf With Bin Undertray
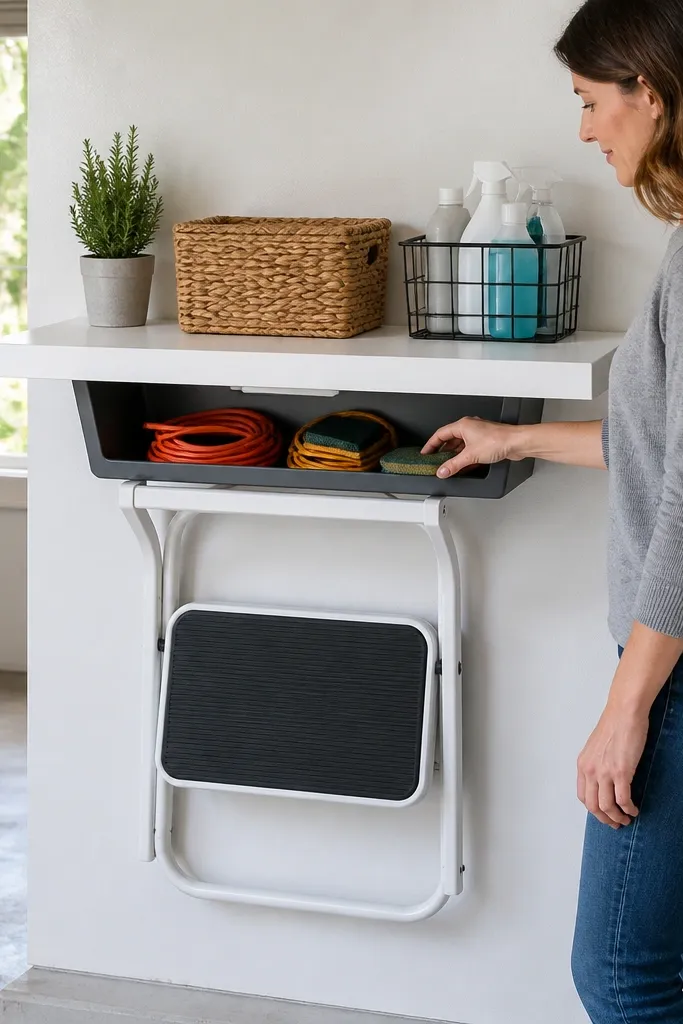
This is a smart way to store a step stool without turning it into a floor obstacle. The shelf keeps the stool up and out of the way, and the undertray catches small accessories like extension cords and cleaning pads. It looks clean because the stool is aligned and the bin is contained under it. It also keeps the garage path open, which changes how the whole space feels.
Find studs and mount a sturdy shelf bracket system at a height that clears the floor and doesn’t block door movement. Place a mounted shelf platform from 3/4 in plywood and add a front lip so the stool feet don’t slide. Screw a small under-bin tray below the shelf and label it for accessory storage.
Add rubber pads to the underside of the shelf where the stool rests to stop squeaks.
Skip undersized brackets; a sagging shelf makes the whole setup look cheap.
12. Clear Lid Storage Box Wall Row for Seasonal Gear
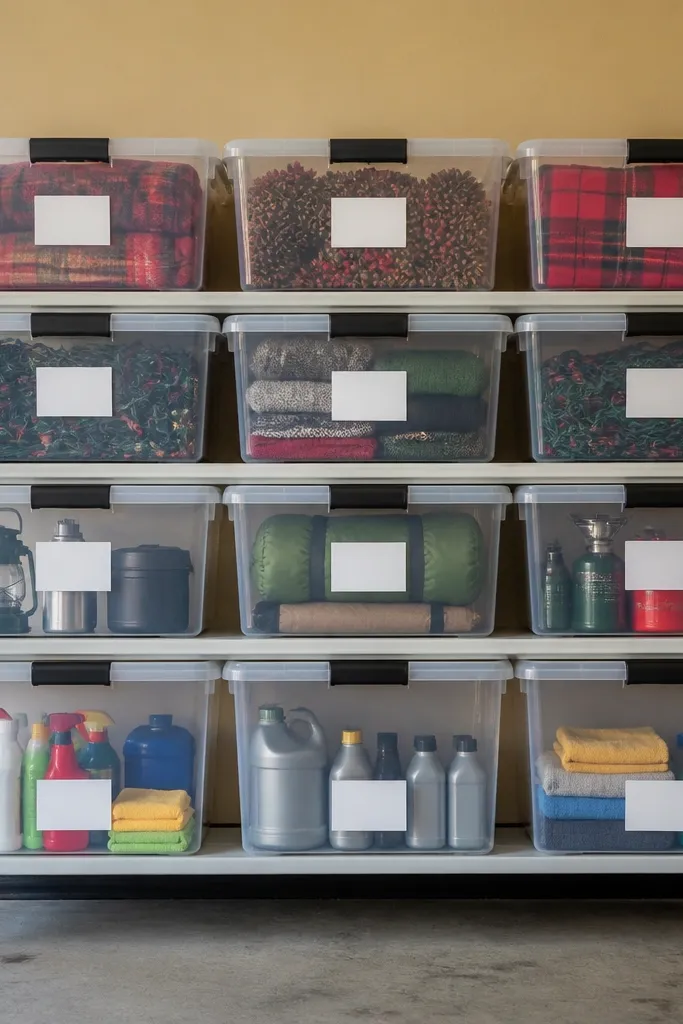
Clear-lid boxes look sharp because you can see what’s inside, and labels keep it from turning into random transparent clutter. This wall row works for seasonal gear like holiday lights, camping accessories, and spare car care products. The visual payoff is a neat lineup with repeatable box shapes. It’s also practical: you find things without opening every container.
Choose a single box size and build a backer wall panel from plywood to mount to studs. Attach a series of cleats at equal spacing so boxes sit level, then add a front stop strip to keep them from sliding. Label each box on the front with tape and add a small “what it is” label near the lid handle.
Paint the wall behind the boxes a matte neutral so labels and contents read clearly.
Don’t mix box sizes; mismatch makes the whole row look like leftovers.
13. Magnetic Strip for Metal Hand Tools and Wrenches
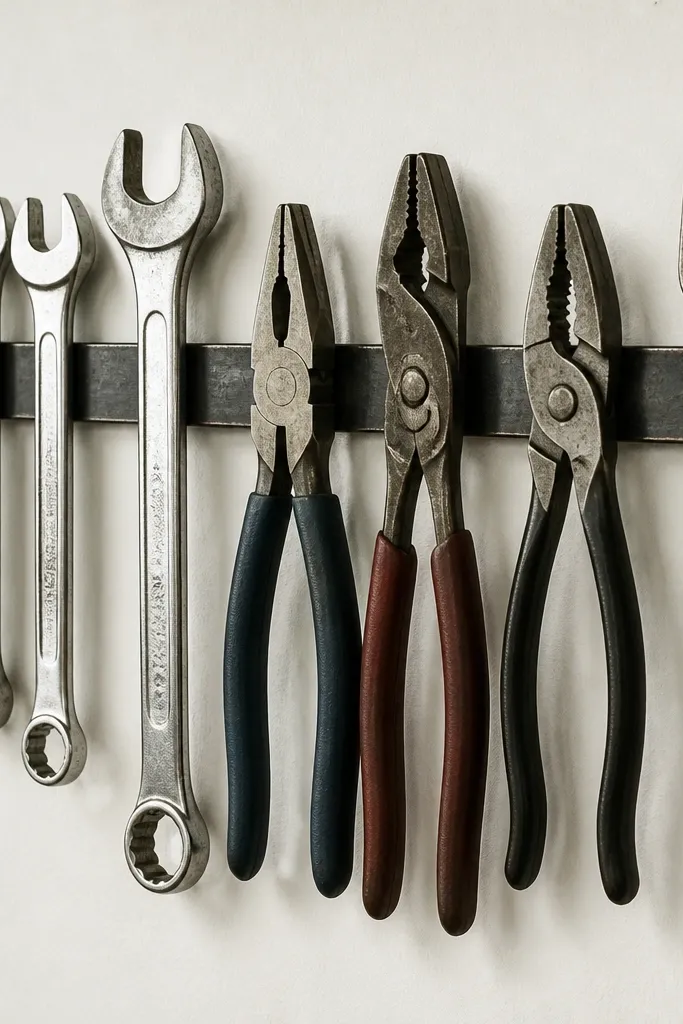
Magnetic storage looks modern and stays tidy because tools hang in a straight line. It works best for metal hand tools like wrenches, pliers, and small specialty tools. The look is clean: tools are visible, and the wall stays flat with no hanging hooks. You get the speed of grabbing tools without digging through bins.
Mount a magnetic strip to studs with screws, not just adhesive, and keep the strip level. Add foam or felt pads behind the strip ends if the wall is uneven to prevent rattling. Label each tool’s position with small tape marks so you put them back in the same spot every time.
Wipe the strip and tools with a dry cloth before sticking — dust weakens magnet grip and looks messy.
Skip heavy hammers or tools that are too heavy for the strip; it will pull away.
14. Pegboard Spice-Style Jars for Screws and Anchors

This is the Budget Garage Storage Organization move that makes small hardware look like a store display. Jars keep screws and anchors separated by size, and the pegboard grid makes it easy to scan. It’s visually striking because the jars are uniform and labels are consistent. Also, you can see when you’re running low without opening anything.
Mount pegboard to studs and mark a grid for jar hangers. Use identical jars and attach jar brackets to the pegboard holes so each jar hangs at the same height. Add label tape on the jar front and, if needed, a small second label on the jar lid for quick reading when hands are greasy.
Use jars with wide mouths for screws so you don’t fight lids with oily fingers.
Don’t use mixed jar sizes; it kills the clean grid look.
15. Bike Helmet and Gloves Wall Hooks With Shelf Lip
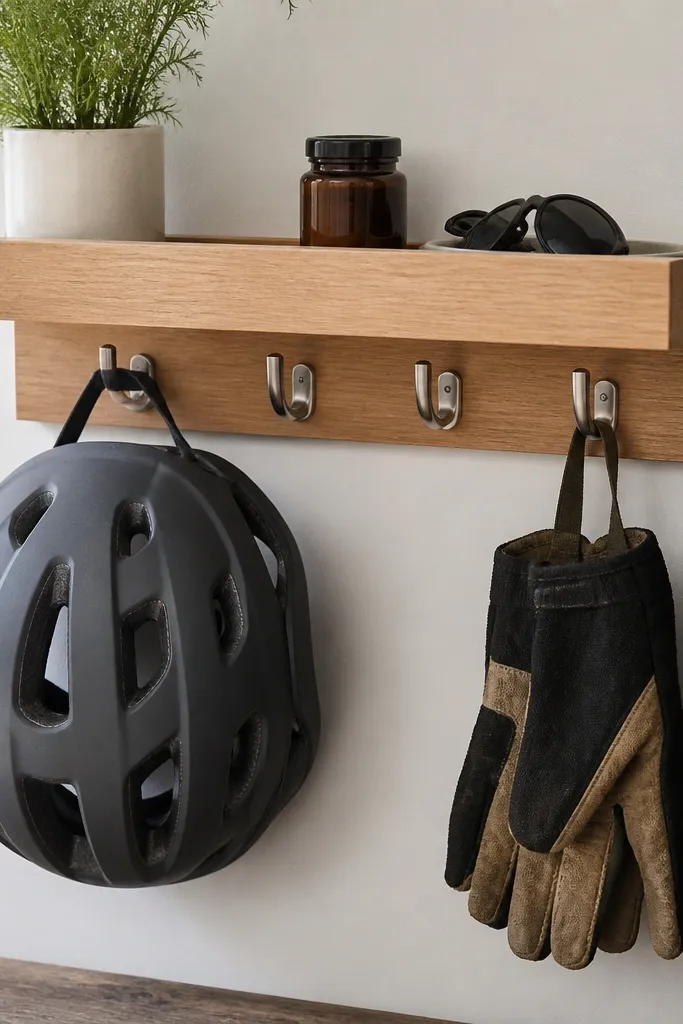
This setup keeps bike helmets, gloves, and small safety items from turning into floor clutter. The shelf lip is a tiny detail that makes the hooks look intentional: helmets sit neatly under the shelf and don’t slide. It’s also great for motorcycle gloves or work gloves, since it keeps them off benches and away from dust. The look is clean and organized because everything hangs in a consistent line.
Mount two or three hooks into studs at head height and add a small top shelf from 3/4 in plywood with a 1 in front lip. Screw the shelf lip to the same studs so it stays rigid. Add a labeled small bin under the hooks for tiny items like keys or visor wipes.
Use wide hook bases or rubber-coated hooks to prevent helmet scuffs.
Skip thin hooks that wobble; wobble makes the whole wall look unfinished.
16. Trash and Recycling Center With Closed Bin Doors
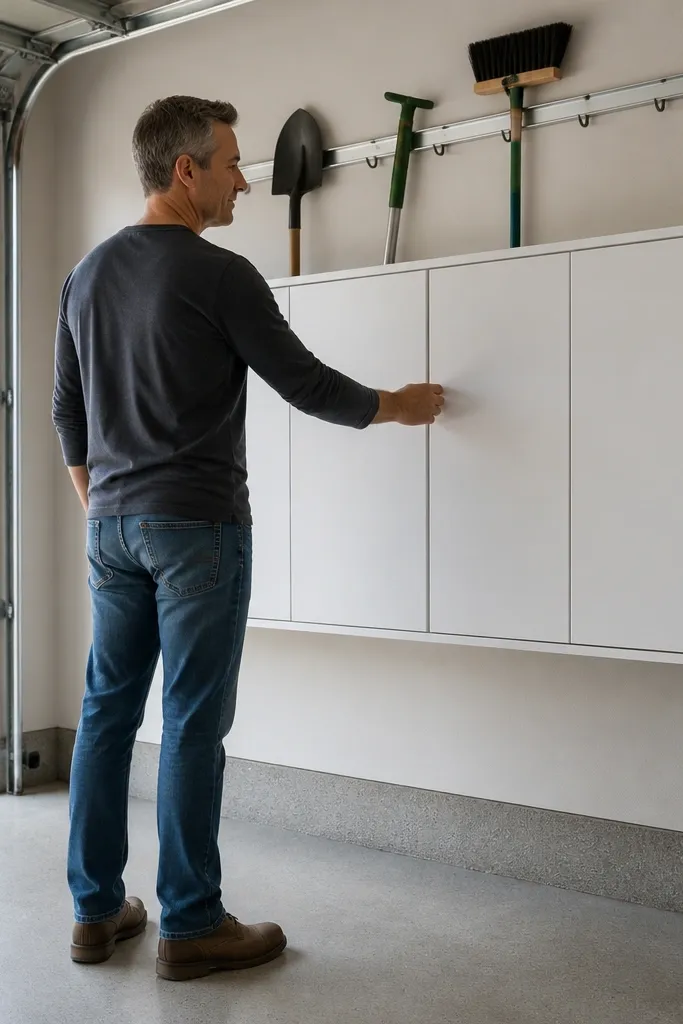
Garages look gross when trash sits open or half-covered. A simple closed-bin cabinet makes the mess disappear and keeps the wall looking clean. This is one of the most aesthetic Budget Garage Storage Organization projects because it removes the biggest visual “ugh.” You also reduce odors and keep bags from tearing in the open.
Build a small cabinet frame from 2x2 lumber and 1/2 in plywood, sized to your trash bin footprint with a 1/2 in clearance on each side. Install a door on hinges and add a front cutout or removable panel for bag access. Add a bottom drip tray or sealed base, then paint the cabinet and mount it to studs.
Use rubber bumpers where the bin contacts the cabinet so doors close quietly.
Don’t leave gaps that let bags sag; it looks messy and makes spills likely.
17. Wall-Mounted Saw Storage With Blade Guard Covers
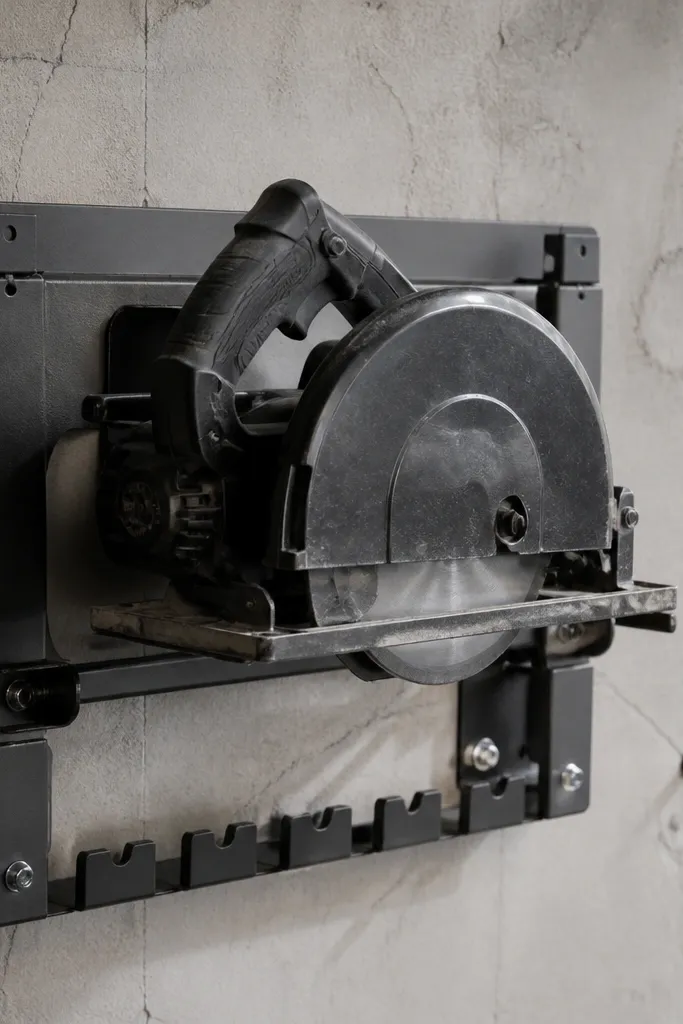
Power tools look chaotic when they lean on stands or sit on the floor. Wall-mounted saw storage keeps them aligned and makes your garage look like a workshop instead of a storage room. Adding blade guard covers keeps the look clean and prevents dust from collecting on exposed areas. This setup also makes it easier to spot missing tools.
Mount a plywood backer to studs and add two horizontal rails for tool handles. Use strap hangers with screws and washers to secure each saw body at the same height. Add blade guard covers made from thin plastic or sealed fabric sleeves, then label each tool position with tape marks.
Editor's noteKeep the lowest tool at least 10 in off the floor to reduce dust and accidental knocks.
Skip thisSkip hanging heavy tools by cords; cords pull, and the tool ends up crooked.
18. Toolbox-Style Rolling Caddy for Car Wash Supplies
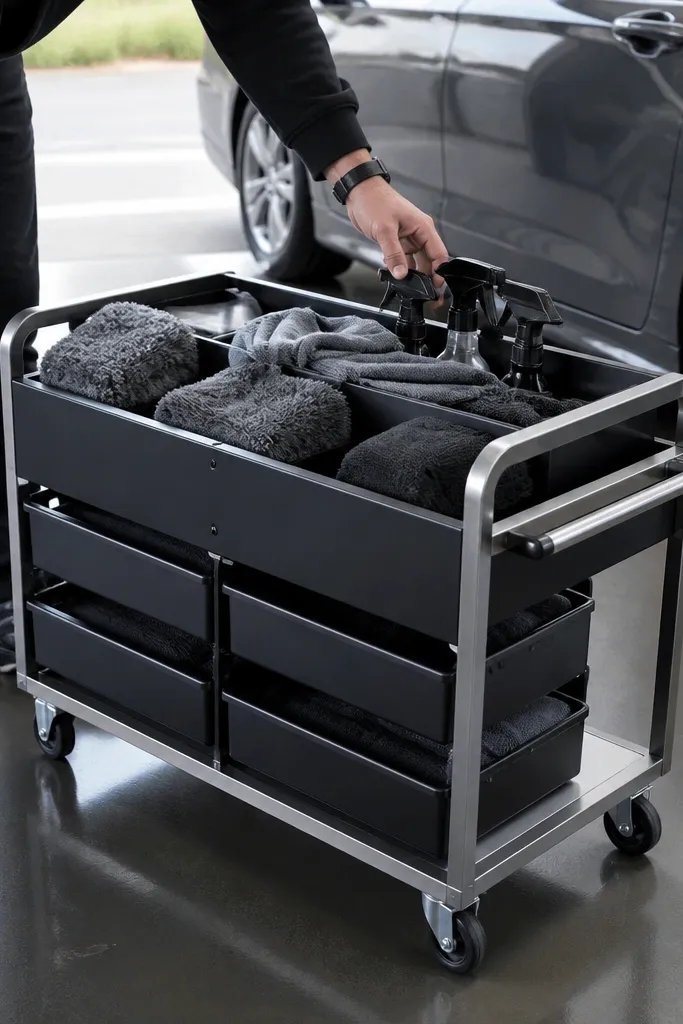
A rolling caddy keeps car wash stuff from spreading across counters and shelves. It’s photogenic because it looks like a compact toolbox, with compartments that line up and labels that read cleanly. When you roll it out, you still keep the garage tidy because everything returns to one cart. It’s also a smart solution for garages with limited wall space.
Build a cart frame from 2x2 lumber and add three to five removable compartments using 1/4 in plywood dividers. Install caster wheels rated for at least 100 lbs each, then add a handle for pulling. Label each compartment and seal the inside surfaces with clear coat for easy wipe-down after water and soap.
Editor's noteUse a tray at the bottom for drip control so the cart doesn’t leave wet spots.
Skip thisDon’t overload the top compartment; balance matters for rolling carts.
19. Paint-Stick Organizer Shelf With Color Tabs
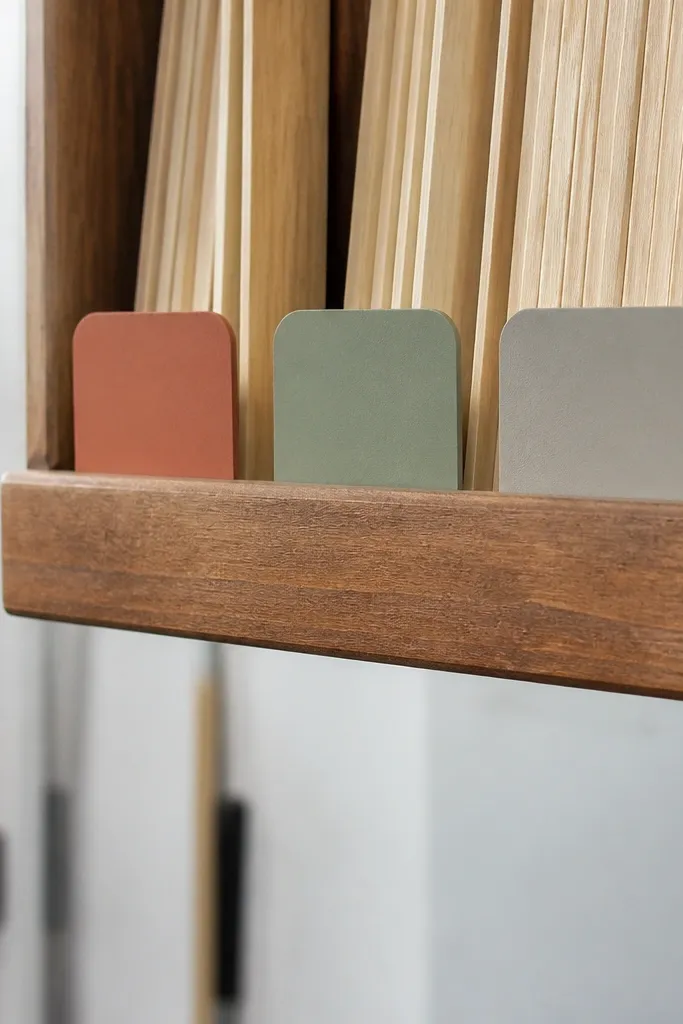
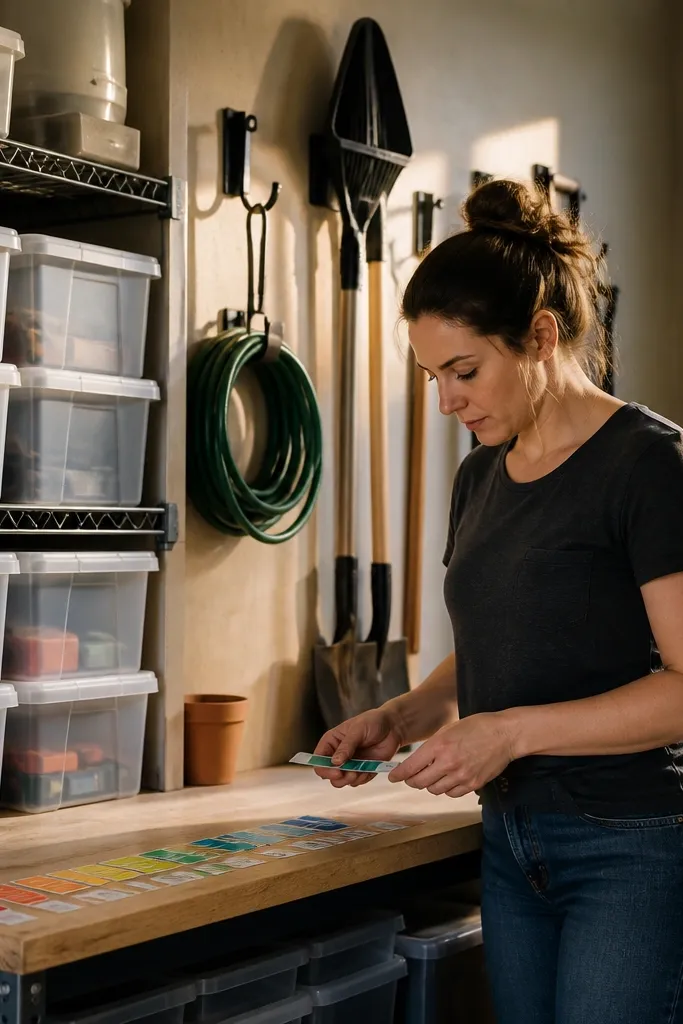
Paint supplies look messy when they’re stored in a pile of sticks and sample cups. A paint-stick organizer shelf keeps samples and stir sticks in a clean row, and color tabs make it easy to find the shade you need. This project is small but it’s extremely photogenic because the tabs create a neat strip of color. It also reduces the “where is that sample?” headache.
Mount a narrow shelf board to studs and add a series of shallow slots using a strip of scrap wood spacing guides. Insert paint sticks upright so they stay separated, then attach small tabs on the front edge for color names. Seal the shelf with primer and a wipeable finish, then add a small labeled cup for stir sticks and small sample lids.
Editor's noteUse the same font style on every label tab so it looks intentional, not random handwriting.
Skip thisSkip open piles; samples slide and you lose the whole clean look.
20. Garage Wall Drying Rack for Mops and Wash Brushes

Drying gear is a garage eyesore. A wall drying rack keeps mops, brushes, and squeegees off the floor while still letting them drip into a controlled tray. The look is clean because the tools hang in a consistent direction, and the tray makes the system feel finished. It’s a practical upgrade that also makes your garage look ready to use.
Build a wall-mounted frame from 1x2 lumber and attach drip tray supports under the hanging area. Add a row of hooks or dowels for mop handles, spaced to prevent tangling. Install a small removable gutter tray below the hooks and seal the wood so it handles wet drips.
Editor's noteAdd a slight slope to the tray supports so water drains to one corner.
Skip thisDon’t hang tools directly on bare wood; they will stain and the rack will look grimy fast.
21. Storage Bench Top Organizer With Flip-Up Divider Trays
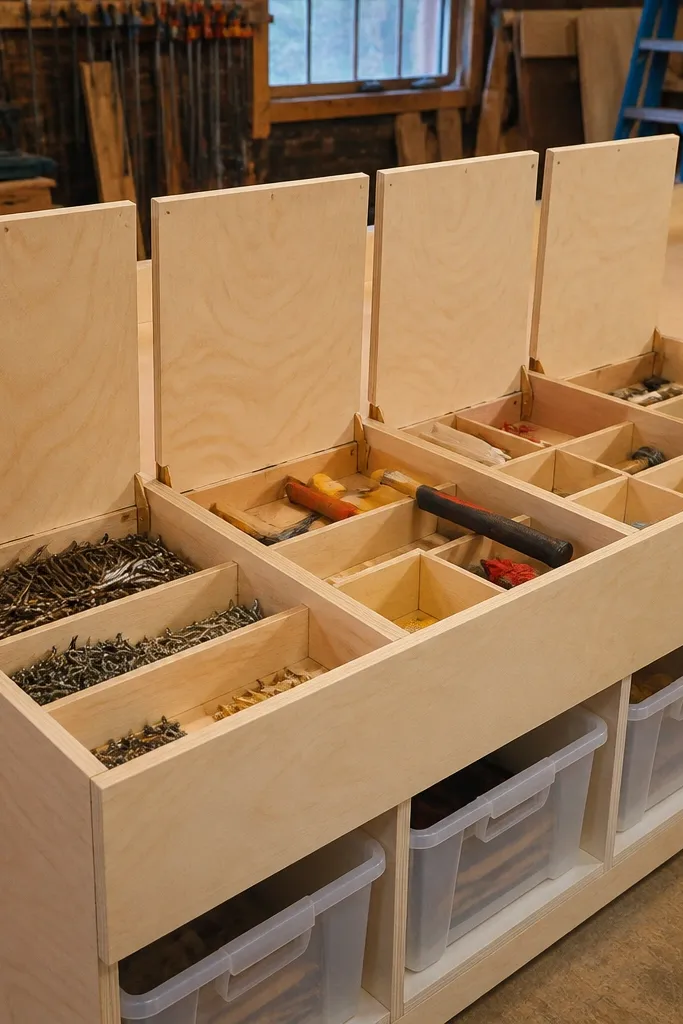
A clean bench top is the difference between “garage storage” and “workspace.” Flip-up divider trays keep small parts contained while still letting you access them quickly. The look is tidy because bins sit in a neat row under a consistent face panel. This works for screws, nails, small tools, and frequently used consumables like sandpaper and blades.
Measure your bench top and build a shallow organizer box from 1/2 in plywood with a front panel face. Install hinge-supported divider trays sized for your bins, then add magnetic catches or simple latches to keep trays closed. Sand and paint the exterior, then add labels on each tray front so everything has a return spot.
Use a light matte finish on the top face so labels stay readable and glare stays low.
Don’t skip dividers; open bins turn into mixed piles the moment you’re busy.
22. Fold-Down Ladder Rack With Wall-Protected Straps
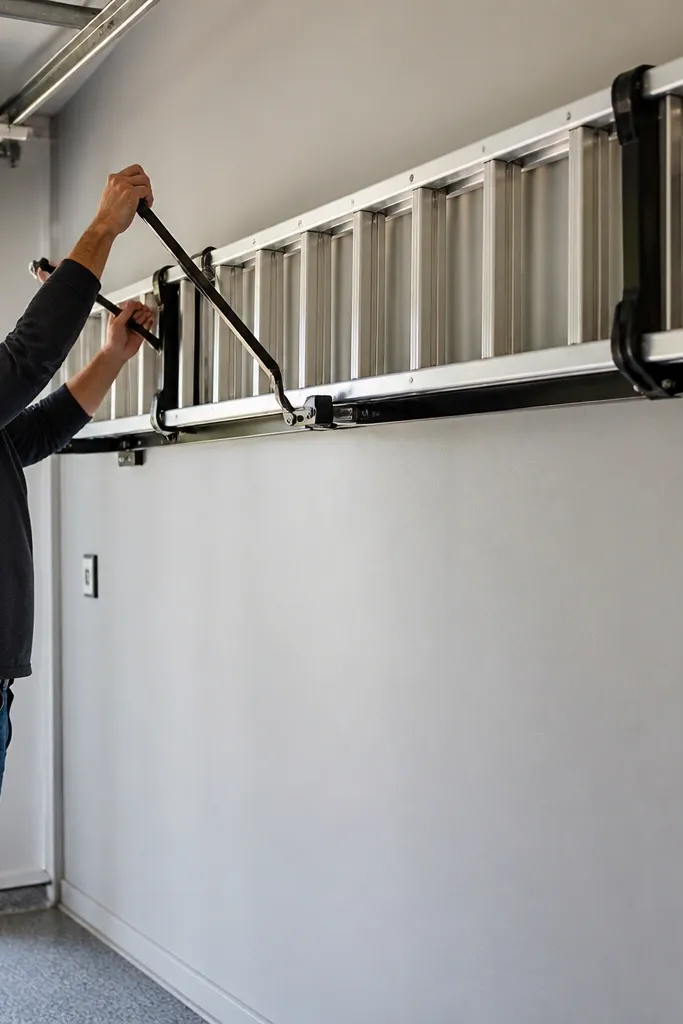
Ladders are the hardest garage item to store neatly because they’re big and they move. A fold-down rack keeps it out of the way while still looking clean when stored — the ladder stays aligned, not leaning. The strap protection keeps the ladder from chewing up the wall and helps the rack look finished. It’s a big visual win because it removes the bulky silhouette from your floor.
Mount a heavy-duty fold-down bracket system into studs, then attach a ladder support platform sized to the ladder base rails. Add wall-protection strips made from rubber or felt where ladder contact happens. Test the fold motion, then install a strap tie-off point so the ladder locks into place when stored.
Editor's noteUse a rubber edge strip on the bracket contact points to prevent metal-on-paint wear.
Skip thisSkip testing movement with the garage door track clear; clearance surprises are common.
23. Shelf-Lip Spice Racks for Solvent Bottles and Household Tools

This is a slick way to store bottles without building a full cabinet. The repeated bottle holders create a uniform look, and the slim front lip stops bottles from tipping forward when you reach. It’s perfect for solvent bottles, brake cleaner, windshield fluid, and small household tools like brushes. The aesthetic comes from repetition: same spacing, same heights, same labeling style.
Cut a shelf panel from 3/4 in plywood and install it on studs at a workable height. Add bottle holders using drilled dowels or simple wood blocks spaced evenly across the shelf top, then glue and screw the blocks so they don’t shift. Finish by adding a 1 in front lip strip and labeling each bottle position with tape.
Editor's noteSeal the shelf with a wipeable finish so drips don’t stain the wood.
Skip thisDon’t use holders that are too tight; bottles should slide in easily and sit straight.
24. Overhead Track Storage for Long-Handled Tools (No More Ceiling Clutter)
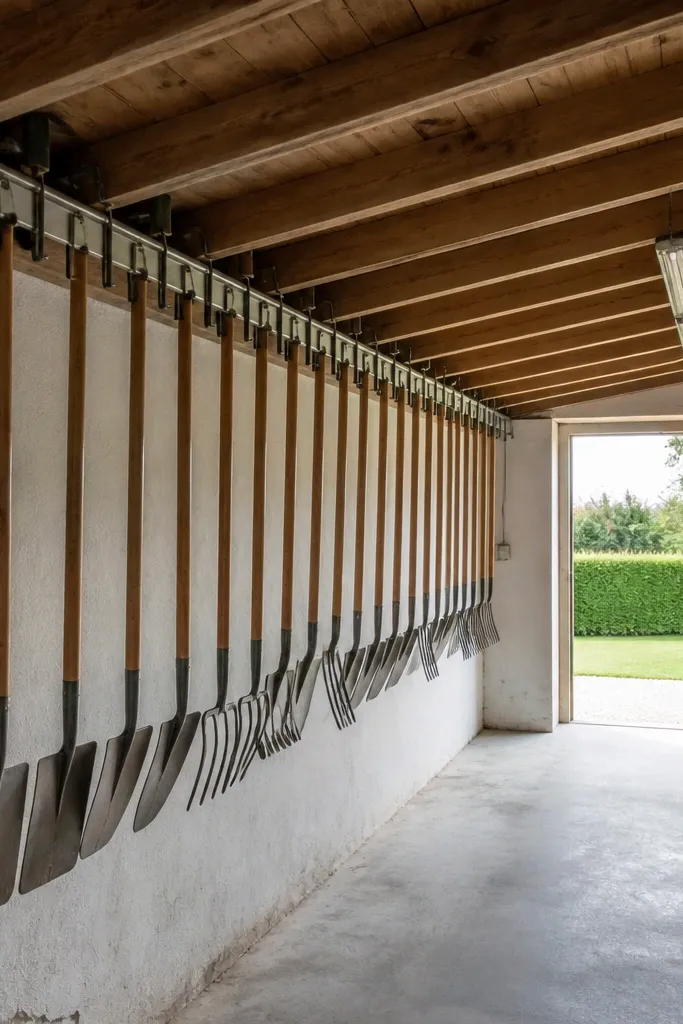
Long-handled tools eat up floor space and make the garage feel messy fast. This setup hangs them from an overhead track so they sit out of the way, but still look clean because the tools align in one neat row. You get a clear walking lane and fewer trips over handles when you’re hauling stuff in and out. It’s a simple build using a straight aluminum or steel track and padded clamps, so it looks intentional instead of like random hooks. Plan for a half-day build if you measure carefully and drill clean holes; it suits garages with exposed rafters, joists, or a beam you can anchor to.
1) Find solid structure: locate ceiling joists or rafters and mark them every 16 in (or measure your spacing). Install a straight track (2 in wide aluminum T-track or a 1-1/2 in steel rail) across two or three joists using 1/4 in lag screws and washers; keep the track 6-7 ft off the floor so tool heads clear when you grab them. 2) Make two clamp styles from 1/4 in thick UHMW or rubber sheet backing plus a metal U-bolt clamp: one clamp for shovel/rake handles (around 1-1/2 in contact width) and one for long broom/mop handles (around 1 in). Add a small rubber pad where each clamp touches to prevent squeaks and paint scuffs. 3) Position each clamp so tools hang parallel to the floor and the tool head rests 2-4 in above the top of a wall shelf or bin lid; tighten everything, then test one tool at full lift and tug to confirm it doesn’t shift.
Editor's noteUse a level and string line when installing the rail. If the track is straight, the whole row of tools looks “designed” instead of crooked.
Skip thisDon’t anchor into drywall or thin ceiling panels — find the joists and lag into wood.
25. DIY Slanted Pegboard Tool Shadow Box for Power Tools and Accessories
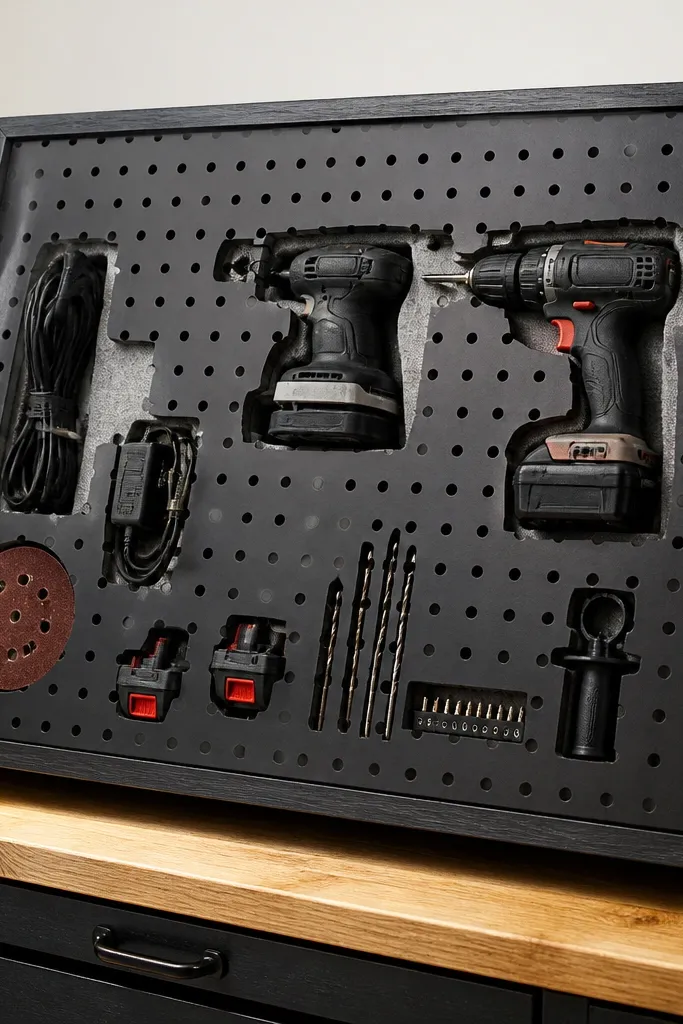
Loose power tools and chargers end up stacked in corners, and the mess gets worse because you can’t see what you own. A slanted pegboard shadow box keeps tool faces visible and accessories lined up, so grabbing the right drill or sander takes seconds. The “shadow” part matters: you put a thin foam backing behind the pegboard so tools don’t rattle and their cords don’t snag on hard edges. It also looks sharp because every item sits in a consistent plane, like a display but built for daily use. This fits best on a workbench wall or beside the main door where you want tools visible without taking up bench depth.
1) Cut a backer frame from 1x3 pine or 1x4 boards into a rectangle sized to your wall space, then set it on a 10-15 degree slant. Build the frame so the top sits higher than the bottom by about 4 in on a 24 in tall panel; square it with a speed square. 2) Screw pegboard (1/4 in thickness) to the frame, then add a thin foam layer behind it using spray adhesive or contact cement, leaving the peg holes clear. Install L-brackets or cleats on the wall studs so the entire box hangs solid; use 2-1/2 in wood screws into studs and add a couple of anchors if your studs don’t line up perfectly. 3) Add tool hangers and cord guides: use standard pegboard hooks for small items, then mount heavier tool holders made from metal peg hooks plus a 1/8 in rubber pad. For chargers, install two short cable management clips so cords route straight down without looping across the pegboard face. Finish by painting the frame and sealing the pegboard with a clear matte coat so it wipes clean.
Editor's notePaint the frame before assembling. It’s faster, and you avoid brush marks where wood meets pegboard.
Skip thisDon’t hang heavy tools from the foam layer — the pegboard and frame need to take the load.



