
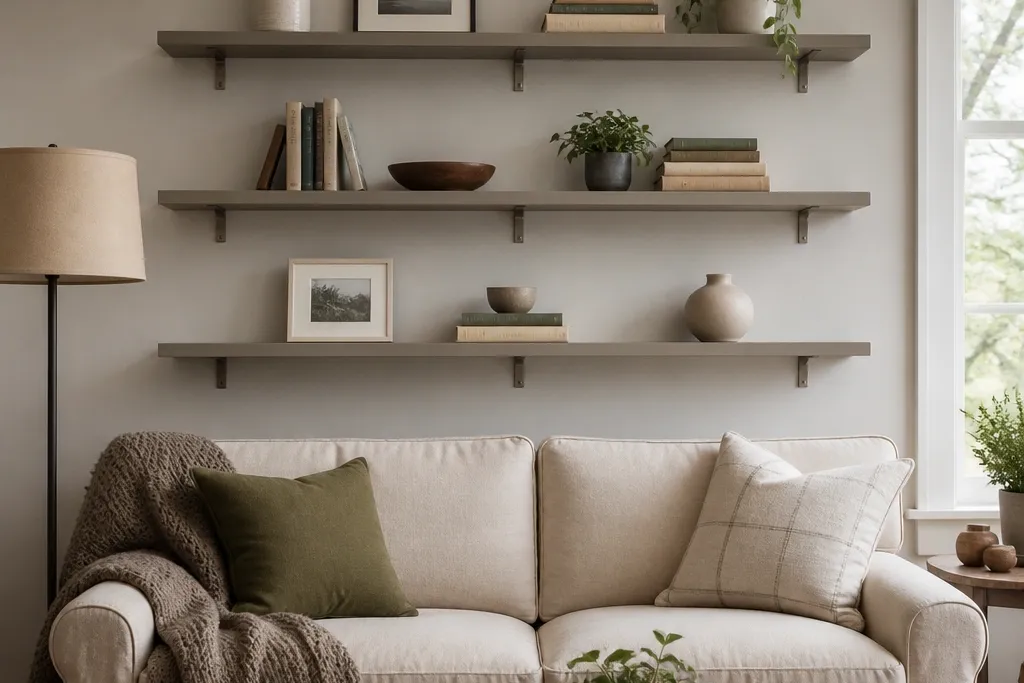
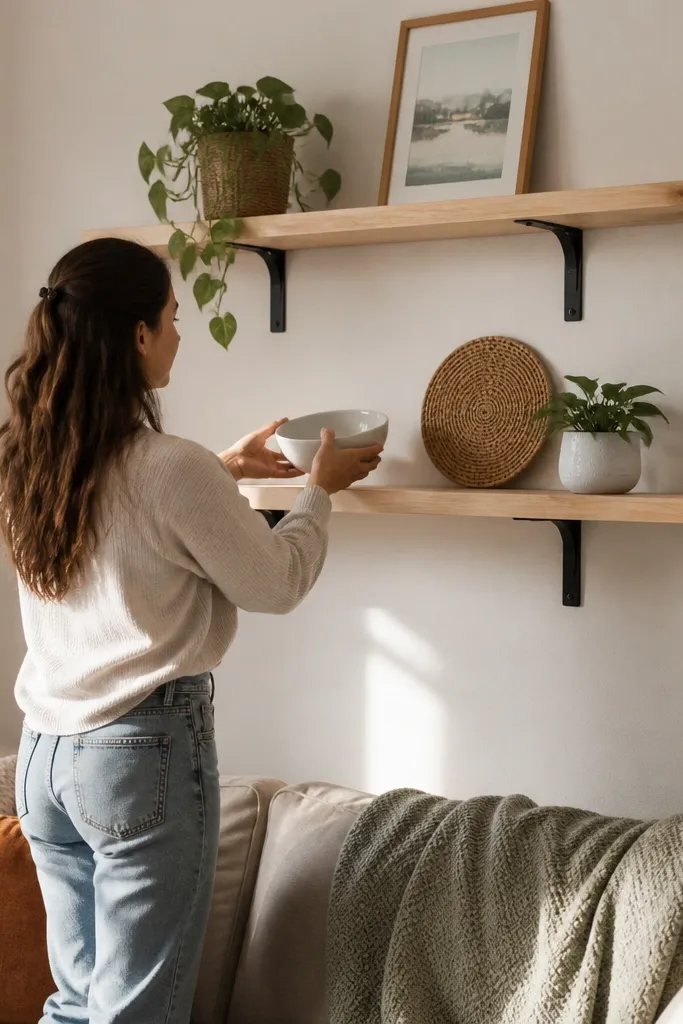
1. Chalky White 5-Inch Plant-Ledge Run
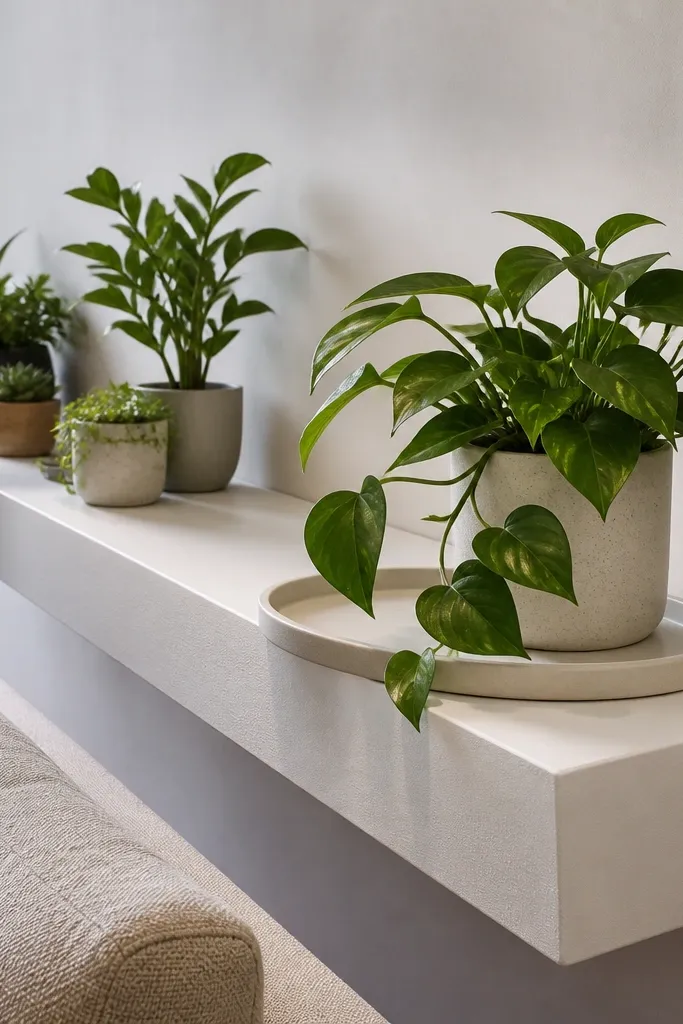
This is the cleanest “living room instantly styled” setup for people who want plants without cluttering the floor. Keep the shelf depth at 5 inches so it reads as a ledge, not a bookcase. Use chalky matte white so leaf shadows look soft instead of shiny and harsh. The look stays airy, and you can swap decor seasonally without the shelf feeling heavy. Skill level is beginner-friendly because the shelf is simple and the visual payoff is in spacing and finish.
Start by cutting a shelf board to 5-inch depth and your chosen length, then sand the top and front edge to 180 grit. Mark stud locations on the wall and install hidden shelf brackets so the top surface ends up level at your target height (measure from the floor to the shelf top, not from furniture). Attach the shelf to the brackets, then fill screw holes with wood filler and sand smooth. Prime and paint with a matte wall-grade finish, letting it dry fully before styling plants.
Dry-fit one bracket and test the shelf face level with a phone level app before you drill through anything.
Don’t choose a deep shelf for plants — 8-10 inches makes the wall look crowded in small living rooms.
2. Warm Greige 8-Inch Book Shelf With Clean Edge
If your living room has books but your wall feels bare, this shelf width reads balanced instead of skinny. An 8-inch depth holds most paperback and hardback spines while leaving enough ledge for a small framed print. Warm greige keeps it modern and hides small color mismatch between wood and wall. The visual trick is the edge: a simple rounded front edge looks finished and photographed well. This one is great for beginners who want a sturdy build without complicated joinery.
Cut the shelf to 8 inches wide and 3/4-inch thick, then ease the front edge with a 1/8-inch roundover bit or sand a gentle curve by hand. Locate studs and mount heavy-duty floating shelf brackets so the bracket line lines up under the shelf front edge. Screw the shelf to the brackets, then patch and sand any gaps at the mounting points. Paint warm greige in two coats with a matte finish, and seal with a clear matte topcoat if the wood grain shows through unevenly.
Use a scrap piece to test your roundover depth so the front edge stays consistent across the full length.
Skip glossy paint — it shows every sanding mark and makes the shelf look DIY in bright overhead lighting.
3. Soft Black 10-Inch Shelf for High-Contrast Decor
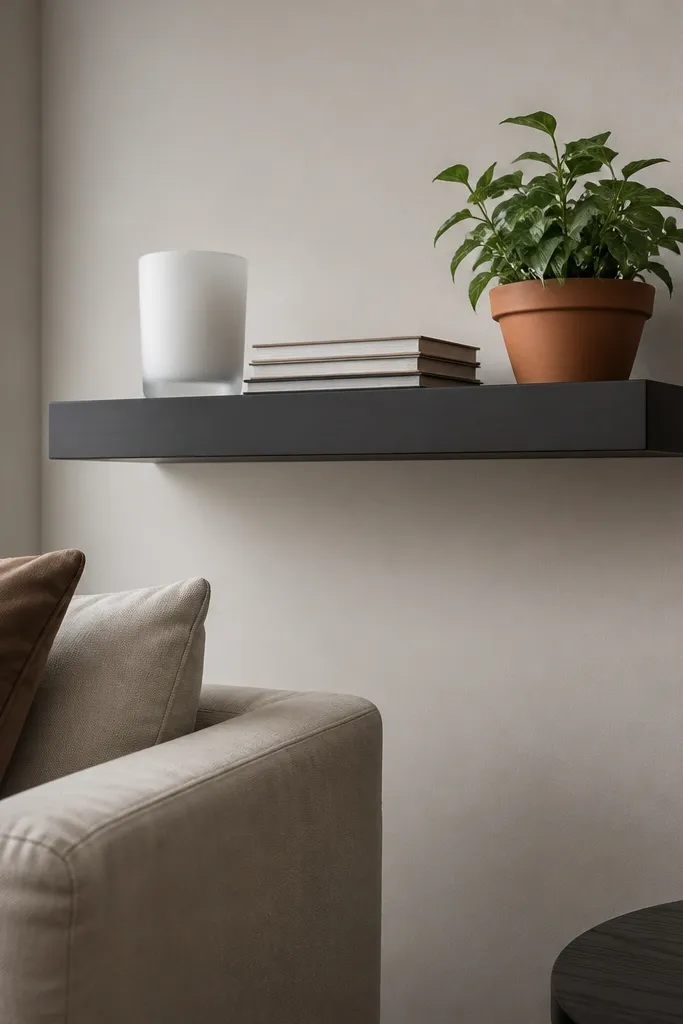
Soft black shelves make living room styling look intentional, especially if you mix white ceramics, wood tones, and one green plant. The 10-inch depth gives you enough room for a candle plus a small stack of books without the decor spilling off the front. Choose a “soft” black (not jet) so it doesn’t look harsh next to warm walls. This is the shelf idea that makes your decor pop without needing extra wall art. It’s a mid-level build mainly because black paint shows chips and uneven edges.
Sand the shelf to 180 grit, then wipe with a tack cloth so dust doesn’t cause pinholes. Prime with a bonding primer, then spray or roll two coats of soft black matte paint, keeping the coat thickness even. Install brackets into studs with the shelf top at a height that lines up with your furniture sightline (often 54-60 inches from floor to shelf top). Mount the shelf, fill any visible hardware gaps, and do a final spot-sand and touch-up before styling.
Mask the wall around the shelf before painting — a neat paint edge makes the whole project look custom.
Don’t skip primer on raw wood — black paint will look patchy and uneven at the grain.
4. Two-Tier Floating Shelves for a Gallery-Like Wall
Pick your bottom shelf height first, then measure up for the top shelf so there’s a 12-16 inch gap between shelf faces for decor height. Cut two shelves (ex: 10-inch and 7-inch depths), sand to 180 grit, and paint or stain to match your living room palette. Mark stud locations, then install brackets for the bottom run and mount that shelf. Install brackets for the top run using the same method, then mount and level both shelves before final touch-ups.
Two-tier shelving turns a blank living room wall into a gallery without hanging a dozen frames. Keep the bottom shelf slightly wider than the top, like 10 inches below and 6-8 inches above, so the composition feels grounded. The look works because the tiers create height variety and give your decor places to “step” upward. Use consistent bracket spacing on both runs so the shelves read as one designed feature. This is a beginner build if you stay organized with measurements, because the hardest part is layout, not construction.
Skip thisDon’t wing the vertical spacing — if the gap is too small, your decor looks cramped and defeats the layered look.
Editor's noteUse painter’s tape on the wall to mark shelf outlines before you drill — it prevents bracket placement mistakes.
5. Rustic Walnut-Style Stain With Clear Matte Seal
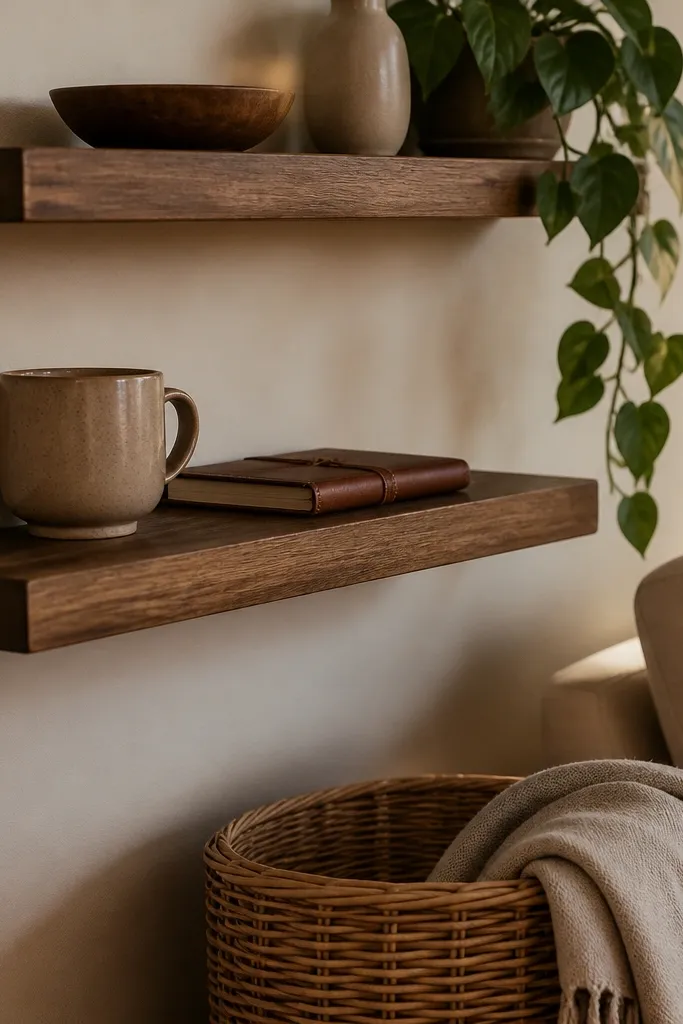
Sand the shelf to 120 grit first, then move to 180 grit and remove dust. Apply a walnut-toned stain evenly with a foam brush or rag, wiping off within the stain’s recommended window so you don’t get blotches. Let it dry, then add a matte clear topcoat in two thin coats. Mount brackets into studs, set the shelf level, and screw it down. Finish by sealing the underside edges too so the shelf looks uniform from any angle.
Stained shelves look expensive when you get the grain tone right and keep the sheen matte. A walnut-style finish warms up a living room and makes natural materials like linen, rattan, and leather feel cohesive. This idea works best for walls that already have warm undertones, like beige, cream, or soft greige. The shelf depth can be 8-10 inches, but keep the front edge tidy so the stain doesn’t highlight rough sanding. Skill level is easy to moderate because staining is simple, but prep affects everything.
Skip thisDon’t stain over rough mill marks — they show as dark stripes after sealing.
Editor's noteTest the stain on the underside corner first — walnut shades vary a lot by wood type.
6. Whiteboard-Style Backing Shelf for a Clean Floating Look
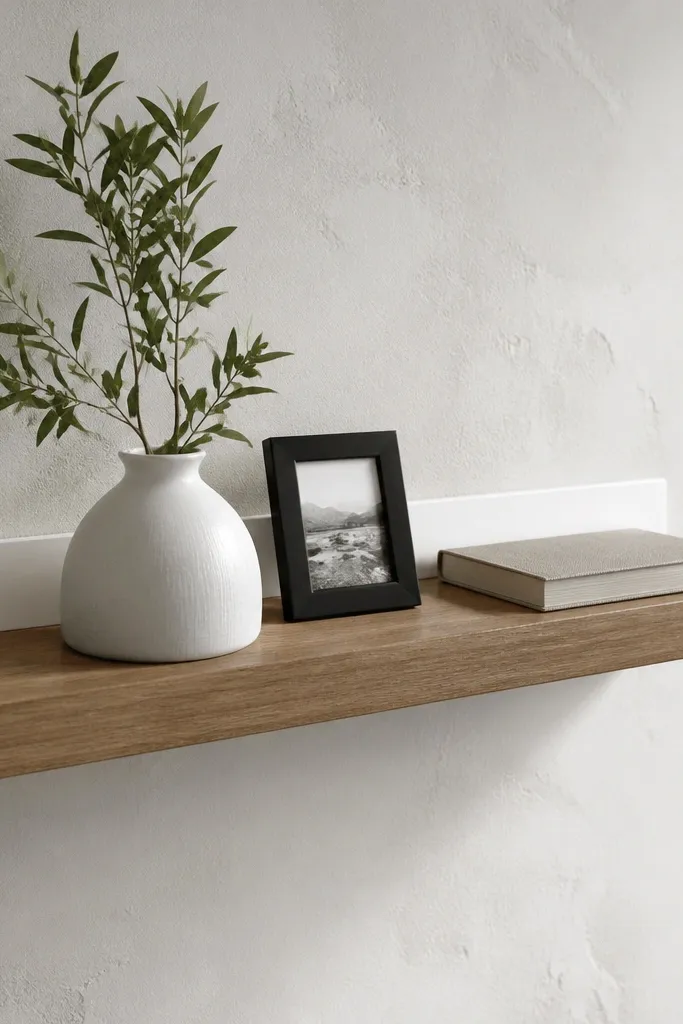
This is a smart aesthetic trick: add a thin light backer behind the shelf so decor shadows look crisp and the wall behind doesn’t distract. It’s especially good if your wall has texture or patchy paint. Keep the shelf depth around 8 inches and use a backing panel cut to the shelf length, leaving a small reveal so it still reads “floating.” The look is bright and modern, and it makes small objects look more intentional. Build difficulty is moderate because you need straight cuts and consistent spacing.
Cut a backing panel from 1/4-inch plywood or MDF to the shelf length minus a small reveal (example: backing 1/2 inch shorter than shelf width so edges don’t overhang). Attach the backing to the underside of the shelf with wood glue and finish nails, staying inside the shelf thickness so brackets still have solid contact. Install your floating brackets into studs, mount the shelf, and confirm level. Prime and paint the shelf and backing together for a unified look. Let everything cure fully before placing decor.
Use a thin pencil line to mark where brackets will go so you don’t accidentally hit the backing attachment points.
Don’t leave the backing raw — the wall texture will show through and ruin the clean backdrop effect.
7. 5-Inch Floating Shelf Over a Media Console for Symmetry
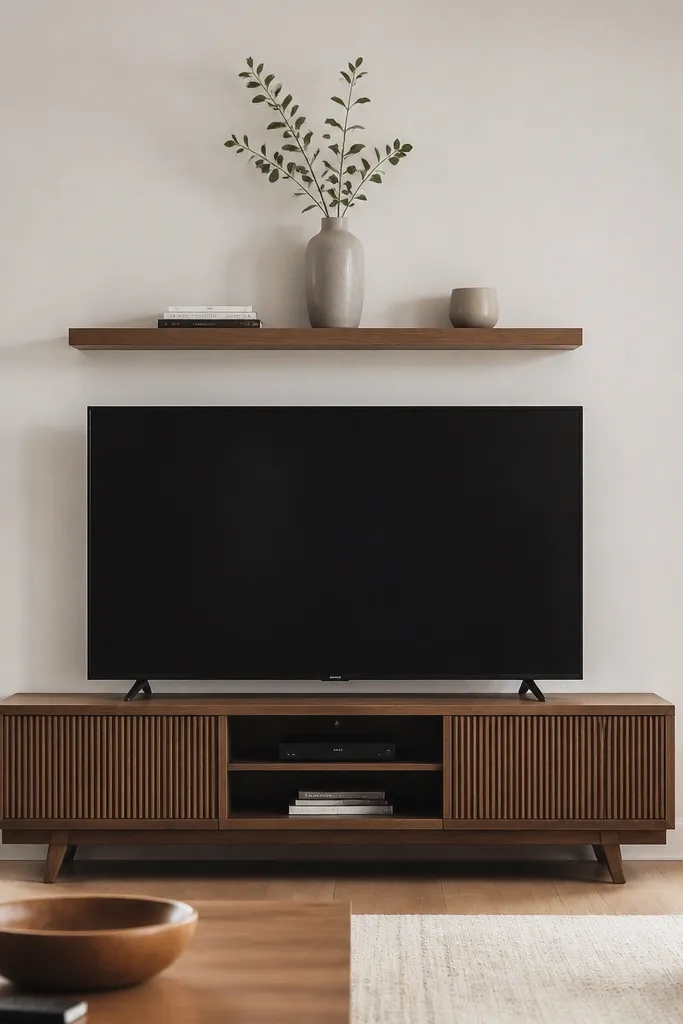
Measure the width of your media console and decide the shelf length so it’s centered with equal overhang on both sides (often 2-4 inches past each edge). Mark stud locations and install brackets so the shelf top lands at a comfortable height above the TV. Cut and sand the shelf board to the chosen length and depth, then attach to brackets. Prime and paint or stain to match your room. Keep decor minimal so the shelf reads clean, not crowded.
A single shelf centered above the TV or media console makes the whole living room feel balanced. The sweet spot is 5-6 inches deep so the shelf doesn’t compete with the screen. Style it with a single tall element (a vase or tall plant) and two lower pieces so the composition doesn’t feel flat. The aesthetic win is symmetry — your eye reads the center line instantly. This is a beginner build if you measure and anchor correctly.
Skip thisDon’t mount it too high — if the shelf sits above eye line, it looks like an afterthought.
Editor's noteUse a laser level if you have one — a TV wall magnifies any level mistake.
8. Long 12-Inch Floating Shelf as a Mini Reading Station

If you want floating shelves that actually replace a small console, 12 inches is the move. At this depth, you can stack books horizontally, place a reading lamp base, and still have a front ledge for decor. The look feels custom because the shelf face has presence, not flimsy “ledge” vibes. Use this idea in a corner or along a wall where you can create a mini reading station. Skill level is moderate because wide shelves need more bracket support to stay straight under load.
Cut shelf boards to 12-inch depth and 3/4-inch thickness, then sand all surfaces to 180 grit. Install multiple brackets into studs with even spacing — for longer runs, plan bracket positions before you cut so every bracket hits a stud. Mount the shelf, then check for any twist by sighting down the length. Fill and sand any screw holes, then paint with matte finish in two coats. Seal if you stained instead of painted.
Use a straight board as a temporary brace while you screw the shelf to brackets so it doesn’t shift mid-install.
Don’t use only two brackets on a 12-inch deep shelf — it will sag or flex over time with books.
9. Staggered Floating Shelves With a 45-Degree Corner Accent
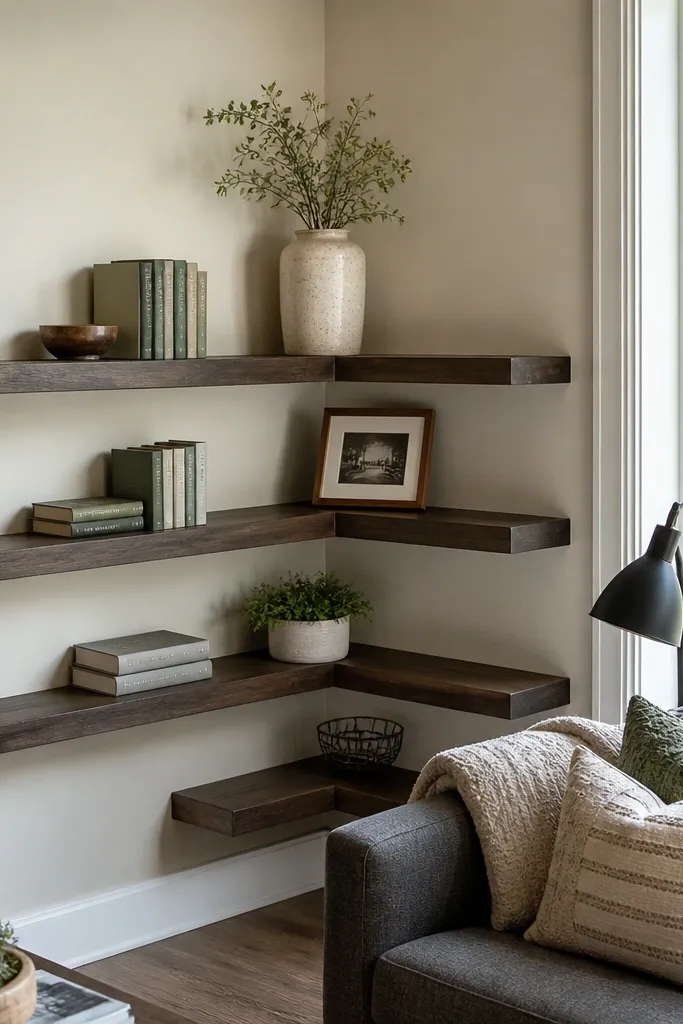
Staggered shelves look designer because they break the straight-line monotony of a standard run. This version adds a 45-degree corner accent so your decor wraps around the room’s corner instead of sitting in one plane. Keep each shelf shallow (6-8 inches) so the corner doesn’t feel bulky. The beauty is in the angles and spacing — you get a sculptural display that photographs well. This is a moderate build because corners require careful cutting and bracket placement.
Cut two shelves for the perpendicular walls and make one corner shelf with a 45-degree miter so it fits cleanly. Sand and finish each shelf before mounting so the corner seam looks tidy. Mark stud locations on each wall and mount brackets on both sides, keeping the corner shelf level with the other runs. Dry-fit the corner piece first to confirm the miter gap is tight, then secure it. Seal the corner seam with paintable caulk or wood filler after mounting.
Do a dry-fit on the floor with painter’s tape marking the final positions — it prevents miter surprises.
Don’t rush the miter — a small gap in a corner looks huge once lights hit it.
10. Matte White Floating Shelf With Brass Peg Hooks Under
Install the floating shelf brackets into studs and mount the shelf first, then paint or finish it. Mark where you want the hooks on the underside using a measuring tape and a level. Drill pilot holes for the brass hooks and screw them in, checking that each hook clears the shelf’s underside trim. If you’re using decorative pegs, space them so items hang evenly and don’t swing into the shelf face. Finish by wiping metal with a dry cloth so it doesn’t smear paint residue.
This combines shelf storage with a practical styling surface, and it looks good because the brass reads warm and intentional. Put a 8-inch matte white shelf above a sofa-side wall or entry nook and hang a few small items under it — keychains, lightweight bags, or decorative bundles. The shelf stays clean because you’re not cluttering the tabletop. Brass hardware adds contrast without needing a dark shelf. It’s an easy-to-moderate build: drilling for hooks is straightforward, but you need to place them after the shelf is mounted.
Skip thisDon’t put hooks too close to the shelf edge — items will block the floating look and look crowded.
Editor's noteUse a small piece of tape to label stud edges — it helps you avoid drilling into the wrong spot later.
11. Wood Slat-Style Floating Shelves Using 1x2 Strips
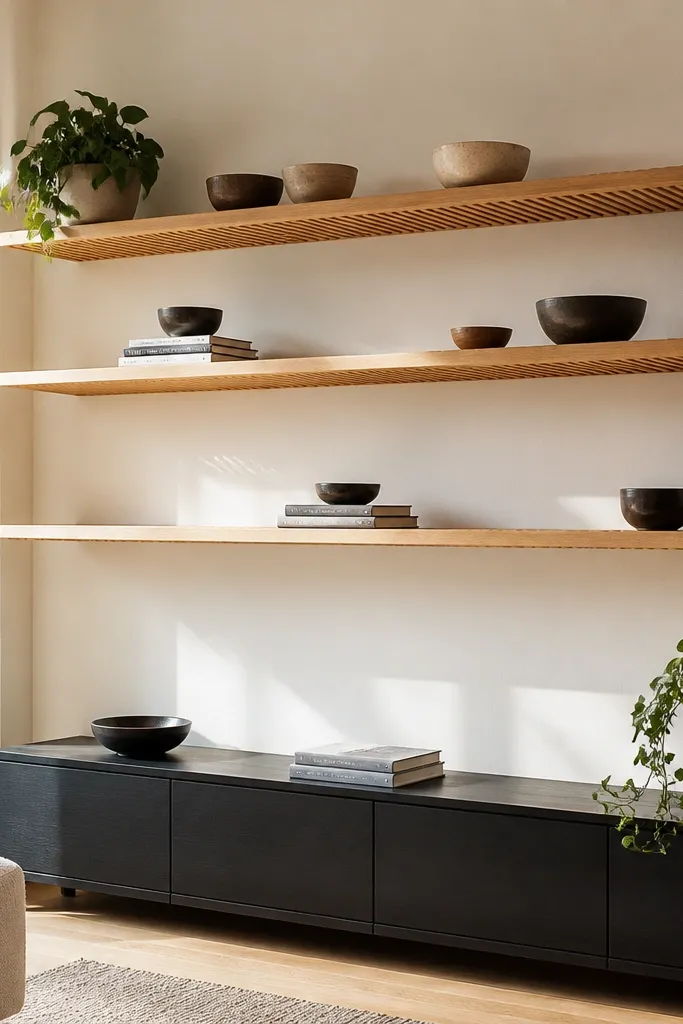
Cut several 1x2 strips to your shelf length and sand each to 180 grit. Build a simple underside frame from 1x3 or plywood that sits on your floating brackets so the slat pieces can be screwed to it. Space the slats evenly (use a spacer block like 1/8 inch) and fasten from below with short wood screws. Mount the bracket system into studs, secure the frame, then attach slats. Finish with stain and a matte clear coat so the gaps stay clean and uniform.
Slat-style shelves look modern and airy because you can see small gaps between pieces. This idea is perfect for living rooms where you want decor to feel lighter and you don’t need a flat surface for heavy books. Use 1x2 or similar narrow strips, space them evenly, and keep the finish consistent so the shelf looks like one planned object. The gaps create shadow lines, which makes it photogenic even with simple decor. Build difficulty is moderate because you’re making a “platform” out of multiple boards.
Skip thisDon’t use uneven spacing — the whole look reads messy fast.
Editor's noteMark slat positions with a pencil grid on the underside frame before you screw anything.
12. Two Floating Shelves Side-by-Side for a Symmetry Moment
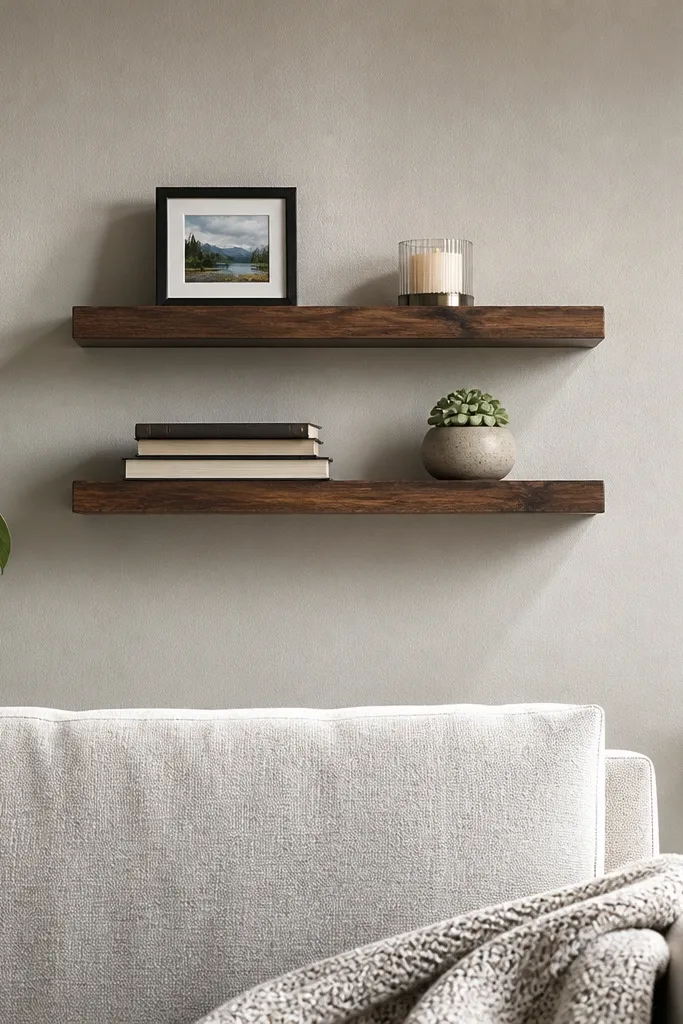
Two side-by-side shelves create a balanced “moment” without needing a full gallery wall. This works best when you keep the shelves the same depth and finish and display different heights on each side. Put one shelf slightly higher than the other if you want movement, but keep the overall centerline aligned. The look is clean because the shelves frame your decor like bookends. Skill level is beginner-friendly if you follow a measured layout and anchor into studs.
Decide shelf depth (8 inches is a safe bet), and cut two shelves to the same length. Measure the gap between them so you have room for a tall object in the middle (12-18 inches looks good). Mark studs and install brackets for the first shelf run, then mount and level. Repeat for the second shelf using the same shelf height reference point. Fill holes, sand, paint or stain, and style with objects that vary in height but share a color story.
Use one long straightedge across both shelf tops while the paint dries — it helps you catch any bracket misalignment early.
Don’t style both shelves with the same object type — it looks like duplicates, not a designed pair.
13. Floating Shelf With Hidden Cable Pass-Through
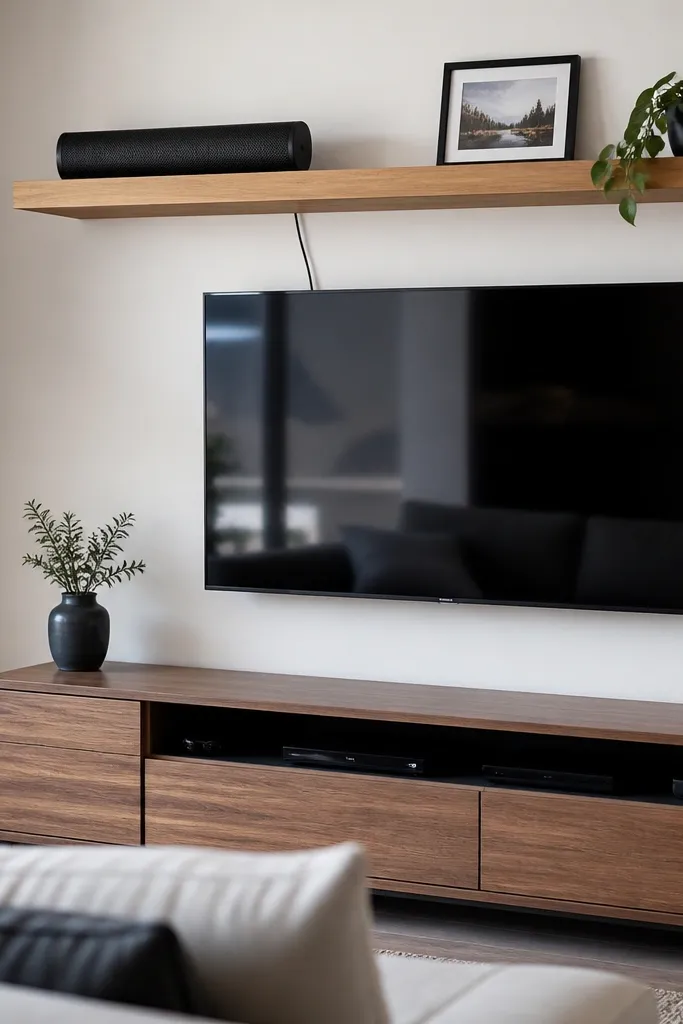
Pick a shelf location where the cable can drop behind furniture and still reach your outlet. Cut a small pass-through opening in the underside/back area (a 1-1/4 inch hole is a common size for many cables), then sand the edges smooth so the cable doesn’t get damaged. Install brackets into studs and mount the shelf, then feed the cable through the opening before you fully secure the shelf. Add a small cable grommet or brush insert in the hole so the opening looks finished. Finish the shelf and style it with items that cover the cable path from the front.
If your living room setup includes a soundbar, router, or console, hidden cables ruin the clean look. This shelf idea keeps the aesthetic by letting you route one cable through the shelf back area so it disappears behind the decor. It’s especially useful in narrow spaces where you can’t hide wires in a cabinet. The shelf still looks like a normal floating run from the front, but the back side stays organized. Build difficulty is moderate because you need to add a pass-through hole and plan placement before mounting.
Skip thisDon’t drill the hole after painting without masking — you’ll chip the finish around the opening.
Editor's noteDo a cable test before you mount the shelf — feed it through and confirm slack is enough for adjustments.
14. Slim Floating Shelves for a Wall of Framed Prints

Cut shelves to 5-inch depth and sand to 180 grit, then paint matte to match your frames or wall. Find studs and install brackets so each shelf run is level and evenly spaced from the floor. Mount the shelves, then do a quick check with a level across the top surface. Add felt pads or small non-slip strips on the shelf where frames will sit so they don’t slide. Style with 2-3 frames per shelf and keep the objects centered for a clean look.
Slim shelves create a “floating frame ledge” effect that keeps wall art from looking flat. Use 5 inches deep so frames sit cleanly and don’t look like they’re hanging off a staircase. This idea is best for living rooms that already have framed prints but need a home for small decor like candles and tiny planters. The look is photogenic because the shelf line acts like a visual underline for your wall. It’s an easy build if you keep bracket alignment tight and finish edges smooth.
Skip thisDon’t place heavy frames on a shelf that spans too far between brackets.
Editor's noteUse painter’s tape to mark frame bottom positions before placing anything — it stops clutter from creeping forward.
15. Natural Oak Finish With a White Back Panel
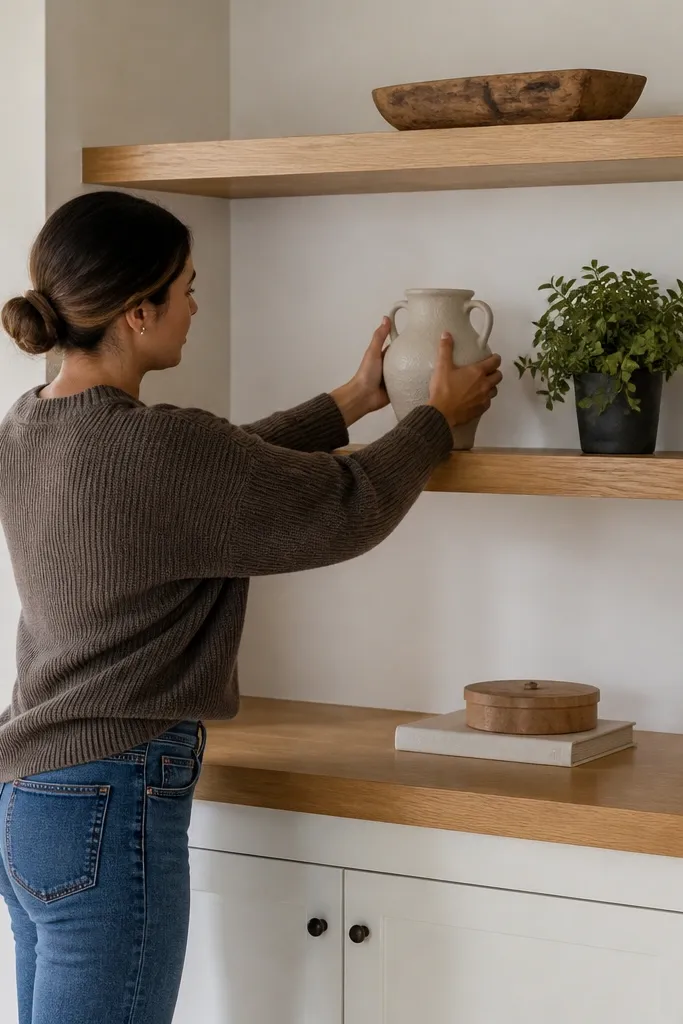
This combo looks bright and warm at the same time: natural oak tone on the shelf face, white behind it. The white back makes small decor pop and hides uneven wall color, so the shelf looks polished even if your paint isn’t perfect. It also improves photo readability because shadows are softer against white. Use 8-10 inches depth for a living room shelf that holds books and decor together. Skill level is moderate mainly because you’re doing both stain and a clean paint backer.
Sand the shelf to 180 grit and apply a light oak or medium oak stain, wiping evenly to avoid blotches. Let dry, then seal with a matte clear topcoat. Cut a thin white backing panel and attach it to the underside so it sits behind the shelf face. Prime and paint the backing in matte white, then mount the shelf using brackets into studs. Fill holes, sand, and touch up the finish where hardware meets the wood.
Seal all edges on the oak shelf — that’s what keeps the color even after installation.
Don’t use a glossy back panel — it reflects lamp light and makes everything look washed out.
16. Mirror-Front Floating Shelf Look Using Glass Insert
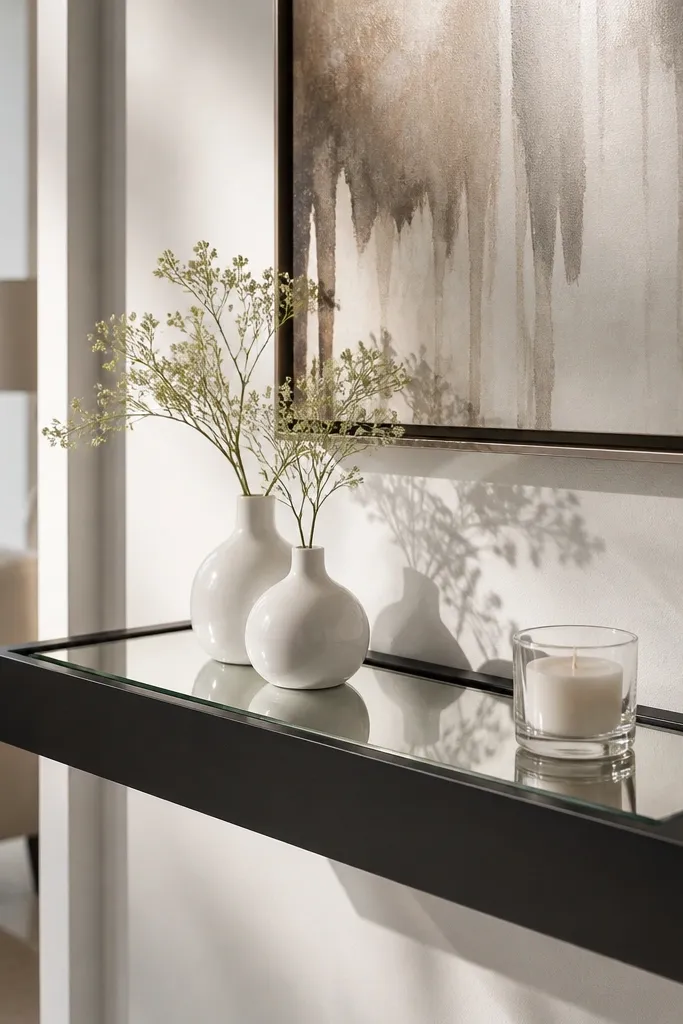
If you want a “designer” look on a budget, use a glass insert on top of a floating shelf. The shelf still reads as floating, but the glass adds sparkle and makes small decor look more expensive. This works best with a soft black or warm white shelf base so the reflected light doesn’t look muddy. It’s great for small living rooms because the reflective surface brightens the wall area. Build difficulty is higher because glass needs careful handling and proper support.
Build your shelf base from 3/4-inch wood and install brackets into studs first, then mount and finish the base. Cut a glass insert to fit within a shallow top recess or sit on thin wooden stops so it doesn’t slide. If you’re not confident with glass cutting, order pre-cut glass with polished edges. Add a thin felt strip where glass contacts wood to prevent rattling. Seal and touch up the shelf finish, then place small decor on top of the glass insert.
Use clear, polished-edge glass — rough edges make the shelf look cheap fast.
Don’t rely on bare wood contact — glass can shift and chip without non-slip stops.
17. Stained Ceiling-to-Shelf Column Effect Using a Single Long Run
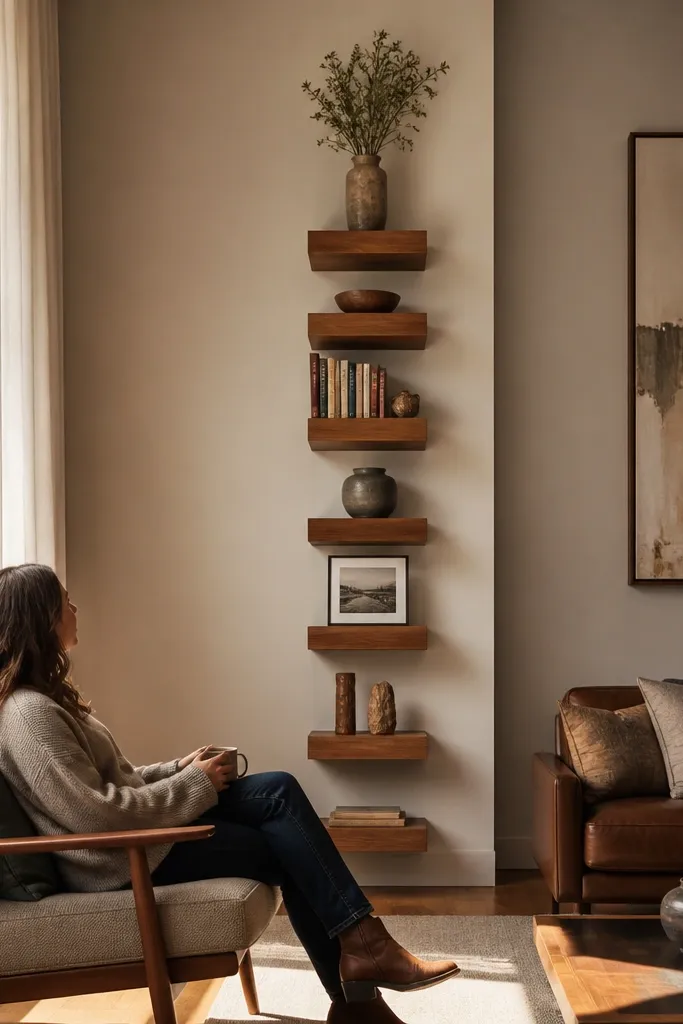
This idea makes a living room feel taller by turning floating shelves into a vertical column. Instead of scattering small shelves, use one long run with consistent spacing and style it with height variation — tall vase, then books, then a framed photo. Stain it in a warm tone so it blends with floors and furniture. The visual result is clean because the shelf line reads like one continuous feature. It’s doable for DIYers with basic tools, but you need a careful stud plan because you’re mounting multiple brackets vertically.
Decide your column height and shelf count (example: three shelves at different heights). Cut each shelf to the same depth (8-10 inches) and finish them before mounting. Mark stud locations and map bracket points for each shelf level so they land on studs. Install brackets for the top shelf first, mount it and confirm level, then repeat for the middle and bottom shelves. Style with a consistent palette so the vertical column doesn’t look random.
Keep the shelf depth identical across all tiers — the eye reads it as one column feature.
Don’t mix shelf depths in a vertical column — it breaks the tall, clean look.
18. Painted Tongue-and-Groove Board Floating Shelf
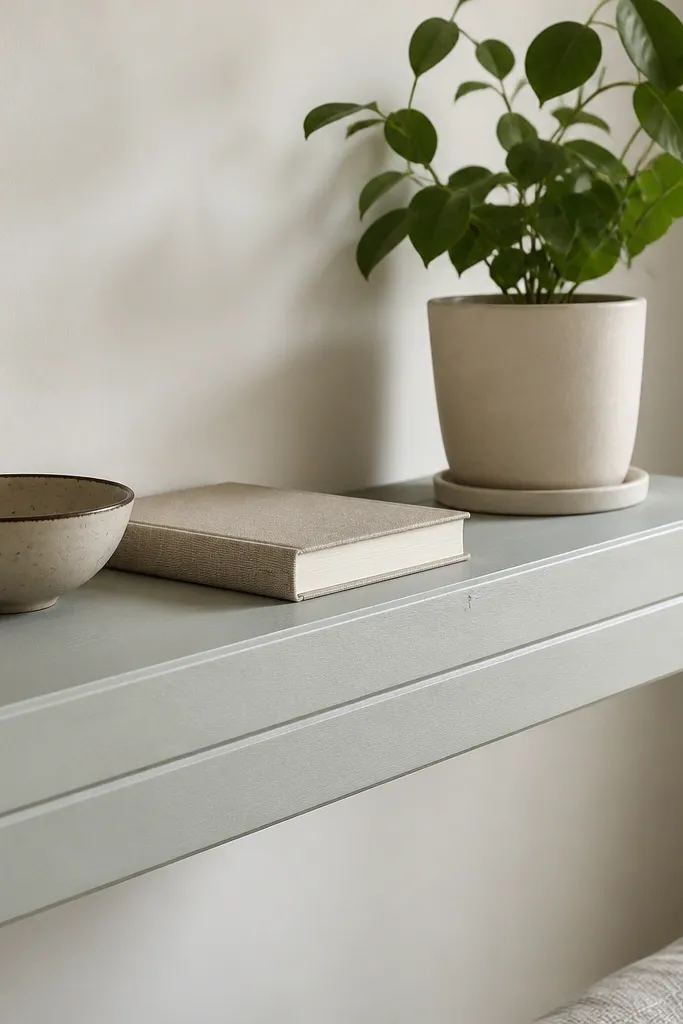
Build the shelf face using tongue-and-groove boards cut to your shelf length, then sand lightly to even the surface. Assemble the face into a backing frame that sits on floating brackets so the shelf is solid. Prime and paint matte in two coats, sanding lightly between coats for a smooth finish. Install brackets into studs and mount the shelf, checking for level as you tighten each screw. Seal edges so the painted grooves don’t chip along the front over time.
Tongue-and-groove on the shelf face makes even a simple floating shelf look built-in. Paint it matte and the grooves add shadow texture, so the shelf looks dimensional without extra decor. This is a great choice for living rooms with plain walls because it adds pattern where you need it. Keep the depth at 8 inches for a practical decor surface. Skill level is moderate because you’re assembling a face from boards, but the result is visually worth it.
Skip thisDon’t skip priming — paint won’t grip well in the groove texture and can peel.
Editor's noteSand the groove ridges gently, not flat — you want shadow depth, not a flat board.
19. Floating Shelf With Fabric-Behind Backdrop for Soft Color
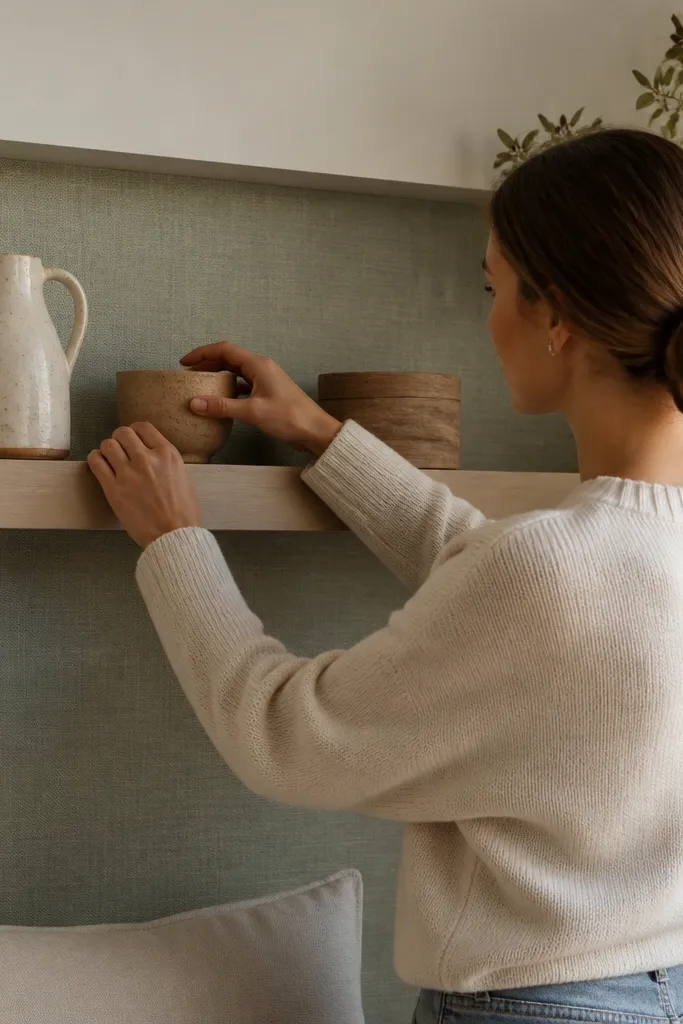
Create a backing frame under the shelf using thin plywood or wood battens so you have something to staple fabric to. Stretch linen fabric taut and staple to the frame, trimming edges clean. Mount brackets into studs, then attach the shelf so the fabric backing sits behind the shelf opening. Paint or finish the shelf face matte, and seal the underside so the fabric doesn’t get exposed to humidity. Style with a few items that match the fabric tone to keep the shelf from looking like a random craft.
A fabric-backed shelf makes the whole wall feel softer, especially in living rooms with lots of hard surfaces. Choose a neutral linen or a muted color like dusty sage, then keep the shelf finish simple so the fabric does the heavy lifting visually. The fabric hides wall texture and makes small decor look staged. This is photogenic because the background isn’t flat paint; it has gentle texture that reads well under warm lighting. Skill level is moderate because you need to stretch fabric cleanly without wrinkles.
Skip thisDon’t use stretchy knit fabric — it wrinkles and looks sloppy once it relaxes.
Editor's noteUse a tensioner staple gun if you have one — it keeps fabric from sagging later.
20. Two-Color Floating Shelves Using a Stained Top and Painted Sides
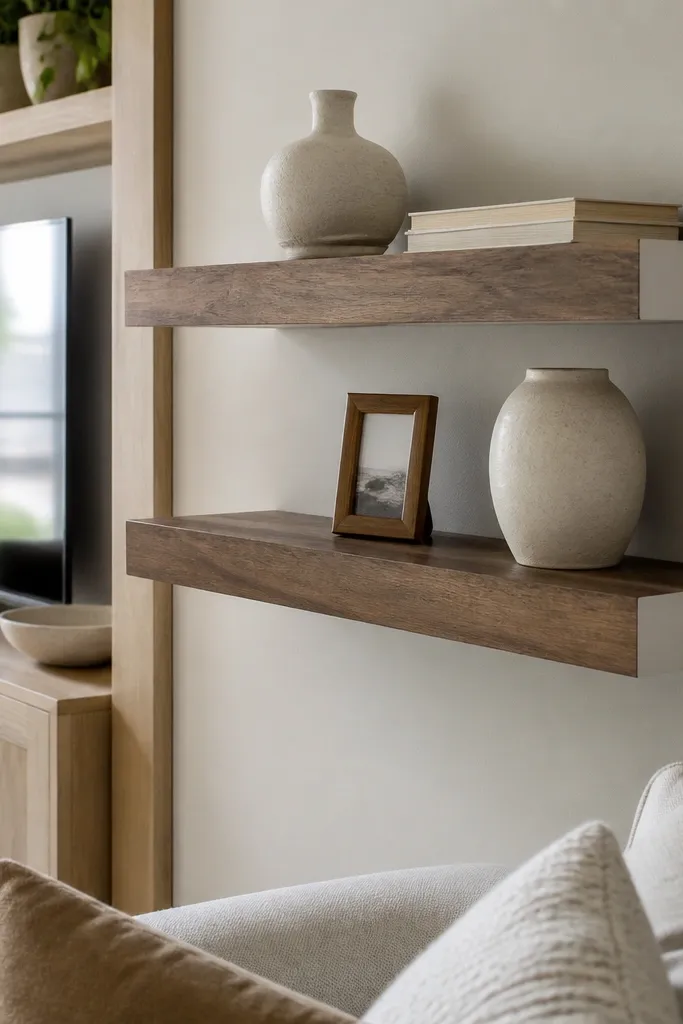
Cut your shelf board to the final size and sand all faces to 180 grit. Mask the top surface and stain it, then wipe and seal with matte clear. Unmask and mask the stained top, then paint the sides and any back edge with matte white or greige. Let everything cure fully, then install brackets into studs and mount the shelf. Patch and touch up at the mounting points so the color break stays sharp.
Two-color shelves look custom even when the build is simple. Stain the top for warmth and grain, then paint the sides and back edge in a matte neutral like white or greige. This creates a border effect that frames your decor and makes the shelf look more architectural. It’s perfect if your living room has wood furniture but also needs a clean light wall. Skill level is moderate because you’re finishing multiple surfaces and you need masking discipline.
Skip thisDon’t rush the masking — sloppy tape lines show immediately on two-tone shelves.
Editor's noteUse thin painter’s tape and press the edge with a plastic card so paint doesn’t creep onto the stain line.



