
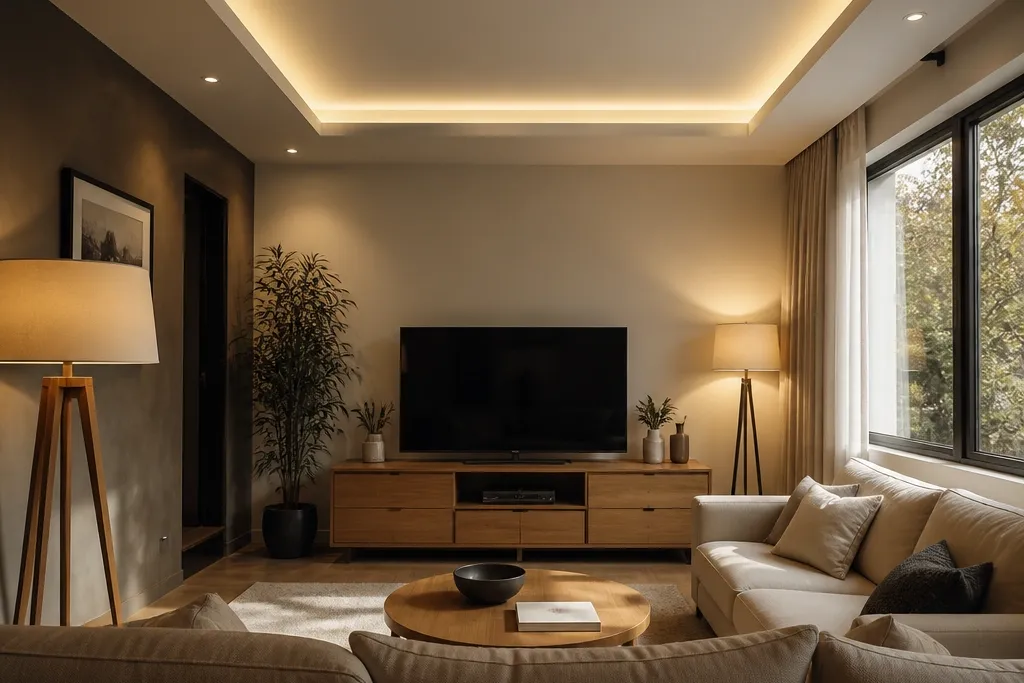
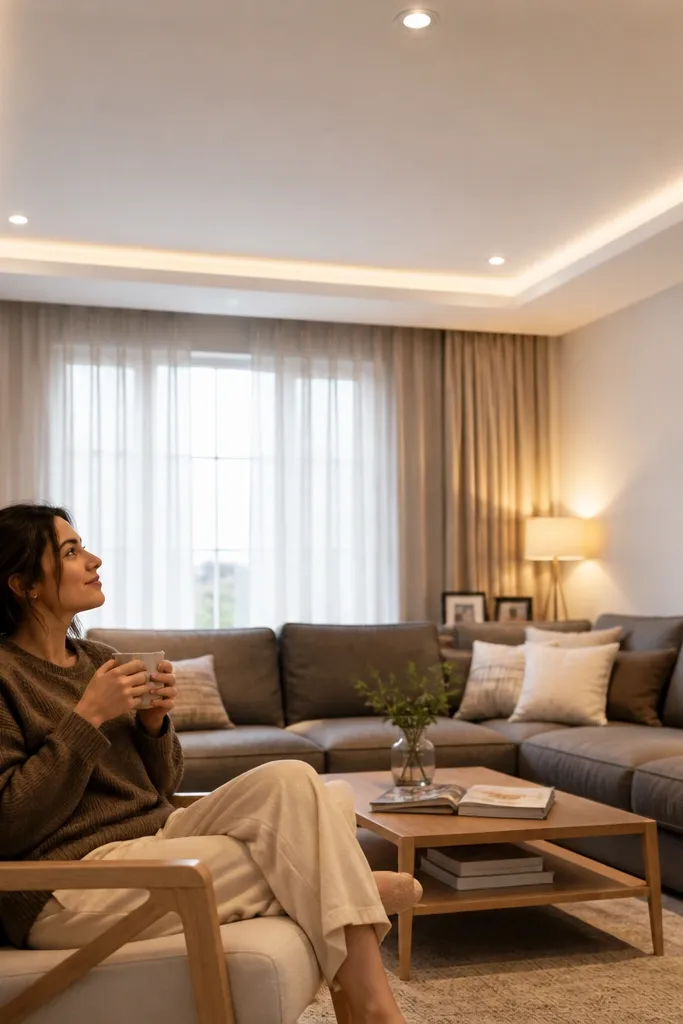
1. Slim Tray Border with Warm Perimeter LED
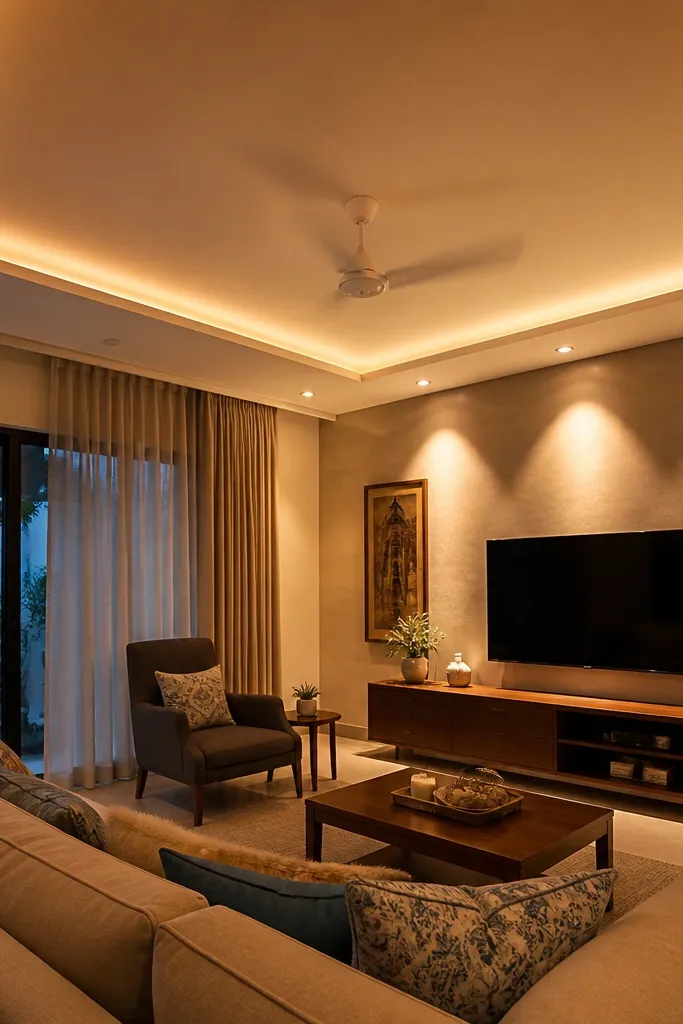
Start by marking a level line 9-11 cm below your highest point using a laser level. Build a perimeter channel for the outer border and add a second inner channel for the tray step, keeping the inner drop about 6-7.5 cm. Install 12.5 mm gypsum boards in the main plane first, then cap the tray with the second layer boards. Route LED strip wiring through the ceiling cavity and test the light before closing all boards. Finish with joint compound, sand smooth, prime, then paint matte white.
This is the easiest way to make a budget False Ceiling Living Room look intentional. The slim tray border gives you a clear frame, and the warm perimeter LED makes the ceiling look higher than it is. Keep the tray drop around 2.5-3 in (6-7.5 cm) and use a narrow inner step so the design doesn’t feel bulky. Finish the main ceiling in matte white gypsum board — it hides joint marks better than gloss. This design suits most rectangular living rooms and works with ceiling fans if you center the fan inside the main plane.
Skip thisDon’t use a wide tray width — it makes low rooms feel smaller in photos.
Editor's noteUse a 12V constant-voltage LED driver and place it in an access spot, not buried behind the tray frame.
2. Two-Stage Rectangle Drop Around the Ceiling Fan
Mark the outer rectangle first, keeping its edges parallel to the room walls and leaving 2-3 in (5-7.5 cm) clearance from any wall cornice. Drop the outer frame to about 9-11 cm, then add a second inner rectangle down to about 6-7.5 cm. Fix primary and secondary metal channels to the slab, then board the outer drop and the inner step separately. Cut a neat opening for the fan and add a reinforced fan support ring using thicker frame members. Install recessed lights on the inner step and wire through junction boxes before closing the boards.
If you have a ceiling fan or a central fixture and you want the ceiling to look modern, this layout is clean and forgiving. The two-stage rectangle creates a visual border while leaving a defined central zone for the fan. The first drop hides wiring and uneven plaster; the second step gives you depth without adding too much height loss. Use recessed downlights on the inner step so the light lands evenly on the room. This is a solid choice for medium-sized living rooms where you want structure but not a heavy grid.
Skip thisDon’t place downlights too close to the inner edge — the cutouts weaken the board and look messy.
Editor's notePlan your recessed downlight spacing by drawing a grid on paper first — aim for even spacing around the center opening.
3. Geometric Grid with Alternating Recessed Squares
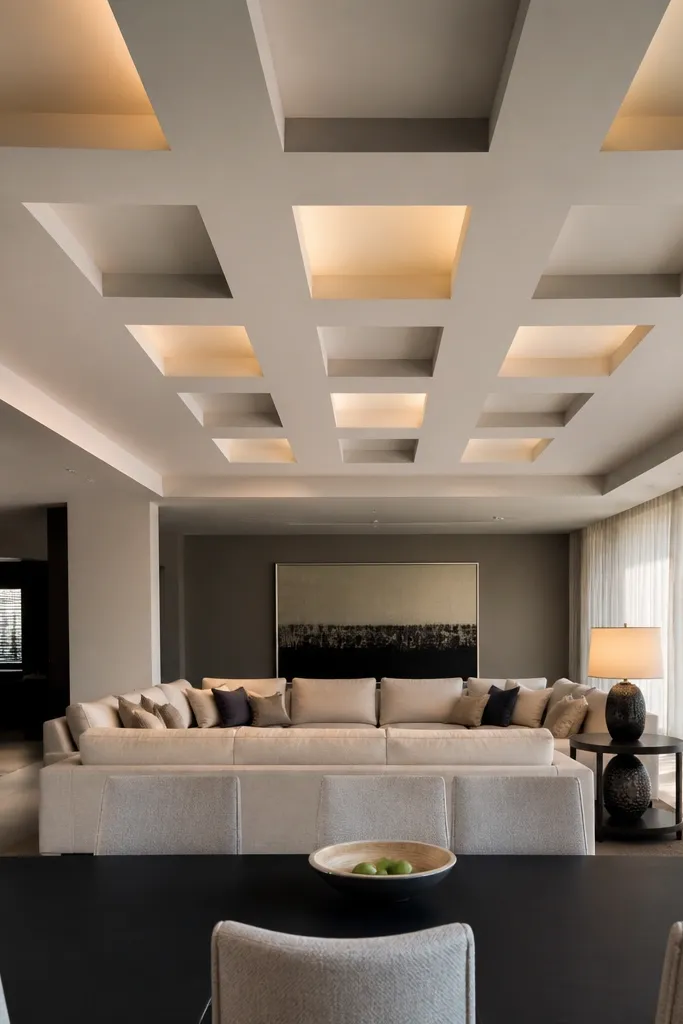
Start by deciding your module size — a common sweet spot is 24-30 in (60-75 cm) between grid lines. Install a full suspension system with primary channels running one direction and secondary channels in the other direction to match the grid. Board the main plane first, then create shallow recess frames for the alternating squares using additional channel sections. Cut openings for recessed LED downlights in the recessed squares only. Seal joints, sand, prime, and paint matte white; then install LED trim rings for a crisp edge.
This is the “modern magazine” look that still works on a budget because you’re repeating one simple shape. The grid hides uneven ceilings and makes the space feel designed, not patched. Alternating recessed squares create shadow lines that read well in photos, especially with warm-white lighting. Keep the recess depth small — about 1.5-2 in (4-5 cm) — so you don’t lose headroom. This design is best in living rooms with straight walls and a clear focal wall where the grid can visually align with furniture.
Skip thisDon’t over-recess — deep squares make the ceiling look lower and increase sanding work.
Editor's noteUse the same module size across the whole room — mixing sizes makes the grid look accidental.
4. Center Coffered Panel with Perimeter Glow
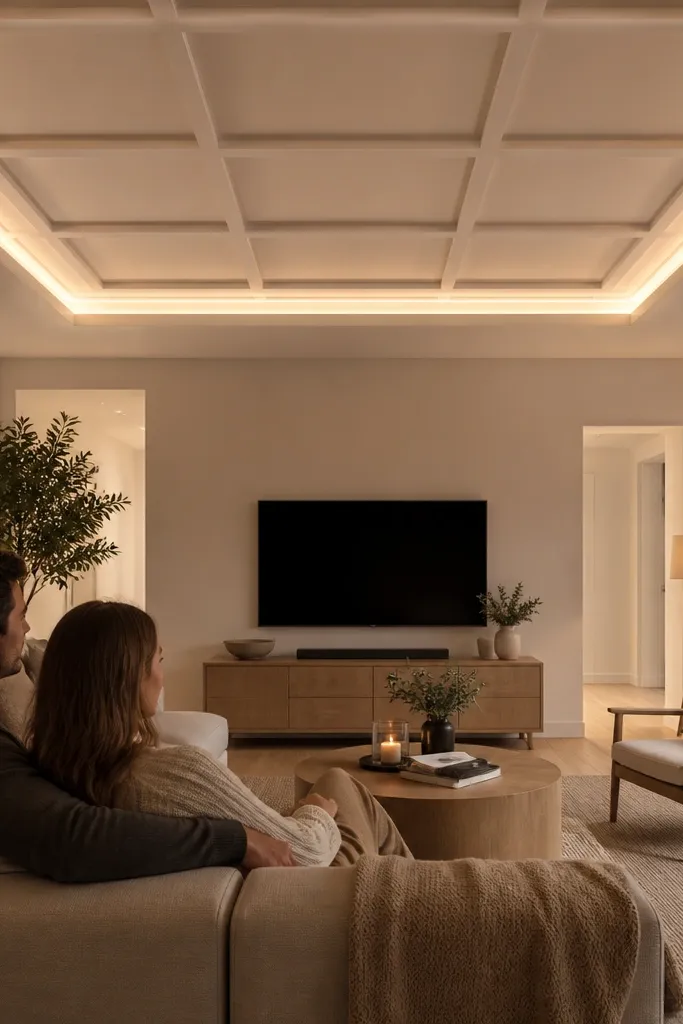
Coffered ceilings look expensive, but you can mimic the look with a single central panel and simple border steps. The coffered effect comes from shallow box frames inside the center area, while the perimeter glow adds the modern “floating” feel. Keep the center panel about 60-70% of the room’s width so it stays readable from the couch. Use warm LED strips (around 2700-3000K) behind a diffuser channel for an even halo. This works great when you want a focal point without building a full complex pattern across the entire ceiling.
Mark a central rectangle and build the outer drop first at 9-11 cm. Inside the central zone, install box frame channels to create 2-3 shallow coffer sections, each recess about 1.5-2 in (4-5 cm). Board the main plane, then board the coffer frames carefully so the edges align. Add an LED channel around the outer perimeter drop; route the LED wire through the ceiling cavity and secure it with clips every 8-10 in (20-25 cm). Finish with joint compound, sand flush, prime, and paint matte white.
Use a frosted LED diffuser strip so the glow looks soft, not like exposed dots.
Don’t paint the LED channel area glossy — it reflects and highlights uneven joint edges.
5. Wood-Look Accent Strip Centerline with Recessed Spots
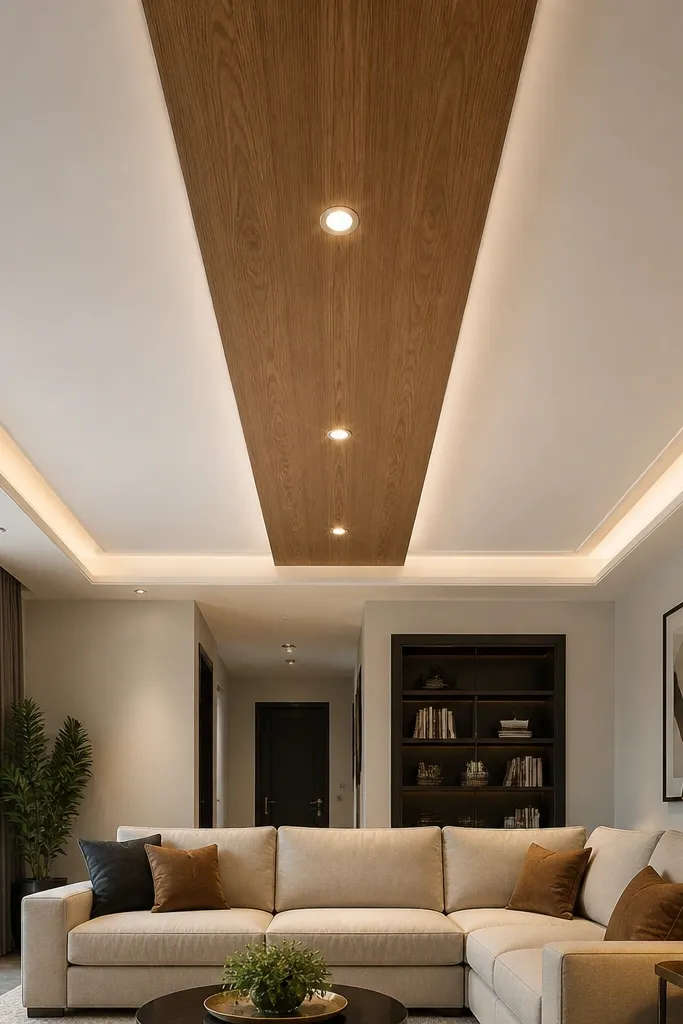
Build a simple flat false ceiling drop at 9-11 cm across the room to hide wiring and level the surface. Install a centerline frame: two parallel channel lines spaced to match your accent width (about 10-15 cm). Board the center strip area separately so you can attach the wood-look layer cleanly. Cut and install recessed LED spots around the center strip at equal spacing — start with 24-30 in (60-75 cm) intervals. Prime and paint the white areas matte; then apply the wood-look laminate to the accent strip and seal the edges.
This design looks modern because it uses one warm material accent instead of trying to add many colors. A single wood-look strip running down the center creates direction and makes the ceiling feel styled, not generic. Recessed spotlights along the strip keep the room bright and make the accent read clearly. For a budget build, use gypsum board for the structure and apply a wood-look laminate or veneer sheet to the accent strip. Keep the accent width around 4-6 in (10-15 cm) so it looks intentional from a distance.
Skip thisDon’t choose a high-gloss wood-look finish — it shows installation seams and catches glare.
Editor's noteUse a thin contact adhesive for laminate and press with a roller so corners don’t lift later.
6. L-Shaped Border for Open-Plan Living Rooms
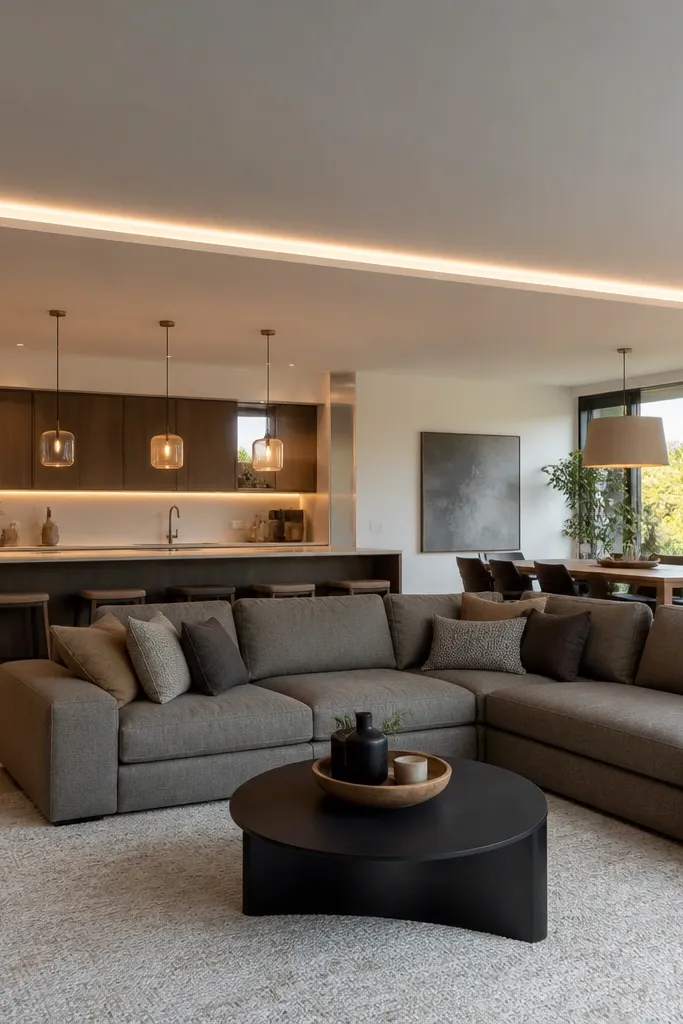
Identify the living zone boundary and measure the border path with a chalk line so it stays straight to the room edges. Install a false ceiling drop only along the L-shaped border line at about 9-11 cm, leaving the rest of the ceiling flatter if your slab is close to level. Build the inner LED channel with a narrow step drop of 6-7.5 cm. Board the border area and keep the main plane in one layer of gypsum. Finish with joint compound and matte white paint, then install the LED strip with a frosted diffuser.
Open-plan living rooms often have two visual zones, and an L-shaped border helps the ceiling match that layout. Instead of a full perimeter frame, you draw a border where you want the focus — usually around the living zone boundary. The LED line glow inside the border adds depth without adding a lot of height. This is a budget-friendly move because it reduces the amount of framing and board area you need compared to a full tray. It also photographs well because the border creates a strong diagonal-ish visual cue.
Skip thisDon’t wrap the border too close to corners — LEDs can look uneven where the channels bend.
Editor's noteUse a single LED cut plan and keep the LED driver outside the border path for easier access.
7. Corner Accent Squares with Ceiling Fan Center
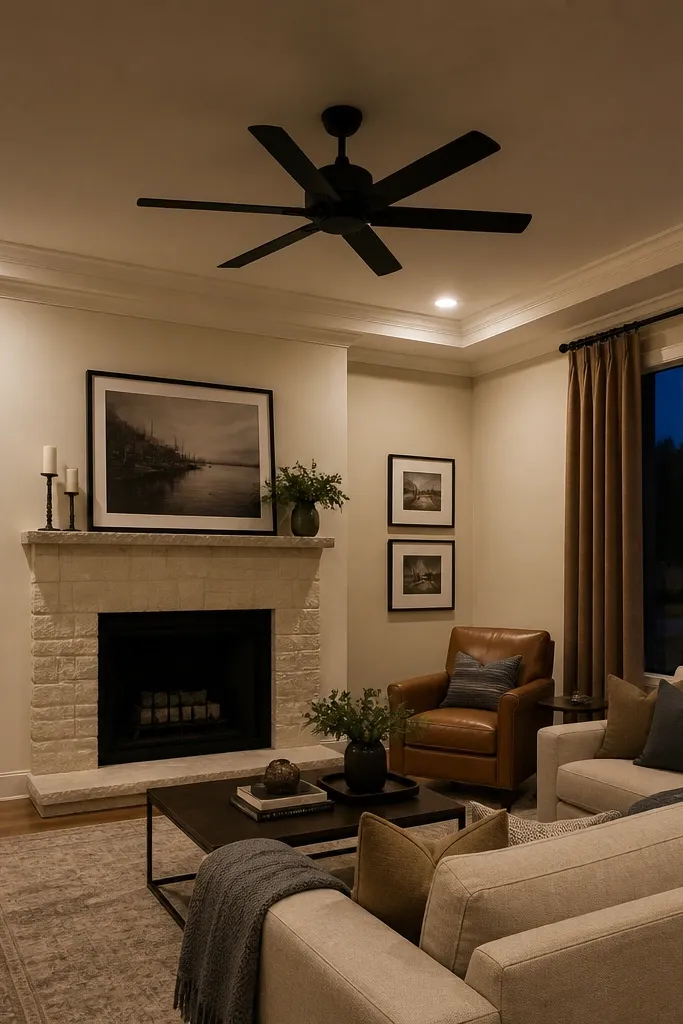
Start with a simple flat false ceiling drop of 9-11 cm for level and wiring cover. Mark four corner zones, each about 24-30 in (60-75 cm) from each wall, and create shallow square frames inside those zones with a recess depth of 1.5-2 in (4-5 cm). Board the main plane, then board each corner recess separately for crisp edges. Cut holes for recessed LED lights in each corner square and wire them to a junction box near the fan canopy area. Finish sanding and prime the whole ceiling, then paint matte white.
This design keeps your center clean — great if you want the fan to stay visually dominant — while still giving you a modern ceiling look. Corner accent squares add structure and frame the room without turning the whole ceiling into a grid. Recessed corner lights create a gentle lift in brightness, making the living room feel bigger. Because the accents are limited to four areas, it stays budget-friendly in framing and board cuts. It’s especially good for long rooms where a central tray might feel too narrow.
Skip thisDon’t add corner accents near smoke alarms or sensors without leaving clearance.
Editor's noteKeep corner squares symmetrical left-to-right and front-to-back — camera angle makes asymmetry obvious.
8. Rounded Rectangle Border with Soft LED Shadow Gap
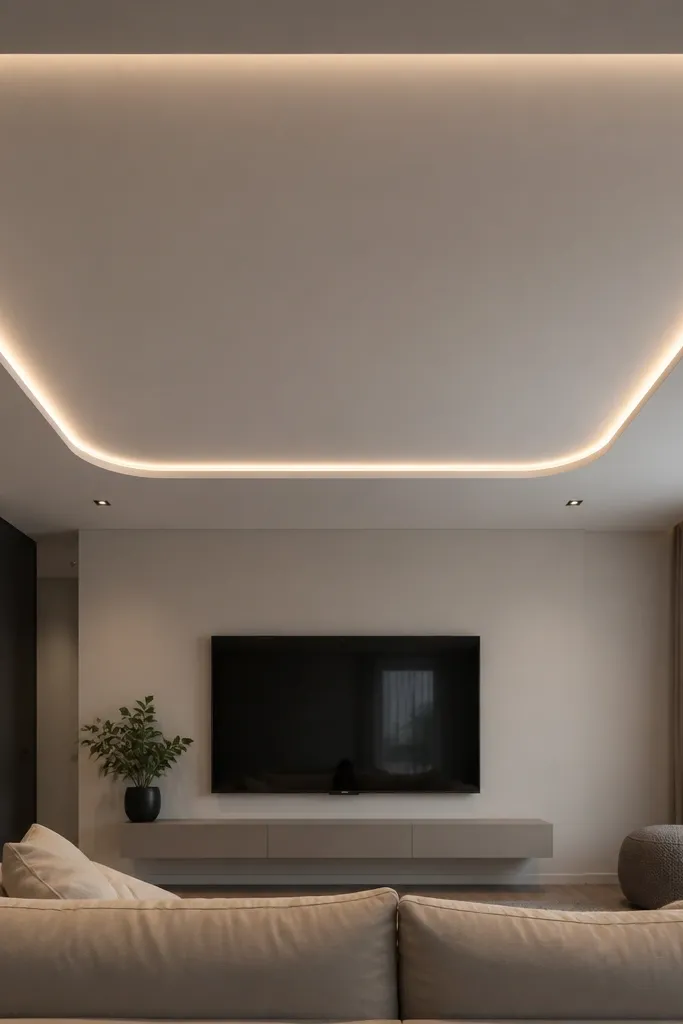
Hard corners look modern, but rounded rectangles read softer and more premium. You get a clean, continuous border line that hides uneven ceiling edges and makes the room feel calmer. The shadow gap from the LED channel gives you that “floating border” look. Keep the border thickness narrow and the radius consistent so it looks designed, not improvised. This is a great option for living rooms with curved furniture lines or arched wall niches.
Mark a rounded rectangle on the ceiling using a template or string compass so the radii are equal. Drop the border line to about 9-11 cm and build a secondary inner layer for the LED channel at about 6-7.5 cm. Use flexible gypsum board or carefully cut segments to form curves — keep seams on the outer edge where they’re easier to hide. Install a frosted diffuser LED strip in the inner channel so the light line stays soft. Finish with joint compound, sand, prime, paint matte white, then install the LED driver and test before final trim.
If you’re nervous about curves, start with a polygon curve (6-8 sides) — it reads rounded once painted.
Don’t skip a consistent radius — uneven curve spacing looks sloppy in ceiling photos.
9. 3D Box Frames on a Flat White Plane
This gives you real depth without turning the whole ceiling into a maze. A flat matte plane keeps the look clean, while raised box frames catch light and create shadow that looks expensive. Use only 2-3 boxes, placed in a diagonal or stacked arrangement, to keep it modern and not busy. Recessed lights inside the boxes add a crisp highlight along the edges. This is a strong pick for budget False Ceiling Living Room projects where you want maximum “wow” per dollar.
Build a flat false ceiling drop at 9-11 cm with a level grid of primary and secondary channels. Choose a layout with 2-3 box frames; each box should be about 18-24 in (45-60 cm) wide and recess/raise depth around 1.5-2 in (4-5 cm). Frame each box with extra channel members so the edges stay straight after boarding. Board the plane first, then install the box frames and cap boards for raised edges. Cut and install recessed LEDs within the boxes, then fill joints and sand flush on the plane while keeping the raised edges sharp.
Use painter’s tape to mask edges while sanding so you don’t round off the crisp box corners.
Don’t place too many boxes — three looks intentional; five starts looking cluttered.
10. Floating Center Shelf Effect with Hidden LED
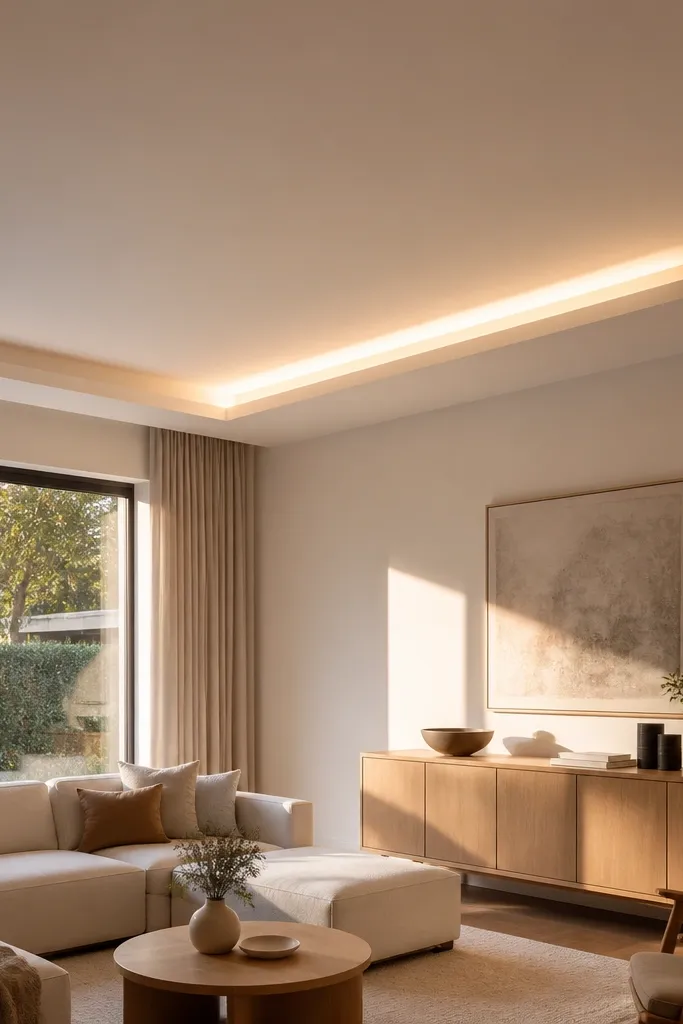
Drop the main ceiling plane by 9-11 cm, then design a center ledge that drops only an extra 2-3 in (6-7.5 cm). Frame the ledge with two channel rails and cross members so it holds board weight without sag. Board the ledge top and underside separately so the underside edge is sharp. Install a channel for the LED strip on the top side of the ledge, aiming the light down at a slight angle. Wire through a junction box, test the LED, then fill joints and paint matte white everywhere except the LED channel area.
This style looks like a floating shelf on the ceiling, and it’s one of the best ways to make a budget ceiling feel high-end. You build a center “ledge” drop and hide the LED behind it so the light washes downward. The rest of the ceiling stays simple and flat, so you don’t fight complicated patterns. This works especially well in living rooms with a TV wall opposite the seating, where the center panel reads clearly. Keep the LED warm-white to avoid harsh shadows on walls.
Skip thisDon’t run LED without a diffuser — exposed chips look cheap fast.
Editor's noteUse a frosted LED strip diffuser so the light looks like a wash, not a thin line.
11. Perimeter Coffered Border with Inner Recess
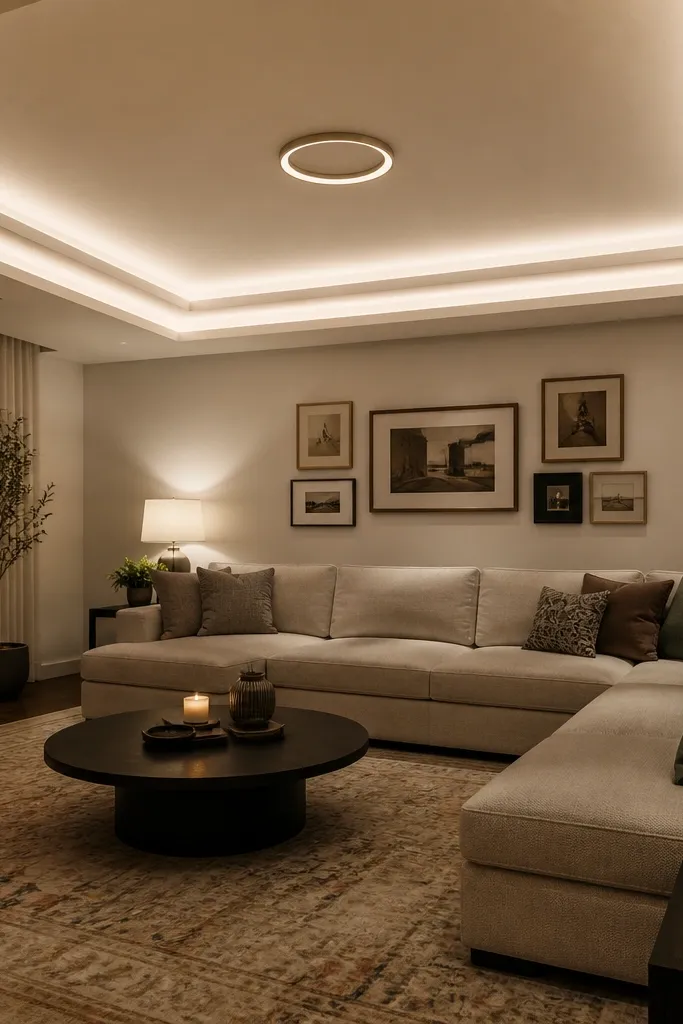
Start by marking an outer perimeter drop at 9-11 cm and an inner ring recess at about 6-7.5 cm. Build a simple coffer pattern on the outer border only, using box frames spaced 18-24 in (45-60 cm) apart. Board the main plane, then install coffer frames and board caps for the border sections. Add recessed LED spots or a hidden LED channel inside the inner ring for a clean glow effect. Finish with joint compound, sand, prime, and matte paint; then install lighting trims and test.
If you like the look of coffered ceilings but hate the full-grid complexity, this is the compromise. You build a coffered border around the edges and keep the center clean with one recessed ring. The coffered border adds texture and depth where it’s most visible from the couch. The inner recess gives you a highlight ring that looks modern with minimal extra work. This is a great fit for rectangular living rooms where you want the ceiling to look structured without taking over the room.
Skip thisDon’t make the inner ring too wide — it can look like a thick halo that dominates the room.
Editor's noteKeep coffer depth shallow (around 1.5-2 in / 4-5 cm) so the ceiling doesn’t feel like a drop ceiling.
12. Asymmetrical Channel Lines with Spotlights
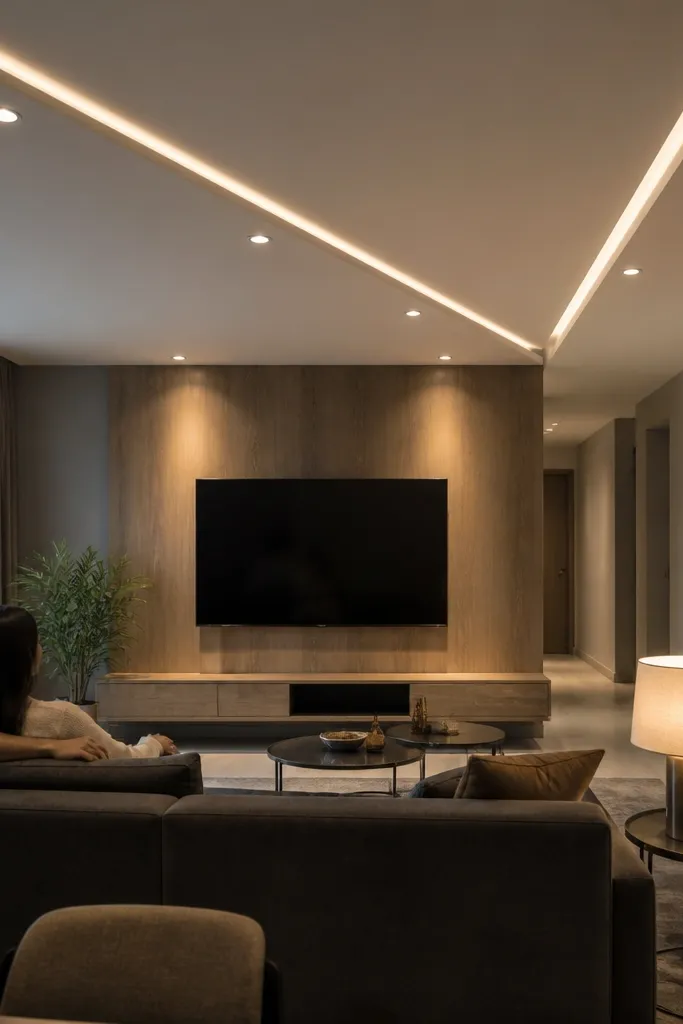
This is the modern, slightly artsy ceiling look that still reads clean on a budget. Instead of a full border, you add two or three diagonal channel lines that guide the eye toward the seating or TV wall. Pair it with recessed spotlights so the channels look intentional and not like random trims. The beauty here is restraint: matte white stays the base, and the channel lines create the design. It’s best for living rooms with one strong focal wall where you want the ceiling to direct attention.
Measure your room and pick one diagonal line path from near one corner toward the opposite wall, keeping the line at least 12-16 in (30-40 cm) away from edges. Install a false ceiling drop of 9-11 cm as the base plane. Frame the diagonal channel lines by adding extra secondary channels along your marked paths and boarding strips to form raised or recessed channels about 1.5-2 in (4-5 cm) deep. Cut recessed LED spots along the diagonal line — aim for spacing of 18-24 in (45-60 cm). Finish joints and paint matte white, then install LED trims.
Use a laser level to keep both diagonal lines perfectly aligned — asymmetry looks stylish only when it’s controlled.
Don’t add more than two diagonal lines — it turns into clutter fast.
13. Mirror-Symmetric Double Border with Center Downlights
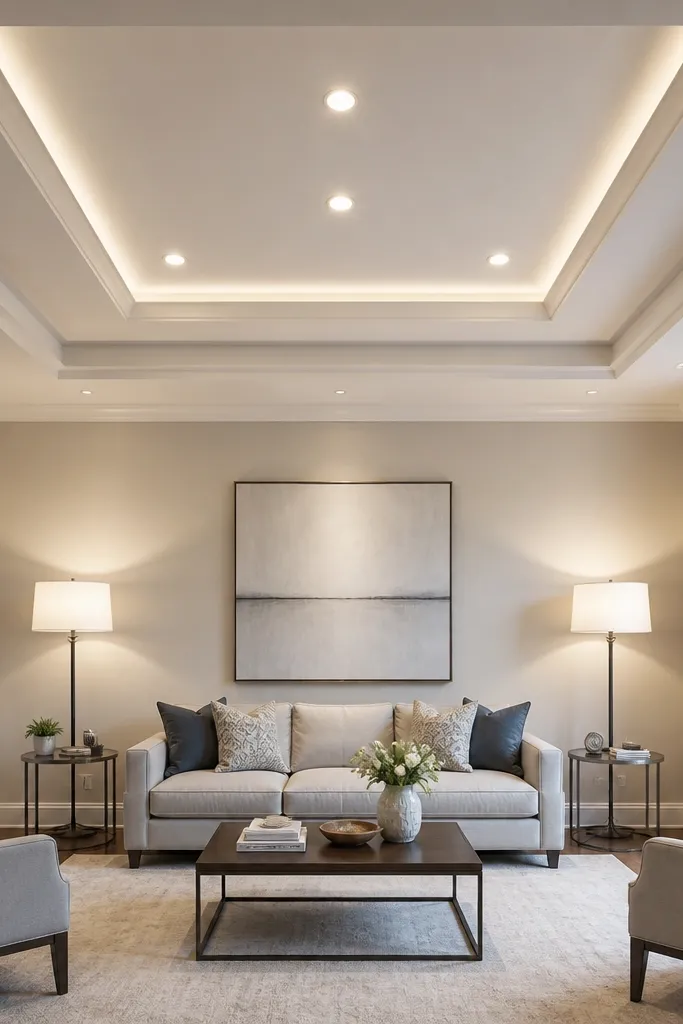
This design is built for people who want a modern ceiling that looks neat in every direction. Double border squares create a clean, architectural frame, and center downlights keep the room bright without making the border the only focus. Use even spacing for downlights so the ceiling looks balanced. Matte white with a crisp border edge reads well on camera, and it’s predictable to build. Great for living rooms with simple rectangular shapes and no curved features.
Mark two concentric rectangles (outer border and inner border) and keep the gap between them around 12-16 in (30-40 cm). Drop the outer border to 9-11 cm and the inner border to 6-7.5 cm. Fix channels to the slab for both borders, board the main plane, then board the border steps. Mark and cut downlight holes in the center area based on a simple grid spacing, like 24-30 in (60-75 cm). Sand and paint matte white, then install downlight trims after painting so the edges stay sharp.
Use the same downlight cutout size everywhere — mismatched trims show up immediately.
Don’t eyeball the borders — small angle errors make the symmetry look off.
14. Hidden LED Cove Only on One Wall Side
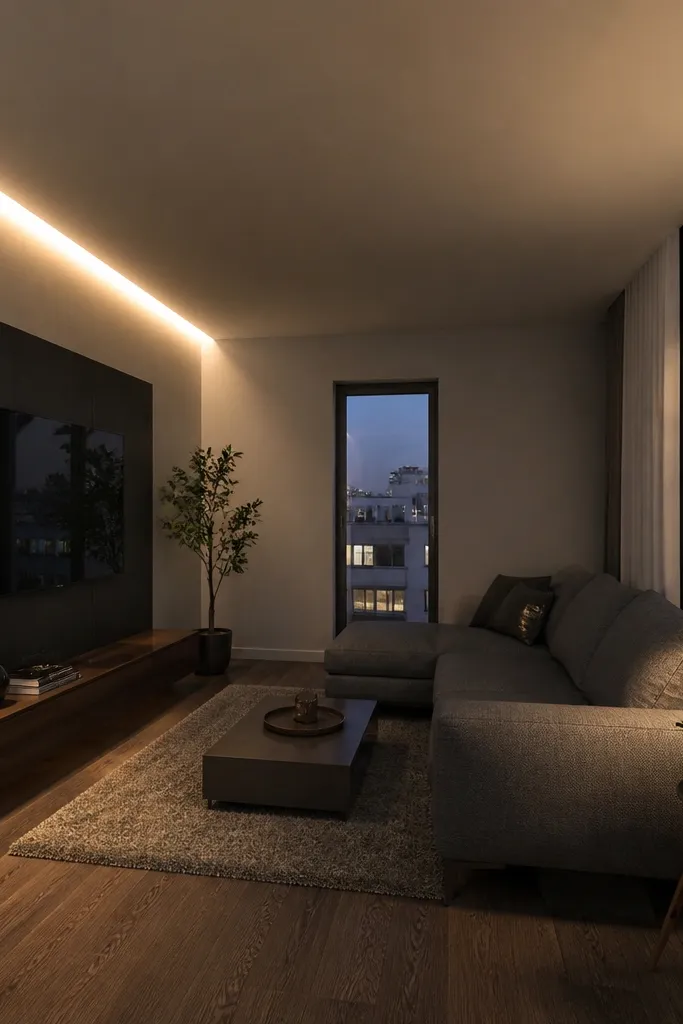
If your living room has a TV wall or a sofa wall, you can make that side feel taller by adding a hidden LED cove only along one edge. This is a budget-friendly trick because you build less framing than a full perimeter glow. The light wash adds mood and makes the ceiling look modern without heavy geometric patterns. Keep the cove depth around 6-7.5 cm and use a frosted diffuser. This design photographs beautifully in evening lighting because the glow creates a clean separation between ceiling and wall.
Choose the wall side you want to emphasize and mark a straight line parallel to the wall at 9-11 cm drop from the highest ceiling point. Build the cove channel at 6-7.5 cm drop for the LED strip and board the cove underside so the LED is hidden from direct view. Install the LED strip inside the channel and secure with clips every 8-10 in (20-25 cm). Keep the rest of the ceiling as a single matte white gypsum plane for a clean look. Prime, sand, paint matte, then test the LED before final trim installation.
Use warm-white LEDs (around 2700-3000K) so the glow looks cozy, not bluish.
Don’t place the LED too close to the edge of the channel — it creates bright hotspots.
15. Textured Plaster Look Panel in a Clean Frame
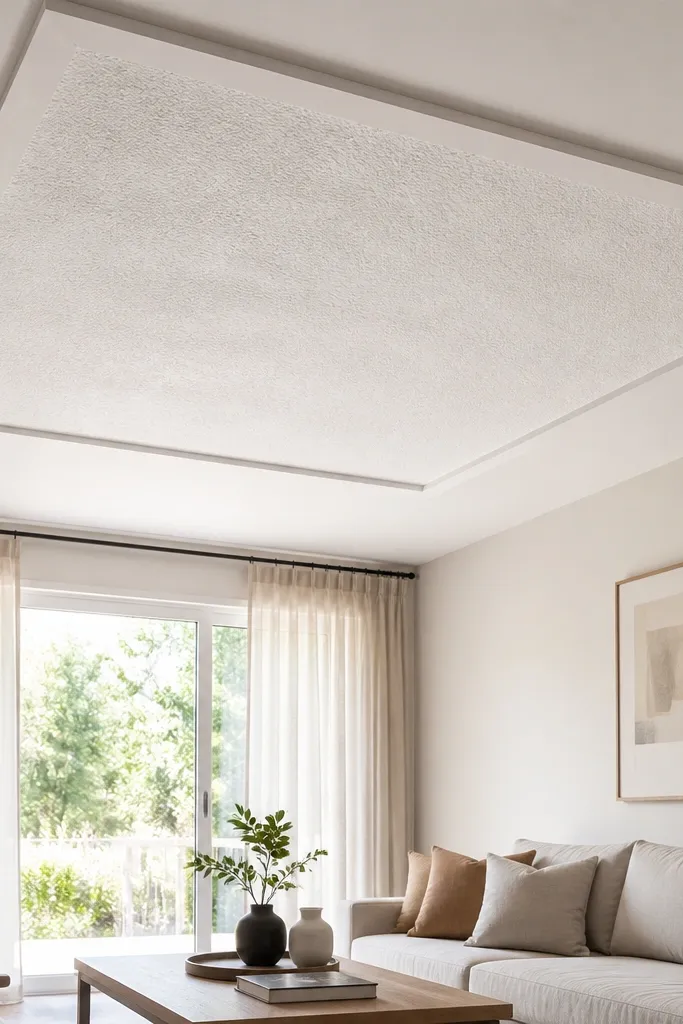
Build a basic false ceiling drop at 9-11 cm across the room to level the surface. Create a rectangular or oval frame by installing extra channels and boarding the frame area, keeping the frame width around 6-8 in (15-20 cm). Apply a textured coat inside the frame using a roller or trowel technique, then let it cure fully. Paint the textured area and frame in matte white so the texture reads subtly. Install one or two recessed downlights angled toward the textured panel to bring out the surface shadow.
You can get a high-end feel without complex carpentry by using one textured panel inside a simple frame. The frame is gypsum board painted matte white; inside it you apply a textured finish like fine cement-based plaster or a gypsum texture coat, then paint it the same white to keep it modern. The texture creates shadows and depth even with normal lighting. This design works well when you want a calm, architectural ceiling that doesn’t rely on lots of recessed lights. It’s best for living rooms with warm wall colors or wood flooring where texture adds warmth.
Skip thisDon’t use glossy paint on the texture — it highlights unevenness harshly.
Editor's noteTest your texture coat on a small board scrap first — the same paint looks different on rough vs smooth surfaces.
16. Ceiling Fan Ring with Surrounding Recessed Light Halo
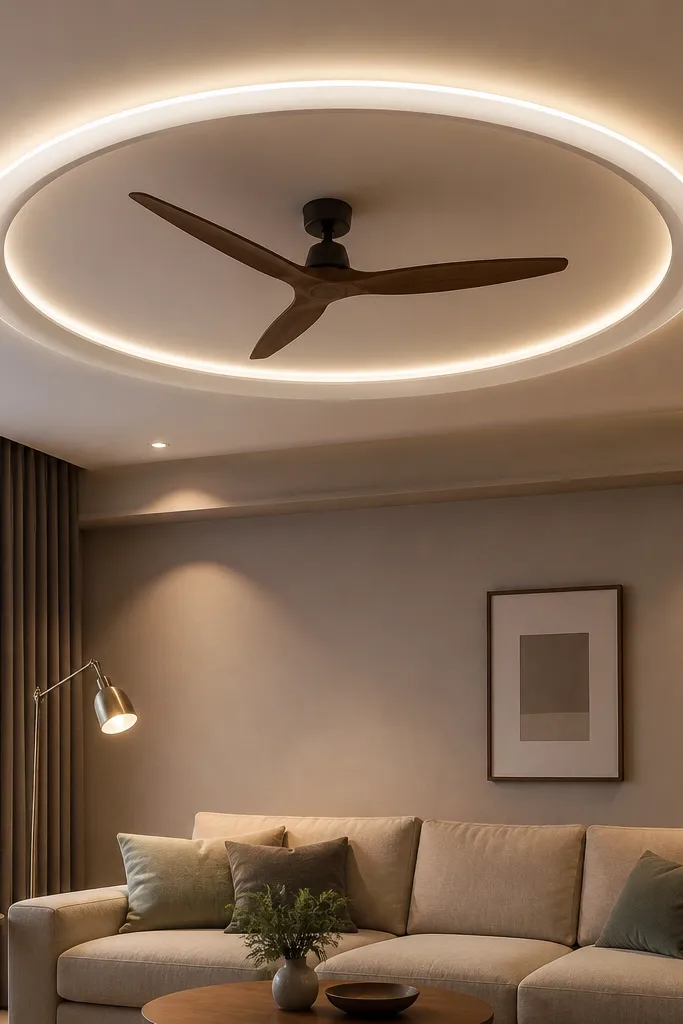
This is a clean way to make a fan area look designed instead of random. A circular or oval ring around the fan creates a focal point, and the recessed halo light makes it feel intentional. This design is budget-friendly because you focus framing in one area and keep the rest flat. It’s ideal for living rooms where the fan is centered and you want the ceiling to look modern without a full border. Use warm-white LEDs so the halo looks soft rather than harsh.
Build a flat false ceiling drop of 9-11 cm to level and hide wiring. Mark the fan center and create a ring template with a radius that leaves at least 6 in (15 cm) clearance around the fan mounting hardware. Frame the ring using curved metal channels or cut-and-bend channels to match the template, then board the ring. Cut a ring of recessed LED holes or install a circular LED channel within the ring for halo lighting. Finish jointing carefully around the ring so the edge stays smooth, then paint matte white.
Use a flexible template for the ring so your cutout lines stay smooth and symmetrical.
Don’t mount the ring too close to the fan — vibration can crack joint compound.
17. Slim Perimeter Border with Hidden Light Slots at Corners
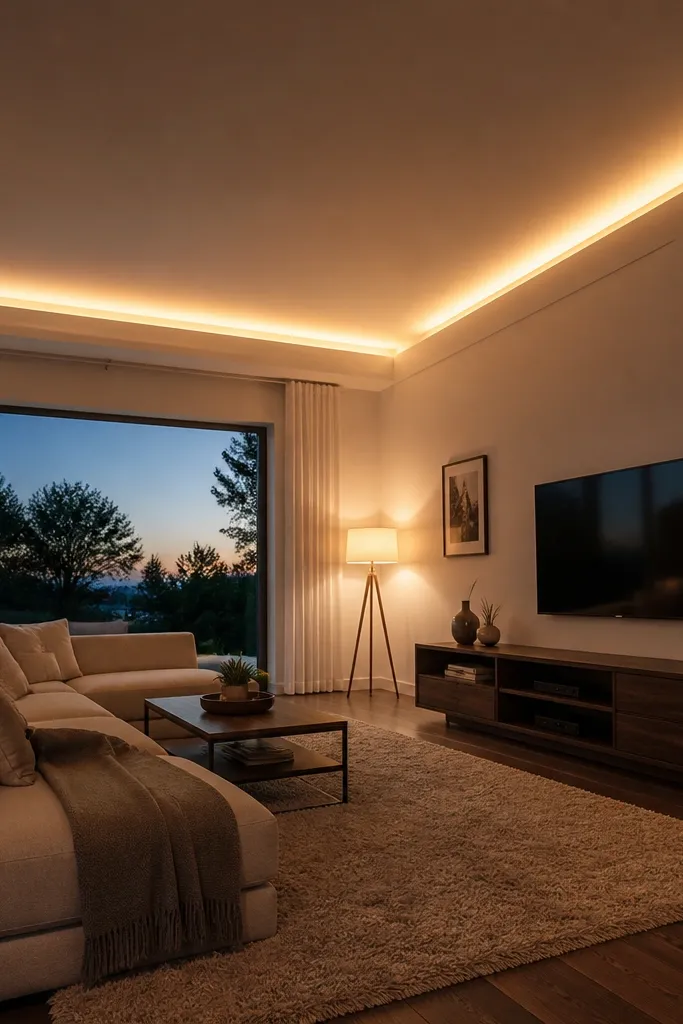
Mark a perimeter drop line at 9-11 cm and build a slim border frame using metal channels. Board the main plane and then board the border underside so you get a clean shadow line. Create small corner light slots by adding short channel segments at each corner, keeping slot width around 1-1.5 in (2.5-4 cm). Install LED strip segments inside the slots with a diffuser and wire them to a driver near the nearest access point. Sand, prime, matte paint, and test the corners after painting so you can adjust placement if needed.
This style looks designer because the light comes from inside the ceiling line, not from obvious fixtures. The border is slim, and the corner slots create a subtle glow that makes the room feel more premium. It’s budget-smart because you only build a narrow perimeter frame and a few light channels at the corners. The ceiling stays mostly flat, so sanding and finishing stay manageable. This design works best in living rooms with simple walls and where you want soft, indirect lighting rather than bright downlights.
Skip thisDon’t use open LED strips without diffusion — corners will look like bright dots.
Editor's noteUse one LED driver for all corner segments if the total wattage stays within the driver rating.
18. Random-Not-Random Drop Panels with One Central LED Strip
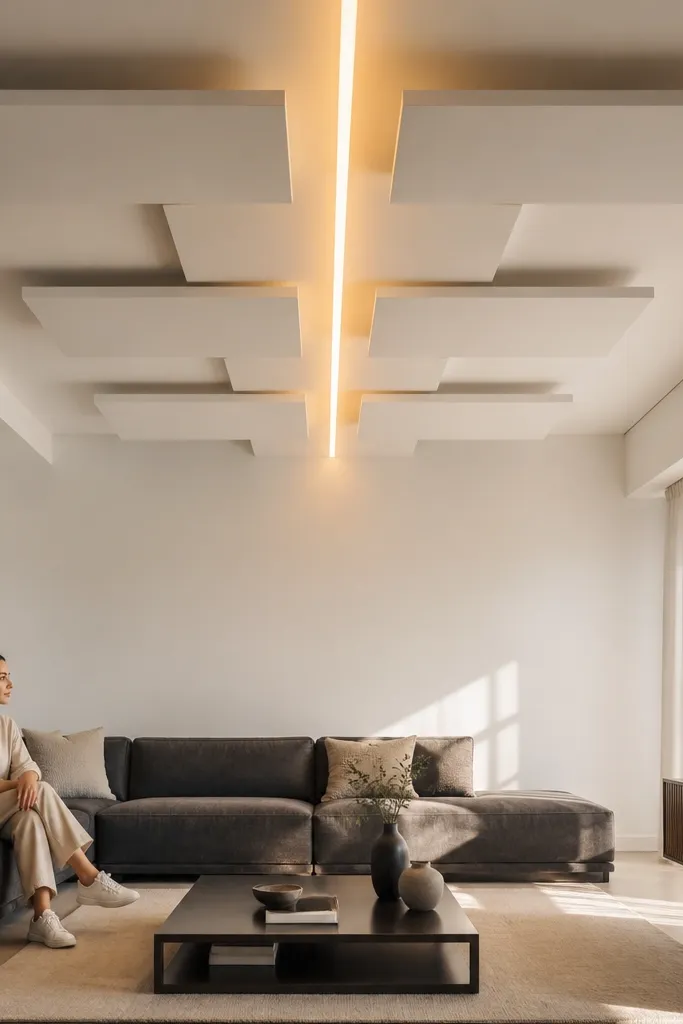
Start with a flat base drop at 9-11 cm. Lay out 3-4 rectangular panel positions and stagger them by about 1.5-2 in (4-5 cm) in drop depth so the shadows show. Frame each panel with metal channels and board them as separate sections so joints land cleanly. Build a central LED channel along one of the panel edges and keep the LED strip hidden with a diffuser. Finish sanding and painting matte white, then install the LED driver and test the glow.
This is the “modern stagger” look that still stays budget because you limit the complexity. You create a few rectangular drop panels in a staggered arrangement, but you keep the lighting simple with one central LED strip. The stagger creates shadow and movement; the single LED line gives it a cohesive finish. Use matte white on everything, and keep the LED warm-white. This design is best for rooms with long seating lines where the ceiling can visually guide movement toward the focal wall.
Skip thisDon’t make random panel sizes — variation looks intentional only when the layout is balanced.
Editor's notePlan the panel sizes so they align with furniture width — ceiling shadows look better when they match the room’s proportions.
19. Edge-Lit Square Frame with Recessed Corner Spots
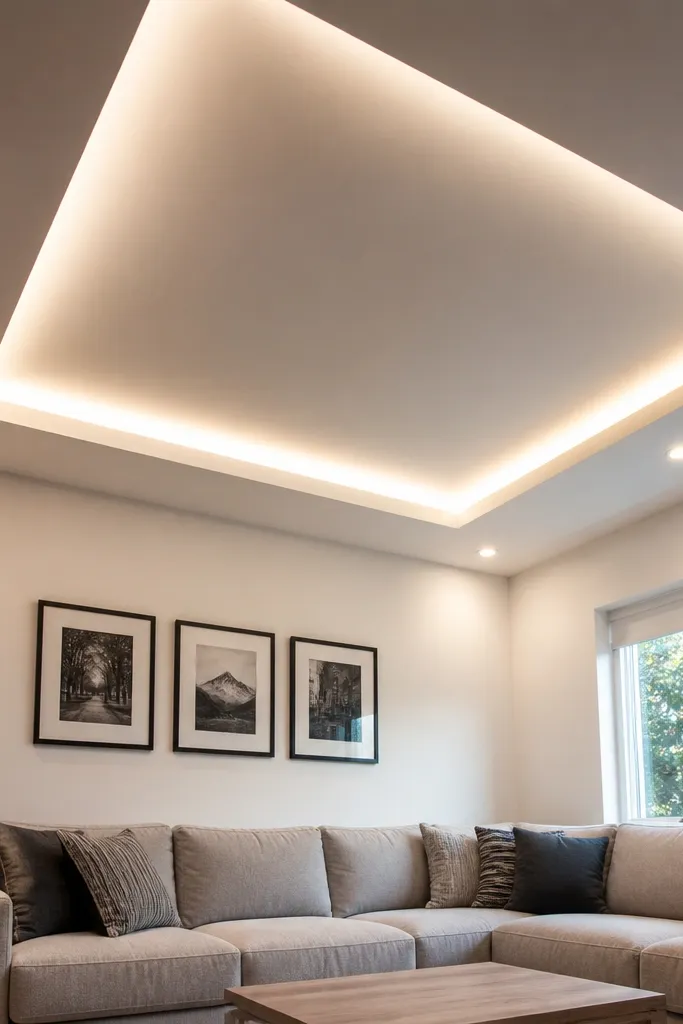
Mark a central square inside the room footprint, leaving a consistent margin from walls. Build the perimeter false ceiling drop at about 9-11 cm and board the main plane. Frame the square border at an additional 6-7.5 cm drop and install an LED channel along the inside edge for edge lighting. Cut and install small recessed downlights near the corners of the square frame, keeping spacing even. Finish joint filling on the main plane and frame edges, sand smooth, prime, then paint matte white before final light trim installation.
An edge-lit square frame is a clean modern look that hides wires and looks good from multiple angles. The square frame gives you strong geometry, while corner recessed spots brighten the room without flattening the ceiling. This is a great budget False Ceiling Living Room choice when you want a structured ceiling but don’t want a big drop everywhere. Use a warm LED strip and frosted diffuser to keep the light line smooth. It also works well with contemporary furniture because the geometry matches straight lines.
Skip thisDon’t place the LED channel too deep — if it’s hidden too far, the glow looks weak.
Editor's noteUse identical LED strip lengths and splice carefully — uneven soldering shows through if the diffuser is thin.
20. Panel-in-Panel Rectangles for TV Wall Focus
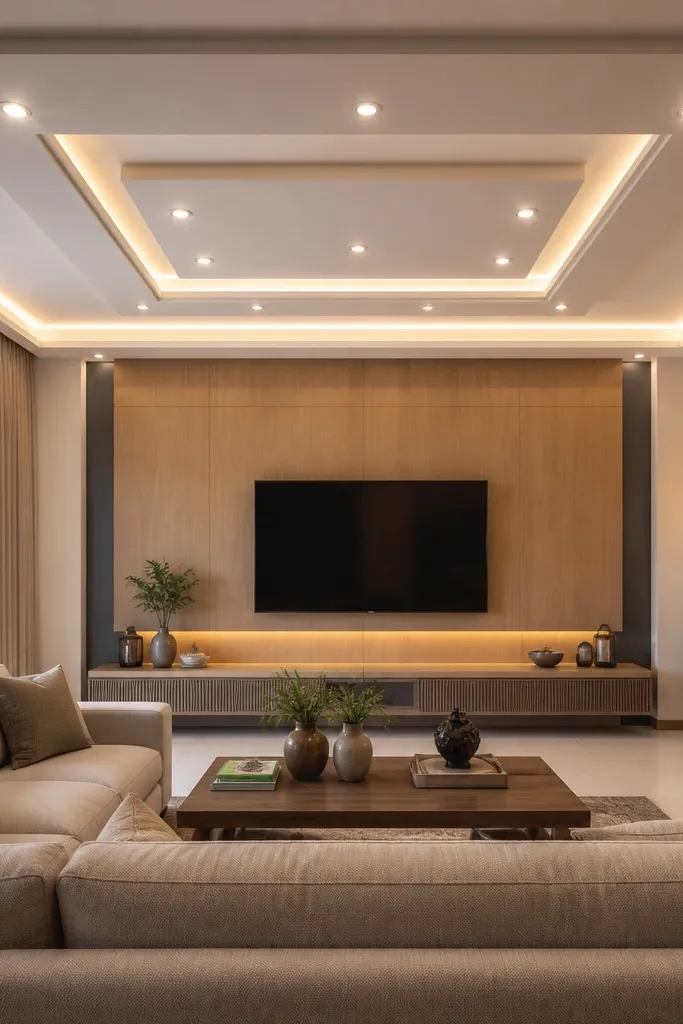
Decide your outer rectangle size based on room width and keep it centered. Drop the outer layer to 9-11 cm, then build an inner rectangle drop at 6-7.5 cm, and a third inner step at about 4.5-5.5 in (11-14 cm) from the slab if your height allows. Frame each rectangle with metal channels, board the steps, and ensure each edge is square and aligned. Add recessed LED spots along the inner step — start with 4-6 lights depending on room size, spaced evenly. Sand, prime, paint matte white, then install trims and test lighting angles.
Layered rectangles pull the eye toward the TV wall and give you a modern, architectural ceiling without going full grid. You build one outer rectangle, then a smaller inner rectangle, then a third step — each layer adds depth. Because the layers are rectangles, it’s easier to measure and build accurately than curved designs. Install recessed lights along the inner step so the room stays bright and the layers cast crisp shadows. This design works best when the TV wall is centered opposite the seating, so the ceiling geometry reads straight.
Skip thisDon’t stack steps too close together — if the gaps are tiny, the layers blend visually.
Editor's noteAim the recessed lights slightly toward the center layers so shadows define the steps instead of lighting the ceiling flat.



