
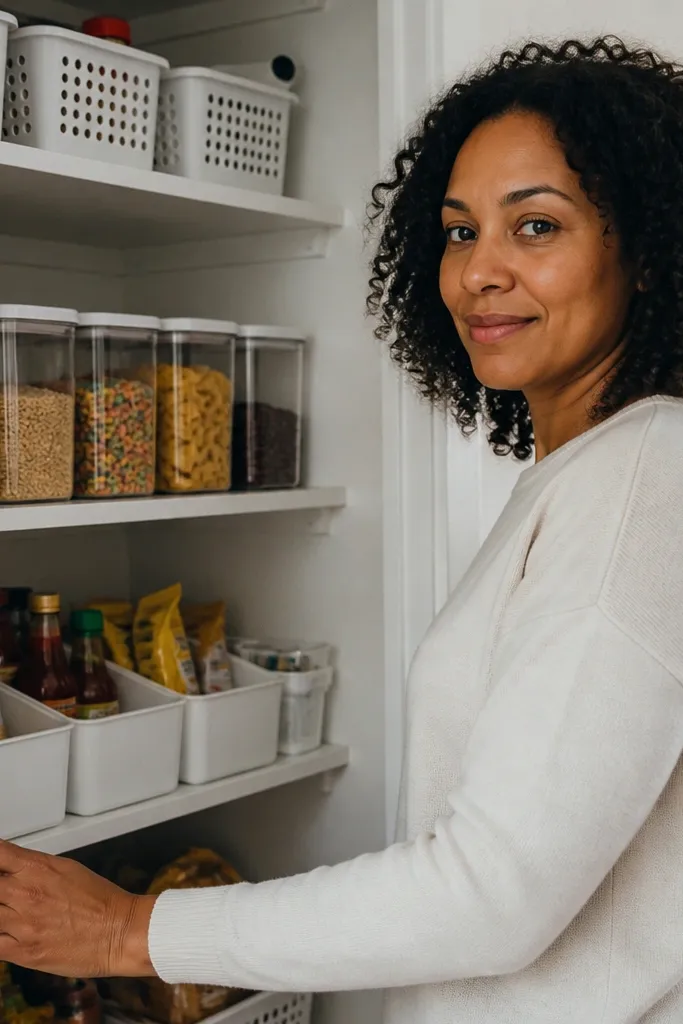
1. Stacked Clear Snack Tiers with Washi-Label Fronts
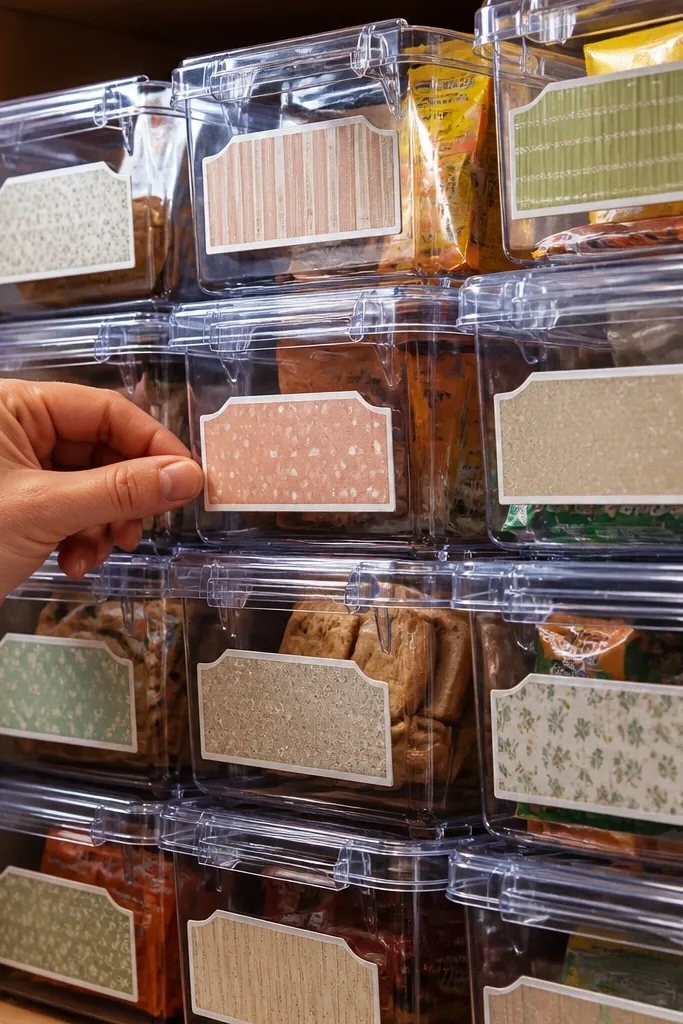
This is the fastest way to make a pantry look “intentional” without buying fancy organizers. Clear bins show you what’s inside, and the stacked tier layout creates a clean vertical rhythm that looks good in photos. Use Dollar Tree clear containers with snap lids so the shelf stays tidy even when you’re refilling. Label the front with a thin, high-contrast strip so the pantry looks organized from standing height. This works best for snacks, tea packets, and single-serve items where you want quick grab access.
Editor's noteUse a ruler to place labels — crooked labels make cheap organizers look messy.
Start by measuring the shelf width and choosing three bins that stack without wobbling. Place the bottom bin first, then set the second and third bins on top, aligning corners so the lids form a straight column. Cut label tape strips to about 1.5 inches wide, then press them centered on the bin front. Fill each tier with one category and keep the top layer light so it doesn’t crush snacks. Finish by wiping the outside of the bins so fingerprints don’t ruin the look.
Skip thisAvoid mixing bin sizes in one stack; it breaks the clean tier line.
2. Under-Shelf Cookie Sleds Using Small Plastic Trays
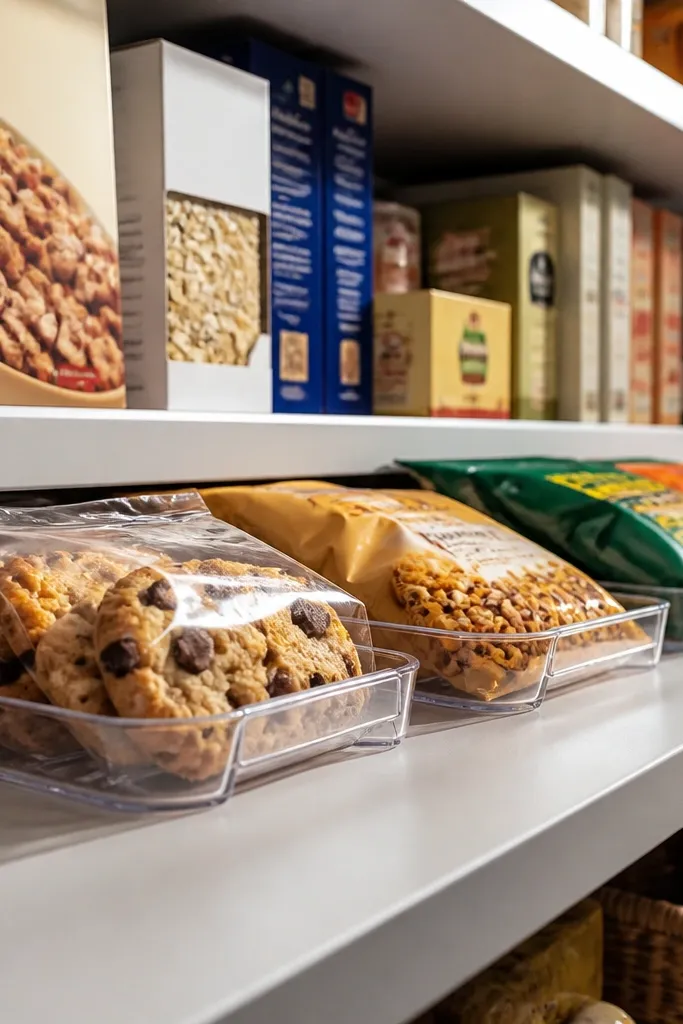
When your pantry shelf is deep, small snack bags disappear behind bigger boxes. These under-shelf sleds pull the items forward visually, so the front shelf looks styled instead of cluttered. Dollar Tree sells small plastic trays and clip-on style items, and the payoff is immediate: your cookies and snack packs become a neat lineup. The look is clean because the trays are all the same color and sit in the same plane. This idea suits cookie tins, granola bars, and any small packaged items you want visible but protected.
Editor's noteChoose trays with a flat front edge so labels stick cleanly and don’t peel.
Find the underside clearance first — you need enough room for the tray height plus a little airflow. Attach the tray using the simplest method you can manage — either adhesive hooks rated for lightweight items or small clips if your shelf has a lip. Load the tray with one type of snack so the front looks consistent. Add one label on the tray front edge using label tape so it reads even from the doorway. Keep the sled height consistent across shelves if you do more than one.
Skip thisDon’t overload the tray; sagging makes the whole shelf look uneven.
3. Brown Paper Label System on White Wire Baskets
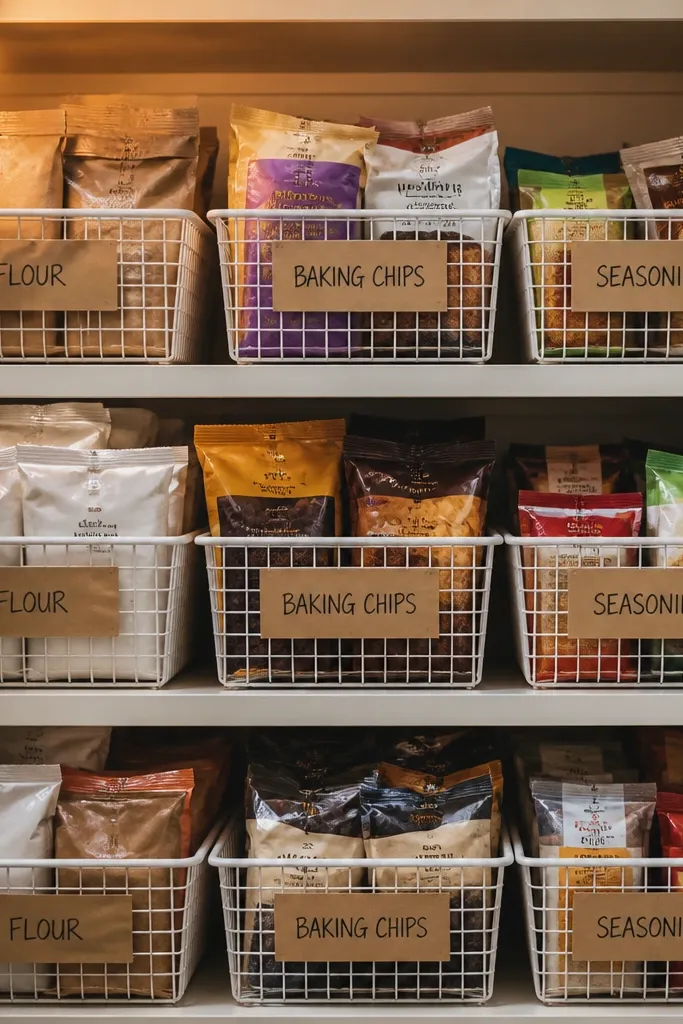
This is for people who want pantry organization that looks warm, not hospital-clean. White wire baskets plus brown label tape creates a styled contrast that photographs well and hides mess. Put loose items like flour packets, baking chips, or seasoning packets into baskets so they don’t scatter. The wire design also keeps things from trapping moisture and gives you a little texture that looks good in a pantry. Skill level is easy: you’re mostly assembling and labeling.
Pick two or three wire baskets that fit the same shelf footprint. Line the basket bottom with a thin sheet of parchment paper or a Dollar Tree liner so small packets don’t slide through. Cut label tape strips in the same size for every basket and apply them to the front center. Fill each basket to about 80% so items don’t spill over the rim. Place the baskets in a row with equal spacing so the shelf looks like a set.
Press labels firmly with a credit card edge to prevent edge lift.
Avoid handwritten labels that vary in size; keep every label the same width.
4. Lazy Susan for Oils and Vinegars with Mini Labels
If your oils and vinegars live in the back, a lazy Susan is the cheapest way to make them feel organized. The rotation means you don’t have to dig, and the visual payoff is strong because the bottles line up neatly when the tray turns. Use small Dollar Tree containers or bottle-friendly holders to prevent rolling and wobble. Add mini labels so each bottle has a clear place. This works great for olive oil, sesame oil, vinegar bottles, and any tall bottles that are hard to see.
Start by choosing a lazy Susan base that fits your shelf space and can hold your tallest bottle height. Place the bottles on the tray, then mark where they sit so you can add small non-slip pads or folded liners. Label each bottle with label tape, keeping the label near the front so it’s readable when the tray rotates. Add a small basket or tray for “extras” like cooking spray or specialty oils. Rotate the tray once before tightening your arrangement to confirm nothing tips.
Put a thin non-slip liner under the bottles so they don’t slide when you spin the tray.
Avoid placing bottles too close to the edge; vibration makes them look messy over time.
5. Clear Spice Drawer Look with Stackable Small Containers
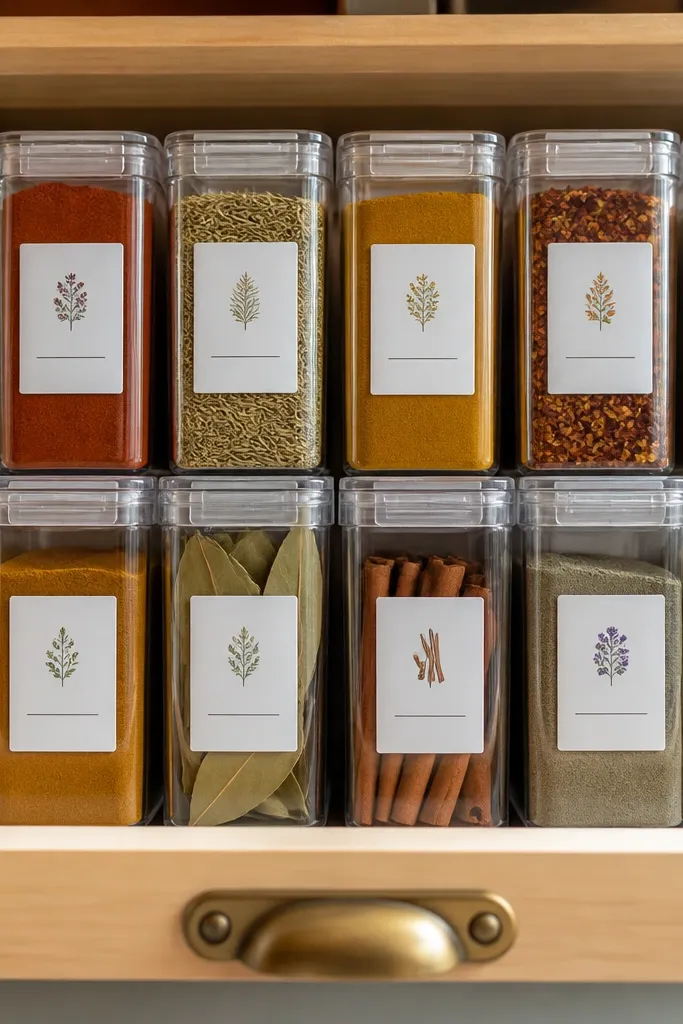
You can make a pantry shelf look like a drawer by using stackable clear containers with matching lids. This gives you a clean “front face” look where labels are aligned and spices don’t clump together in one pile. It’s also easy to find what you need because everything faces outward. Choose containers that stack in a tight column so the shelf doesn’t look chaotic. This idea suits spices, tea blends, instant coffee, and seasoning packets.
Editor's noteLabel before filling so the tape sticks flat and you don’t trap wrinkles.
Choose stackable clear containers that have the same front width so labels line up. Put the heaviest items at the bottom stack and keep powders in sealed bags or original pouches inside the container. Apply label tape to the front center of each container with the same font style (all caps works best). Arrange containers in order by use frequency so the most used sits at eye level. Wipe container fronts to keep the clear look crisp.
Skip thisDon’t mix opaque and clear containers in the same column; it breaks the drawer illusion.
6. White Magazine File Organizer for Bulk Bags on the Side
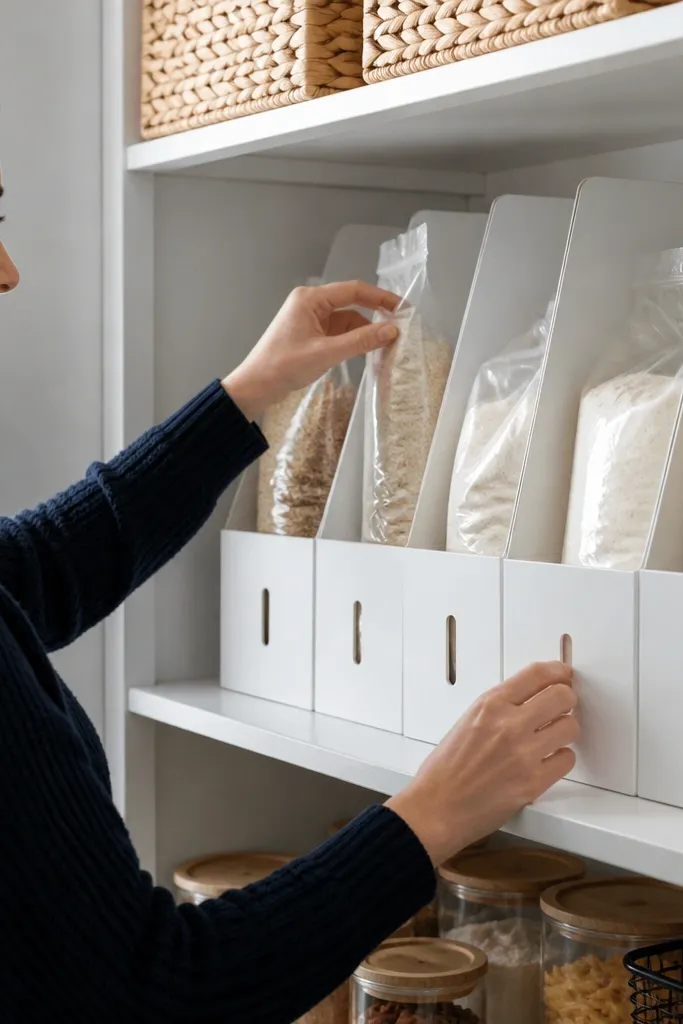
If your pantry has bulk bags that lean or collapse, a white file organizer keeps them upright and photogenic. The vertical slots create a clean grid, and the bags look tidy instead of slumped. This is a great way to store rice bags, flour bags, or snack bulk packs without buying real bulk bins. The white color makes everything look brighter, and the labels help your pantry read like a system. Works best for upright, flat-front bags.
Editor's noteAdd a small strip of non-slip shelf liner under the organizer to stop it from sliding.
Select a file organizer with enough slot depth for your largest bag. Stand the organizer on the shelf or attach it to the shelf side with adhesive hooks if the shelf is stable. Label the front of each slot with label tape — put the label at the top third so it stays visible. Insert bags vertically, then press the bag fronts flush against the organizer back. Keep only one brand or size per slot so you don’t end up with uneven gaps.
Skip thisAvoid overstuffing slots; crushed bag fronts look messy even when labeled.
7. Pegboard Pantry Wall with Dollar Tree Label Strips
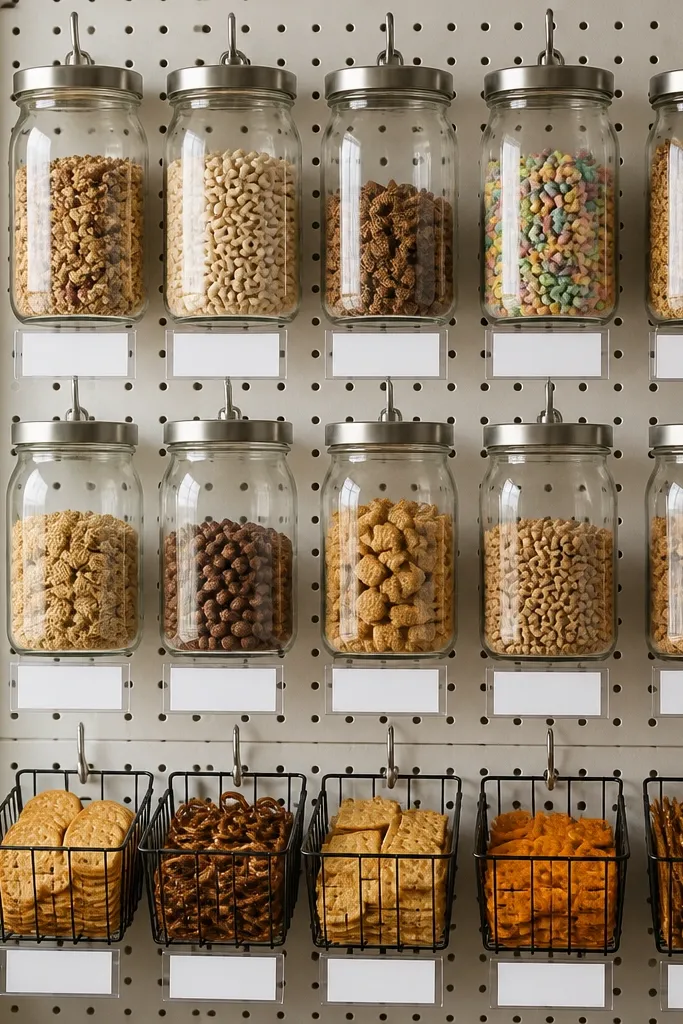
A small pegboard section can turn pantry storage into a clean wall display, even if you only do one area. Hook jars and baskets up so items aren’t buried on shelves, and the label strips create a uniform look. This is especially good for frequently used items like cereal toppings, baking tools, and snack jars. The pegboard gives you structure, and the jars give you consistent shapes. Keep it to one wall section so the project stays under $20.
Editor's noteUse the same jar size across the pegboard section; mixed sizes make the wall look cluttered.
Cut or choose a pegboard panel that fits your pantry wall segment. Mount it with the simplest method your wall allows, then add hooks at equal height intervals. Use small jars or containers and hang them so labels face outward. Apply label tape to the front center of each jar lid or jar body. Arrange items by category — baking on one row, snacks on another — so the layout looks planned.
Skip thisAvoid placing heavy bottles on the highest hooks; it pulls the whole display out of alignment.
8. Chalky White Contact Paper Shelf Liner for a Clean Base
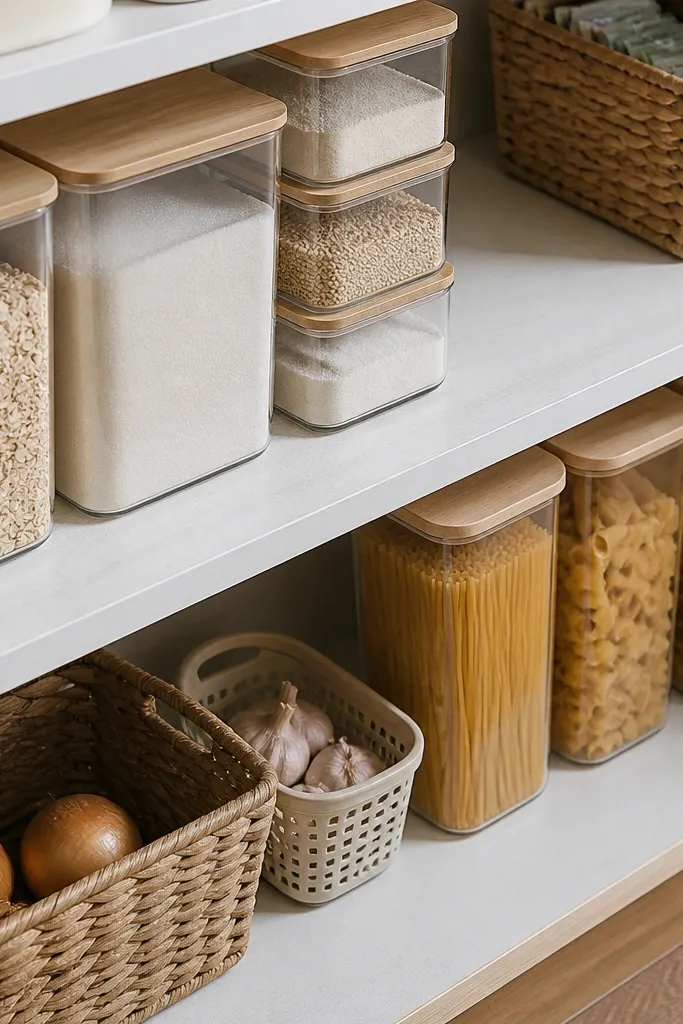
This isn’t a bin hack. It’s a base hack. When your pantry shelf is wood or stained, cheap organizers can look dull and dirty. A chalky white contact paper liner makes everything underneath look brighter and more intentional in photos. It also hides scuffs and small spills, so the pantry stays looking new longer. This pairs with any of the other ideas because it improves the whole visual “frame.” Use it on the hero shelf where labels will show.
Measure the shelf and cut contact paper with a little extra on the edges for trimming. Clean the shelf surface with rubbing alcohol so the adhesive grips. Lay the liner down slowly, smoothing as you go to avoid air bubbles. Trim the edges with a sharp craft knife so it sits flush. Let it set for a few hours before placing bins so corners don’t lift.
Warm the contact paper slightly with a hair dryer so it conforms to corners without wrinkling.
Don’t apply over grease or sticky residue; lifted corners kill the clean look.
9. Two-Tone Zone Shelves with Painter's Tape Boundaries
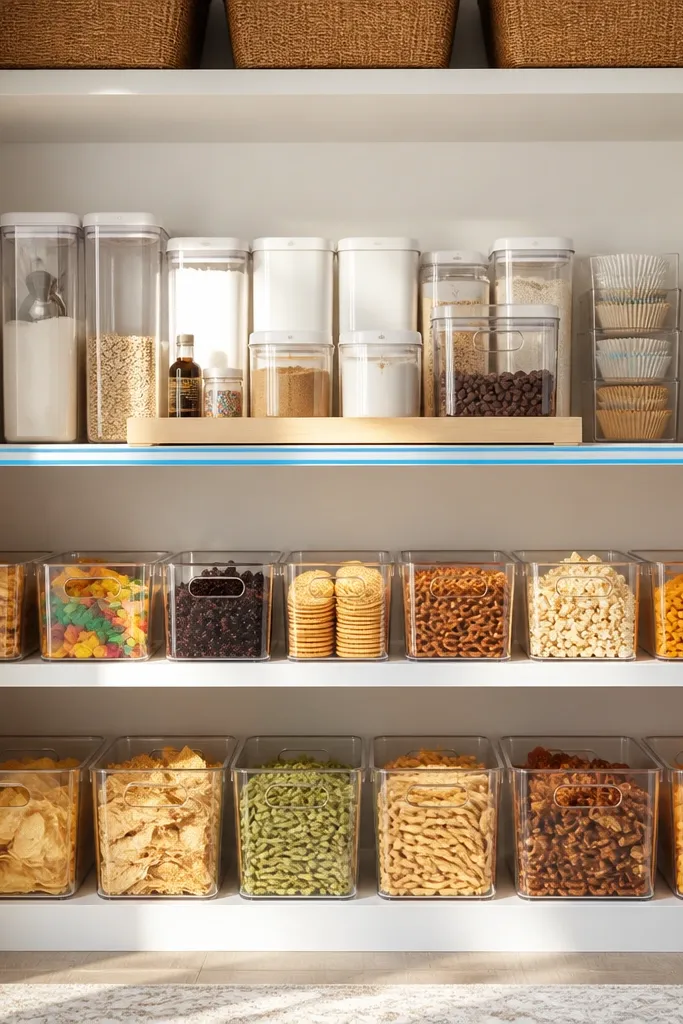
Zones are what make a pantry look designed. Use painter’s tape to create a visual boundary line on the shelf, then only place one category on each side. For example, snacks on the front half and baking supplies on the back half. The look is crisp because the tape line creates a straight horizon that organizes your eye. This is one of the best budget dollar tree pantry organization ideas because it costs almost nothing and makes everything look calmer.
Editor's noteAlign container fronts before you fill them; it’s easier to nudge empty bins into perfect rows.
Clean the shelf surface and apply painter’s tape in a straight line at the height you want the zone boundary. Place matching bins or baskets on each side so you don’t cross categories. Add labels to each container that match the zone name, like “Front Snacks” and “Back Baking.” Keep container fronts aligned to the tape line so the shelf reads like a grid. Remove or leave the tape depending on whether you’re using it as a permanent design element.
Skip thisAvoid moving bins around after labeling; constant shifting makes the zone line stop looking straight.
10. Tall-Lid Organizer for Baking Foils and Wraps
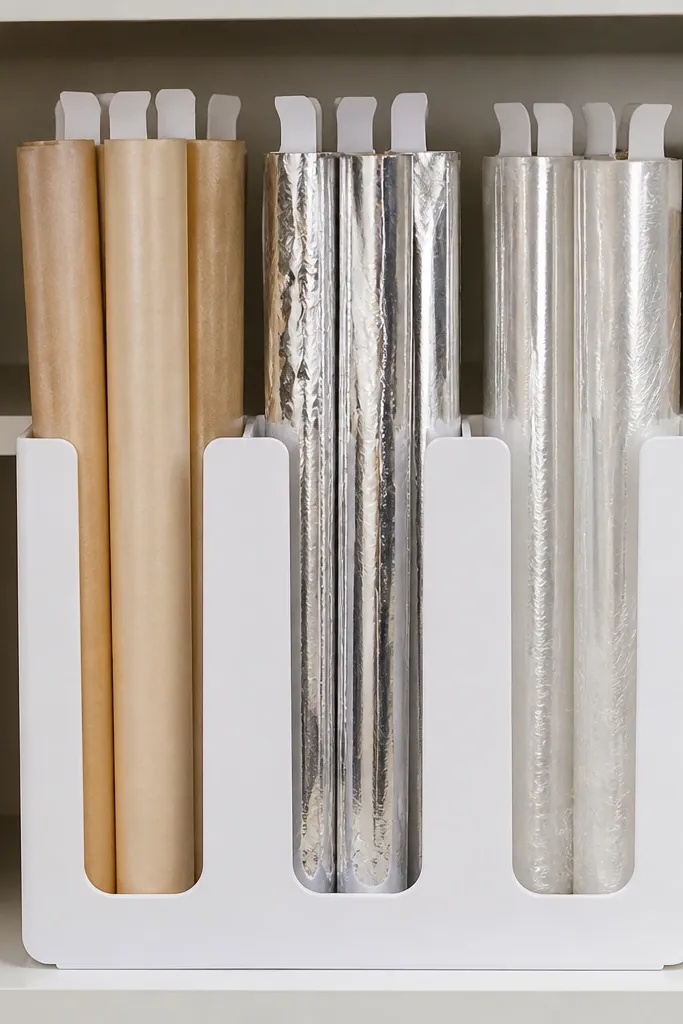
Wraps and foils are the reason many pantries look chaotic, because they lean and tangle. A vertical organizer keeps parchment, foil, and plastic wrap upright and easy to grab. The look matters: vertical rolls look neat when they’re evenly spaced and labeled at the top. Choose a Dollar Tree organizer that holds tall items without crushing, or use a stackable container system that stands rolls upright. This works best for roll-based items that take up depth.
Measure your roll width and height, then choose an organizer that holds at least two rolls side by side. Stand rolls upright, then adjust spacing so labels face the same direction. Add label tape directly on the top of each roll or on a small tag inside the organizer front. Keep one roll per slot so you don’t get a tangled stack. Place the organizer on the shelf edge so it’s visible without pulling everything out.
Put a thin strip of felt or non-slip liner at the organizer bottom so rolls don’t slide sideways.
Avoid stuffing extra rolls behind; it makes the front look crooked.
11. Labeled Clear Baggie Bin with Scoop-Top Look
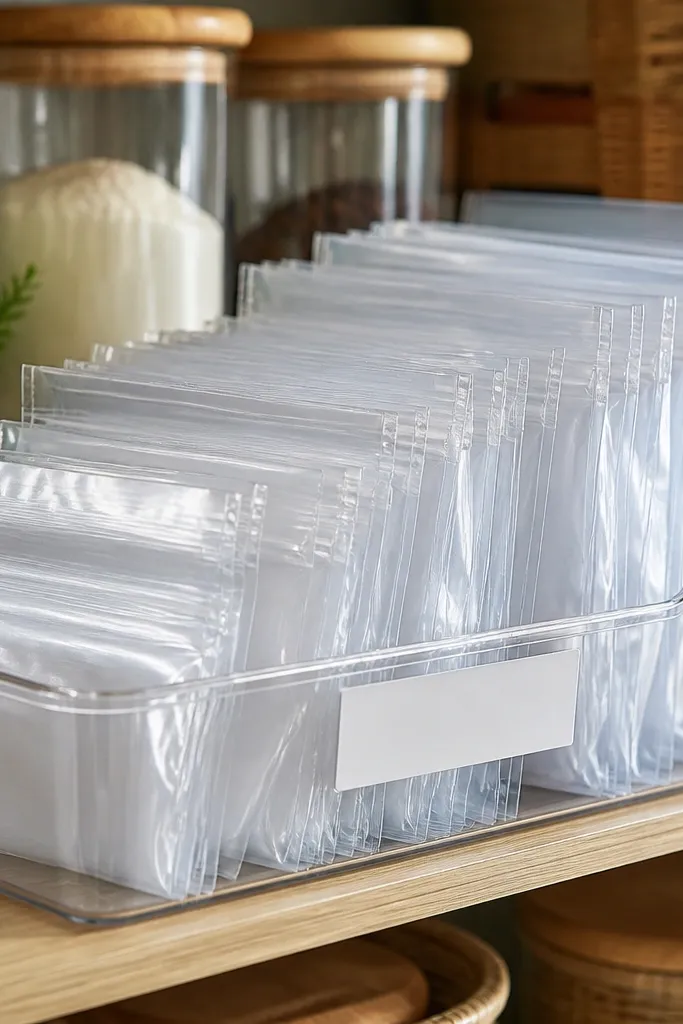
Small baggies disappear unless you contain them. This bin setup gives you a neat “scoop-top” look where you can grab the top stack without dumping everything. Use clear bins so you can see what’s inside, and keep the baggies sorted by size. The photogenic win is the clean label front and the uniform pile height. This works well for snack baggies, sandwich bags, and small portion items like nuts or dried fruit.
Editor's noteUse a small piece of paper towel under the top stack to absorb moisture and keep baggies from sticking.
Choose a clear bin with a wide opening so you can pull baggies smoothly. Fold baggies into consistent shapes so the stack stays even. Apply a label to the front center and write the category in short words. Fill the bin to about two-thirds so baggies don’t spill when you pull one out. If the bin lid is see-through, wipe it so glare doesn’t hide your label.
Skip thisAvoid mixing bag sizes in one bin; uneven stacks look messy fast.
12. Drawer-Style Crisper Baskets for Produce Snacks
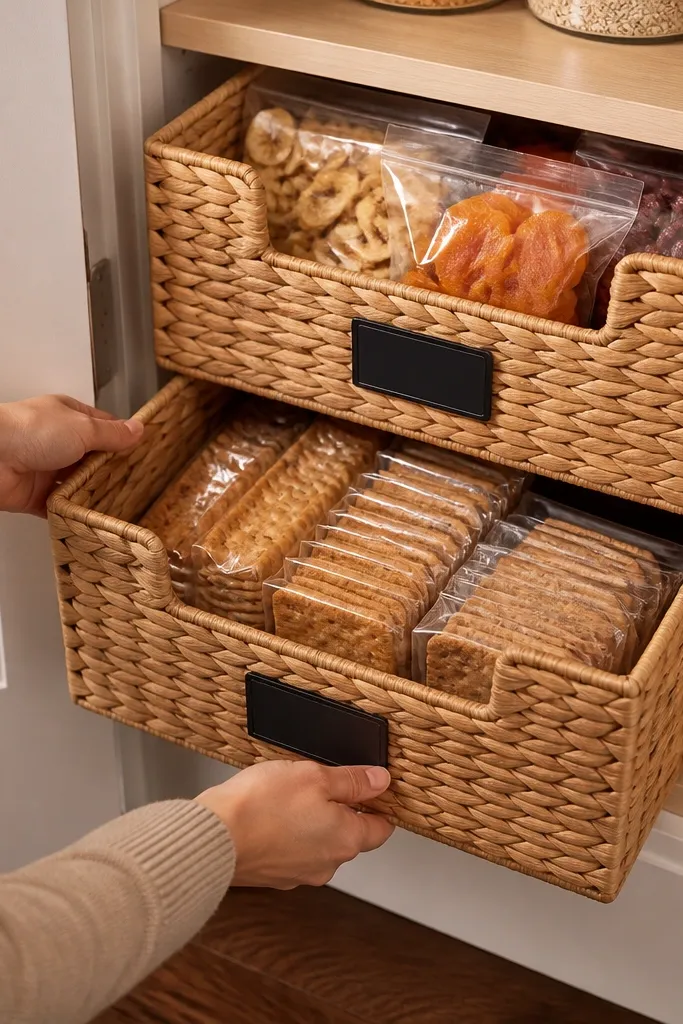
If you store dried fruit, crackers, or snack packs in baskets, you can make them look like mini drawers. The trick is using baskets that slide together visually — same front height, same spacing, and labels placed at the same spot. This creates a “furniture” look in the pantry, not a pile-of-items look. It’s also practical: you can pull one basket out to grab what you need without disturbing everything else. Great for snack shelves and the area closest to the kitchen.
Pick two or three baskets with similar front widths and heights. Add label tape on the front edge so it’s readable when baskets sit in a row. Place the baskets on the shelf so their front rims align in a straight line. Add a liner sheet in each basket to keep crumbs from falling between items. Fill each basket with one snack category and keep the basket height consistent so the row looks even.
Use thin labels on the basket front edge instead of long labels; they look cleaner and don’t curl.
Avoid using baskets with different heights in the same row; the line looks uneven in photos.
13. Spill-Proof Powder Tray Using a Small Plastic Organizer
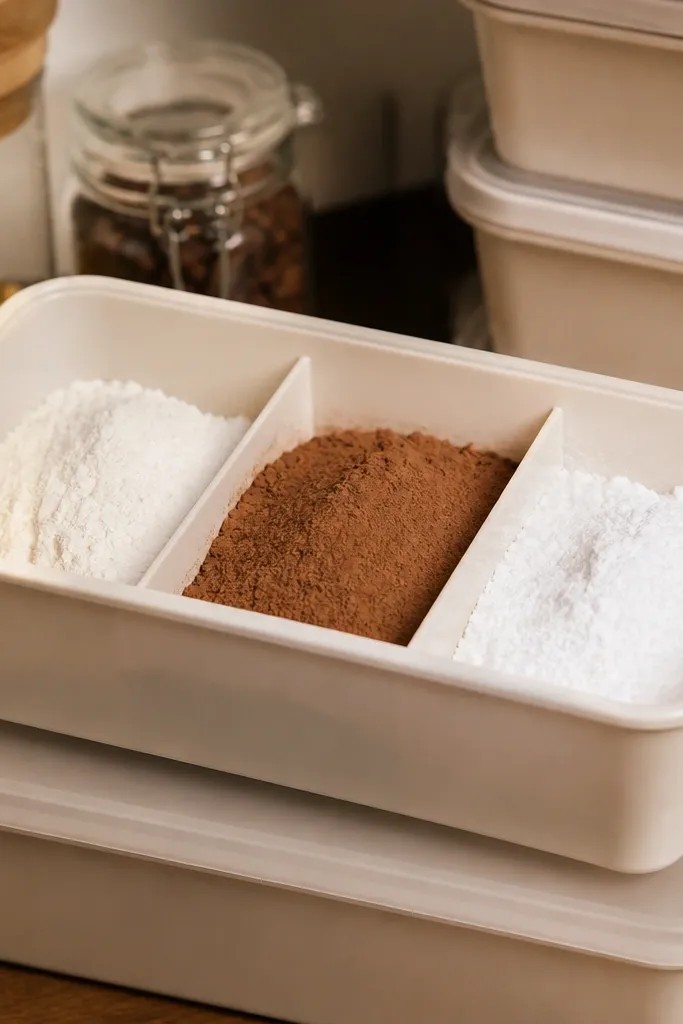
Powders and granules create the ugliest pantry clutter because they spill, then everything looks dusty. A small plastic organizer tray contains the mess and keeps containers from sliding around. You’ll get a neat compartment look that photographs cleanly, especially if you use matching container shapes. This is a strong pick for flour, cocoa, sugar, and baking mixes. It’s also easy to wipe down, so the pantry stays tidy between restocks.
Editor's noteUse a coffee filter under the container lid area if you notice tiny leaks; it keeps dust from spreading.
Choose a small plastic organizer tray with multiple compartments or a shallow grid. Set your powder containers inside with lids closed, then test for fit so nothing bumps and tips. Label each compartment or label the container front with short names. Place the tray on the shelf in a spot where you can access it without reaching across other bins. Wipe the outside of containers and the tray before you finish, since powder dust shows up on clear plastic.
Skip thisAvoid placing powders directly on the shelf liner; spills look worse than you think.
14. Cordoned Snack Wall with Clear Cup Holders and Tape Labels
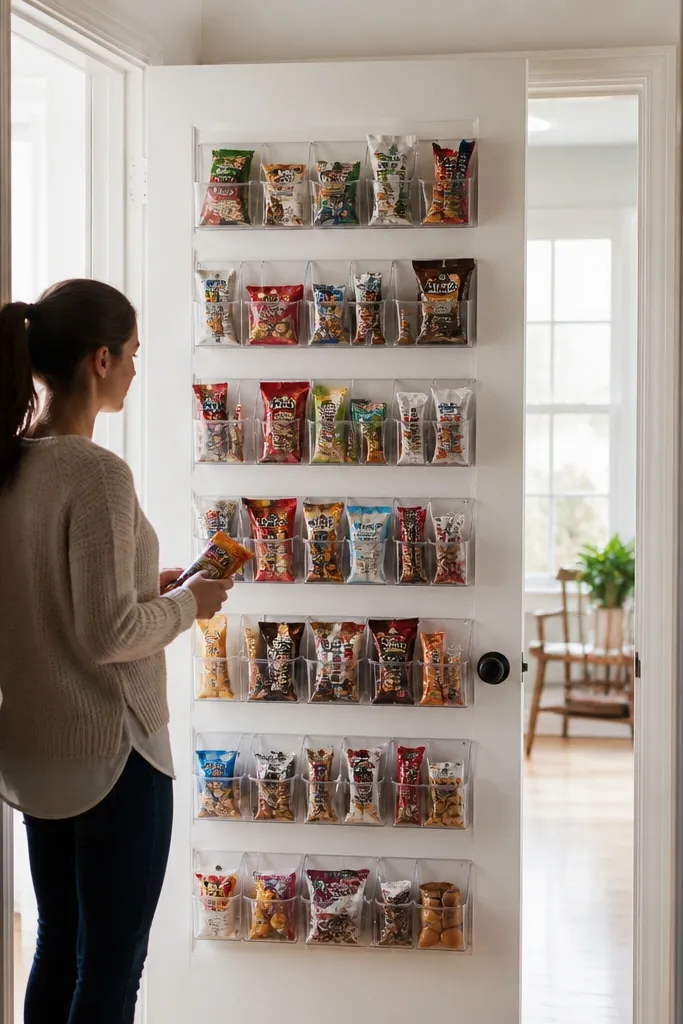
If your pantry door has room, you can use it like a snack wall. Clear cup holders let you store snack packets upright and visible, and the labels keep the wall looking neat. This setup looks good because the items face forward like a mini display. It also reduces shelf clutter since you’re removing small snacks from the main shelf. Great for grab-and-go items like tea packets, single-serve oatmeal, and snack bags.
Measure the door or inside panel and choose cup holders that match the surface. Attach holders with the right mounting method for your door type — adhesive for smooth surfaces or screws if you have wood framing. Place packets upright in the cups and adjust spacing so labels aren’t hidden. Add label tape directly on each cup front, keeping the text short. Stand back and check alignment — the whole point is a straight, “store display” look.
Use the same label size on every cup; it makes the door look intentional.
Don’t mix cup heights; uneven rows read as clutter even when labeled.
15. White Peg Hooks for Utensil Storage Over Pantry Shelves
Counter clutter in a pantry often comes from tools that don’t have a home: measuring spoons, mini spatulas, and jar openers. Peg hooks let you hang these items neatly and keep the shelf surface clear. The look is clean because everything hangs at the same height and labels can face outward. This also frees up shelf space for food containers, which makes the pantry feel bigger. It’s a simple DIY that still looks styled in photos.
Pick a peg hook strip or small pegboard panel and mount it above the shelf line where it won’t bump your head. Hang utensils in matching groups so the visual weight is balanced. Add label tape to each hook area or to a small tag attached to the handle. Keep the heaviest items on the lower hooks so the arrangement stays straight. Wipe hooks and handles so fingerprints don’t dull the white finish.
Group by use: baking tools in one section, pantry tools in another, so you’re not hunting.
Avoid hanging random sizes close together; it creates a messy “grab bag” look.
16. Stackable Lid Rack for Small Condiment Jars
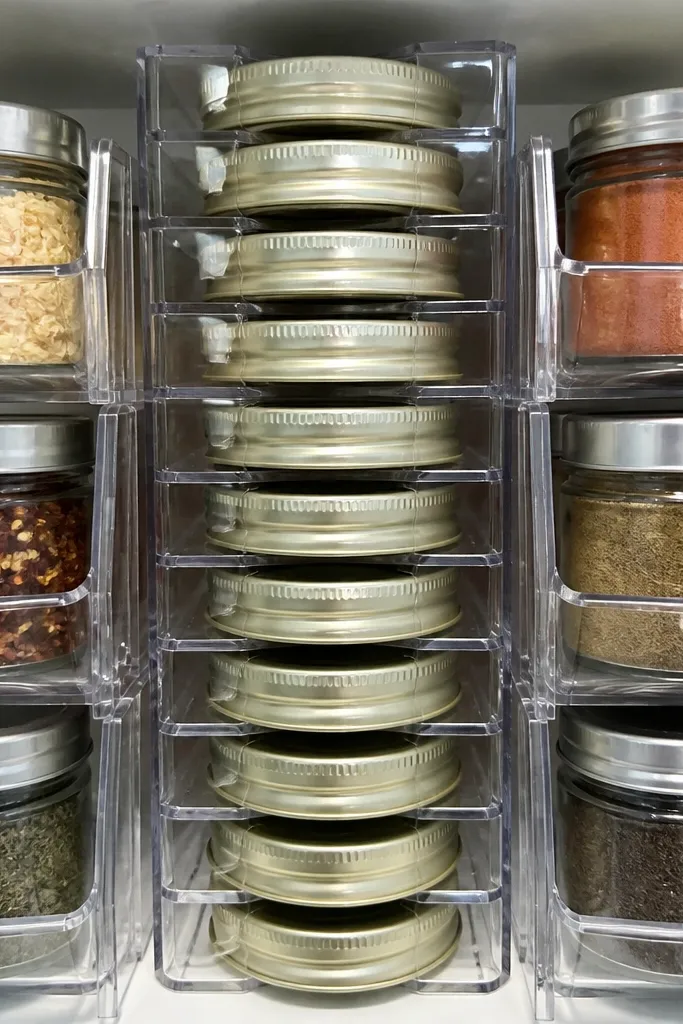
Condiment jars and their lids are the fastest way to ruin a pantry look. This build keeps jars aligned and keeps lids from becoming a pile. Use small clear containers or stackable organizer pieces to create a lid rack effect that looks orderly. The photogenic part is the uniform lid orientation and the straight label fronts. It’s perfect for small items like mustard, hot sauce, pickling spices, and jam jars. If your pantry has “misc jars everywhere,” this is the fix.
Choose a stackable organizer setup that can hold small jars upright and keep lids from falling. Arrange jars in a tight row and label each jar front with tape. Store extra lids in a separate compartment or small clear bin so they don’t get mixed. Keep lid orientation consistent by placing lids flat in slots or in a bin with a divider. Place the jar-lid system on the shelf where you can see the labels without pulling everything out.
Label lids too — it prevents the “which lid goes with what” mess later.
Avoid mixing jar heights in the same row; it makes the shelf look uneven.
17. Clear Bin + Bamboo-Look Handle for Flour and Sugar
If flour and sugar are in mismatched containers, the pantry looks chaotic even when the rest is neat. A clear bin with a handle gives you a clean, grab-friendly unit and keeps the label visible. The handle also makes the bin look more “designed” than a plain container. Store flour and sugar in separate bins so you don’t end up with one big dumping ground. This idea looks especially good on white or chalky shelf liners because the clear plastic pops.
Pick two clear bins with similar shape and lid style so they match on the shelf. Add label tape to the front center of each bin and keep the wording short. Fill with flour and sugar, then wipe the outside before placing them back. Place the bins side by side with a small gap so labels are readable. If you have smaller baking mixes, add them in a matching small bin above or beside.
Use a funnel when filling so the rim stays clean and the label doesn’t get smudged.
Avoid using different bin styles for flour and sugar; mismatch shows immediately.
18. White Snack Boxes with Window Labels for Front-Shelf Pop
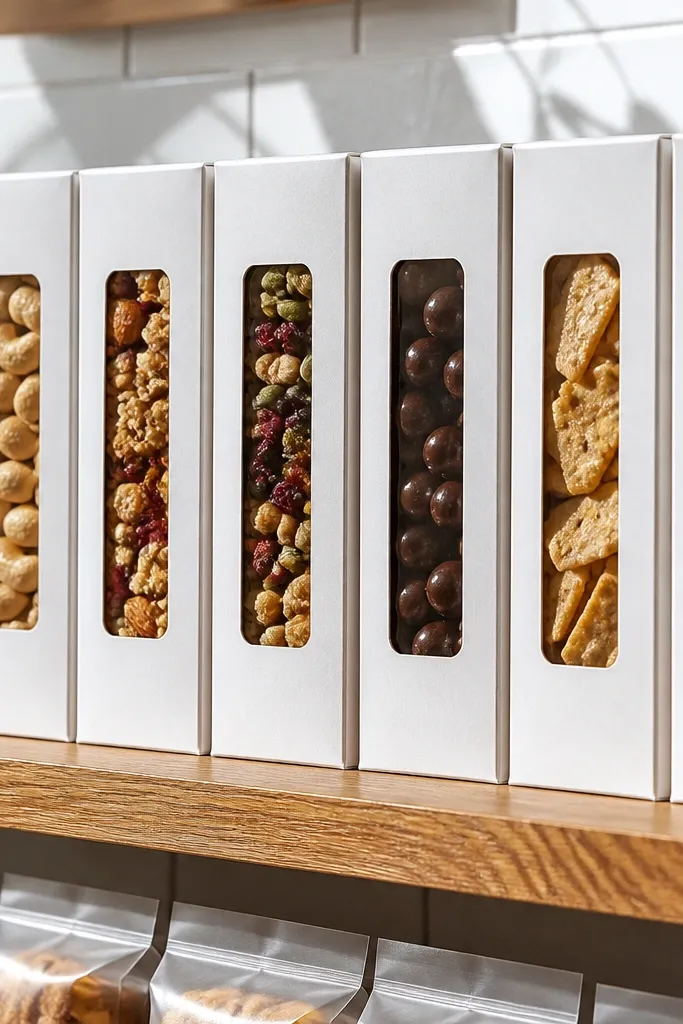
This is the “front shelf looks like a store” idea. White snack boxes make everything look bright, and a window-style label strip keeps the focus on the category name. Put snacks that you actually grab daily into this set so the look stays consistent. The uniform boxes create a visual line, and the label strip gives you clear direction without clutter. This works for cereal toppings, granola, pretzels, and snack packs that are currently in random bags.
Choose white boxes or baskets with similar sizes and lids. Apply label tape strips to the front in the same position on each box. Fill each box with one snack type and keep the fill level consistent so the front looks level. Arrange boxes in a row on the hero shelf where the labels face outward. Wipe the fronts before you step back to check alignment.
Use all-caps labels so they read clearly through distance and pantry lighting.
Avoid mixing box sizes in one row; uneven heights kill the store-display look.
19. Wire Shelf Basket Drawer for Tea and Coffee Packets
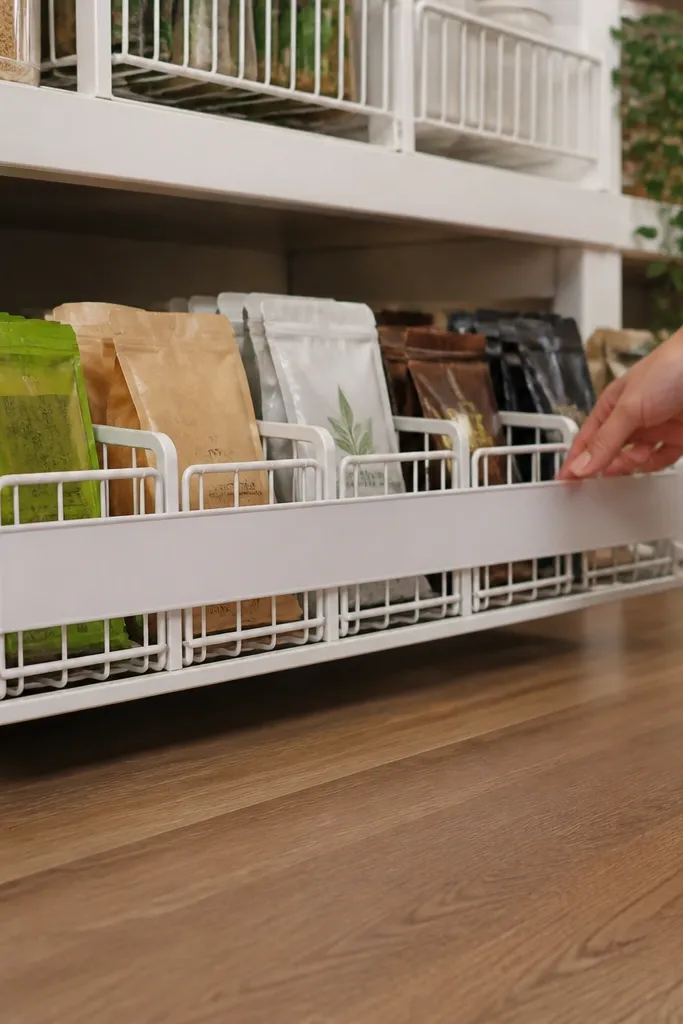
Tea and coffee packets are small enough to clutter, but they look neat when you store them in a basket drawer setup. Wire baskets work well because they keep packets from trapping moisture and the open sides make the contents visible. The drawer look comes from placing labels on the front and keeping the basket row aligned. This is a practical, photogenic solution for people who hate rummaging for the right tea bag. It’s also easy to refresh because you can swap packets by season.
Pick a wire basket that fits your shelf depth and has a front edge you can label. Add a thin liner so packets don’t slip through the wires. Label the basket front with category names like “Tea” and “Coffee.” Stack packets upright and keep the height consistent so the front edge looks straight. Place the basket at eye level and keep one category per basket to maintain the clean look.
Use a label width that matches the basket front edge for a tight, finished look.
Avoid stuffing packets in sideways; it makes the basket look lumpy and messy.
20. Clear Bin Pantry Organizer for Breakfast Cereal Toppers
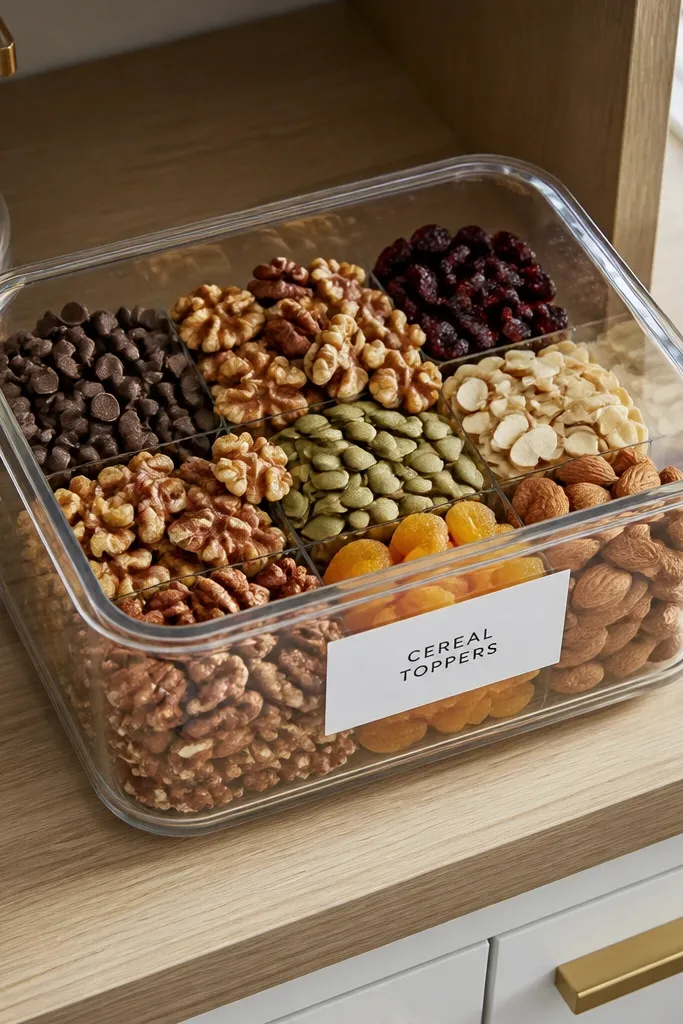
Cereal toppers are the pantry equivalent of “small chaos.” Nuts, chocolate chips, and dried fruit end up scattered in bags because they’re too small to store neatly. A clear bin gives you visibility and keeps everything in one place, while the centered label makes the bin look like it belongs. This idea also prevents the “random bag corner” look on shelves. It’s great for anything you scoop or grab for breakfast and want ready-to-go.
Editor's noteWipe the inside of the lid and the bin rim so condensation doesn’t fog the label area.
Choose a clear bin with a lid that seals to keep pests out. Put similar items together so you don’t end up with a bin that looks like mixed trash. Apply label tape to the front center and write the category in short words. Fill the bin to about two-thirds so items don’t spill when you open the lid. Place the bin on the shelf near where you make breakfast so it stays used.
Skip thisAvoid using a bin that’s too small; overfilling makes the front look messy.



