
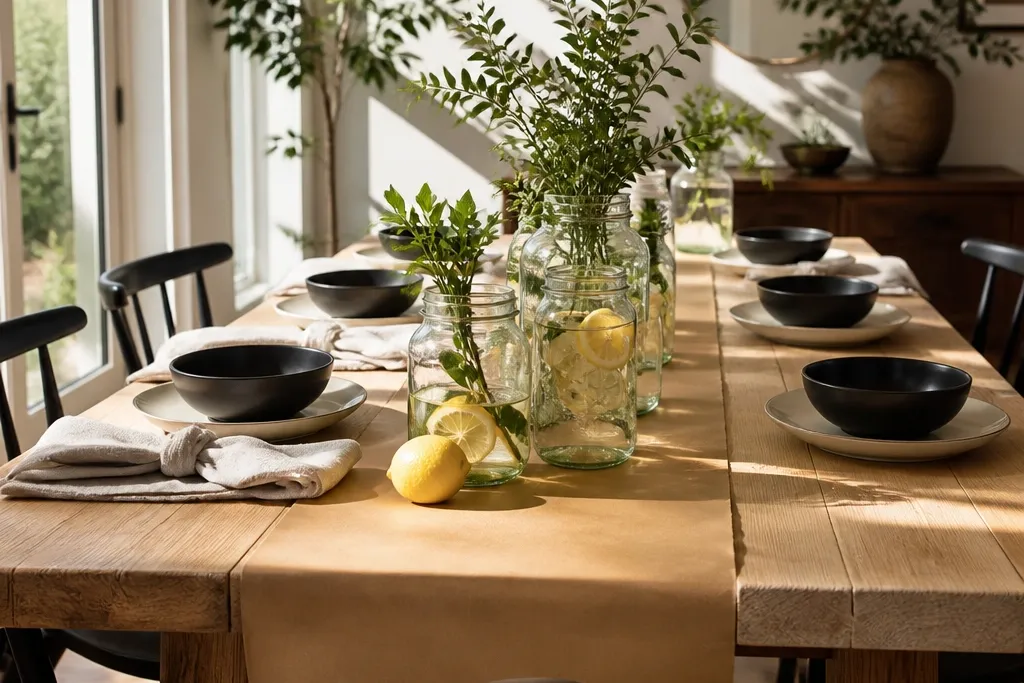
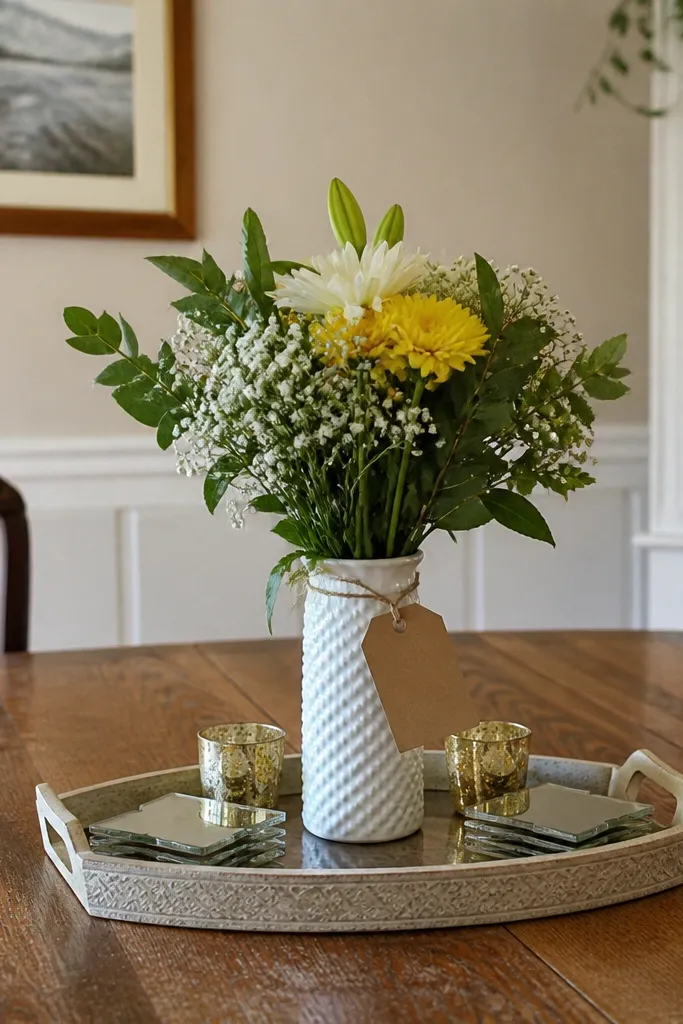
1. Dried Citrus + Candle Trio on a Wood Riser
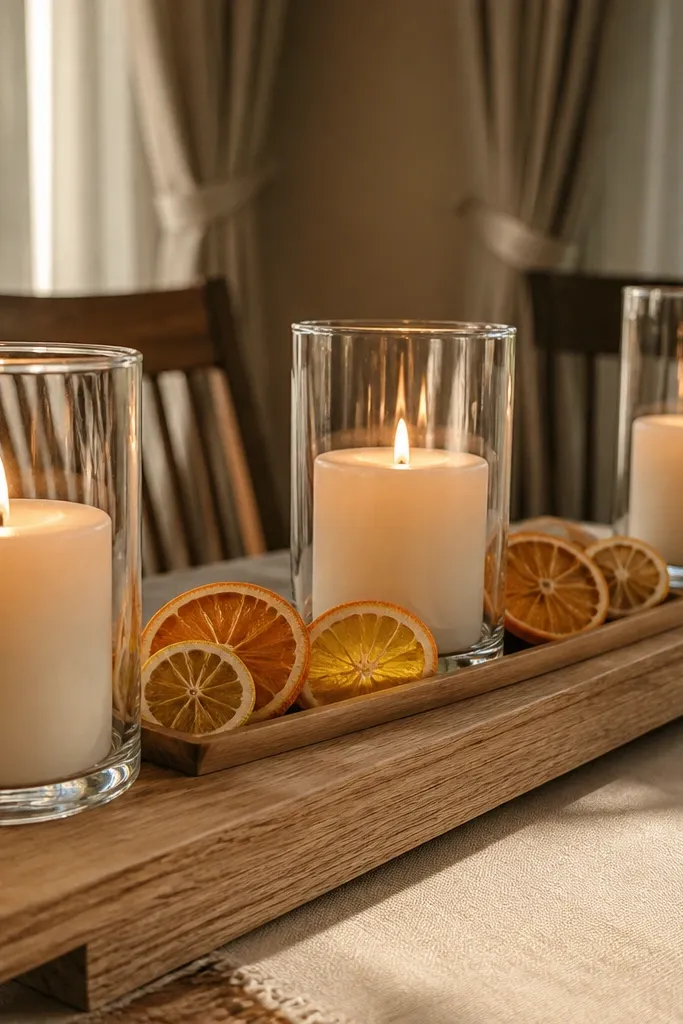
This setup looks bright and “bistro” without needing expensive florals. The dried citrus adds color that doesn’t wilt, and the trio of candles gives you that restaurant rhythm across the table. Use a wood riser or stacked books covered with a cloth so the candles sit above the table line — it instantly cleans up the silhouette. It works best for fall and winter dining, but the citrus color also pairs well with bright spring tables. Skill level is easy, and you can do it in an afternoon with items you can find at any grocery store.
Start by making a base: place a small tray or wooden board on your table, then set it on a riser that lifts it 2-4 inches. Arrange three candles in a loose triangle and secure tall stems with floral tape if you’re using faux or dried branches. Add dried citrus slices around the candle bases, then fill gaps with a few cinnamon sticks or dried eucalyptus leaves for texture. Finish by tying a thin strip of natural twine around the riser for a tidy edge.
Editor's noteIf you can, use unscented candles and add scent with the citrus — it keeps the whole table from smelling too strong.
Skip thisAvoid wet citrus or fresh fruit — it turns the look sour fast and can leave residue.
2. Chalk-Painted Bottle Bud Vases in a Row
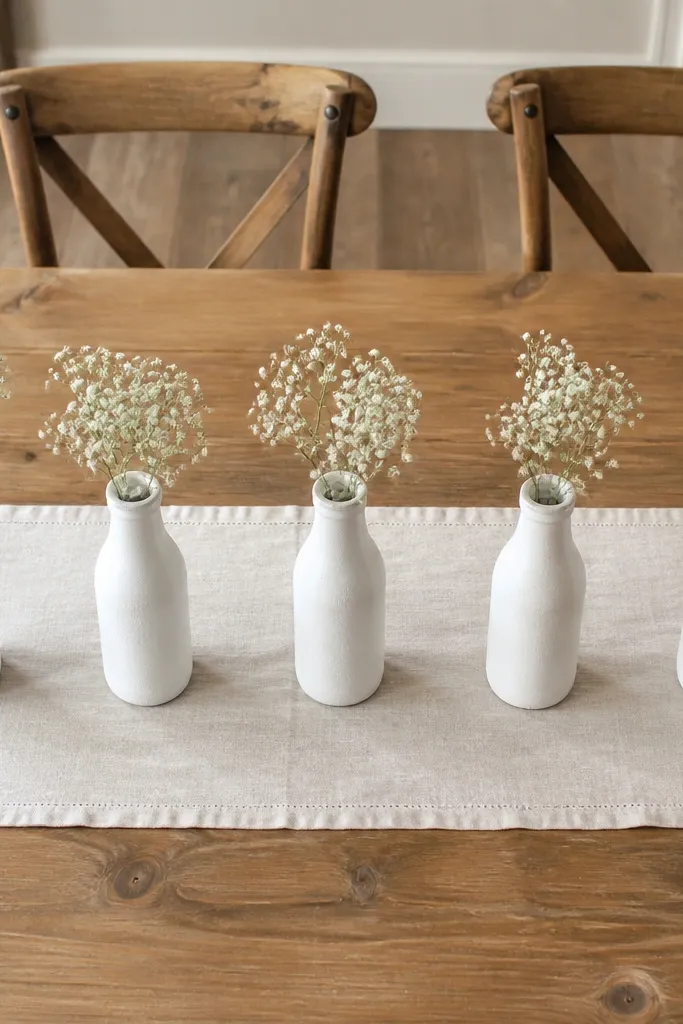
A row of bud vases is one of the easiest ways to make budget dining room table decor look styled instead of random. Bottle vases are cheap, and chalk paint turns them into a matching set without needing matching glassware. Keep it photogenic by using single stems per bottle and spacing them evenly — the negative space looks intentional. This works for any season because you can swap stems: baby’s breath, dried grasses, or a few eucalyptus leaves. It’s a great project for beginners because it’s mostly paint and arrangement.
Find 3-5 glass bottles with similar neck shapes (thrift stores are perfect). Clean with dish soap, let dry fully, then lightly sand with 220-grit so paint sticks. Apply two thin coats of chalk paint and seal with a matte clear coat if the bottles will be handled often. When dry, add a small amount of water and insert one stem per bottle, then line them down the center of a tray or runner.
Editor's noteUse painter’s tape to mask clean stripes if you want a more graphic look than solid paint.
Skip thisSkip thick paint layers — they crack and look lumpy around the bottle curves.
3. Kraft Paper Runner with Block-Printed Lines
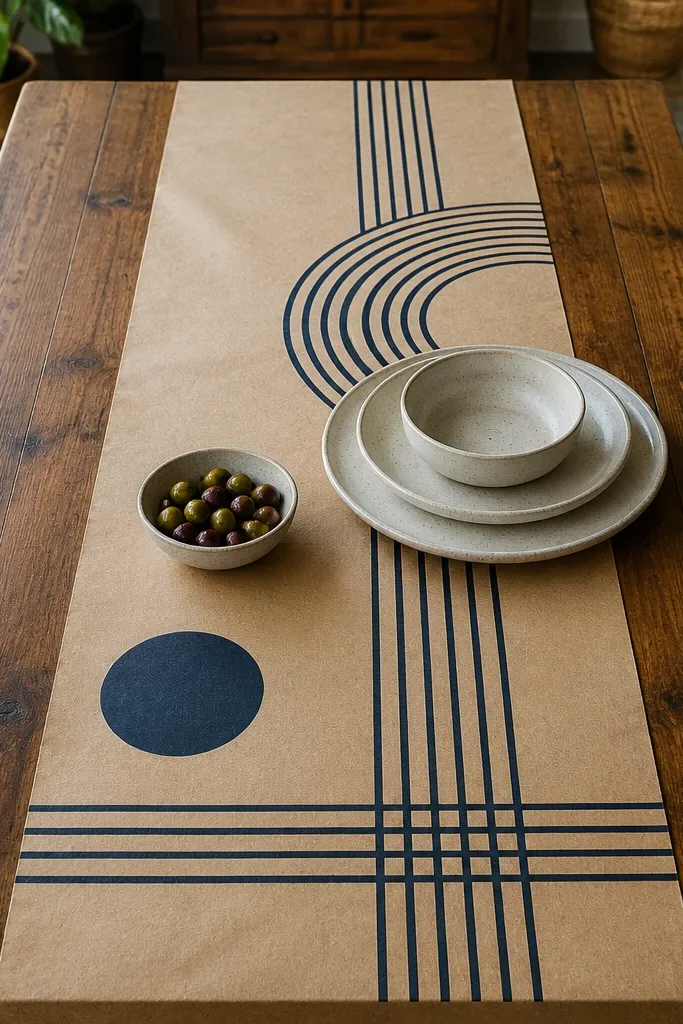
Kraft paper looks surprisingly high-end when it’s neat and repeatable. This runner gives you a strong base for your whole table, and the printed lines add a design detail without buying decor you’ll only use once. It’s also cheap: one roll of kraft paper can cover most tables, and block printing uses basic supplies. This is ideal for everyday dinners because it hides small spills and crumbs better than fabric. The look is clean, warm, and very “intentional” in overhead photos.
Measure your table length and width, then cut kraft paper to leave 6-10 inches of overhang on each side. Make a simple block stamp: use a potato or a small foam block and cut a straight line pattern with a craft knife. Mix craft paint with a little water so it prints cleanly, then stamp parallel lines across the runner with light, even pressure. Seal with a clear matte spray if you want it to survive more table life, then place under your centerpiece and napkins.
Editor's noteTape the runner to a flat surface while stamping so your lines stay straight.
Skip thisDon’t use glossy paint — it smears under dining light and looks messy.
4. Thrift Tray + Mirrored Coaster Scatter (No Flowers Needed)
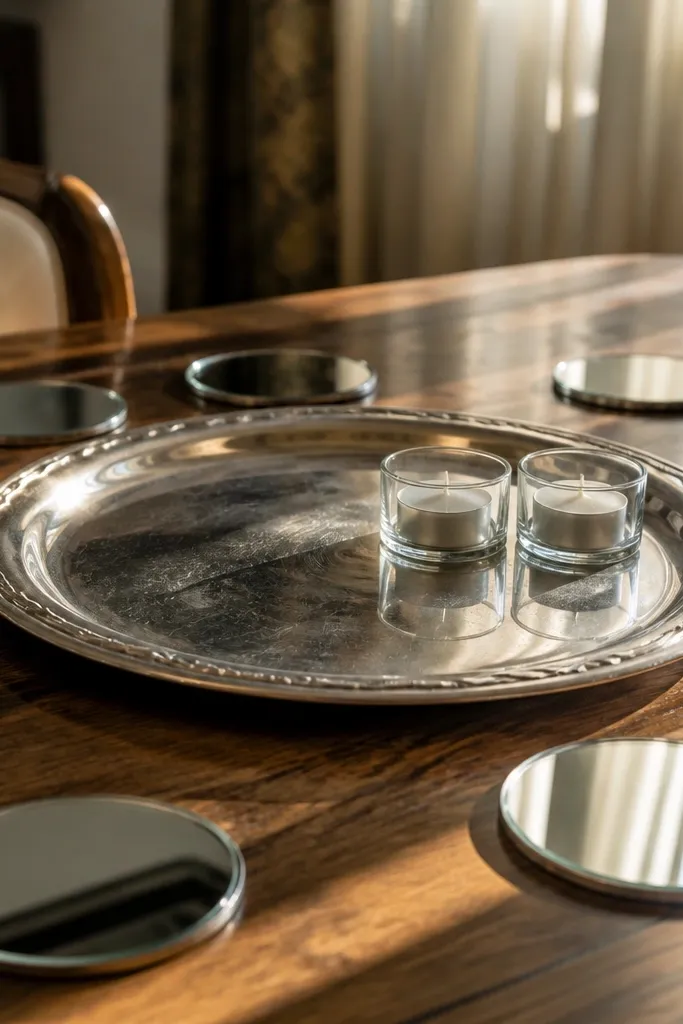
If you want photogenic budget dining room table decor without the hassle of arranging stems, do a coaster scatter. Mirrored coasters catch light like tiny tiles, so your table looks styled even with minimal items. Start with a thrifted tray because it anchors the whole scene and keeps small pieces from looking like clutter. Add two pillar candles and a small bowl for balance. This works for parties, holidays, and any time you want “wow” without floral cost.
Pick a tray size that covers about one-third to half the table length. Place 8-14 mirrored coasters randomly but keep them within the tray edges. Set two pillar candles upright near opposite sides and add a small metal or ceramic bowl in the center. If you have them, tuck in a few faux leaves or a single faux branch to add organic shape.
Choose coasters that are all one finish (all silver or all gold) so the scatter reads intentional.
Avoid mixing too many finishes — it turns into visual noise fast.
5. Gingham Napkin Knots with a Plain Stoneware Bowl
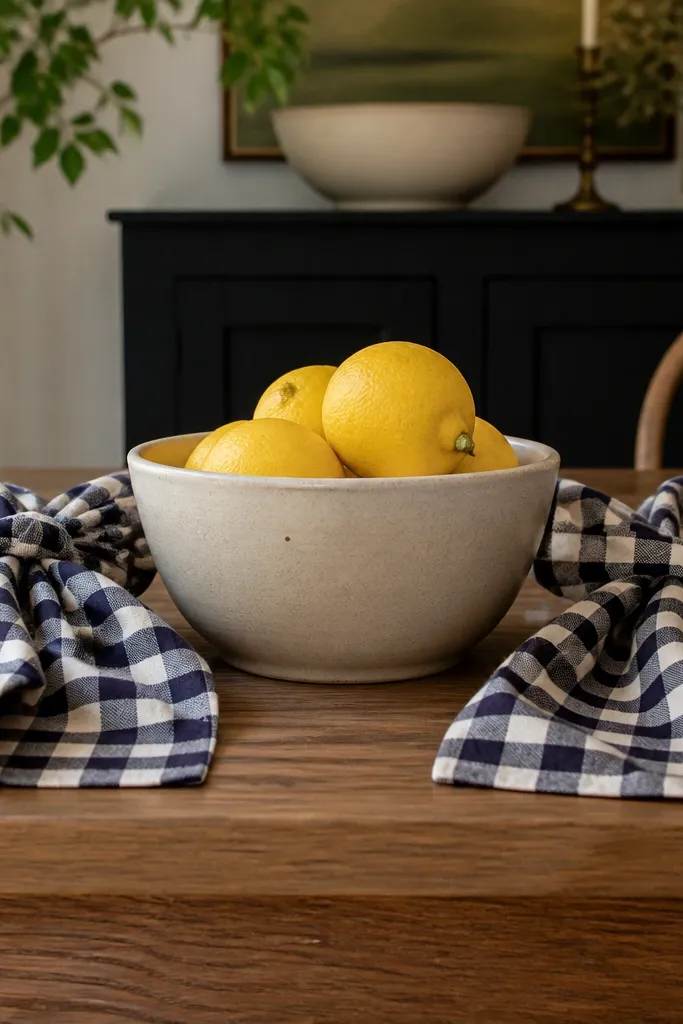
Napkin styling is one of the highest impact moves for budget dining room table decor. Gingham knots look crisp, and they frame your centerpiece so the table reads “done.” Pair it with a plain stoneware bowl because it gives the scene weight and prevents the whole table from looking too busy. This setup is best for casual dinners, brunch, and spring/summer tables. It’s also fast: you can finish it in 20 minutes and it looks good from every angle.
Buy or thrift 4 matching gingham napkins (cotton or linen look best). Fold each napkin into a rectangle, pinch at the center, and tie a simple knot so the knot sits about 2 inches above the plate. Place a stoneware bowl in the middle and fill it with one thing only: lemons, a few oranges, or a bundle of dried wheat. Set the remaining table décor low so the napkin knots stay the visual focus.
Steam or iron the napkins first — the folds make the knot look sharp instead of sloppy.
Don’t overcrowd the bowl with mixed items — one hero fill looks cleaner.
6. Painted Clothespin Place Card Holders on a Mini Tray
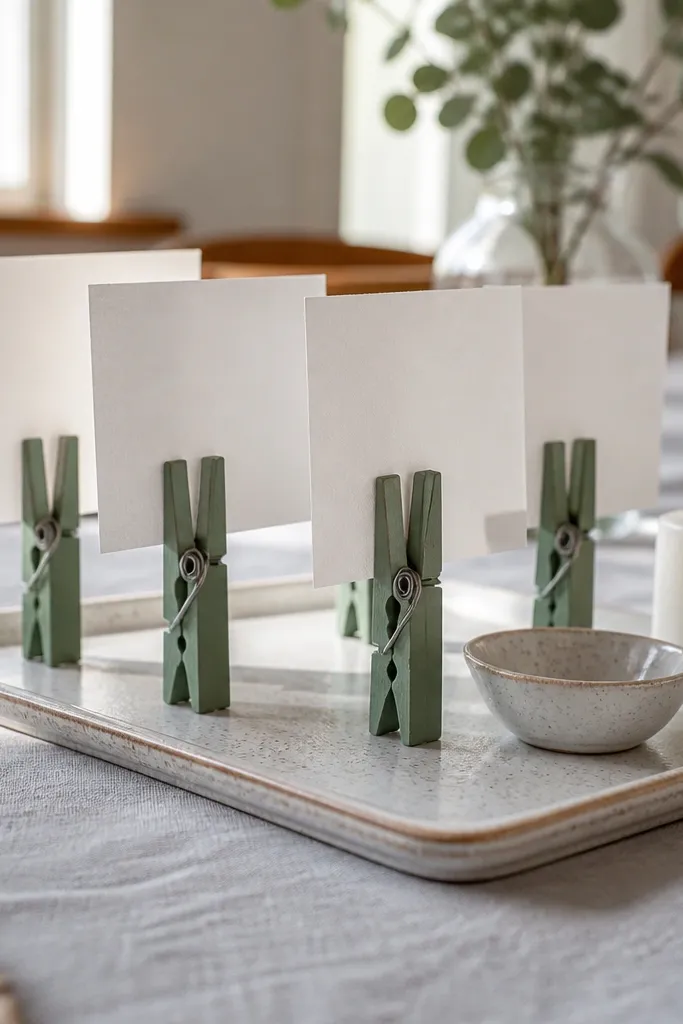
This idea turns place cards into decor, which is the most budget-friendly kind of table styling. Clothespins are cheap, easy to paint, and they create a playful vertical line that looks great in photos. Use a mini tray or shallow basket as the base so everything stays grouped. Put a small candle or a pinch bowl on the tray too, and you get a centerpiece that doubles as seating help. It’s best for dinner parties and holiday tables where you want structure.
Paint clothespins with acrylic paint in two coordinated colors, then let them dry and seal with a clear matte coat. Cut place cards from cardstock and fold them so they stand with the clothespin gripping the bottom edge. Arrange the clothespins on a mini tray in two rows, then add a small filler item like pine cones, faux berries, or a single bud stem in a tiny jar. Place the tray center-front on the dining table so guests see it when they sit.
Editor's noteUse a fine-tip paint pen to add tiny dots or numbers — it looks intentional without extra work.
Skip thisAvoid glossy paint on the clothespins — it reflects harsh light and looks cheap.
7. Lemon-Salt Glass Jars as a Table Scatter
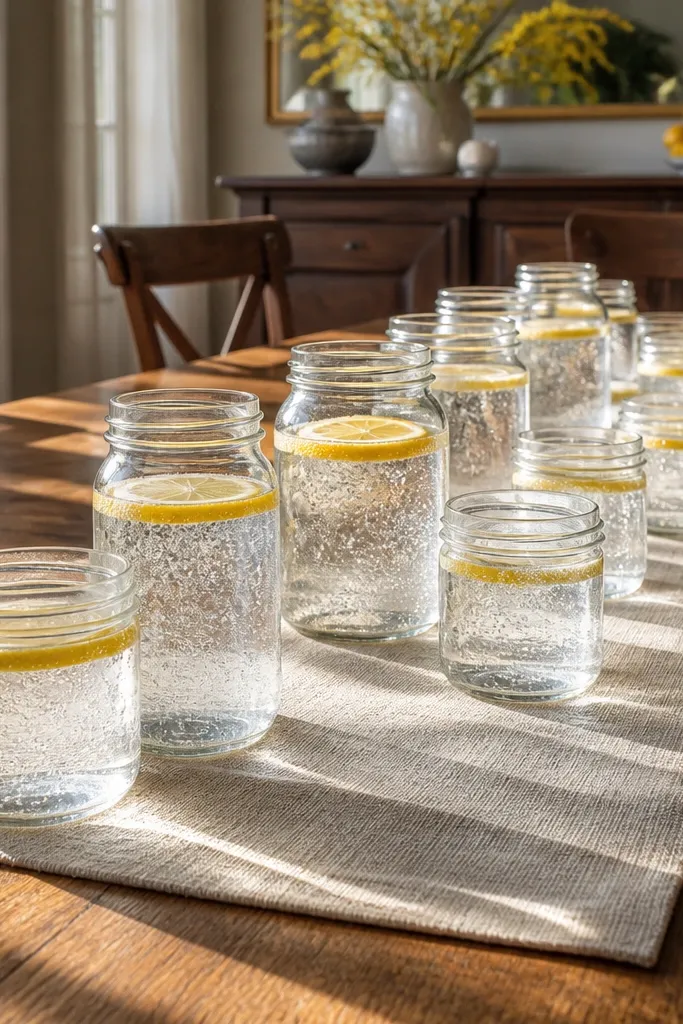
This is a clean, sunny look that costs almost nothing and fills empty space fast. Small glass jars scattered across a runner give you sparkle and height variety without flowers. The lemon slices add color and the clear salt (or sugar) makes the jars look bright and textured. It’s perfect for summer and spring tables, especially if you want something that still looks good after a meal. The build is simple and the payoff is high.
Clean 6-10 small glass jars or spice jars and dry them completely. Add a thin layer of clear salt or sugar, then tuck in dried lemon slices or thin lemon rounds that have been fully dried. Layer more salt to hold the slices in place, then cap them with lids or leave them open if they’re protected from splashes. Scatter them along the centerline of the table on top of a runner, then place two taller items (one candle, one bud stem) to anchor the ends.
Editor's noteUse dried lemons with a matte surface — shiny slices look wet and ruin the aesthetic.
Skip thisDon’t use fresh lemon slices — they spoil and stain the glass.
8. Book Stack Riser with a Ceramic Catchall
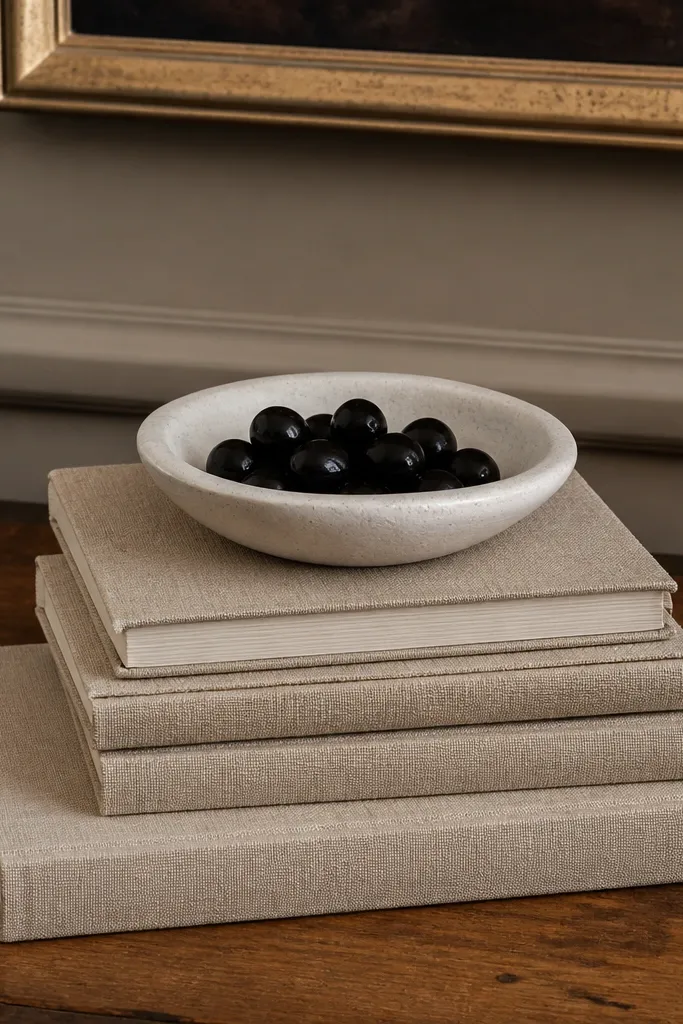
A riser fixes the biggest budget dining room table decor problem: everything sits too low and looks flat. Stacking books is cheap, and covering them with matching paper or fabric makes the riser look like a designed pedestal. Put a ceramic catchall on top and fill it with one type of object, like black olives for a styled drink night or pinecones for winter. This works with any table shape because you can scale the height. It’s also beginner-friendly and fast.
Choose 2-3 books with similar height and cover color, then wrap them tightly with kraft paper or a fabric scrap and tape the edges underneath. Stack the books and place a ceramic catchall on top, centered. Fill the bowl with a single item type so the surface stays clean — dried eucalyptus, cotton stems, or seasonal fruit. Add a small candle on the lower tray area so the scene has both height and glow.
Editor's noteWrap the books with paper first, then add a thin strip of linen at the front edge to hide the seams.
Skip thisDon’t use a tall riser that makes the centerpiece block sightlines — keep it under about 14 inches tall.
9. No-Sew Linen Table Runner with Heat-Bond Hem
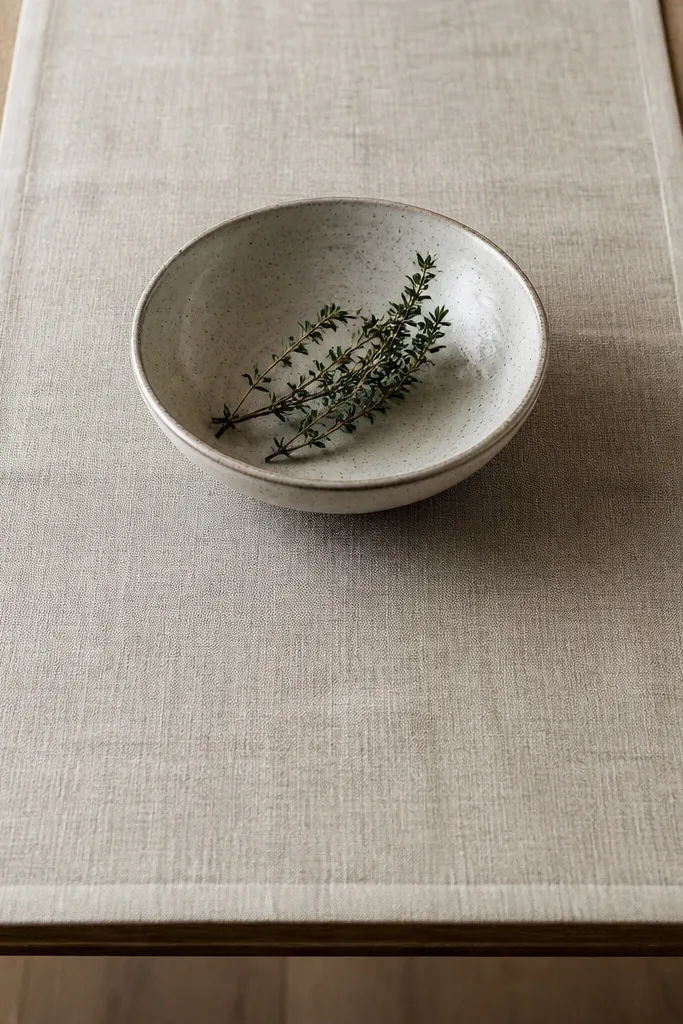
Fabric changes everything. A linen runner makes budget decor look intentional because it gives your centerpiece a stable, matte background. You don’t need to sew: heat-bond hem tape makes clean edges fast and keeps the runner from fraying. This is ideal if your table is usually bare or you want a consistent base you can reuse all year. It’s more work than the scatter ideas, but the runner becomes a reusable “stage” for every centerpiece you try.
Buy a linen blend or cotton-linen fabric in a neutral (cream, oat, or warm gray). Cut it to runner size so it overhangs 4-6 inches on each side of the table. Fold both long edges in 1/2 inch, place heat-bond hem tape between fabric layers, and press with an iron following the tape instructions. Press the short ends too if you want a finished look, then iron flat and lay it centered.
Editor's noteChoose a runner width around 14-16 inches — it looks balanced on most dining tables without swallowing the centerpiece.
Skip thisAvoid thin, clingy fabric — it wrinkles and makes the whole table look sloppy.
10. Mini Terracotta Planter Centerpiece with Moss + One Stem
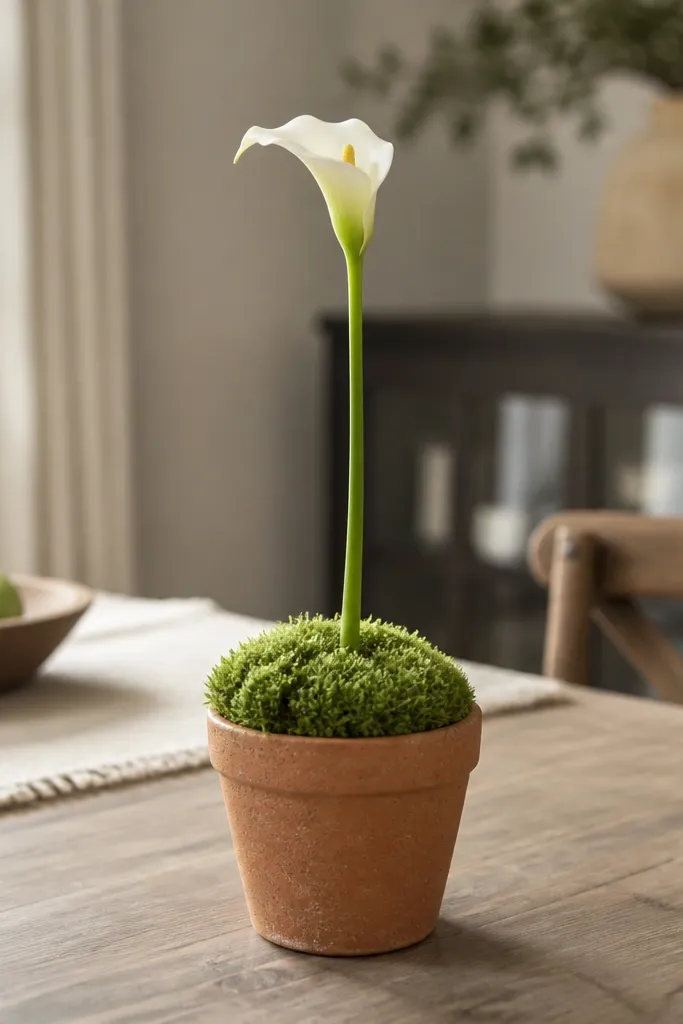
This is the “one hero plant” approach to budget dining room table decor. Terracotta looks warm and expensive, and moss gives you that rich green texture without the mess of real flowers. One long stem keeps the shape tall and elegant instead of bushy. It’s perfect for dining rooms that feel too plain or too modern, because terracotta softens everything. The build is simple and the centerpiece lasts longer than fresh bouquets.
Pick a small terracotta pot (about 4-6 inches wide) and clean it. Add a waterproof liner or plastic bag inside so water doesn’t soak the pot. Place a handful of preserved moss (or dried sheet moss) and insert one stem — dried eucalyptus, dried grass, or a single faux branch. Top with a few pebbles if you want a finished edge, then place the pot on a small saucer or tray.
Use a foam pin holder or floral pin behind the moss to keep the stem upright.
Skip loose moss without a liner — it sheds and makes a crumbly mess.
11. Candle Lanterns Made from Clear Cups and Spray Paint
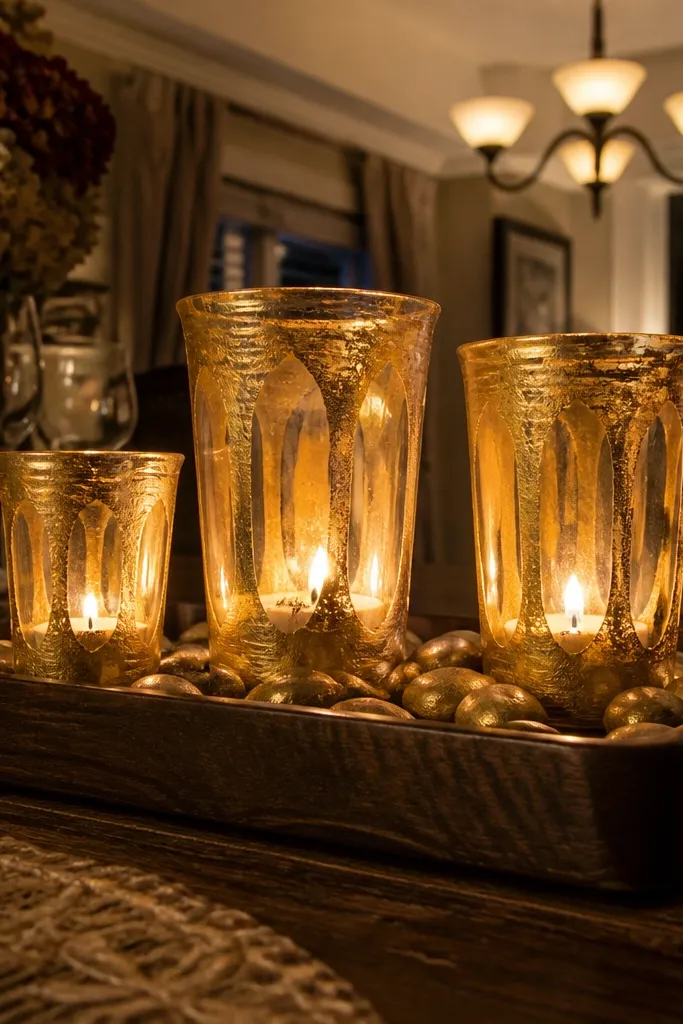
Lantern-style candles look high-end because the light bounces off glass and creates a glow. You can make them with clear plastic cups or glass tumblers and a light spray paint color. The trick is to spray lightly and leave some clear areas so the flame shows through. This is great for dinner parties because it creates atmosphere without floral upkeep. The look is cozy, warm, and very photogenic.
Clean clear cups and let them dry completely. Mask the bottom area where you want the candle to sit stable, then spray the cup in 2-3 thin coats from 10-12 inches away. Let cure fully per the spray instructions. Place a small LED candle or a real tealight inside, then set the lanterns on a mirrored tray or dark runner so the glow reads clearly.
Editor's noteIf you’re using real candles, use heat-safe glass and avoid spray paint near the flame area.
Skip thisDon’t spray too heavy — thick paint blocks the light and looks flat.
12. Checkerboard Coaster Border with a Single Center Bowl
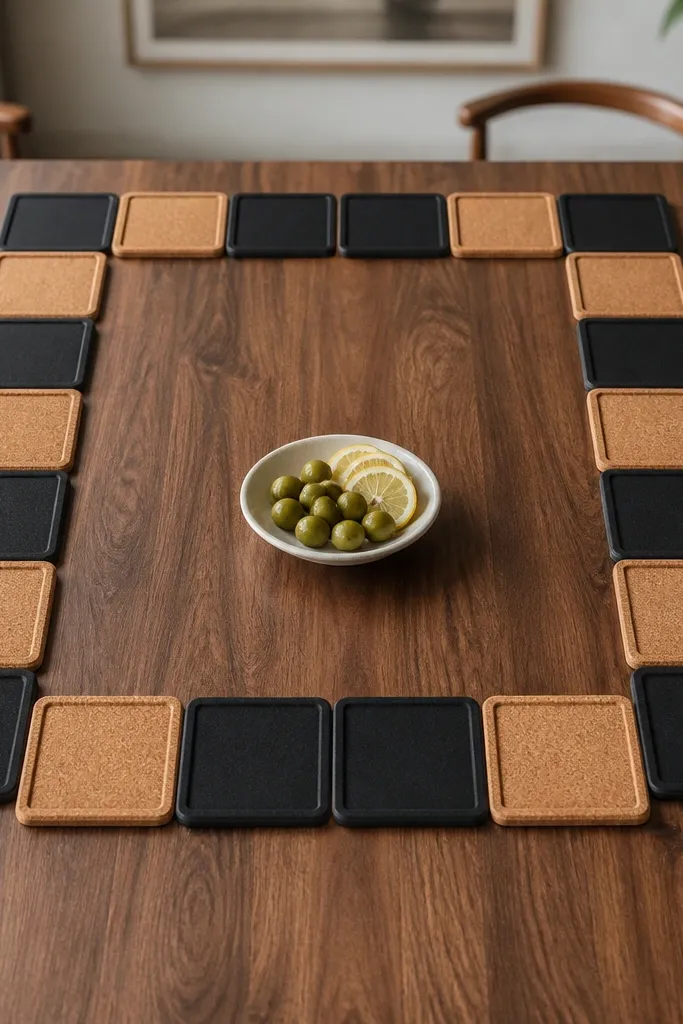
This makes your table look organized instantly. A coaster border frames your centerpiece and creates a clean visual edge, which is exactly what budget dining room table decor needs when the rest of the table is simple. Use coasters in two colors that match your chairs or table finish. Then keep the center minimal with one bowl and one fill. It’s great for everyday meals because you can swap the bowl fill without rebuilding the whole look.
Lay out a rectangle or oval boundary on your table using painter’s tape as a guide (remove after). Place coasters in a checker pattern inside the guide using 10-14 coasters depending on your table size. Center a single bowl (ceramic or wood) in the middle and fill it with seasonal items like apples, oranges, or decorative stones. Keep everything else off the table surface so the checker border stays the frame.
Use the same coaster material (all cork, all stone, or all felt) so the pattern looks crisp, not mixed.
Don’t use coasters of random sizes — the checker pattern breaks visually.
13. Paper Flower Pom-Poms on a Tray with Tea Lights
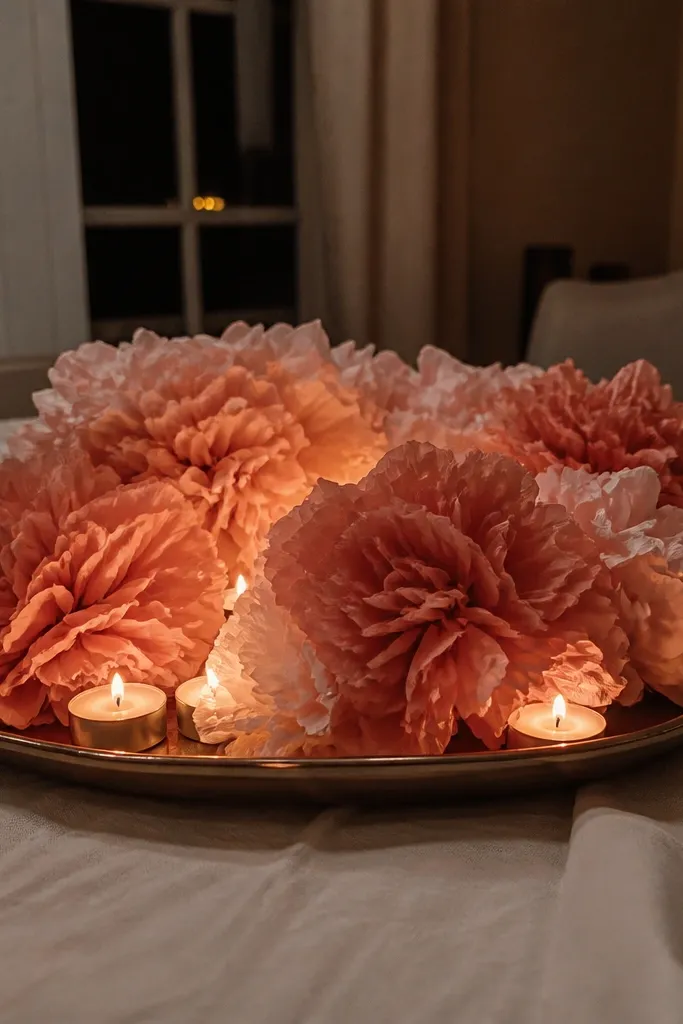
Paper pom-poms are one of the cheapest ways to get “party” energy on a dining table. They look soft and full, and because they’re lightweight you can place them on a tray without cluttering the table surface. The tea lights add warmth and make the colors pop under low dining light. This works for birthdays, bridal showers, and holiday dinners where you want photos to look fun and bright. It’s also a great way to use leftover tissue paper.
Cut tissue paper into squares (about 10-12 inches each) and stack 6-8 layers. Fold accordion-style, tie a center string tight, then fan out each layer to form a pom. Make 6-10 pom-poms in two colors. Place them on a shallow tray and set tea lights around the edges so the center stays clear. Keep the tray centered and leave space between pom-poms so they don’t look crushed.
Editor's noteUse matte tissue paper — it photographs better than shiny sheets.
Skip thisDon’t overcrowd the tray — leave at least 2 inches between pom-poms for shape.
14. Macrame-Look Jute Runner with a Simple Fringe Edge
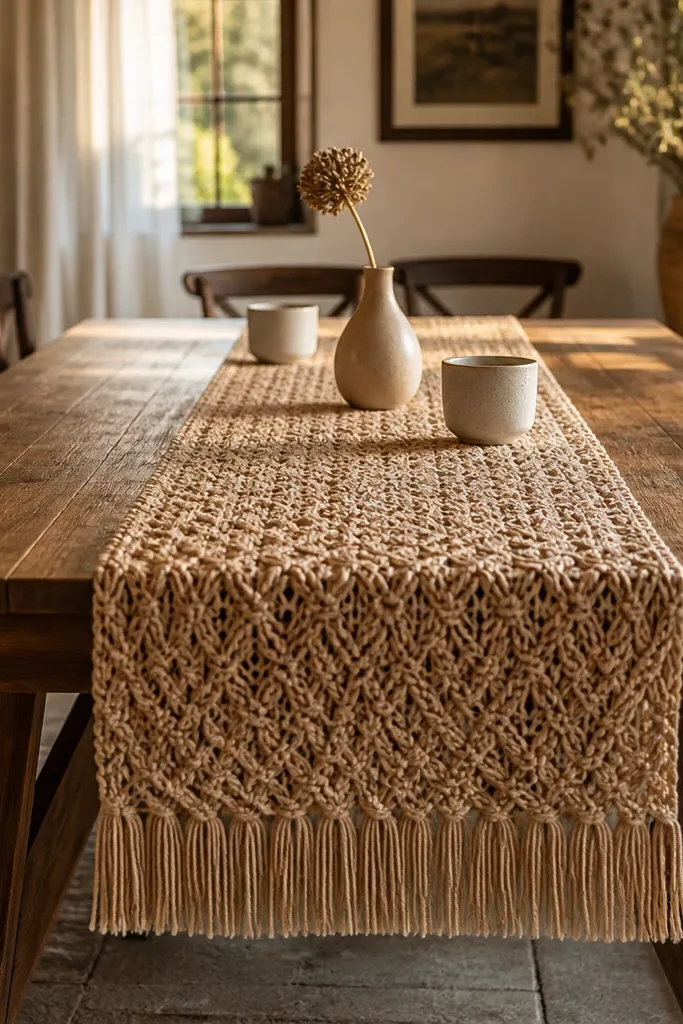
Jute has that natural, textured look that reads expensive when paired with clean ceramics. This runner gives you a macrame vibe without needing to actually knot anything. The fringe edge makes the table look styled even if you keep the centerpiece simple. It works especially well on farmhouse, boho, and warm modern dining rooms. You’ll spend more time trimming than building, but the result is a reusable base that looks good year-round.
Buy jute fabric or jute burlap with a stable weave in a width that matches your table runner size. Cut to length and iron flat if needed. For the fringe, mark lines about 1-2 inches apart along the short ends, then cut the fringe strips and comb them with a stiff brush so they separate evenly. Add a fabric glue line along the long edges or use heat-seal tape to keep it from fraying. Lay centered and place a candle tray or ceramic bowl on top.
Editor's noteBrush jute with a dry paintbrush to fluff fibers before styling — it looks fuller in photos.
Skip thisAvoid super-thin jute — it looks see-through and sloppy on a dining table.
15. Painted Wood Bead Garland Across the Center
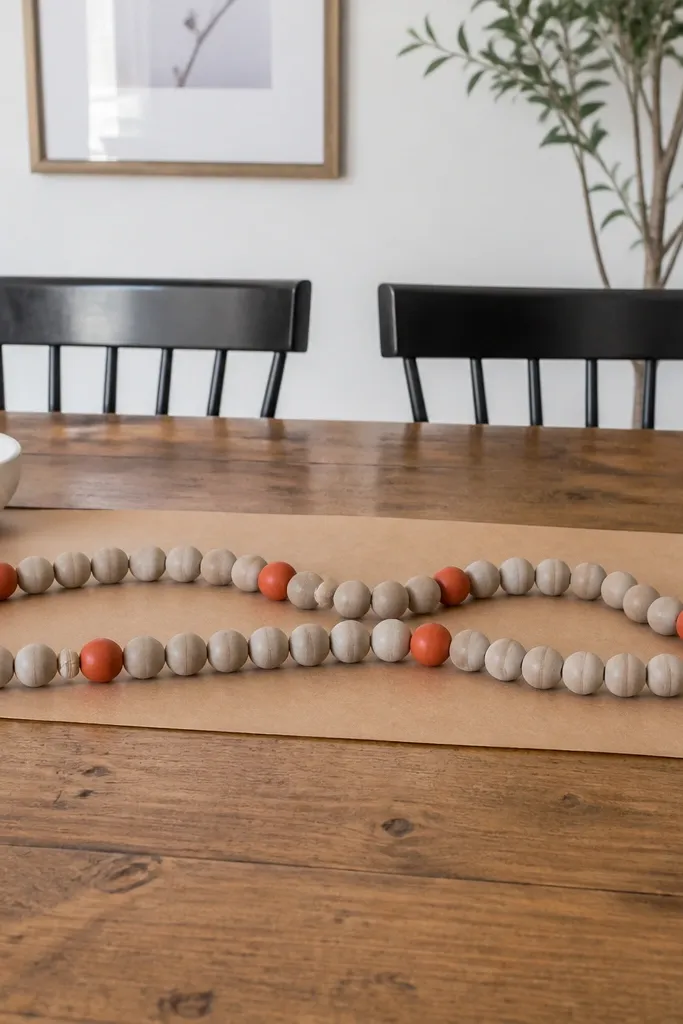
A bead garland is a low-effort way to get a line of color and texture across the table center. It looks styled because it creates a path your eyes follow, and it also hides empty space where people usually leave nothing. Keep bead colors neutral and add one accent color like terracotta or sage. This idea works for long tables because you can size the garland to your space. It’s also easy to store compared to bulky centerpieces.
String wooden beads onto twine or strong thread, mixing sizes if you like a natural look. Paint beads with acrylic paint in 2-3 neutral shades, then let dry and seal with matte clear coat. Lay the garland across your table center and anchor each end with small removable adhesive hooks or ties under the runner. Place a candle cluster or a small vase on top of the garland midpoint so it looks like the garland supports the centerpiece rather than competing with it.
Editor's noteUse matte clear coat — beads look chalky and soft instead of shiny-plastic.
Skip thisDon’t make the garland too tight — slack looks more natural than stretched.
16. Oversized Serving Spoon Candle Holder Hack
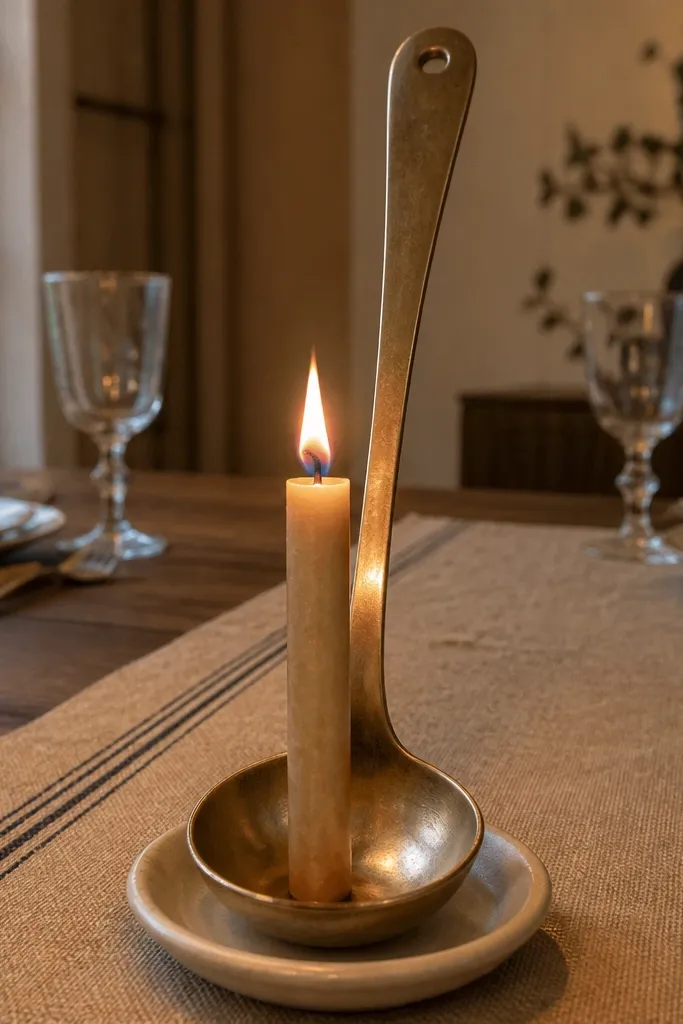
This one is weird in a good way. A serving spoon holds a candle and adds a sculptural, vintage-feeling element that reads “designed” even when the rest of the table is simple. It’s a great budget dining room table decor move because spoons are cheap at thrift stores and you don’t need many items. Pair it with a small bowl and a couple of matching details like salt shakers or napkin rings. It’s best for dinner tables where you want a focal point that isn’t floral.
Find a few large serving spoons with shallow bowls. Clean and dry them, then polish with a quick metal cleaner if needed. Place a tealight or LED candle into the spoon bowl and keep it stable with a small strip of double-sided tape on the candle base. Arrange the spoons on a tray or directly on the table center with a small bowl of pinecones or citrus nearby. Add one extra stem for height if the spoons sit low.
Editor's noteUse LED candles for easy placement — no heat worries and no wax mess on the table.
Skip thisAvoid spoons with deep, round bowls — the candle sits unstable and tips.
17. Single-Color Glass Bud Vase Wall with Painter's Tape Grid
This looks like a styled “mini installation” but it’s just a smart layout. A painter’s tape grid helps you place bud vases evenly so the table looks like it has a plan. Use one color glass or one repeated tint by choosing clear bottles with the same hue (smoked, amber, or clear). Then fill each with one stem so the grid stays airy. It’s perfect for narrow tables because it creates structure without taking up much width.
Center a runner or tray first, then apply painter’s tape to mark a grid layout (for example, 3 columns by 2 rows). Place 5-6 small glass bud vases inside the taped area so they align evenly. Fill each vase with one stem and adjust heights so they vary slightly but stay within 10-14 inches total. Remove tape carefully once everything is set. Add a tiny candle near one corner to break the symmetry.
Mix stem lengths: one short at 4-5 inches, one medium at 7-8 inches, one tall at 10-14 inches for a natural rhythm.
Don’t use tiny stems in tall vases — it looks like empty containers.
18. Seasonal Stone Bowl with Painted Pebble Scatter
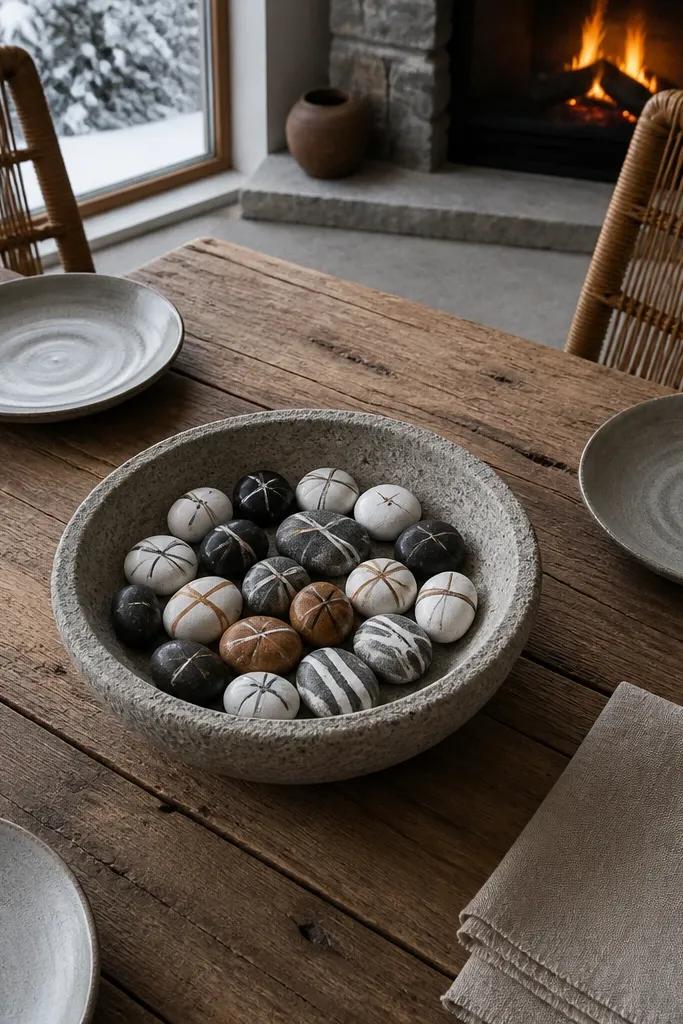
Painted pebbles give you a custom centerpiece fill without buying decorative fruit or expensive seasonal items. A stone bowl looks grounded and expensive, and the pebble scatter adds texture you can see even from far away. Keep the palette to one season color plus neutrals: white + black + warm brown for winter, or cream + terracotta + sage for spring. This setup works year-round because you can repaint pebbles for each season. It’s also tidy because pebbles don’t bruise or leak.
Pick a shallow stone or ceramic bowl (about 8-10 inches wide). Collect smooth pebbles from a craft store or a safe outdoor area, then wash and dry them thoroughly. Paint pebbles with acrylic paint in your chosen palette, then let dry and seal with matte clear coat so they don’t chip. Add the pebbles to the bowl and place a single candle or small jar next to it. Keep everything else off the table surface so the texture reads clean.
Editor's noteSeal pebbles twice if kids or frequent wiping will hit them — matte paint scuffs easily.
Skip thisAvoid glossy sealant — it looks like plastic under warm dining bulbs.
19. Wine Cork Coaster Row with a Minimal Center Candle
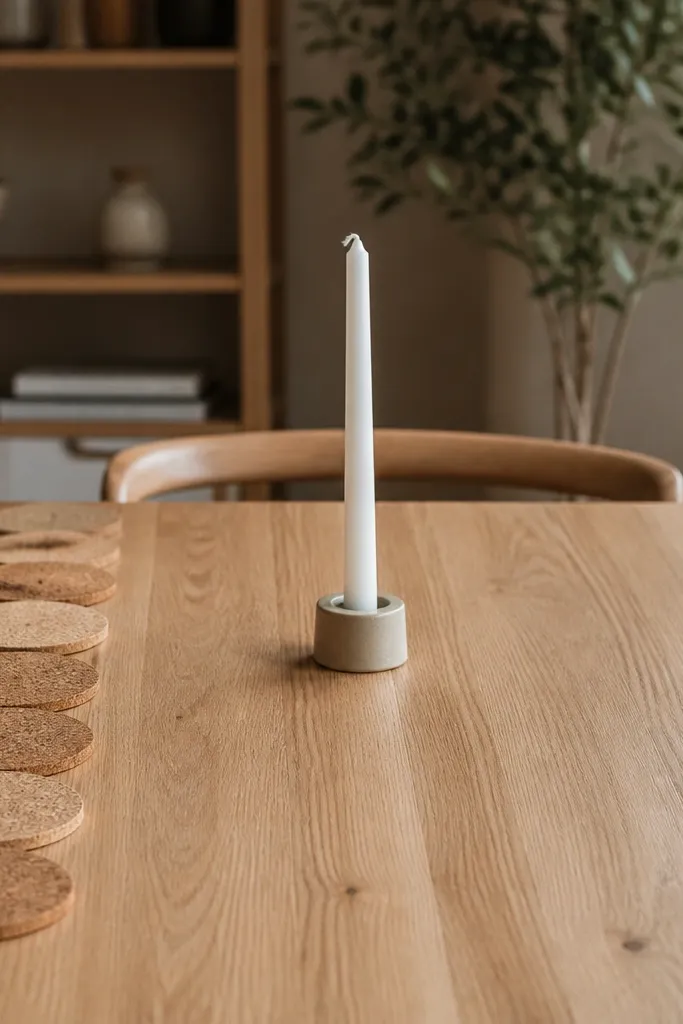
Cork is one of the most forgiving materials for budget dining room table decor. It’s warm, matte, and it gives you that cozy texture without looking like you tried too hard. A row of cork coasters creates a clean boundary, and a single center candle keeps the look focused. This is a smart choice for small tables where big centerpieces crowd the space. It’s also easy to swap for seasons by changing the candle color and the small center bowl fill.
Collect corks and cut them into 1-inch rings or use pre-made cork coasters. Arrange them in a straight line across the table center, leaving a gap in the middle for your candle. Place a small candle in a glass holder at the gap point. Add a tiny filler item next to the candle like a matchbox, a cinnamon stick bundle, or a small bowl of potpourri. Keep the rest of the table surface clear so the cork row is the design line.
Editor's noteUse a dark tray under the cork line if your table is light — it makes the cork read richer.
Skip thisDon’t use wet or crumbly cork — it looks damaged and won’t photograph clean.
20. Painted Pinecone Placeholders with a Clear Candy Dish
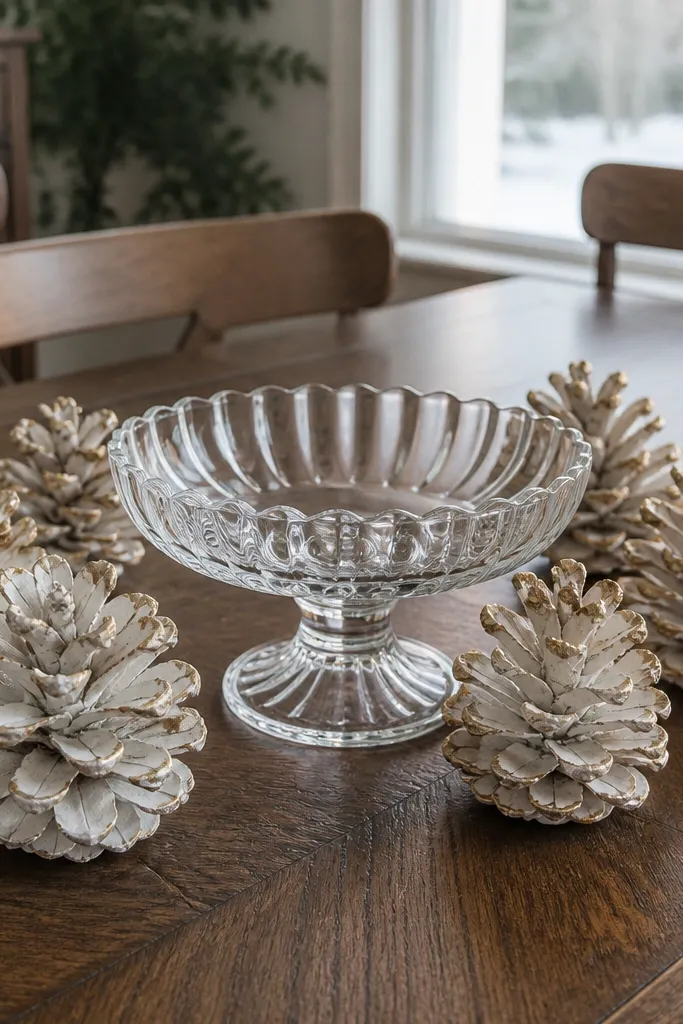
Painted pinecones are the fastest way to get seasonal texture for budget dining room table decor. A clear candy dish keeps things modern and prevents the whole centerpiece from looking like a craft project. The contrast between matte pinecone texture and glass shine reads expensive. This works for winter and early holiday season, and it’s photo-friendly because pinecones have strong shape. The build takes about an hour and then you can reuse the pinecones for years.
Pick pinecones that are already dry and open slightly so they look fuller. Spray paint or brush paint them in one color (matte white, matte black, or muted gold) and let dry completely. Place a clear glass candy dish in the center and fill it with a few matching items like wrapped mints or decorative stones. Arrange 6-10 pinecones around the dish, then add two small candles at opposite ends of the table runner.
Editor's noteUse matte paint — pinecones should look soft, not shiny like ornaments.
Skip thisAvoid overfilling the dish — a few items look styled, too many looks messy.



