
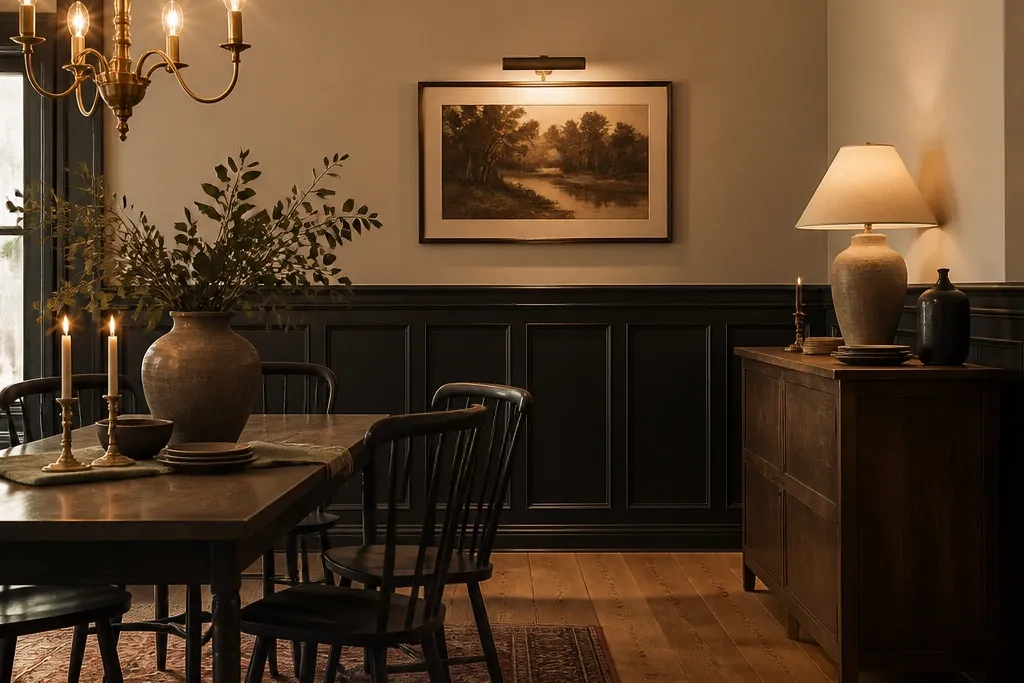

1. Espresso Shaker Wainscot with 3-Board Grid
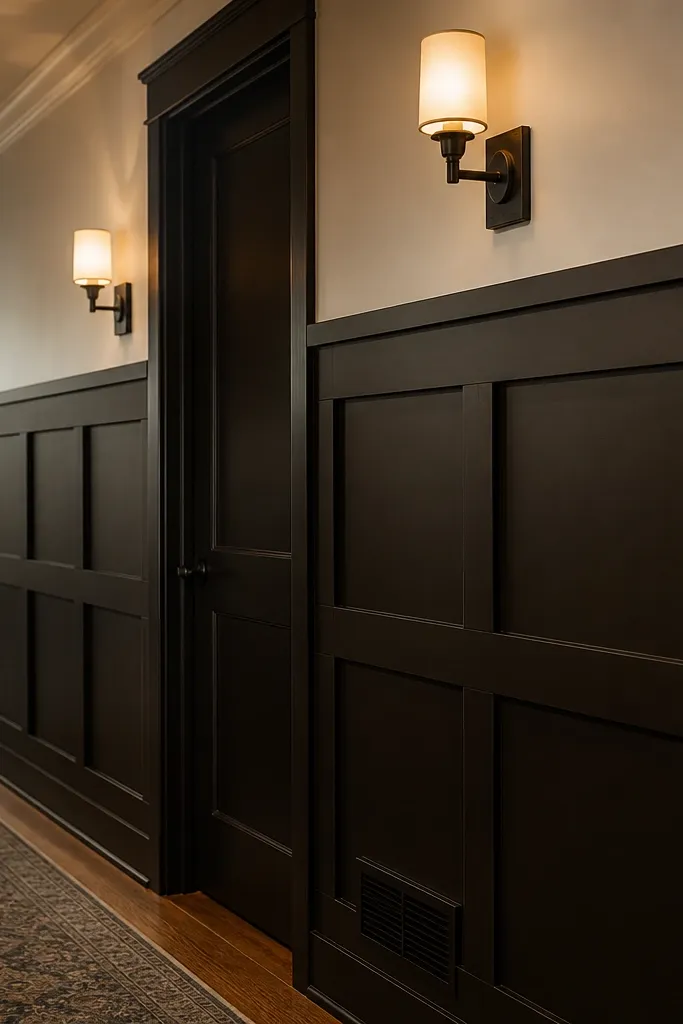
This is the “quiet luxury” option that still looks moody on a budget. The shaker look comes from a clean grid: verticals and horizontals that frame each panel, plus a simple top and bottom rail. Use a near-black espresso paint on the trim so it reads dark in daylight and still has depth under warm bulbs. It’s forgiving because flat boards hide minor wall unevenness, and the grid keeps the eye moving instead of catching flaws. Skill level is beginner-friendly if you can measure, cut straight, and hold the level line.
Start by marking your wainscot height at 36-42 inches from the floor and snap a level line. Install a bottom rail and a top rail using 1x3 or 1x4 MDF trim, then add vertical stiles spaced evenly (a common target is 12-16 inches). Frame each bay with horizontal rails so each panel looks like a shallow square. Fill nail holes with wood filler, sand smooth, prime, then paint the entire system with a trim enamel in espresso near-black.
Editor's noteDry-fit one bay on the floor and measure the “real” panel width so your layout stays consistent before you commit to the wall.
Skip thisDon’t eyeball spacing — uneven panel widths show up fast in dark paint.
2. Near-Black Board-and-Batten with Wide Vertical Ribs
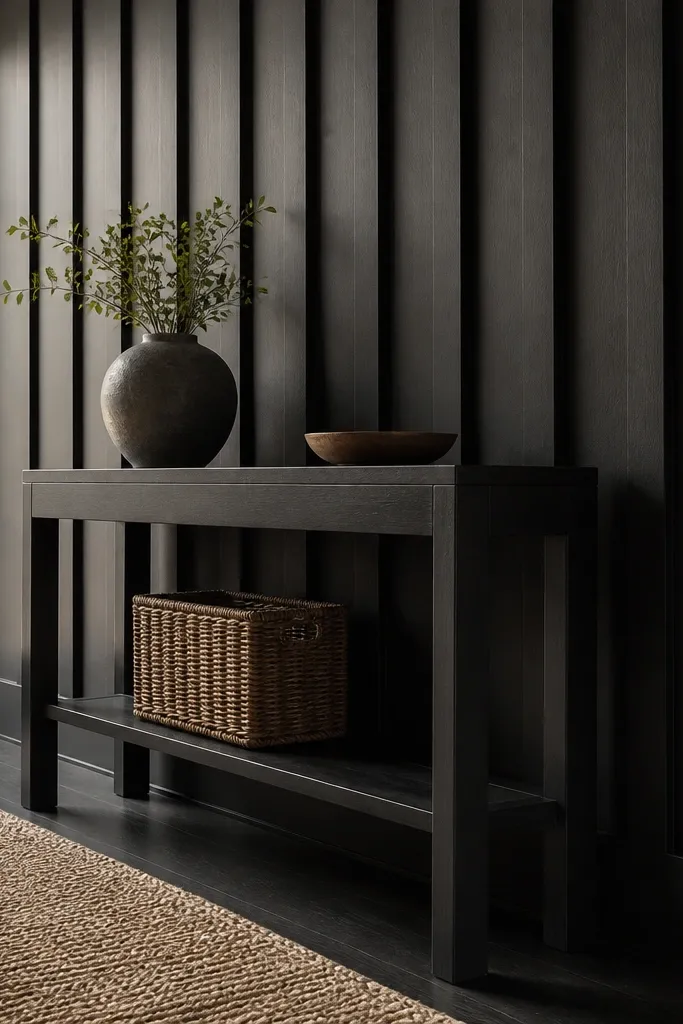
Board-and-batten gives you the deepest shadow effect per dollar. Wide vertical ribs make the wall look taller and darker because each rib throws a noticeable line of shade. This is the best move if your walls have slight waviness; the vertical rhythm distracts from small gaps behind the trim. For a moody look, use a true near-black with brown undertone and keep the finish matte or satin, not glossy. It photographs dramatically because the shadow gaps read as lines, even from a distance.
Mark a consistent wainscot height (try 40 inches) and install a bottom rail first. Add vertical battens using 1x2 or 1x3 MDF strips with even spacing — start by dividing your wall width into equal bays and keep the edges tight. Add an optional top rail to close the look and keep the battens from visually “ending” mid-wall. Caulk the seams, prime all MDF, then paint with a near-black trim enamel.
Editor's noteUse 1/8-inch spacers between battens while you nail so your shadow gaps stay uniform.
Skip thisSkip the temptation to “widen” one gap to make it fit — one off spacing makes the whole section look DIY.
3. Dark Picture-Frame Wainscot with 2x2 Squares
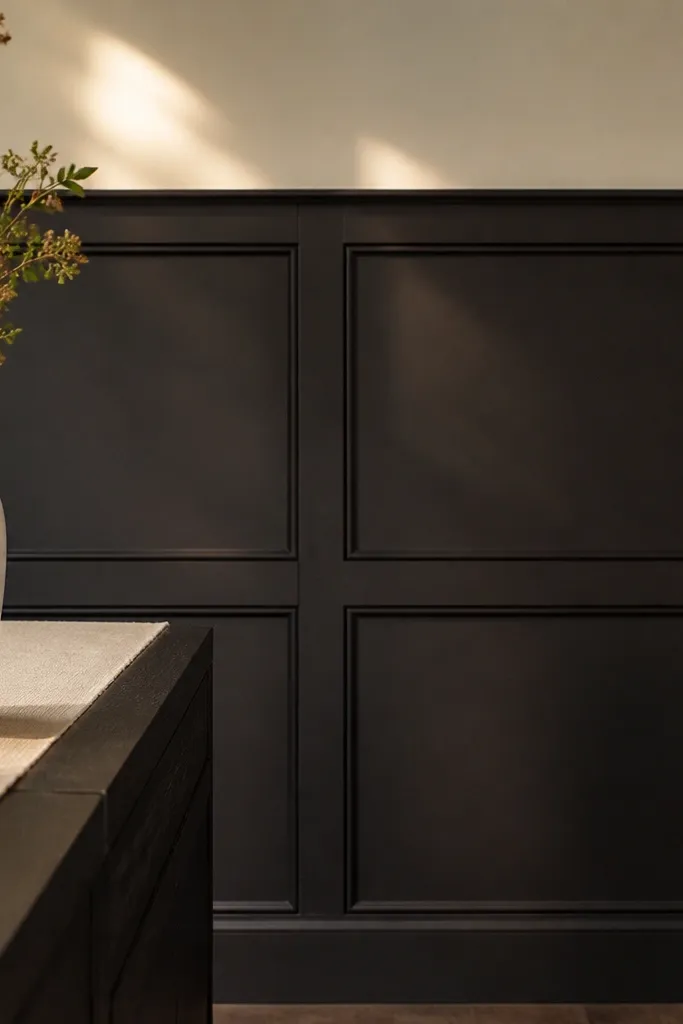
Picture-frame wainscoting looks sharp because it creates a grid that reads like built-in trim. The moody part comes from the dark frame against a lighter wall, plus the thin inner reveal that makes the panel edges pop. Use 1x2 trim for the frame and keep the inner opening consistent. This style is great for dining rooms and hallways because it makes long walls feel organized. It’s also one of the easiest to scale up or down — you can adjust panel count without changing the look.
Choose a wainscot height around 38 inches and install a bottom rail and a top rail. Add outer frame trim first, then build each picture frame with 1x2 strips so each inner opening is the same size (a solid starting point is 16x16 inches). Cut miters or butt joints at corners depending on your comfort; for budget builds, butt joints with tight caulk lines are fine. Prime and paint the frames dark, then paint the wall a lighter warm tone so the grid shows.
Mark the inner opening size on the wall with tape before cutting — it prevents cumulative measurement drift.
Don’t use thick trim for the inner frame; it kills the crisp “picture” effect.
4. Two-Tone Dark: Black Rail + Charcoal Panels
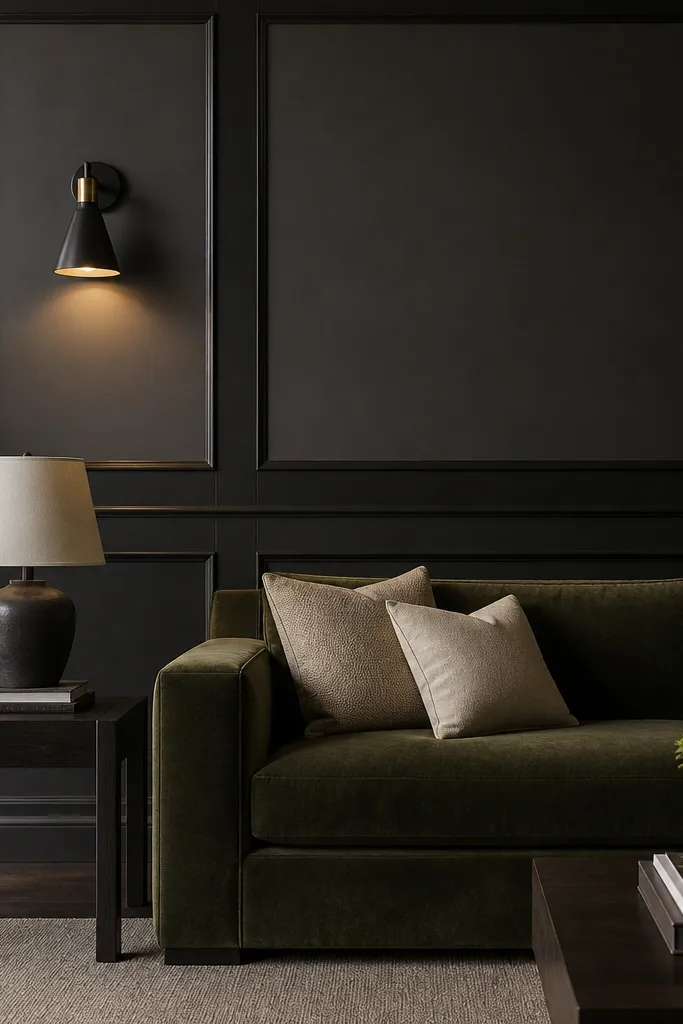
If your room feels too flat, two-tone dark fixes it. Make the rails near-black and the panel field charcoal so the horizontal lines look stronger while the middle stays softer. This creates depth without needing raised panels. It also helps if your wall color is cool — the charcoal keeps everything grounded. The result is moody and tailored, and it hides minor gaps better because the color change makes the eye move.
Install your base layout (rails plus panel grids) using MDF trim boards. Paint the entire wainscot system one color only after installation is complete and caulked. Mask off the panel fields and paint the rails separately: rails first, then panel color. Use a satin trim enamel for both colors so the rails catch light but don’t glare. Let cure time pass before removing tape to avoid edge peeling.
Use painter’s tape with a light burnish over caulk lines so you get a clean color separation.
Don’t switch undertones — keep both colors warm-dark so they don’t look mismatched.
5. Stair-Step Wainscot for Hallways
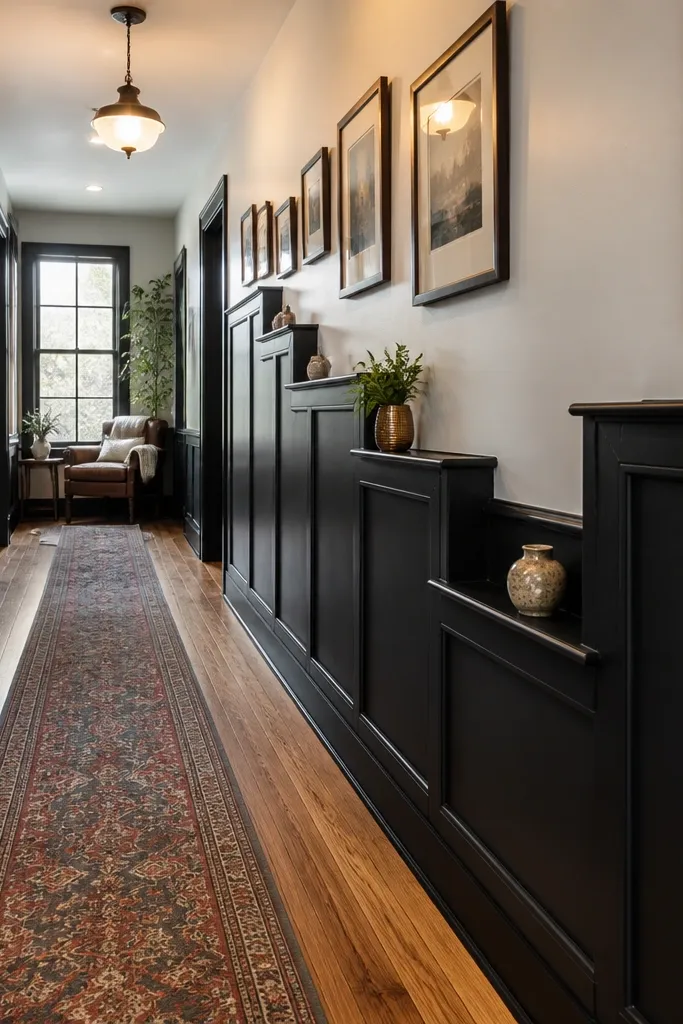
This layout turns a boring hallway wall into a design moment. Instead of rectangles stacked evenly, you create staggered “steps” that mimic built-in shelving geometry. The moody effect is strong because the dark sections break up reflections and make the wall feel more dimensional. It’s also a budget win because you can build it with flat trim and consistent cuts. This works best in narrow spaces where plain grids look repetitive.
Pick your wainscot height and mark a baseline rail line. Install a continuous bottom rail, then add short horizontal ledges and vertical separators so each panel steps up by a fixed amount (for example, 6 inches per row). Keep the step widths consistent so the pattern reads intentional. Caulk, prime, then paint everything dark with enamel for the clean edges.
Editor's noteMake a paper template for the step pattern and tape it to the wall before you cut any trim.
Skip thisDon’t change the step height mid-run — one irregular row reads like a mistake.
6. Herringbone Accent Wainscot at the Bottom
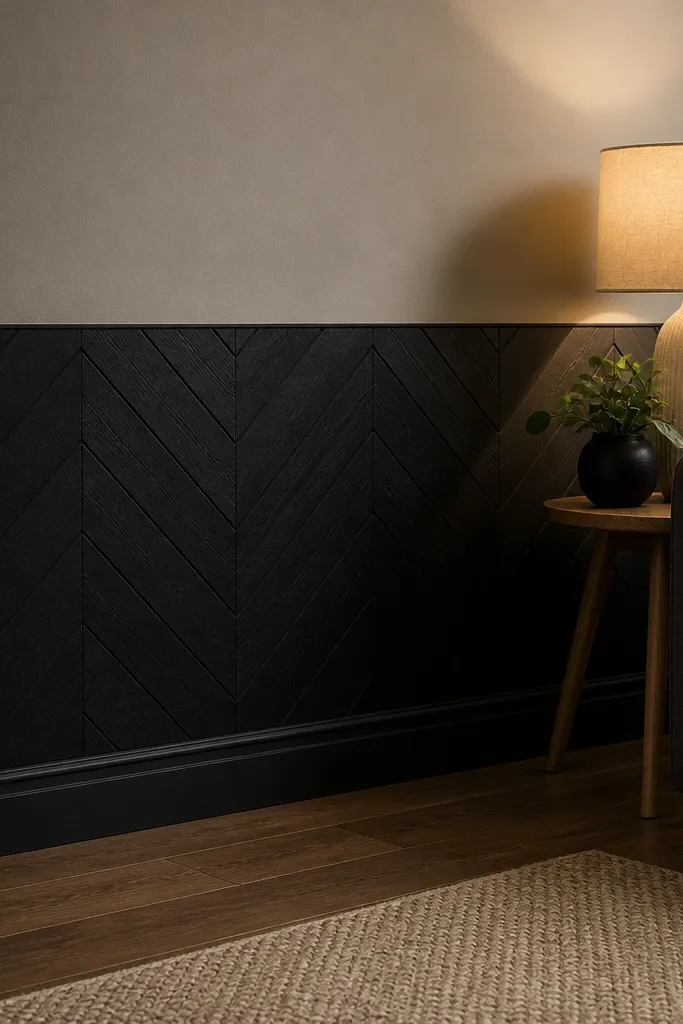
Herringbone is the quickest way to make dark wainscoting look designer without buying expensive panels. Because the pattern creates diagonal shadows, the wall reads richer even with matte paint. Keep it lower than full height so the room doesn’t feel crowded; this is a bottom accent that still photographs like a full project. Use thin strips so you don’t add too much bulk. It’s a mid-skill build because alignment matters, but the payoff is huge.
Mark a wainscot height around 30-34 inches so the pattern stays an accent. Install a bottom rail and top border frame, then lay out a grid to guide the herringbone angle (commonly 45 degrees). Use narrow MDF strips (like 1x2) and glue plus finish nails to attach each piece. Fill gaps, sand, prime, then paint dark enamel. Seal edges with caulk where the pattern meets the border frame.
Use a scrap-angle jig made from plywood to keep the strip angles identical across the wall.
Don’t start from the corner without a layout — herringbone shifts fast if you don’t plan the first row.
7. Oversized Tuscany-Style Panels in Flat MDF

If you want “moody old-world” vibes, go big. Oversized panels read dramatic because the dark field takes over the wall’s visual weight. You can get the look with flat MDF panel rectangles and a wide border frame, skipping the complex raised molding. This works in living rooms and dining rooms where you want one strong wall statement. It also hides wall imperfections because the border frames can bridge slight dips.
Choose a wainscot height around 42 inches and decide on 2-3 large panel bays. Install a bottom rail and a wide outer border using 1x4 MDF trim. Build each panel by adding inner borders from 1x2 trim so you get a shallow reveal around the panel field. Prime thoroughly, then paint the frames dark and, if you want extra depth, paint the inner panel field a shade slightly lighter than the frames.
Keep border widths consistent — wide borders plus inconsistent inner spacing looks cluttered.
Avoid tiny panels at this scale; they look busy instead of dramatic.
8. Beaded Board Look with Dark Paint and Tight Reveal
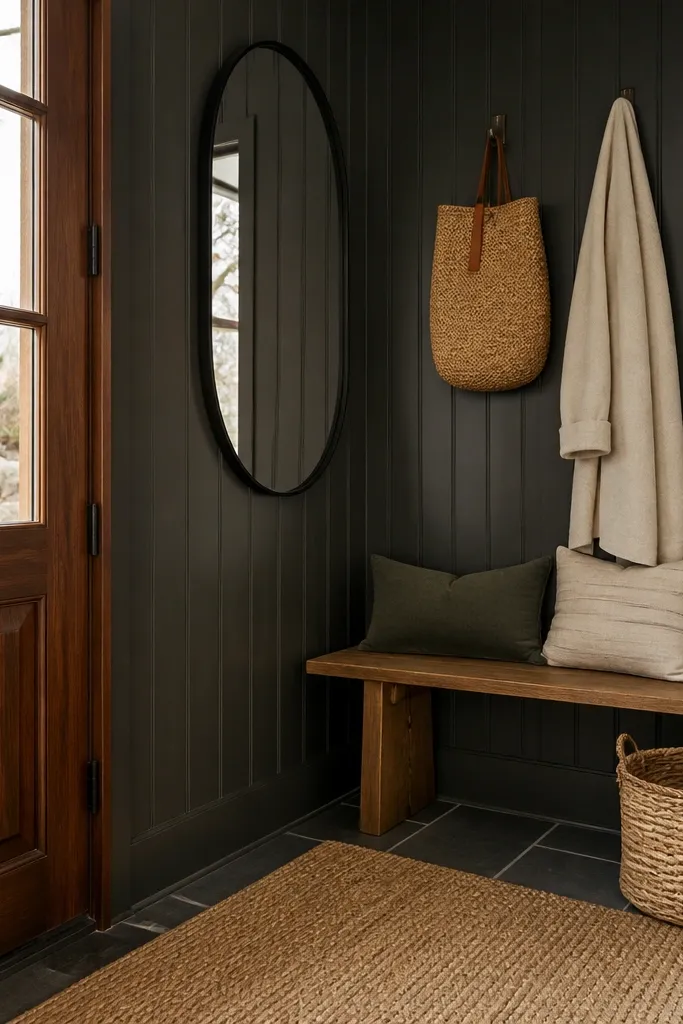
Beaded board gives texture without needing raised panel fabrication. In dark paint, the beads create fine highlights that make the wall feel richer than flat boards. It’s a smart choice for basements, entryways, and rooms with lots of natural light where matte flat trim can look dull. The key is tight installation and clean reveals so the texture doesn’t look messy. This style still reads cohesive in photos because the texture runs vertically and catches light consistently.
Install a bottom rail and a top rail, then attach beaded board panels to studs or a continuous backer. If you’re cutting around outlets, plan access covers before paint. Use caulk along the top and bottom edges, then fill nail holes and sand smooth where needed. Prime with a bonding primer, then paint with a matte or satin dark trim paint designed for walls and trim. Let it cure fully before handling so the texture doesn’t scuff.
Editor's noteTest paint on one scrap panel; dark paint can hide bead shadows if you use the wrong sheen.
Skip thisDon’t leave gaps between boards — dark caulk smears and makes the texture look uneven.
9. Shadow-Line Wainscot with 1/4-Inch Reveal
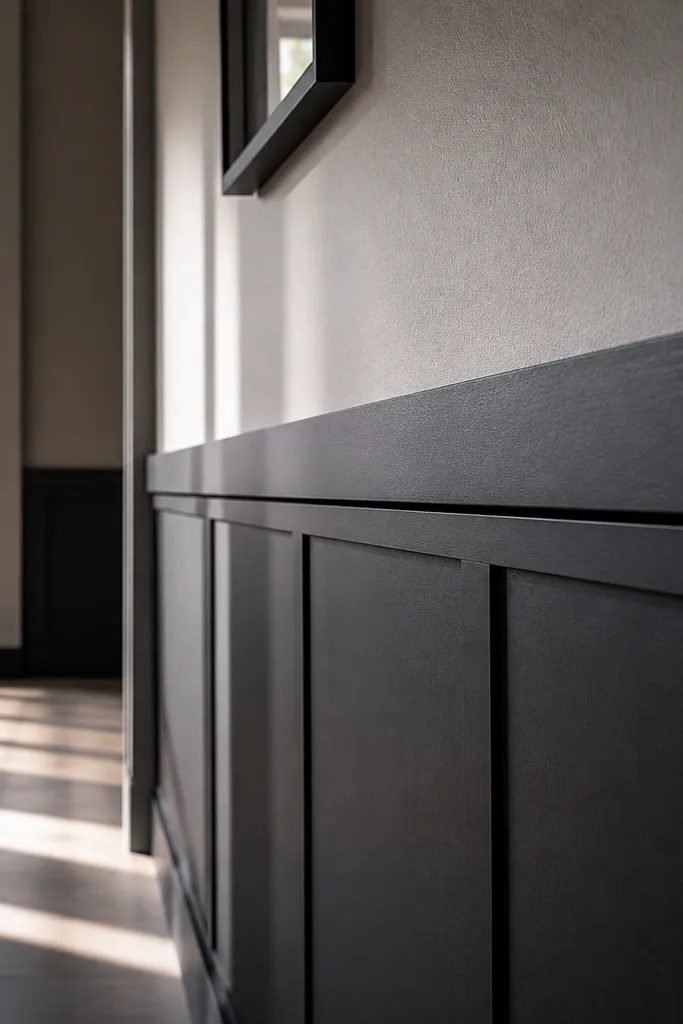
Shadow-line wainscoting looks like it was built with custom millwork because the panels float visually. You get this by creating a deliberate reveal — a thin gap — between trim pieces. In dark paint, that gap reads as a thin dark shadow line, which is the whole aesthetic. This works best when your wall is reasonably straight so the reveals stay even. It’s a cleaner look than classic beadboard and still feels moody.
Use 1/4-inch reveal spacers when installing inner panel frames so you keep the gap consistent. Build outer borders with 1x3 or 1x4 MDF trim, then attach inner strips with a spacer behind each strip while you nail. After everything is attached, remove spacers and caulk only the outer seam lines — don’t fill the reveal gap. Prime and paint in two coats with an enamel finish so the edges stay crisp and the shadow line stays visible.
Editor's noteUse a scrap spacer cut to exactly 1/4-inch and check it against your trim thickness before you start.
Skip thisDon’t caulk the reveal gap — it kills the floating effect.
10. Dark Wainscot with Decorative Corner Columns
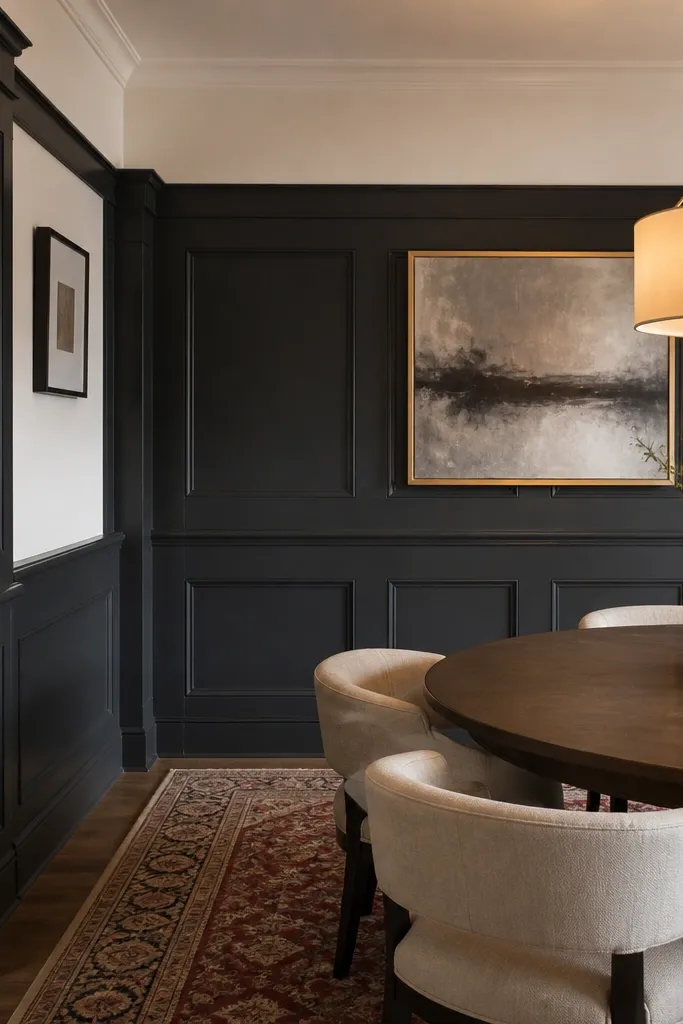
Corner columns make a huge difference in how “finished” dark wainscoting looks. Even if the center panels are simple, the corners create structure and frame the room. This is a budget-friendly way to get a formal feel without buying ornate full-height columns. Use straight, squared corner posts or simple square corbels turned into corner accents. It’s especially good for rooms with doors or fireplace openings because it anchors the trim visually.
Install a basic wainscot layout with rails and simple panel squares or vertical ribs. Add corner columns by attaching square trim posts at each end of the run and at key openings, keeping them aligned with your top rail line. Use MDF for easy cutting and consistent edges, then fill nail holes and caulk seams. Prime and paint the entire system dark enamel. For extra depth, keep the columns the same color but add a slightly higher sheen on the corner posts only if you want light to catch them.
Measure column placement from the inside edge of the corner, not the outside trim edge, to keep the pattern symmetrical.
Don’t let columns overlap panel lines — it looks sloppy in dark paint.
11. Dark Wainscot with Thin Center Molding Strips

This idea looks like higher-end molding because it adds a few thin center strips inside each panel. The technique is simple: build a basic grid or rectangular panel field, then add narrow vertical or horizontal trims in the middle. Dark paint makes the thin strips read like shadow lines instead of bulky trim. It’s a good choice if you want moody without making the wall feel heavy. This also helps if your first pass feels too plain; the thin molding gives it a second layer of detail.
Install rails and a main panel grid using 1x3 or 1x4 trim for the outer frame. Inside each panel, add thin strips using 1x1 or 3/4-inch MDF strips spaced evenly, centered in each bay. Nail through the outer frame so the thin strips stay flush. Caulk edges, prime, then paint dark enamel in two coats so the thin strips don’t look streaky. Keep the center strips aligned across the wall for a clean photo read.
Use the same offcut strip as a spacing gauge so every thin line has the same gap.
Don’t add thin strips without a plan — random spacing looks worse in dark than in light.
12. Vertical Panel Columns with Horizontal Ledger
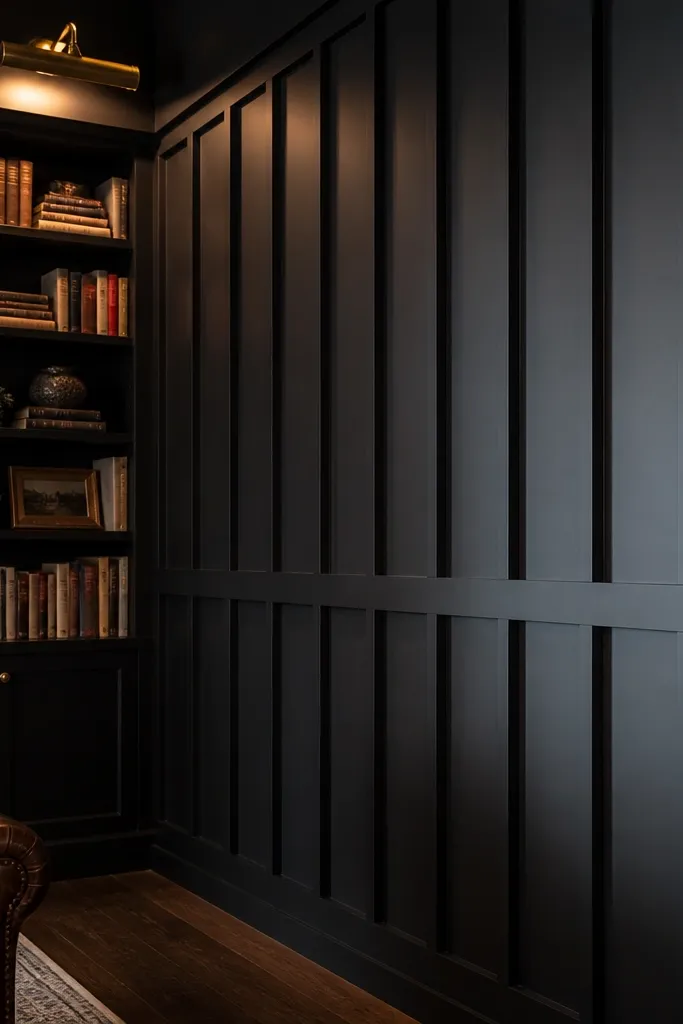
This layout gives you a “library wall” mood. Vertical panels create height, while a single horizontal ledger rail breaks the wall visually and makes the dark area feel intentional. It’s also one of the easiest to build because you’re repeating one shape: vertical columns. Use dark paint on the trim and keep the wall lighter so the vertical rhythm shows. It’s a strong option for rooms with tall ceilings because it doesn’t feel short or boxy.
Mark a wainscot height around 40 inches and install a bottom rail and one horizontal ledger rail at the top of the panel area. Build vertical columns using 1x2 or 1x3 MDF strips, spaced evenly across the width. Add a vertical border at each side so the columns have a clear frame. Prime, fill nail holes, then paint dark enamel. Finish by caulking the ledger edges so the line stays crisp.
Start your column layout from the center of the wall if the room has a focal point like a fireplace.
Don’t let your first vertical column be wider than the rest — symmetry matters more in dark.
13. Dark Wainscot with Flat Arch Panels at the Bottom
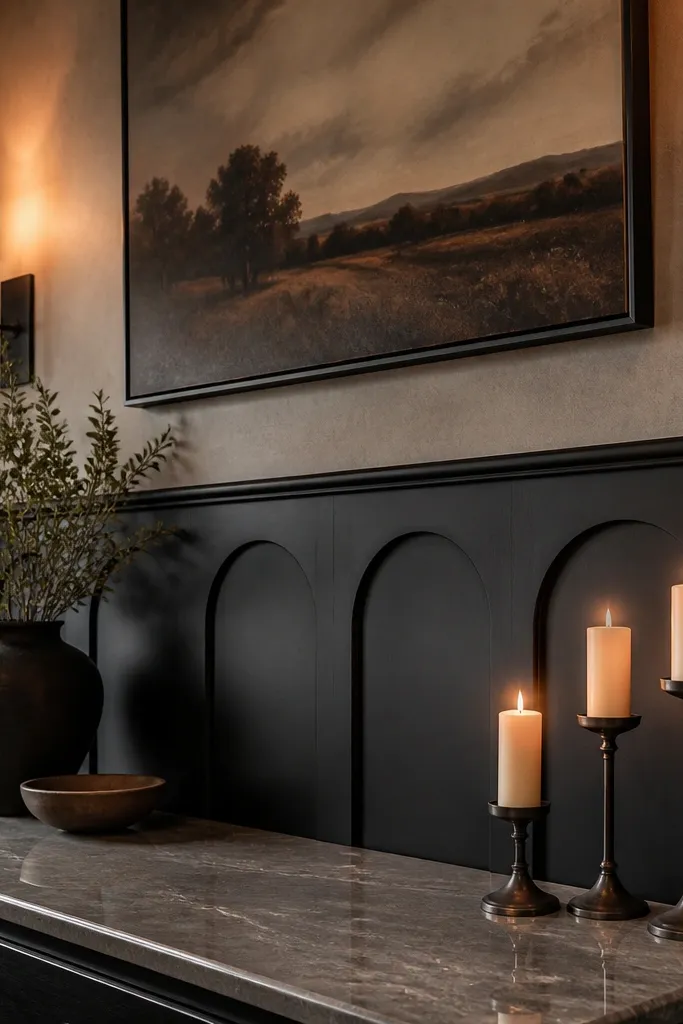
Arch panels add softness to dark walls without going full ornate. The trick is to use flat arch shapes made from MDF so you get the curve look without expensive molding. In a moody palette, arches read architectural and feel warmer than straight grids. This works well behind a sideboard, in a dining room, or on a wall that already has curved decor. Plan for repeats so the arches look designed, not decorative.
Set your wainscot height around 34-38 inches. Build a rectangular outer frame with bottom rail and top rail, then create inner arch openings by cutting MDF arch templates. Attach each arch border with consistent spacing and keep the arch apex at the same height across the wall. Caulk seams, prime, then paint dark enamel. If you want extra depth, paint the arch interior panel field slightly lighter than the arch border.
Editor's noteMake one arch template and trace it onto MDF for every panel so the curve stays identical.
Skip thisDon’t freehand the arches — off curves look worse than straight mistakes in dark paint.
14. Dark Wainscot with Raised-Effect Panels Using Batten Strips

You can fake a raised-panel look with stacked trim strips and it stays budget. The idea is simple: create a stepped border around flat panel fields so the border casts a shadow. In dark paint, those tiny steps read like real millwork depth. This style is great if you want classic European vibes but don’t want to route profiles. It takes a bit more measuring, but the build is straightforward and the result is dramatic.
Install a basic outer frame and inner panel squares. For each panel, add two layers of trim: first layer sits flush with the panel border, second layer sits slightly inset to create a step. Use MDF strips cut to match and keep the step width consistent, like 1/2-inch for the inset layer. Prime and paint the whole system dark enamel, then lightly sand high spots before a final coat so the step edges stay sharp.
Editor's noteUse a spacer board for the step depth so every panel has the same raised effect.
Skip thisDon’t overfill the step gaps with caulk — it turns the step into a flat line.
15. Dark Wainscot with Vertical Slats and a Top Cap
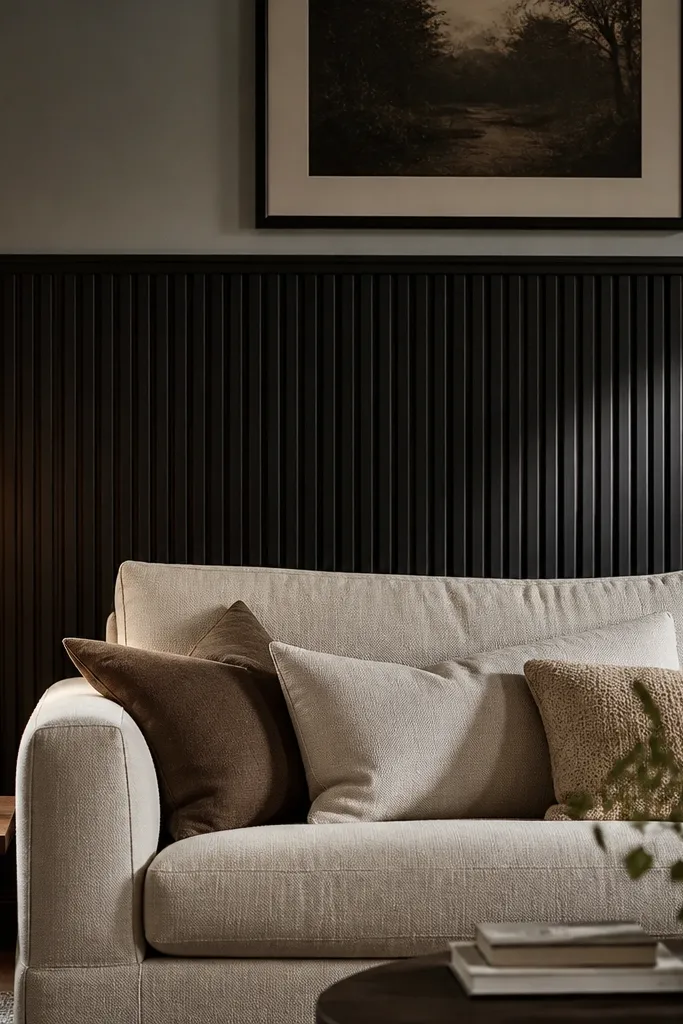
Vertical slats look clean and modern while still reading moody in dark paint. Add a single top cap molding and the whole run looks intentional, like built-in wall treatment. This is a great choice for rooms that already have modern furniture or for people who don’t want traditional panel shapes. The slats create a soft texture that catches light and hides minor wall imperfections. Build it with MDF strips for consistency and easy caulking.
Mark your wainscot height at 36-42 inches and install a bottom rail. Attach vertical slats using 1x2 or 1x3 MDF strips with consistent spacing; a good starting gap is about 1/4 inch for a visible shadow line. Add a top cap using 1x3 trim so the slats look finished at the top. Caulk the seams, prime, and paint with dark enamel. Two coats matter here because slat edges can look patchy without full coverage.
Editor's notePaint with a foam roller plus angled brush for edges so slat faces stay smooth and even.
Skip thisSkip wide spacing — too much gap makes the wall look unfinished, not intentional.
16. Dark Wainscot with Diagonal Bracing Lines
Diagonal bracing is a cheat code for depth. Instead of a plain grid, you add two diagonal lines inside each panel bay so the dark wall has movement. The diagonals throw shadows that look custom, and the layout stays budget because it’s just trim strips. This works especially well on walls with simple decor because the wainscot becomes the pattern. Keep the diagonals subtle by using thin strips and consistent spacing across the wall.
Build a standard wainscot frame with rails and rectangular bays. Inside each bay, add diagonal strips that run corner-to-corner, using 1x1 MDF strips for a thin line. Keep the diagonal placement consistent by marking the diagonals with pencil on the wall before nailing. Prime and paint dark enamel over the whole assembly so the thin strips blend into one crisp design. Caulk all edges along the frame so the lines look clean in photos.
Editor's noteMark diagonals using a tape measure and a square — eyeballing diagonals looks crooked even when it’s close.
Skip thisDon’t use thick trim for the diagonals; it overpowers the moody, refined look.
17. Dark Wainscot with Mirrored Center Panel (Single Feature)
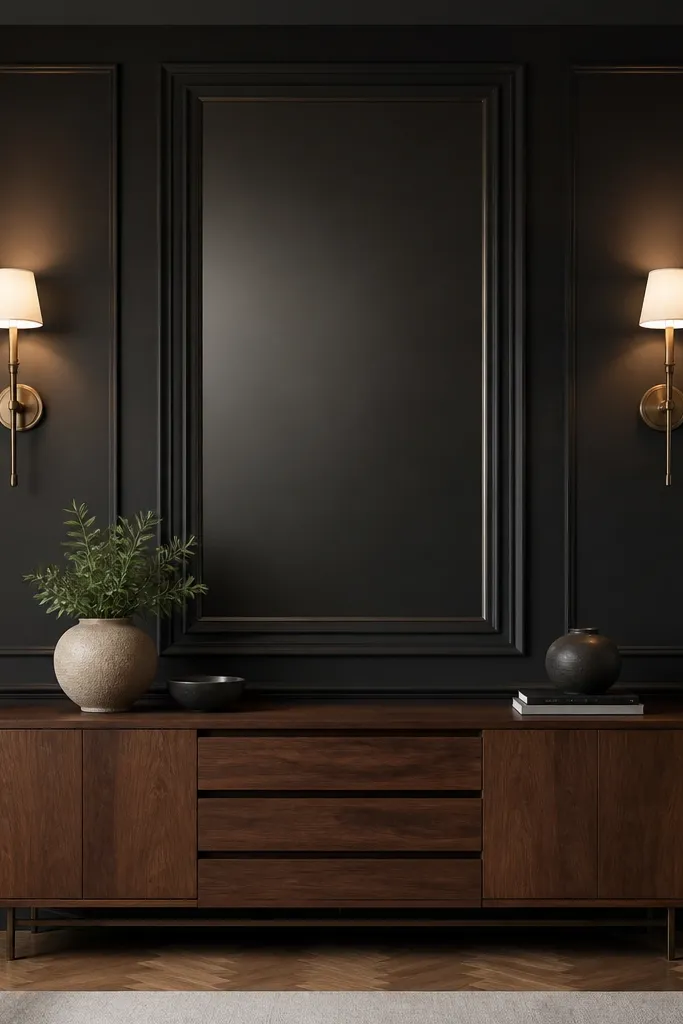
If you want moody but don’t want a full grid, anchor the look with one centered feature panel. The rest of the wall gets simpler rails and minimal framing, so your effort goes where it shows most. Dark paint makes the center panel look deeper, especially if you use a slightly different shade or sheen on the feature. This style works well in rooms with a focal point like a mirror, console, or fireplace. It’s also a good budget choice because you’re reducing the total amount of trim cuts.
Choose your wainscot height around 40 inches and install bottom and top rails across the wall. Create a centered feature bay by framing a larger rectangle in the middle using 1x3 trim. Add simpler side bays using only vertical stiles and one horizontal rail if you want them. Prime and paint dark enamel, then consider a second coat with a slightly different sheen on the center panel for depth. Caulk seams and fill nail holes so the feature reads clean.
Measure the center feature from the wall centerline and keep equal side bay widths for symmetry.
Don’t make the center panel too small — the moody effect comes from scale.
18. Dark Wainscot with Open Lattice Panels
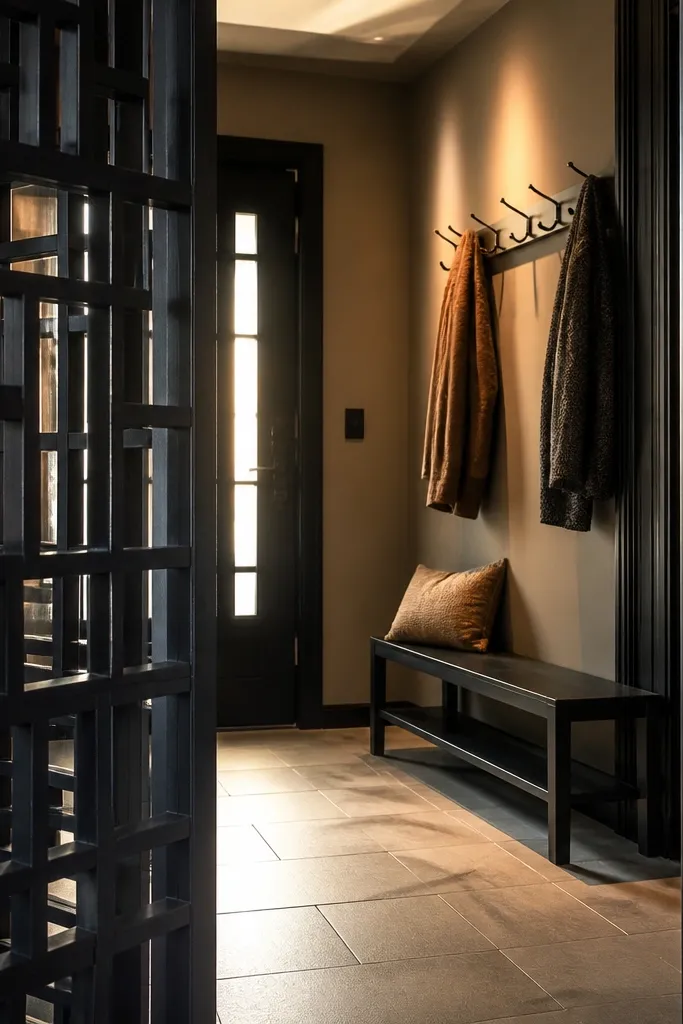
Open lattice gives you a lace-like pattern, but in dark paint it reads bold and architectural. Instead of solid panels, you build a framework that creates lots of shadow lines. It’s photogenic because the pattern stays crisp under flash and looks dimensional in daylight. This is a great option for entryways where you want something interesting but not visually heavy. Use thin MDF strips and keep the lattice spacing consistent.
Install a bottom rail and a top border frame to lock the height. Build square lattice grids inside each bay using thin MDF strips, like 1x2, spacing them evenly. Leave the openings open — don’t fill with backing — so you get that shadow-line effect. Prime the framework thoroughly, then paint dark enamel in two coats. Caulk only where the lattice meets the outer border so the interior openings stay clean.
Editor's notePaint the lattice on the floor first for one coat, then finish on the wall to avoid missed edges.
Skip thisDon’t use thick, rounded trim — lattice looks best with flat edges.
19. Dark Wainscot with Vertical Picture Frames and Inner Reveal
This is a tall, narrow take on picture-frame wainscoting. Vertical frames make the wall feel taller and more intentional, and the inner reveal gives you that “custom built” shadow line. Dark paint makes the inner gaps look like fine shadows, which is where the moody look comes from. It’s a strong choice for narrow hallways, stair landings, and rooms with slender wall space. Build it with consistent reveals so every frame looks aligned.
Set wainscot height at 38-42 inches and install bottom and top rails. Add outer vertical frame trim first, then build inner vertical frames using 1x2 strips with a narrow reveal, like 1/8 to 1/4 inch. Keep frame widths consistent by dividing the wall width into equal bays, then adjust the last bay to fit symmetrically. Prime and paint with dark enamel, and caulk outer seams only so the inner reveal stays visible.
Editor's noteUse a single spacer thickness for the inner reveal and don’t swap it mid-wall.
Skip thisAvoid wide inner reveals — they make the frames look unfinished in dark paint.
20. Dark Wainscot with Horizontal Panel Bands (No Verticals)
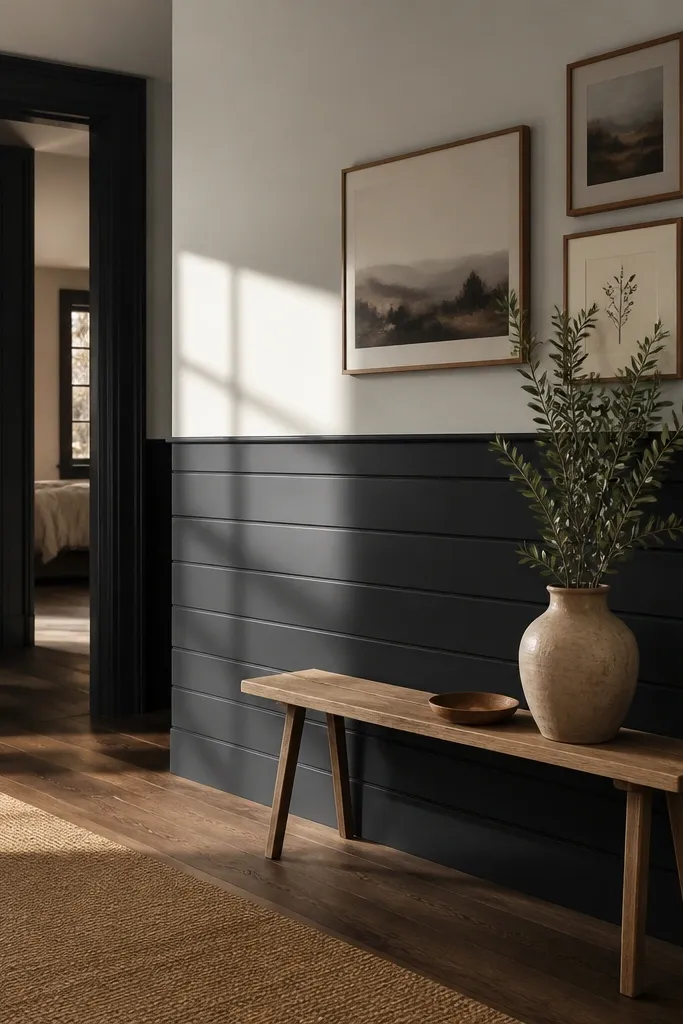
If you want moody without lots of cuts, go horizontal. Horizontal bands create a strong, graphic look that reads expensive in photos because the lines are clean and continuous. This style also works well when your wall has tricky features like door casings; you can stop and restart bands neatly. Dark paint makes the bands feel like architecture. You’ll need fewer vertical measurements, which keeps mistakes from snowballing.
Mark your wainscot height and install a bottom rail and a top rail. Add horizontal rails across the panel area, creating 2-3 stacked bands using 1x3 MDF trim. Then add simple panel rectangles within each band using 1x2 trim so each section has a framed look. Prime and paint dark enamel, then caulk all rail seams for crisp lines. Let the paint cure before touching so edges stay sharp.
Use a pencil line and level for every horizontal rail — even a small tilt shows up immediately in dark paint.
Don’t leave bands floating; always anchor them with framed rectangles or side borders.



