
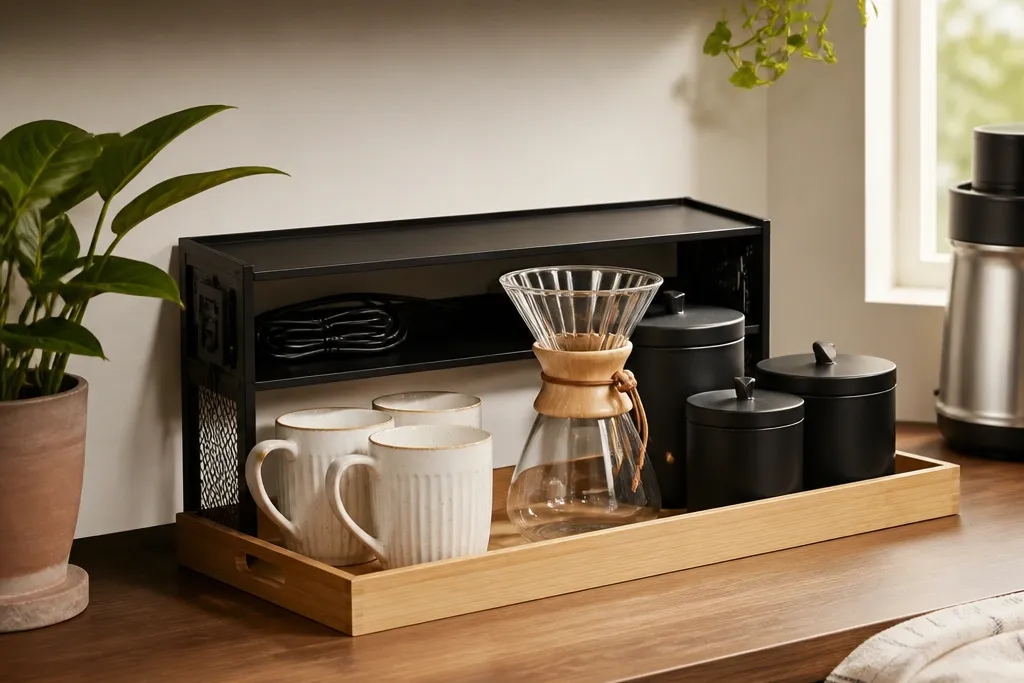
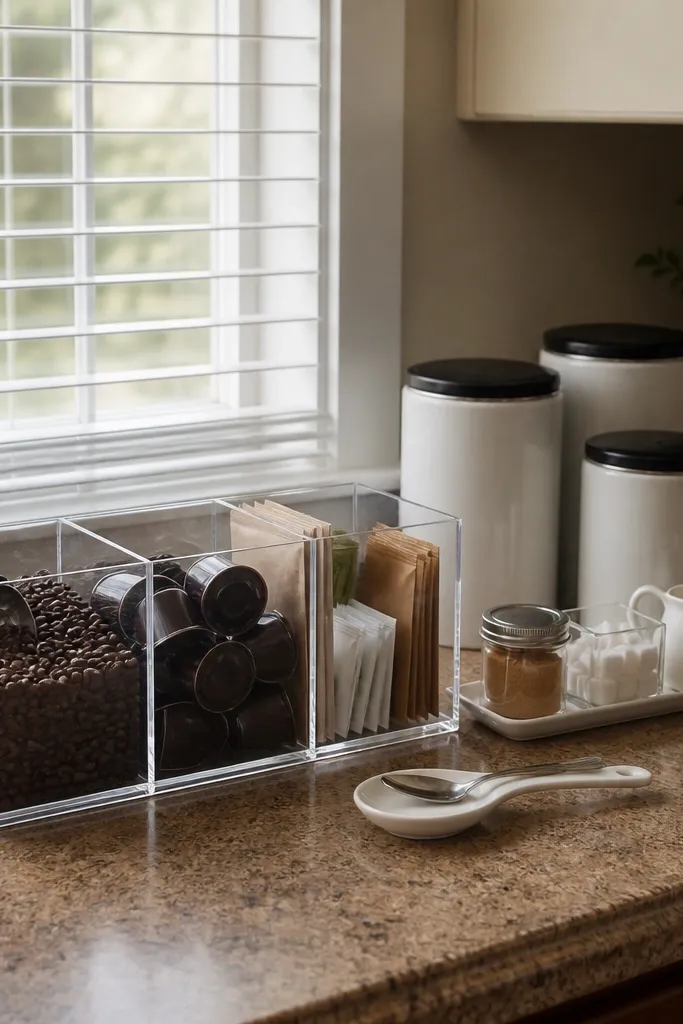
1. Shallow Rolling Tray Station with Mesh Under-Compartment
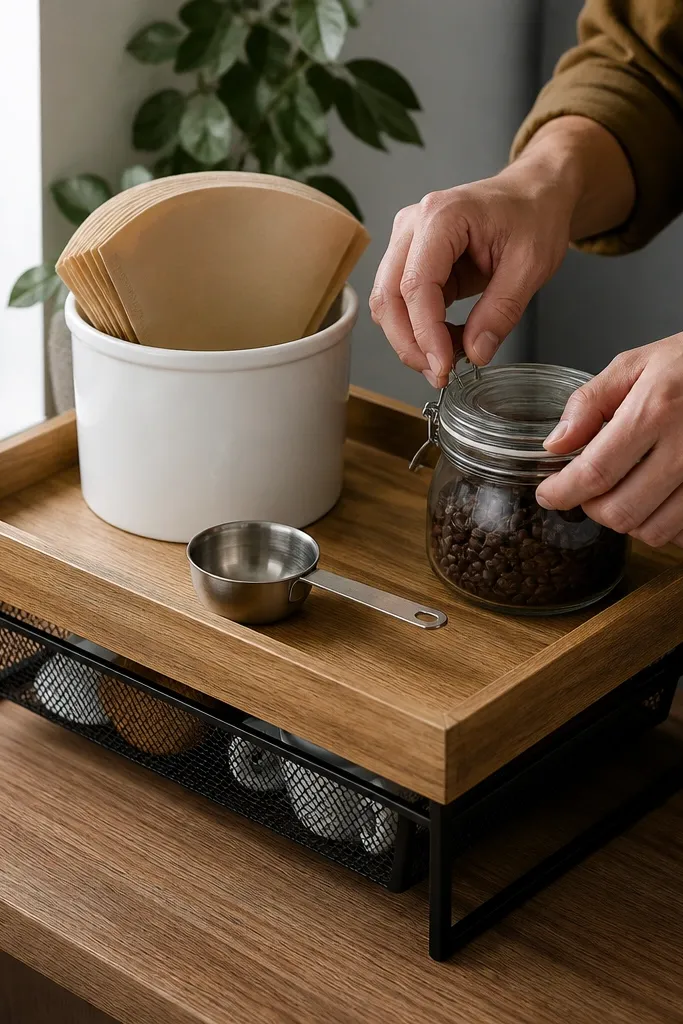
This layout is the cleanest way to keep coffee tools together when your counter gets used for other things. The key is the shallow tray surface — it limits what can sit out, so you naturally keep it tidy. Underneath, a mesh shelf hides extra supplies without trapping spills. Use matching canisters with matching lids so the top looks intentional, even if you swap syrups or tea flavors weekly. It’s a great fit for kitchens where you need to clear the counter quickly or where the coffee area shifts depending on the day.
Start by finding a tray that’s 16-20 inches long with raised sides so items don’t slide off. Add caster wheels if your tray doesn’t already have them, using a drill and mounting screws through the tray base. Then place a metal mesh shelf under the tray frame, secured with brackets or zip ties and a quick check for wobble. Finish by arranging three zones on top: a mug row on the left, a canister cluster in the middle, and a small tray for daily tools on the right.
Line the tray bottom with a thin rubber shelf liner so jars don’t clack and slide.
Skip tall wheels and tall shelves — extra height makes the station bulky and harder to clear.
2. Wall Rail + Two-Tier Mug and Syrup Shelf
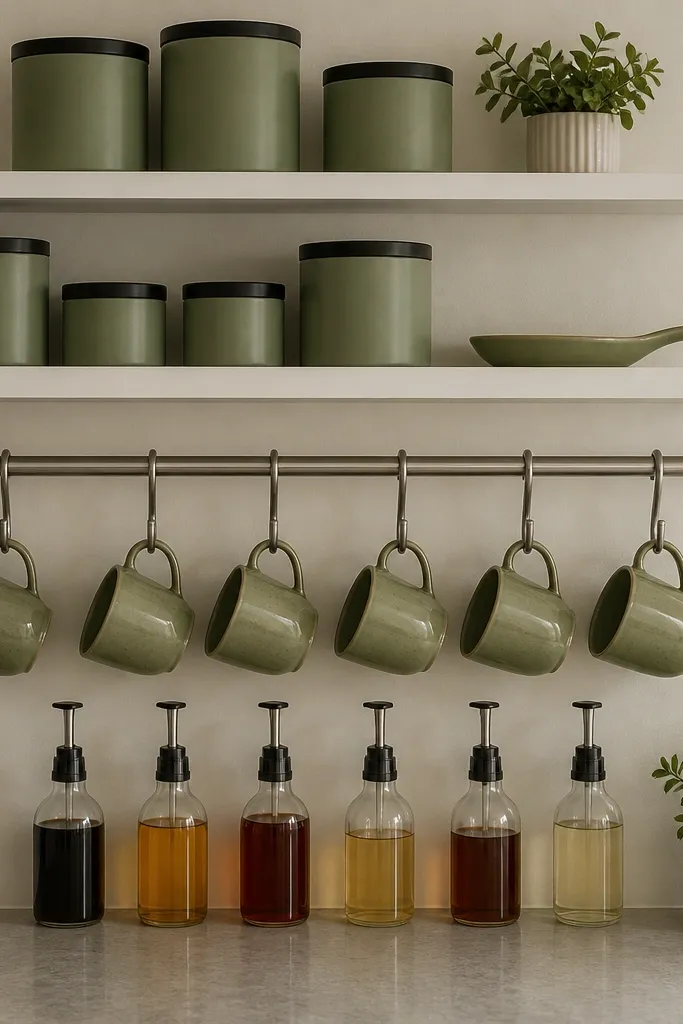
A wall rail keeps mugs and syrups off the counter while still looking styled. Two tiers matter because the top shelf holds the “pretty” items — canisters and a small plant or spoon rest — while the lower shelf stores daily grab things you reach for constantly. The hooks under the rail give mugs a consistent spacing, which looks better in photos than a mug pile. Use a rail finish that matches your faucet or hardware (matte black is the easiest to coordinate). This works best in kitchens where counter space is tight but wall space is available above the outlet-free zone.
Mount a horizontal rail using a stud finder and level it so the shelves hang straight. Attach two shelves to the rail at different heights, keeping the lower shelf about 10-12 inches below the top so jars don’t crowd. Add cup hooks beneath the rail and hang mugs by handle so they line up cleanly. Then group syrups in a row on the top shelf and keep filters in a closed container on the bottom shelf.
Editor's noteUse small binder clips on the shelf edge to hold a roll of paper towels or a spare filter pack flat.
Skip thisDon’t mount shelves too low — you’ll bump them with elbows and knock jars into the counter.
3. Cabinet-Door Coffee Organizer That Stays Hidden
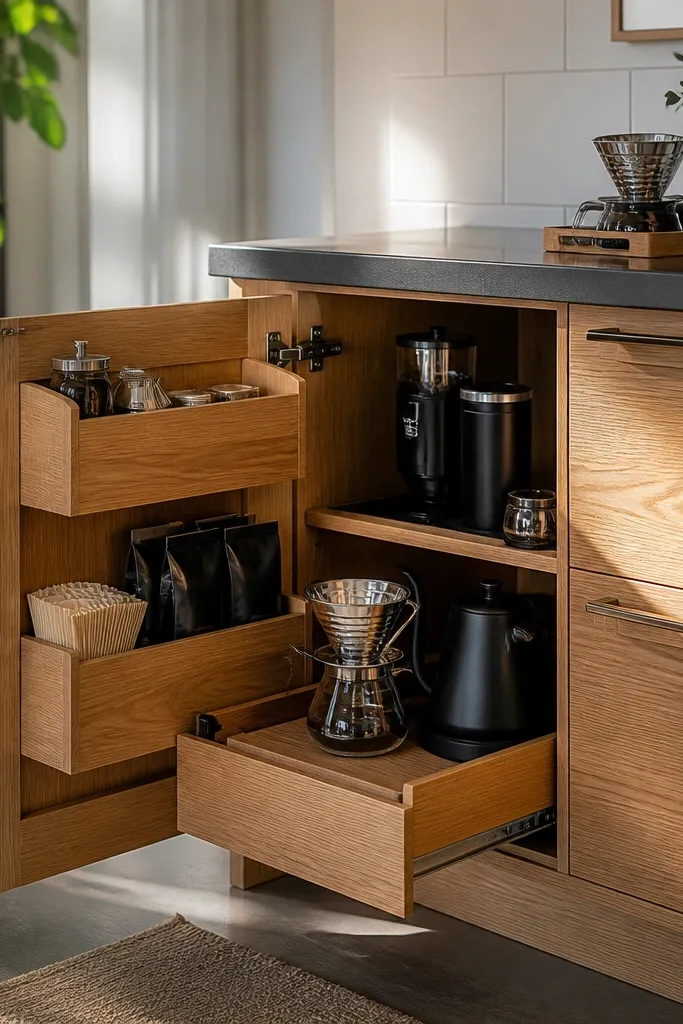
If your counter is always getting used for other cooking, hiding the coffee station is the smartest space-saver. This idea turns the cabinet door into the station footprint, keeping the countertop mostly clear. The look is clean because the bins close the visual mess, and you can still pull out the exact items you need. Choose an organizer with clear or labeled bins so you don’t open everything every morning. It’s ideal for apartments, small galley kitchens, or anyone who wants a coffee setup that disappears when guests arrive.
Hang an over-the-door organizer or mount a door-mounted rack with multiple shallow bins. Set up three bins: one for filters, one for stir sticks and measuring spoons, and one for daily syrups. Add hooks for mugs under the bins so the handles don’t scratch the door. Place a small tray on the counter only for the “today” items, then move them back into the bins after use.
Editor's noteLabel bins with painter’s tape and a thick marker so you can update seasons without buying new labels.
Skip thisSkip deep bins — deep storage turns into a junk drawer and you’ll stop putting items back.
4. Tiered Ceramic Tray with Lidded Sugar and Syrup Caddies
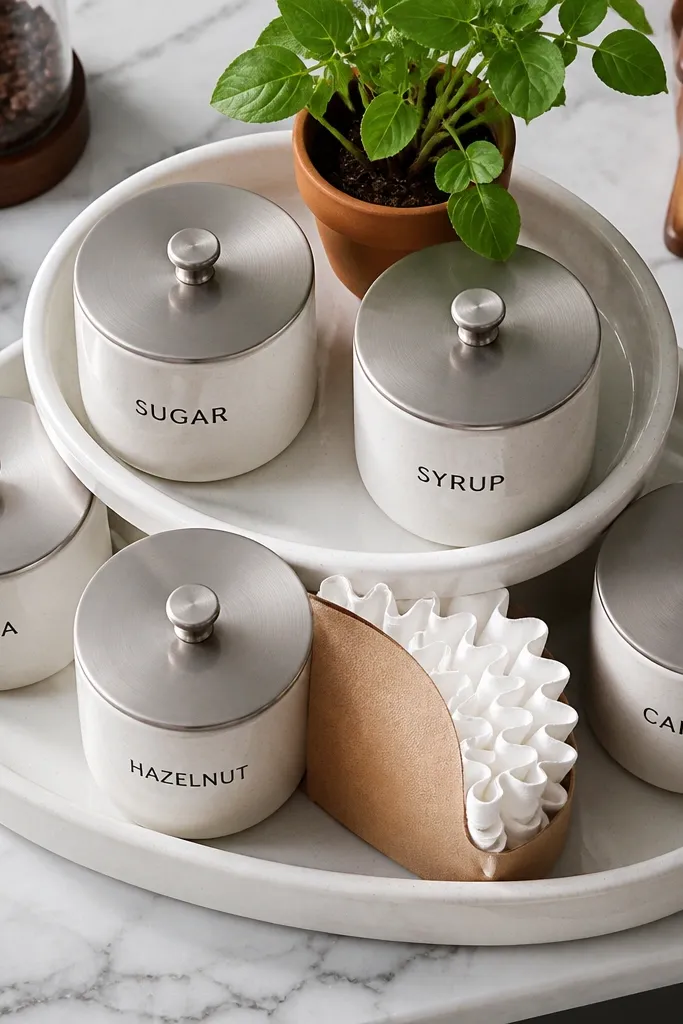
This is the “coffee but make it pretty” station. A tiered tray lifts the eye and keeps items visible without crowding the counter. Lidded jars are the secret — coffee station mess shows up fast, and lids stop dust and spills from looking messy. Use glazed ceramics or white stoneware because they photograph bright and hide minor scuffs better than bare wood. This works great for espresso-style routines where you only need a few daily items out at a time.
Buy a tiered tray with a flat top and a lower platform; aim for 10-14 inches in diameter so it doesn’t take over the counter. Add one lidded jar for sugar or creamer powder, then a small caddy for syrups that keeps bottles upright. Place a spoon rest on the lower tier and keep filter backups in a small lidded container beside the tray. Wipe the tray edges with a damp cloth before styling so it looks crisp even after use.
Keep syrup bottles to one brand or one color family so the tier reads clean.
Avoid open glass cups for sugar — they look messy when you inevitably get a few granules around.
5. Pegboard Coffee Wall with Color-Coded Canisters
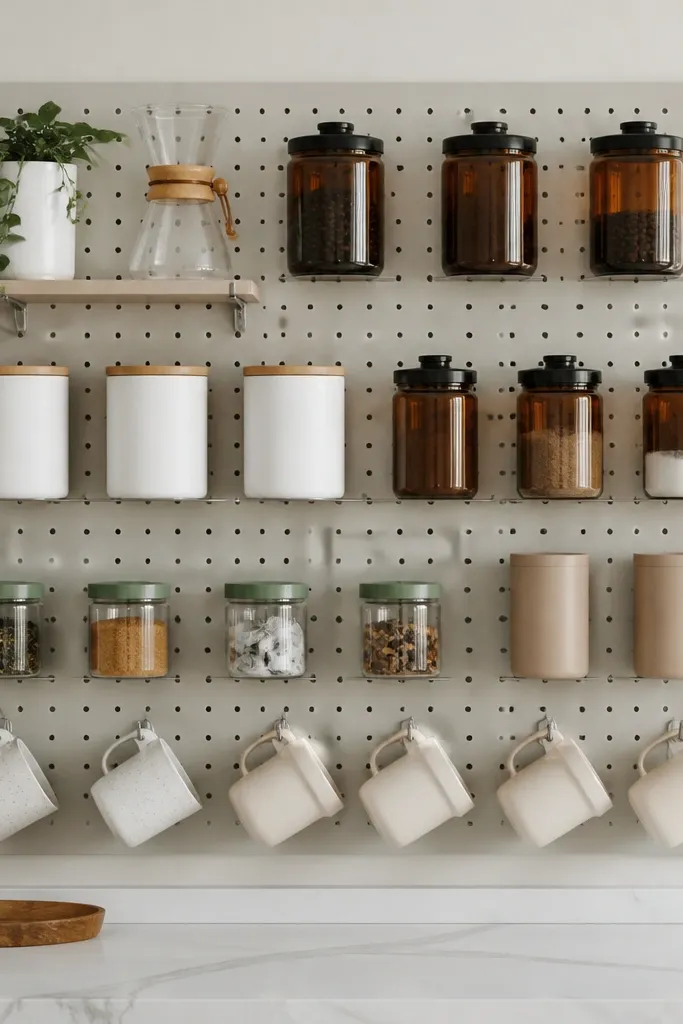
Pegboard gives you vertical storage and it looks intentional because everything has a spot. Color-coded canisters solve the “I can’t find the right packet” problem without adding clutter. The best part for budget countertop coffee station ideas is that you can start small: a mug row, one shelf, and a couple of hooks. Use a light pegboard and paint it matte white or soft gray so the setup looks airy rather than industrial. This suits renters and anyone who wants a station that looks like a planned feature without building custom cabinetry.
Mount pegboard with screws into studs if possible, using anchors if you can’t. Add hooks for mugs and a narrow shelf for canisters, keeping the shelf depth under 6 inches. Line up canisters in a row for syrups and a separate spot for filters in a lidded container. Add a small paper towel holder low on the board so you can wipe drips right away. Finish by hanging a compact scoop or spoon tool on a hook beside the canisters.
Editor's noteUse removable adhesive labels on canisters and swap them as you change flavors.
Skip thisSkip too many hooks — if the pegboard becomes a catch-all, it stops looking tidy.
6. Lidded Basket Coffee Station with a Sliding Spice-Drawer Insert
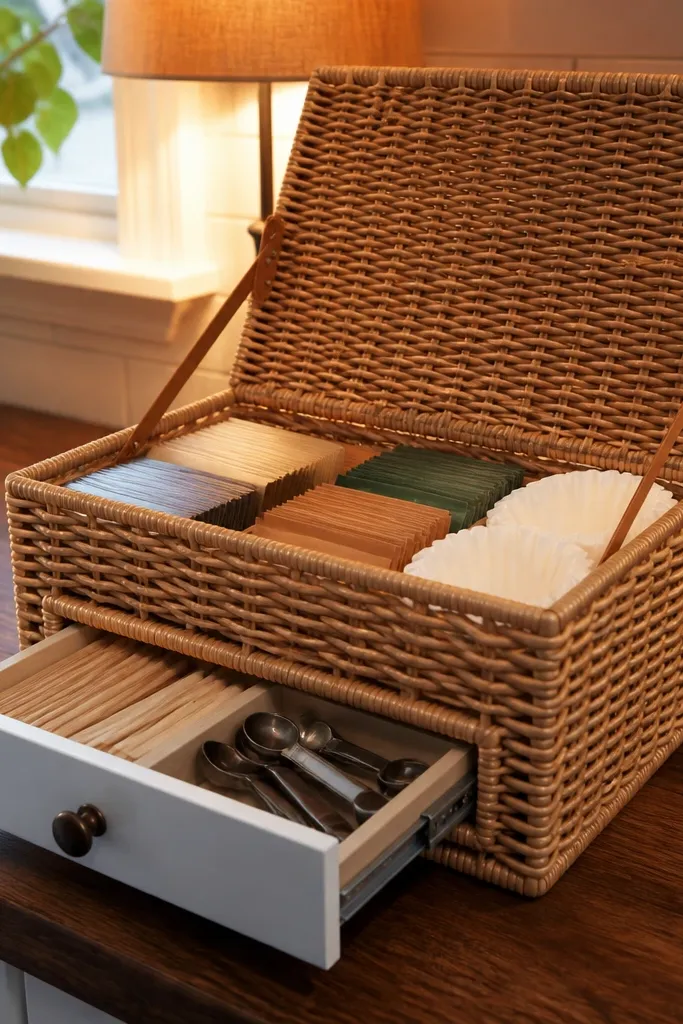
This setup hides the mess and still looks warm. A lidded basket keeps loose packets, extra filters, and backup stir sticks out of sight, which is exactly what saves your counter from “morning chaos.” The sliding insert adds a functional layer: you can pull it out to grab tools without dumping the whole basket. Choose a basket with a lid that closes smoothly so you don’t leave it open out of frustration. This is ideal for homes where coffee is shared and people need fast access without rummaging.
Place a tray or small mat under the basket so drips don’t stain the counter. Pick a basket size that fits your “coffee zone” width and leaves 2 inches of edge space. Add a small wooden or plastic drawer insert that slides inside the basket — measure the interior width first and cut the insert to fit. Load the insert with daily tools: scoops, stir sticks, and a packet holder, then keep backups in the basket space under the insert.
Use felt pads under the basket feet so it stays stable on laminate counters.
Don’t use a lid that sticks — if it’s annoying, it stays open and defeats the whole point.
7. Magnetic Knife-Style Strip for Measuring Spoons and Tools
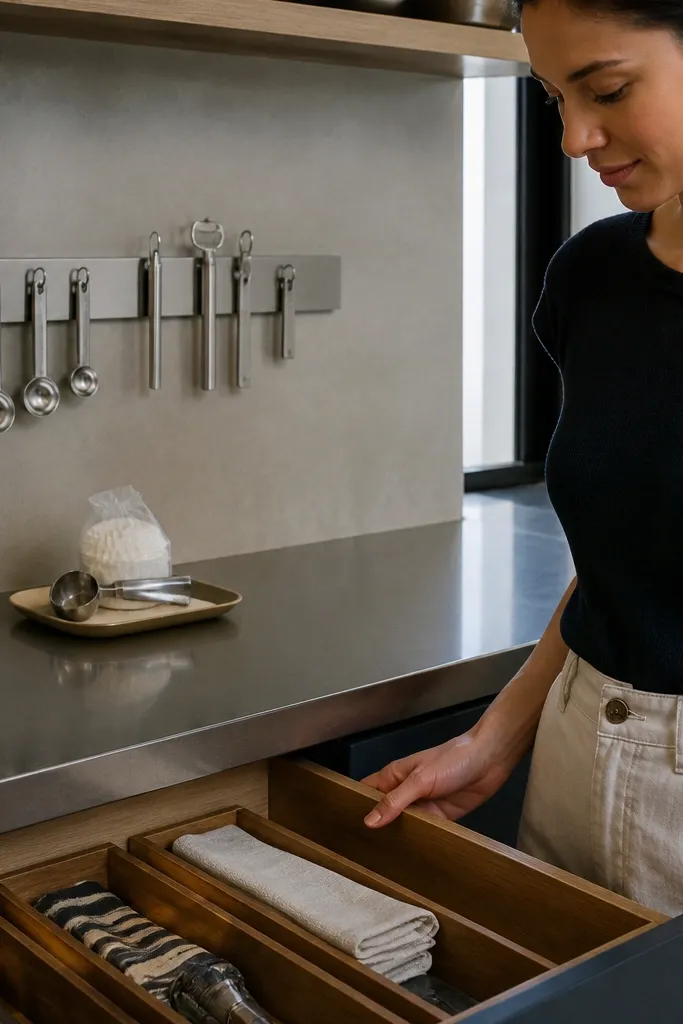
This is a space-saver with a sharp, clean look. Instead of leaving spoons and small tools in a cup, you hang them flat against a magnetic strip, which frees up counter space instantly. The station stays neat because tools have a fixed, visible home. Pair it with a small tray on the counter holding only the items you use right now. This works best when you have a backsplash area near your coffee routine and you want the station to look organized without adding bulky organizers.
Mount a magnetic strip on the backsplash at hand height, centered over your coffee zone. Choose tools with flat metal backs or magnetic-compatible bases so they hang securely. Add one small counter tray for daily items: a spoon rest, a sugar jar, and a filter organizer. Keep the rest of the supplies in a cabinet or drawer so the magnetic strip stays focused on tools.
Editor's noteWipe the strip weekly with a microfiber cloth so it doesn’t pick up dust that shows around the tools.
Skip thisAvoid hanging heavy items like full grinders on magnetic strips — keep it for small tools only.
8. Coffee Station Under-Shelf Swing-Out for Syrups
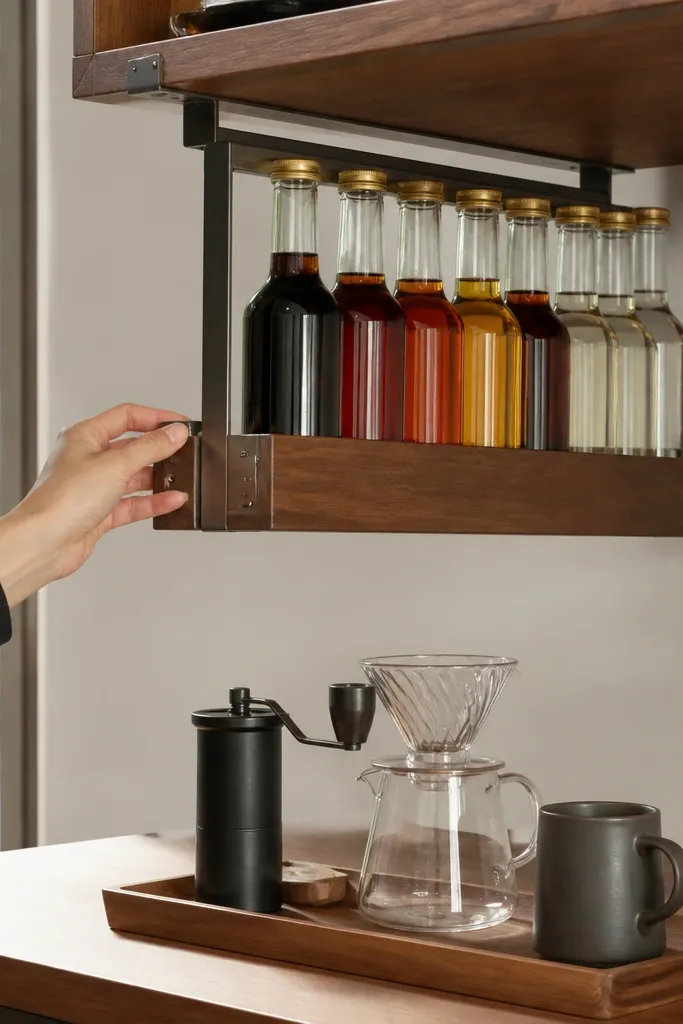
This idea uses the underside of existing shelving, which is free real estate most people ignore. A swing-out rack keeps syrups and extras accessible but off the main countertop plane. It looks sleek because the bottles line up vertically and the counter only shows a tidy tray of daily items. This is best for kitchens with open shelving or a window shelf above the coffee zone. You get both aesthetics and space savings without building a whole new wall system.
Measure the underside clearance under the shelf so the swing-out rack clears the counter by at least 6 inches. Install two mounting brackets into the shelf supports, then attach the swing-out rack with hinges or a slide mechanism. Add a small tray on the counter that holds only two syrup bottles and one spoon rest. Store the rest of the bottles in the swing-out rack and close it after use.
Editor's noteUse a small drip tray under the swing-out to catch any condensation or sticky syrup leaks.
Skip thisSkip flimsy racks — a wobbly swing-out makes bottles fall and ruins the clean look fast.
9. Countertop Coffee Zone with 3-Section Drawer Organizer
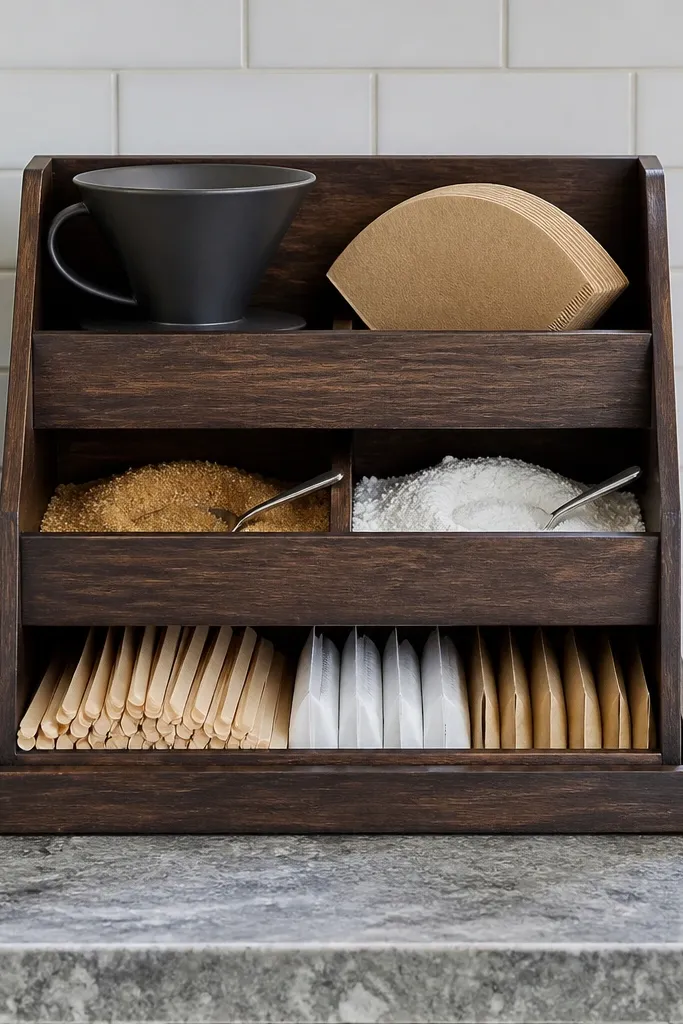
A drawer-style organizer on the counter is the fastest way to keep things from spreading. Three sections force a structure: brewing tools in one, daily add-ins in another, and backups in the third. It looks sharp because the lines are straight and everything sits at the same height. Use a tray underneath so any spills wipe clean, and choose a finish that matches your kitchen — bamboo, walnut, or matte black. This suits countertops that already feel busy because it visually contains the coffee area.
Choose a drawer organizer that fits a 16-20 inch tray area and has shallow compartments. Place it on a sealed tray or silicone mat so the unit doesn’t slide. Fill compartment one with a stack of filters in a small lidded container, compartment two with a syrup/canister cluster, and compartment three with tools like scoops and stir sticks. Add one small mug or two mugs beside the tray, not inside the organizer, so the compartments stay uncluttered.
Use small labels on each compartment so guests and family put things back correctly.
Avoid overfilling compartments — when compartments are packed tight, items spill out during grabbing.
10. Stackable Clear Canister Set with Slim Side Tray
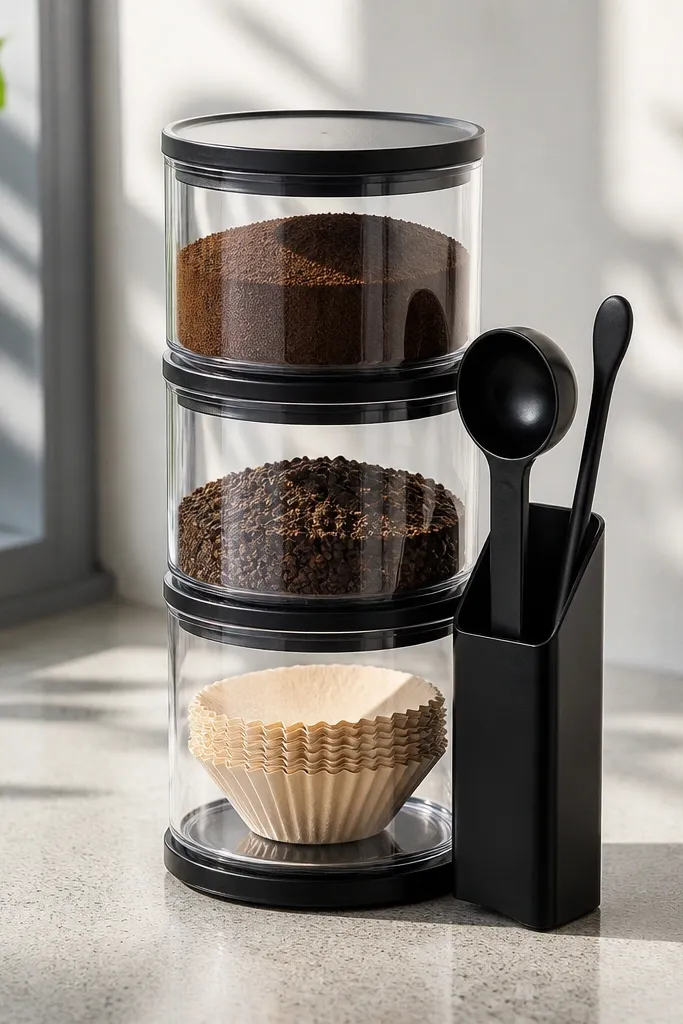
Clear canisters look clean and they show exactly what you have, which reduces the “where is the backup?” mess. The slim side tray keeps small tools from wandering into corners. Choose canisters with matching black lids or matching white lids so the station looks cohesive. This setup is good for filter coffee because it’s easy to see what’s running low. It also photographs well because the shapes stack neatly and the counter stays visually ordered.
Use two or three stackable canisters sized for your supply: one for whole bean or grounds, one for sugar packets or sweetener, and one for tea or backup. Place them on a tray with a slight lip so they don’t slide. Add a slim side tray next to the canisters for daily tools, keeping it under 6 inches wide. Finish by adding a small spoon rest and a folded towel or paper stack tucked under the tray edge.
Editor's noteStore filters in a lidded inner container inside the canister so loose paper doesn’t get crushed.
Skip thisDon’t mix lid colors — mismatched lids make even a neat station look chaotic.
11. Small Bar Cart Coffee Station with Rear Shelf for Backups
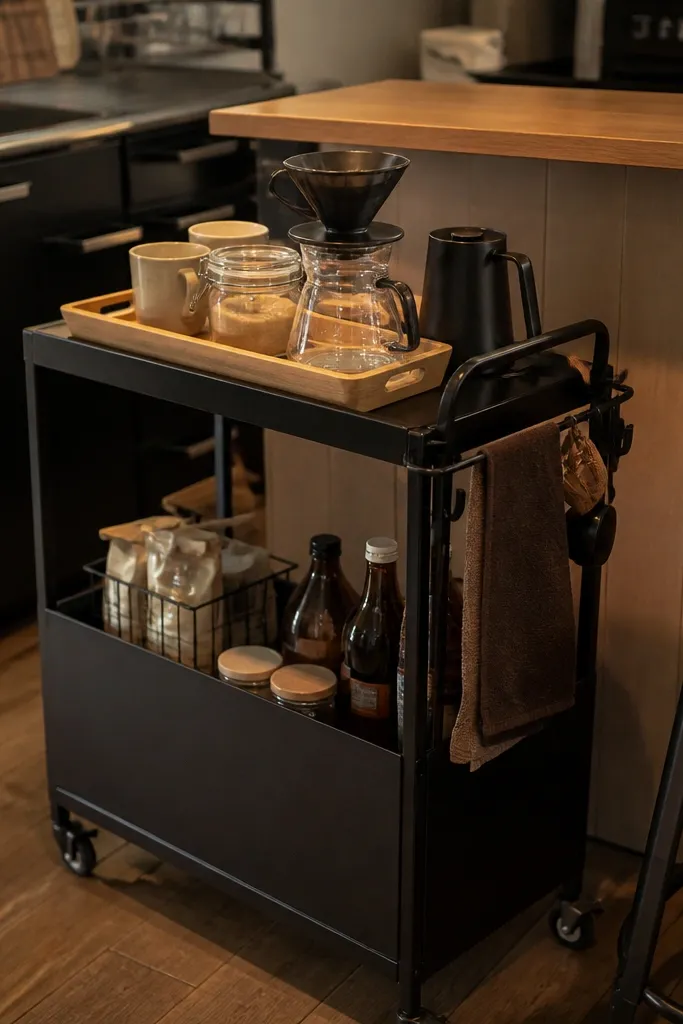
A small bar cart gives you vertical storage and mobility, which is perfect for saving space in multi-use kitchens. The look is clean because the items sit on the cart’s frames, not loose on the counter. Keep daily items on the top shelf and move backups to the rear shelf so you don’t overload the visible area. Matte black or brushed metal carts look best with warm wood canisters. This works well when you want coffee to be a “station” that can move during cleaning or when you host.
Pick a cart with a top shelf depth of 10-12 inches so it doesn’t dominate the counter area. Place a tray on the top shelf to keep canisters aligned and prevent small spills from rolling. Use a lidded container for extra filters on the rear shelf, and keep syrups in a small caddy on the top. Add a hook or small basket on the side for a bag of filters or a spare cloth.
Editor's noteUse locking caster wheels or a cart mat so it doesn’t scoot when you grab mugs.
Skip thisSkip carts with too many open shelves — you’ll fill them and lose the tidy look.
12. Cutting Board Coffee Service Tray with Corner Organizer
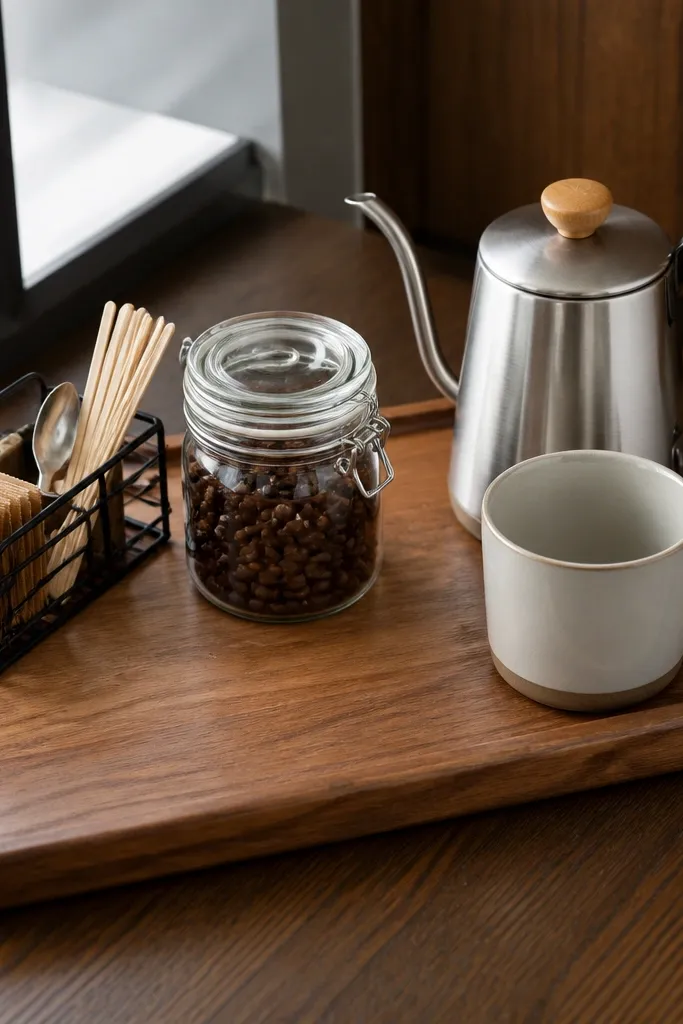
A cutting board turned coffee tray looks natural and warm, and it’s one of the most photogenic budget countertop coffee station ideas because the materials already belong in a kitchen. Add a corner organizer so the “small stuff” — packets, spoons, and stir sticks — doesn’t drift across the board. The raised board edge contains spills and keeps your station looking intentional instead of scattered. This setup suits kitchens where you want coffee to feel like part of daily prep rather than a separate appliance area.
Choose a cutting board that’s 18-22 inches long with a handle so it looks like designed decor. Place it on a silicone mat or tray liner under the coffee zone. Add a corner organizer insert — a small divided tray or two-slot caddy — secured with non-slip pads so it doesn’t slide. Set the board layout: mug(s) on one side, canisters in the center, and tools in the corner organizer. Keep backups in a drawer so only the board is visible.
Seal unfinished wood with food-safe mineral oil and buff dry so it resists sticky syrup marks.
Avoid boards with deep grooves — they trap coffee residue and look dirty fast.
13. Clear Acrylic Sneeze Guard Style Counter Organizer for Daily Items
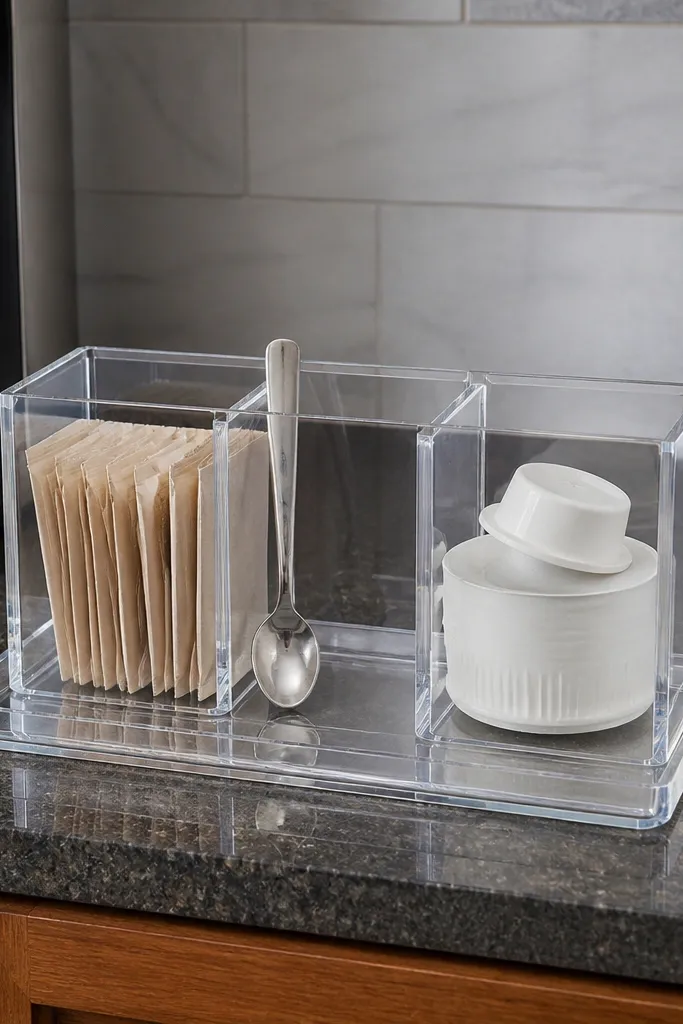
If your counter gets messy because items scatter when you’re moving fast, a clear acrylic organizer box solves it. The compartments keep packets and spoons from becoming a pile, and the see-through look stays crisp on camera. Pair it with a tray underneath so spills stay contained. This is a strong option for households where multiple people grab coffee quickly and put things down wherever they land. It looks modern and clean, especially with neutral canisters and black or white labels.
Find a clear acrylic organizer with at least three compartments and a flat base, sized for a 16-inch tray. Place it on a tray with raised edges so drips don’t spread. Fill the compartments in a strict order: packets on the left, spoons and scoops in the middle, napkins or wipes on the right. Add one small lidded jar for sugar or creamer on the tray edge and keep everything else in a cabinet.
Use thick label tape and black marker so text stays readable through the acrylic.
Skip decorative clutter around it — the acrylic already draws the eye, so keep the rest minimal.
14. Wall Shelf with Magnetic Spice Jars for Instant Add-Ins
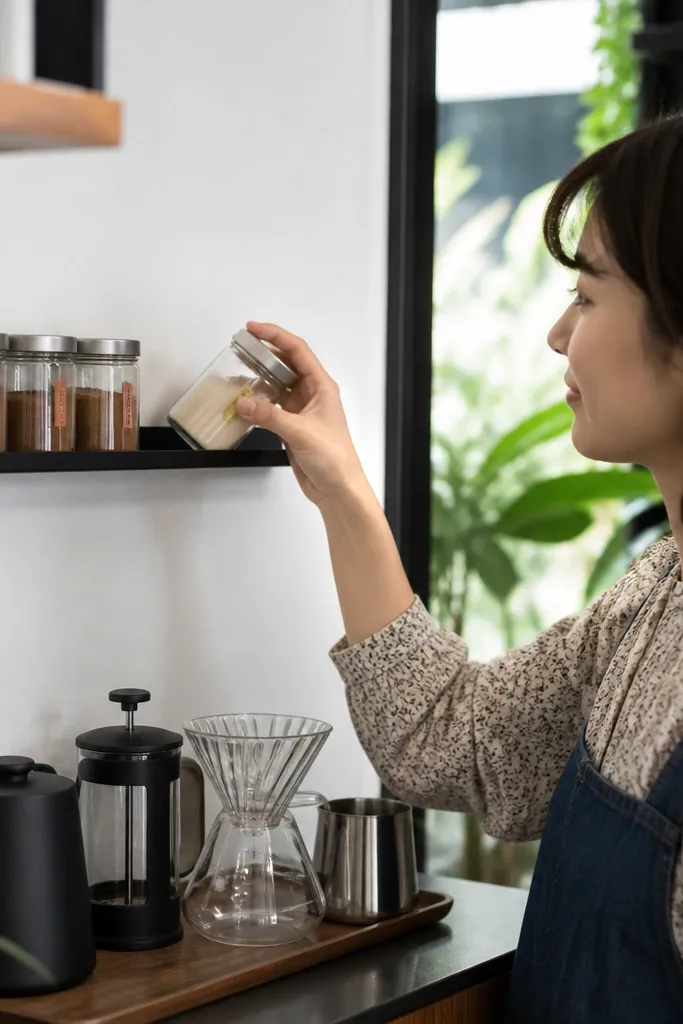
This is a clever way to turn instant add-ins into a clean, repeatable setup. Magnetic spice jars look tidy because they’re uniform, and they keep small packets from ending up loose on the counter. The wall shelf keeps the jars at eye level, while the counter tray holds only the day’s brewing tools. Use jars with matching lids and label each one with a bold, simple marker label. This suits kitchens where you want the counter to stay clear but still want daily customization at arm’s reach.
Mount a narrow floating shelf above your coffee zone, then attach a magnetic strip to the shelf underside or back wall panel. Use magnetic spice jars and stick them in a row so they don’t fall or wobble. Place a small counter tray below for the brew method tools and a lidded container for filters. Label jars so each flavor has a consistent spot, then keep the rest of the flavors stored away.
Editor's noteChoose jars with wide openings so scoops go in easily without scraping lids.
Skip thisDon’t mount too high — if jars are above shoulder height, people stop putting them back correctly.
15. Coffee Station with Under-Mug Shelf and Vertical Paper Towel Holder
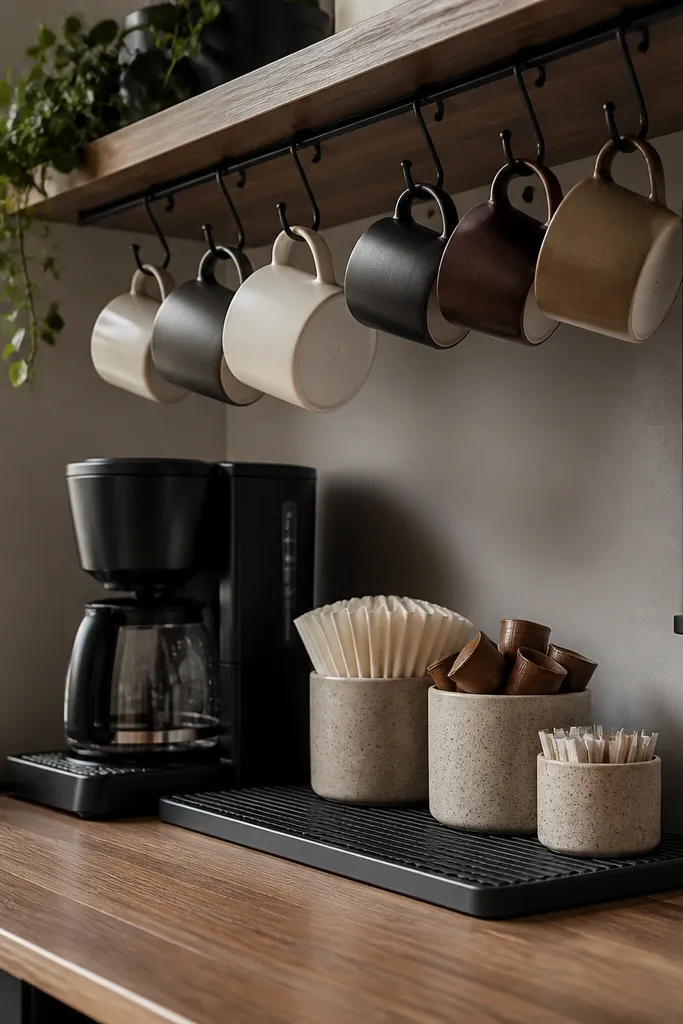
This setup is built for mess control. When mugs hang under a shelf, they don’t take up counter width, and you also reduce the chance of knocking over small items. A vertical paper towel holder makes cleanup immediate, which keeps coffee drips from turning into sticky mess on the counter. Pair it with canisters that have matching finishes so the whole area looks designed. This is best for kitchens where you brew daily and need a cleanup workflow that stays fast.
Install a small shelf above your coffee zone and attach cup hooks underneath, spacing mugs evenly. Add a vertical paper towel holder on the side of the coffee zone so it’s reachable without reaching over hot items. Place canisters on the counter in a straight line, then add a small tray for daily tools like scoops and stir sticks. Keep the trash or wipes container nearby but out of the main view so the station still looks neat.
Use a drip-catching tray under the brew tools so you don’t have to wipe the entire counter.
Skip open paper towel holders that tip — falling towels ruin the clean look instantly.
16. Fold-Flat Counter Mat with Matching Tray for Daily Brew Tools
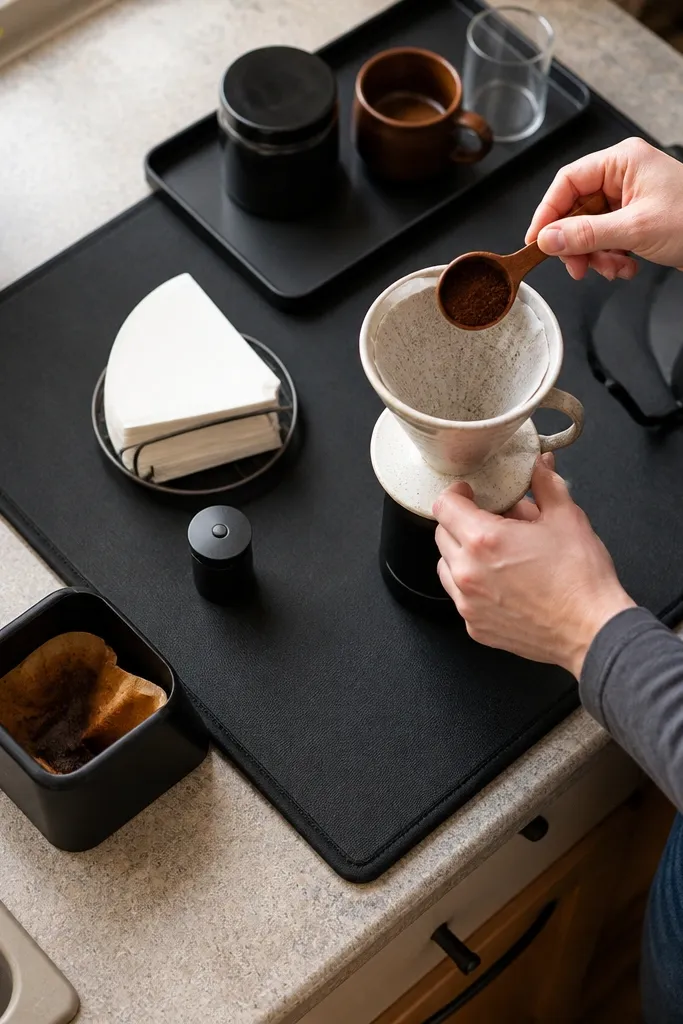
This is a tidy trick: the mat creates a boundary so coffee tools don’t wander. When you brew, everything stays on the mat and you wipe one surface instead of the whole countertop. The matching tray on top keeps the “mess-prone” items contained — filters, scoops, and a small trash bin. For budget countertop coffee station ideas, mats are cheap, easy, and they look intentional when the tray and colors match. This suits renters who don’t want to mount hardware and people who want an easy reset after breakfast.
Choose a mat size that covers the brewing footprint, typically 18-24 inches wide depending on your brewer. Place it on the counter and center your tray on top of it. Add a small lidded container for filters, a spoon rest, and a jar for sugar or sweetener — all kept inside the tray boundary. When you finish, wipe the mat and put only the used items away, leaving the tray ready for next time.
Use a mat with a textured surface so it hides tiny coffee stains better than glossy finishes.
Avoid mats that slide — if the tray moves, you’ll get spills and the whole setup looks messy.
17. Corner Counter Coffee Station with L-Shaped Under-Tray Divider
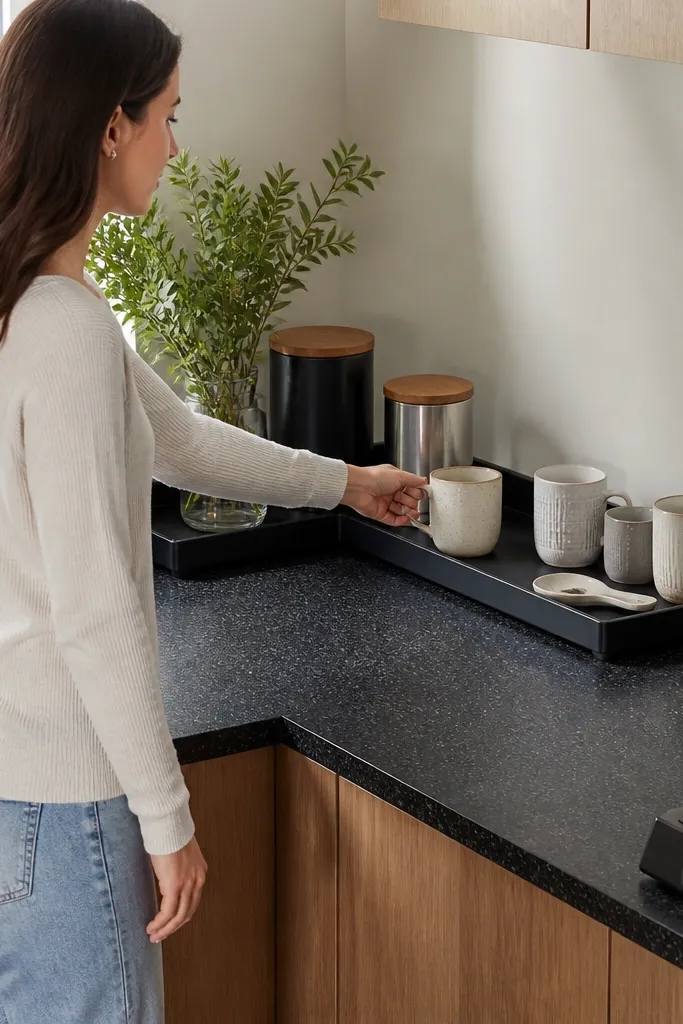
Corners are wasted space unless you build for them. An L-shaped under-tray divider gives you two straight sides, which keeps mugs and canisters from colliding or spreading into the main walkway. This idea saves space because it uses the corner’s natural boundary and keeps the station from growing outward. Keep the look tight with matching canisters and one color for labels. It’s great for small kitchens where the coffee routine happens near a corner outlet or beside a fridge.
Measure the corner width along both walls and choose an L-shaped tray or create one with a divider board cut to fit. Place the L-shaped divider on the counter and add a main tray layer on top. Put mugs along one leg of the L and canisters along the other leg so everything stays separated. Add a small lidded container in the corner pocket for backups, keeping the counter surface clear.
Use non-slip pads under each divider leg so the tray doesn’t creep when you bump it.
Skip oversized mugs — if mugs stick out too far, they block the other items and make the corner feel crowded.
18. Small Window Sill Coffee Station with Clip-On Spice Racks
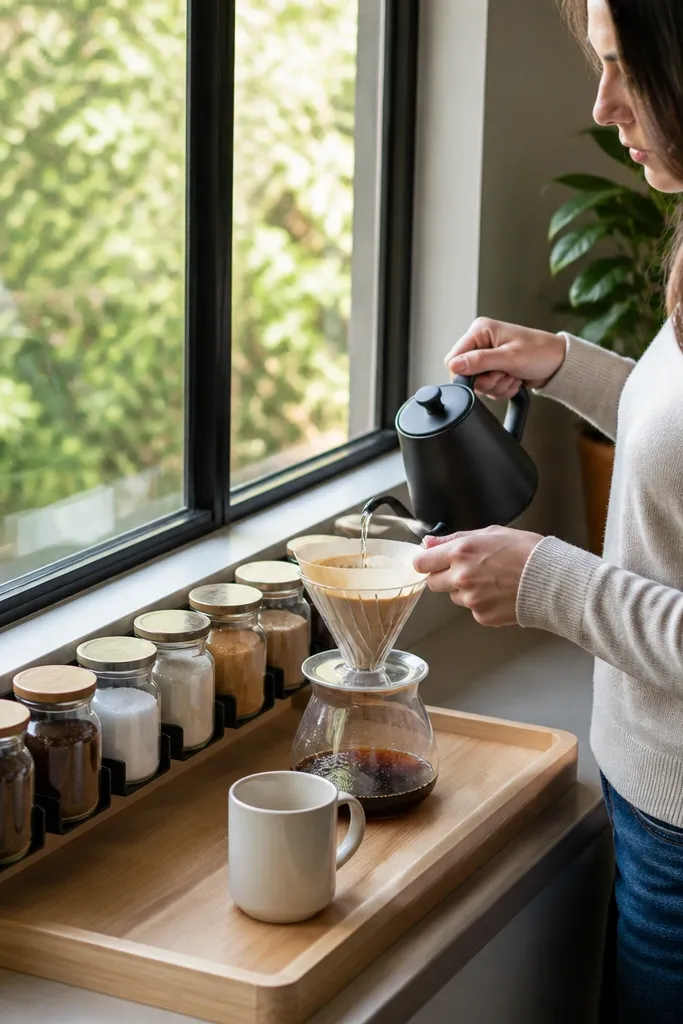
Natural light makes coffee stations look better, and a window sill is already the right height for styling. Clip-on spice racks add vertical organization without drilling, and they keep add-ins visible and aligned. Use a tray beneath to protect the sill and catch any drips. This setup works when you have a shallow sill and want the station to feel like decor instead of clutter. Keep the number of visible items low: two canisters, one sugar jar, and a small spoon rest.
Place a flat tray or mat on the window sill to protect the surface. Clip a spice rack onto the sill edge or inside the window frame area if clearance allows, then hang small jars or canisters with matching lids. Add hooks or small clips for spoons and measuring tools so they don’t end up loose. Finish by arranging mugs on a small tray so they don’t touch the window area and wiping the tray edges after use.
Choose jars with opaque bodies if your sunlight is strong — it keeps blends from fading and looks cleaner over time.
Avoid placing coffee directly on raw wood near the window — condensation and spills can stain it.
19. Magnetic Whiteboard Backer with Menu Cards for Coffee Station
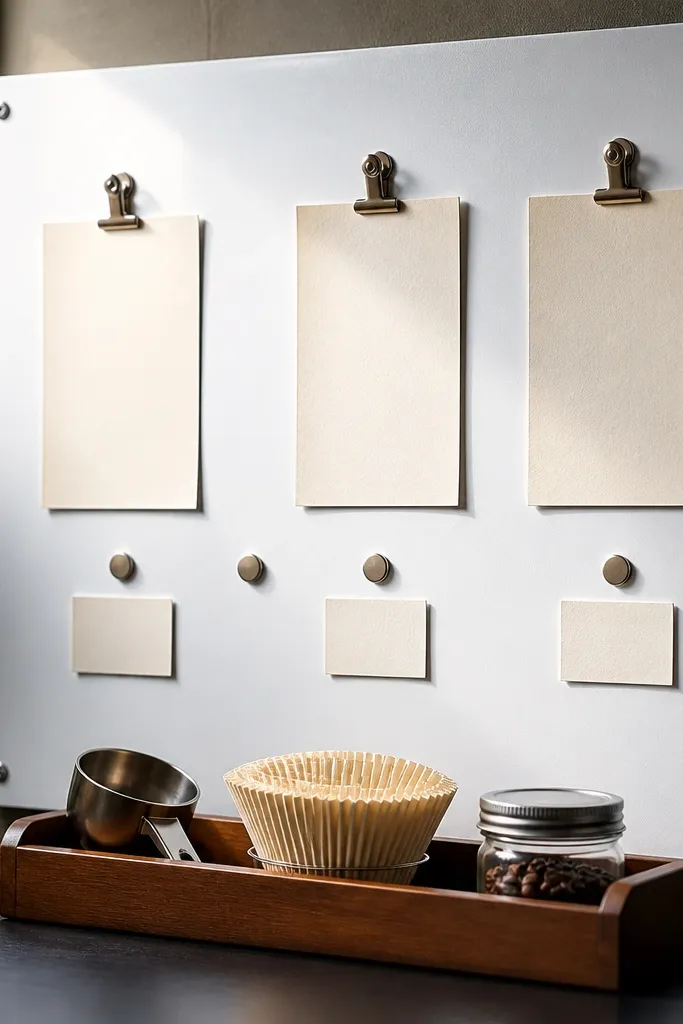
This is a functional look that keeps your station tidy because it tells you where things go. A magnetic whiteboard backer gives you a backdrop for labels and a place to hang small metal scoops or clips. The cards also reduce clutter because you don’t need piles of printed instructions — everything is one neat set. Use a small tray in front for the day’s tools and keep backups behind or in a cabinet. This suits homes where you want the coffee routine to look styled for guests and still work for daily use.
Mount a small whiteboard panel on the wall or backsplash using adhesive strips rated for the surface. Add magnets for small clips, then attach a labeled menu card holder behind the front tray. Place canisters and a lidded sugar jar on a tray in front of the board, aligned so the labels match the items. Hang a metal scoop on a clip and keep a small paper towel roll out of the main view.
Use a single font style on your labels so the whole station reads cohesive in photos.
Avoid writing clutter on the board — too many cards makes it look like a notice wall.
20. Stacked Bookshelf-Style Coffee Station with Flat Trays (No Tall Towers)
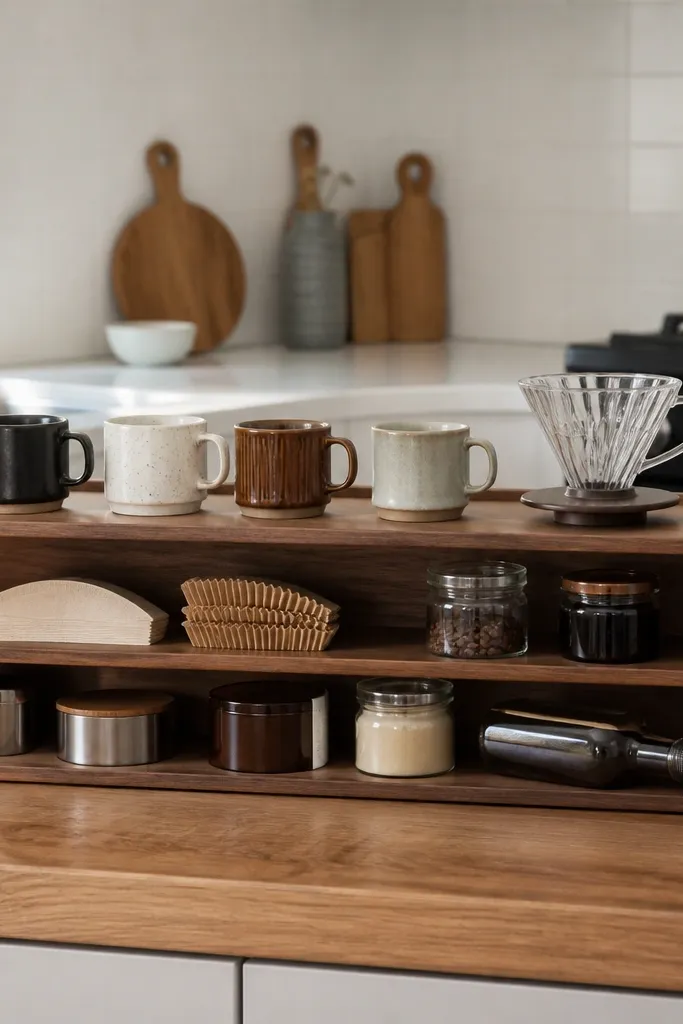
If you want height without losing counter space, use a low shelf unit with flat trays instead of a tall tower. The look is architectural: straight lines, repeated tray surfaces, and a clear separation between daily items and backups. Keep the shelf unit under 18 inches tall so it doesn’t dominate the kitchen. This setup is photogenic because it creates layers — top tray for decor-like items, bottom tray for functional storage. It works best for kitchens where you have a small open area near the counter but no wall storage you can drill into.
Choose a low shelf unit with two tiers and a footprint that fits your coffee zone rectangle. Place flat trays on each tier so everything stays aligned and wipes clean. Put daily items on the top tray — canisters, a spoon rest, and a small jar — and keep backup filters in a lidded container on the bottom tray. Add a small basket under the bottom shelf for extra paper towels or stir sticks if you need it.
Editor's noteUse tray liners that match the tray finish — it makes the whole setup look intentional.
Skip thisSkip tall shelf units — they look top-heavy and you’ll end up stacking too much.



