
1. Two-Level Double-Hang with a Second Rod
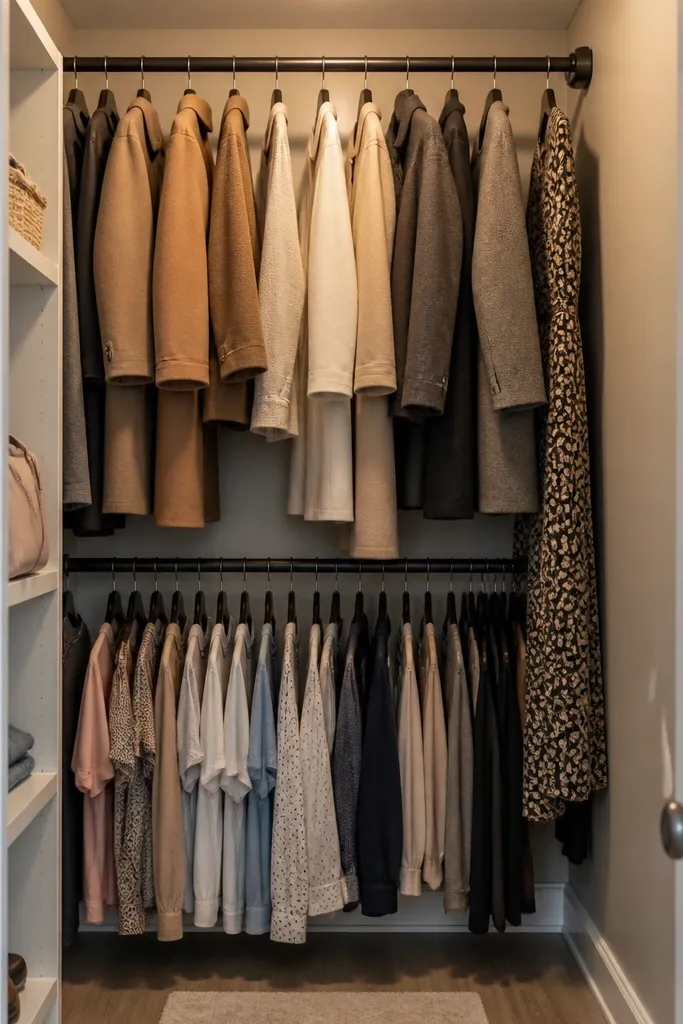
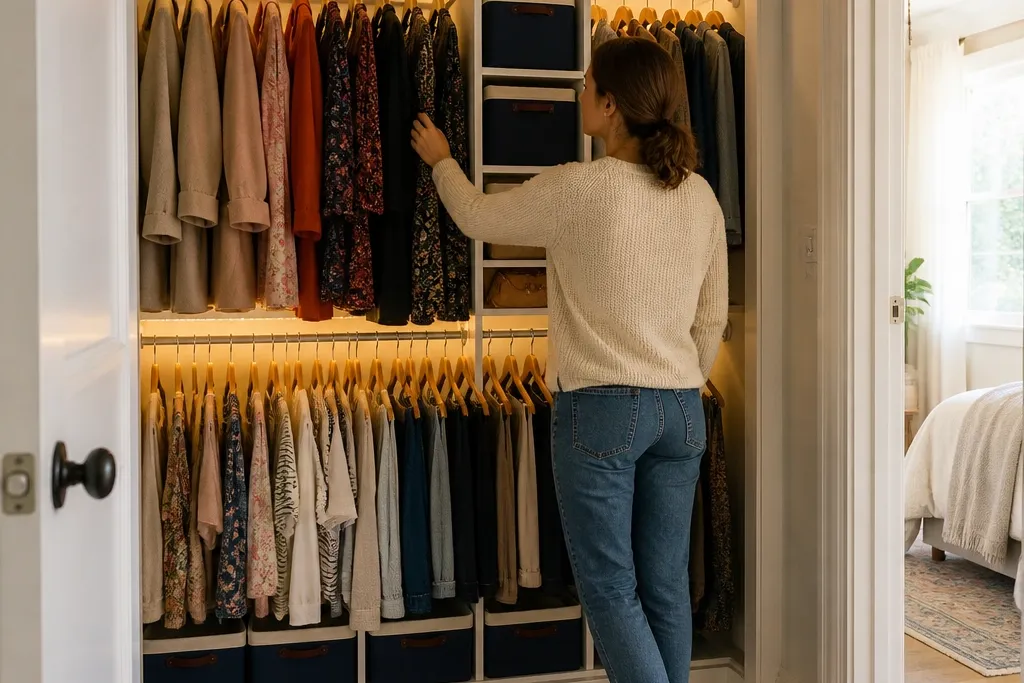
This is the fastest way to turn “one rod” into two usable zones. A second rod lets you store short items like shirts, pants, and lightweight dresses below while keeping coats and long dresses up top. The look stays clean because everything hangs in the same direction, so your closet doesn’t turn into a pile. Use this when your closet already has a single bar and you’re losing space because you can’t stack folded items without cluttering the floor.
Start by measuring the distance from the top of your existing rod to the closet ceiling or the top trim. Mount a second rod so it sits about 28-32 inches above the floor for short hangers, then keep the top rod high enough for full-length coats. Use a level and pencil marks to align brackets on both sides, then drill pilot holes and screw the brackets into studs or the strongest wall anchors you can hit. Finish by matching hangers (same style, same metal or wood tone) so everything visually lines up.
If you hang pants on the lower level, choose clothespin-style hangers so hems don’t drag into the shoes.
Don’t mount the second rod too low — if you can’t slide hangers in and out smoothly, you’ll stop using it.
2. Over-the-Door Shoe + Accessory Rack
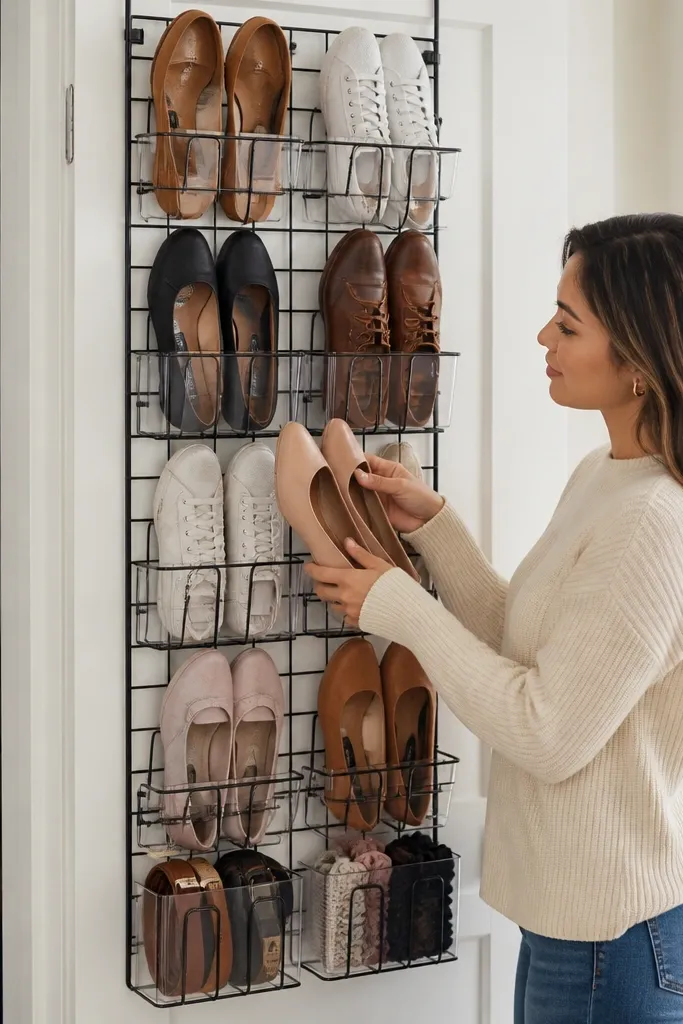
This adds storage without stealing closet depth, which matters in narrow closets. The rack hangs behind the door line, so you get vertical space for shoes, scarves, and small accessories. It looks tidy when you keep shoe pairs together and use small matching bins for items like belts or hair ties. Go for this when your closet floor is currently cluttered or when you have one door and no drawer space.
Hang the rack on the inside of the closet door and adjust it so the bottom clears the floor by at least 2 inches. Sort shoes into pairs and place them in the same orientation so the rack looks uniform. For scarves and belts, add small fabric or clear bins to the hooks or shelves if the rack supports it. Secure any loose sections by tightening screws and checking that the door still closes without tugging the rack.
Use clear bins for small accessories so you can find items without opening everything.
Skip the “too heavy” items on the top sections — flimsy racks sag and the look turns messy fast.
3. Slim Back-Wall Hanging Organizer (The Hidden Second Closet)
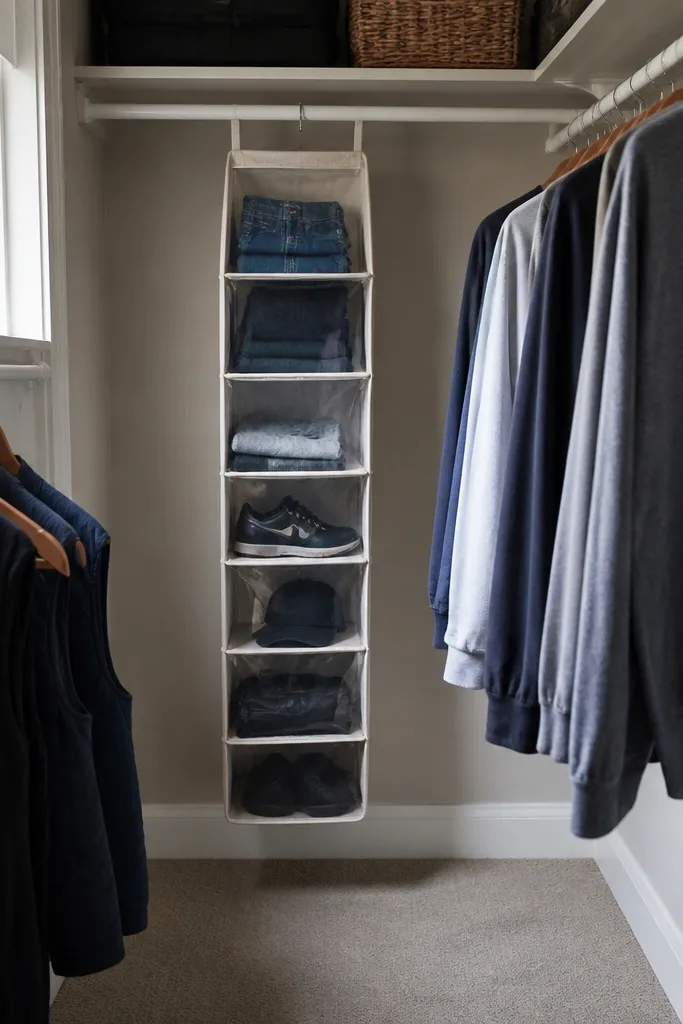
If your closet has a deep back wall but you’ve been using the front for everything, this is the clean fix. A slim hanging organizer mounted to the back wall gives you a second storage plane for folded sweaters, workout gear, or folded jeans. It stays photogenic because sections are separated, not shoved together. This is a good choice when you can’t add another rod and you don’t want bins sitting in front of the door.
Choose an organizer with 6-10 compartments and a fabric or rigid backing that doesn’t balloon out. Mark the back wall height so the organizer sits above the floor line by about 4-6 inches for clearance. Drill pilot holes and mount with screws into studs if possible; if you can only use anchors, pick heavy-duty ones and avoid overloading. Fold items into consistent sizes so each compartment fills neatly and closes without forcing.
Editor's noteFold jeans using a tight rectangle, then store them standing up in the organizer for faster scanning.
Skip thisDon’t cram oversized bulky items — if you can’t close the compartments, the whole thing collapses visually.
4. Clear Drawer Unit Under Hanging (Front-Facing Folded Line)
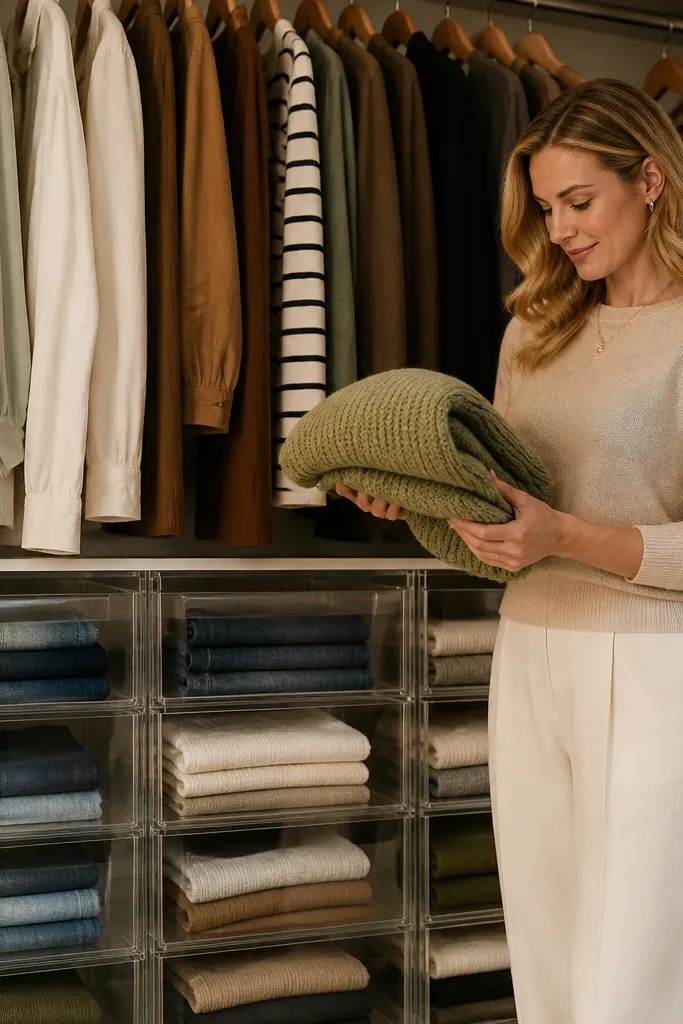
This gives you a front-facing folded storage line that looks organized because the contents are visible and contained. When drawers sit under the hanging zone, you use the “wasted” lower area and keep folded items off the floor. Clear drawer fronts also make the closet feel lighter because you don’t have to open lids. Use this if your closet has hanging bars but no real place for folded tees, socks, or small sweaters.
Measure the space under the hanging rod and choose a drawer unit that fits with at least 1 inch of clearance on each side. Install a simple shelf or ledger board if you need to create a level mounting surface. Slide the drawers in, then add labels on the front edge cards so each drawer has one job. Fold items to the same width so drawers close without bulging.
Editor's noteUse cardstock labels with a thick black marker and a small lamination strip for durability.
Skip thisSkip mixed categories in one drawer — if socks and tees share space, you’ll lose the tidy look.
5. Cube Shelving with Fabric Bins in a Two-Color Palette
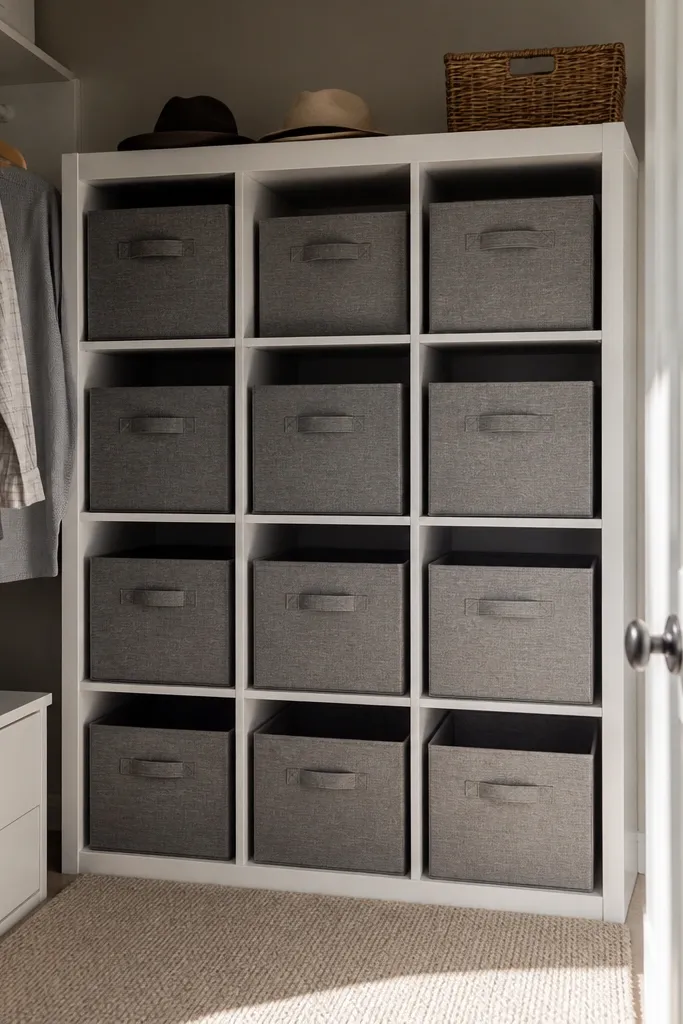
Cube shelving is one of the easiest ways to make a closet look intentionally designed. The structure gives you crisp lines, and fabric bins hide mess while still keeping shapes consistent. A two-color palette (for example, gray bins and white shelves) makes the closet look bigger because your eye isn’t bouncing around. This works well when your closet has a shelf area you can retrofit or when you want a dedicated folded zone.
Pick cube sizes that fit your closet width, then dry-fit the unit before mounting anything. Install it level and anchor it to the wall so it doesn’t wobble when you pull bins. Use bins that match in height for a uniform look, and stack folded items into rectangles that fill each cube without gaps. Leave the top row for items you don’t grab daily, like seasonal hats or extra linens.
Editor's noteLine the top of each bin with a fabric strip so the folded clothes settle flat and don’t slide.
Skip thisDon’t mix random bin sizes — uneven heights make small closets feel chaotic.
6. Hanging Pants Organizer with Clips (One Pair Per Slot)
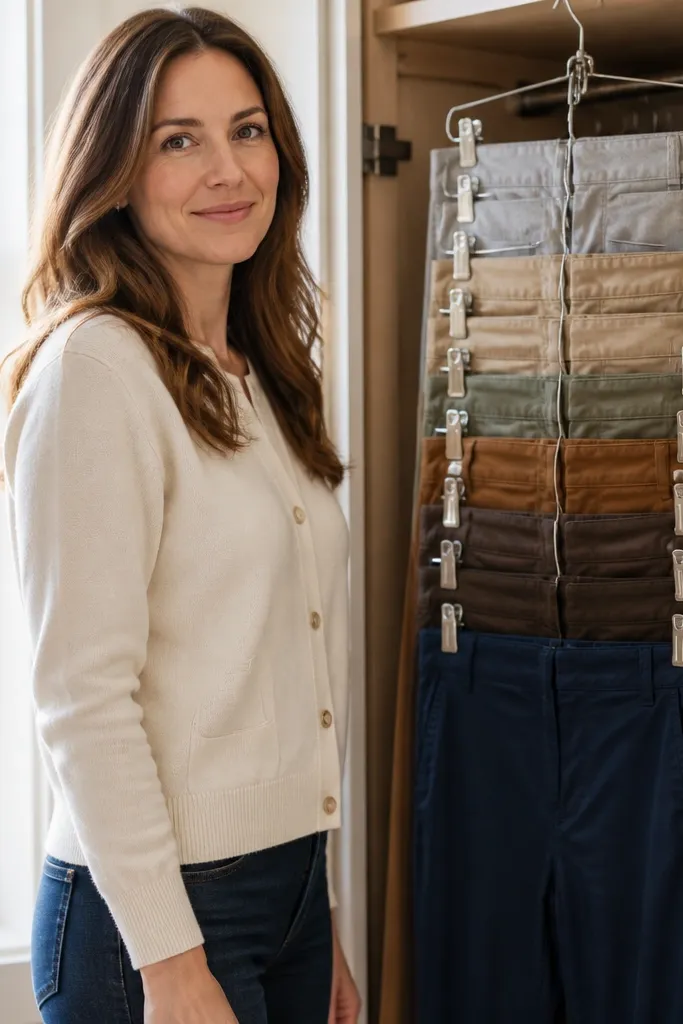
This turns pants storage from “fold and hope” into a clean hanging system that saves space and reduces wrinkles. Clip organizers let you store multiple pairs in vertical slots without stacking bulky folds. The look is especially good when each pair is oriented the same way and color-coded by category. Choose this when your closet floor is full of folded jeans or when you hate digging through piles for one pair.
Buy a hanging pants organizer with clips that match the width of your closet bar. Hang it on the rod and leave a small gap between clips so fabric doesn’t bunch. Use one organizer row per category, like denim on the left and trousers on the right, then keep each pair clipped at the waistband. Finish by smoothing the legs down so hems align visually.
Editor's noteClip the waistband first, then slide the fabric so the clip grips flat — it looks cleaner and prevents creases.
Skip thisDon’t use clips on delicate fabrics like silk — the organizer will still work, but the pull marks ruin the look.
7. Stacked Clear Lidded Bins on a Shelf with Labels
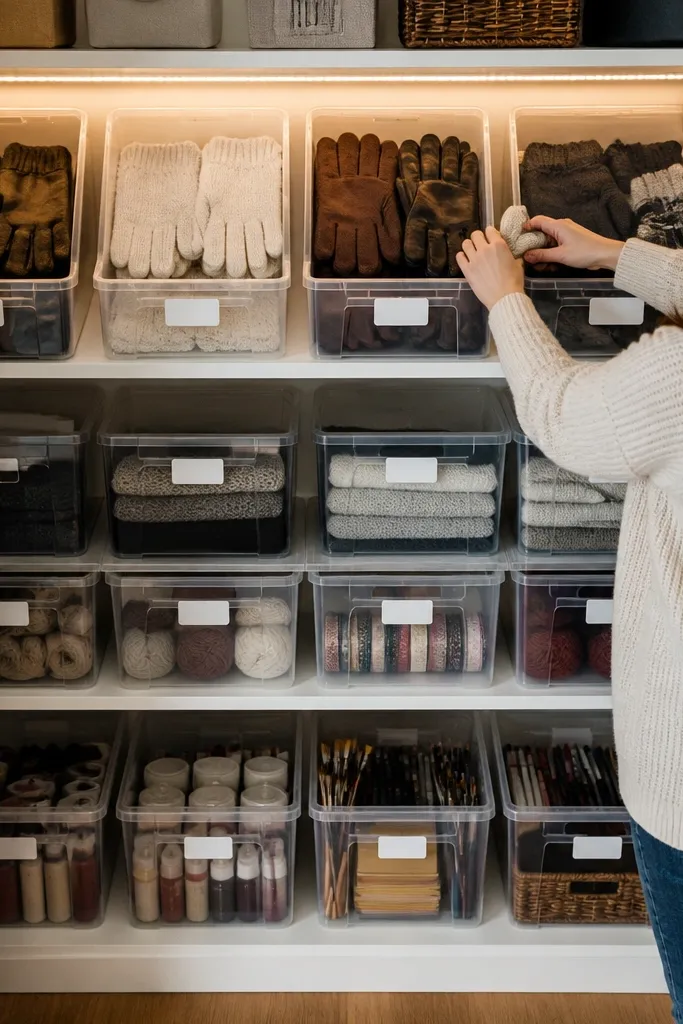
Clear lidded bins give you contained storage and a uniform visual grid. You get the “photo neat” look of matching boxes while still protecting items from dust. This works best for small accessories, winter gloves, craft supplies, or anything you don’t need to grab every day. It doubles usable space by letting you stack vertically on shelves instead of letting loose items spill into the floor area.
Measure shelf depth and choose bins that fit with a 1/2 inch clearance for airflow. Stack them into a stable column, then label the front with a bold label so you can find items without opening. Keep contents consistent: one bin for gloves, one for hats, one for chargers. Add a small piece of felt or foam under the bin stack if your shelf is smooth so bins don’t slide.
Use label tape on the lid edge and the front — you can read it from different angles in a tight closet.
Avoid mixing tall items with short ones in the same stack — it forces awkward gaps.
8. Shoe Storage with Under-Shelf Pull-Out Trays
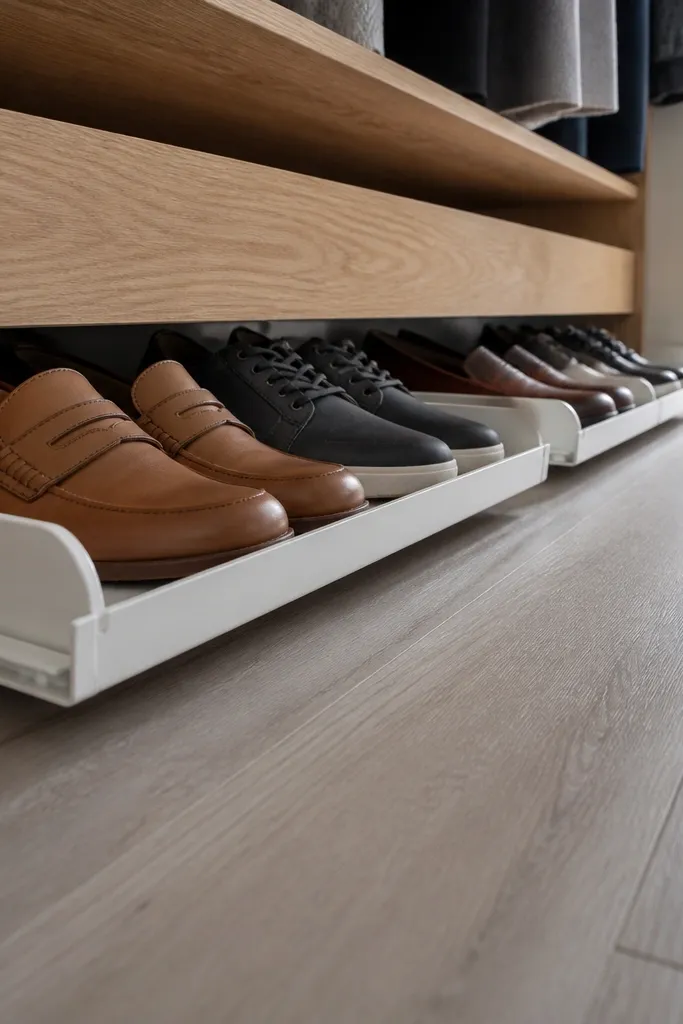
Under-shelf pull-out trays make shoes look intentional instead of scattered. They use the space under a shelf that people usually ignore, and you only pull out what you need. The look stays clean because shoes are lined up and contained. This is ideal if you already have a shelf above your shoes or if you can install a shelf at about 12-15 inches above the floor.
Install a shelf at a height that leaves room for shoes to slide in and out — start with 14 inches from the floor. Attach drawer slides to the underside using a level, then mount matching trays to the slide hardware. Place shoes toe-forward in each tray section so the front edge lines up. Test pull-out with the heaviest shoe you own to confirm clearance and smooth travel.
Editor's noteAdd a thin rubber shelf liner on the tray bottom so shoes don’t squeak and the tray stays neat.
Skip thisDon’t guess the shelf height — if it’s too low, you’ll scuff shoes and hate using it.
9. Corner Shelf with a Mirror-Back Panel
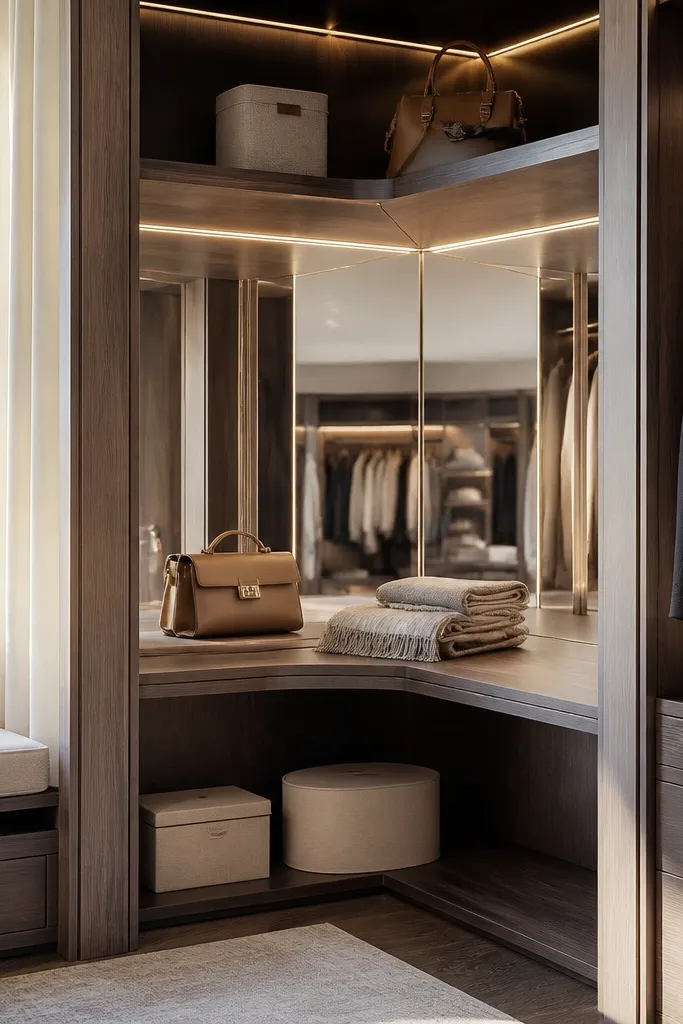
A corner usually holds nothing but dust. A small shelf in the corner adds a dedicated display and a functional storage spot for folded accessories, bags, or scarves. Put a mirror-back panel behind it and the closet looks deeper because light bounces off the corner. This is a visual trick with real payoff: it makes a cramped closet feel less closed-in while giving you a styled surface.
Measure the corner wall and build or buy a shelf that fits without blocking access to the door. Mount the shelf with two sturdy brackets and keep the shelf face flush with the corner line. Cut a mirror panel to size and mount it to the back wall using adhesive made for mirrors or screws with protective spacers. Style the shelf with 2-3 categories only so it reads as intentional instead of clutter.
Editor's noteUse a small fabric runner under the folded items so the mirror doesn’t show every small wrinkle.
Skip thisSkip full-size mirrors if you can’t mount them securely — a loose mirror looks sloppy fast.
10. Pegboard Panel for Small Closet Accessories
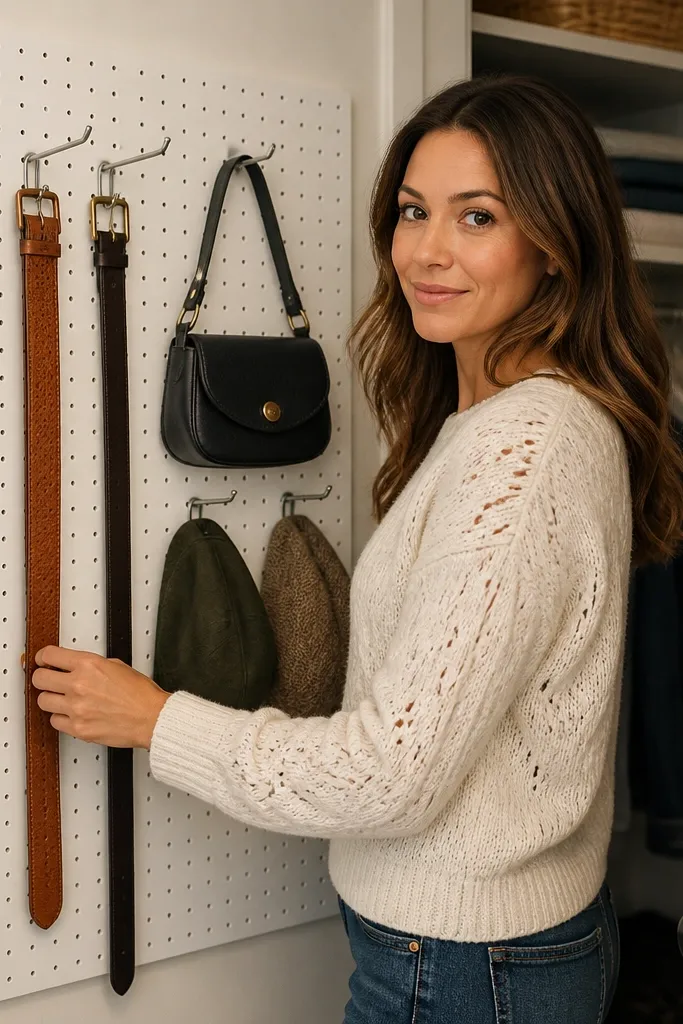
Pegboard turns the inside of a closet wall into a tidy accessory station. It’s one of the best Budget Closet Organization ideas for belts, hats, and small bags because you can re-space hooks as your wardrobe changes. The look is sharp: clean grid lines, consistent hook spacing, and items hanging neatly in rows. Choose this when your closet has blank wall space and your accessories are currently stacked in drawers or on the floor.
Cut pegboard to fit the wall section and mark stud locations so you can mount securely. Paint pegboard white or a color that matches your closet trim to keep the look cohesive. Install hooks for belts and scarves, then use small baskets on a few pegs for sunglasses or hair tools. Hang items by size and keep one category per hook height so everything lines up visually.
Use a label dot system on the board with painter’s tape to map hook placement before you commit.
Don’t mount pegboard too high — if hooks sit above eye level, you’ll stop using it.
11. Folded Sweater Drawer Method with File Trays
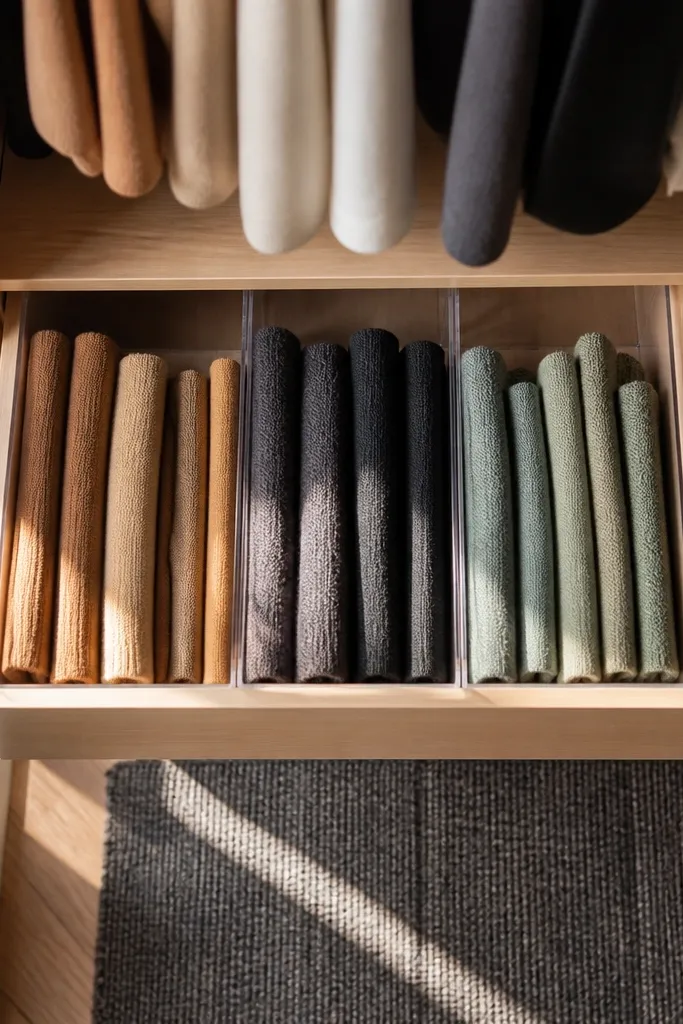
Sweaters and tees look better when they stand up, not when they lie flat in a pile. File trays inside a drawer create vertical compartments so you can see every color without digging. This is a space multiplier because you stop overstuffing and you keep the drawer height usable. It’s best for small closets where you have drawers or can add a narrow drawer unit under hanging clothes.
Measure your drawer width and depth, then buy file trays that fit with about 1/2 inch clearance for smooth slide. Insert trays so each compartment holds one folded rectangle size. Fold sweaters using a consistent rectangle technique so they stand straight — then place them front-to-back by category. Add a single label card on the drawer front so you don’t mix categories over time.
Editor's noteIf your drawer is shallow, store only knits that don’t cling — avoid heavy wool that compresses and collapses the tray structure.
Skip thisDon’t pack the drawer so tight that trays bow — it turns into a mess the first week.
12. Clear Hanging Bag Organizer for Laundry-Day Items
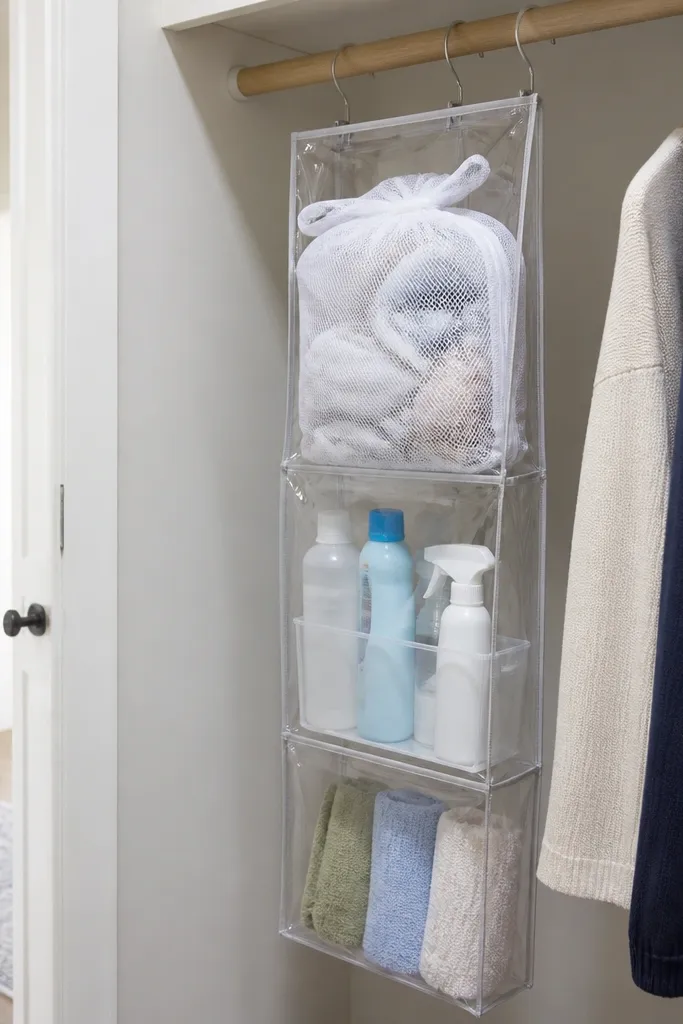
A hanging bag organizer keeps “laundry day stuff” from turning into a pile in the corner. Clear panels make it easy to see what’s inside, so you don’t forget items or grab the wrong bag. This idea doubles usable space by moving the storage off the floor and out of the main hanging zone. It’s ideal for small closets where there’s no room for a hamper next to the door.
Choose a hanging organizer with multiple compartments and clear fronts. Mount it to the inside of the closet door or to the side wall using screws and anchors that match your wall type. Label each compartment with a marker directly on label tape — for example, “Delicates” and “Towels.” Fold and drop items consistently so each bag stays flat instead of ballooning.
Editor's noteUse a hook on the door edge for a small lint brush so the closet stays clean and the bags don’t collect fuzz.
Skip thisAvoid stuffing the compartments past the seam line — overstretched bags look messy and sag.
13. Wall-Mounted Bin Track for Seasonal Items
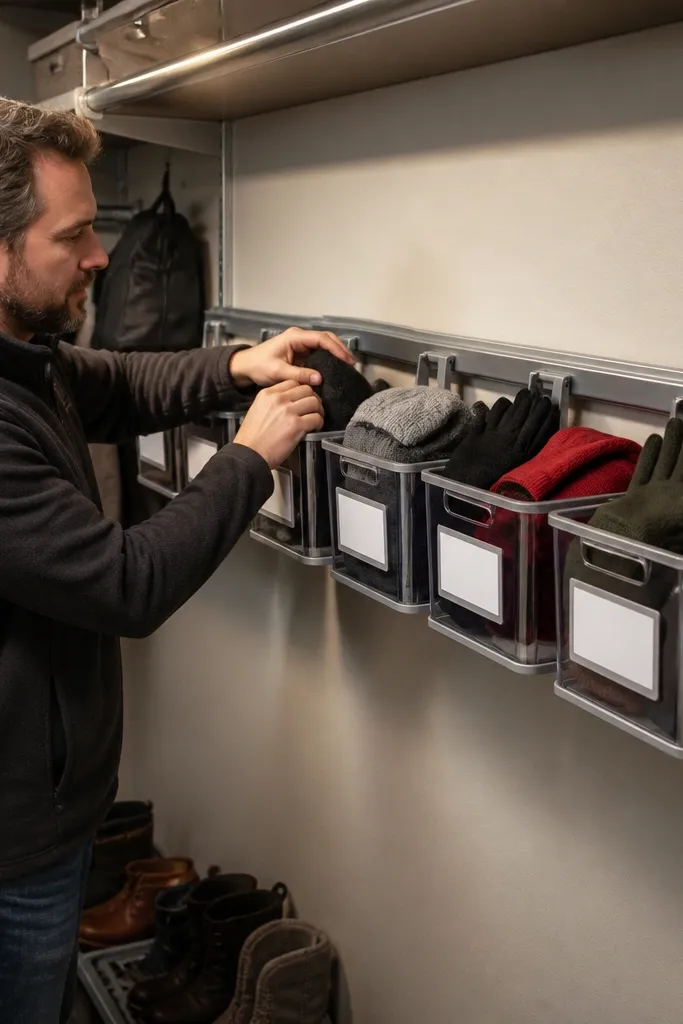
A bin track system turns a wall into an organized seasonal storage zone. The bins slide or sit in a fixed row, so they look aligned and you can pull out only what you need. This is especially helpful when your closet is small and you don’t want a tall tower of bins taking up floor space. The photogenic part is the straight row of same-height containers with readable labels.
Measure your wall width and pick a track height that keeps the top bin reachable without a step stool. Install the track level using a stud finder, then mount bin supports according to the kit. Use identical bins so the row looks uniform, and add labels on the front face. Store seasonal items by weight — lighter items on top, heavier on lower bins so the row stays stable.
Editor's noteStick to one bin size across the whole run so the label layout stays consistent.
Skip thisSkip mixed bin heights — it makes the wall look uneven and smaller.
14. Bar-Top Shelf for Folded Shirts and Tees
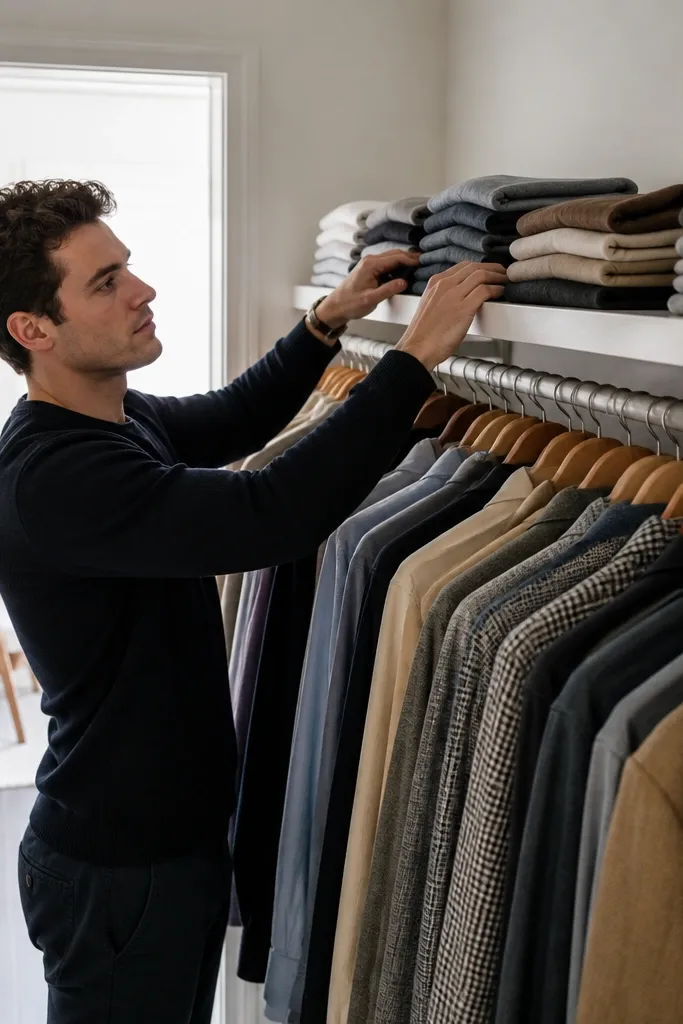
A bar-top shelf creates a second level without adding a whole new rod. Use it for folded shirts, tees, or lightweight layers that you don’t need daily but still want visible. The look is clean because the shelf line matches the rod line, so your closet reads as one system. This works when your closet depth is tight and you don’t want bulky bins in front.
Choose a shelf bracket system that rests on the rod supports or mounts to the side walls. Measure the space above your hanging clothes and leave at least 2-3 inches of clearance so hangers don’t scrape the shelf. Install brackets, then set the shelf and check level. Fold items into slim stacks, place them in a single row on the shelf, and keep the top surface uncluttered.
Use a fabric or paper shelf liner in a light color so folded shirts don’t look dusty or yellowed.
Don’t store items that need to breathe — anything that’s damp will stink up the shelf fast.
15. Pegboard Inside a Closet Door for Belts and Scarves
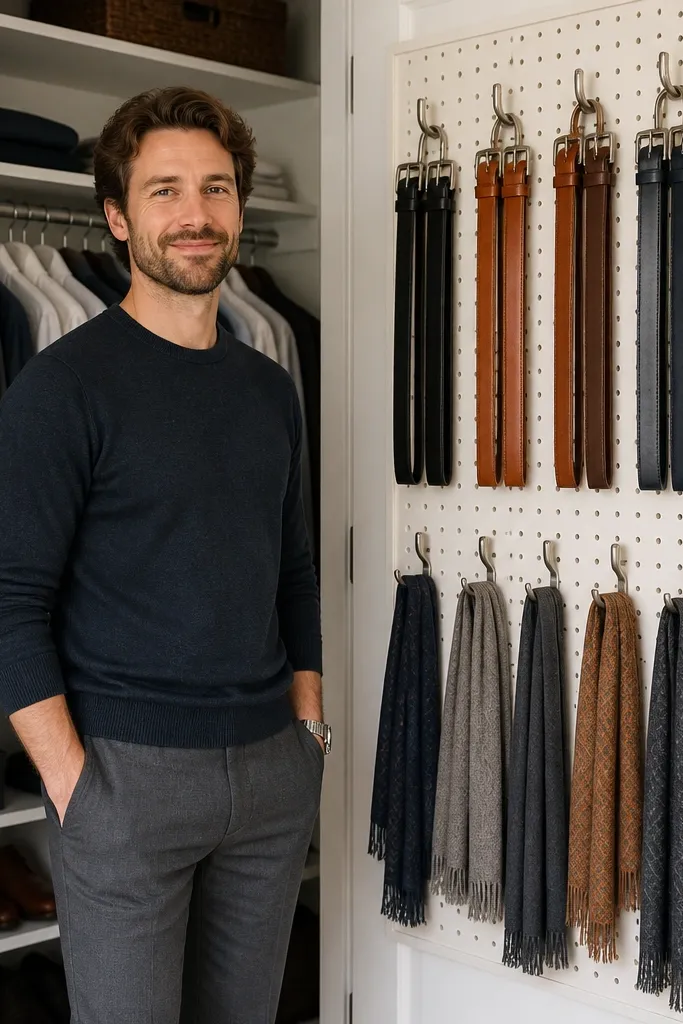
This is a high-impact Budget Closet Organization idea because it uses the door, which usually goes unused. Belts and scarves look better hanging than folded when you want a styled, clean look. The door pegboard also keeps accessories away from the main hanging zone, which makes the closet feel less crowded. Use it when your closet door swings inward and you have a flat door surface you can mount to.
Measure the door panel area and cut pegboard to fit, leaving a small gap for hinges and hardware. Paint or finish the pegboard so it matches your closet interior. Mount with screws through the door panel where it’s sturdy, then add hooks at two heights: low for belts, mid for scarves. Hang items by length and keep the rows aligned so the door reads neat every time it opens.
Editor's noteAdd two small baskets at the bottom for hair accessories so they don’t drop behind coats.
Skip thisDon’t mount hooks too close together — thick belt buckles need spacing or everything tangles.
16. Rolling Laundry Sorter in a Slim Space
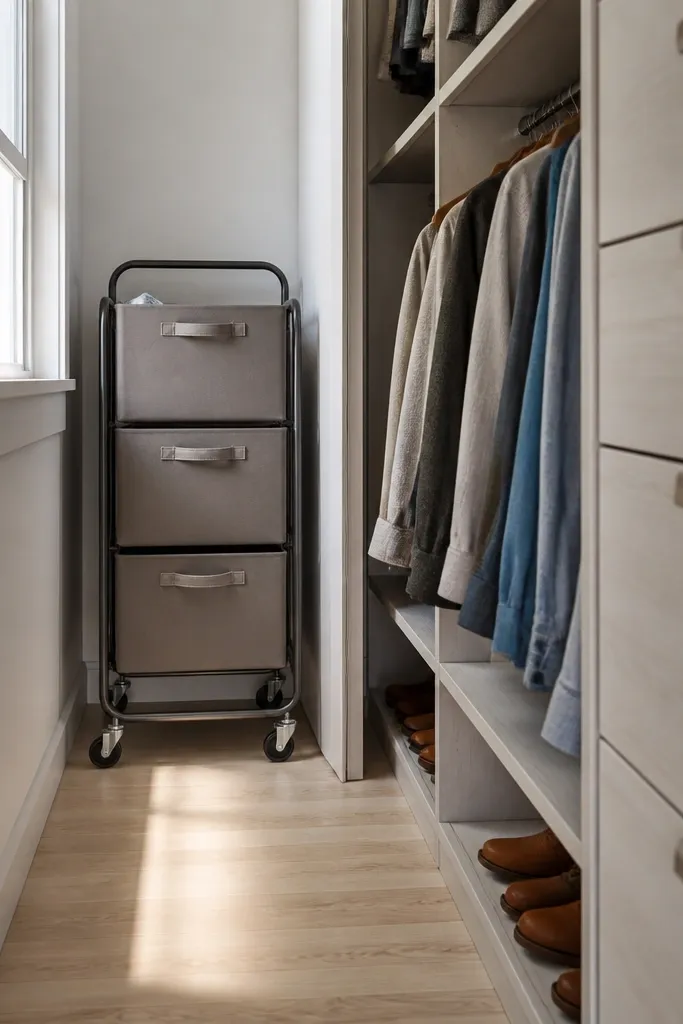
A slim rolling sorter cleans up the floor and gives you a dedicated “in-between” zone. When laundry is stored in labeled bins, it stops migrating onto the closet floor and it keeps the rest of your closet looking sharp. The look is better when the bins match and you choose a neutral color that doesn’t clash with your closet. Choose this when your closet is small enough that a bulky hamper feels like it’s in the way.
Measure the available gap beside the closet wall and pick a sorter with a footprint under that width. Roll it into place, then label each bin with a strip of label tape. Put the sorter near the place you remove clothes so you actually use it, not tucked behind things you never move. Keep each bin type consistent — for example, whites in one, darks in another, delicates in the smallest bin.
Editor's noteLine the bottom with a thin mat so bin edges don’t scuff your floor and the sorter stays quiet.
Skip thisSkip random color bins — mismatched bins make the closet look messy even when it’s organized.
17. LED-Backed Shelf for a Styled Display Moment
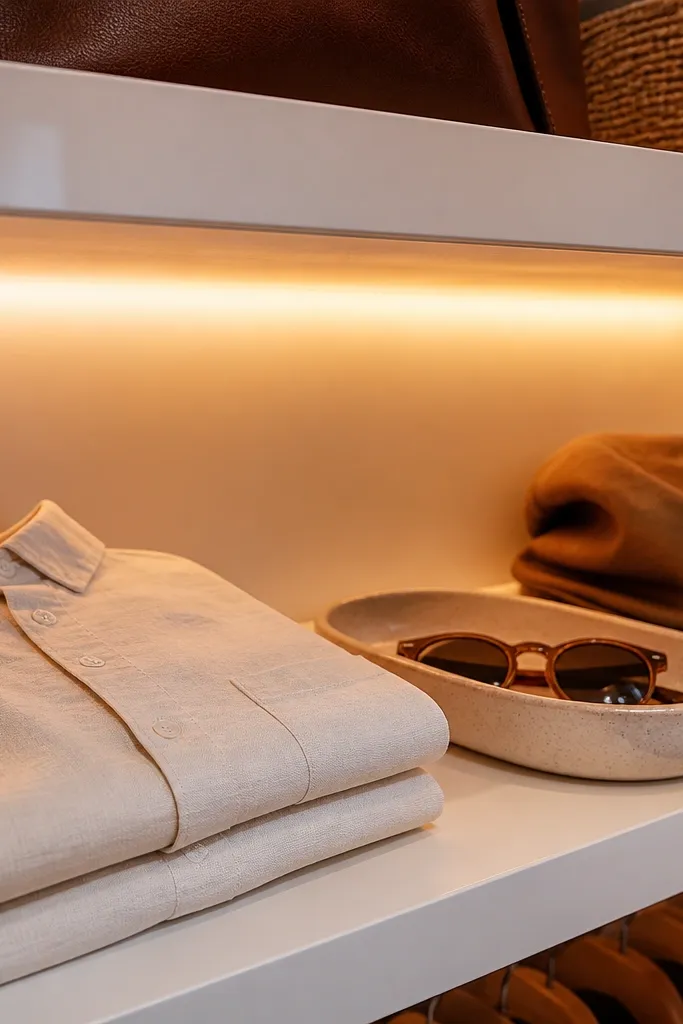
Small closets look bigger when you add light at shelf level. A shelf with warm LED strips behind it makes folded items and accessories look crisp and intentional, not hidden. It also helps you find things faster, which matters when you’re working in a tight space. This is best for closets where you already have at least one shelf and you want it to look like a built-in nook.
Install a low-profile shelf and mount a warm LED strip along the back edge. Use a battery pack or plug-in driver depending on your outlet access, and route the wire neatly along the side. Style with 2-3 categories only — for example, folded scarves, a small tray for sunglasses, and a labeled bin for gloves. Place items so they sit flush against the front edge for that clean, photographed look.
Use warm white LEDs around 2700K so the closet doesn’t look harsh or gray.
Don’t overfill the shelf — LED makes clutter look louder.
18. Slim Folding Step Stool Storage on the Side Wall
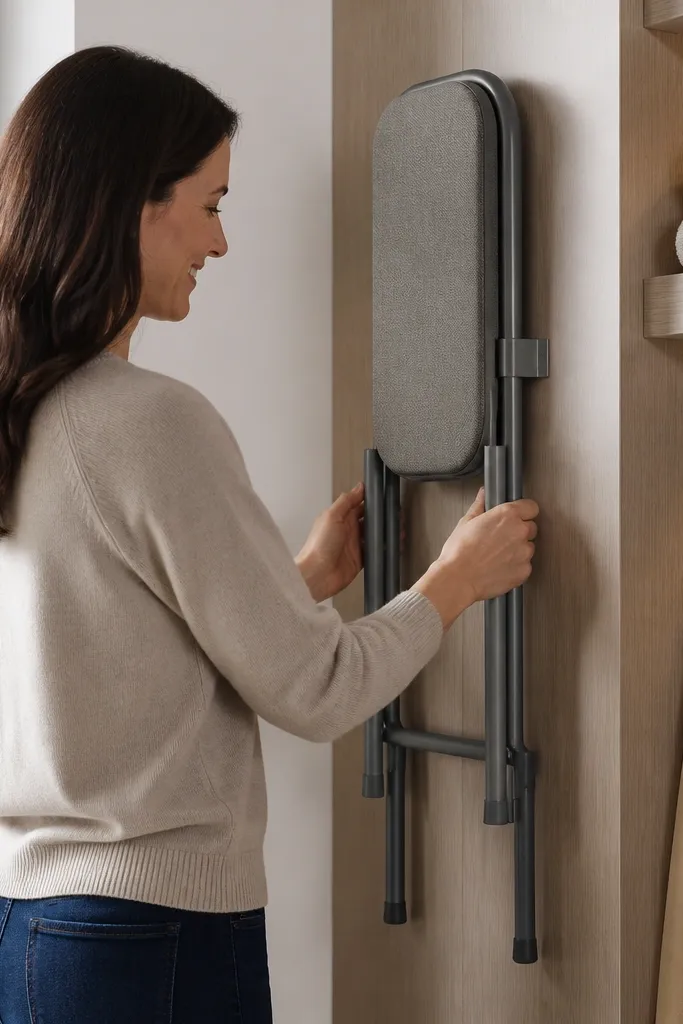
This one sounds boring, but it doubles usable space because it lets you actually use the top shelf. If you avoid the top because it’s annoying to reach, the top becomes dead storage and you stop using your closet fully. A wall-mounted bracket for a slim step stool keeps it tidy and reachable. The look stays clean because the stool is stored vertically or against the wall instead of leaning in the corner.
Pick a slim folding step stool that folds flat enough for your wall space. Mount a bracket or strap system on the side wall at a height that lets you grab it without moving clothes. Place the stool in the bracket and test the reach with the door open. Use the top shelf for lightweight seasonal items and keep the middle shelf for daily items.
Editor's noteStore the stool with the feet facing the wall so dust doesn’t collect on the steps.
Skip thisSkip wall mounting if your closet wall can’t take screws — a falling stool creates a safety mess.
19. Hanger Color Coding with Matching Clips and Labels

Color coding is the aesthetic trick that makes organization look real. When hangers match and each category has a small tag, the closet reads organized even before you perfect the layout. This doubles your usable space because you stop re-shuffling garments when you can’t find the right piece. It’s a good choice when your closet is packed but you don’t want to redo hardware — you’re upgrading the system you already have.
Choose one hanger type for the whole closet and stick to one finish, like matte black or natural wood. Add a small label tag to each hanger section: for example, blue for work shirts, green for casual tees, red for dresses. Arrange by category in vertical blocks so the tags line up. Keep the spacing consistent — leave a 1/4 to 1/2 inch gap between hangers so the closet looks intentional.
Editor's noteUse thin satin ribbon tags for dressy categories so they look neat and don’t snag fabric.
Skip thisDon’t color code everything with random shades — you need a small, repeatable set.
20. Folded-Linen Shelf Divider Panels
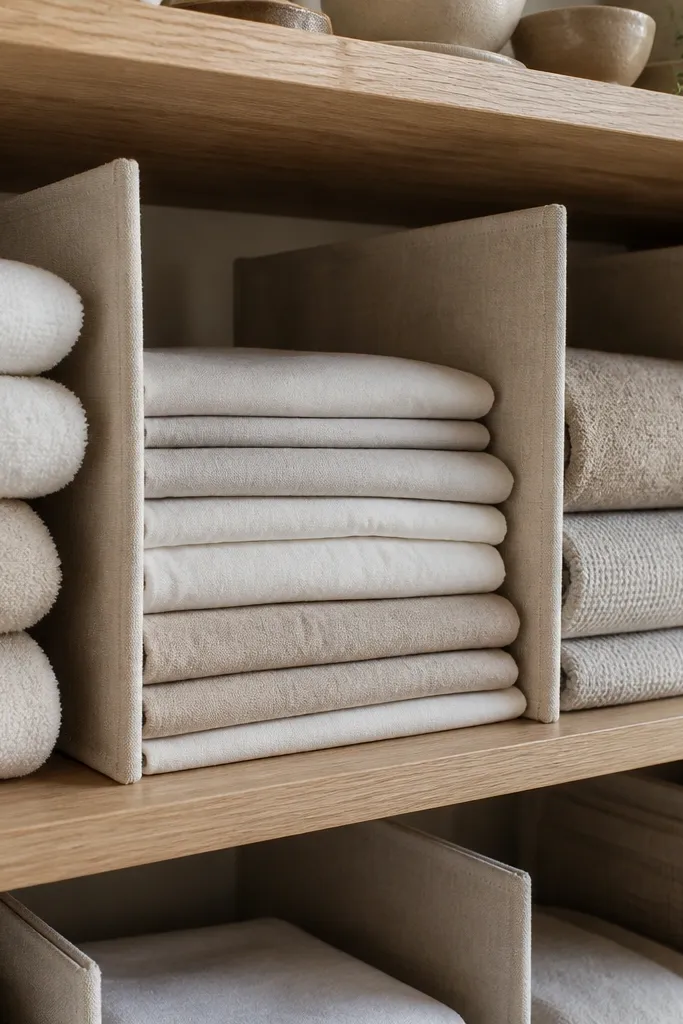
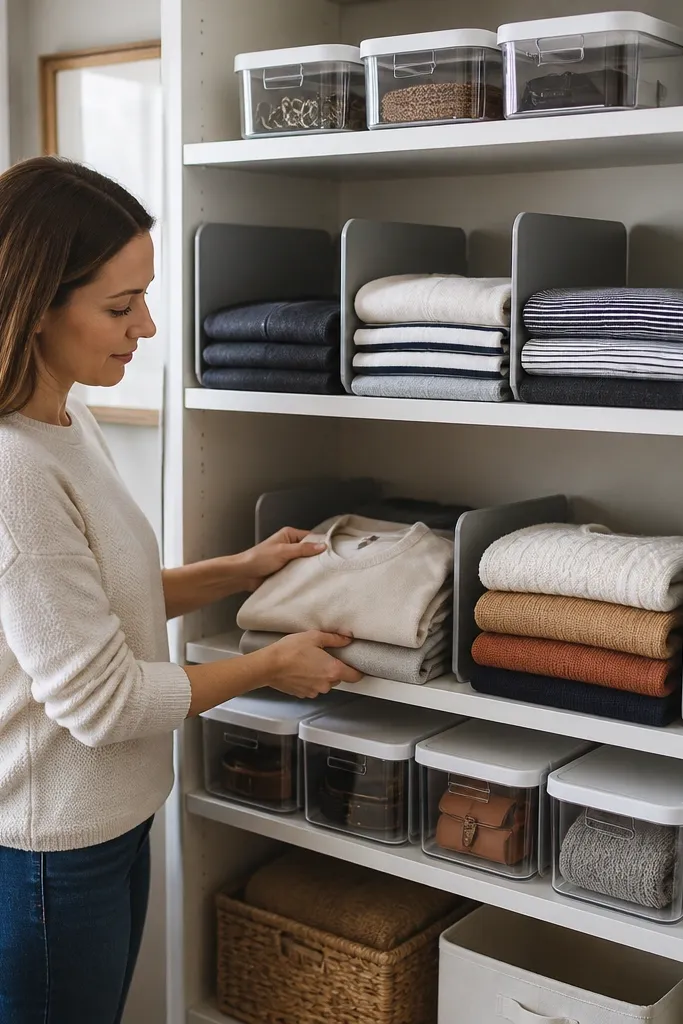
Shelf dividers make folded linens and towels look like they belong in a boutique display. They stop items from sliding into each other and they create clean rows, which makes the closet feel bigger. This is a space multiplier because you can fit more folded pieces without the “slump” that happens when everything is loose. Use it on shelves where folded items currently look like a stack of pancakes.
Measure the shelf interior and cut divider panels from thin plywood or plastic sheet so they fit snugly. Place dividers to create compartments sized for your folded rectangles, like 10-12 inches wide for towels and 8-10 inches for tees. Secure dividers with small screws or adhesive designed for the shelf material. After installing, fold items to match the compartment widths and place them standing or stacked flat, depending on thickness.
Editor's noteAdd a light layer of shelf liner under each compartment so fabric doesn’t shift when you pull items out.
Skip thisDon’t leave dividers too far apart — wide gaps make small closets look empty instead of organized.



