
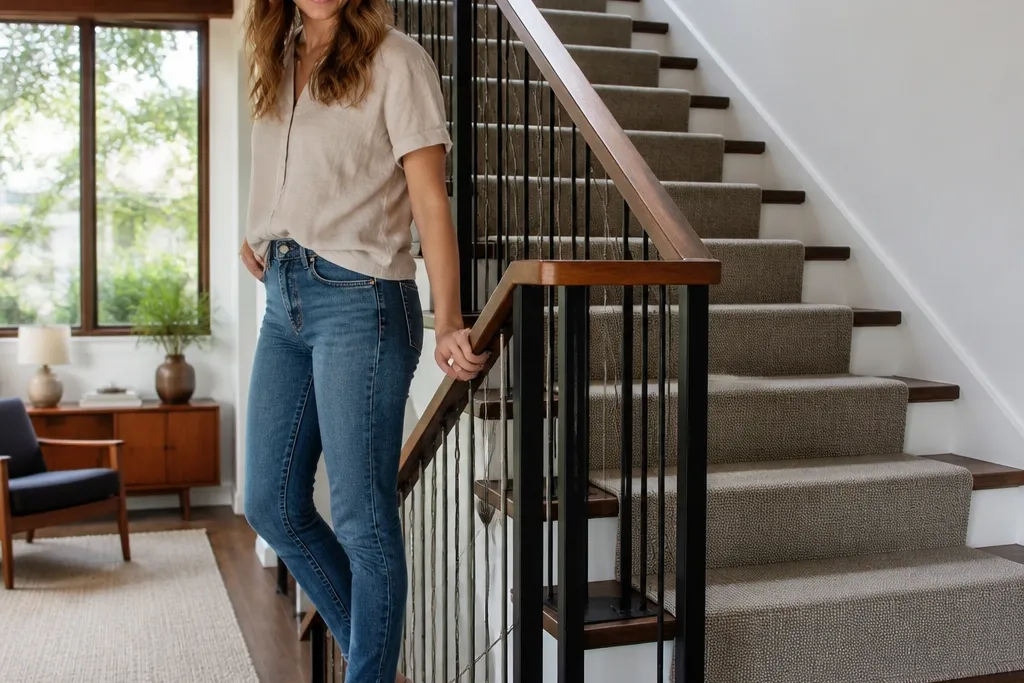
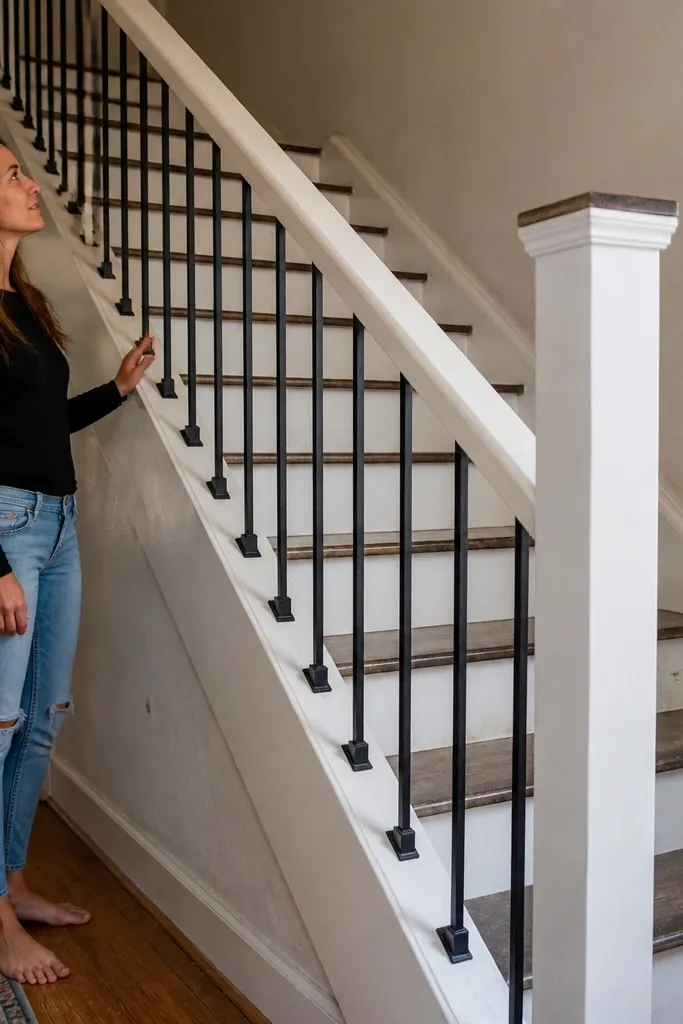
1. Matte black steel frame with walnut handrail
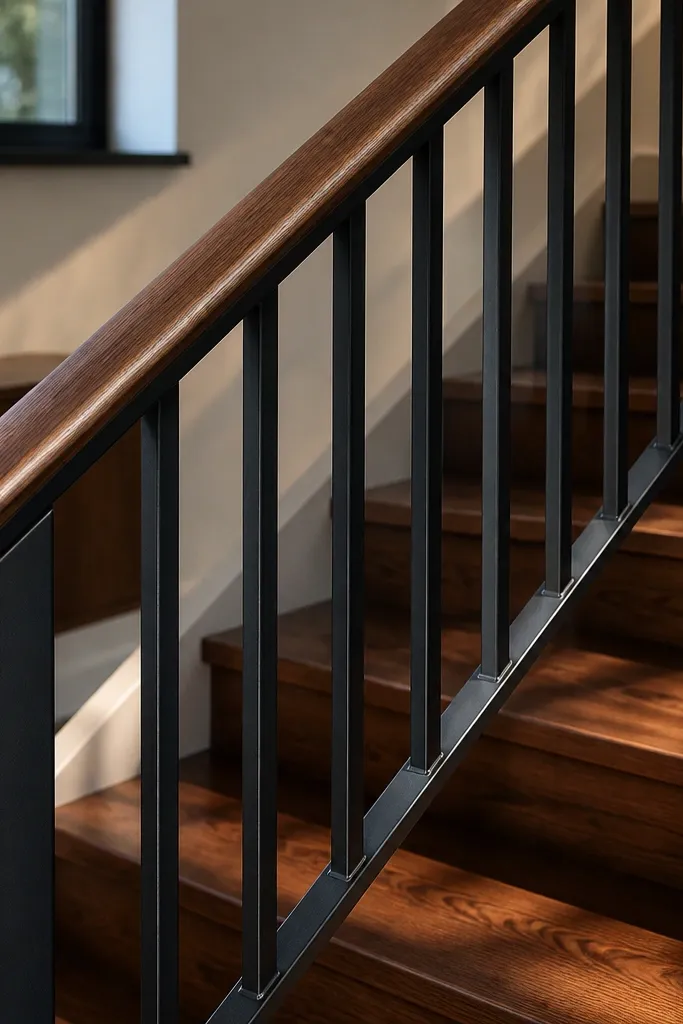
This is the easiest way to get a modern, high-contrast stair look without paying for custom ironwork. The matte black frame reads clean and architectural, while a walnut handrail adds warmth so it doesn’t feel cold or industrial. Keep the verticals either fully straight steel balusters or a simple grid so the pattern looks deliberate. A handrail with a rounded edge catches light nicely and makes the whole staircase feel finished, not slapped together. It fits entryways, hallways, and any stair where you want “designed” instead of “builder-grade.”
Start by installing new corner posts or using existing structural points, then mount straight steel balusters or a simple steel infill frame with matching brackets. Cut the walnut handrail to length and test-fit it so it sits level across every post. Dry-fit all brackets first, then pre-drill and fasten so the metal stays square. Finish the wood with two coats of wipe-on poly or a satin clear, then touch up any metal scratches with matte black spray paint.
Use a long level or a laser to confirm the handrail stays level from post to post before you tighten anything.
Don’t let the handrail float at slightly different heights — that’s what makes the whole look feel off.
2. Wood slat railing with black standoff brackets
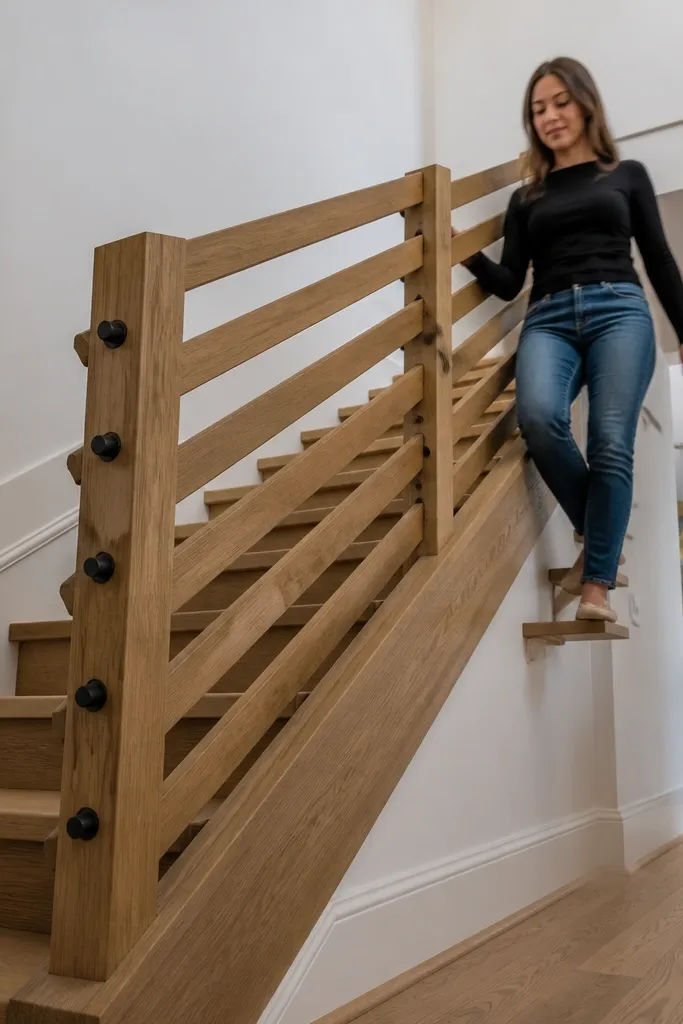
Horizontal slats create that modern, low-visual-noise look because the lines flow across the staircase instead of breaking it up. This design is budget friendly because slats are cheap, and standoff brackets do the heavy lifting for alignment. Use a single wood species and keep the slat widths consistent so the pattern looks like it was designed, not assembled. The black brackets add crisp contrast and make the slats look intentional. It works great on staircases with open sightlines where you want the railing to look sleek from the landing and from the hallway.
Measure the railing run and decide on a slat count using a consistent gap (for example, 1 inch between slats). Cut slats to the same length and sand all edges smooth so they don’t snag or look rough. Mark bracket locations on the posts, then install brackets first and attach slats one by one, using spacers to keep the gaps even. Finish with a stain matched across all slats, then seal with satin polyurethane for scuff resistance.
Editor's noteMake a cardboard or plywood spacer template for the gap so every slat spacing stays identical.
Skip thisAvoid mixing slat widths or sanding them to different thicknesses — the rhythm will look sloppy in photos.
3. Cable railing with a simple wood handrail
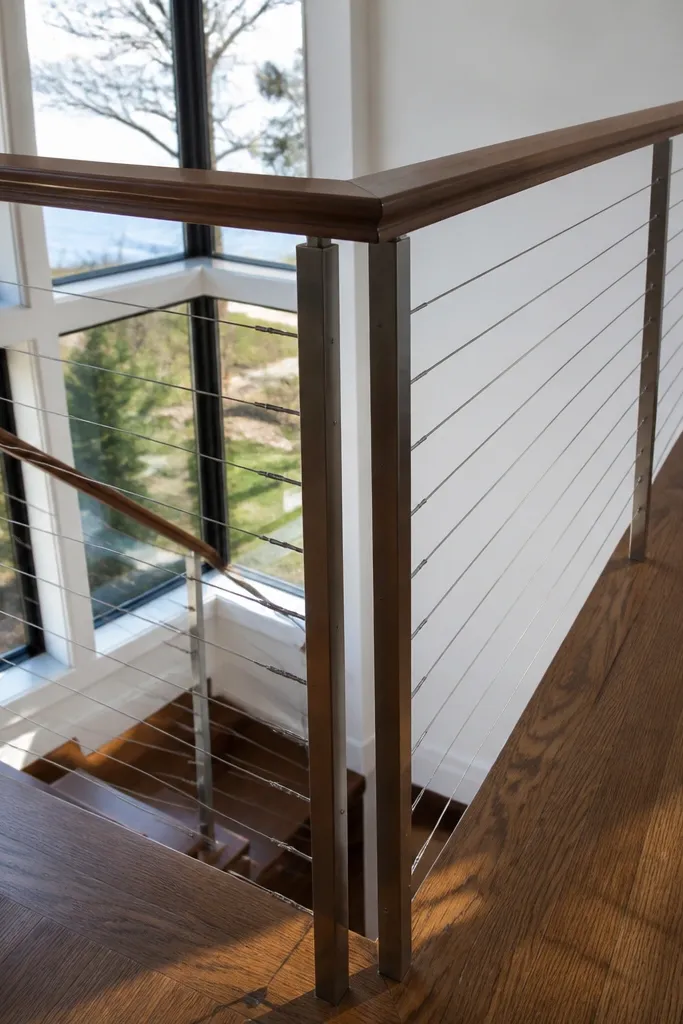
Cable railing looks modern because it’s basically straight lines with almost no visual bulk. The stainless cables read crisp and light, and a wood handrail gives you the warm, comfortable grip that cables alone can’t. This is a strong budget cheap stair railing option when you buy a cable kit and reuse posts or build simple post mounts. The result is airy and clean, especially if your staircase has lots of natural light. It suits modern farmhouses, contemporary interiors, and any home where you want the railing to disappear visually.
Choose a cable kit with the correct cable diameter and end fittings, then plan your post spacing based on the kit’s recommended maximum spans. Install posts plumb and true, then mark cable hole locations at the same height on each post using a jig or measurement stick. Thread cables through the fittings, tension them using the kit’s instructions, and cut ends carefully. Attach the wood handrail on top with proper handrail brackets, then seal the wood and tighten all fittings after the tension step.
Hang a taut string line from post to post before drilling any cable holes to keep your cable pattern straight.
Don’t rush the tensioning stage — uneven tension makes cables look wavy and cheap.
4. White oak handrail with brushed nickel vertical pickets
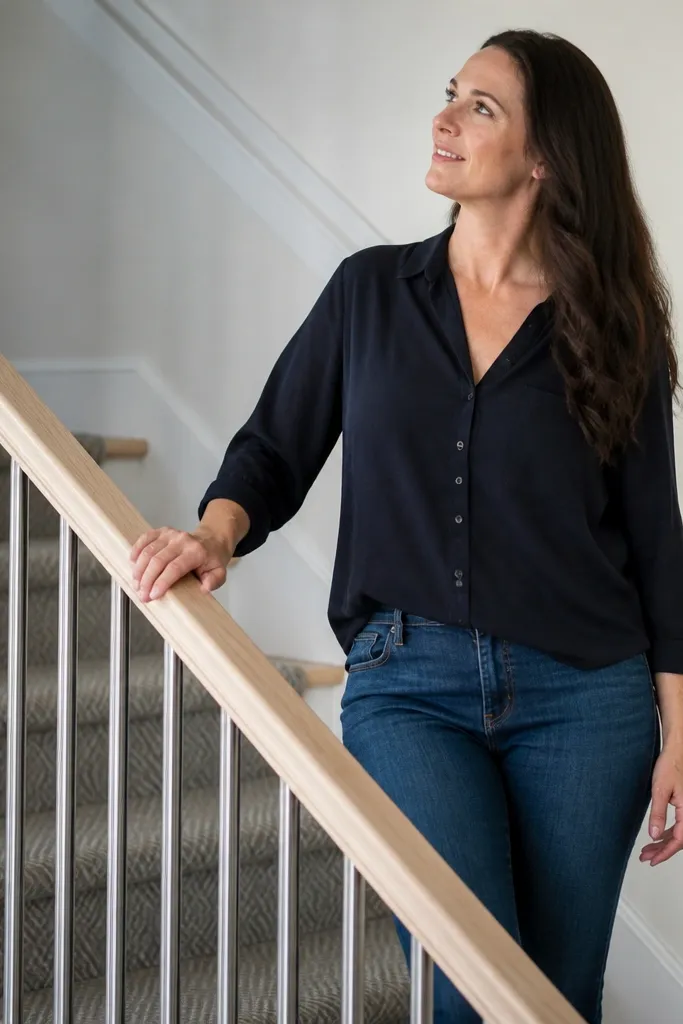
If your home has lighter floors or white walls, brushed nickel pickets look modern without turning the space dark. The warm white oak handrail keeps the railing from reading “hardware-store,” and the vertical pickets make it feel airy while still giving structure. This setup works especially well when you want a traditional silhouette but with cleaner materials and updated finishes. Keep the pickets straight and evenly spaced so the railing looks like a single system. It’s a great choice for staircases near kitchens or living rooms where the railing is always in view.
Pick a picket style that has straight profiles, then lay out spacing on the posts with a consistent measurement so every gap matches. Cut the handrail to length, then attach it to the posts using handrail brackets that keep it level. Mount pickets with pre-drilled holes or threaded inserts to avoid wobble. Sand and finish the oak with a clear satin topcoat, then wipe hardware with a dry microfiber cloth for a clean sheen.
Editor's noteUse a single spacer block for picket gaps so the spacing stays identical along the entire run.
Skip thisAvoid mixing finishes on the metal hardware — mismatched nickel tones make DIY railing look unfinished.
5. Two-tone handrail: dark stained top with light base rail
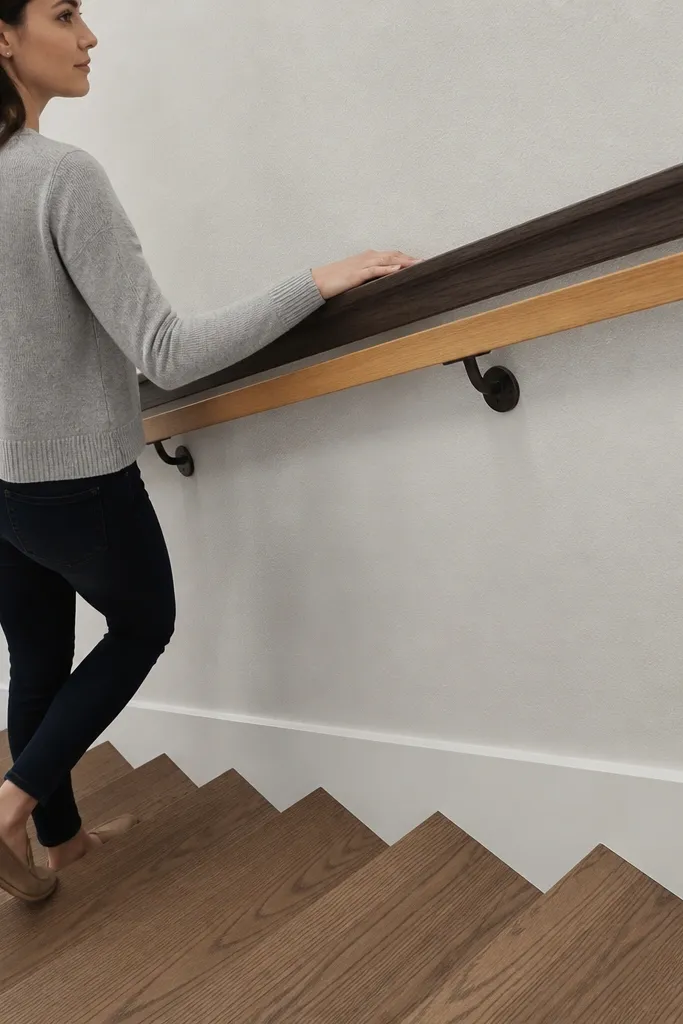
Two-tone railings look modern because they create depth and clean separation without adding extra visual clutter. A dark stained handrail on top gives that strong modern contrast, while a lighter base rail anchors the look and makes the system feel balanced. This design hides imperfections because the base rail visually “frames” the lower area. It also photographs well since the tones separate in different lighting. Use this when you want a budget cheap stair railing that still looks styled, not basic.
Build or mount posts first, then install a base rail at a consistent height across the run. Cut the base rail and handrail from matching straight stock, then stain them separately in different tones (dark walnut on top, natural oak or light maple on bottom). Attach the rails with brackets so both stay aligned and parallel. Seal both pieces with the same sheen level so they reflect light similarly, and touch up metal fasteners with matching paint.
Editor's noteSand both rails to the same grit before staining so the color difference looks intentional, not patchy.
Skip thisDon’t stain the wood out of order — if one rail gets sealed before staining the other, tone matching gets harder.
6. Clear acrylic panels with a matte black perimeter frame
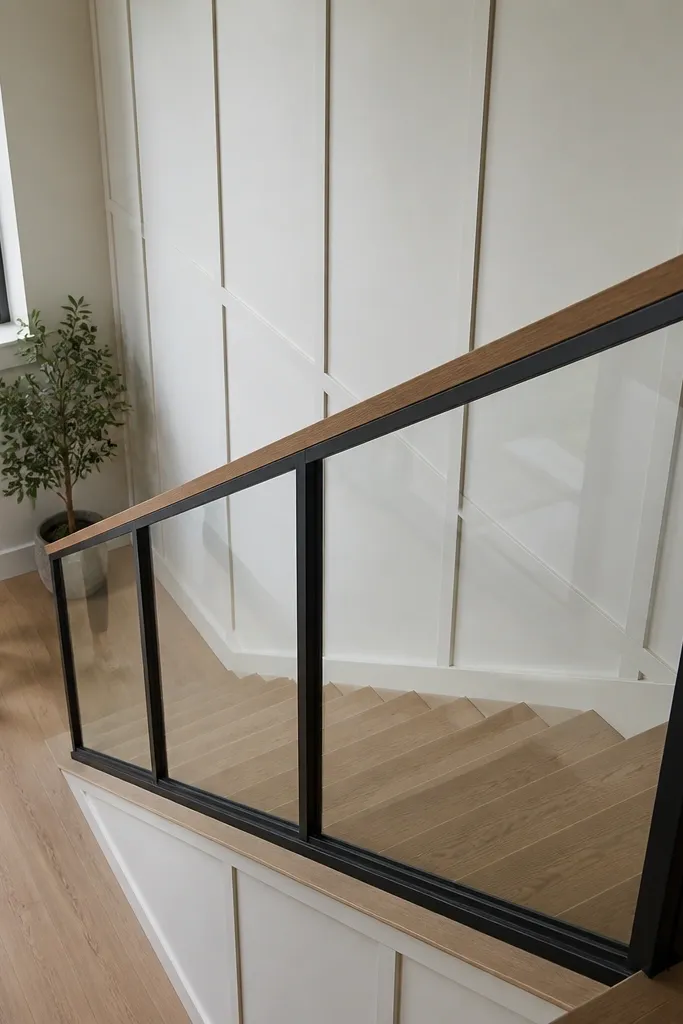
Clear panels make a stair railing look sleek because the infill disappears, leaving only the frame lines and the handrail. A matte black perimeter frame keeps it modern and photo-friendly, and the clear panel gives you the clean, airy feel people associate with higher-end builds. This is a smart option when you want a contemporary look but don’t want cables. The key is using the right thickness and proper mounting points so the panels look straight, not bowed. It fits modern interiors where you want visibility through the railing without the clutter of balusters.
Measure the opening between posts and build a simple perimeter frame from square tubing or painted metal angle. Cut acrylic panels slightly undersized so they don’t bind and stress-crack — aim for a small clearance on all sides. Mount the panels using standoff brackets and screws with washers designed for acrylic. Install the handrail last, then clean the panel surface with a non-ammonia cleaner and seal/paint the frame for a uniform matte finish.
Use a template to mark panel screw holes so every panel mounts at the same height and looks level.
Don’t overtighten acrylic screws — cracking usually shows up weeks later.
7. Reclaimed wood handrail with black iron balusters
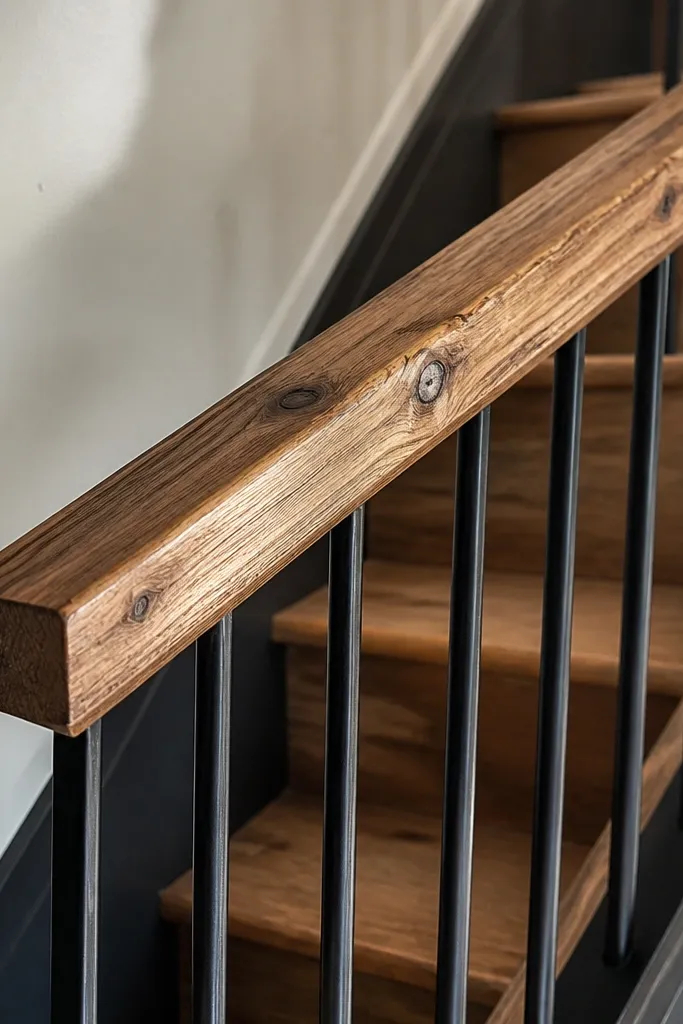
Reclaimed wood on the handrail adds instant character, and black iron balusters keep the look modern instead of rustic-chaos. The trick is to keep the rest of the railing clean: straight balusters, consistent spacing, and a handrail profile that’s comfortable to grip. This works when you want a budget cheap stair railing that still looks like it came from a design shop. The wood grain shows beautifully in natural light, and the black hardware makes the whole thing feel intentional. It suits entry stairs, open-concept living areas, and homes that already have wood beams or reclaimed accents.
Choose a reclaimed plank for the handrail and plane or sand it until it’s smooth and consistent in thickness. Install or mount black iron balusters on pre-marked spacing, then attach a straight top rail support that keeps the handrail level. Drill pilot holes through the wood and use countersunk screws or brackets designed for handrails. Seal the reclaimed wood with a durable clear finish so the surface doesn’t get tacky or uneven. Touch up any scratched metal with matching black paint.
Editor's notePick one reclaimed board and cut the handrail from it so the grain direction stays consistent across the run.
Skip thisDon’t leave the handrail rough — splinters kill the “high-end” look fast.
8. Stair railing with vertical channel slats
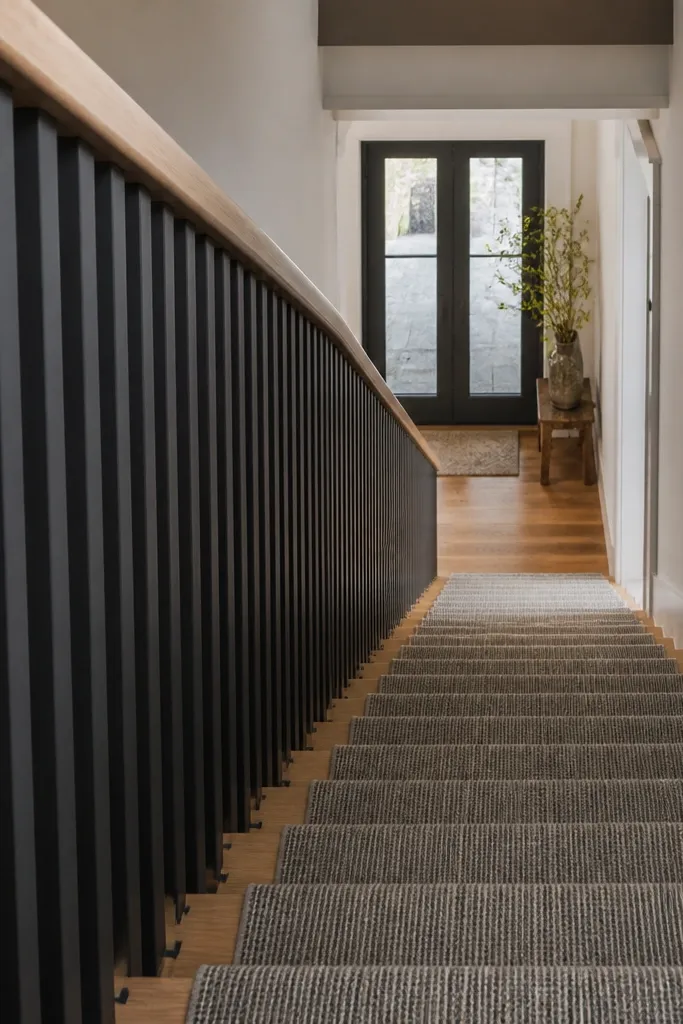
Vertical channel slats look modern because they create a repeating pattern that reads crisp from a distance. This design is also budget friendly because channel stock is straightforward and you can paint it one color for a uniform look. Pair it with a wood handrail for comfort and to keep it from looking like bare metal. The channels also hide small gaps behind the frame, so the railing can look cleaner than a typical DIY baluster layout. It’s a strong option for basements, modern remodels, and staircases with gray or black interior finishes.
Decide the spacing between channels based on your local safety rules and visual rhythm, then cut channel pieces to the exact infill height. Mount posts first, then attach a top and bottom rail support or perimeter frame so the channels sit square. Install channels using brackets or screws through the frame so each channel is plumb. Paint the channels and frame with a matte metal paint, then finish the wood handrail with satin clear coat for a consistent sheen.
Use a simple jig made from scrap plywood to keep channels at the same inset depth.
Avoid eyeballing channel alignment — even small angle differences become obvious in photos.
9. Round wood dowel railing with a continuous handrail
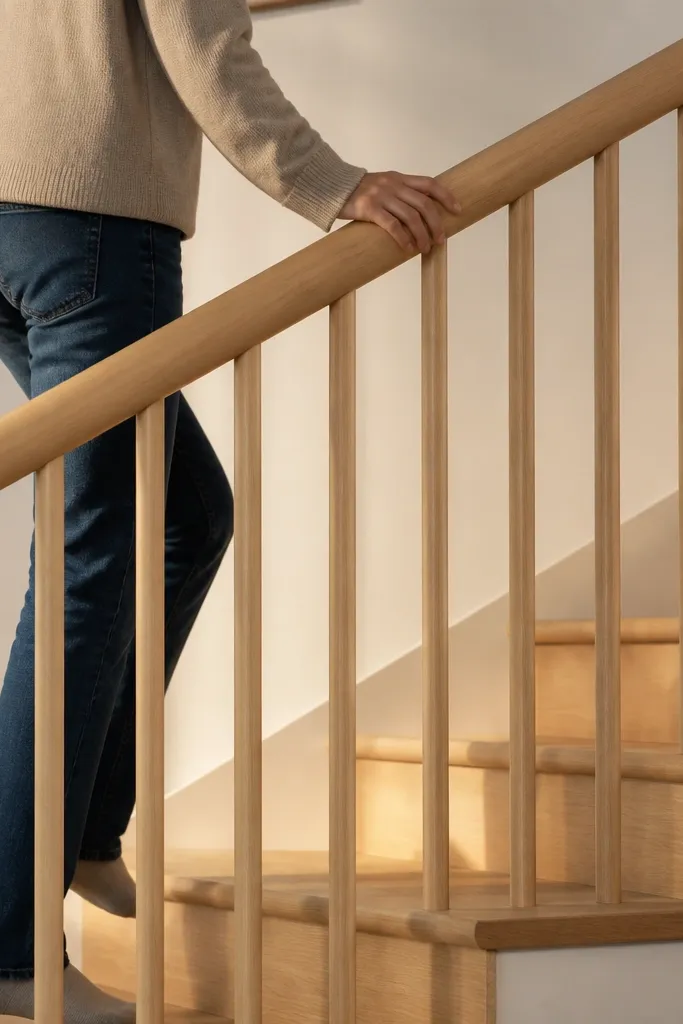
Round dowels give a softer, modern look than square balusters, especially when the handrail is continuous and smooth. This can be a budget cheap stair railing because dowel rods and basic wood joinery are cheap, and you can keep the hardware minimal. The key is using consistent dowel diameters and spacing so the pattern looks refined. A clear satin finish on the dowels keeps them from looking plastic or overly glossy. It works well in Scandinavian-style interiors, light woods, and spaces where you want a calm, clean railing.
Cut dowels to the correct infill height and sand the ends so they fit cleanly. Mark dowel locations on the top and bottom rails using a spacing guide, then drill evenly sized holes to prevent wobble. Assemble the top handrail and bottom rail, then install dowels one by one with a light wood glue and clamps or temporary spacers. Sand the full assembly and apply a satin clear coat so it stays clean and not sticky to touch.
Editor's noteDrill dowel holes with a depth stop so every dowel seats to the same depth and looks even.
Skip thisDon’t use mixed dowel diameters — the railing will look uneven even if it’s structurally solid.
10. Powder-coated black steel with horizontal slat infill
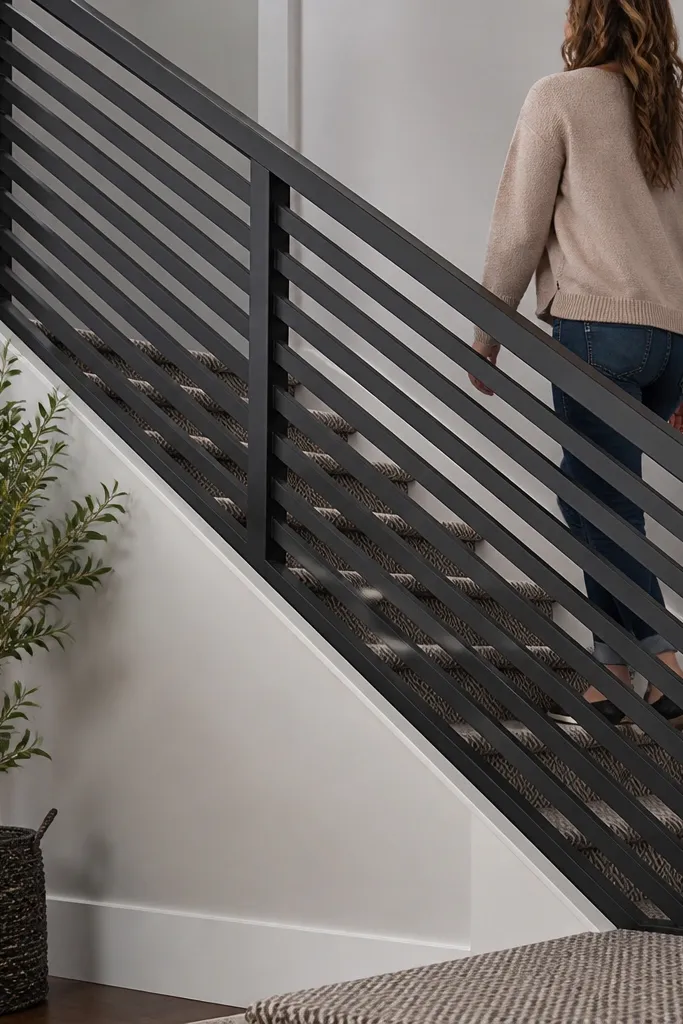
A powder-coated black frame with horizontal slat infill looks sharp because it’s monochrome and the lines stay consistent. The powder-coat finish is tougher than DIY spray paint, so the railing holds up to scuffs from daily use. This design also hides minor wall irregularities because you can create a clean frame perimeter. It’s modern, bold, and reads expensive even when the materials are basic steel and simple slats. Great for homes with black hardware, matte lighting, and modern trim.
Build a rectangular frame for the infill using square tubing, then cut horizontal slats to fit between the uprights. Pre-drill and attach slats so the spacing is even, then mount the frame to posts or directly to studs with proper anchors. Add a metal handrail on top or a wood handrail over a metal cap, then paint or coat to match. If you’re painting, do two coats and let cure time fully before mounting any decorative pieces.
Editor's noteUse a spacing comb made from scrap wood to keep every horizontal slat gap identical.
Skip thisAvoid thin slats that flex when you touch them — bounce in the railing looks cheap.
11. White painted wood railing with slim black balusters
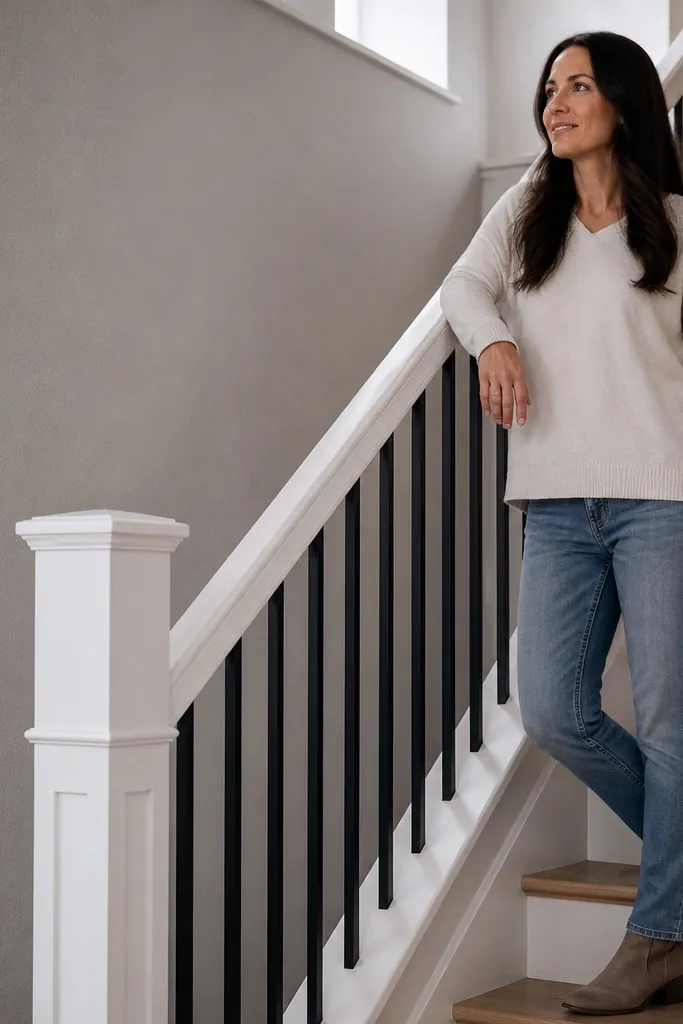
White painted wood plus slim black balusters is a modern contrast that still feels light and friendly. The slim balusters keep the railing from looking heavy, and the white top rail makes it feel crisp against darker walls or floors. This works especially well when you want a budget cheap stair railing that matches white trim and doesn’t fight the rest of the room. It also photographs well because the lines are clean and the color blocks separate nicely. Perfect for staircases with white walls, light floors, or farmhouse-modern interiors.
Paint the top rail and any wood supports with a high-quality primer and then a semi-gloss white so it wipes clean. Install slim black balusters using pre-measured spacing and brackets that keep them straight. Keep the balusters the same length and ensure the top rail is level before attaching. After everything is assembled, touch up paint around screw heads and seal the wood with a wipeable clear topcoat.
Use painter’s tape lines before painting so the white edges stay sharp around hardware.
Avoid flat paint on the handrail — it scuffs and looks dull fast.
12. Metal pipe handrail with wood posts and black fittings
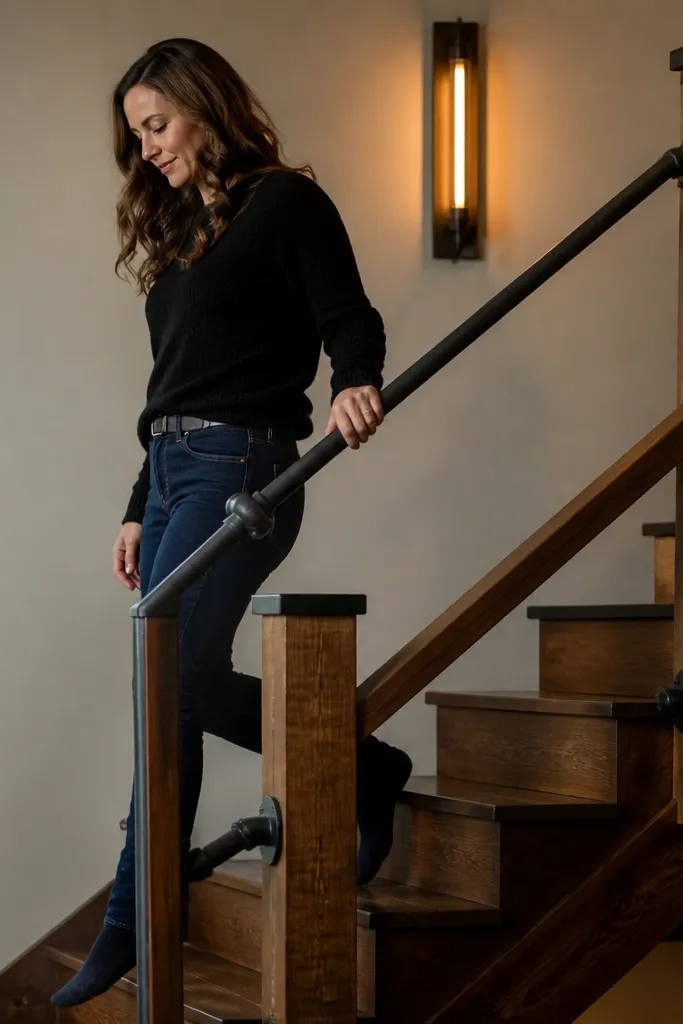
Exposed pipe hardware looks modern when you keep it clean and symmetrical, not when you make it a chaotic “industrial” mess. A metal pipe handrail gives a rounded grip and a distinct modern profile, and wood posts soften the look. The fittings create strong visual anchors, which makes this project easy to photograph from multiple angles. This is a budget cheap stair railing idea when you shop for standard pipe sizes and use a small number of fittings rather than custom bends. It’s a good fit for basements, modern cabins, and spaces with wood ceilings.
Pick a pipe diameter that fits comfortably in the hand (1.25 to 1.5 inch outside diameter looks right for most stairs). Mount wood posts first, then attach pipe flanges to posts at the correct height so the pipe runs level. Use straight pipe sections for the handrail and matching elbows only where the run actually turns. Sand and seal wood posts, then paint or buy black fittings so everything matches, and tighten all flange screws securely.
Editor's noteDry-fit every pipe section on the floor before you mount it — it saves you from discovering one fitting is reversed.
Skip thisDon’t use mismatched pipe finishes — shiny and matte mixed together makes the railing look DIY.
13. Two-level handrail with a lower grab bar
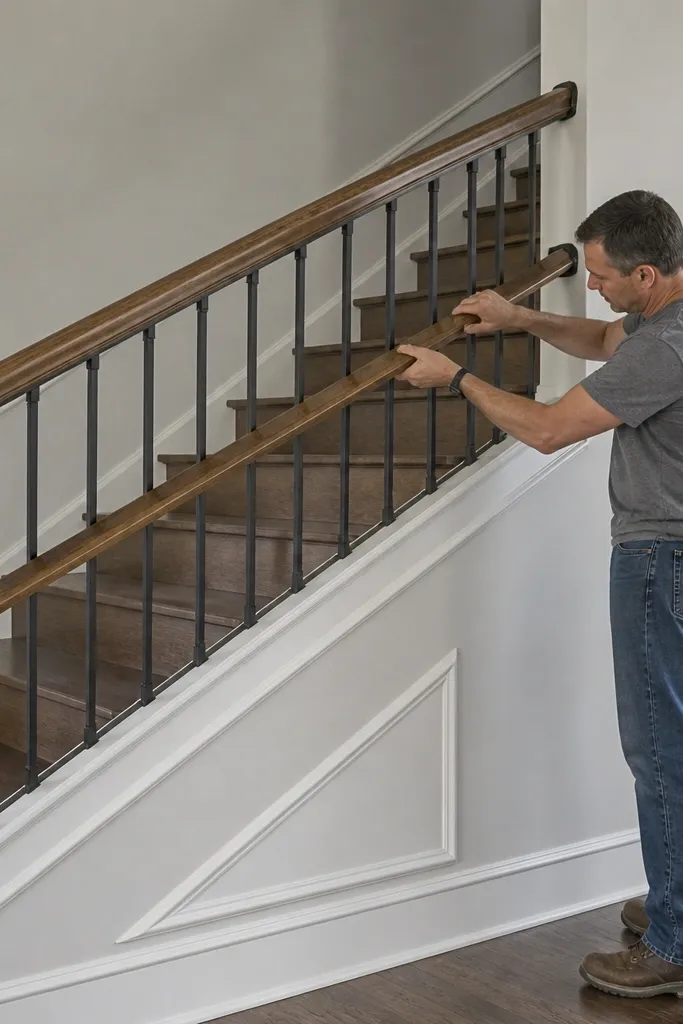
A two-level handrail looks modern because it adds structure and creates a clean visual frame around the stair. The top rail is for normal grip, and the lower grab bar helps with balance and makes the railing feel substantial. It also hides gaps visually since the lower bar creates an extra line that makes spacing problems less noticeable. You can pair it with simple vertical balusters or even minimal infill. This setup is great in homes with kids, older adults, or anyone who wants a more confident grip without adding bulky panels.
Plan the lower grab bar height based on comfort, then install both rails so they’re parallel across each post. Mount vertical balusters or a minimal infill between the rails, keeping spacing consistent so it doesn’t look random. Use brackets rated for the load and pre-drill into posts to prevent splitting. Finish wood rails with satin clear coat and paint or seal metal parts to protect against scuffs.
Check the grip clearance: leave enough space between the two rails so your hand doesn’t cramp on the lower bar.
Avoid placing the lower bar too close to the top rail — it makes the railing feel cramped.
14. Minimalist railing with vertical steel rods and no base rail
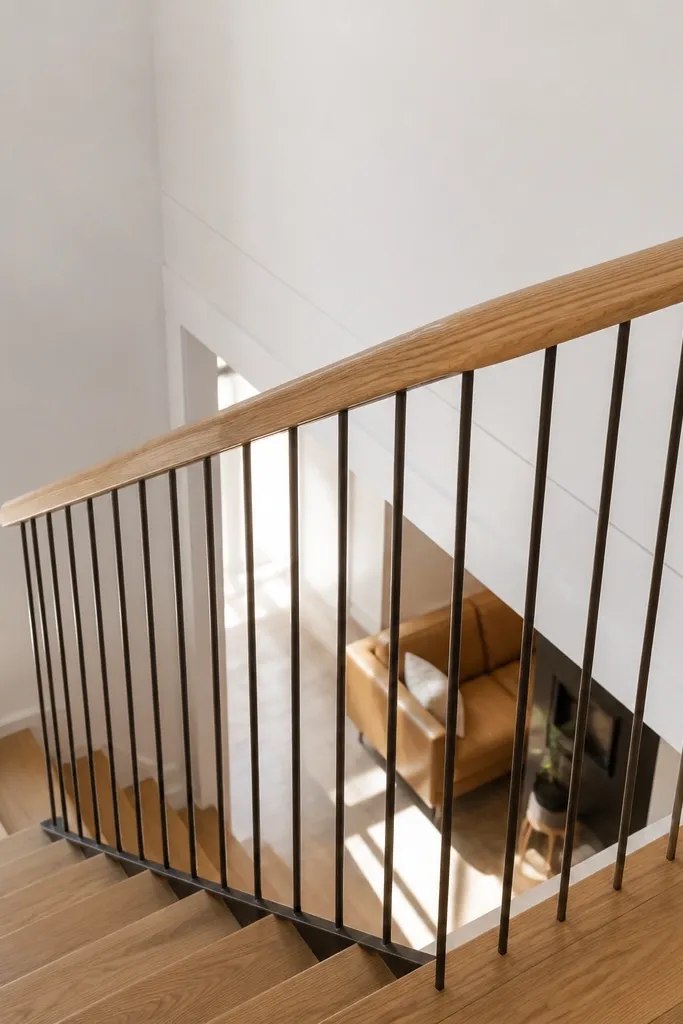
If you want the most modern, “light” look, skip the base rail and let vertical steel rods do the work. The top handrail stays continuous and the rods create clean vertical rhythms without extra horizontal lines. This is a budget cheap stair railing idea when you can reuse existing posts and just add rod mounts and a handrail. It photographs well because there’s less material clutter and the staircase feels open. Best for staircases where the lower area doesn’t need extra coverage and you want a sleek, modern silhouette.
Install posts and mark rod locations with a consistent spacing plan. Mount rod brackets on the inside face of posts so the rods line up vertically and don’t drift. Cut rods to the correct length and attach with threaded ends or rod clamps. Add the top handrail last, making sure it’s level and centered so the rods visually align with it. Paint rods and brackets matte black, then seal wood handrail if you use wood.
Editor's noteUse a rod alignment string line when installing the first and last rod, then match the rest off that reference.
Skip thisDon’t add a base rail later to “fix” spacing — it usually makes the design look patched.
15. Stair railing with angled wood slats for a modern rhythm
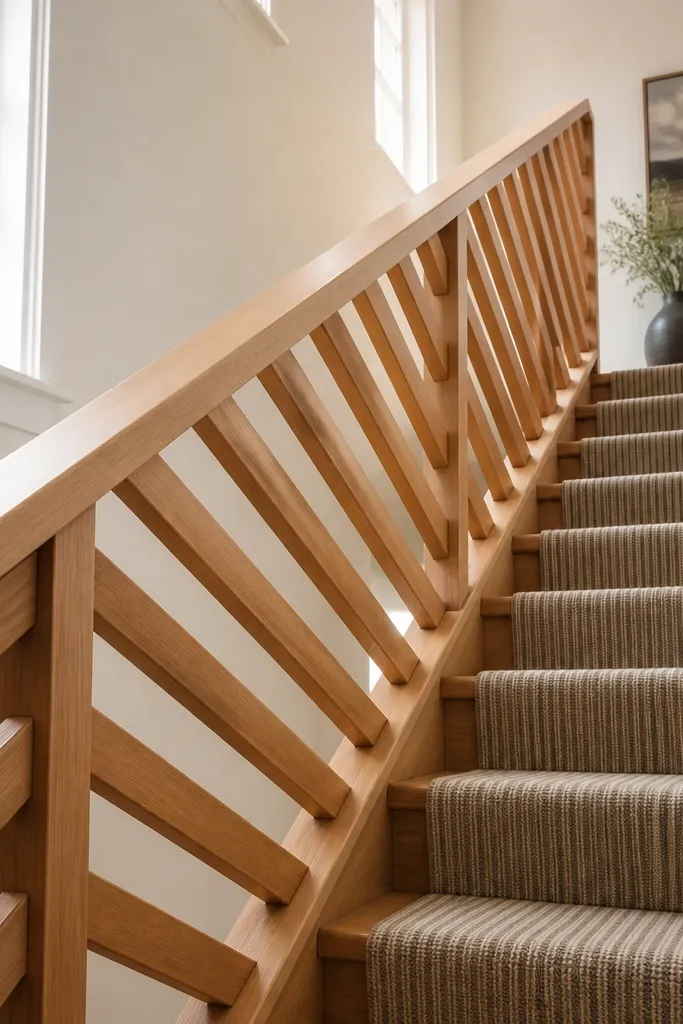
Angled slats bring motion and modern energy to a stair railing without needing fancy metalwork. The diagonal rhythm draws the eye up the staircase and makes the railing look more designed than a straight horizontal pattern. Use angled slats only if you can keep the angle consistent across the run, because the look depends on repetition. This works well when the rest of your space already has some angled elements like chevron flooring, diagonal wall panels, or modern trim lines. It’s a strong choice for budget cheap stair railing when you want “wow” in photos from a single staircase wall.
Decide the angle (commonly 20 to 35 degrees) and cut slat ends with a miter saw so every slat matches. Build a simple frame or mount brackets that hold slats at the same angle between posts. Install the first two slats as references, then space and attach the rest using a spacer strip to keep gaps identical. Finish with stain and satin topcoat, and keep the top handrail simple and level to balance the angled infill.
Editor's noteMake one perfect “template slat” and use it to check every cut — angled builds show errors faster than straight ones.
Skip thisAvoid random angles — if even a few slats drift, the railing looks handmade in a bad way.
16. Galvanized steel vertical panels with a wood handrail
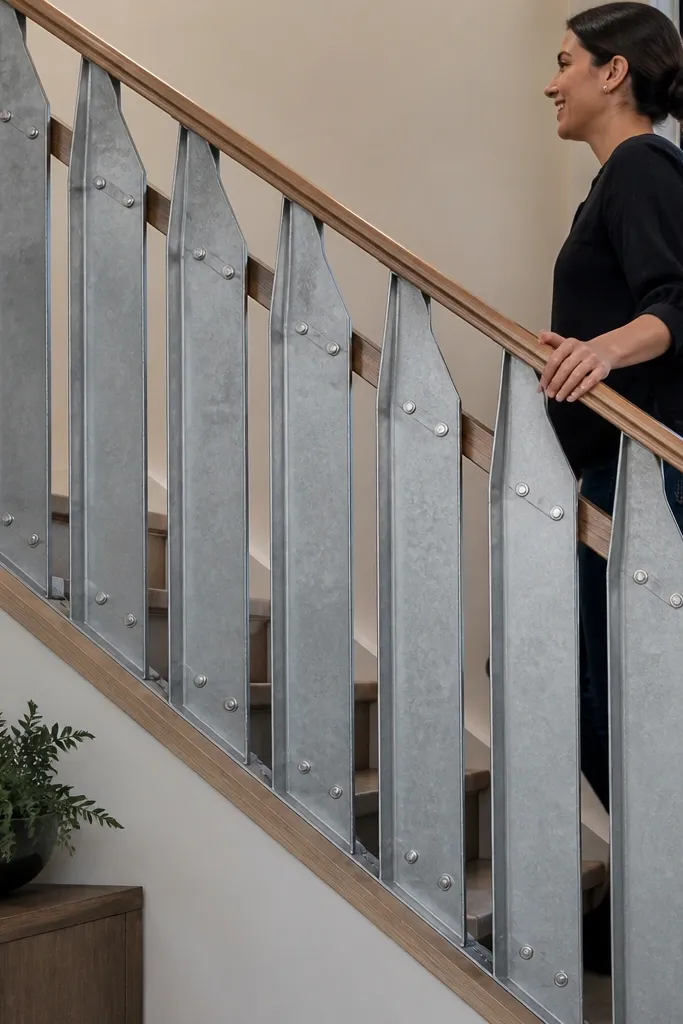
Galvanized steel panels look modern when they’re used in clean vertical sections and paired with a warm wood handrail. The gray metal gives a contemporary industrial edge, but the wood keeps it livable and not harsh. This design is budget friendly because sheet metal or pre-cut panel stock is often cheaper than custom balusters. It also hides the “messy middle” — you get a solid look even if your wall isn’t perfectly straight. It fits modern farmhouse, industrial loft, and entry stairs with gray accents.
Measure the infill opening and cut galvanized panels into vertical sections sized to fit between posts with small clearances. Mount the panels behind or to the posts using standoff brackets and corrosion-resistant screws. Install the wood handrail on top using brackets so it stays level and centered. Seal the wood with a satin finish, then wipe metal with a cleaner and let it fully dry before final touch-ups. Check all edges and cover sharp points with trim or edge caps where needed.
Editor's noteUse edge trim on panel ends so the railing looks finished instead of “sheet metal installed.”
Skip thisDon’t leave raw sharp edges — it looks ugly and it’s unsafe.
17. Clear polycarbonate panels with a wood perimeter frame
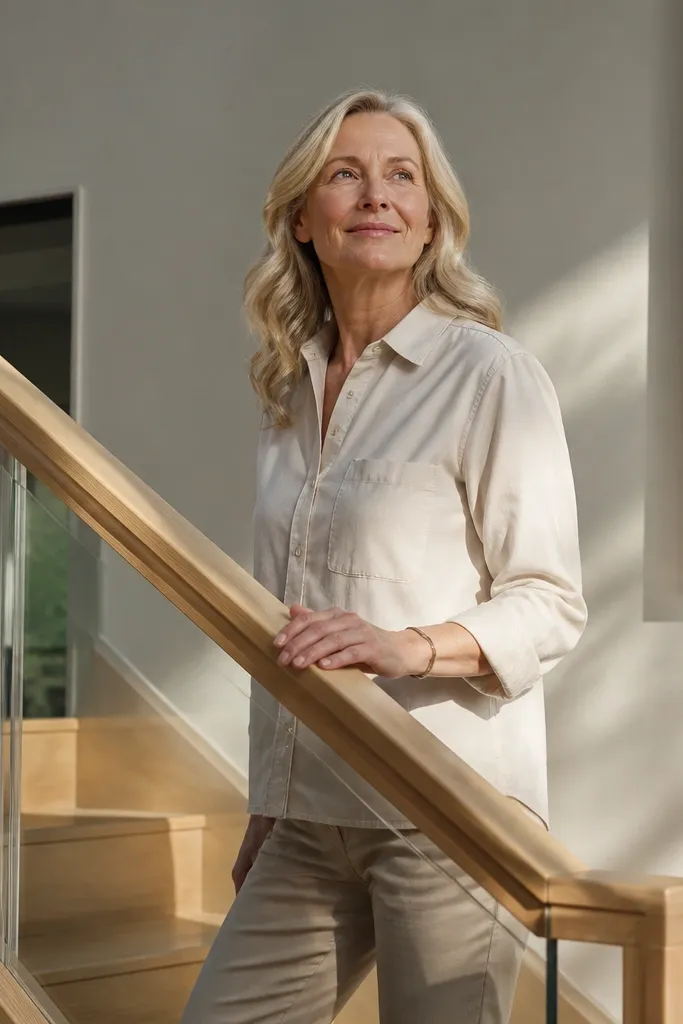
Polycarbonate panels give the clean, modern “see-through” look with more impact resistance than acrylic for many DIY situations. A wood perimeter frame keeps the design warm and makes it feel less cold than full metal. This is a budget cheap stair railing idea when you can source panel sheets cut to size and mount them with simple standoffs. The result is a sleek railing that doesn’t visually block the stair opening. It’s a good fit for homes with lots of daylight or where you want the railing to disappear.
Build a perimeter frame from straight wood rails and stiles sized to the opening, then sand and seal the frame first. Cut polycarbonate to fit with small expansion gaps at the edges. Mount panels with standoff brackets and screws designed for plastics, using washers to spread load. Install the frame to posts, then add the top handrail and finish the wood with a satin clear coat. Clean the panels with a plastic-safe cleaner so they stay clear.
Editor's noteLabel each panel orientation so you keep the clean side facing the stair every time.
Skip thisAvoid overtightening plastic fasteners — it can warp or crack the panel later.
18. Black steel lattice infill with a simple handrail
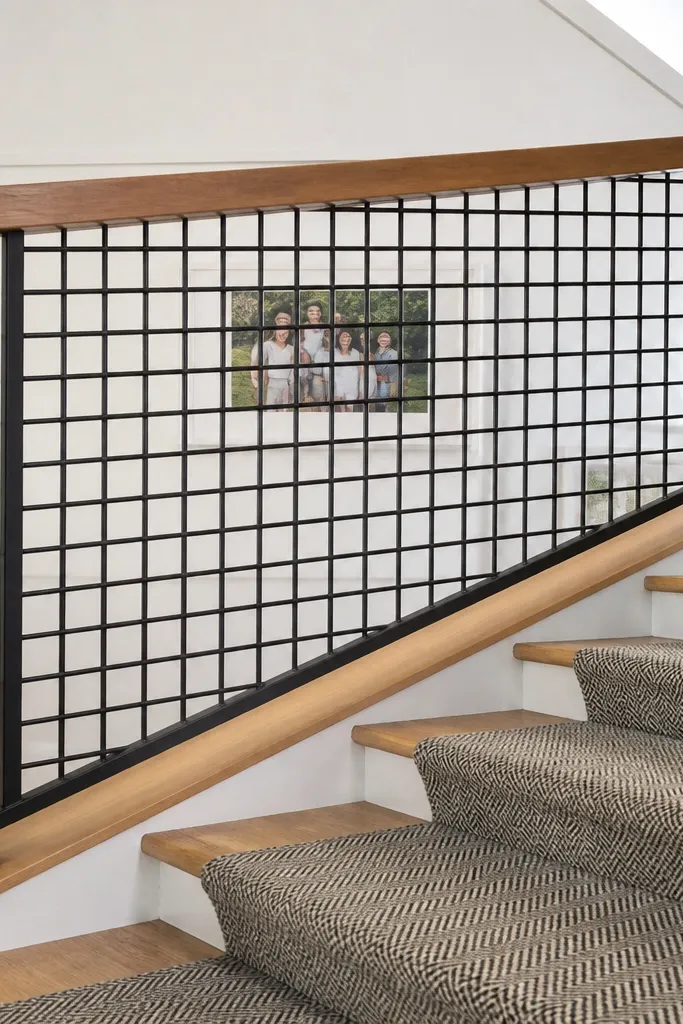
Lattice infill looks modern when it’s used as a single flat plane framed cleanly between posts. The grid creates an architectural pattern without needing lots of individual balusters, and it reads well from a distance. Use black steel for a crisp look, and keep the handrail simple so the lattice does the visual work. This is budget cheap stair railing because lattice panels are often sold in sheets, so you’re not fabricating dozens of pieces. It suits staircases where you want a distinctive look but still want the railing to feel airy.
Choose lattice sheet material sized to your infill area and cut it to fit the frame. Build a straight perimeter frame from steel angle or wood rails, then mount lattice to the frame with screws. Install posts and attach the framed lattice panel so it sits square and doesn’t twist. Add a metal or wood handrail on top with brackets, and paint the frame and lattice matte black for an even finish.
Paint the lattice after it’s mounted to the frame so the frame seams and lattice edges match in color.
Don’t use a wavy lattice — if the sheet isn’t straight, the grid will look sloppy.
19. Light oak handrail with white balusters and black end caps
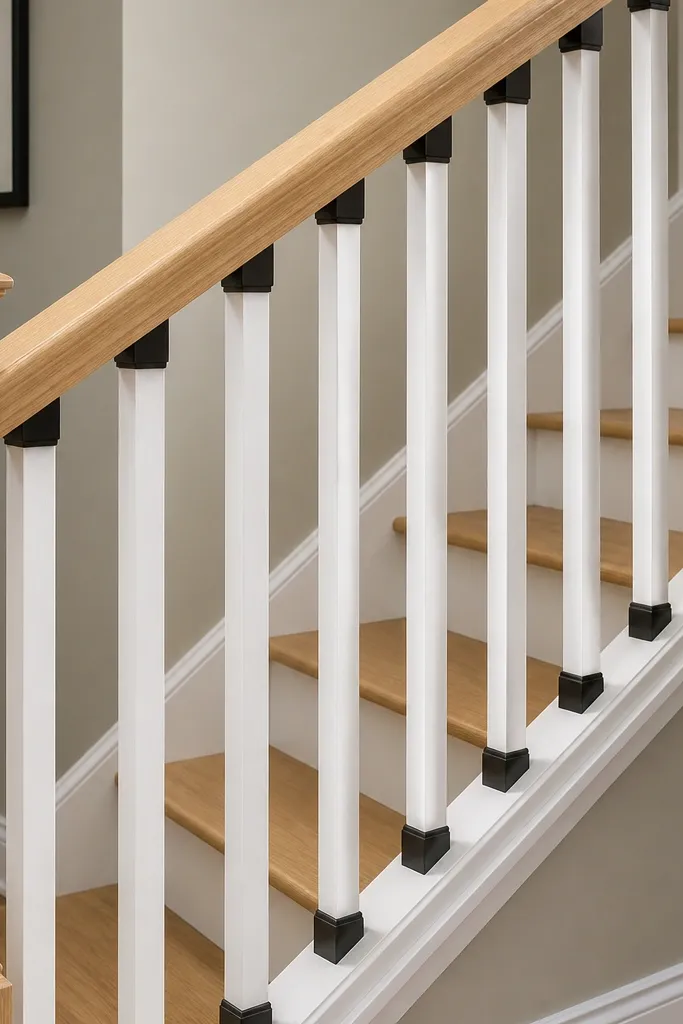
This combo looks clean and modern because it’s mostly light tones with small black anchors. Light oak on top feels friendly, white balusters lighten the railing visually, and black end caps make the posts look finished. It’s a budget cheap stair railing option because you can paint balusters and end caps without custom metal fabrication. The look works well when your walls are white or your trim is already painted. It also photographs well because the railing reads as crisp vertical lines instead of a dark mass.
Install or mark post positions and attach the light oak handrail so it’s level and centered. Mount white-painted balusters using brackets that keep them straight and evenly spaced. Add black end caps or painted black post covers to frame the top of each post. Seal and protect the oak with satin clear coat, then do a final touch-up paint pass on any chips around balusters.
Use a semi-gloss or satin enamel for the white balusters so they wipe clean and stay bright.
Avoid flat white on balusters — it scuffs and looks dingy quickly.
20. Smoked glass panels with thin black rails and a floating handrail
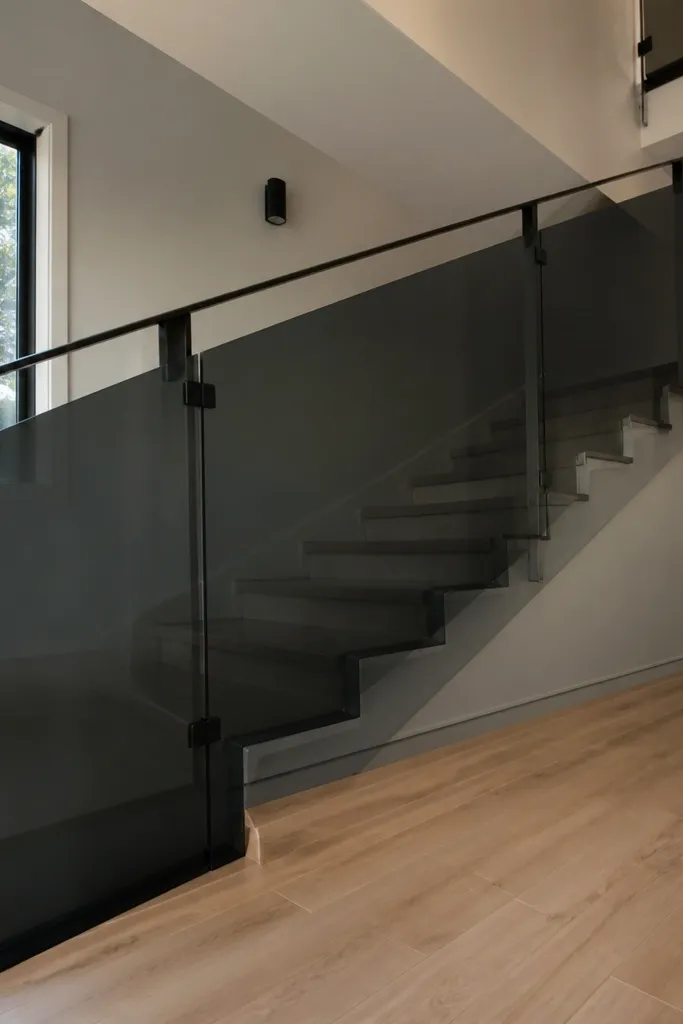
This one looks expensive because it mixes three clean lines: smoked glass, thin black rails, and a handrail that feels like it floats. The glass hides the view of the stair stringers and messy framing, so your railing looks crisp even on older houses with uneven wood. Smoked panels also block glare and make the whole staircase feel calmer, which reads modern in photos. It fixes the biggest budget-cheap stair railing problem — flimsy-looking infill — by using stiff glass panels instead of thin boards. Skill level is moderate: you’re not welding, but you do need careful measuring and clean drilling for hardware. It fits modern interiors with dark trim, black hardware, and a simple color palette.
Buy smoked glass railing panels that are pre-drilled for standoffs, plus a matching thin black top rail system (stainless or black powder-coated) and a solid wood floating handrail. Measure your stair slope first: set your handrail angle using a straight board along the slope, then transfer that angle to the top rail supports so the lines stay parallel. Install the glass standoff posts or brackets into the stringer or blocking, keeping spacing consistent (most panels look best at 36-42 in between vertical support points, depending on your panel size). Mount the top and bottom thin black rails to the posts, then attach the smoked glass panels with the supplied gaskets so the edges don’t rattle. Finish by installing the floating handrail over the top rail — use countersunk screws or a concealed bracket kit so you don’t see fasteners — and add end caps for a clean stop at the newel.
Editor's noteUse a fine-tip marker on painter’s tape to mark drill points, then drill with a sharp bit at low speed to avoid chipping the glass hardware gaskets and brackets.
Skip thisSkip mounting glass hardware directly into bare stringer without adding solid blocking — you’ll get wobble and a noisy railing fast.



