
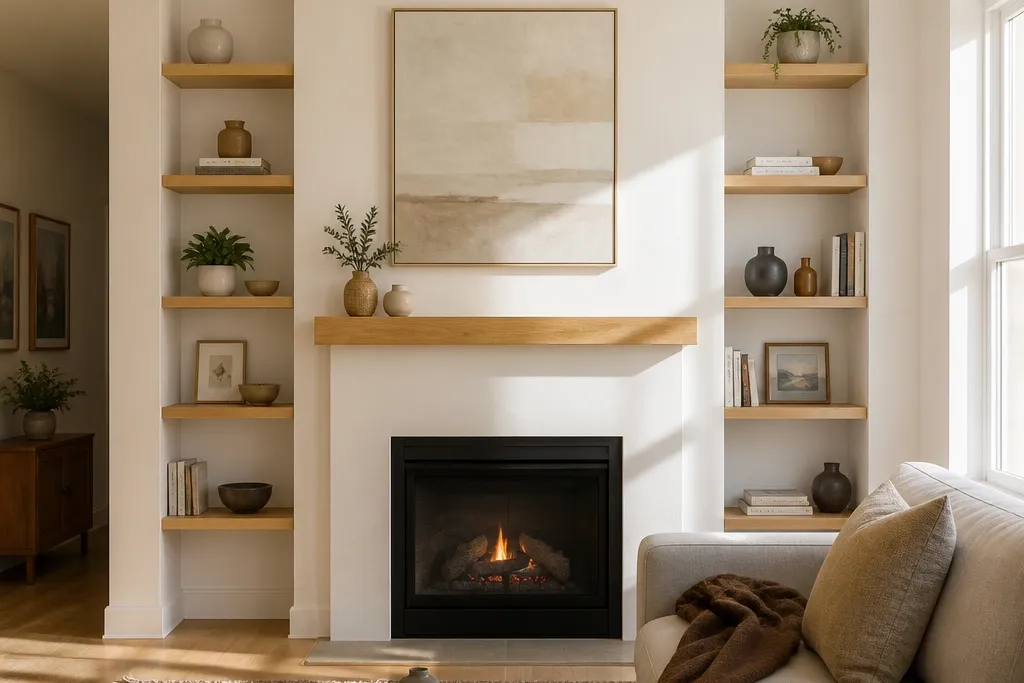
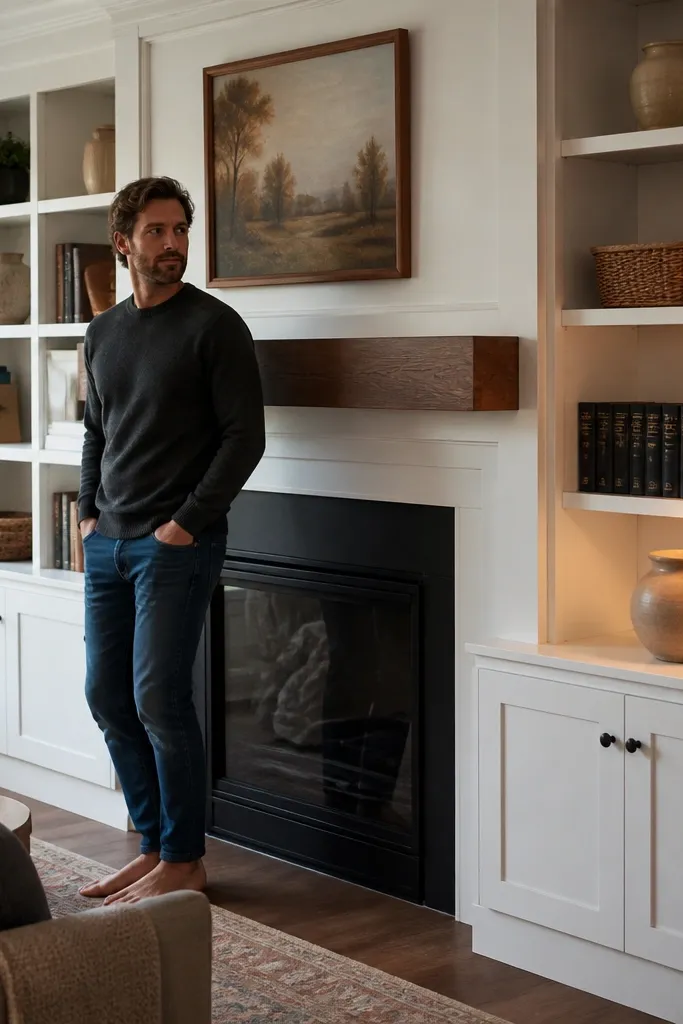
1. Two-Story Mantel Framing With Side Book Bays
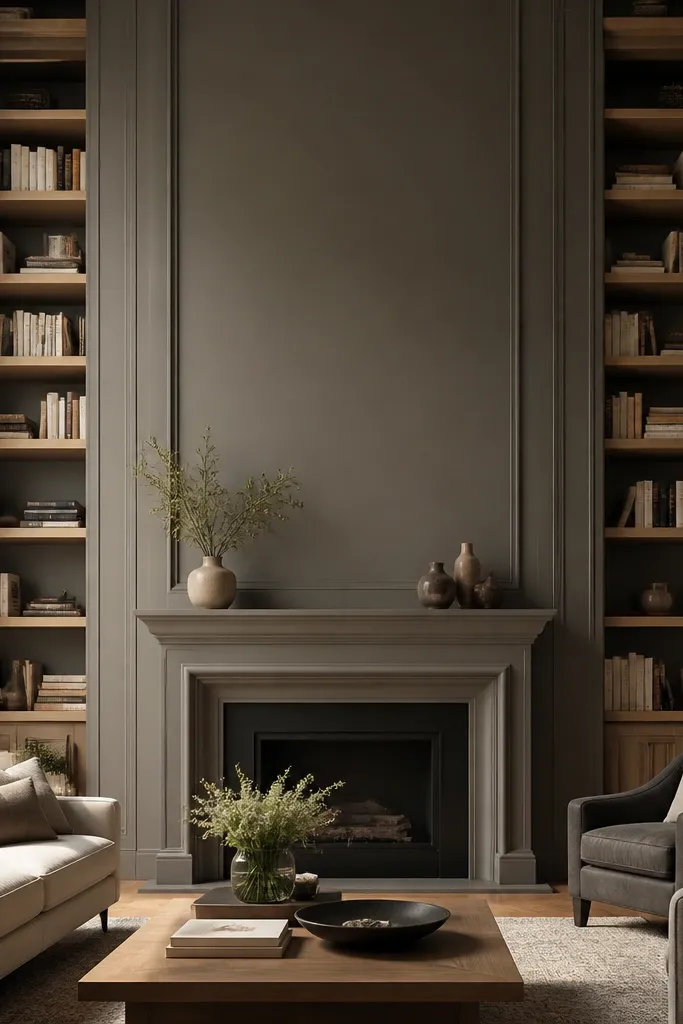
This layout makes the fireplace feel like the center of a whole “built room,” not a standalone feature. The trick is framing the mantel with a tall vertical surround so the shelves start at a consistent height on both sides. Use shelves that run uninterrupted up to near the ceiling line, then break the rhythm with a single lower cabinet panel for closed storage. Paint it bright and flat (satin on trim) so the lines stay sharp in daylight and at night.
First, measure the fireplace opening width and choose two matching bay widths that leave the same filler gaps at each outer edge. Build a plywood face frame for the mantel surround, then add vertical side frames for the two bays using 3/4-inch plywood and 1x3 trim strips. Install fixed shelves at 10-12 inch spacing for books, then add one lower panel door section using 1/4-inch plywood backer and a simple face-frame style door. Prime everything with a bonding primer, caulk seams, then paint the shelves and trim in the same sheen for a clean photo line.
Pre-cut shelf cleats and use a level + chalk line to keep every shelf line dead straight.
Don’t change shelf spacing between the left and right bays — the wall will read uneven.
2. Shallow Floating-Shelf Look With Full-Height Sides
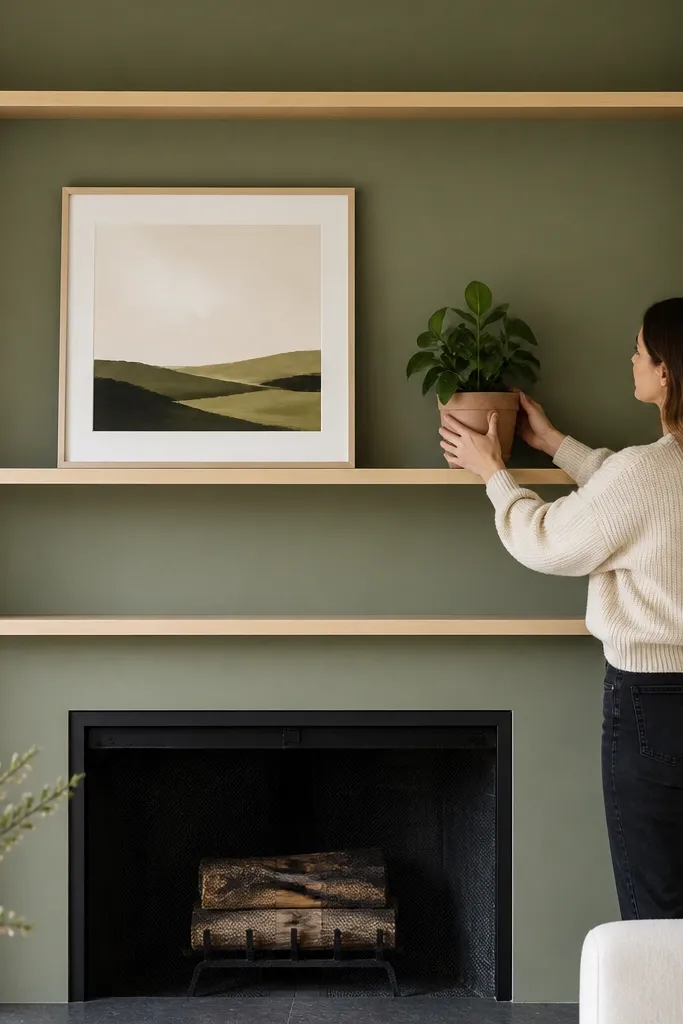
If you want that airy, gallery-style fireplace wall, go with shallow shelves that look like they float. Full-height side panels give you structure and hide the framing, while the shelf faces stay thin and photogenic. This design also works well when the room is small because it keeps the visual weight low. Finish the shelves in a warm stain or paint the panels a contrasting color so the fireplace becomes a focal point without feeling crowded.
Start by building two tall side panels from 3/4-inch plywood cut to the height you want, then fasten them to studs around the fireplace opening. Add a backer strip behind each shelf line so the shelves have something solid to screw into. Use 9-inch deep shelves with a 3/4-inch thickness, then finish the shelf edges with 1/2-inch trim for a crisp profile. Stain or paint, then install the mantel shelf as one straight piece so the top line looks intentional.
Editor's noteUse a spacer jig from scrap plywood to keep every shelf support aligned at the same setback.
Skip thisSkip “shelf brackets only” if you want a clean look — you’ll see hardware and it won’t read built-in.
3. Open-Closed Mix With Shaker Door Bottoms
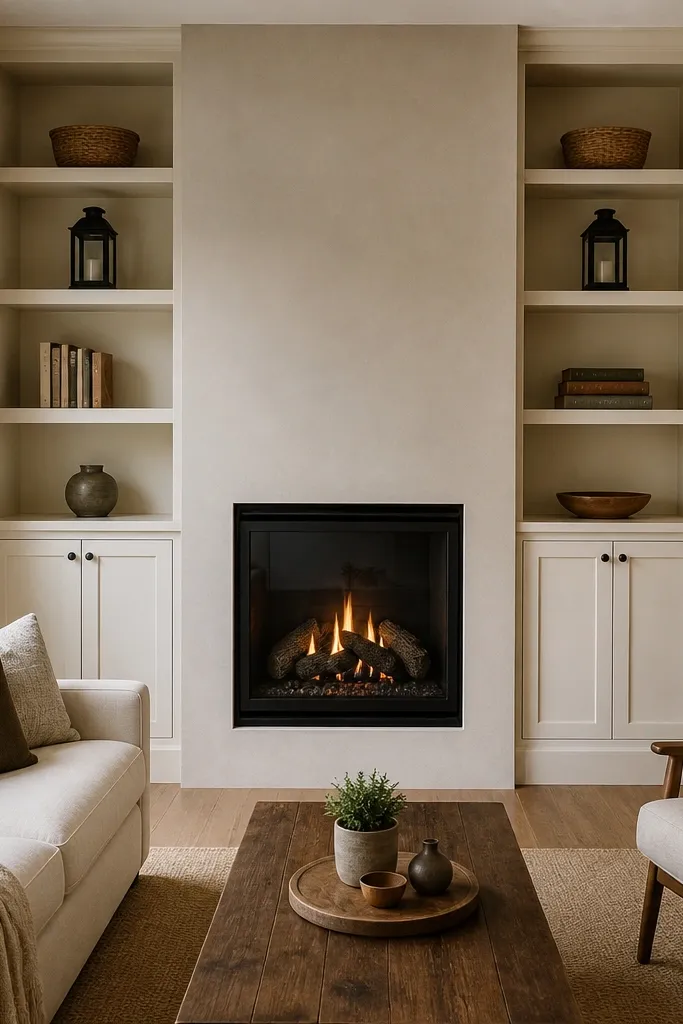
This is the layout for people who want the wall to photograph clean even when you’re not perfectly organized. Open shelves show your styling, while shaker-style doors below hide clutter like remotes, board games, and extra blankets. The fireplace stays visually anchored because the mantel surround continues down into the cabinet line. Use painted cabinetry and keep the door hardware minimal so the wall doesn’t turn into a kitchen look.
Build a centered mantel surround from plywood and 1x3 trim, then frame the left and right bays as two open top sections above two lower cabinet sections. Install fixed shelves in the open areas first, then frame the door openings with 1/2-inch face frames. Hang shaker doors with concealed hinges or simple overlay hinges; keep reveal lines consistent across both sides. Prime and paint, then add a thin crown trim at the top of the lower cabinets to tie it back to the mantel.
Use magnetic catches on the inside of the doors so they close quietly and stay aligned.
Don’t put the doors too high — you need knee-level access and it keeps the proportions balanced.
4. Corner Fireplace Wrap With One Long Shelf Run
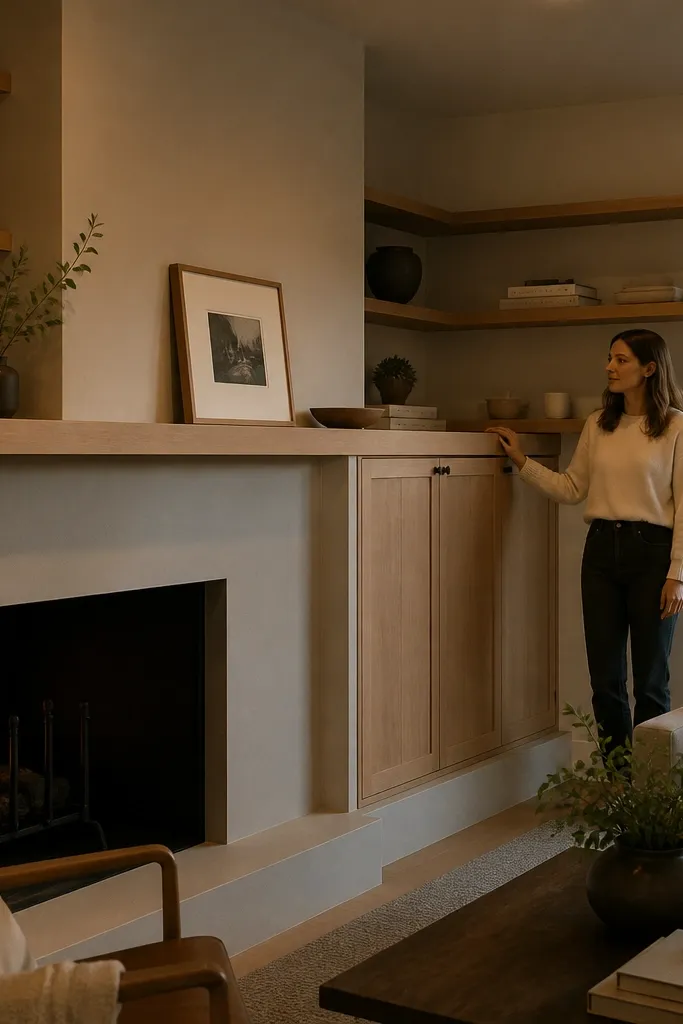
Corner fireplaces can look awkward because the wall reads broken. This design fixes that by wrapping the built-ins around the corner with one continuous shelf line, so the room feels planned. The corner cabinet section gives you a place to hide bulky items while keeping the shelves photogenic. Use a long mantel shelf that bridges the corner so the fireplace reads cohesive from both angles.
Start by drawing a straight reference line from the fireplace face across both walls, then design shelves at 9-10 inches deep to match that line. Build two shelf frames for each wall section, then add a corner face frame panel that covers the junction. Install corner shelves first, then clamp and screw the long shelf run so it stays level across both planes. Finish with trim casing on the outside edges so the corner looks crisp, not like a patchwork.
Editor's noteUse pocket screws for internal frames, then cover with trim so no screw heads show.
Skip thisDon’t try to “eyeball” the corner shelf angle — make a cardboard template for the cut.
5. Tall Fireplace Surround With Floating Ladder Shelves
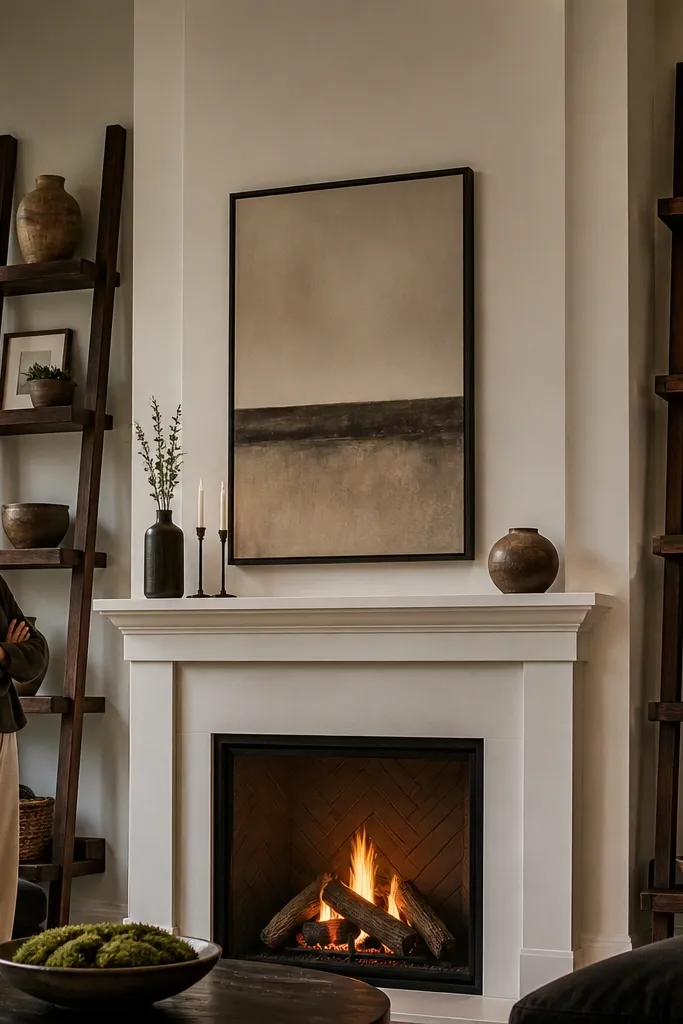
This one is bold and photogenic because it adds vertical movement next to the fireplace. Ladder shelves (open frames with rungs) keep the wall from feeling heavy, and they look great with tall decor like vases and framed prints. Keep the ladder width consistent on both sides, and let the mantel sit cleanly in the center. Paint the wall a warm white and stain the ladder shelves if you want that contrast without going dark.
Frame the fireplace surround with plywood and casing trim, then build two ladder shelf units using 1x3 rails and 3/4-inch rungs. Cut rung spacing so you can fit standard decor heights — aim for 12-14 inches between shelves. Anchor the ladder frames into studs on each side, then add a thin backing panel behind the ladder that hides wiring and gives the rungs a solid screw base. Finish with primer and top coat, then apply stain only to the ladder wood faces.
Editor's notePre-drill and countersink rung screw holes so the ladder stays tight and doesn’t split.
Skip thisDon’t make ladder units too deep — 9-10 inches keeps it looking light, not chunky.
6. Symmetric Picture-Ledge Shelves With Center Mantel
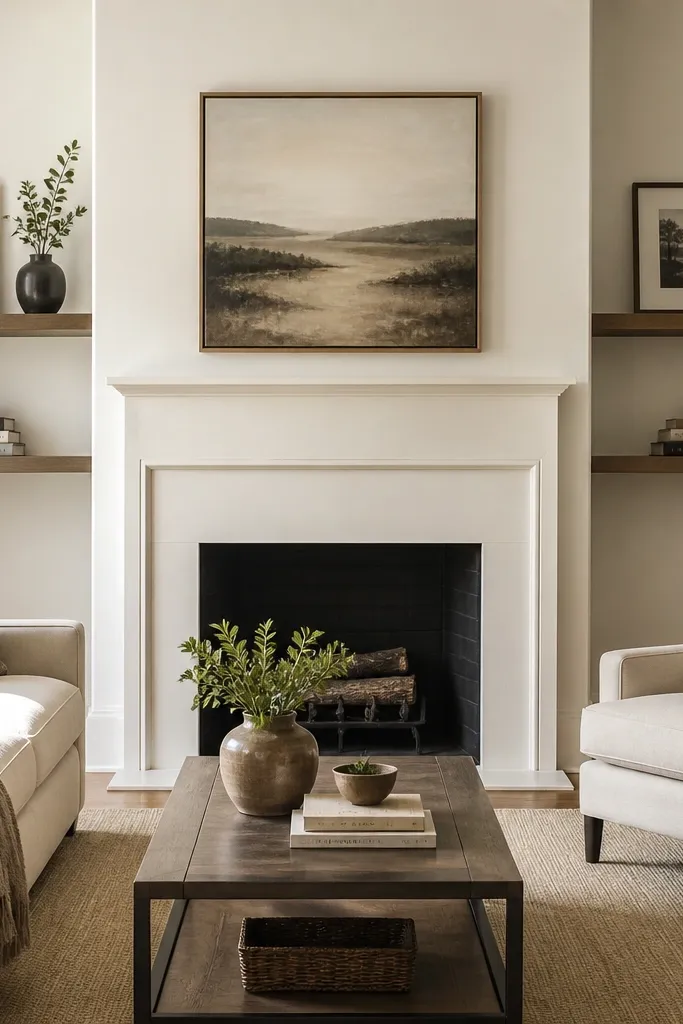
Picture-ledge shelves look clean because they’re thin and they create a perfect line for decor. When you flank the fireplace with matching ledges, the wall reads like a designed gallery. This is a great option if you want a minimal style and don’t want heavy cabinet doors. Use a slightly darker wood or a matte paint on the ledge faces so it holds contrast with the fireplace surround.
Build a mantel surround first, then mark two vertical columns where the ledges will repeat. Make ledges with 1x3 or 3/4-inch plywood faces and a small back lip so items don’t slide. Install cleats into studs at each ledge height, then screw ledges down and add a thin trim return under the front edge. Keep the ledge depth at about 8-9 inches so the shelf doesn’t visually compete with the mantel.
Editor's noteAdd a 1/4-inch back lip on the ledges — it keeps books upright and makes the shelf look intentional.
Skip thisAvoid glossy finishes on ledges — glare kills the look in photos.
7. Built-Ins With Hidden Media Niche Under the Mantel
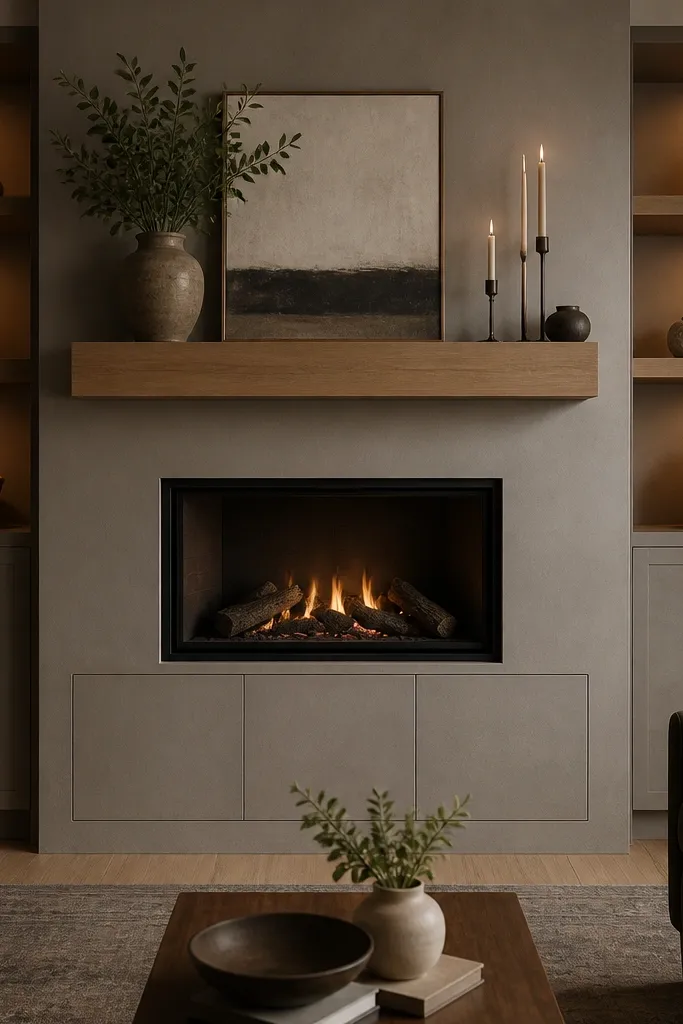
If you need storage for a console, cables, or a media box, this layout keeps it hidden without breaking the fireplace symmetry. The niche below the mantel makes the wall functional while still looking like a single built-in. Side shelves stay open for styling, so the fireplace doesn’t get buried under electronics. It’s a good match for living rooms where the fireplace is used as the focal point but you still need TV or sound equipment.
Frame the fireplace surround, then build a centered media niche box below the mantel height with 3/4-inch plywood sides and a removable panel front if you need access. Add two side shelving bays with fixed shelves, keeping the shelf depth at 9-10 inches for books and decor. Run wiring before drywall or paneling, then install a cable pass-through at the back of the niche. Finish by adding trim casing around the niche and shelves so the whole wall reads like one unit.
Editor's noteUse a single back outlet location and route cables through a channel before you close the niche.
Skip thisDon’t place the niche too low — you want the mantel line to stay visually dominant.
8. Bookshelf Wall With Fireplace Set Into a Raised Center Panel
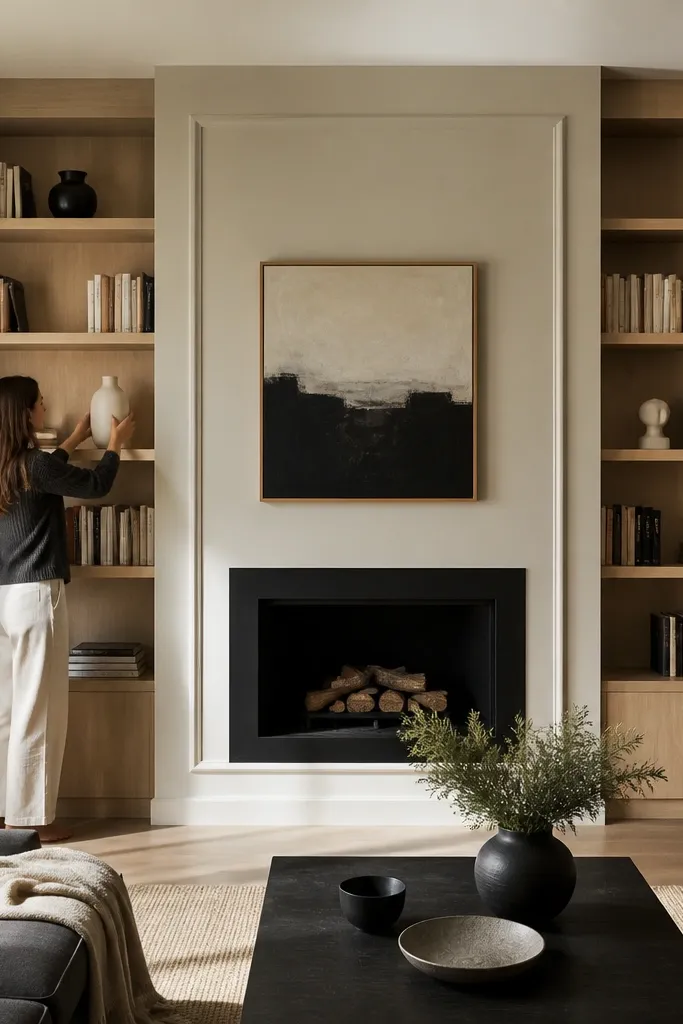
This design makes the fireplace look like it belongs to the shelving wall by raising it within a framed center panel. The raised panel gives you a “picture frame” effect around the firebox, so everything reads layered. Keep shelves continuous on both sides, and use a slightly different paint color or sheen to make the center panel pop. It’s also forgiving if your fireplace surround isn’t perfectly finished, because you’re building a new frame around it.
Create a center raised panel frame using 1x4 trim strips around the fireplace opening, then sheath it with drywall or 1/2-inch panel board. Build side shelf structures that line up with the raised panel edges, keeping shelf heights consistent. Install fixed shelves and cap the top with a crown trim that spans across the whole wall. Prime, caulk, then paint the center panel and shelves in the same color family for a subtle layered look.
Use 2-inch wide trim for the center panel so it reads clearly from across the room.
Don’t use thin trim for the center panel — it disappears visually.
9. Corner-To-Wall Floating Shelves With Fireplace Column
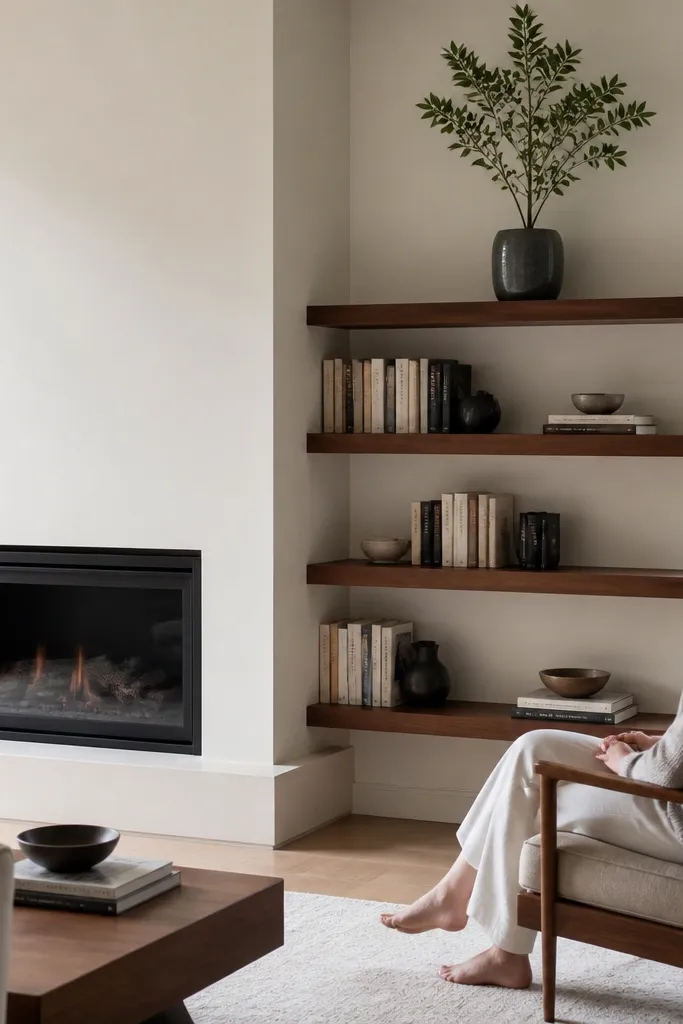
This layout is for a fireplace that’s offset from the center of a wall. A vertical column beside the fireplace gives you a clean anchor line, while floating shelves extend toward the more open side. It looks intentional even when the room layout forces asymmetry. Use uniform shelf depth and keep the column width consistent so the eye doesn’t feel pulled in random directions.
Mark a vertical reference line for the column on the wall using a laser level if you have one. Build a 3/4-inch plywood column box around the fireplace surround with a mantel shelf on top, then install floating shelf cleats on the longer side. Cut shelves to 9 inches deep, screw them to the cleats, and add a thin fascia trim strip at the shelf front. Finish with paint on the column and shelves, or stain only the shelves if you want a warmer look.
Pre-sand the shelf faces before primer so you don’t get “grain telegraphing” through paint.
Avoid random shelf heights — pick a spacing grid and stick to it.
10. Dark Trim Built-Ins With Light Fireplace Surround
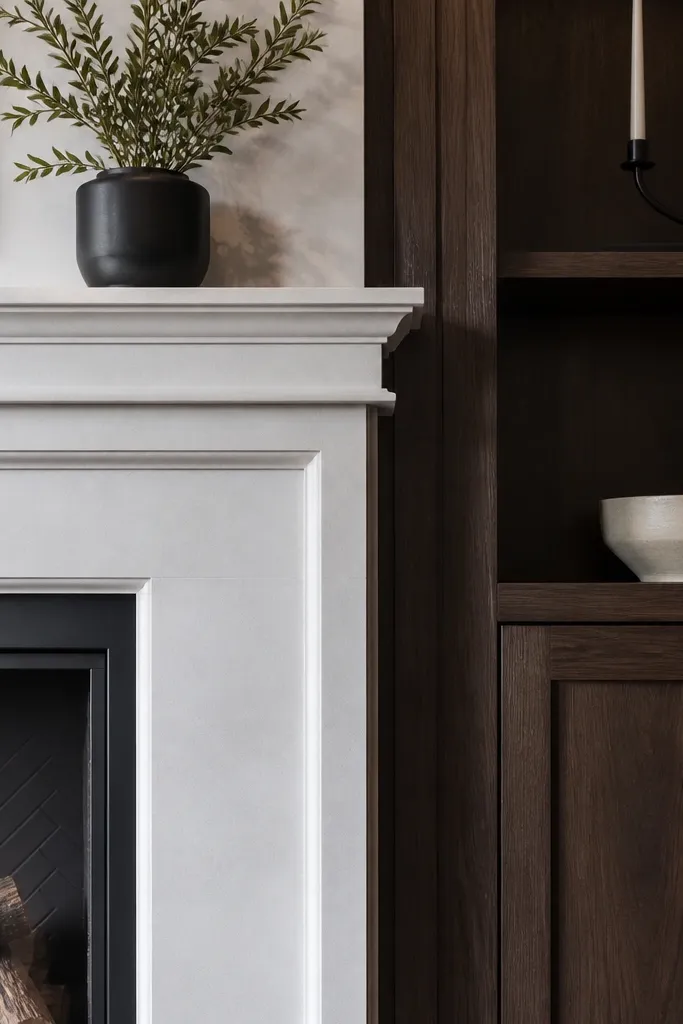
Color contrast makes built-ins look custom even on a budget. Keep the fireplace surround lighter (white or soft warm gray), then frame the shelves with darker trim. This gives you crisp separation between the firebox and the shelving, which is what most budget builds miss. Use dark walnut-look stain or a deep charcoal paint on the trim pieces, not on the whole wall.
Build the shelving wall with plywood panels and paint them white or light gray first. Then add dark trim casing on the shelf edges and vertical stiles using 1x3 and 1x4 pieces. Install shelves at 9-10 inches deep, with a 3/4-inch face so the trim stands out. Finish with a satin top coat on the dark trim for depth and easy wipe-down.
Editor's notePaint the dark trim pieces separately and let them cure before installation so you get clean edges.
Skip thisDon’t paint dark trim directly over raw plywood — it looks blotchy.
11. Mantel + Two Tall Cabinets With Glass Upper Panels
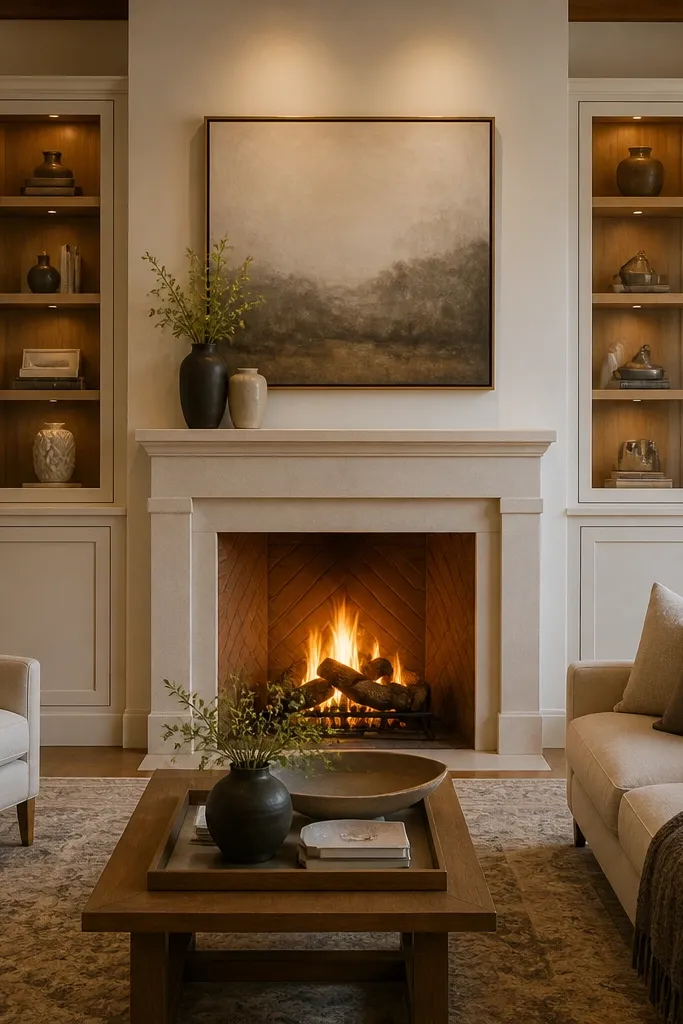
If you want the built-ins to look like furniture, this is the move. Tall cabinets on both sides of the fireplace make the wall look balanced and give you storage that looks styled. Glass upper panels let you show curated items without open clutter, while the lower areas stay closed. This project photographs well because the door frames create a grid that reads from across the room.
Frame the mantel surround, then build two tall cabinet boxes from 3/4-inch plywood sized to match the fireplace width and chosen symmetry. Use 1x2 frame rails to create the glass upper sections and install glass with a gasket so it doesn’t rattle. Put fixed shelves behind the glass for plates, books, or decor, and add doors with soft-close hinges on the lower sections. Prime and paint the cabinet frames, then install the glass frames and trim to hide gaps.
Editor's noteUse 1/4-inch tempered glass and a clear gasket — it looks clean and resists chips.
Skip thisSkip flimsy door frames — thin rails flex and the glass panel won’t sit straight.
12. Floating Mantel Shelf With Full-Height Bookcase Columns
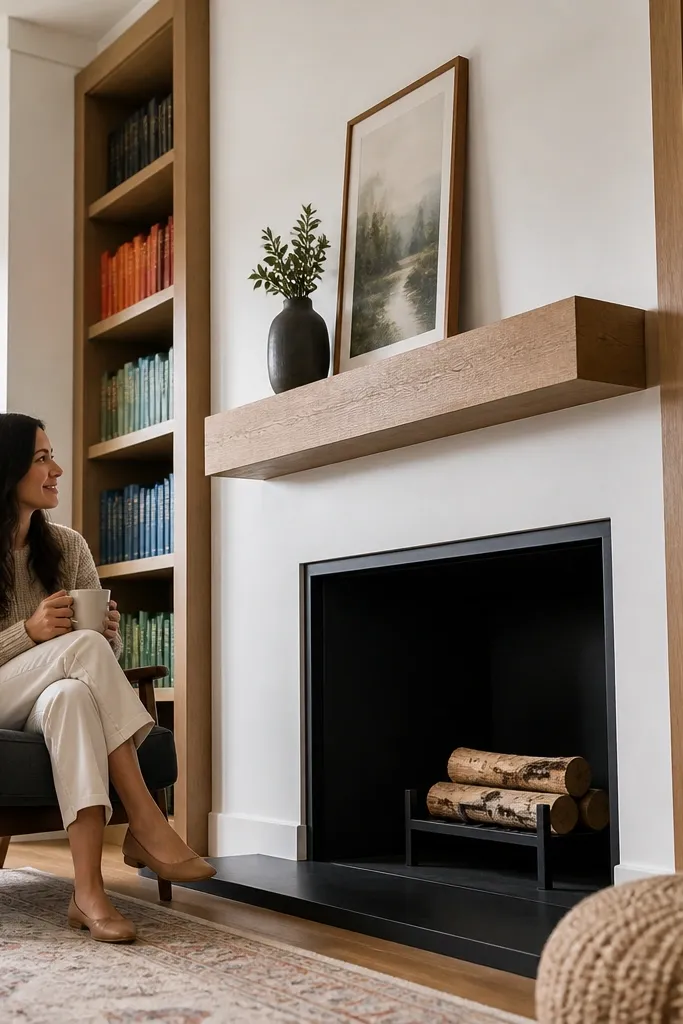
This design keeps the fireplace line clean while giving you serious storage. The key look is a floating mantel shelf that visually separates the fireplace from the tall bookcase columns. It feels modern, but you can make it cozy by using warm wood shelves with a white painted surround. The columns also help if your fireplace opening is narrower, because they widen the overall visual footprint.
Install a mantel shelf first, using a ledger secured to studs and hidden brackets or a cleat system. Build two bookcase columns from plywood with 3/4-inch shelves, matching column width on both sides of the fireplace. Set shelves at 10-12 inches for books and decor, and add a base panel at the bottom so the columns look grounded. Finish with stain on shelves and a painted surround, then run a thin trim cap across the tops to unify everything.
Editor's noteUse shelf pin systems only if you want adjustable shelves; fixed shelves look cleaner for photos.
Skip thisDon’t skip a bottom base panel — bare framing makes it look unfinished.
13. Built-In Window Seat Style Around the Fireplace
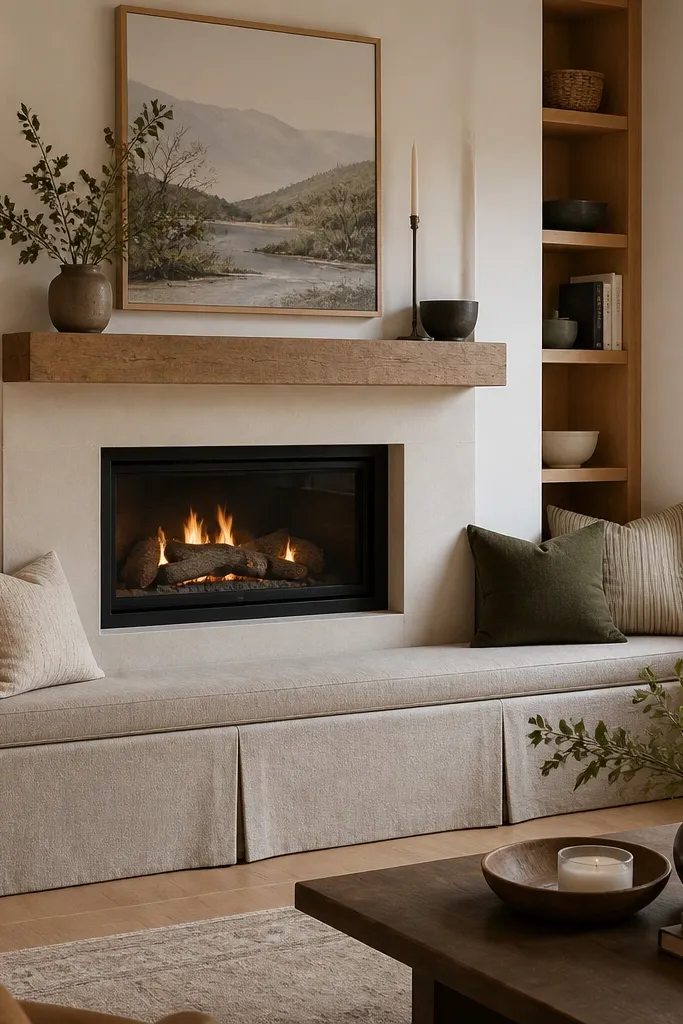
If your living room needs a cozy spot more than more storage, this layout does both. A built-in bench below the fireplace creates a reading corner, while shelves on each side keep the wall looking styled. It’s a great choice for rooms where you want people to gather around the hearth. Use upholstered cushions in a durable fabric and keep shelving simple with a few open lines so the seat stays the star.
Frame the fireplace surround and then build a bench platform with 2x lumber or plywood deck supported to studs. Add side shelf bays using 3/4-inch plywood frames and 9-10 inch deep shelves, then install a back panel behind the shelves so the wall looks finished. Build a hinged or lift-up cushion access panel if you want storage underneath. Finish the bench base with paint and install fabric cushions on top after the wall is painted and dry.
Editor's noteUse a water-resistant indoor-outdoor fabric for the cushion cover so spills don’t ruin your look.
Skip thisAvoid open shelf clutter when you have seating — keep decor to three items per shelf.
14. Recessed Fireplace With Shiplap-Look Panels and Shelves
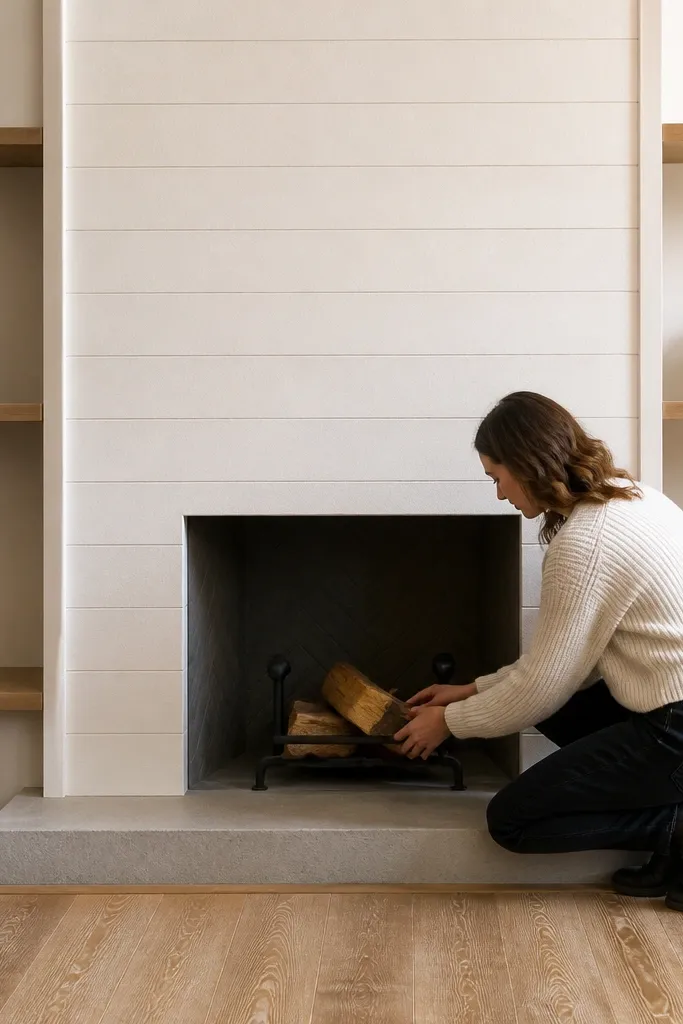
Texture is what makes this feel high-end without high-end materials. Recess the fireplace surround slightly and add a consistent panel texture around it, then flank it with smooth shelves. The texture catches light and makes the fireplace look deeper and more intentional. Keep shelves smooth and clean so the wall doesn’t get visually noisy. This is a good option if you want cozy farmhouse energy but still want crisp lines.
Build a recessed frame around the fireplace opening using 2x lumber and drywall or panel board so the firebox sits back 2-3 inches. Install your panel texture on the recessed area, then frame the left and right shelving bays around it. Use 9-10 inch deep shelves with a smooth face and paint them the same color as the wall for cohesion. Caulk all panel seams, prime, then paint to lock down the texture.
Use a roller for panel paint and a brush only for edges so you don’t get uneven texture paint marks.
Don’t texture the shelves — keep texture only where it frames the fireplace.
15. Tall Narrow Shelves With a Center Fireplace Column
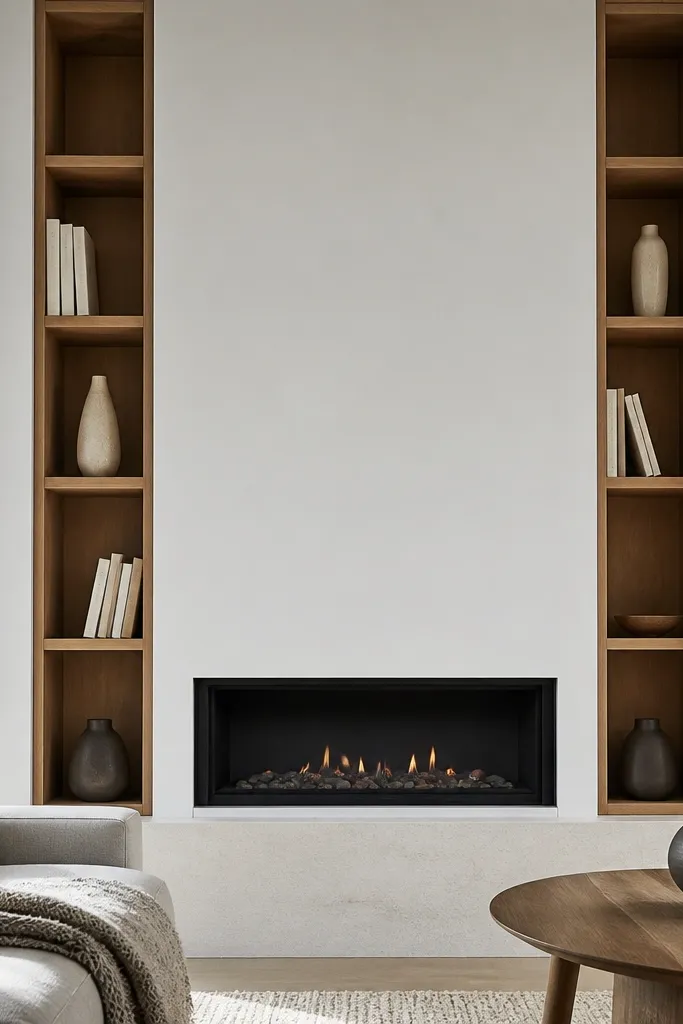
Narrow shelves look sleek and modern, and they’re a smart way to avoid bulky built-ins in small rooms. The fireplace sits in a centered column, and the narrow shelves read like a vertical grid. It’s great when you want room for books but don’t want thick shelf spans. Choose a consistent shelf spacing and keep the column trim crisp so the grid looks deliberate.
Frame the fireplace column with plywood to the exact width you want, then mark narrow shelf bay openings on both sides. Build shelves from 3/4-inch plywood cut to a 7-8 inch depth, then install them with hidden cleats screwed into studs. Add trim casing around each bay so the edges look finished. Prime and paint the entire grid wall, and top the column with a mantel shelf that sits level and centered.
If you’re storing books, keep the shelf depth closer to 8 inches so covers don’t stick out.
Avoid super-thin shelves under 6.5 inches — they sag or look flimsy.
16. Sculptural Asymmetry With One Side Display Shelf Wall
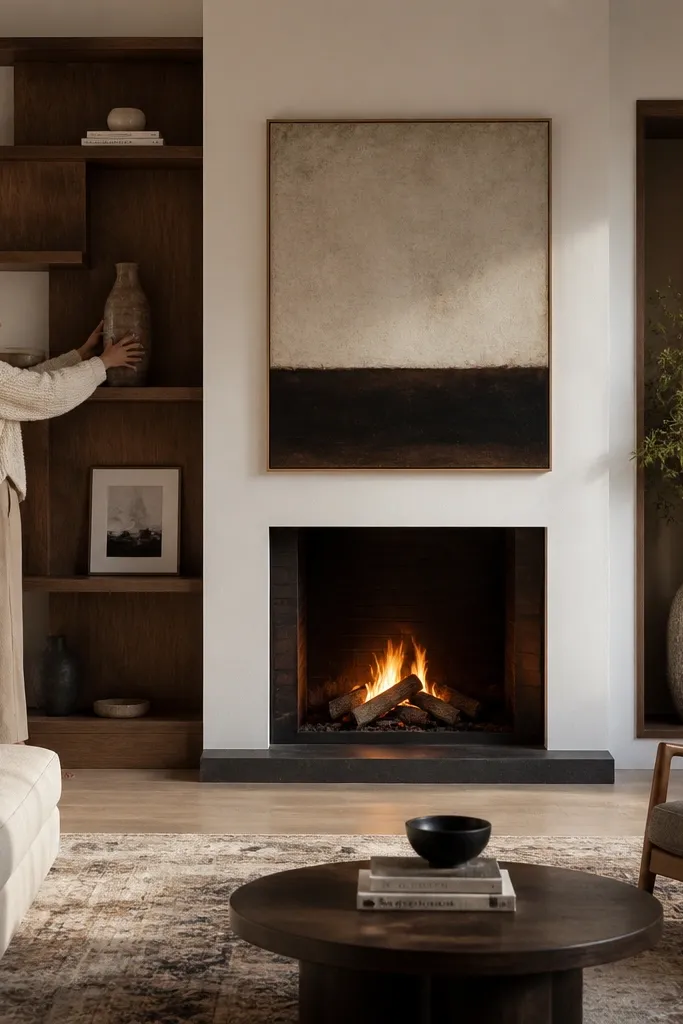
Perfect symmetry is not the only way to make built-ins look designed. This layout uses one bold shelf wall on one side, paired with a cleaner, simpler frame on the other side. The fireplace remains centered, while the asymmetry adds personality and makes the wall feel curated. It’s ideal if the room has an open doorway or irregular wall line on one side.
Frame the mantel surround centered on the fireplace, then build a full shelf wall on one side using 3/4-inch plywood panels and 9-inch deep shelves at staggered heights. On the other side, use a single tall cabinet column or a narrow shelving strip to keep balance. Anchor everything into studs, add a back panel behind the open shelf area, and keep shelf spacing consistent within the display side. Paint the wall base, then stain only the shelf faces if you want contrast.
Editor's notePick one visual rhythm: either stagger all shelf heights or keep them straight. Mixing rhythms looks messy fast.
Skip thisDon’t add random shelf lengths — keep them uniform so the asymmetry still reads clean.
17. Full-Length Mantel Beam With Shelf Ledge Rail
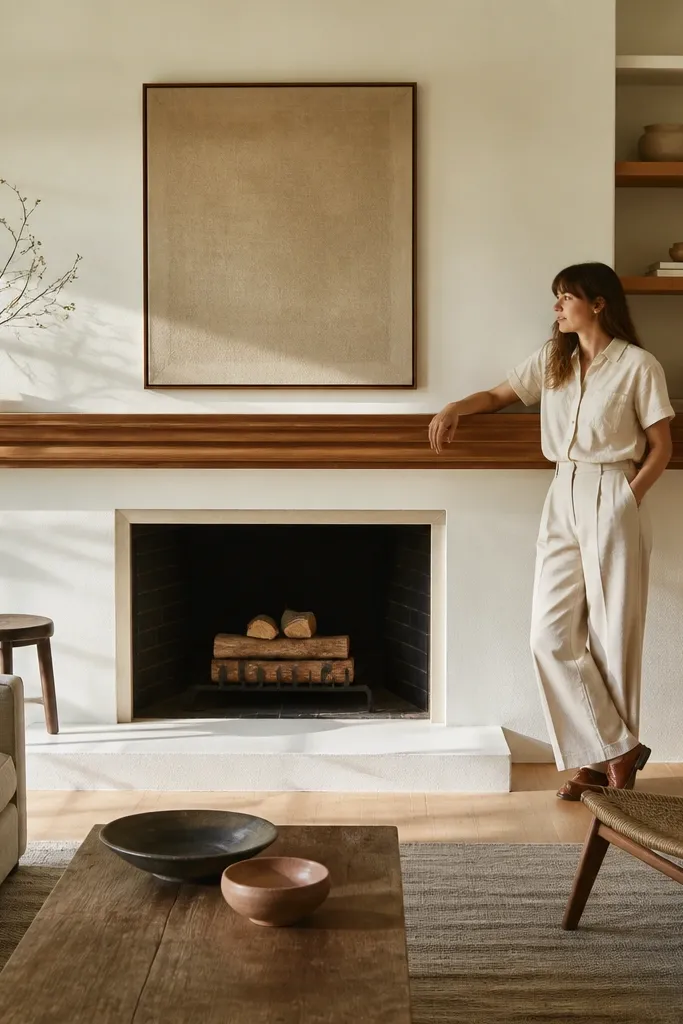
This is the “designer trim detail” look that reads custom in photos. A full-length mantel beam ties both sides together, while a simple rail under each shelf creates a repeated line that makes the wall feel built-in. Use a sturdy 2x or plywood mantel board with a smooth face, then add a thin decorative rail profile under the shelves. Keep the shelf depth at 9-10 inches so the ledge rail doesn’t make it look too heavy.
Build the mantel surround frame first and install a straight mantel beam using hidden brackets or cleats. Then install shelf cleats and cut shelves from 3/4-inch plywood at 9-10 inches deep. Add a decorative rail board under each shelf using 1x2 trim, miter corners where needed, and keep the rail height consistent across the wall. Prime and paint the wall and trim, then seal the mantel with a clear top coat if you used stain.
Editor's noteUse a consistent rail height measured from the shelf face, not from the wall, so shelves stay visually aligned.
Skip thisDon’t skip sanding between primer coats — rail edges show bumps in daylight.
18. Built-In Fireplace Surround With Integrated Accent Lights
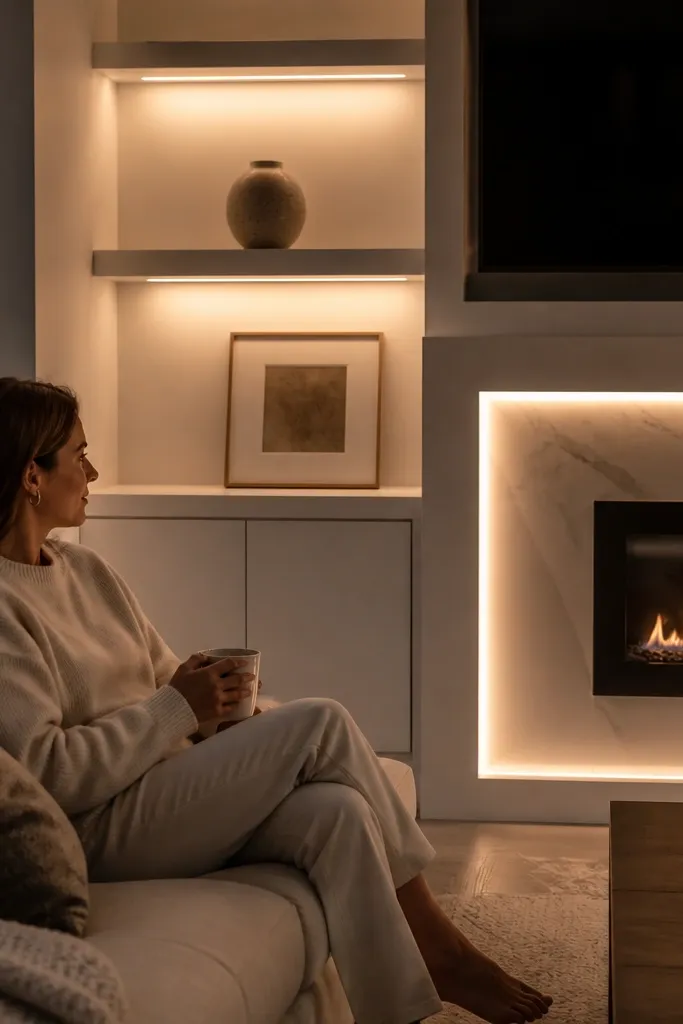
Lighting is the fastest way to make shelves look finished and expensive. This design hides LED strips under the shelf lips and inside the fireplace surround framing, so the wall glows softly instead of looking flat. Keep shelves clean and light-colored so the light reflects nicely. The fireplace becomes the brightest “center,” while books and decor show their edges instead of turning into shadows.
Plan your wiring before you close the wall: run low-voltage LED wiring through a channel behind the shelf frames. Install shelf lips with a 1/2-inch overhang so the LED strip sits hidden under the edge. Build the fireplace surround framing with a shallow channel behind the mantel area for an up-light look. Test the lighting before final caulk and paint, then seal wire access panels so you can service it later.
Use a warm LED temperature around 2700K so the firebox glow matches the room tone.
Don’t place LEDs too close to the shelf face without a diffuser — you’ll see bright dots.
19. Cabinet-Top Ledgers With Open Shelves Below
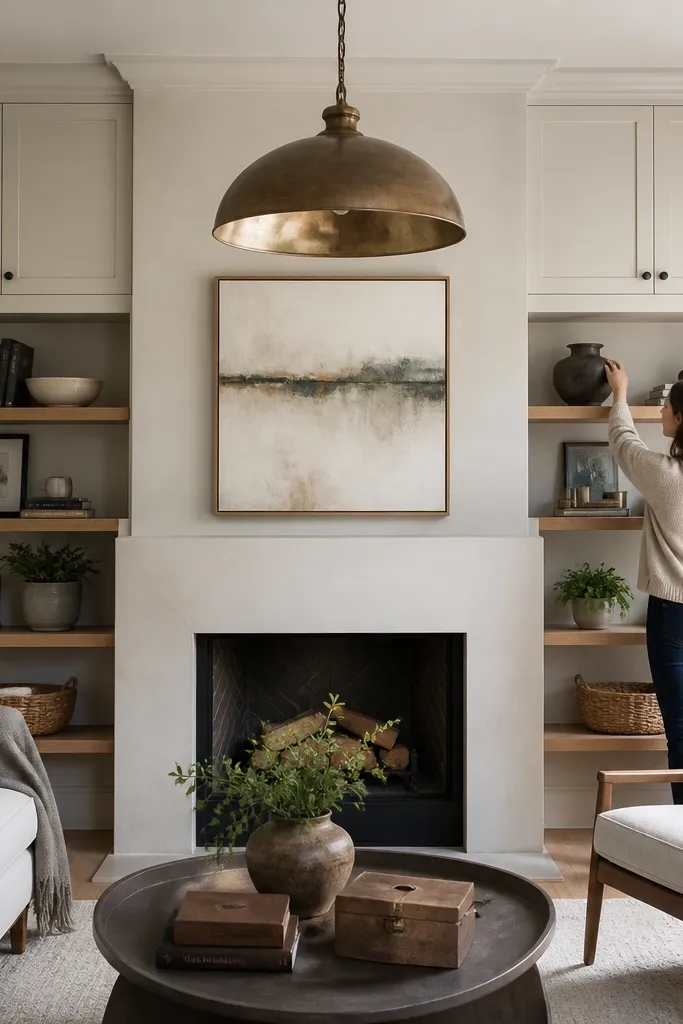
This layout gives you a “built furniture” feel without doing full-height cabinets. Upper ledgers look like a cabinetry finish, while open shelves below keep the wall light and photogenic. The fireplace stays centered because the upper ledgers align across both sides. It’s also practical for hiding bulky items up high and styling the lower shelves with a few larger pieces.
Frame the mantel surround, then build two upper cabinet-ledger boxes on both sides using 3/4-inch plywood and 1/2-inch face frames. Install doors or panel fronts on the top sections, then create open shelf bays below with fixed shelves at 10-12 inch spacing. Add a back panel behind open shelves so the wall doesn’t show studs. Caulk, prime, and paint the cabinet ledgers and shelves in matching colors with a satin top coat on door fronts.
Editor's noteKeep door hardware in one finish and one shape so the wall reads cohesive.
Skip thisAvoid too many small shelves — two or three larger openings look cleaner around a fireplace.
20. Minimal Flat-Panel Shelves With Thin Trim Borders
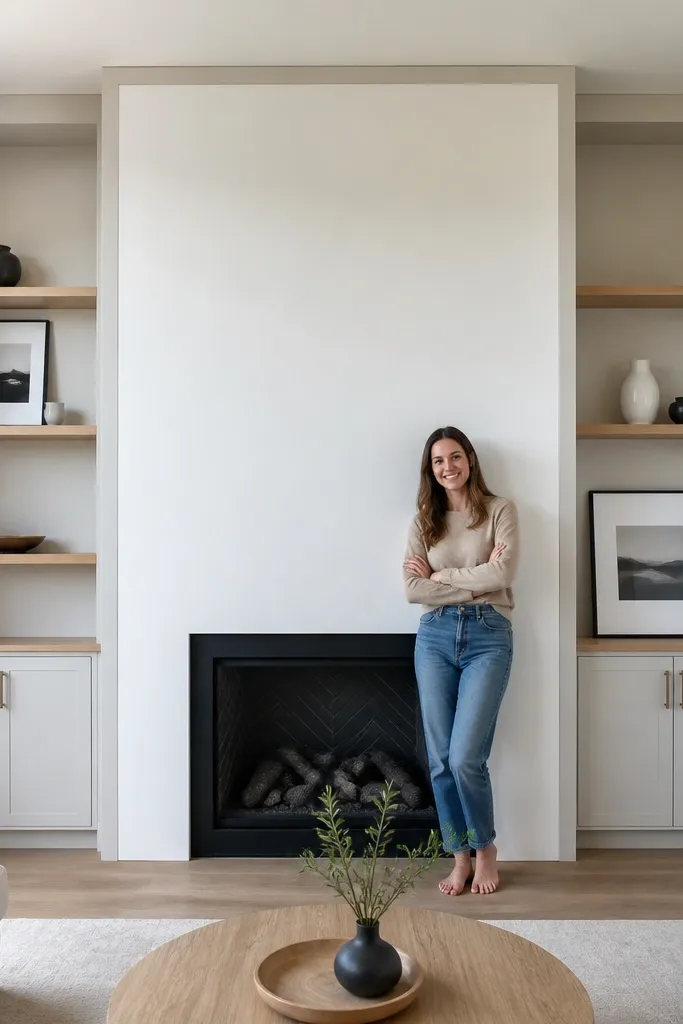
If your style is clean and modern, this is the safest aesthetic bet. Flat-panel shelves with thin trim borders look sharp and don’t overwhelm the fireplace. The border trick adds “edge definition” so photos show crisp lines instead of flat planes. Use a matte wall paint and a satin trim finish so light doesn’t glare off broad surfaces.
Build a plywood backing panel around the fireplace and shelf zone, then frame shelf openings with 1x2 trim borders. Cut shelves from 3/4-inch plywood and cap the front edge with a 1/2-inch strip for a subtle profile. Install using cleats at each shelf height and screw into studs for strength. Prime with a bonding primer, caulk all trim seams, then paint in two top coats.
Use a foam roller for the flat wall sections and a brush only at trim edges for clean separation.
Don’t skip caulk — tiny gaps show up immediately in flash photos.



