
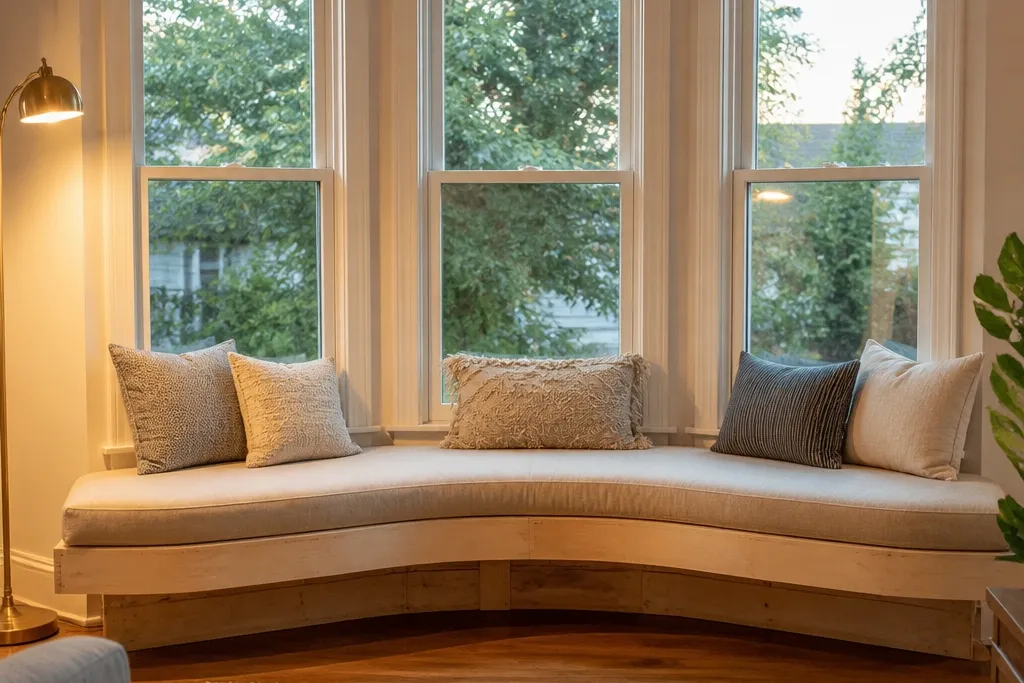
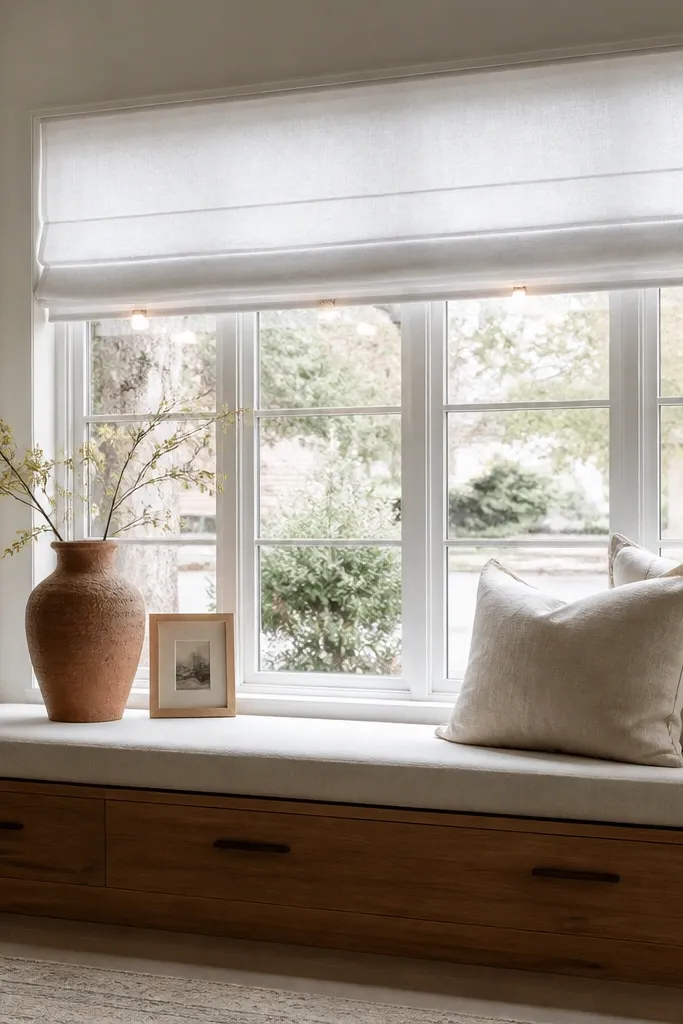
1. Corner-to-corner built-in bench with a single front rail
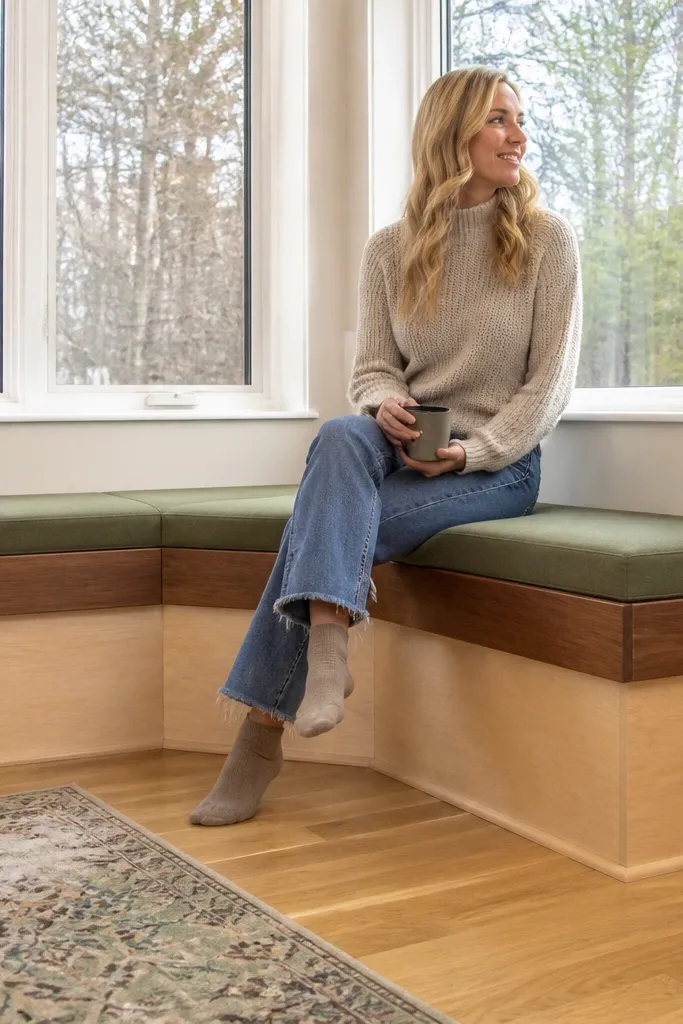
This is the cleanest way to make budget Bay Window ideas look custom: one continuous front rail makes the whole bay read as a single piece, even when the frame is built in sections. Use a simple plywood/2x lumber carcass with a front rail that runs across each angled wall segment. The look is cozy because the cushion sits proud of the frame by about 1 inch, creating a soft overhang that hides minor corner gaps. Finish the rail in the same color as your trim, then pick a cushion fabric with a matte texture like cotton duck or linen blend so it doesn’t look shiny and cheap.
1) Measure each bay leg and cut carcass bases from 3/4-inch plywood, leaving a 1/8-inch gap between pieces for alignment. Install a ledger/cleat at your chosen seat height on studs, then screw each carcass to the cleat and through the back into framing. 2) Add a front rail board (2x3 or ripped plywood strip) so the front line stays straight across angles; clamp and screw from the underside. 3) Cut foam to match each section with the top edge slightly rounded, then wrap with batting before you add your cushion cover.
Add 1/2-inch spacer shims behind the angled pieces while you fasten the carcass so the front rail doesn’t “step.”
Skipping a cleat or stud fastening makes the bench feel wobbly and kills the custom look.
2. Two-tone window seat with upholstered side panels
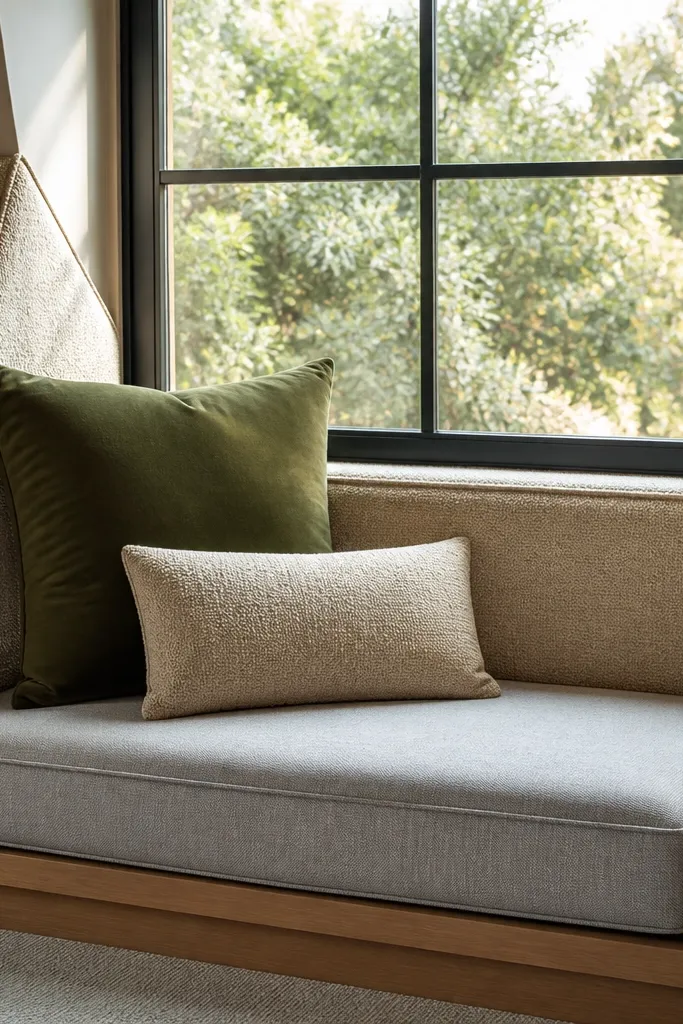
This look makes a budget bay feel designer because the upholstered side panels soften the angles that usually look awkward. The frame stays simple and cheap, but the “detail” is the side panel — it’s what your eyes catch when you walk into the room. Pick a contrasting fabric for the side panels, like a warm oatmeal or small-scale check, and keep the cushion cover in a calmer solid. The result is cozy and photogenic because the bay has depth — the angles don’t look like cut plywood boxes.
1) Build your base frame with regular plywood or pre-cut boards, then leave the sides exposed. Cut side panels from 1/2-inch plywood or hardboard to match each bay leg angle; cover them with 1/2-inch foam and batting. 2) Attach the upholstered side panels to the frame using screws through the inside edges, then add a fabric border strip along the top edge for a crisp line. 3) Build cushions for the top surface only, keeping the cushion seam hidden under the upholstered side panel edge.
Editor's noteUse spray adhesive plus a staple gun for the foam and batting, then pull fabric tight before stapling to the back edge.
Skip thisUsing slippery fabrics for the side panels can cause sagging; choose cotton duck, canvas, or upholstery-weight fabric.
3. Slipcovered chaise-style cushions with pleated skirt
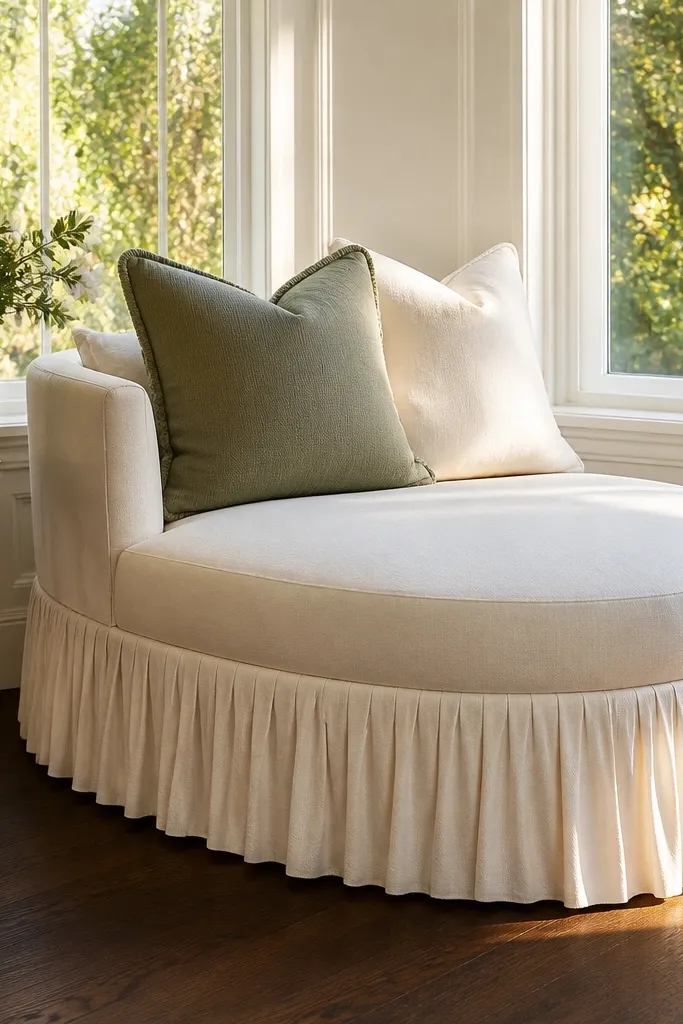
If you want cozy and relaxed, this is the most forgiving option. Instead of a rigid built-in look, you create a soft chaise-style seat using a frame you can cover, then add a pleated skirt that makes the bay look “dressed.” Pleats hide unevenness at corners and give you a clean visual boundary where the seat meets the wall. Use a neutral slipcover fabric like cotton-linen blend; it reads warm in daylight and looks good in low light because it stays matte.
1) Make a simple platform seat with 3/4-inch plywood over a basic support frame; keep the top flat and level. 2) Cut seat cushions from foam (4-5 inches thick) and make zippered slipcovers or tied covers. 3) Measure the seat perimeter and build a skirt panel from fabric in a width that gives you 2-3 inches of fullness per foot; attach to a hidden Velcro strip on the underside of the seat so it doesn’t shift.
Press the pleats before attaching and mark the corner pleat placements so the skirt hangs symmetrical across the angled sections.
Skipping a hidden attachment (Velcro, snaps, or ties) makes the skirt ride up and show gaps at the bay corners.
4. Piped cushions on a boxed frame
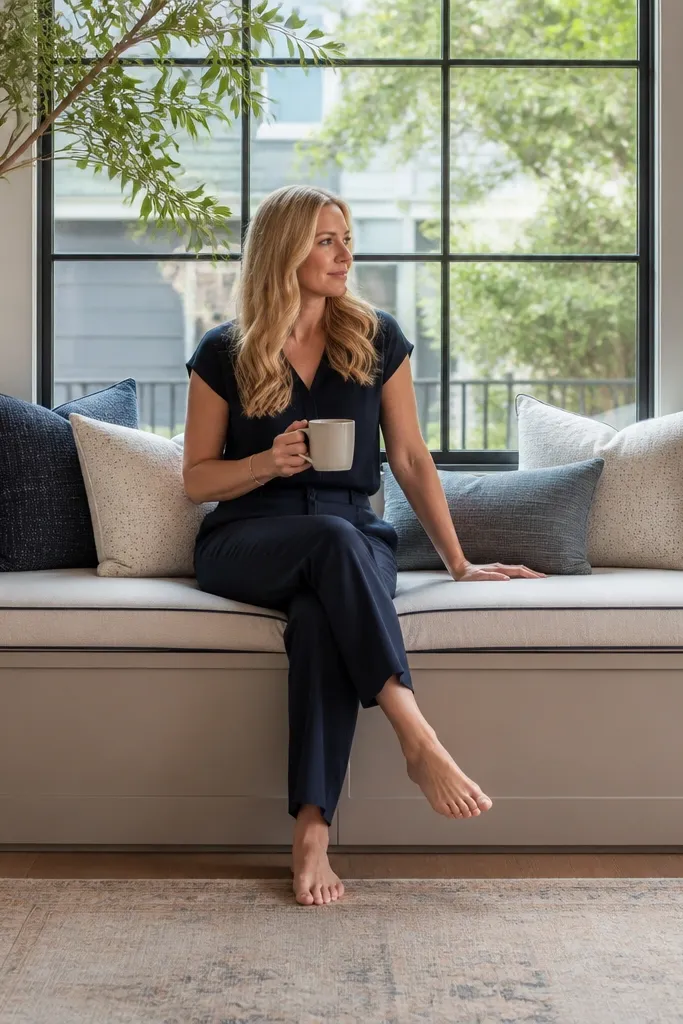
Piping is the quickest way to make budget Bay Window ideas look intentional. A boxed frame keeps construction simple, but the contrast piping along the cushion edges creates that tailored, furniture-store vibe. Choose piping in a color that matches your trim or curtain rod — it frames the seat and makes angled corners look deliberate. This setup also stays cozy because piping keeps cushion edges crisp instead of collapsing over time.
1) Build the seat base as a boxed platform per bay leg, then sand edges smooth so fabric sits flat. 2) Cut cushion foam pieces for each leg and wrap with batting; install piping using pre-made piping cord or make your own bias tape piping with matching fabric. 3) Sew cushion covers with a zipper at the back edge for easy removal, then slide covers over foam and attach with a few discreet ties to prevent shifting.
Stabilize the cushion cover hem with interfacing where the zipper sits so the fabric doesn’t stretch and distort the piping line.
Using thick, bulky batting under piping can make corners pucker; keep batting even and thin at the seams.
5. Storage bench with hinged top and fabric-wrapped edge
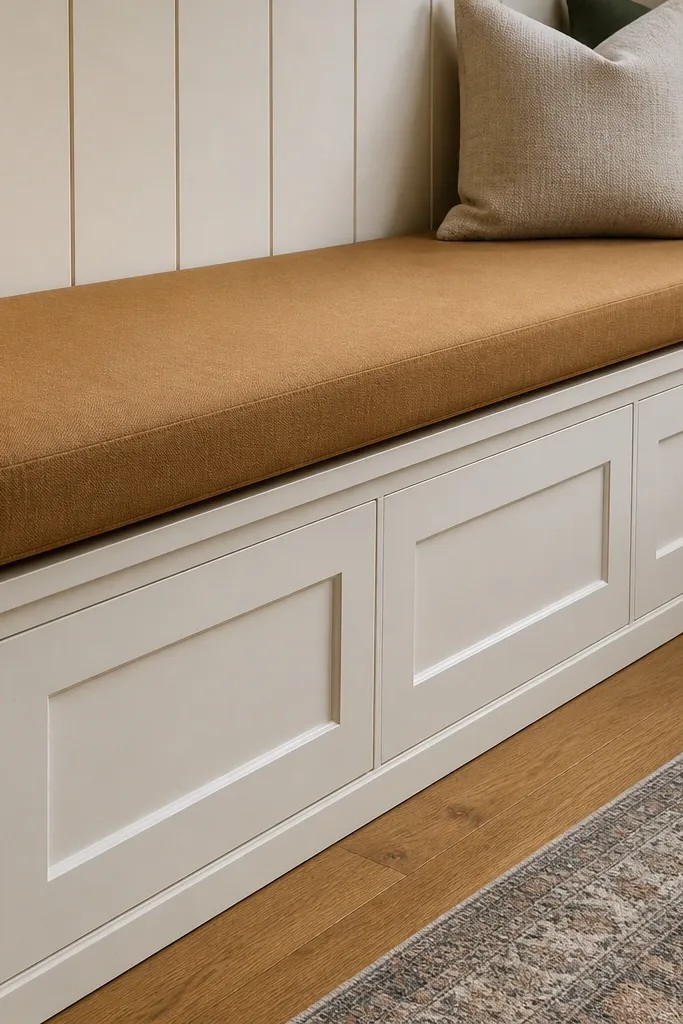
This one is practical and still pretty. Storage makes the bay usable year-round, and the hinged top gives you a clean silhouette without a bunch of separate pieces. The fabric-wrapped edge is the aesthetic secret: it hides plywood edges and keeps the front looking soft instead of utilitarian. For a cozy look, use a medium-weight fabric like canvas or outdoor fabric on the exterior, then a removable liner for inside.
1) Build a storage box per bay leg from 3/4-inch plywood with a bottom shelf; screw the box into studs or use a cleat ledger. 2) Add a hinged top panel for each section using piano hinges, and cover the top with foam and batting before adding your fabric. 3) For the front edge, wrap a thin foam strip with fabric and glue it around the perimeter so seams don’t show at the corners.
Use soft-close hinges or add a simple rubber bump stop so lids don’t slam and the fabric stays uncreased.
Skipping a gas strut or hinge support makes the lid hard to lift and eventually damages the hinge line.
6. Window seat with reading nook backrests in angled panels

Backrests turn a bench into a real seating zone. For budget Bay Window ideas, the trick is to build angled backrest panels that match the bay geometry and cover them as one visual unit. Use 2-3 inch foam thickness and a slightly taller backrest on the side angles so it frames your shoulders when you sit. The look is cozy and photogenic because the backrest creates a “picture frame” effect behind throw pillows.
1) Build the seat base first, then cut backrest panels from 1/2-inch plywood sized to each bay leg angle. Add 1-2 inches of foam to each panel and wrap with batting. 2) Attach panels to the wall or to the back of the seat base using sturdy brackets and screws into studs. 3) Sew pillow covers that coordinate with the cushion; place two small pillows on the backrest and one larger lumbar behind them.
Editor's noteMake the backrest height 18-22 inches from the seat top so it supports without looking like a tall headboard.
Skip thisUsing flat, vertical panels in an angled bay makes the backrest look misaligned and uncomfortable.
7. Outdoor-fabric bench with removable covers for sun bays
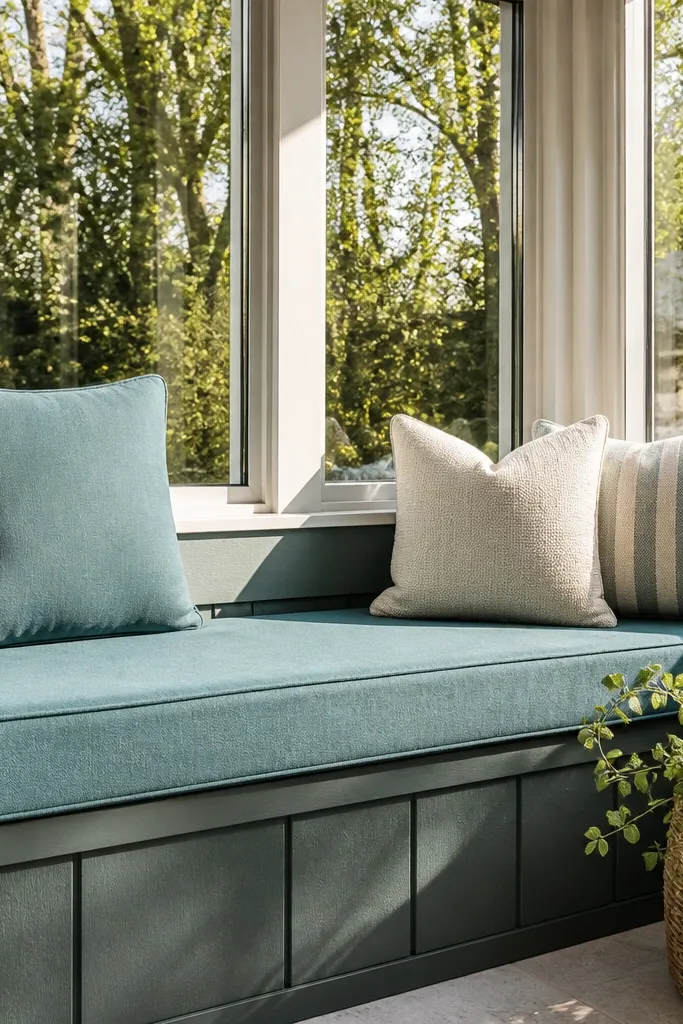
If your bay gets strong sun, you’ll get the prettiest long-term result with outdoor fabric and removable covers. This keeps the look crisp because the fabric doesn’t fade into a sad, uneven color patch. Build the base normally, then make cushion covers from outdoor canvas or solution-dyed acrylic — these look great in daylight and stay matte. Add a few coordinating throw pillows with the same fabric family for a cohesive, cozy photo look.
1) Build or buy foam seat cushions sized to your bay legs, then cover with batting. 2) Sew zippered cushion covers using outdoor fabric; add a hidden zipper at the back edge and reinforce seams with a heavier thread. 3) For the back pillows, make separate covers so you can swap them seasonally without redoing seat cushions.
Editor's notePre-wash outdoor fabric before cutting so shrink doesn’t throw off seam lines.
Skip thisChoosing shiny upholstery fabric in a sunny bay makes it look cheap and glare-y in photos.
8. Floor cushion + built-in trim border for a renter-friendly look
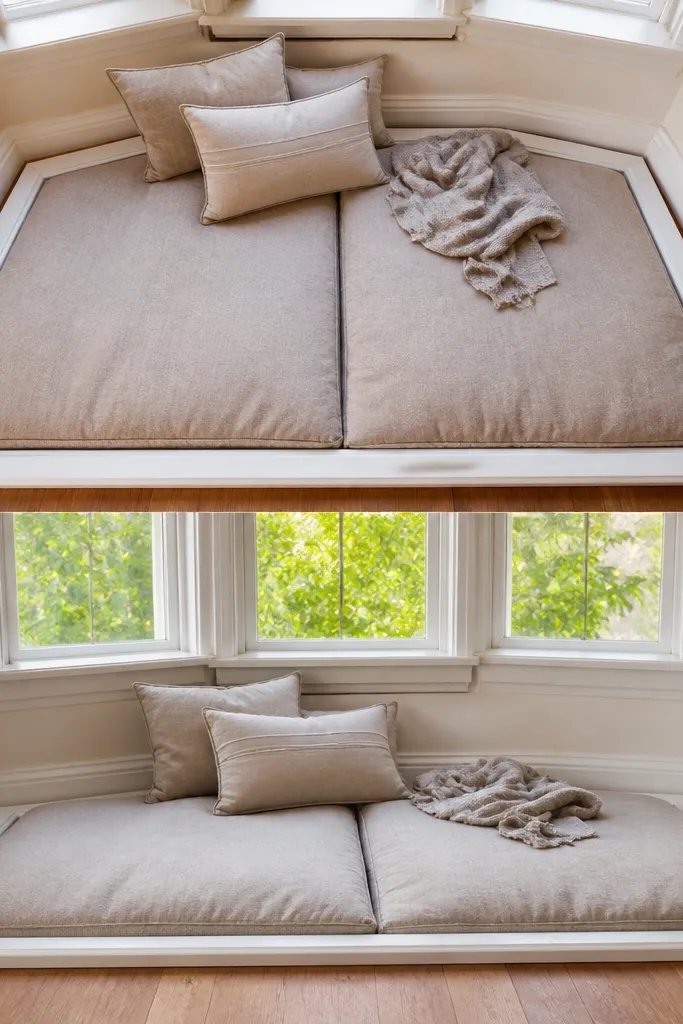
This is the fastest way to nail budget Bay Window ideas without heavy carpentry. You build a low, decorative trim border along the bay walls, then place thick floor cushions inside the boundary. The border makes the arrangement look intentional, not random. Use foam floor cushions 6-8 inches thick for real comfort; choose covers in cotton or linen blends for a cozy, soft look that photographs well.
1) Install a simple trim rail (like 1x2 boards) along the bay walls using a level and screws into studs or existing trim, depending on your setup. Keep the inside opening consistent so cushions sit square. 2) Add corner blocks so the trim forms clean angles at the bay corners. 3) Place cushions inside and secure them with small Velcro dots on the underside so they don’t slide when someone sits down.
Editor's noteUse 1x2 boards ripped or sanded to match your trim width so the border looks like it was always part of the room.
Skip thisRelying on only loose cushions without any boundary makes the seat look messy after a week.
9. Linen bench with tufted seat top and modern skirt
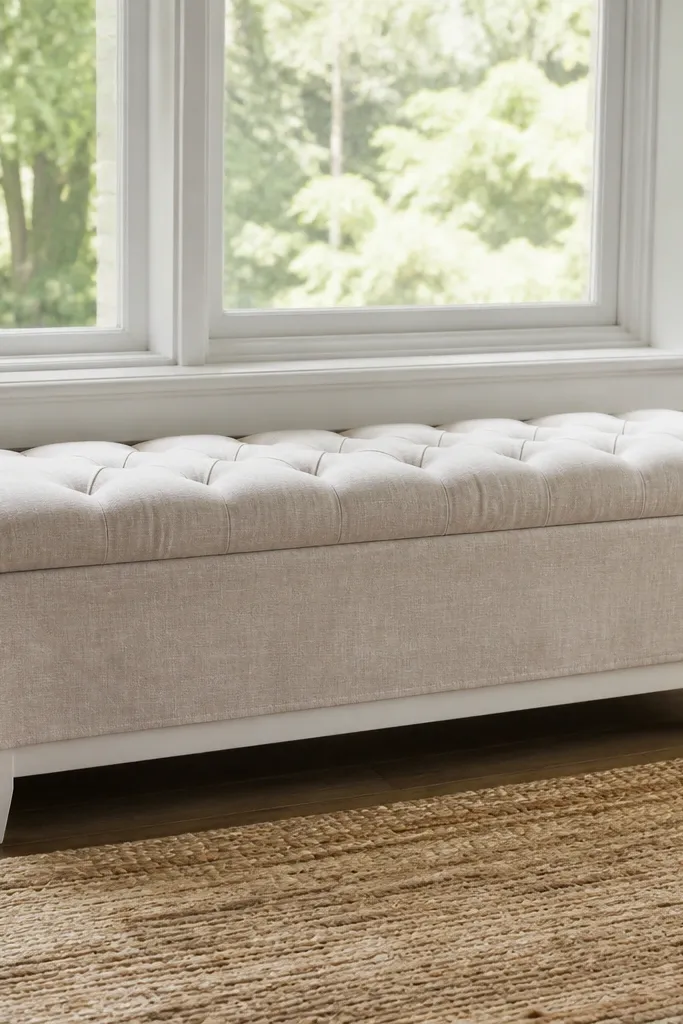
Tufting makes a bench look expensive because it adds texture you can see from across the room. For budget Bay Window ideas, tuft the top cushion only, not the whole bench, so you keep the build manageable. Use a straight skirt instead of pleats for a cleaner look that works in modern rooms. Linen-look fabric gives you that soft, cozy feel, and tufting keeps the top from looking flat.
1) Build a simple flat seat base and cover it with a thin layer of batting so the cushion sits evenly. 2) Make a tufted cushion: cut foam, add batting, then mark tuft points on the underside and sew tufts through the cushion with a button attachment method. 3) Sew the cushion cover in linen-look fabric and add a straight skirt panel that attaches to the underside with snaps or Velcro.
Editor's noteUse fewer, larger tuft points (about 8-10 per cushion section) for a clean look instead of a busy pattern.
Skip thisOver-tufting makes cushions sag and can create lumps that show through fabric.
10. Hex-panel cushion grid for bold pattern without chaos
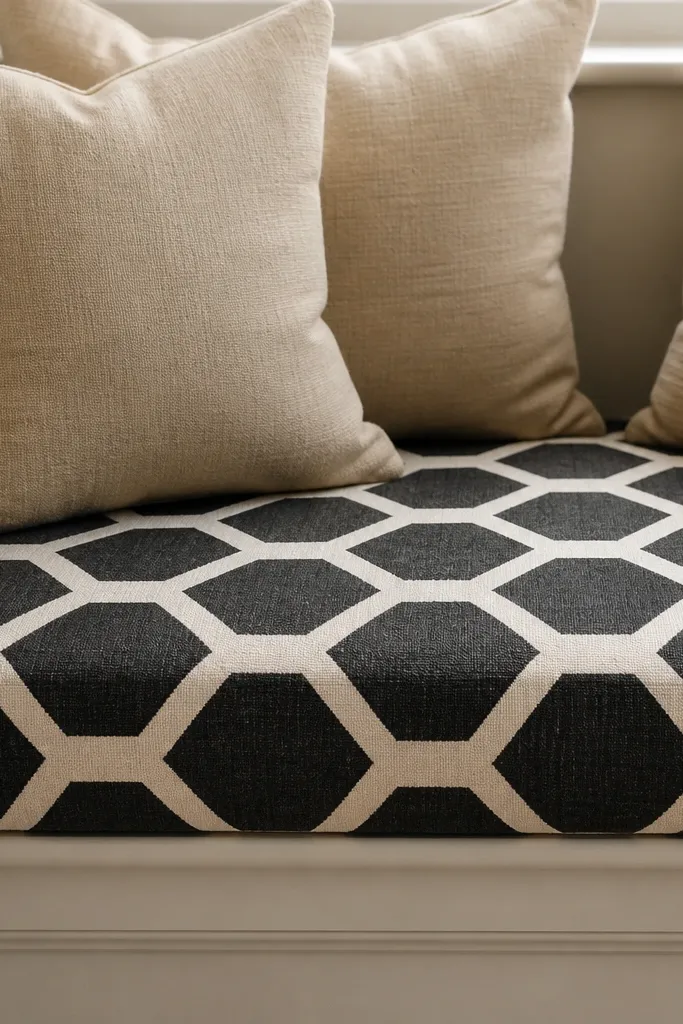
This is how you add personality without turning budget Bay Window ideas into a patchwork mess. Use a simple cushion cover construction with a hex-panel grid in one bold print, then keep the back pillows in a solid coordinating color. The bay becomes a focal point because the pattern sits on the seat surface, where it’s framed by the window light. It’s cozy because you still use thick foam and a soft fabric base — the pattern just gives it style.
1) Build the base platform and decide cushion thickness first (4-6 inches). 2) Sew a cushion cover using hex-panel pieces cut from one patterned fabric, keeping all seams aligned at the cushion edges; add a zipper at the back. 3) For angled bay legs, keep the hex panel pattern centered and trim the last row to fit so the design doesn’t warp. Add two solid back pillows to balance the look.
Editor's noteUse a rotary cutter and a quilting ruler for hex pieces so the seam lines stay sharp and symmetrical.
Skip thisMixing multiple prints in the same seat cover — one bold print reads more intentional.
11. Weathered wood bench with removable knit throw pillows
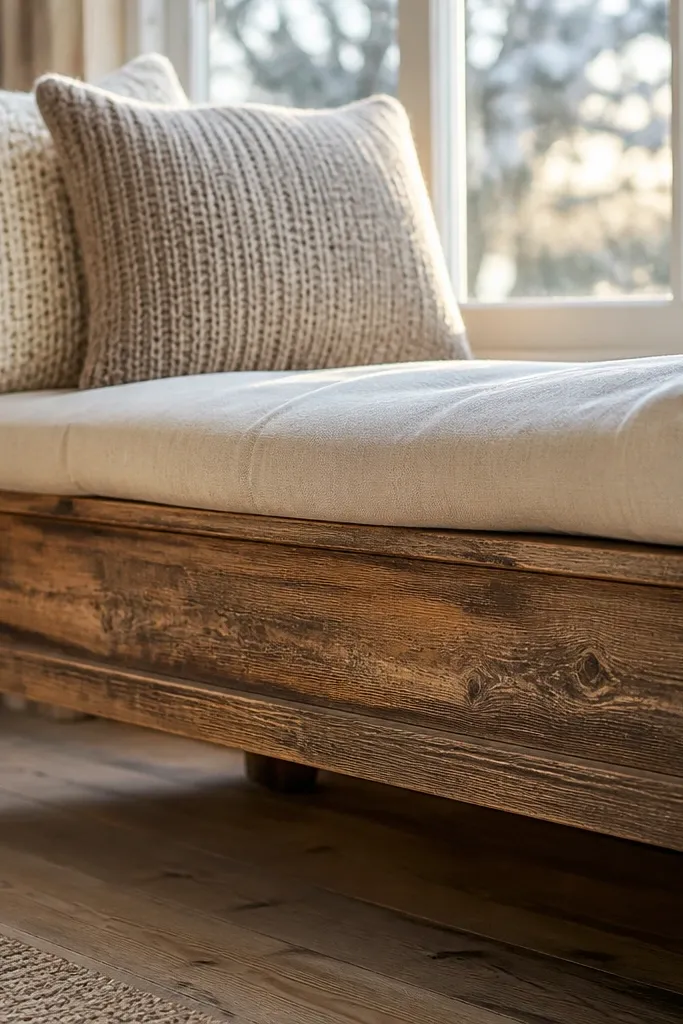
This one leans cozy and lived-in. Keep the seat frame in a warm, weathered finish — think stain + light distress — then top with simple cushions and chunky knit throw pillows. The wood texture adds depth, and the knit pillows make the bay look inviting in winter light. It’s budget-friendly because the frame can be built from basic lumber, and the “designer” look comes from finishing and pillow styling.
1) Build a basic bench base and sand it smooth, then apply stain in a medium warm tone. 2) Add a light distress step: rub a little dark wax or stain on edges, then wipe back until only the corners show wear. 3) Place 4-6 inch foam cushions and add slipcovers, then style with two knit pillow covers plus one lumbar pillow at the back.
Seal the stained wood with a matte clear coat so it doesn’t look plasticky in photos.
Using glossy topcoat — it reflects window glare and makes the bench look cheaper.
12. Shiplap-look paneled bench front with hidden fasteners
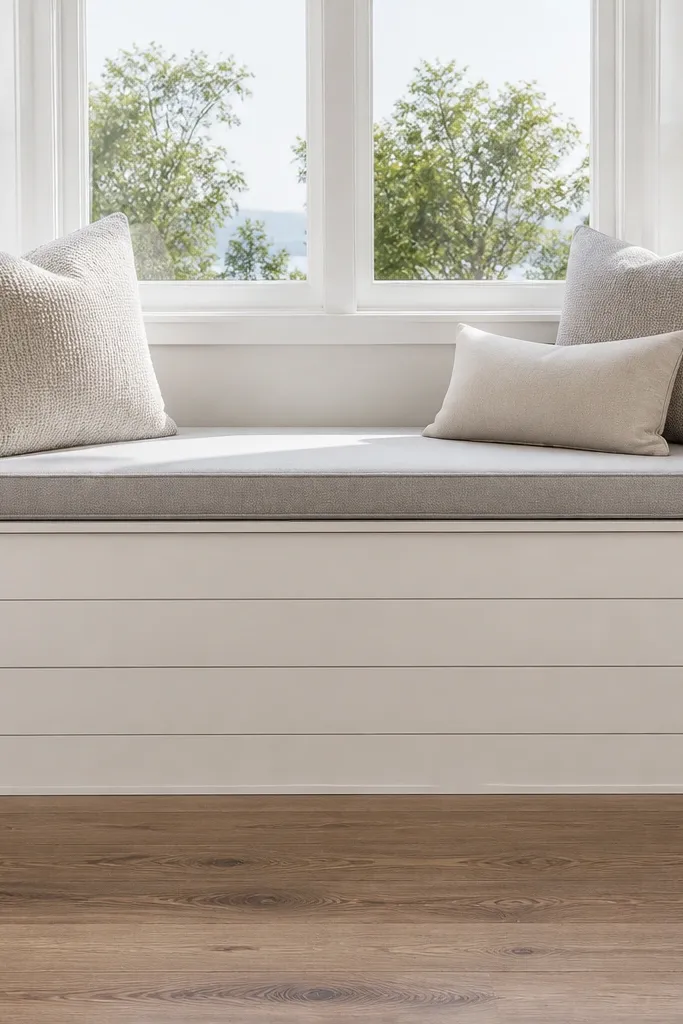
A paneled front is a strong photogenic upgrade because it gives the bay a “built-in wall unit” feel. You can get a shiplap-look using thin boards or pre-finished slats, then cover the top with cushions so the paneling stays visible. This makes budget Bay Window ideas look intentional because the front detail frames the seat and hides the construction lines. Keep the cushion cover neutral and matte so the panel texture is the star.
1) Build the bench carcass, then attach a flat front face panel from 1/4-1/2 inch plywood. 2) Install thin horizontal slats (like 1x2 ripped strips) with consistent spacing, then fill nail holes and caulk the seams for a clean line. 3) Sand and paint the panel face to match your trim; add foam seat cushions on top with a cover that ties in color.
Editor's noteUse a spacer block to keep slat spacing identical across the angled sections so the front reads straight.
Skip thisSkipping caulk between slats makes shadows look uneven and messy.
13. Rounded-corner cushion system with corner wedges
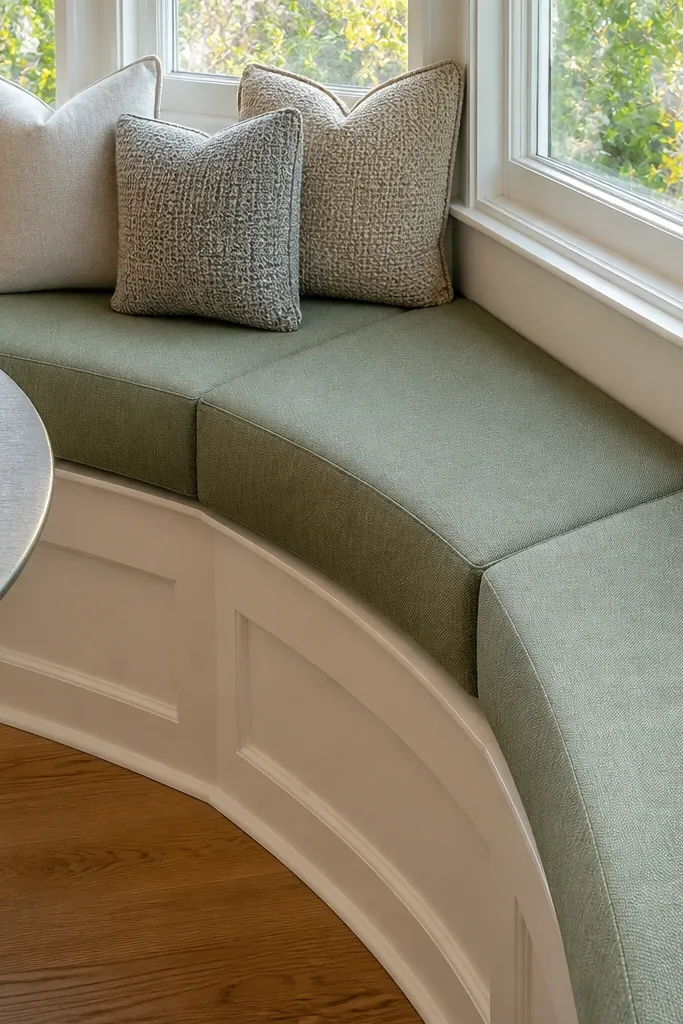
Corner wedges are what make angled bays look smooth instead of blocky. Build the bench with standard frames, then add triangular corner wedges under the cushions so the cushion top surface becomes one continuous curve. This is the biggest visual fix for budget Bay Window ideas because corners are where DIY usually looks “assembled.” Use foam wedges wrapped in batting and covered with fabric so the transition from one bay leg to the next looks intentional.
1) Build the seat frame in sections and leave the top slightly higher at the corner seam. 2) Cut corner foam wedges from high-density foam or stack foam pieces, then wrap with batting. 3) Build your cushion covers for each leg, but cut them so the top surface overlaps the wedge seam and hides it; add piping if you want a crisp edge line.
Test-fit with batting first — it’s easier to trim before you commit to the final foam shape.
Forcing one flat cushion across an angled corner makes the seam gap obvious.
14. Window seat with hanging drop-down curtain behind backrest
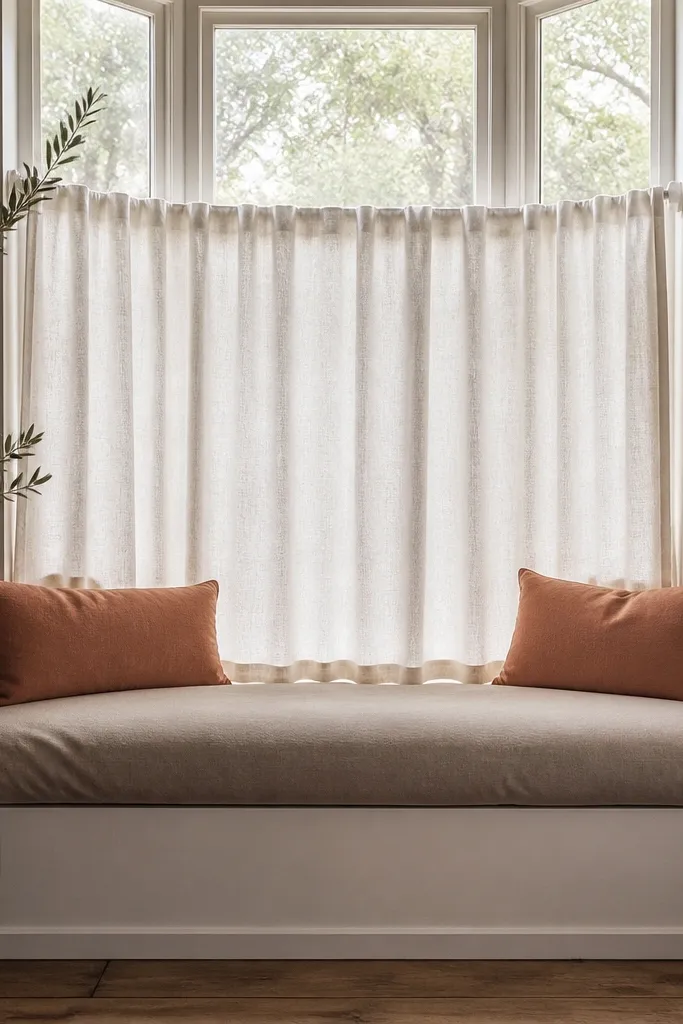
This look makes the bay feel cozy even when you don’t want to build a tall backrest. You add a hanging curtain panel behind the seating area, anchored just above the cushion line, then style pillows in front of it. It adds softness and hides visual clutter from the window area. The curtain also helps the bay photograph well because it creates a consistent background behind cushions.
1) Install a small curtain rod or tension rod behind the bay seating area at about 6-8 inches above where you want pillows to sit. 2) Hang a sheer-to-medium curtain panel in a warm neutral so it doesn’t overpower the cushions; hem it so it falls evenly across angles. 3) Build a low seat base with cushions, then place two pillows against the curtain and one lumbar in front.
Editor's noteUse a fabric with a matte finish so daylight doesn’t create glare bands behind the pillows.
Skip thisUsing a stiff, shiny fabric makes the curtain look like plastic and flattens the cozy vibe.
15. Bench with removable cushion blocks and fabric-covered storage cube set
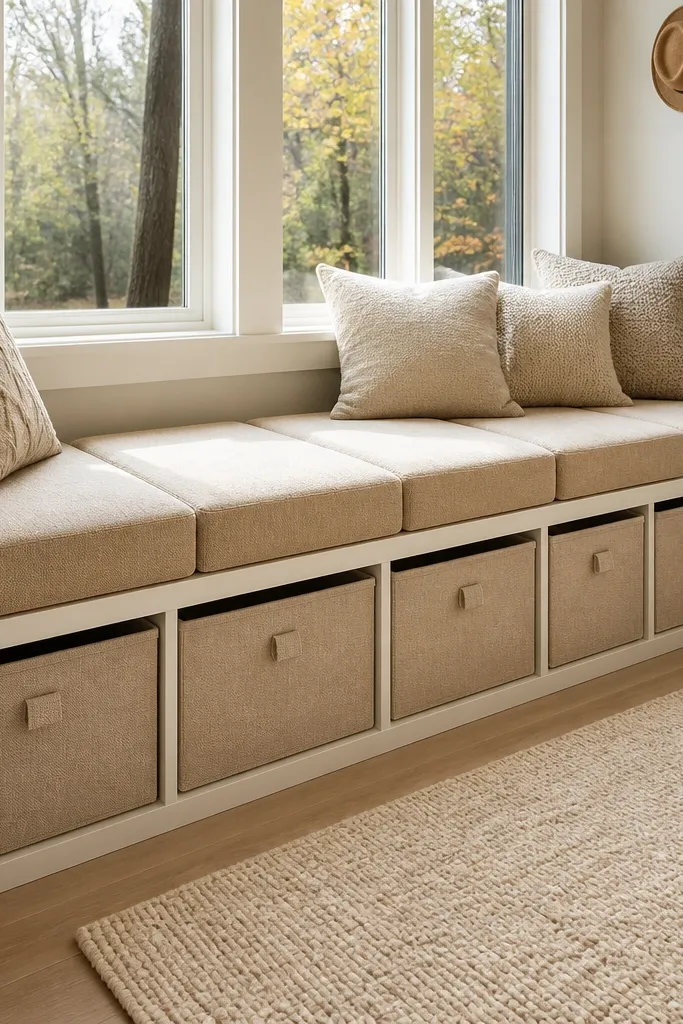
This is a modular approach that looks styled, not temporary. You build a base and place removable cushion blocks on top, then add matching fabric storage cubes along the sides or under the seat line. The visual rhythm looks designed because the cubes repeat the same fabric and color family as the cushions. It’s cozy because you can swap covers and rearrange blocks to match seasons without rebuilding anything.
1) Build a low base platform with enough support for modular cushions; keep the top flat and sand smooth. 2) Cut foam blocks into two sizes: one for the main seat and smaller blocks for corners; wrap each with a fitted cover that has a zipper or Velcro closure. 3) Add fabric-covered storage cubes: either buy cube organizers and wrap them, or build simple boxes with fabric panels and a removable top cushion cover.
Choose one fabric family and stick to two colors max so the modular look stays calm.
Mixing random cube sizes without a repeating fabric creates clutter fast.
16. Built-in seat with upholstered armrests on the side angles

Armrests make a bay seat feel like real furniture. For budget Bay Window ideas, build simple armrest boxes for the two side angles and upholster them in the same fabric as the cushions. This gives you a cozy “hug” around the seating area and creates a clear frame for pillows and a small tray. The armrests also hide the corner seam line, which is where DIY usually shows its hand.
1) Build the base bench platform per bay leg. 2) Cut armrest boxes from plywood or MDF with an angled front that matches the bay leg; add 1-2 inches foam on top and sides, then wrap with batting and fabric. 3) Attach armrests to the bench and wall with screws into studs, then place seat cushions so they butt cleanly against the armrest edge.
Editor's noteRound the outer armrest corners slightly with foam so it looks soft instead of boxy.
Skip thisMaking armrests too tall — keep them around 16-18 inches from the seat top so they don’t crowd the bay.
17. Curtain-backed bench with beadboard paneling for cottage-cozy
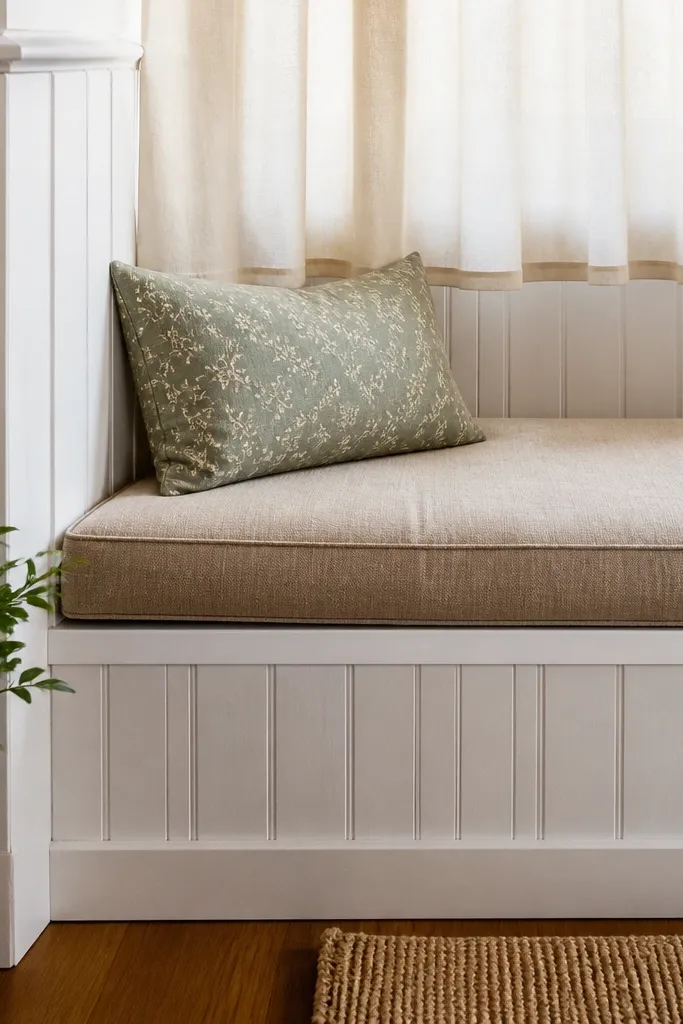
If you want cottage-cozy on a budget, beadboard behind the seat does the heavy lifting. Add a beadboard panel to the wall behind the seating area, then hang a curtain that covers the window area slightly above the cushion line. The beadboard gives you texture without needing expensive upholstery, and the curtain adds softness. Keep cushions in a light neutral stripe or small floral, and use warm-toned wood or white paint depending on your room.
1) Install beadboard paneling in sections that match each bay wall segment; use construction adhesive plus small finish nails. 2) Paint beadboard and trim, then mount a curtain rod above the seat line so fabric drapes behind pillows. 3) Build the bench base and cushions, then place pillows so they sit in front of the curtain panel for a layered look.
Use a satin paint finish on beadboard so it cleans easily and still looks soft.
Skipping caulk at beadboard seams — you’ll see gaps under window light.
18. Color-block seat with painted front and neutral cushions
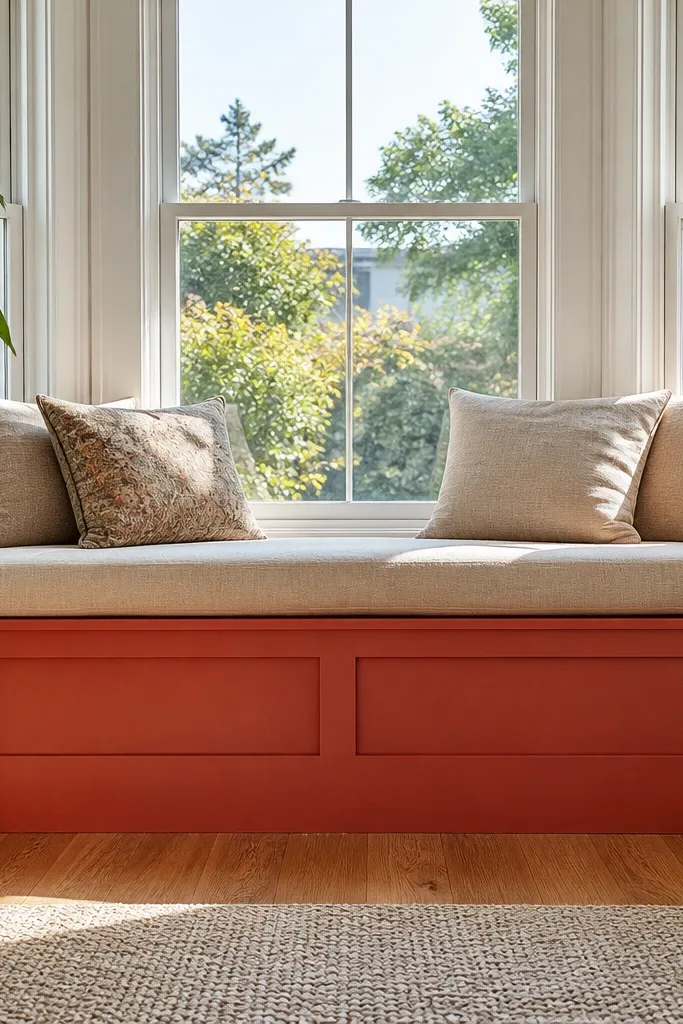
This is the fastest way to make budget Bay Window ideas look styled: paint the front of the bench a bold, solid color and keep cushions neutral. The contrast reads high-end because the eye sees clean color blocking instead of messy fabric patterns. Choose a color that matches your existing room accents — terracotta, deep olive, or dusty blue all look good in bay light. The cushions in oatmeal or cream keep it cozy and prevent the bay from feeling loud.
1) Build your bench base and cover the top with a temporary cushion board so you can paint clean edges. 2) Paint the front panels and rail with a durable cabinet paint or enamel; apply two coats and sand lightly between coats for smoothness. 3) After paint cures, add foam cushions with neutral covers and style with one accent pillow in the same painted color family.
Editor's noteMask the cushion line with painter’s tape and remove tape while paint is slightly tacky so the edge stays crisp.
Skip thisPainting over dusty wood — it causes peeling and makes the whole look look cheap.
19. Rattan-look styling with simple cushions and cane storage sides
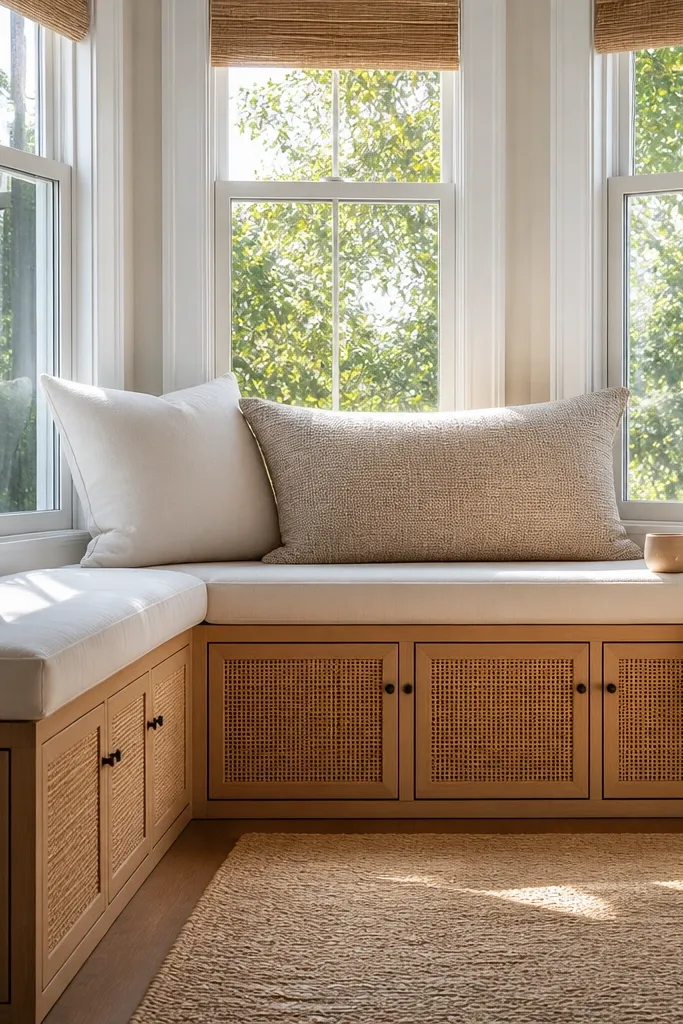
You don’t need to build an entire wicker seat to get the rattan vibe. Build a simple bench base, then add cane or rattan-look panels on the sides or as storage doors. The airy texture makes the bay feel lighter, and it photographs well because it catches daylight in small highlights. Keep cushions simple and solid to balance the texture, then add a woven tray on top for a cozy finishing touch.
1) Build the bench base and leave side openings for panels. 2) Install cane/rattan-look panels using a frame strip so they sit flat; secure with small screws and wood glue where the frame meets the bench. 3) Add cushions on top with foam thickness around 4-6 inches, then style with two textured pillows in linen or cotton and one woven tray on the seat.
Editor's noteChoose cane panels with a tight weave so they look solid from a distance and don’t sag.
Skip thisUsing very dark stains on cane-style panels — it can look heavy and muddy in bay light.
20. Bench with track lighting-style corded shelf above cushions
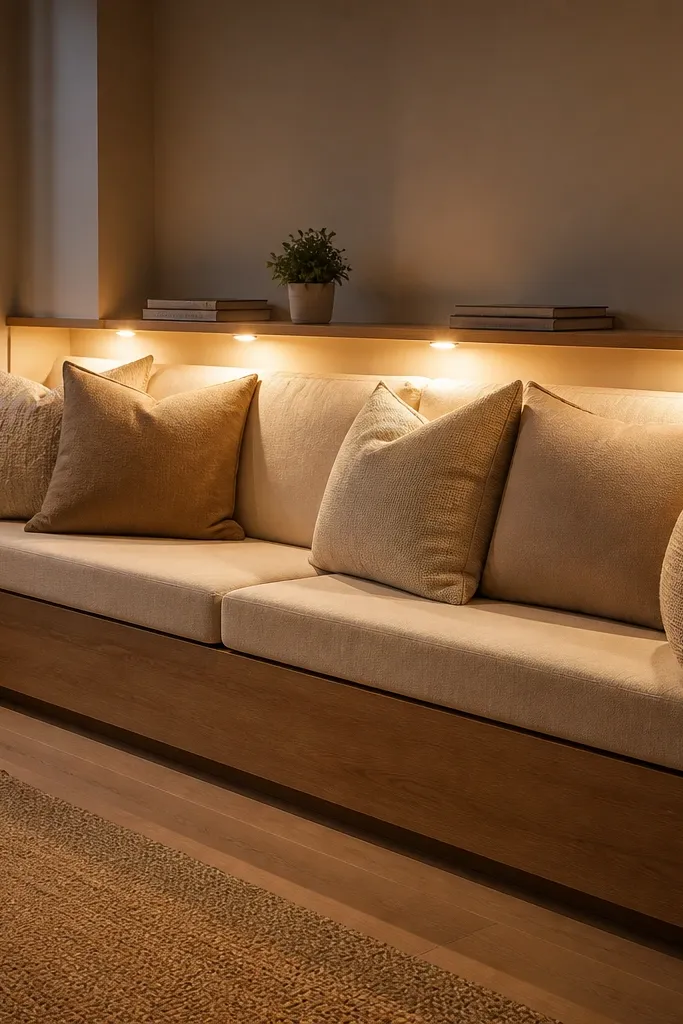
This look reads cozy at night because it adds a lighting layer above the seating. Instead of complicated wiring, you add a small shelf or ledge above the seat line and place a warm plug-in lamp or battery puck lights along it. The shelf also helps you style books, a small plant, and a tray without cluttering the seat. This is one of the best budget Bay Window ideas because the lighting makes the bay feel intentional without changing the bench build much.
1) Install a narrow shelf above the cushion line using a level and two brackets anchored into studs. 2) Use a warm plug-in lamp with a fabric shade, or mount battery puck lights under the shelf edge if outlets are hard to reach. 3) Build the seat base and cushions normally, then place two pillows and one small tray on the seat to complete the look.
Use a warm bulb around 2700K so the bay reads golden instead of blue.
Putting lighting directly behind sheer curtains — it creates glare bands.



