
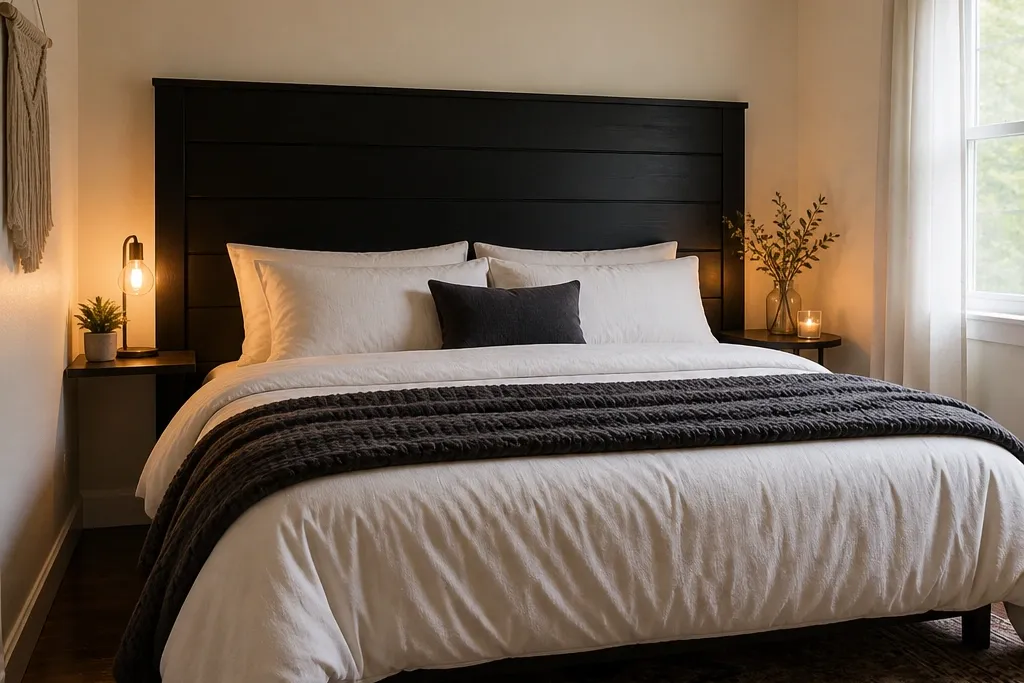

1. Matte black slatted wood panel headboard
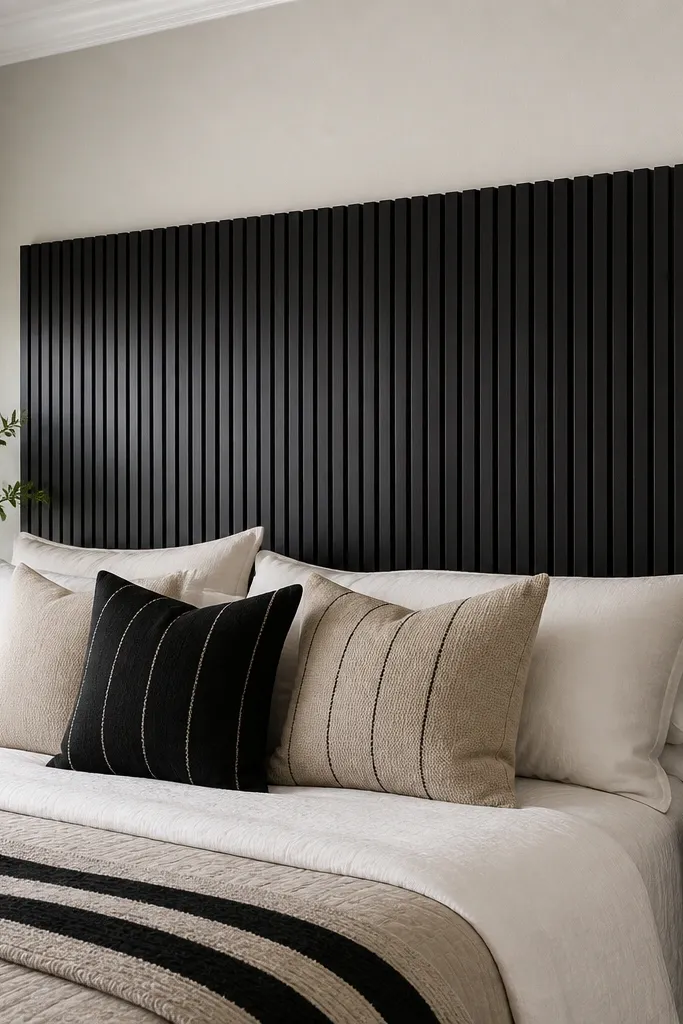
Cut a plywood panel to your target width (match your bed width and leave 1-2 in overhang on each side). Add a rail-and-stile backing or glue-and-screw slat strips so you can keep the gaps even, aiming for 1.5-2 in spacing between slats. Sand everything to 180 grit, wipe with a tack cloth, then spray or roll matte black paint in 2-3 thin coats. Seal with a satin clear coat only if you’re using a water-based paint; otherwise leave it matte for the most glare-free look. Mount to the bed frame with brackets or cleats so it sits centered and doesn’t wobble.
This is the cleanest route to bold black headboard ideas that still look modern instead of heavy. The thin vertical slats create a repeating pattern that reads crisp from across the room, and the matte finish keeps the surface from looking plastic. Build it as a single panel so the shape stays flat and photo-friendly. It works best for rooms with light bedding and wood floors because the black becomes the frame, not the whole weight of the room. Skill level is beginner to intermediate, and the look improves fast once the finish dries.
Skip thisSkip heavy primer layers — they can make edges look rounded and less “sharp” in photos.
Editor's noteUse painter’s tape as a spacer jig for consistent slat gaps before you glue and screw.
2. Black faux-leather banded headboard with tuft-like seams
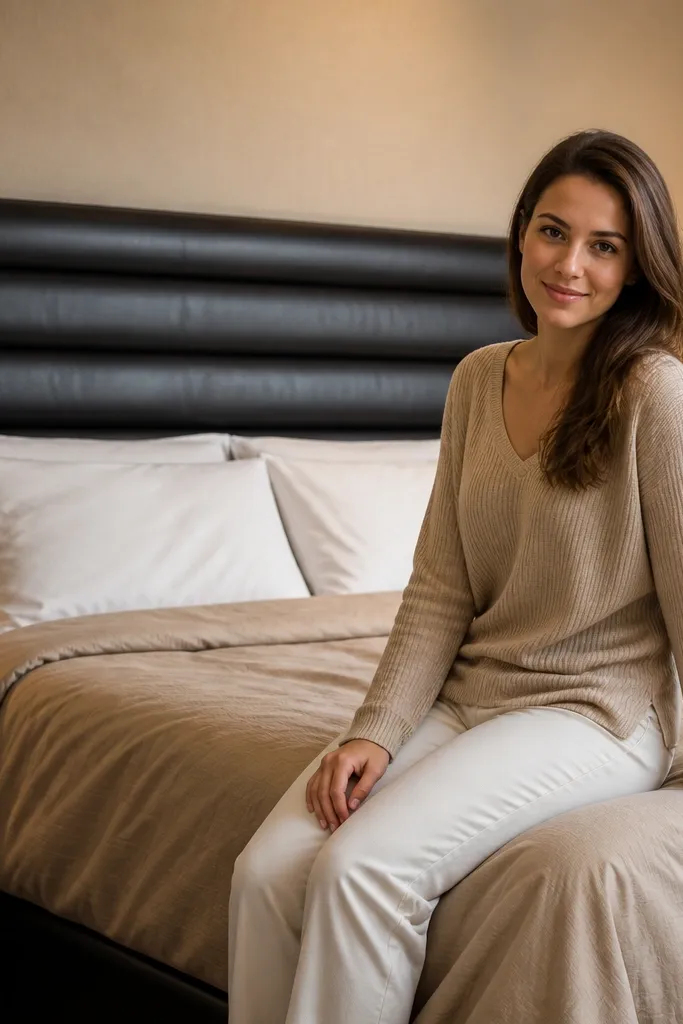
If you want bold black headboard ideas that look luxe without deep tufting, go for banded panels in black faux leather or vinyl. Horizontal bands create a tailored, tailored look, and the stitched lines add depth even when the bed is simple. This style shines in modern bedrooms with neutral bedding because the black surface reads bold but controlled. It’s also easier than classic buttons because you’re shaping bands, not doing complex deep pulls. Plan for intermediate effort: cutting, stretching, and stapling cleanly matters.
Build a simple rectangular frame from 1x2 or 2x2 lumber and add a sheet of plywood for the backer. Stretch 1/2 in foam batting over the frame, then wrap faux leather/vinyl on top, pulling tight and stapling at the back. Mark band lines on the front and add faux stitching by using upholstery thread through a guide strip or by installing narrow black fabric tape strips as seam lines. Add a thin border strip around the edge for a crisp finish. Mount using two wall cleats or bed-frame brackets so the headboard stays flat.
Use a sharp utility blade and change blades often; faux leather tears when the edge gets dull.
Don’t skip a test stretch on scrap — vinyl can pucker if you pull too hard in small areas.
3. Black upholstered wingback headboard with a boxed edge
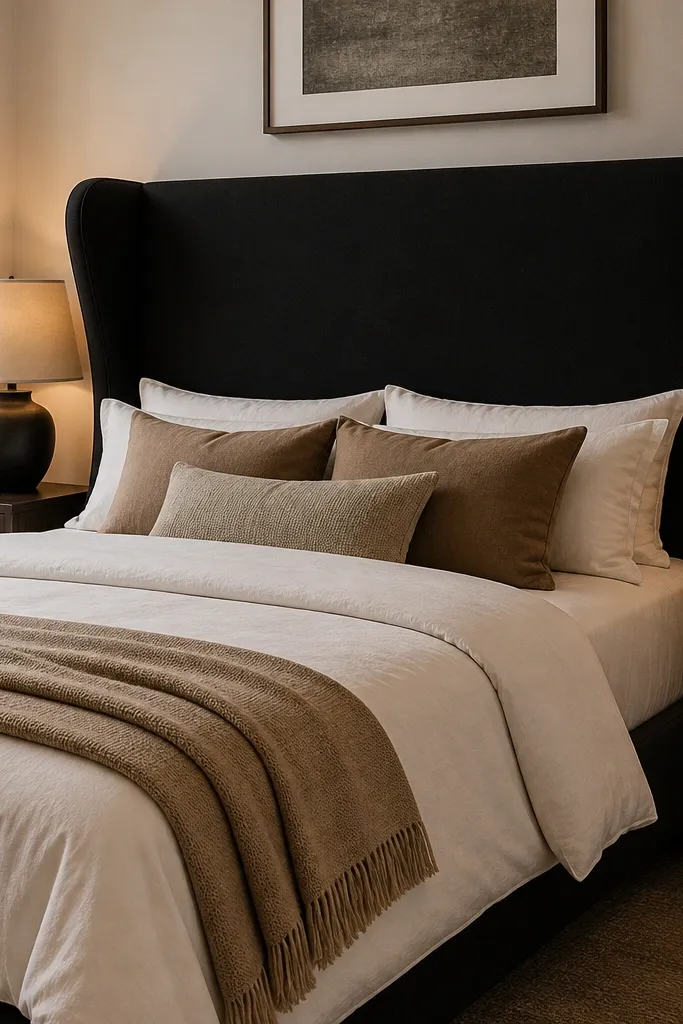
Wingback shapes make a bedroom feel finished fast, and black upholstery makes it look bold instead of soft. A boxed edge is the secret here: it keeps the silhouette crisp and prevents the “floppy” look that happens when upholstery is only loosely wrapped. This headboard pairs well with white, cream, or camel bedding because the black reads like tailored furniture. It also hides wall imperfections because the foam and batting cushion the surface. Skill level is intermediate, mostly because you’re cutting consistent curves and stapling evenly.
Start with a backing board cut to your wing shape, using MDF or thick plywood so it stays rigid. Add 1 in foam to the center panel and 3/4 in to the wings, then cover with batting for a smooth front. Wrap black upholstery fabric and staple from the center outward, smoothing as you go so you don’t get wrinkles near the wing curves. Install a boxed border using trim strips or a welt cord along the perimeter for a sharp edge line. Attach to the bed frame with 2-3 sturdy brackets per side and check the top height at least twice before tightening.
Trace your wing curve onto cardboard first and adjust until it looks right from bed height, not floor height.
Don’t use thin fabric without structure — it will show foam lumps and kill the clean wing shape.
4. Black reclaimed wood plank headboard with clear topcoat
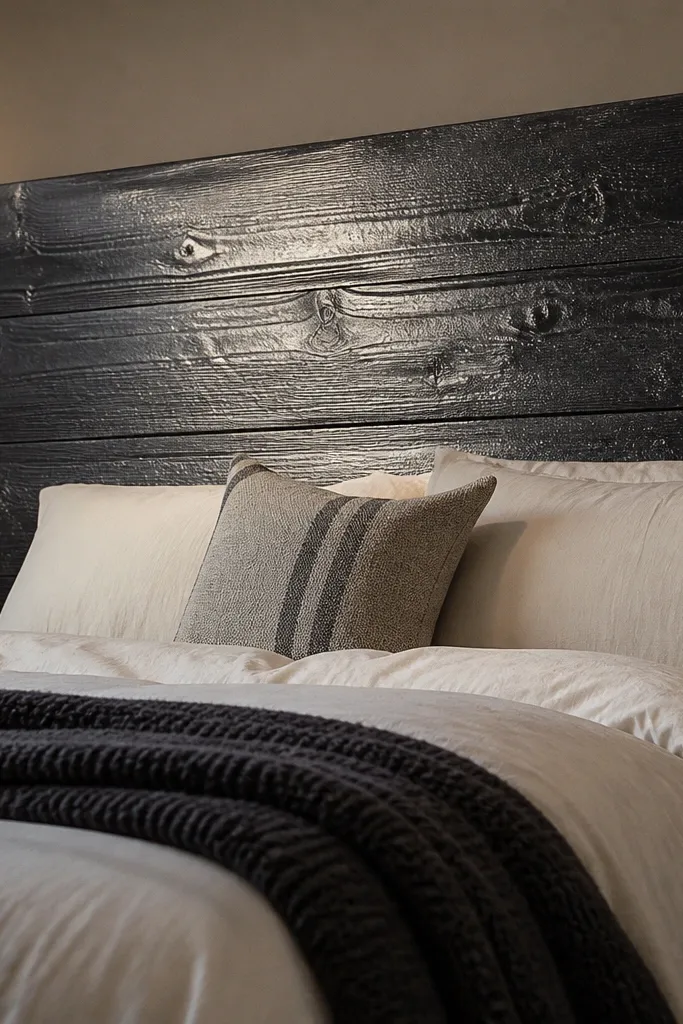
Cut reclaimed boards to match your bed width and height target, then lay them out with consistent spacing gaps (1/4-1/2 in). Sand to 120 grit first to level high spots, then go to 180-220 grit for a smooth stain surface. Apply black stain, wipe back quickly to keep grain visible, and let it dry fully. Seal with 2-3 coats of clear water-based polyurethane, sanding lightly between coats with 220 grit. Mount with two cross rails behind the planks so it won’t flex.
This is bold without looking flat. Reclaimed wood grain shows through black stain differently than paint, so you get depth and texture that looks real in every lighting condition. The clear topcoat keeps the wood from looking chalky and adds a controlled sheen that photographs well. It also works in bedrooms that already have wood furniture, because the grain ties everything together. Skill level is intermediate because you’re sanding and dealing with uneven boards, but the payoff is a one-of-a-kind headboard that still reads cohesive.
Skip thisSkip skipping the wipe-back step — straight soaking can turn everything into a dead-black block with no grain.
Editor's noteUse a foam brush for stain on knots — it spreads more evenly than a rag on textured spots.
5. Matte black fabric panel headboard with vertical channels
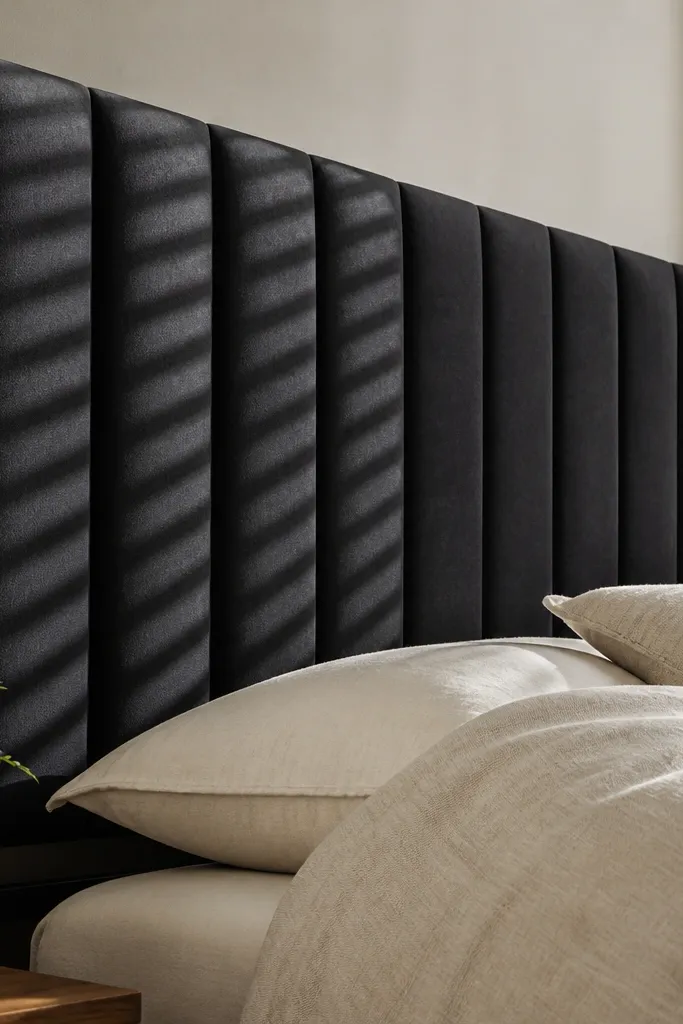
Cut a rigid backing board to your desired headboard size and staple foam batting to the front. Mark vertical channel lines using a chalk line or measured tape, spacing them evenly (for example, 3-4 in between channels). Stitch channels through the fabric using upholstery thread and a long needle, or create channels by adding narrow foam strips under the fabric before wrapping. Wrap and staple the fabric edges tightly on the back, then add a simple fabric-covered border strip. Attach with a French cleat or bed brackets for a secure, level mount.
Channel lines add structure, and structure makes black feel intentional instead of “just a dark rectangle.” This headboard is built like a soft panel: a rigid backing, foam, then fabric, with vertical channels stitched or formed so the surface stays sculpted. It’s a great choice for apartments or rental rooms because you can mount it with cleats instead of permanent wall work. The look is bold from a distance and still detailed up close. Skill level is intermediate, since you’re keeping channels straight and tension even.
Skip thisDon’t pull fabric unevenly across channel lines — it creates a wavy surface that reads sloppy in photos.
Editor's notePress channels with a warm iron through a pressing cloth on a low setting before final stapling.
6. Black board-and-batten wall headboard
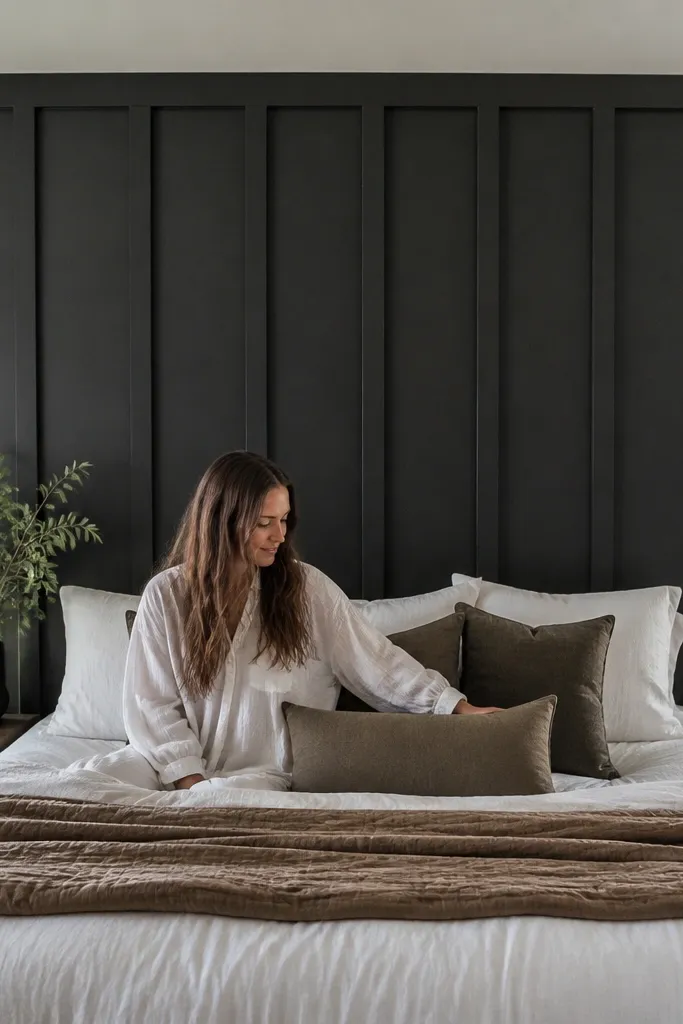
Decide the headboard footprint first: a common look is 60 in tall and 58-62 in wide for a queen, centered above the bed. Mark a level top rail line and install a straight ledger board so the panel stays level. Attach flat panels or plywood sheets to the wall, then add vertical battens (1x2 or 1x3) with consistent spacing. Fill nail holes, sand smooth, then prime and paint matte black in 2-3 coats. Seal edges and add corner trim if your wall line is uneven.
This is the “architectural” look without buying furniture. Board-and-batten in black gives you bold structure, and the raised battens cast shadows that look good even when the room lighting is flat. It’s also one of the best ways to make a headboard feel built-in. The battens make the surface look dimensional, so you don’t need extra decor to make the bed stand out. Skill level is intermediate because measurements and level lines matter, but the build is straightforward: rails, battens, paint.
Skip thisDon’t skip priming — black paint on raw wood will show patchiness and uneven sheen.
Editor's noteUse a laser level for the top rail and check the corners with a tape measure every few battens.
7. Black metal grid headboard with welded look

Create a rectangular frame from metal tubing or use a pre-made metal panel frame sized to your bed width. If building, weld or bolt crossbars so the grid spacing stays consistent (like 2-3 in rectangles). Finish with a black metal primer and spray topcoat, keeping coats light to avoid drips. Mount with heavy-duty wall anchors or attach to a bed frame using brackets that support the full width. Add a thin backing sheet behind the grid only if your wall needs hiding.
A metal grid headboard makes bold black headboard ideas feel airy instead of bulky. The open rectangles create a pattern that frames your bed and adds visual interest without covering your wall. If you like a modern, industrial, or loft vibe, this is the most “graphic” option in the list. It also works great with sheer curtains because the grid echoes the light-and-shadow effect. Skill level depends on your comfort: you can buy a grid frame or build with hardware panels, but you need solid mounting.
Skip thisDon’t use cheap wall anchors — a grid headboard has leverage when someone leans on it.
Editor's noteHang it a hair higher than you think — metal shows the whole silhouette, and higher looks more intentional.
8. High-gloss black acrylic panel headboard
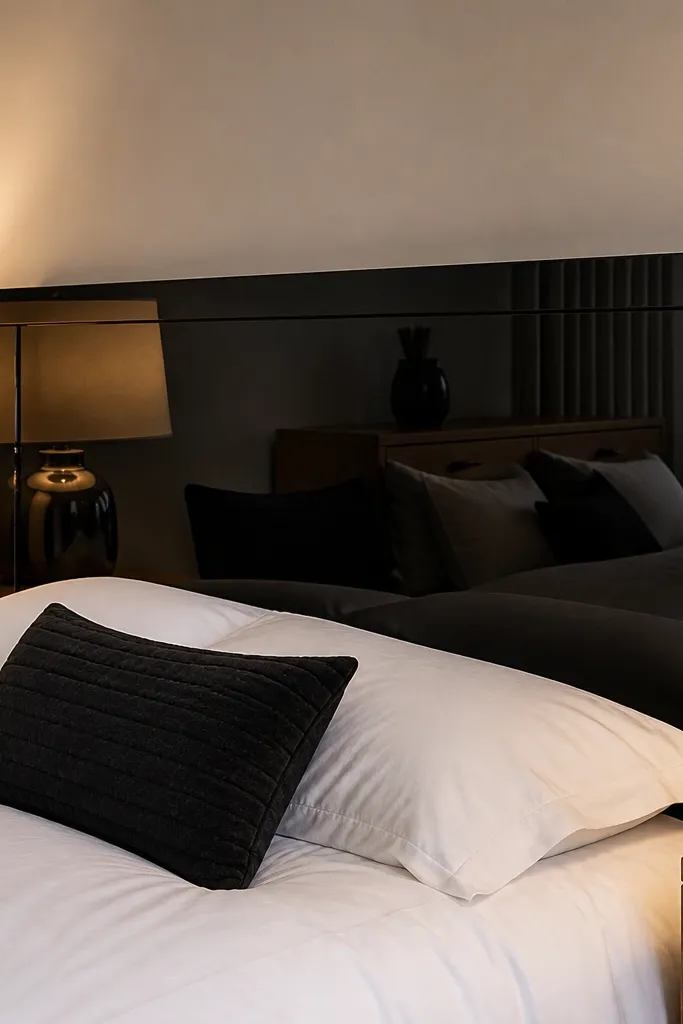
Start with a rigid base like MDF sealed and sanded smooth. Apply black primer, then spray high-gloss black paint in thin coats, sanding lightly between coats with 600-800 grit for a smooth finish. Edge-seal the panel so moisture doesn’t lift layers. If you want the acrylic look, finish with a clear glossy topcoat over the black paint for depth. Mount with a hidden cleat system and add felt pads between panel and wall to avoid scuffs.
High-gloss black is the fastest way to get a bold, almost lacquer look. The surface reflects light and makes the bed look like it belongs in a showroom, even with plain bedding. This works best in bedrooms with warm lamps because the reflections look flattering instead of harsh. The downside is it shows imperfections, so the project is about surface prep and clean edges. Skill level is intermediate because you’re cutting and finishing a smooth panel.
Skip thisDon’t rush sanding between coats — gloss makes every sanding ripple visible.
Editor's noteUse a tack cloth right before the final coat — any dust will show as bumps under gloss.
9. Black velvet with a simple rounded top rail
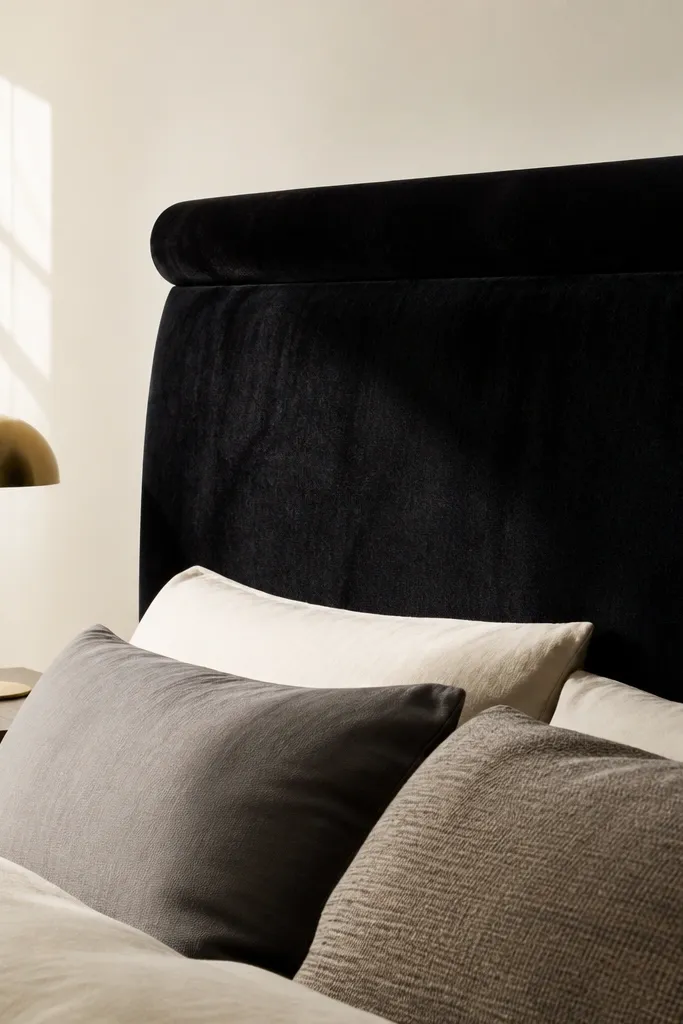
Velvet is one of the only fabrics that makes black look rich without turning into a flat void. A rounded top rail gives a softer silhouette but still reads bold because the color is solid and the shape is clean. This headboard is photogenic because velvet catches light in a subtle way as you move around the room. It also feels cozy, which matters if you lean on the headboard while reading. Skill level is intermediate: you need clean cutting and careful stapling.
Cut a rigid backing to your width and height, then add foam backing at the top rail and center area. Build a smooth rounded edge by shaping foam and covering it, then wrap black velvet with the pile direction consistent across the whole surface. Staple at the back, pulling evenly so the fabric doesn’t twist. Add a thin border strip around the edge in a matching black fabric for a finished look. Attach to the bed frame with brackets or a cleat so it sits centered and doesn’t shift.
Plan the pile direction before cutting; velvet pile changes the way black looks from angle to angle.
Don’t use a fabric that sheds or frays at the edges without sealing — it looks messy fast.
10. Black leather-look headboard with diagonal seam panels
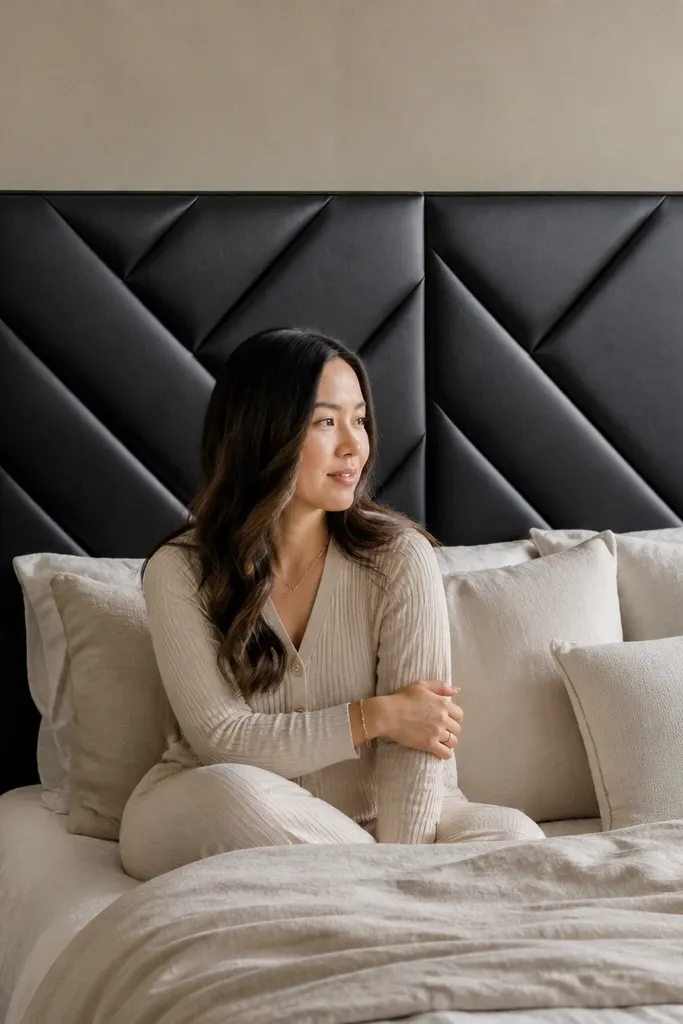
Build a rectangular backing frame with plywood and foam, then decide your diagonal layout using painter’s tape on the front. Cut leather-look panels with enough overlap for tight seams and consistent grain direction, then attach them to the foam with contact adhesive or upholstery staples behind the seams. Create the diagonal seam lines by adding narrow trim strips or stitching through layered fabric if your material supports it. Add a border frame to hide raw edges. Mount with sturdy brackets and check the diagonals are level from both sides.
Geometric seams make black feel architectural. Diagonal paneling breaks up the monotone surface and gives you an instant design grid that reads bold in photos. This style is great if you want something that looks custom but still builds from a simple backing frame. The leather-look surface keeps it sleek and easy to wipe, which is handy if you have kids or pets. Skill level is intermediate because cutting panels cleanly is the whole job.
Editor's noteUse a rotary cutter and a straightedge; leather-look material shifts if you cut with scissors.
11. Black fabric headboard with oversized piping border
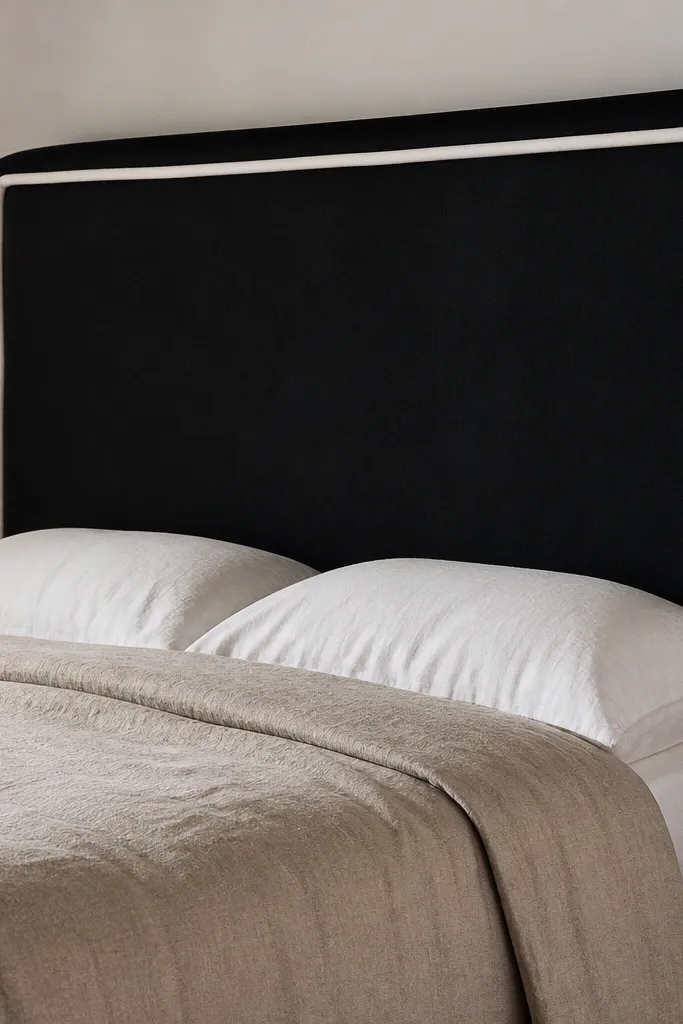
Cut a rigid backing board to size and attach foam batting to the front. Wrap fabric tightly and leave enough overhang to attach piping around the perimeter. If you’re sewing piping, install it along the edge before final stapling, using upholstery thread and a zipper foot if you have one. Trim and staple the fabric back, then add a second layer of border fabric to hide staples. Mount with two cleats so the headboard hangs straight and doesn’t sag.
Piping is the fastest way to make a black headboard look designed. The oversized border creates a bold outline that separates the headboard from the wall, even if the wall is also dark. It looks sharp in modern bedrooms and gives a tailored finish similar to store-bought upholstered furniture. This is also a forgiving project: even if your fabric has slight wrinkles, the piping frames everything and makes it look intentional. Skill level is beginner to intermediate if you can handle basic sewing or you buy pre-made piping.
Skip thisDon’t use piping in a different black tone — it reads gray or purple under warm bulbs.
Editor's noteBuy pre-made piping in black that matches your fabric sheen so the outline looks crisp, not mismatched.
12. Black tile mosaic headboard with grout lines
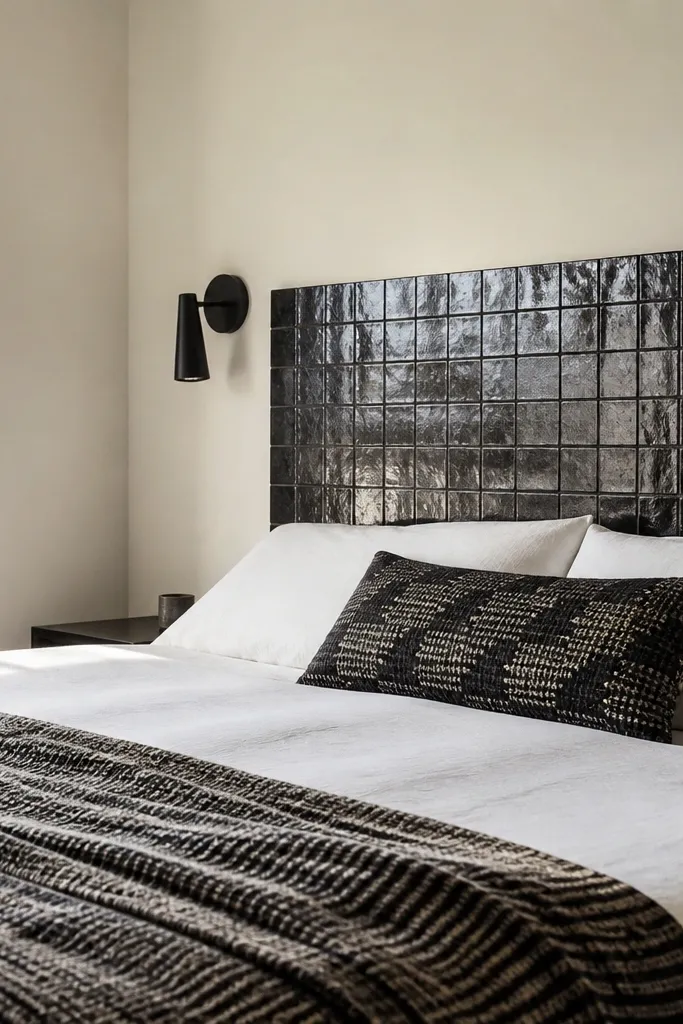
Build a flat, rigid base using cement board or a plywood backing sealed and topped with thinset-approved surface prep. Plan your tile grid with painter’s tape so grout spacing stays consistent (like 1/8 in). Apply thinset, set tiles in rows, and use spacers to keep lines even. After curing, grout with a black or charcoal grout that matches your tile finish, then wipe clean and seal if your tile needs it. Mount to the wall using anchors rated for cement board and weight.
Tile is the boldest “graphic” option because grout lines draw the pattern and the glossy or matte tile surface catches light. A black mosaic with contrasting grout creates instant depth, and it’s incredibly durable compared to fabric. This headboard works especially well in bathrooms-adjacent bedrooms or homes where cleaning matters. It also looks high-end because the surface is uniform and clean. Skill level is intermediate because you’re measuring, cutting tile, and keeping grout lines straight.
Skip thisDon’t grout before thinset fully cures — it can smear and make the pattern look uneven.
Editor's noteDry-lay one section first so you see how the grout color changes the black tone.
13. Black faux slate panel headboard
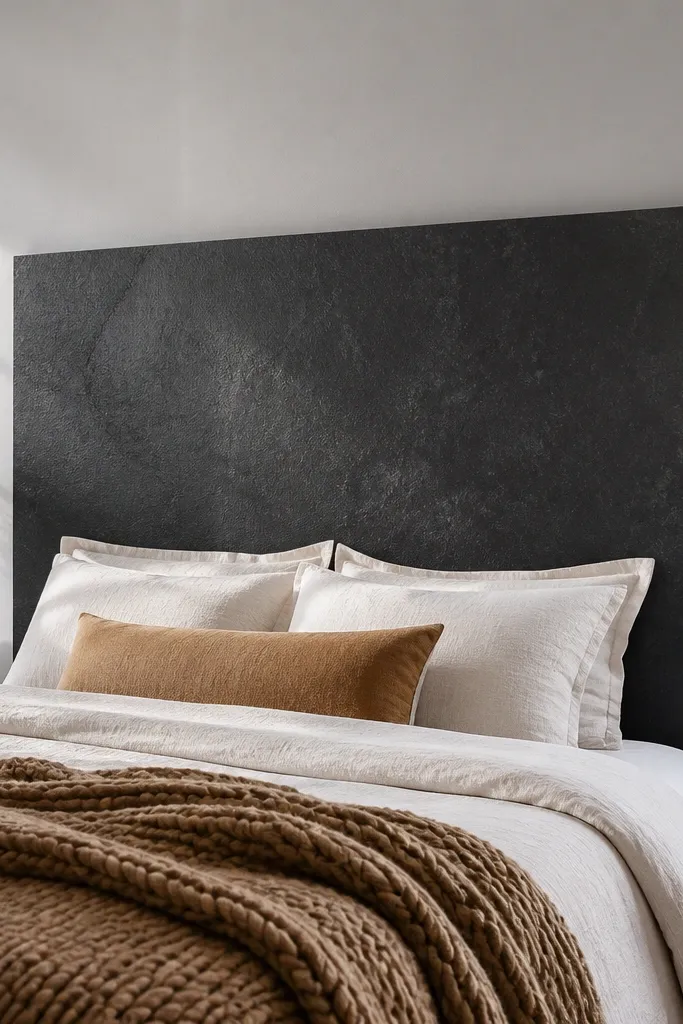
Choose a faux slate sheet or peel-and-stick slate panel designed for wall mounting. Build a simple backing board if needed so you have a flat surface, then clean and dry-fit the slate panel to your headboard dimensions. Apply adhesive or install per the product instructions, pressing firmly at seams and edges. Trim the perimeter cleanly with a utility knife and straightedge. Seal the edges and mount to the bed frame or wall with a cleat so the panel stays aligned.
If you want bold black headboard ideas that don’t look like paint, faux slate gives you natural-looking texture with a single smooth install. The surface reads like stone in daylight, and the pattern breaks up the monotone so your bedroom doesn’t feel flat. This is a great option if you want something dramatic but you don’t want tile cutting. Skill level is beginner to intermediate depending on which mounting method you use. The look is photogenic because the texture catches light differently across the panel.
Skip thisDon’t mount over dusty drywall — texture adhesive fails when the wall isn’t clean.
Editor's noteUse a metal ruler and cut slowly — faux slate edges chip if you rush.
14. Black ladder-shelf headboard for books and decor

Build or buy two vertical side rails and multiple cross rungs sized to your bed width. If building from lumber, cut rails and rungs, then pre-drill and screw to reduce splitting. Add a back brace if you can so the structure doesn’t rack. Finish with matte black paint and a protective topcoat for durability. Mount securely to studs or use a cleat system with additional wall anchors, then place lightweight decor only until you confirm stability.
A black ladder-shelf headboard is bold because it adds height and storage at the same time. The open rungs create a strong vertical rhythm, and the shelving makes the headboard do something, not just sit there. This is ideal for small bedrooms where you want wall space without extra nightstands. Use black shelves with a matte finish so the decor doesn’t look cluttered. Skill level is intermediate because you’ll be building a sturdy frame that can hold weight safely.
Skip thisDon’t rely on drywall anchors alone — shelf headboards need stud mounting.
Editor's noteKeep the top shelf about 6-8 in above pillow height so it doesn’t block reading light.
15. Black slat-and-fabric hybrid headboard with a shadow gap
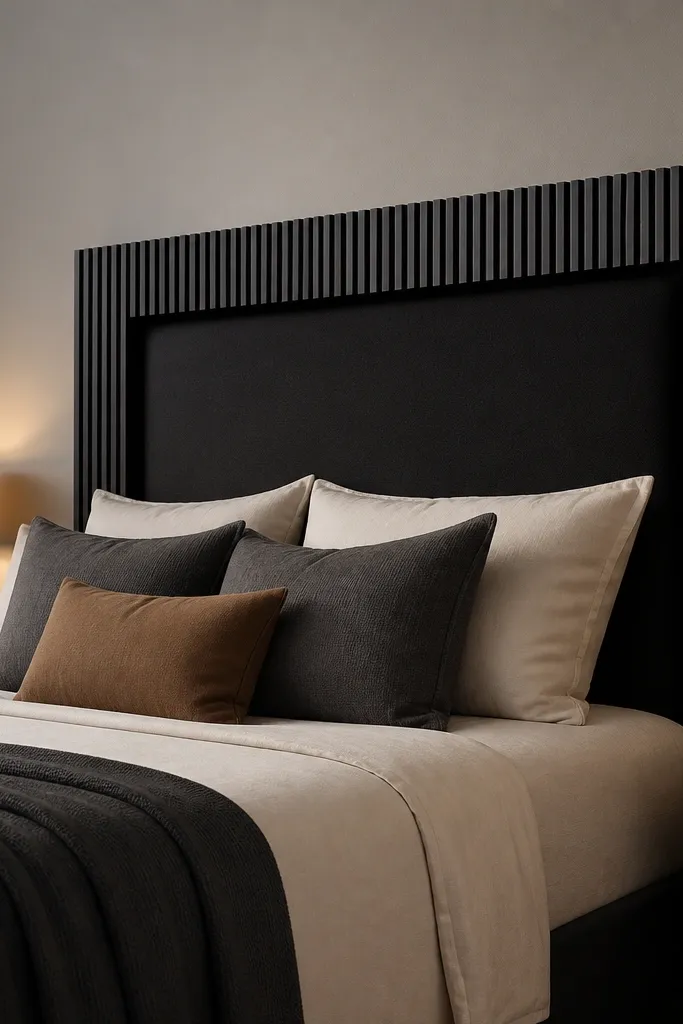
This hybrid design looks expensive because it mixes hard and soft: a black slatted outer frame with a black fabric center. The shadow gap between the frame and inset fabric makes the headboard look built-in and dimensional. It’s a strong choice for bold black headboard ideas when you want structure but also want comfort for leaning. The fabric center also hides minor wall imperfections behind it. Skill level is intermediate since you’re building frame geometry and keeping the inset even.
Build an outer slat frame from wood strips, then attach a rigid backing for the fabric inset. Create a consistent shadow gap by adding a thin spacer or using a rabbet so the inset sits recessed (aim for 1/2 in depth). Stretch and wrap fabric over a separate panel board, then mount it into the recessed area. Paint the frame matte black and let it cure fully before assembling. Mount the whole piece to the bed frame or wall with brackets placed at the frame corners.
Test fit the inset panel with painter’s tape spacers so you can dial in the gap before painting.
Avoid making the shadow gap too thin — it disappears visually and loses the built-in effect.
16. Black upholstered panel headboard with a contrast welt
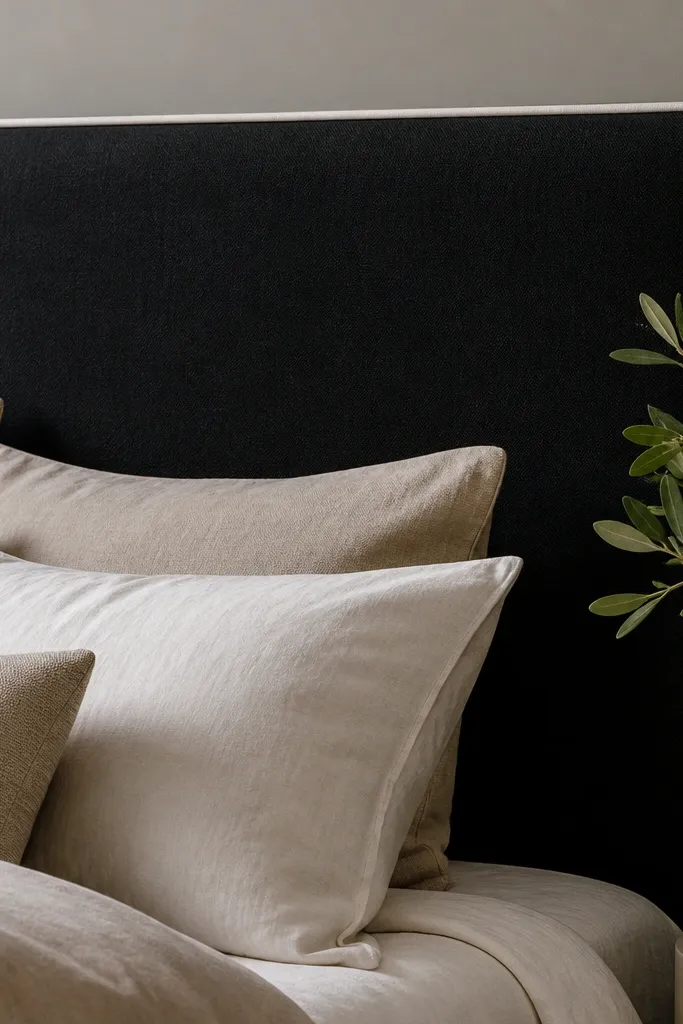
Cut a rigid backing and glue foam to the front, then cover with batting for a smooth face. Wrap black upholstery fabric and pin the contrast welt around the perimeter before stapling it in place. If sewing welt, stitch the welt to the fabric strip first, then install along the edge with even tension. Trim corners neatly so the welt turns without puckers. Mount with a level cleat and check the top edge against a wall line.
Want bold black headboard ideas that look custom without complicated patterns? Use a black upholstered panel and add a contrast welt in white, cream, or charcoal. The welt creates a crisp outline that makes the black pop against the wall, especially if your bedding is neutral. It also makes the headboard look “tailored” even if the rest of the room is plain. This design is clean, graphic, and easy to photograph. Skill level is intermediate because you’re sewing or installing welt cleanly.
Skip thisDon’t use a welt that’s too bright — neon trims look cheap on large furniture surfaces.
Editor's noteChoose welt color with your bedding, not your wall paint. The welt should match the closest trim in the room.
17. Black paint-over-brick headboard look panel
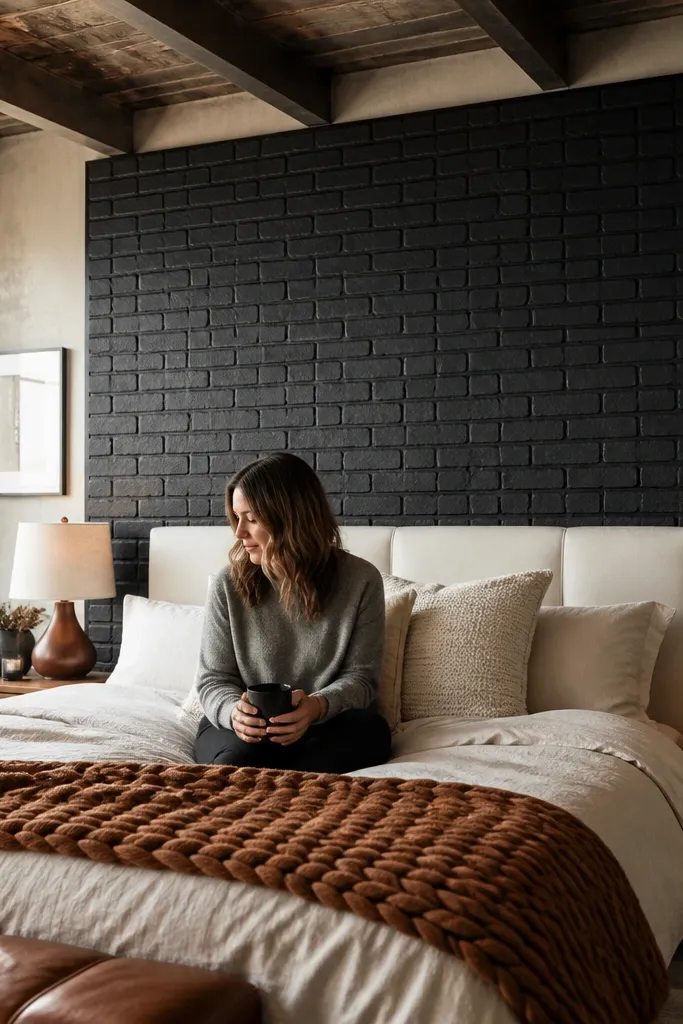
Pick a faux brick wall panel or foam panel system that comes in sheets sized for wall mounting. Prepare a flat backing (plywood if needed), then test-fit the panel to your headboard size and mark the cut lines. Install with construction adhesive and follow the product’s seam method so the texture lines up. Paint the entire surface matte black, using a foam roller to avoid streaks in the texture. Seal if the panel needs it, then mount to studs or a cleat so it stays level.
A faux brick texture in black gives you a bold, industrial headboard look without the mess of real masonry. The raised pattern creates shadows that make the black feel deep and not flat. This works great in loft-style bedrooms, but you can also soften it with warm bedding and a chunky knit throw. It’s one of the best ways to get high-impact texture without tile work. Skill level is beginner to intermediate because the main job is mounting a textured panel evenly.
Skip thisDon’t rush drying — matte black can flash-dry unevenly in texture if you keep touching it.
Editor's noteUse a foam roller for the paint; a brush will leave streaks in the brick grooves.
18. Black geometric MDF headboard panels with removable fabric overlay
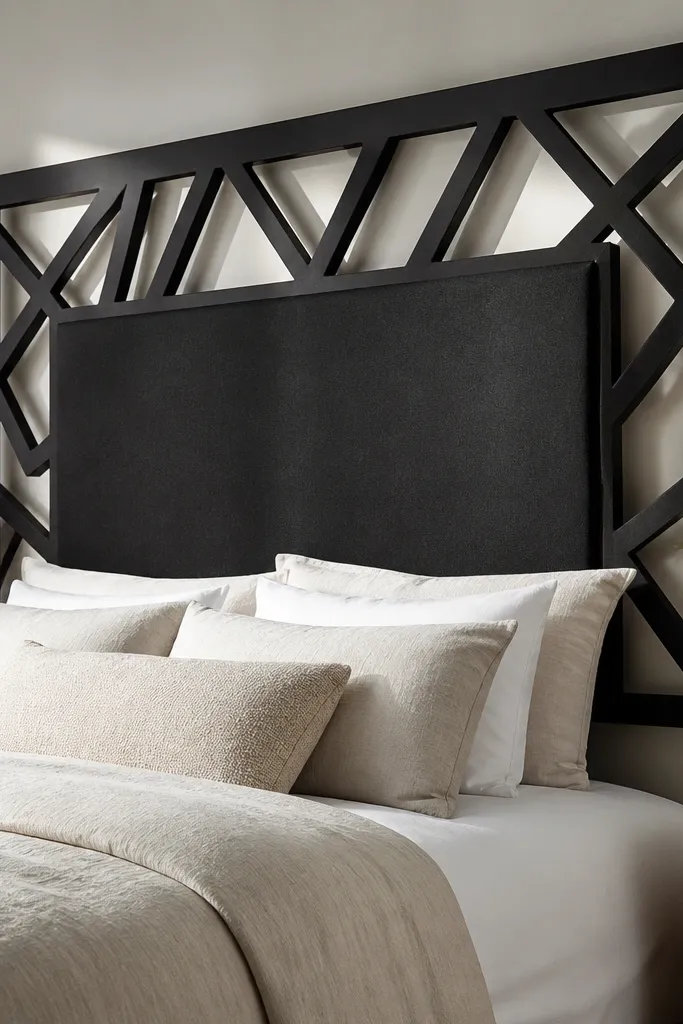
Cut an MDF panel to your headboard size and mark geometric sections using a grid and a pencil template. Cut clean openings with a jigsaw, then sand edges smooth and seal bare MDF with primer. Paint the MDF matte black in 2-3 coats. Build a separate fabric overlay panel that covers the top portion or a central region, and attach it with hidden magnets or Velcro strips so it’s removable. Mount the base to the bed frame with brackets at corners and add felt where it meets the wall.
Geometric cutouts make bold black headboard ideas look graphic and modern, especially when the design casts shadows on the wall. An MDF base keeps it straight and sturdy, while a removable fabric overlay lets you swap styles seasonally without rebuilding the whole headboard. This is a smart move if you like bold shapes but hate committing to one look for years. It also keeps the project manageable because you can change the soft layer instead of the whole structure. Skill level is intermediate because you’re cutting shapes and making a clean finish.
Skip thisDon’t skip edge sanding. Rough MDF edges show through black paint as a fuzzy outline.
Editor's noteSeal MDF edges before paint; untreated edges drink paint and look lighter in black.
19. Black quilted headboard with diamond stitch lines
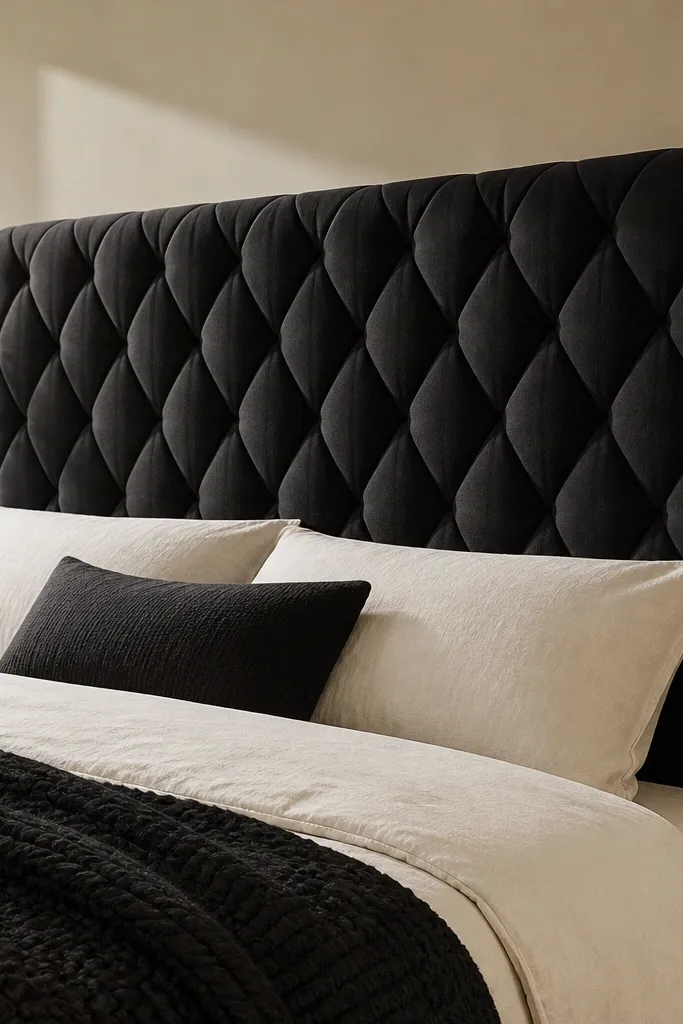
Quilting makes black look plush and expensive because the surface has movement. Diamond stitch lines create a pattern that holds up well in photos, even from angled shots. This headboard also works if you want a softer bedroom but still want bold black presence. The trick is keeping the diamonds even and tight so it looks tailored, not homemade. Skill level is intermediate because you’re stacking batting and stitching through layers.
Build a rigid backing panel and add foam batting, then add a layer of quilt batting on top for loft. Mark a diamond grid with a washable fabric marker and template spacing, then tack the lines lightly to prevent shifting. Stitch through layers along the diamond lines using upholstery thread and a heavy-duty needle. Trim the edges clean, wrap and staple fabric on the back, and add a border strip. Mount with brackets or a cleat and press it flat so the stitching lines look crisp.
Use painter’s tape to mask the seam lines while you stitch; it keeps your guide straight.
Don’t overstuff the batting. Too much loft makes diamonds bulge and look uneven.
20. Black velvet headboard with a floating rolled bolster edge
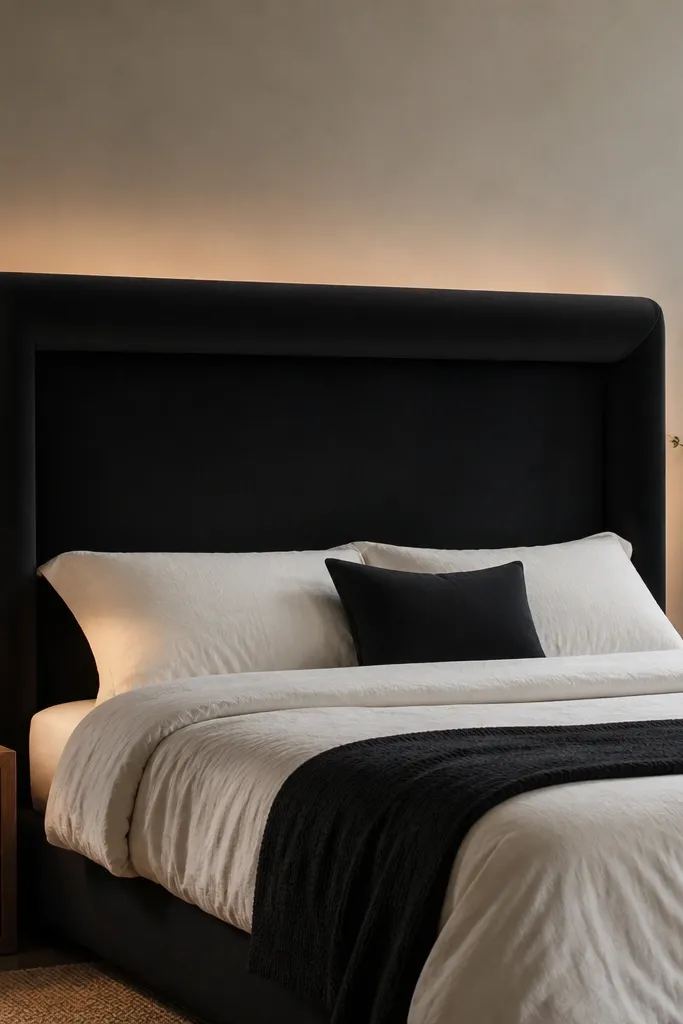
This is the bold black headboard look that reads expensive even when you build it yourself. The trick is the floating rolled bolster edge — it frames your bed like a picture mat, catching light on the curve while the velvet stays deep and soft. Use a thick foam core and a tight, clean wrap so the velvet doesn’t look wrinkled or cheap. It works best in bedrooms where you want drama without height — the headboard can be 46-50 inches tall and still look like a statement. Skill level is medium because you’re sewing and shaping curves, but the build is straightforward with the right tools. It suits a modern, glam, or transitional room, especially if you have warm wood floors or brass lighting to make the black feel intentional.
Cut a plywood backing to 60 inches wide by 48 inches tall (or match your bed width plus 2 inches on each side). Add 2-inch-thick high-density foam on the face, then trim it so the front edge is flat where the rolled bolster will sit. Build the bolster from 3-inch foam strips wrapped in velvet and sew a simple cover tube; the bolster should be about 2.5 inches tall with a firm rounded profile. Attach a 1x2 cleat to the wall at the top mark, then mount the headboard backing to the cleat using French cleat hardware so it sits 3/4 inch off the wall and creates a shadow line. Finish by wrapping the back edges with black fabric, stapling tight, and covering hardware with a thin fabric dust cover.
Use a long roller (like a paint roller) to press velvet into corners before stapling — it flattens the nap so you don’t get fuzzy ridges. Pre-cut your velvet facing pieces with the nap running the same direction on every panel so the sheen matches across the whole headboard.
Avoid thin foam — it makes the velvet sag and the rolled edge collapse instead of holding its rounded shape.



