
1. Tall cabinet with a single arched top face
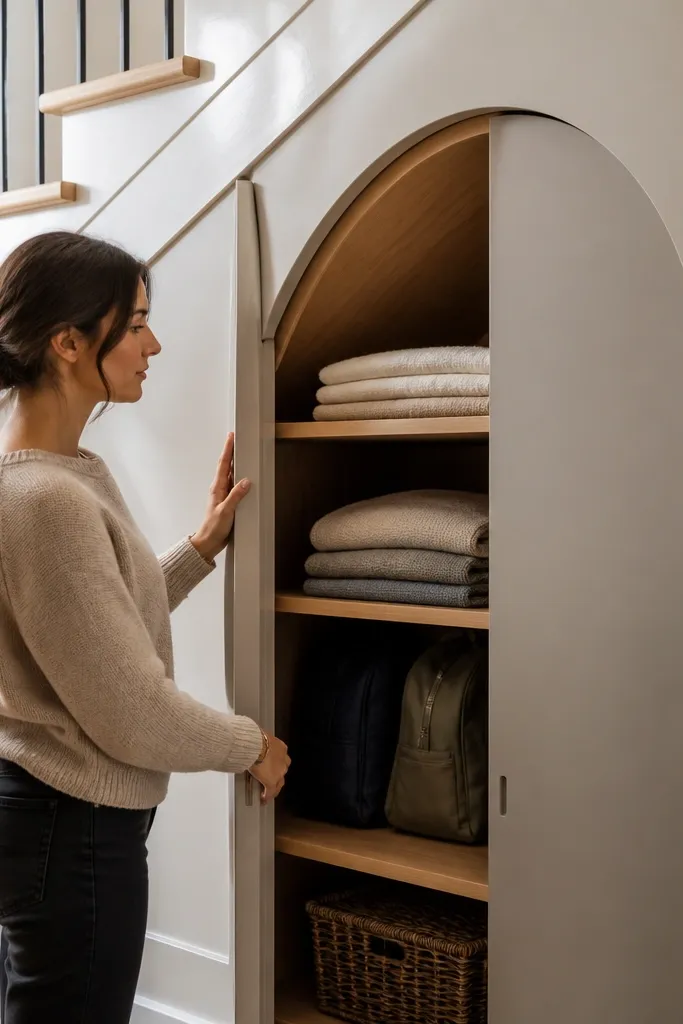
This is the under-stairs idea I’d pick when the space is irregular but you want it to look custom. A single arched top face makes the whole bay read as one piece, even if the cavity changes depth because of the stair stringer. Use it for linens, backpacks, or cleaning supplies you don’t want visible. The look stays clean because the storage is closed, and the arch adds softness that makes it feel designed instead of boxy.
Start by measuring the opening at the widest point and the height you want the cabinet to reach, then draw an arch template in cardboard. Build a frame from 18mm plywood or MDF, using the stair slope as your side reference, and set the cabinet depth so doors clear the stringer by at least 15mm. Install fixed shelves inside, then hang two doors with concealed hinges so the reveal stays even. Finally, add the arched panel on top, sand everything flush, prime with bonding primer, and paint with a satin cabinet finish.
Editor's noteUse an arch template made from scrap MDF so both sides match perfectly when you cut the top panel.
Skip thisDon’t leave the arch “floating” without a trim shadow line — it looks unfinished in photos.
2. Shallow drawer bank with pull-out trays
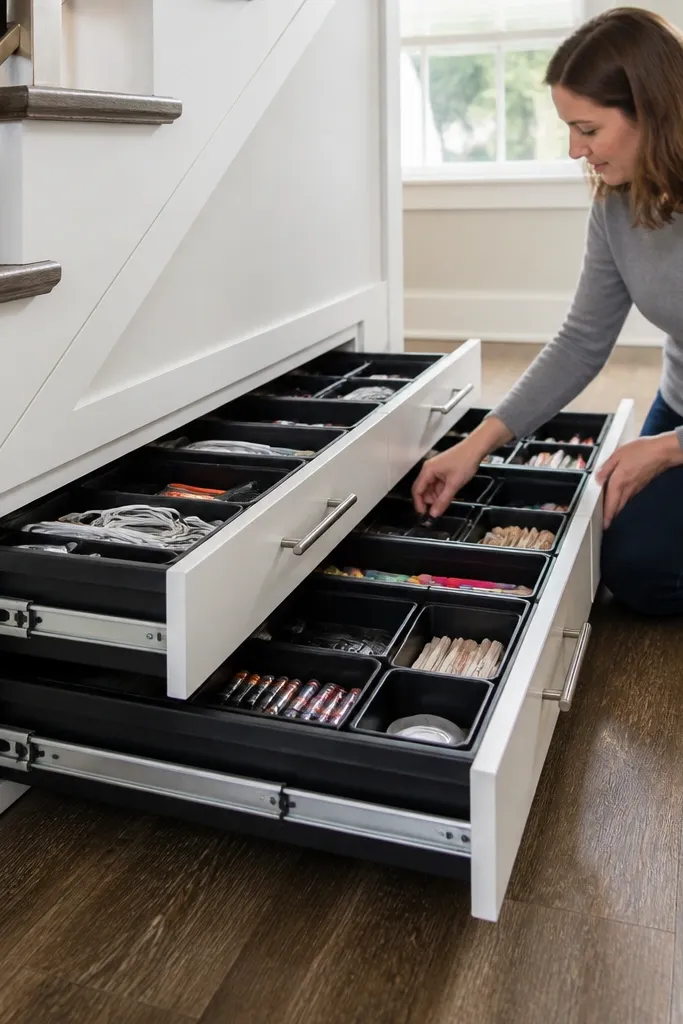
When the under-stairs space is tight, drawers look better than open cubbies because they hide messy contents. The trick is using shallow drawer boxes plus pull-out trays inside for items like cords, batteries, art supplies, or pet gear. It photographs well because the front faces are uniform and the hardware lines up. This build also fixes a common problem: people cram tall shelves, then nothing fits neatly, so the area looks chaotic.
Measure usable depth and subtract 10mm for clearance so drawers slide without rubbing. Cut drawer boxes from 12mm plywood or MDF panels, and build the drawer fronts from 18mm material for a crisp edge. Install full-extension soft-close slides rated for the drawer weight, then add pull-out trays inside each drawer using 6mm ply sides and a base panel. Finish by painting fronts and lightly distressing the tray edges only if you’re going for a lived-in look.
Editor's noteChoose drawer slides that match your depth — shallow spaces need low-profile slides to keep the face flush.
Skip thisDon’t make drawers too tall; if you can’t see the contents when open, you’ll lose the tidy look fast.
3. Pegboard back with framed doors
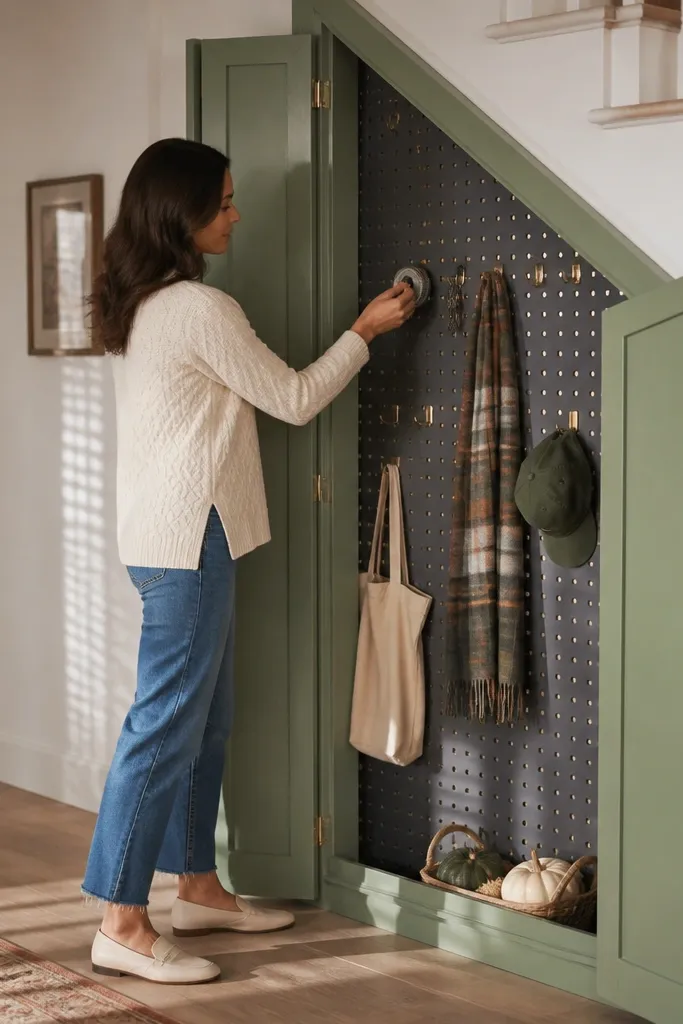
This one is for homeowners who want storage that still feels useful and flexible. The pegboard back lets you hang small tools, keys, measuring tape, or seasonal accessories on hooks, while framed doors keep everything hidden when you’re not using it. The framed door look is what makes it photogenic — it reads like a built-in workshop cabinet, not a random utility nook. It also solves the problem of pegboards looking messy: your hooks can change, but the outside stays tidy.
Cut a pegboard sheet to fit the back of your cabinet bay, leaving 20mm clearance around it for mounting. Build a simple rectangle frame from 18mm MDF, then mount the pegboard onto cleats so it doesn’t bow. Install doors on concealed hinges with consistent gaps, and add a magnetic latch or soft-close latch. Prime and paint the frame and doors, then seal the pegboard with a clear matte coat so it wipes clean.
Editor's notePre-plan hook spacing using a scrap pegboard so you don’t end up with dead zones where you can’t place hooks.
Skip thisSkip glossy paint inside — it reflects light and makes the pegboard look cluttered on camera.
4. Shoe cubbies with a slatted air-front
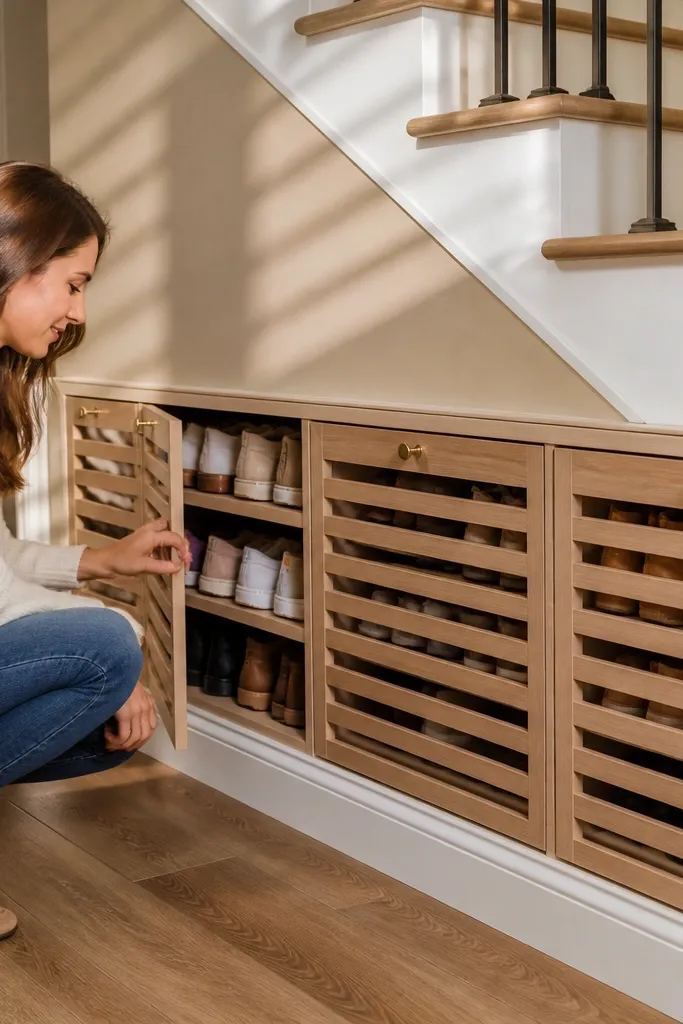
If your shoes always end up in a pile, this is the clean fix. You build cubbies at a consistent height and width, then cover them with slatted fronts so air moves and the doors don’t look heavy. The slats add texture that photographs well, and the open slat pattern keeps the space from feeling like a solid block. It’s also practical: sneakers dry faster, and the storage doesn’t trap odor.
Decide shoe size targets first: for most adults, cubbies around 260mm height and 300mm width work well, but measure your tallest shoes. Build a carcass from 18mm plywood, then divide it into equal cubbies with vertical dividers. For the slatted front, cut slats from 12-18mm timber and space them 8-12mm apart, then mount to door frames. Finish with a matte clear coat or paint the frame and leave the slats in a natural tone for contrast.
Add a 10mm toe kick strip at the bottom so the slatted doors sit cleanly and don’t scrape.
Don’t make cubbies too deep without a front stop — shoes slide back and disappear into the dark.
5. Angled open shelves with a matching trim rail
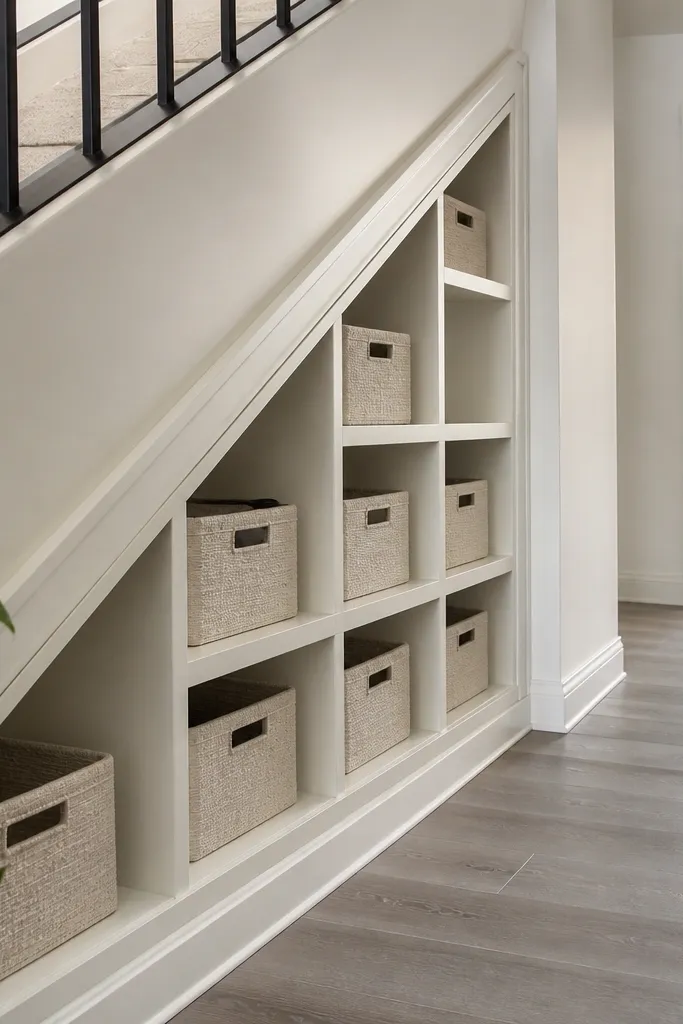
Open shelves under stairs can look gorgeous if you control the angle and keep everything container-matched. Use angled shelves that follow the stair slope, then add a continuous trim rail that runs the length of the bay. The rail is what makes the storage look intentional in photos; without it, shelves look like they were added after the fact. This build is best for baskets, board games, or folded items in matching bins where you don’t mind seeing everything.
Measure the stair slope and calculate shelf angle so the front edges stay level to your eye. Cut shelf supports from plywood, then set them on a ledger line anchored to wall studs. Add a trim rail from 30x15mm timber across the front edges so every shelf has a consistent visual boundary. Sand, paint the rail and supports, then mount shelves with concealed brackets so the underside stays clean.
Use the same bin size across all shelves — repeating dimensions is what keeps open storage from looking messy.
Don’t mix wood stains and paint on open shelves; the color mismatch reads as clutter.
6. Cabinet doors with full-height vertical grooves
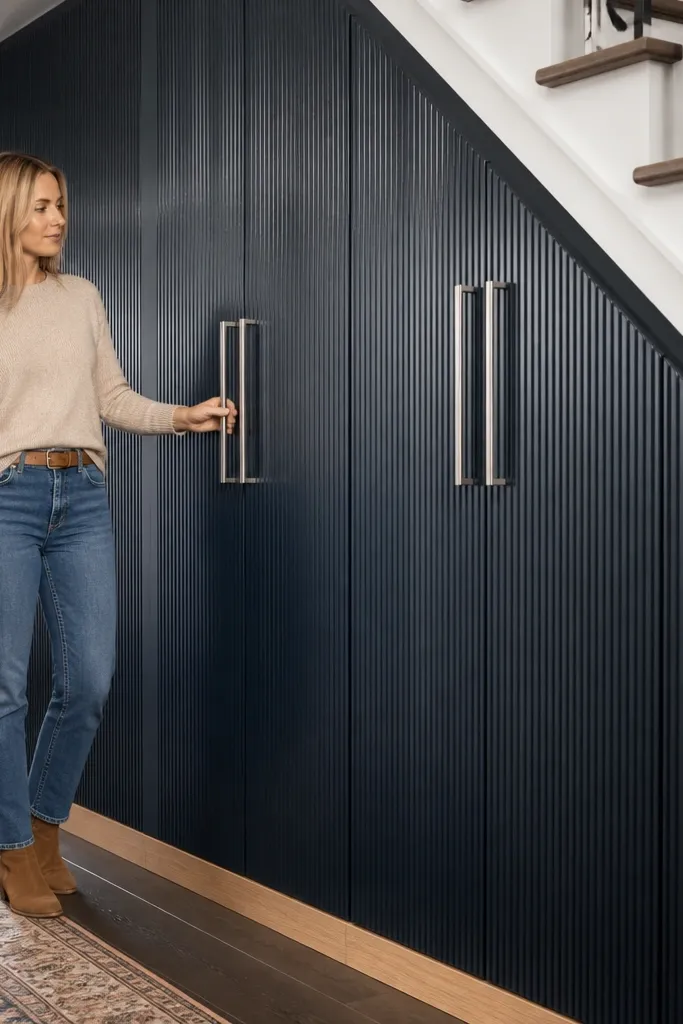
Grooved doors make under-stairs storage look premium without adding complex joinery. The vertical grooves catch light and create a rhythm that looks good even in dim hallways. This build works for cleaning closets, coats storage, or holiday supplies because the doors keep contents out of sight. If you want a crisp, modern look, this is one of the strongest options in the list.
Choose a door material first: 18mm MDF is easiest for grooves. Mark groove lines on the door panels with a spacing that matches your aesthetic, then cut grooves using a router with a straight bit and a guide. Build the cabinet carcass from 18mm plywood, then fit doors with concealed hinges and adjustable mounting plates. Paint with a cabinet-grade paint (primer plus topcoat), then install slim bar pulls centered vertically.
Editor's noteTest groove width on scrap MDF and paint it — grooves change how shadows read once painted.
Skip thisDon’t make grooves too shallow; they look decorative only until you see them in real light.
7. Window-seat style storage drawers
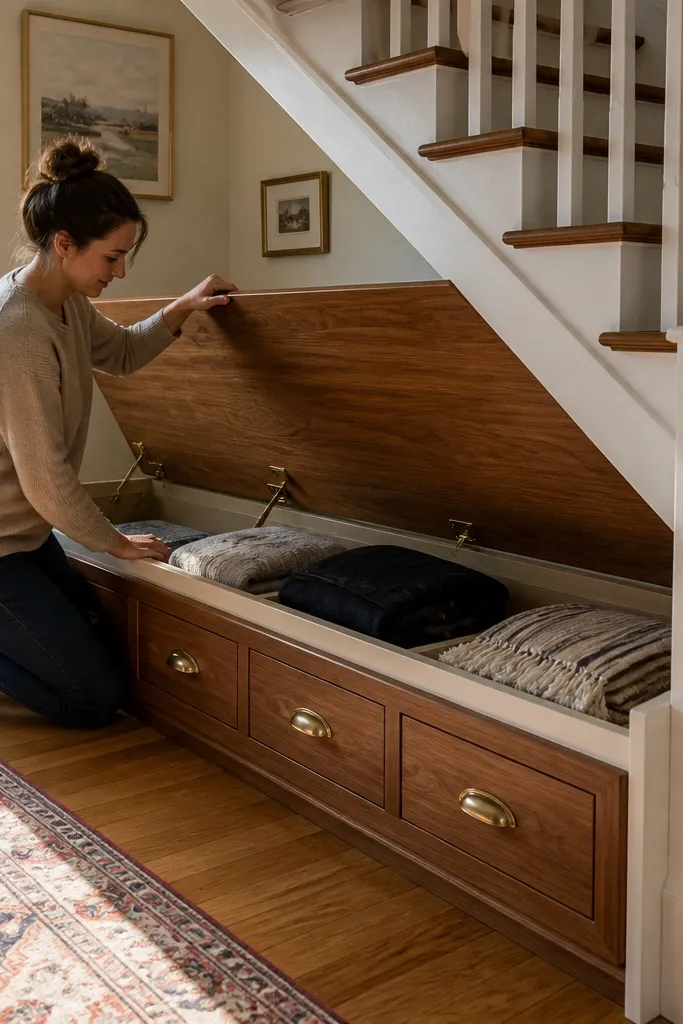
This is a smart option when you want the under-stairs area to feel like a feature, not a closet. A bench-style seat with a hinged lid gives you a clean top surface, while drawers underneath store smaller items. It’s photogenic because you get a continuous “built-in furniture” look that matches living spaces. It also helps people who hate bending down to reach storage — the seat front is the access point.
Build a base frame from 18mm plywood with a level top panel, then install drawer boxes on runners inside the lower section. For the seat lid, use a hinged panel sized to cover the top opening, supported with a cleat and a gas strut or lid prop. Add a hardwood or plywood seat top, then cover with foam and fabric if you want a softer look. Finish by sealing wood edges and adding a latch so the lid stays shut.
Use a removable seat cushion cover so you can wash it without tearing the whole bench apart.
Don’t hinge the seat directly to thin board; it warps and the lid won’t sit flush.
8. Corner-to-wall pantry style with pull-out baskets
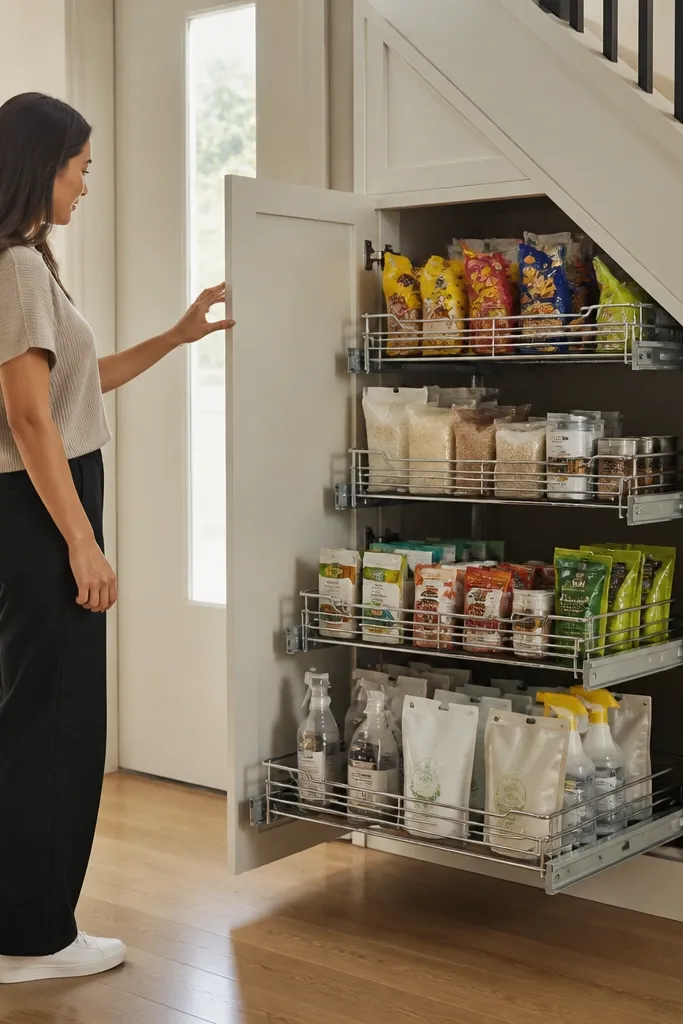
When the under-stairs cavity is oddly shaped, pull-out baskets make the space usable without fighting angles. The baskets keep items visible and easy to grab, and the door keeps everything looking neat. This is a strong choice for groceries, snacks, or cleaning refills, because wire baskets handle small spills and wipe down fast. Visually, the cabinet door keeps the bay looking like furniture.
Build a cabinet carcass that follows the widest and narrowest parts of the stair void, then add a false side panel if you need to create a straight slide line. Install two or three pull-out basket frames using manufacturer rails, set them so baskets clear door hinges and stop fully before the door. Add a single door with a handle that aligns with your trim line. Paint or veneer the door and carcass so they match the rest of the hallway cabinetry.
Label the baskets with removable tape on the inside lip so the outside stays clean for photos.
Skip “loose” baskets without rails — they wobble and the storage stops looking tidy.
9. Laundry-style open cubbies with matching lidded bins
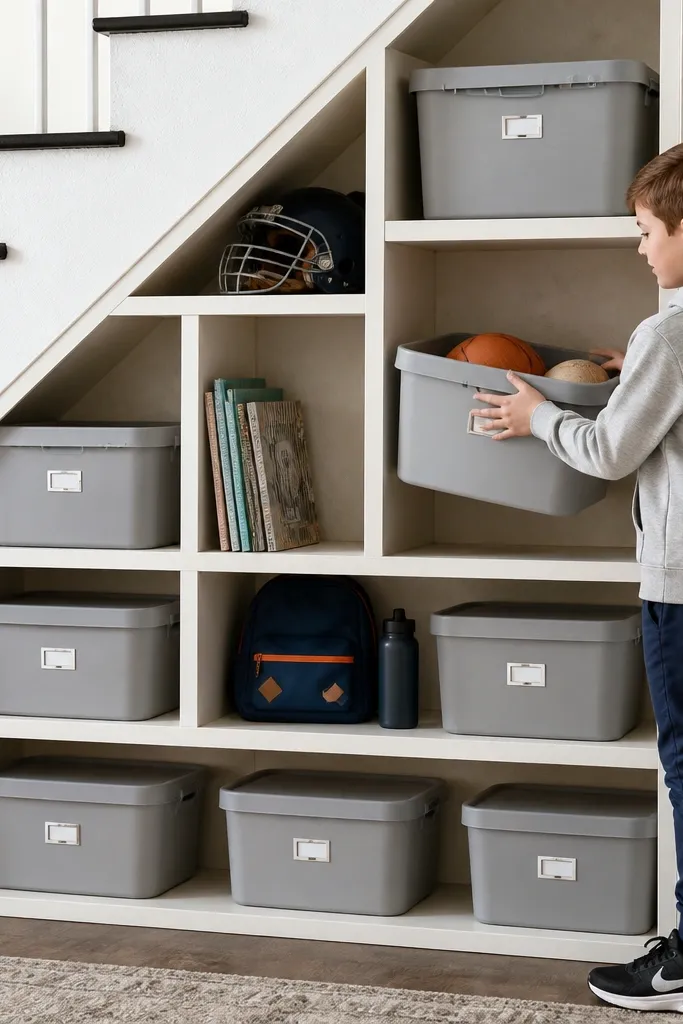
Open cubbies under stairs can work if you remove the visual clutter at the source. Use identical lidded bins in each cubby so the area looks styled, not dumped. This setup is great for kids' school gear, sports bags, or craft supplies where you need quick grab-and-go. The look is clean because every cubby has a matching “container face,” which camera angles love.
Frame the cubbies using 18mm plywood, keeping each opening consistent even if the cavity narrows — you can adjust by shifting vertical dividers. Sand edges, then paint the interior wall and cubby frames in the same color so nothing looks unfinished. Place bins after the final paint cures so you can test fit. Add a slim base trim and a top trim to frame the cubbies like built-in furniture.
Choose bins with a matte finish; they don’t glare under hallway lighting.
Don’t mix bin heights across cubbies — uneven tops look like clutter even when you’re organized.
10. Sliding door cabinet with mirror panel
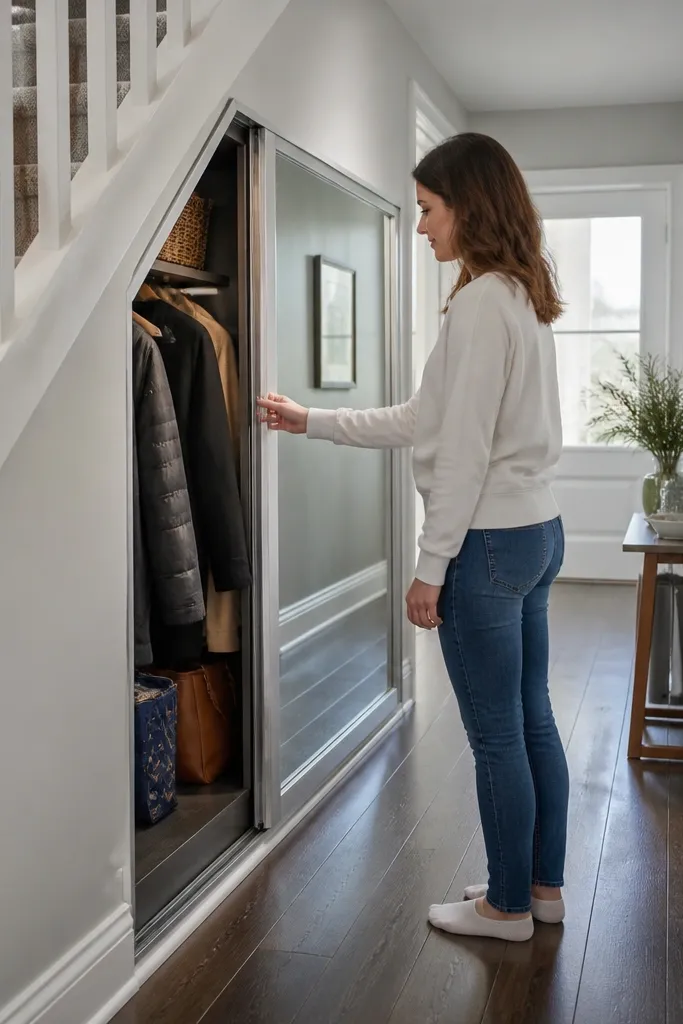
If your under-stairs area is in a narrow hallway, a sliding door with a mirror panel makes it feel bigger and cleaner. The mirror reflects light so the storage bay looks less like a hole in the wall. You still get full enclosure for coats, shoes, or seasonal bags, but the front reads like a design feature. It’s also photogenic because the mirror gives you crisp reflections and a clean boundary line.
Build a cabinet carcass and install a frame for a sliding door track. Use a mirror panel that fits inside a door frame, with rubber glazing strips so it doesn’t rattle. Mount the sliding track to the top of the cabinet and install a bottom guide so the door stays aligned. Finish by painting the door frame in a color that matches your hallway trim and adding a slim pull handle.
Add a soft-close slider if you can; slamming doors ruin the “furniture” feel fast.
Don’t use a mirror without a protective film strip — it helps with safety if the panel chips.
11. Bottom drawer + vertical coat hooks panel
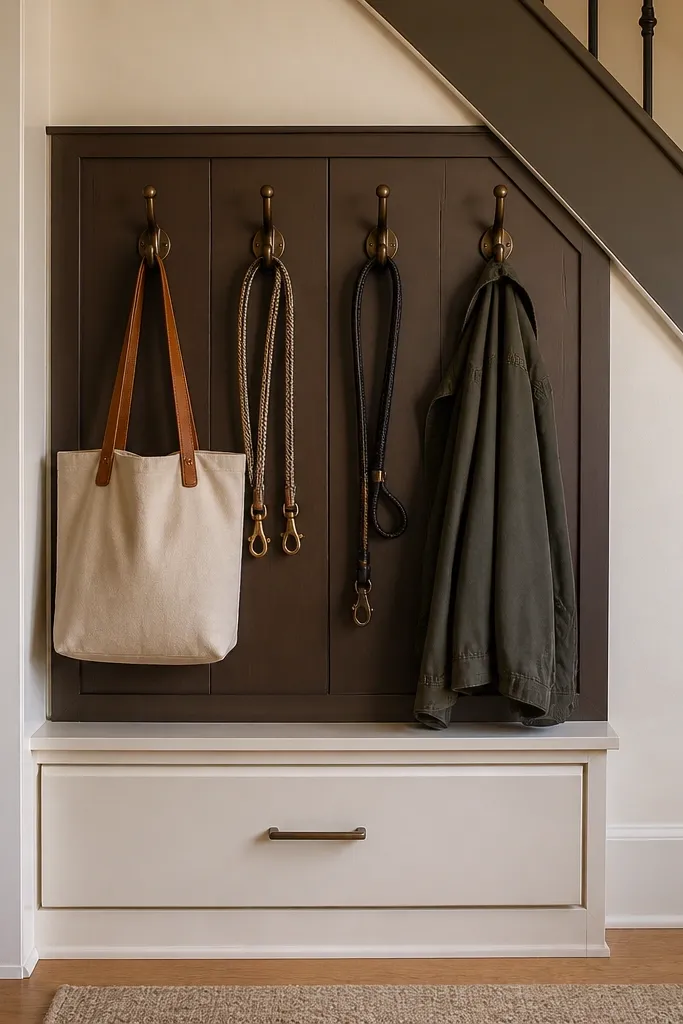
This is the best layout when you want both hidden storage and daily access. Put a drawer at the bottom for small essentials, then install a vertical hooks panel above for bags, leashes, or coats that you grab every day. The hooks panel keeps the look active and functional, while the drawer hides the messy stuff. It also looks great because you get two strong shapes: a solid drawer block and a vertical line of hooks.
Build a base carcass and install a single deep drawer that reaches close to the cavity width, leaving 5-8mm gaps for smooth operation. Mount a vertical backing board above the drawer using wall anchors into studs where possible. Install hooks on a consistent grid, then frame the backing board with a trim strip so it looks like a designed panel rather than raw board. Paint everything, then seal the hooks board with a clear coat if you use stained wood.
Space hooks so bags hang without touching each other — 70-90mm between hooks looks neat in real use.
Don’t mount hooks directly to thin drywall; it pulls loose and the panel looks crooked.
12. Hidden pantry door disguised as stair skirt
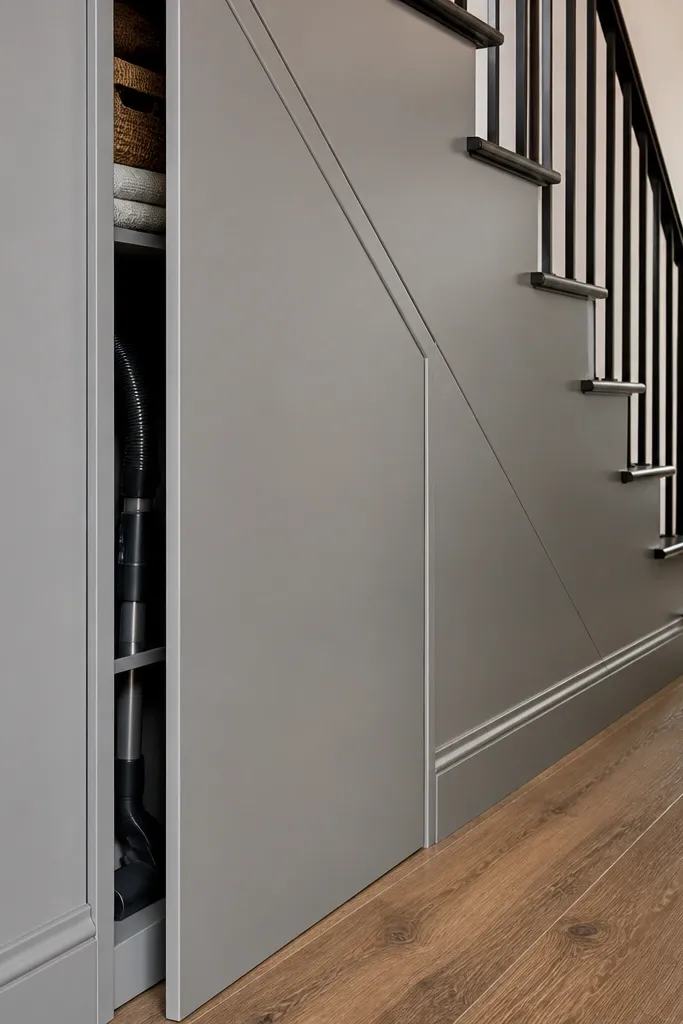
This is the “wait, what?” build — when the under-stairs door blends into the stair skirt, the whole bay looks architectural. You get a full hidden cabinet for vacuum attachments, cleaning spray, or backup linens, but guests don’t see a door outline. The look is clean because the face is flush and matched to the trim. If your stair skirt already has paneling or a consistent profile, this idea uses it.
Build a cabinet carcass behind the skirt area, then plan a door panel that matches the existing skirt thickness and profile. Use concealed hinges and a magnetic latch so the seam stays tight. Add a flush trim frame around the door opening, then sand and paint the door and trim as one surface so the lines disappear. Install a small pull tab on the inside edge if the door is hard to open by hand.
Editor's noteUse a hinge template and a laser level so the door sits flush across the whole height.
Skip thisDon’t rely on caulk alone to hide gaps — gaps catch light and ruin the illusion.
13. Open cubbies with a slanted backboard for board games
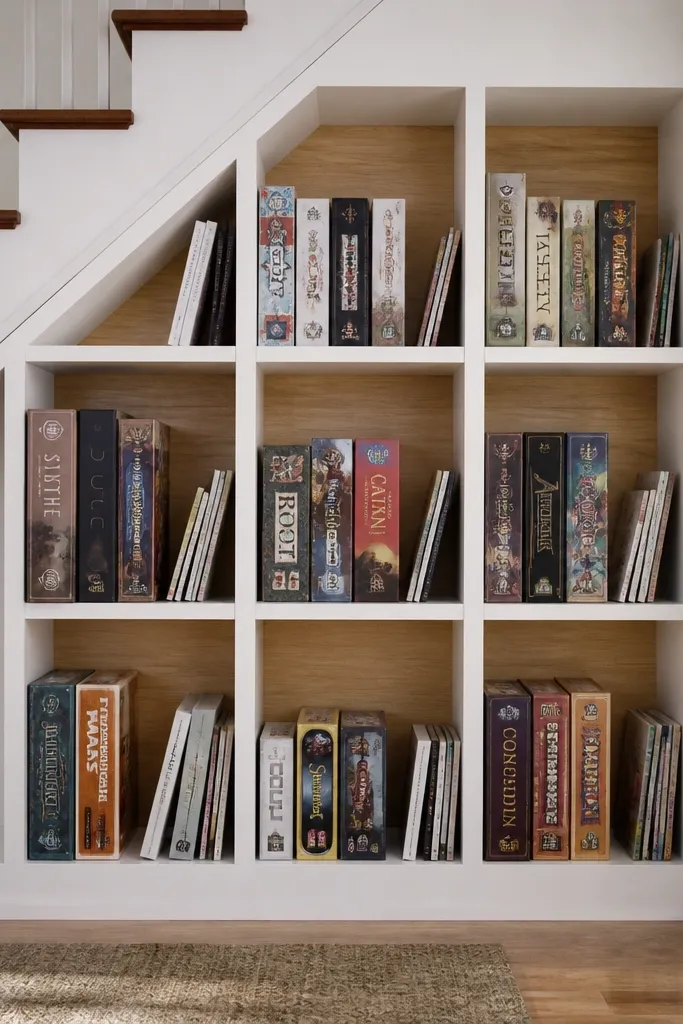
This build is about display. A slanted backboard makes board games and book spines stand out and keeps them from looking randomly piled. The slant also helps prevent items from tipping forward, so the look stays neat even when you add new games. It’s photogenic because the front edges line up in one clean grid, and the slanted back adds depth behind the boxes. Use it where you don’t mind seeing your collection.
Frame the cubbies to a consistent front width, then cut a slanted backboard panel for each run so the slope creates a uniform display angle. Use 12mm plywood for the backboard so it stays rigid and easy to cut. Install a stop strip at the bottom of each cubby so boxes don’t slide out. Paint the interior backboards in a slightly darker tone than the front to make the spines pop.
Measure one game box height and build the cubby depth to that plus 5mm for easy insertion.
Don’t make the slant too steep; if the boxes lean forward, the arrangement looks careless.
14. Full-length shelf with a rolling ladder track
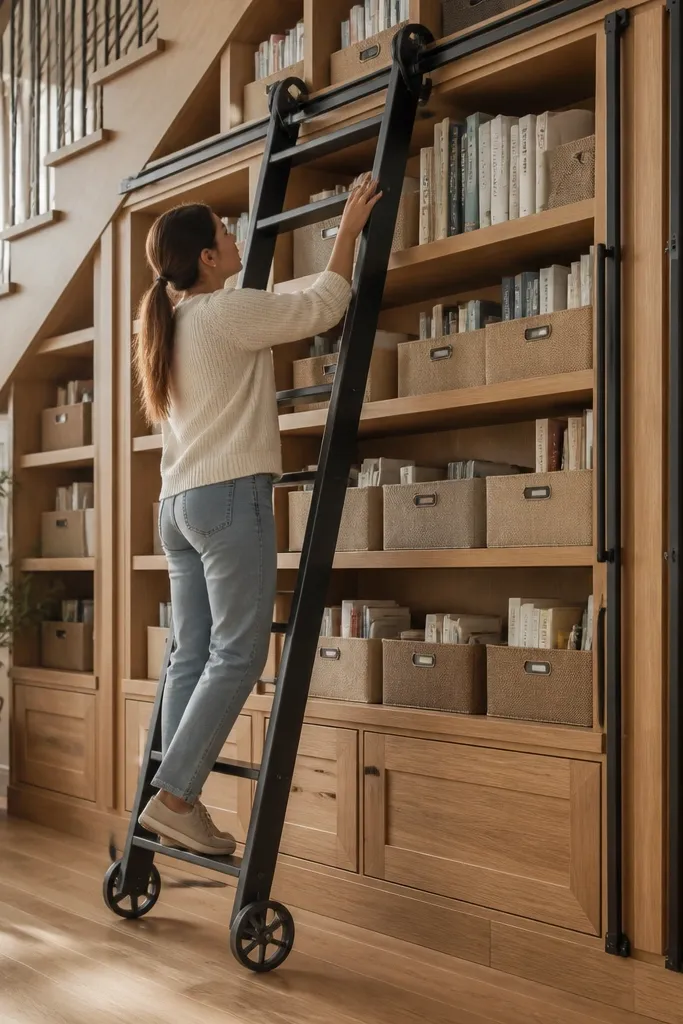
If you want under-stairs storage that looks like a designer library, a rolling ladder over a full-length shelf is the way to do it. The ladder makes the space feel intentional and adds vertical drama that photos love. Use the shelf for books, baskets, or display bins that are organized by height. This option is best when the under-stairs area has enough width to mount a track securely without looking flimsy.
Build a sturdy shelf support frame from 18mm plywood and anchor it into studs. Install a ladder track to the side support using metal track hardware, then mount the rolling ladder wheels and guide. Lay shelves at consistent spacing, leaving extra height for baskets or taller items. Finish by installing a front rail to stop items from sliding and paint the shelf supports to match your trim.
Use a metal track and wheels rated for the shelf load — cheap ladder kits wobble and look off in photos.
Don’t mount the shelf only to drywall — it will sag and the ladder will bind.
15. Ladder-frame under-stairs library with hinged reading nook desk
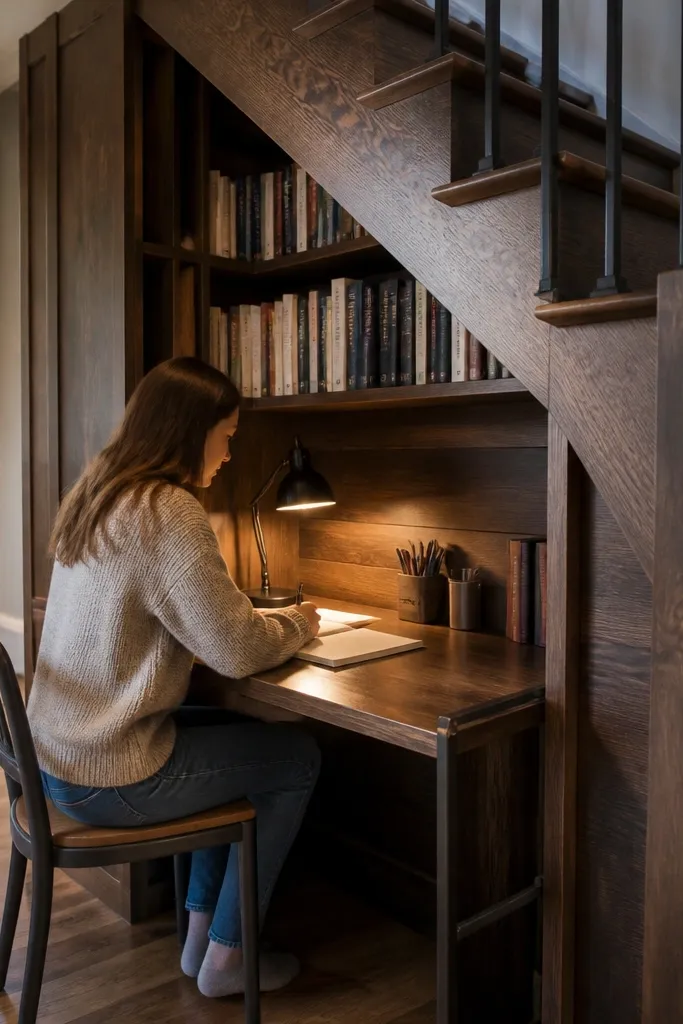
This is the under-stairs storage idea I’d build differently when the space is narrow and you want it to look intentional, not like a hallway closet. The ladder-frame sides make the built-ins look architectural, and the hinged desk panel gives you a real work surface that folds down only when you need it. The book cubbies stay open and photogenic, so you get that clean grid look even when the bottom area is clutter-prone. Use this in a reading corner, a homework spot, or a home office nook where you want storage plus a surface without adding another piece of furniture. It’s medium-skill DIY: you’re building a frame, adding shelves, and fitting a hinge and soft-close, but it’s straightforward carpentry with clear measurements.
1) Measure the under-stairs opening width and depth at three points, then subtract 1/2 inch from the shelf bay width so the shelves slip in without forcing. Build two ladder frames from 3/4-inch plywood or 1x hardwood — side rails cut to the opening height, with rungs spaced every 10 inches for a tight book fit. Install the ladder frames plumb to the studs or stringers using 2-1/2-inch screws and construction adhesive, then add a back cleat so the shelves have a reference plane. 2) Cut 3/4-inch shelves to fit between the ladder rails and pin them with 1-1/4-inch brads or screws from underneath; leave the cubby bottoms open if you want the cleanest look. For the hinged desk, cut a 3/4-inch panel to the bay width and about 14-16 inches deep, then mount a piano hinge along the top edge to the frame. Add a fold-down support stop using a gas strut or a simple adjustable wood cleat so the desk locks flat and doesn’t sag. 3) Finish everything with a durable topcoat — satin water-based polyurethane is easy to wipe clean — and add a small toe-kick trim at the bottom so the frame edges look finished instead of raw.
Pre-drill hinge screw holes and clamp the desk panel in the open position before you tighten anything — hinge alignment is the one place small errors show up fast.
Don’t build the shelves to the tightest measurement at the widest point — under-stairs openings are rarely parallel, and shelves will bind or leave ugly gaps.



