
1. Wall-Mounted Floating Shelf with Under-Shelf Tray
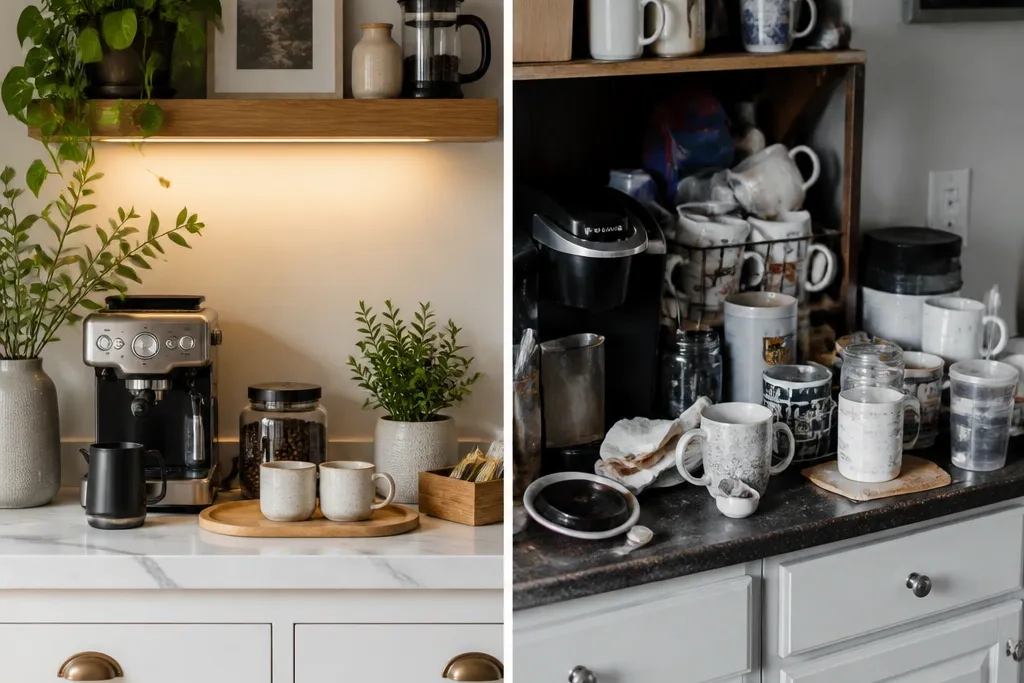
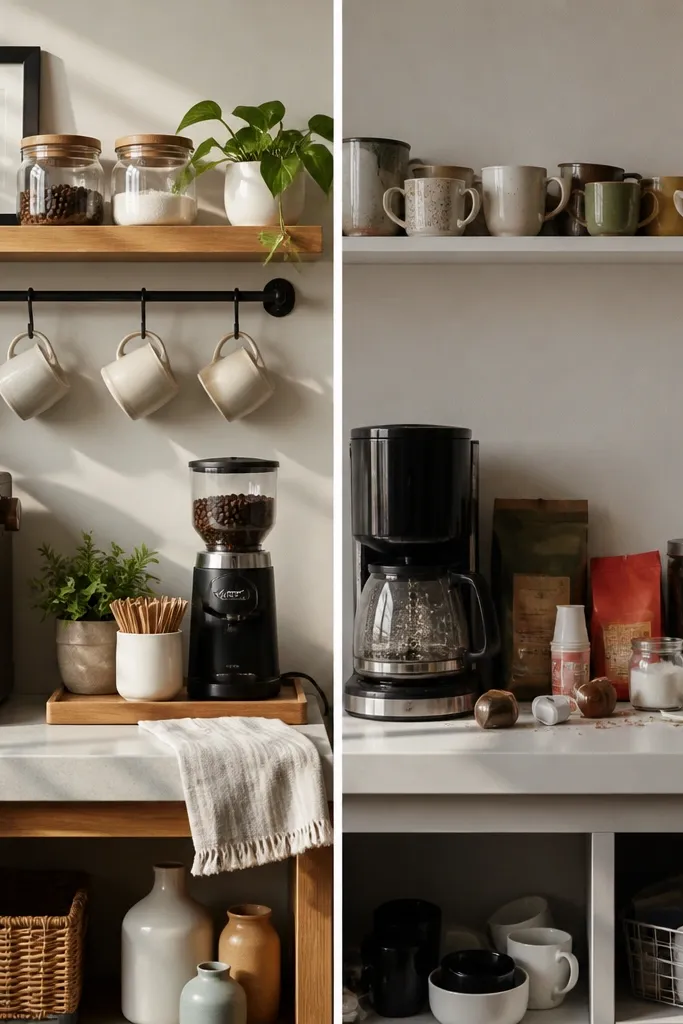
This is the cleanest counter-rescue move because it removes the “gravity clutter” from your countertop. Install a floating shelf at mug height so cups live where your eyes expect them, not in a scattered pile. Put your daily brew tools on an under-shelf tray so drips and stray grounds have a catch area. The look stays photogenic because the shelf line is straight, the jars match, and the tray frames the mess instead of spreading it across the counter. Skill level is beginner-friendly with basic measuring and a level — plan for about a half day including patching and drying time.
Start by measuring your counter depth and picking a shelf depth of 9-10 inches so mugs clear the backsplash and don’t hit when you pull them down. Mark studs, then mount the shelf with 2-3 inch wood screws; use a level so the shelf line stays crisp in photos. Add an under-shelf tray (metal or wood) with 1/2 inch clearance so you can wipe it easily. Finish by placing matching labeled jars for sugar and stir sticks, and set a small mat on the tray for grounds. Seal the shelf with a wipe-on clear coat if it’s raw wood so coffee drips don’t leave marks.
Use a single jar style for everything that’s visible — same height and lid color makes the station look designed.
Don’t mount the shelf too low; if mugs scrape the counter, you’ll stop using it and the counter will creep back.
2. Rolling Bar Cart with Pull-Out Waste Bin
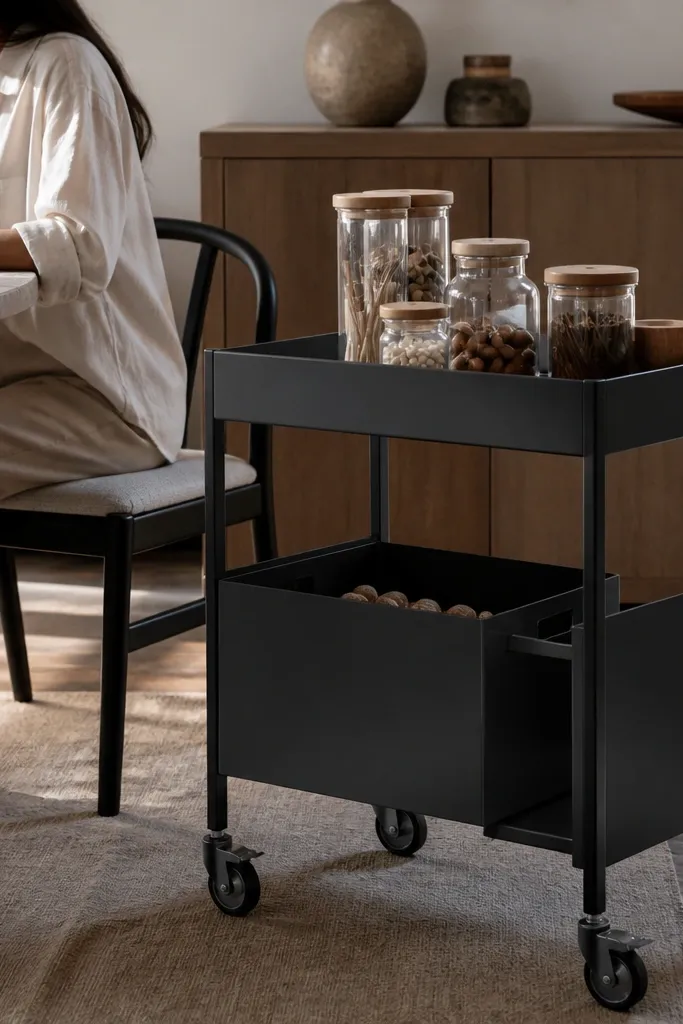
Pick a cart with two shelves and a top that’s at least 20 inches wide; you want room for a tray without crowding. Attach a slim pull-out bin to the lower shelf using a bin bracket kit or by screwing the bracket into the shelf frame. Place a fitted tray on the top — aim for a 1-inch lip so items don’t slide off when you move it. Mount a small hook or clip under the top shelf edge for a scoop or reusable filter. Finish by filling matching canisters with beans (or grounds) and sugar, and keep the bin closed so it stays visually clean.
A bar cart saves counter space because it turns a “station” into a movable zone. The trick is to keep the top surface clear: use a removable tray for your daily brew gear so the cart looks styled even when you’re mid-routine. Add a pull-out waste bin on the lower shelf so used grounds and filters don’t sit in a visible trash can. The look is modern and photo-ready because the jars and tools sit on one top plane, not scattered across the kitchen. This project suits kitchens where the coffee area gets used by multiple people and you need fast cleanup.
Skip thisDon’t use an open basket for waste — it makes the station look messy the moment someone uses it.
Editor's noteChoose matte black or brushed metal and wipe it with a microfiber cloth; fingerprints ruin the look faster than you think.
3. Cabinet Door Coffee Station with Magnetic Canisters
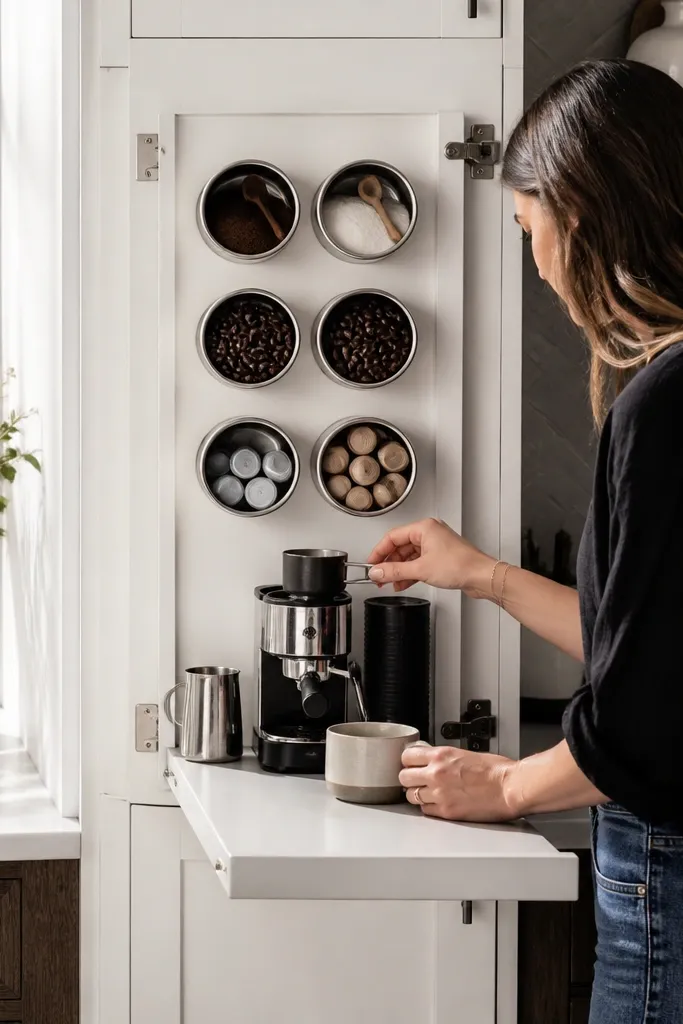
If your counter is small, a cabinet door station is the real fix because it hides the bulky stuff. Use magnetic canisters so you can pull out only what you need: pods, sugar, filters, and stir sticks. When the door shuts, the coffee station looks like tidy storage, not a permanent mess. The visual payoff is big: clean cabinet face, minimal countertop items, and a neat tray area for daily use. This is best for renters or homeowners who already have nearby cabinets and want a built-in look without a full remodel.
Start by measuring your cabinet door interior and selecting canisters with flat backs that can magnetize without wobbling. Install a shallow pull-out tray (or a fixed shelf lip) at the height you want your daily tools staged. Add magnetic strips or magnetic plates to the door interior and test pull strength so canisters don’t slide when the door closes. Keep the counter clear by storing everything inside, leaving only a small tray on the counter for the day’s brew. Add a small label strip so you can restock quickly without guessing.
Use two canister sizes: one for daily pods and one for backup. The contrast makes the door look organized instead of cluttered.
Don’t mount magnets on a wobbly door panel; if it flexes, the canisters will fall and the system will fail.
4. IKEA-Style Kallax Insert Coffee Zone with Matching Liners
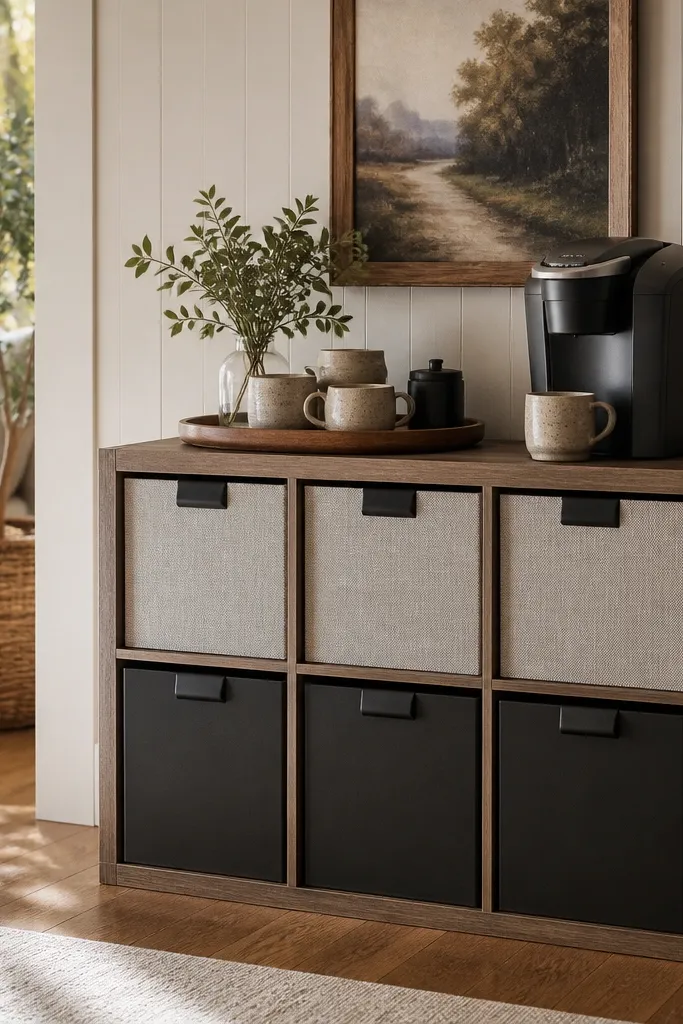
Open cubbies can look chaotic fast, but a Kallax-style organizer becomes gorgeous when you treat it like a display with rules. Use closed bins for anything that looks messy: packets, filters, and extra cups. Then show only the “pretty” items — a small stack of mugs, a neat row of stir sticks, and one decorative scale or pour-over. This idea saves counter space because the station moves off the countertop and into a vertical grid. It also photographs well because the grid makes everything look intentional and aligned.
Choose a unit width that fits your coffee corner and decide which cubbies stay visible. Install or place closed bins (with lids) for pods, filters, and sugar refills, using matching colors so the cubbies look uniform. Add a laminated or washable liner to the visible cubbies to protect surfaces and make the colors consistent. Place a small tray on the top or inside the top cubby for daily brew tools. Finish by adding a mug rack or hooks to one side cubby wall so cups don’t sit piled.
Pick liner colors that match your kitchen palette; a warm neutral liner makes wood tones look better in photos.
Don’t leave packets and wrappers visible. Even a few will make the whole station look crowded.
5. Countertop Coffee Tray System with Modular Jars and a Drip Mat
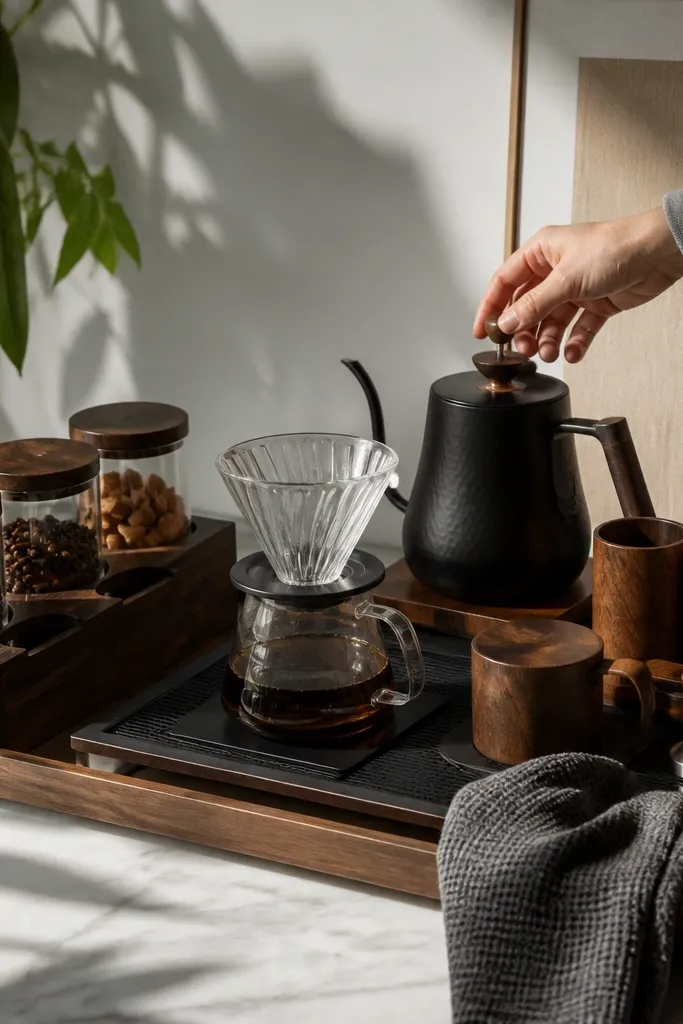
Start by choosing a tray large enough to hold your daily items in one footprint — aim for 18-24 inches wide depending on counter space. Lay a rubber-backed drip mat on the tray where the dripper or kettle sits. Place two to four modular jars with the same lid finish and keep only daily quantities visible. Add a small removable caddy for filters so they don’t spill out. Finally, create a “landing spot” at the tray edge for the scoop so it always returns to the same place.
This is the “looks styled in 5 seconds” setup. A large tray acts like a boundary, so your coffee items don’t creep beyond the station. Use modular jars with matching lids for sugar, creamer, and stir sticks, and keep a drip mat under the area where you pour. When you’re done brewing, you can lift the tray and wipe the counter — the station stays clean without a whole reset. It’s perfect for renters or anyone who doesn’t want to drill holes but still wants their counter to look intentional.
Skip thisDon’t place the tray too small. If items hang over the edges, the whole look turns messy fast.
Editor's noteUse two jar heights only. Variety looks fun until it turns into visual clutter in photos.
6. Pegboard Coffee Station with Hooks, Bins, and a Shelf Lip
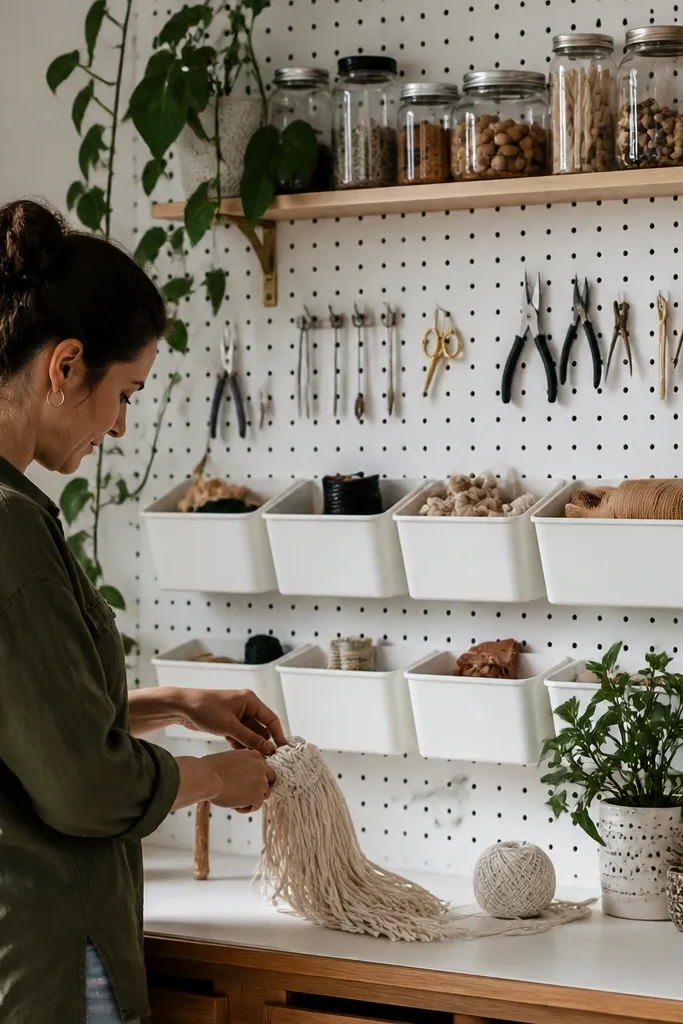
Measure the wall and cut or buy a pegboard panel sized for your space; keep at least 2 inches of clearance around the edges. Install into studs with anchors if needed, then add shelf brackets and hooks. Use small labeled bins for filters and stir sticks, and put frequently used mugs on hooks at hand height. Add a bottom tray or shelf lip to catch drips from a pour-over. Paint pegboard with a semi-gloss finish so coffee splashes wipe clean.
Pegboard looks industrial and clean at the same time, and it’s one of the best ways to reclaim counter space without building a cabinet. The beauty is in the control: everything has a hook or bin, so nothing spreads across the countertop. Add a shelf lip for jars so they don’t slide, then use hooks for mugs and tools like tongs or a scoop. This setup is very photogenic because the lines are neat and the station is vertical. It works best in kitchens with a blank wall near the coffee maker.
Skip thisDon’t hang everything at once. Start with 6-8 items you use daily or it becomes a clutter wall.
Editor's noteArrange tools by frequency: daily items on the center row, backups higher or lower so the station looks tidy at a glance.
7. Built-In Look Coffee Nook from a Narrow Bookcase and Door Latch
Pick a bookcase width that fits your space — 12-16 inches deep works well for coffee corners. Add either a small door or a latch on the front of one cubby section so you can close the messy stuff. Line the shelves with washable liner and place closed bins in the lower cubbies. Use one shelf as the only open display for jars and a small tray. Anchor the unit to the wall and add rubber feet if it sits on tile.
A narrow bookcase gives you the built-in look without the full cabinet install. The key is adding closed storage where the mess lives and leaving only one open shelf for the “daily” set. Put mugs on the open shelf or a side rail, then store pods, filters, and extra cups in closed boxes inside the cabinet. This saves counter space because the coffee station becomes its own furniture piece. The aesthetic stays clean because the open shelf is limited — photos don’t show the clutter behind closed doors.
Skip thisDon’t use open cubbies for pods and filters. They look messy even when you “sort it nicely.”
Editor's noteUse matching bin labels in one font size; even simple labels make it look designed.
8. Wood and Metal Coffee Corner with Sliding Drawer for Pods
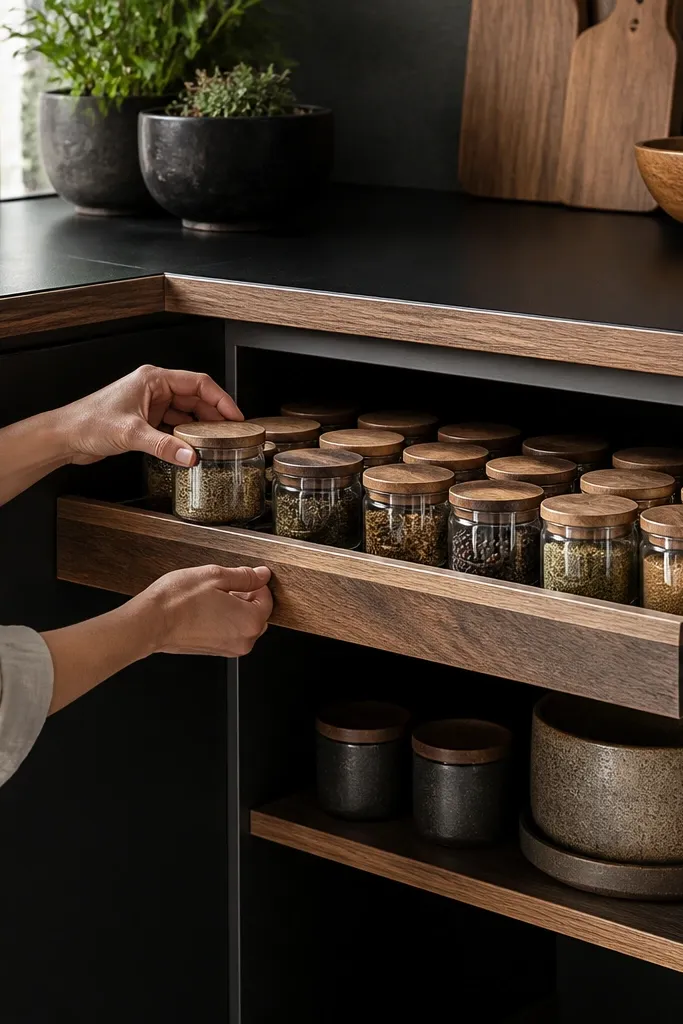
A sliding drawer solves the biggest visual problem with coffee stations: pods and packets look like clutter when they sit out. Build a corner-friendly station with a wood top and matte black metal sides, then add a shallow sliding drawer sized for pod packs or small boxes. Keep the top as a staging area for a tray, dripper, and kettle — clean lines only. The drawer hides the chaos while still letting you grab what you need fast. This is a great DIY if you’re comfortable with basic carpentry and want a “furniture” look.
Cut a simple base frame using 3/4 inch plywood or hardwood, then add a top panel sized to your corner space. Install matte black metal side rails for a smooth drawer slide and build a drawer box with a front panel. Measure your drawer interior for your pod box dimensions so it slides in without forcing. Add a drawer pull that matches the metal finish. Seal the wood top with a wipe-on polyurethane and add a tray to keep drips contained.
Sand the drawer front to a smooth satin feel; rough wood catches grime and shows it in photos.
Don’t make the drawer too shallow. If pods can’t sit flat, you’ll shove them in and it will look messy.
9. Magnetic Knife-Style Rail for Scoops, Spoons, and Scissors
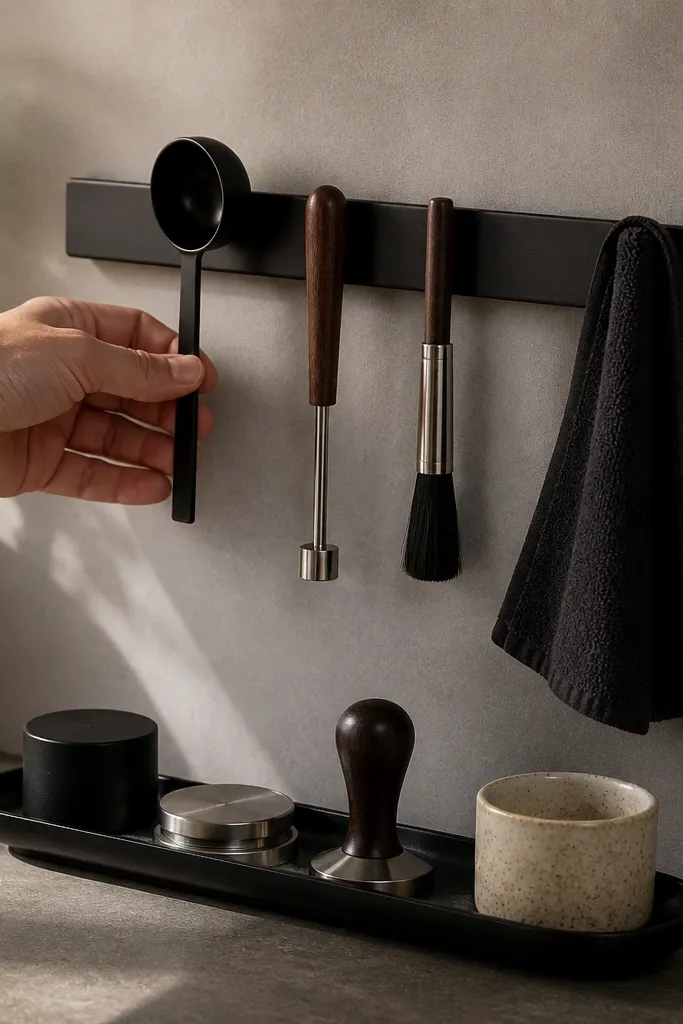
Pick a rail length that spans the width of your tray staging area, usually 10-18 inches. Mount into studs if possible, or use heavy-duty anchors rated for the rail’s weight. Place the rail at a height where you can grab tools without reaching over the coffee maker. Add small hooks or magnetic cups for tools with handles, and keep the heaviest items closest to the mounting points. Finish by adding a drip mat under the tray so any accidental drops don’t stain the counter.
Countertop stations look messy because small tools multiply. A magnetic rail gives every scoop, stir spoon, and even scissors a fixed home — and it looks neat because the tools line up. Mount it above or beside your staging tray so you don’t create another clutter zone. This idea is surprisingly good for aesthetics: tools are thin, so the rail looks intentional instead of crowded. It’s also a space saver because it pulls items off the counter without adding another shelf.
Skip thisDon’t hang bulky items like full canisters on the rail. Keep it to thin tools only.
Editor's noteUse one metal finish across the rail and any hardware on nearby cabinets for a cleaner look.
10. Over-the-Sink Coffee Station with Fold-Down Shelf
Choose a fold-down shelf kit rated for kitchen use and mount it into studs. Set the shelf height so your kettle and dripper sit comfortably without blocking the faucet. Install wall-mounted hooks and a small shelf lip for jars so they don’t swing. Add a washable tray or silicone mat to the shelf surface because water and coffee splashes happen near sinks. Finish by keeping only daily items on the shelf — everything else goes in cabinets.
If your counter is tight, using the wall beside the sink is smart because that space is often underused. A fold-down shelf gives you a staging surface only when you need it, then it disappears visually. Pair it with wall-mounted jars and a small hook for a filter holder. This station looks clean because the shelf is closed when you’re not brewing, so you don’t see the coffee mess all day. It works well for pour-over users who want space to prep without dedicating a whole counter stretch.
Skip thisDon’t store mugs on the fold-down shelf when it’s closed. They’ll tip or look cramped.
Editor's noteUse a light-colored shelf finish so the area looks brighter and coffee drips are easier to spot and clean.
11. Cheese-Board-Style Sliding Insert for a Drawer Coffee Zone
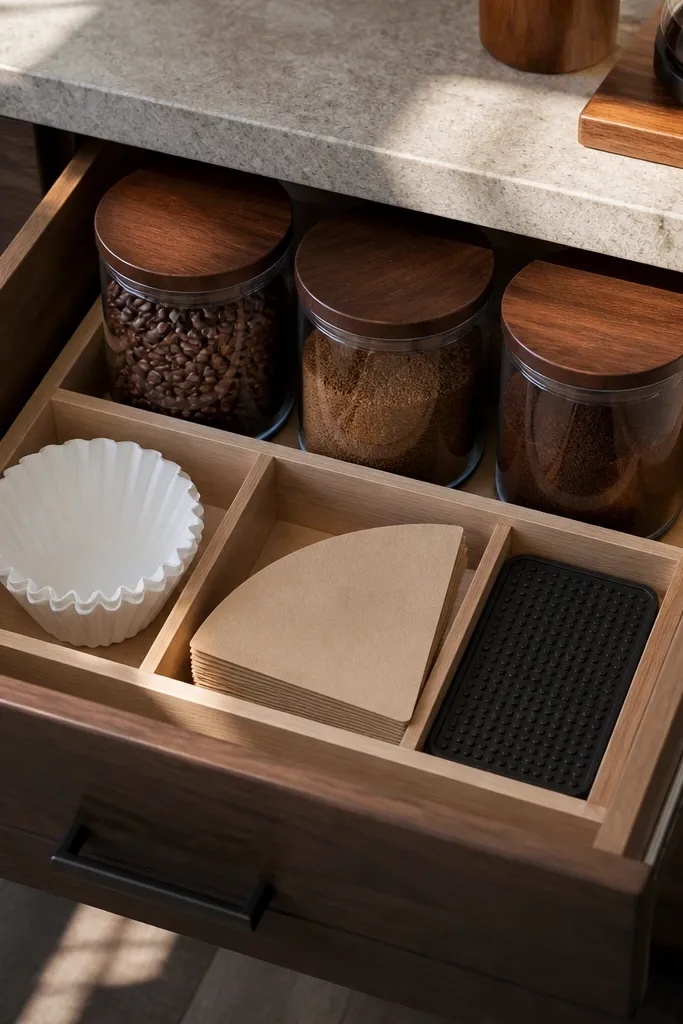
Measure your drawer width and depth, then build or buy a sliding insert sized with 1/4 inch clearance on each side. Add a removable drip mat on the top surface where you set filters or pour tools. Install small dividers for packets and stir sticks so they don’t become a jumbled pile. Add a compartment for a small trash bag or a foldable waste container if you brew often. Finish by sealing the wood with food-safe topcoat and ensuring the insert slides smoothly without scraping.
Drawer stations look sleek because they hide everything, and they’re perfect when you hate counter clutter. A sliding insert turns a deep drawer into a coffee prep zone with a clean front edge that looks tidy when closed. Use a wood insert with a fitted drip mat and small compartments for filters, stir sticks, and a scoop. Then keep mugs in a nearby rack or on the wall so the drawer holds only the prep items. This setup is great for narrow counters because it moves storage into the place you already have.
Skip thisDon’t store wet or uncapped items in the drawer. Dry grounds and lids only.
Editor's noteUse a tray-within-the-insert for the daily items so you can lift it out and wipe the drawer quickly.
12. Lidded Canister Set on a Tiered Stand with a Center Tray
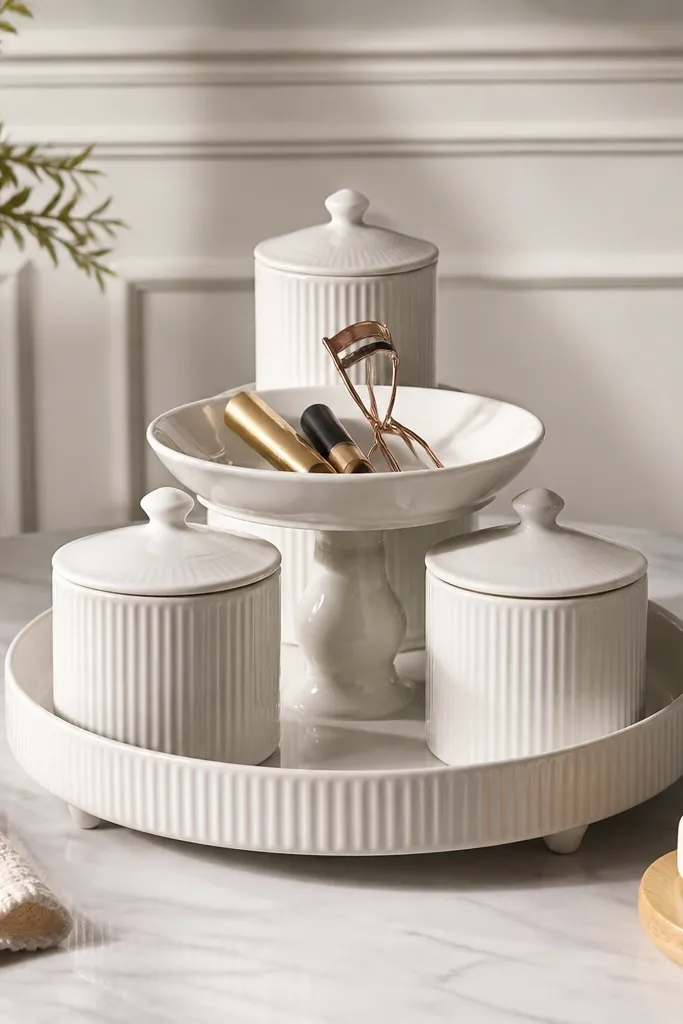
Tiered stands look gorgeous because they create height, and height makes the station read as styled instead of random. The look stays clean when the canisters are lidded and match — open containers spill visual noise. Put the messy stuff in lidded canisters and keep only one center tray for daily brew tools. This saves counter space because you’re stacking storage vertically while keeping the pour area contained. It’s best for small kitchens where you want a decorative station but still need it practical for daily use.
Choose a tiered stand with a stable base and a center tray area, ideally ceramic or metal with a matte finish. Place a lidded canister for sugar or creamer on the top tier and a lidded container for stir sticks or pods on the lower tier. Use a center tray for daily tools like filters, scoop, and a small brush. Add a silicone mat under the center tray if you pour near the stand. Finally, keep the rest of the counter bare except for the kettle and a single mug position.
Match lid colors across all canisters — even if the canisters are different sizes, the lids unify the look.
Don’t use a tiered stand for open bags. Visual clutter defeats the whole point.
13. Corner Floating Cabinet with Lift-Up Top for Brew Gear
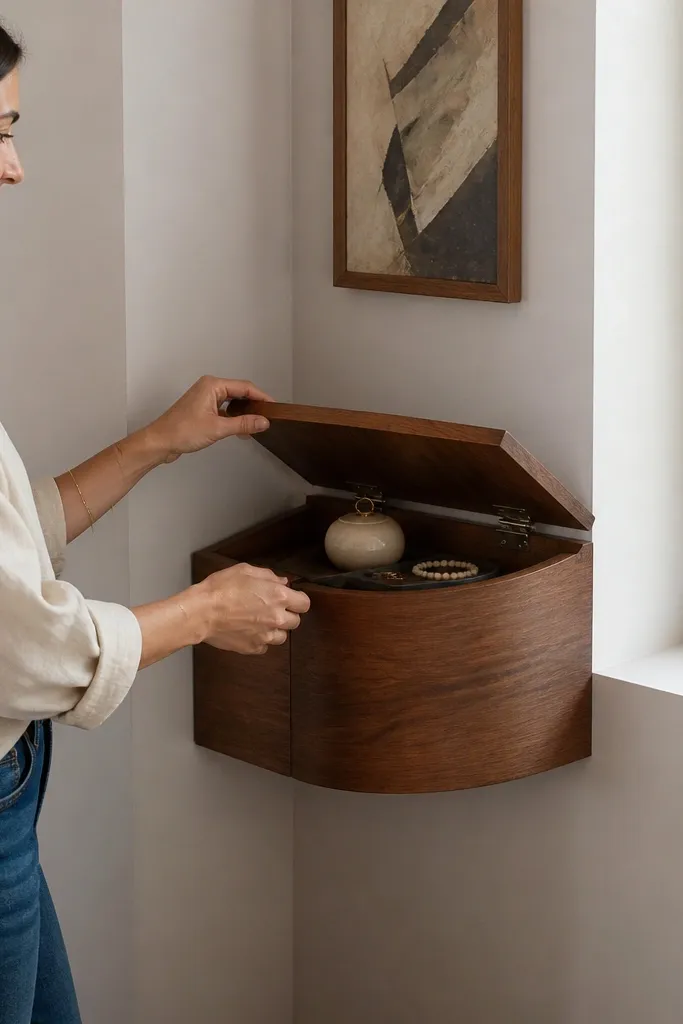
A corner cabinet is the space-saving hero because corners waste room and are hard to decorate. A lift-up top gives you a hidden brew staging area that stays out of sight until you need it. Inside, mount a tray system with slots for filters, a scoop, and a small brush, so everything has a home. When the top closes, the station looks like a clean cabinet front — no visible coffee tools. This is best for people who want a “kitchen built-in” look without giving up daily access.
Pick a small corner cabinet sized to your wall studs and mount it securely with stud screws. Add a lift-up top panel using a hinge kit and soft-close gas struts if you want it to feel premium. Inside, install a removable tray with dividers and a small lip to catch drips. Place a drip mat on the inner tray surface and keep only daily items inside the tray. Finish by painting or staining the cabinet to match nearby cabinetry and adding a simple handle or pull.
Use a tray that lifts out. It makes cleaning coffee residue a 30-second job instead of a whole reset.
Don’t store beans or open liquids inside the cabinet without spill control. The cabinet will smell and look off.
14. Photo-Ready Coffee Wall with Pegboard + Matching Label Frames
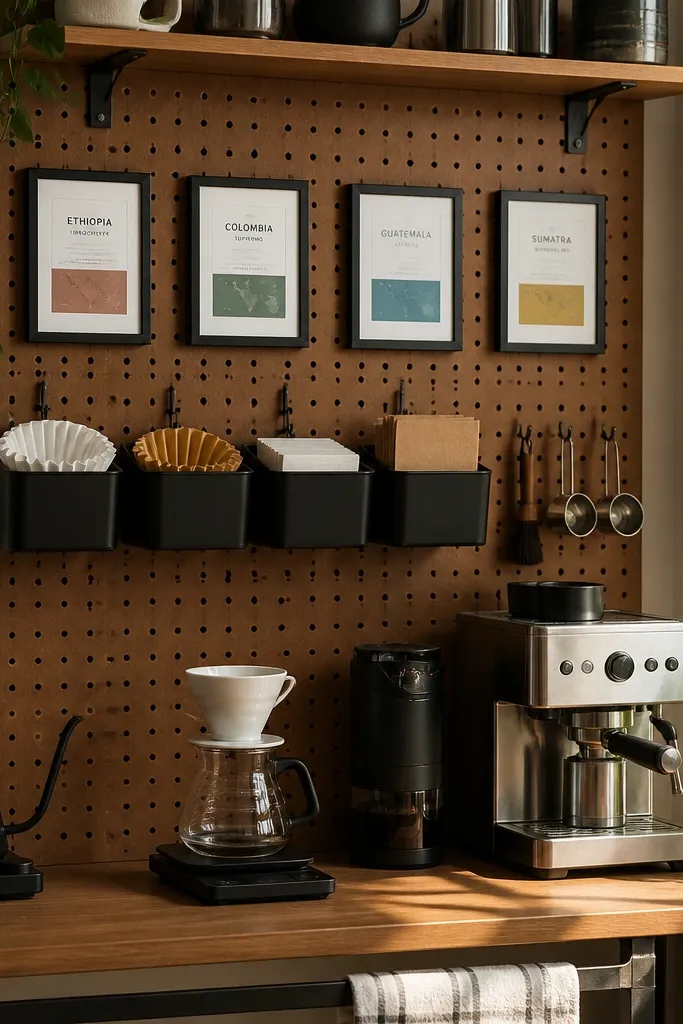
Start by choosing a pegboard size that fits the wall area above your coffee maker or near a prep corner. Mount the pegboard to studs, then install hooks for mugs and a small shelf lip for jars. Use identical bins (same color and shape) and attach label frames with printed labels for filters, stir sticks, and backups. Add one center tray shelf for the daily pour setup so you can stage and wipe. Finish by keeping only one type of jar visible at a time to avoid visual noise.
This one is about the look: the station reads organized because everything has a label and a consistent container shape. Use pegboard for the structure, then add small matching label frames on bins so the visual rhythm stays calm. Keep mugs on hooks, and store filters and stir sticks in uniform bins that all open the same way. The counter stays clear because the station is wall-based, and the wall design makes the whole coffee zone feel intentional in photos. Skill level is beginner — it’s mostly measuring, mounting, and picking matching containers.
Skip thisDon’t mix bin sizes and label fonts. The wall will look like a storage dump, not a station.
Editor's noteUse label frames with the same border width. It’s the small uniform detail that makes the wall look designed.
15. Open Shelving with Glass Doors and Inside LED Strip Light
Install glass-front shelves or add glass doors to an existing open shelf frame, then ensure the shelves can handle the weight of jars and mugs. Add lidded canisters and place them in a consistent grid so the lighting highlights clean lines. Install an LED strip inside the cabinet with a plug-in adapter and a switch, then route the wire neatly along the top. Add a small tray for daily tools on the middle shelf so drips stay contained. Finish by cleaning the glass and using matte labels so the lighting doesn’t reflect harshly.
Glass-front storage looks great in daylight and at night, but only if you control what’s visible. Add glass doors to open shelving so the coffee tools and add-ons don’t look like clutter when you’re not using them. Put lidded jars inside and keep the shelf layout symmetrical: mugs one side, canisters the other, and a single tray in the middle. LED strip lighting makes the station look intentional and adds that “coffee shop” feel without adding more items. This setup is ideal for kitchens where you want the station to be a focal point, not hidden away.
Skip thisDon’t fill every shelf level. Two levels plus a center tray looks curated; five levels looks like storage.
Editor's noteUse warm white LED (2700K-3000K) so wood tones and ceramic mugs look flattering on camera.



