


1. Simple Picture Frame Moulding Grid
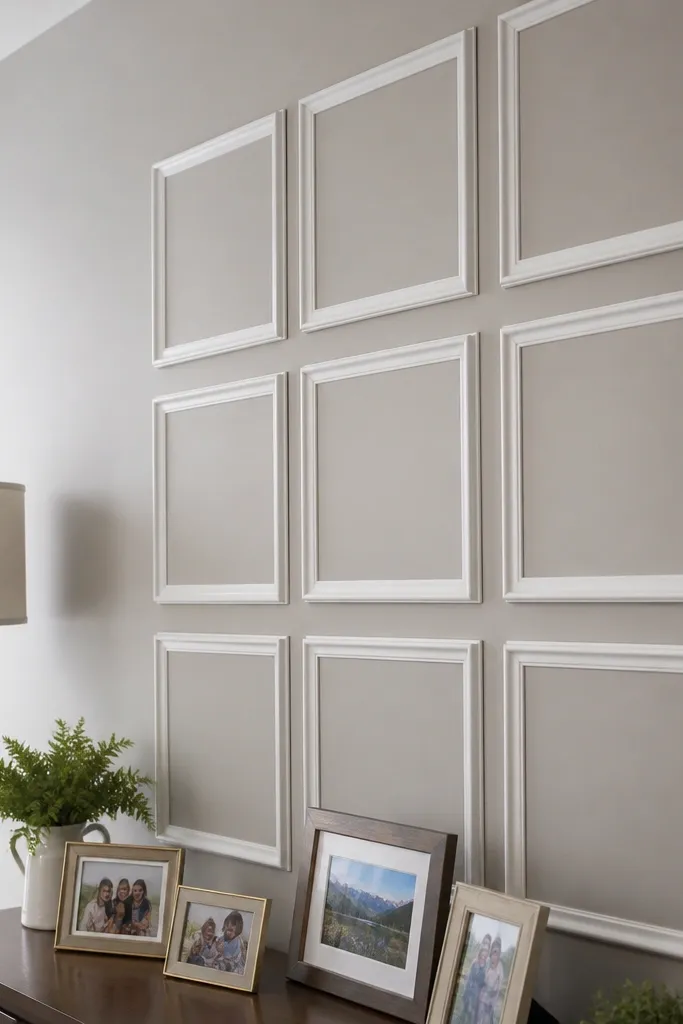
This look turns a flat wall into a gallery wall without hanging anything. The trick is using a moulding profile that creates a visible lip, so each rectangle catches light and reads like framed art. You build a grid with equal spacing, then paint it the same color as the wall or slightly brighter for a subtle pop. It’s beginner-friendly wall moulding ideas because the layout is repetitive, and the visual impact is immediate. Expect 1 weekend for one accent wall if you measure carefully and pre-cut your lengths.
Editor's noteCut a few test pieces and tape them to the wall to confirm the spacing reads right from standing height.
Start by deciding your rectangle size. A clean beginner formula is 12-16 inches between vertical frame lines and 16-20 inches between horizontal lines, then adjust to your wall dimensions. Mark a level border line, install the perimeter frame first, and then add the inner rails using a miter saw for corners or butt joints with corner blocks. Fill nail holes, caulk the reveal, and paint with satin trim paint after the caulk cures.
Skip thisDon’t mix spacing between rows — uneven gaps make the whole wall look crooked in photos.
2. Classic Chair Rail with Two-Tone Wall Color
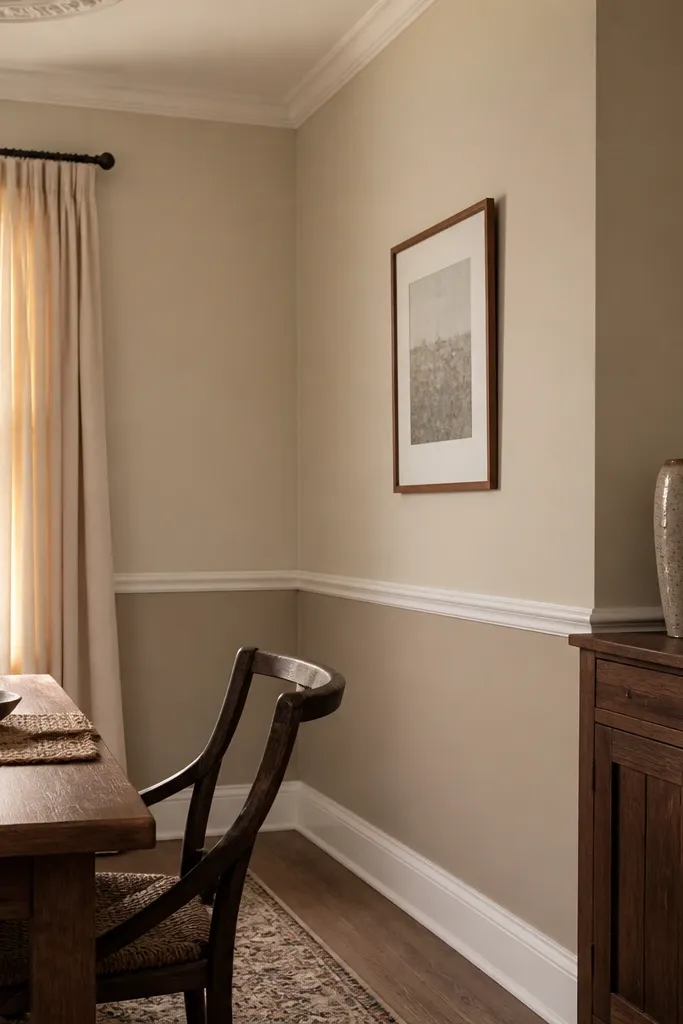
A chair rail line makes rooms feel pulled together instantly, especially in dining rooms and hallways. The moulding is simple, but the look comes from the color split and the crisp shadow line at the rail. You get a more expensive feel by painting the rail slightly brighter than the wall and using satin on the trim only. This is one of the most forgiving beginner-friendly wall moulding ideas because you can keep the design to one straight line. It also hides the problem of a wall that looks fine up top but dull below.
Start by finding the chair rail height you want. A common starting point is 36 inches from the floor to the top edge of the rail, then fine-tune to your door frames and furniture. Paint the lower and upper sections first, let them cure, then install the chair rail on the painted wall using a level and stud-finder. Caulk the top and bottom edges of the rail, fill any fastener holes, and finish with satin paint only on the moulding.
Use painter’s tape as a guide for caulking — run a thin bead and tool it with a damp finger for a tight line.
Don’t install on a wobbly reference line — measure from the same floor point every time.
3. Tall Wainscoting Panels with Vertical Dividers
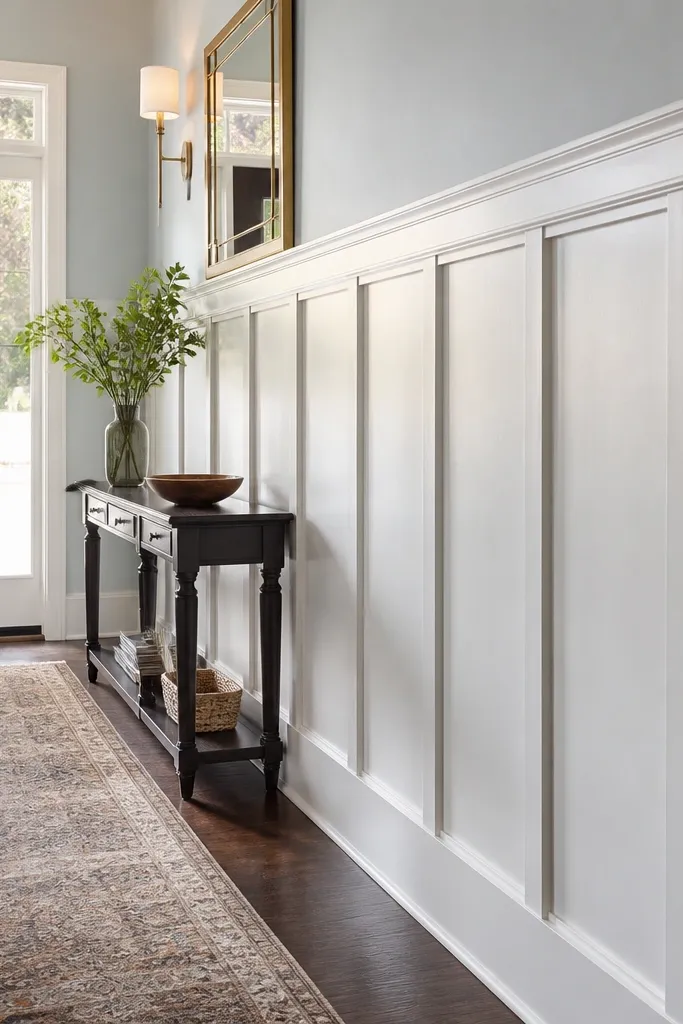
Vertical panel wainscoting adds height and structure, which is why it looks so good in narrow rooms and stair landings. The panels make the wall feel intentional, and the vertical dividers keep it from looking like a single block of trim. This works especially well in entryways where you want a strong first impression without wallpaper. Beginner-friendly wall moulding ideas here means you can build with straight runs and consistent panel widths rather than complex corners. It also gives you a practical “frame” for wall scuffs and scuffs that happen near seating or doors.
Editor's noteIf your wall isn’t perfectly straight, use thin shims behind vertical pieces before fastening so the panel faces stay flat.
Start by marking a top rail line for your wainscoting height, like 48-54 inches from the floor. Install a horizontal base rail first, then add vertical stiles at equal widths (often 18-24 inches). Add the panel rails at the top of each section to form rectangles, using caulked butt joints or mitered corners depending on your trim profile. Fill, sand, caulk, then paint everything satin for clean edges.
Skip thisDon’t set panel widths by eyeballing — measure and calculate once so every rectangle matches.
4. Shiplap-Style Modern Trim Panels (Without Lumber)
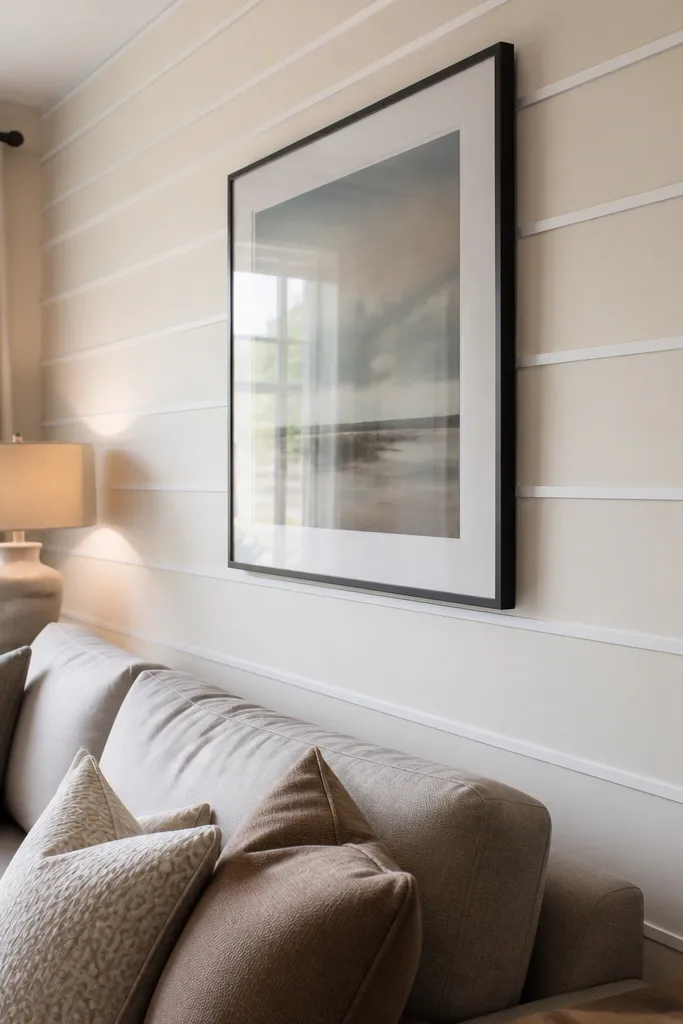
This look gives you the cozy, textured vibe of shiplap but with smoother, cleaner lines because you’re using moulding strips instead of boards. The photogenic part is the repeated shadow gaps: each strip creates a line of darkness that makes the wall look dimensional. It’s beginner-friendly wall moulding ideas because the pieces are thin and forgiving if you keep spacing consistent. It also works well in bedrooms and offices where you want texture without a heavy, rustic feel.
Editor's noteUse the same spacer thickness for every row — it’s the difference between “designed” and “messy lines.”
Start by choosing thin casing strips or flat moulding that’s about 1/2 to 3/4 inch wide. Mark a level starting line, then install the first strip, leaving a consistent gap behind it (use 1/8 inch spacers or scrap shims). Continue the row by row spacing, checking level every 3-4 strips. Caulk the edges, fill nail holes, then paint the wall and trim in one color or use a slightly brighter trim color.
Skip thisDon’t rely on a measuring tape alone — use spacers so gaps stay uniform even if the wall isn’t.
5. Two-Tier Wall Moulding with Top Crown Band
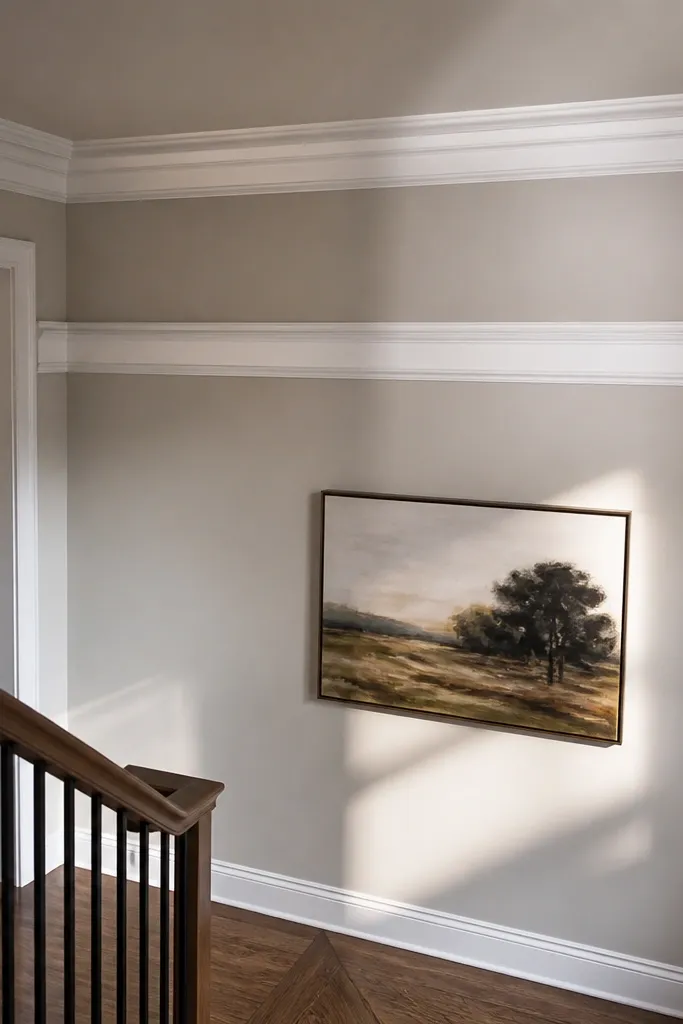
Two-tier moulding gives you that classic “room within a room” effect, and it photographs really well because the bands create layered shadows. You’ll place one moulding band near the upper third of the wall, then a second band below it. This design is beginner-friendly wall moulding ideas because it’s mostly straight lines — fewer panels, fewer corners. It also helps if you want a statement but don’t want the time cost of a full grid.
Start by measuring your wall height and picking two band heights that look balanced, like one at 54 inches and one at 30 inches from the floor to the top edge. Install the upper band first using a level, fasten into studs, then install the lower band with the same spacing from the floor references. If you want extra polish, add small corner blocks where bands meet at corners. Fill holes, caulk the edges, and paint satin for crispness.
Dry-fit the corner pieces on a scrap wall section first so you don’t discover a gap after the paint.
Don’t skip caulking the band edges — tiny gaps kill the shadow-line look.
6. Floating Shelf-Frame Wall (Moulding Only)
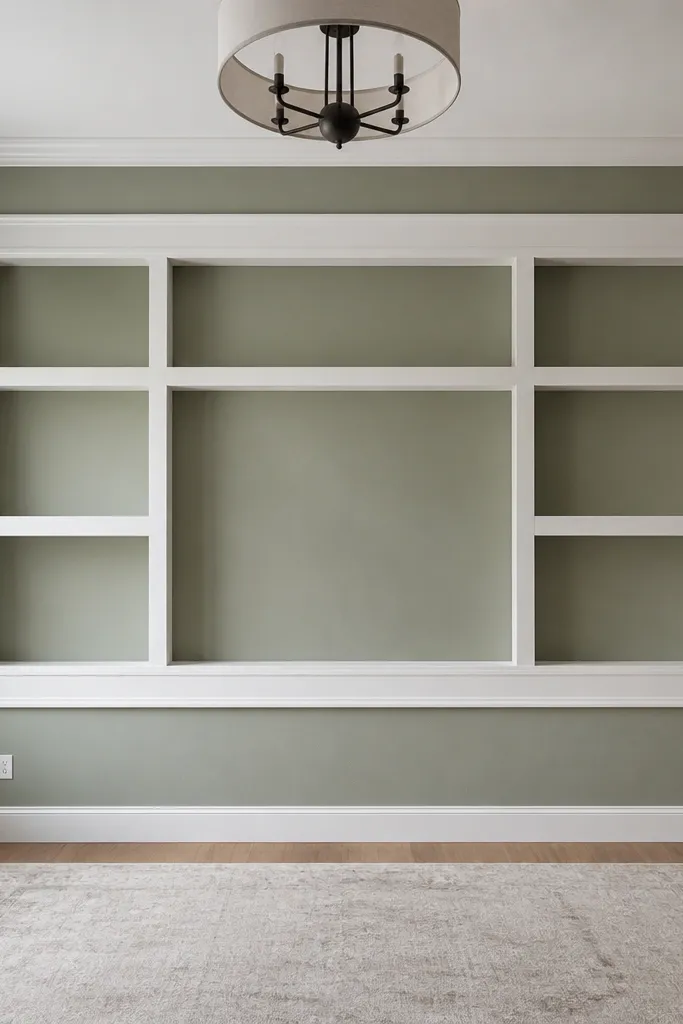
This is a clean way to create an architectural focal point without building actual shelves. You install a large rectangle frame and optionally add smaller inner rectangles, so the wall looks styled even when it’s empty. The moulding profile should have a flat face and a crisp edge so it reads clearly from across the room. Beginner-friendly wall moulding ideas here is all about planning: you’re making one big shape, not a complicated system. It’s great for living rooms and bedrooms where you want a focal wall but you don’t want to commit to built-ins.
Editor's noteUse a laser level if you have one — it makes centering and leveling frame edges dramatically easier.
Start by choosing a main frame size, like 48-60 inches wide and 36-48 inches tall, then center it over your intended furniture. Mark the perimeter lines, install the outer frame with mitered corners, and then add one inner rail if you want a more layered look. Fasten into studs, fill holes, and caulk the reveal so the inner shadow line stays even. Prime if needed, then paint the moulding satin.
Skip thisDon’t make the frame too close to the ceiling or baseboards — it looks cramped in photos.
7. Oversized Vertical Strips for a Taller Look

Wide vertical strips pull the eye up and make ceilings feel higher. This works especially well on entryway walls, stair landings, and narrow hallways where you want a clean, modern structure. The look is all about spacing and width consistency, not complicated details. Beginner-friendly wall moulding ideas because you’re using straight runs and repeating the pattern. Paint it all one color for a subtle texture, or paint the trim a shade brighter for stronger contrast.
Editor's noteCheck plumb at eye level, not just at the top — small tilts show up fast in photos.
Start by deciding the strip width, like 1-1/2 to 2 inches, and choose a spacing so you get a balanced rhythm. Mark reference points from a consistent starting edge, then install the first strip level and plumb using a stud line for fastening. Add the rest at equal spacing, using a spacer block to keep gaps consistent. Caulk edges, fill holes, sand lightly, then paint satin.
Skip thisDon’t space strips unevenly — the wall will look like it was measured in a hurry.
8. Corner Picture Frame Accent (Small but Punchy)
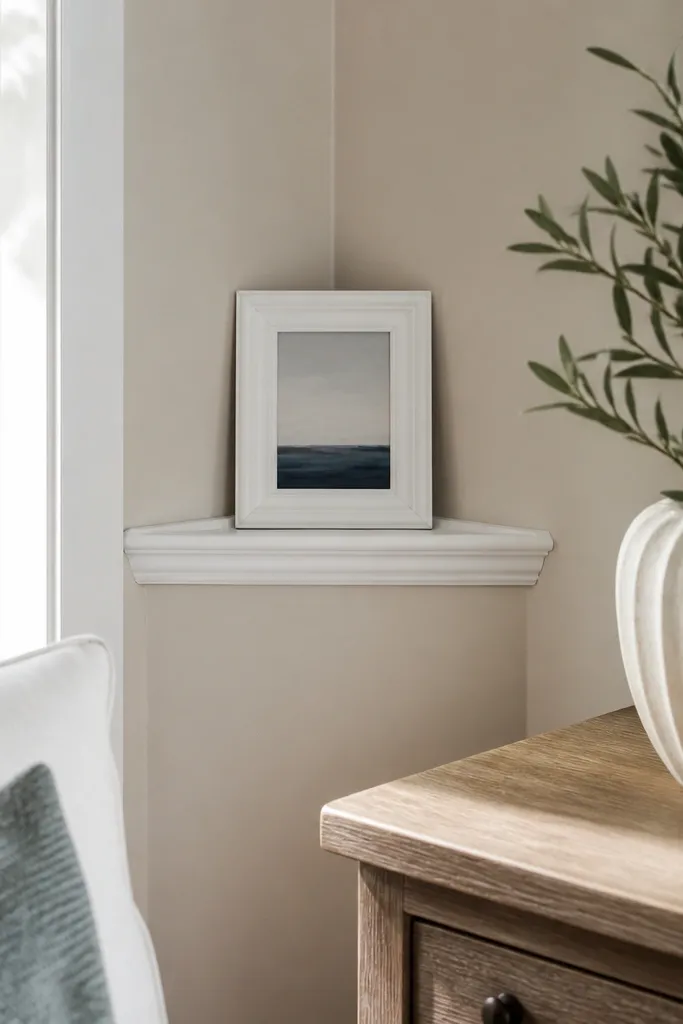
If you want beginner-friendly wall moulding ideas that don’t take over the room, do a small corner frame. It creates a “designed detail” look that feels intentional, and it makes plain corners less visually dead. Keep the frames modest — think 12-18 inches on each side — so it reads as a refined accent. This is a great option for renters too, because it’s smaller and easier to remove later if needed. The moulding profile should have a visible face so the shadow line is crisp.
Start by choosing a frame size that sits comfortably near the corner, leaving about 6 inches of breathing room from the adjacent wall edges. Mark the top and side lines, install perimeter pieces with mitered corners, and keep the inner gap consistent. Add a small inner border if you want more depth. Caulk edges, fill fastener holes, prime if necessary, then paint satin.
Use a thin foam brush to smooth caulk in corners — it helps avoid messy ridges.
Don’t place the frame too high — corner accents read best around 48-60 inches from the floor.
9. Crown Moulding-Look Band at the Ceiling Line
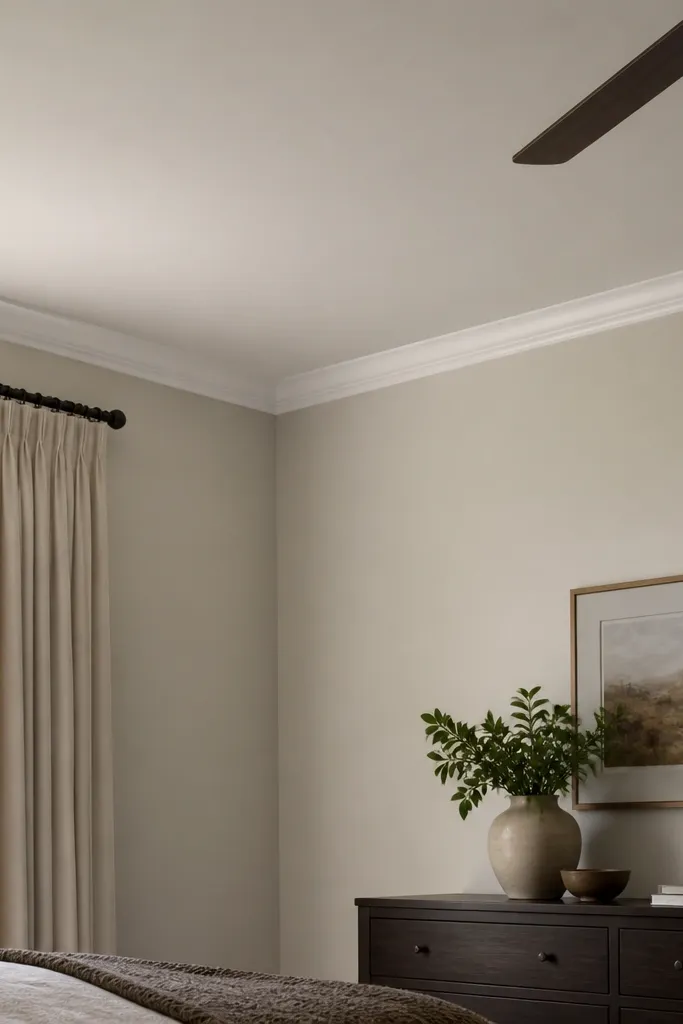
You can get a classic “crown moulding” look without wrapping the whole room. A single band at the ceiling line adds instant finish and makes the ceiling feel taller because it creates a crisp shadow. This is beginner-friendly wall moulding ideas because you’re working on a straight perimeter line and controlling one height. It’s also photogenic because the shadow line shows depth under daylight and warm lamps.
Start by choosing a simple crown profile or chair rail-style moulding with a gentle curve. Measure the room perimeter and mark your installation height, usually 3-5 inches down from the ceiling line depending on the profile. Install in sections, mitering corners, and fasten into studs where possible. Fill nail holes, caulk the top and bottom edges, then paint satin after priming.
If the ceiling is uneven, use a slightly wider caulk line — it hides small gaps while keeping the shadow line clean.
Don’t force the moulding to follow a crooked ceiling — let caulk handle micro gaps.
10. Grid Panels with Raised Center Blocks
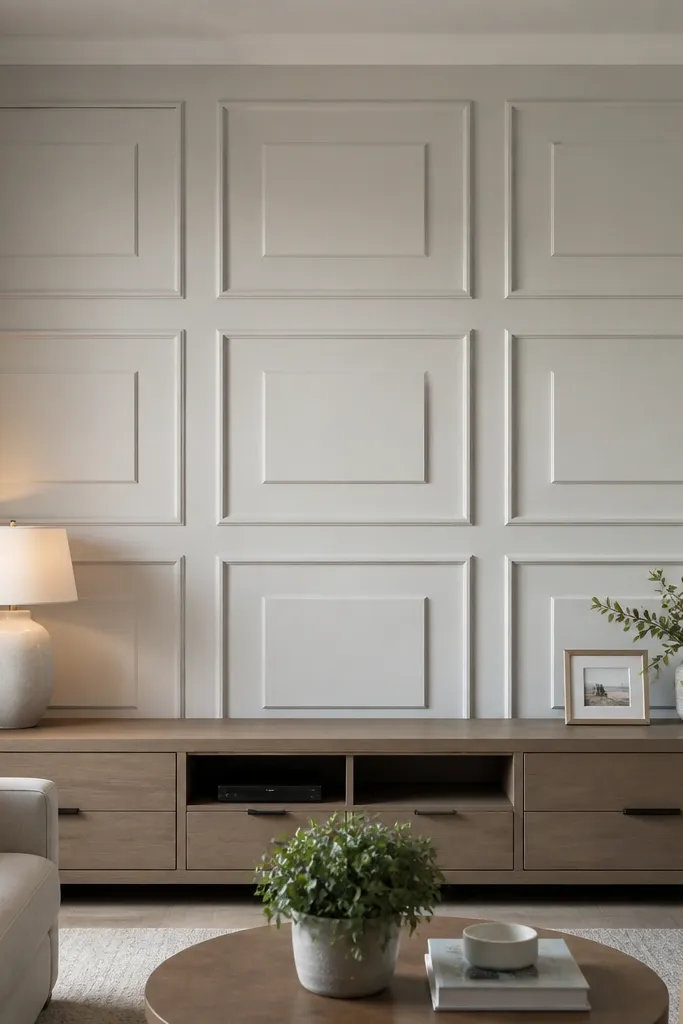
This is the “designer” version of panel moulding: the wall has a grid, and each cell gets a raised center block. The raised blocks catch light differently than the flat rails, so the wall reads dimensional even from across the room. It’s beginner-friendly wall moulding ideas if you keep the grid simple, like 3x3 or 2x4. You’ll get a high-end look that doesn’t require ornate profiles.
Start by laying out a grid using straight rails and consistent spacing, like 18 inches between vertical rails and 18-20 inches between horizontal rails. Install the outer border and the grid rails first, keeping the face flush. Then add small center blocks cut from matching moulding or trim stock, sized to leave a 1/8 inch shadow gap around each block. Caulk edges, fill holes, sand, prime, and paint satin.
Cut center blocks slightly oversize, then trim to exact fit after test fitting — it prevents gaps in the middle of each cell.
Don’t glue blocks before you confirm alignment — misaligned blocks look obvious in every cell.
11. Symmetrical Arched Frame Using Corner Blocks
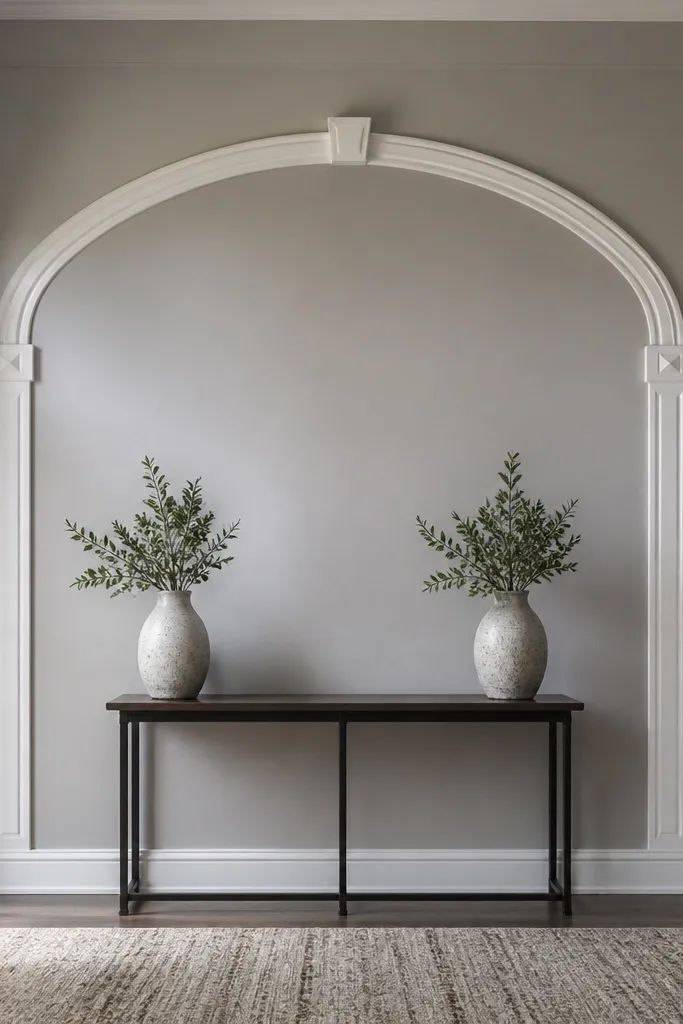
Arches make a wall feel softer and more decorative than straight rectangles, but you don’t need fancy woodworking to get the look. Use a moulding that can be cut into an arch with a template or use flexible trim for the curve. The symmetry is what makes it photogenic: center it, keep the arch height consistent, and pair it with a simple base rectangle. Beginner-friendly wall moulding ideas because the design stays controlled and repeatable.
Start by choosing a main arch width like 36-48 inches and mark the centerline of your wall. Create an arch template on cardboard, then cut the arch segments or use a flexible moulding strip along the curve. Install the outer arch first, then add a rectangular base frame beneath it. Caulk all seams, fill nail holes, and paint satin after priming for clean coverage on curved profiles.
Use painter’s tape to hold curved pieces in place while you fasten — it stops drift while the glue sets.
Don’t rush the template — a slightly off center arch reads wrong in photos immediately.
12. Modern Window-Trim Style Panels Around a Feature Area
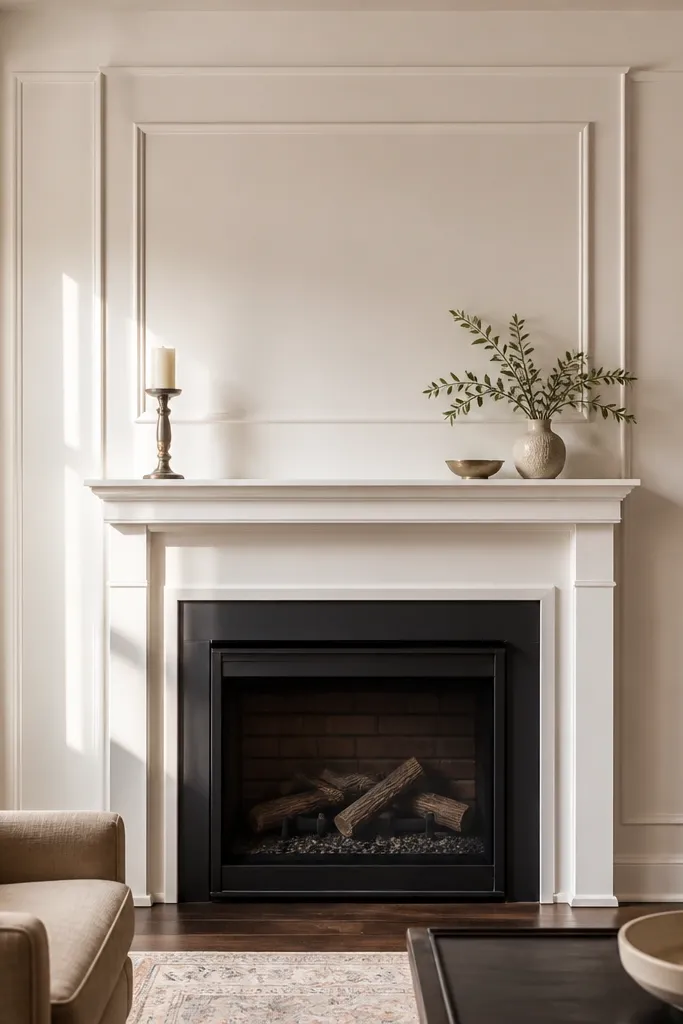
This look frames a feature area like a fireplace wall, TV niche, or empty corner where you want structure. It mimics built-in trim around windows, so the wall feels “finished” even without furniture. The moulding should be a casing-style profile with a flat face so it reads like real architectural trim. Beginner-friendly wall moulding ideas because it’s one big border that you can measure and repeat on both sides. It’s also very photogenic since the border creates a clear focal rectangle.
Editor's notePre-measure your miter angles and test on scrap to avoid tiny corner gaps that show in bright light.
Start by measuring the feature area opening and deciding your border thickness, typically leaving 2-4 inches of spacing around it. Install a top casing and two side casings first, then add a bottom casing so the frame is complete. Use mitered corners for the cleanest look, and fasten into studs behind the wall. Caulk the seams, fill holes, sand, prime if needed, and finish with satin paint.
Skip thisDon’t make the frame uneven on both sides — measure from the same edge reference every time.
13. Vertical + Horizontal Checker Panels (A Bold Accent)
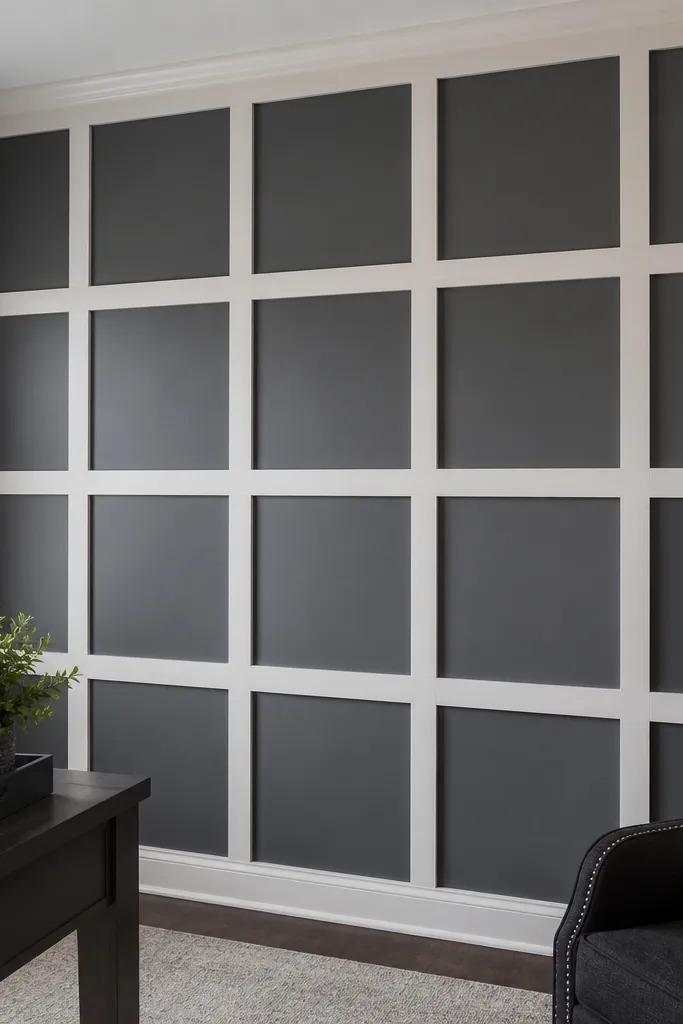
A checker-style panel wall looks bold and modern because the grid creates constant visual rhythm. It’s photogenic because every intersection makes a tiny shadow corner, so it looks detailed under lighting. This is beginner-friendly wall moulding ideas only if you keep panel sizes consistent and avoid tiny pieces that are hard to align. Use it on one accent wall, not the whole house, so it feels intentional rather than busy.
Start by choosing a simple strip width like 1/2 inch and a grid size like 12-16 inches per cell. Mark a baseline, install vertical strips first, then install horizontal strips crossing them at consistent spacing. Use a spacer block so the grid gaps match at every intersection. Caulk edges, fill holes, sand, prime, and paint satin in a single color or a slight trim-color contrast.
Work in sections and keep a running tally of your measurements so the grid doesn’t drift mid-wall.
Don’t rely on “eyeballing” intersections — use spacers and check alignment frequently.
14. L-Shaped Corner Moulding for a Clean Modern Frame
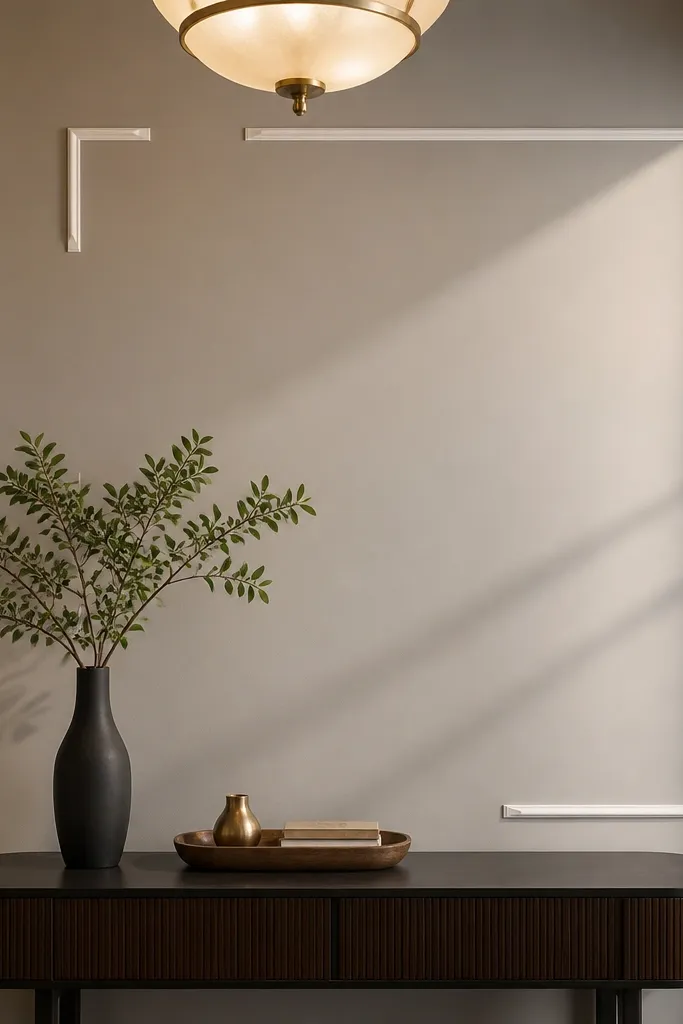
This is a minimal design that still looks intentional in photos. Instead of full rectangles, you install L-shaped corner moulding that suggests a frame without the bulk. The result is cleaner lines and fewer cuts, which makes it a strong pick for beginner-friendly wall moulding ideas. It’s especially good above a console table or behind a desk where you want structure but not heavy trim. Keep the corners crisp and the paint finish satin so the edges catch light.
Editor's noteUse a straightedge and level to set the “inside corner” height so both corners align.
Start by choosing an L-profile or using two simple flat strips cut to 45 degrees at each corner if you want mitered corners. Mark where the corner points should land and install one side strip, then the perpendicular strip. Repeat the pattern to create a rectangular impression around your chosen area, leaving the middle open. Caulk the edges, fill holes, sand lightly, and paint after priming if your wall or trim needs it.
Skip thisDon’t let the L pieces wander — the eye catches misalignment fast.
15. Raised Border with Center Flat Panel (Classic but Fresh)
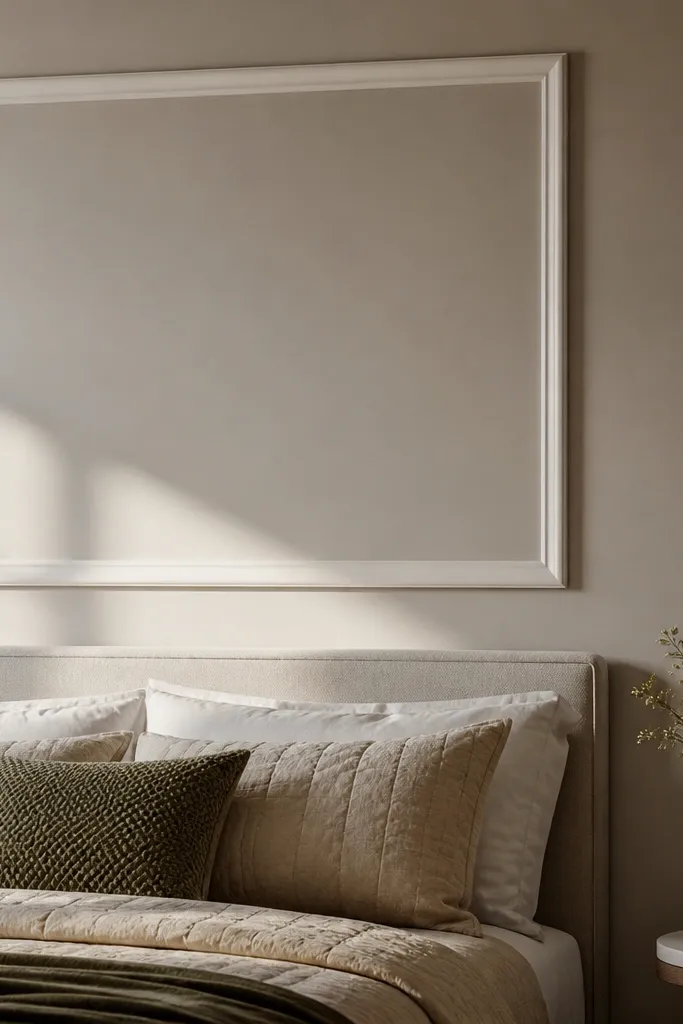
A raised border rectangle gives you the classic panel look without building a full grid. The border creates a shadow outline, while the center stays flat, which keeps the wall from feeling busy. This delivers a clean, photogenic focal point above a bed, desk, or console. Beginner-friendly wall moulding ideas because it’s mostly one rectangle layout with fewer joints. Choose a moulding profile with a defined edge so the border reads clearly.
Editor's noteIf you’re painting the border a different color than the wall, mask carefully and paint wall first, trim second.
Start by marking a rectangle size like 48 inches wide by 30-36 inches tall, centered where you want the focal point. Install the border pieces first — top, sides, then bottom — using mitered corners for crispness. Leave the center area untouched so you don’t create extra seams. Caulk along the border edges, fill nail holes, prime, then paint satin for a smooth, durable finish.
Skip thisDon’t use a super-thin profile if you want strong shadow lines in daylight — choose a moulding with a visible face.
16. Checkerboard Half-Wall with Chair Rail Base
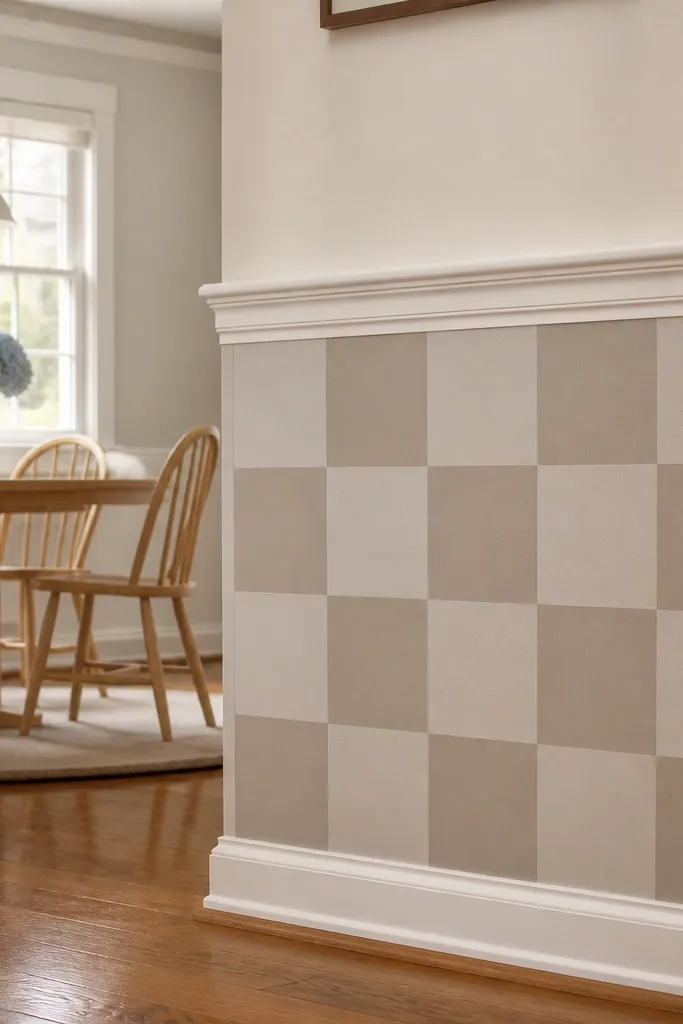
This design mixes the clean structure of a chair rail with a playful checker pattern below. The top rail keeps the look grounded, and the pattern below adds visual energy without covering the whole room. It’s beginner-friendly wall moulding ideas because you’re working in a smaller area and you can control spacing better. It’s especially photogenic in dining rooms, kids' rooms, and entry nooks where you want character. Use a two-color paint scheme to make the checker pop on camera.
Start by installing a chair rail at your chosen height, like 36 inches to the top of the rail. Decide the checker cell size below it, like 10-12 inches per cell, then mark a grid on the wall. Install horizontal strips first across the lower section, then vertical strips to create each cell. Caulk all seams, fill holes, and paint the trim satin after the caulk fully cures.
Paint the checker cells after the trim is installed so you can cut clean edges around moulding faces.
Don’t start painting before caulk cures — soft caulk smears and ruins crisp lines.
17. Diagonal Panel Accent Using Slim Trim Strips
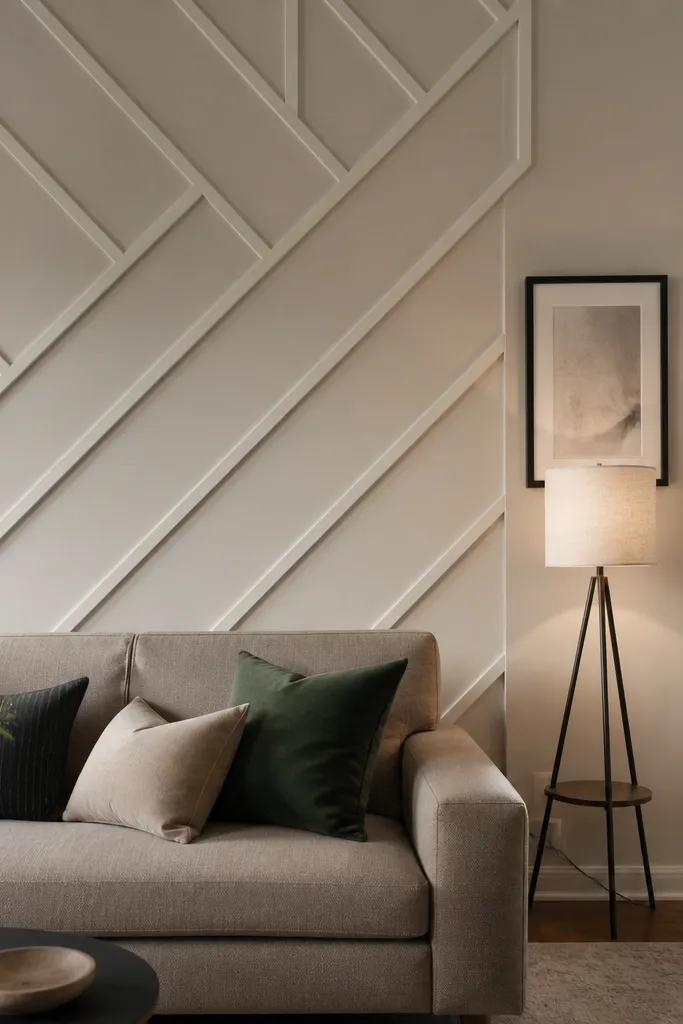
Diagonal trim makes even a plain wall look like a design feature because it breaks the horizontal/vertical monotony. Slim strips keep it modern and light, and the angled shadow lines look great under side lighting. Beginner-friendly wall moulding ideas because the pattern is still made from straight cuts and a repeatable diagonal layout. Use this on one wall where you want a statement but not a full ceiling-to-floor grid.
Start by picking a diagonal grid size, like 24-30 inch diamond shapes, and mark your centerline. Install diagonal strips by measuring and cutting consistent angles, then add a border frame around the pattern so it looks intentional. Use spacers to keep the gaps between strips even. Caulk seams, fill nail holes, prime, and paint satin so the diagonals read clean.
Mark cut lines on the back of the trim pieces with a square so your angles stay consistent across dozens of cuts.
Don’t let diagonals cross without a border — the pattern looks unfinished at the edges.
18. Slim Picture Rail + Small Frames for Art Layout
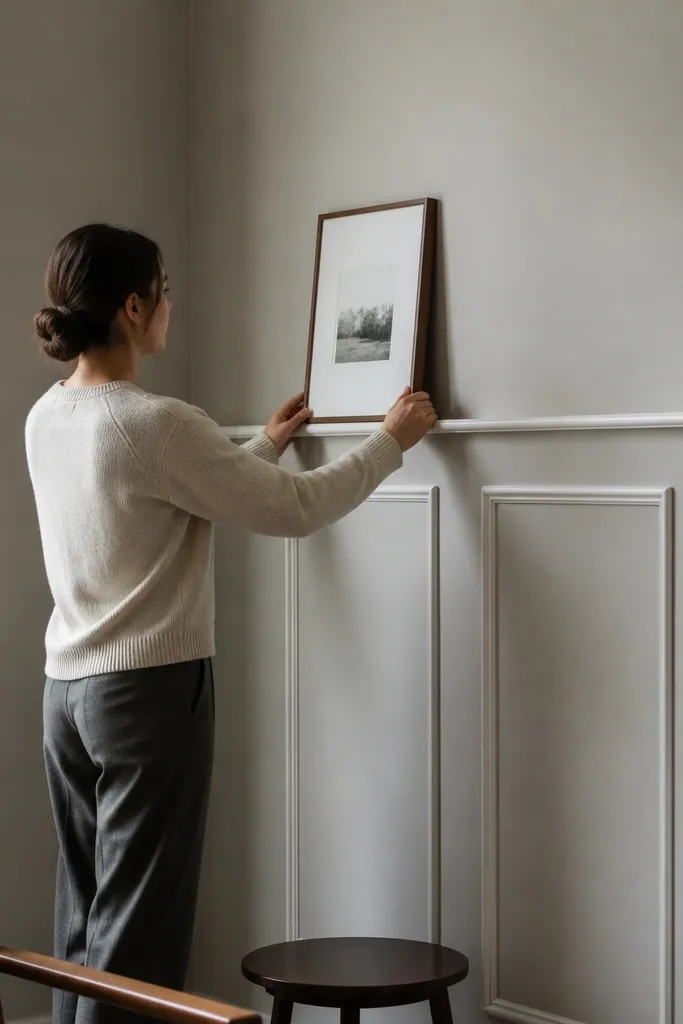
A slim picture rail creates a polished, classic line and gives you a place for art ledges or hanging systems. Add small moulding frames below to keep the wall decorative even when art is minimal. This is beginner-friendly wall moulding ideas because the picture rail is one straight measurement and the frames are small and easy to repeat. The look is photogenic because it creates layered horizontal structure and makes wall art placements feel curated. It’s a smart choice for hallways where you want order.
Editor's noteUse a scrap spacer to keep frame gaps identical — it makes the whole wall look professionally measured.
Start by installing a slim horizontal picture-rail-style moulding at a height that matches your art eye level, often around 60-66 inches to the top edge. Then add small rectangular frames beneath it, like 12x16 inch frames, keeping equal spacing. Fasten the frames into studs or use anchors where studs are missing. Caulk edges, fill holes, sand, prime, and paint satin for a smooth finish.
Skip thisDon’t mount frames without checking stud locations — patching later is messy and slows you down.
19. Floating Panel Columns for a Modern Entryway
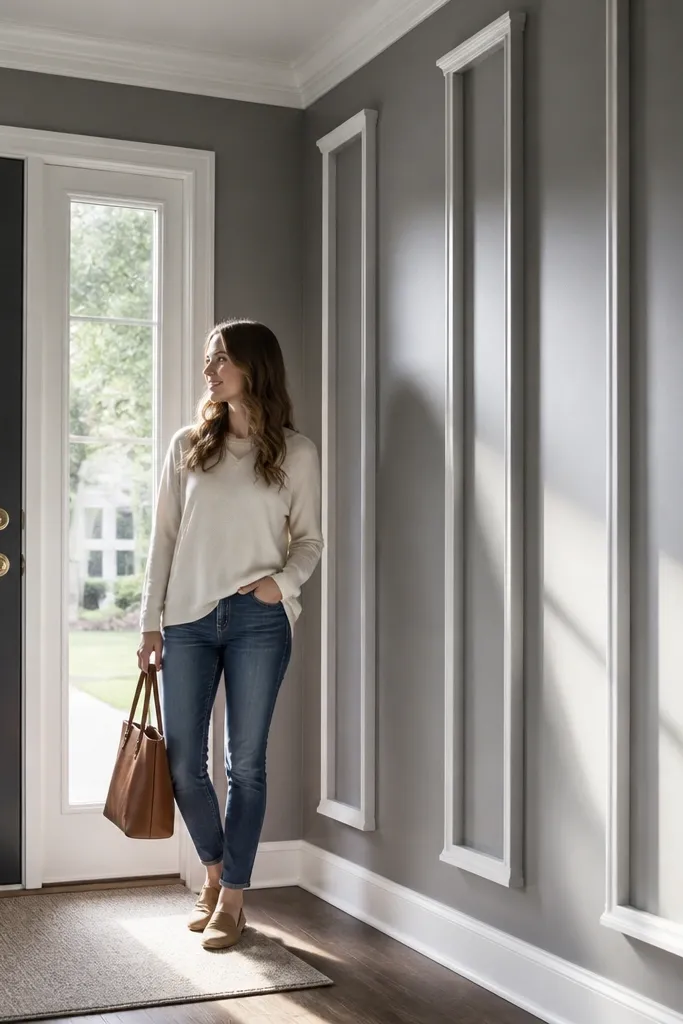
Floating columns look high-end because they create a clear vertical rhythm and a shadow gap that reads like built-in millwork. You build them with two vertical rails and a few horizontal caps, leaving the center open or filled with a flat panel area. This is beginner-friendly wall moulding ideas because each “column” is basically a rectangle stack. It’s ideal for entryways and sides of fireplaces where you want symmetry. The photo appeal comes from the vertical shadows and the clean negative space.
Editor's noteUse a consistent gap spacer and don’t adjust mid-run — floating columns look wrong when one side is tighter.
Start by measuring your wall and deciding the column width, like 12-18 inches each, with 4-6 inches of spacing between columns if you’re doing two. Install the outer vertical pieces first, then add horizontal caps at the top and middle to create the stacked shape. If you want the floating look, keep a consistent gap at the edges by using spacers during installation and caulking after alignment. Fill holes, caulk, sand, prime, and paint satin.
Skip thisDon’t skip leveling the top caps — one crooked cap ruins the “built-in” feel.
20. Wide Border Panels with Thin Inner Trim Line
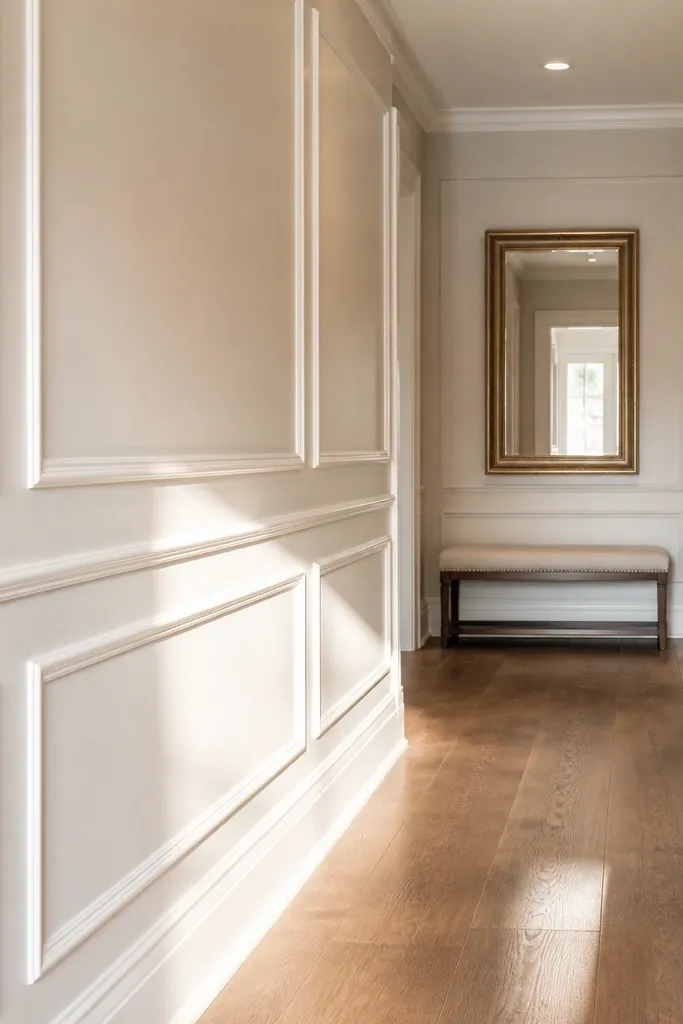
This gives you depth without a complex build: a wide outer border plus a thin inner trim line creates two shadow layers. It looks expensive because the wall has a clear frame and a second highlight line that catches light. Beginner-friendly wall moulding ideas because you’re mostly cutting straight lengths and keeping one rectangle centered. It works great behind a sofa or in bedrooms where you want a calm, structured focal wall. Paint the outer and inner lines in the same color for subtle texture, or use a slight contrast for extra definition.
Editor's noteMeasure inner line position using two reference points on each side so it stays symmetrical.
Start by marking your main rectangle size, like 52 inches wide by 34-40 inches tall. Install the wide outer border pieces first with mitered corners, then add the thin inner line using smaller moulding stock set back by about 1-2 inches. Keep the inner line perfectly parallel to the outer border by measuring from the outer edge at multiple points. Caulk both border layers, fill holes, prime, then paint satin after caulk cures.
Skip thisDon’t eyeball the inner line distance — even a 1/4 inch mismatch is obvious in photos.
21. Ceiling-to-Wall Vertical Frame Panels (Full Height Look)
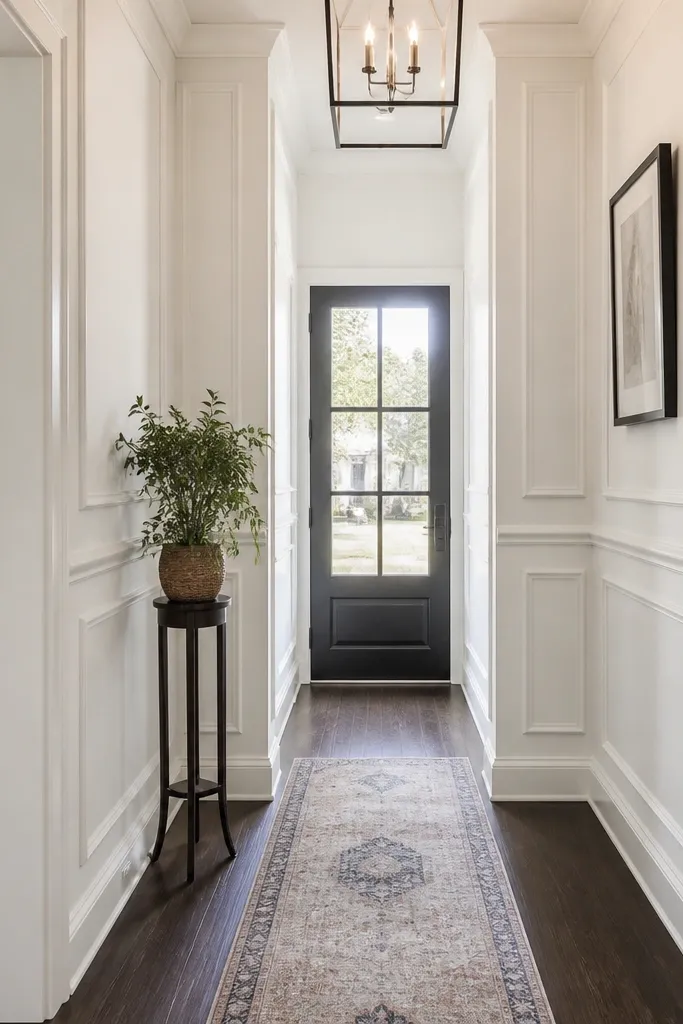
Full-height frame panels make a wall look like it has real architectural bays. It’s dramatic, but it still reads beginner-friendly if you keep the grid simple, like two vertical bays and one middle horizontal rail. The photogenic part is the continuous lines from ceiling to base — they make the room feel taller and more structured. Great for living rooms and dining rooms where you want a statement without wallpaper. Use a consistent moulding profile and paint it satin for clean edge definition.
Start by deciding the number of bays, like 2 or 3 vertical sections, based on your wall width. Mark a level horizontal line at mid-height, then install the horizontal rail across the wall. Install vertical stiles from that rail to the ceiling and from the rail to the baseboard, using spacers to keep reveals consistent. Finish with caulk along every edge, fill holes, sand, prime, and paint satin in one or two coordinated colors.
If your ceiling isn’t level, use a wider caulk bead at the top edge so the frame reads straight from normal viewing height.
Don’t do tiny bays — narrow frames exaggerate any wall waviness.
22. Modern Half-Panel with Raised Top and Flat Bottom
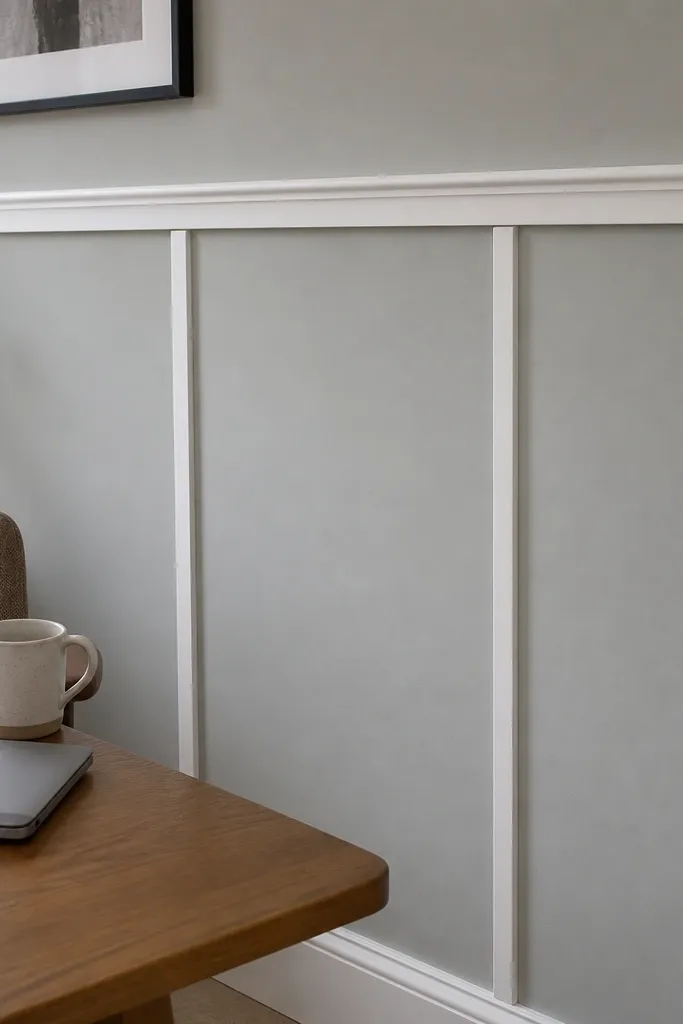
This is a clean, modern alternative to full wainscoting. You install a raised top border and a few vertical dividers, while leaving the bottom area flat. The look is more airy than a full grid, and it photographs well because it has strong line contrast without visual clutter. Beginner-friendly wall moulding ideas because the build is smaller and the lines are easy to measure. Ideal for staircases, hallways, and small dining spaces where you want structure but don’t want heavy trim coverage.
Editor's noteUse painter’s tape to mask the wall edge under the raised border so your caulk line stays crisp.
Start by marking the height of the raised border, like 42 inches from the floor to the top edge. Install a horizontal top rail first, then add vertical dividers spaced evenly under it, like every 18-24 inches. Keep the dividers straight and fasten into studs. Caulk all edges, fill nail holes, sand, prime, then paint satin on the moulding.
Skip thisDon’t add too many dividers — more pieces makes alignment harder and the wall looks busy.
23. Moulding Riser Panels for Under-Stair Bump-Outs
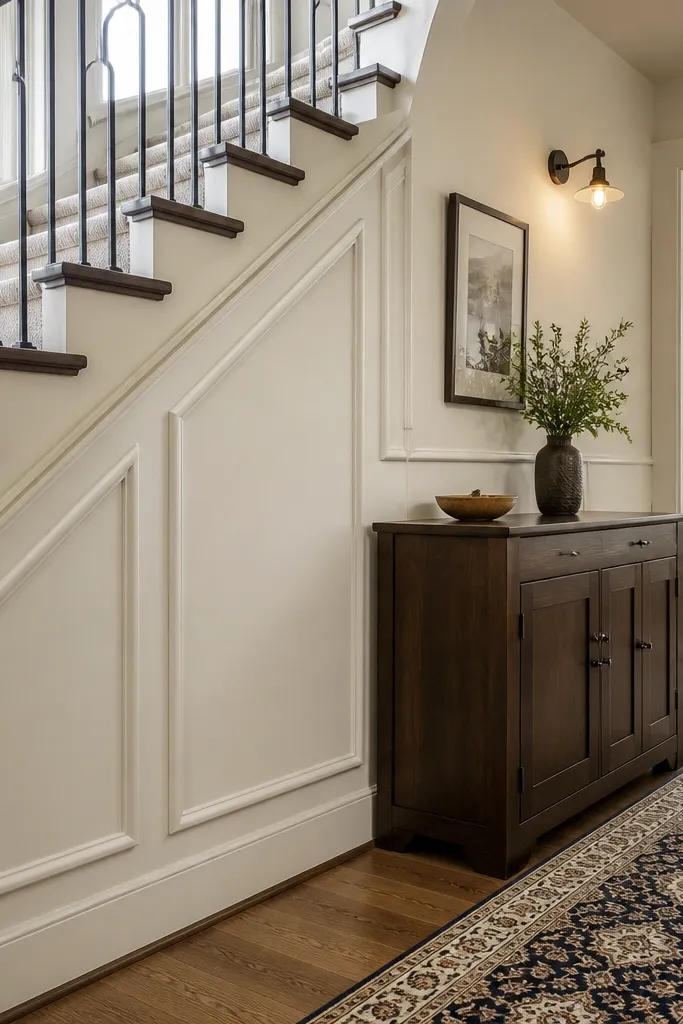
Under-stair walls are awkward because they’re small, angled, and full of odd surfaces. Moulding panels fix that by creating clean rectangles that visually “square up” the space. This is beginner-friendly wall moulding ideas because the panels can be scaled down and built as separate flat sections that you fit to the space. It’s photogenic because the pattern makes the corner look designed, not leftover. Use this in under-stair storage, small home offices, and laundry alcoves.
Start by taking measurements in three places because under-stair walls rarely stay square. Build a few repeat-sized rectangles, like 10-14 inches wide and 12-18 inches tall, and dry-fit them before installing. Fasten moulding into studs or use anchors where needed, then caulk edges and seams. Fill holes, sand, prime, and paint satin for a clean finish that holds up to daily contact.
Pre-cut extra short pieces so you can adjust one panel without redoing the whole layout.
Don’t force panels to fit without checking wall angles — trim should follow the wall, not the other way around.
24. French-Style Scrollwork Frame Wall with Flat Center Panels
This look gives you the ornate feel of French trim without doing real cabinetry work. The trick is using simple, flat center panels so the wall reads clean from across the room, while the scroll corners and flourishes add the drama up close. It looks stunning in dining rooms, entryways, and hallways because the frames catch light and break up big blank wall surfaces. You get a high-end, gallery-wall vibe that still photographs well because the relief creates shadow lines. Beginner-friendly is real here because you’re building with straight runs of casing and adding pre-made corner scroll pieces instead of hand-carving anything.
1) Mark a grid on the wall using painter’s tape: choose panel widths of 18-24 in and keep the vertical seams aligned. Use 1/4 in MDF or primed finger-jointed trim for the flat center panels, and cut a matching inner opening so the panel sits flush inside the frame. 2) Build the outer frame with 1x2 casing strips (or 3/4 in x 1-1/2 in trim boards), mitering corners at 45 degrees for crisp lines. Add pre-made scroll corner blocks (or cut scroll corner pieces from MDF) at each frame corner, then glue and nail them into place with 23-gauge brads. 3) Fill nail holes with spackle, sand smooth, and prime everything with bonding primer before paint. Use a satin or semi-gloss on the trim and a flat or matte on the wall for strong contrast.
Dry-fit every miter before adhesive — a 1/16 in gap shows badly once paint dries. Prime MDF edges twice so they don’t drink paint and look darker in photos.
Skip painting the trim before the spackle fully cures; soft filler marks show as dull patches under raking light.
25. Modern Floating Shadow-Box Rows with Recessed Panels
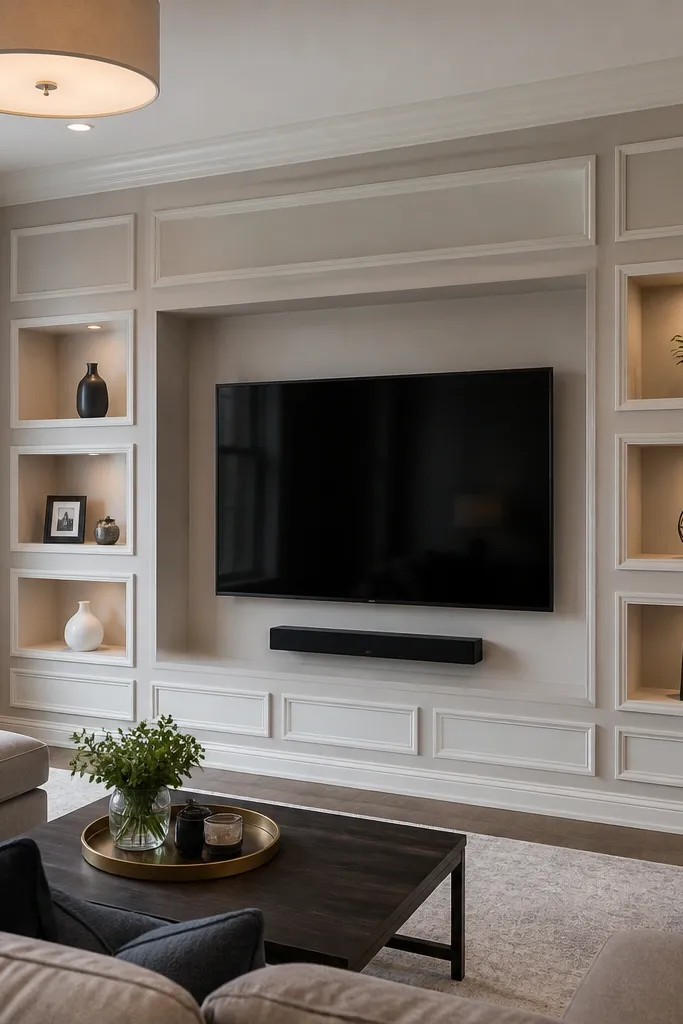
This is the cleanest way to get a “custom built-in” look without building cabinets. You create recessed rectangles that sit back from the wall, so the shadows do the heavy lifting and the wall looks dimensional even with minimal decor. It’s perfect for living rooms and offices where you want structure behind a TV, desk, or sofa without heavy ornament. The finish reads modern because the trim lines are thin and consistent, and the recessed centers keep the design from looking busy. Skill level is beginner-friendly because the build is straight cuts and repeatable spacing — no complex profiles required.
Editor's noteUse a laser level or a long spirit level and stop every row for a quick check — floating shadow-box walls punish off-level lines more than flat trim does.
1) Decide your repeat unit: use 24 in wide by 18 in tall recessed panels, stacked in three rows, with 3/4 in spacing between them. Cut 1/2 in MDF rectangles for the recessed centers and 1x2 trim strips for the outer outlines; you’ll also need 1/4 in spacer shims or thin strips to hold depth. 2) Install a level ledger strip across the wall at the bottom of the first row, then glue and screw a perimeter frame for each panel using the 1x2 trim. Set the recessed MDF centers back using shims so you get a 1/4-3/8 in shadow gap around each opening, then fasten the centers with construction adhesive and a few brads. 3) Fill nail holes, sand, and prime with bonding primer; caulk the trim-to-wall seam with paintable acrylic caulk. Paint the recessed centers the wall color and the trim in a crisp finish color so the shadow lines stay visible.
Skip thisAvoid setting the recessed centers flush to the wall; you lose the shadow effect that makes this look “stuck-on built-in” instead of flat.



