
1. Classic chair-rail wainscoting with simple rectangles
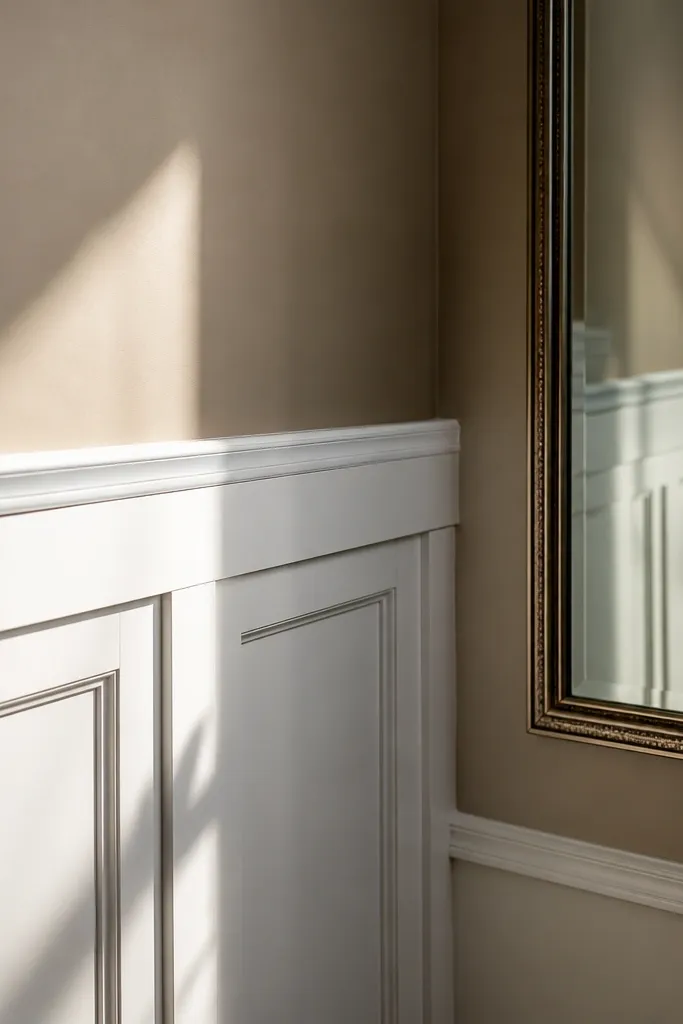
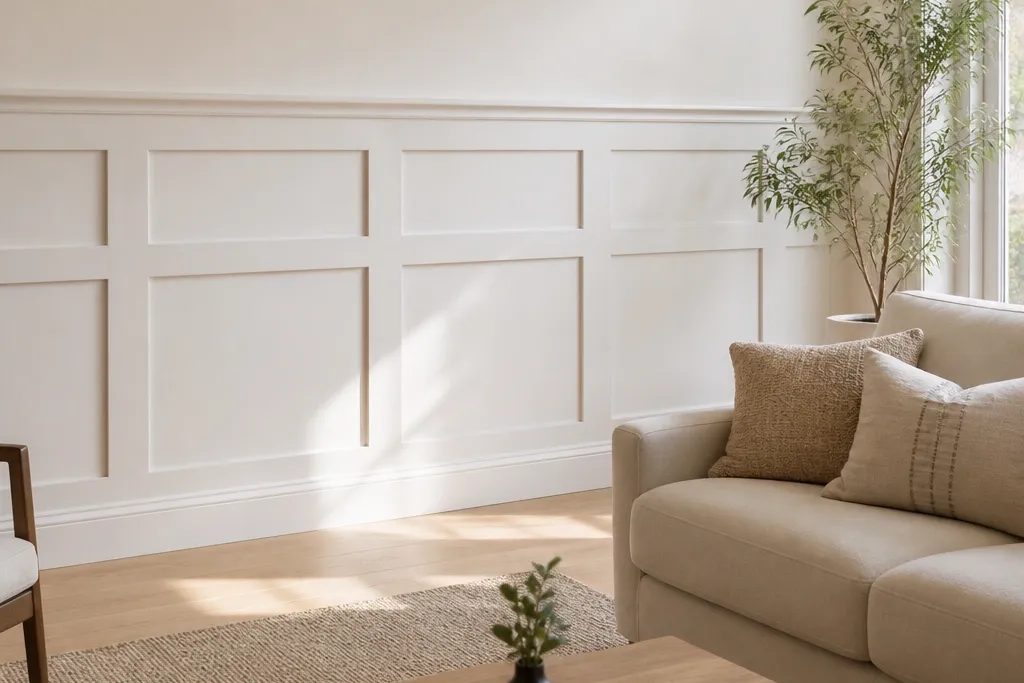
Start by marking your top rail height at 36 inches from the floor, then draw a level line around the room. Install a bottom rail at about 10-12 inches below the top rail, then add vertical stiles to create equal-width panel frames. Use MDF strips ripped to consistent widths, miter the corners cleanly, and nail through the backer with 18-gauge brads. Finally, add the inner panel frames and caulk the seams; prime and paint in satin trim paint.
This is the safest beginner-friendly wainscoting idea because it creates a strong horizontal anchor and gives you a repeatable grid. The visual payoff comes from shadow gaps between the rails and the panel frames. Keep the rectangles proportional — small panels look busy, while large ones look too bare. Use this look in living rooms and dining rooms when you want the wall to look finished without turning the space into a full-on built-in.
Skip thisDon’t skip checking level twice — wavy rails ruin the whole “straight and expensive” look.
Editor's notePre-measure one panel bay and build the rest from that exact width so the pattern stays even around corners.
2. Two-tone wainscoting with a crisp picture-frame top
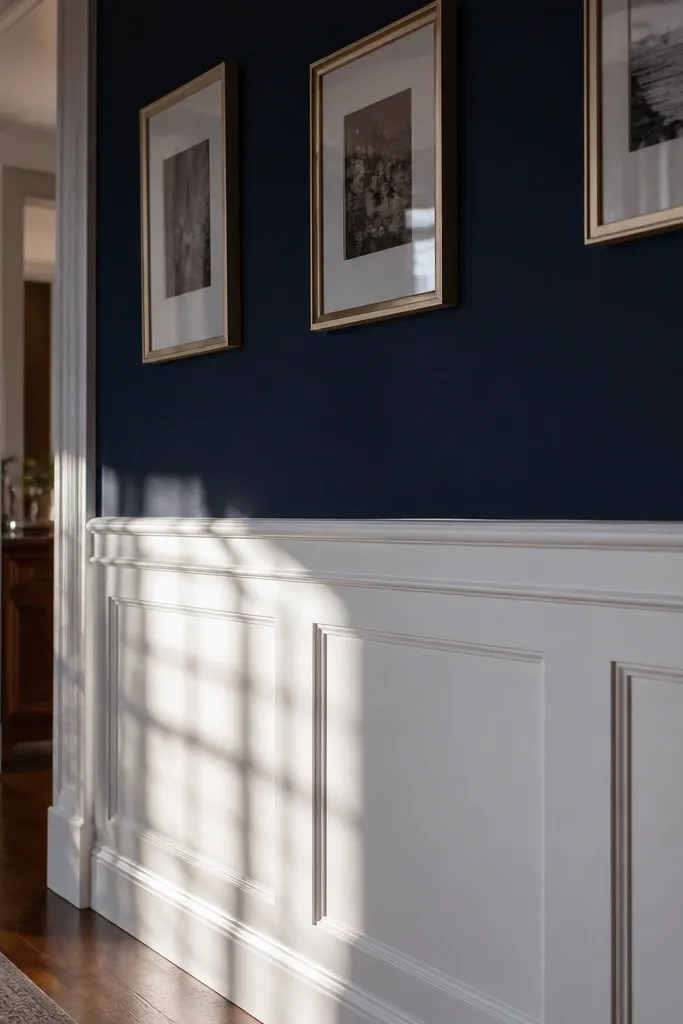
Two-tone wainscoting makes the panels read instantly, even from across the room. The top picture-frame rail adds structure and makes the wall feel custom, without complex molding profiles. Choose a deeper color for the upper wall and keep the wainscoting itself bright and clean so the trim casts visible shadows. This is a strong pick for hallways and entryways where you want a “wow” moment but you still want a simple build.
Paint the upper wall color first and mask a clean line where the wainscoting top rail will sit. Install the wainscoting frame using 1x2 or 1x3 MDF rails with a slightly larger cap on top for a picture-frame look. Build the panel rectangles inside the frame with identical stiles and rails, keeping your grid centered on the longest wall section. Caulk edges, prime the MDF, then paint the trim color (white or off-white) in satin for that crisp contrast.
Use painter’s tape as a temporary layout guide — press it down hard along your panel lines before you cut anything.
Don’t paint the trim color first and then try to mask — MDF edges lift tape and leave messy borders.
3. Horizontal slat wainscoting with a modern finish
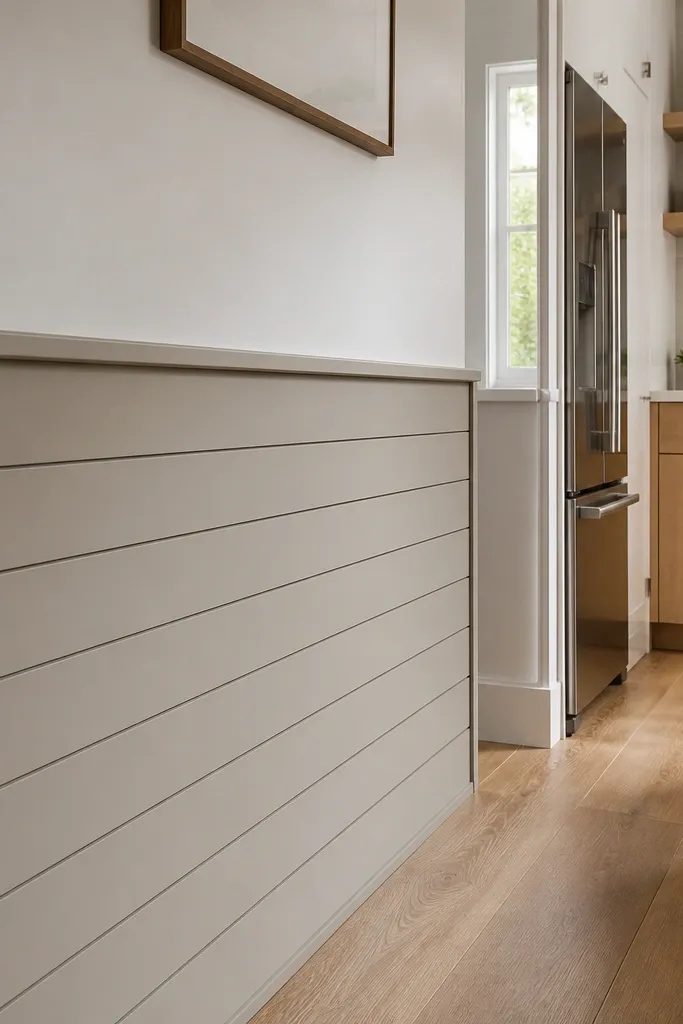
If you want beginner-friendly wainscoting ideas that look modern and not fussy, go with horizontal slats. The beauty is in the rhythm: tight, even spacing creates a clean pattern that looks intentional even with minimal panel shapes. This style works especially well in offices, mudrooms, and kitchens where you want durability and a more casual feel. Use a consistent slat width so the wall looks like it came from a showroom.
Start by installing a top and bottom border rail, then mark your slat grid between them using a spacing jig (like a scrap with the exact gap you want). Cut slats from 1x3 or 1x2 boards and keep all lengths consistent so the lines align. Nail each slat into the wall with brads, then fill tiny nail holes with wood filler if you’re staining or a spackle if you’re painting. Finish with either a clear matte sealer for wood warmth or a satin paint that matches the rails.
Make a spacer strip out of a scrap and tape it to a pencil so every gap stays identical as you work down the wall.
Don’t vary the slat spacing near corners — trim the last slat to fit instead of squeezing the gaps.
4. Beaded frame wainscoting for a cottage-clean look
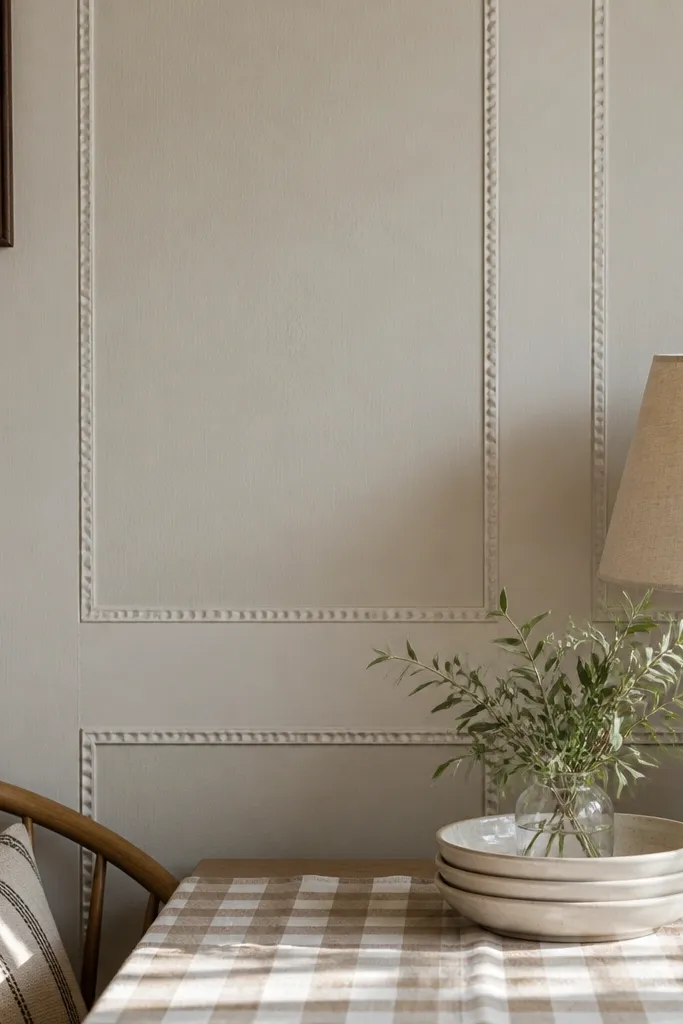
Beaded trim instantly adds texture, so the wall looks layered without heavy molding. The bead line catches light and makes each panel feel finished in photos. This is a great option for beginners because you can buy pre-beaded boards and build a simple rectangle grid around them. It suits bedrooms, breakfast nooks, and bathrooms when you want something classic but not overly ornate.
Use pre-beaded trim strips as your panel frames and border rails, keeping the design as a grid of rectangles. Mark the top rail height at 34-38 inches, then install the outer frame first so everything references a straight line. Cut vertical stiles and horizontal rails to fit the panel bays, mitering corners for a clean look. Nail down the beaded trim carefully, then caulk the edges lightly and paint the entire system in semi-gloss for crisp bead definition.
Use a small foam roller for paint — it pushes paint into the bead grooves without leaving streaks.
Don’t use a flat wall paint on the trim; it dulls the bead shadows and makes it look unfinished.
5. Raised panel inserts with flat rails
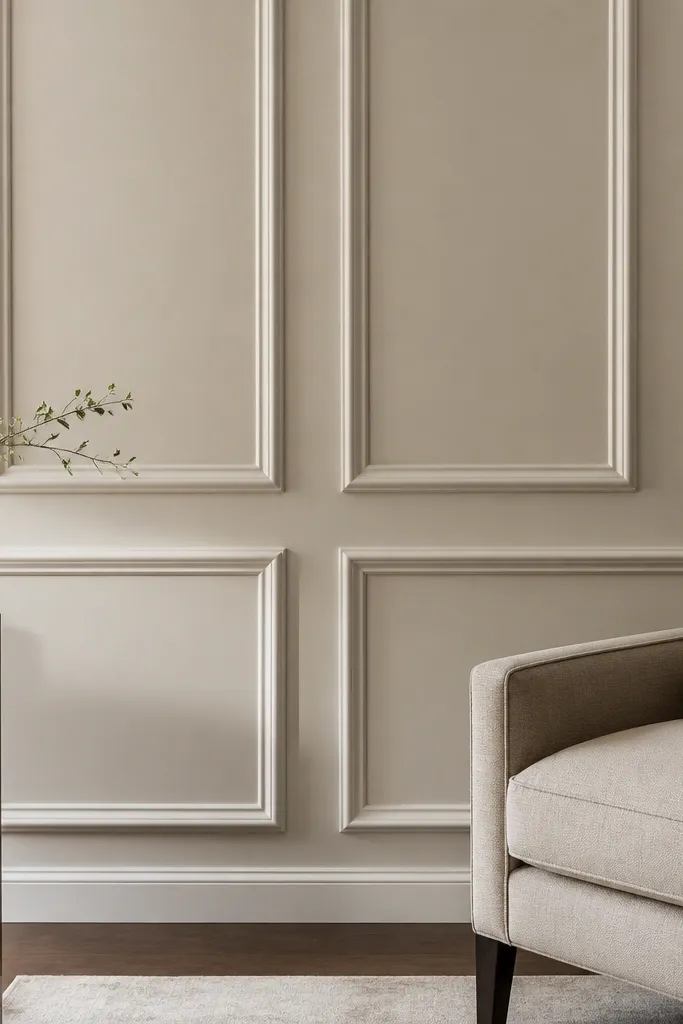
Raised panel inserts add depth without requiring you to route complex shapes yourself. The look is more dimensional than simple frames, and it reads “custom” even when your wall is plain. For beginner-friendly wainscoting ideas, this works because the panel inserts come pre-sized or can be cut to consistent dimensions. Use this in living rooms and dining rooms where you want the wall to feel richly finished but still buildable.
Build a simple rectangular frame using MDF rails and stiles, then leave an opening sized to accept your raised panel insert. Dry-fit one panel to confirm clearance, then nail the frame pieces to the wall with shims where needed. Insert the raised panels and secure them with small brads through the backer or frame lip. Fill nail holes and seams, then prime and paint; satin finish makes the raised edges pop.
Keep panel openings uniform by measuring from the inside edge of the frame, not from the outside face.
Don’t rush the dry fit — raised inserts need consistent gaps or the panels will look crooked.
6. Crown-molding top rail with classic wainscoting
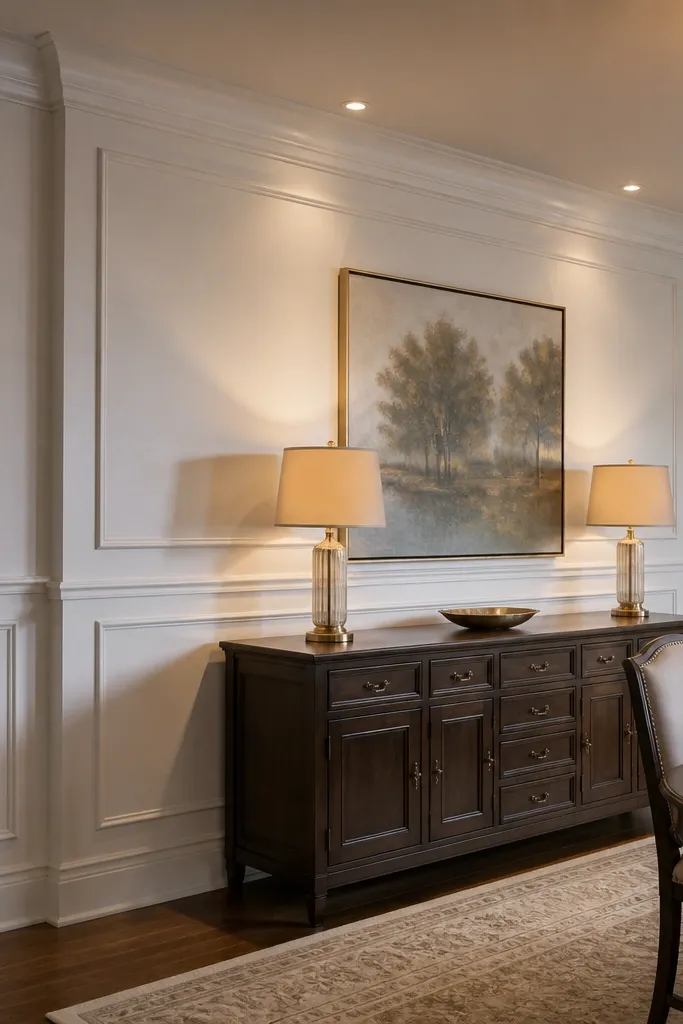
A crown-molding top rail makes the whole wall look built-in. It adds a premium silhouette without changing the panel grid, so it’s still beginner-friendly. The crown profile creates a stronger shadow line and makes the wainscoting read as a single architectural feature. Use this in formal dining rooms, entry foyers, and stair landings where the top edge is visible and worth the extra trim detail.
Install your main chair rail height first, then add the crown-like profile along the top using pre-mitered or carefully cut miters. Build the panel frames below using the same rail widths so everything aligns visually. Nail the crown trim into the wall studs or wall backing; if you’re only nailing drywall, use construction adhesive plus brads. Caulk the top seams, prime, and paint the entire system in satin for a crisp, photo-ready sheen.
Dry-fit the crown pieces on the floor and label each corner — crown miters are easy to mix up mid-install.
Don’t place the crown too high — if it clashes with door trim, you lose the clean wainscoting proportions.
7. Board-and-batten wainscoting with a chair rail base

Start by installing a bottom rail and a top rail to define the wainscoting band. Fill the band with wide boards spaced evenly, then cover the seams with narrower battens. Nail the boards into studs where possible; for drywall-only sections, use adhesive plus brads to prevent lifting. Sand, fill holes, prime, and paint the boards and battens; satin on the trim makes the lines crisp.
Board-and-batten looks bold and intentional, and it hides minor wall imperfections better than tight panel grids. The vertical battens create height and make the wall look taller in photos. Pair it with a chair rail base so it still reads like wainscoting, not just a feature wall. This is great for farmhouse-leaning rooms, mudrooms, and basements that need structure.
Skip thisDon’t make the battens random widths — consistent batten width is what makes it look designed.
Editor's noteSet your batten spacing using a scrap spacer and mark every stud line so you’re not measuring from scratch each time.
8. Herringbone panel wainscoting band
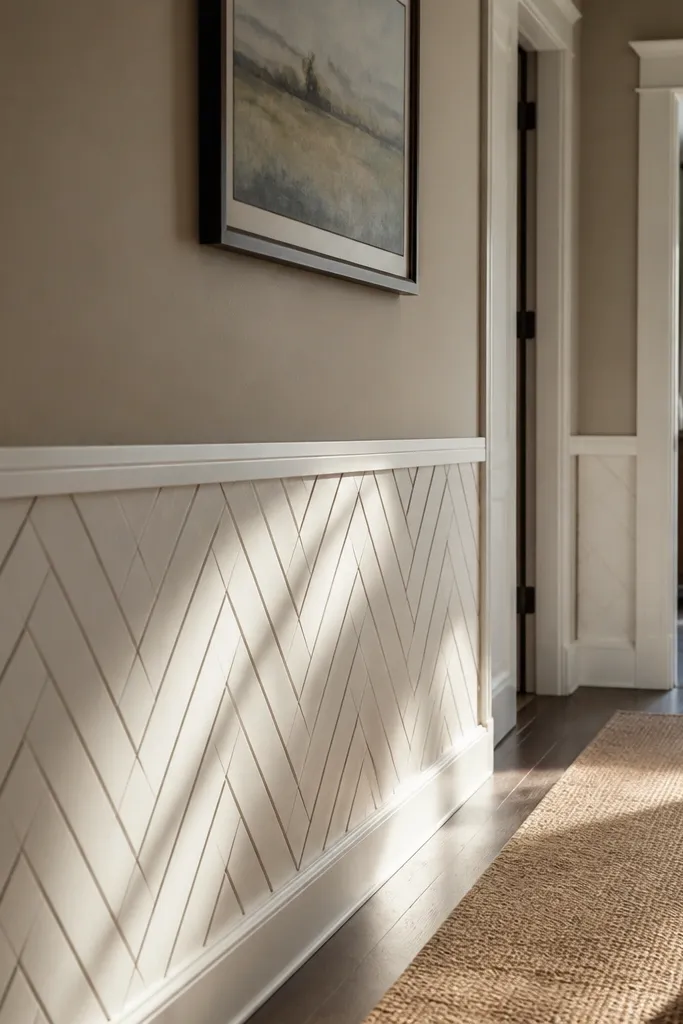
Herringbone turns wainscoting into a statement without covering the entire room. The pattern reads as “premium” because you get diagonal movement, not just rectangles. For beginners, keep it to a single band width so your measurements stay manageable. This looks best in entryways and hallways where the wall is seen straight-on, and it photographs well because the pattern catches light.
Build a simple rectangular outer frame with rails at your chosen height and width. Inside, create a small herringbone grid using narrow strips cut to a consistent width and angle (typically 45 degrees). Dry-fit a few rows on the floor to lock in the spacing, then transfer the layout to the wall using chalk lines. Nail each strip into place, fill seams, and paint the entire panel area; satin paint makes the diagonals stand out.
Start with the center row first — aligning from the middle keeps the pattern symmetric on both sides.
Don’t try to run herringbone over uneven corner walls without shimming — the angles will drift.
9. Vertical beadboard wainscoting with a clean top rail

Install a bottom and top rail first, then mount vertical beadboard panels between them. Use a level to ensure the first panel line is straight; everything else follows from that. Nail into studs or blocking, and use paintable caulk at the edges. Sand any sharp joints, prime, then paint in semi-gloss so the bead texture stays visible.
Vertical beadboard gives you texture and height, and it’s one of the most beginner-friendly wainscoting ideas because the pieces are repeatable. The bead line makes the wall look detailed even if you keep the rest simple. Add a single top rail to keep the band looking intentional. This works well in kitchens, bathrooms, and laundry rooms where you want a tidy, bright look.
Skip thisDon’t start with the first panel off-level; the vertical lines will look crooked even if everything else is perfect.
Editor's noteUse a small putty knife to tool caulk into the bead edges — it looks cleaner than leaving a flat seam.
10. Picture-frame wainscoting with wide center panels
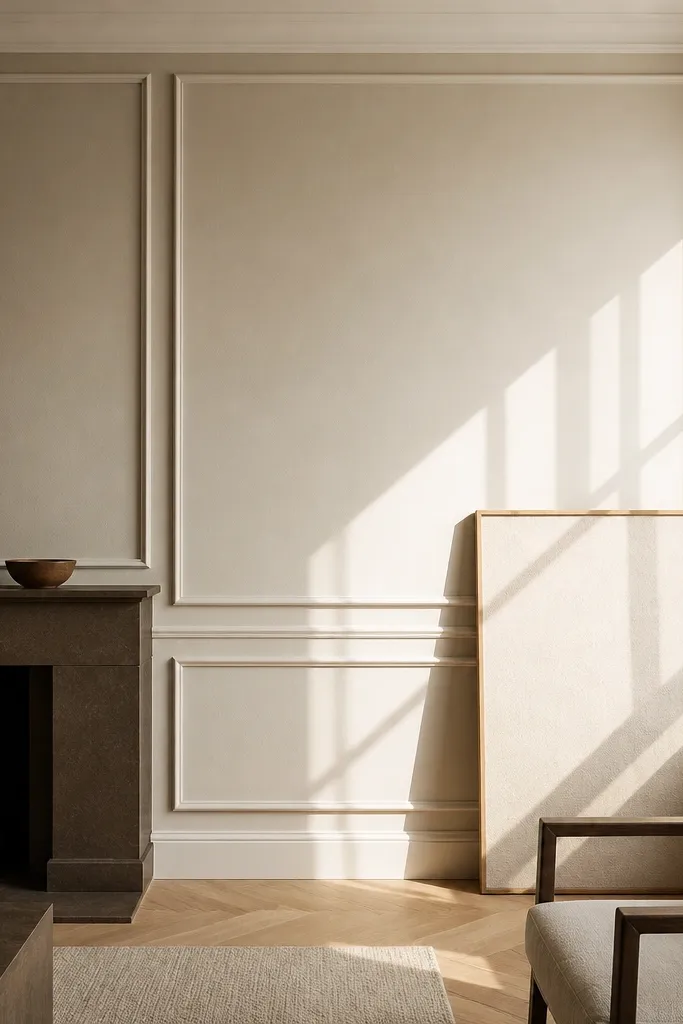
Wide center panels make wainscoting feel airy and expensive because the negative space is controlled. This version avoids the “busy grid” look that smaller rectangles can create. The picture-frame border around each panel makes the wall read like a gallery wall, even when you don’t hang art. It’s a strong choice for living rooms and dining rooms with bigger wall spans.
Pick a frame style with a slightly thicker outer trim and a thinner inner border. Mark a centerline on the wall, then design your panel widths so the center bay is the widest and the side bays mirror each other. Install outer rails and stiles first, then add inner trim borders around each opening. Caulk the miters, fill nail holes, prime, and paint; use satin trim paint to make the frame shadow visible.
Cut one “sample” panel frame and place it on the wall before building the whole run.
Don’t let the side panels get tiny — if you end up with slivers, redesign the layout.
11. Skirted wainscoting with a decorative base cap
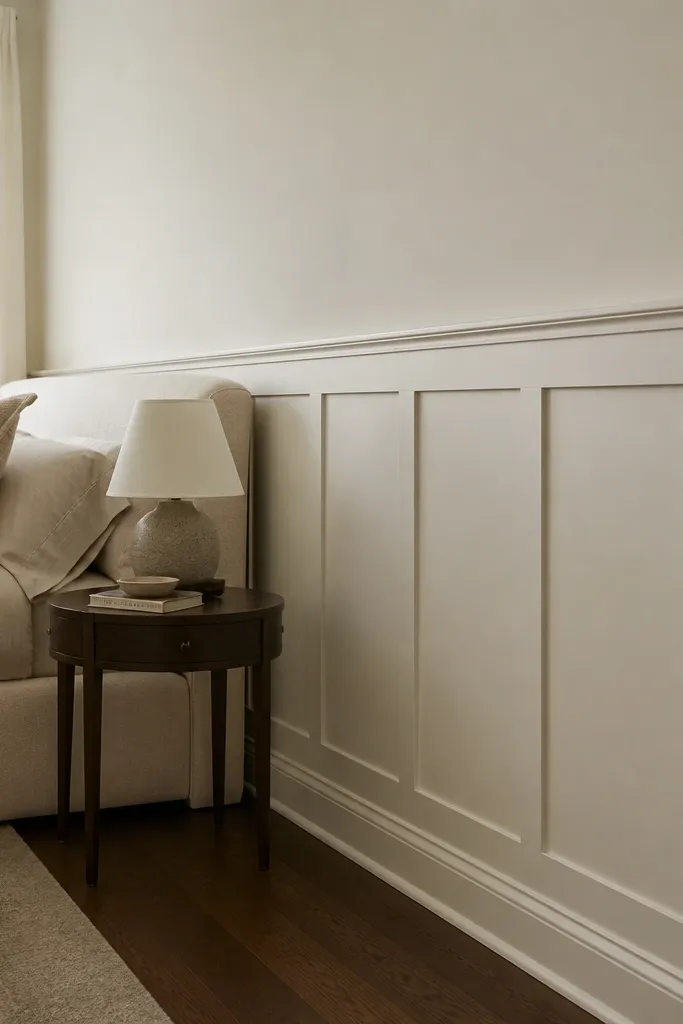
Start with a standard chair rail height and build rectangular panel frames above it. Then add a thicker base cap at the bottom of the wainscoting band — think 1x4 or a molded profile board. Install the base cap first if the wall is uneven, then shim so the cap looks straight. Nail, caulk seams, prime, and paint both the base cap and frames in satin for a crisp line.
This look pushes the drama to the bottom. A decorative base cap makes the wainscoting band feel grounded and finished, which is why it photographs well with furniture up against the wall. Keep the panels above simple so you don’t overwhelm the room. Choose this for bedrooms, living rooms with sofas, and spaces where the lower wall gets the most visual attention.
Skip thisDon’t bury the wainscoting band under heavy baseboards — you need the band to be visible.
Editor's noteIf your baseboard is already thick, align the new wainscoting base cap with the top edge of the existing baseboard so the transition looks intentional.
12. Corner post wainscoting with full-height vertical accents

Corner posts add structure and make wainscoting look like it was designed around your room, not just added to a wall. The posts create vertical framing that makes the panels look aligned from floor to chair rail. This is beginner-friendly because you only need to add a few extra vertical elements — the panel grid stays simple. Use it in living rooms and hallways with prominent corners or alcoves.
Install the standard wainscoting rails and panel frames, but extend two thicker posts at the corners above and below the panel band. Use wider MDF strips for the posts so the edges look intentional. Shim behind the posts if the corner wall is uneven, then nail into studs. Caulk the seams where posts meet rails, prime, and paint; satin finish helps the posts read sharp and clean.
Measure corner post placement from the same reference point on both sides so the posts don’t “lean” visually.
Don’t make corner posts the same width as your panel stiles; the posts need to be wider to look like framing.
13. Floating panel wainscoting with thin trim reveals
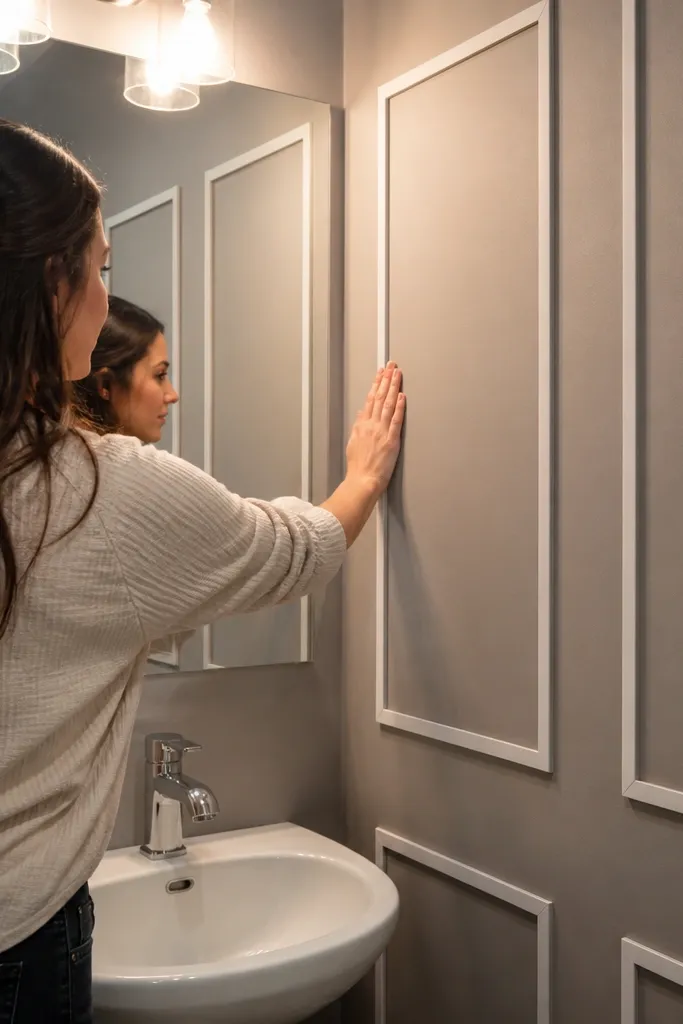
A floating look creates a modern illusion: the panels feel slightly separated from the wall surface. You get strong shadow reveals without bulky molding. This makes wainscoting feel lighter and more contemporary, and it’s great for small rooms where heavy trim would crowd the space. It’s also a good beginner path because the design uses simple straight strips.
Use thin MDF trim strips to build panel frames, then add a small spacer behind the frame pieces if your goal is a visible reveal. Mark the panel layout, build one frame section on the wall, and check spacing before continuing. Nail into studs, then add caulk only along the edges so you keep the shadow gap visible. Prime and paint; satin paint on trim makes the reveal pop even in soft lighting.
Use a consistent spacer thickness for every panel so the “floating” shadow line stays even.
Don’t smear caulk across the reveal — it kills the floating effect.
14. Wainscoting with a mid-rail and stacked micro-panels
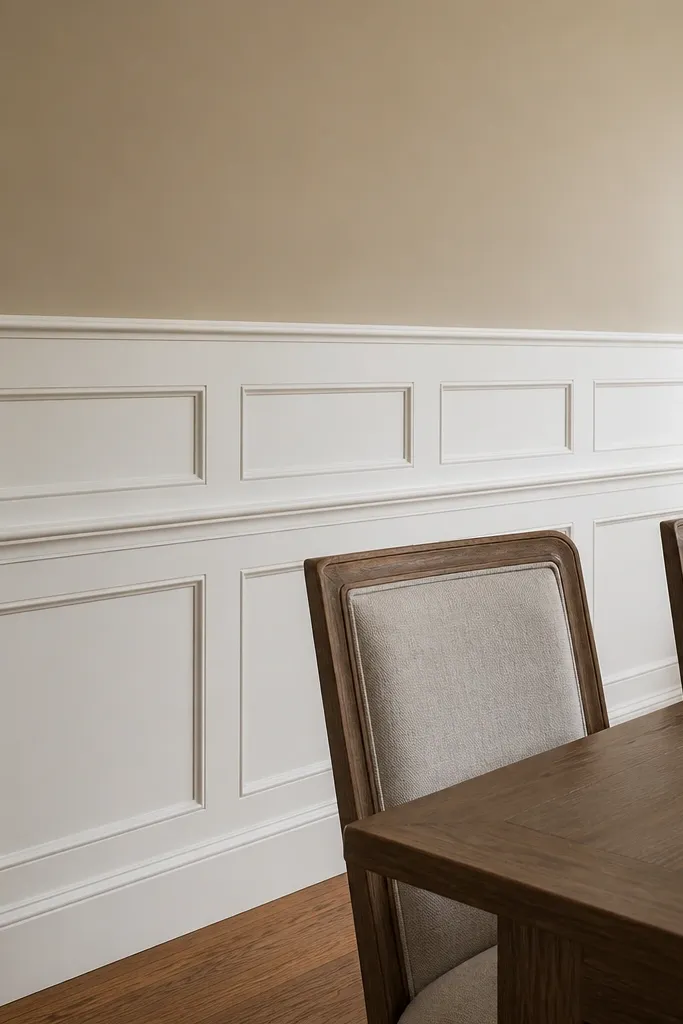
Micro-panels look fancy, but you can keep this beginner-friendly by limiting the number of rows. A mid-rail splits the band and lets you stack smaller rectangles above and below, which makes the wall feel taller and more detailed. This style works in bedrooms and dining rooms where you want the wall to look dressed without adding crown molding. The key is keeping the micro-panels consistent and not too tiny.
Set your overall wainscoting height, then add a mid-rail about halfway up that band. Create a grid of small rectangles within each section, using the same stile width across the wall. Install the outer rails and stiles first, then add the inner rectangle frames. Caulk edges carefully, fill nail holes, prime, and paint in satin so the micro-panels cast distinct shadows.
Use graph paper for the layout and transfer the grid with measurements — it’s faster than recalculating widths each row.
Don’t make micro-panels smaller than 6-7 inches wide; they look cramped and harder to keep straight.
15. Arched top panels inside a wainscoting frame
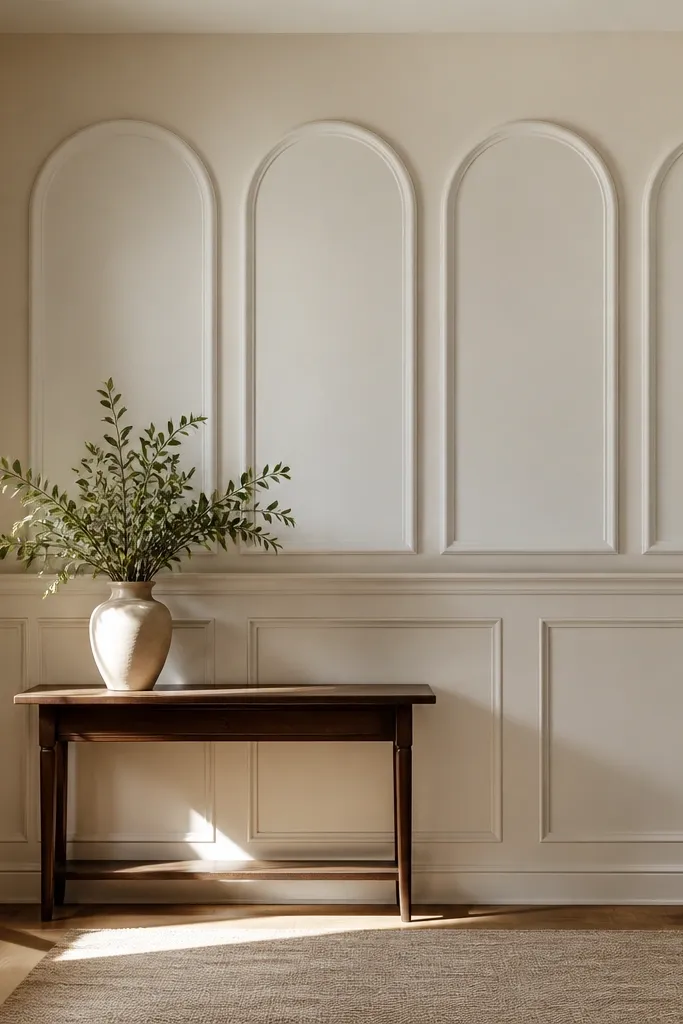
Arched top panels add softness and make wainscoting feel custom, even if the rest of the wall is simple. This look is photogenic because the arches catch light differently than straight lines. Keep the arches only in the upper row so you don’t have to repeat complex shapes everywhere. It’s a great pick for entryways and breakfast nooks where you want charm without going fully ornate.
Build a standard rectangular wainscoting outer frame, then divide it into two rows. For the upper row, create arched panel openings by using a pre-made arch template or a consistent radius cut on MDF. Install stiles and rails to frame each arch, then add straight rectangular panels below. Nail, caulk seams, prime, and paint; satin paint makes the arch shadows visible.
Make an arch template from scrap MDF and clamp it to your material for repeatable cuts.
Don’t freehand the arches — even slight differences show up immediately in photos.
16. Matte black wainscoting with white panel frames
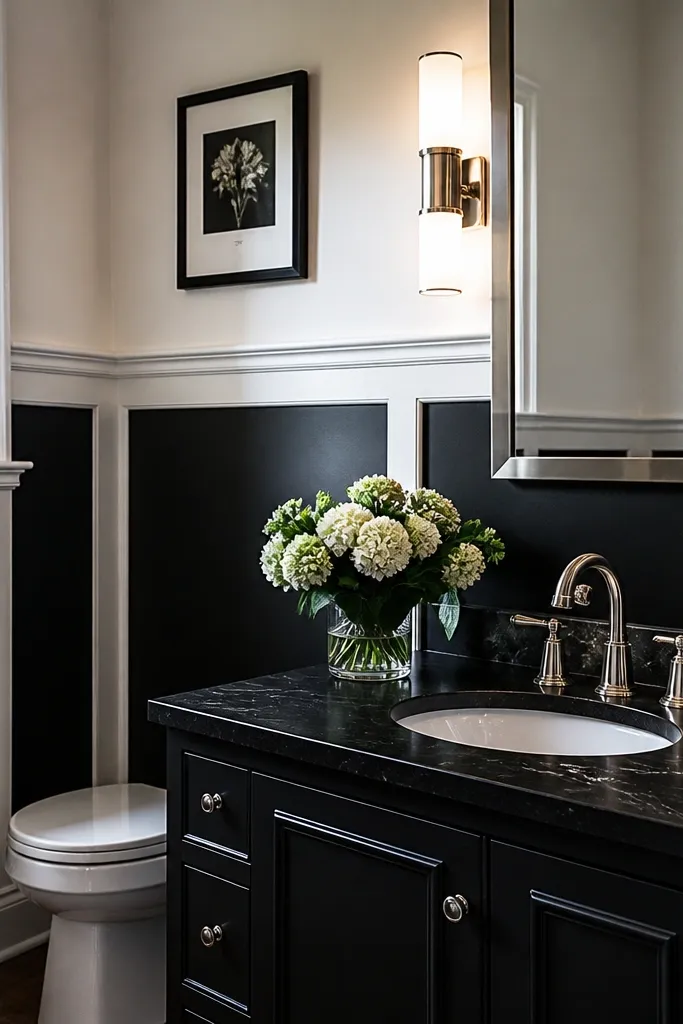
Bold contrast is how wainscoting looks “instantly elevated.” Matte black on the wall area under the top rail makes the white panel frames pop, and the shadow line between them reads crisp. This is still beginner-friendly because the build is a simple rectangle grid; the drama comes from paint choices. Use it in powder rooms, offices, and hallways where you want a strong look with a manageable wall area.
Install your wainscoting rails and panel frames first using MDF strips. Tape off the panel openings and paint the wall band matte black, then paint the frames white in satin. Remove tape carefully while paint is still slightly tacky for clean edges. Seal the matte black with a trim-friendly topcoat so it stays wipeable, especially in bathrooms. Re-caulk any micro-gaps after the first coat and touch up with a small angled brush.
Use an angled sash brush for trim edges — it keeps the white frames razor sharp against black.
Don’t use glossy paint on matte black — it looks like a different finish and kills the sleek contrast.
17. Cream wainscoting with warm wood panel inserts

This is how you get warmth without losing the clean, high-end look. Paint the frames in a creamy off-white, then use wood-toned panel inserts so the wall has texture and depth. The contrast makes the panels read clearly even in low light. This works in living rooms and dining rooms where you want a cozy feel but still want crisp lines. It also hides small imperfections because wood grain draws the eye away from tiny gaps.
Build the wainscoting frame using MDF strips for crisp edges, then leave openings for wood inserts. Cut insert panels from pine or veneer plywood and sand smooth; apply stain in one consistent direction and seal with a matte or satin clear coat. Install the frame on the wall, then nail or pin the wood inserts into place from the back or inside lip. Caulk only where frame meets insert and paint the frame in creamy satin trim paint.
Seal stained inserts before installation so the wood doesn’t soak moisture from the caulk and warp slightly.
Don’t use glossy clear coat — it reflects light and makes the wood look plasticky next to painted trim.
18. Wainscoting with a diagonal brace detail
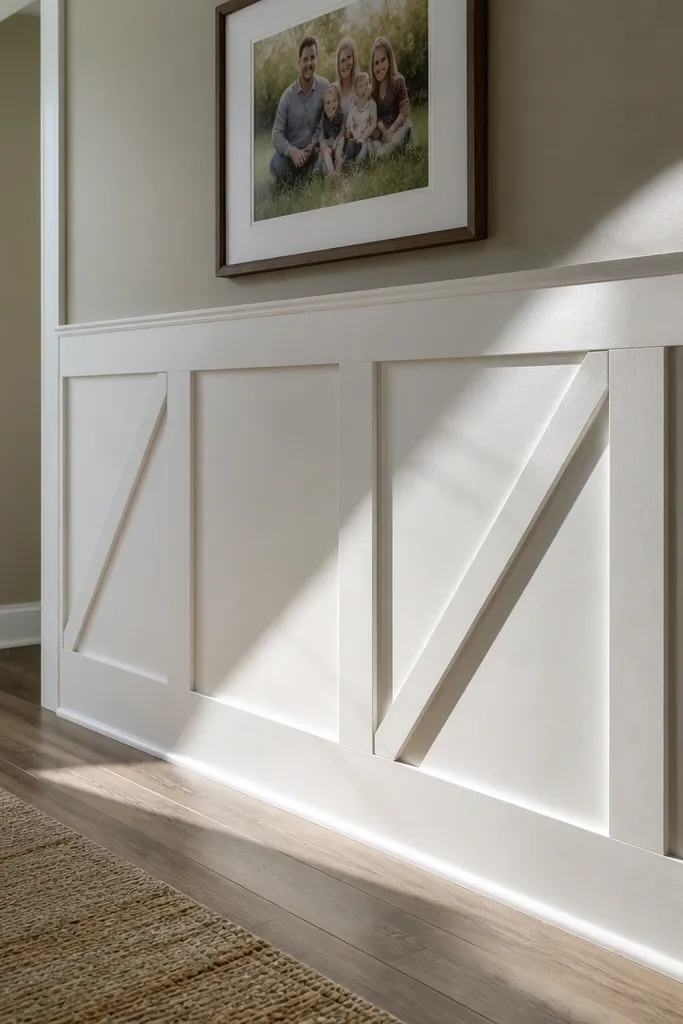
A diagonal brace makes wainscoting look more architectural. It adds a graphic element without needing a full pattern like herringbone. This is a great way to keep it beginner-friendly: you still build rectangles, then add one diagonal per panel bay. The brace also helps the wall look dynamic in photos, especially when you have a lamp or window casting light across the trim.
Mark your standard wainscoting band height and install outer rails. Build a grid of rectangular panel frames using MDF strips, then add a single diagonal brace strip from one corner of each panel opening to the opposite corner. Cut diagonals with a miter saw set to 45 degrees if your panel openings are square; otherwise measure and cut by angle using the actual opening. Nail the brace into the frame edges, caulk seams, prime, and paint in satin.
Cut a few brace pieces first and label left/right so you don’t flip them accidentally mid-wall.
Don’t put diagonals on uneven spacing between bays — match the brace placement to the panel edges every time.
19. Wainscoting with a chair rail and vertical reeding accents
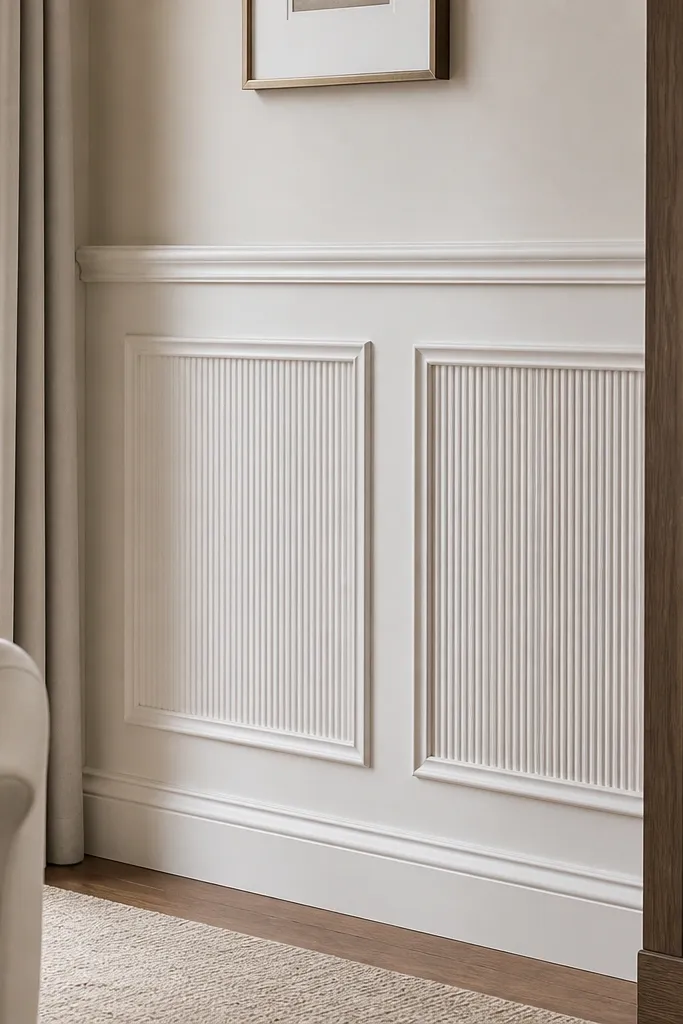
Reeding gives you a built-in look that reads fancy in close photos. You don’t need carved wood to get it — use reeded MDF or reeded trim boards as the vertical accent pieces inside a simple panel frame. This is beginner-friendly because the main structure stays rectangular and straight. It works in living rooms and bedrooms where you want classic style with a bit of texture.
Install the chair rail and bottom rail to create the wainscoting band. Build rectangular panel frames around the reeded accents using smooth MDF strips for the outer frame. Place reeded trim boards vertically inside each opening, spacing them evenly and nailing into the frame edges. Caulk the outer edges, prime, then paint; satin paint keeps the reeding lines visible without looking too shiny.
Use a small foam roller on the reeded sections so paint fills grooves evenly.
Don’t paint reeding with flat wall paint — it fills the texture and makes it disappear.
20. Tall wainscoting with a single large panel grid
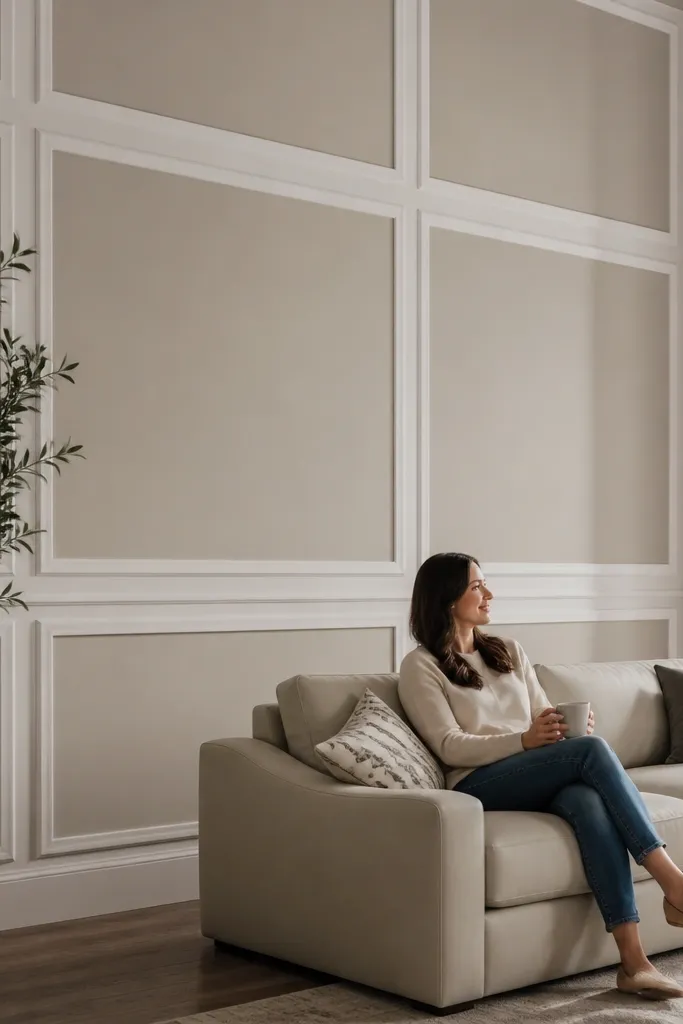
Decide your total wainscoting height, then divide it into a grid of large rectangles using a top rail and a mid-rail if needed. Install outer rails first, then add vertical stiles to create equal-width columns. Add horizontal rails to split rows, then frame each opening with MDF strips. Nail, shim behind where needed, caulk all seams, prime, and paint satin trim paint.
Tall wainscoting changes the whole room because it takes up more wall real estate with a consistent grid. Instead of lots of tiny details, you get big panels that look calm and designed. This style is beginner-friendly when you keep the layout to a few columns and rows. It’s ideal for living rooms with long blank walls and for dining rooms where you want the wall to hold its own behind a buffet or sideboard.
Skip thisDon’t cut panels to fit without checking the wall width at the exact rail height — walls bow.
Editor's noteKeep column widths equal by measuring the wall width at the height of the top rail, not at the floor.
21. Wainscoting with a recessed panel look using thin inset boards
A recessed panel look is one of the most photogenic beginner-friendly wainscoting ideas because it creates a real depth effect, not just a surface frame. Thin inset boards create a shadow gap that reads high-end. This works especially well when your wall paint is smooth and matte and you want the trim to pop. Choose this for modern rooms, stair landings, and offices where clean geometry looks best.
Build an outer frame with rails and stiles, then create a second inner border that sits slightly in from the outer face. Use thin MDF strips for the inset border so you get a crisp recessed step. Nail the outer frame to the wall, then attach the inset strips so they create an even depth around each opening. Caulk only at the inset edges, prime, and paint; satin on the recessed borders makes the shadow line visible.
Use a depth gauge by stacking scrap trim pieces — it helps you keep the inset step consistent across the wall.
Don’t overfill with caulk in the recessed area — it turns depth into a flat line.
22. Wainscoting with a decorative lattice band (small-scale)
A lattice band adds pattern without the full complexity of wallpaper or tile. Keep it small-scale so it still feels like wainscoting and not a fence panel. The grid creates tons of photo-friendly shadow lines, especially near windows. This works great in entryways, powder rooms, and dining rooms where you want something detailed but still buildable for beginners.
Install outer rails to define the wainscoting band height. Inside each opening, add two layers of thin strips at right angles to form the lattice grid, using a spacer to keep the crosshatch spacing consistent. Cut the strips long enough to reach the outer frame edges cleanly and nail them at intersections into the frame. Caulk the outer seams, prime, then paint in satin so the lattice shadows stay sharp.
Mark lattice intersections with a light pencil grid so you don’t lose alignment halfway across the wall.
Don’t make the lattice spacing too tight — it clogs with caulk and looks messy after painting.
23. Oyster-White Wainscoting With Shadow-Gap Panels

This is the “quietly expensive” look that makes a room feel pulled together fast, even if the rest of the space is plain. The trick is a shadow gap — thin, even spacing between the panel frames so the lines stay crisp and light catches the edges. Use an oyster-white paint on the frames and a slightly deeper warm white or off-white on the panel fields so the separation reads from across the room. It’s beginner-friendly wainscoting ideas because you’re not carving profiles or doing fancy moldings; you’re building straight, repeatable rectangles with consistent reveal lines. This works best in hallways, dining rooms, and bedrooms where you want structure without going full traditional. Expect one weekend for a small wall and two weekends for a larger room, depending on how many cuts you have to make.
1) Plan your grid: pick a chair-rail height of 36 in. (or 38 in. If your ceiling is 9 ft), then lay out panel widths so you land on whole numbers. Use 1/4 in. MDF or primed finger-jointed pine for the frame rails, and keep a 1/8 in. “shadow gap” by spacing the panel field with spacers or thin strips (I use 1/8 in. Plastic shims or scrap strips) while the glue sets. 2) Install the base rail first, level it with a 4 ft level, then build the vertical rails and top rail. Glue and nail the frame rails, then set the panel field inside, keeping the 1/8 in. Gap all the way around. 3) Fill nail holes, caulk the shadow gap edges lightly, then paint frames oyster-white and paint panel fields a shade deeper (about 1 step darker in the same brand line). Let it cure fully before you touch up any edges.
Use painter’s tape as a spacer guide for the shadow gap while you glue — it keeps the line straight and prevents glue squeeze-out.
Skip sanding the frame edges flat before painting — any ridge shows up as a thick, messy line in the shadow gap.
24. Thermal-White Wainscoting With Beveled Panel Edges
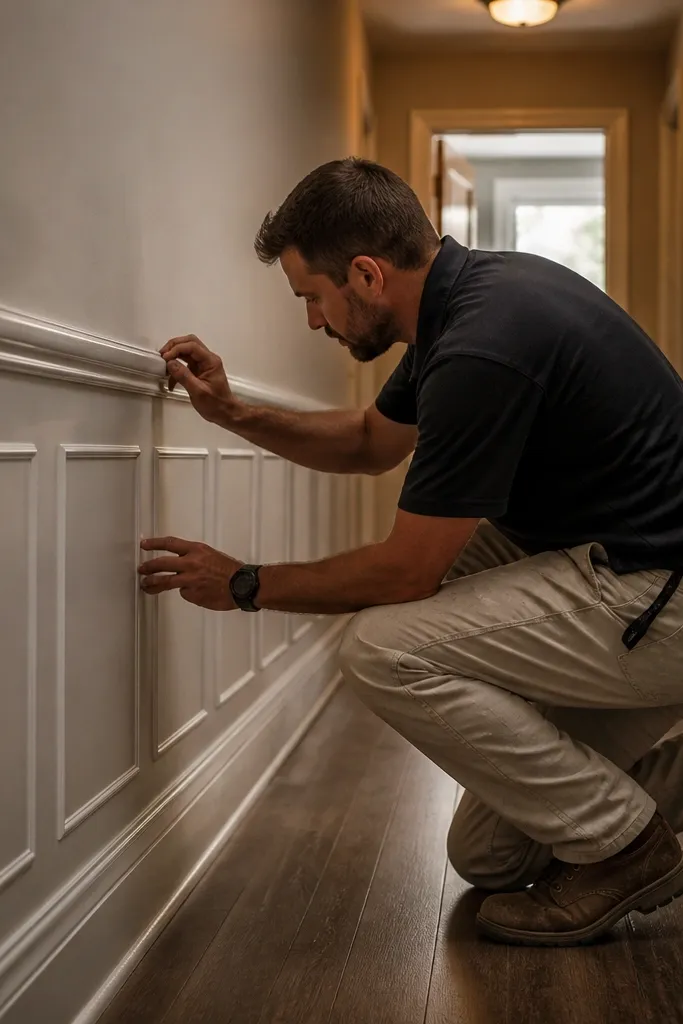
1) Choose your panel size: a simple grid of 12 in. Wide panels between rails looks balanced on most walls. Buy pre-primed MDF panel boards and rout or buy boards with a shallow 3/16 in. Bevel edge on the panel field sides; keep all bevels the same direction. 2) Install a chair rail base at 36 in. Height, then add vertical rails using 1x3 primed boards. Use a finish nailer and wood glue on every joint, and keep reveals tight by using a single spacer block for all gaps. 3) Prime everything, then paint with a satin or soft-satin trim paint; satin hides small imperfections better than flat. After the first coat, inspect the bevel line for any missed spots and do a quick edge touch-up before the second coat.
If your room feels flat because the walls are smooth drywall, beveled panel edges add dimension without adding heavy moldings. The bevel creates a highlight line when light hits the wall, so the wainscoting reads even in low lighting. This style looks clean and tailored, not fussy, because the bevel is subtle and consistent. It’s ideal for modern farmhouse, transitional, and small rooms where you want the “elevated” look but don’t want ornate details. Beginner-friendly wainscoting ideas, this one works because the cuts are repeatable and the finish does the rest — a crisp paint job plus a light bevel. Budget for MDF panel stock or pre-primed panel boards and plan on one full day for layout and cutting, then one day for install and filling.
Skip thisDon’t skip priming MDF — unprimed MDF drinks paint unevenly and dulls the bevel highlight.
Editor's noteTest the paint sheen on one scrap panel — satin makes the bevel pop, while semi-gloss can look too shiny and highlight wall bumps.
25. Walnut-Trim Wainscoting With White Flat Panel Fields
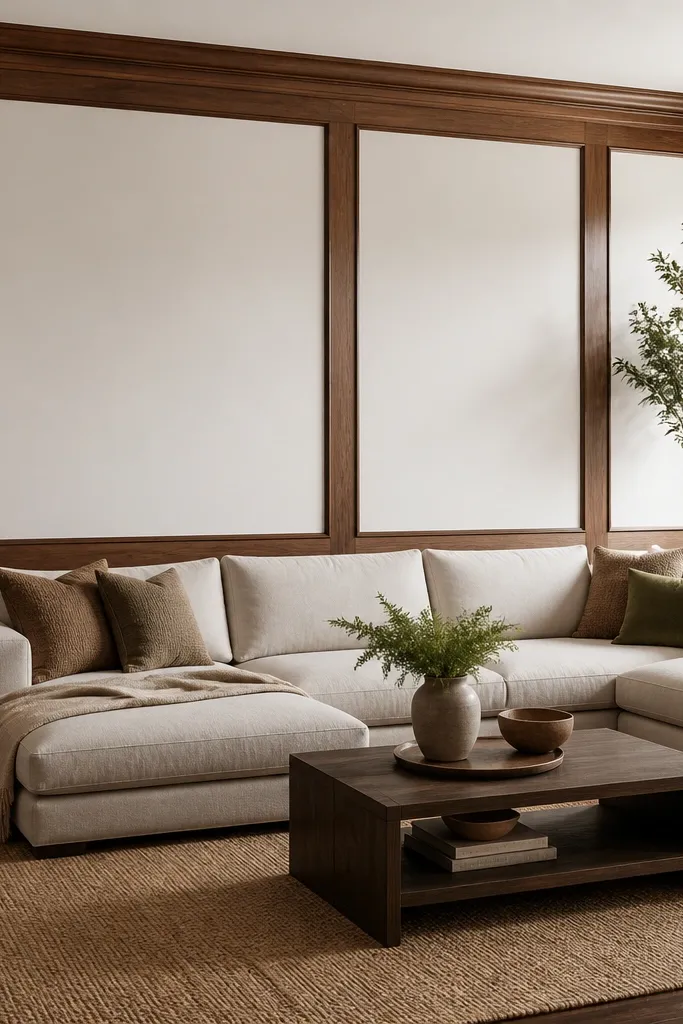
1) Pick your materials: use 1x2 or 1x3 primed poplar for the trim frame and 1/4 in. MDF or pre-primed panel sheets for the flat fields. Stain only the trim strips in a walnut tone (a gel stain works well for even color), then seal with a water-based clear satin topcoat. 2) Install the chair rail base and verticals first, then cut the panel fields to fit between rails with a 1/8 in. Reveal all around. Glue the trim frame joints with wood glue, then nail through the trim into the wall studs or furring strips. 3) Finish by sealing the panel fields with paint (satin for durability), then caulk the perimeter where trim meets panels. Wipe any stain smudges immediately and keep a clean cloth — walnut stain transfers fast.
This is the fastest way to make wainscoting look custom without buying elaborate moldings. White flat panel fields keep the wall bright, while walnut-toned trim makes the whole thing look intentional and high-end. The visual win is contrast at the edges — you see clean borders from across the room, and the walnut stain adds warmth that paint alone can’t. It works especially well in living rooms, entryways, and kitchens where you want the walls to look styled but not heavy. This is beginner-friendly wainscoting ideas because you’re building with straight trim strips and staining one consistent material. Plan for about 2 days for one standard wall run, including stain drying time and a careful topcoat.
Skip thisDon’t mix stain and paint sheens randomly — matte fields with shiny trim look mismatched even if the layout is perfect.
Editor's noteUse a foam brush for gel stain and keep a light hand — heavy passes can create darker blotches at the edges where the trim is most visible.



