
1. Countertop apothecary tray with three zones
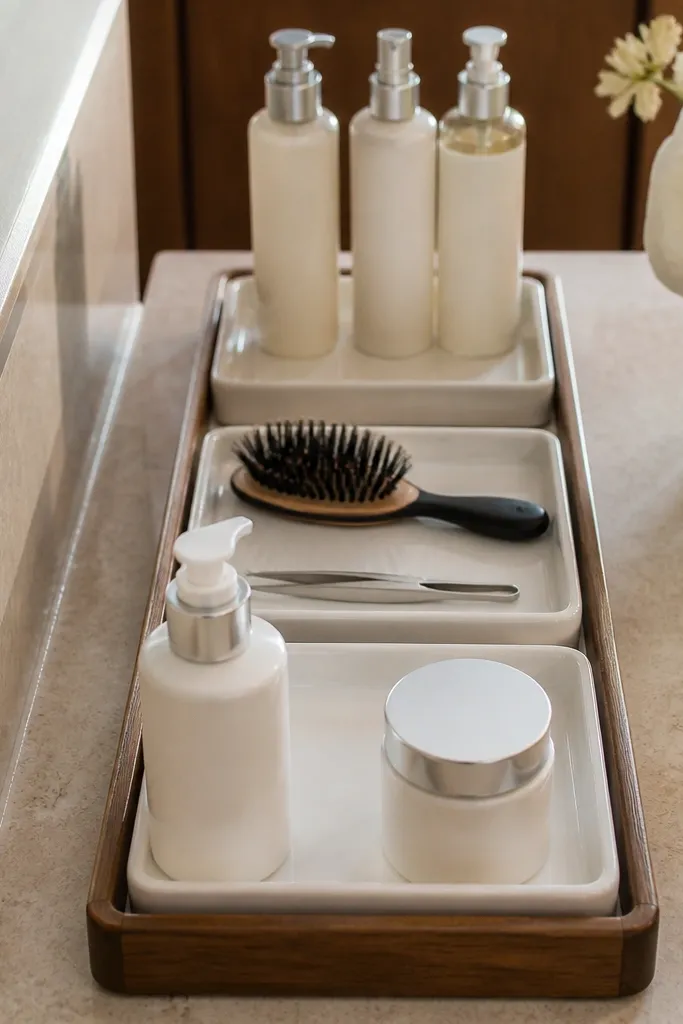
This setup fixes clutter by turning your counter into a landing strip. You’re basically creating three visible zones: a front “daily” lane for the products you grab every morning, a middle “tools” lane for brushes or tweezers, and a back “backup” lane for refills. Use a long tray so it frames the area and makes the counter look styled even when you’re in the middle of using things. The look stays clean because everything has a boundary — no bottles creeping outward or rolling toward the sink.
Editor's notePick one liner color for all three zones. It makes the tray look intentional instead of like three random organizers.
Start by measuring the free counter space and choosing a tray that leaves at least 2 inches of breathing room around it. Use painter’s tape to mark three zones on the tray base, then line each lane with matching adhesive shelf liner or a thin felt sheet (cut to fit). Place daily items in the front lane, tools in the middle, and backups in the back lane using small matching cups so heights stay even. Finish by wiping the tray with a damp cloth and drying fully so adhesive liner doesn’t lift.
Skip thisDon’t use a mix of tray sizes and loose items; if nothing has a boundary, clutter returns fast.
2. Drawer "see-through" organizer with foam bottle cradles
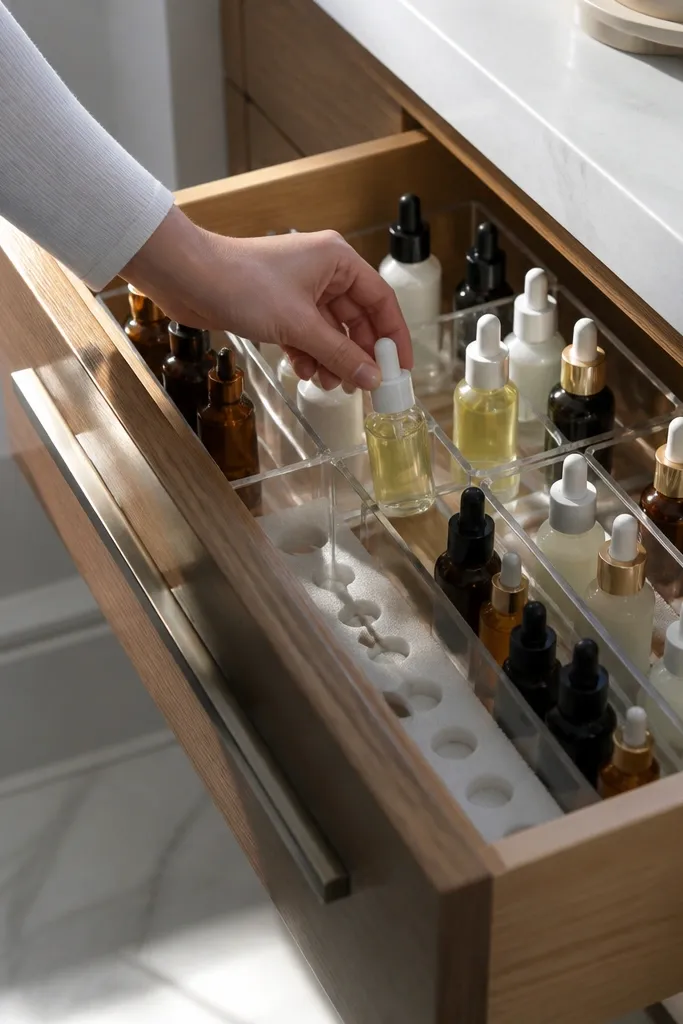
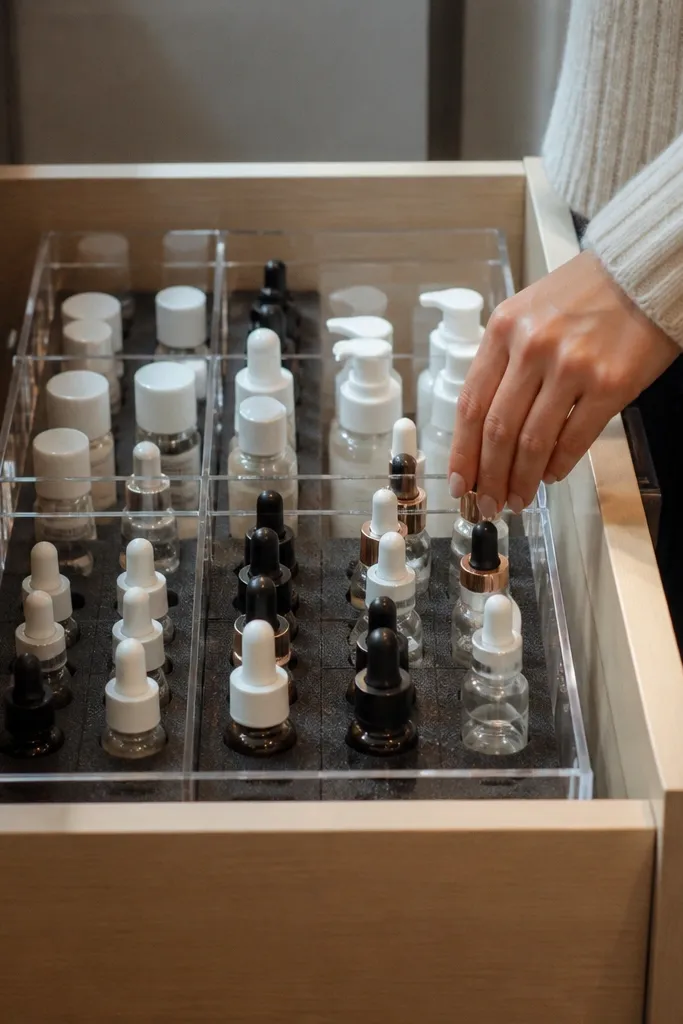
A drawer should be calm, not a maze. Clear bins let you spot what you need without dumping half the drawer, and foam cradles keep bottles upright so they don’t slide and smear. This idea is especially good for serums, toners, and face oils that are small but numerous. It also keeps caps aligned, which makes the drawer look neat even after a week of use. The visual payoff comes from clean rows: upright bottles in cradles, flat backups in bins.
Measure your drawer width and depth, then buy or cut clear acrylic or clear plastic bins that fit with a 1/4 inch gap around the edges. Cut foam (craft foam or shelf liner foam) into bottle-sized blocks so each bottle has a snug spot; aim for foam that holds the bottle at the shoulder, not the cap. Place the foam blocks inside the bin, then set bottles in a single height row. Add one small bin for flat items like cotton pads or travel sizes and label the outside with painter’s tape.
Use a label maker or neat handwriting on painter’s tape. Labels keep it beginner-friendly because you don’t have to guess where things go.
Don’t cram bottles into one tight row; if bottles press together, they tip and the drawer turns messy again.
3. Vertical bottle holder made from a slim wood rail

Vertical storage is the easiest way to stop counter clutter without building a whole cabinet. A slim wood rail with dowels or peg-like holders lets you stand bottles upright, which makes them easier to grab and harder to knock over. This looks good because bottles line up visually, and the wood adds warmth. It also works for tools like lip balm or small brushes when you want them visible but contained. If your vanity counter gets crowded, this approach clears the surface and keeps your routine in view.
Editor's notePaint or stain the rail to match your vanity hardware. Matching finishes make the whole setup look designed.
Cut a piece of wood or purchase a slim unfinished rail and sand it smooth. Mark bottle positions and attach small wooden dowels or peg hooks so each bottle has a dedicated “slot” (aim for 2-2.5 inches between centers for most pump bottles). Mount the rail using two screws into studs or wall anchors rated for the weight. Place bottles with caps facing forward and add a thin felt strip at the base so bottles don’t scratch the rail.
Skip thisDon’t mount it too high; if bottles sit above eye level, you’ll start setting them down on the counter again.
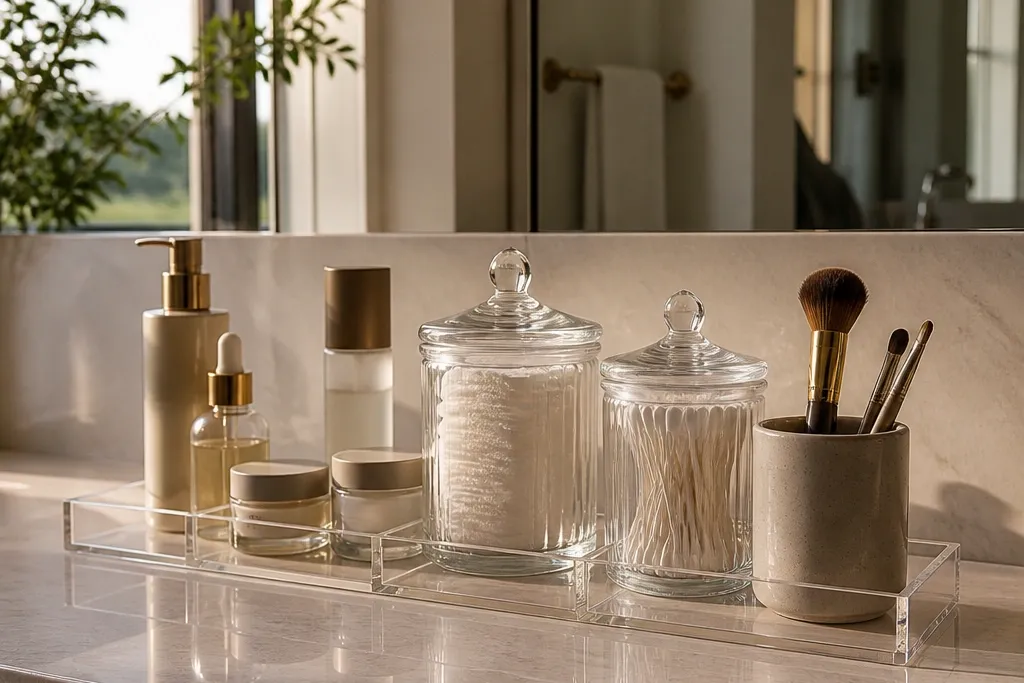
4. Lid-on jar set for cotton pads and backups
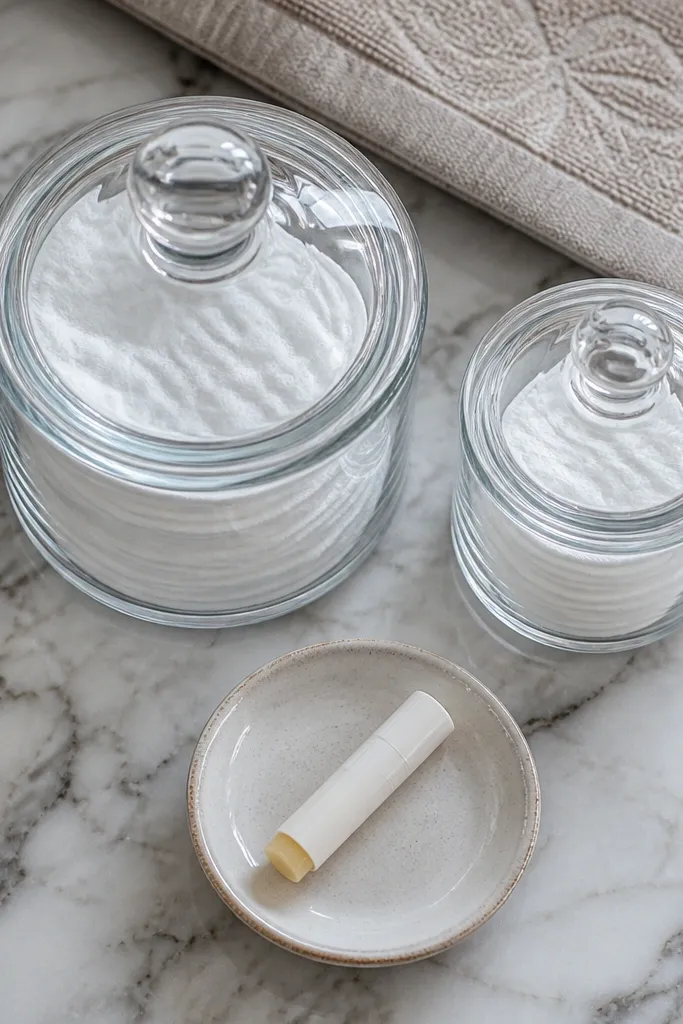
Cotton pads and small backups are the fastest way for a vanity to look messy because they’re flat, stack-unstable, and easy to leave out. Matching glass jars with lids make the clutter disappear while keeping your most-used item visible. The jar look is clean and photogenic because the silhouettes align and lids keep things from looking dusty. This is beginner-friendly because you’re not rearranging every product — just removing the “loose” ones that visually explode. It also helps you track how much you have, so you stop buying duplicates.
Editor's noteKeep jar openings consistent. If one jar is wide and another is narrow, the visual rhythm breaks and the space looks cluttered again.
Pick two jar sizes: one for cotton pads and one for small backups like mini creams or spare elastics. Wash and dry jars fully, then add a small label on the lid side or jar front with painter’s tape. For cotton pads, keep the stack inside the jar with the top folded neatly so it doesn’t sag. Place jars on a tray or in a shallow bin so they stay together and don’t spread across the counter.
Skip thisDon’t store cotton pads in a jar without a lid. The look goes dull fast once dust settles.
5. Pegboard vanity organizer with clear hooks
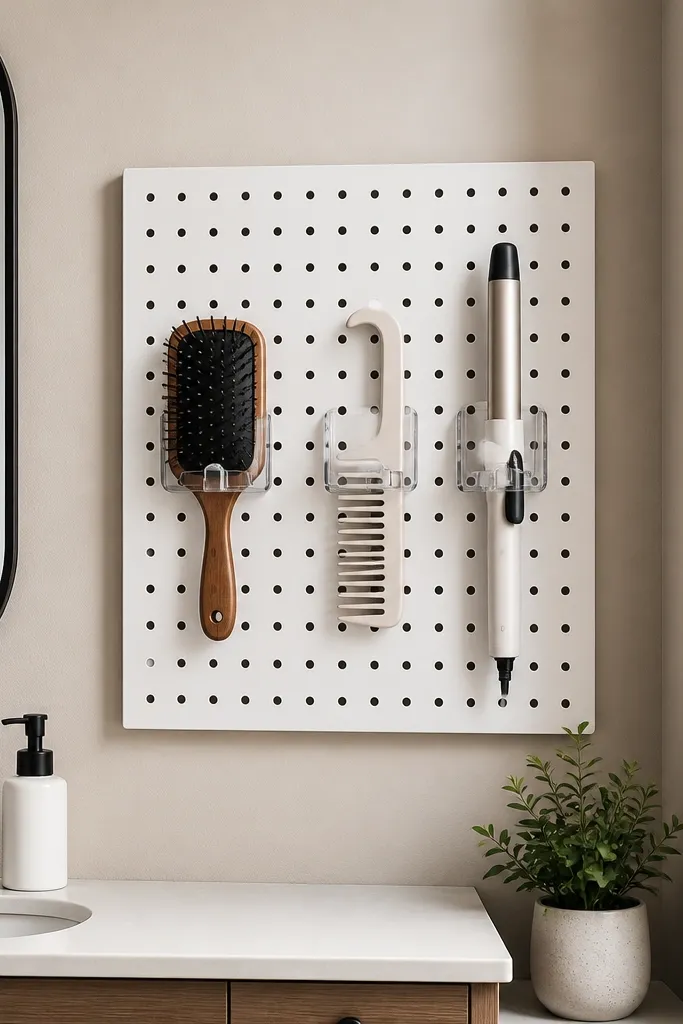
A pegboard setup gives you vertical control and keeps tools from living on the counter. Clear hooks make it look light and tidy, and the grid lines make everything look intentional. This is great for hair brushes, combs, and small styling tools when you want them reachable but contained. It also solves the “where do I put this?” problem because the hook locations are visible. The result is a vanity wall that looks styled instead of random.
Editor's noteUse two hook heights: one for daily brushes and one for less-used tools. It keeps your eye flow clean.
Cut or buy a small pegboard sheet sized to your wall space beside the mirror. Sand the edges, then paint or prime it so it matches your bathroom tone. Install the pegboard using screws and anchors where needed. Add clear hooks and attach small baskets for tiny items like hair ties; then hang brushes by handle and combs by teeth orientation so they don’t snag.
Skip thisDon’t hang heavy tools directly on thin hooks; weight pulls the board out of alignment.
6. Turntable for daily skincare on the corner of the vanity
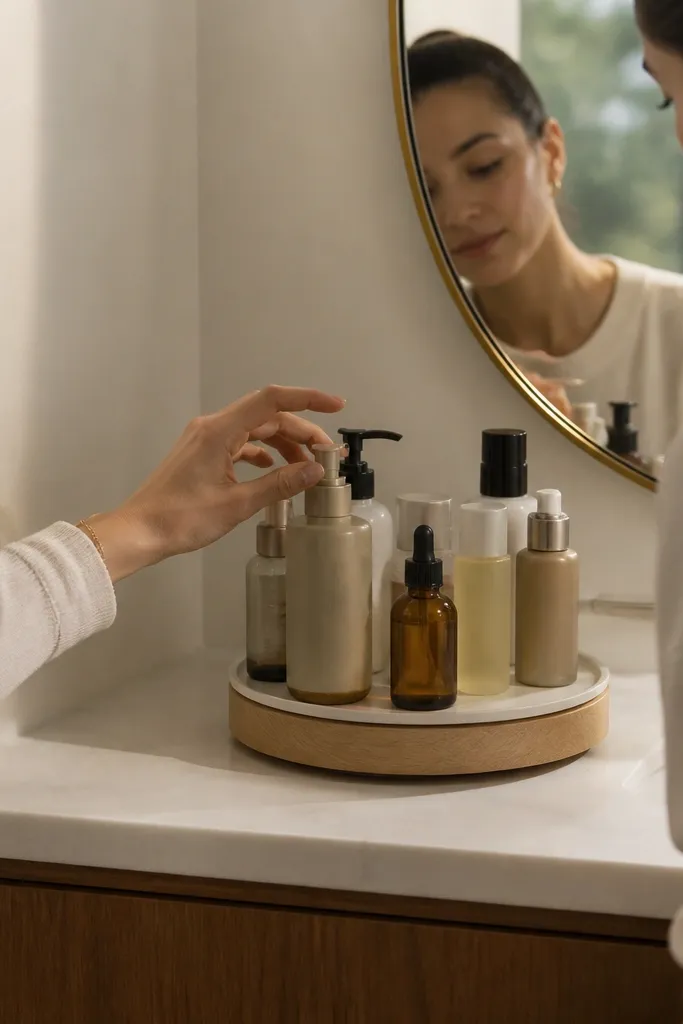
A turntable reduces clutter because it keeps everything in a tight circle. Instead of bottles spreading across a tray, you spin to find what you need. It’s beginner-friendly because you don’t need perfect labeling at first — the rotation gives you a visual map. The look is clean and aesthetic because the products form a neat ring, and the turntable gives the corner a focal point. This works best for a small set of daily items like cleanser, toner, serum, moisturizer, and SPF.
Choose a turntable tray with a diameter that fits your corner without touching the sink. Place it on a non-slip mat so it doesn’t slide when you spin. Arrange bottles by routine order from left to right, then add a small cup near the center for lip balm or eye cream. For photogenic uniformity, group similar heights together and keep pump tops facing forward.
Use one small riser under taller bottles so everything sits at the same visual height.
Don’t overload it. If you fill the whole turntable, it stops feeling curated and you’ll start leaving things out.
7. Wall-mounted under-mirror shelf with slim bins
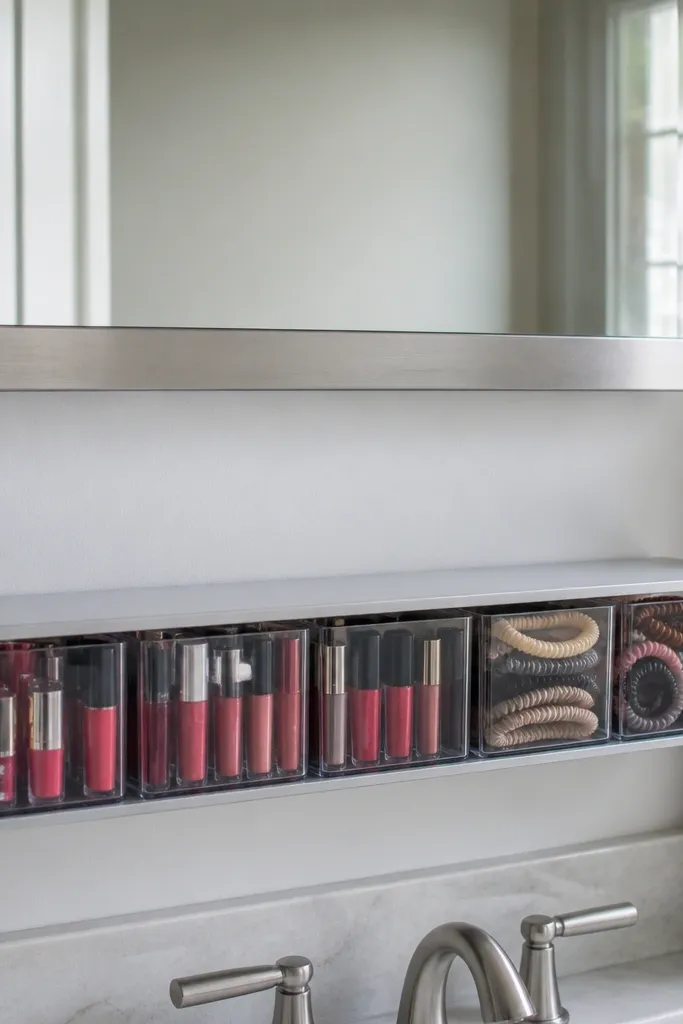
That empty space under the mirror is wasted real estate for clutter. A thin shelf installed under the mirror gives you storage that looks clean and doesn’t steal counter space. Slim bins keep small items from turning into a pile, and the bin fronts create a tidy visual block. This is perfect for lip products, hair ties, travel sizes, and anything you reach for mid-routine. The whole setup looks put-together because you’re creating a controlled “display” line instead of random drawer dumps.
Measure the distance between the mirror bottom and the counter, then choose a shelf depth that leaves at least 2 inches of clearance below bottles. Install the shelf with level marks and use wall anchors if studs aren’t available. Add slim bins with matching colors, then insert items by category: lip in one bin, hair accessories in another, and travel sizes in a third. Label bin fronts with painter’s tape so you can reset quickly after use.
Keep bin heights consistent. Uneven stacks look messy even when you’re organized.
Don’t place wet items on the shelf. Set wet tools on a towel first or you’ll get water spots.
8. DIY drawer divider from clear acrylic strips
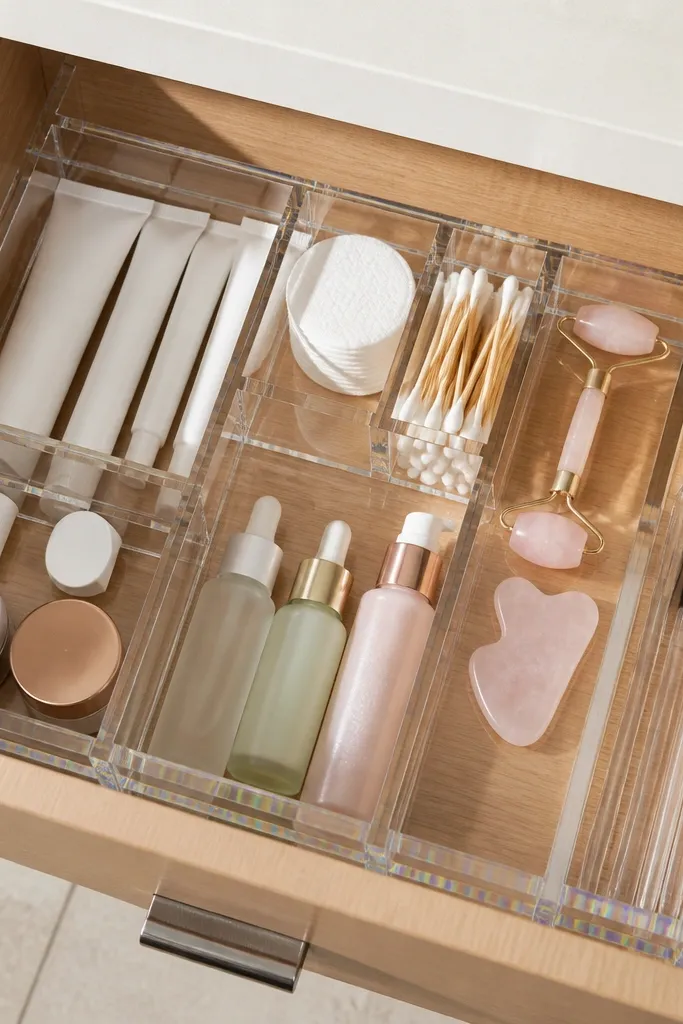
If your drawer is a jumble of tubes and loose tools, divider strips fix it fast. Clear acrylic keeps the drawer looking airy and helps you find products without opening everything. This idea is especially good for beginner-friendly vanity organization because you can build it to your exact drawer dimensions instead of forcing products into store-made sizes. It also makes the drawer look polished because compartments create clean lines. You’ll feel the difference immediately when you open the drawer and everything sits in a defined spot.
Editor's noteLeave a 1/8 inch gap between dividers and drawer walls so items slide in without scraping.
Measure your drawer interior and cut clear acrylic strips to create a grid. Use a non-permanent adhesive like removable mounting squares if you want flexibility, or use screws if your drawer material allows it. Arrange strips so you have one long divider for bottles and one set of smaller dividers for tubes. Test-fit each compartment with your products before you commit, then wipe the acrylic with glass cleaner so it looks crisp.
Skip thisDon’t make compartments too small. If tubes have to squeeze, you’ll shove them sideways and break the system.
9. Heat-safe tool stand with cord wrap
Hair tools create a specific kind of clutter: cords everywhere and hot items getting shoved into drawers. A heat-safe tool stand solves both by giving the tool a place to cool and keeping the cord controlled. Look-wise, a stand with a simple neutral finish keeps the corner tidy and doesn’t scream “utility.” This is beginner-friendly because it’s a single home for the whole category — tools plus cord. Once you stop improvising after styling, the rest of your vanity stays calmer.
Editor's noteUse a strap that you can loosen with one hand. You’ll actually reset it after use.
Pick a heat-safe base like a ceramic or metal tray and add a silicone mat on top. Create a cord wrap using a fabric cable tie or a simple Velcro strap so the cord coils neatly. Place the stand near an outlet, then set the tool on the silicone mat so the hot surface has safe contact. Add one small hook or clip on the side for a brush or comb so the styling area stays contained.
Skip thisDon’t store hot tools in sealed bins. Heat trapped inside makes everything smell and look grim fast.
10. Rotating makeup brush cup with spacing rings
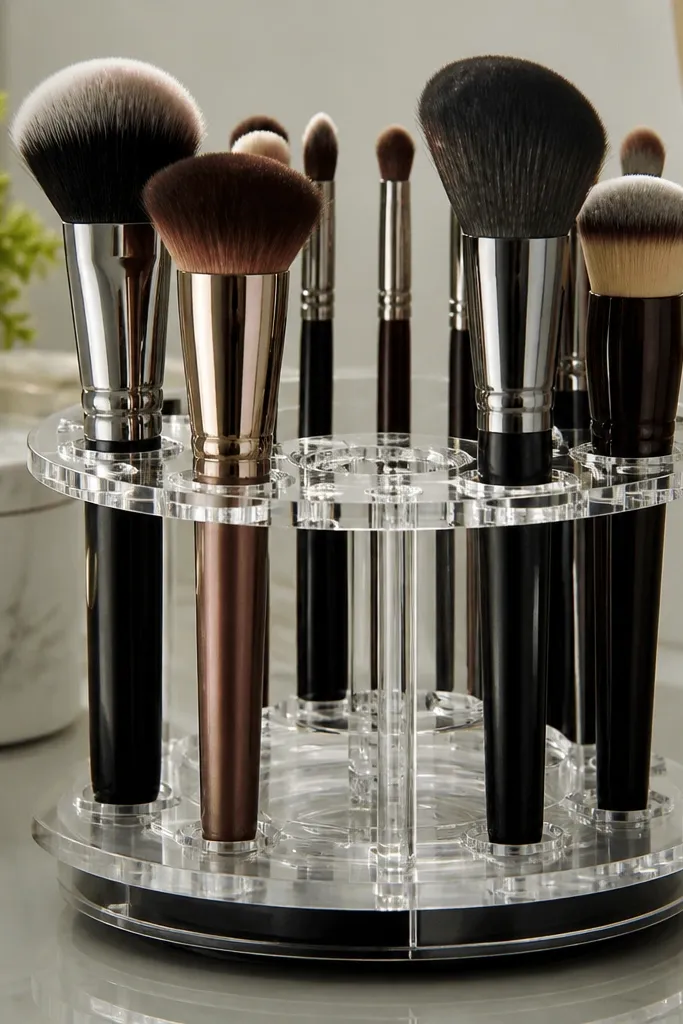
Brush clutter looks messy even when it’s “organized” because brushes lean, touch, and spill visually. A rotating base plus spacing rings keeps handles upright and evenly spaced. This setup also makes it easier to grab the right brush without dumping the cup. The look is clean because you see a tidy stack of handles and the rotation keeps the cup from turning into a random pile. It’s beginner-friendly because you only have to arrange brushes once — the rings do the heavy lifting.
Use a sturdy cup with a flat base, then mount it on a small lazy Susan or rotating tray. Add spacing rings made from foam or silicone cut into strips sized to the brush handle thickness. Place rings inside the cup so each ring holds one brush or two similar handle sizes. Rotate the base so your most-used brush sits at the front, then adjust ring positions until brushes stand straight.
Label the cup with a tiny strip of painter’s tape for the brush type you use most. It speeds up mornings.
Don’t overfill the cup. If brushes are packed too tight, they bend and the spacing falls apart.
11. Clear acrylic risers for lip and eye products
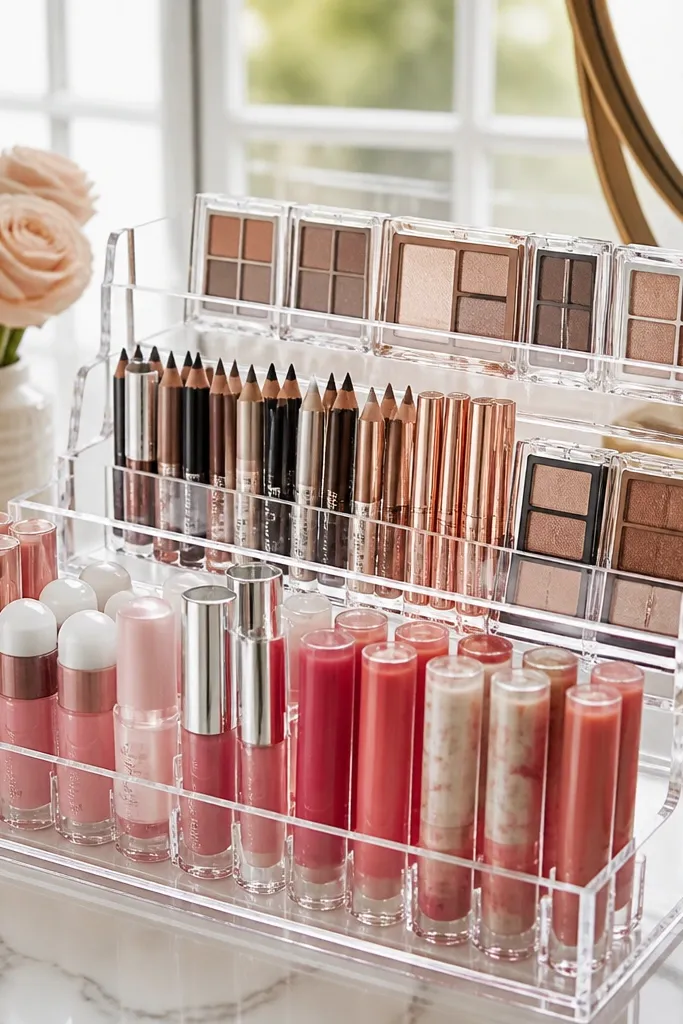
Risers turn a messy “stack” into a clean display. Lip products and small eye items look chaotic when they’re piled, because different heights collide and everything falls forward. Clear acrylic risers keep items separated by height and make the whole section easy to scan. The aesthetic payoff is huge: you get crisp rows, reflective surfaces, and a tidy gradient of product heights. This is beginner-friendly because you can build the section one category at a time.
Editor's noteWipe acrylic with a microfiber cloth before arranging products. Fingerprints ruin the clean look.
Choose risers with a footprint that fits your tray width and a height around 2-4 inches for most lip products. Place the risers on a tray or in a shallow bin so they don’t slide. Arrange lipsticks by finish type (matte, gloss, balm) and keep labels facing forward if you’re using clear tubes. Add a small catch tray underneath to stop any drips from spreading.
Skip thisDon’t mix tall bottles with flat compacts on the same riser. The stack becomes unstable and looks messy.
12. Magnetic strip for tweezers and small metal tools
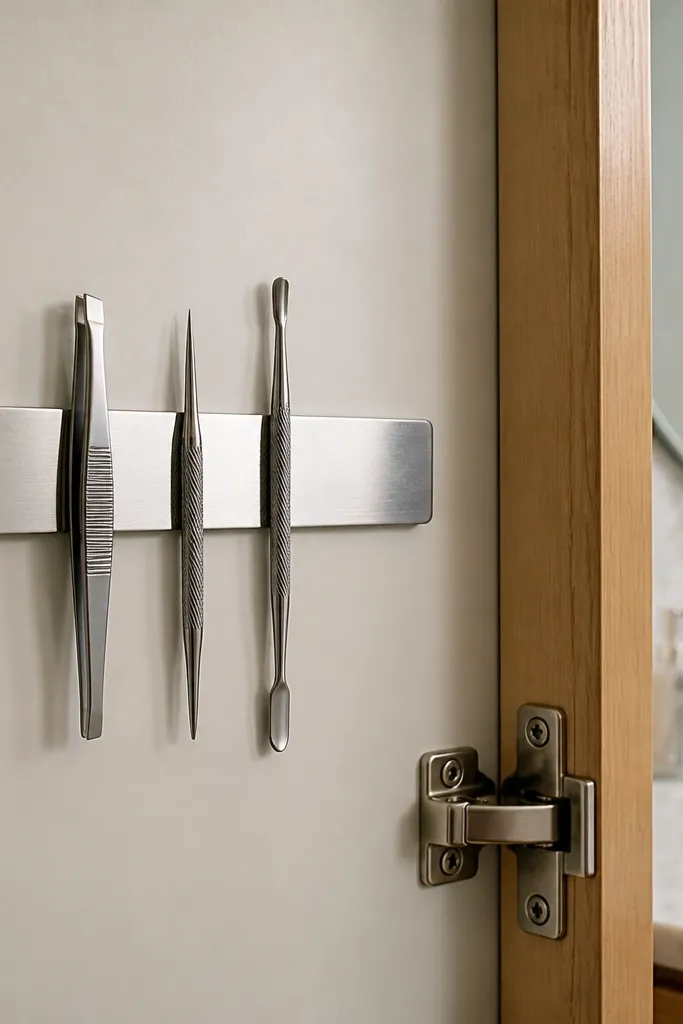
Small metal tools are the reason drawers end up cluttered. They scatter, they get buried, and you end up leaving them on the counter “temporarily.” A magnetic strip gives every tool a defined landing spot and keeps the look clean and intentional. It’s also photogenic because tools line up in a neat row with handles facing the same direction. This is beginner-friendly because it’s simple: tools go on the strip, period. You’ll also stop hunting for tweezers mid-routine, which is where the mess starts.
Editor's noteKeep the strip near eye level for daily tools. If it’s too low, you’ll leave items on the counter instead.
Pick a magnetic strip length that fits your tool count and install it on a wall or inside a cabinet door. Use a level and mark screw holes before attaching. Place tweezers, small scissors, and any metal tools with flat backs on the strip. Add a small felt strip beneath the tools if you need extra protection from scratches.
Skip thisDon’t place plastic-handled tools on the strip if they don’t sit flat. They’ll fall and ruin the system.
13. Cabinet door organizer with clear pouches
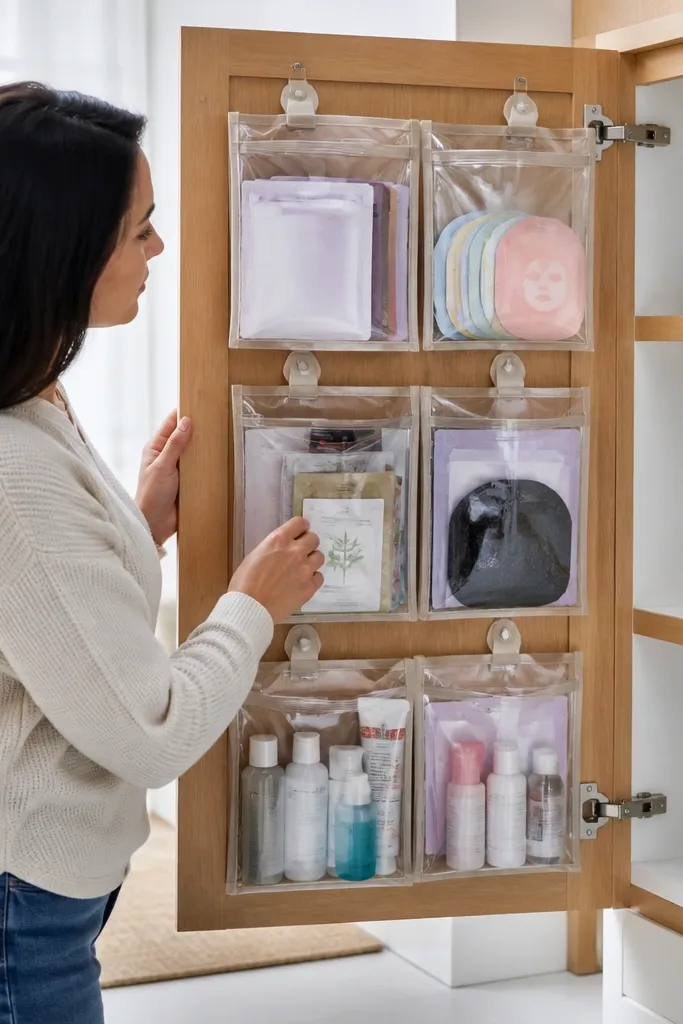
The inside of a cabinet door is dead space. Clear pouches turn it into visual storage for things you grab less often but still want easy access to. This works well for sheet masks, hair masks, backups, and travel sizes that otherwise get lost behind larger products. The look stays neat because items are contained and visible, not piled. For beginner-friendly vanity organization, this is a low-effort win because you’re not remodeling anything, just using a forgotten surface.
Editor's noteUse one pouch for backups only. If you mix daily and backups in the same pouch, you’ll dig and clutter returns.
Measure the inside width and height of your cabinet door and buy clear pouches that fit without sagging. Install hooks or command-strap anchors at the top so the pouch hangs flat. Fold items so they sit evenly inside, and keep pouches grouped by category: face masks in one, hair care in another, and travel sizes in a third. Label each pouch with painter’s tape so you can reset quickly.
Skip thisDon’t overstuff pouches. When pouches bulge, zippers and seams fail and everything looks messy.
14. Rolling tray for weekly restock and refills
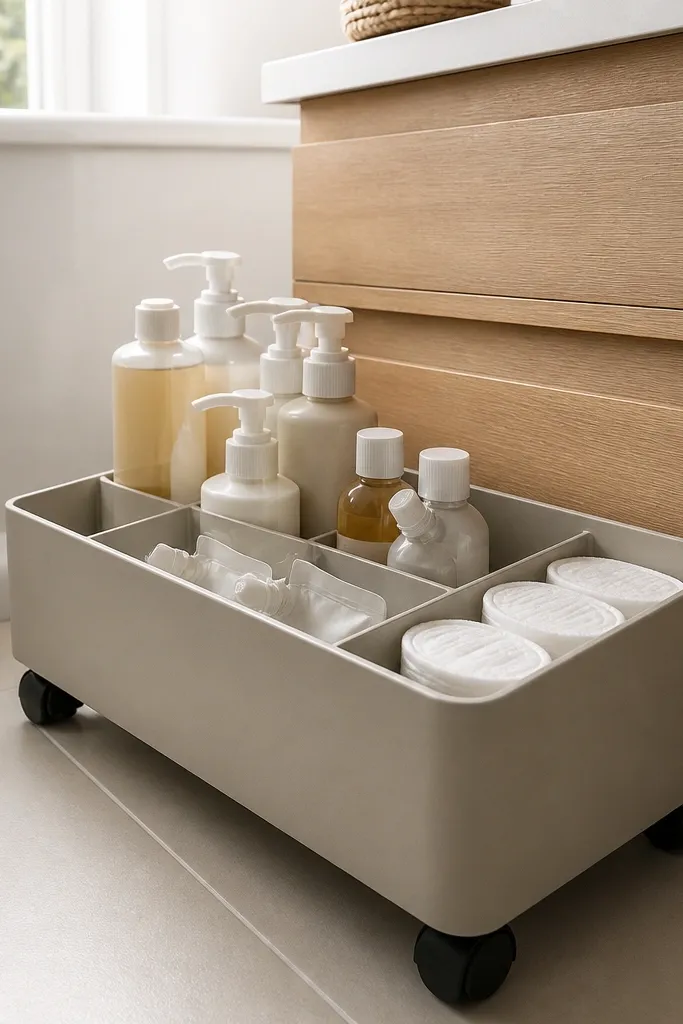
Clutter often comes from refills being stored in random places until you remember them. A rolling tray with labeled bins keeps your weekly restock contained and makes the restocking process neat. It’s beginner-friendly because you only handle the tray during your routine, not every drawer and shelf. The aesthetic is clean because the tray creates a consistent “station” with matching bins. When you roll it away, the vanity looks styled again.
Editor's noteUse bins with straight sides. Rounded bins look cute but spill when you set them down quickly.
Choose a small rolling tray with a handle and a top surface you can wipe. Add two or three small bins for restock categories like cleansers, moisturizers, and wipes. Label bins with painter’s tape and keep only the items you plan to use within the week. When you finish, roll the tray into a closet or under-sink area so the vanity counter stays minimal.
Skip thisDon’t store full-size duplicates on the tray. Keep it for the next week only.
15. Under-sink pull-out bin with height labels
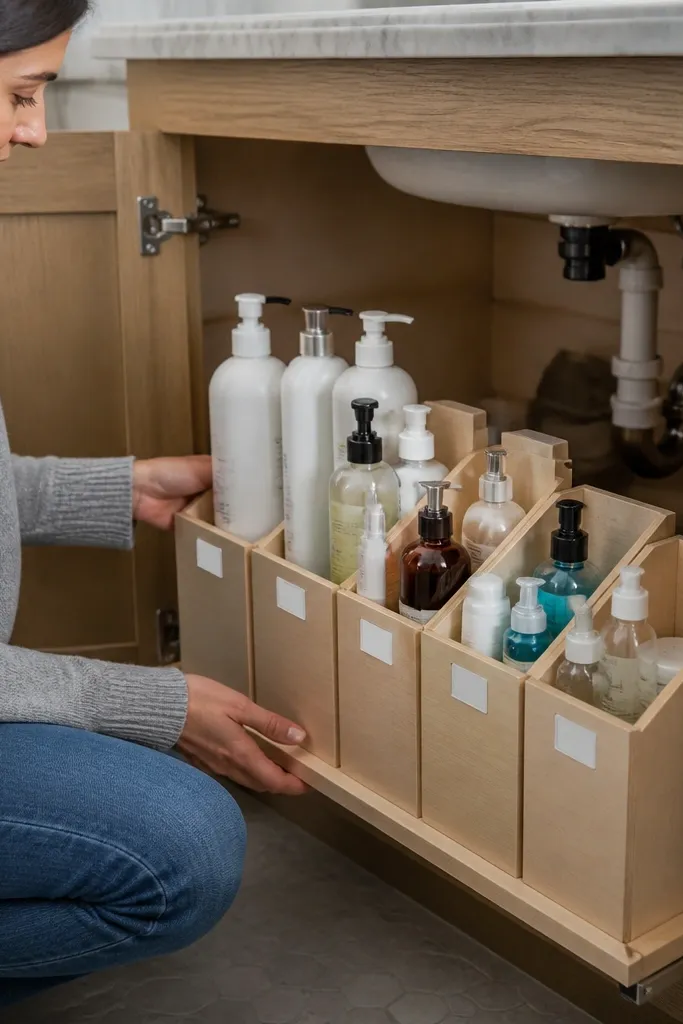
Under-sink storage looks chaotic because it’s deep and hard to see. A pull-out bin system fixes visibility and stops “I’ll remember it’s in there” clutter. Height labels help you keep bottles standing upright instead of tipping sideways in the back. The look isn’t about display here, it’s about order that prevents mess. For beginner-friendly vanity organization, under-sink control is a big deal because leaks, spills, and expired bottles are what turn your vanity area into a disaster.
Measure the under-sink cavity and buy or build a pull-out bin that slides fully out. Add bins inside for categories like backup skincare, cleaning supplies, and cotton products, keeping tall bottles in one bin and flat items in another. Label each bin front with painter’s tape and a thick marker. Add a small spill tray or plastic liner under the bins to catch drips and make cleanup easy.
Keep one bin for “trash and expired” only. When something goes bad, move it immediately so it doesn’t accumulate.
Don’t stack bottles in the back without a spill tray. The first leak turns everything into a sticky mess.
16. Makeup wipe and spray station in a shallow caddy
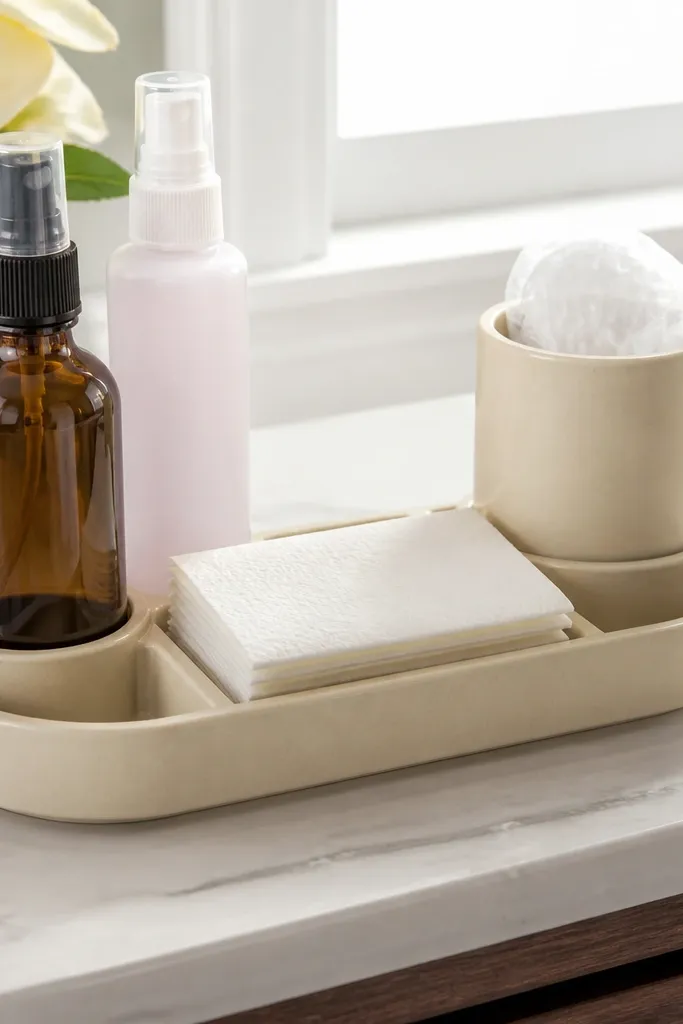
A wipe and spray station stops the messy loop where products migrate across the counter. Shallow caddies keep bottles from tipping and hold wipes in a contained stack. Add a small trash cup inside or beside it so you don’t leave used wipes in random places. This setup is visually clean because it’s one compact footprint with matching containers, not a scatter of single items. It’s beginner-friendly because you’re creating a “reset zone” for routines and cleanup.
Editor's noteUse a small non-slip mat under the spray bottles. It prevents micro-sliding that looks messy over time.
Choose a shallow caddy that fits your counter space and won’t block drawers. Place a wipes container or folded wipes in one side, then add a small cup for cotton pads or spatters. Put spray bottles upright in the other side using a non-slip mat or foam strip so they don’t slide. Add a small bin or cup for used wipes and line it with a plastic bag for easy disposal.
Skip thisDon’t put sprays loose on the counter. If they roll, the whole station looks chaotic.
17. Ceramic cup set for brushes, sponges, and tools
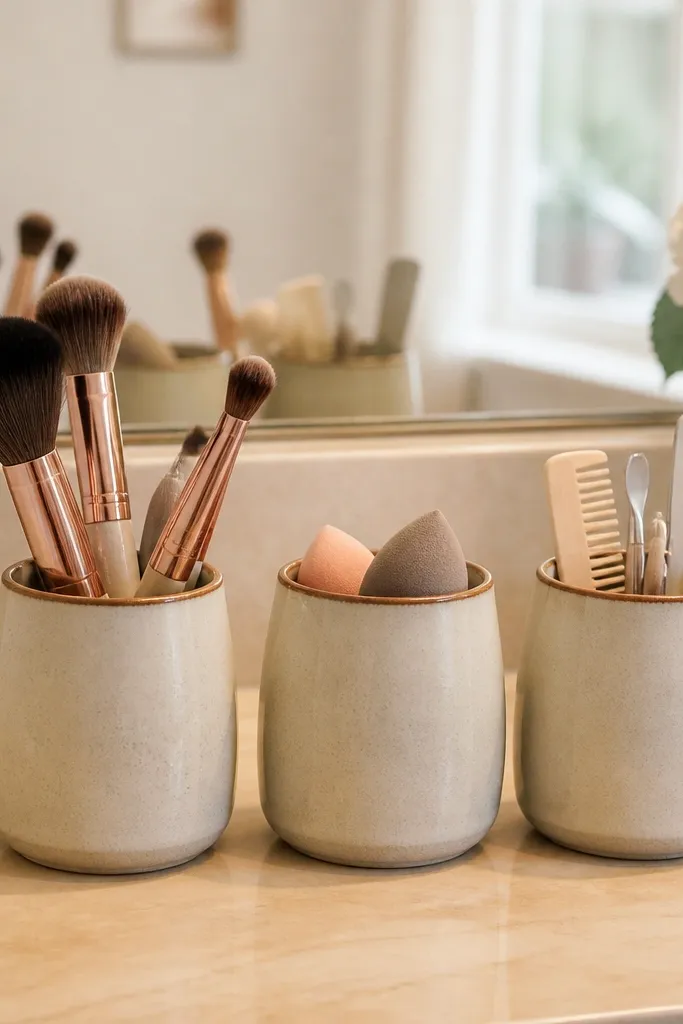
Matching cups are the fastest way to make a vanity look styled. Brushes, sponges, and small tools look messy when they’re mixed in one container because they touch, stain, and tip. Three separate cups keep them clean-looking and visually separated, which makes the whole counter read as intentional. Choose ceramic cups in a single color family so the set looks cohesive. This is beginner-friendly because you only need to transfer items once, then you’re done — the cups do the organization for you.
Editor's noteUse a sponge holder insert or small dish. It keeps the sponge from sitting in drips and looking messy.
Pick three cups with different widths but matching color, and set them on a tray for extra containment. Assign one cup for brushes, one for sponges, and one for small tools like eyelash curlers or a nail file. Keep sponges in a container with a lid or a removable insert so they don’t look soggy. Add a small label strip on the tray edge or inside the cup so everyone using the space returns items correctly.
Skip thisDon’t use mismatched cup heights. If one cup is too tall, the arrangement looks uneven and messy.
18. Shoe-box style drawer organizer for hair accessories
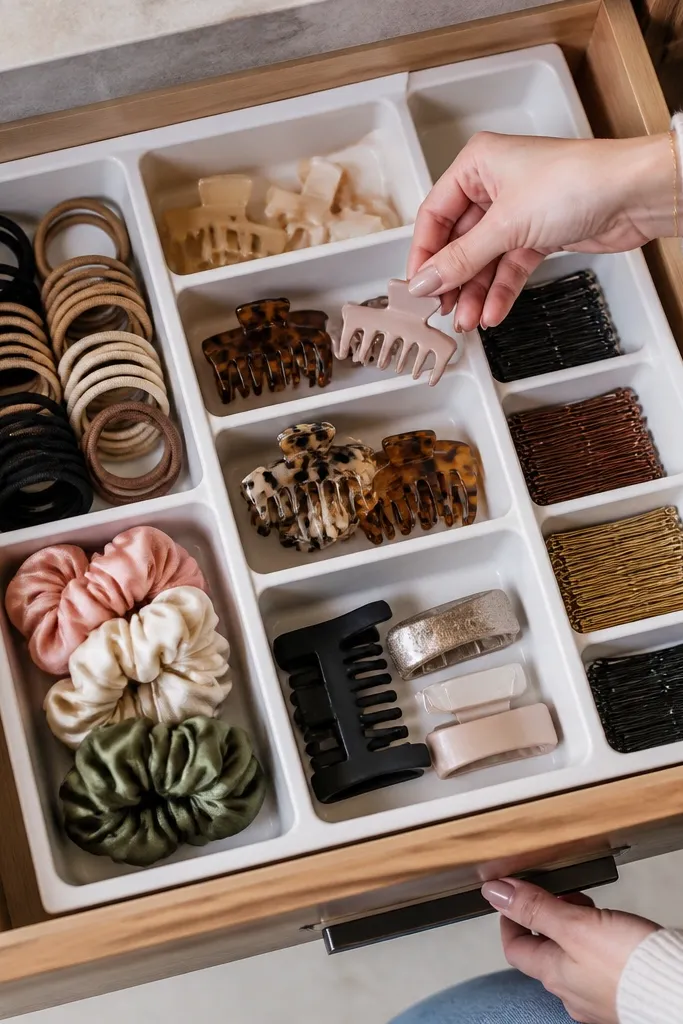
Hair accessories are tiny, and tiny items are where clutter grows. A shoe-box style organizer with sections keeps elastics, clips, and pins from turning into a tangled pile. The look is clean because everything sits in a defined shape and you can see the pieces without digging. This is beginner-friendly because you’re not trying to store every hair item differently — you’re making one drawer area behave. It also helps you stop losing clips behind bottles and under towels.
Editor's noteUse a small lidded cup for bobby pins. Loose pins spread and look messy fast.
Measure your drawer and build a shallow organizer box using thin plywood or sturdy foam board, then line the inside with fabric shelf liner. Create 3-5 sections using the same liner to form vertical dividers. Place elastics in one section, claw clips in another, bobby pins in a small lidded cup, and headbands flat in a dedicated slot. Keep the organizer at the front of the drawer so it’s visible and easy to reset.
Skip thisDon’t dump hair ties and clips together. Mixed piles tangle and become unusable.
19. Clear-lid bin for backups with a "next up" label
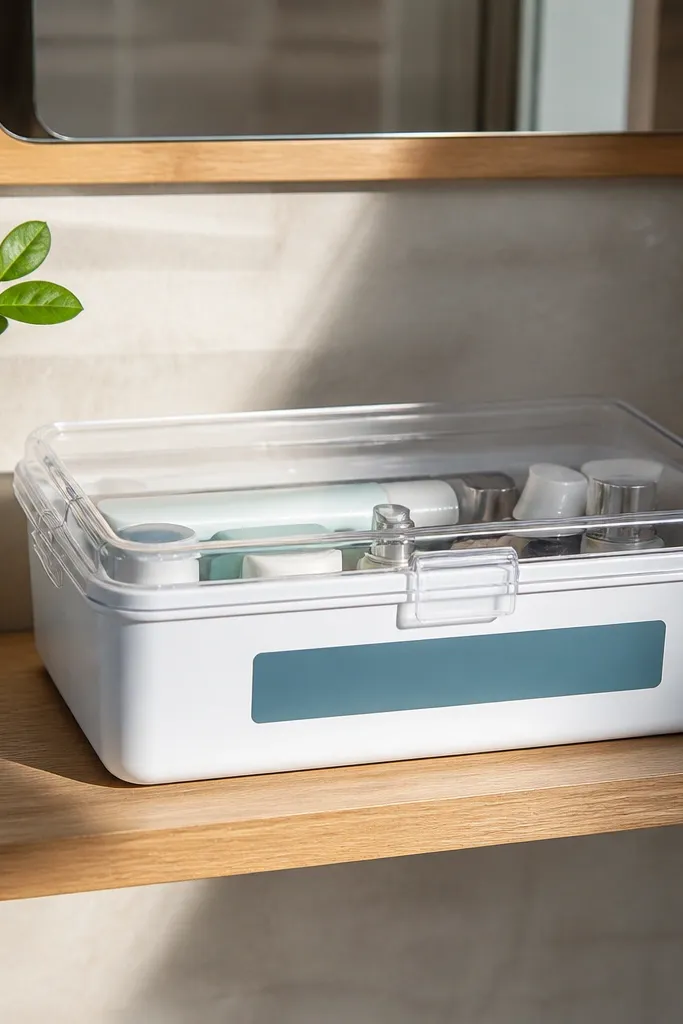
Backups look cluttered because they’re stacked randomly and you can’t see what’s next. A clear-lid bin solves that by showing contents while keeping them contained. Add a “next up” label so you pull the correct item and leave the rest neat. This keeps the vanity looking styled because backups are hidden inside a single container, not scattered. For beginner-friendly vanity organization, this is one of the easiest ways to stop the overflow problem without buying ten different organizers.
Choose a bin with a lid that fits your drawer or shelf depth and can stack neatly with other items. Place backups inside by category, keeping similar product types together. Add a label like “Next up” on the front and write the product name or type. When you use an item, move the next one to the front of the bin and update the label with painter’s tape.
Keep the bin small enough that you only store what you can use within 30-45 days. Overfilling turns it into a messy storage box.
Don’t hide backups in opaque bags. You’ll forget what you have and clutter multiplies.
20. DIY label board with color-coded tape strips
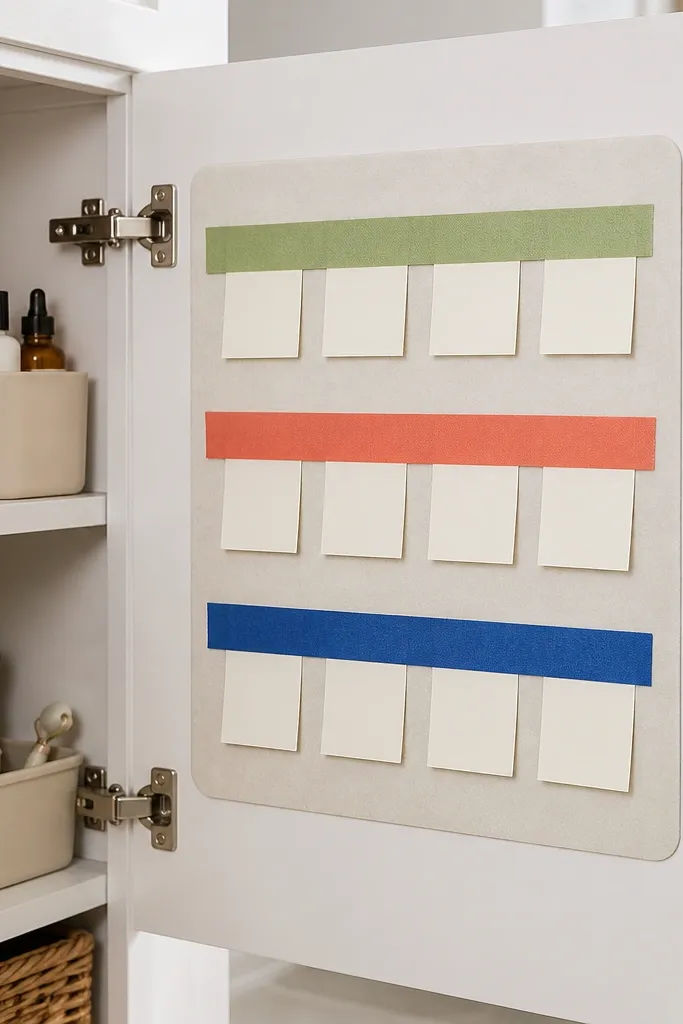
Beginner-friendly vanity organization breaks when you can’t remember where things go. A label board fixes that by turning your system into a quick reference. Use color-coded tape strips for categories like skincare, hair, and tools so you can reset in seconds. The look is clean and aesthetic because labels are consistent and the color coding makes the vanity feel designed. This also helps roommates or partners follow the system without asking. It’s small, but it’s the glue that keeps the rest of your storage from falling apart.
Editor's noteUse the same tape color on every matching bin. Consistency is what makes it look good and easy.
Grab a small frame board or cork board and cut it to fit a drawer lid or wall area near the vanity. Use painter’s tape strips in three colors and write category names clearly on each strip. Add mini labels on each container using the same tape colors. Place the board where you can see it while you’re getting ready, then keep your categories limited to what you actually store.
Skip thisDon’t create labels for every single product. Label categories and let the containers do the rest.
21. Satin-finish acrylic pencil tray for makeup brushes
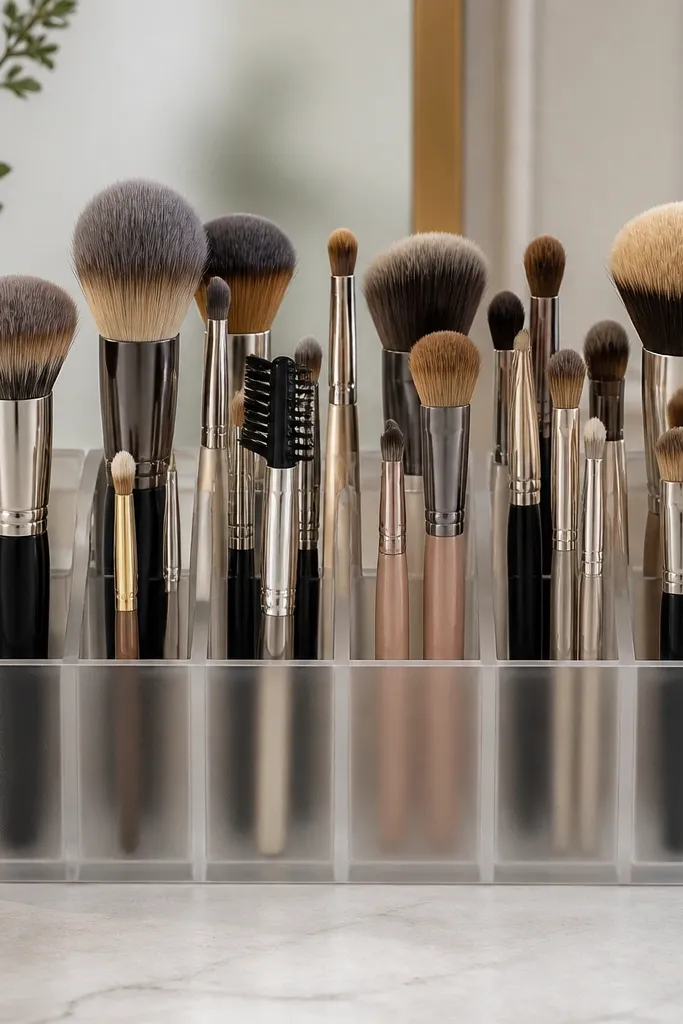
Makeup brush storage often looks messy because brushes lean and handles disappear. A pencil-tray style organizer with compartments solves this by keeping each brush upright and separated. Satin-finish acrylic looks softer than glossy plastic, so the vanity stays calm and photogenic. It’s beginner-friendly because you can fit different brush sizes by adjusting how you place them across compartments. You also get a clean, grid-like look that makes the whole section feel curated without being fussy.
Editor's noteAdd a thin non-slip pad under the tray. Brush cups are heavy enough to shift if the surface is slick.
Choose an acrylic tray with deep compartments or cut slots into a foam insert to match your brush handles. Place the tray on a shallow base tray so it doesn’t slide. Insert brushes by handle length, with longer handles in back compartments and shorter handles in front. Keep the brush heads facing the same direction so the whole grid looks uniform.
Skip thisDon’t place brushes loose at the bottom of the tray. If they can tilt, they’ll tilt every day.
22. Under-drawer sliding tray for small tubes and minis
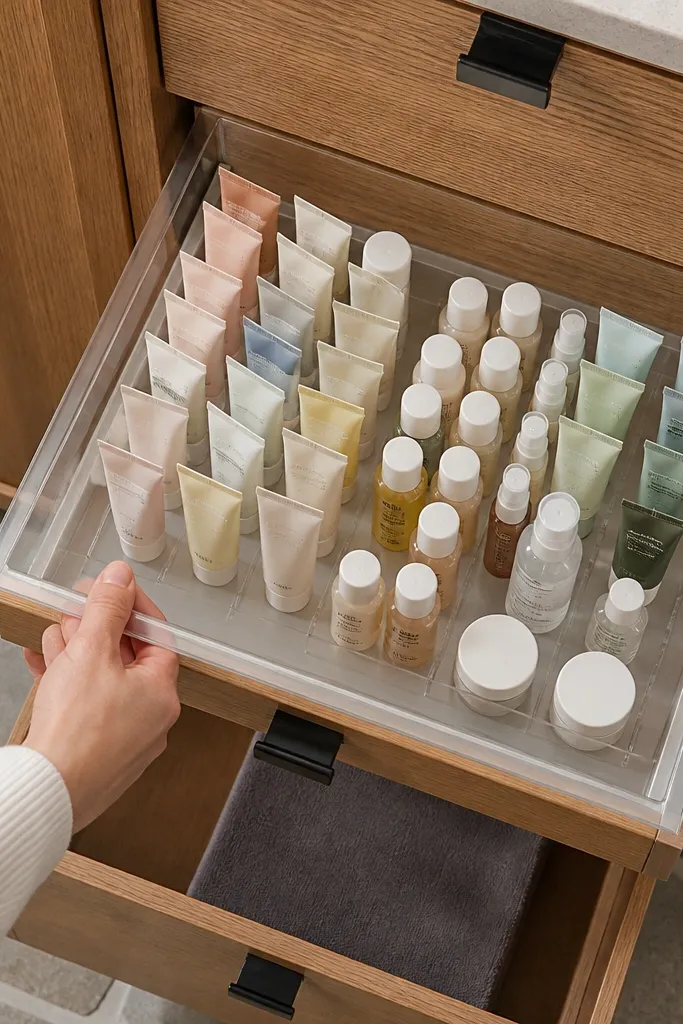
A sliding tray under the drawer is a sneaky fix for the “tiny stuff disappears” problem. Minis, small creams, and tubes get buried under larger products, so you end up digging and spilling. A sliding tray keeps small items at eye level when you open the drawer, which makes the system easier to maintain. The look is clean because the main drawer space stays orderly while minis have a dedicated home. This is beginner-friendly because it doesn’t require redesigning your whole vanity — just adding one functional layer.
Editor's noteStore only items that fit upright. If you place flat items randomly, the tray turns into another pile.
Measure your drawer base and choose a shallow sliding tray that fits without scraping. Install the tray rails according to the manufacturer instructions, then test pull to confirm clearance. Add a foam insert or simple divider strip inside the tray so tubes stand upright. Organize by type (serums, creams, eye products) and label the tray front with painter’s tape.
Skip thisDon’t overload the sliding tray. If it sits too full, tubes tip and the look degrades quickly.
23. Lidded caddy for nail care with separate polish zone
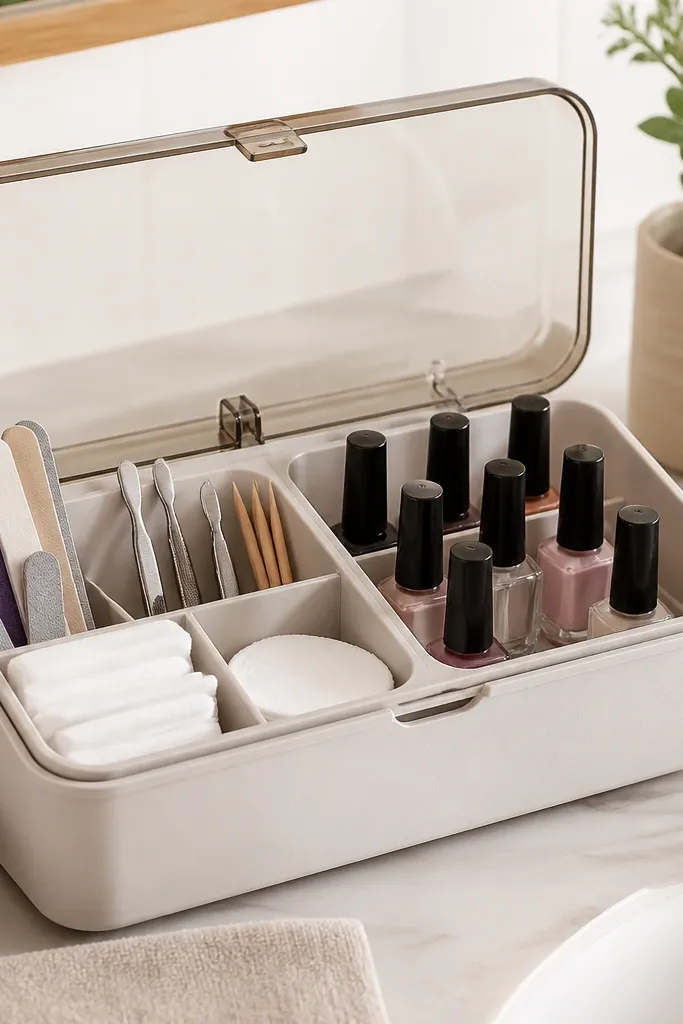
Nail care is a clutter magnet because you have tools, bottles, files, and cotton pads all in one routine. A lidded caddy keeps it contained and stops polish bottles from spreading across the counter. The separate polish zone matters — it keeps bottles from bumping tools and keeps the whole set visually tidy. This is beginner-friendly because you can close the lid when you’re not using it, which hides the mess instantly. It also looks good because the caddy creates one styled block on the vanity.
Editor's noteUse a small silicone mat under polish bottles to stop slipping and reduce scuffs.
Choose a lidded caddy with compartments or line a single caddy with a divider made from thin wood or foam board. Add one compartment for tools like clippers, file, and tweezers, and a second compartment for polish bottles standing upright. Place cotton pads and remover wipes in a small zip pouch inside the caddy so they don’t look messy. Label the caddy front and keep it on a tray for extra stability.
Skip thisDon’t store polish caps loose. A capless bottle turns the caddy into a sticky mess.
24. Clear-lid organizer for hair ties and scrunchies with color sorting
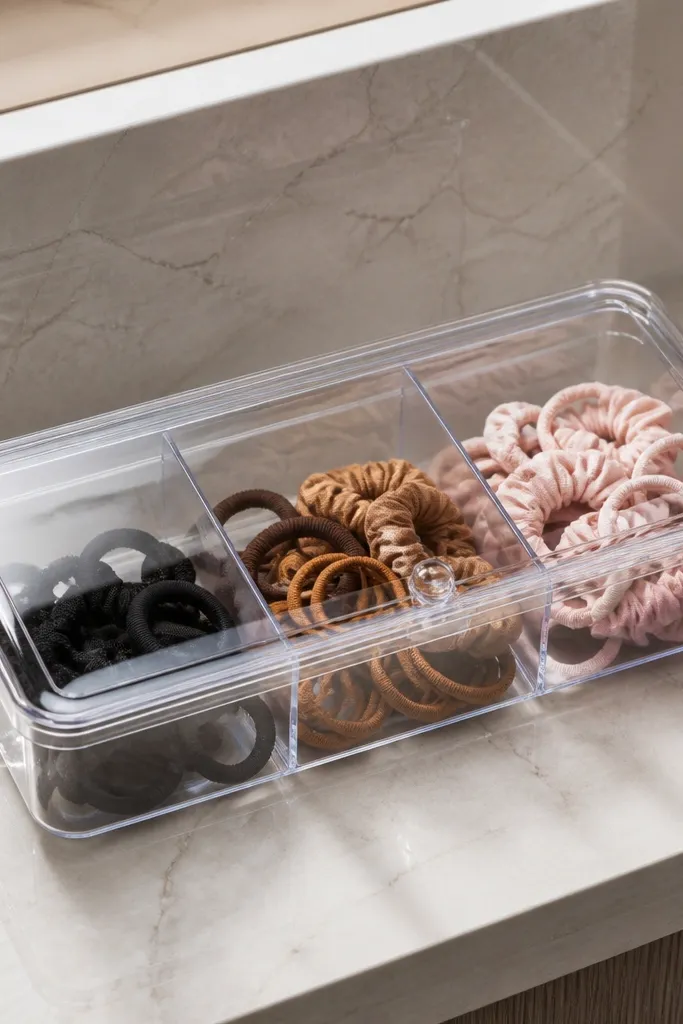
Hair ties are small, stretchy, and visually chaotic when they’re tossed together. A clear-lid organizer fixes that by letting you see what you own and keeping pieces from tangling. Sorting by color makes it look styled instead of random, and the clear lid keeps dust off. This idea is beginner-friendly because you’re not building a complex system — you’re creating one neat container that makes it easy to return items. The look is photogenic because scrunchies and ties create a soft, color-blocked pattern.
Editor's noteCut a small notch in dividers so you can grab the scrunchie without pulling the divider out of place.
Buy a clear plastic organizer with multiple compartments and a lid. Sort scrunchies and ties by color family and place them in separate compartments so you can grab quickly. If your organizer has too few compartments, add a divider using thin acrylic or foam board inside the main section. Close the lid after each use and place the organizer in the drawer at the front for easy access.
Skip thisDon’t mix tangled hair ties with looped scrunchies. The mix makes the organizer feel messy even when it’s closed.
25. Spa-style towel and product stacking shelf with baskets

If your vanity area looks cluttered because towels and products are mixed, this stacking shelf solves it with vertical organization. Baskets keep towels contained and product baskets keep bottles from spreading. The aesthetic is spa-like because everything has a “home” and the shelf creates clear vertical structure. This is beginner-friendly because you build one consistent zone instead of reorganizing every drawer. It also makes your routine look intentional since daily items sit in the front basket and backups live in the lower basket.
Install or place a small shelf beside the vanity with enough space for your tallest bottles. Add two baskets: one for daily items and one for backups or towels, keeping heights different so the arrangement looks layered. Use a tray or thin liner inside the baskets to prevent bottles from sliding. Place daily products in the top basket first, then add backup items in the lower basket and keep towels folded in a separate basket.
Use baskets with similar weave or finish. Mixed textures make the shelf look busy even when the organization is correct.
Don’t stack towels directly under open products without a barrier. Water transfer and dust make everything look worn.



