
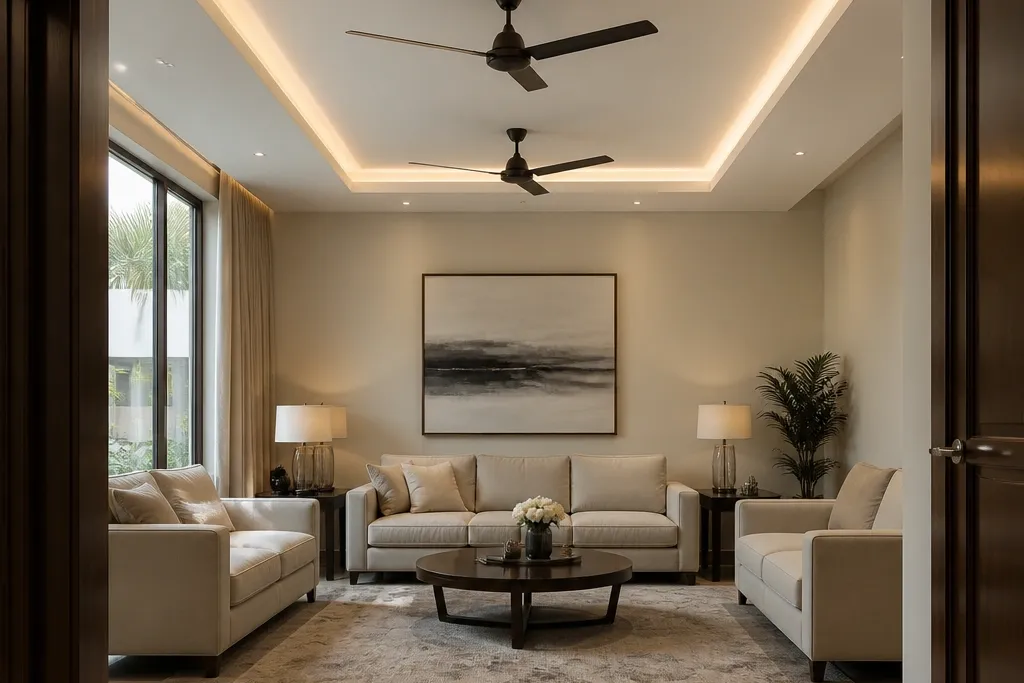
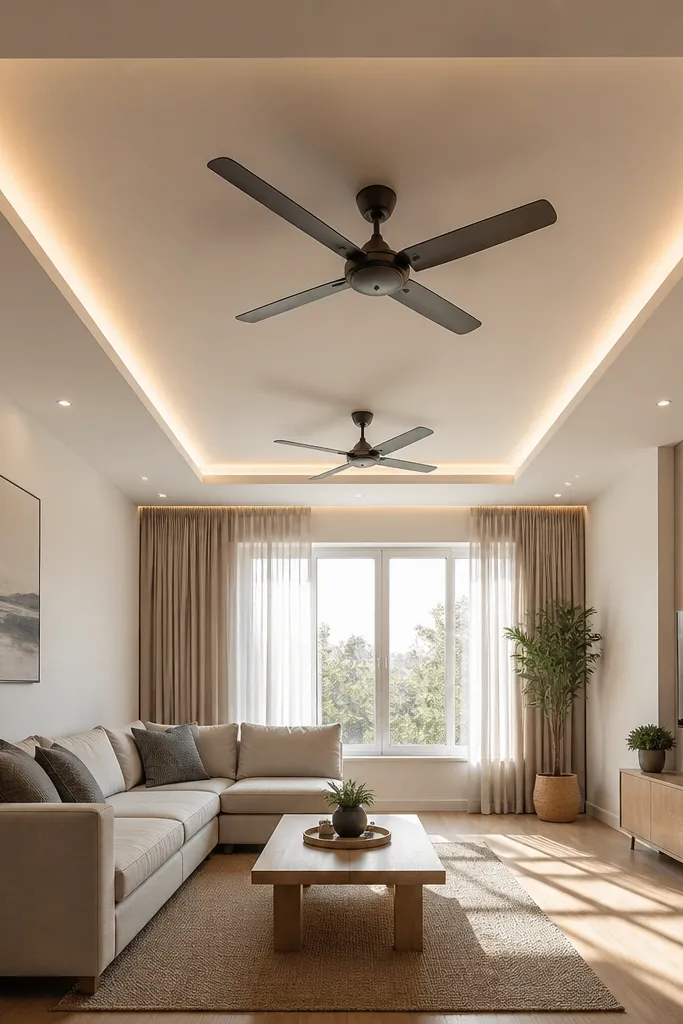
1. Double-Frame Rectangle with Mirrored Fan Centers
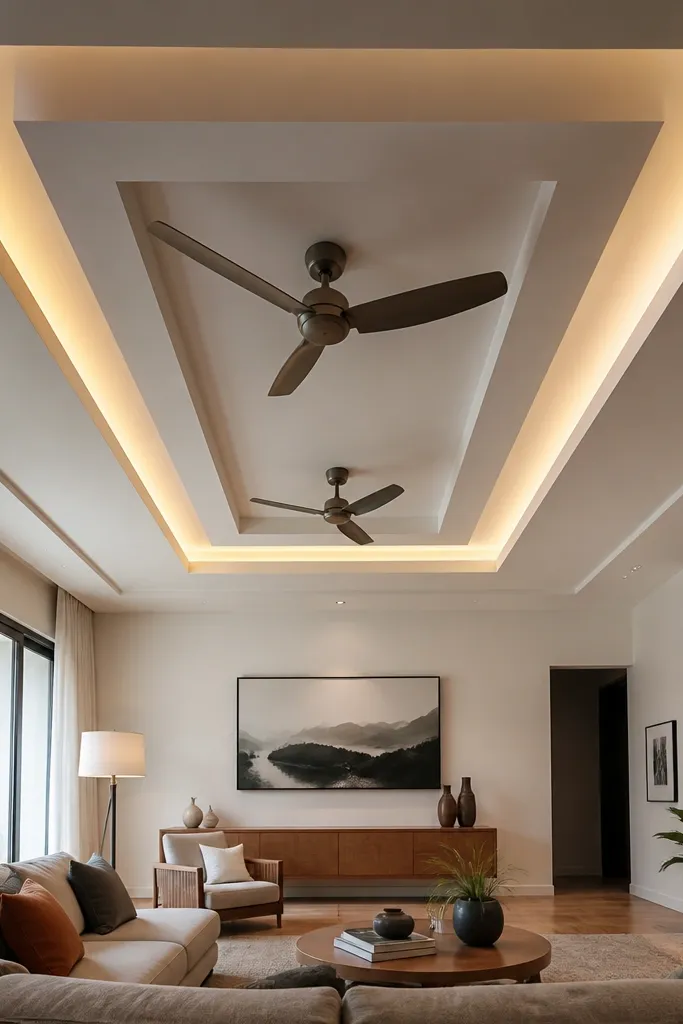
This is the cleanest “designer” look for beginner-friendly False Ceiling Living Room 2 because it reads clearly from the doorway: a big outer rectangle, then a tighter inner border. The two fans sit in the open middle area, evenly spaced so the ceiling doesn’t feel top-heavy or lopsided. Use a warm LED strip in the outer border for a soft glow that makes the fans look intentional instead of floating. This layout suits square rooms and rectangles where you want a calm, modern vibe with minimal cutting.
Start by marking the room centerline on the ceiling and snap chalk lines for the outer rectangle. Build a metal grid with perimeter channels for the outer border, then add a second inner border frame 20-30 cm inside it. Mark two fan center points so they are symmetric across the centerline and keep at least 30-45 cm clearance from the inner border edge. Install the fan junction boxes with proper support, run wiring in ceiling channels, then close with gypsum board and add LED strip channels along the outer border.
Use a laser level for the border drop so the inner and outer frames stay perfectly parallel.
Don’t set the fans too close to the inner border — you’ll lose the framed “open center” look.
2. Shallow Cove Border with Two Fans in a Center Field
If you want a gentle, photogenic glow, a shallow cove border is the easiest way to make a two-fan ceiling look expensive without deep carpentry. The fans sit in a mostly flat center field, so the ceiling stays visually light and the room looks taller. This works especially well when your walls have windows or artwork that you don’t want competing with heavy ceiling shapes. Choose warm white lighting so the cove looks cozy rather than blue.
Mark a perimeter line where the false ceiling drop will start, then install perimeter channels at that height. Add a cove profile using a simple angled gypsum edge or a cove trim channel, keeping the cove depth around 5-7 cm. Place two fan centers symmetrically along the centerline, and keep their blades' sweep area clear of any ledge. Close the center field with gypsum board, then fix LED strip inside the cove channel and run the driver to a reachable access point.
Editor's notePaint the cove interior white before LED installation — it boosts brightness without extra LEDs.
Skip thisSkip glossy paint on the cove — it creates glare halos around the fans.
3. L-Shaped Border That Frames the Seating Side
This layout is for living rooms where the seating is pushed to one side. The trick is an L-shaped border that visually “holds” the seating area while still placing two fans symmetrically around the room centerline. The ceiling looks directional and stylish in photos, even though the fans themselves remain balanced. It also helps hide wiring runs because one long border segment can house the main conduit line.
Draw the room centerline and then decide your seating side. Build a full perimeter border on the far wall side, but on the seating side create an L shape by stopping the border short near the entry side. Keep the fan centers symmetric across the centerline and position them so they sit inside the open area created by the L. Use LED strip only along the longer border segment for a cleaner glow, then board the remaining ceiling field flat.
Editor's noteKeep the stopped border edge crisp and wide (at least 8-10 cm) so it doesn’t look like an unfinished cut.
Skip thisDon’t break the border right under a fan — it makes the fan look “cut off.”
4. Two-Layer Grid with Fan Squares
A layered grid makes the two-fan setup feel structured, like a modern ceiling panel system. Instead of one big rectangle, you get repeat lines that guide the eye to each fan. The look is great for medium-sized living rooms where you want texture without complicated curves. Use cement board or gypsum board on a metal grid, and keep the grid spacing consistent so it looks sharp from the sofa.
First, plan a square or rectangular ceiling panel area and mark a grid with consistent spacing, like 40-50 cm. Install the metal grid for the base layer, then add a second layer border around the two fan zones to create raised squares. Place two fans so each one sits centered in its own square panel, keeping equal distance from the nearest grid lines. After boarding, sand seams, prime, and paint the raised grid edges before installing LEDs in a perimeter strip or along grid channels.
Editor's noteUse the same board thickness for both layers so raised squares don’t look uneven.
Skip thisDon’t mix grid spacing sizes around the fans — it makes the layout look accidental.
5. Central Medallion with Two Fans on a Mirrored Axis
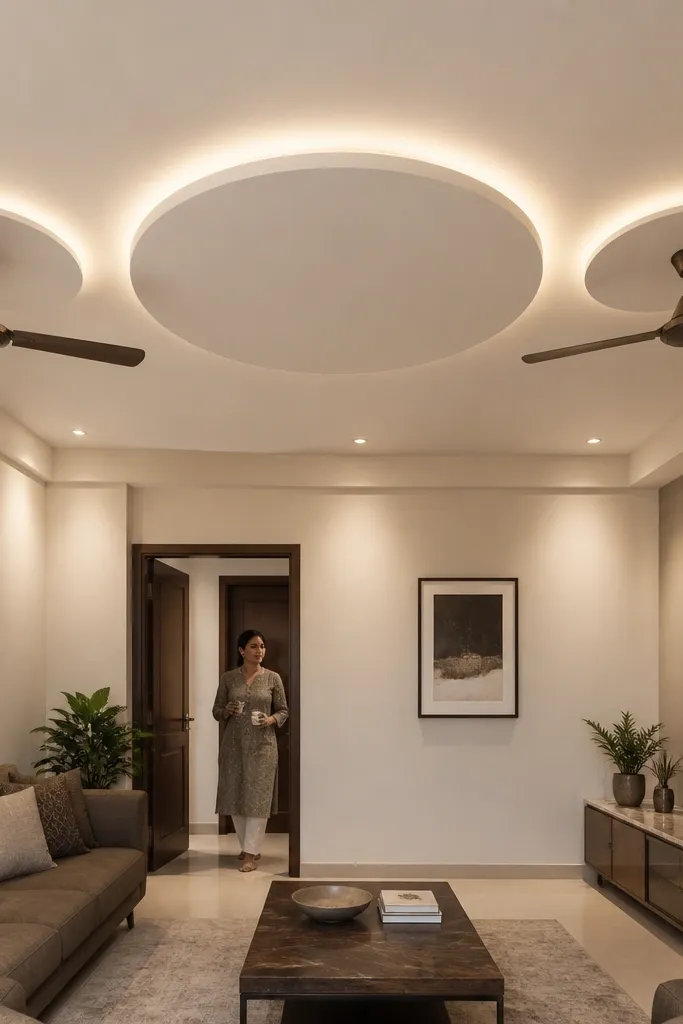
This is a classic false-ceiling trick, but with a beginner-friendly twist: keep the medallion simple and place the two fans symmetrically around it. The medallion acts like a visual anchor, so even if your room is slightly off-square, the ceiling still looks balanced. It photographs well because the center detail draws attention upward, and the fans sit in matching “sub-areas.”
Mark the room center and decide the medallion shape — a simple circle or octagon made from gypsum strips is easiest. Build the perimeter border as a thin frame, then create the medallion by installing radial segments or using a pre-made trim. Place two fan centers along a straight axis that passes through the medallion center, keeping equal spacing on both sides. Install downlights around the medallion or use a small LED ring inside the medallion channel.
Editor's noteUse 2700K LEDs around the medallion so the glow looks warm instead of harsh.
Skip thisDon’t make the medallion too large — if it eats the center field, the fan placement looks cramped.
6. Rectangular Tray Ceiling with Two Fans in the Recess
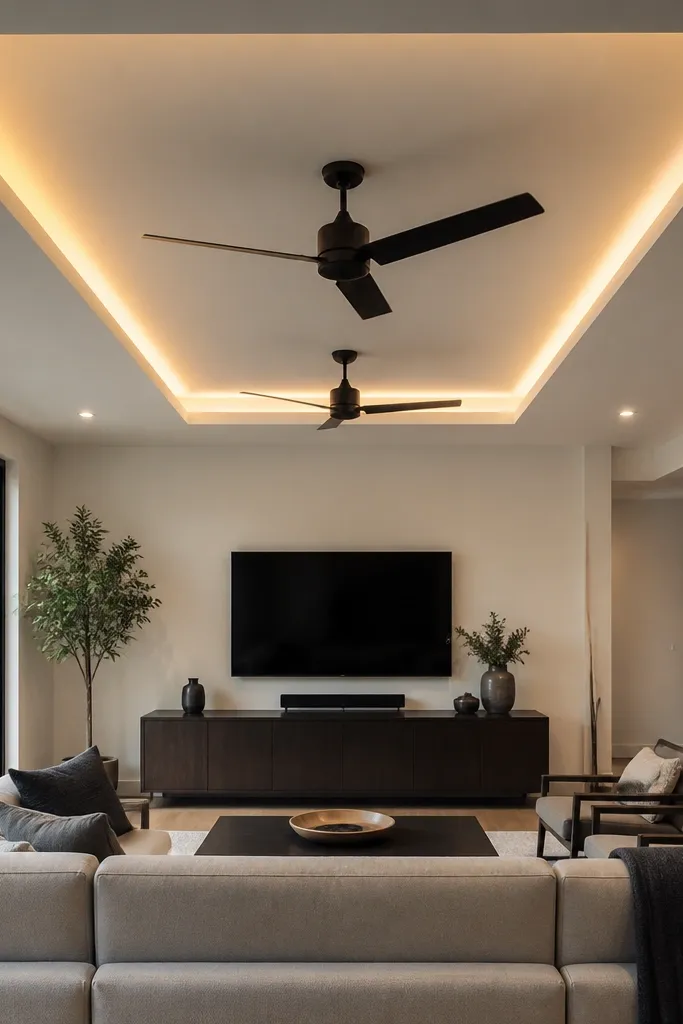
A tray ceiling adds depth fast. The false ceiling drops in a rectangular recess, and the two fans sit inside that recess so their silhouette looks grounded. This layout works well for rooms where you want a more dramatic look without making the whole ceiling deep. Keep the tray edges clean and consistent, and use a thin LED line at the tray lip so the depth shows on camera.
Mark the tray boundary on the ceiling and install drop-down framing only for that rectangle, typically 8-12 cm deep. Build a perimeter tray lip using metal channels, then install the flat center board inside the tray. Place two fans symmetrically across the room centerline so each fan is centered within the tray’s open area. Add an LED strip at the tray lip, then finish the outer perimeter ceiling flat with board and paint.
Editor's noteBefore closing the tray, test LED alignment with a strip prototype — tiny angle errors show up in photos.
Skip thisDon’t run the tray edge directly under the fan motor housing — you need clearance for service access.
7. Double Border Square with Center Line Downlights
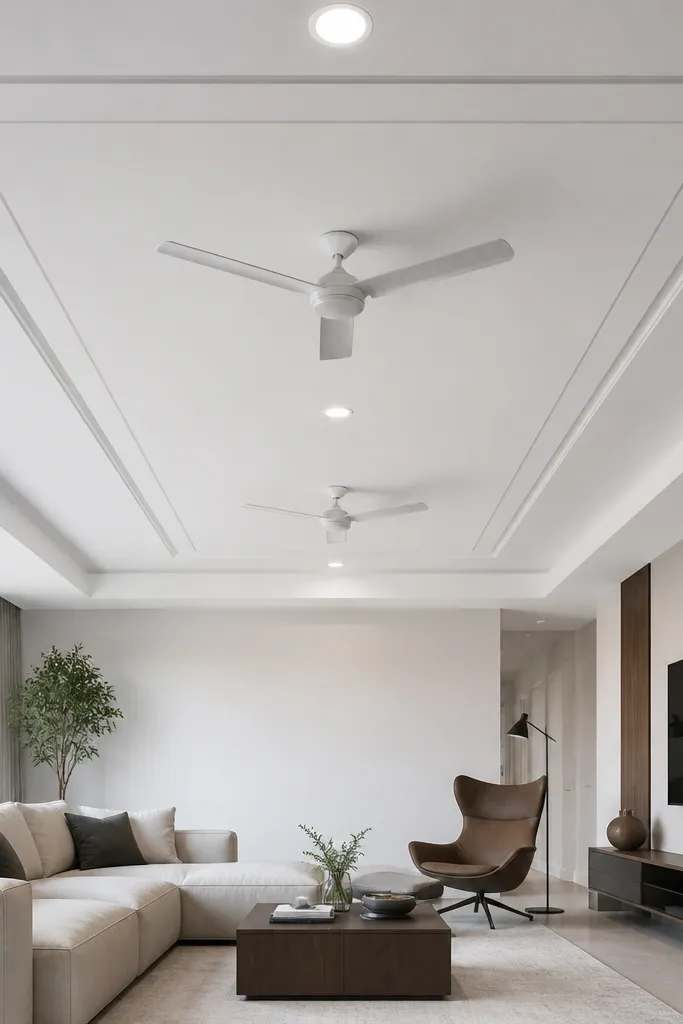
This one looks crisp because the lighting layout is disciplined. The ceiling has a square double border, but the downlights run along the center line between the two fan zones, giving a clean vertical rhythm. The fans stay the main feature, while the downlights keep the ceiling bright enough for living-room tasks. Great for medium rooms where you want a modern, slightly formal look.
Mark your outer and inner square borders with equal margins from each wall. Install the perimeter frames first, then build a flat center board area. Place two fans symmetrically across the centerline, keeping their centers equal distance from the inner border edge. Drill and install downlight cutouts along the center line in a straight line, then run wiring in the grid and connect to a dimmable driver if you want mood lighting.
Use a consistent downlight spacing, like 50-60 cm, so the line looks intentional and not random.
Don’t place downlights too close to fan blades — keep a clear safety zone around the fan center.
8. Stepped Border with Two Fans in the Upper Step
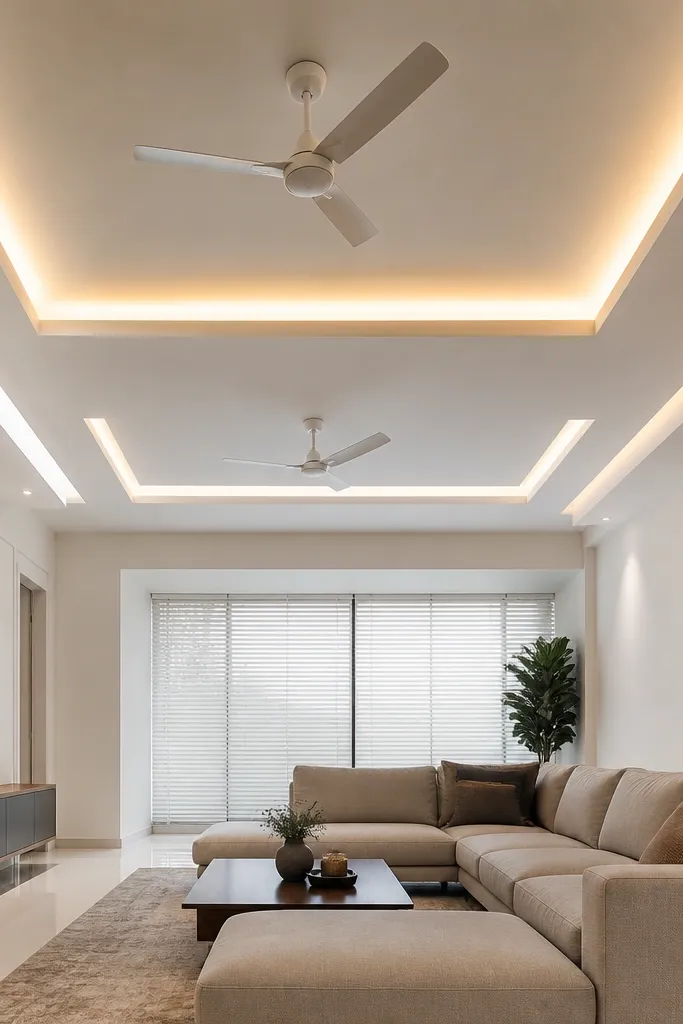
A stepped border adds dimension without complex curves. The center zone where the fans mount sits slightly higher than the outer border, so the fans appear framed and “lifted.” This is a strong choice for living rooms with straight furniture lines and a need for a bold, photogenic ceiling. Keep the steps shallow so it stays beginner-friendly and doesn’t eat too much headroom.
Pick a two-step drop plan: outer border drop of about 8 cm and inner step drop of about 4-5 cm. Build the metal grid in layers so the inner zone boards mount higher than the outer. Mark two fan centers symmetrically and ensure the fan mounting plate is anchored to strong framing. Close the steps with gypsum board, then add LED strip along the step edge to show the separation line.
Use a white primer on the step surfaces before final paint; it makes the step shadow line look clean.
Don’t let the step edge wander — even a 5 mm height difference looks messy.
9. Diagonal Border Corners with Symmetric Fan Pair
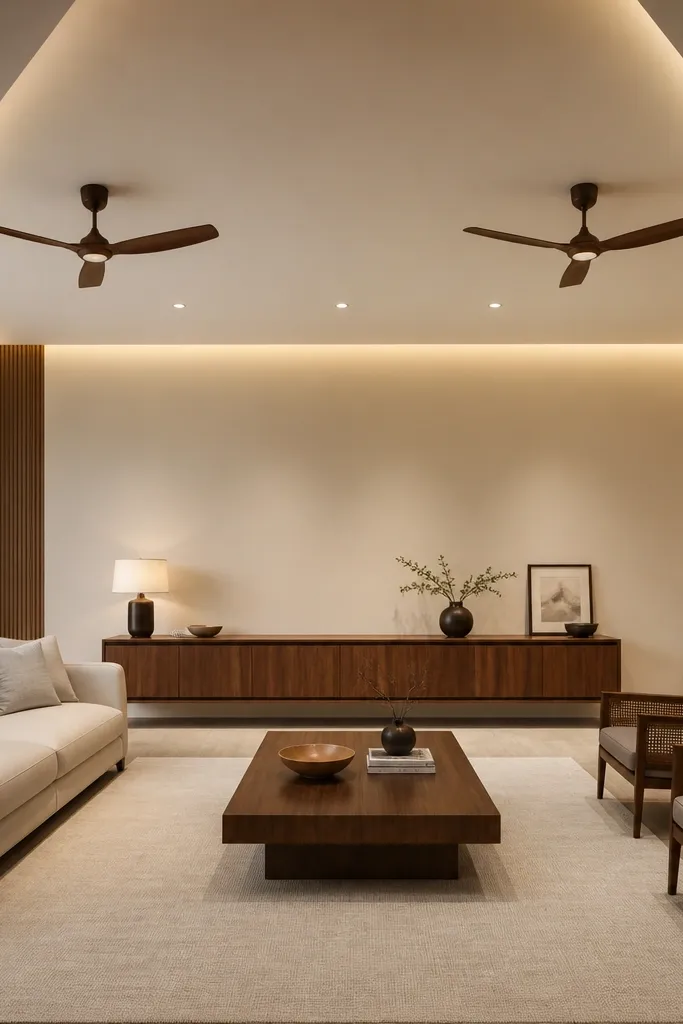
Diagonal corner cuts make a two-fan ceiling feel modern and architectural. The border still frames the room, but the angled corners break up the “boxy” look that can flatten living rooms in photos. The fans stay symmetrical, so the design doesn’t feel chaotic. This works best when your living room has a strong rectangular layout and you want a subtle edge on the ceiling.
Start with a rectangle border, then cut the corners by marking diagonal lines at each corner, aiming for a 45-degree chamfer. Build the border framing along the diagonal edges using metal channels bent or pre-cut segments. Mark fan centers symmetrically across the centerline, keeping them well inside the diagonal-border area. After boarding, install LED strip along the border channels, and paint the diagonal faces the same color as the ceiling for a uniform finish.
Editor's notePre-cut diagonal channel segments and dry-fit them before screwing — it prevents twisted corners.
Skip thisDon’t skip sanding at diagonal seams; rough edges show under LED lighting.
10. Corner-Weighted Border with Fan Pair Centered
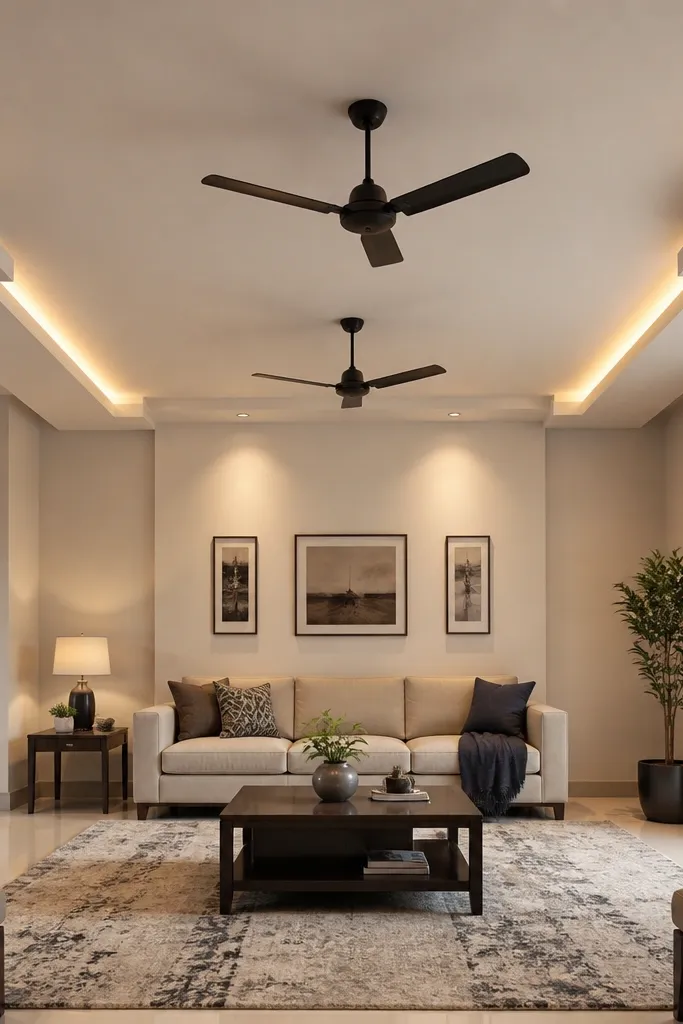
If your room has corners that feel visually heavy or empty, corner-weighted blocks fix that. You keep the fans centered and symmetric, but the border thickens at the corners, giving the ceiling a sculpted look. It’s great for rooms with a sofa centered on the far wall, because the ceiling draws attention outward from the fans. The key is making the corner “pillars” look intentional, not like random thicker patches.
Draw a perimeter border frame at a uniform drop, like 7-8 cm. Then add thicker framing blocks at each corner — about 12-15 cm wide — by adding extra channel layers at the corners only. Keep the fan centers symmetric across the room centerline and ensure they are centered within the open center area between the corner blocks. Board the border and corner blocks, then run LED strip along the border inner edge for a bright but controlled glow.
Use a corner template cut from cardboard so each corner block width matches exactly.
Don’t make one corner block deeper than the others — it kills the balanced look.
11. Wave Edge Border with Two Fans in a Flat Middle
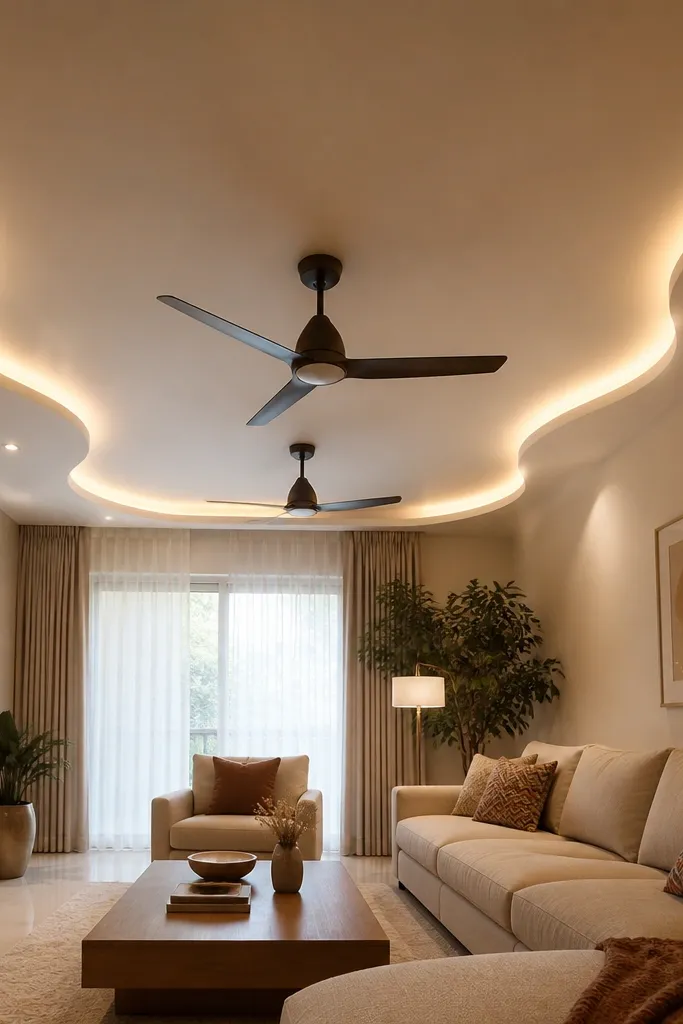
A wave edge is the quickest way to make a two-fan ceiling look lively in photos. The middle stays flat for beginner ease, and the wave only happens on the outer border so you don’t fight complex shapes around the fans. Choose gentle waves with low amplitude so your installation is manageable and the ceiling doesn’t look chaotic. This suits living rooms with rounded decor elements or softer color palettes.
Mark the perimeter border drop line and cut gypsum strips to create a wave profile using a flexible carrier board or pre-scored gypsum. Build a standard metal grid for the flat center, then attach the wave edge frame around the perimeter. Place two fans symmetrically across the centerline and keep them at least 35-50 cm away from the wave edge so the wave doesn’t interrupt the fan zone. Install LED strip behind the wave edge channel and finish with joint compound and sanding on the wave seams.
Editor's noteMake one wave template and trace it — repeating the same curve is what makes it look designed.
Skip thisDon’t push the wave too close to the fan centers; the ceiling can feel crowded.
12. Octagon Center Panel with Two Fan Seats
An octagon center panel gives you a “medallion” vibe but in a cleaner, panel-like form. Two fans mount inside two matching areas of that octagon, which keeps the ceiling symmetrical and photo-friendly. It also helps if your room has a doorway offset — the octagon pulls attention to the center rather than the walls. This layout reads modern without looking like a heavy carved ceiling.
Build a perimeter border first at a drop of 7-9 cm. Create an octagon center panel by laying out eight equal sides from the room center, then install metal channels along those lines. Place two fans symmetrically across the centerline inside the octagon area, keeping equal clearance from each octagon edge. Board the octagon panel, add downlights or a thin LED ring around the octagon, then finish seams and paint with a smooth roller nap for crisp edges.
Editor's noteUse a thin black caulk line at octagon seams before paint — it hides hairline gaps under raking light.
Skip thisDon’t use too many intersecting lines around the octagon; keep the border simple.
13. Split Perimeter Border with Two Fans Over the Split
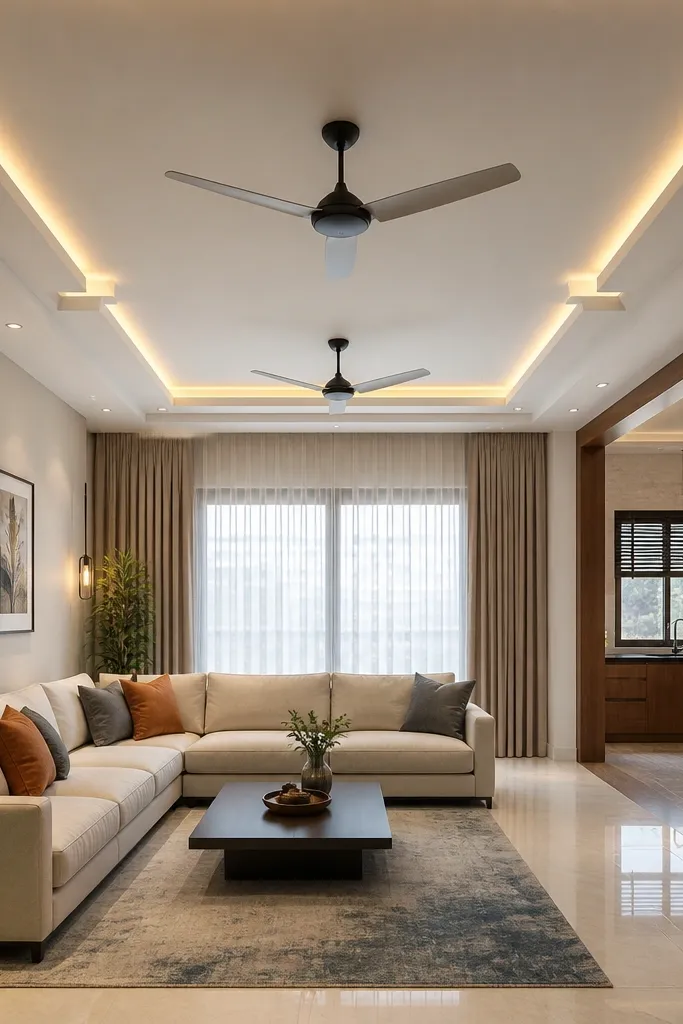
This layout looks bold because the border is interrupted in two places, like a visual “split,” while the fans stay centered and symmetric. It’s great for living rooms with a doorway or open-plan flow where you want the ceiling to feel like it has breathing space. The breaks also give you a clean path for wiring and for placing a ceiling hook or speaker cable. Keep the breaks mirrored so the ceiling still feels balanced.
Mark a full perimeter border drop, then decide two mirrored break points on opposite sides. Build the border frame with gaps at those points, keeping the border width consistent elsewhere. Install the base ceiling field flat, then place two fans symmetrically across the centerline in the open field area. Add LED strip only on the continuous border segments, and use downlights in the gaps if you want even brightness.
Editor's notePlan the break widths to be at least 15-20 cm so the ceiling doesn’t look like an unfinished cut.
Skip thisAvoid random break positions; mirrored breaks are what make it look intentional.
14. Rectangular Frame with Fan Pair in Separate Side Panels
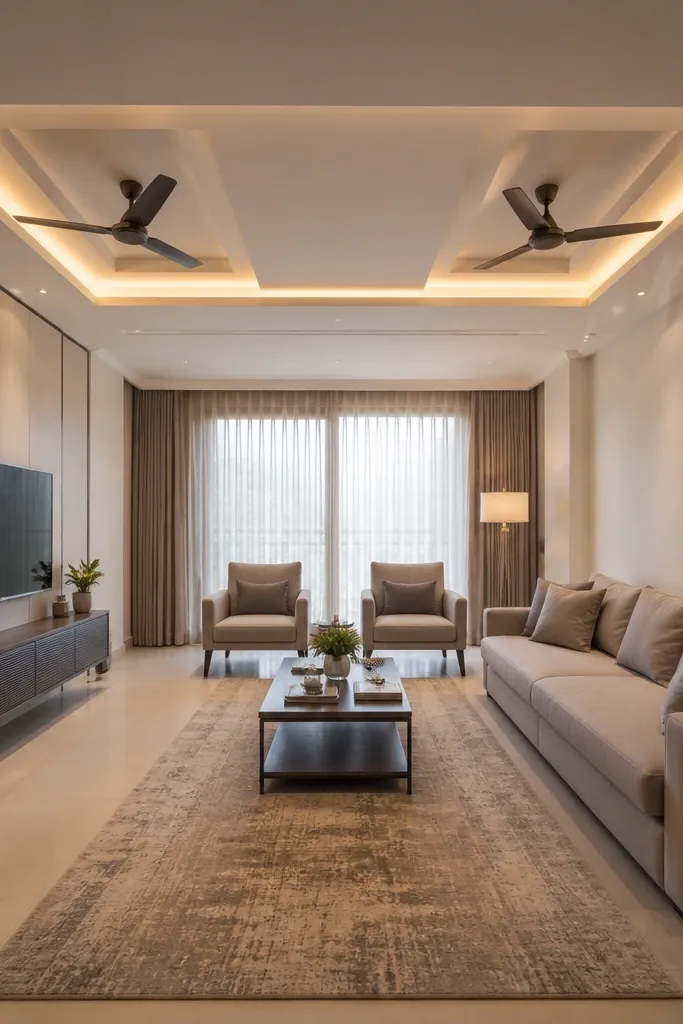
Instead of putting both fans in one open middle, this layout divides the ceiling into two side panels inside a larger frame. Each fan sits inside its own “panel box,” so the ceiling looks organized and the fans look like part of a designed system. It’s especially good for long living rooms where a single open field can make one fan feel farther from the seating. The look is clean and graphic.
Build a large outer rectangular border at a 7-10 cm drop. Then create a vertical divider line in the middle of the rectangle to make two side panels, leaving a small gap for seam finishing. Place one fan centered in the left panel and the other centered in the right panel so the spacing from the outer border is equal. Board the center field and panels, then add LED strip along the inner edges of the outer frame for a crisp outline.
Editor's noteUse the same panel width on both sides; measure from the divider to each inner border edge.
Skip thisDon’t use a flimsy divider without strong framing — the gypsum seam will crack.
15. Center-Line Beam Look with Two Fans Under the Beam
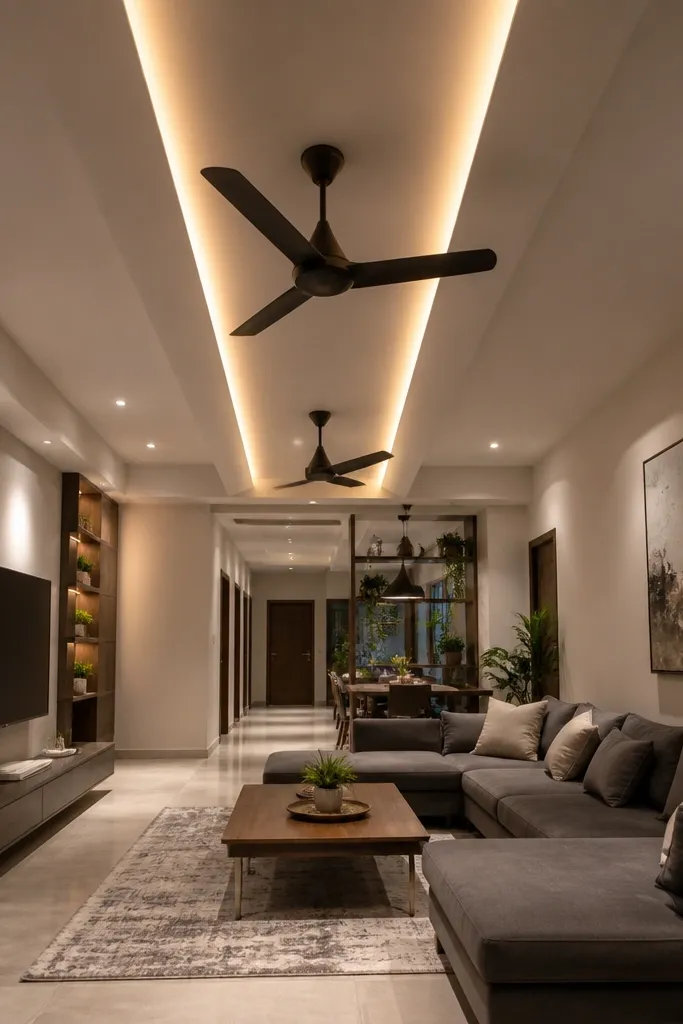
This layout mimics a beam ceiling but stays false-ceiling friendly. You create one raised center beam strip, then mount both fans under that beam area in a symmetric pattern. The ceiling looks intentional and high-end in photos because the raised beam catches light and adds direction. It’s best for rooms with a long axis where you want the ceiling to guide the eye toward the far wall.
Install a flat ceiling grid first at your chosen drop, then add a raised center beam by building two parallel channel rails and bridging them with shorter cross pieces. Make the beam width around 18-25 cm so it reads as a beam, not a skinny strip. Place two fan centers symmetrically under the beam axis, keeping safe clearance from beam edges. Add LED strip in a channel along one side of the beam for a linear glow, then board and finish the flat field around it.
Editor's notePaint the beam top and sides the same color and use a matte finish to avoid glare hotspots.
Skip thisDon’t narrow the beam too much; a 10-12 cm beam looks like an accidental strip.
16. Raised Square Frames Around Each Fan
This is a “fan-first” design that still looks cohesive. You build two raised square frames in the ceiling field, one for each fan, and keep the rest of the ceiling flat and clean. It’s perfect for beginner-friendly False Ceiling Living Room 2 because you get clear structure and easy measuring: frame size is repeatable, and fan placement is locked into the square. The frames also hide minor wiring bends and junction boxes neatly.
Mark the fan centers symmetrically across the room centerline. Decide a square frame size around each fan, like 60-80 cm per side, and draw the square boundaries. Build the raised frames by installing extra metal channels along the square edges and bridging inside the frame for board support. Board the frames and flat field, then add LED strips around the inside edge of each square frame if you want a glow ring.
Editor's noteUse the same frame size and same LED placement around both fans so the ceiling looks balanced instantly.
Skip thisDon’t forget to brace the fan mounting plate — raised frames must be anchored to strong support.
17. Corner-to-Corner Border with Center Fan Pair
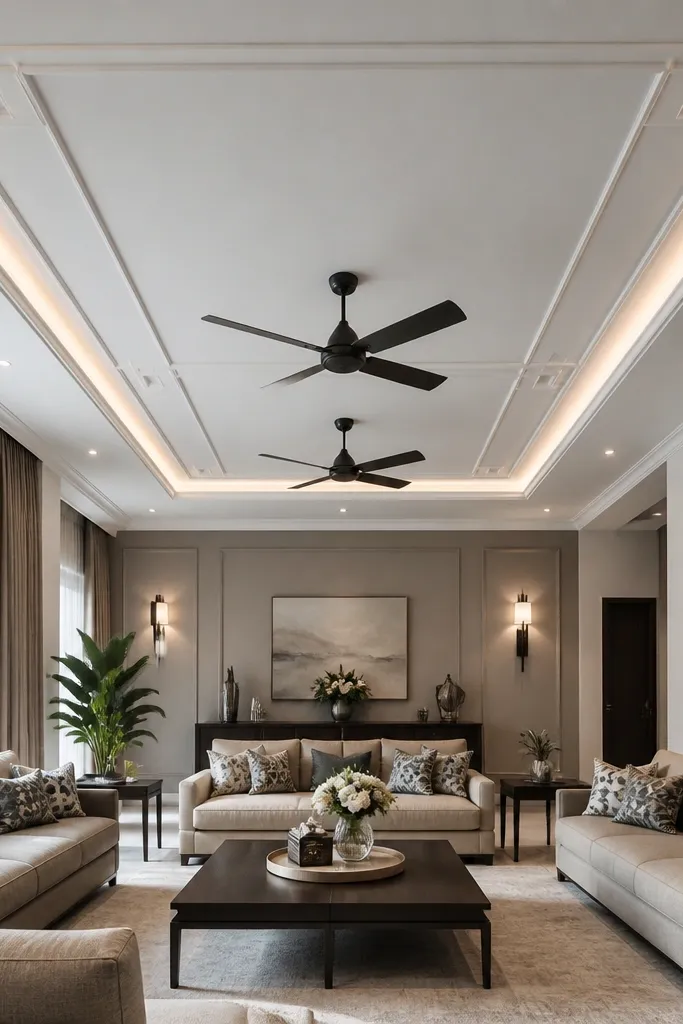
This layout gives a modern, geometric feel by using a border that visually stretches across the room rather than sitting only at the walls. Two fans sit in the middle, symmetrical and centered, while the border lines add a sense of length and structure. It’s great for rectangular living rooms where you want the ceiling to feel longer and more intentional. Keep the border lines straight for the cleanest look.
Mark a perimeter border drop, then add diagonal or corner-to-corner line frames using metal channels connected to the perimeter structure. Keep the border thickness consistent, around 8-10 cm wide, so it looks like a designed feature. Place two fans centered along the room centerline and keep equal clearance from the border line intersections. Board the ceiling field flat, then run LED strip along the border channels for a bright edge line.
Editor's noteBefore boarding, hold a straight ruler across each border segment to check alignment — small twists show under LEDs.
Skip thisDon’t crowd the border intersections — leave space so the fan centers stay visually calm.
18. Perimeter Ring with Two Fans on a Raised Center Platform
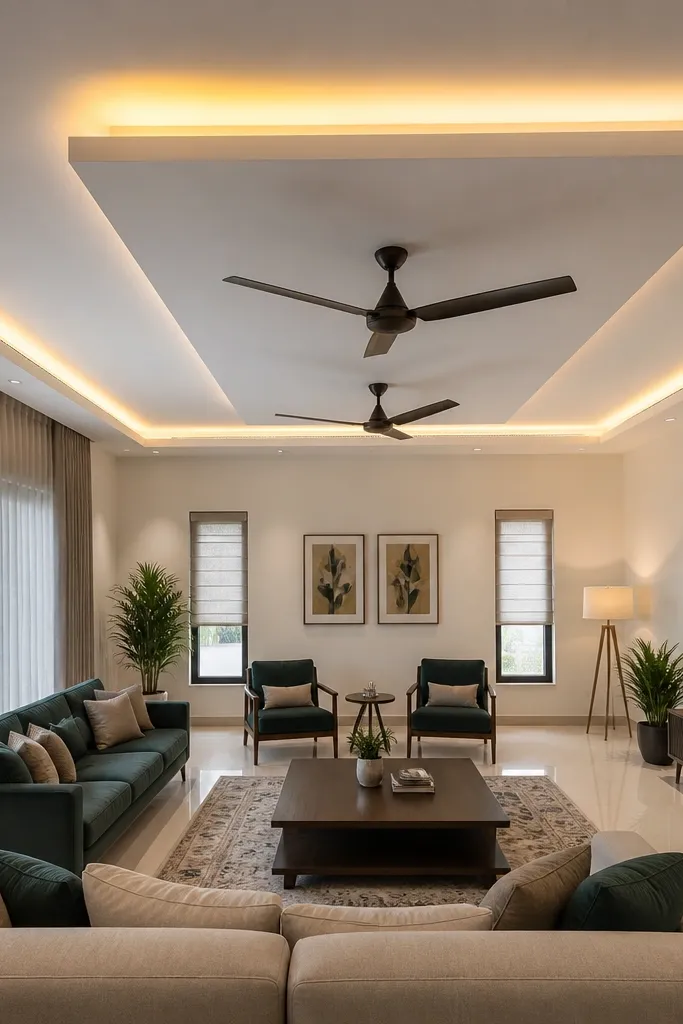
A raised center platform makes the fan area look like a stage. The room gets a clear ceiling hierarchy: perimeter ring for outline, raised center for the fans, and flat outer ceiling for balance. This is a strong choice when your living room has a lot of furniture clutter in the center area and you want the ceiling to feel organized. It also hides service access routes because you can route wiring to the platform framing.
Build a perimeter ring border at about 7-9 cm drop, leaving the center area higher by 3-5 cm. Install metal framing for the raised platform and ensure it is supported with cross members strong enough for fan loads. Place two fans symmetrically on the raised platform, and keep their centers aligned with the room centerline. Add LED strip inside the perimeter ring, board the platform and outer field, then sand and paint all levels before installing fans.
Editor's noteUse a single paint batch for both levels to avoid shade mismatch under LED glow.
Skip thisDon’t raise the platform too high; if your drop differences are extreme, the ceiling looks uneven.
19. Twin Arches Border with Fans in the Middle Bowl
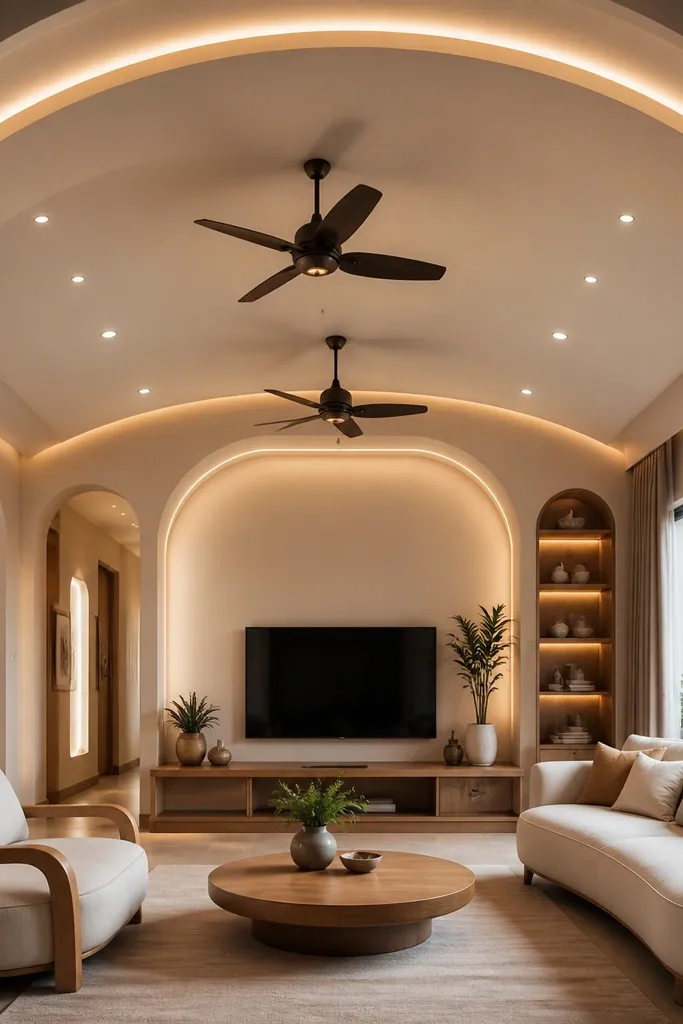
Twin arches add softness while staying beginner-friendly because the arches live on the perimeter border. The ceiling looks like it has a gentle bowl shape, and the two fans sit in the calmer middle zone. This layout is great when you want “pretty” without deep coffers and when your living room decor has curved lines. Keep the arch radius consistent so it looks balanced.
Mark a perimeter border drop and install a straight grid for the ceiling field. Create two arch segments on opposite sides of the room (mirrored left-right), using pre-bent metal channels or thin strip gypsum with careful support. Keep the arch width about 12-18 cm and maintain equal spacing to the fan centers. Board the perimeter arch border, then run LED strip inside the arch channel for a warm outline glow.
Editor's noteLightly score the gypsum strips for cleaner bending and smoother arch edges.
Skip thisDon’t make arches too tight; narrow curves are harder to finish without visible seams.
20. Perimeter Border + Two Rectangular Fan Pods
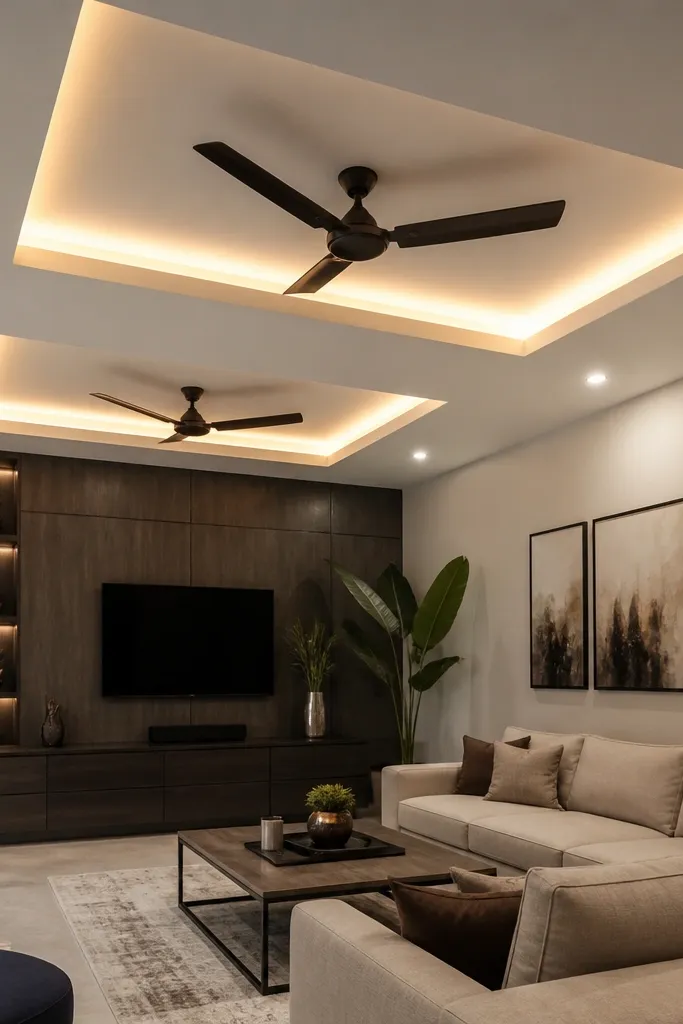
This one looks like a custom commercial ceiling — in a good way. You keep a simple perimeter border, then create two rectangular recessed pods where each fan sits. The pods add depth and make the fans look like they belong to a built-in system. It’s a great choice if your living room ceiling is plain and you want a noticeable upgrade without adding a lot of complex lines.
Build a perimeter border first at a 7-10 cm drop. Then create two recessed pods by lowering the center field around each fan — about 3-4 cm lower than the surrounding ceiling field. Place one fan centered in each pod, symmetrically across the room centerline. Install LED strips along the pod perimeter edges so the recess reads clearly even when the main lights are off.
Editor's noteUse a consistent pod size and depth — uneven pods make the ceiling look DIY in a bad way.
Skip thisDon’t forget to brace the recessed edges; thin framing causes sagging and visible cracks.
21. Ceiling Corner Squares with a Clean Fan Center
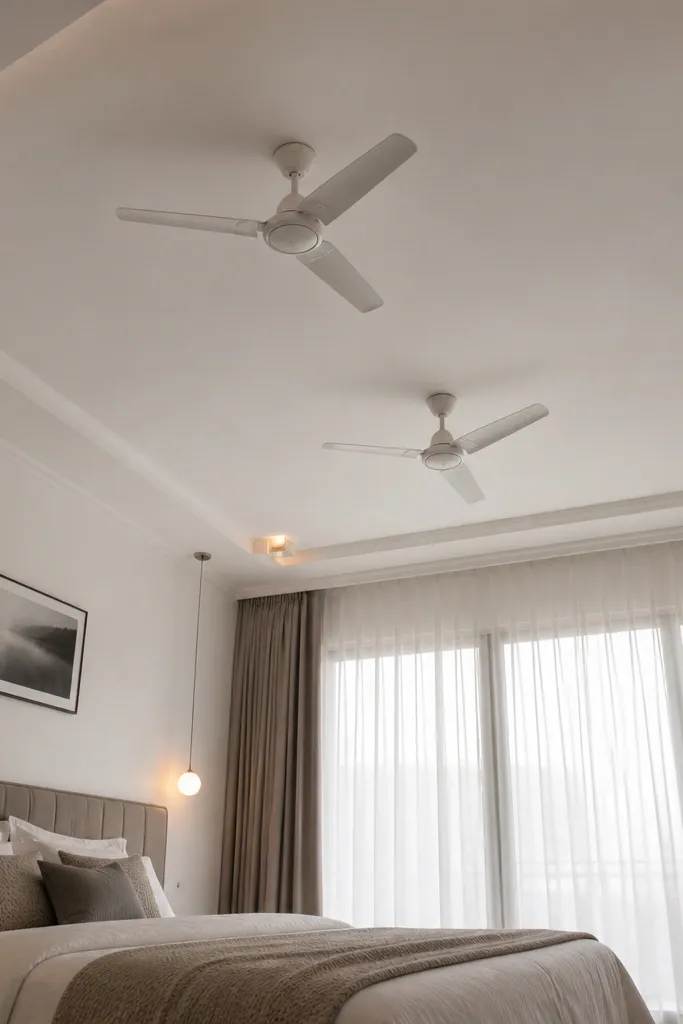
Corner square accents give you a geometric look without cluttering the fan zone. You keep the center area clean and flat, so the two fans look crisp and the room stays bright. This layout fits living rooms with a simple paint scheme where you want the ceiling to add character without heavy patterns. It’s also beginner-friendly because you only build features at the corners.
Set the main ceiling field flat at your chosen drop. Then install corner square frames at each corner, like 40-60 cm squares, using metal channels and cross braces. Place two fans centered along the room centerline, away from corner frames so the fans sit in an open field. Add LED strip only in the corner frames or along the perimeter edge for a soft glow.
Keep corner squares identical and aligned to the same distance from each wall — symmetry is everything for photos.
Don’t place corner accents too large; they can compete with the fans.
22. Grid Panels with a Narrow Border Strip and Two Fan Targets
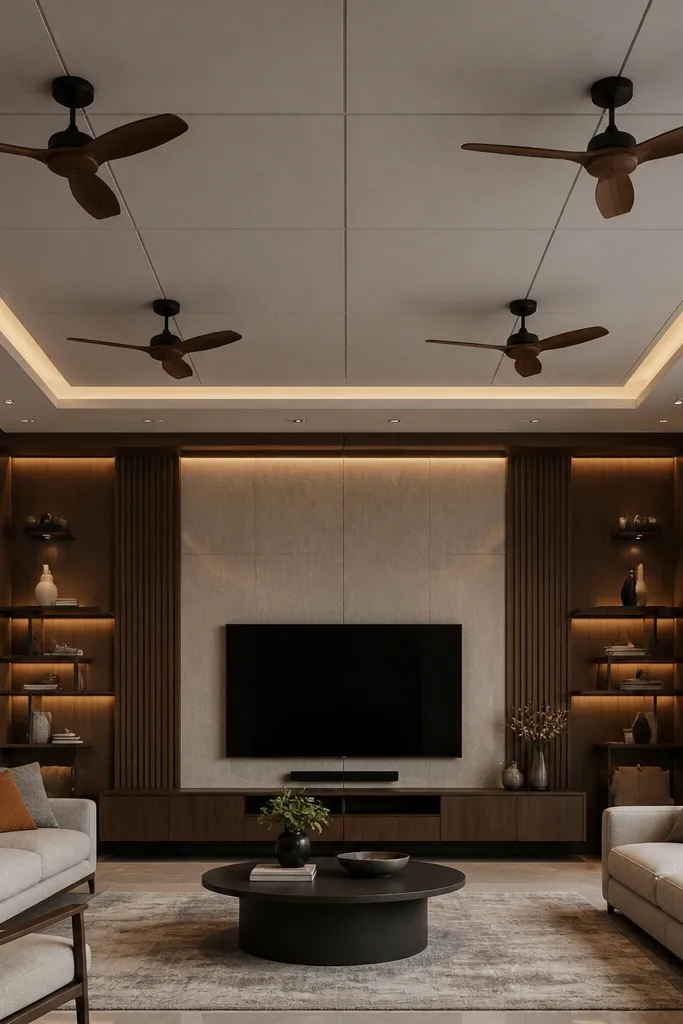
Grid panels make the ceiling look designed because the eye loves repeated lines. Here, you keep a narrow perimeter border strip and build a grid across the ceiling field, then place each fan on a grid intersection so the placement looks “engineered.” This is a strong option for modern homes where you want a clean, orderly look. It also works well if your room has a lot of straight furniture legs and shelves.
Mark the ceiling field boundaries and build a metal grid with even spacing, like 45-60 cm. Add a narrow perimeter border strip at about 6-8 cm drop so you still get a defined outline. Place the two fans symmetrically so each fan center lands exactly on the same grid intersection pattern. Board the grid panels, then run LED strip inside the narrow border strip or use small downlights aligned with grid lines.
Use the grid as your measuring system — once it’s squared, fan placement becomes easy and repeatable.
Don’t eyeball the grid — off-square grids show up immediately with two fans.
23. Raised Double-Diamond Frame with Two Fans in the Center
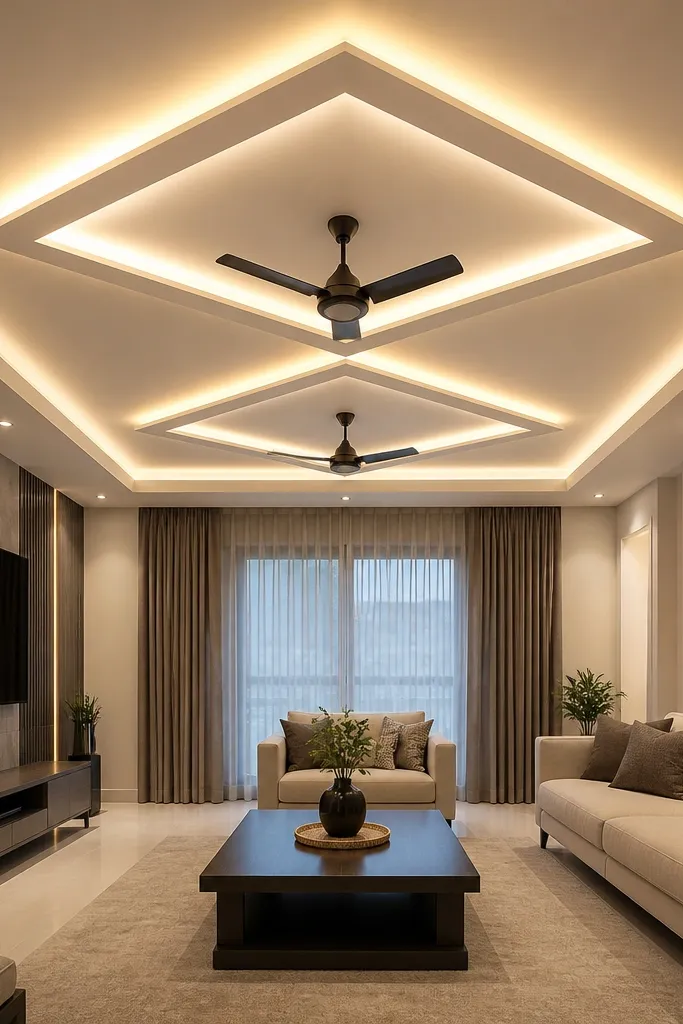
Diamond frames look stylish because they break the straight-line feel of rectangular rooms. You build a raised diamond outline inside a simple perimeter border, then place the two fans in the center area beneath the diamond frame. The result is a ceiling that feels custom while still being manageable for DIY if you keep the diamond lines clean and symmetrical. Use warm LED to make the raised edges pop without harsh glare.
Mark a perimeter border drop for the outer frame, then draw a diamond outline by rotating a rectangle 45 degrees around the room center. Build the raised diamond using metal channels along the diamond edges, keeping the diamond thickness consistent, about 10-12 cm. Place two fans symmetrically across the centerline so their centers sit inside the diamond’s widest open area. Board the raised diamond and flat field, then add LED strip along the diamond inner edge for a controlled glow.
Editor's noteTape a long string line through the room center to keep the diamond points perfectly aligned.
Skip thisDon’t add extra small diamond corners near the fans; it gets busy fast.
24. Perimeter Border with Two Fan Domes (Shallow Curves)
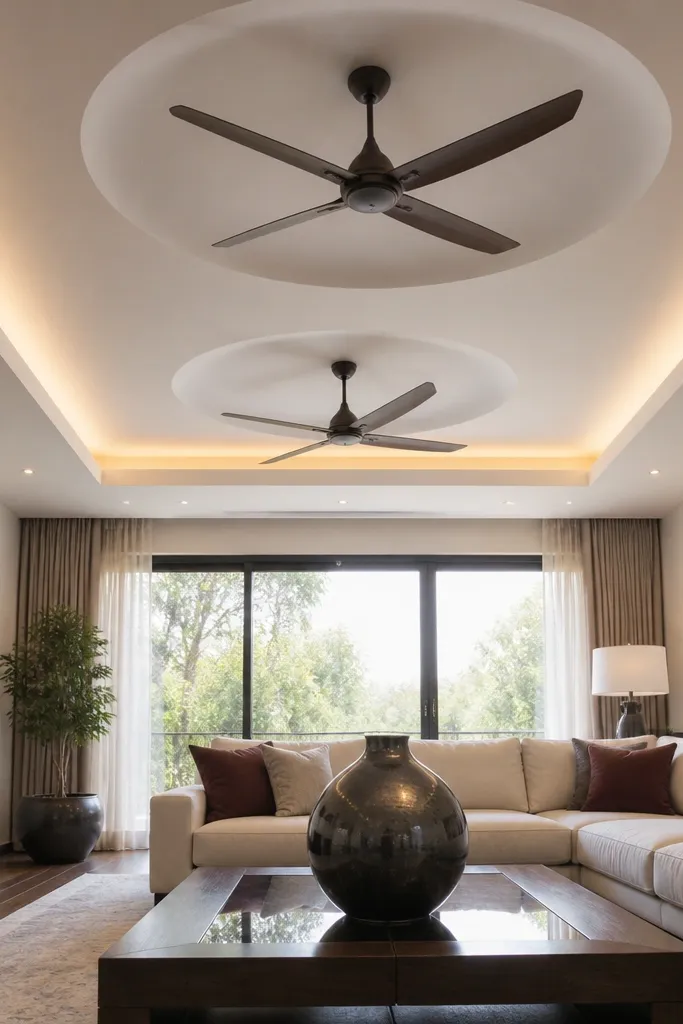
Shallow domes around each fan give a soft, sculpted look that still stays beginner-friendly because the curves are small. The perimeter border stays straight, so you don’t need complex wave work across the whole ceiling. Each fan sits inside its own dome recess, which makes the ceiling look like it has planned depth. This is a great choice for living rooms with warm paint tones and wood furniture.
Build a simple perimeter border first at a 7-9 cm drop. For each fan, create a shallow dome recess by using segmented gypsum strips or flexible board sections anchored to curved metal ribs, keeping the dome drop around 3-4 cm. Place fans centered in each dome and keep equal spacing from dome edges. Install LED strip around the perimeter border, then board and finish the dome seams with joint compound and sanding before final paint.
Editor's noteUse segmented ribs with small spacing so the dome curve stays smooth, not faceted.
Skip thisDon’t make the dome too deep — it will reduce headroom and looks heavy.
25. Long Rectangle with Fan Pair in a Central Channel
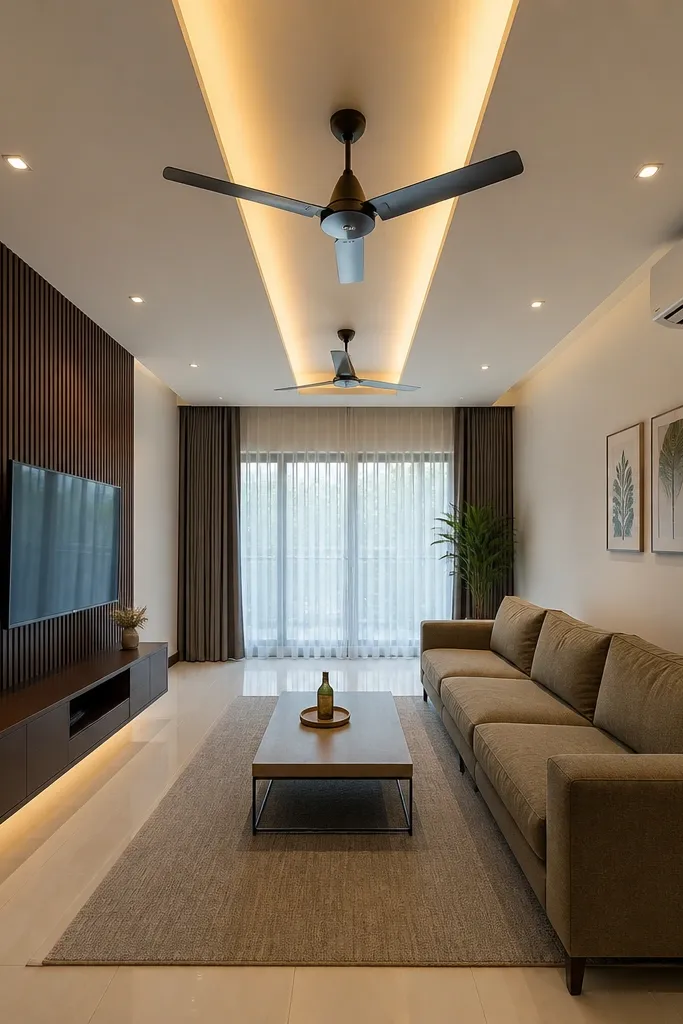
This layout is made for long living rooms where you want the ceiling to emphasize length. You install a central channel feature (a raised or recessed strip) and mount the two fans along the channel’s center axis, symmetrically spaced. The border is a simple rectangle, so the overall ceiling stays clean while the channel adds the “designed” element. It looks great from the seating side because the ceiling lines lead toward the far wall.
Mark the outer rectangular border drop and build a flat ceiling field inside it. Create a central channel strip by raising a narrow beam (about 15-20 cm wide) or recessing a strip (same width) from the ceiling field. Place two fans symmetrically on either side of the room centerline along the channel axis, keeping equal distances to the outer border edge. Add LED strip inside the channel edge, then board and finish the ceiling field for a smooth, continuous look.
Keep the channel straight and centered — a slight offset looks obvious with two fans.
Don’t rotate the channel off-center to “fit” wiring — center it and reroute wiring instead.



