
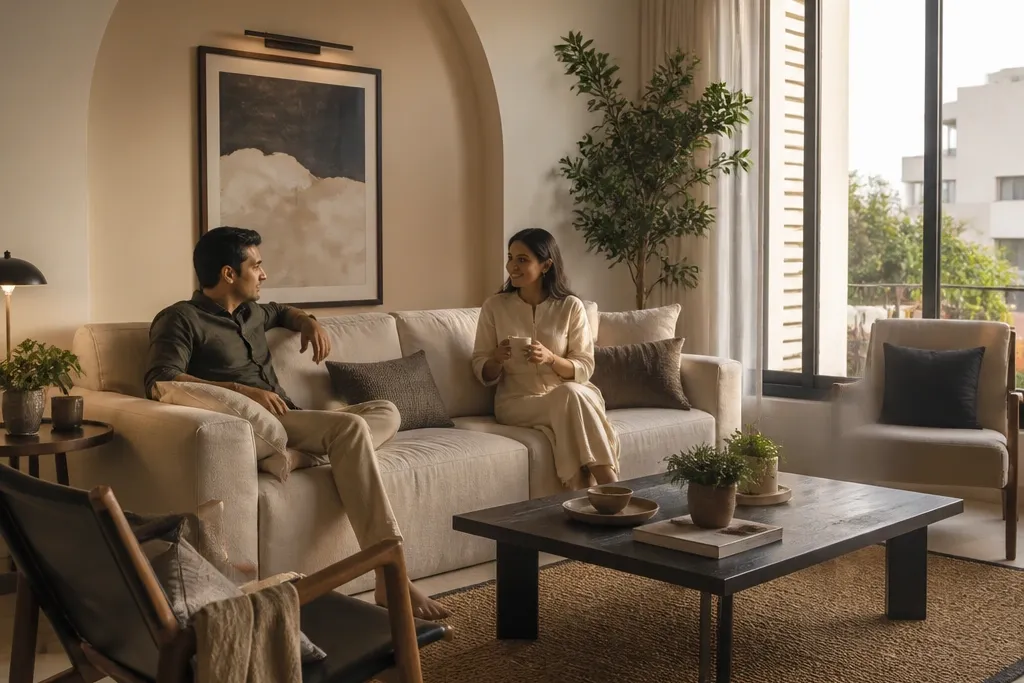

1. Two-tone wall with a soft arch accent
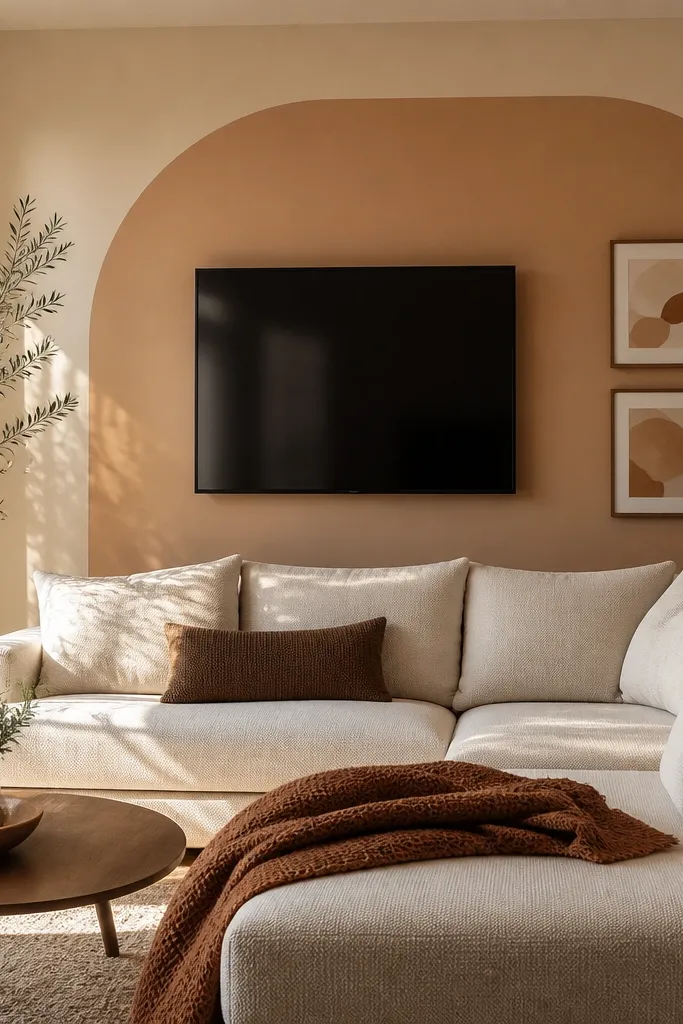
This is the easiest way to make a beginner-friendly stylish drawing room look designed without buying new furniture. Paint the main wall in a warm light base, then add a single arch shape behind the sofa or TV area. The arch creates a natural focal point, and the two-tone separation makes even basic seating look intentional. Use matte or eggshell paint so the wall absorbs light instead of reflecting it. This works best when your sofa is against one wall and you want the room to look taller and cleaner in photos.
Start by measuring the wall space behind the sofa and marking the arch center point. Tape off a clean arch using painter’s tape, then paint the arch color first and let it dry fully. After that, paint the rest of the wall with the base color, remove tape carefully, and touch up any bleeding with a small angled brush. Finish by checking the edges under daylight and adding a second coat only where the tape lifted.
Editor's notePress tape down firmly with a credit card so paint doesn’t creep under the edge.
Skip thisDon’t choose two colors that are too close in shade — the arch disappears.
2. Crisp picture ledge gallery above the sofa
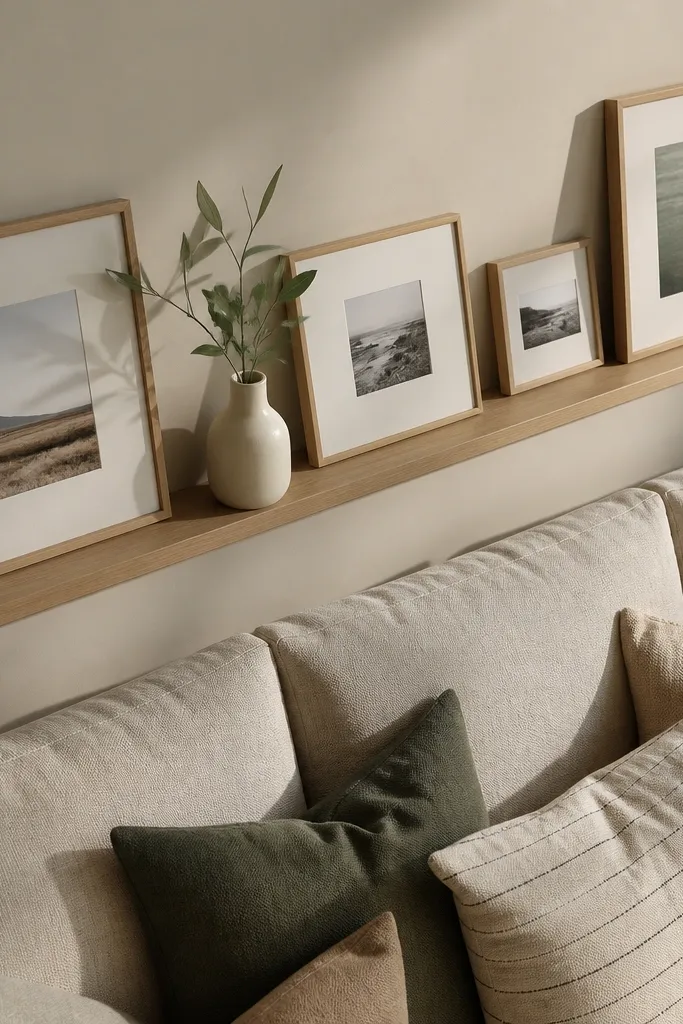
A picture ledge makes your drawing room look styled even when you’re starting with plain walls. It gives you control over height, so you’re not stuffing decor on shelves or risking crooked hanging frames. The best part for beginners is that you can rearrange everything as you find pieces. Choose a slim ledge so it doesn’t crowd the wall, then use a consistent frame color and keep objects grouped in odd numbers. This idea is great for small 2 BHK spaces because it adds interest vertically without eating floor space.
Pick a ledge depth around 4-5 cm and cut or buy one that fits your wall length. Mark the wall studs or use proper wall anchors, then install the ledge centered above the sofa line. Arrange 3-5 frames first, then add small decor like a ceramic tray or stacked books. Finally, step back and adjust spacing so the bottom edges of frames sit at a consistent height.
Editor's noteUse frame mats in one color (white or warm cream) to keep the whole gallery cohesive.
Skip thisAvoid mixing frame finishes like black, brass, and wood all in one row.
3. Jute rug with a border and one solid accent cushion
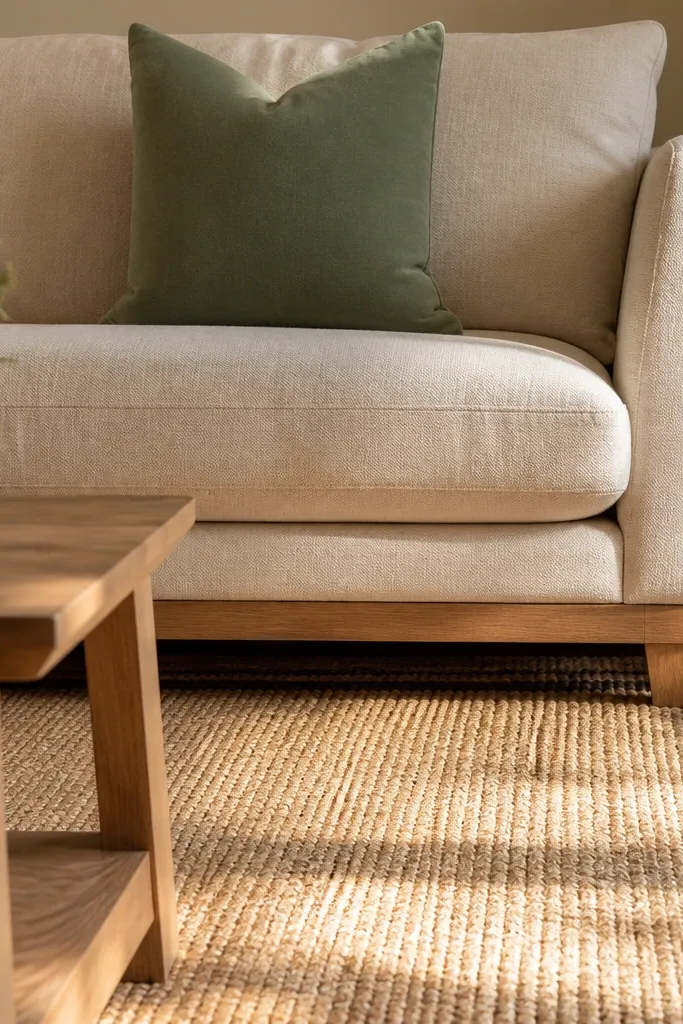
If your room feels empty, a rug with a defined border fixes it fast. Jute looks textured and warm, and the border gives structure so the seating area reads as one zone. Pair it with one accent cushion in a solid color that matches your wall or curtain palette — just one, not five different patterns. This setup works because texture adds depth while the border and solid cushion keep the look clean. It’s a strong beginner-friendly stylish drawing room move for both modern and traditional homes.
Measure your seating area so the rug extends under the front legs of the sofa and chairs. Choose a jute rug with a thin border in a darker neutral like charcoal, walnut, or deep tan. Add one accent cushion (solid, no busy print) and keep the rest in neutrals. Place a small tray or floor lamp base on the rug so the center looks anchored.
Use a non-slip rug pad — jute shifts easily and ruins the crisp look.
Don’t choose a rug that stops short of the sofa legs; it makes the room feel cut off.
4. Budget wall paneling in vertical strips
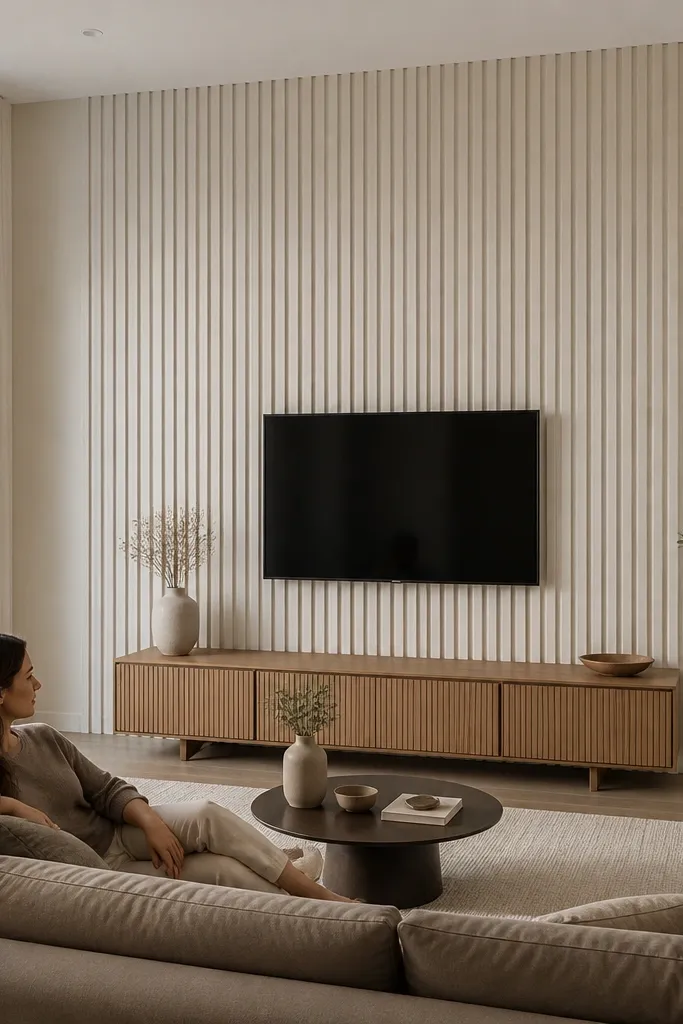
Vertical wall strips make ceilings look higher and add a premium feel without complex carpentry. Use wood-look panels or real thin battens painted to match your palette. Keep the panel area to one wall only — usually the main wall behind the sofa or TV. The clean lines photograph well and hide minor wall imperfections. This is ideal for beginners because you can install strip by strip with basic tools and still get a professional, architectural look.
Clean the wall and mark a straight vertical reference line using a level. Install thin battens spaced 20-30 cm apart, using wall anchors or adhesive rated for panels. Prime and paint the strips in a matte finish, then caulk small gaps along edges for a crisp line. Finish by adding a simple sconce or framed art so the paneling doesn’t feel empty.
Editor's noteUse a laser level if you have one — straight lines matter more than the panel color.
Skip thisDon’t run paneling across multiple walls; it gets busy in 2 BHK rooms.
5. TV console with open shelf styling and matching baskets
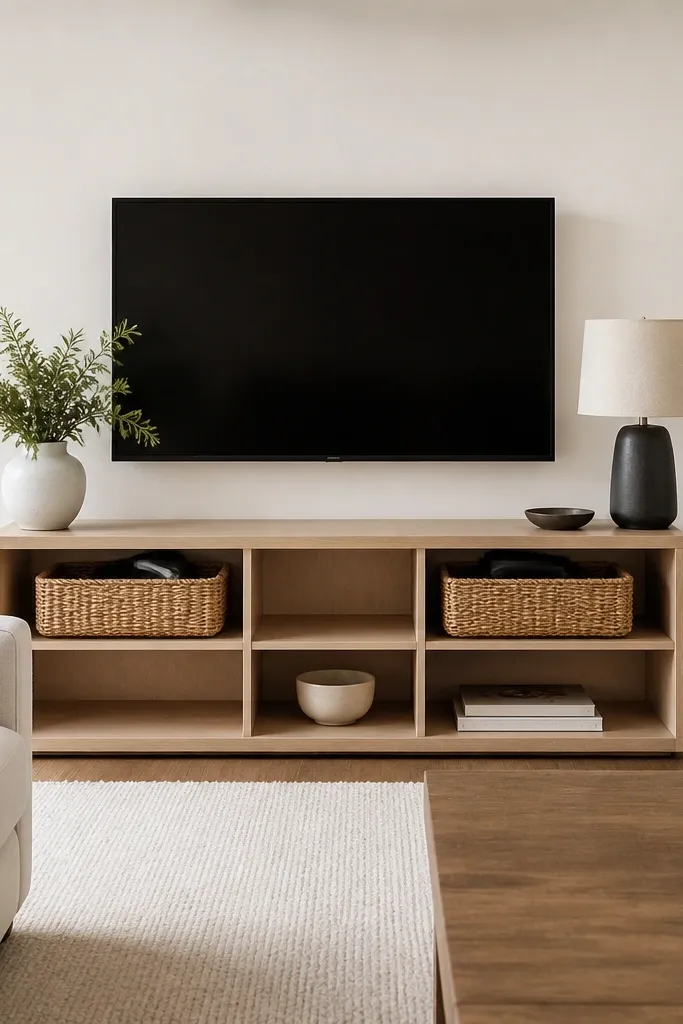
A TV area can look messy quickly, and most drawing rooms suffer from cluttered consoles. This idea keeps it clean by mixing open shelves with matching woven baskets for cables, remotes, and small items. The look stays photogenic because the baskets are uniform and the open space is used in a controlled way. Choose a console in matte wood or painted white, then style only 2-3 decor pieces on top. It’s beginner-friendly because you’re not building furniture; you’re styling it with a system.
Pick a console with at least two open shelves and one solid cabinet or drawer for hidden storage. Measure shelf widths and buy baskets that fit with a 1-2 cm gap on each side. Place baskets first, then add one tall item (floor vase or book stack) and one flat item (frame or tray) on the top surface. Route cables down the back before you style, then wipe the front panel so it looks sharp in photos.
Editor's noteMatch basket color to your rug or curtains so the storage looks intentional.
Skip thisAvoid stacking random-sized items in open shelves — it reads as clutter.
6. Corner reading nook with a slim floor lamp and small side table
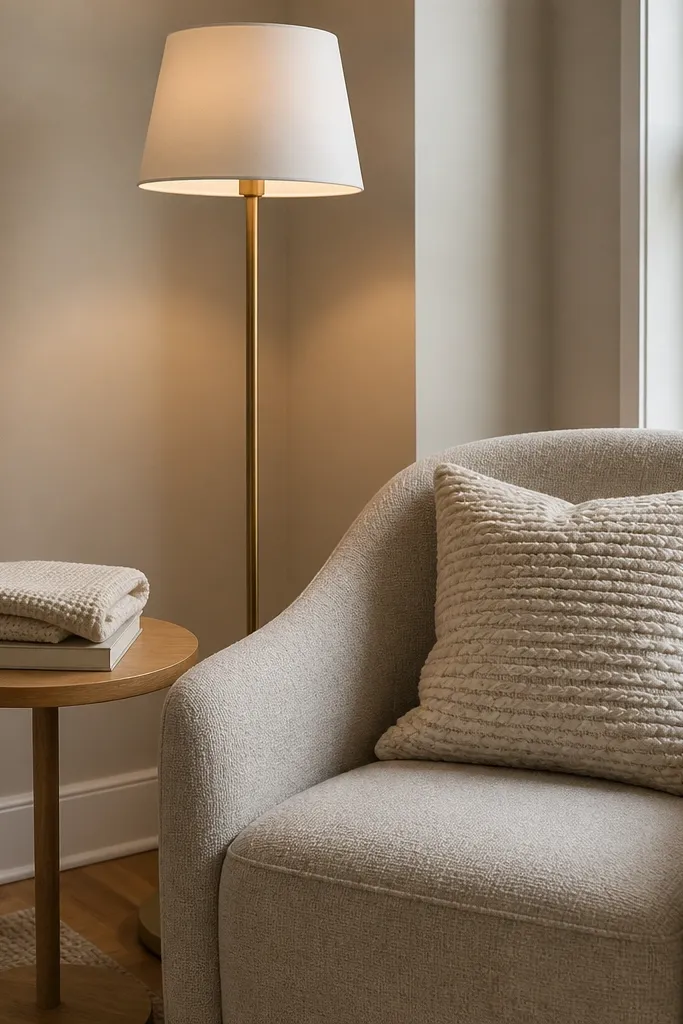
A drawing room looks finished when one corner has a clear purpose. A reading nook does that with minimal changes: a slim floor lamp, a small side table, and one styled throw. The lamp adds warm light and gives the room depth at night, which is what people notice in photos. Keep the palette simple — neutral throw, one patterned cushion, and a lamp shade in linen or matte fabric. This works great in 2 BHK homes where you want comfort without taking over the room.
Choose a floor lamp with a narrow base so it doesn’t block walkways, and pick a shade color that matches your curtains. Place it 30-40 cm from the sofa arm so the light falls onto the seating area. Add a small side table with a tray on top to hold a candle or book. Finish by draping a throw blanket over the sofa arm with one corner hanging slightly.
Use a warm bulb around 2700K so the lamp looks soft, not harsh.
Don’t put the lamp too close to the wall; it creates glare and flat shadows.
7. Curtain makeover using the right length and a single color
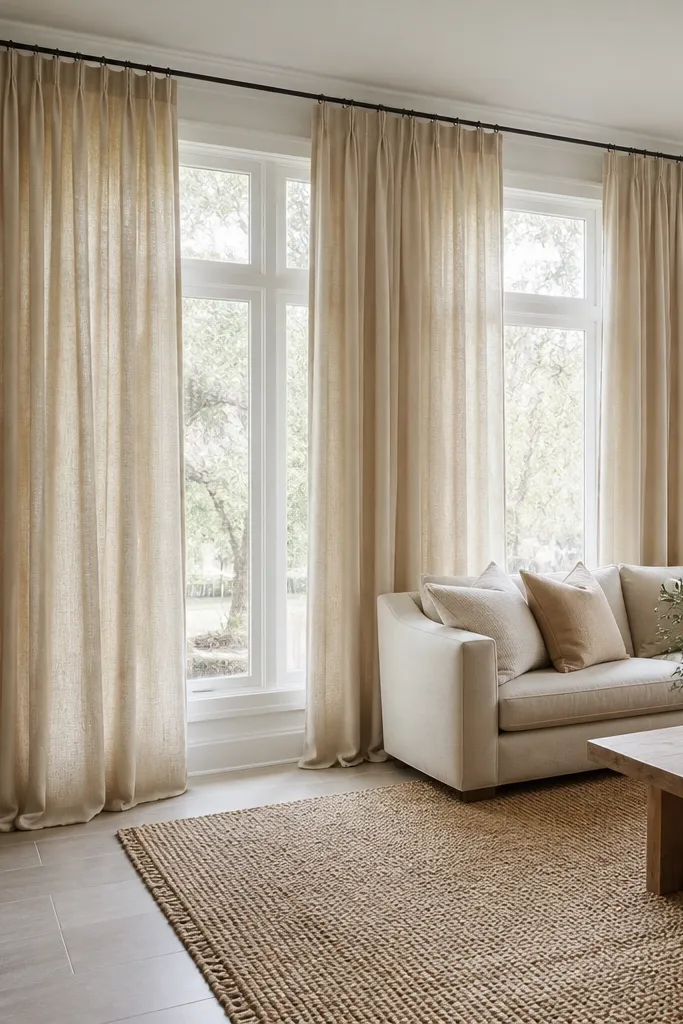
Curtains are the fastest visual upgrade for a beginner-friendly stylish drawing room because they change the wall height instantly. The key is length: curtains should hit just above the floor or pool slightly, not stop at mid-window. Choose one color that matches your rug or wall — linen-look cream, light beige, or warm grey — and skip heavy patterns for a clean look. Add a proper curtain rod that sits slightly above the window frame to make the window feel bigger. This idea suits most 2 BHK layouts and works even if your furniture stays the same.
Measure from the rod to the floor and decide on a 1-2 cm gap above the floor or a slight puddle. Install the rod 10-15 cm above the window top and 10 cm wider on each side. Hang curtains using rings or hooks that allow smooth movement, then steam or iron the panels flat. Finally, adjust gather spacing so the folds look consistent from left to right.
Get blackout lining only if you need it — otherwise use light filtering fabric for a softer, photo-friendly glow.
Avoid short curtains; they make the whole room look cramped.
8. Matte black + warm wood photo wall frames
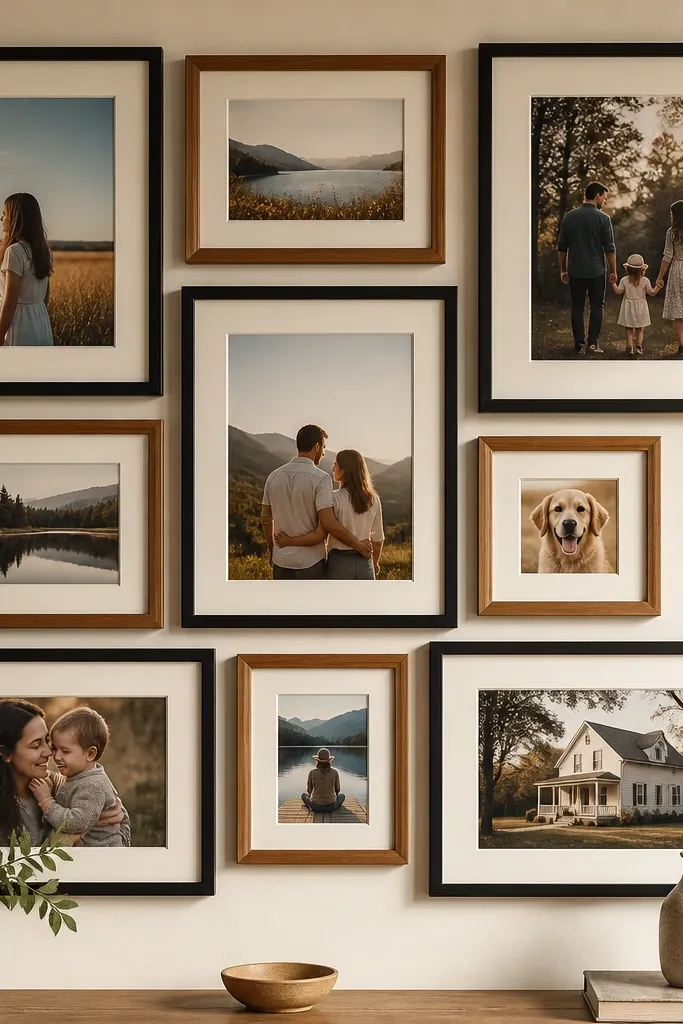
A photo wall adds personality without feeling childish when you keep the frame system tight. This plan uses matte black frames paired with warm wood frames so the wall looks curated but not matchy. Use mostly portrait and landscape mix, but keep a consistent mat color like warm white. The look works because the frames create a grid structure, and the wood-black contrast keeps it modern. This is beginner-friendly because you can build the layout on the floor first, then hang one frame at a time using measured spacing.
Pick a frame size set (for example 8x10 and 11x14) and decide on one mat color so everything aligns visually. Lay frames on the floor in the final arrangement, then measure total width and height. Mark the top center point on the wall and transfer the grid using painter’s tape. Hang the outer frames first, then fill in the middle so spacing stays even.
Editor's noteLeave 5-7 cm between frames so the wall doesn’t look like a sticker sheet.
Skip thisDon’t hang frames at random heights; it reads messy immediately in photos.
9. Floating shelf with a single-color ceramic collection
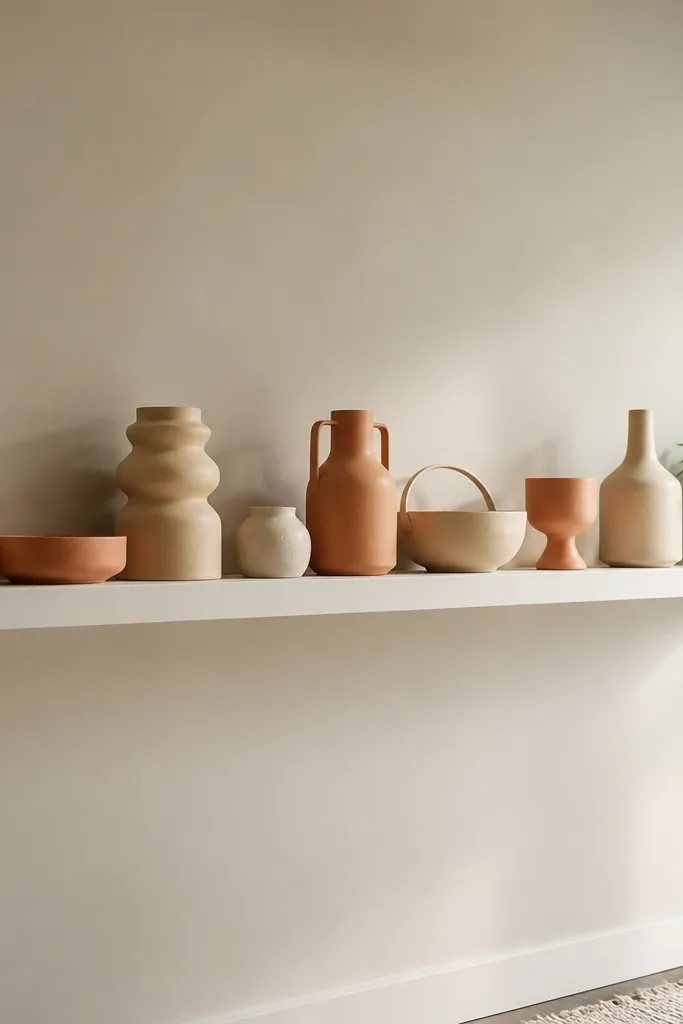
Floating shelves look clean and modern, and they let you style small items without cluttering surfaces. The trick for a beginner-friendly stylish drawing room is limiting the color range. Choose ceramics in one or two tones like cream, sand, and light terracotta, then add only one green plant. The shelf line also helps balance a room with tall furniture or a low sofa. Keep items spaced so negative space shows — that’s what makes it look high-end.
Choose shelf length based on wall width, then pick one shelf height around 1.5 m from the floor for easy viewing. Install with proper anchors or screws into studs, then level it carefully. Place a small plant or framed art at one end, then arrange ceramics in a staggered pattern. Step back and remove one item if it feels crowded — empty space is part of the design.
Use felt pads under ceramics so they don’t slide or scratch the shelf.
Avoid mixing too many sizes of knickknacks; keep the collection intentional.
10. Rug layering with a thin flatweave underlay
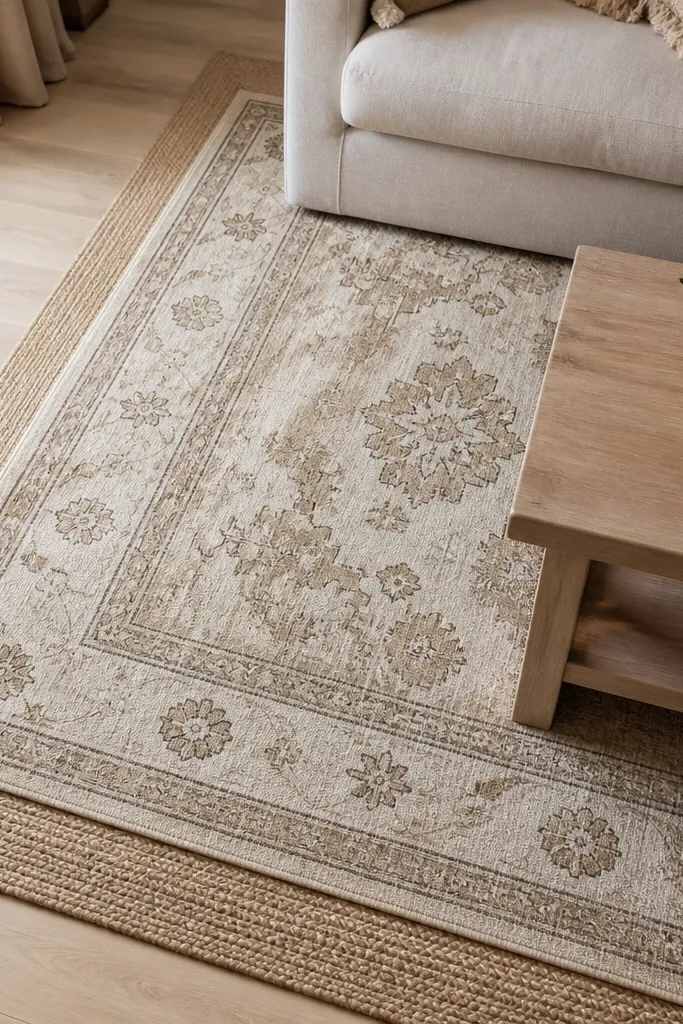
Layering rugs gives depth and hides minor floor imperfections, and it looks great in drawing room photos. The technique is simple: place a thin flatweave under rug to anchor the pattern above it. Choose a neutral underlay like jute or plain cotton, then put a patterned rug on top in a similar warm color family. This approach is beginner-friendly because you’re not replacing everything at once — you’re improving what you already have. It works best when your sofa is low and you want the seating zone to look grounded.
Start by choosing a flatweave underlay that’s close to the same width as your main rug. Place it first so it extends under sofa front legs, then center the top rug with equal margins. Use double-sided rug tape at corners if your floor is slippery tile. Finally, align the rug edges with the sofa line so the pattern looks intentional, not random.
Editor's noteKeep the top rug pattern bold but the underlay plain — the underlay should calm, not compete.
Skip thisDon’t layer two thick rugs; the height gets awkward and looks messy.
11. Matte wallpaper stripe on the window wall
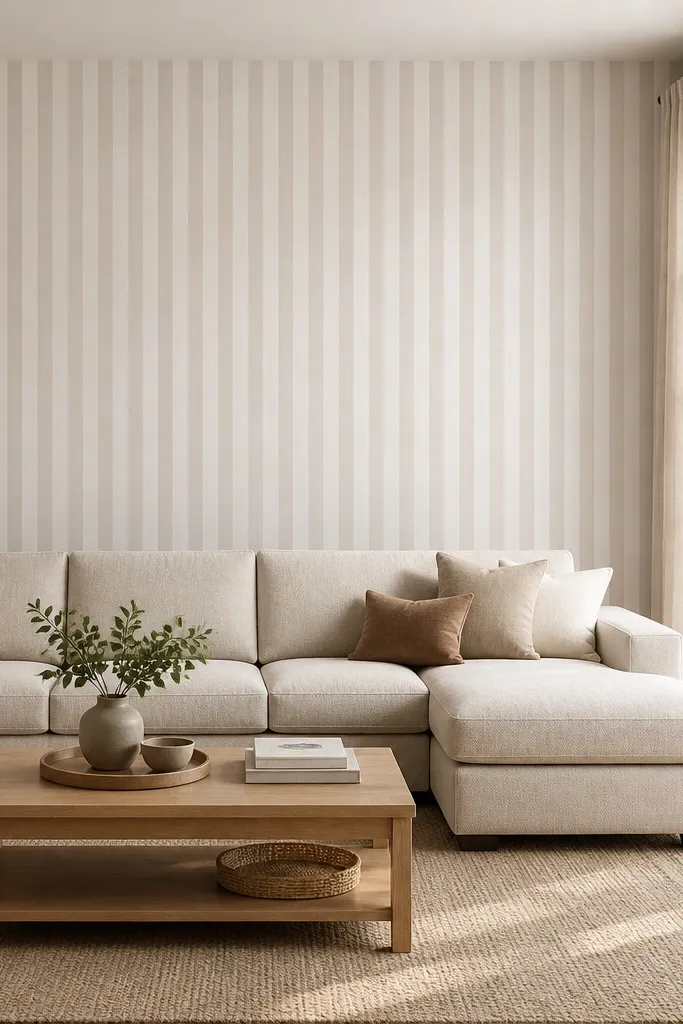
If one wall feels flat, a narrow stripe wallpaper section adds structure without overpowering the room. Choose matte wallpaper with vertical lines in light tones like off-white and pale taupe. The stripes make the wall look taller and cleaner, which matters in smaller 2 BHK drawings. Keep furniture neutral so the stripes become the star. This is beginner-friendly because you can apply it as a single feature panel around the window wall rather than covering the entire room.
Measure the window wall and decide the stripe panel height, typically from near the ceiling down to the sofa line. Prep the wall by filling holes and sanding smooth, then apply primer if the wall is uneven. Apply wallpaper using a smoothing tool and keep the first strip perfectly plumb. Trim edges carefully around the window and seal the final seams with wallpaper seam adhesive.
Use a sharp utility blade for clean trimming near the window trim.
Avoid glossy wallpaper; it reflects light and makes the room look harsher.
12. Sofa makeover with slipcovers in a textured fabric
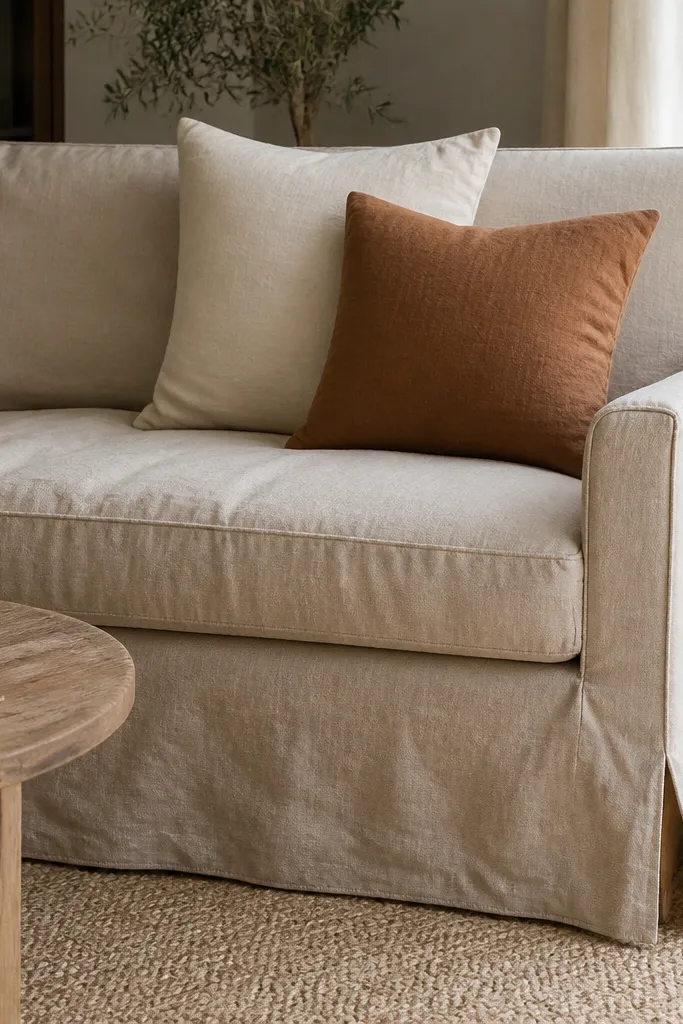
A slipcover upgrade is the fastest way to make a beginner-friendly stylish drawing room look “new” without replacing the sofa. Choose a textured fabric like cotton-linen blend or woven twill in a warm neutral. Texture matters because it hides minor wear and looks expensive under soft lighting. Pair with two cushions in matching tones and one throw in a complementary texture like boucle or knit. This works best when your current sofa is visually tired or mismatched with your wall color.
Measure your sofa seat width, back height, and arm width, then buy a slipcover size that fits these measurements. Install the slipcover starting from the back — pull evenly and tuck fabric at seams so it sits tight. Add cushion covers and place them so the seams align with the sofa back. Finish by steam ironing the cover if the fabric allows, so it lays smooth rather than wrinkled.
Editor's noteChoose slipcover fabric with a slight stretch so corners tuck neatly.
Skip thisAvoid shiny slipcovers; they show wrinkles and look cheap fast.
13. DIY wall molding frame around one artwork
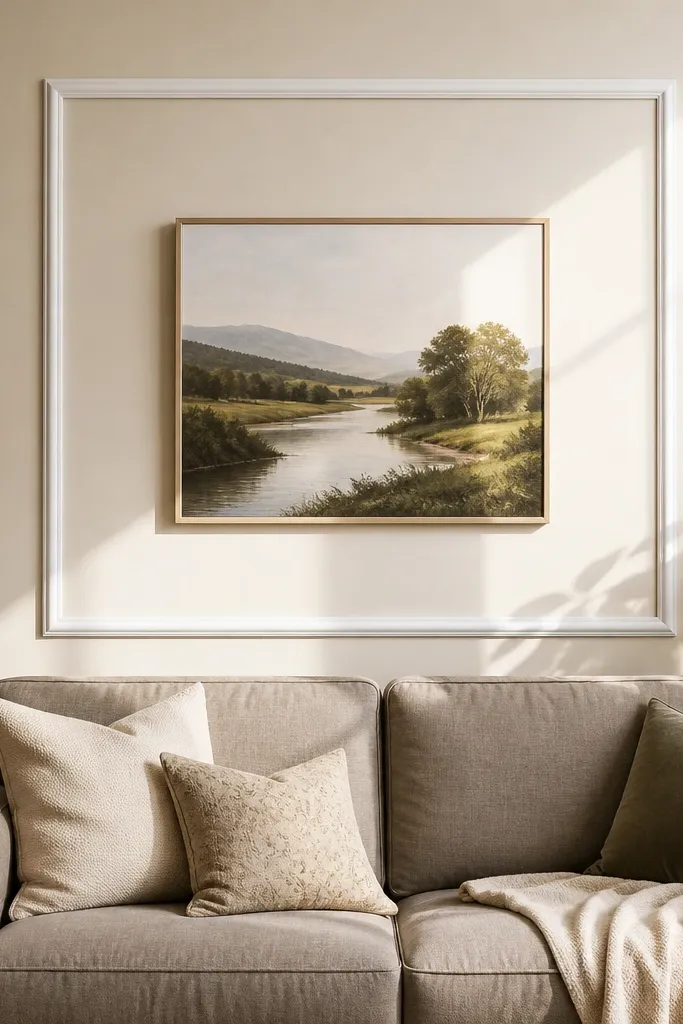
Wall molding frames make a drawing room look tailored even if you only hang one piece of art. You create an architectural boundary that makes the artwork feel intentional and gives the wall depth. Use thin molding strips painted matte white or the same color as your trim. The best part is that it’s beginner-friendly: you’re building a rectangle, not complex shapes. This looks especially good in 2 BHK rooms because it keeps the focus on one centered focal point rather than scattering decor.
Choose a molding strip width around 2-3 cm, then measure your artwork size and decide on a 10-15 cm margin around it. Cut four pieces to form a rectangle, then dry fit on the wall to confirm alignment. Paint molding strips before installing so corners look clean. Secure with wood glue and small nails, then fill nail holes and caulk edges for a crisp frame.
Use a laser level to keep the frame perfectly centered above the sofa.
Don’t skip caulk at the molding edges; gaps make the whole thing look DIY.
14. Metallic accent lamp and one mirrored tray on the coffee table
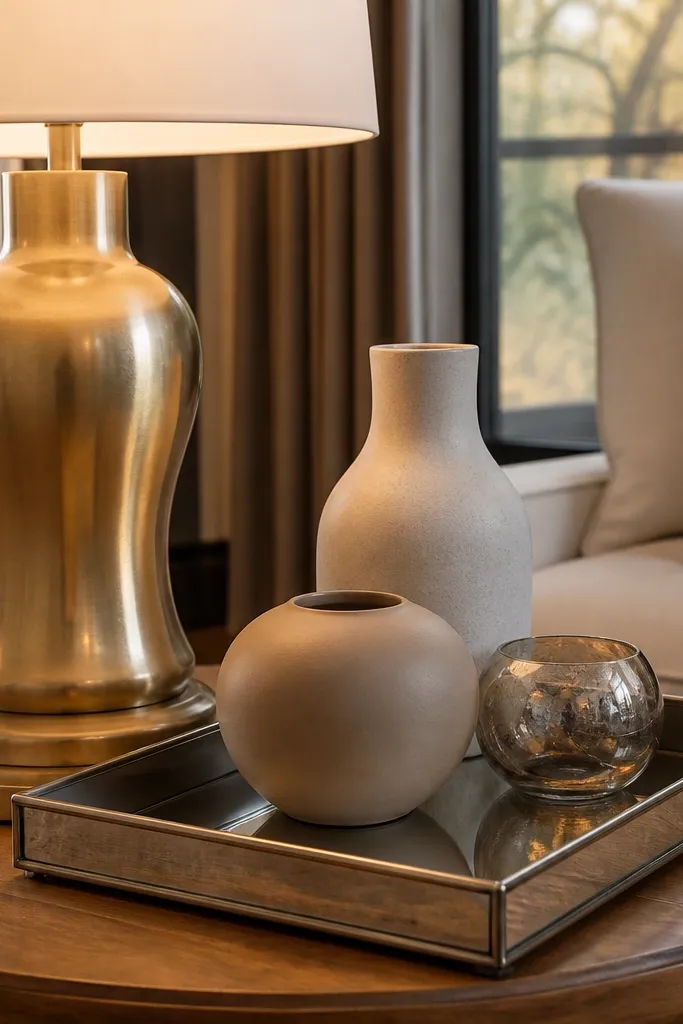
When a drawing room lacks polish, the problem is often reflective light. A small mirrored tray plus a metallic lamp base adds controlled shine without turning the room into a disco. Keep it to one tray and one lamp so it doesn’t look overdone. Choose a warm metallic like brushed brass or antique gold rather than bright chrome. This is beginner-friendly because it’s mostly styling and lighting — you can do it without major renovation.
Place a mirrored tray at the center of the coffee table and build the styling inside it: one candle, one small vase, and one book or coaster. Add a small lamp on a side table or directly on the tray if the table is stable. Choose warm bulbs and keep the lamp shade light-colored for soft diffusion. Wipe mirror edges and keep the tray items aligned so the reflections look tidy in photos.
Editor's noteUse a lint-free cloth on the mirror — fingerprints kill the look fast.
Skip thisAvoid stacking multiple mirrored items across the room — it gets visually loud.
15. Under-sofa storage with matching fabric bins
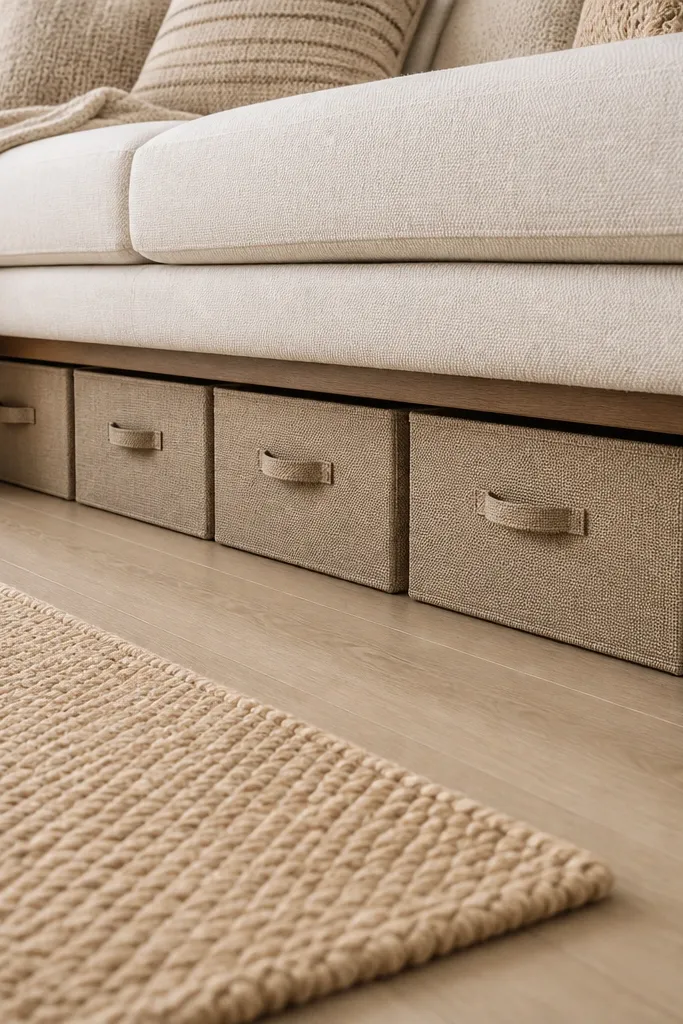
A drawing room looks messy even when everything is “put away” — the visual mess is what shows under furniture. Under-sofa bins solve that without building cabinets. Pick bins in the same color family as your rug or cushions and keep them uniform so the space looks designed. This is beginner-friendly because you’re buying and placing, not cutting or installing. It’s ideal for 2 BHK homes where you want storage but don’t want heavy wardrobes in the living area.
Measure the clearance under your sofa and choose bins that slide in with a few cm of breathing space. Line the floor under the bins with a thin non-slip mat so they don’t slide. Place bins in a row, then tuck blankets or board games inside. Add a small fabric lid or organizer panel if you need a cleaner silhouette from the front.
Keep bin colors consistent with the base neutral of the room so they disappear visually.
Don’t use colorful bins; they show up as blocks of color in photos.
16. Slim console behind the sofa with a landing styling plan
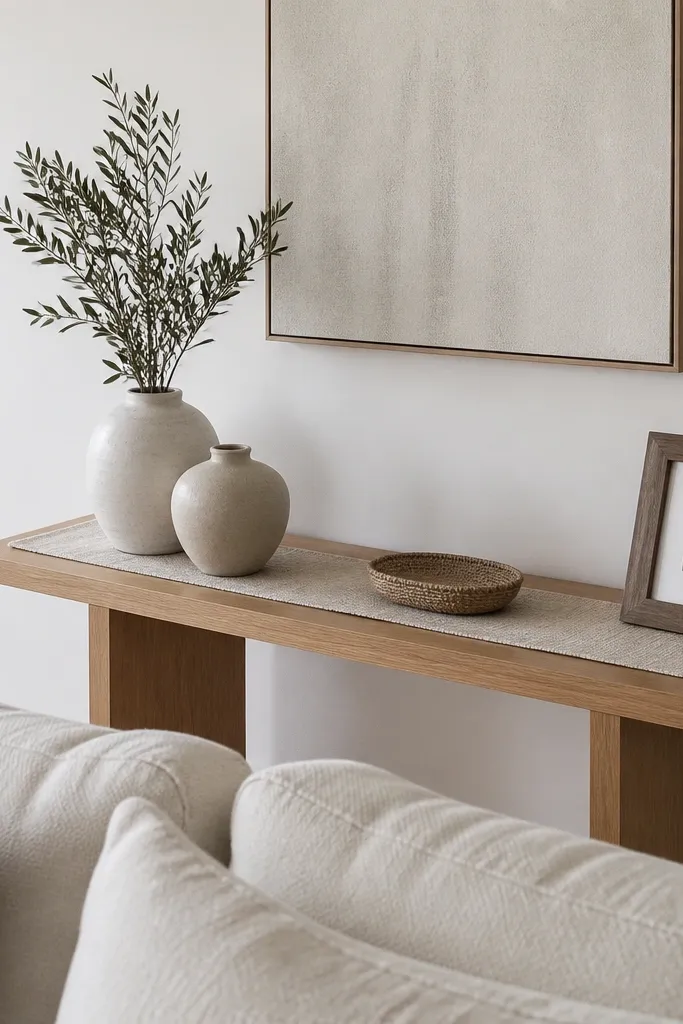
If your drawing room has space behind the sofa, a slim console instantly makes it look styled and “complete.” The console acts like a visual frame for the seating area, but it stays light when you pick a narrow depth like 25-30 cm. Add a runner in a neutral texture and style only a few items: two vases, one tray, and one small framed piece. This is beginner-friendly because it’s layout and styling, not renovation. It also helps in 2 BHK homes where you want extra storage without a bulky cabinet.
Measure the gap behind the sofa and choose a console depth that leaves at least 80-90 cm for walking. Install or place the console level, then add a runner that reaches about 10 cm past each end. Style with two matching vases at the ends and a tray in the center. Finish by keeping the tallest item centered so the console line looks balanced from the doorway.
Editor's noteUse matte finishes and avoid glossy tops; they show dust and streaks quickly.
Skip thisDon’t overload the console — too many objects make the walkway feel cramped.
17. Wall-mounted curtain rod with ceiling-height illusion
This takes curtain styling up a notch by tricking the eye into seeing more height. Place the rod near the ceiling or as high as you can above the window, then hang full-length panels that reach the floor. The higher rod creates a clean vertical line and makes the drawing room feel bigger, which is exactly what you want in 2 BHK spaces. Keep fabric matte and light enough to drape — sheer-to-medium works well. It’s beginner-friendly because you only change hardware placement and panel length.
Measure the ceiling-to-floor height and decide the rod position so it doesn’t hit window trim or blinds. Install heavy-duty brackets into studs or use correct wall anchors. Hang panels wide enough to cover the window when closed with 15-20 cm overlap each side. Steam and adjust so folds fall naturally and the bottom edge stays even.
If you’re unsure about length, buy panels slightly longer and hem after steaming.
Avoid rods that are too narrow; narrow rods pinch the curtains and ruin the height illusion.
18. DIY fabric wall art with stretched canvas and simple frames
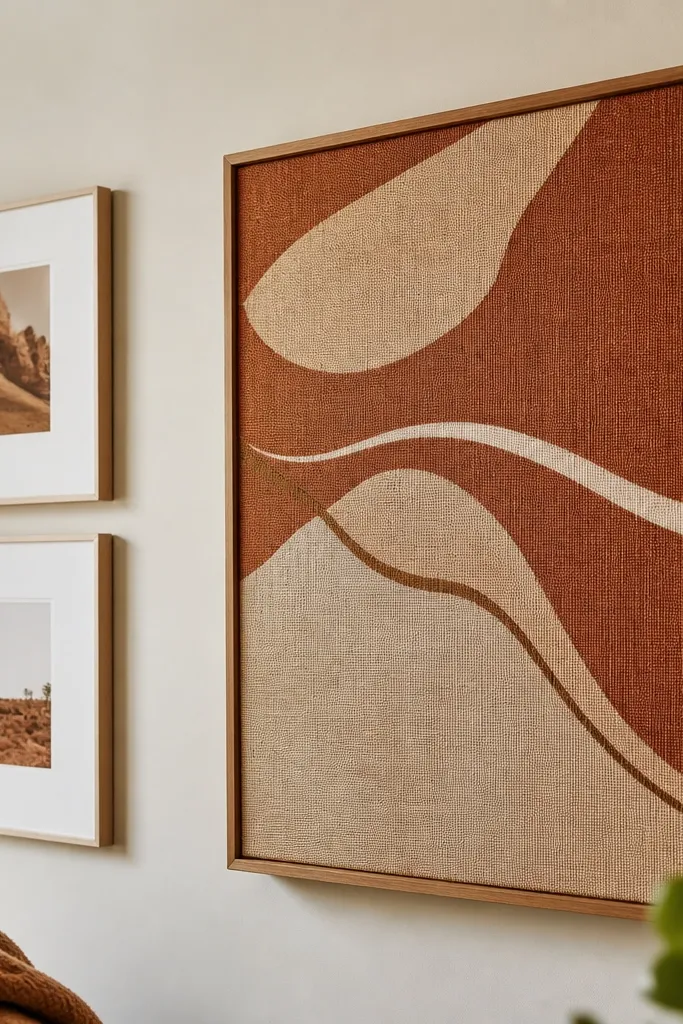
Fabric wall art is a beginner-friendly way to add color and softness without wallpaper or painting. Use a stretched canvas inside a wooden frame so it looks crisp, not like a random cloth. Choose one fabric with a strong pattern or a solid textured weave, then keep the rest of the room neutral. This works because textile art warms up the room and reduces the harshness of blank walls. In a 2 BHK drawing room, one large fabric piece can replace multiple small decor items.
Pick fabric large enough to wrap around a stretcher frame with at least 5 cm extra on each side. Stretch the fabric evenly, staple on the back corners first, then pull tight and staple the remaining sides. Trim excess fabric and add corner caps if your frame has them. Mount the framed canvas centered above the sofa or on the focal wall, and level it carefully.
Pre-wash fabric if it’s washable, then iron so the pattern doesn’t warp.
Don’t use thin, flimsy fabric that wrinkles — it looks sloppy once stretched.
19. Matte white floating TV wall with cable concealment
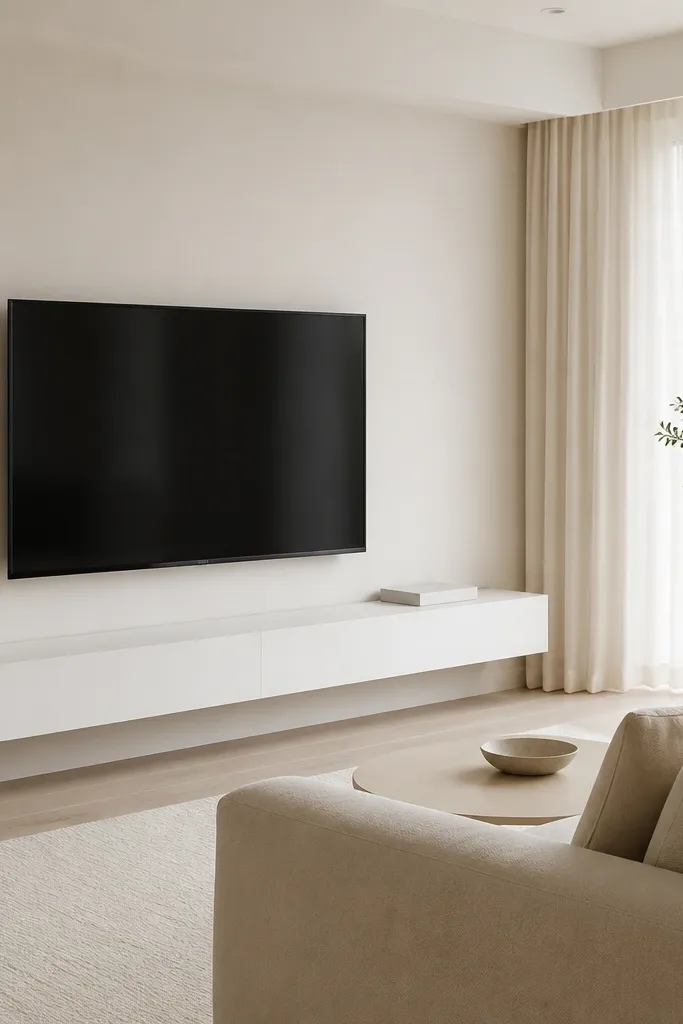
A clean TV wall makes the entire drawing room look pulled together. A matte white floating shelf and a simple TV mount with cable concealment removes the visual noise that screams “unfinished.” Keep the rest of the decor minimal so the wall stays bright and calm. This is beginner-friendly because you’re not building cabinets from scratch — you’re creating a clean mounting and hiding system. The matte finish also photographs well because it doesn’t glare like glossy paint.
Mark TV mounting height based on your seating line, then install a TV bracket into studs. Run cables through a cable raceway behind the wall or through a conduit channel up to the shelf area. Install a floating shelf level using heavy-duty brackets rated for the shelf weight. Finish by adding one plant and one frame on the shelf, keeping the TV area visually quiet.
Editor's notePlan your cable length before installation so you’re not stretching wires after the shelf is mounted.
Skip thisAvoid mounting without a stud — it makes the whole look unsafe and unstable.
20. Corner plant stand with a single tall statement plant
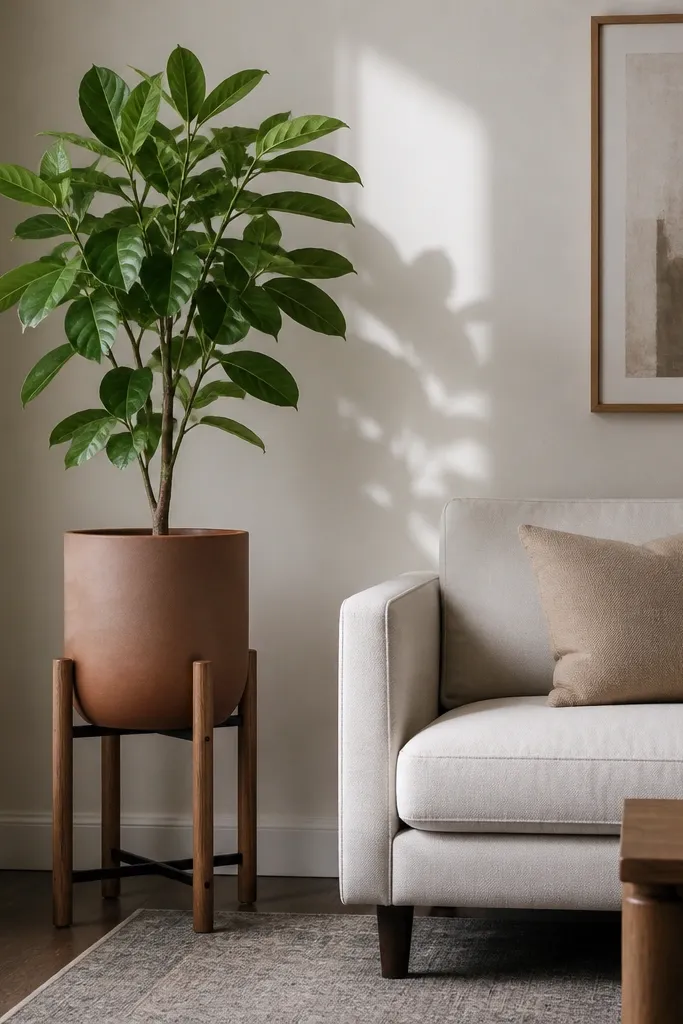
Plants make a drawing room feel alive, but the style fails when there are too many small pots. This idea uses one tall statement plant placed on a stand, so it creates height and balances seating. Choose a stand in wood or matte metal and a pot cover that matches your rug and curtains. The look is photogenic because the plant silhouette reads clearly against a plain wall. It’s beginner-friendly since you’re styling and placement, not re-landscaping your whole home.
Pick a plant with upright growth like a dracaena, areca palm, or fiddle-leaf type, then choose a pot size that fits the stand top. Place the stand in the corner where it won’t block walkways and where light reaches it. Use a neutral outer pot cover and keep the soil surface tidy. Rotate the plant weekly for even growth so it stays symmetrical from the doorway angle.
Wipe leaves with a damp cloth — dust makes plants look dull in photos.
Avoid placing plants too close to curtains where leaves brush and snag fabric.
21. Coffee table styling with a tray + two-height rule
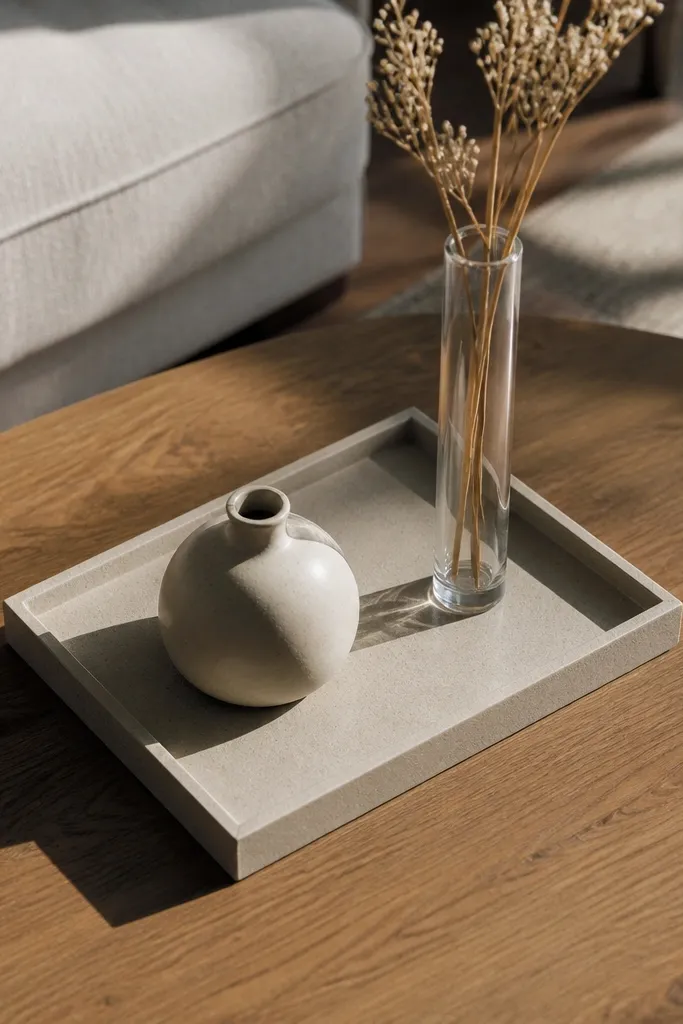
A coffee table is where the room either looks styled or chaotic. The two-height rule is simple: one tall item and one low item, both inside a tray or on a defined area. That makes the table look intentional even with minimal decor. Use matte ceramics and one reflective element like glass or metal for a clean contrast. This is beginner-friendly because you can do it with items you already own, and it works regardless of whether your table is wood, marble-look, or glass.
Choose a tray size that covers at least half the table surface and place it centered. Add one tall item like a slim vase or candle holder, then add a low item like a small candle or coaster group. Keep the rest of the table mostly empty. Wipe the tabletop and adjust items so the tallest piece sits slightly off-center toward the seating side for a natural look.
Editor's noteUse felt pads under the tray so it doesn’t slide and scrape.
Skip thisAvoid scattering decor across the table without a tray — it reads random.
22. Bedroom-style false ceiling lighting with warm glow
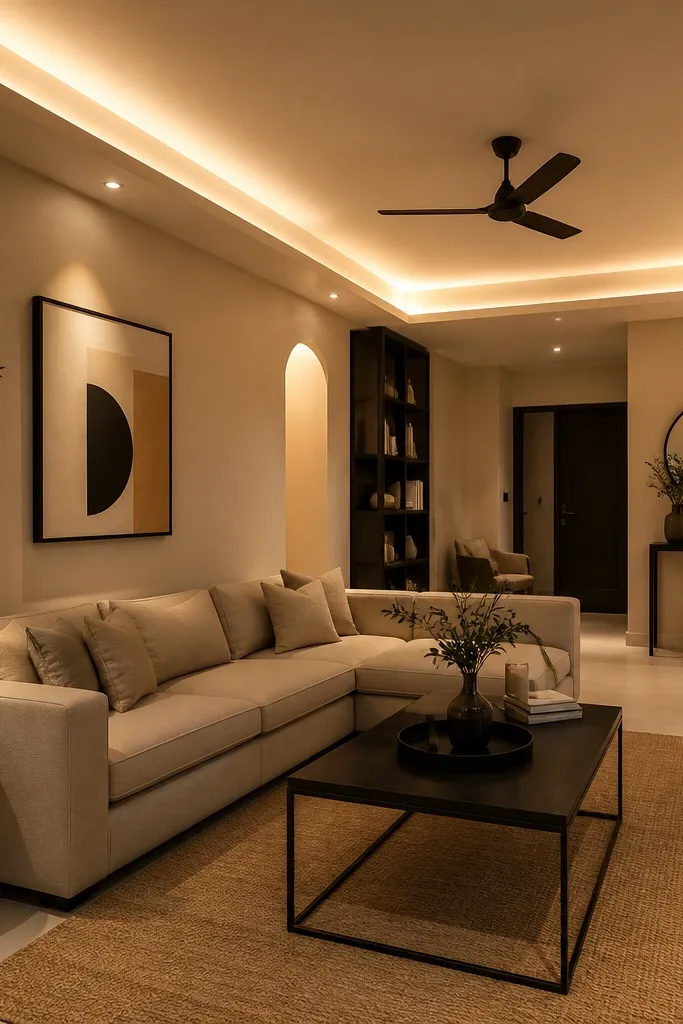
Even without changing walls, lighting can make the drawing room look like a designer space. A simple false ceiling glow effect uses warm light directed toward the wall so the room looks softer and more flattering. In 2 BHK homes, this is where you fix the “flat” look from harsh overhead lights. Keep the rest of the decor neutral so the glow becomes the mood. This project is best when you have a living room with a ceiling you can modify or when a builder already installed basic downlights.
Decide on a warm temperature around 2700K and plan wall-wash light placement so it hits the focal wall behind the sofa or TV. Use LED strips or downlights with diffusers, installed behind a small drop or cove line. Test the lighting at night before finalizing trims and finishes. Finish by painting the ceiling and cove surfaces in matte white so light spreads evenly.
Add a dimmer if possible — warm glow looks best when you can lower brightness.
Avoid cool white 6500K bulbs; they make neutrals look gray.
23. Hand-painted geometric side table set with matching coasters
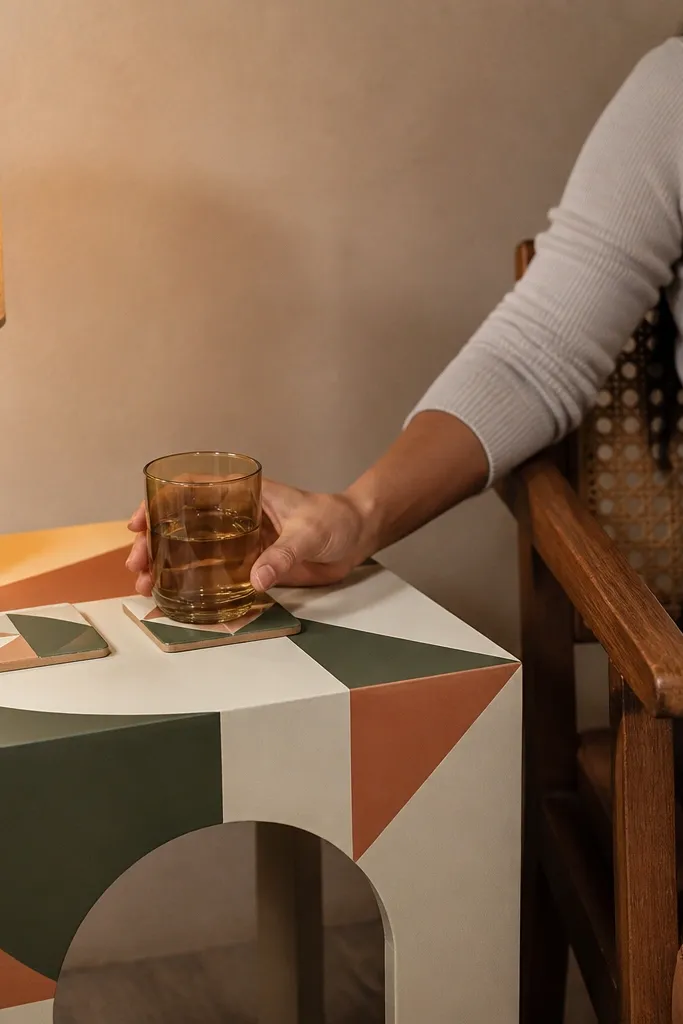
This is a beginner-friendly stylish drawing room idea that adds personality without needing a full renovation. Paint a side table with one clean geometric pattern and repeat the same pattern on coasters, so the room looks coordinated. Keep the base color neutral and choose one accent color — terracotta, deep green, or mustard — so it doesn’t clash with your walls. The look photographs well because the pattern catches light and breaks up plain furniture surfaces. It’s ideal if your room has neutral furniture but needs a focal detail.
Sand the side table lightly, wipe dust, and prime it with bonding primer. Use painter’s tape to block geometric shapes, then paint with matte enamel for a smooth finish. Let it cure fully before using the table. Create 4-6 matching coasters using the same colors and pattern size, then seal everything with a clear matte protective coat.
Editor's noteUse painter’s tape with thin edges and burnish it down to prevent paint bleed.
Skip thisAvoid glossy paint — it reflects and makes the pattern look cheap.
24. Narrow console mirror with a frame and warm bulb
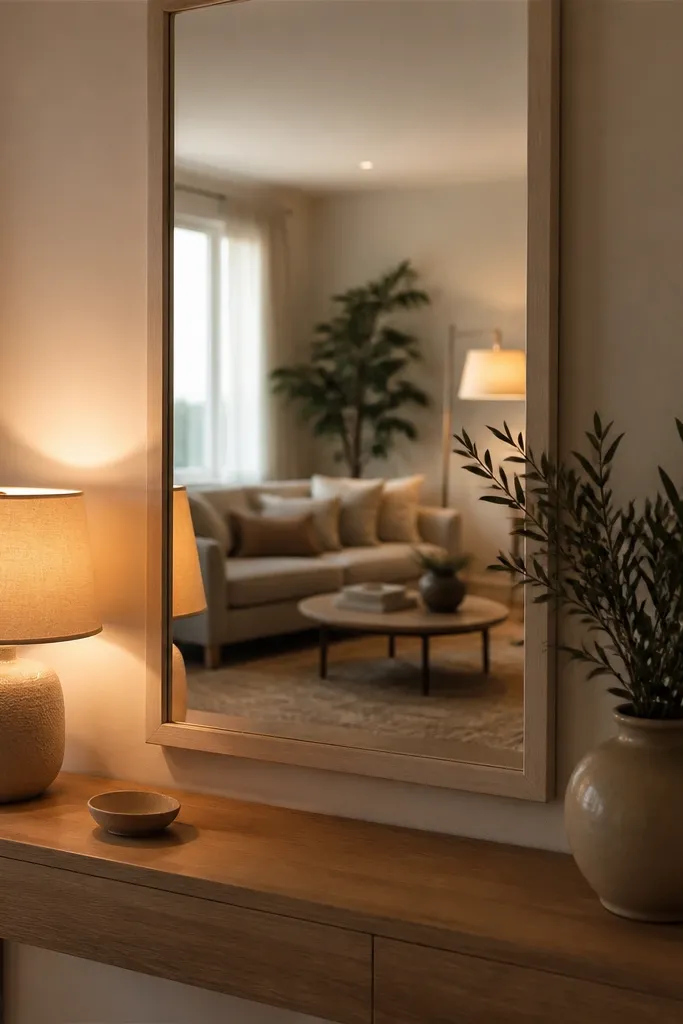
A mirror placed correctly makes a 2 BHK drawing room feel bigger and brighter, and it looks great in photos. Choose a narrow console and hang a framed mirror above it so it reflects the seating area rather than clutter. Add a warm lamp nearby so the reflection looks soft, not harsh. This idea is beginner-friendly because it’s mostly placement and styling. It gives you a clean focal point in entry-adjacent drawing rooms or living rooms where walls feel empty.
Pick a mirror size that matches your console width and hangs centered at eye level for standing views. Secure the mirror using D-ring or proper wall anchors, and ensure it’s level. Place a small lamp on the console side and add one tray with minimal items. Finally, adjust the lamp angle so the reflection shows warm light on the wall, not the bulb itself.
Editor's noteUse bulbs around 2700K and keep the lamp shade light to prevent bright hotspots in the mirror.
Skip thisDon’t hang the mirror where it reflects a messy TV cable area.
25. Matte wall paint with a washable accent patch behind seating
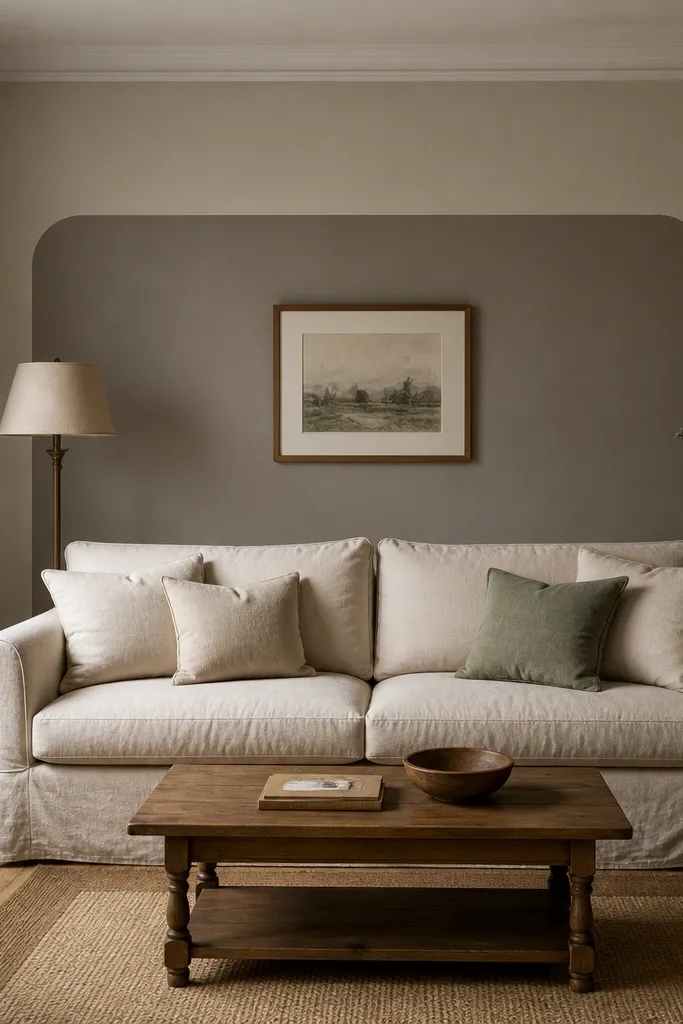
If full feature walls feel like too much, an accent patch gives you the same impact with less risk. Paint a rectangular or rounded patch behind the sofa or a reading chair using a washable matte paint. It adds depth and makes the seating corner feel designed. Keep the patch color within one shade family of your main wall — warm taupe, soft clay, or muted olive — so it looks cohesive. This project is beginner-friendly because it’s smaller, easier to tape, and faster to repaint if you change your mind.
Choose a patch size around 60-120 cm wide depending on your seating area, and mark the outline with painter’s tape. Paint the patch color in two thin coats, letting each coat dry before removing tape. Touch up edges with a small angled brush. When dry, add one framed art piece or a wall sconce so the patch feels intentional rather than random.
Editor's noteUse matte paint on the accent patch so edges don’t look glossy or uneven.
Skip thisAvoid high-contrast colors that clash with your rug — it looks like a mistake, not a design choice.



