
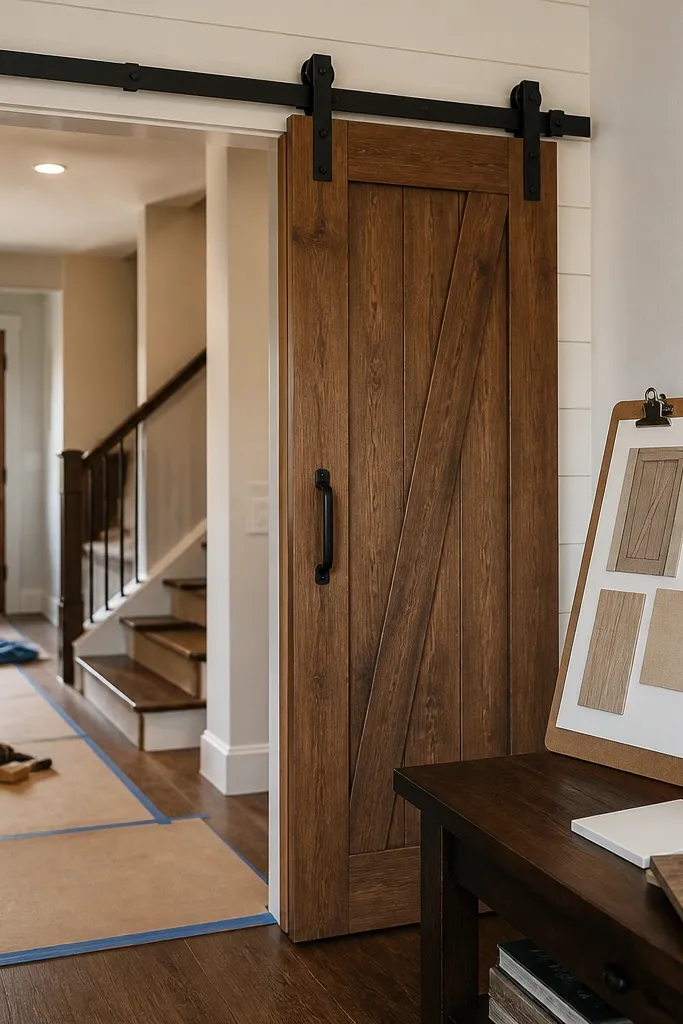
1. Matte black rail with a stained wood slab door
This is the fastest way to make a sliding door look designed. A single stained wood slab reads warm and solid, and the matte black rail gives strong visual contrast against light walls. The door doesn’t need fancy joinery because the wood grain does the work; even a simple plank build looks expensive when the stain is even and the edges are sealed. It’s also beginner-friendly because you can use pre-made door slabs or build a simple framed panel that stays flat with proper sealing. Put it in a hallway, laundry room, or closet where you want separation without heavy construction.
Start by buying a door slab or building a panel frame with 1x lumber and a flat plywood center, then sand everything to 120 grit. Stain in thin coats, wipe back the excess, and seal with two coats of clear matte polyurethane so the surface looks smooth instead of glossy. Mount the track only after you measure overlap — mark a level line 3 inches above the opening and set the track so the door covers the opening edge-to-edge. Screw the track into studs or install 2x4 blocking behind drywall, then hang the door and adjust the rollers until the bottom clears the floor by about 3/8 inch.
Use a painter’s tape strip along the wall edge where the door will land so you can check overlap before you drill.
Don’t mount the track to drywall alone; the whole look falls apart when the rail shifts.
2. Raised panel shaker door on a hidden track
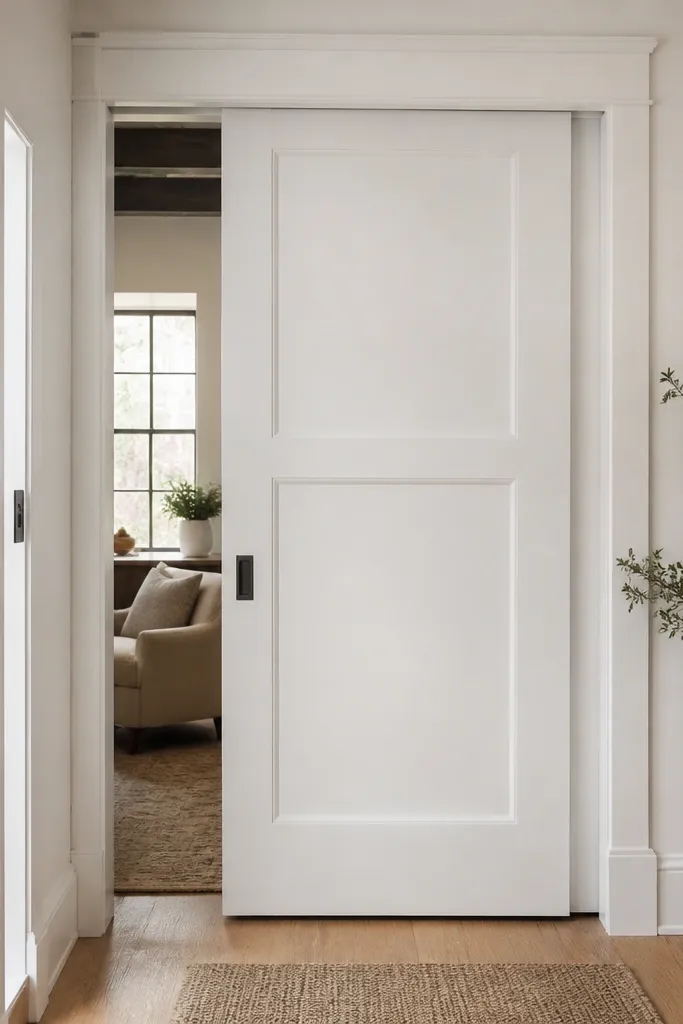
Build or buy a shaker-style door panel with simple rails and stiles, then paint it with bonding primer and two coats of satin or semi-gloss paint. For a hidden track, you’ll need a track housing box: frame a rectangular enclosure above the opening using 2x4s or 1x3s, then cover it with drywall or plywood. Install the track inside the housing while the box is open, checking level with a long level. Once mounted, hang the door and adjust the roller height so the door stays parallel to the floor and the bottom gap is even across the width.
If you want that built-in look, a shaker-style door with a hidden track is the cleanest visual trick. The raised panels create depth, and the hardware disappears, so the door reads like it belongs to the architecture instead of being an add-on. Paint it crisp white and the door becomes a bright focal point in entryways and bedrooms. This works especially well when your wall has trim — the door frames visually match the trim lines and the seam looks intentional. It’s beginner-friendly because the door design hides tiny edge gaps, but you still need accurate track placement to keep the door level.
Skip thisDon’t guess the roller height; adjust the hangers until the door sits level before you close the housing.
Editor's notePaint the door edges too, not just the faces, so the seam looks clean when the door moves.
3. Vertical slat door with warm wood stain
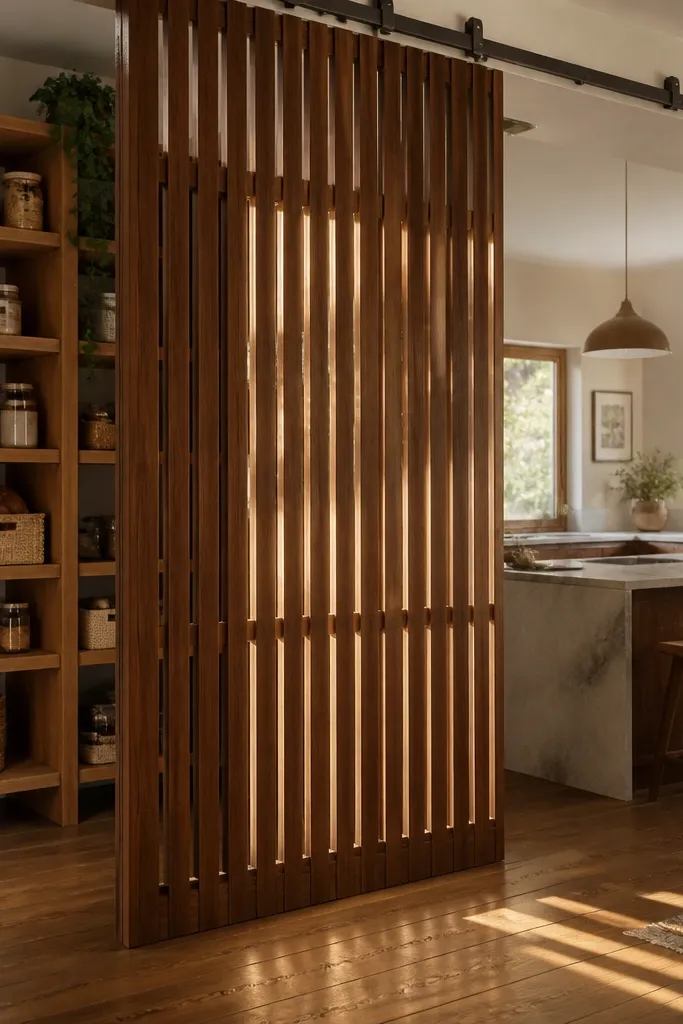
Vertical slats look stunning because they add rhythm without looking busy. Light passes through the gaps, so the door separates space while still keeping rooms feeling airy. Use a warm stain and the slats look handcrafted, even if you use simple boards. This is ideal for pantries, home offices, or a mudroom where you want partial privacy and a clean, modern texture. For beginners, it’s forgiving because slats hide minor imperfections along the door edges better than flat panels.
Start with a simple rectangular frame made from 1x3 or 1x4 lumber, then attach vertical slats leaving a consistent gap of about 1/4 inch. Sand the whole assembly, stain evenly, and seal with matte clear coat to reduce glare. Mount a standard surface track above the opening and hang the door so the slat face overlaps the opening by 2 to 4 inches. Adjust the rollers until the door glides smoothly; then use a soft door stop or floor guide to keep the bottom from swinging.
Pre-finish slats before assembly, then do a quick final sanding on the frame; it’s faster and more even.
Don’t use uneven slat spacing; inconsistent gaps show up immediately in photos.
4. Frosted glass insert door with aluminum frame
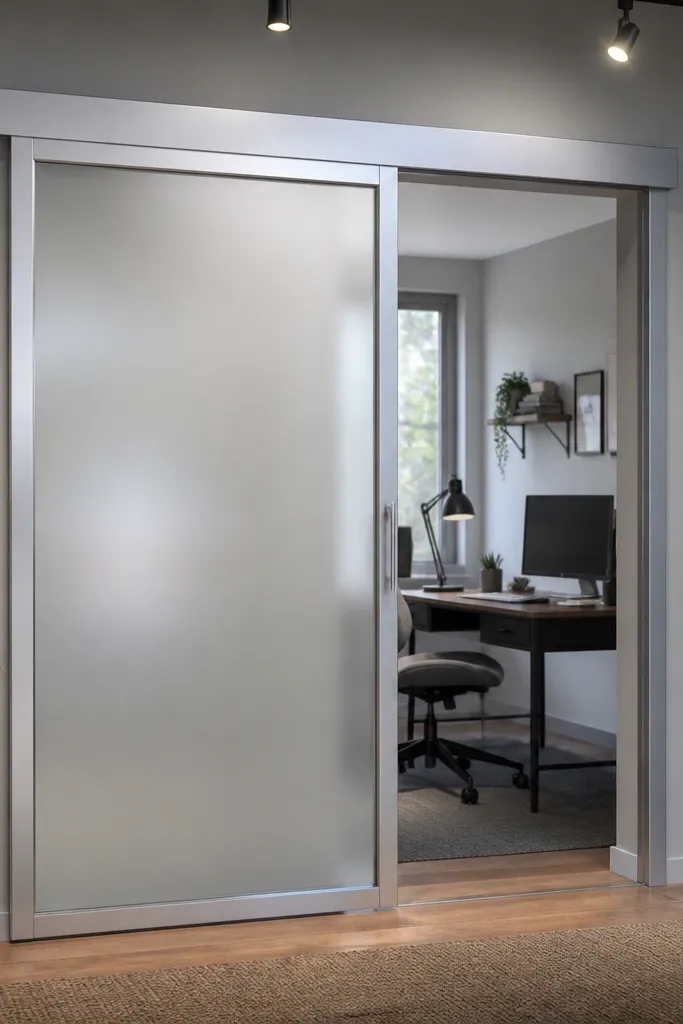
Frosted glass turns a sliding door into a light-control feature. You get privacy without blocking brightness, and the glass surface adds a sleek, modern look that photographs well from multiple angles. Use an aluminum or painted wood frame around the glass so the edges look crisp instead of DIY. This works great for office nooks, bathrooms near hallways, or dining spaces where you want separation but not darkness. It’s beginner-friendly if you buy pre-cut frosted glass and build a frame that holds it safely.
Measure the opening and build a door frame from 1x4 or 1x3 boards, then cut grooves or rabbets to seat the glass. Install the glass using glazing stops and clear silicone designed for glass, then secure with small screws through the stops. Prime and paint the frame, then mount the door using a heavy-duty sliding hardware kit rated for the door weight. Hang the door and set the track so it overlaps the opening by at least 2 inches, then add a bottom guide to prevent wobble.
Choose frosted glass with a consistent texture (not random patterns) so the door looks uniform on camera.
Don’t skip a bottom guide; frosted glass doors wobble more and look crooked fast.
5. Barn-rail look with two-tone painted door panels
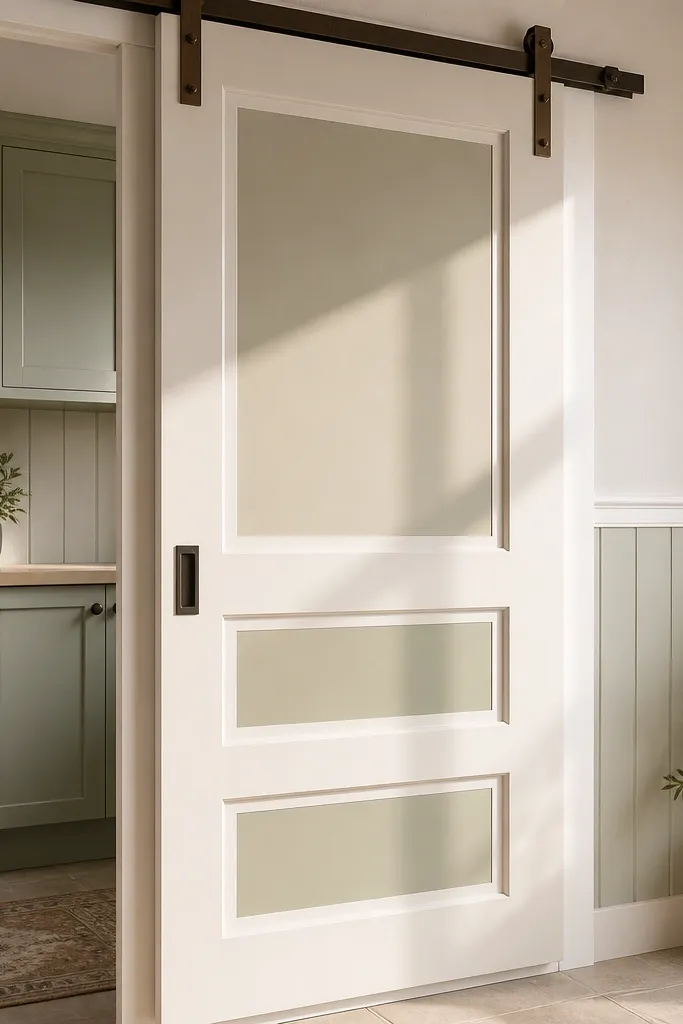
Build a simple framed door with flat inset panels using 1x3 framing and 1/4-inch plywood or MDF inserts. Prime everything, then paint the base color first; once dry, mask the inset panels with painter’s tape and paint the second color. After curing, seal with a clear topcoat if you want extra scuff resistance. Mount a barn-rail hardware kit above the opening, set overlap at 2 to 3 inches, then hang the door and adjust roller height until the bottom gap is even.
Two-tone paint gives you the “designer” look without complex carpentry. Pair a calm neutral base with a contrasting panel color — think off-white door with warm greige or light sage inset panels. The barn-rail style hardware adds a rustic edge, but the clean paint keeps it modern. This is great for laundry rooms, kids' spaces, and entry closets where you want color without going loud. Beginners like this because paint hides small edge flaws and lets you refine the look in a couple of coats.
Skip thisDon’t paint over exposed raw edges; it causes pinholes that ruin the crisp two-tone lines.
Editor's noteUse 220-grit sanding between paint coats; the second color will look sharper and less patchy.
6. Whiteboard sliding door for a home office wall
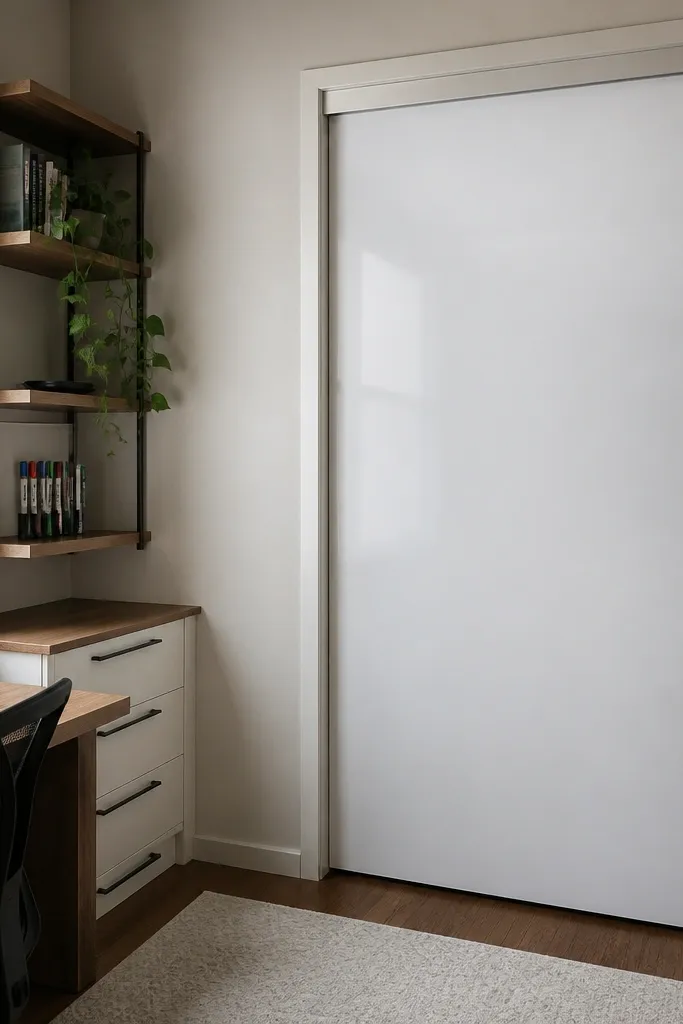
A sliding whiteboard door looks fun and practical in photos because it’s bold and functional. You get a clean surface that reflects light, plus it turns a boring doorway into a creative wall. For beginners, the trick is to mount a proper whiteboard sheet or buy a ready-to-install board panel and frame it cleanly. Use this in an office, craft room, or study where you want notes, schedules, or quick sketches. The look is modern and the usability is real — you’re not building a door just to hide it.
Buy a whiteboard panel sized to your door frame, then build a frame from 1x3 lumber with a backer so the board sits flat. Attach the board using adhesive meant for whiteboards and add small screws through the frame where hidden by trim. Prime and paint any exposed wood edges, then seal with a clear coat that won’t yellow. Install a sturdy track rated for the door weight, set overlap at 2 inches, and add a floor guide so the board doesn’t drift.
Choose a magnetic whiteboard so you can add clips and markers without tape everywhere.
Don’t use a cheap thin board; it dents and looks bad under raking light.
7. Coastal rope-handle door with a natural wood frame
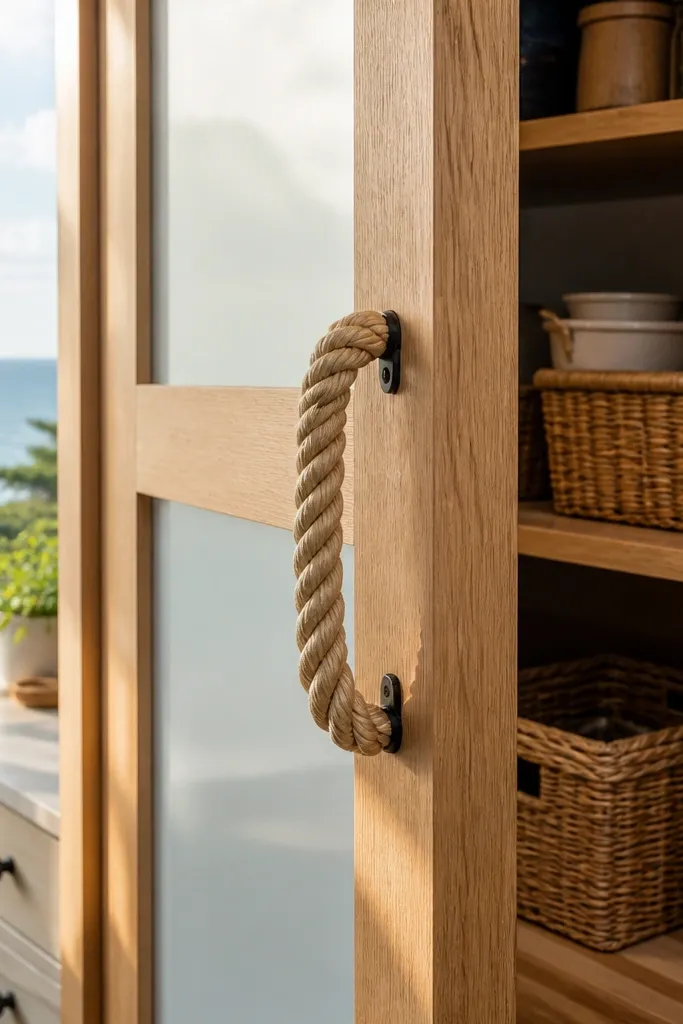
This idea is about tactile charm. A natural wood frame with a rope pull looks cozy and photos well because you get texture from grain and hardware at the same time. It’s not just “cute” — the rope handle also makes the door easy to open even when you don’t have a perfectly aligned grip position. Use it for a pantry, linen closet, or a beach-house style entry. Beginners can do it because the frame is simple and the hardware is easy to install; the only real requirement is sanding and sealing so the wood stays uniform.
Build a framed door with 1x3 lumber and a plywood center, then sand to 180 grit and apply a clear natural oil or stain with a final wipe-back. Install a rope pull: drill two holes through the frame edge, thread rope through eye bolts, and tie off with a tight stopper knot. Mount a track with a top roller kit, then hang the door with 2 to 4 inches overlap. Add a floor guide to keep the rope-handle side from pulling the door out of line.
Seal the rope ends with a little clear varnish so fibers don’t fray over time.
Don’t skip sealing the door edges; that’s where coastal-style doors show wear first.
8. Mirrored panel door for a bright hallway
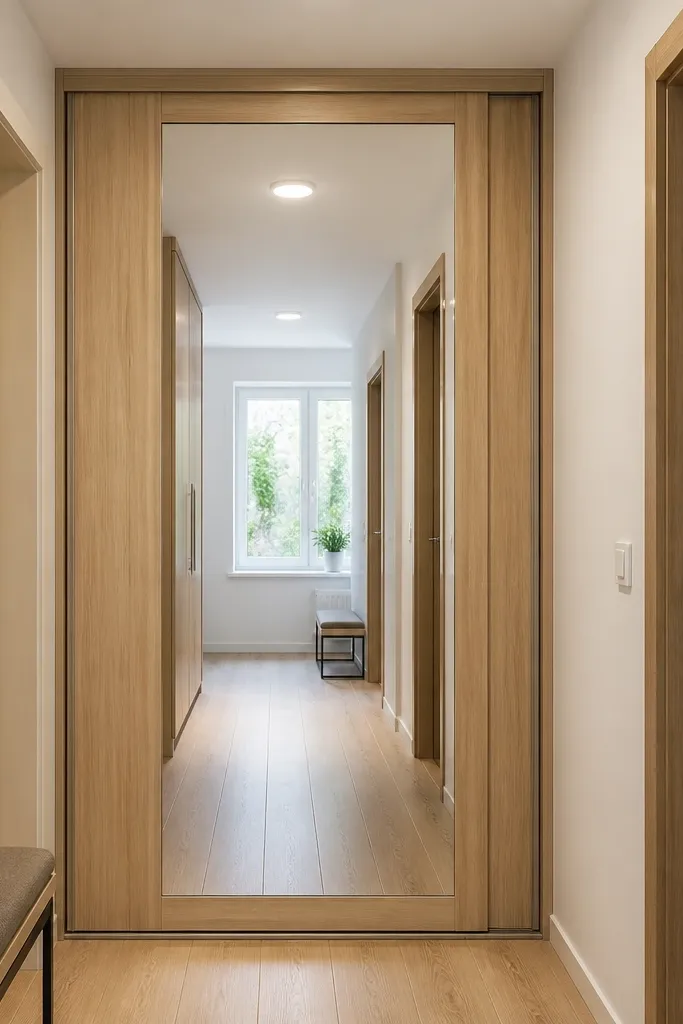
A mirrored sliding door makes small spaces feel bigger and looks dramatic in overhead and side lighting. The mirror also hides the “door is a door” vibe because it reflects the room and turns the opening into a feature. Use a single rectangular mirror inside a simple frame so the lines look clean. This works best in narrow hallways, entryways, and bedrooms where you want light bounce without adding a separate mirror. It’s beginner-friendly if you use mirror panels cut to size with edge protection.
Frame the mirror using 1x3 or 1x4 lumber, leaving a margin for mirror edge clips. Install the mirror with mirror mastic or manufacturer-recommended clips, then add corner trim pieces to cover fasteners. Prime and paint the frame if needed, then apply a clear topcoat on any raw wood edges. Mount the sliding hardware to studs or blocking, set overlap at 2 inches, and add a bottom guide so the mirror doesn’t swing.
Choose a mirror with a protective backing and use edge trim; it keeps the look clean if you bump the frame.
Don’t mount hardware before you confirm the mirror thickness; wrong spacing can crack edges.
9. Woven reed panel door with matte white paint
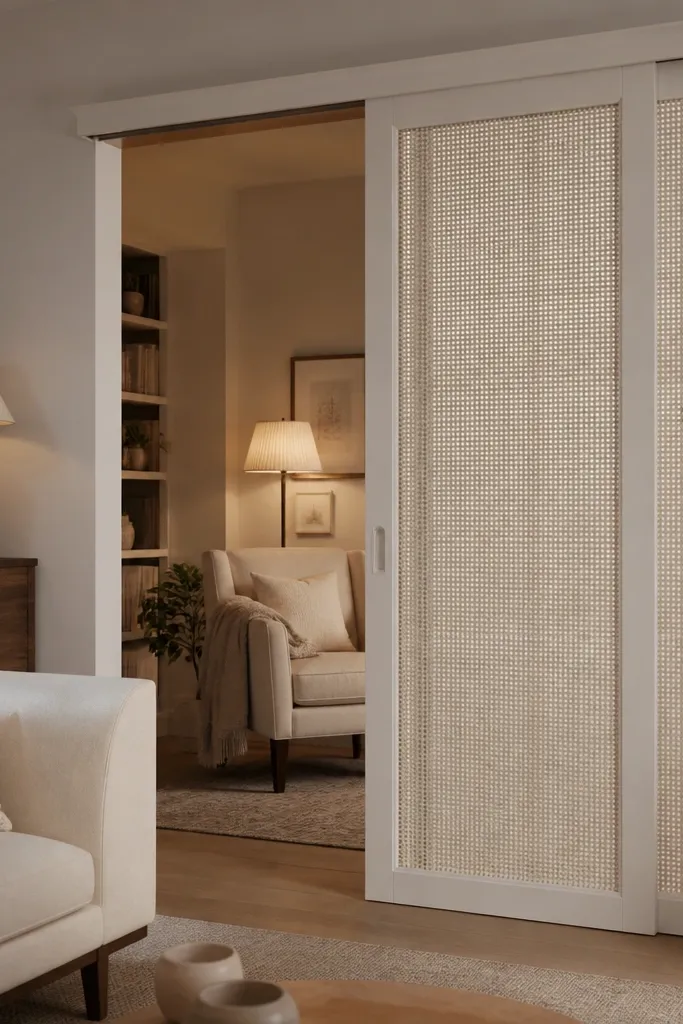
Build a rectangular frame, then attach a reed or rattan panel to a backing sheet like thin plywood so it stays flat. Paint the frame matte white, then seal with a clear coat that won’t stiffen the weave too much. Mount the door on a standard track, ensuring overlap of 2 to 3 inches. Install a bottom guide and check the door clearance so the panel doesn’t rub and fray.
Woven reed or rattan panels bring texture that reads warm and airy. Painted white frames the weave, so the door looks light, not heavy. This is one of the best beginner-friendly sliding door ideas for rooms that need softness — think living rooms, guest rooms, and nursery spaces. The weave also hides minor surface bumps, and the door looks photogenic from straight-on angles and side angles. You still get a real door that slides smoothly when you use the right panel backing.
Skip thisDon’t mount the panel directly to the frame without backing — it warps and sags.
Editor's noteSpray paint the frame edges with a light mist coat first; it fills grain without drenching the weave.
10. Vertical shiplap sliding door with dark stain
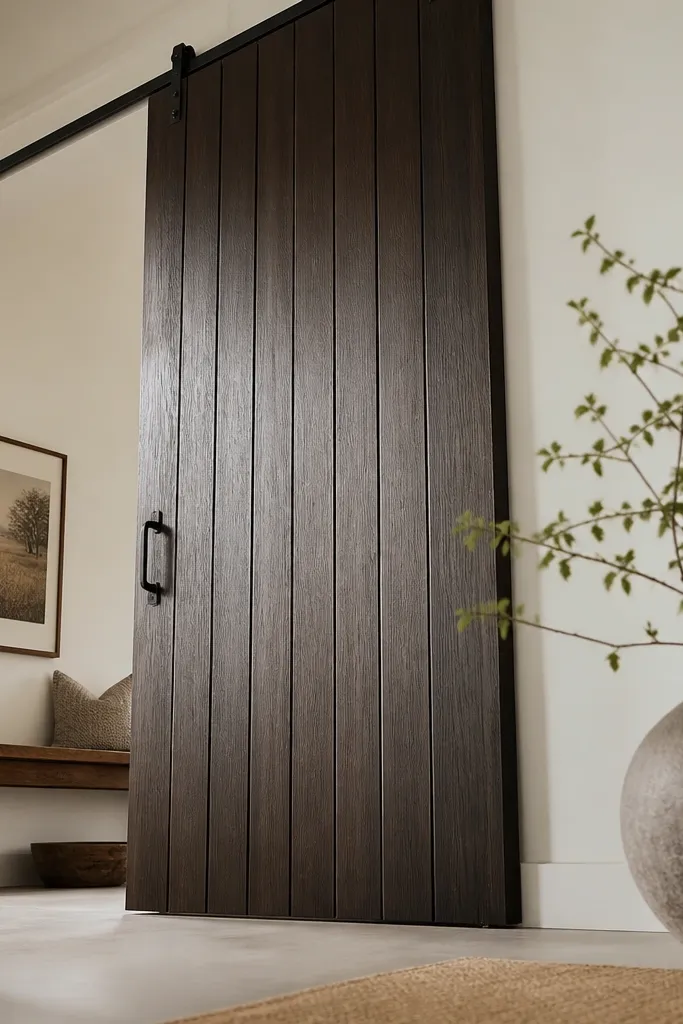
Build a simple frame, then cut vertical shiplap boards to size and nail or screw them onto the frame. Sand lightly, then stain in even coats and wipe back the excess to keep the tone consistent. Seal with a satin polyurethane to protect against scuffs. Mount the track above the opening with 2 to 4 inches overlap, hang the door, and adjust rollers so the door sits square. Add a floor guide to keep the bottom edge aligned.
Vertical shiplap looks bold because the lines pull the eye up and down, and dark staining makes the texture show. The door feels architectural, not decorative, and it stands out against light walls without needing extra trim. This is a smart pick for entryways and laundry rooms where you want a strong look but still want the door to blend with wood tones. Beginners can do it because shiplap boards hide small gaps and the stain makes everything uniform. The result is photogenic even when the door is partly open.
Skip thisDon’t use high-gloss polyurethane; it makes shiplap highlights look patchy under indoor lighting.
Editor's noteStain after full assembly so the boards match where they overlap and meet the frame.
11. Panel-in-panel door with contrasting border trim
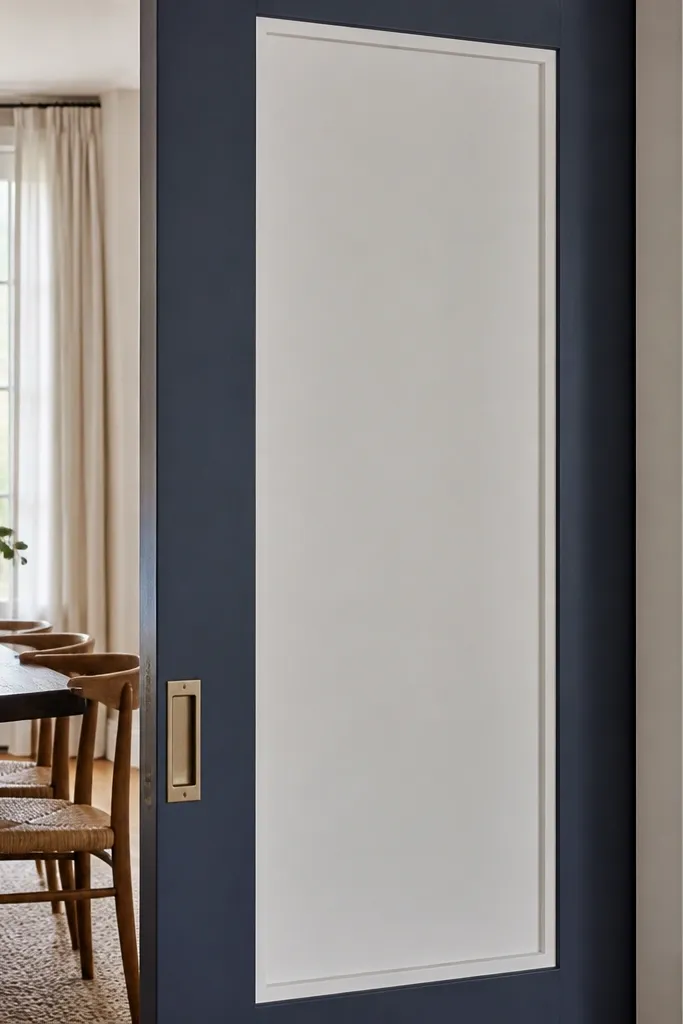
Build a door from plywood or a simple frame with a flat center panel, then attach trim strips around the perimeter to create the “second frame.” Prime everything, paint the center first, and mask off the border for the contrasting color. Once dry, add a clear topcoat to protect the painted trim. Mount the sliding hardware, set overlap at 2 inches, and adjust the hangers so the door closes evenly without a skewed seam.
This look is all about a clean frame inside a frame. A flat center panel with a contrasting border trim gives you sharp geometry that photographs well and hides basic construction mistakes. Pick one bold color for the border and keep the center white or light gray. It’s a strong beginner-friendly sliding door idea because you can build the door with simple plywood panels and trim strips, then paint until it looks crisp. Use it in kitchens, pantries, or bedrooms where you want the door to read like part of the design system.
Skip thisDon’t rush paint curing; soft paint chips when you install stops and guides.
Editor's noteUse a 1/2-inch overlap target between trim and opening so the border looks deliberate, not thin.
12. Louvered door with a slim top rail and brass handle
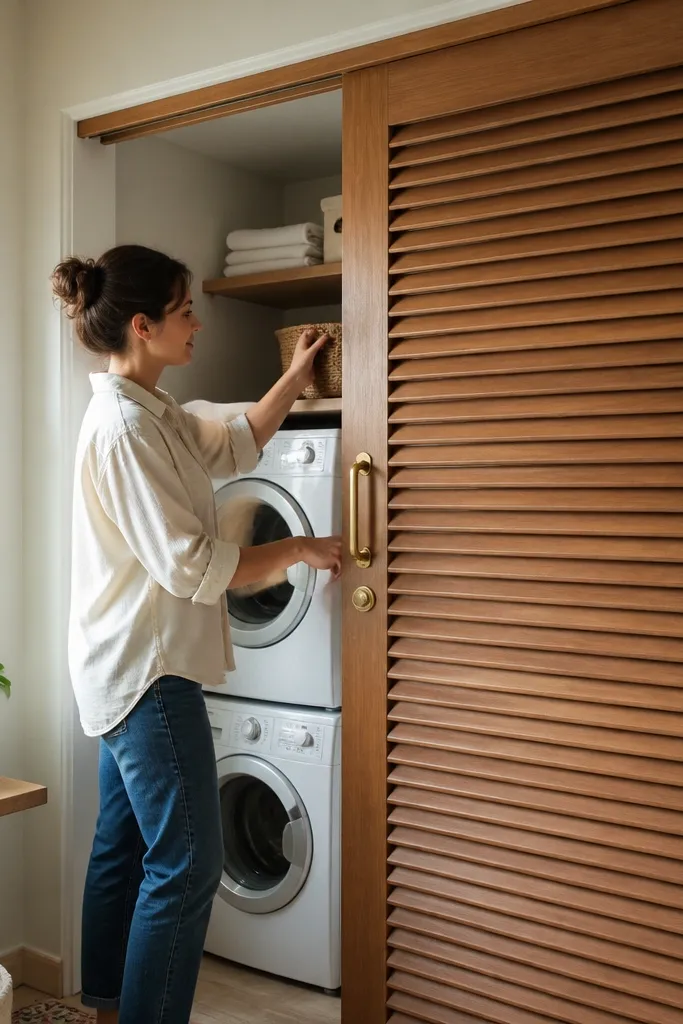
Start with a louvered insert sized to your door frame, or build louvers from thin strips spaced about 3/8 inch apart. Build a frame with a slim top rail and bottom rail, then attach the louvered section with screws hidden behind trim. Finish with a warm stain and seal with satin clear coat. Mount a heavy-duty track, hang the door with 2 to 3 inches overlap, and install a bottom guide to keep the slats from rubbing the floor.
Louvered doors look stunning because the slats catch light and create a shadow pattern. This is the best option when you want airflow or partial privacy — like laundry rooms, closets, or a craft space you don’t want to feel closed off. Warm wood plus brass hardware reads expensive without being fussy. Beginners can pull this off by buying a louvered insert or building slats on a sturdy frame so it stays straight. The door looks great in morning light and still looks good at night with lamps.
Skip thisDon’t use flimsy louvers; they warp and the door starts to scrape.
Editor's notePaint or stain the inside edges of the frame; it keeps the door looking finished even when it’s slid open.
13. Faux sliding barn door with wood slat spacer reveal
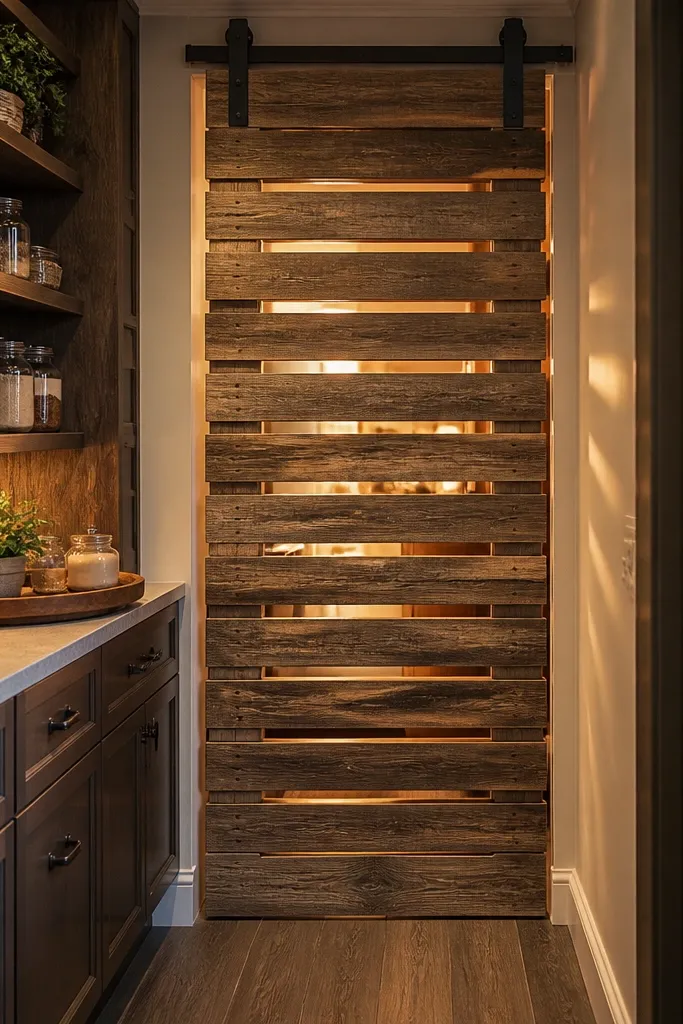
This gives you that barn door look without the heavy, chunky feel. The trick is adding visible spacer gaps between slats so the door reads layered. It’s photogenic because you see depth even from a distance, and it hides minor unevenness in the slat surface. Use it for entry closets and pantry areas where you want rustic texture but still want a clean finish. Beginners can manage it because the slats are simple strips and the spacing is controlled with spacers.
Build a rectangular back frame, then attach horizontal or vertical slats using small wood spacers like 1/8-inch strips to keep gaps consistent. Sand, stain or paint, and seal the surface. Mount barn-style sliding hardware above the opening, then align the door so the slat face overlaps by 2 to 4 inches. Hang the door and adjust rollers, then add a floor guide so the reveal stays even as it moves.
Use identical spacers for every gap; one “almost” gap shows up in every photo.
Don’t skip a seal coat; unsealed slats look dull and get rough quickly.
14. Rustic wood and metal mesh door for an industrial look
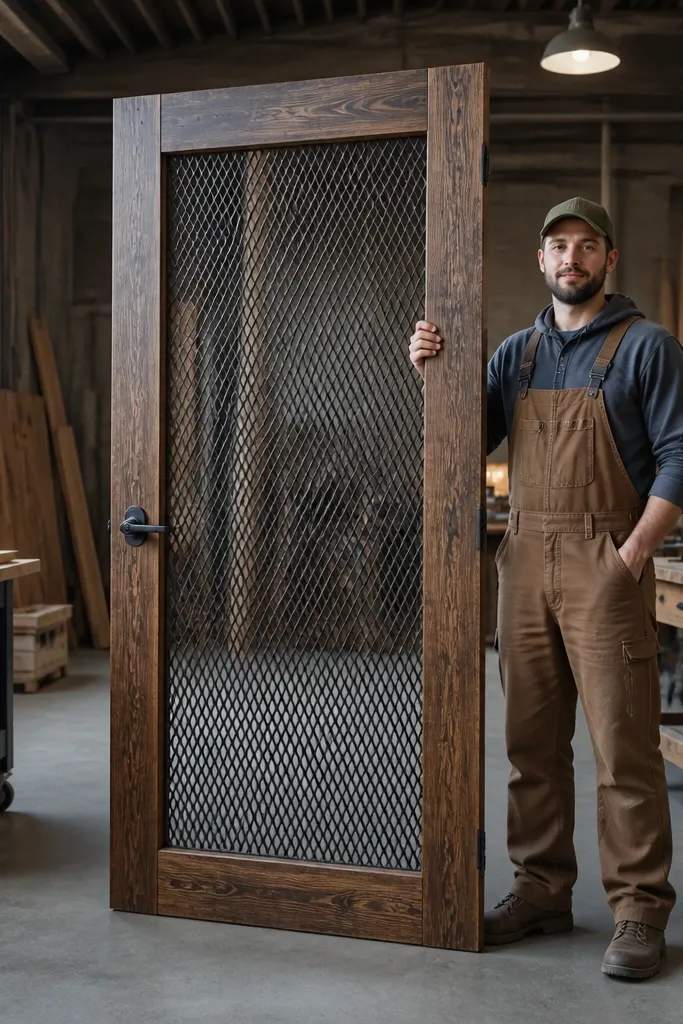
Build a wood frame from 1x3s, then attach a pre-cut metal mesh panel using small screws and washers or a spline method with thin trim. Sand edges and apply stain to the wood, then seal with clear coat. Mount the track using heavy-duty rollers sized for the door weight, set overlap at 2 inches, and hang the door so it slides without rubbing the frame. Install a bottom guide and check that the mesh panel doesn’t sag.
Metal mesh inside a wood frame looks industrial, but it’s still clean when the wood finish is even. The mesh adds a strong texture and makes the door look like a built piece, not a generic prefab. This works for garages, workshops, and hobby rooms, plus it looks great in modern loft-style interiors. Beginners can do it if they use a rigid mesh panel cut to size and mount it in a frame that prevents flex. The door also gives partial visibility — useful when you want to check a space quickly.
Skip thisDon’t use flexible mesh; it bows and makes the door look crooked.
Editor's noteWrap the mesh edges with a thin trim strip so the door looks finished and safe to touch.
15. Painted MDF framed door with a simple glass top window
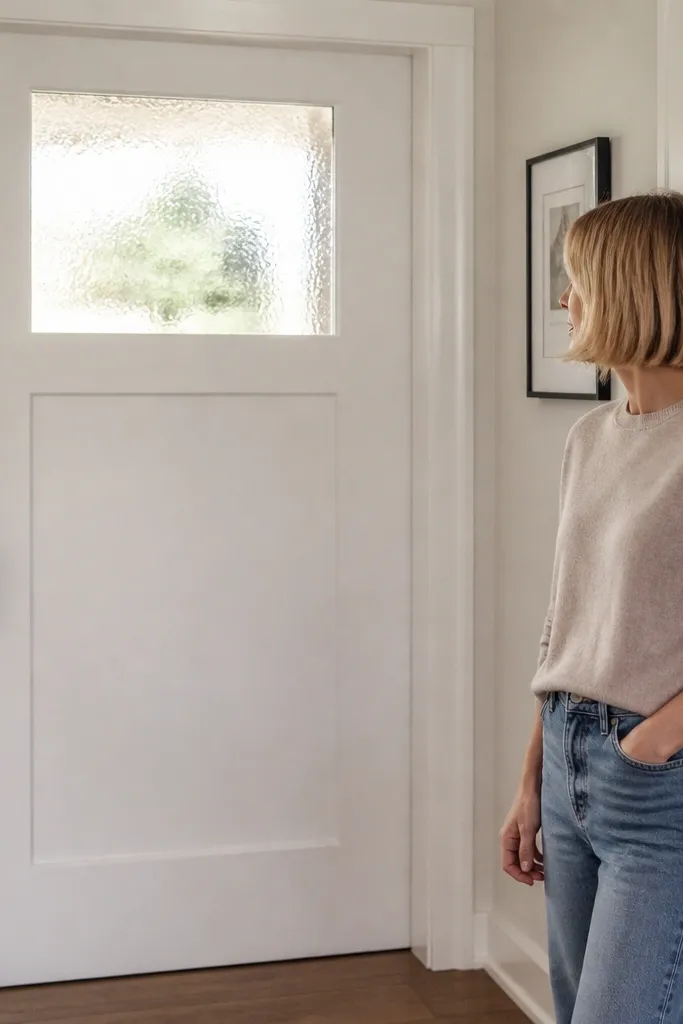
A small glass window at the top makes a sliding door feel lighter and more architectural. It adds a focal highlight without turning the whole door into a glass panel, so it’s easier for beginners who want privacy. Paint the MDF frame cleanly, and use a small tempered glass insert with frosted or seeded texture for privacy. This is a great option for bathrooms, home offices, and bedrooms where you want airflow and visibility at eye level without full transparency. The look is photogenic because the window creates a “design line” across the door.
Build a framed door from MDF or wood with a rectangular pocket for the glass insert. Prime and paint the door with bonding primer and two coats of satin or semi-gloss paint, sanding between coats. Install the glass using glazing tape and small stops so the edges don’t rattle. Mount the track, set overlap at 2 to 3 inches, hang the door, and adjust rollers until the door closes evenly. Add a bottom guide to prevent side-to-side drift.
Use seeded or frosted glass so the door reads stylish while still blocking direct views.
Don’t skip tempered glass; regular glass is unsafe for a door application.
16. Wainscot-style sliding door with beadboard panels
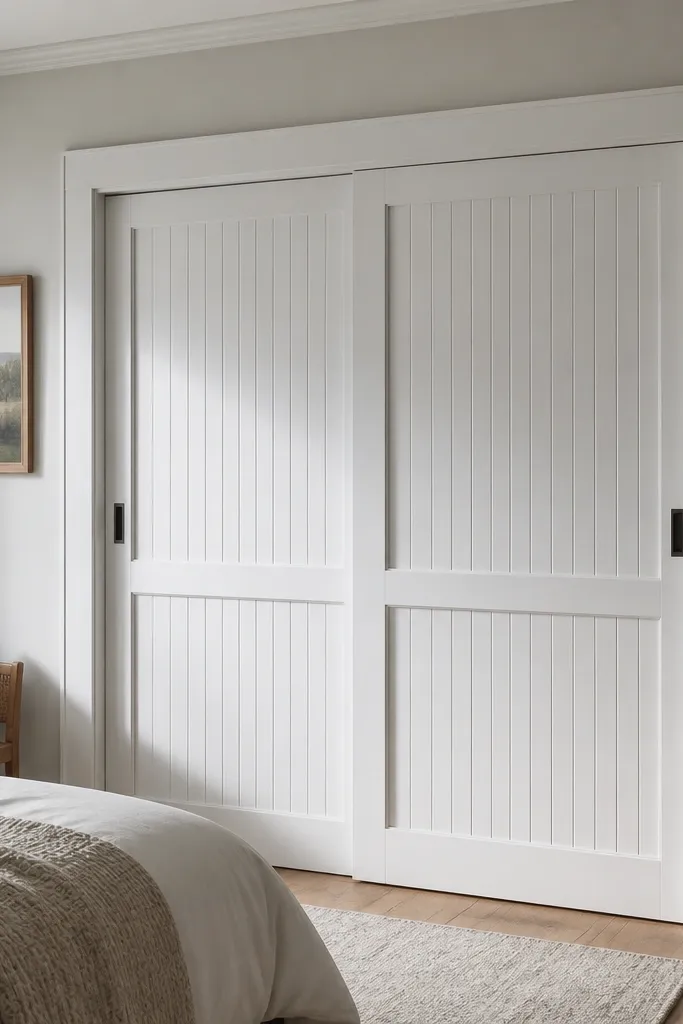
Beadboard instantly looks classic and tidy, and it photographs well because the grooves catch soft light. Pair it with simple wainscot trim for a tailored, room-ready look that doesn’t feel DIY. This is a strong beginner-friendly sliding door idea for bedrooms, hall closets, and dining rooms where you want something pretty but not modern-minimal. White paint makes the grooves crisp, and the style hides unevenness around the door frame. It’s also easy to build because beadboard panels are modular and simple to cut.
Cut beadboard panels to fit a door frame made from 1x3s or 1x4s, then secure them with nails or screws. Add wainscot rails and stiles — keep the proportions simple: one mid-rail across the door at about one-third from the bottom. Prime, then paint two coats in satin for a clean look. Mount the track with 2 to 4 inches overlap, hang the door, and adjust rollers for an even gap. Install a bottom guide to keep the beadboard from rubbing.
Use caulk only on trim seams, not on the beadboard grooves; over-caulking makes grooves look filled in.
Don’t use glossy paint; beadboard grooves disappear under shiny finishes.
17. Thermal blackout fabric door with a sleek frame
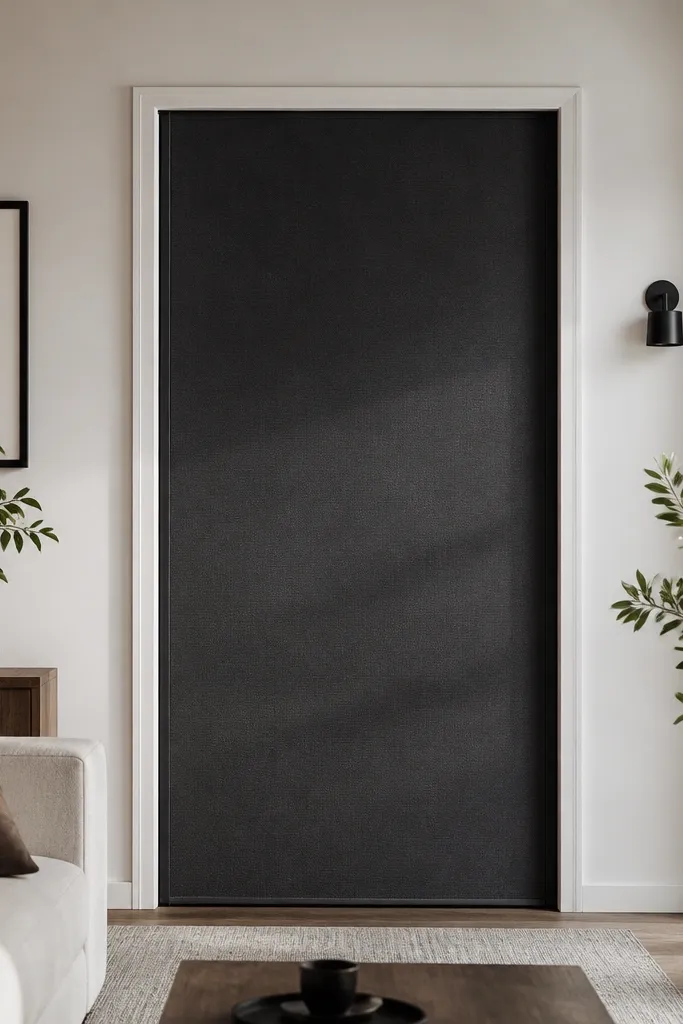
Fabric sliding doors can look stunning because they turn a doorway into a soft, tailored panel. Use blackout or light-blocking fabric in solid color so the door looks like a large piece of wall art. Frame it cleanly with thin trim so it reads sharp instead of like a curtain. This is beginner-friendly when you need privacy or light control without heavy glass or complicated carpentry. It’s especially good for bedrooms, media rooms, and nurseries where you care about darkness and calm.
Build a shallow frame from 1x2 or 1x3 trim, then stretch blackout fabric tightly and staple it to the back. Add a backing panel so the fabric stays flat, then finish the frame with primer and two coats of paint. Mount a track rated for the frame weight, set overlap at 2 inches, and hang the door with rollers or hangers designed for flat panels. Install magnetic catches or a simple door stop so the fabric panel seals evenly when closed.
Choose fabric with a tight weave; loose weave reads wrinkly and looks messy in bright light.
Don’t use thin decorative fabric; it sags and shows light through the weave.
18. Terracotta and cream painted door with arched top frame
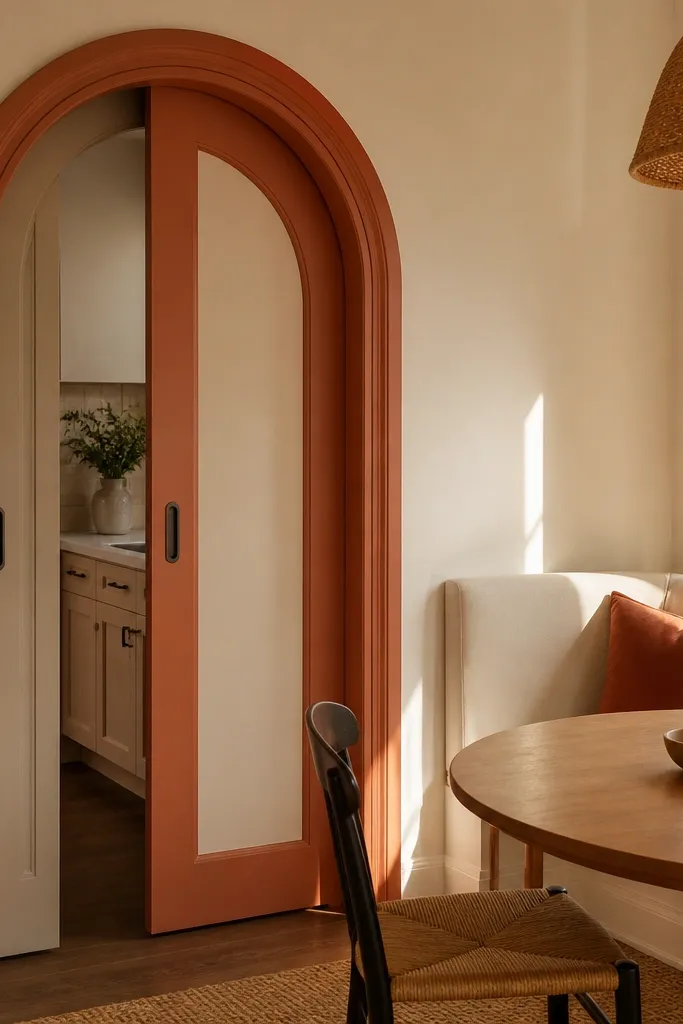
An arched top frame turns a sliding door into a focal art piece. The curved silhouette reads softer than rectangle doors, and two-tone paint makes the arch pop even in small spaces. This is a great idea for kids' rooms, breakfast nooks, and entryways where you want charm but still want it to look intentional. Beginners can do it because the arch can be cut from a template and the rest is straight framing. The door looks stunning in photos because the arch creates a strong visual line.
Build a rectangular door frame, then add an arched top panel using a template cut from plywood. Attach straight stiles and rails, then install a flat center panel like 1/4-inch plywood. Prime thoroughly, paint cream first, then mask and paint the terracotta arch area. Mount the track, set overlap at 2 to 3 inches, hang the door, and adjust rollers until the door sits centered on the opening. Add a bottom guide so the arch stays aligned as the door moves.
Sand the arch template edges smooth before you trace; a rough edge transfers into the final paint line.
Don’t rush masking; fuzzy tape edges turn the arch into a smudged blob.
19. Slim profile door with horizontal oak veneer panels
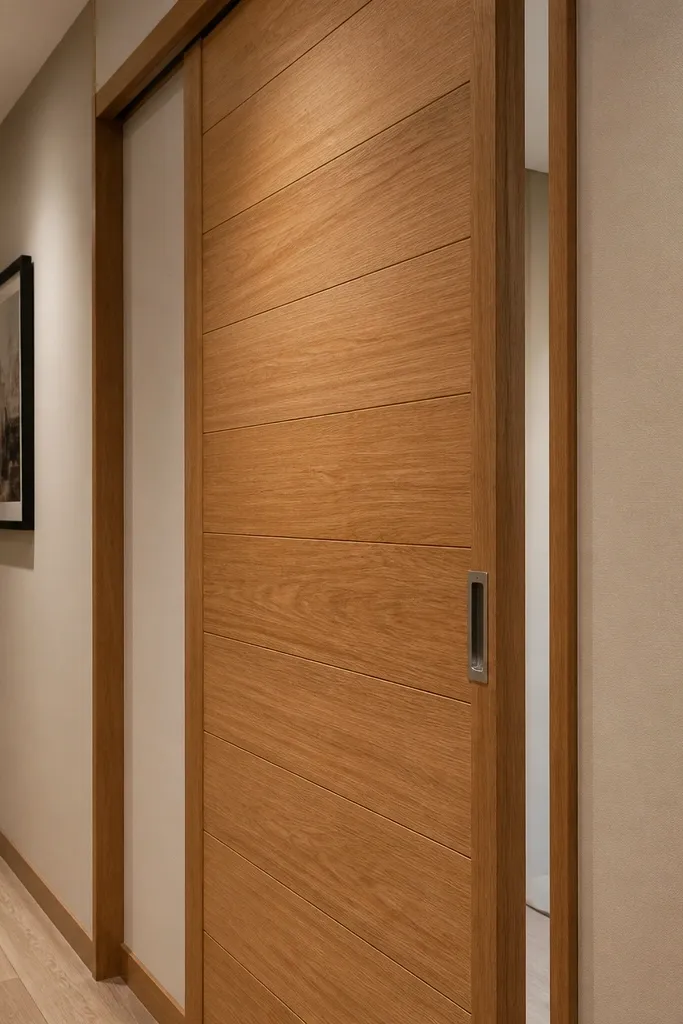
Cut plywood to door size, then glue oak veneer sheets to the faces using veneer adhesive and a roller for full contact. Trim edges cleanly and seal with a clear finish made for wood veneers. Build a slim frame from 1x2 or aluminum trim, then attach the veneered panel. Mount a minimalist track, set overlap at 2 inches, hang the door, and adjust rollers so the door closes with an even gap. Install a floor guide to keep the door from drifting.
Horizontal oak veneer panels look premium because the grain runs cleanly and the door stays visually light. A slim frame keeps the door from looking bulky, which helps in apartments and narrow hallways. This idea works for modern interiors where you want texture without clutter. Beginners can pull it off by using veneer panels on a stable core like plywood so the door stays flat. The result looks stunning because the veneer reflects light in a controlled way.
Skip thisDon’t skip edge sealing on veneer; unsealed edges look darker and patchy over time.
Editor's noteUse a router flush-trim bit after the glue sets; it makes veneer edges look crisp instead of messy.
20. Two-panel sliding door with a decorative center rail

Build a door frame with a center rail: make two equal-height panel sections using 1/4-inch plywood, then add a decorative rail strip across the middle. Prime and paint the panels, then paint the rail in a contrasting finish. Mount the track above the opening with 2 to 4 inches overlap, hang the door, and adjust rollers until the seam line stays straight across the opening. Add a bottom guide to prevent the door from twisting and misaligning the panel edges.
Two-panel doors look great because they break up the surface into clear sections, and a decorative center rail adds a “designed” middle line. Keep the panels simple and let the rail do the styling. This is a good beginner-friendly sliding door idea for living rooms and bedrooms where you want a door that looks like furniture. Choose one color for the panels and a slightly different finish for the rail, like satin paint on the rail over a semi-gloss base. It photographs well because the center rail catches light as the door moves.
Skip thisDon’t use too-thick trim; it makes the door look heavy and can rub the track housing.
Editor's noteUse a straightedge to align the center rail before you paint; crooked rails show up immediately in photos.
21. Color-block sliding door with a bold vertical stripe
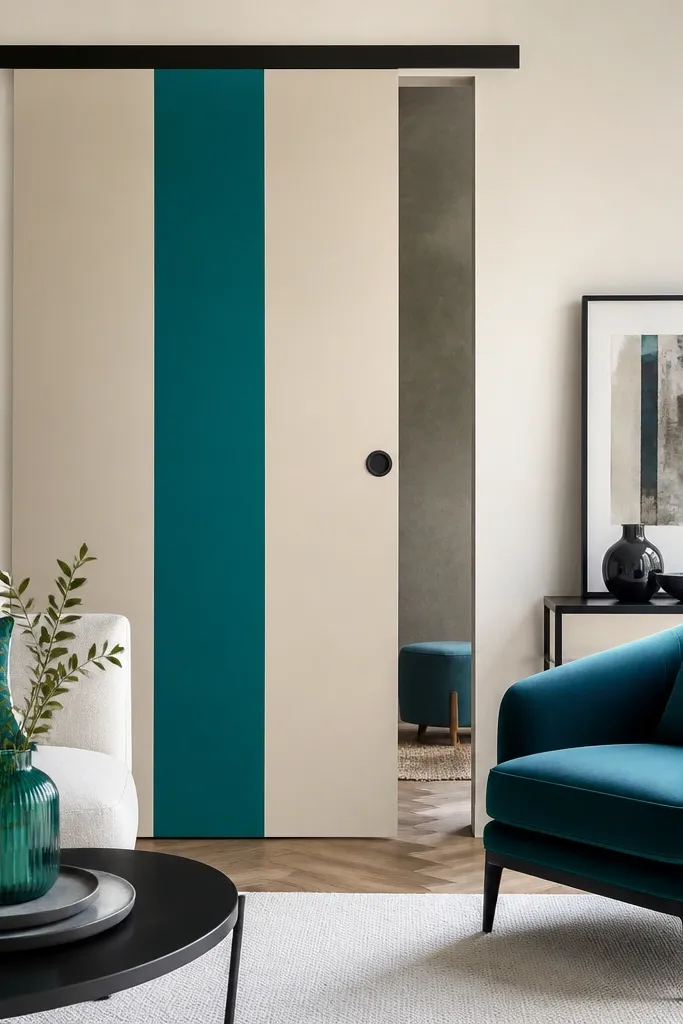
Color-blocking is one of the most photogenic beginner-friendly sliding door ideas because it gives you a clear graphic element. A bold vertical stripe makes the door look taller, and it helps the door stand out without turning into a busy pattern. Pick a stripe color that matches your room accents — then keep the rest of the door clean and light. This works in entry closets, home offices, and laundry rooms where you want a fun statement but still want it to feel organized. The look is strong from a distance, even when the door is partially open.
Build a simple framed door with a flat center panel, then prime and paint the base color first. Mask a vertical stripe using painter’s tape and a level to keep it straight, then paint the stripe color. Once fully cured, seal with a clear coat appropriate for painted wood. Mount the track, set overlap at 2 inches, hang the door, and adjust rollers so the stripe stays centered in the opening. Install a floor guide to keep the stripe perfectly aligned as the door slides.
Press tape edges down with a plastic spreader so paint doesn’t bleed under and blur the stripe line.
Don’t use glossy stripe paint; it reflects light and exaggerates roller marks.
22. Half-lap sliding door with exposed wood edges
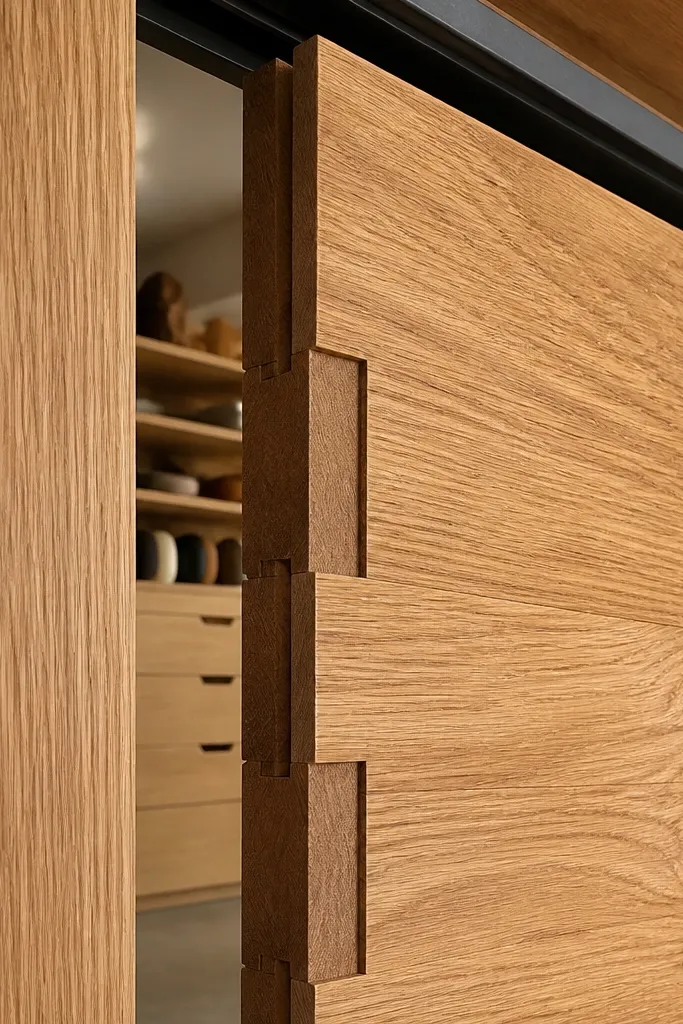
Build a door frame and cut consistent half-lap joints at the corners so the edges interlock. Use a router with a straight bit or a table saw dado setup to keep the depth consistent, then dry-fit before assembly. Sand and finish the door with stain or a clear oil, making sure the joinery edges get sealed too. Mount a sturdy track, set overlap at 2 to 3 inches, hang the door, and adjust rollers for a smooth glide. Add a bottom guide so the door doesn’t rack and stress the joints.
Exposed joinery looks stunning because it shows craftsmanship without needing complicated ornament. A half-lap style door reads modern, and the exposed edges add depth that holds up in close-up photos. This is an excellent option if you like the look of furniture-grade woodwork. It’s still beginner-friendly if you build a simple rectangular door and use consistent router or chisel techniques for the lap joints. Put it in a workshop, pantry, or entry closet where wood detail will be seen often.
Skip thisDon’t rush sanding inside the laps; rough edges show through the finish.
Editor's noteDo a test cut on scrap at the exact thickness you’re using; half-laps only look right when the depth matches perfectly.
23. Textured limewash sliding door panel
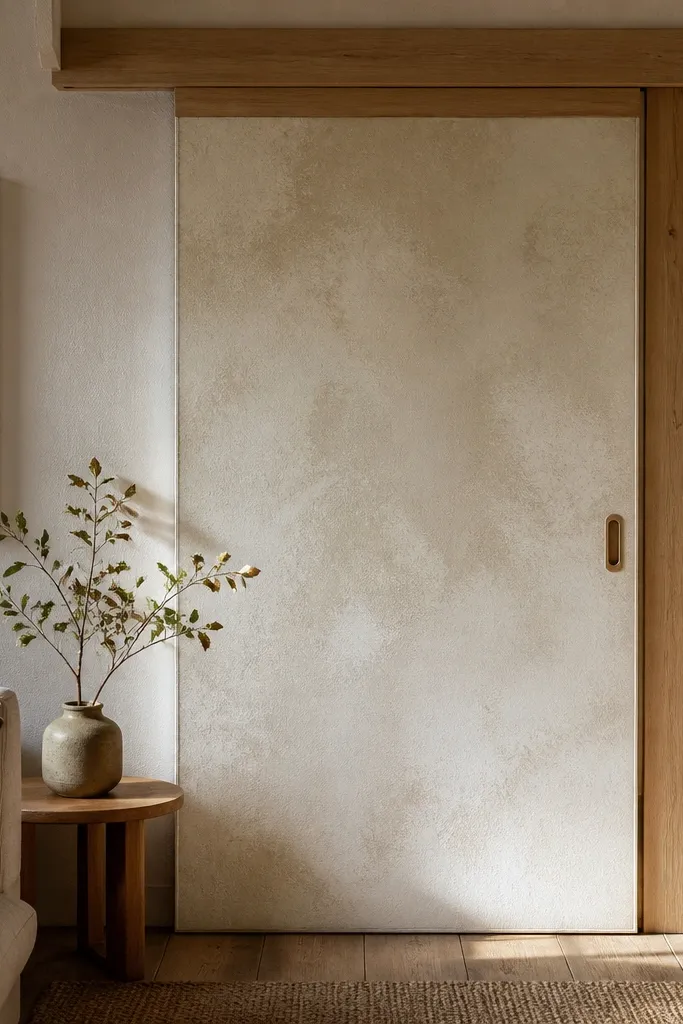
Build a flat door panel or use a pre-made slab, then sand to 150 grit and clean dust thoroughly. Apply a limewash or limewash-style paint in thin layers, brushing in one direction and letting each layer grab before adding the next. Seal only if the product label says it’s compatible; some limewash finishes stay breathable. Mount the track, set overlap at 2 inches, hang the door, and adjust rollers. Install a bottom guide to keep the door from bumping and scuffing the textured finish.
Limewash-style texture makes a sliding door look like it belongs in a lived-in, styled room. The surface looks uneven in a good way, and light creates soft highlights instead of harsh reflections. Use a neutral — off-white, warm gray, or pale sand — and pair it with a simple white or light wood track so the texture stays the star. This is perfect for living rooms and bedrooms where you want a calm, organic vibe. Beginners can do it because limewash products are forgiving, and the texture hides small edge imperfections.
Skip thisDon’t roll limewash; rolling flattens texture and ruins the look.
Editor's noteMix limewash to a consistent batch size so the tone stays uniform across the door.
24. Clear acrylic panel sliding door with wood frame
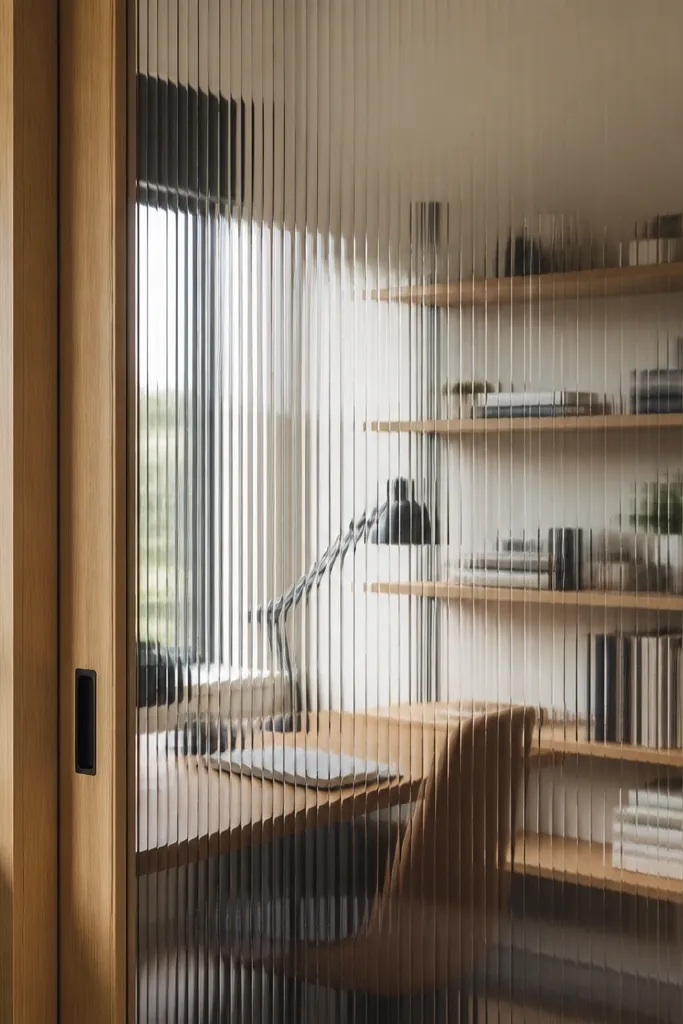
A clear acrylic panel makes a sliding door feel modern and airy. It’s visually light, and the wood frame keeps it from looking like a temporary divider. This is great for home offices and studios where you want separation but still want to see movement and light. Beginners should choose acrylic over glass if they want easier handling and less breakage risk. The look is stunning because the door reads like a framed window, not a wall.
Build a wood frame from 1x3 lumber and cut a panel opening sized for acrylic with a small clearance gap of about 1/16 inch per side. Install acrylic using U-channel trim or plastic glazing stops so it doesn’t crack when the door moves. Sand and finish the wood frame, then mount the door on a track with rollers rated for the door weight. Set overlap at 2 to 3 inches and add a bottom guide so the acrylic panel doesn’t rub. Test the door movement slowly and adjust the hangers until it glides without touching the frame.
Use felt pads on the bottom guide contact points so acrylic stays scratch-free.
Don’t overtighten screws through acrylic; it stresses and can crack.
25. Uplifted top-hung sliding door with decorative corbel blocks
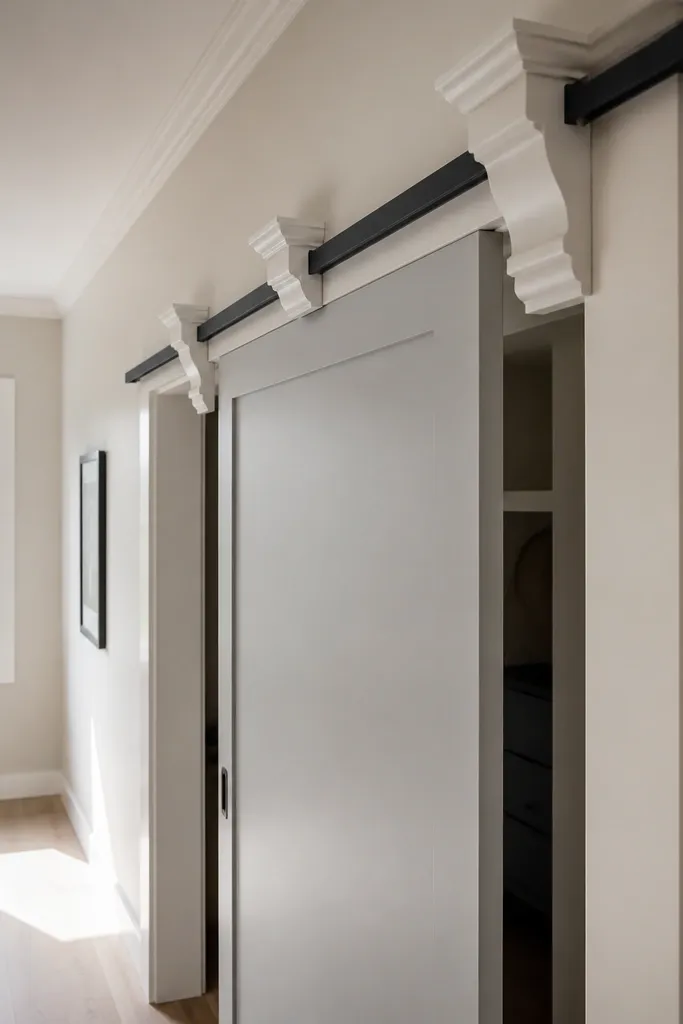
Mount the track first using studs or blocking, then mark where corbel blocks will sit under the rail. Build or buy corbels sized about 4 to 6 inches wide, attach them to the wall with screws into studs, and caulk the edges for a clean seam. Paint the corbels and track cover the same color for a unified look. Hang the door, set overlap at 2 to 4 inches, and adjust rollers until the door closes evenly. Add a floor guide to control the bottom edge.
Decorative corbel blocks under the track make a sliding door look built-in instantly. The blocks give you a “mounting detail” that frames the hardware and hides the mechanical look of rollers. This option looks great in dining rooms and hallways because it adds a classic architectural element while keeping the door sliding. Beginners can do it because corbels are typically made from simple wood blocks or purchased decor blocks, then painted to match or contrast. The door itself can be simple — the corbels do the heavy lifting visually.
Skip thisDon’t place corbels without checking the roller path; you can block the hardware and ruin the glide.
Editor's notePre-drill corbel blocks and use countersunk screws so the paint stays smooth over fastener heads.



