
1. Toe-Forward Slat Rack With a Front Lip
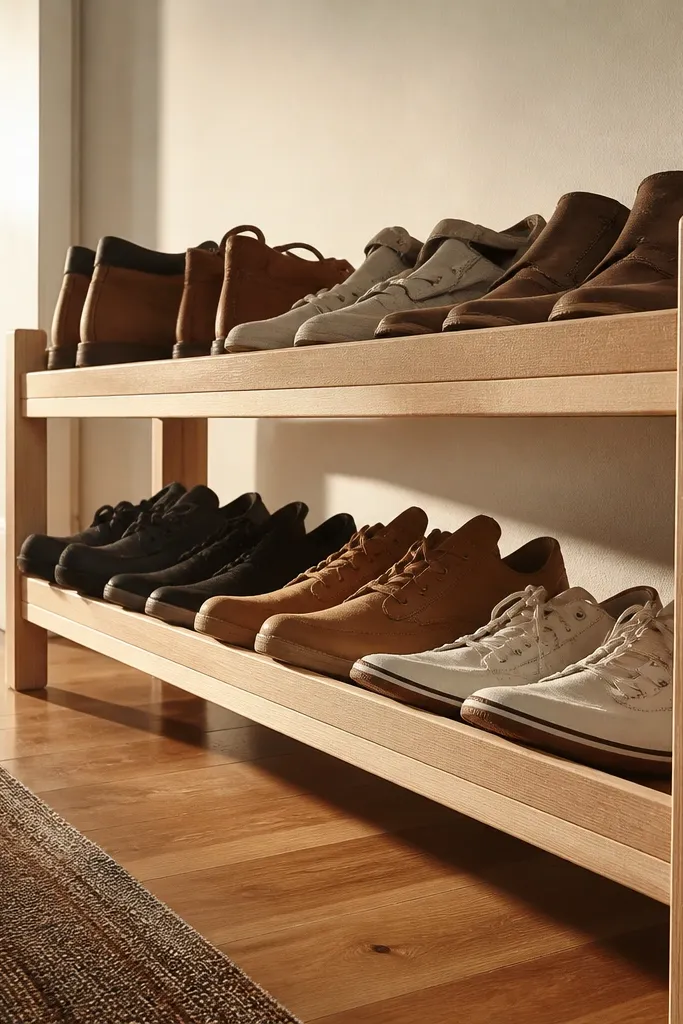
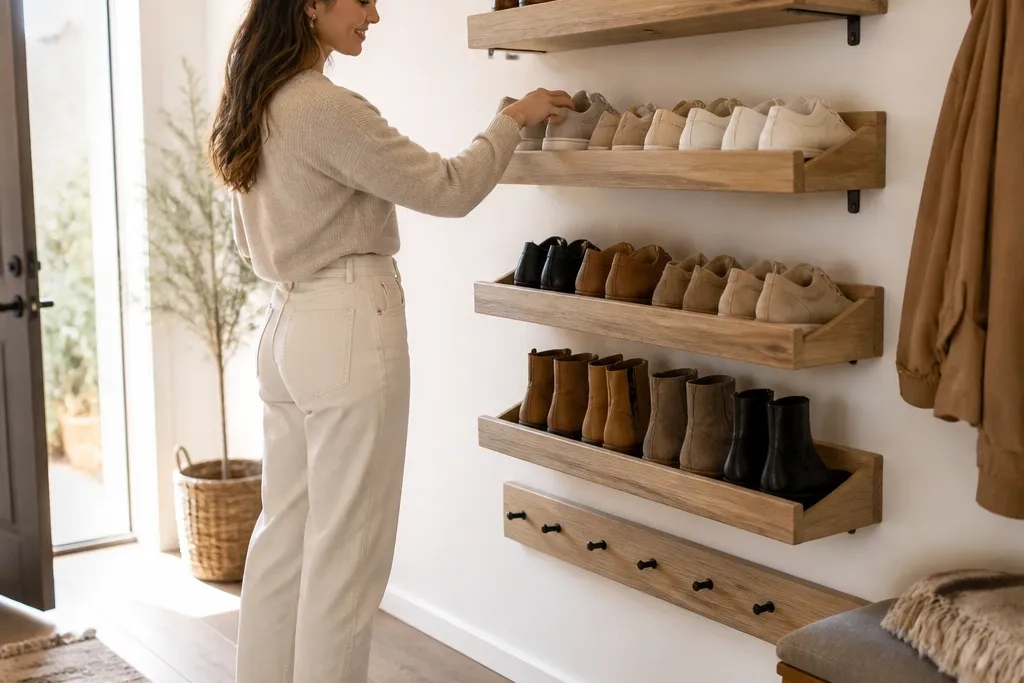
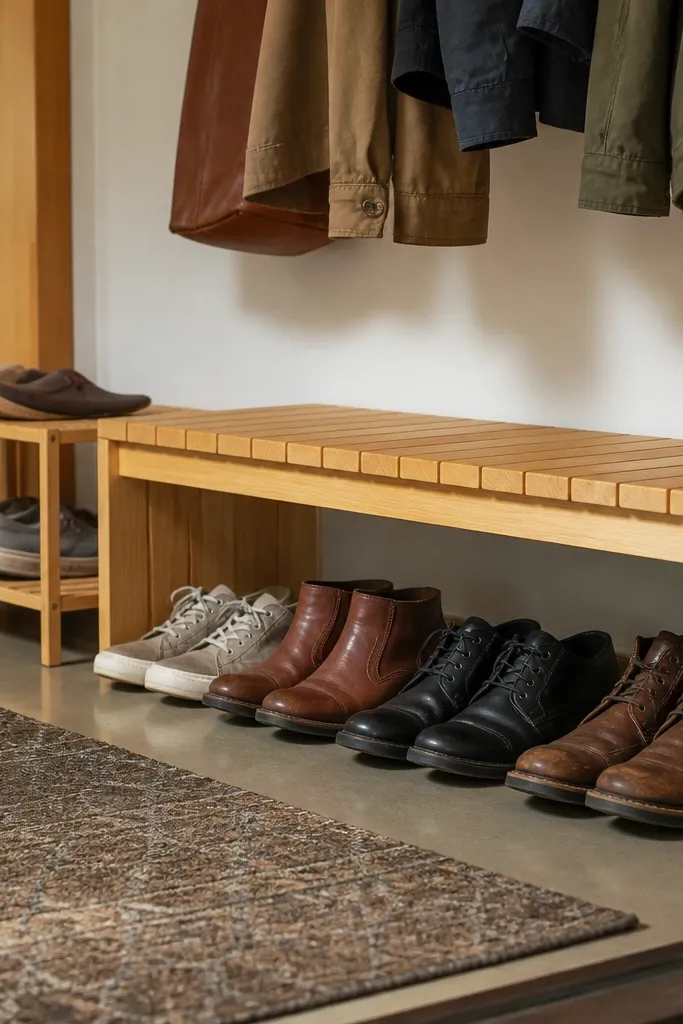
This is the shoe rack I recommend when your real enemy is sliding. A toe-forward slat layout cradles shoes at the front while the raised front lip stops them from creeping into the hallway. The slats also look airy, so the rack doesn’t look heavy even when it holds a lot of pairs. Finish it in light oak or birch and use black screws for a clean, modern look that stays photogenic even with everyday shoes.
Cut two side panels from 3/4-inch plywood or hardwood, sized to your total rack height and depth (aim for 11-12 inches deep for sneakers). Install a bottom rail and a top rail, then space slats 2 to 2.5 inches apart so shoes sit toe-forward without sagging. Add a front lip strip 3/4-inch tall across each shelf opening, and screw it into the front edge of the rails. Sand edges smooth, then seal with a clear satin finish so the wood looks warm without turning glossy.
Use a straightedge to keep slats evenly spaced; uneven spacing is what makes these look “janky” in photos.
Don’t make the front lip shorter than 3/4-inch or shoes will still slide out when you step past.
2. Boot Shaft Pegboard Rack With Vertical Holders
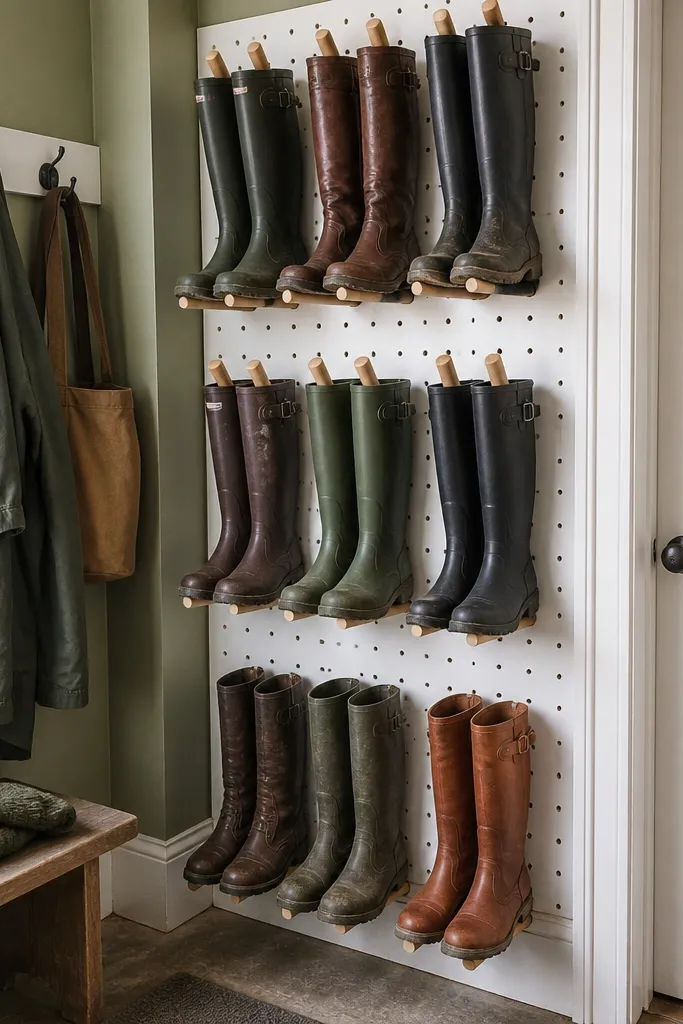
Mount a 1/2-inch pegboard sheet to studs at your chosen height, with 16-inch stud spacing in mind. Mark a grid with a pencil and add vertical boot shaft holders or simple leather straps attached to hooks, spacing them so one holder fits one boot shaft. Use an adjustable hook system so you can swap between tall and short boots without rebuilding. Seal or paint the pegboard, then add a small tray or shelf at the bottom for boot socks or boot polish.
If boots eat your floor, pegboard is the cleanest beginner-friendly way to tame them. You’re not storing boots by the sole alone; you’re supporting the shaft with vertical holders, so boots don’t flop into each other and don’t take up floor space. The pegboard also keeps the look organized because each holder aligns to a grid. Paint the pegboard matte off-white and keep holders in black for a sharp, gallery-like feel.
Skip thisDon’t mount pegboard on drywall only; boot weight will loosen the anchors fast.
Editor's noteBefore mounting, dry-fit a boot on the hook so you know where the shaft naturally sits without bending.
3. Cedar-Slat Bench With Hidden Side Cubbies
Build a simple bench frame from 2x2 lumber or 2x3 supports, keeping the top height around 18 inches. Create side cubbies using 3/4-inch plywood partitions, sized for your shoe width; for most sneakers, 10 inches wide per compartment is a good starting point. Cut a slatted top from cedar boards and screw it on with even spacing so it looks uniform. Add a hinged or removable access panel on one side so you can reach inside, then sand and finish the cedar with a clear protective oil.
This is a “two jobs, one piece” rack: you get a place to sit and a place to store. Hidden side cubbies keep shoes from visually cluttering your entryway, while the slatted bench top looks warm and intentional. Cedar slats also smell better than plain plywood, and the bench shape makes the whole corner feel finished. It’s great for apartments because it gives you storage without turning the space into a stack of open shelves.
Skip thisDon’t leave cubbies open to the front without a divider; shoes will spill forward when you grab one pair.
Editor's notePre-drill every cedar screw hole; cedar splits if you rush it.
4. Angled Plywood Cubby Rack for Minimal Visual Clutter
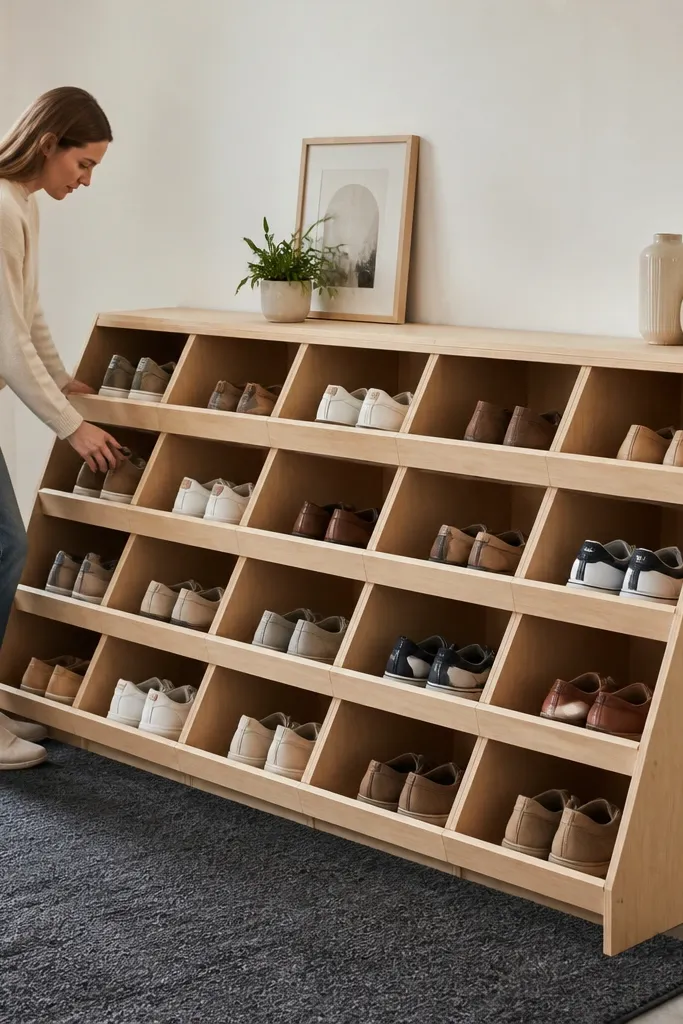
Cut back and side panels from 3/4-inch plywood and set the rack depth at 12 inches. Install internal partitions at an angle so each cubby holds a shoe at about 15-20 degrees tilt. Space partitions 4 inches apart if you stack low-top sneakers; widen to 4.5-5 inches for bulkier shoes. Sand corners smooth, then add a thin front rail to each cubby opening so shoes can’t slide out.
Angled cubbies are one of the best ways to make shoe storage look neat instead of crowded. With a slight angle, shoes sit with toes forward, so you see less of the messy toe area and less of the shoe tops. The rack also makes it easier to grab pairs because you can see which ones are where. Use plywood with a light stain and black corner brackets to keep the look clean and photo-friendly.
Skip thisDon’t set the angle too steep or shoes will tip forward and bump the rail.
Editor's noteMark angles with a scrap jig; small angle mistakes show up immediately in photos.
5. Wall-Mounted Hex Shelf Rack With Toe Slots
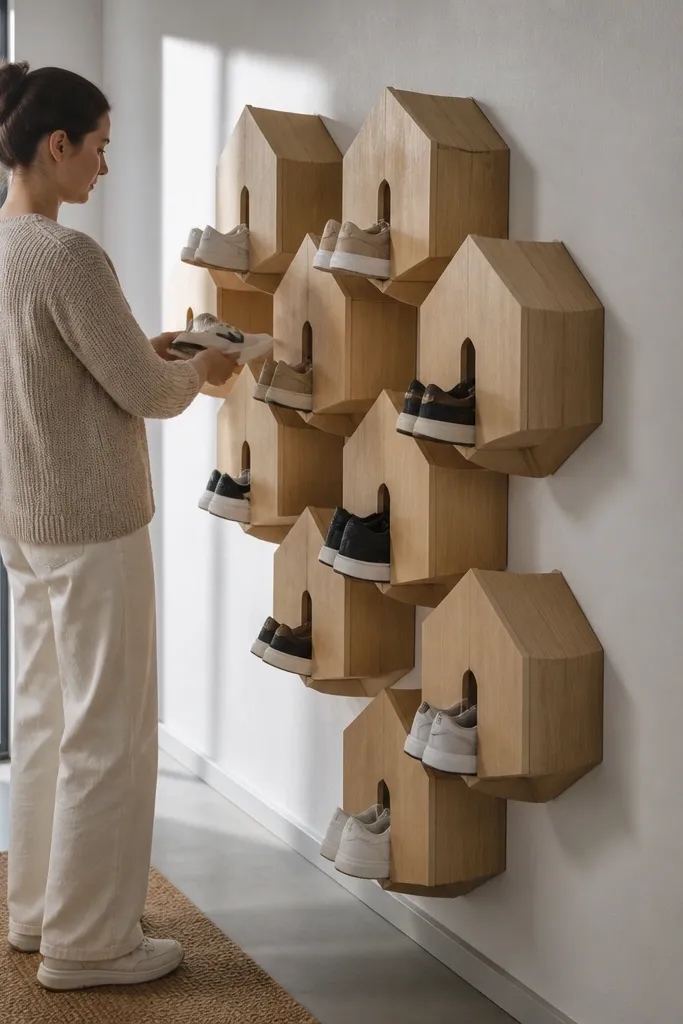
Design your hex layout around your shoe width and the wall studs. Cut hex shelf fronts from 3/4-inch plywood and add toe-slot dividers using 1/2-inch strips. Mount the shelves to studs with heavy-duty screws, and include a back lip on each slot about 1 inch tall. Sand edges, then apply a matte finish to reduce glare in pictures and keep the wood looking clean.
Hex shelves look modern and they make the storage feel intentional instead of utilitarian. The toe slots let you slide shoes in without squishing, and because the rack is on the wall you reclaim floor space instantly. This is ideal for narrow entryways where a floor rack blocks walking paths. Finish with a matte clear coat and use matching wall anchors and screws so it looks sturdy, not sketchy.
Skip thisDon’t skip a back lip; toe slots without a stop cause shoes to creep out.
Editor's notePaint the underside matte white if the shelves are in a darker corner; it brightens the whole look.
6. Fabric-Drawer Shoe Rack in a Rigid Frame
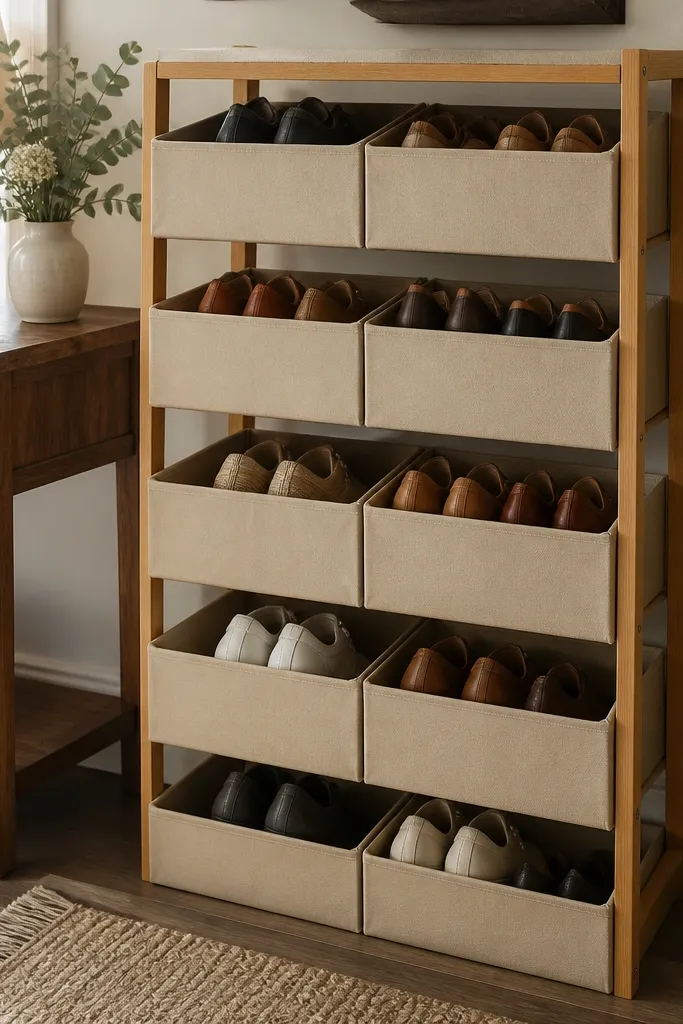
Build a rectangular frame from 2x2 lumber or 3/4-inch plywood panels, leaving openings sized to your shoes. Add drawer rails and a crossbar so drawers slide straight. Use rigid fabric drawer inserts with firm bottoms, and attach them to drawer slides. Sand the frame and stain, then keep fabric in a matte cotton or canvas color like oatmeal or light gray.
When you want the rack to look calm and styled, fabric drawers hide the visual chaos. The key is using a rigid frame and rigid drawer bottoms so shoes don’t slouch and turn each drawer into a mess. This setup is beginner-friendly because you can build the frame from simple lumber and buy the drawer hardware. The look is clean, especially with neutral fabric and a consistent wood stain.
Skip thisDon’t use floppy storage bins; they collapse and make the rack look messy even when you organize.
Editor's noteUse drawer pulls that match your hardware color; mismatched pulls ruin the aesthetic fast.
7. Stacked Clear-Front Cubby Rack With Label Tabs
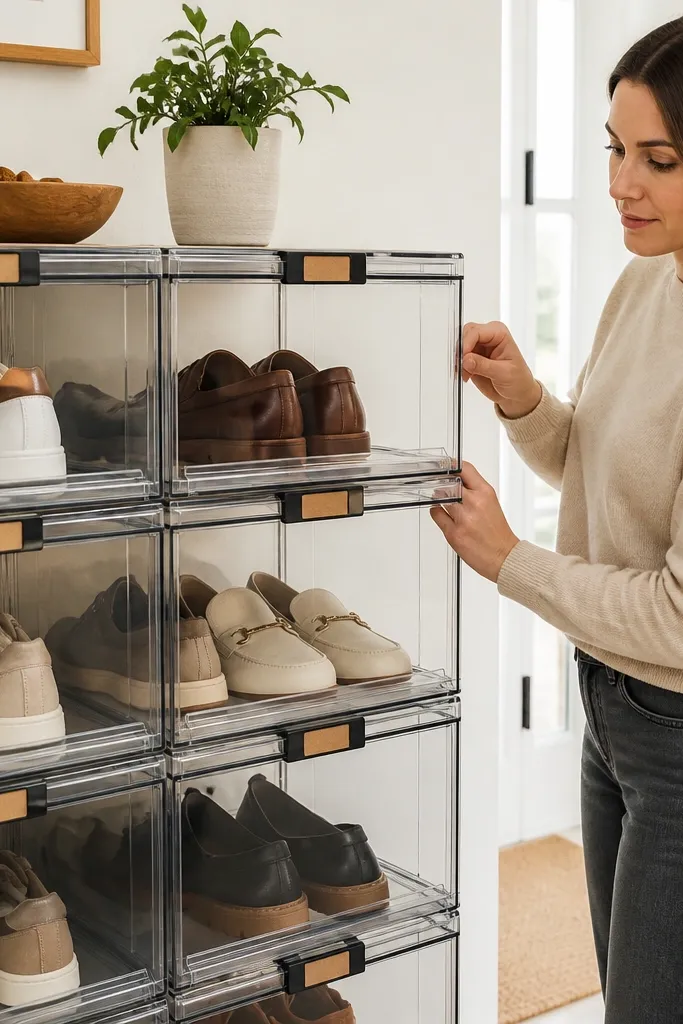
Build a wooden frame from 3/4-inch plywood with cubby dividers, leaving each cubby about 11 inches wide and 9-10 inches high for low sneakers. Add a clear front panel on hinges or with a sliding lip, so you can open it without disassembling everything. Install label tabs on the top edge of each cubby using a small strip of wood and a simple marker or printed label. Seal the frame and mount it securely to the wall if it’s taller than 48 inches.
Clear-front storage looks neat because you can see what’s inside, and label tabs keep it from becoming a guessing game. The trick is to build cubbies with fixed dividers so shoes don’t tumble and create a “mystery pile” behind a clear panel. This is great for sneaker collectors who want the rack to look like part of the room decor. Use smoked clear acrylic or clear PET with a thin frame for a sleek look.
Skip thisDon’t make cubbies too tall; extra empty space makes shoes look sloppy inside.
Editor's noteSmoked plastic hides scuff marks better than crystal-clear panels, and it looks moodier in photos.
8. Corner Ladder Rack With Boot Toe Stops
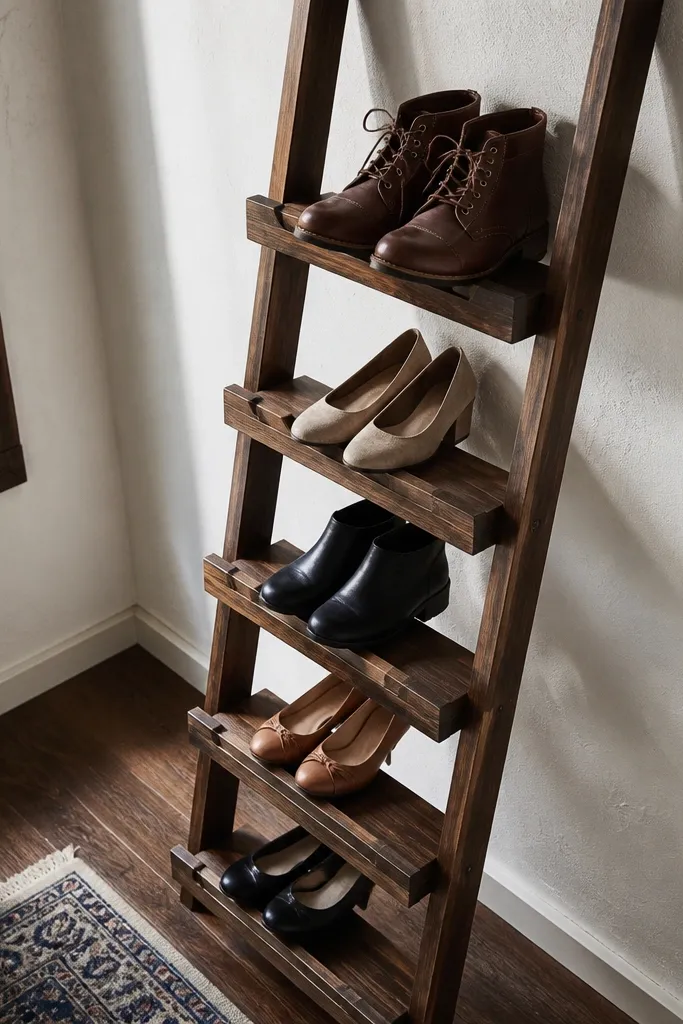
Build two ladder side rails from 1x3 or 2x2 boards cut to fit your corner angle and height. Attach rungs spaced 9-10 inches apart for sneakers, or 12 inches for bigger shoes. Add toe stops by screwing a thin 1-inch strip along the front edge of each rung. Finish with stain or paint, then add felt pads on the base if it touches the floor.
Corner ladder racks use space you usually waste, and they look good because the lines climb upward. Add toe stops to each rung and you stop the classic problem where shoes slide off ladder shelves. This style is great for small apartments and hall corners where you can’t fit a full cabinet. Stain it dark walnut or paint it matte black for a crisp, architectural look.
Skip thisDon’t rely on friction alone; if the rack isn’t square, shoes will slide toward the wider gap.
Editor's noteUse a single color for screws and hardware; visible contrast makes DIY builds look unfinished.
9. Rolling Shoe Cart With Slatted Shelves and Locks
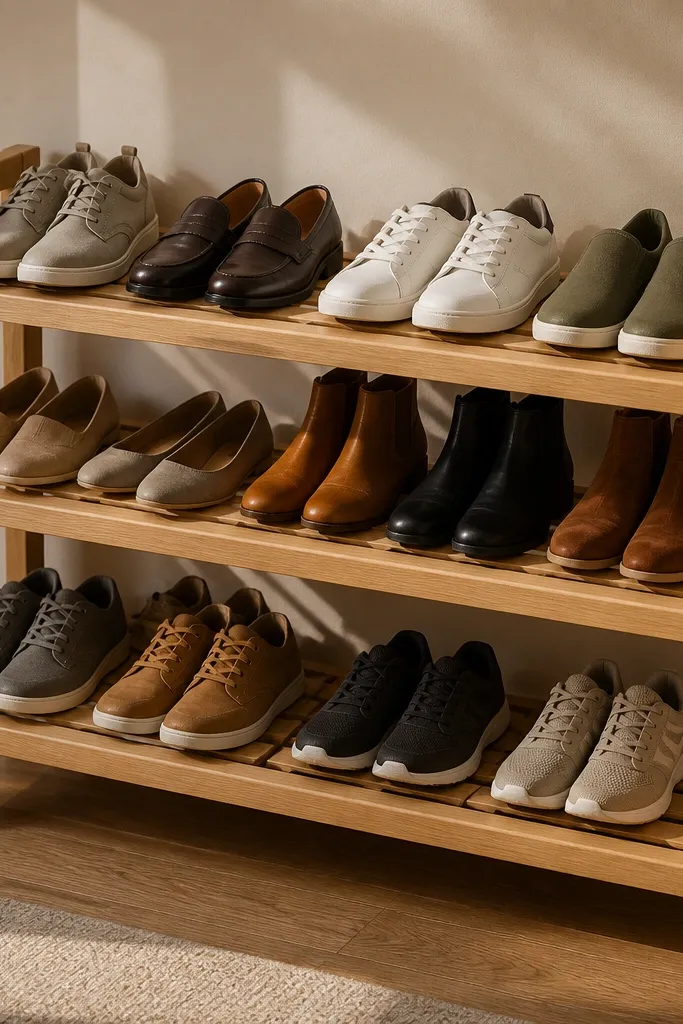
A rolling rack looks tidy because you can tuck it against the wall when guests come over. Slatted shelves let air circulate so shoes don’t smell as quickly, and the cart style keeps everything in one controlled zone. This is beginner-friendly if you buy caster wheels and focus on clean shelf spacing. Make it photogenic by using a matching wood finish and adding a slim handle.
Build a rectangular cart frame from 3/4-inch plywood and 2x2 supports. Cut 3-4 slatted shelves using thin boards, leaving 1/2-inch gaps for airflow. Install casters with at least two locking wheels and mount them with bolts through the frame. Add a top handle and a small side lip so shoes don’t slide when you move the cart.
Keep shelf spacing consistent; uneven spacing makes shoes look chaotic even if you organize them.
Don’t skip locking casters; unlocked carts roll when you open doors.
10. Mid-Century Style Walnut Slat Rack
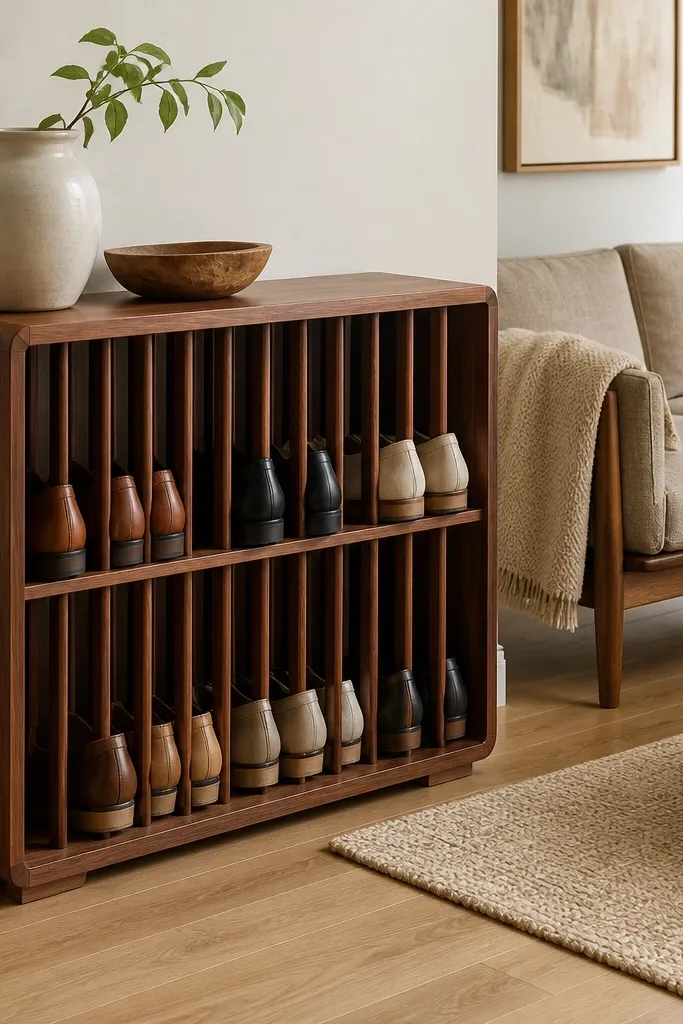
Cut side panels from 3/4-inch walnut plywood and add a back rail for rigidity. Install slats spaced 2-2.25 inches apart on each shelf and keep the shelf depth around 11 inches. Use dowels or pocket screws for strong joints and to hide hardware. Sand to 180 grit and apply a walnut stain or clear walnut oil for that smooth, furniture-grade look.
If you want shoe storage that looks like furniture, go for a mid-century style slat rack. The warm walnut tone makes the rack blend with living rooms, and slats keep it from looking boxy. This design handles sneakers and flats well because the slats support weight while still letting shoes breathe. It’s a good choice when you want the rack to look good even when it’s slightly messy.
Skip thisDon’t use shiny polyurethane; it reflects flash and makes the rack look cheap.
Editor's noteUse a consistent slat width across the whole rack; tiny variations show up in photos.
11. Shiplap-Style Shoe Cabinet With Hinged Doors
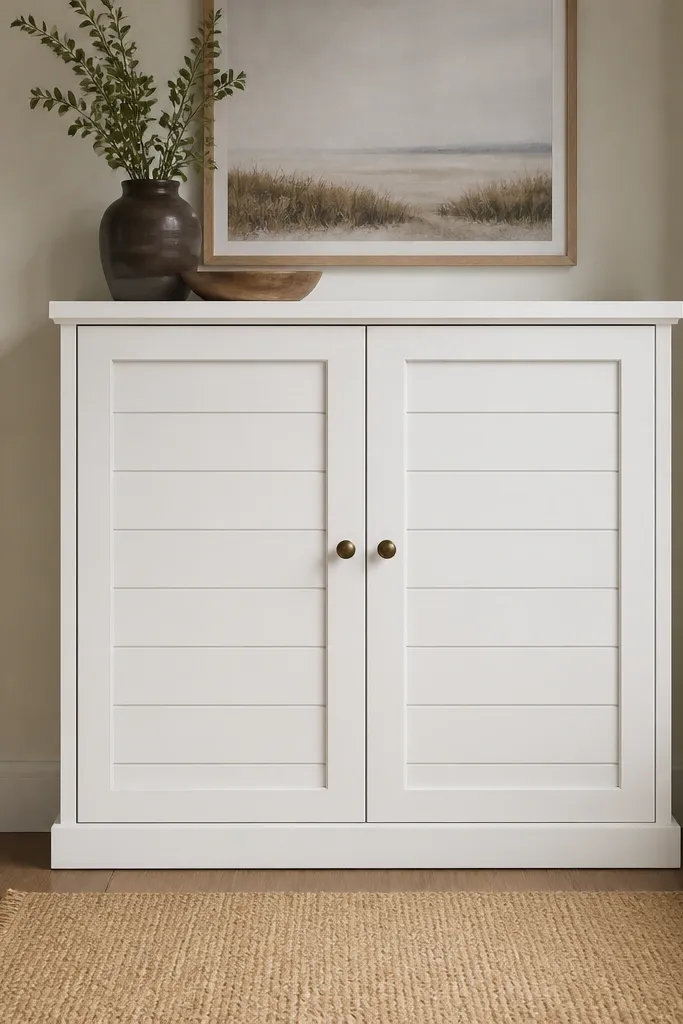
Closed doors instantly reduce visual clutter, especially in entryways where shoes are always in view. Shiplap-style paneling makes the cabinet look charming and photogenic, even if you’re storing everyday sneakers. This works best when you have mixed shoe types and want them out of sight while still keeping the cabinet breathable. Use simple shelves inside with toe-forward placement to keep shoes from turning into a pile.
Build a cabinet frame from 3/4-inch plywood, then create shiplap panels using thin strips to cover the sides and door faces. Install two or three interior shelves with toe-forward spacing; start with about 10-11 inches depth per shelf. Add hinges to a pair of doors and include small ventilation holes on the back panel. Sand, prime, and paint the exterior in a matte white so it looks clean in daylight.
Add a magnetic door catch so doors close smoothly and don’t swing open.
Don’t seal the cabinet airtight; shoes need venting or you get odor fast.
12. Pegboard Shelf With Wire Basket Inserts
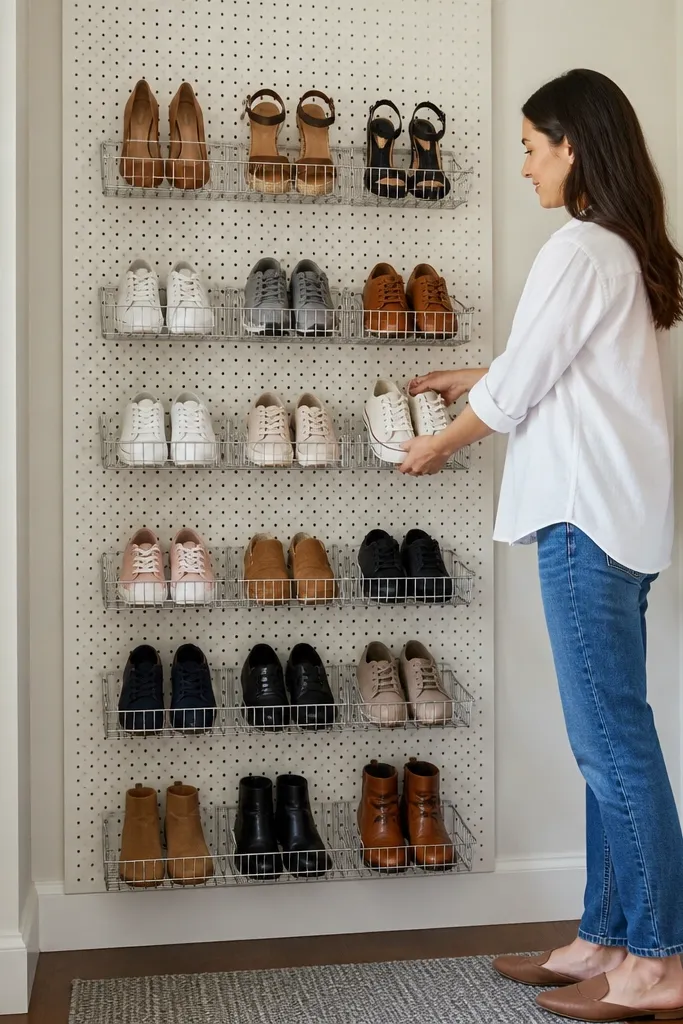
This hybrid setup looks tidy because wire baskets show off shoes neatly, and pegboard keeps everything adjustable. It’s great for people who keep changing their rotation of sneakers or kids' shoes. The baskets also make it easy to grab without digging through a pile. For a good look, paint the pegboard the same color as the basket frames or choose black on black.
Mount a pegboard panel to studs and add a level shelf ledge at the height you want. Install wire baskets onto hooks so they sit flat and don’t sway. Add a lower row of baskets for smaller shoes and a higher row for boots using deeper baskets. Finish by painting or sealing the pegboard and adding a small base tray for loose items.
Use baskets with a flat bottom, not rounded ones; rounded bottoms tilt shoes.
Don’t overload baskets; if baskets bow, shoes slip and the rack looks messy.
13. Plywood Shoe Carousel Wall Rack
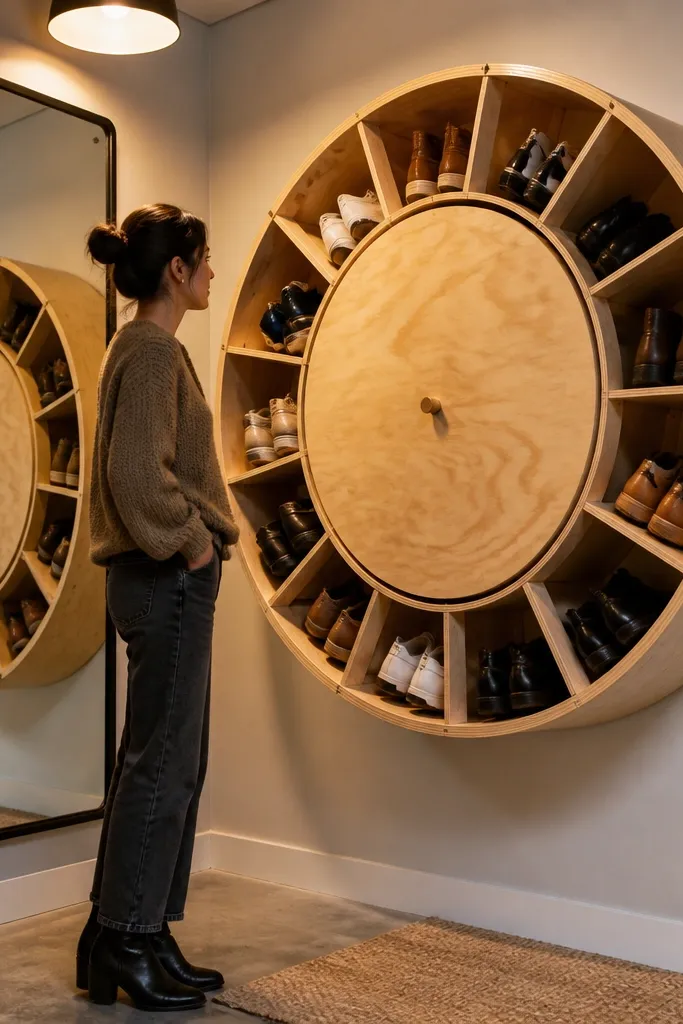
Build a circular base from layered plywood discs and mount it to a wall with a center pivot hardware kit. Cut wedge-shaped compartments sized to your shoe width and attach them to the rotating ring. Add a fixed back plate to stop the carousel from spinning too far and to keep the compartments aligned. Sand, then seal the plywood with a satin finish to reduce glare.
A carousel rack is the most “wow” option on this list, and it still solves clutter because each pair has a dedicated spot. The rotational design keeps shoes visible but organized, which is what makes it photogenic. It’s best for smaller collections like 12-20 pairs, where you want quick access and a clean display. Use a plywood build with a clear coat or a dark stain for a polished look.
Skip thisDon’t make compartments too tight; tight spacing forces you to shove shoes in and it looks messy.
Editor's noteTest compartment size with your widest shoe before you cut the final ring pieces.
14. Reclaimed Ladder With Fabric Shoe Pockets
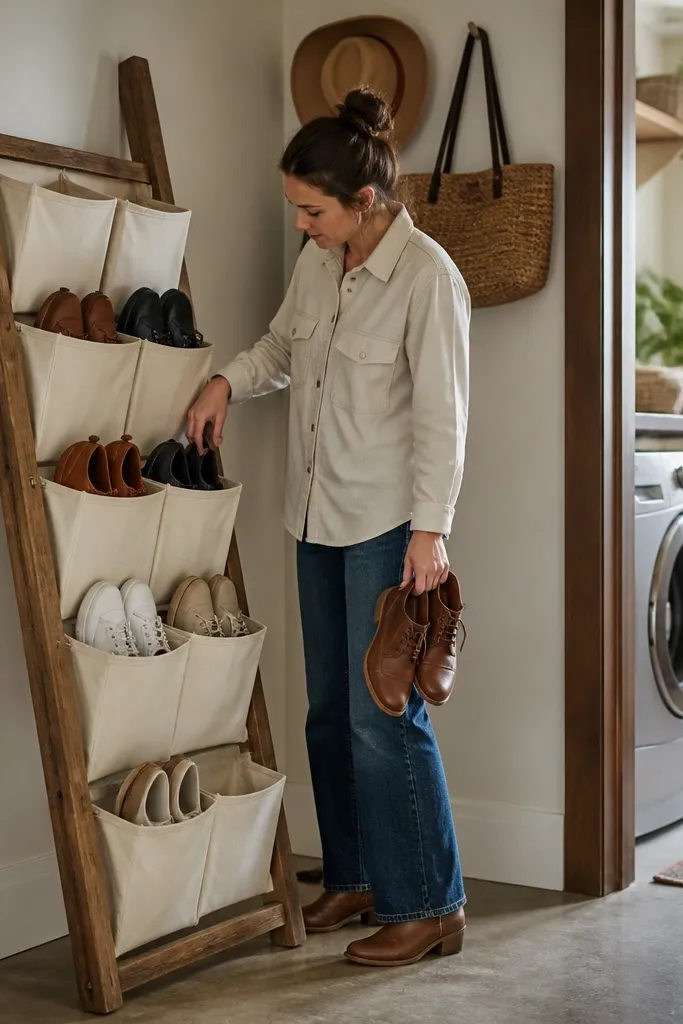
Lean or mount a small reclaimed ladder securely, then attach fabric shoe pockets to the ladder rungs using grommets and zip ties or screws with washers. Choose pocket sizes: 11-12 inch pockets for sneakers and smaller 9-10 inch pockets for flats. Add a bottom tray or a small shelf under the ladder for shoes that don’t fit the pockets. Finish the ladder with a clear seal or paint, then add a fabric pocket backing so pockets stay flat.
This is the aesthetic option when you want something lighter than wood shelves. Fabric pockets hang from a ladder frame and make shoes easy to grab, while the pockets keep each pair in its own compartment. The look is cozy and casual, great for mudrooms and laundry-adjacent entry zones. Use thick canvas pockets and stiff backing so they hold shape instead of sagging.
Skip thisDon’t use thin, stretchy fabric pockets; they collapse and make the whole rack look sloppy.
Editor's noteStiffen pocket backs with thin cardboard or plastic canvas so each pocket looks crisp.
15. Stacked Milk Crate Rack With Matching Stain
Sand crate surfaces, then stain all crates the same way and let them dry fully. Stack crates with spacers so they sit level, and screw through the sides using small brackets or corner braces. Add a flat top board sized to cover the stack and give you a landing surface. Seal with a clear coat so the wood looks uniform and wipes clean.
Milk crates are cheap, but they look best when you treat them like furniture: stain them, align them, and add a clean top. This rack tames clutter by creating consistent cubbies that stop shoes from merging into one pile. It’s beginner-friendly because you’re mostly measuring, sanding, and finishing. For photos, choose one stain tone and keep hardware simple and dark.
Skip thisDon’t skip sealing; unsealed crates grab dirt and look dingy fast.
Editor's noteUse a single top board that overhangs 1/2 inch on each side; it makes the whole thing look intentional.
16. Fold-Out Toe Shelf Rack for Small Spaces
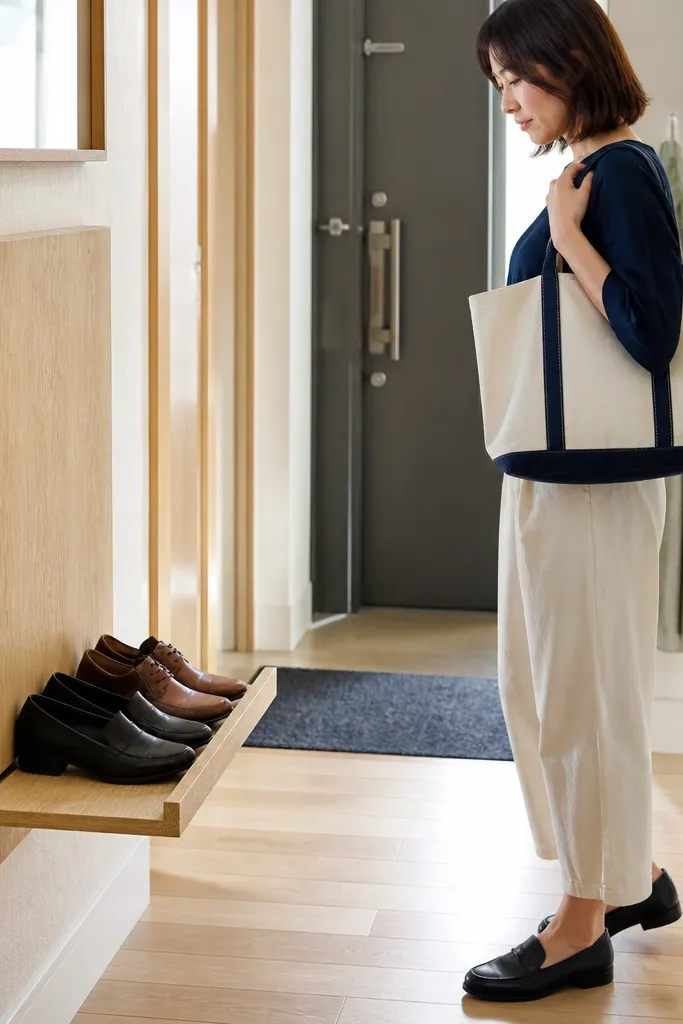
Mount a sturdy wall base board to studs and add a hinge system for a fold-out shelf. Build the shelf from 3/4-inch plywood and include a front toe stop strip 1 inch tall. Add a simple latch or magnetic catch so it closes securely. Sand and paint the shelf and base, then add small felt pads so it doesn’t scrape when folded.
For tiny entryways, a fold-out toe shelf solves clutter without eating floor. When closed, it’s basically a wall panel. When open, it gives you a place to set shoes with a toe stop so they don’t slide. This is especially good for apartments where you don’t want a permanent cabinet but you need control. Paint it the same color as the wall for a clean look.
Skip thisDon’t mount on drywall only; fold-out racks pull forward when you open and close them.
Editor's noteUse a hinge rated for the shelf weight; cheap hinges sag and the shelf looks crooked.
17. Recessed Under-Stairs Shoe Drawer Units
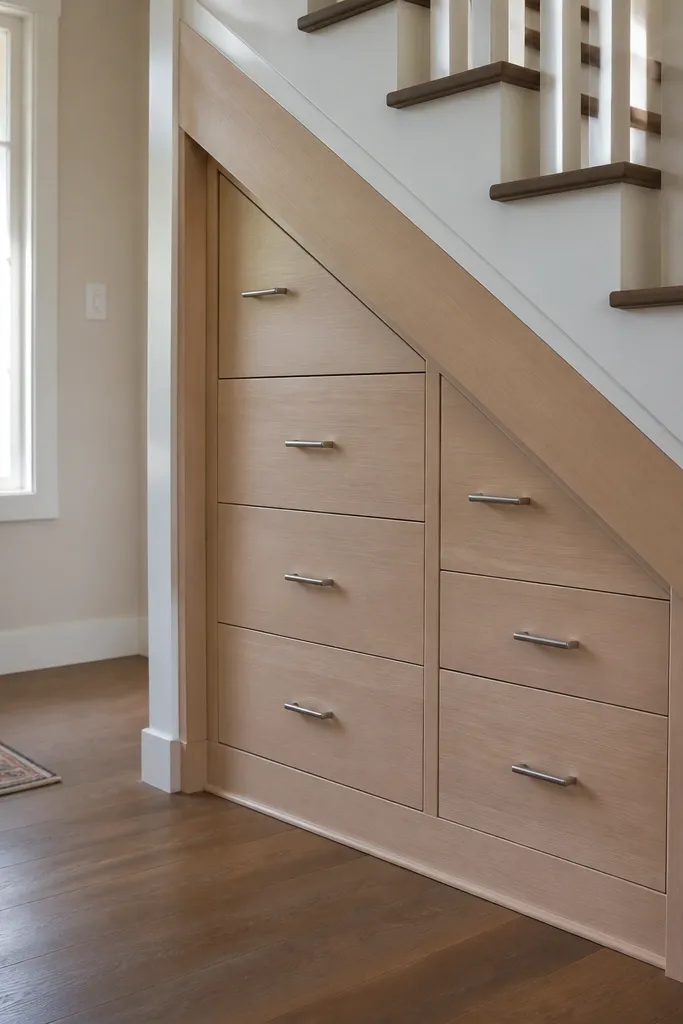
Measure the under-stairs opening and plan drawer fronts so each drawer holds one shoe type category. Build drawer boxes from 1/2-inch plywood and mount full-extension slides. Add drawer dividers inside using 1/4-1/2-inch strips, leaving enough clearance for thicker soles. Sand and finish the drawer fronts, then install a toe-kick panel at the base so the whole unit looks built-in.
Under-stairs storage looks custom because it’s built into wasted space. Drawer units keep shoes contained and hide the mess, so your entry area stays clean even when you’re rushing out. This design is best when you have a fixed under-stairs footprint and want everything aligned. Use a light wood finish and simple pulls so it looks like it belongs there, not like an afterthought.
Skip thisDon’t make drawers too deep; deep drawers waste space and encourage messy stacking.
Editor's noteLabel drawer types with a small icon on the pull (sneaker, boot, flat) so sorting stays fast.
18. Clear Shoe Organizer Bench With Removable Trays
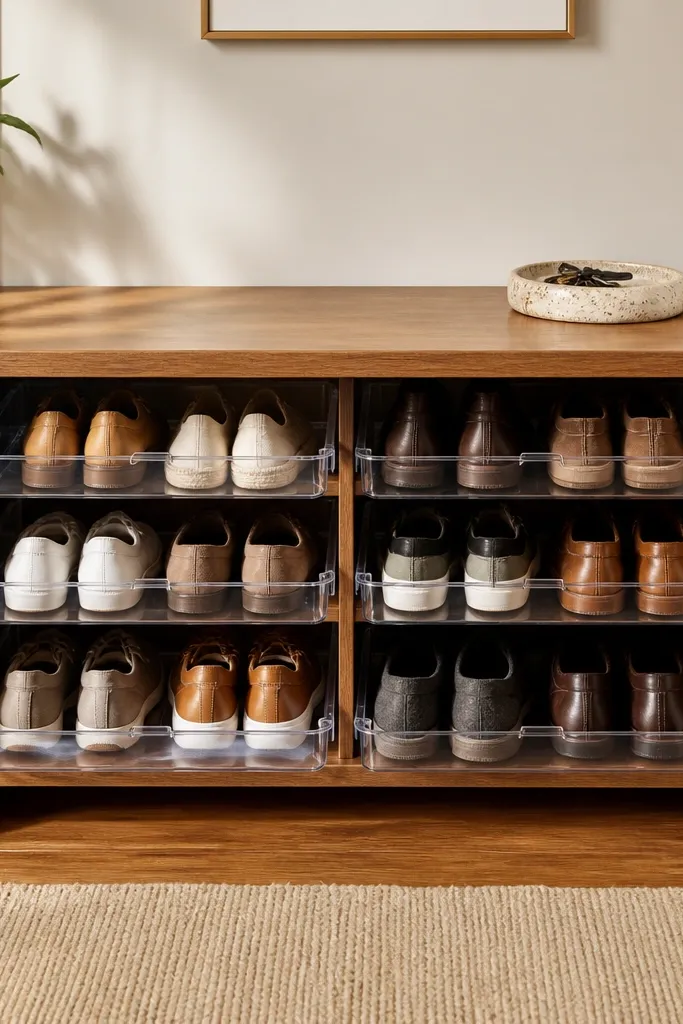
Build a bench frame from 2x2 supports and 3/4-inch plywood panels, keeping the seat height around 18-20 inches. Create removable tray compartments using shallow boxes that slide into rails. Use clear acrylic or PET trays cut to fit each compartment and add a small lip so shoes can’t slide out. Sand and finish the frame, then attach non-slip pads on the bottom.
A bench makes shoe storage feel intentional, and removable trays keep shoes from turning into a hidden pile. Clear trays also look neat because you can see which shoes are where, and the bench top gives you a practical landing spot. This is a great option for entryways where you need both function and a clean, styled look. Pair clear trays with a matte wood base and black feet.
Skip thisDon’t use flimsy trays; thin plastic bows and shoes won’t sit flat.
Editor's noteUse rails on both sides of each tray; one-sided rails cause trays to tilt and get stuck.
19. Slim Vertical Shoe Rack With Front Window Panel
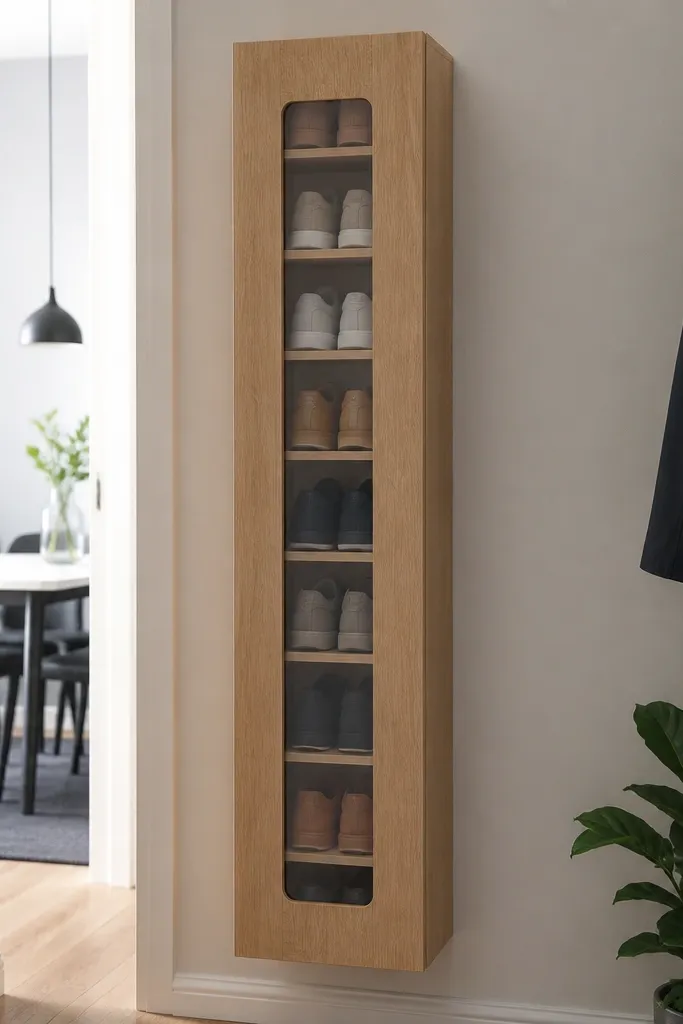
A slim vertical rack is perfect when you have a narrow hallway or a tight spot beside a door. The front window panel makes the rack look like a design object while still letting you see shoes without opening anything. This solves clutter by organizing pairs in stacked shelves that stop them from migrating across the floor. Use a dark frame with a light window panel for contrast.
Build a tall, narrow frame from 3/4-inch plywood, aiming for 16-18 inches wide and 60-72 inches tall. Install internal shelves using 1/2-inch dividers spaced for your shoe heights; start around 7-8 inches between shelves for sneakers. Add a front window panel using clear acrylic or polycarbonate sheet, framed with thin wood strips. Add a small base and anchor it to studs for safety.
Keep shelf edges rounded slightly so shoes slide in without catching and scuffing.
Don’t skip anchoring; tall slim racks tip when you pull shoes out.
20. Rotating Pegboard Shoe Organizer for Small Collections
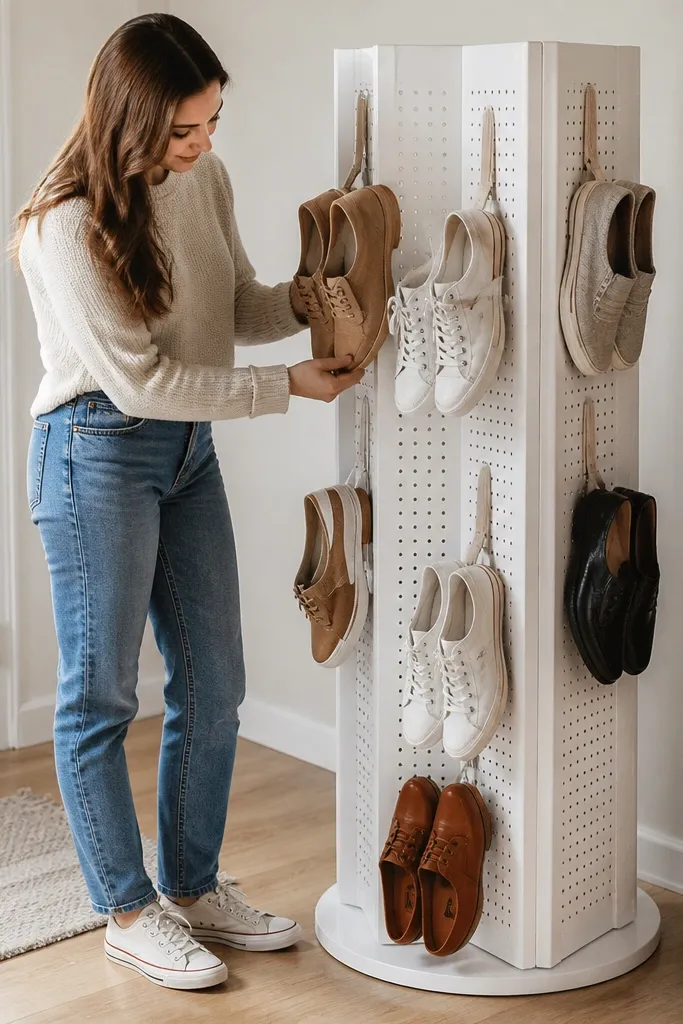
Rotation turns shoe storage into something you interact with, which reduces the “pile by the door” problem. This uses pegboard sections mounted to a rotating base, each holding a few pairs by hooks or small straps. It’s best for 8-15 pairs where you want quick access and a clean display. For the look, paint the pegboard the same color as the wall and keep hardware black.
Build a circular base from plywood and mount a rotating hardware lazy susan mechanism. Attach pegboard sections to the rotating ring with screws and spacers so it rotates smoothly. Add hooks or small strap holders sized for your shoe types and keep spacing consistent. Sand and paint the pegboard, then mount a fixed stop plate to keep rotation smooth and prevent over-spinning.
Use a stop plate so the rotating section lands in the same position every time; it makes the rack look deliberate.
Don’t pack too many hooks; overcrowding makes shoes fall when you reach.
21. Fabric Roll-Up Shoe Organizer on a Wooden Rod
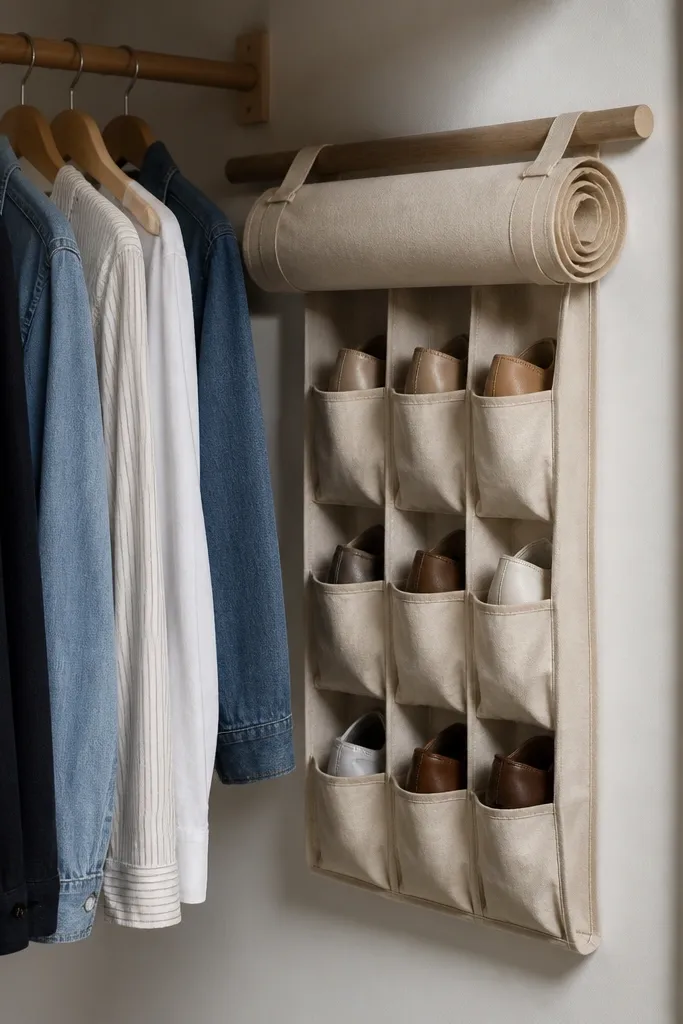
Mount a heavy wooden rod to studs at the height that works for grabbing shoes. Attach fabric pockets to a rolling sleeve or sew them to a flexible backing that rolls evenly. Add a tension piece or a bottom Velcro strip so pockets hang flat and don’t twist. Roll it up to store when not in use, then add a small shelf or hook below for shoe accessories.
This is the cleanest solution for seasonal shoes and travel-ready pairs. Roll-up organizers keep shoes contained and reduce dust exposure, and the fabric looks softer than hard cubbies. Mount it on a wall or inside a closet door area so it stays out of the main line of sight. It’s beginner-friendly because the build is mostly mounting a rod and securing the fabric pocket structure.
Skip thisDon’t use thin pockets for boots; shafts flop and the roll-up becomes a tangled mess.
Editor's noteChoose fabric with a stiff grid backing so pocket shapes stay crisp.
22. Shoe Rack With Built-In Shelf for Shoe Care
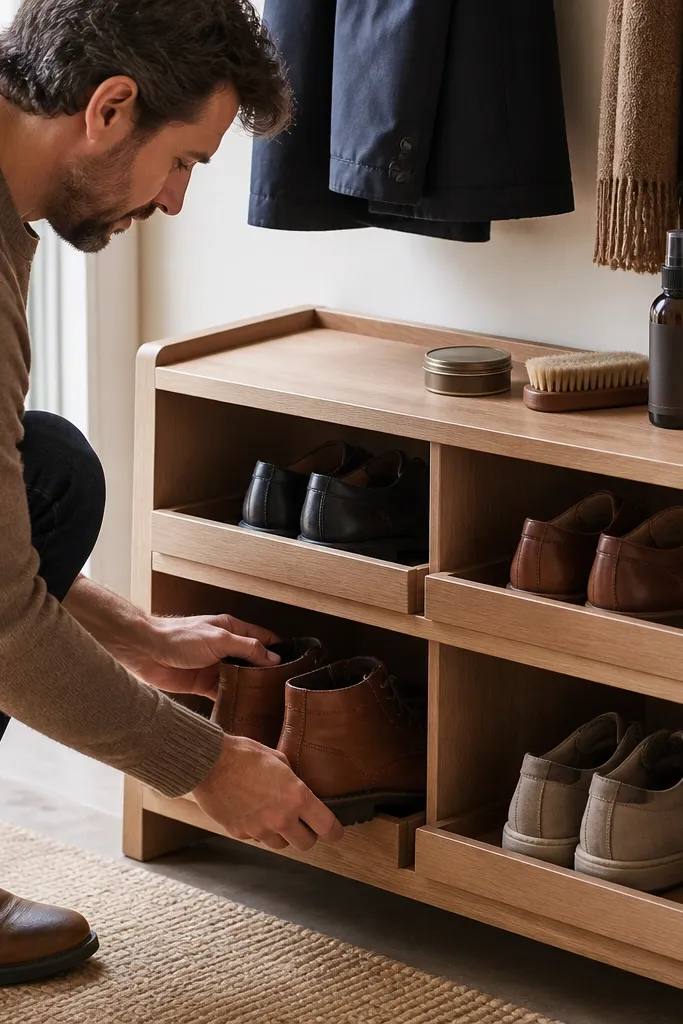
Build a shoe rack frame from 3/4-inch plywood with an 11-12 inch depth and multiple shelves with toe-forward placement. Add a 2-3 inch front lip to stop shoes sliding. Install a top shelf across the back or full width, leaving 2-3 inches of clearance so bottles don’t bump shoes. Sand and seal everything, then add small rubber pads under containers to prevent scratches.
Clutter grows when shoe care items live on random surfaces. This rack fixes that by adding a top shelf sized for polish, brushes, and a small spray bottle, while still keeping shoe storage neat underneath. The look stays clean because everything has one home, and the rack becomes a purposeful entry station. Use a simple wood frame with a front lip and keep the top shelf narrow but deep enough for bottles.
Skip thisDon’t put the top shelf too low; it crowds the space where you’re grabbing shoes.
Editor's noteSet the shelf back from the front edge by 1 inch; it looks cleaner and keeps bottles from falling forward.
23. DIY Modular Shoe Cubby Wall With Removable Panels
Cut a grid of frames from 3/4-inch plywood and mount them to a backer board attached to studs. Build each cubby as a box with dividers sized for your shoes; for sneakers, aim for 10-11 inches wide cubbies. Add removable front panels using simple magnets or a sliding lip so you can clean or swap sizes. Sand and finish the frames in a consistent tone, then mount the system securely.
A modular cubby wall looks like a store display, and it keeps you from reorganizing every time your shoe rotation changes. Removable panels make maintenance easy, and the grid layout keeps everything aligned so it looks tidy even if you’re not perfectly color-matching. This is best for entryways or laundry rooms where you can commit to a feature wall. Use light wood frames and white panels for a bright, photogenic look.
Skip thisDon’t make cubbies all identical height if you store boots; boots need a taller module.
Editor's noteUse magnets sized for the panel weight; weak magnets cause panels to sag and look sloppy.
24. Open Shelf Rack With Angled Side Wings
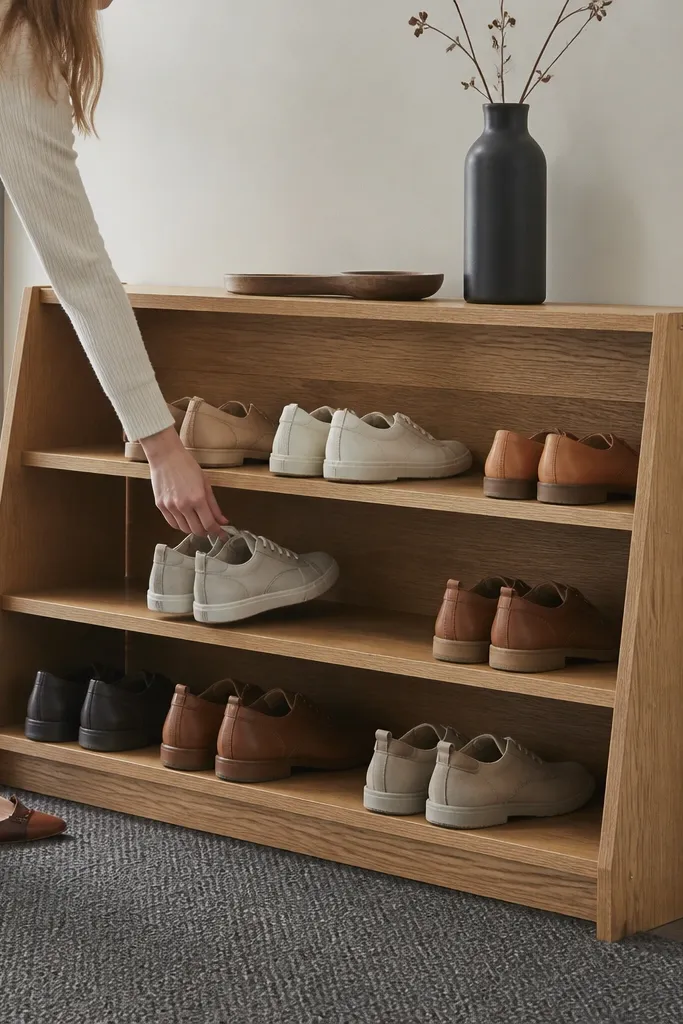
Build a multi-shelf frame from plywood with a depth of 11-12 inches. Add interior dividers and then attach angled side wings from thin plywood strips on both sides of each shelf opening. The wings should angle inward about 10-15 degrees so shoes settle centered when you push them in. Add a front lip strip for extra hold, then sand and finish with a matte clear coat.
Side wings solve a sneaky problem: shoes don’t just slide forward, they slide sideways when you pull one pair out. Angled wings guide shoes back into position and keep the front row looking straight. This rack is open, so it breathes well, and the wing design makes it look more like a design object than a basic shelf. Great for sneakers and flats in a hallway where you want easy access.
Skip thisDon’t skip side wings if you store narrow shoes; narrow pairs slide sideways more than you expect.
Editor's noteUse thin plywood for wings so they stay straight and don’t warp with humidity.
25. Corner Floating Shelf Rack With Hidden Cable Stops
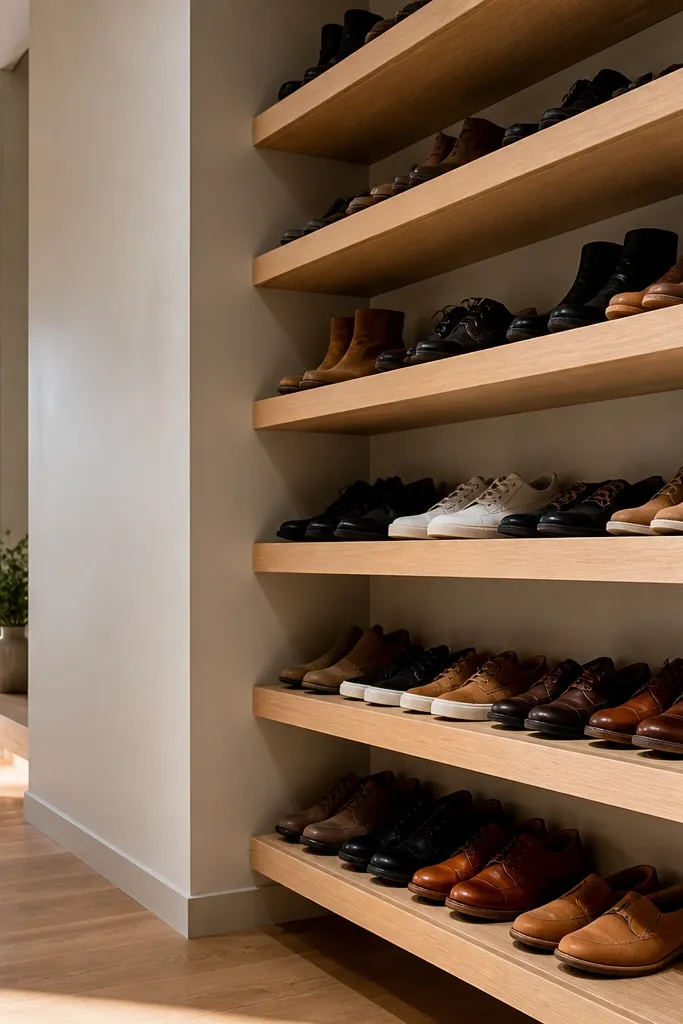
Mount a backer strip in the corner to studs, then attach floating shelf brackets on the inside edge. Cut shelves from 3/4-inch plywood and add an underside lip on the back edge so shoes can’t slide toward the wall. Install hidden stops under the front edge using small hardware or a thin rail screwed into the shelf underside. Sand and finish, then check shelf level so shoes sit evenly.
This looks clean because the shelves look like they’re floating, but it still stops shoes from sliding off. The hidden stops can be small cable stops or internal rails so the rack stays minimal and photogenic. It’s perfect for shoes you grab daily, where you want speed and a tidy front edge. Use a consistent wood finish and keep the stops hidden under the shelf lip.
Skip thisDon’t mount brackets into studs only at one side; use multiple mounting points for stability.
Editor's notePre-drill bracket holes so shelves don’t split; floating shelves show damage immediately.



