
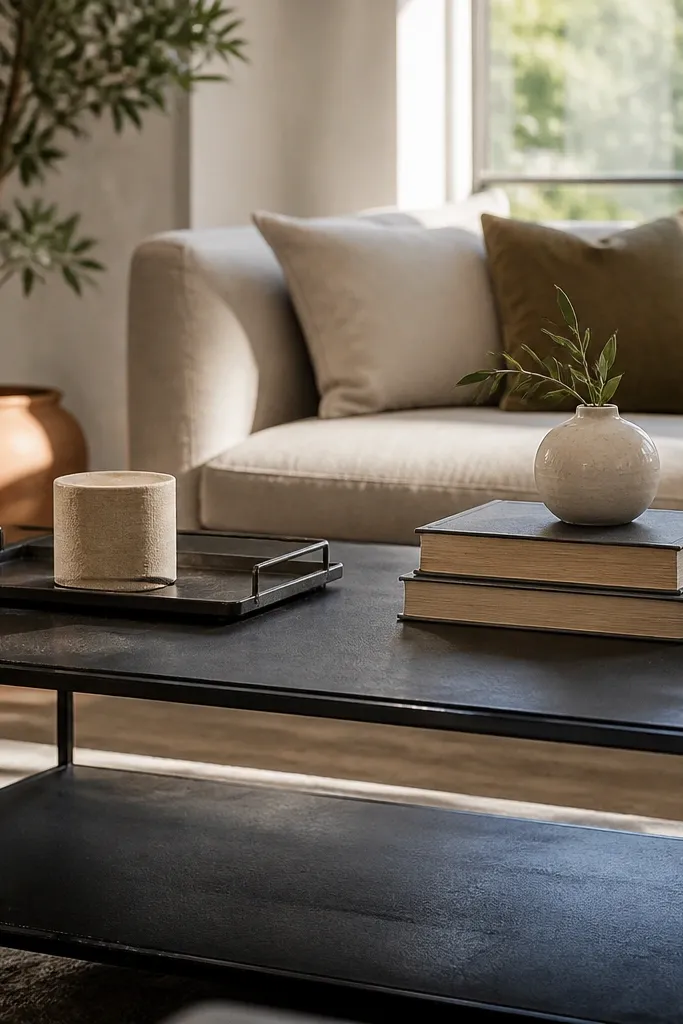
1. Walnut tray with two ceramic bud vases and a linen strip
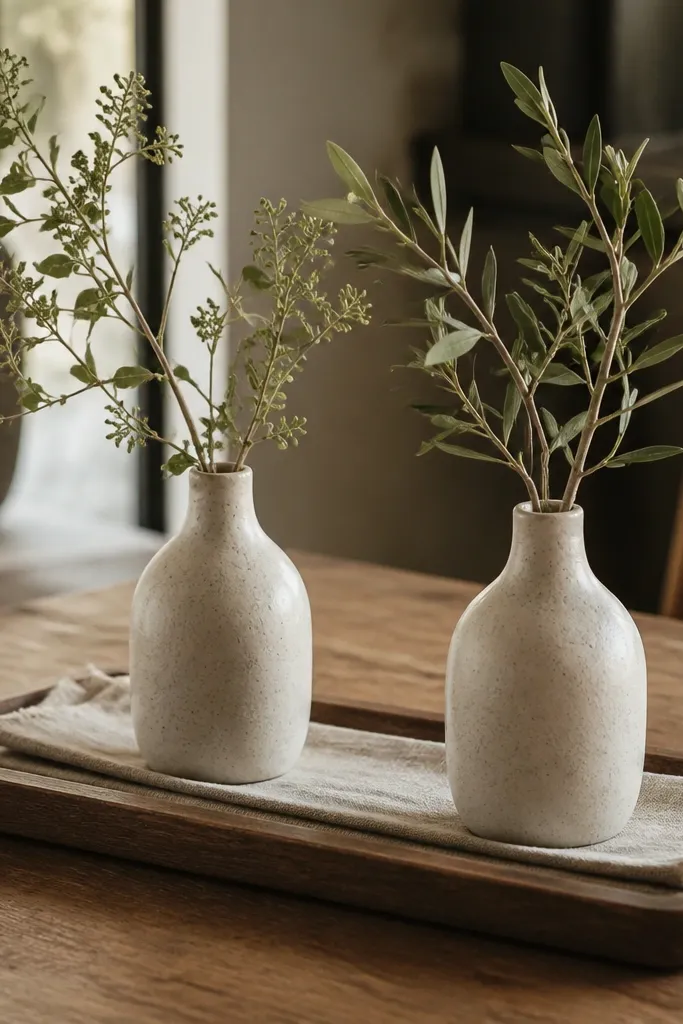
This is the cleanest tray-first move for beginners because it gives you a clear “design rectangle” and a built-in rule for spacing. The walnut tray grounds everything visually, while the two bud vases add height without needing tall flowers. A linen strip under the vases softens the look and hides minor table scratches or uneven sheen. You’re aiming for a tight, symmetrical feel with a little texture — not a cluttered shelf. Works great on 48-54 inch tables in living rooms that need a calm centerpiece.
Start with a rectangular walnut tray about 14-18 inches wide so it doesn’t swallow the table. Place the tray centered side-to-side and set it about 1-2 inches back from the front edge. Fold a neutral linen strip and lay it inside the tray, then set one bud vase on each side with a 3-5 inch gap between them. Add a few stems or leave them empty if you’re going for minimal — the vase shape still reads. Finish by wiping the tray with a dry cloth so the wood doesn’t look dusty.
If your vases are wobbly, add a thin cork sheet or felt pad under the base before arranging.
Don’t pick a tray that’s wider than 2/3 of the table width — it makes the center feel heavy.
2. Charcoal tray with 3 stacked books and a single brass candle
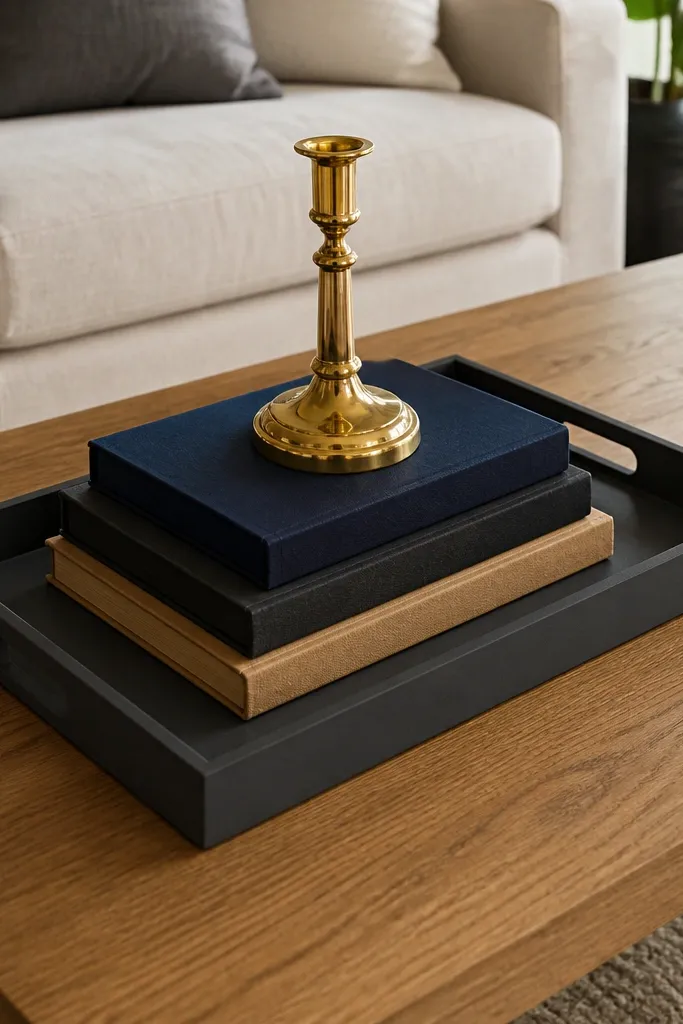
This setup uses both tools in a beginner-friendly way: the tray keeps the candle and stacks from drifting, and the book stack creates the height you’d otherwise need a tall centerpiece for. Charcoal looks sharp on lighter woods and keeps the brass from screaming. The key is limiting the number of vertical items — one candle plus one book stack reads styled instead of busy. It’s a good choice if your living room has neutral walls and you want a little contrast without adding more colors.
Choose a rectangular tray with low sides so the book stack doesn’t look trapped. Stack three books with covers in a tight palette — cream/gray/charcoal spines is the easiest combo to match. Put the book stack slightly back in the tray, then place a small brass candle in front or to the side with about 4 inches of spacing. Stand the candle so it’s stable; if it leans, rotate the stack until the line looks straight. Dust the tray and candle base before you set it down to avoid visible grit.
Use books with flat, clean spines. Raised lettering can create messy glare under overhead lights.
Skip tall candles on a low tray — the proportions look off fast.
3. Cream tray with a tray-liner and a "two-height" decor cluster
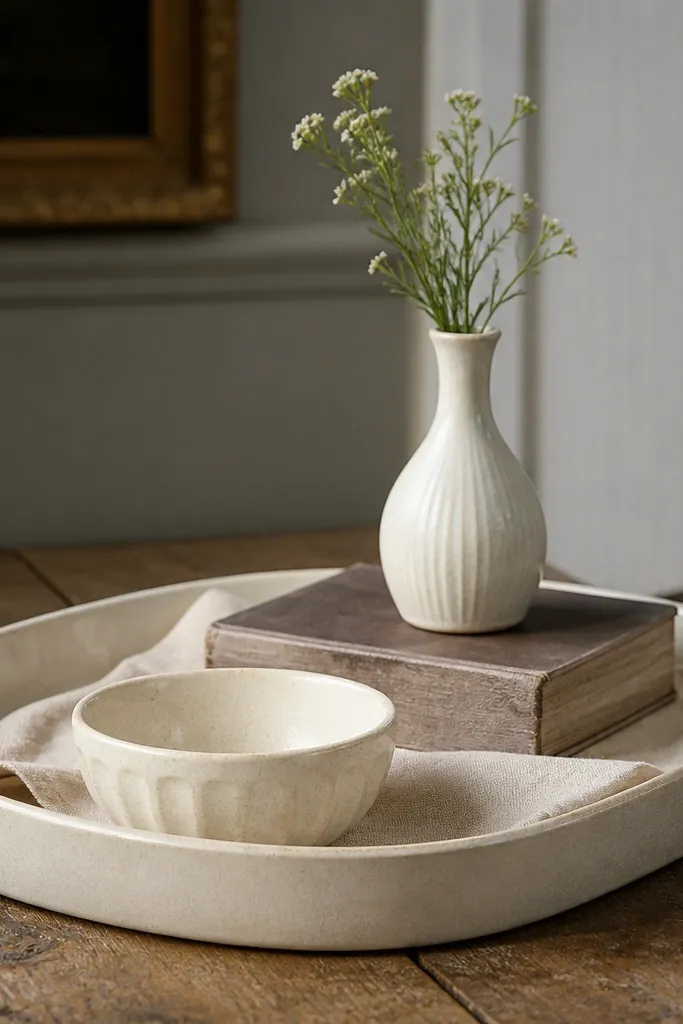
A cream tray with a fabric liner is a secret weapon for people who think their coffee table decor looks too harsh. The liner softens the background, so your objects look like they belong together. The “two-height” rule keeps it beginner-friendly: one item sits low, the other sits on a small book or riser to create gentle dimension. This look is great for everyday styling because it hides small imperfections in the table finish and doesn’t demand perfect symmetry.
Pick a tray that’s light-colored and wipeable, ideally ceramic or coated wood. Cut a linen or cotton runner to fit the tray bottom, leaving 1/2 inch at the edges so it doesn’t bunch. Put a low object in the center — a shallow dish or small bowl — then add a second object behind it on a single thick book (or a slim riser) for height. Keep the tallest point under 6 inches above the tray so the table still feels open. Center the whole cluster on the table and adjust until the heights look even left-to-right.
If your liner slips, add two small dots of double-sided tape at the corners of the tray bottom.
Don’t use a patterned liner with bold patterns. One busy pattern makes the whole table feel noisy.
4. Stacked book skyline with a slim tray for the "catchall"
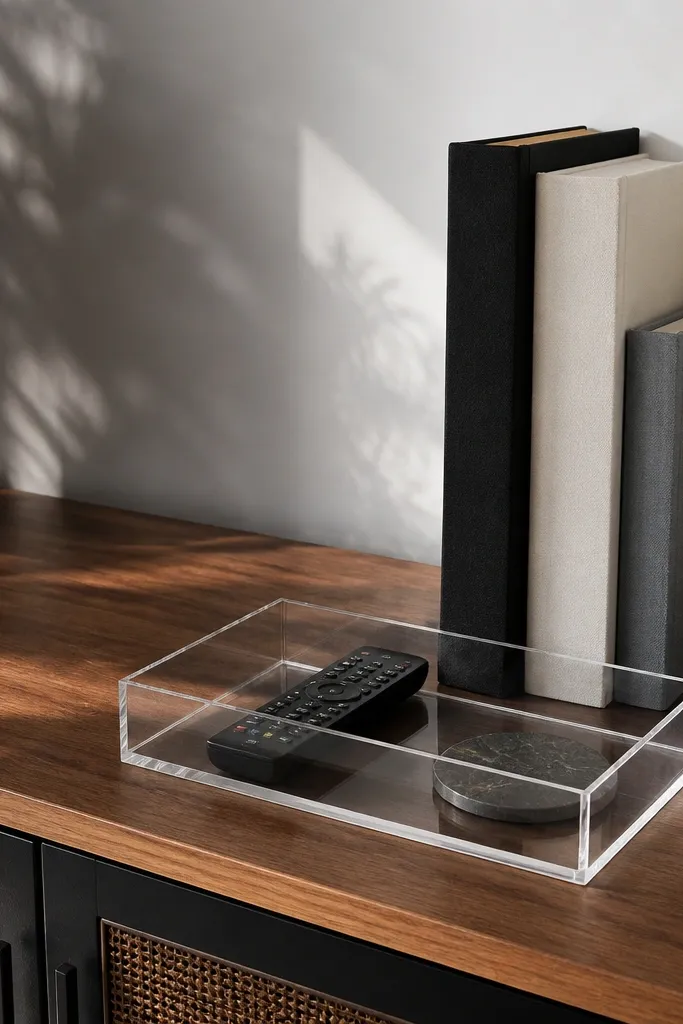
This is a book-led approach that still respects the reality of daily life. You get height from a book “skyline,” and the slim tray catches the things you don’t want floating around — remote controls, coasters, or a small dish for keys. The trick is keeping the skyline height controlled: two tall books plus one shorter book on top reads intentional. A slim tray prevents the catchall from looking like a pile.
Editor's noteUse a book with a matte cover for the top layer. Gloss spines reflect overhead lights and look messy.
Choose three books with similar spine widths so the stack looks even. Arrange them in a staggered skyline: two books stacked on the bottom, then place the third on top at a slight angle so the top line looks dynamic. Set a slim rectangular tray near the front edge of the stack, leaving about 2 inches between the tray and books. Add your catchall dish or coaster inside the tray. Adjust the angle of the top book until the highest point sits about 1/3 of the way from the left edge of your table.
Skip thisAvoid a skyline made of five books. The height jumps too quickly on rectangular tops.
5. Black tray with a single tall vase on a book riser
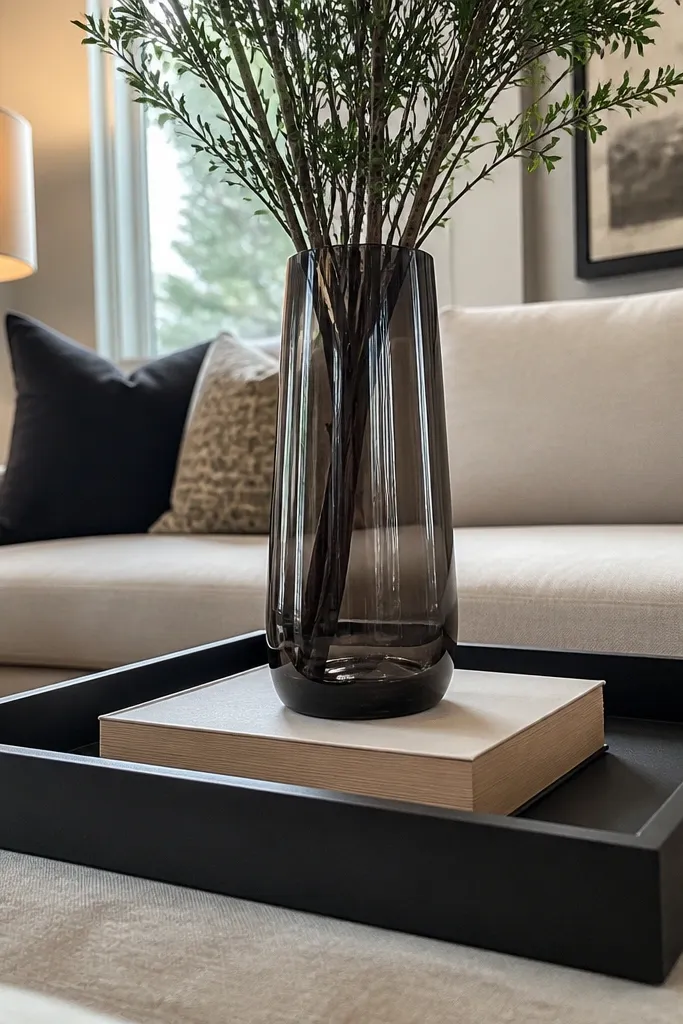
If your coffee table looks flat and you want one strong vertical line, this works. The black tray frames the vase and makes the shape feel deliberate, while the book riser adds height without needing a huge vase. It’s also easy to maintain because the center is one object — fewer pieces to rearrange. This look suits modern spaces and tables with light-colored wood or stone finishes.
Start with a rectangular black tray around 16-20 inches long. Place a single thick book or two thin books centered inside the tray, then set a tall vase on top. Position the vase so the widest part is centered and the vase base sits fully on the riser. Add a small filler — a few pebbles in a dish or a short stem bundle — but keep it low so it doesn’t compete with the vase. Center the tray on the table and keep the vase height consistent with your eye level (usually 10-14 inches above the tabletop).
Use a riser that matches the vase base width. If the vase base overhangs, it looks unstable.
Don’t put the vase directly on the tray if the base is narrow. It slips visually and physically.
6. Brass tray with two books and a small framed photo stand
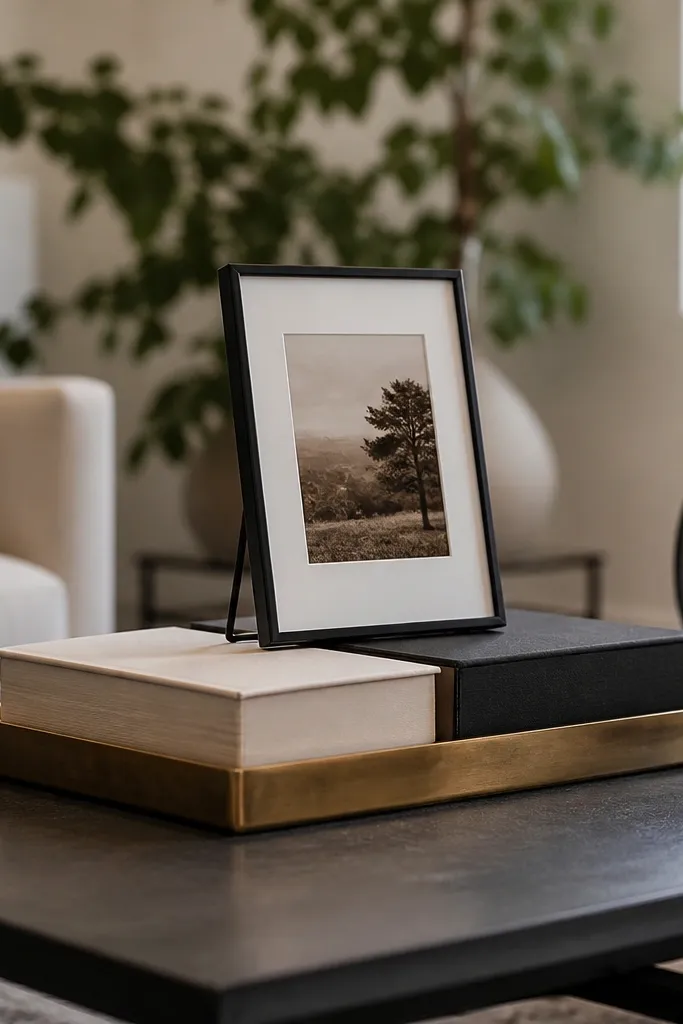
This is a beginner-friendly way to make decor feel personal without turning the table into a photo dump. The brass tray adds warmth, and the two-book platform gives you a stable “stage” for the photo stand. Because the photo stand is vertical, you also get a vertical element without needing candles or tall vases. Keep the photo stand small so it doesn’t overpower a rectangular table. Great for entry-adjacent living rooms where you want a styled look that still feels lived-in.
Pick a brass tray with a flat bottom and low sides. Place two books side-by-side on the tray, then set the photo stand on top, centered. Choose books with neutral spines and one accent color that matches the frame mat (cream mat is easiest to match). Add a small object next to the books like a tiny ceramic dish, but keep it under 4 inches tall. Place the tray centered and slightly back from the front edge so the photo reads clearly from the couch.
Use a photo stand with a matte frame. Gloss frames reflect light and look washed out on coffee tables.
Skip oversized frames. A big frame on a tray looks like a podium.
7. Rattan tray with coasters and a candle trio (only if you keep it tight)
Rattan trays look casual and warm, and they hide the messiness that can happen when you use coasters daily. This setup works if you keep the candle trio small and close — three tiny candles on a rattan tray reads like a curated moment. The coasters underneath or beside the candles make the table functional, not just decorative. It’s a good choice for beginners because you can swap candles seasonally while keeping the same base layout.
Choose a rectangular rattan tray with a flat base so items don’t rock. Put coasters in one corner or spread them in a tight cluster — aim for 2-3 inches between coaster edges. Place three small candles in a line along the opposite side, keeping them the same height. If the candles are different heights, stack them behind each other instead of side-by-side. Center the tray on the table and keep the total candle height under 5 inches above the tray.
Use unscented LED candles if you want the look every day without worrying about wax drips.
Don’t add a fourth candle. Four makes it feel like a store display.
8. Wood tray with a book stack and a single ceramic bowl for keys
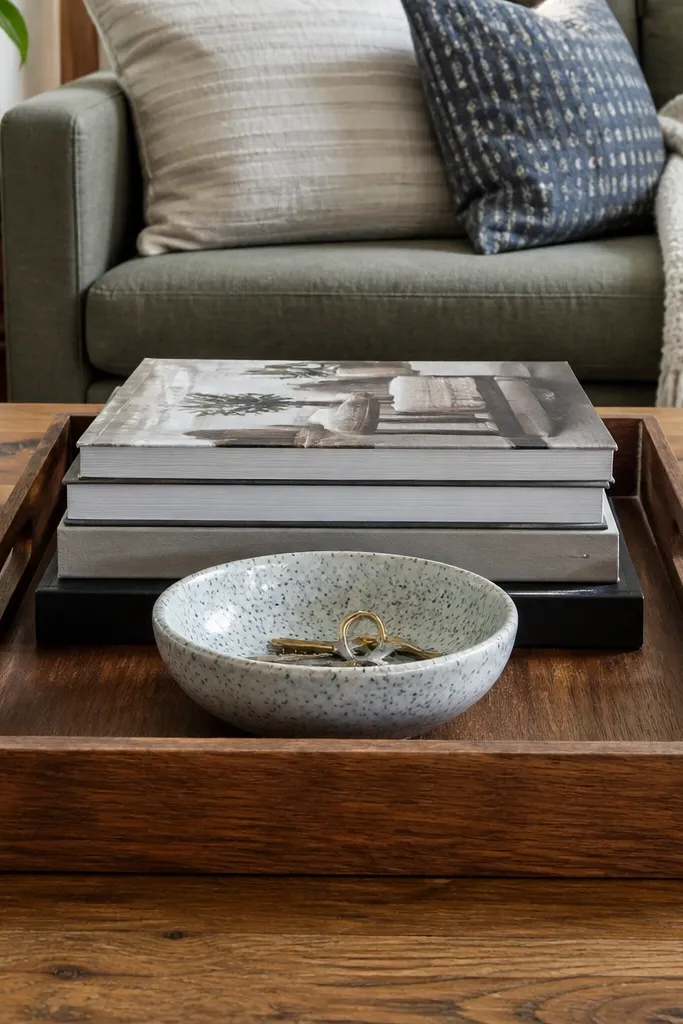
This is tray-first practicality with style. A wood tray warms up a room, the book stack adds height so the keys don’t sit in a boring flat spot, and the ceramic bowl keeps everything from scattering. It’s one of the best Beginner-Friendly Rectangular Coffee Table Decor options if your table collects random small items. You get a clear spot for keys and a decor focal point that doesn’t require constant rearranging.
Pick a wood tray with a slightly raised lip so items don’t slide — 16-18 inches long is a sweet spot. Stack two books on one side of the tray, aligned to the tray’s long edge. Place a ceramic bowl on the opposite side with a 3-5 inch gap from the books. Put keys, a small catchall, or even a coaster in the bowl. Center the tray and keep the bowl’s top edge below the highest book so the stack reads as the main height.
Choose a bowl with a matte glaze. Matte hides fingerprints better than glossy ceramics.
Avoid placing the bowl in the exact center if you have a busy room. It makes the whole arrangement look like a dumping zone.
9. Two-book riser with a low tray for a candle and match holder
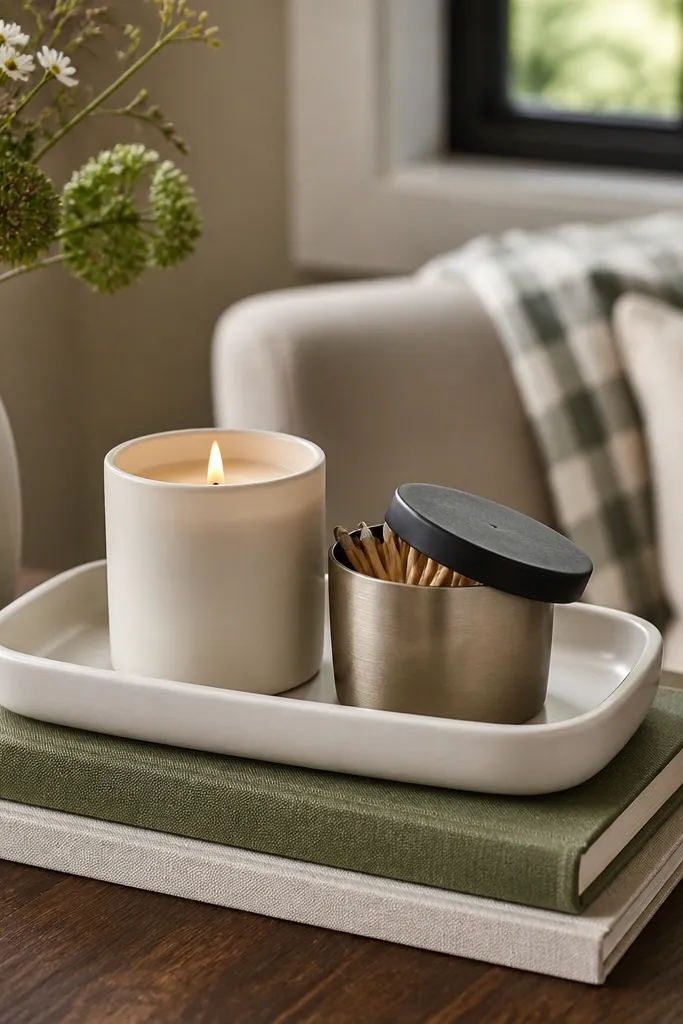
This is a clean book-led layout that still feels organized because the candle sits in its own low tray. The two-book riser gives you a “platform,” and the low tray creates a second boundary for small items like a candle and match holder. It’s ideal when you want decor that looks styled from the couch, not just from above. Works well on tables with a visible front edge where you want the focal point to sit slightly forward.
Editor's noteUse a non-slip drawer liner under the tray to stop tiny shifts every time you dust.
Stack two books with similar spine widths and keep the stack height around 4-6 inches. Place them near the center of the table, slightly back from the front edge. Put a low rectangular tray on top of the books so it’s fully supported and won’t shift. Add one candle plus a small match holder or thin ceramic dish inside the tray. Adjust the tray so it lines up parallel to the table edges, then check the angle from your seating position.
Skip thisSkip tall candle jars on a book riser. The top gets too high and blocks sightlines.
10. Tray + vertical magazine stack with a short vase
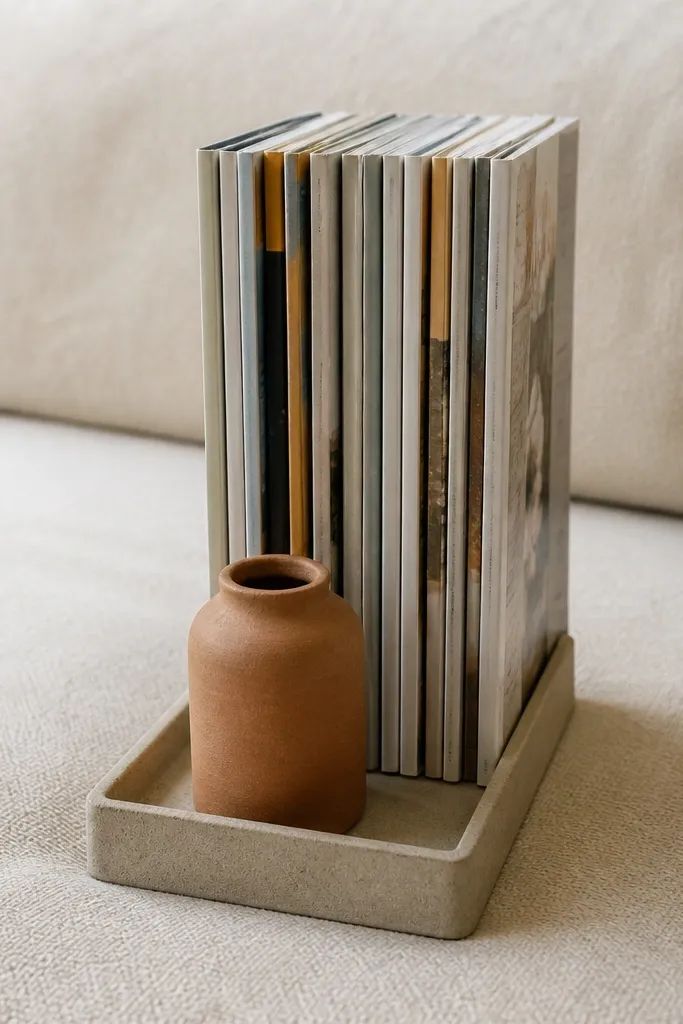
A vertical magazine stack is a smart height hack because it’s slimmer than most book stacks and takes up less horizontal space on rectangular tables. Put it in a tray so the edges look intentional, then add one short vase for shape. This combo looks especially good when your table has a lot of open space and you want one compact focal point. It also helps beginners avoid the “too many small items” problem because the magazine stack takes care of the vertical interest.
Editor's noteUse magazine covers with muted colors. High-contrast covers fight with everything else in the room.
Choose a rectangular tray with a width that fits the magazine stack plus a little breathing room (about 6-8 inches wide for a slim magazine stack). Stand 2-3 magazines vertically in the tray, aligned so the top edges are even. Place a short vase in front or beside the stack with the vase base fully inside the tray. Add a single filler — one stem or a few dried reeds — so the vase looks styled, not empty. Keep the tallest point under 14 inches above the tabletop so it doesn’t feel top-heavy.
Skip thisDon’t angle the magazine stack randomly. Angle only if both top corners still align neatly.
11. Glass tray with sand and a small plant in a ceramic pot
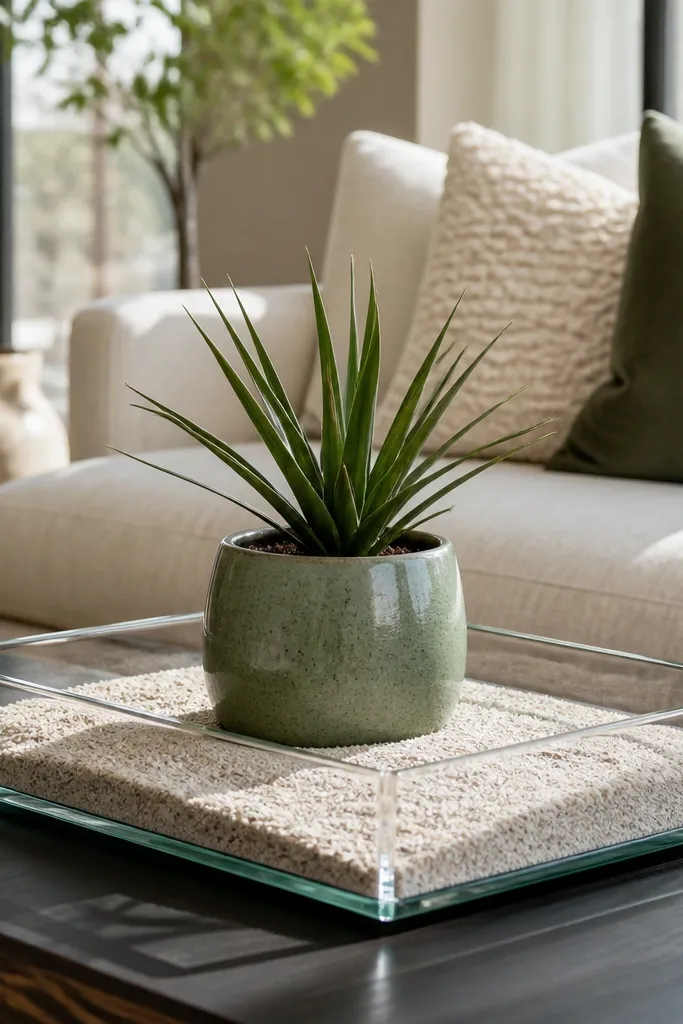
Glass trays make the arrangement feel lighter, which is helpful if your table is dark or you want the decor to disappear into the background. The sand is the grounding trick: it gives you a natural texture layer and makes the plant look like it’s planted, not sitting on a random surface. This is beginner-friendly because the glass tray is easy to wipe and the layout is simple — sand base, small pot, one supporting object. Great for bright rooms where you want a clean, airy look.
Select a rectangular glass tray with straight sides. Add a thin layer of sand or decorative gravel — about 1/2 inch deep — and level it with a spoon. Place a small ceramic pot in the center and press the sand slightly around the base for stability. Add one extra small object on the tray edge, like a tiny smooth stone or a short candle, but keep it minimal. Wipe the glass with glass cleaner so you don’t trap fingerprints under lighting.
If sand spills on your table, put a thin felt pad under the tray before styling.
Avoid using wet soil or an overly wet plant base. It can stain the sand and smear the glass.
12. Linen runner under a tray with a "stacked shells" ceramic set
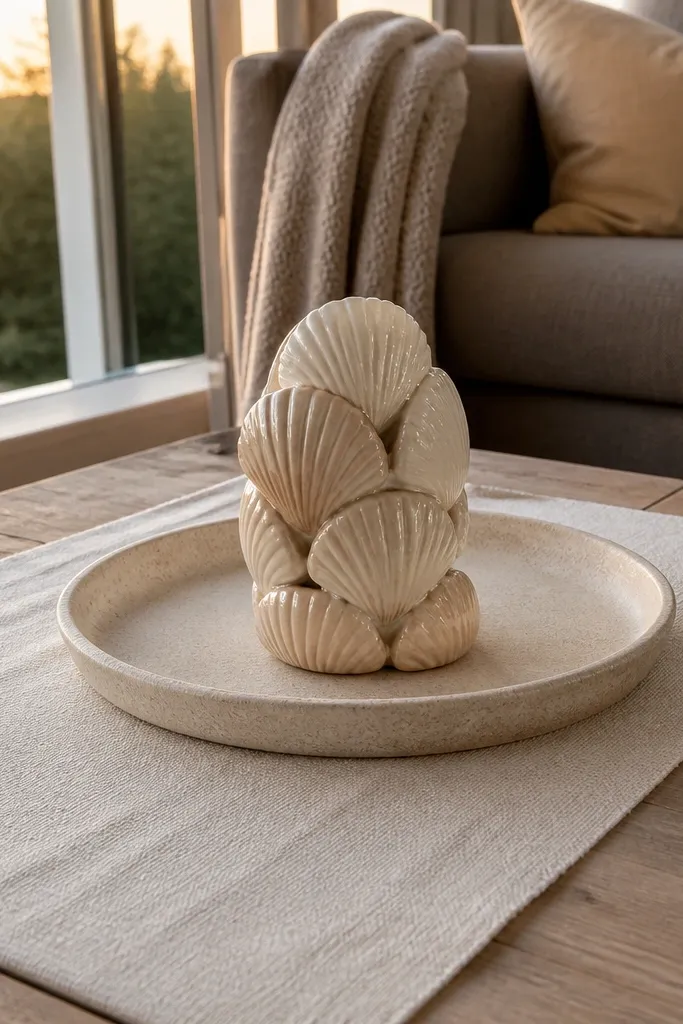
This is a soft-texture tray build for people who hate how hard wood tables can look at night. The linen runner creates a gentle background, so your small ceramics read clearly without clutter. The “stacked shells” style — small ceramic pieces grouped in a vertical-ish cluster — gives you subtle height without needing a tall vase. It’s easy to keep consistent because you’re repeating one material and one shape family. Works in living rooms with neutral decor or coastal-leaning palettes.
Lay a linen runner across the tray base so it covers most of the bottom area but doesn’t bunch at the corners. Place the ceramic shell-like pieces in a tight cluster, starting with the largest at the bottom and stacking smaller ones on top. Add one low accent — a small dish or candle — on the opposite side of the cluster. Keep the arrangement centered and use 2-3 inches of open space around the cluster so it looks intentional. Dust everything first; small ceramics show dust fast on linen.
Use a lint roller on the linen runner before you style. It makes a surprising difference in how clean it looks.
Don’t pack the tray edge-to-edge. That’s where it turns into a pile.
13. No-tray look: three books, one dish, one plant stem
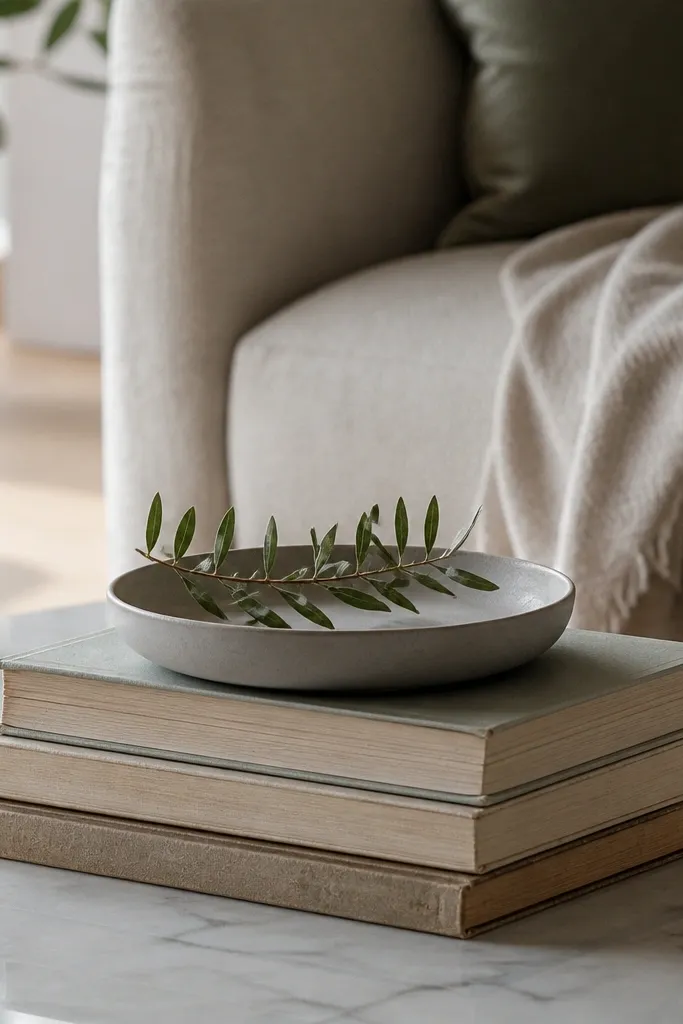
If you hate trays because they feel too “set dressing,” this no-tray option still reads styled because the books do the organizing. Three books create a stable height block, and the dish + plant stem keep it from looking like a random stack. This works best when your coffee table has a clean, easy-to-wipe surface and you’re not constantly moving things across it. It’s also a good choice if you want decor that takes up less space and lets the table surface show.
Editor's noteChoose books with similar thickness. Uneven stacks look accidental even when you mean them to be styled.
Pick three books and stack them so the top book is centered over the bottom two. Place the stack slightly back from the front edge by 1 inch. Set a small ceramic dish on the table in front of the stack, spaced about 3-4 inches away. Add one plant stem or a single small sprig in the dish — not a full pot. Adjust the dish position so the plant stem leans slightly toward the center of the stack for a natural line.
Skip thisSkip tiny scattered objects around the books. One dish plus one stem is the rule here.
14. Rectangular tray with a book stack inside and a rotating decor dish
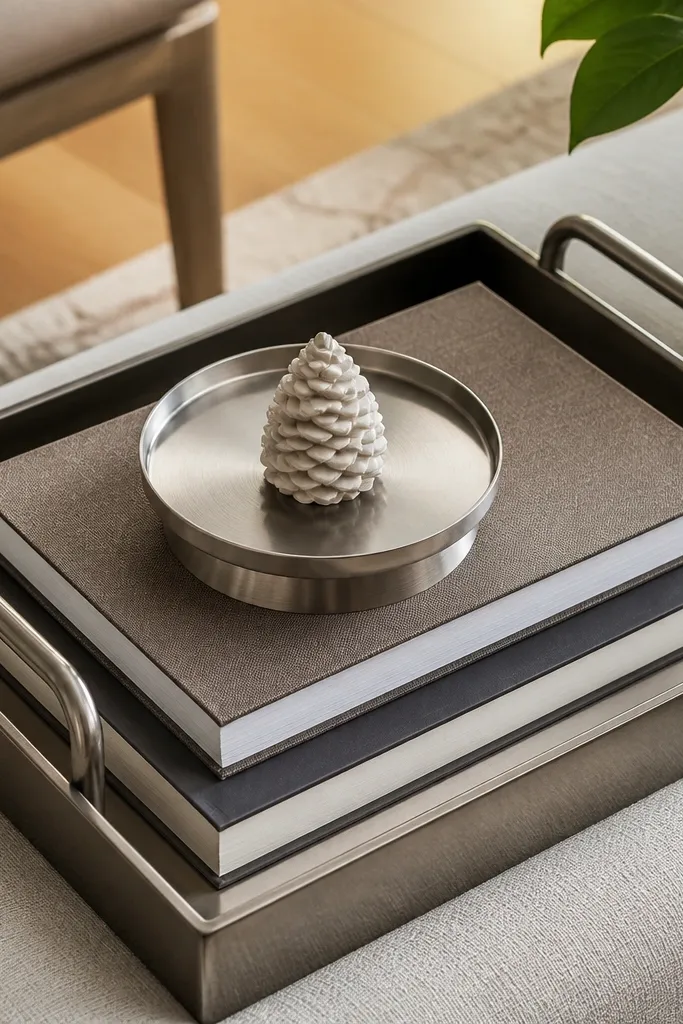
This is a smart beginner build because it gives you a “swap system.” The tray holds your structure — book stack, base alignment — while a small rotating dish lets you change what’s on top without rebuilding the whole arrangement. That means fewer decisions when you’re tired and fewer mistakes when you add seasonal items. The look stays consistent: rectangular tray lines plus controlled vertical height. Great for people who like to switch decor between fall, winter, and spring.
Choose a tray that’s wide enough for a book stack plus a dish on top, ideally 16-20 inches long. Stack two books inside the tray and keep their spines aligned to the tray’s long edge. Place a small pedestal dish or shallow bowl on top of the books, centered. Use the dish as your “season swap” — swap in small ornaments, a candle, or a dried arrangement. Finally, check that the dish top is level with your eye line from the couch and adjust the book thickness if needed.
If you want easy swapping, use a dish with a flat base and a diameter that sits fully on the book covers.
Don’t glue anything to the books. You want the option to change the dish later.
15. Two-zone setup: small tray on one end, book cluster on the other

This is the best layout for beginners who keep trying to put everything in the center and end up with a cluttered middle. On a rectangular table, splitting into two zones makes the decor feel intentional even when the items are different. One zone is a small tray with a low object, and the other is a book cluster with a taller element. The spacing between zones matters — it keeps the table from looking like one big pile. Works on longer tables where a single centerpiece feels too narrow.
Editor's noteUse a consistent color rule across both zones. For example, match the tray metal and the book spine accent color.
Measure your table length and pick a small tray that’s about 1/3 the table length. Place the tray on one end of the table, centered side-to-side within that end zone, leaving 2-3 inches of gap from the center line. On the other end, stack two books and add one taller object like a short vase on top or beside the stack. Keep the tallest item in the book zone under 14 inches above the table. Step back and make sure the two zones feel balanced — similar visual weight, different height.
Skip thisDon’t mirror the exact same objects in both zones. That reads like duplication, not design.
16. Round ceramic tray placed on a rectangular table with a slim book base
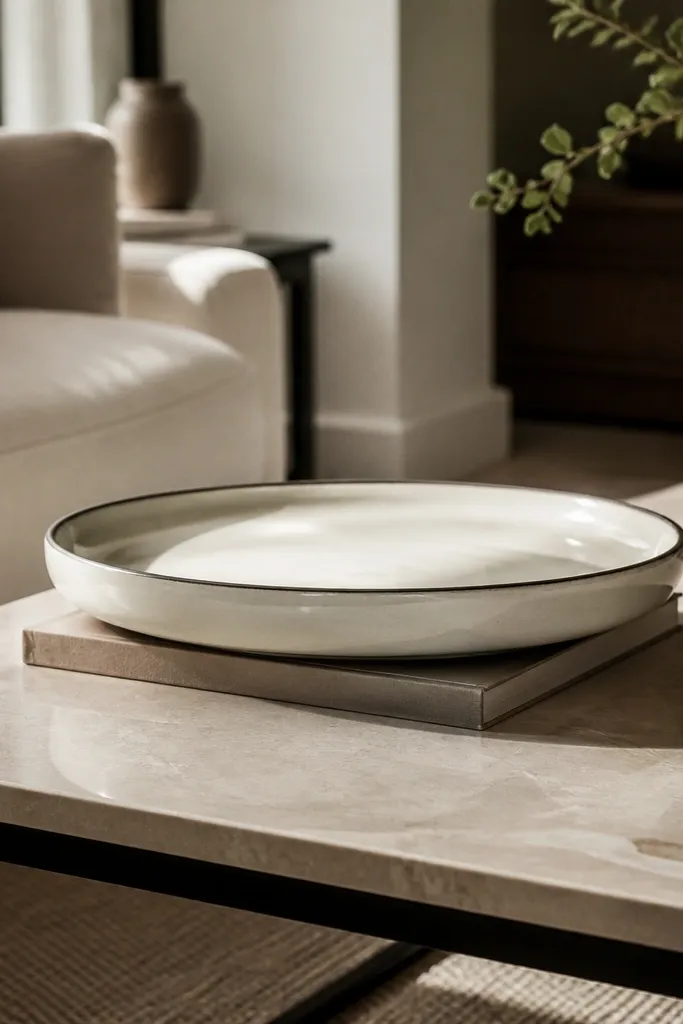
This is a shape-mixing trick that looks designed without needing lots of items. A round ceramic tray breaks up the hard rectangle lines of the table, and a slim book base adds height just enough to make the tray feel like a focal point. You’ll get a clean, modern look even if your decor collection is small. This works best when your room has straight-lined furniture and you want one softer curve in the mix.
Choose a round ceramic tray with a diameter around 10-12 inches. Place a slim book or two thin books under the tray so the tray sits slightly above table level. Set the tray centered side-to-side and 1-2 inches back from the front edge. Add one item inside the tray like a small candle or a shallow bowl — keep it low. If the tray rocks, replace the book base with a thicker single book and recheck stability.
Use a book base that matches the tray color temperature. Warm wood books + warm ceramics look cohesive.
Avoid stacking books so high that the tray feels like it’s floating.



