
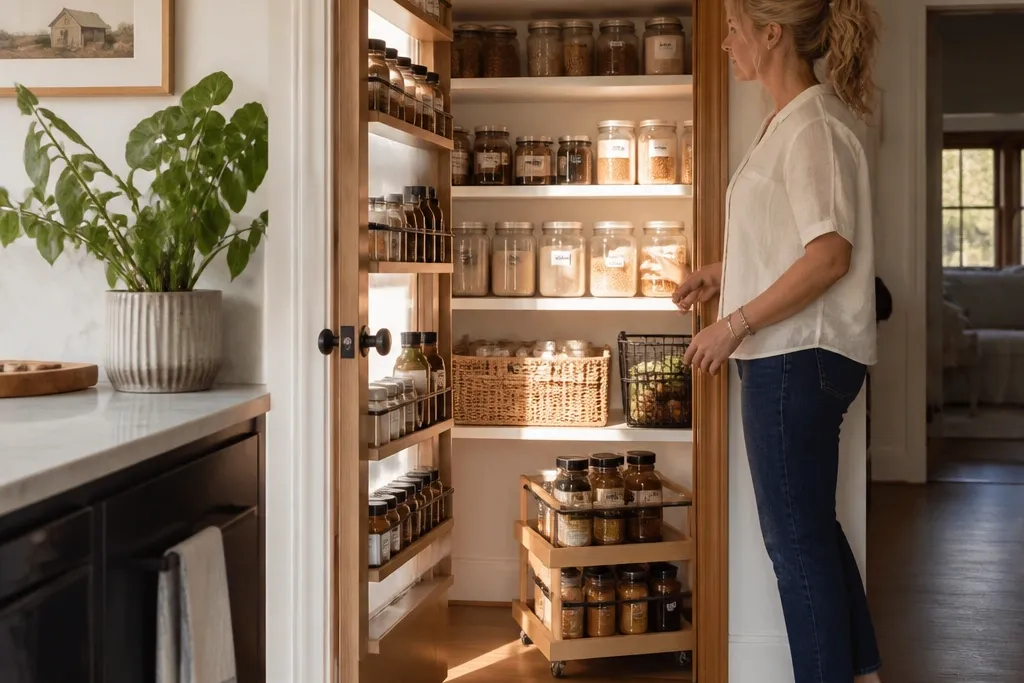
1. Door spice strip with matching mini canisters
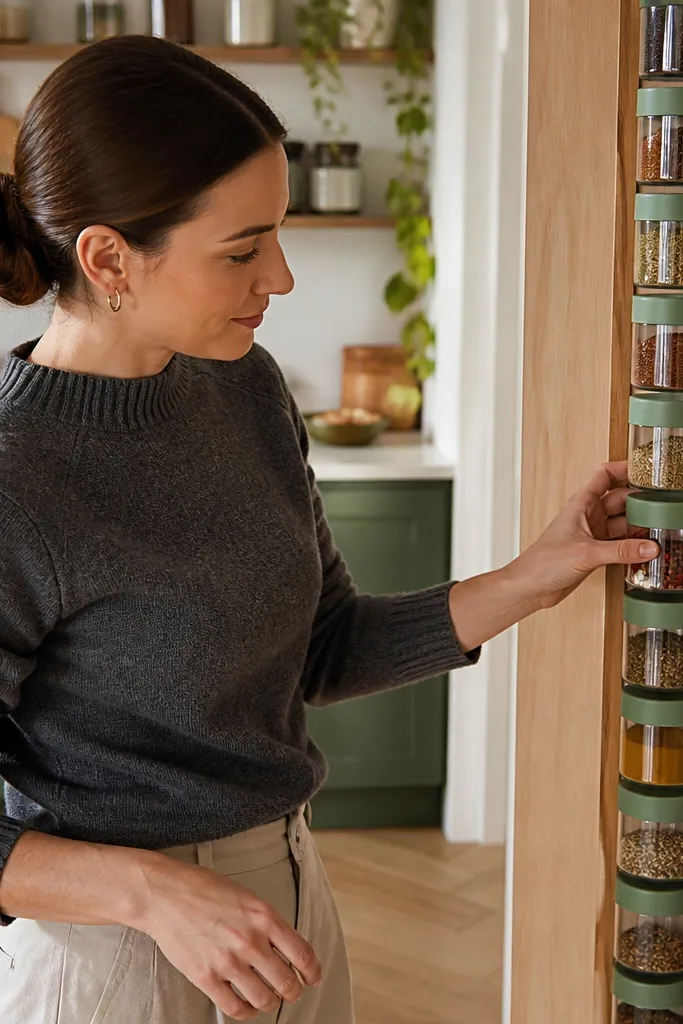
This is the fastest way to make a pantry look intentional because the door is always in view. Use a row of identical mini canisters so your spices read as a clean lineup instead of a pile of jars with different sizes. The look stays tidy because each jar has a home and the lids align, so you don’t get that “random rotation” problem. It’s beginner-friendly pantry organization ideas because you can do it with simple bins, a label maker, and a little measuring.
Start by measuring the door bin width and depth, then choose mini canisters that fit with about 1/4 inch of clearance on each side. Arrange the canisters in one row, then remove and re-insert them until you get a snug fit that doesn’t wobble. Finally, label each lid with a consistent format like “Cumin” and add a small dot color if you want quick sorting. Stick a removable adhesive label on the bin so you can replace it if you change brands or sizes.
Print labels slightly smaller than the lid, so you don’t get peeling edges when you wipe jars.
Avoid mixing tall and short canisters in the same row — it makes the whole door look messy.
2. Front-shelf snack caddy in a tray system
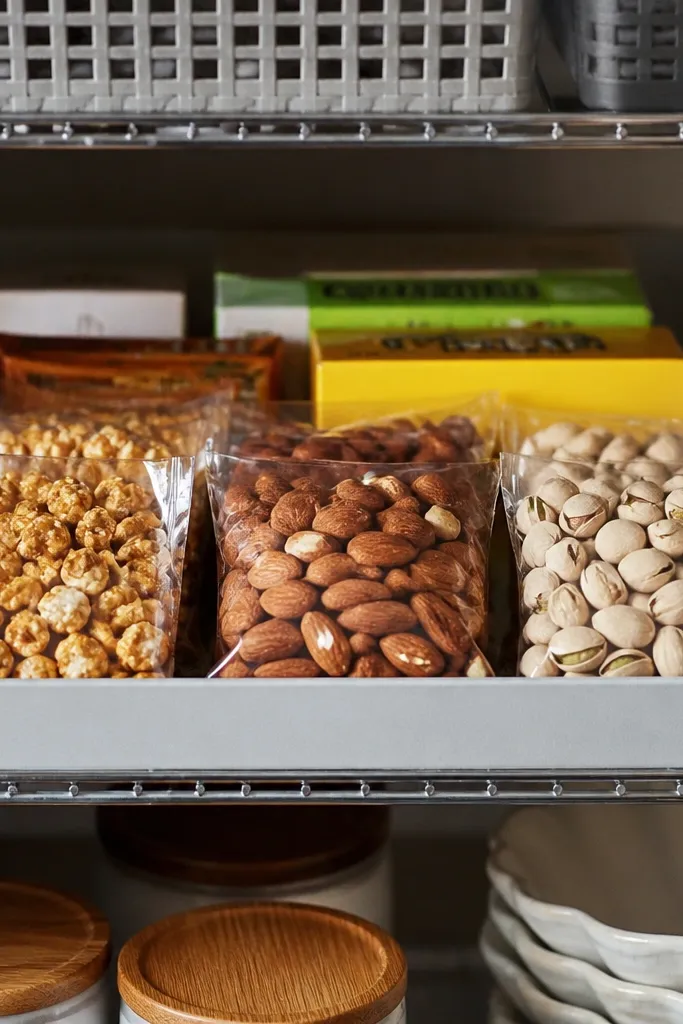
If your pantry front shelf is where everything gets dumped, a tray system turns it into a controlled display. Use one shallow caddy that holds the snacks you actually reach for, so your “grab” moment stays clean and repeatable. The aesthetic win is the tray boundary — it creates a straight edge your eye can trust. This works beautifully for beginner-friendly pantry organization ideas because it’s one small zone you can keep up with even when life is busy.
Choose a tray with a lip or grid so bags sit upright. Sort snacks into keep (daily/weekly), overflow, and trash/expired, then place only the keep items in the tray. Use two small bins inside the tray if you have both sweet and salty items so they don’t blur together visually. Label the bins with simple words like “Chips” and “Cookies,” then set the tray at eye level.
Add a small “back stock” bin on the bottom shelf so you refill the tray without unpacking everything.
Skip the temptation to store every snack in the tray — one zone, one limit.
3. Clear-lid cereal and granola canisters with uniform labels
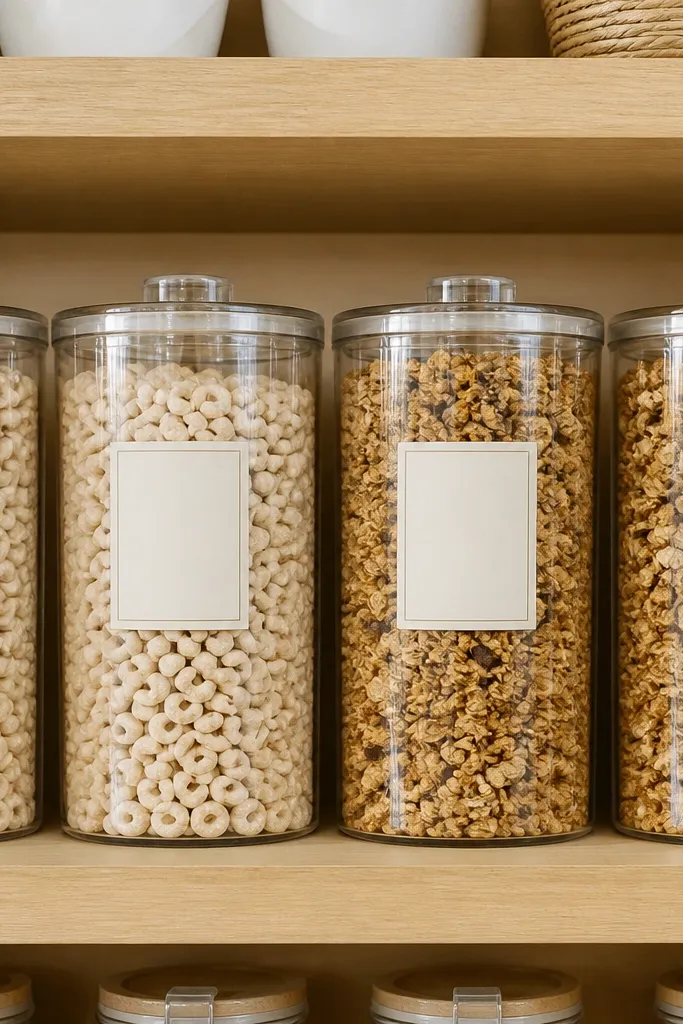
For a calm pantry look, this is the easiest high-impact project. Clear-lid canisters make the front shelf readable, and uniform labels stop the color chaos from different packaging. Use the same label size and placement so the shelf looks designed, not “repacked.” It’s beginner-friendly pantry organization ideas because the work is straightforward: empty, dry, fill, label. The result is also practical — you can see what’s low without digging.
Editor's noteFor sticky granola, store it with a tight lid and wipe the rim before sealing so labels don’t get tacky.
Pick canisters that match in height or at least match in label height, then plan your shelf layout by measuring the shelf length. Clean and dry the original containers, then transfer cereal and granola into the canisters, leaving about 1 inch of headspace. Apply labels to the front center of each canister using the same font and format, like “Oats — 32 oz.” Place the canisters in a row by breakfast frequency, not by brand.
Skip thisDon’t use labels that wrap over curved lids — they peel faster and look messy.
4. Stacked baking zone with risers and identical jars
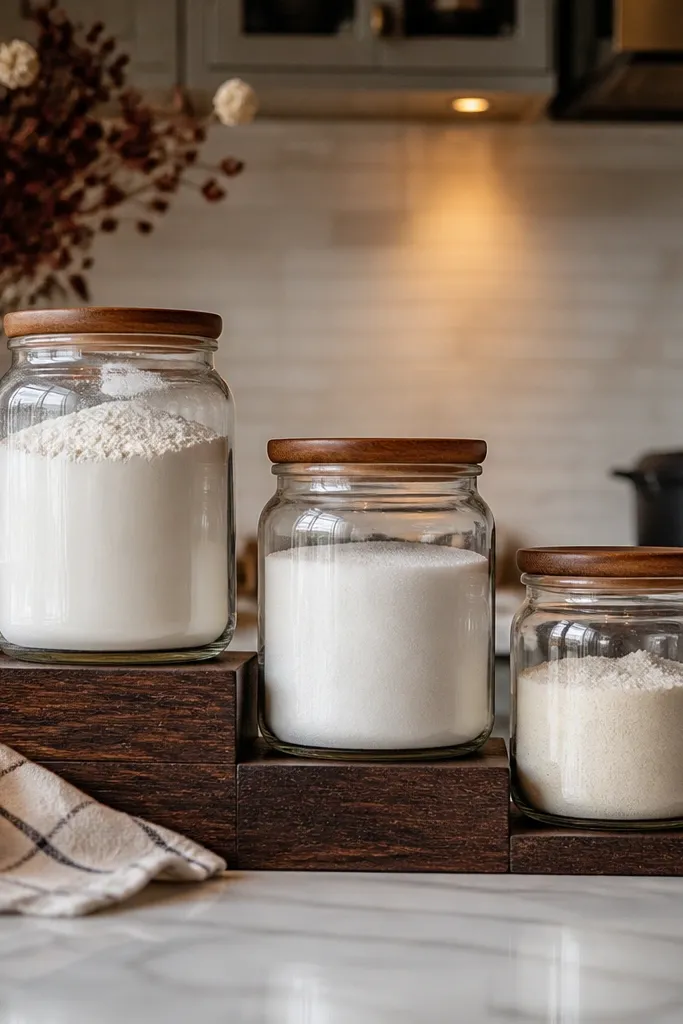
A baking zone makes your pantry look organized because baking ingredients naturally group together. Risers create a clean staircase effect, so flour, sugar, and baking powder aren’t sitting at random heights. Identical jars keep the visual rhythm. This is one of the best beginner-friendly pantry organization ideas because it turns a cluttered shelf into a labeled workstation you’ll actually use.
Editor's noteUse a matte label stock for flour and sugar so fingerprints don’t shine under light.
Start by choosing a set of jars that match in width, then buy risers sized to fit your shelf depth. Place the largest items (like flour or sugar) on the bottom, then smaller ones on the risers so labels stay readable. Transfer dry baking staples into jars, then label with “Baking Soda,” “Powder,” “Brown Sugar,” and so on. Finally, add one small bin for measuring tools or sprinkles so the zone stays tidy when you bake.
Skip thisAvoid mixing jar widths — it breaks the stacked look and makes the shelf feel uneven.
5. Under-shelf bin for packets and single-serve items
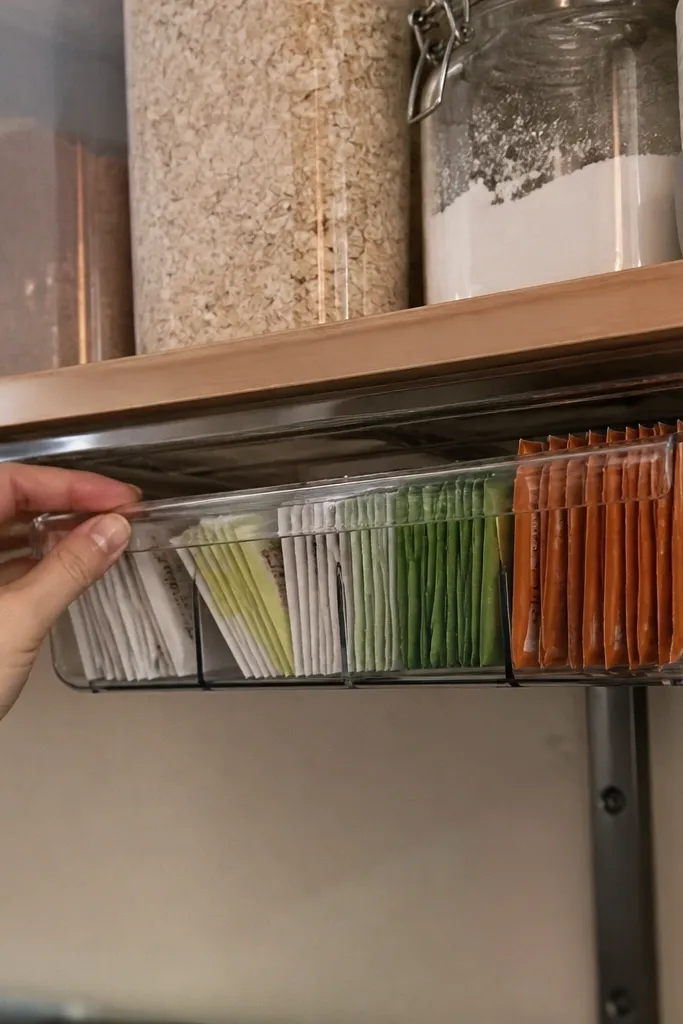
Under-shelf storage is a quiet aesthetic win because it hides the messy stuff that creates clutter. Tea bags, bouillon packets, and single-serve drink mixes look messy on open shelves, but they look clean in a tucked-away bin. This setup also keeps things accessible without taking up your main shelf space. Beginner-friendly pantry organization ideas like this work because they remove visual noise while staying easy to refill.
Editor's noteFold paper labels slightly over the bin edge for better durability when you tug packets out.
Measure the space under the shelf lip and choose a bin with the right height so it clears shelf supports. Sort packets by type, then stack them neatly so you can pull one without tearing the stack. Add a simple label on the outside front of the bin, like “Tea” or “Broth.” Install the bin using adhesive hooks or a clip system that doesn’t require heavy drilling, then place it under the most-used shelf.
Skip thisDon’t cram packets in tight — crushed corners make the bin look messy fast.
6. Wire-shelf risers to stop the 'fall-back' chaos
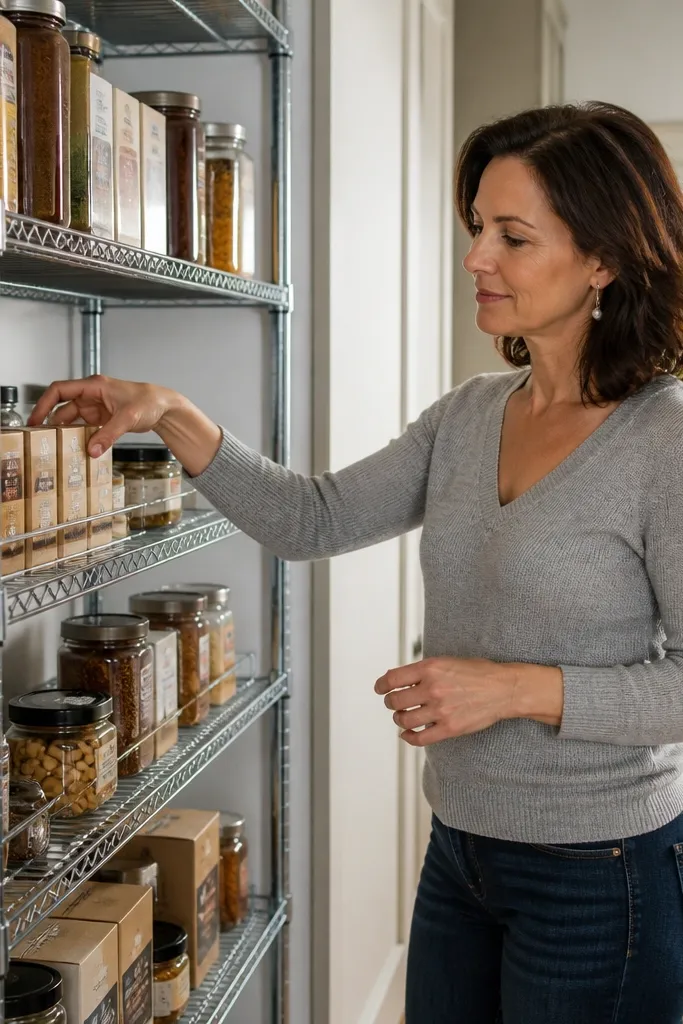
Wire shelves create a specific problem: items slide, tilt, and disappear behind others. Risers solve that by giving you clear front edges and consistent spacing. The look is better because everything sits at the same “reading height,” so labels line up and the pantry looks calmer. This is a beginner-friendly pantry organization idea that doesn’t require fancy tools, just careful measuring and a few sturdy inserts.
Editor's noteUse a 1/2-inch gap between container rows and the shelf edge for smoother pull-out movement.
Measure the shelf grid spacing and depth, then choose risers that match the wire frame so they won’t wobble. Place the risers on the shelf first, then do a dry layout with your containers before transferring anything. Assign one riser level to one product family, like canned goods on the bottom and boxed mixes on top. Secure loosely placed items with small non-slip pads so they don’t shift when you open the door.
Skip thisAvoid risers that flex — wobble makes the whole shelf look less organized.
7. Stackable drawer organizers for cans and boxes
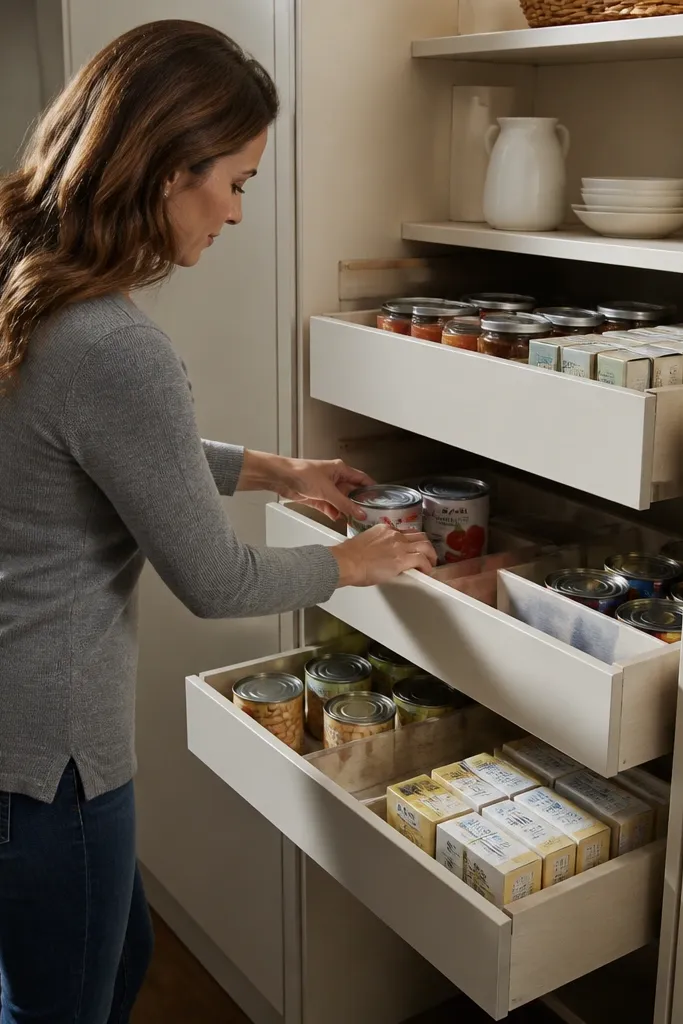
Drawer-style organizers make pantry storage look like built-in cabinetry. Instead of a shelf full of mixed shapes, you get clear compartments with matching fronts. That’s the aesthetic difference: the eye sees blocks, not clutter. This is beginner-friendly pantry organization ideas because you can start with one shelf and expand later. It also helps you keep inventory under control since each compartment has a limit.
Editor's noteLabel the divider, not the back of the bin. You’ll thank yourself every time you’re searching fast.
Choose organizers with adjustable dividers or fixed compartments that fit your shelf width. Remove everything from one shelf, then place organizers on the empty shelf and test with your tallest box and can. Transfer items into compartments by size, then label the front with the item name and unit if you store multiple sizes. Finally, add a small “restock” area on the next shelf so you don’t overflow into random corners.
Skip thisDon’t mix tall cans and short boxes in the same compartment — it creates a slanted, messy front.
8. Chalkboard label board for rotating pantry basics
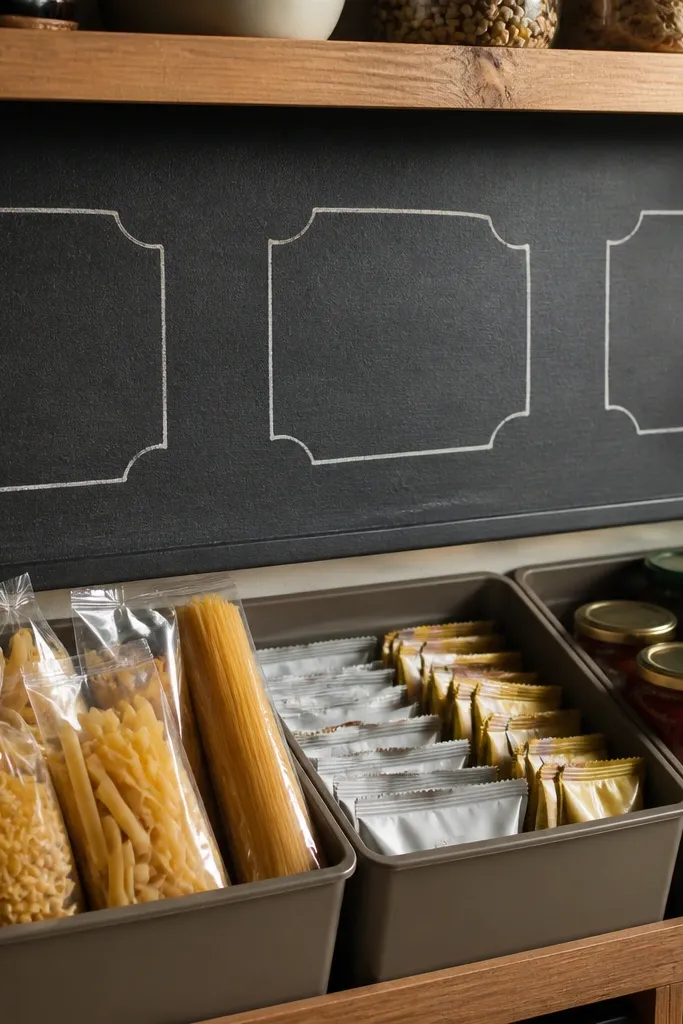
If you hate re-printing labels, a chalkboard category board keeps the pantry looking styled and still flexible. The board gives you a designed focal point, and it makes “what goes where” obvious at a glance. Use it above bins that hold categories like “Pasta,” “Breakfast,” and “Sauces.” This is a beginner-friendly pantry organization idea because the build is just a board and a consistent bin layout, not a full remodel.
Pick a chalkboard or paintable wood board that fits the width of your shelf or wall segment. Mount it at eye level using picture hooks or screws, then set up matching bins underneath with clear fronts. Write category labels in the same size each time so the look stays uniform. When you swap items, erase and rewrite quickly instead of replacing stickers across multiple containers.
Use chalk markers for darker, cleaner lettering and fewer smudges than standard chalk.
Skip tiny handwriting — if you can’t read it from standing height, it won’t calm your pantry.
9. Glass jar wall for tea, coffee, and dry herbs
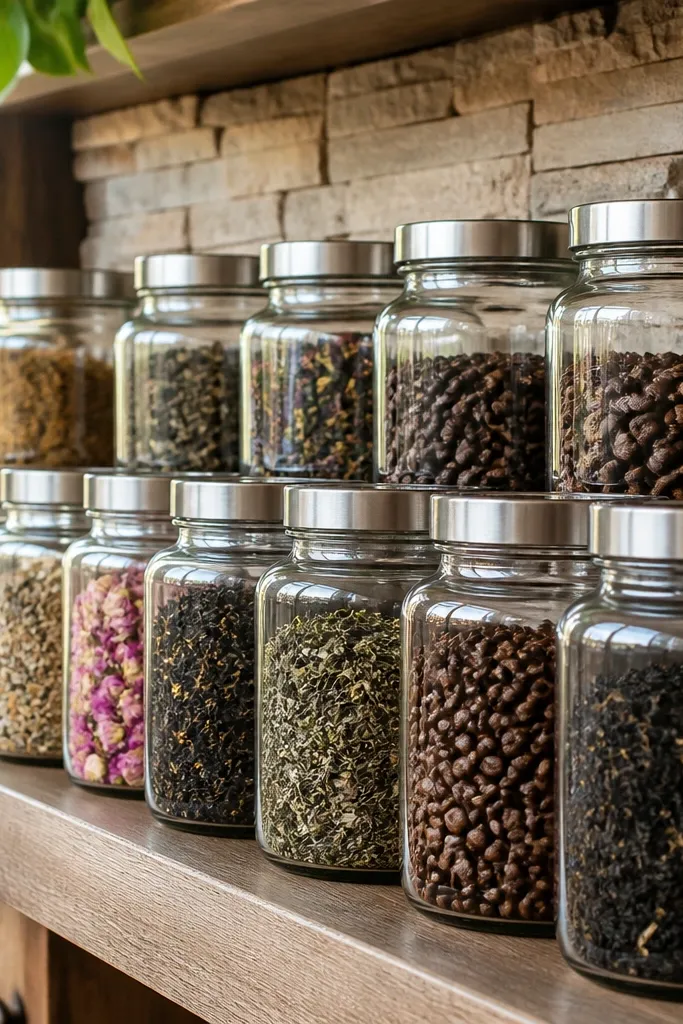
A jar wall looks expensive because it’s basically a retail display, just smaller. Glass jars add a clean shine, and aligned lids keep the shelf tidy. This works best for items that you don’t store in huge quantity, like tea, coffee, and dry herbs. Beginner-friendly pantry organization ideas like this calm your kitchen because they turn “random small packets” into a neat visual system.
Choose jars with matching lid colors and widths so the shelf looks uniform. Decide on one shelf height and stick to it — jars should sit with labels all facing forward. Transfer dry items into jars, then wipe the jar rims before sealing to keep labels crisp. Arrange by frequency (morning items first), then add a small tray underneath for drips or packets you haven’t repacked yet.
Put coffee on the bottom shelf level if it’s heavy — less strain when you refill.
Don’t include items with different storage needs in the same jar wall, like oily mixes that need opaque containers.
10. Kraft label + clear bin snack shelf with color dots
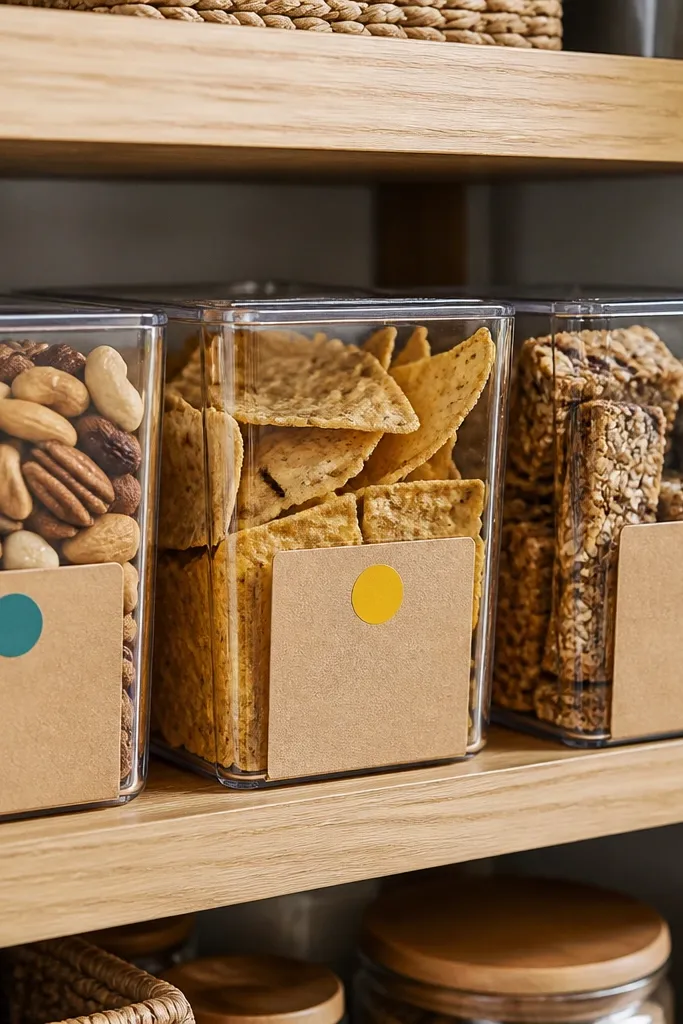
This is a clean, warm-looking approach that still reads organized. Kraft labels look cozy, and color dots let you sort fast without cluttering the shelf with full-color packaging. Use clear bins so you can see inventory, then keep the label style consistent across everything. It’s beginner-friendly pantry organization ideas because you can do it with pre-made bins and a label maker, and it instantly makes the shelf look calmer.
Pick clear bins with similar height so the shelf forms a straight line. Print kraft-style labels using one consistent layout: item name on top, size below if you store multiple. Add a small colored dot in the corner of each label to group categories like “sweet” and “savory.” Put the most-used bins at eye level and keep the overflow on a lower shelf behind one “front bin.”
Use the same dot color for the same category across the entire pantry so your brain learns it fast.
Avoid using full-color labels that mimic the original packaging — it defeats the calm look.
11. Magnetic spice tin lids on a metal sheet
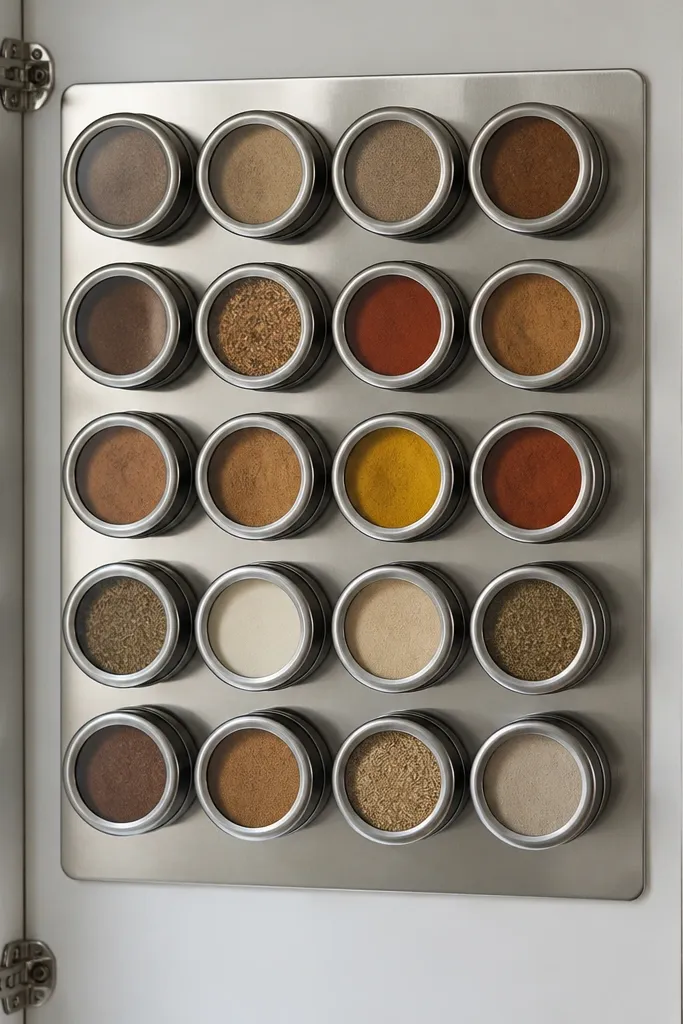
If you want a pantry that looks like a tidy kitchen station, this one is visually sharp. You mount a metal sheet on the inside of a cabinet or pantry wall, then use magnetic lids for spices so jars stack neatly. The look is grid-like and clean, with the same lid alignment every time. Beginner-friendly pantry organization ideas benefit from this because you’re not fighting shelf clutter; you’re turning vertical space into a display.
Mount a small metal sheet inside the pantry or cabinet at a height you can reach comfortably. Use spice tins or jars with magnetic lids that match the sheet’s magnet strength. Arrange them in a tight grid and leave a small gap between tins so labels stay readable. Label tins with a consistent system and keep the heaviest spices on the bottom row.
Test magnet strength before committing — if a lid slides when the door opens, fix it now.
Don’t mount the sheet too high — reaching makes people toss tins back in randomly.
12. Tall oil and vinegar bottles in a front-facing tray
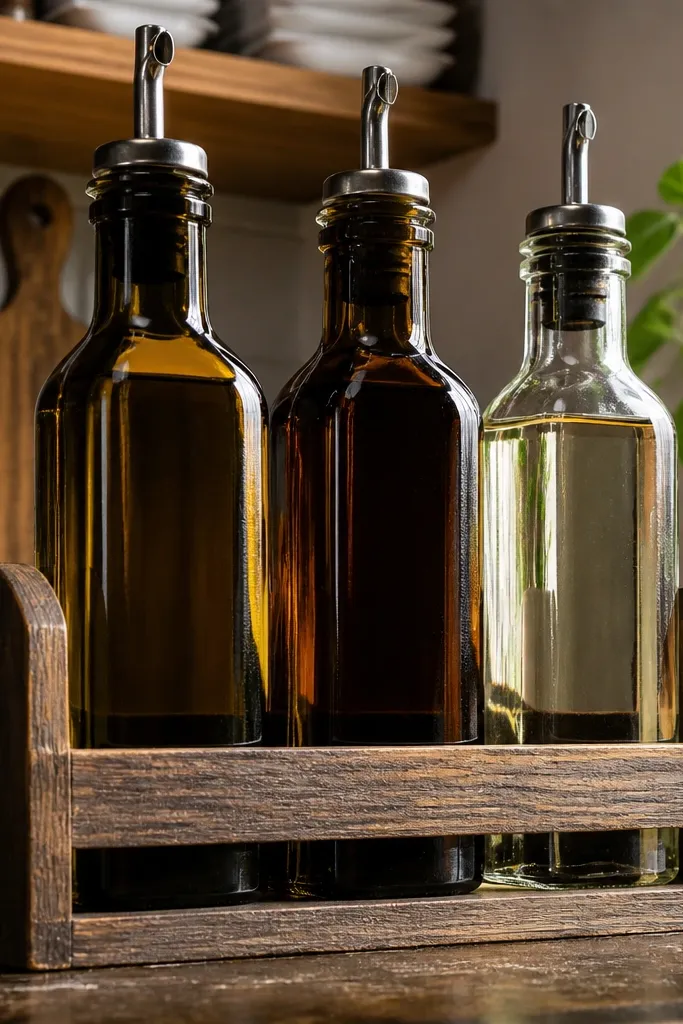
Oils and vinegars are tall, heavy, and visually loud when they’re stacked without order. A front-facing tray turns them into a neat, readable row. Choose a tray with a lip or dividers so bottles don’t clink and slide, and keep labels all facing forward. This is beginner-friendly pantry organization ideas because it’s one shelf corner that looks instantly calmer and prevents accidental spills.
Pick a tray sized to your shelf depth and slightly wider than the bottle base footprint. Place dividers or use a tray with built-in sections, then test bottle spacing so labels are readable without twisting. Transfer oils and vinegars into matching bottles if needed, then wipe labels and apply consistent label placement. Place the tray near the front so you don’t pull bottles from the back.
Use a small silicone mat under the tray to catch drips and protect shelf surfaces.
Avoid storing fragile glass bottles loose — they rattle and shift, which ruins the clean look.
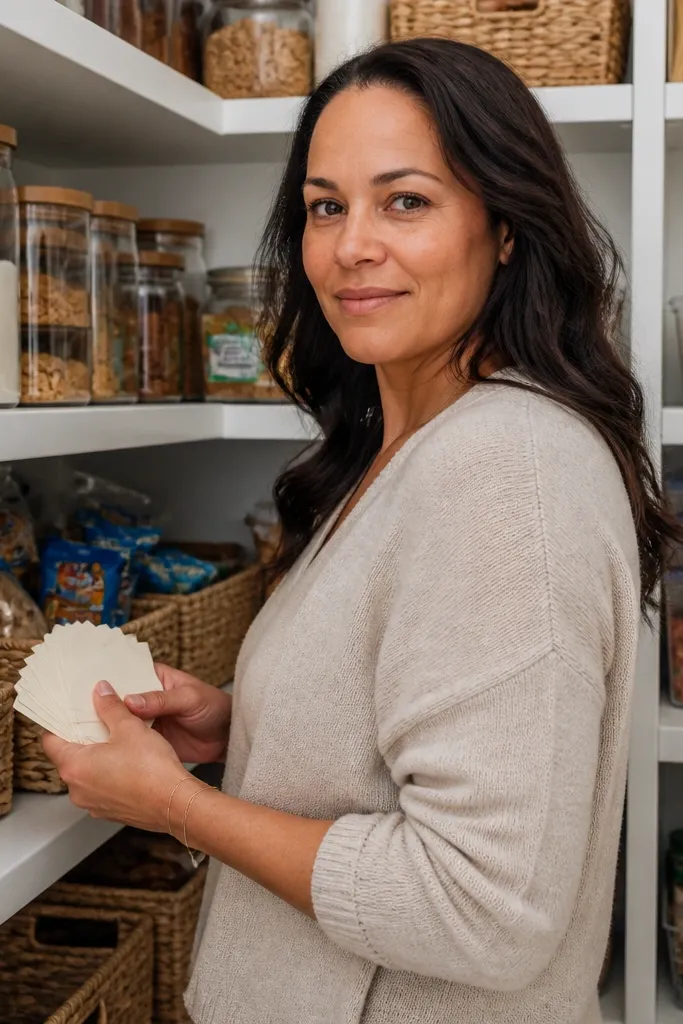
13. Label-first can rack with 'use by' rotation cards
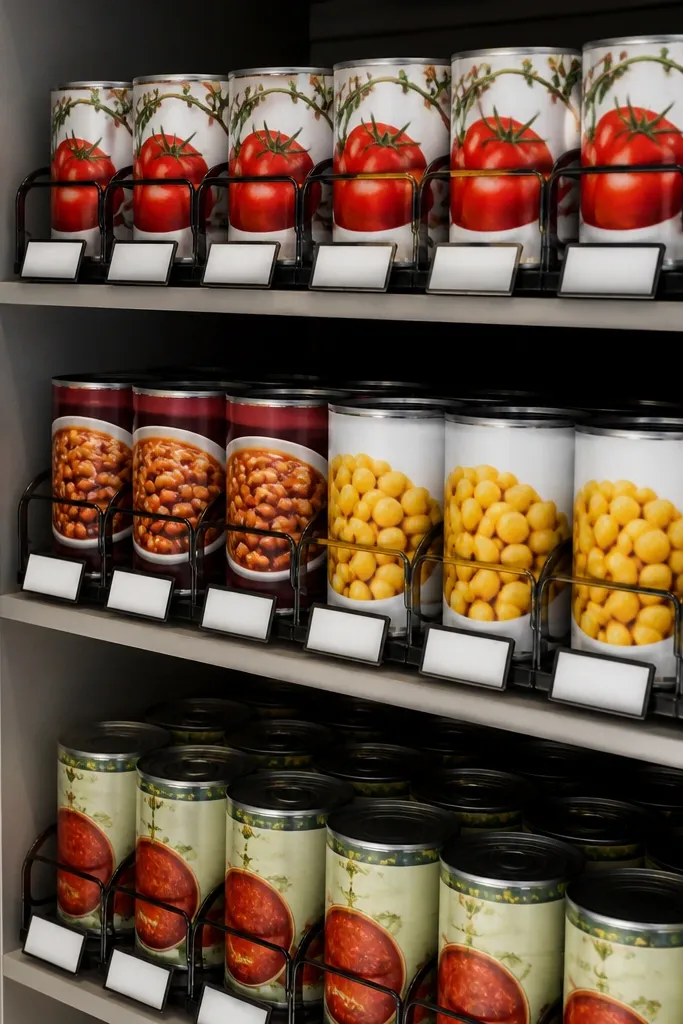
Cans look messy when they’re stacked without order, but a label-first rack makes them look like a pantry library. The aesthetic comes from uniform label placement and a consistent front edge — you can see everything without digging. Beginner-friendly pantry organization ideas that include rotation cards help the system last, because you’re less likely to forget older cans. It’s also practical: you pull from the front and restock behind it.
Choose a can rack or create a simple front lip using shelf risers so cans stay upright with labels visible. Sort cans by type, then arrange in rows with labels facing forward. Add small rotation cards at the front of each row with month/year and a simple “new behind” rule. Finally, place the rack at eye level and keep only one or two can types per row for readability.
Write dates on the card, not the can. It keeps labels clean and avoids marker smears.
Avoid mixing can sizes in one row if you want the rack to look crisp.
14. Stacked baking paper and foil station with vertical organizer
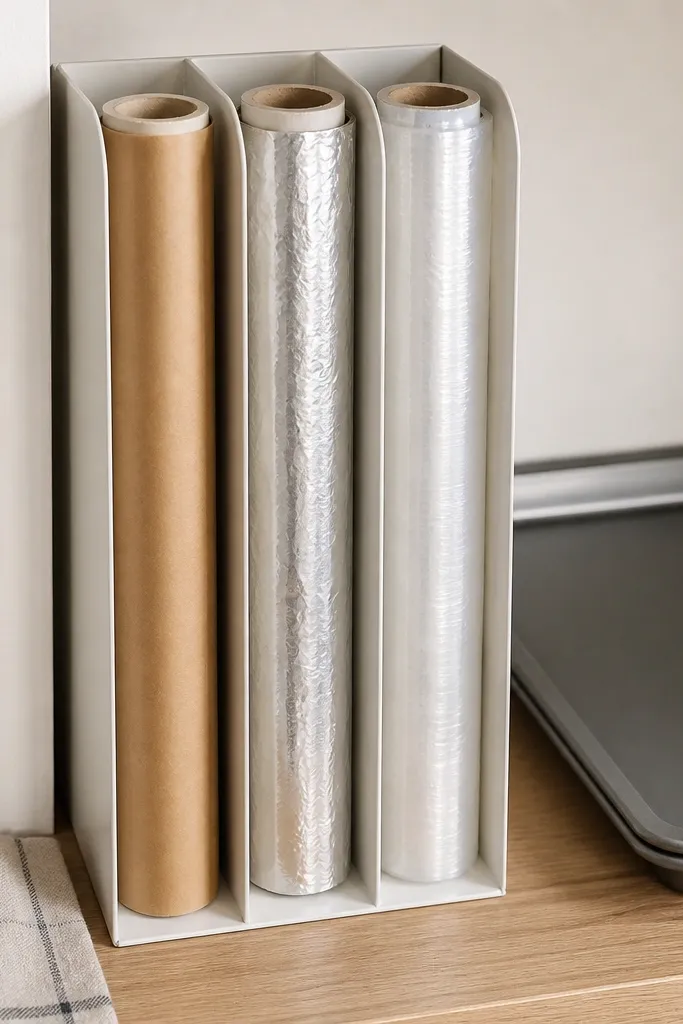
Paper products are the hidden clutter makers. When foil, parchment, and plastic wrap are loose, they look like a mess even if everything else is sorted. A vertical organizer keeps rolls upright and aligned, so the shelf looks intentional. This beginner-friendly pantry organization idea is also functional: you grab the exact roll without wrestling with tangled edges.
Measure the roll diameter and your shelf height, then buy or build a vertical organizer that fits those dimensions. Place the rolls so labels or markings face forward, then add a small tray at the bottom for spare roll ends. Sort by use frequency, with parchment or foil closest to the front. Label the organizer slots with words like “Parchment,” “Foil,” and “Wrap.”
Use a small strip of painter’s tape on the first roll edge to keep it from unwinding during setup.
Skip a horizontal stack — it creates crushed edges and a messy look fast.
15. Fabric shelf liner with clear bin boundaries
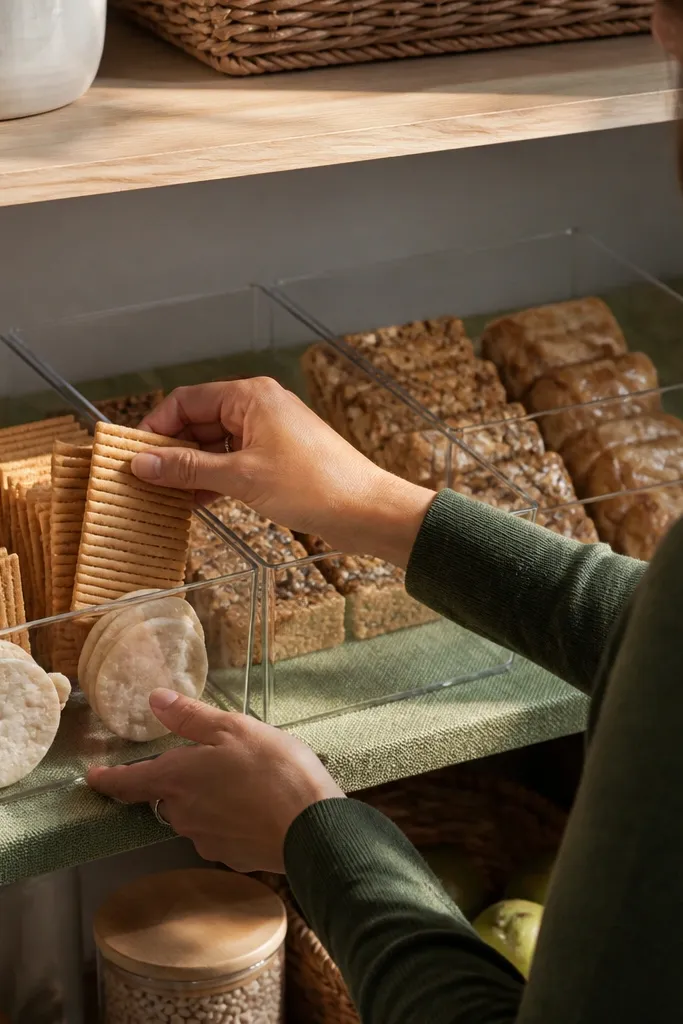
A liner gives your pantry a finished, cozy look that makes the organized stuff feel more intentional. When you pair fabric liners with clear bins, you get texture without visual chaos. This is a beginner-friendly pantry organization idea because it’s mostly prep and placement, not complicated building. The liner also protects shelves from spills and reduces the “sticky shelf” look that makes people avoid organizing.
Measure shelf length and depth, then cut fabric liner pieces with a clean edge and a slight overlap for coverage. Use non-slip shelf liner tape or removable adhesive to keep the fabric from shifting. Place clear bins in straight rows and keep bin fronts aligned with the shelf edge. Label bins and stop there — no need to over-decorate because the fabric texture already adds warmth.
Choose washable fabric like cotton canvas and test a small corner with cleaner before you line the whole shelf.
Don’t pick a busy pattern if your labels already have color — it competes visually.
16. Pull-forward bin for flour, sugar, and bulk mixes
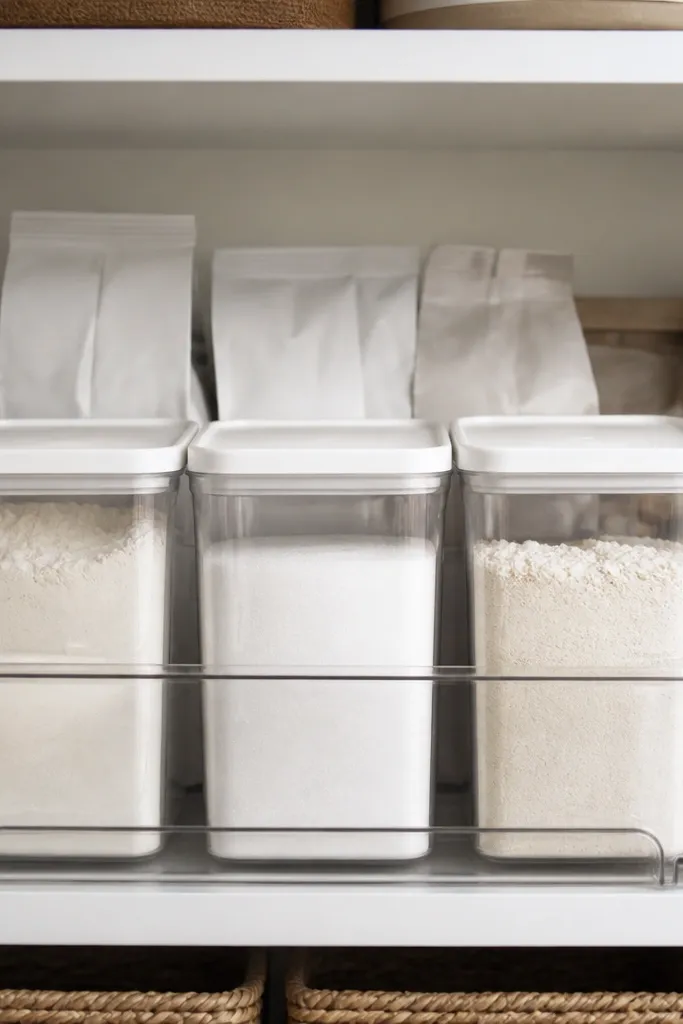
Deep pantry shelves make bulk items feel unreachable, so they end up in the back and get forgotten. A pull-forward bin fixes that and makes the pantry look tidy because you see the front containers, not random bags. The aesthetic is clean because the bin creates a frame around your labels. Beginner-friendly pantry organization ideas like this reduce wasted food and make restocking simple.
Choose a bin or caddy that slides forward on the shelf without scraping, then measure shelf depth to ensure it fully pulls out. Transfer flour, sugar, and bulk mixes into uniform containers and line them up inside the bin. Label the front container with the type and size. Place the bin on the deepest shelf closest to the pantry door so it’s easiest to pull forward during cooking.
Add a small “low” marker with a clip or sticky tab so you notice when it’s time to restock.
Avoid using oversized containers that force the bin to jam when you pull it out.
17. Corner lazy-susan for oils, sauces, and condiments
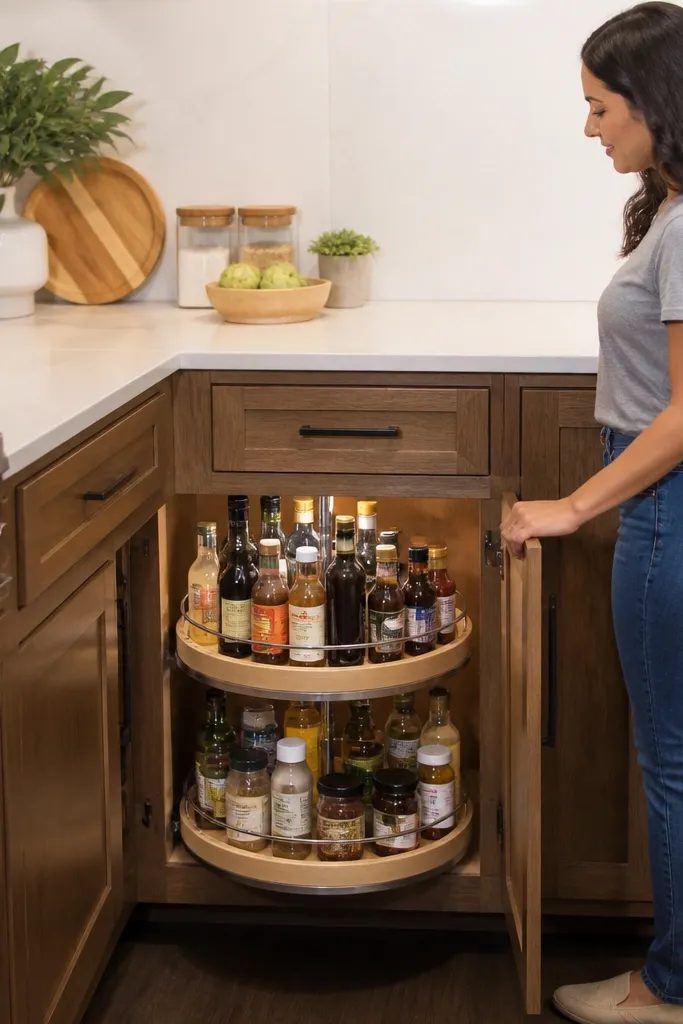
Corners are where pantry organization goes to die. A lazy Susan turns that dead space into a visible, rotating display, so you stop digging behind bottles. It looks good because everything is arranged in a circle with consistent label fronts. Beginner-friendly pantry organization ideas work well here because the action is simple: spin, grab, replace. It also keeps condiments from taking over your main shelves.
Measure the pantry corner diameter and choose a lazy Susan that fits with a small clearance for shelf edges. Place the items by weight, with heavier bottles on the outer ring for stability. Group by use — cooking oils on one side, sauces on another — then label each jar or bottle. Finally, set a small tray on the floor of the Susan for caps or spare bottles that you keep on hand.
Use uniform bottle labels so the rotating look stays clean as items move.
Skip mixed-height stacks without a tray — the center gets cluttered and won’t look tidy.
18. Stacked baking mix pouches in a labeled 'dry goods' bin
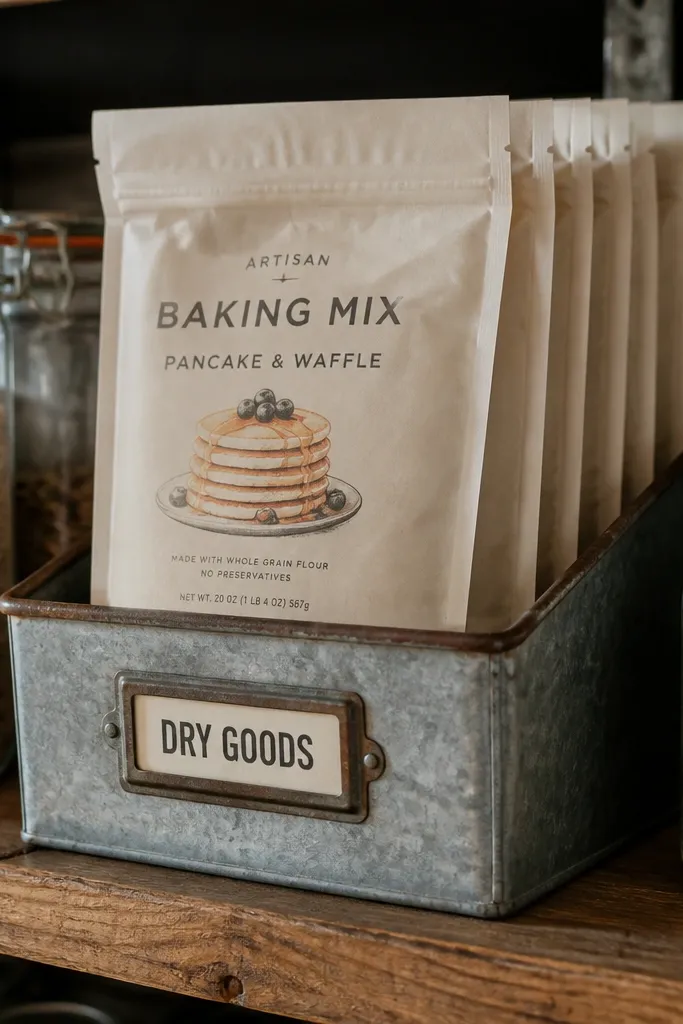
Boxed mixes and pouch mixes are bulky and they ruin the look when they’re left in crumpled piles. A labeled dry goods bin keeps them upright, aligned, and easy to scan. The look is photogenic because the bin creates a single shape block on the shelf. This is beginner-friendly pantry organization ideas that’s also practical: you can pull one mix without tearing the rest.
Editor's noteUse binder clips on the top edge of pouches that have soft openings so labels stay flat.
Pick a bin with enough height to keep pouches upright and enough width to prevent them from leaning. Sort mixes by type and keep only the ones you actually use, then remove expired or duplicates. Stand pouches vertically, with the label facing out, then add a label on the bin front. Place the bin at eye level and add a smaller overflow bin one shelf down if you buy multipacks.
Skip thisDon’t overfill the bin — stuffed pouches bow and the shelf looks messy again.
19. Crisp label set for canned tomatoes and sauce staples
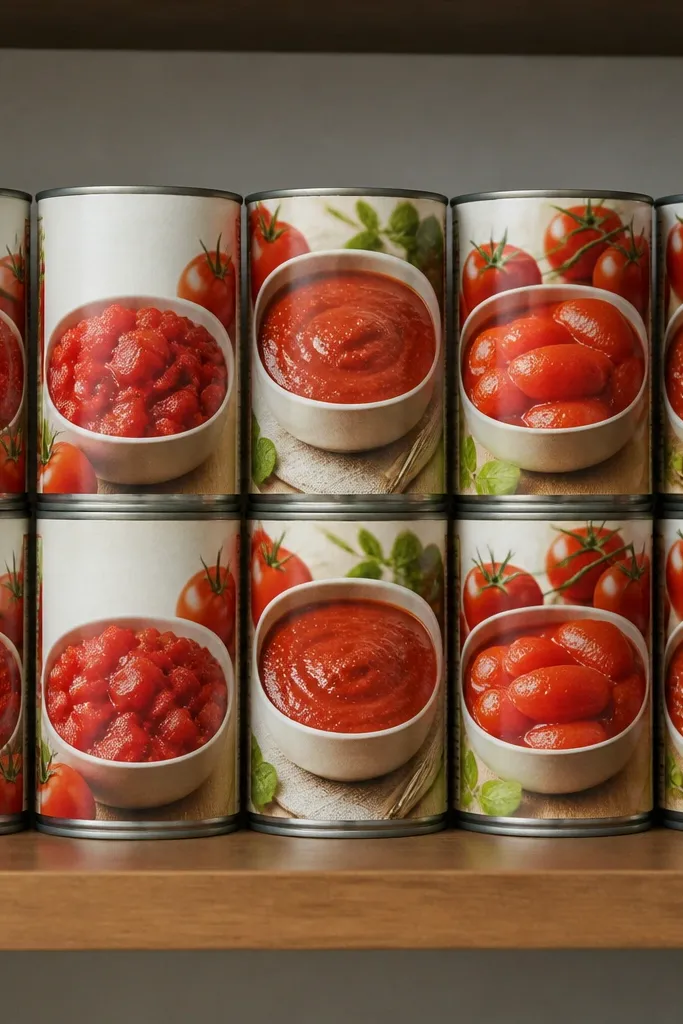
Canned tomatoes and sauces are the pantry backbone, but they look chaotic if you don’t control the front row. A crisp label set creates a consistent look that makes your pantry feel calmer instantly. Use a simple labeling system that matches the can front — the label is the visual anchor. Beginner-friendly pantry organization ideas here are about repetition: same label size, same placement, same spacing so the shelf reads clean.
Wipe can fronts clean so labels stick, then choose label sizes that fit without covering important brand info if you like to keep that visible. Arrange cans in rows by type and place the newest behind the oldest. Apply labels to the front center of each can and keep the text short like “Crushed,” “Diced,” “Tomato Paste.” Place the rows on a shelf at eye height and keep one extra row for overflow.
Use waterproof label paper or laminate so labels don’t curl when cans get condensation in humid kitchens.
Avoid hand-lettering on each can differently — inconsistent handwriting makes the shelf look cluttered.
20. Clear bin for cleaning supplies with separate pantry shelf rules
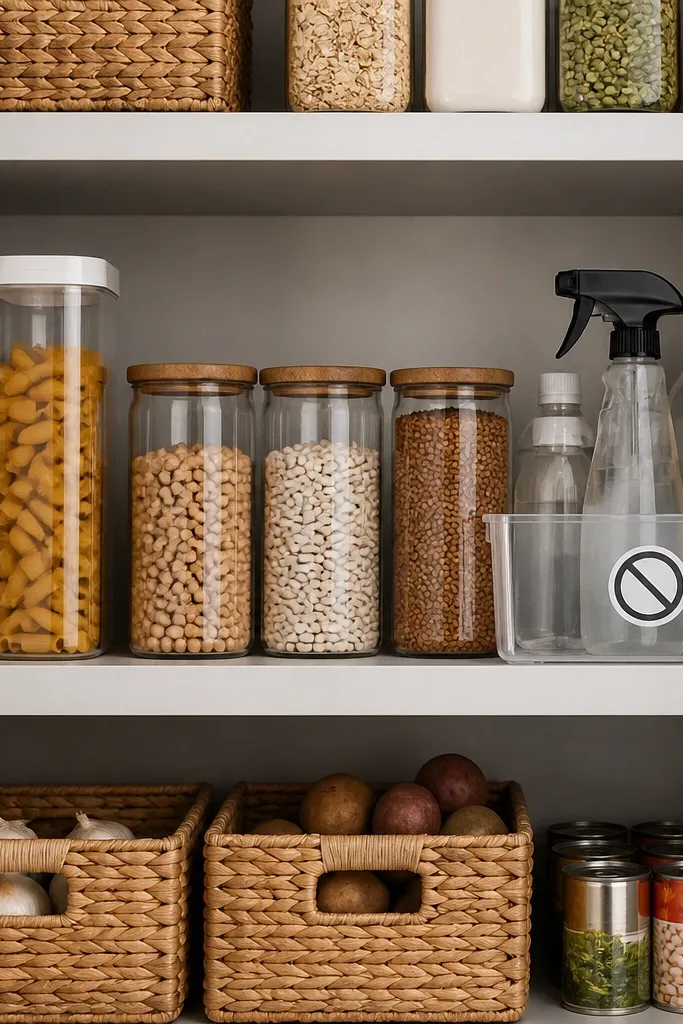
If your pantry ever holds cleaning backups, it breaks the “calm kitchen” look because those bottles and tools clash with food containers. A single labeled clear bin solves that by hiding the mismatched stuff while keeping it accessible. The look stays photogenic because the bin creates one consistent visual block. This is a beginner-friendly pantry organization idea because it separates categories without requiring you to reorganize your whole home.
Pick a clear bin with a lid or at least a tall front so bottles don’t create visual chaos. Place only non-food items in the bin, then label it clearly on the front. Put the bin on a shelf that’s less visible from the pantry opening, but still reachable for refills. If you have room, add a second small bin inside for gloves or scrub pads so the contents don’t spill out.
Keep cleaning items on a different shelf than food, even if they’re in bins, so you never mix the workflow.
Avoid leaving cleaning sprays loose on shelves — they create clutter even when everything else is organized.
21. Matching canisters for flour, sugar, and rice with moisture-proof liners
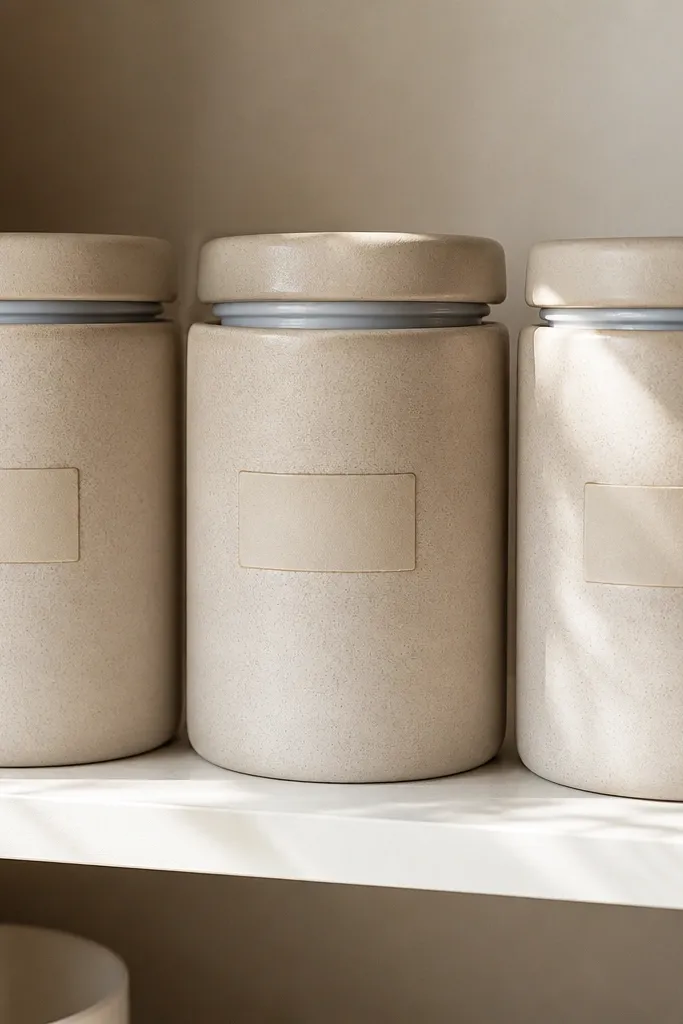
Dry staples look best when they look identical. Matching canisters for flour, sugar, and rice create a clean shelf rhythm, and the labels make it easy to restock without guessing. This project also helps with real kitchen problems like moisture clumping and stale smells mixing. Beginner-friendly pantry organization ideas like this are worth it because you get both aesthetics and better storage, using simple liners and tight lids.
Choose canisters with airtight seals and matching sizes, then dry all bulk items before transferring. Add a moisture-proof liner to the inside bottom if your kitchen runs humid, then fill each canister to a consistent level. Apply labels on the front, aligned at the same height for every jar. Arrange them in a row by how quickly you use them, with the fastest-moving items closest to the front.
Wipe the outside of canisters before labeling so labels don’t stick to residue and peel later.
Avoid loose powders in open bins — they make a dusty look that ruins the clean shelf.
22. Under-cabinet pull basket for foil, wraps, and snack overflow
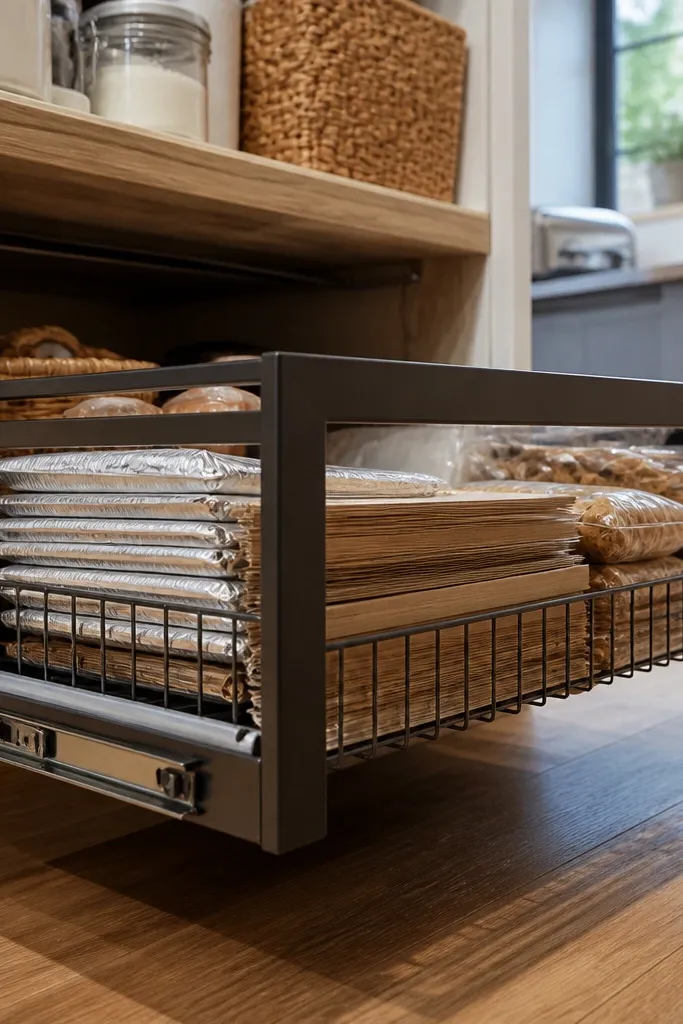
When your pantry has awkward dead space under shelves, a pull-out basket is the prettiest fix that also saves your back. It hides overflow and keeps “in-between” items like snack backups and foil packs off the main shelves. The look is better because the basket front can be labeled and aligned like the rest of your system. This is beginner-friendly pantry organization ideas because the build is simple and the effect is immediate.
Select a pull-out basket with a handle and measure to confirm it clears shelf edges when extended. Mount it under the shelf so the basket slides out without scraping, then add one or two small bins inside for grouping. Label the front of the basket with a category like “Wraps + Snacks.” Fill it with overflow items only, leaving main shelves for daily-use containers.
Use a soft felt pad at the mounting point to prevent metal-on-metal noise and scratches.
Skip storing heavy cans in pull-out baskets unless the hardware is rated for that weight.
23. Snack portioning station with small jars and a refill schedule card
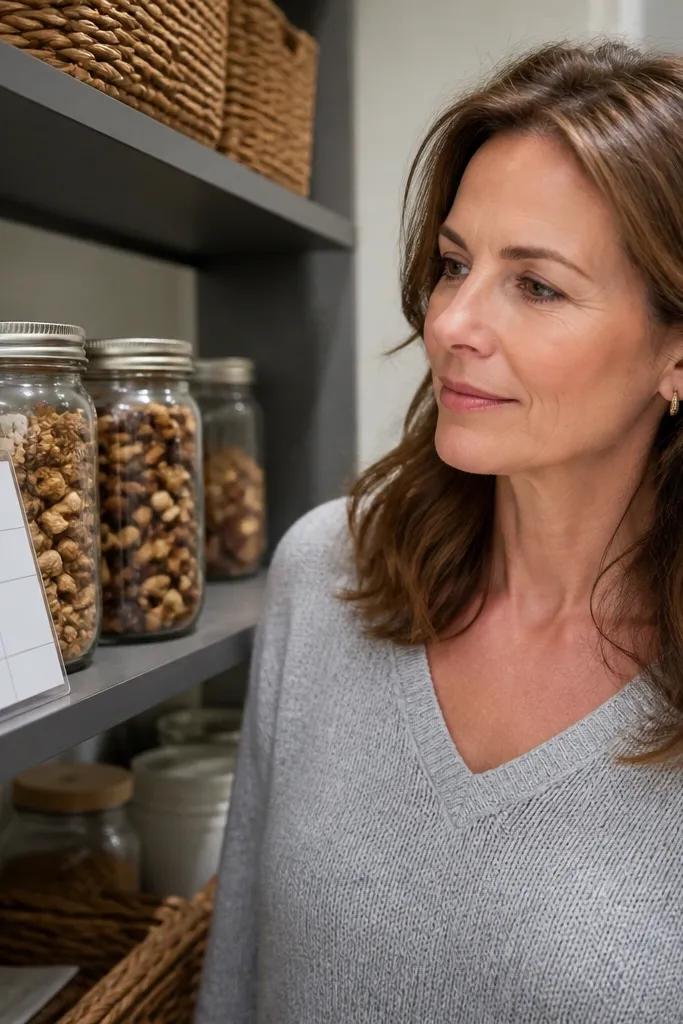
Portioned snacks look calm because they remove the “bag clutter” and keep portions consistent. Small jars for nuts, granola, and trail mix create a tidy, photo-friendly shelf that doesn’t rely on fancy packaging. Add a refill schedule card so you don’t drift into chaos by refilling randomly. Beginner-friendly pantry organization ideas like this work because portioning is a behavior change, not just storage.
Editor's noteUse a funnel when filling jars to avoid spills that make labels look dirty.
Pick small jars with matching lids and a size that matches what you eat in a week or two. Pour snacks into jars and label each jar with “Portion” plus the snack name. Create a refill schedule card with days you shop and tape it inside the pantry door or on the inside wall. Keep one larger “refill” container in the back so you can refill jars without moving everything.
Skip thisDon’t mix sticky and dry snacks in the same jar line — it makes the shelf look inconsistent and messy.
24. Tiered Lazy-Susan for Breakfast Toppings (sugar, sprinkles, nuts)
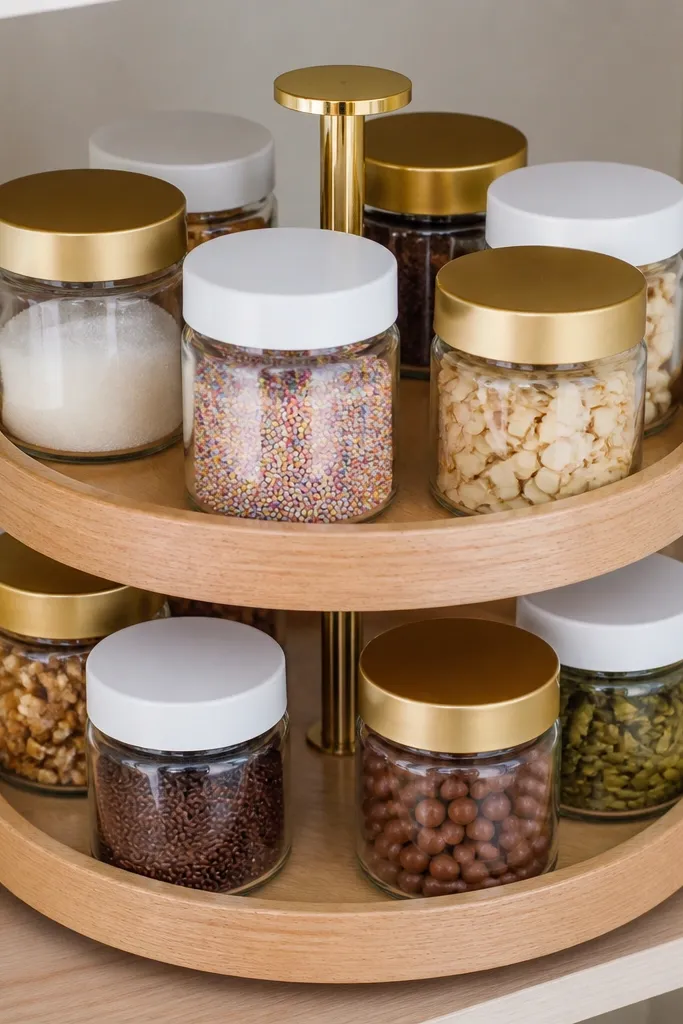
This fixes the exact pantry mess that comes from breakfast add-ons — the stuff that spreads across shelves and turns into a scavenger hunt. A two-tier lazy-susan keeps everything visible while you cook, so you stop digging and knocking loose jars. The look is clean and photogenic because every jar faces forward with consistent label placement and matching lids. It’s beginner-friendly because you’re building a layout, not a complex cabinet insert. Plan on about 60-90 minutes total, plus drying time if you paint anything.
Pick a base lazy-susan that fits your shelf depth. For most pantries, aim for a 12-inch to 14-inch diameter base, then add a second tier insert that’s 8-inch to 10-inch. Use a scrap of 1/2-inch plywood or a thin MDF round for the top tier, and sand the edges smooth so jars don’t wobble. Drill small starter holes for a few shallow stop blocks made from 3/4-inch wood strips so the jars don’t slide when you spin. Mount the stop blocks with wood glue and screws, then finish with a satin clear coat or paint so labels wipe clean.
Use the same jar shape across both tiers and keep jar heights within 1/2 inch of each other — it makes the whole thing look intentional in photos and in real life.
Avoid mixing tall and short jars on the same tier; it makes the top-heavy items tip when you rotate.
25. Clear Door-Frame Pantry Organizer with Flip-Down Label Tabs
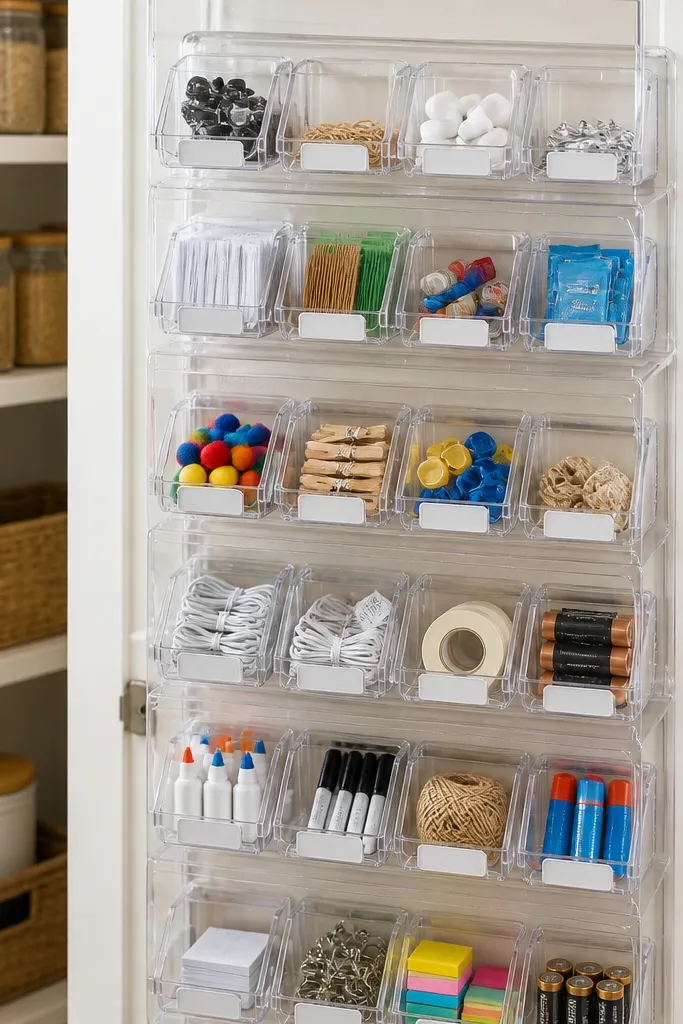
If your pantry door is the dead space where odds and ends vanish, this turns it into a calm, countable system. The clear door-frame panel lets you see items at a glance without opening the pantry, and the flip-down label tabs keep labels readable while still looking tidy. It’s worth doing because it reduces the “where did that go?” loop that makes pantries look chaotic even when the shelves are organized. This is beginner-friendly woodworking because you’re mostly cutting straight pieces and mounting a clear panel with simple hardware. Budget 2-3 hours, and it fits small kitchens where shelf space is tight.
Editor's noteUse painter’s tape to mask the acrylic before drilling — it prevents cracking and gives you cleaner screw lines.
Measure the inside face of the pantry door frame where you want the organizer. Cut a shallow rectangle frame from 1x2 pine or poplar so it sits inside the door opening without rubbing, leaving about 1/8-inch clearance on all sides. Attach a clear acrylic sheet (3/16-inch thick works well) to the back of the frame with small countersunk screws and a thin strip of weather-seal tape to prevent rattling. Make flip tabs from 1/8-inch thick scrap plastic or thin wood strips, sized about 1.5 inches wide by 3 inches tall, and hinge them with small brass hinges. Glue or screw label cards behind the tabs so they flip down to show the label and flip up to hide it.
Skip thisAvoid mounting the clear panel too tight to the door frame; even slight swelling from humidity can cause friction and stress the screws.



