
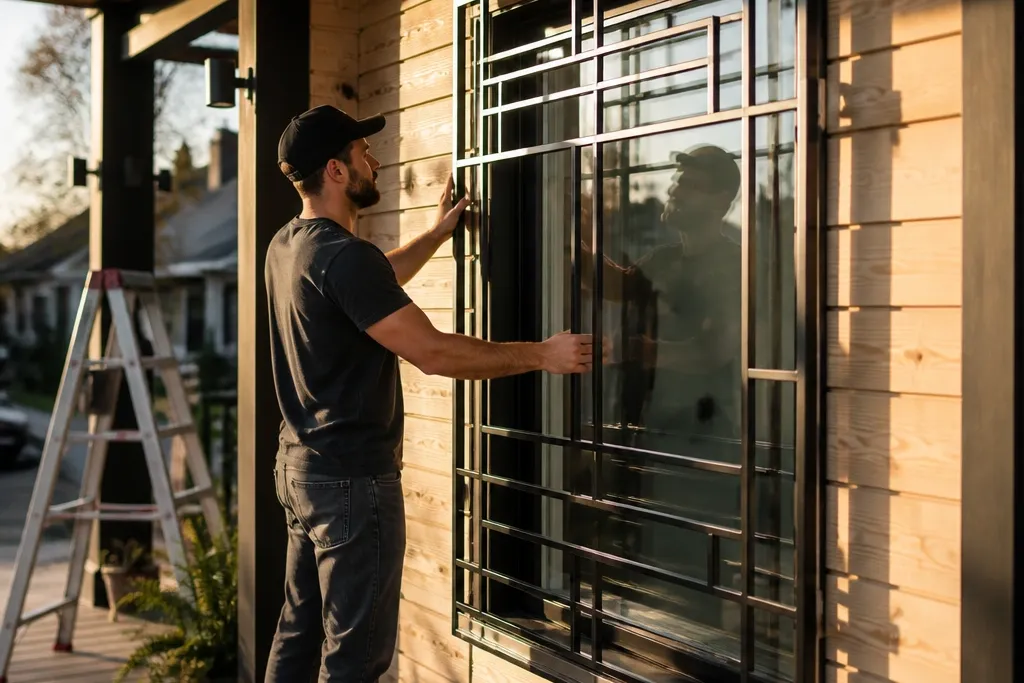
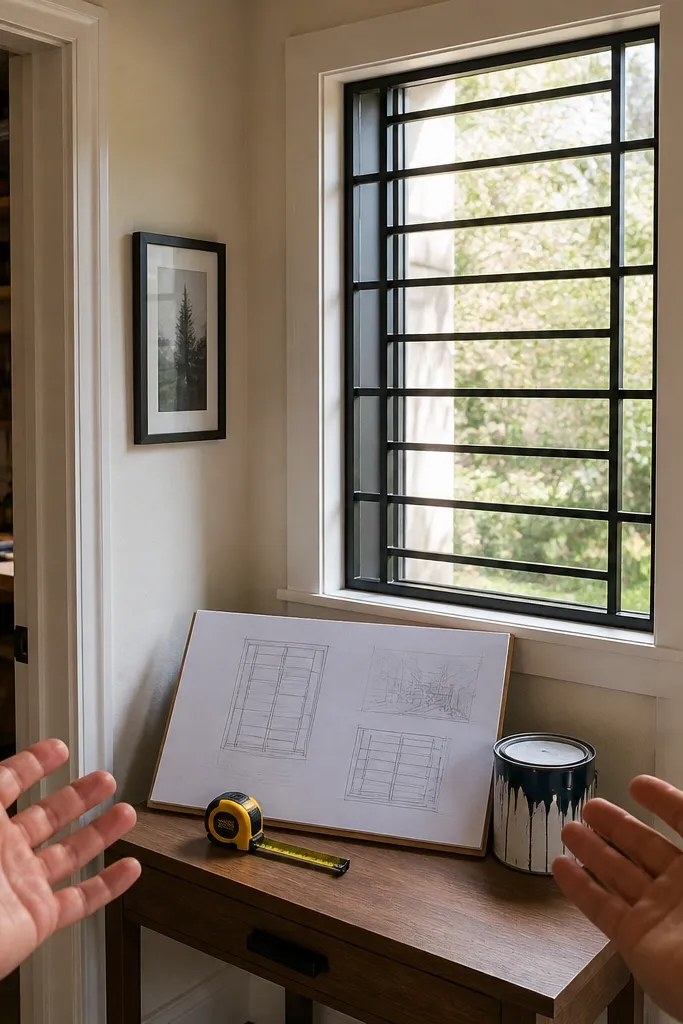
1. Matte Black Square Grid with Thin Frame
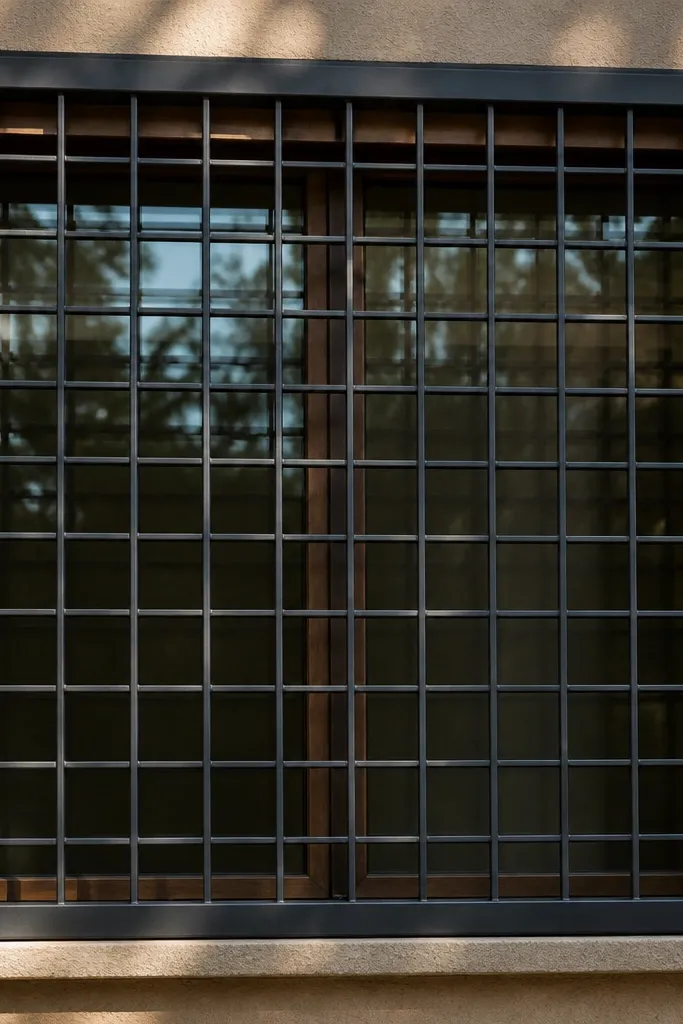
This design looks modern because it reads like a clean architectural grid from a distance. The thin outer frame keeps the pattern from feeling heavy, and the square openings feel balanced instead of busy. It also hides minor DIY imperfections because the repetition forgives small angle shifts. Build it in matte black for the “designed” look that doesn’t shine in direct sun. It suits street-facing windows, front rooms, and entry doors with sidelights.
Step 1: Measure the window opening and cut an outer rectangle frame from flat bar, leaving 1/8 in clearance on each side when you test-fit. Step 2: Decide on your grid size (a good starting point is 4 in to 5 in square openings), then mark equal vertical and horizontal bar positions across the frame. Step 3: Attach the bars using bolt-on plates and structural screws, or weld if you have the equipment, then sand all edges and prime before top-coating matte black.
Editor's notePaint cut ends first. That’s where rust starts, especially around drilled holes.
Skip thisDon’t mix bar thicknesses — it makes the grid look accidental.
2. Vertical Slats with Hidden Spacer Lines
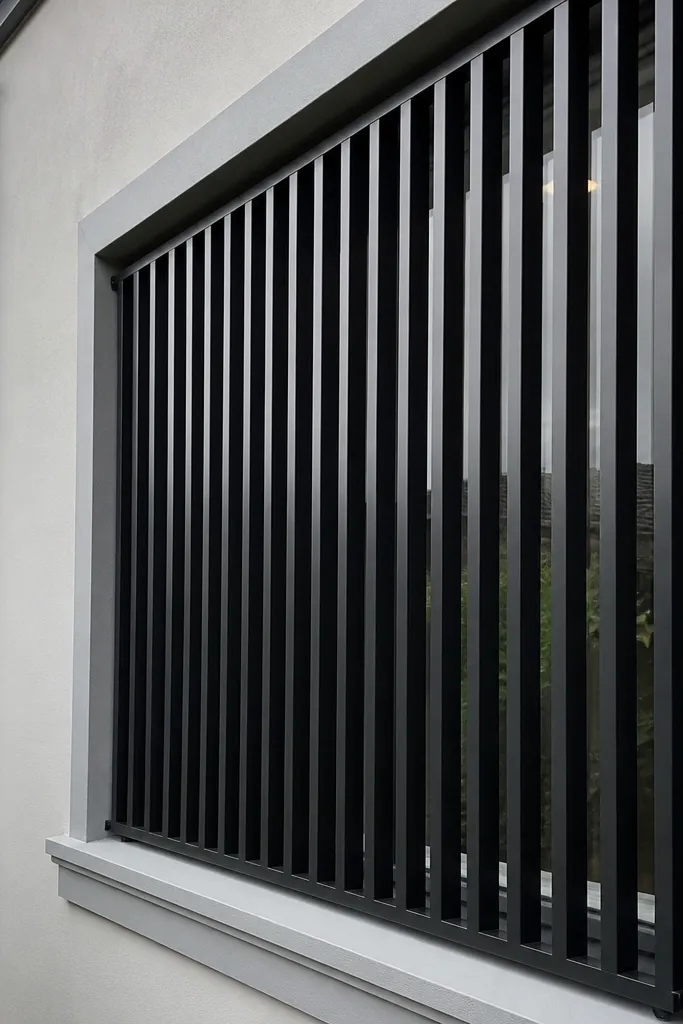
Vertical slats give you a tall, modern silhouette without looking like a fence. The key aesthetic detail is equal spacing and straightness — the slats should align like a ruler. This is great for privacy because the openings are narrow, but it still lets daylight through. Use satin black so it looks crisp rather than flat. It works especially well for bedrooms and bathrooms where you want privacy without blocking light.
Step 1: Build a perimeter frame from square bar, then cut straight vertical bars with the same length as the inside frame height. Step 2: Mark a consistent spacing using a spacer block (example: 1/2 in spacer between slats) so every bar lands the same. Step 3: Attach slats with two bolts per slat at the top and bottom rails, then prime and satin-top-coat after a full dry fit.
Use a scrap spacer block and keep it on the workbench, not in your hand — it keeps spacing consistent.
Avoid eyeballing gaps. Uneven slats look messy fast.
3. Diagonal Diamond Lattice with Clean Corners
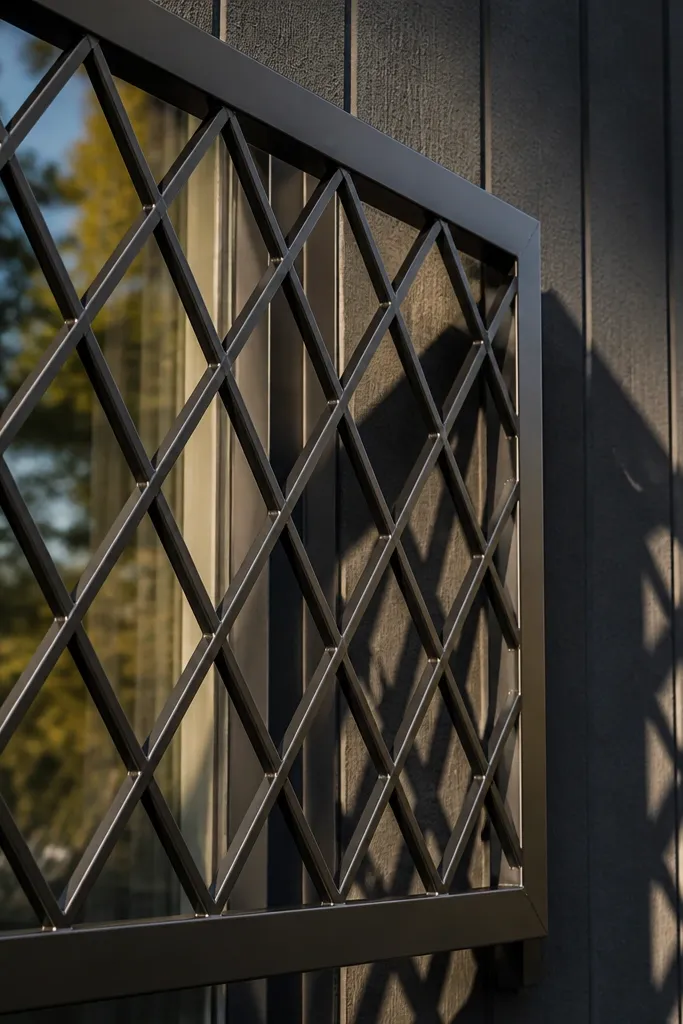
A diamond lattice feels modern because it creates movement while staying structured. Clean corners matter: the diagonals should meet the frame at crisp points instead of drifting inward. This design looks sharper when you keep the diamonds uniform, so the whole panel feels engineered. Pick matte black or dark bronze for the best contrast against light walls. It’s a strong choice for living rooms, stair landings, and front windows that need a focal point.
Step 1: Cut an outer frame and set it perfectly square on a flat surface (use a carpenter square). Step 2: For the diamonds, cut diagonal bars so each intersection lands at the center of the opening, then mock the pattern dry before attaching. Step 3: Attach with corner plates or weld, then sand intersection points, prime, and finish with matte black outdoor coating.
Dry-fit the whole lattice on cardboard first. It lets you fix angle drift before any permanent fastening.
Don’t make random diamond sizes. One odd opening stands out from the street.
4. Arch-Top Modern Frame with Horizontal Bars
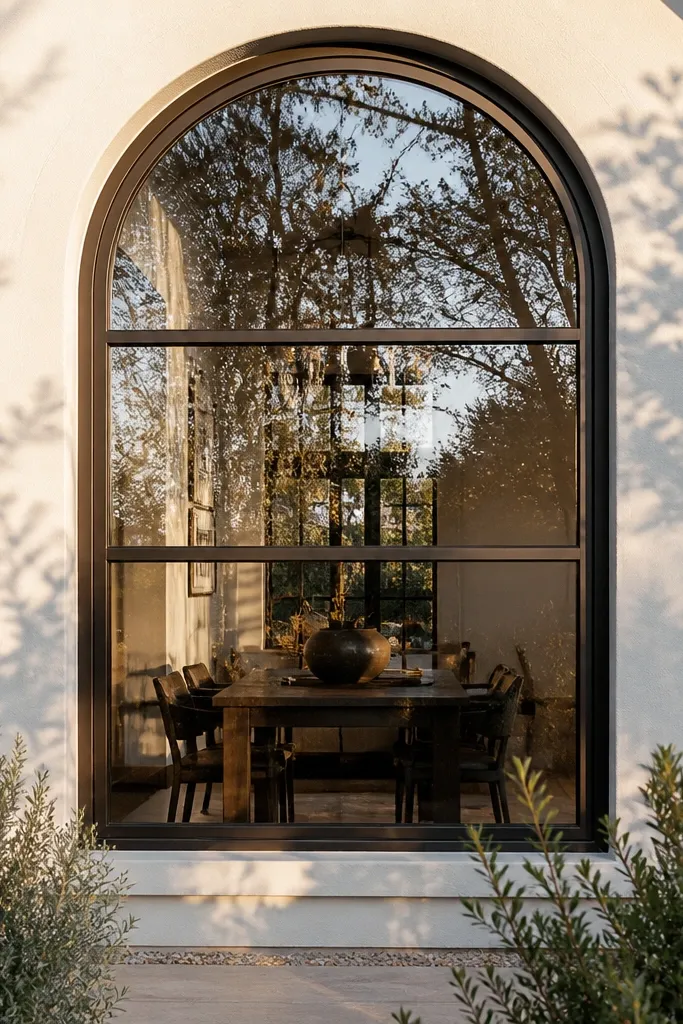
This design gives you a modern twist on a classic window silhouette. The arched top makes the window look taller and more refined, while the horizontal bars keep it simple and DIY-friendly. It’s photogenic because the arch creates a strong line against the wall, and the horizontals read as calm structure. Choose satin black for an upscale look. It suits entryways and windows near the front door where the shape matters most.
Step 1: Create an arched top frame by cutting two identical curved side pieces from flat bar (template it on cardboard using the window width and desired arch height). Step 2: Add a straight bottom rail and then install horizontal bars with equal spacing across the inside opening. Step 3: Bolt the frame together first, test-fit on the window, then prime and coat after all holes are drilled and edges are sanded.
Make the arch template and trace it onto both sides before you cut metal. Symmetry is the whole look.
Don’t skip the test-fit. Arched frames bind if the opening isn’t perfectly measured.
5. Half-Round Fan Motif in the Center
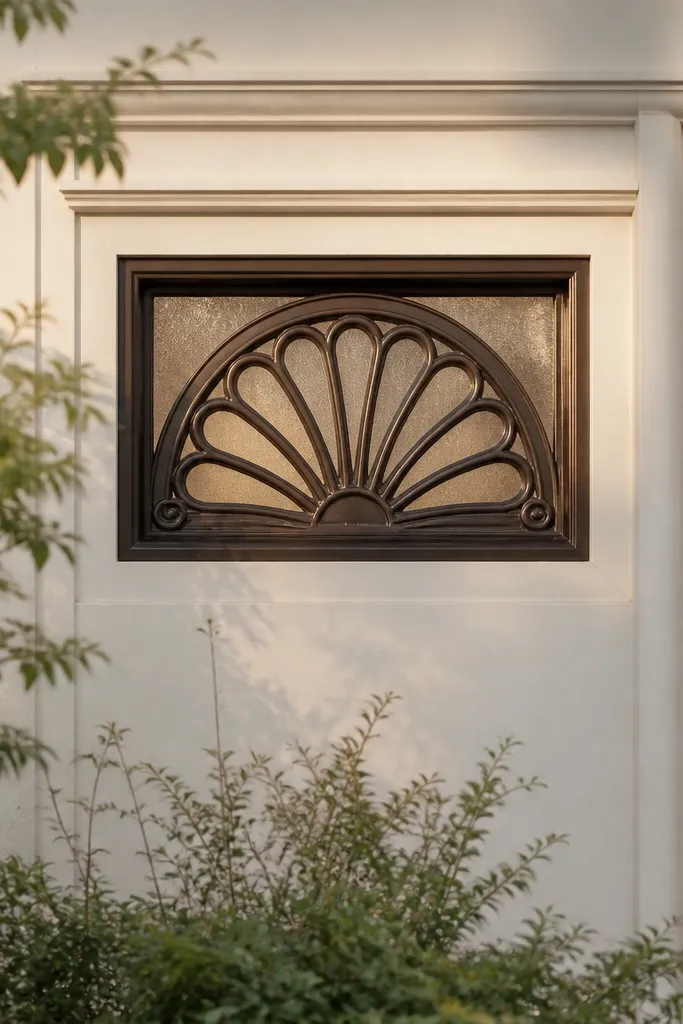
A centered fan motif looks modern because it’s sculptural but still controlled. The half-round arcs give a soft curve, and the surrounding frame keeps everything crisp. This works well if your windows are large and you want one clear focal point instead of full-panel patterning. Finish in dark bronze if you want a warmer, design-forward look. It’s a great fit for bay windows, dining rooms, and any front-facing window that needs a “feature.”
Step 1: Build a simple outer frame, then mark the center point of the panel. Step 2: Cut multiple identical arc pieces (same radius) and arrange them like a fan, evenly spaced, then attach them to a center vertical support bar. Step 3: Add a few vertical or horizontal bars around the motif to frame it, then prime and coat, making sure arcs are fully secured at their ends.
Use one radius template for every arc. If one arc is off, the fan looks lopsided instantly.
Avoid too many arc pieces. Five to seven arcs look intentional; nine can look cluttered.
6. Two-Tone Grid with Dark Outer Frame and Light Inner Bars
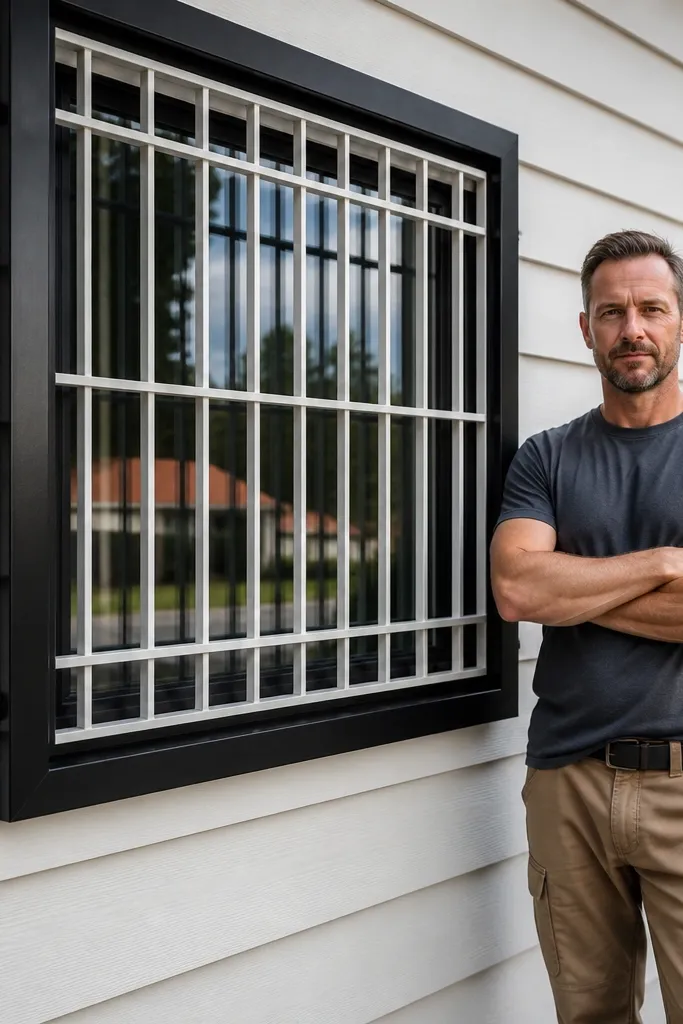
Two-tone grills look modern because they create depth. The dark outer frame pulls the eye to the window edges, while lighter inner bars keep the pattern airy. This design is especially photogenic on light-colored walls. Use a matte black frame with a powdery off-white or light gray inner bars for a clean contrast. It works best when the wall color is simple — think white, cream, or pale gray.
Step 1: Assemble the full grill panel and prime everything with a rust-resistant primer. Step 2: Mask the inner bars with painter’s tape and a thin plastic strip, then spray the outer frame matte black and let cure fully. Step 3: Remove masking, then spray the inner bars in a light metal top coat, and seal cut ends with touch-up paint.
Editor's noteUse painter’s tape only after primer cures. Fresh primer can lift and smear under masking.
Skip thisDon’t skip scuffing between coats. Smooth metal will cause flaking on the second color.
7. Minimalist X-Bars with Center Cross
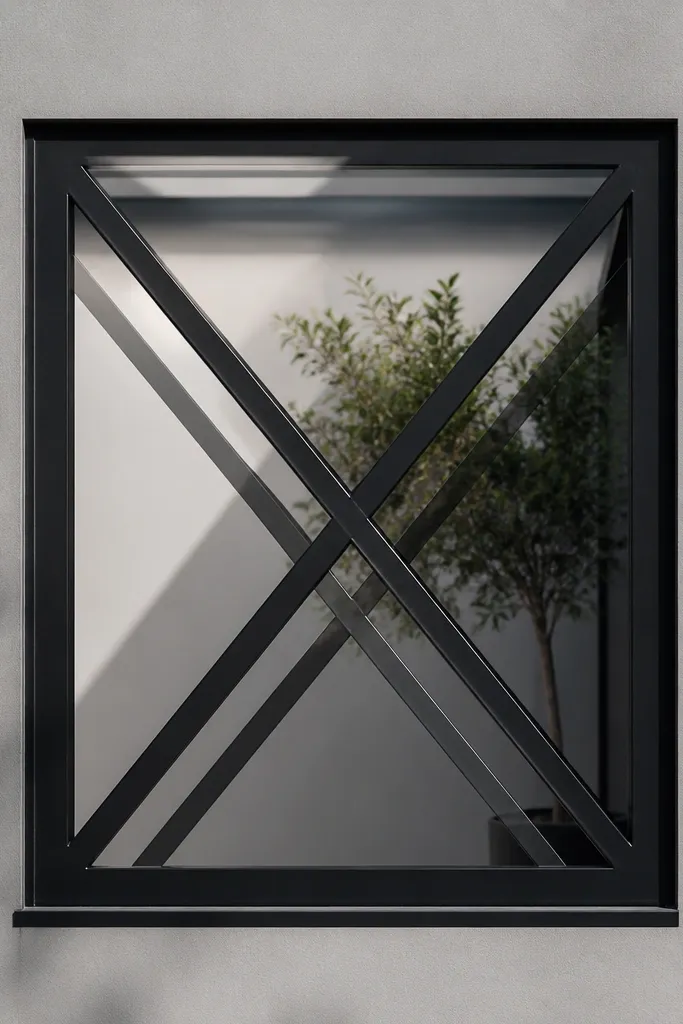
This is the modern “clean lines” look: fewer bars, stronger geometry. The big X shapes read instantly, and the small center cross adds a subtle focal point without turning into a busy lattice. It’s beginner-friendly because you can plan it with one repeated X scale. Matte black makes the X feel graphic and crisp. It’s great for narrow windows where a full grid looks too dense.
Step 1: Build a rectangular frame, then mark two diagonal X placements centered within the opening. Step 2: Cut diagonal bars so they meet at the center at consistent angles, and bolt or weld the center intersection with a small plate. Step 3: Add one or two vertical or horizontal bars to keep the panel rigid, then prime and matte-coat.
Editor's noteUse diagonal bars cut from the same length stock so the X thickness stays consistent.
Skip thisAvoid overlapping diagonals without a center plate. The intersection looks messy and weak.
8. Staggered Rectangle Pattern (No Squares)
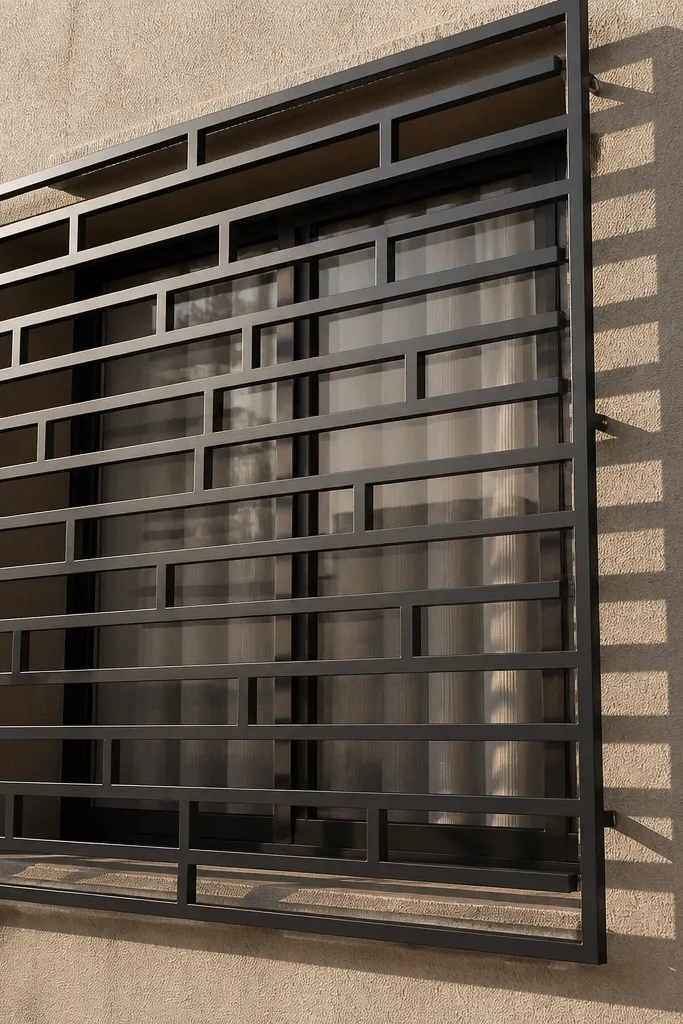
Staggered rectangles look modern because they create rhythm without the “fence grid” vibe. Instead of squares, you use repeating horizontal rectangles that shift by one step each row. This gives a stylish, slightly dynamic look that still feels orderly. It’s also a good option if you want privacy but don’t want narrow slats. Choose satin black for a sleek finish.
Step 1: Build the outer frame, then decide a rectangle size like 3 in wide by 5 in tall openings. Step 2: Mark row one openings, then offset row two by half a rectangle width so the pattern staggers. Step 3: Attach vertical and horizontal bars according to the marked openings, then prime and spray satin black after sanding edges smooth.
Editor's noteDraw the pattern on paper with actual dimensions before cutting. Stagger math is easier on a grid.
Skip thisDon’t change the offset halfway through. The pattern will look wrong immediately.
9. Open-Loop Corner Frames with Straight Center Bars
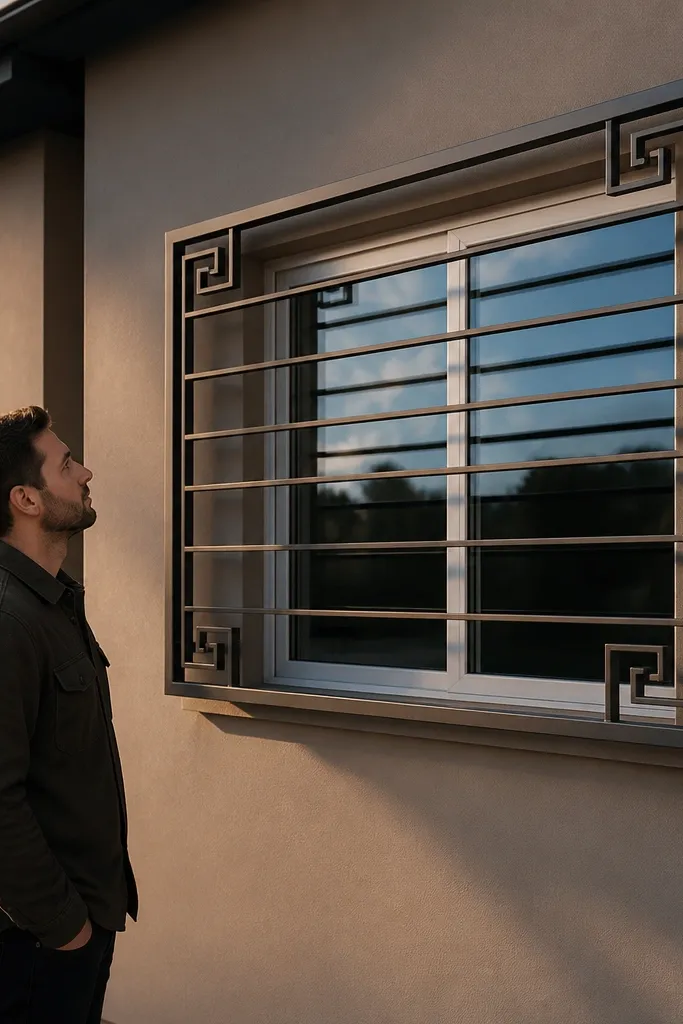
This design looks architectural because the corners do the work. Open-loop corner frames add a signature shape while the center stays simple with straight bars. You get a modern look without needing a full lattice across the whole panel, which keeps build time down. Finish in dark bronze for a warm, refined tone that still reads modern. It’s ideal for entry-level DIY because the pattern is limited and repeatable.
Step 1: Build the perimeter frame and add two long straight inner bars (vertical or horizontal) to anchor the center. Step 2: Cut curved loop corner pieces and bolt them at the corners using small corner plates so you can adjust alignment. Step 3: Sand, prime, and coat in dark bronze, then touch up drilled holes for rust protection.
Editor's noteKeep loop radii consistent. One corner with a tighter curve breaks the design.
Skip thisAvoid loops that touch the inner bars. Leave a small gap so the shape reads cleanly.
10. Slim Vertical Bars with a Horizontal Band at Eye Level
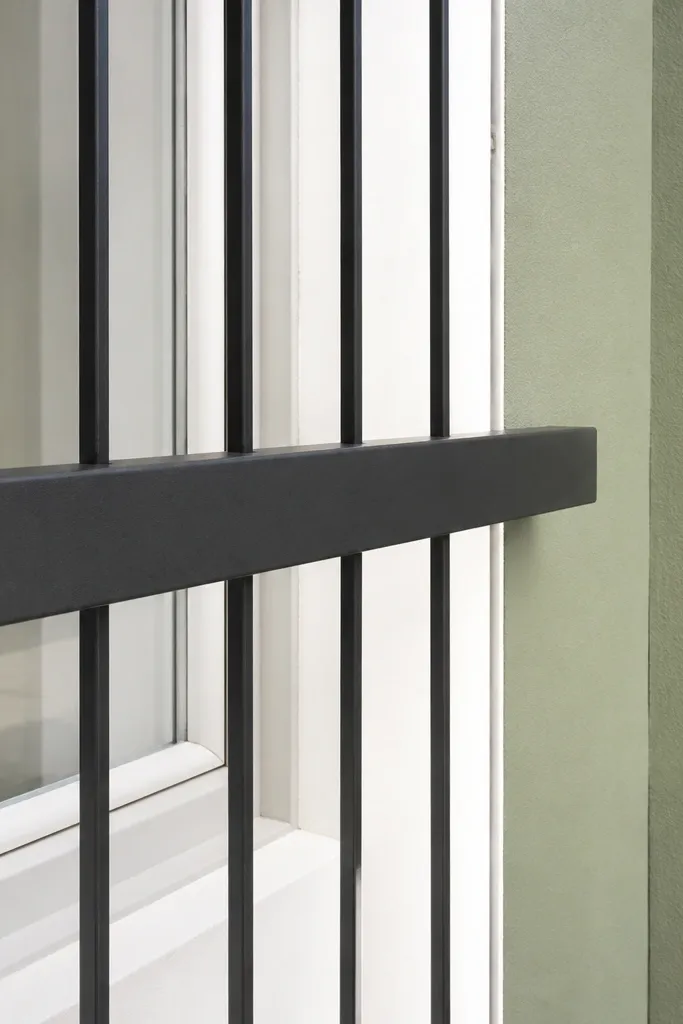
The horizontal band makes this grill feel designed instead of generic. Slim vertical bars give a modern, lightweight look, and the single thicker band adds structure and visual balance. It also guides the eye, which looks great in photos because the band catches light and creates a strong line. Use matte black so the band and bars look uniform. It suits windows where you want privacy but still want a clean, open feel.
Step 1: Cut and install a perimeter frame, then install slim vertical bars using equal spacing (a thin spacer block helps). Step 2: Add one thicker horizontal bar across the middle at a consistent height based on your desired “eye level” line. Step 3: Bolt at intersections, then prime and matte-coat after sanding all edges.
Choose the band thickness first. Around 1 in wide flat bar looks right without overpowering the slats.
Don’t put the band too high or too low. Center it visually on the window.
11. Checkerboard Squares with Oversized Outer Border
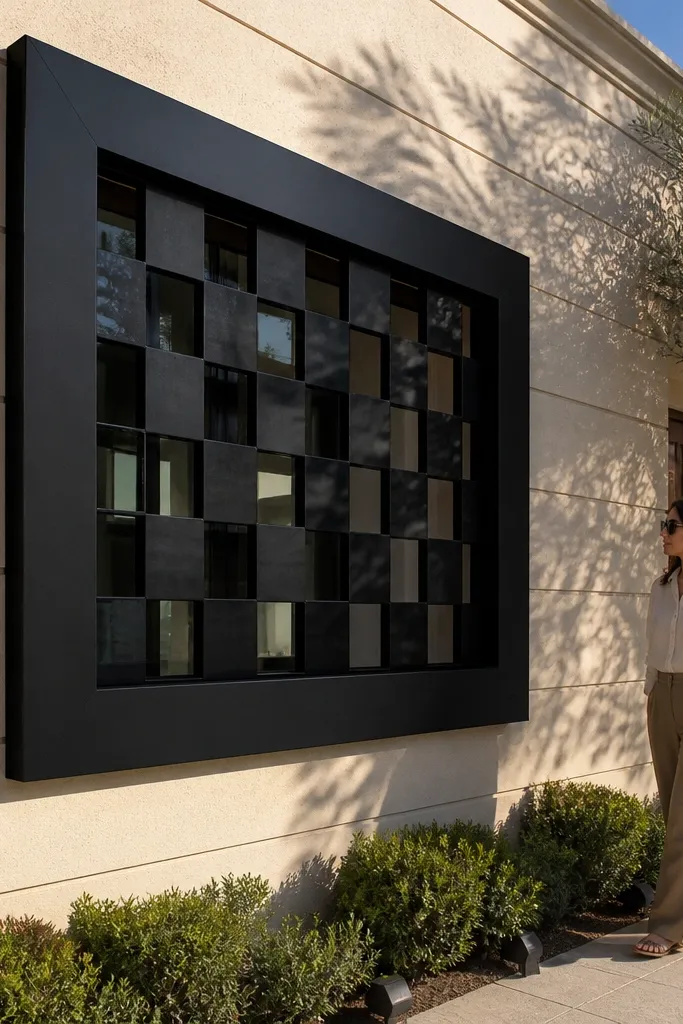
Checkerboard grills feel modern when the border is oversized and the squares are crisp. You get a graphic look that reads well from the street because the outer border frames the pattern like a poster. For DIY, the design is manageable because you can alternate filled and open cells with marked rows. Matte black keeps it sharp and consistent. This works great on bigger windows where the pattern has room to breathe.
Step 1: Build a thick outer border frame from flat bar, then mark an internal grid of equal cells (example: 4 in x 4 in). Step 2: Install bars to create the grid, leaving alternate cells open to form the checkerboard effect. Step 3: Prime everything, then coat matte black, and add extra fasteners at the border corners for rigidity.
Editor's noteIf your window is wide, keep cell size larger (4-5 in) so it doesn’t look like a fence.
Skip thisAvoid tiny squares. They look dated and can hide uneven spacing.
12. Modern C-Channel Frame with Center Diamond
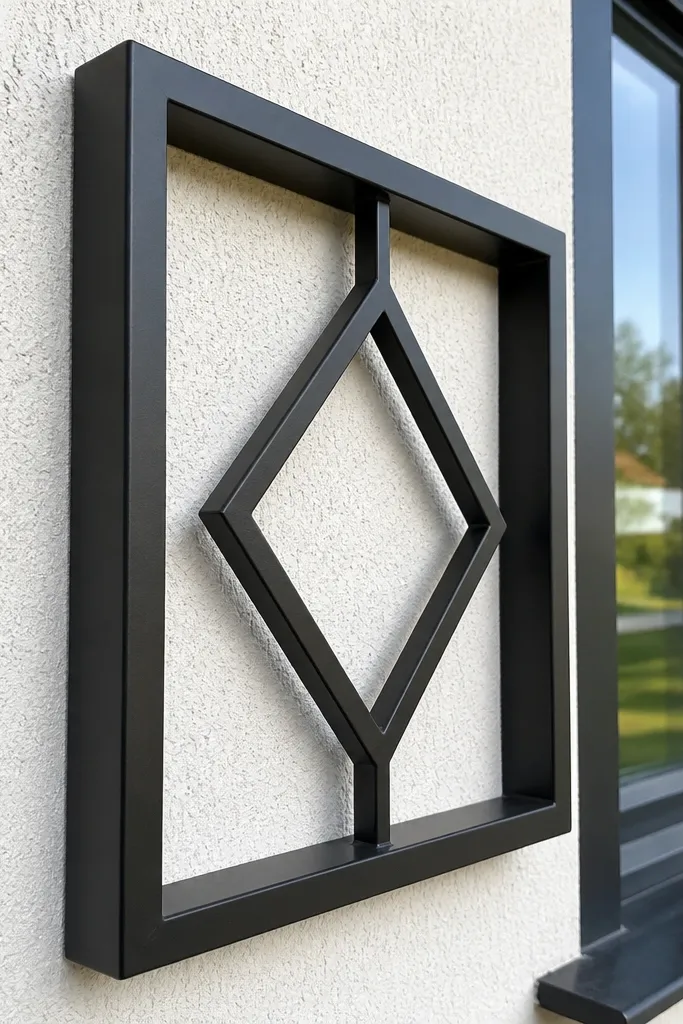
Using a C-channel style outer frame gives the grill a more industrial, modern edge. The center diamond keeps it decorative without turning into a full lattice. This design looks clean because the outer frame creates depth and the diamond gives a single focal point. If your home has metal accents, this matches them well. It’s a good pick for entry windows where you want the grill to look intentional, not decorative-only.
Step 1: Cut C-channel or square tubing for the outer frame and assemble it square, then add a centered vertical support bar inside. Step 2: Cut two diagonal bars to form the diamond and anchor them to the center support and frame corners using plates. Step 3: Prime the metal, then top coat, and install with mounting brackets so the grill sits flat against the wall.
Editor's noteUse mounting brackets, not long screws alone. Brackets keep the panel from twisting over time.
Skip thisAvoid thin outer framing. It makes the diamond look like it’s floating and can warp.
13. Geometric Triangles with a Vertical Spine
Triangles read modern when they’re organized around one strong vertical spine. This design gives a gallery-like pattern without needing complex curves. The vertical spine keeps alignment easy and makes the panel look symmetrical. Matte black is the best finish because it makes edges look crisp. It suits tall windows and stairwells where a vertical pattern makes the opening look higher.
Step 1: Build the outer frame and install one straight vertical spine in the center. Step 2: Cut triangle bars or angled segments and arrange them on both sides, using a cardboard template for each triangle angle. Step 3: Bolt or weld each triangle to the spine and frame, then sand, prime, and matte-coat with outdoor paint.
Make one triangle template and reuse it. Angle consistency is the whole look.
Avoid mixing triangle sizes. Keep every triangle identical across the panel.
14. Wave-Edge Side Frames with Straight Crossbars
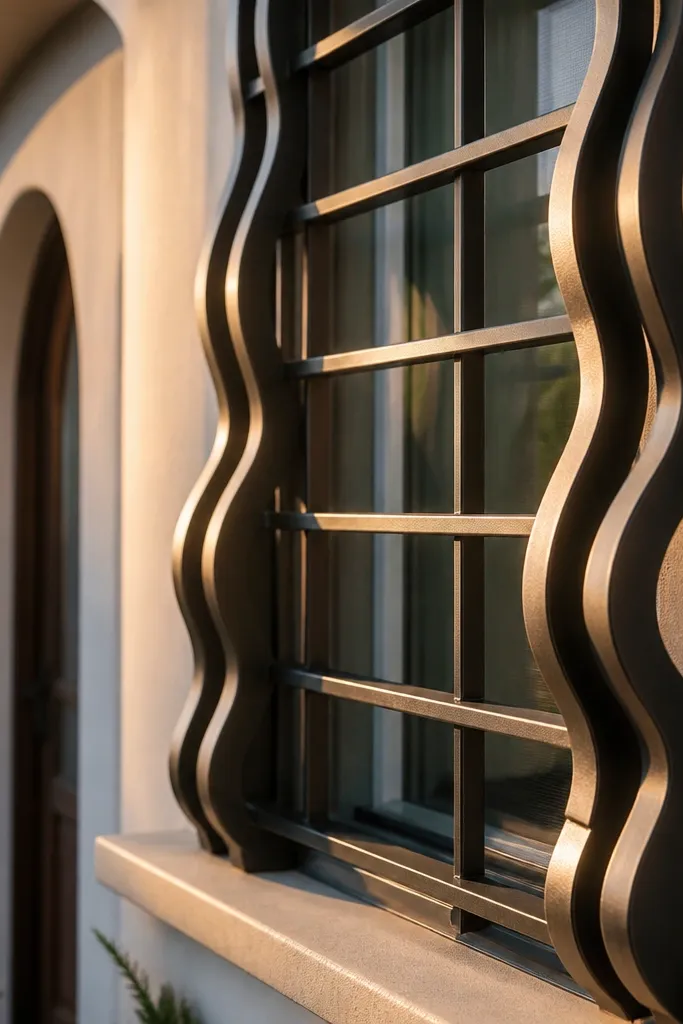
Wavy side frames make the grill feel custom and modern while the straight crossbars keep it buildable. The wave edge is the visual signature; the horizontals add stability and simplify spacing. This looks great on windows with rounded architectural details nearby. Use dark bronze or charcoal black depending on your exterior palette. It’s a strong choice for front rooms and entry windows where you want a softer modern look.
Step 1: Build a frame with straight top and bottom rails, then create wavy side pieces using a repeated curve template and cut-and-fit flat bar segments. Step 2: Install horizontal crossbars at equal spacing across the opening and bolt them into the wavy side pieces using corner plates. Step 3: Prime fully, then coat, and seal any joints where the side pieces meet.
Editor's noteIf you’re not welding, bolt the side pieces to the rails first, then attach crossbars. It keeps alignment during assembly.
Skip thisDon’t make the waves too tight. Large gentle waves look modern; tiny ripples look decorative-trim.
15. Minimal Half-Grid with One Thick Vertical Column

This is an asymmetrical modern look that still feels clean. One thick vertical column anchors the design, while the half-grid pattern fills the rest without making the panel crowded. It photographs well because there’s a clear focal line and negative space. Choose matte black for a crisp contrast. It suits kitchens, side windows, and any place where you want privacy but prefer a lighter look.
Step 1: Build a rectangular outer frame, then decide how much coverage you want (example: grid on the left half, open on the right half). Step 2: Add one thick vertical column at the dividing line, then install matching horizontal and vertical bars on the covered side only. Step 3: Prime everything, coat matte black, and use extra fasteners around the thick column to prevent wobble.
Editor's noteMark your “half” line with tape on the frame before cutting bars. It saves you from crooked symmetry.
Skip thisAvoid a lopsided half-grid. The covered area needs straight edges.
16. S-Shaped Center Scroll with Rectangular Frame
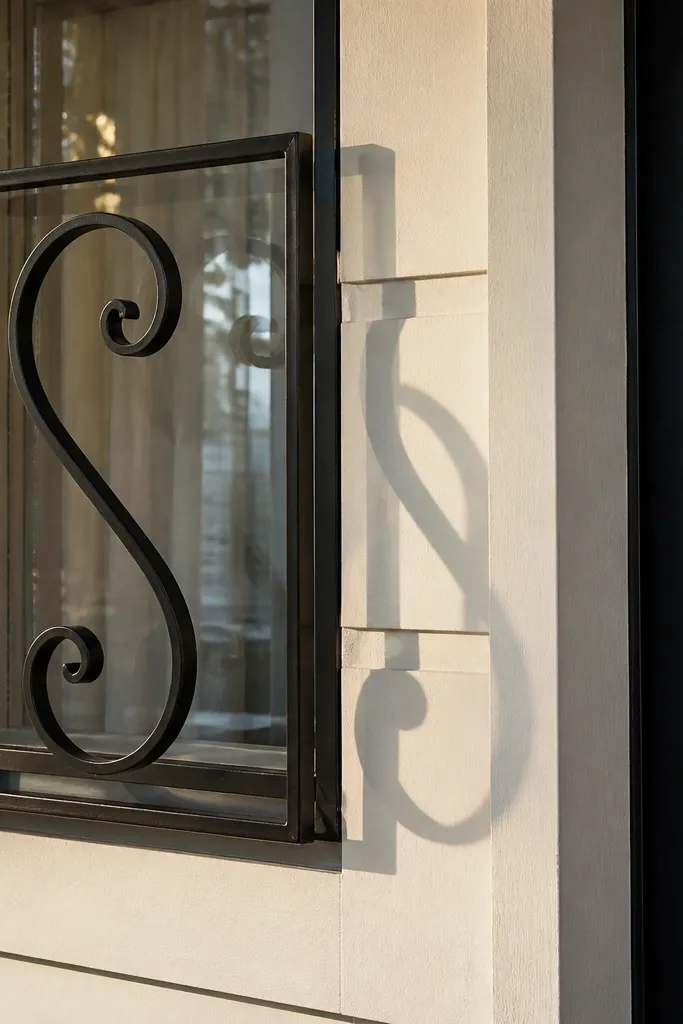
An S-shaped center scroll adds a modern twist because it’s placed in the middle, not spread across the whole panel. The surrounding rectangular frame keeps the overall look sharp and contemporary. This design is great for people who like ornament but want it to look controlled. Use matte black so the S-line reads clean. It suits windows where you want one decorative element that still feels minimal.
Step 1: Build an outer rectangular frame, then create a center S scroll using cut flat bar segments or bent metal pieces shaped with a template. Step 2: Bolt the scroll to a center vertical and a center horizontal support so it doesn’t flex. Step 3: Add two or three simple vertical bars on each side for balance, then prime and matte-coat.
Keep the scroll line thickness consistent. If the S has varying thickness, it looks handmade in a bad way.
Avoid oversizing the scroll. If it touches the frame edges, it looks cramped.
17. Square Frame Inside a Rectangular Frame (Double-Line Look)
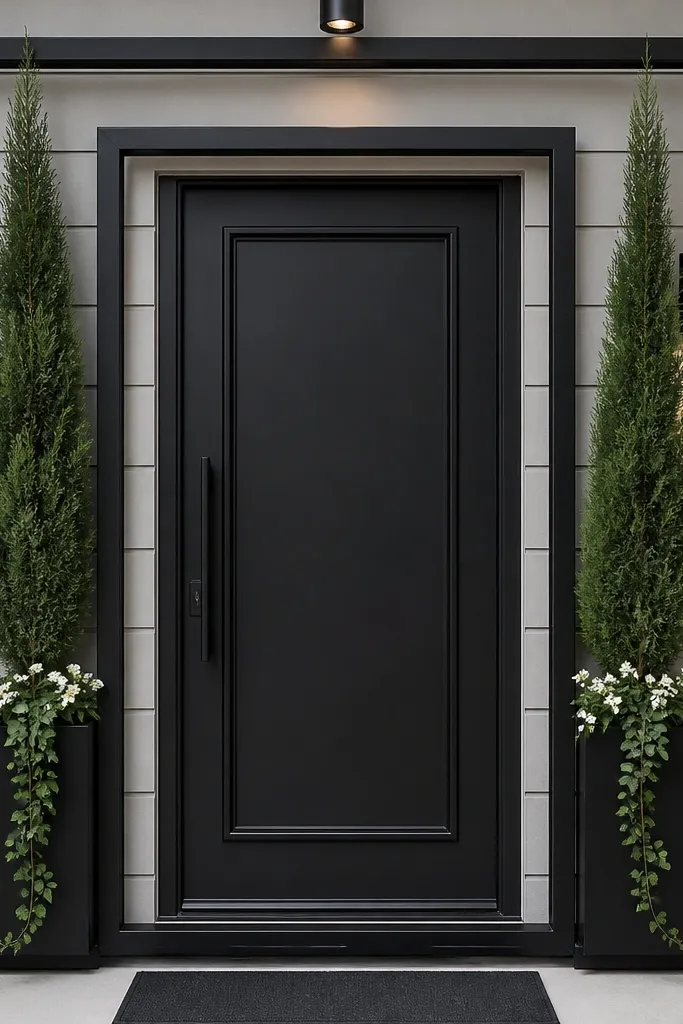
Double-line framing looks modern because it creates layered depth without complex patterns. The inner square makes the window feel designed, and the outer rectangle keeps it structured. This is one of the easiest ways to get a high-end look as a beginner since you’re mostly cutting straight bars. It also works with almost any window shape. Matte black is the cleanest choice for a modern exterior.
Step 1: Cut an outer rectangular frame and an inner square frame sized to leave a consistent border gap (like 2 in on all sides). Step 2: Attach inner frame corners to the outer frame using four short spacer bars or corner plates so the spacing stays even. Step 3: Prime and coat in matte black, then mount with brackets so the layered lines stay flat.
Editor's noteUse a single spacer length for all four sides. That’s how you keep the border gap uniform.
Skip thisDon’t skip corner plates if you’re bolt-on. Loose corners make the lines look wavy.
18. Diagonal Half-Moon Panels on Top and Bottom
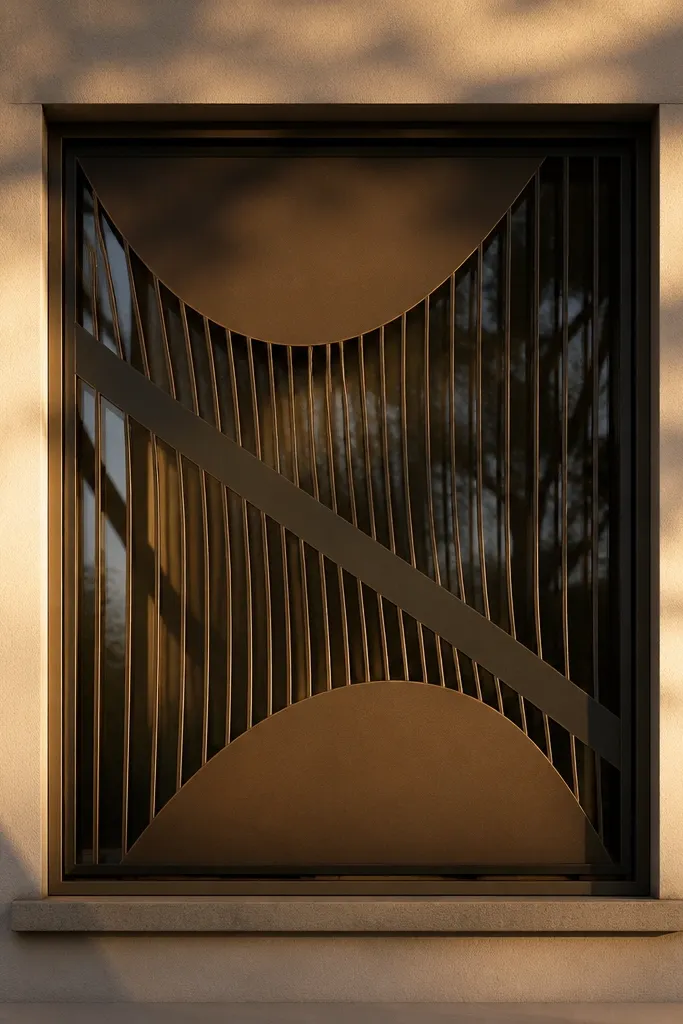
This design adds modern drama by mixing curves (half-moons) with straight diagonals. The top and bottom half-moons create a rhythm, while the diagonal band keeps it from looking too decorative. It’s visually strong in photos because it has both soft and sharp geometry. Use dark bronze if you want the curves to look warmer and more upscale. It fits front-facing windows and dining rooms where you want a statement.
Step 1: Build the outer frame, then mark a center diagonal band height and install straight diagonal bars first. Step 2: Cut half-moon arc pieces for the top and bottom sections with the same radius, then bolt them to the frame at equal heights. Step 3: Add a few vertical supports behind the arcs for stiffness, then prime and top coat with outdoor metal paint.
Align the arcs using measurements from the outer frame corners. Eye alignment lies.
Avoid mixing arc radii. Keep top and bottom arcs identical.
19. Modular Box Cells with Flat Bar Crossings
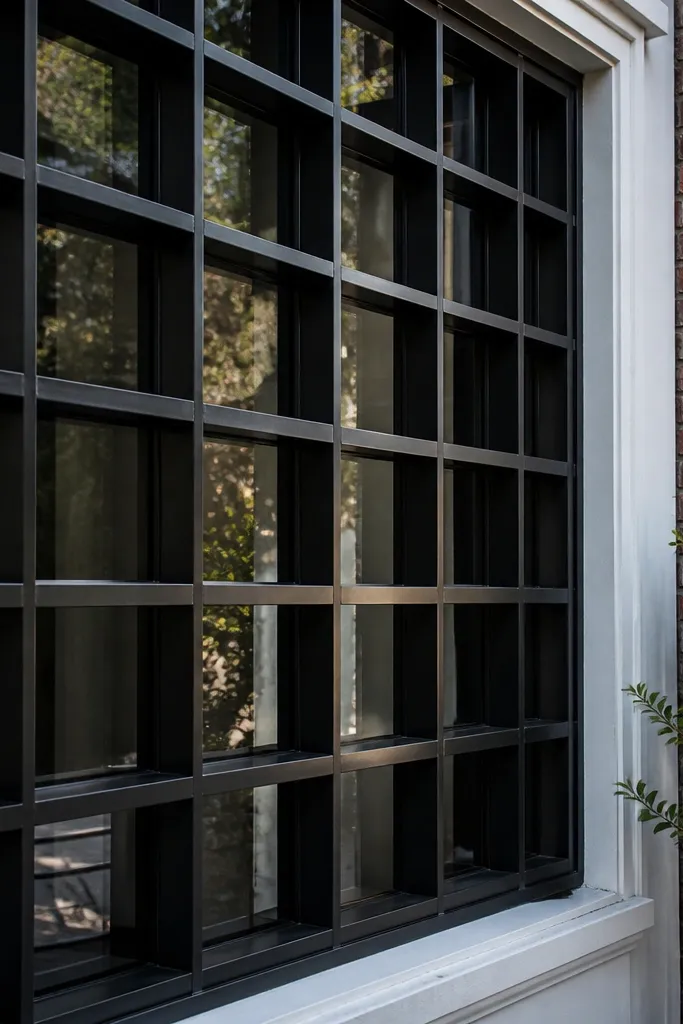
Box cells look modern when the cells are consistent and the crossbars are flat. This creates a “panel” feel instead of a simple grid, and it looks more architectural from the street. It’s a strong option for larger windows because the repeating boxes fill the space cleanly. Use matte black to keep the geometry sharp. This design suits living rooms and storefront-like facades where you want a bold, clean pattern.
Step 1: Decide your cell size (example: 5 in x 5 in) and build the outer frame. Step 2: Install vertical bars first, then install horizontal bars to create the box walls, leaving openings inside the cells. Step 3: Add small spacer blocks or reinforcing plates at intersections if you’re bolt-on, then sand, prime, and matte-coat.
If you’re cutting lots of bars, label them by length on masking tape before assembly.
Avoid cell sizes that force odd bar lengths. It makes your spacing uneven.
20. Louver-Style Alternating Bars (Modern Vent Look)
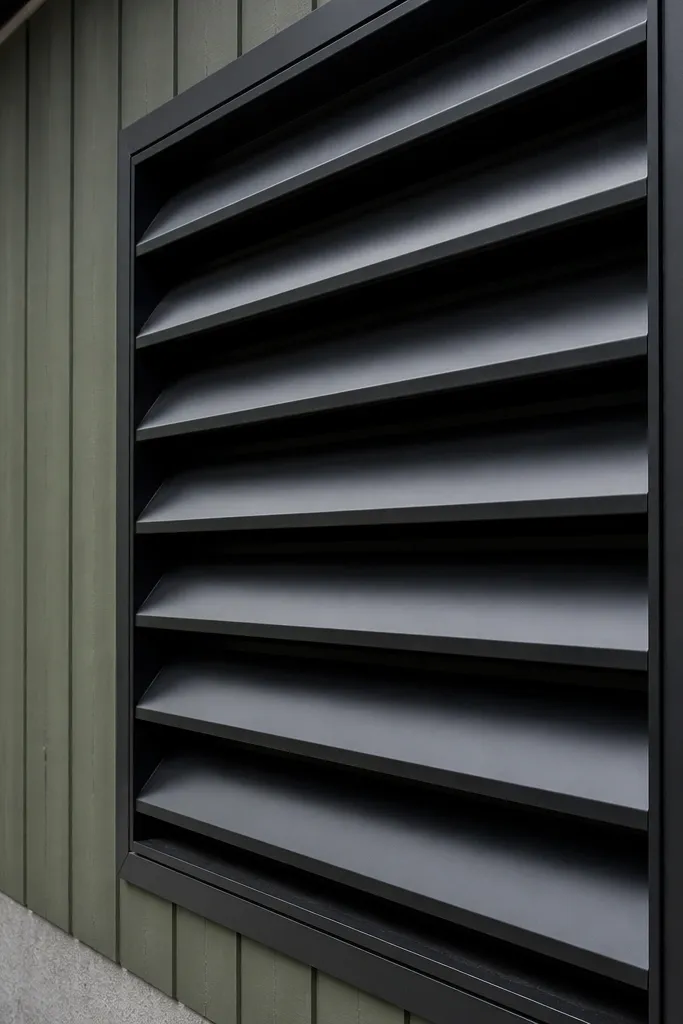
Alternating angled bars give a modern vent-style look without the bulk of a full louver system. It feels stylish because the angles create light-and-shadow contrast. It also improves airflow if you’re building a grill for rooms that need ventilation. Use satin black so the angled edges catch light softly. This design is a good fit for utility rooms and kitchens.
Step 1: Build a top and bottom frame, then set two angled bar rows with consistent angle (a template makes this easy). Step 2: Alternate the bars so one bar sits in front of the next, creating the louver-like shadow effect while keeping spacing safe. Step 3: Bolt the bars into the rails with angle brackets, then prime and satin-coat after dry-fitting the panel.
Editor's noteMake one angle jig from scrap wood so every bar is cut and drilled the same way.
Skip thisDon’t use random angles. The pattern should look intentional across the whole panel.
21. Sunburst Bars from a Center Point
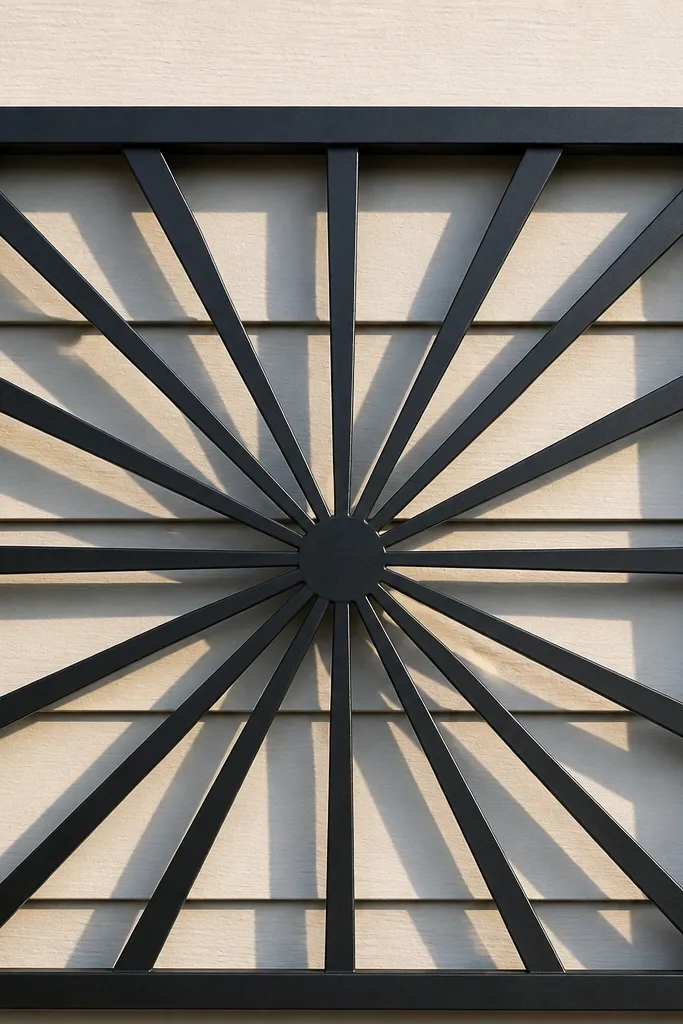
A sunburst pattern looks modern when it’s restrained: use a limited number of radiating bars and keep the outer frame simple. The center point creates a focal look that feels like a design element, not a decorative hobby. This is photogenic because the rays cast shadows across the wall. Finish in matte black for a graphic, high-contrast look. It suits living rooms and front windows where you want a statement without full lattice coverage.
Step 1: Build an outer frame and mark a center point on the inside. Step 2: Cut several equal-length bars and angle them so their ends land evenly around the inside perimeter, keeping spacing consistent. Step 3: Bolt the bars at the center using a small hub plate, then prime and matte-coat after you confirm the panel is square.
Editor's noteCount your rays and stick to that number. A clean count looks designed; a messy count looks random.
Skip thisAvoid too many rays. If you overdo it, it stops looking modern and starts looking busy.
22. Rounded Rectangle Frame with Two-Layer Inside Bars
Rounded rectangles feel modern because the curves soften the hard geometry. The two-layer inside bars add depth and make the grill look thicker and more expensive. This design also hides slight misalignment because the rounded corners visually blend. Use charcoal black or dark bronze so the curves look clean. It fits modern homes with softer trim lines and works well for front windows.
Step 1: Cut an outer frame with rounded corners by using a curved template and cutting flat bar segments that form the radius. Step 2: Add an inner rectangle frame, then install two staggered bars between inner and outer layers to create the two-layer look. Step 3: Bolt all intersections, sand edges, prime, and coat with outdoor paint.
Editor's noteTest-fit the rounded frame before adding the inner layer. If it doesn’t sit flat, the inside layer will never align.
Skip thisAvoid sharp corner transitions. If the rounded corners look faceted, it won’t read modern.
23. Modern Border-Only Grill with Open Center
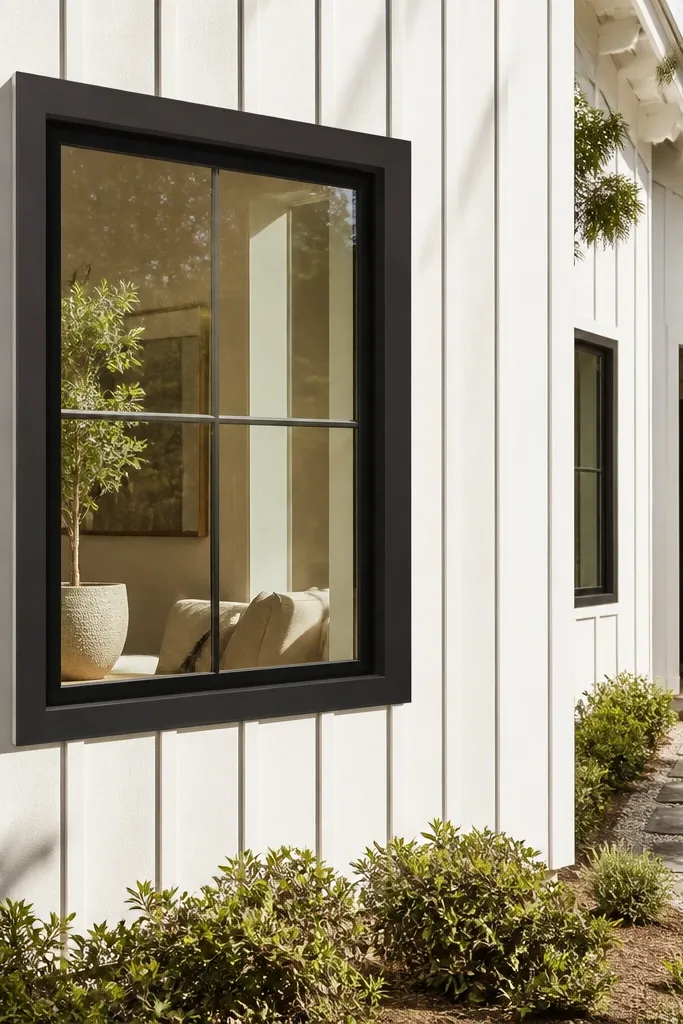
Border-only grills look modern because they let the window itself be the focus. The thick frame gives structure and curb appeal, while the open center keeps the look light. This design is great for people who want the aesthetic but don’t need heavy security bars across the entire opening. Matte black makes the border look crisp. It suits second-story windows, small front windows, and anyone who wants a minimal look.
Step 1: Measure the window opening and cut an outer frame with a thicker border width (like 1 in flat bar), then test-fit it with 1/4 in total clearance. Step 2: Add four corner reinforcement plates if you’re bolt-on, then attach the frame to mounting brackets. Step 3: Prime and coat the frame, and add a thin inner retainer lip if you need it to sit snugly.
Editor's noteIf you need partial security, add just one horizontal bar across the center instead of filling the whole panel.
Skip thisDon’t make the border too thin. A thin border reads cheap and won’t frame the window well.
24. Chevron V Pattern with a Center Divider
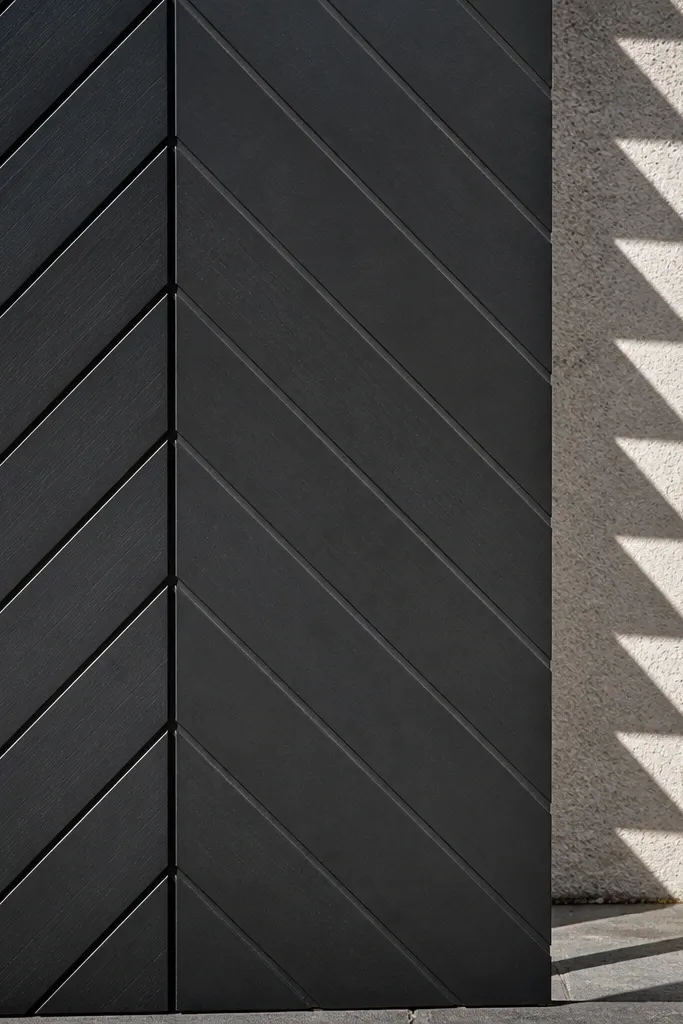
Chevron V patterns feel modern because they create a strong zig-zag direction while staying symmetrical. A center divider keeps the chevrons aligned and makes the pattern easier to build. It’s also a good choice if you want the grill to look like a design feature rather than a fence. Matte black keeps it sharp and photo-friendly. It works well for windows with enough width to show the V shape clearly.
Step 1: Build the outer frame and install a center vertical divider bar first. Step 2: Cut diagonal bars to form chevrons on each side, using a template for the angle and consistent bar lengths so the V points meet neatly. Step 3: Bolt at intersections, then prime and matte-coat, checking squareness before the final paint cures.
Mark the V point location on the divider bar before you cut diagonals. That single mark prevents wasted material.
Avoid chevrons that don’t mirror perfectly. Even a small mismatch shows in daylight.
25. Crosshatch Grid with Offset Nodes

Crosshatch looks modern when the intersections aren’t dead-center. By offsetting the nodes, you get a more dynamic pattern that still feels structured. This design also creates extra shadow depth, which makes it look better on textured walls. Use satin black so the lines look smooth and slightly reflective without being glossy. It suits windows where you want more visual interest than a plain grid.
Step 1: Build an outer frame, then install one set of bars (vertical) evenly. Step 2: Install the second set (horizontal or angled) with a deliberate offset so intersections land between the first set’s lines, not directly on top. Step 3: Secure intersections with small plates for rigidity, then sand, prime, and satin-coat after a full dry fit.
Editor's noteUse a marker line for the offset position before drilling. Once holes are drilled, you can’t “adjust” the look.
Skip thisAvoid sloppy offsets. The pattern should look intentional, not like a mis-measure.



