
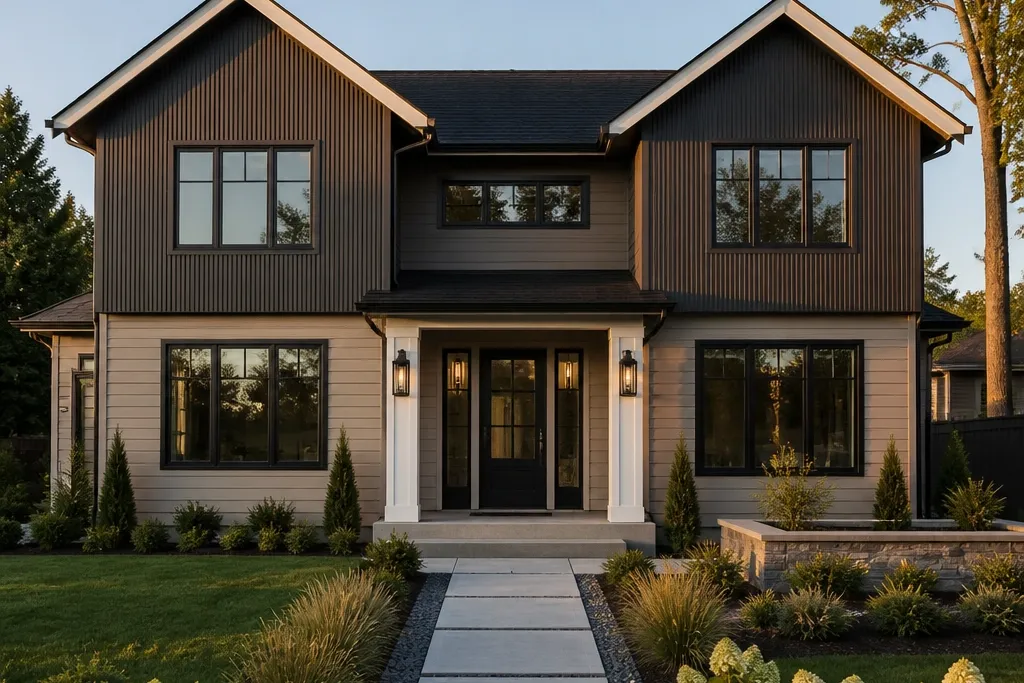
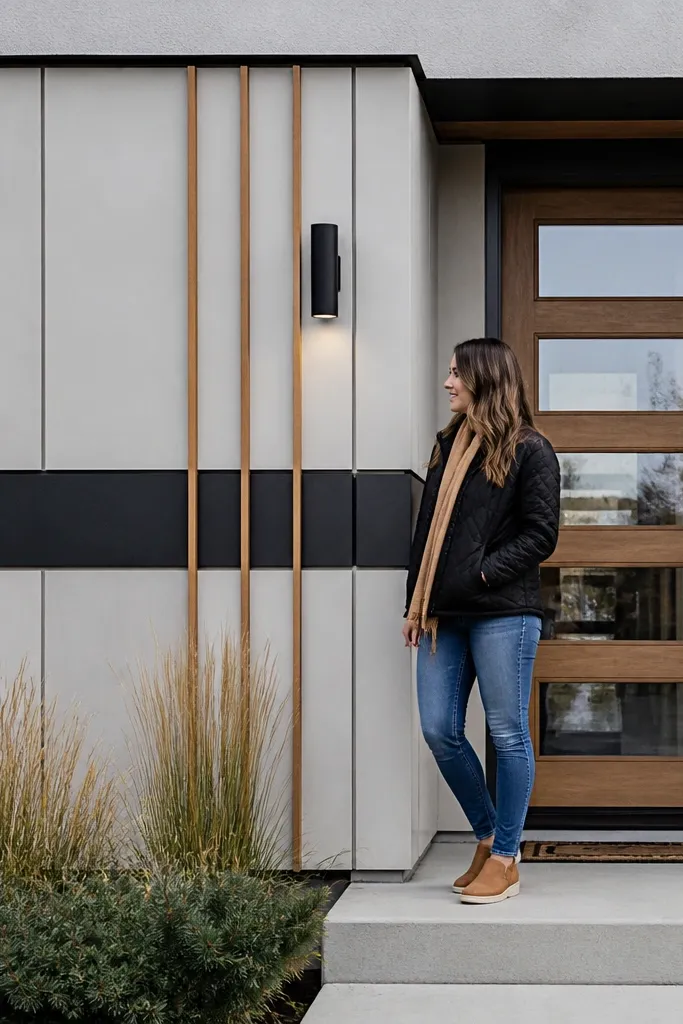
1. Vertical slat screen over existing siding
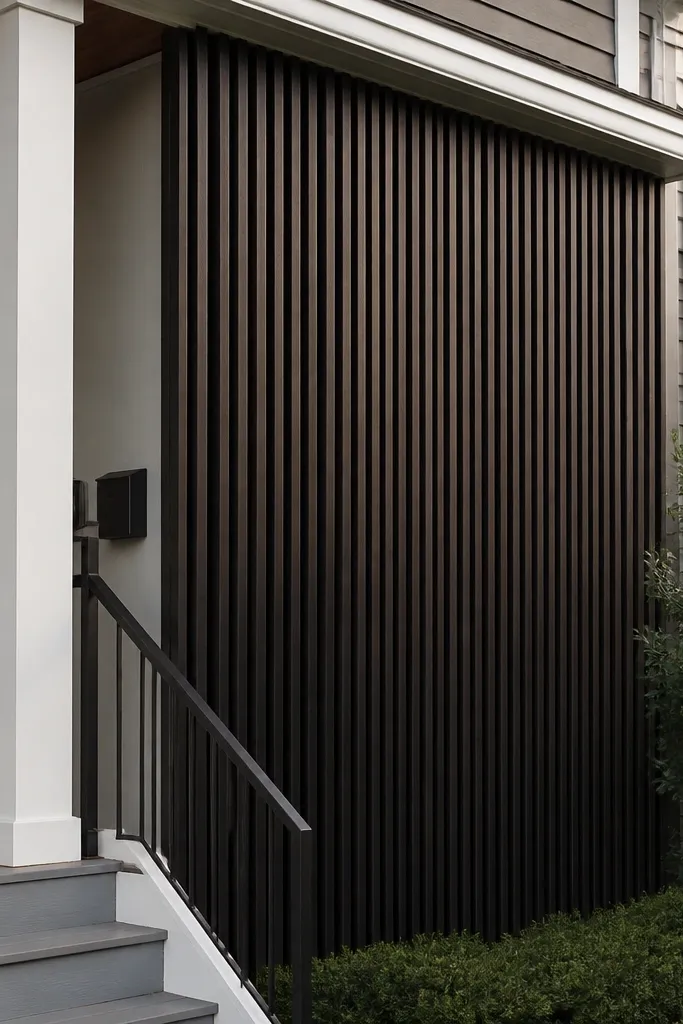
This is the fastest way to get beginner-friendly modern house facades that look intentional. A vertical slat screen creates a strong rhythm across the front and hides uneven old siding lines under it. Use a dark stain or matte black finish so the slats read crisp in daylight and don’t look like temporary fencing. The look also photographs well because the slats throw narrow shadows that change through the day. It’s a good choice for small homes, townhomes, and any facade with windows that need a clean visual frame.
Start by measuring your facade width and deciding your slat spacing. Use treated 1x3 or 1x4 boards set on 1x2 rails, keeping a 1/2 in. To 3/4 in. Gap between slats for a modern shadow line. Install horizontal rails into studs or solid backing with exterior screws, then hang the vertical slats and keep spacing consistent with a scrap spacer. Prime any cut ends, then finish with an exterior stain plus a topcoat rated for siding exposure. Finish by adding a simple border trim around windows so the slat grid lines up across openings.
Build a spacing jig from scrap plywood and clamp it to the last slat — it keeps every gap identical.
Don’t attach slats directly to random spots on old siding without finding studs.
2. Board-and-batten modern front with crisp shadow gaps
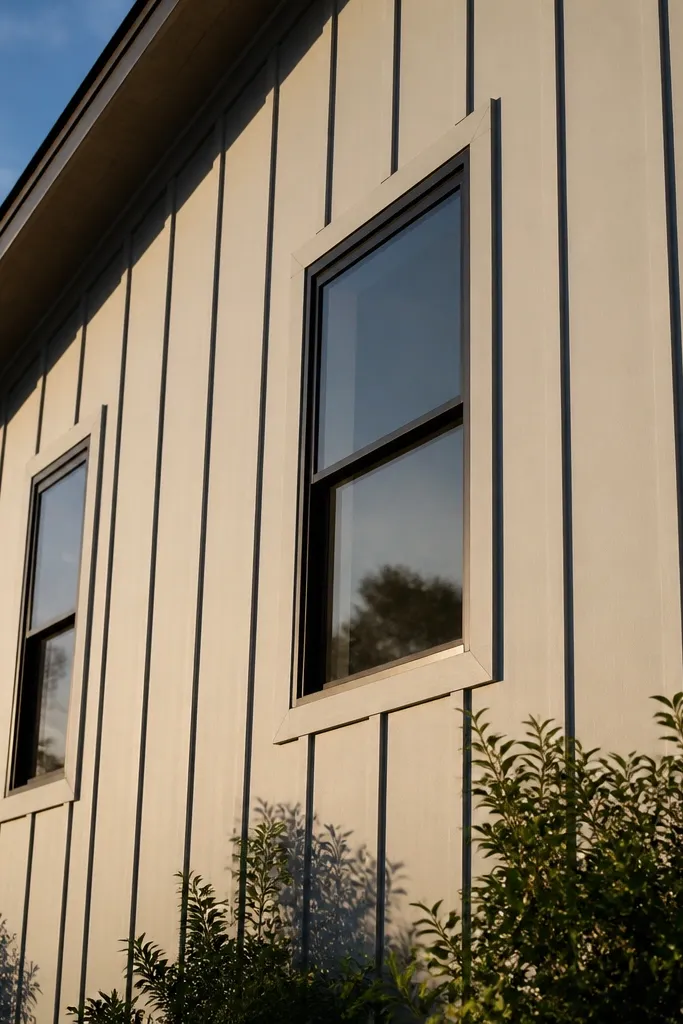
Board-and-batten can look farmhouse, but the modern version is about spacing, clean edges, and shadow depth. A wide main field with narrower battens reads sleek, especially when you keep the battens perfectly vertical and the paint finish matte. This works well when you want a full facade transformation without complex panel geometry. It also hides small cracks and old seams because the battens cover them. Use it on single-story fronts and two-story entries where you want the facade to feel taller and more structured.
Choose a main cladding panel — fiber cement sheets or flat siding — then plan battens that are narrower than the field. Mark vertical lines on a level reference line and use a consistent gap (about 3/4 in. Is a sweet spot for shadows). Install horizontal starter rails into studs, then screw battens over the main surface with exterior-rated fasteners. Caulk the edges lightly, prime cut ends, and paint all exterior faces with a quality exterior paint in a matte or satin finish. Keep window trim simple and align batten lines to the window corners.
If your facade isn’t perfectly plumb, set the first batten using a laser level and let the rest follow — it’s the easiest way to keep lines straight.
Don’t use glossy paint; it highlights wavy surfaces and makes the battens look sloppy.
3. Cedar-tone vertical fins with black reveals
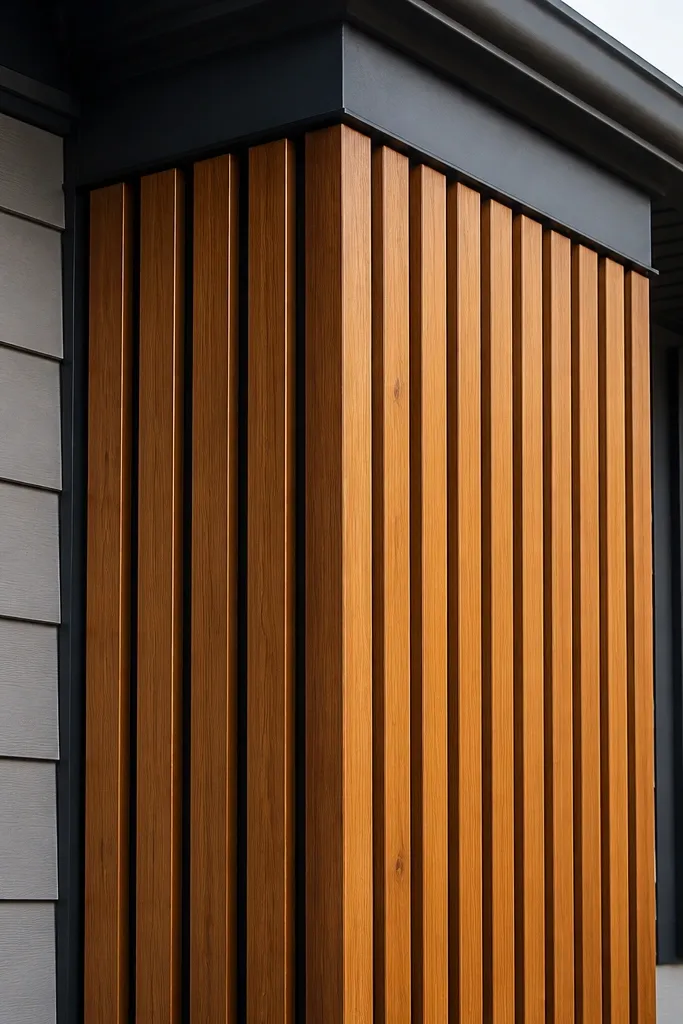
Install backing rails horizontally into studs first, then mount fins vertically using consistent center spacing. Use thin 1x2 or 1x3 fins to keep the look light, and leave a deliberate reveal gap of about 1/2 in. Between fins and trim returns. Add black trim boards or painted reveal strips at the edges of openings so the fins look “cut” cleanly. Prime and stain fins, then apply a clear exterior topcoat that matches the finish level you want. Caulk seams where water can sit, especially at fin ends.
Vertical fins give you that “modern massing” look without needing full panel replacement. The trick is to pair warm cedar-tone fins with black reveals so the shadows and edges read sharp. This is a great option for beginner-friendly modern house facades because you can build a repeatable module and scale it across the front. It also looks premium from street level since fins create depth even on plain walls. Choose this if your current facade is mostly solid but you want a more architectural frame around windows and entry.
Skip thisDon’t skip water management at fin ends — unsealed end grain darkens and cracks fast.
Editor's notePre-finish the fins on sawhorses before installation; it’s faster and gives cleaner coverage on end grain.
4. Panelized stucco-look with a dark window band
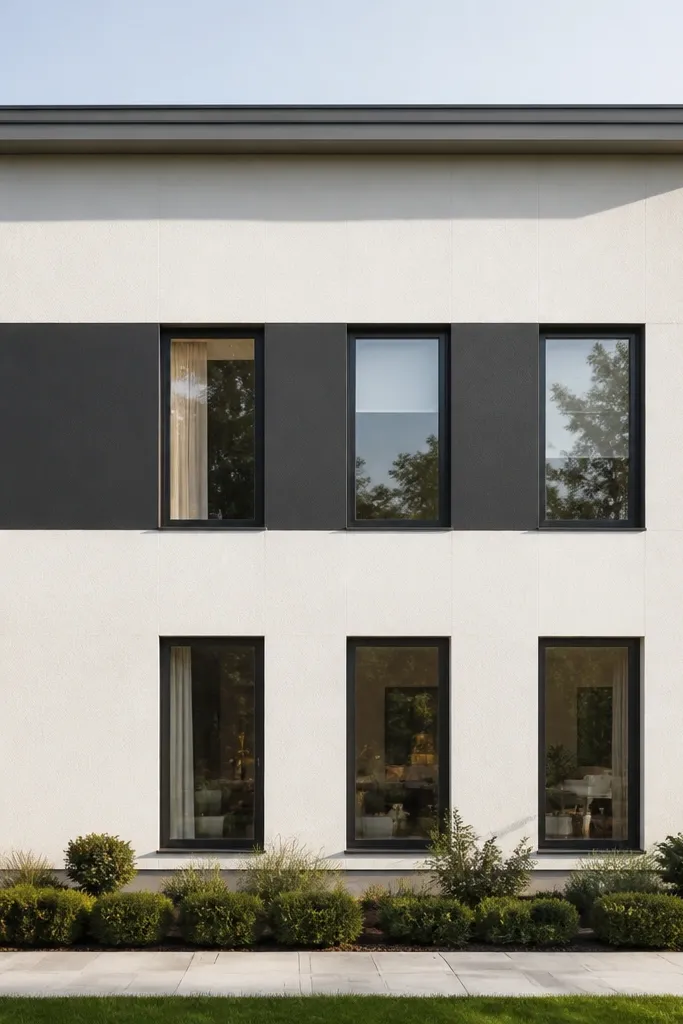
Prep the wall thoroughly: remove loose paint, patch cracks, and apply a bonding primer. Apply a stucco-look system (cementitious or polymer-based) in a smooth or light texture you can reproduce consistently. Mark a straight horizontal line where the dark band will sit, then install trim strips or a band cladding panel at that height. Paint the band and trim a matte black or deep charcoal, and paint the field in a warm off-white. Finish by caulking around windows and ensuring the band has a water-shedding edge detail.
If you want a modern front that looks like a custom build, a stucco-look finish plus a single dark band is the cleanest move. The band creates a horizontal anchor that makes the facade feel designed and helps the windows read aligned. This style is beginner-friendly because you can work in straight lines and keep the rest simple. It also hides minor wall texture differences since stucco finishes naturally blur small variations. Use it on homes with larger window spans or a wide front elevation that needs structure.
Skip thisDon’t choose a pure bright white — it highlights patchiness and reads harsher than modern neutrals.
Editor's noteUse painter’s tape on a taut line for the band edge, then remove tape immediately after the paint skins.
5. Cement board rainscreen with charcoal vertical accents
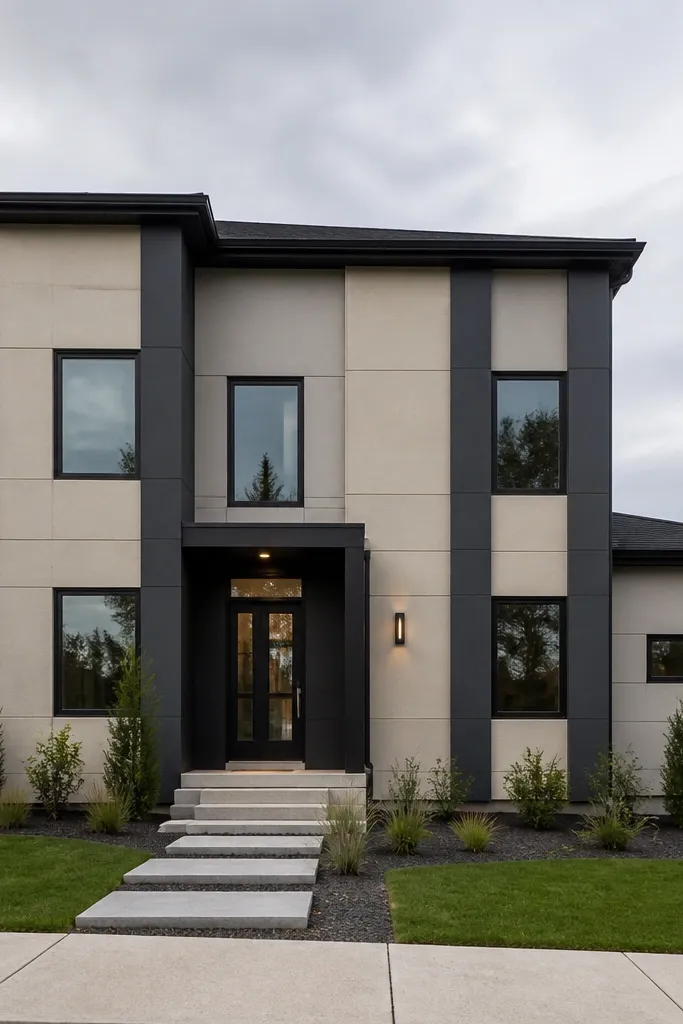
A cement board rainscreen approach gives you a modern look that’s also durable. Light cement board as the field keeps the front crisp, while charcoal vertical accents add the “designed” element. This combination reads modern because it’s mostly large surfaces and a clean accent stripe, not lots of tiny trim pieces. It’s also a smart choice if your existing facade is weathered and you want a long-term, water-aware setup. This works especially well for beginners who want a straightforward build order and a finish system that doesn’t require wood staining.
Install a rainscreen furring system over the existing wall so air can move behind cladding. Attach cement board panels to the furring with correct exterior fasteners and joint treatment per product instructions. Choose a charcoal accent — either pre-primed cement boards cut into vertical strips or factory panels — and keep the spacing consistent. Seal all panel edges and joints, then prime and paint the entire facade in two coordinated tones. Add simple trim around windows and keep caulk lines clean.
Plan your accent strip widths so they hit window reveals — align the accent edges with window corners for a cleaner grid.
Don’t rush joint finishing; uneven caulk ridges show through even matte paint.
6. Rustic-modern horizontal slats with a clean entry porch
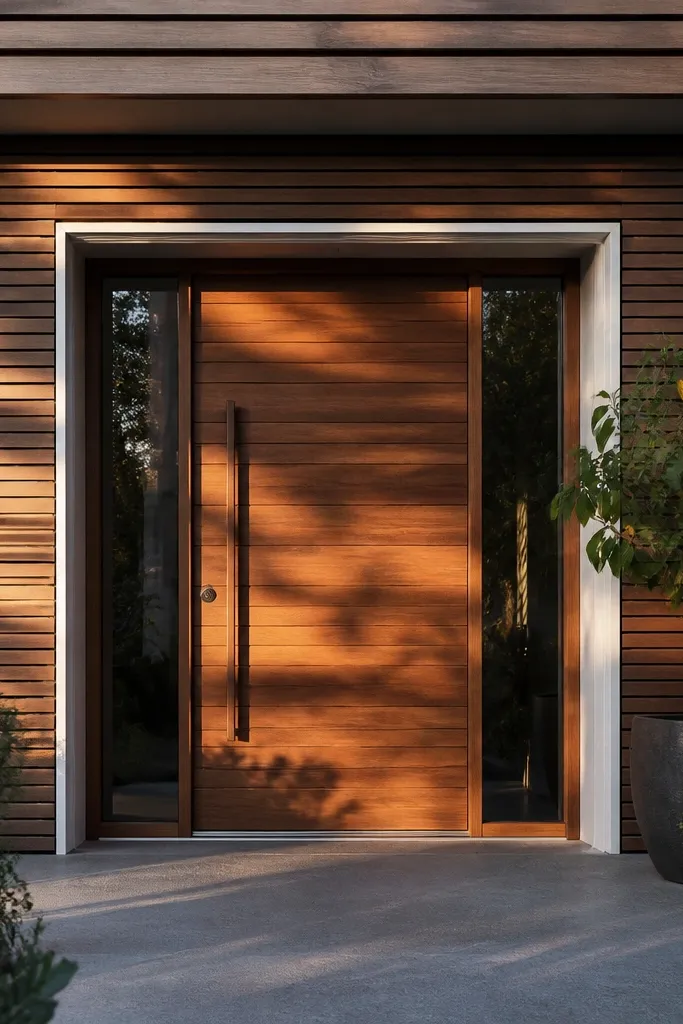
Horizontal slats can look modern when the spacing is tight and the surrounding trim is minimal. This project focuses on the entry zone — the spot people notice first — and uses slats to frame the door and reduce visual clutter. It’s beginner-friendly because you can limit the work to the porch façade and still get a big curb appeal impact. The horizontal lines also make the entry feel wider and more grounded. Choose it if your front door area feels bland or if you want a modern focal point without redoing the whole house.
Measure the porch front elevation and decide on slat height so the door sits centered. Use exterior-rated slats mounted to a simple frame, leaving a 3/8 in. To 1/2 in. Gap for shadow. Install a top and bottom trim rail to keep the slats aligned, then attach slats with consistent spacing using a spacer block. Prime and paint or stain the slats, then seal all cut ends. Caulk where the frame meets the porch structure and finish with a clean door surround trim.
Use a single long straightedge to check the slat line every 5-6 boards — small drift becomes obvious on horizontal runs.
Don’t use wide, uneven gaps; it reads like a temporary fence.
7. Modern window surround with shadow-box trim
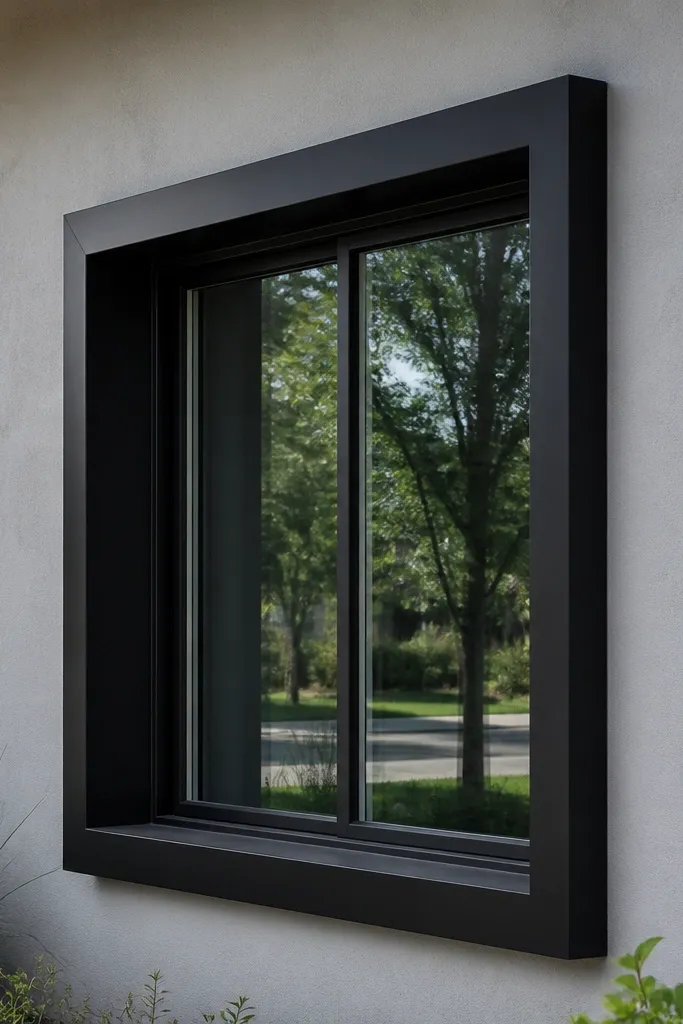
A shadow-box window surround is one of the most photogenic beginner-friendly modern house facades because it makes flat trim look architectural. The window becomes a framed centerpiece, and the depth hides minor wall imperfections around openings. This works on almost any existing facade — siding, stucco, or older painted trim — as long as you can mount trim securely. It also lets you keep the wall color simple while still looking modern. If your house has windows that look “stuck on” to the wall, this fixes that instantly.
Start by choosing trim material that holds edges — primed MDF is not ideal outdoors; use exterior PVC trim or properly sealed wood. Measure each window opening and build a surround frame with 3/4 in. To 1 in. Depth so the shadow reads. Install a backer strip first, then mount the outer trim pieces so there’s a consistent recess around the window. Caulk the corners, then paint the trim in a crisp color (white, light gray, or matte black) against your facade. Repeat the same surround proportions across all windows for a unified look.
Dry-fit each corner and use a small scrap spacer to keep the reveal depth consistent from window to window.
Don’t use thin trim that flexes; it creates wavy shadows that look cheap in photos.
8. Two-tone facade with a vertical accent panel grid
Pick your two colors first: a light neutral for the field and a deep charcoal or black for the grid. Install vertical battens or PVC slats on straight layout lines, using a level and a laser if you have one. Keep the grid spacing consistent — start by choosing a repeating module like 16 in. Or 24 in. Center-to-center and stick to it. Prime and paint the battens and field after installation, then add a simple border at the corners and around windows. Seal all edges to prevent water intrusion behind strips.
This look is modern because it uses a grid, not random accents. A light field with dark vertical panel lines gives you that clean, designer facade rhythm even if you’re working with existing walls. It’s beginner-friendly because you can build it like a layout project: measure, mark, install strips, paint. The best part is that you can scale it to your house — wider homes need fewer, bolder lines; narrow homes need slimmer panels. It also photographs well because the vertical lines create strong contrast against windows and doors.
Skip thisDon’t vary spacing near windows; adjust the overall grid so the layout stays consistent.
Editor's notePaint the battens before final mounting if you can — it prevents missed edges and gives cleaner coverage.
9. Metal panel porch screen with matte black framing
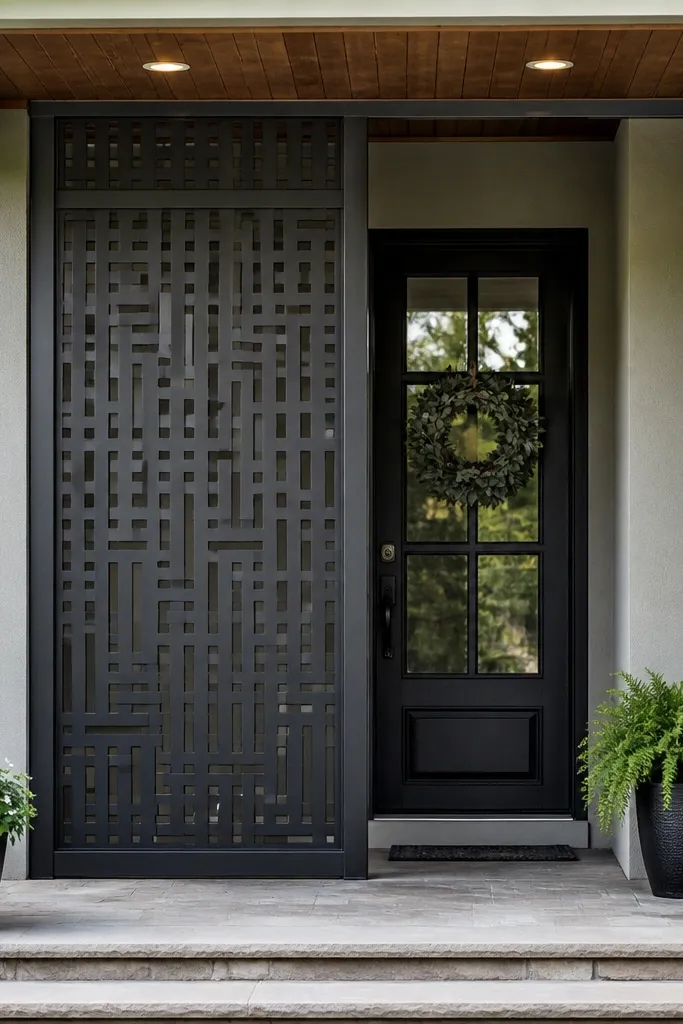
Matte black framing plus metal panels reads modern and sharp. This project is photogenic because the panels create flat, clean surfaces with subtle highlights, and the black frame draws a clear rectangle around the entry. It’s beginner-friendly if your porch is already built, since you’re mostly adding a screen and cladding. Use it to modernize an entry that feels dated with wood railings or mismatched trim. It also works well in windy climates because metal is stable and doesn’t warp.
Build a rectangular frame from aluminum or treated lumber, then attach it to the porch posts with corrosion-resistant hardware. Install metal panels with manufacturer-recommended screws and gaskets, keeping panel edges aligned to the frame. Use a consistent reveal between panels and trim — about 1/2 in. Looks clean and reads as intentional. Finish the frame in matte black and leave the metal in a dark finish (charcoal, black, or gunmetal). Seal any penetrations and check that water sheds away from the porch structure.
Use gaskets and don’t over-tighten — it prevents panel dimpling and keeps the finish tidy.
Don’t cut panels without deburring; sharp edges snag paint and skin quickly.
10. Concrete board facade with a single large horizontal band
Install concrete board over a prepared surface using a proper mounting system so it stays flat and secure. Prime and paint the field a light neutral. Then plan the band height: place it so it hits the centerline of windows or aligns with the door height. Install a band material with straight edges — cement board strip or trim panel — and paint it a matte deep gray or black. Caulk the band edges and ensure there’s a water-shedding line on the top edge.
One large horizontal band is a modern trick: it simplifies the facade into two clean planes. Concrete board as the field looks crisp and takes paint well, while the band adds contrast and makes windows look aligned. This is beginner-friendly because the build is mostly straight lines and fewer cuts than slat systems. It also hides uneven siding because the board covers it. Choose this if you want a modern look without a lot of small details that require perfect spacing.
Skip thisDon’t rely on eyeballing — a slightly sloped band makes the whole facade look off.
Editor's noteMeasure band height from a single reference point like the top of the garage door or the trim line — it keeps everything level.
11. Shadow-gap vertical battens with limewash-style wall paint
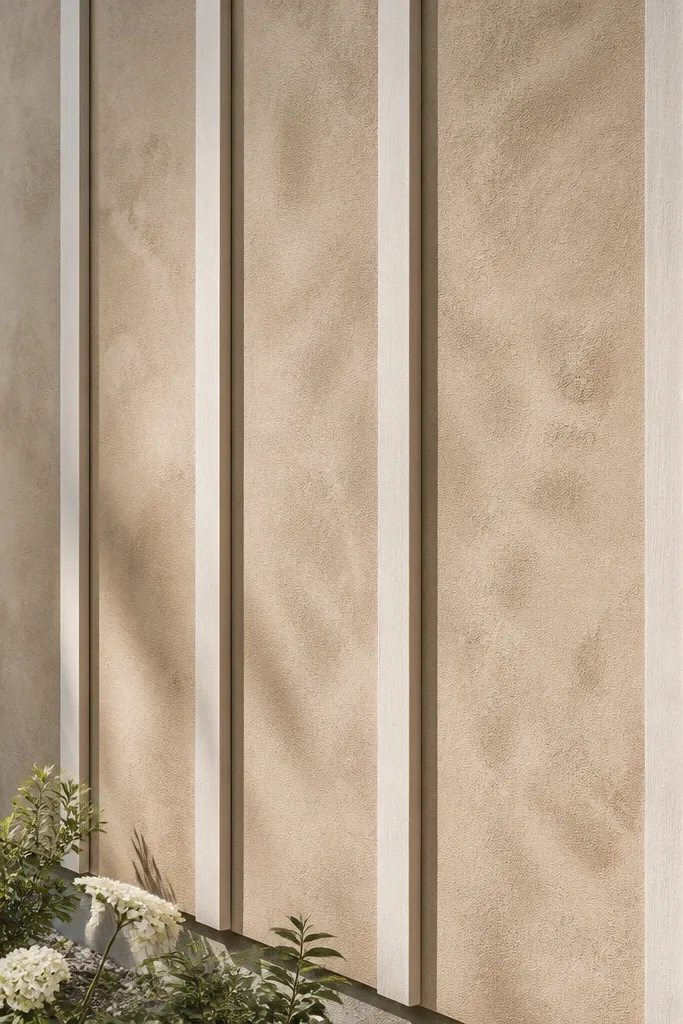
Prep the wall and prime so the texture paint bonds well. Apply a limewash-style coating using a consistent technique (brush or roller in one direction) and let it cure fully. Install vertical battens over the field with a consistent reveal of about 1/2 in. To 3/4 in. So shadows are visible. Paint or stain battens in a matte dark gray or black, then seal edges and caulk the joints. Keep the batten layout aligned with windows and corners for a clean grid.
This is the modern way to use textured wall color: paint the field in a limewash-style finish, then add smooth, crisp battens with shadow gaps. The texture keeps it from looking flat, and the battens keep it modern. It’s beginner-friendly because the battens are the “structure,” and the paint texture hides minor surface prep flaws better than a smooth finish. The result looks warm and designed, not sterile. It also photographs nicely because the texture catches light while the battens create clean shadow lines.
Skip thisDon’t use high-gloss on the battens; it makes the texture look messy and cheap.
Editor's noteDo a small test patch for the limewash finish — it changes a lot depending on how porous your wall is.
12. Pergola-style facade frame with angled slat infill
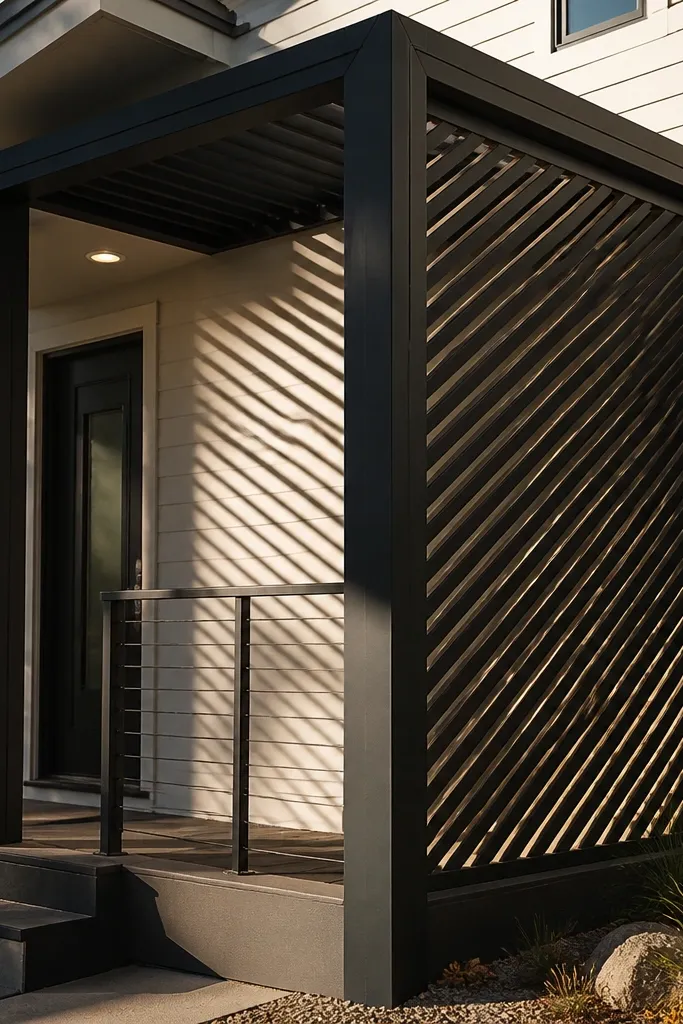
Find the mounting studs and decide the frame size — start with something like 6 ft wide by 4 ft tall for a strong proportion. Build an outer frame from treated lumber or metal, then mount it to the wall with exterior-rated anchors. Add angled slats across the frame at a consistent angle, leaving 1/2 in. Gaps for shadow. Finish the frame in matte black and stain or paint slats in a complementary tone (charcoal, dark brown, or cedar). Seal all end grain and caulk perimeter joints to keep water out.
A pergola-style frame on the front elevation looks custom because it adds a third dimension and a strong geometric motif. Angled slat infill adds motion to the facade and creates dynamic shadows — perfect for photos. This is beginner-friendly if you build it as a modular rectangle that mounts to the wall near the entry or garage. You’re not covering the entire house; you’re placing a focal “modern frame” that makes the rest look intentional. It works best on fronts with a blank wall plane where a focal rectangle can sit cleanly.
Skip thisDon’t choose an angle that’s too steep; it can look like a fence unless the spacing is tight.
Editor's noteUse a template cut for the slat angle so every slat hits the same line at the frame edges.
13. Monolithic facade panels with hidden fastener battens
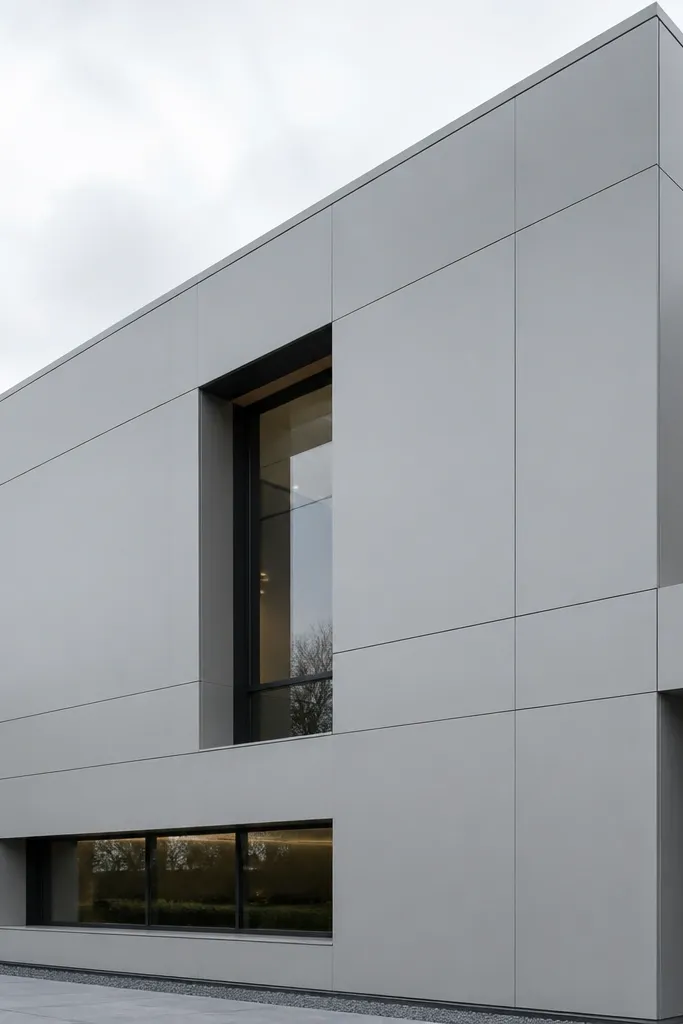
“Monolithic” modern house facades look smooth and expensive because they hide most of the hardware and keep seams narrow. You can fake that look with large panel cladding and narrow battens or joint trim that creates thin shadow lines. This is beginner-friendly because the build is repetitive: install panels, add seam battens, paint. It also works when your existing wall is uneven — the panel system covers it. If you want the front to look like a single sculpted surface, this is your best bet.
Choose a panel system you can install flat and rigid, like fiber cement sheets or panelized cladding, and plan seam locations. Install backing and furring so panels sit straight; then mount panels using the system’s recommended fastening method. Add narrow seam battens or joint strips at panel edges to create thin shadow lines, about 1/4 in. To 1/2 in. Wide. Prime everything and paint with an exterior system that matches your panel type. Finish by adding simple corner trims and consistent window reveals so the whole facade reads as one surface.
Keep seam lines aligned across the width of the front — that one decision sells the monolithic look.
Don’t mix panel sizes randomly; irregular seams read messy from the street.
14. Crisp corner boards with a modern entry porch column wrap
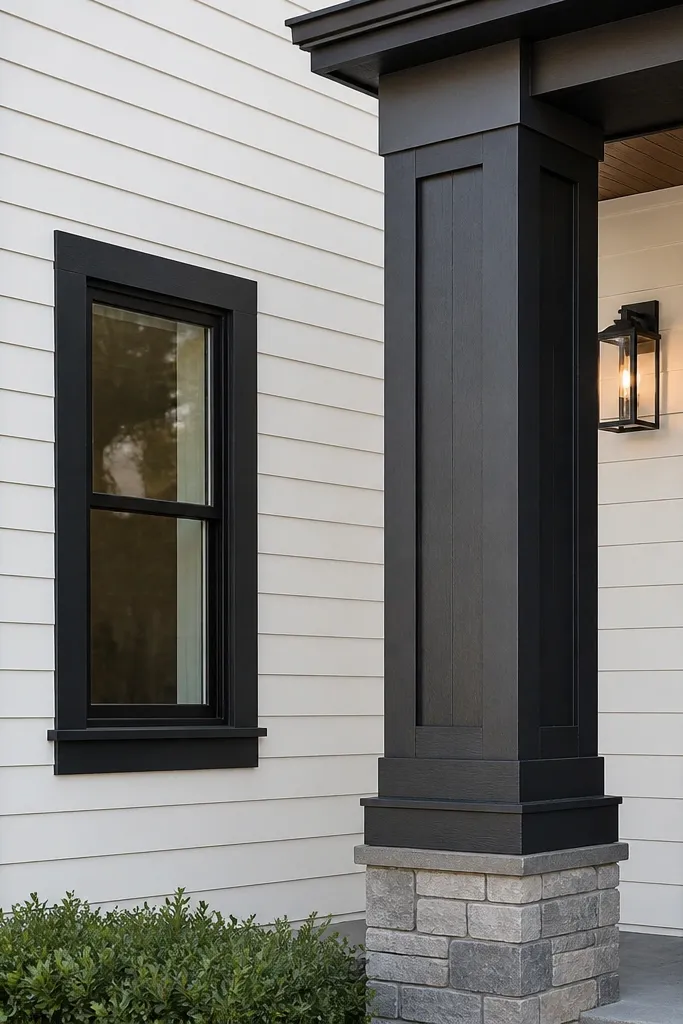
Install corner boards on all outside corners using straight, pre-primed exterior trim boards and a level reference. Wrap the porch columns with vertical trim strips, keeping the same reveal spacing on each side. Build a simple header and base trim around the column wrap so it looks like one clean block. Paint everything matte in a deep neutral and keep the field lighter. Caulk corners and wrap joints to prevent water getting behind the trim.
Corner definition is what makes many facades look modern even if you don’t change much else. This project uses crisp corner boards plus a column wrap around the entry porch so the front reads framed and clean. It’s beginner-friendly because you can focus on the entry zone and corners, which are the most visible areas from the street. You’ll also hide ugly old column bases or mismatched trim by wrapping them in the same material and color as the facade accents. It’s a good choice for homes with traditional porch elements that you want to modernize.
Skip thisDon’t leave column wraps with gaps; any shadow in the wrong place looks like a repair.
Editor's noteUse a laser level on corner boards — corner lines are what your eye catches first in photos.
15. Raked wood slat gable accent with modern siding
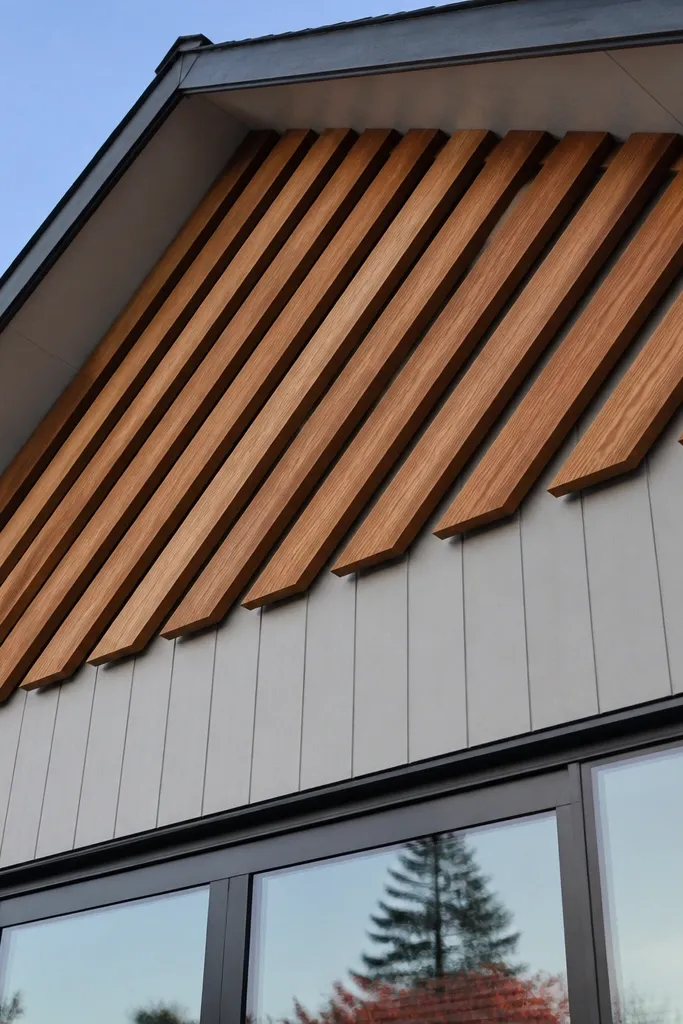
Measure the gable face and build a backing frame that matches the triangle shape. Install vertical or angled slats onto the frame with consistent spacing, leaving 1/2 in. Gaps for shadow. Use exterior screws and pre-drill to prevent splitting. Paint the surrounding gable area in a light neutral and finish the slats in a dark color like charcoal or black. Seal all edges and add drip-cap style trim at the top where water runs off.
A gable accent is a modern shortcut because it adds a dramatic focal triangle without covering the whole facade. Raked slats create a diagonal rhythm that reads modern and looks great in front-facing photos. Pair it with simple siding on the walls to keep the look clean. This is beginner-friendly because you can build the accent as a separate frame, then mount it onto the gable area. It also helps if your roofline feels generic — you’re giving it a designed element.
Skip thisDon’t use random slat lengths; uneven lengths make the gable read handmade in a bad way.
Editor's noteMake a slat spacing template and mark slat positions on the frame with a pencil line — it speeds up the build.
16. Metal panel cladding with recessed vertical channels
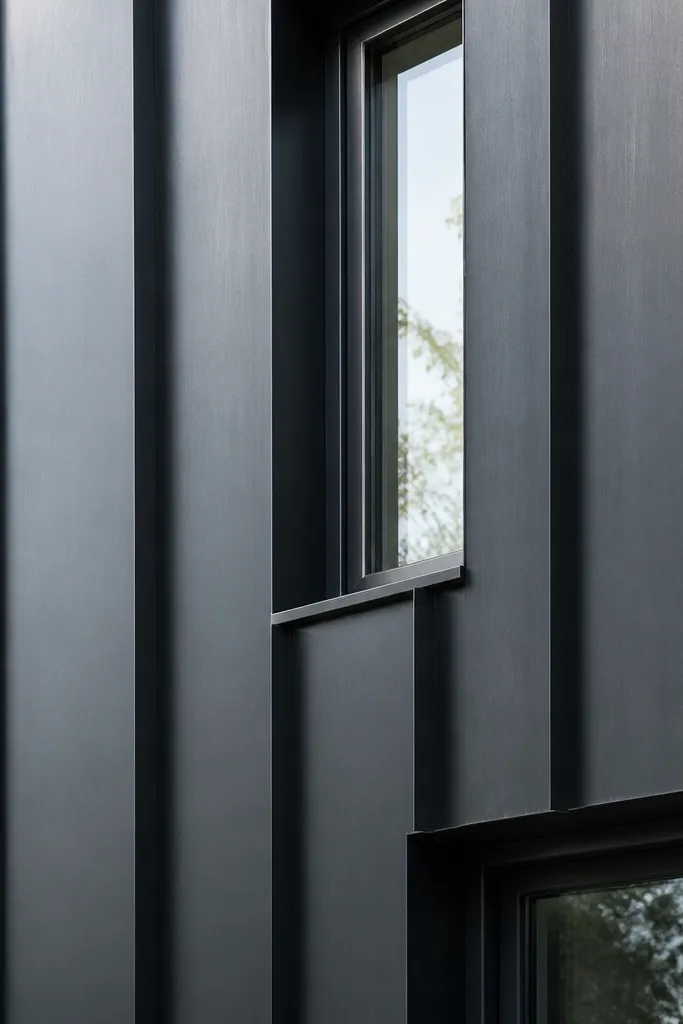
If you want a modern facade that looks sharp year-round, dark metal with recessed channels is hard to beat. The recessed channels create shadow depth and hide panel seams so the front looks like one continuous surface. This is beginner-friendly if you can work with a panel system and follow the manufacturer’s fastening details. It’s also great for homes near salt air or harsh weather because metal cladding resists rot and warping. Choose this look for larger fronts where the metal can cover a big plane.
Select a metal cladding system and matching trim channels, then plan your layout so channels run straight and align with windows. Install a proper backing system and air gap per the cladding instructions. Mount panels with the correct fasteners and keep the channel spacing consistent across the facade. Finish edges with trim pieces and seal transitions at corners and around openings. Prime and paint trim if needed, then verify all seams shed water away from the wall.
Mark reference lines with chalk or a laser before the first panel — misalignment is painful to fix later.
Don’t improvise fasteners; wrong screw types can cause staining and leaks.
17. White facade with black horizontal fins above windows
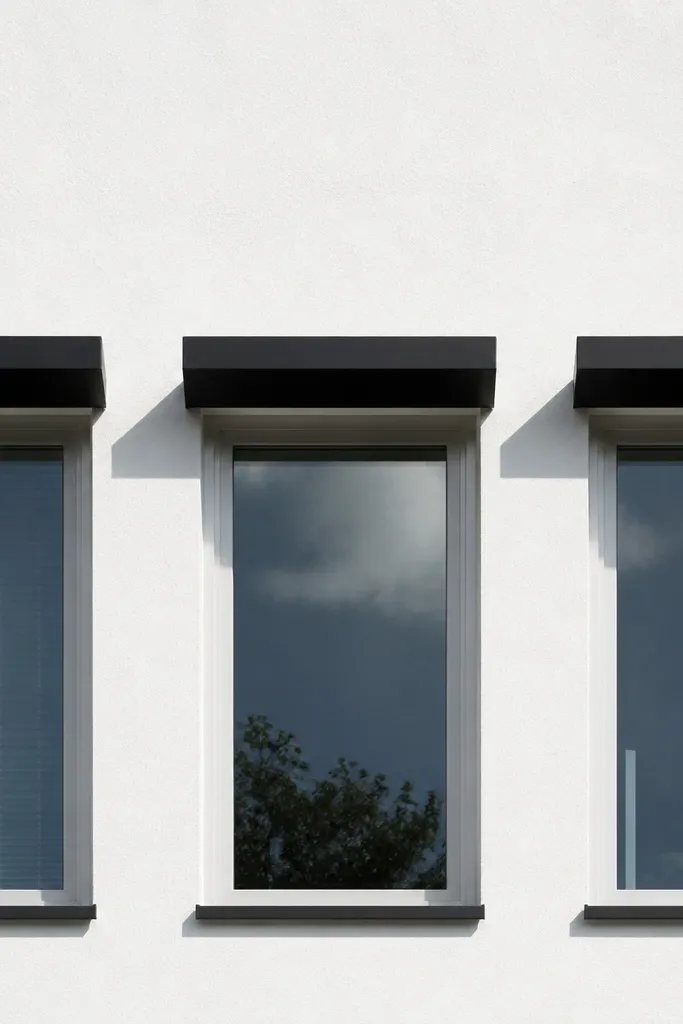
Horizontal fins above windows make a facade feel modern without rebuilding everything. The fins create a frame effect that draws attention to the window line and adds shadow where your eye expects detail. This is beginner-friendly because it’s a small surface area and you can focus on alignment. It also works on homes with mixed window sizes since you’re creating a single visual band. The look is clean, graphic, and very easy to photograph in morning or late afternoon light.
Pick a mounting height for the fin line and mark it across the facade using a level. Install a continuous backing rail into studs, then mount fin strips with consistent spacing. Use a 1/2 in. Gap between fins and keep the fin thickness sturdy enough not to flex. Paint the fins matte black and the field a crisp off-white or light gray. Caulk the top edge of the fin system and install simple side trims so water doesn’t sit in corners.
Use identical fin lengths and keep the ends aligned — it reads more architectural than “custom cut.”
Don’t mount fins without finding studs; loose rails create wobble and ugly shadows.
18. Dark entry wall panel with light siding contrast
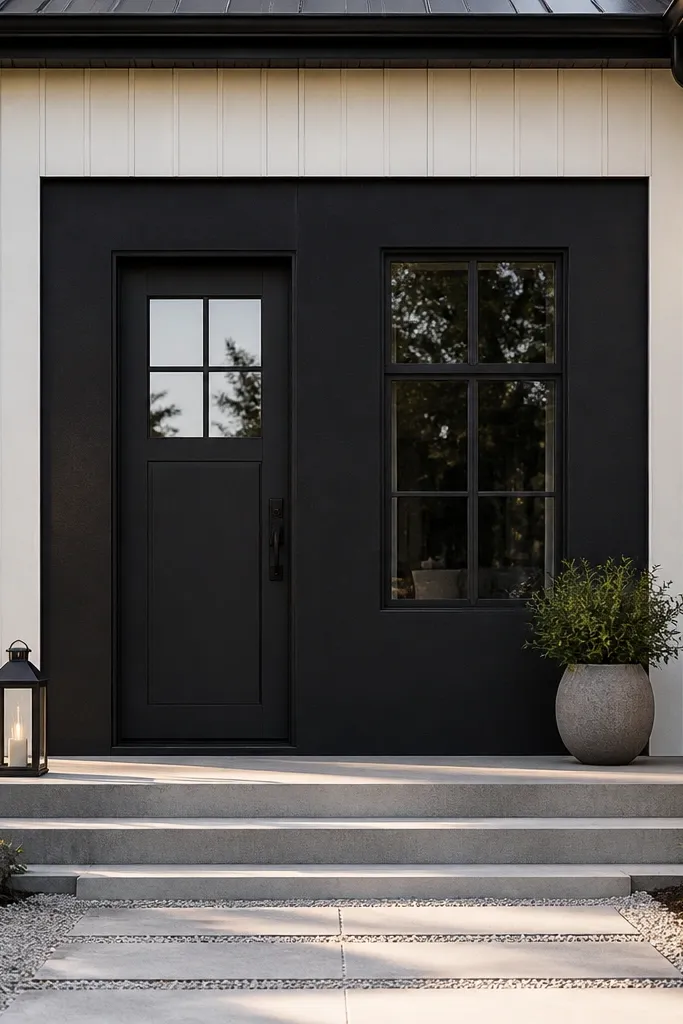
Measure the entry wall area and decide on the accent rectangle size — aim for a panel that’s wider than the door and reaches near the corners. Install a backing layer and mount cladding panels like cement board or exterior PVC sheet in the rectangle. Add trim edges around the panel so seams look crisp and straight. Paint the accent a deep charcoal or matte black and paint the field a light neutral. Seal around the door opening and ensure the bottom edge has a water-shedding detail.
A single dark entry wall panel is one of the cleanest modern facade moves because it creates a focal plane. Keep the rest of the house light and simple, then make the entry area feel intentional with a larger accent rectangle. This is beginner-friendly because it’s limited work and the geometry is straightforward. It also makes the front door look more premium without changing the door itself. Choose this if your house already has decent siding but the entry feels flat or lost.
Skip thisDon’t make the accent rectangle too small; tiny accents read like stickers.
Editor's noteLine the accent panel edge up with existing trim lines so your eye reads the house as one system.
19. Modern louvered vent stack for garage facade
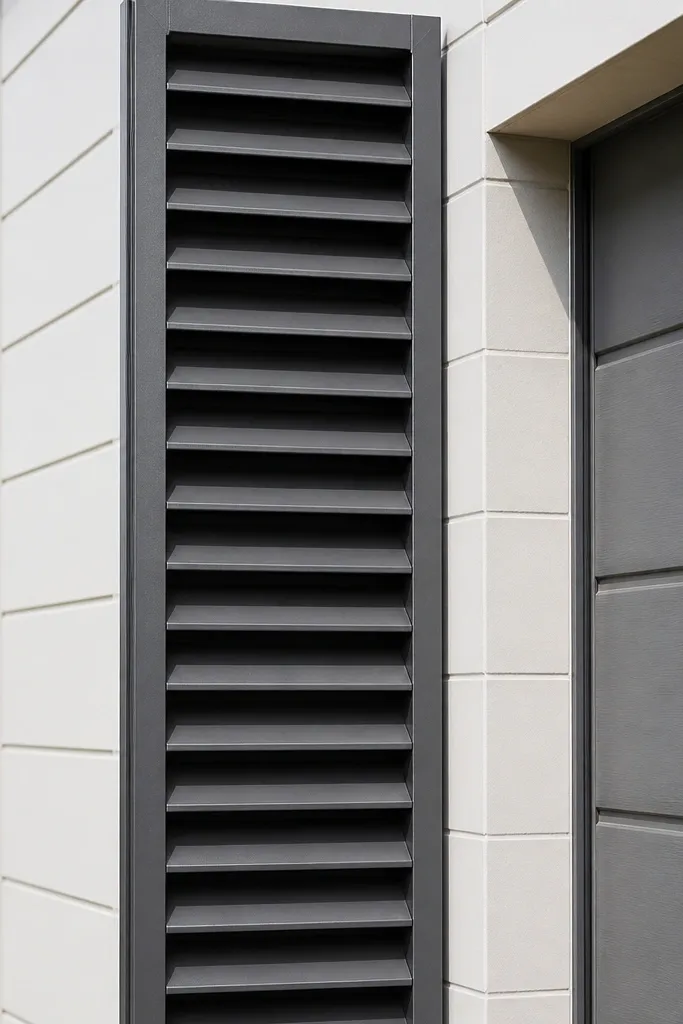
Decide the vent location near the garage side wall where airflow is needed and studs are accessible. Choose a louvered vent kit or build a simple framed louver box with exterior-grade wood or metal. Cut the opening to match the vent size and install it with proper flashing and weather seals. Frame the vent with trim boards so it looks like part of the facade panel system. Paint the louvers and trim in a coordinated modern palette — black trim with light field is the easiest read.
A louvered vent stack adds modern texture and solves a real functional need in garage and utility areas. The stacked louvers create a clean vertical column that looks designed, not random. This is beginner-friendly because you’re installing a pre-fabricated vent or a simple louver box system, then integrating it into your facade grid. It photographs well because the louvers create consistent shadow lines and a strong shape. Use it on fronts where the garage door is wide and you need a side element to balance the composition.
Skip thisDon’t caulk the vent shut; keep the airflow pathway clear.
Editor's noteUse a template to cut the vent opening — a clean opening makes the trim look professional.
20. Vertical plank cladding with centered door and matching trim lines
Vertical plank cladding looks modern when the boards are consistent, the spacing is even, and the door surround aligns with the board lines. This project is beginner-friendly because it’s one direction of layout and you can treat the door surround as the design anchor. It’s ideal for homes with a simple rectangular front where you can keep the facade plan clean. The look reads modern because vertical lines pull the facade upward and the centered door makes the composition feel balanced. It’s also a good fix for older siding that needs replacing.
Choose exterior boards like fiber cement or properly sealed wood planks and decide your board width and spacing. Install a furring system so boards sit straight, then mount planks vertically with consistent gaps (about 1/4 in. To 3/8 in. For a tight modern line). Keep the door surround aligned: install trim strips that match the plank rhythm on both sides. Prime and paint or stain planks, then seal all joints and cut edges. Add corner trims and simple top cap trim so water doesn’t sit in the board seams.
Check board alignment every few rows; vertical drift becomes obvious around the door opening.
Don’t vary board width — it breaks the grid and makes it look patched.
21. Two-story facade stripe using alternating panels
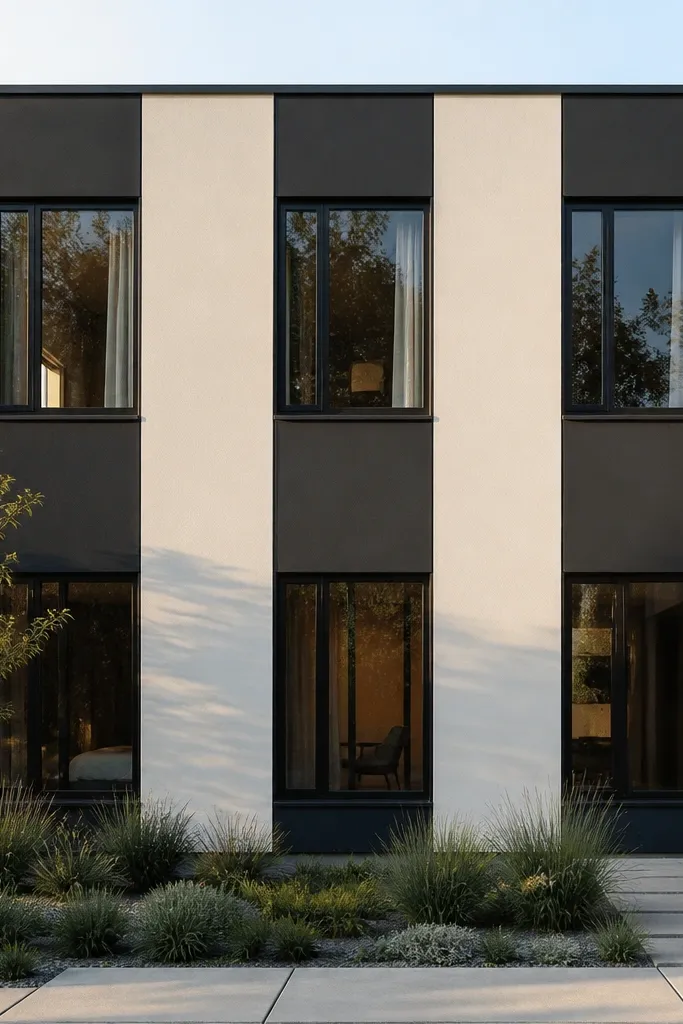
If you have a two-story front, a vertical stripe treatment can make it look sleek without covering the whole house in complex patterns. Alternating dark and light vertical panels create a modern rhythm and help the windows look organized. This is beginner-friendly because the pattern repeats in a simple module — measure once, then replicate. It also photographs well because the stripes create strong contrast and depth. Pick this if you want modern symmetry and your facade has enough width to show the pattern.
Pick one light field color and one dark accent color and choose a cladding type that looks uniform when painted (cement board strips or PVC panel strips). Mark your stripe layout using a module width and spacing, then install furring so you can mount each stripe edge cleanly. Install alternating panels in the same order across the whole two-story face, making sure door and window openings break the pattern neatly. Prime, paint, and caulk all edges, then add simple corner and window trim to keep the lines crisp. Confirm all stripes align at corners and across floors.
Snap chalk lines before you install the first stripe so every panel edge lands on the same plane.
Don’t start the pattern at a random point; break the stripes evenly around the centerline.
22. Cement board panel corners with thin metal edging
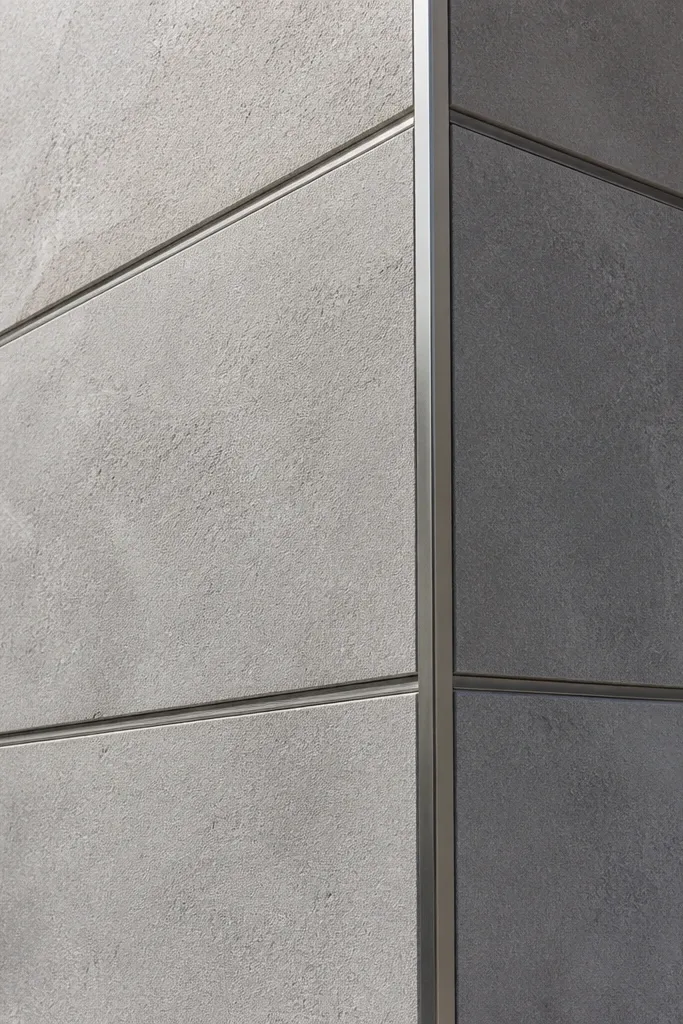
Thin metal edging at panel corners gives a modern, engineered look without adding a ton of visual clutter. The cement board keeps the facade flat and paintable, while the metal edges create a crisp line that reads high-end in photos. This is beginner-friendly because the build is mostly about straight cuts and clean fastening. It’s also a smart choice if you want clean geometry around a garage door or large entry opening. The edging makes seams look intentional instead of like joints you patched.
Install cement board panels as your field, keeping joints treated and flat. Plan where you want panel breaks — usually around windows, corners, and a central composition line. Add thin metal edging strips at those panel corners and edges to create a sharp boundary between planes. Fasten the metal with appropriate exterior screws and caulk where water can get behind. Prime and paint the cement board field, then leave metal edging in a coordinated finish like black or gunmetal.
Use tin snips and deburr the edges — clean metal corners look sharp, rough ones look sloppy.
Don’t paint over unprimed metal; it can peel and stain the facade.
23. Half-height slat wainscot for a modern porch front
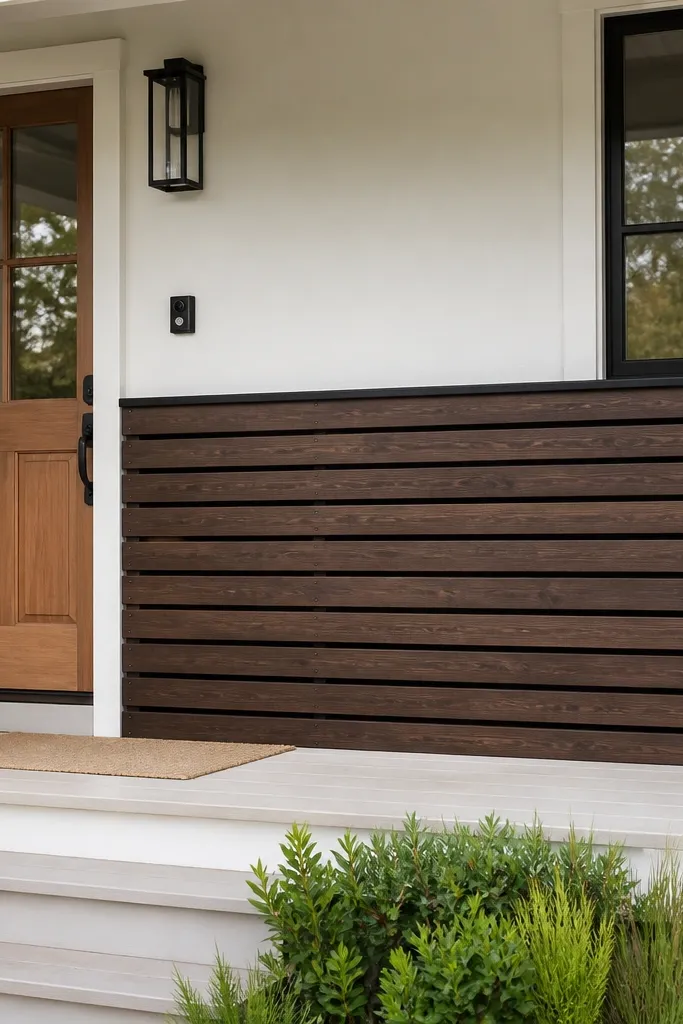
Measure the porch front and decide wainscot height — about 30 in. To 36 in. Looks right for most entries. Build a simple frame and mount vertical slats with consistent gaps, then add top and bottom trim rails to lock in the geometry. Keep the slats straight using a spacer jig and a level reference line. Prime and paint the slats and trim in matte finishes, and seal all cut edges. Caulk where the wainscot frame meets the porch posts and trim.
A half-height slat wainscot modernizes a porch fast because it adds structure without turning your front into a full screen. The key is the proportion: the wainscot should sit around mid-height and stay consistent across the porch face. This is beginner-friendly because you’re working on a manageable area and the slats can hide wall blemishes behind. It photographs well because you get depth at eye level — where people look. Choose this for homes with porches, covered entries, or front stoops where you want modern style without covering the entire elevation.
Skip thisDon’t make slat spacing random — the whole look depends on repeatability.
Editor's noteUse a slightly thicker top rail than bottom rail; it makes the wainscot read intentional and finished.
24. Modern stucco panels with thin recessed lines
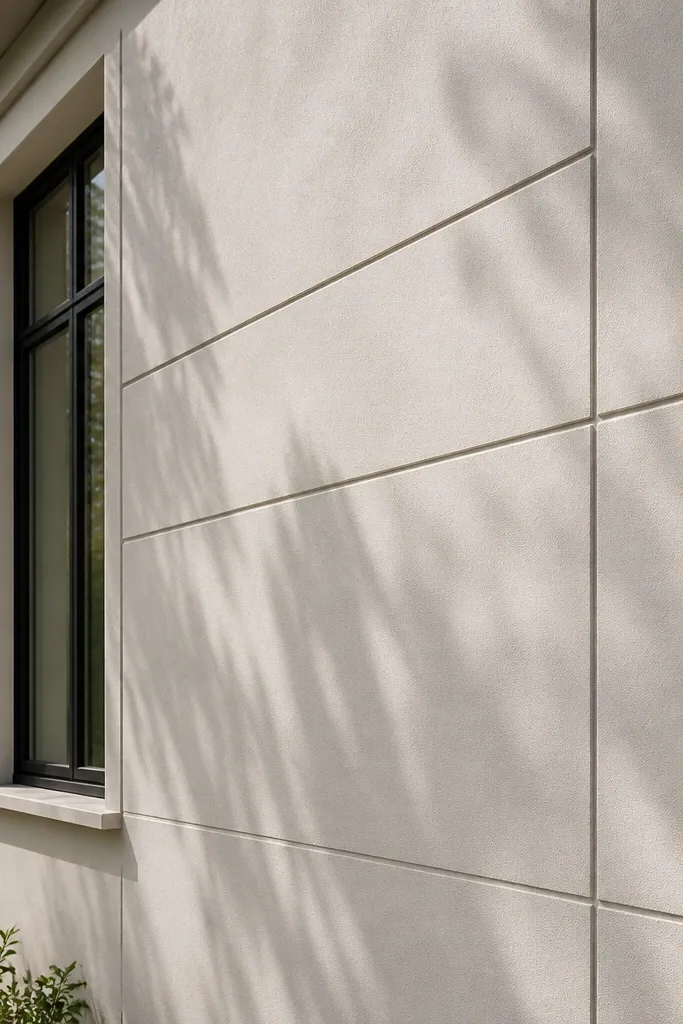
This look gives you modern panel definition on a stucco-style wall using thin recessed lines. It’s beginner-friendly because you can create the pattern with simple strip forms and keep the finish consistent. The recessed lines create shadow depth that looks architectural even when the wall is otherwise plain. It also helps if you want a clean, minimal facade without wood slats or metal panels. This is a good choice for stucco-friendly climates and for homeowners who like smooth wall surfaces but want more structure.
Apply your stucco-look base coat and keep it smooth or lightly textured so the recessed lines read. Then use thin strip forms (like straight PVC strips) to create recessed grooves at your panel lines while the material is workable. Remove forms carefully and fill/finish edges so the lines are clean and consistent. Prime and paint the stucco system in a light neutral, then lightly touch up line edges for sharpness. Caulk around windows and corners to prevent cracks from showing.
Pick panel widths that match your window sizes so the grooves align with window centers.
Don’t make the recessed lines too deep; deep grooves look heavy and cheap on small facades.
25. Charcoal board-and-batten gable statement
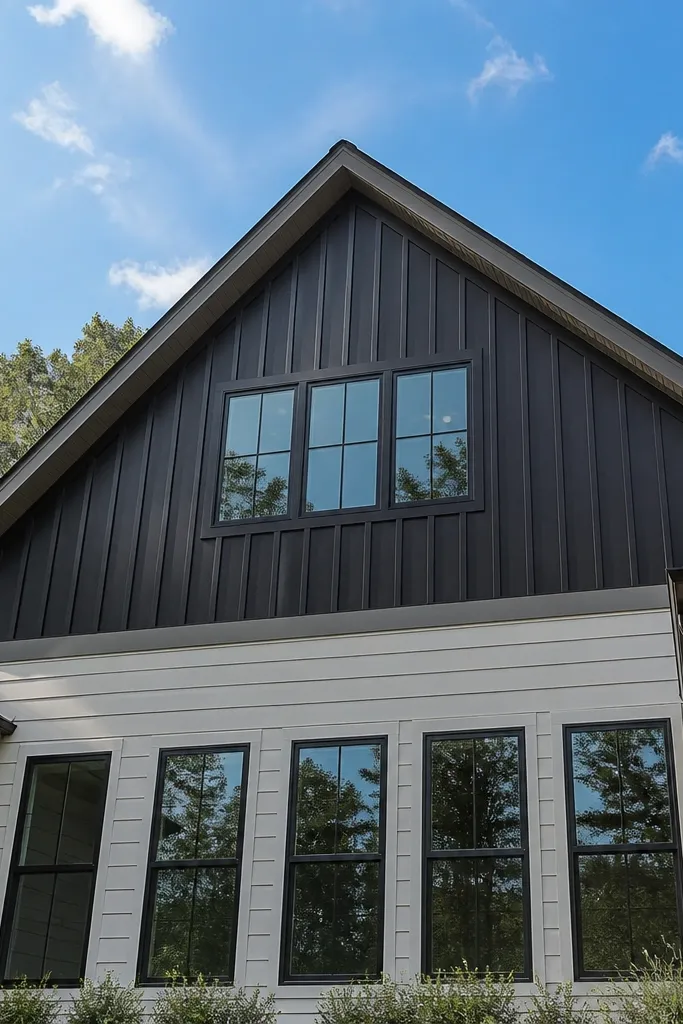
Mark the gable area and build a straight backing grid so battens sit perfectly vertical. Install a main field cladding on the gable face, then add battens with consistent spacing and a shadow gap. Use exterior primer on all cut ends before final paint or stain. Paint the battens charcoal and keep the field light for contrast. Seal joints and add trim at the gable edges where water can run down.
A board-and-batten gable statement is a modern focal point that doesn’t require full facade work. The gable is naturally eye-catching, and charcoal battens against a lighter wall makes the geometry pop. This is beginner-friendly because you can build the gable accent as a contained project with straightforward lines. It also hides small roofline trim issues by framing the gable with consistent battens. If your house feels plain from the street, this gives it a strong identity without touching the entire exterior.
Skip thisDon’t rush caulk on the gable; gaps look bigger on angled surfaces.
Editor's noteUse a laser line to set the first batten — the rest follow faster and stay aligned.



