
1. Charcoal shaker door with crisp white casing
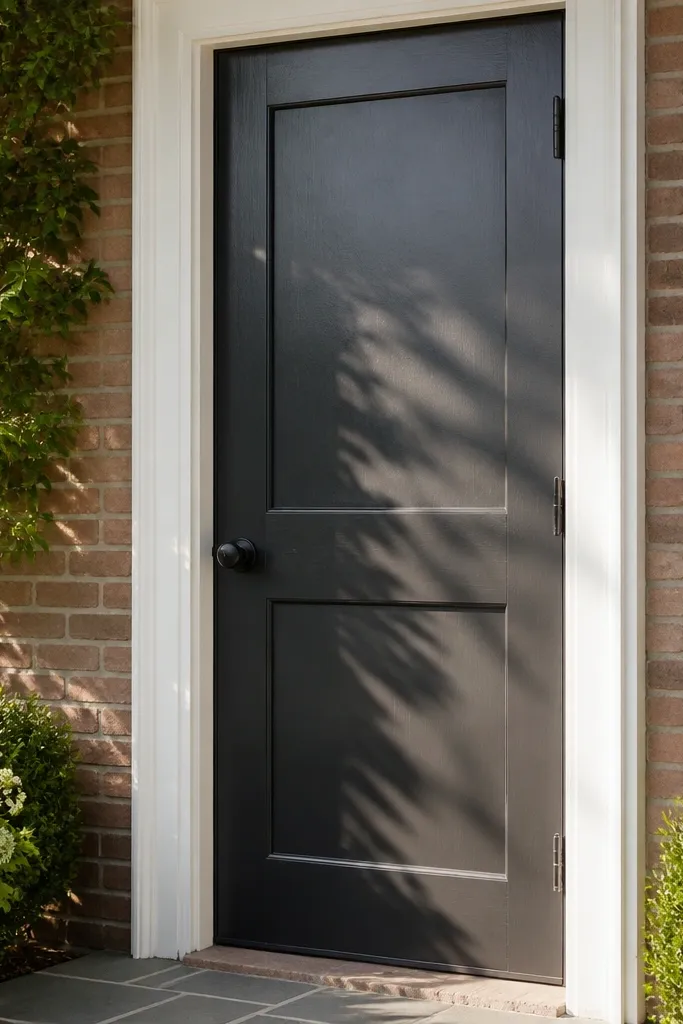
This is the “clean and expensive” combo: a deep charcoal door gives contrast, and white casing makes the doorway feel framed instead of recessed. Shaker-style panel lines add structure even if your door is plain, and the geometry catches light in the morning and evening. Use a semi-gloss or satin exterior paint so the door looks smooth but not shiny like a car. This design suits most homes because charcoal works with brick, siding, and stone, and the white trim ties into window frames. Skill level is beginner-friendly because you’re painting and adding trim lines, not building a full custom door from scratch.
Start by removing the door hardware and cleaning the door with a degreaser, then scuff-sand with 180-grit so primer sticks. Fill any dents with exterior filler, sand flush, and wipe dust off with a tack cloth. Prime with an exterior bonding primer, then paint the door charcoal in two coats, letting it dry per the can. Next, apply pre-cut shaker trim pieces inside a template you measure from the door edges, using exterior wood glue plus small brad nails or trim screws. Finish with caulk around the trim edges and reinstall the hardware.
Use painter’s tape to mark your panel grid before you cut trim — it keeps the lines straight across the door.
Avoid painting over a glossy surface; it leads to peeling and cloudy-looking edges.
2. Two-tone entry with painted transom trim
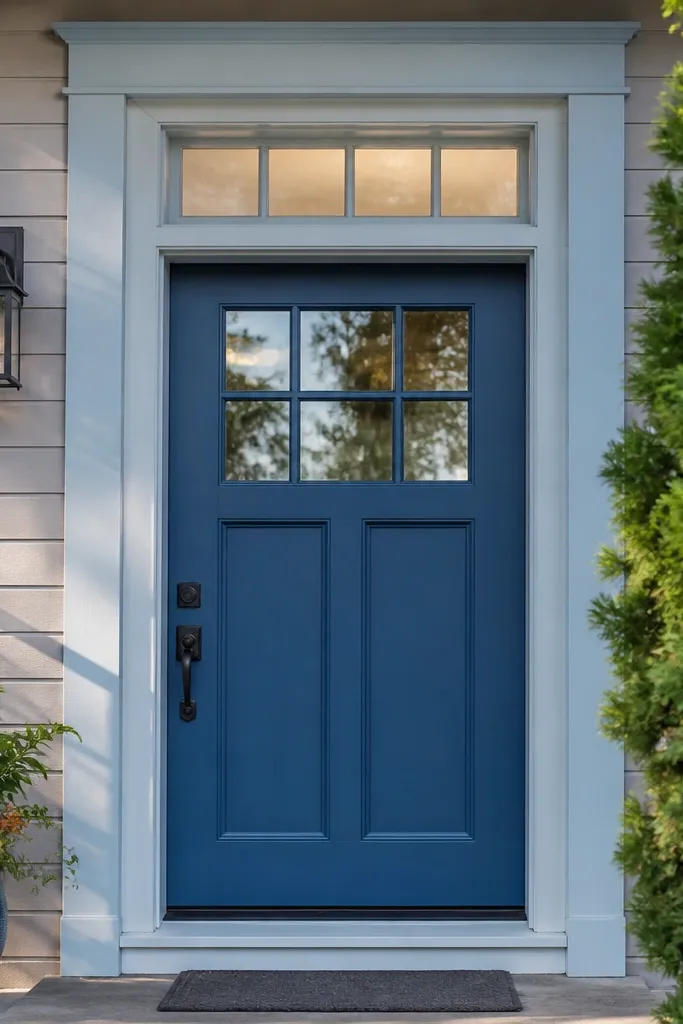
Two-tone entry design makes the door look more architectural because it treats the whole opening like one composition. Paint the door a saturated color, then paint the transom trim and casing in a lighter shade that matches your trim tone. The contrast adds depth and makes the glass area look intentional instead of like an afterthought. This works especially well when your door has sidelights or a transom, because the painted trim gives the light a cleaner frame. It’s beginner-friendly because you’re painting trim surfaces you can access easily, not cutting complex molding profiles.
Editor's noteSpray works cleaner for trim if you have it, but a brush-and-roller combo with careful back-brushing beats skipping primer.
Mask off the glass and weather stripping, then clean and scuff-sand the door casing and transom trim. Prime all bare wood or scuffed areas, then paint the lighter trim color first with a brush-friendly exterior enamel. After that cures, paint the door in your saturated color using a foam roller for flat areas and an angled brush for edges. Finish by removing tape carefully while the paint is still slightly tacky so edges stay crisp. Reinstall any hardware and check that the door clears the weather seals.
Skip thisSkip thick paint on window trim; it can run and create a wavy edge around the glass.
3. Natural wood-look door with black hardware
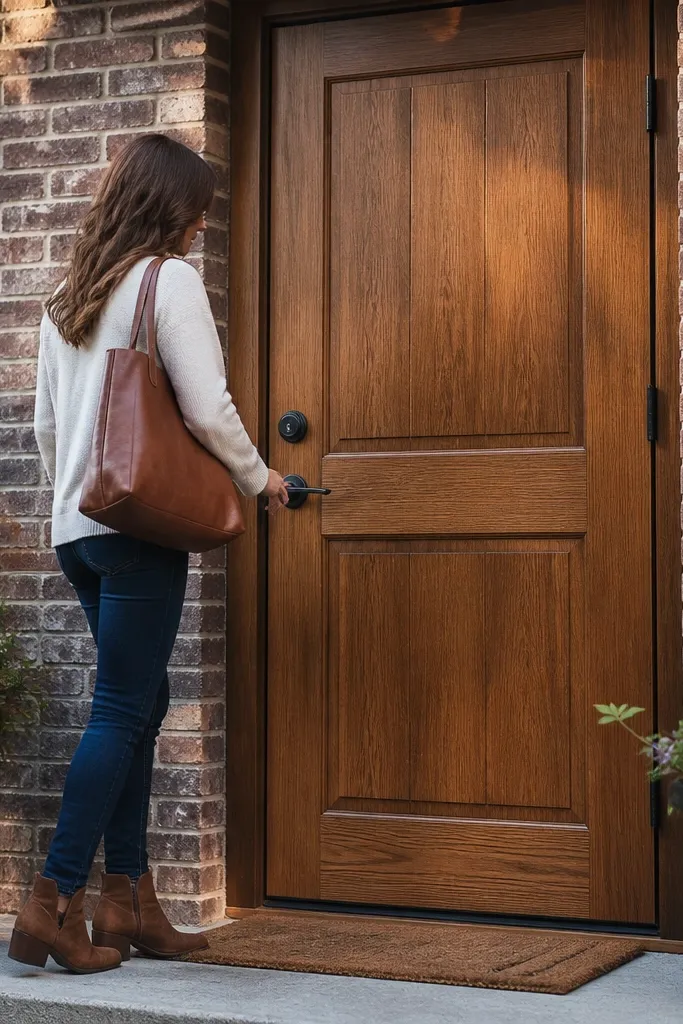
If you want the entrance to feel warm without looking busy, go with a wood-look finish and solid black hardware. A stain-like finish or a clear coat over a wood-toned door slab makes the grain read rich, and black hardware grounds it so the door doesn’t look washed out. The look is especially good on homes with brick or warm siding because the tones harmonize. This is also beginner-friendly if your door is already wood or you can apply a stain system over a compatible surface. The key is getting the sheen right: exterior satin keeps it modern and hides minor imperfections better than high gloss.
Clean the door thoroughly and strip any loose coating if the surface is flaking. Sand with 120-grit to level, then 180-grit for a smooth feel, wiping dust between grits. Apply an exterior wood stain or stain system in thin coats, working with the grain and wiping off excess for even tone. Let it cure, then topcoat with an exterior satin clear that protects against UV and moisture. Finally, swap in black hardware and add house numbers in a matching black finish at eye level, centered over the deadbolt height.
Do a small test patch in a hidden corner to confirm the stain tone — wood-look finishes can shift fast under sunlight.
Don’t apply clear coat before the stain fully dries; it can seal in blotches.
4. Limewash door with whitewashed trim accents
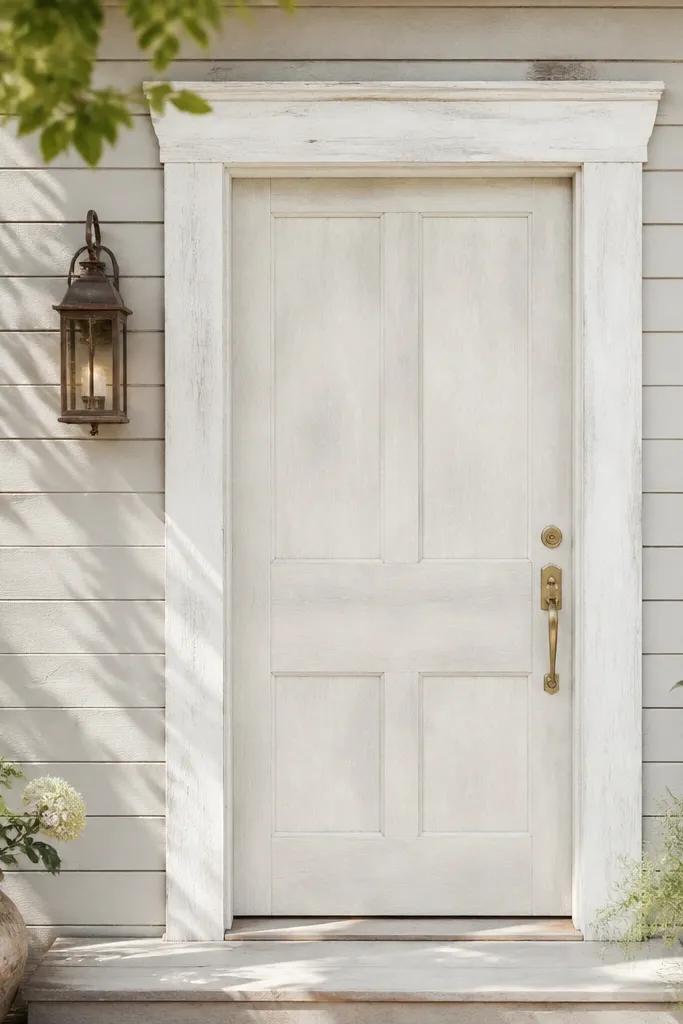
Limewash-style finishes create that soft, matte texture that reads charming and high-end in photos. Pair a slightly warm off-white limewash on the door with whitewashed trim accents so the whole entry feels lighter and more welcoming. The texture hides small surface flaws and gives the door a timeworn, natural look without needing real aged wood. This design is great for cottages, craftsman homes, and any entry with lots of light. It’s beginner-friendly because you can apply it with a brush and a rag technique, but you must follow dry times to avoid uneven spotting.
Editor's noteWork small sections and keep a wet edge so you don’t get hard overlap marks.
Prep the door by cleaning and scuff-sanding with 220-grit, then prime if the surface is bare or glossy. Mix or apply the limewash per the product directions, keeping coats thin so the texture stays airy. Use a wide brush to lay on the base, then lightly drag a dry brush or rag to remove heavy buildup. Let it dry, then do one more thin coat for consistency. Paint or whitewash the trim in a matching off-white, then seal only if the product recommends it for exterior use.
Skip thisAvoid heavy, thick limewash coats; they look muddy and take longer to dry.
5. Modern framed door with picture-frame trim
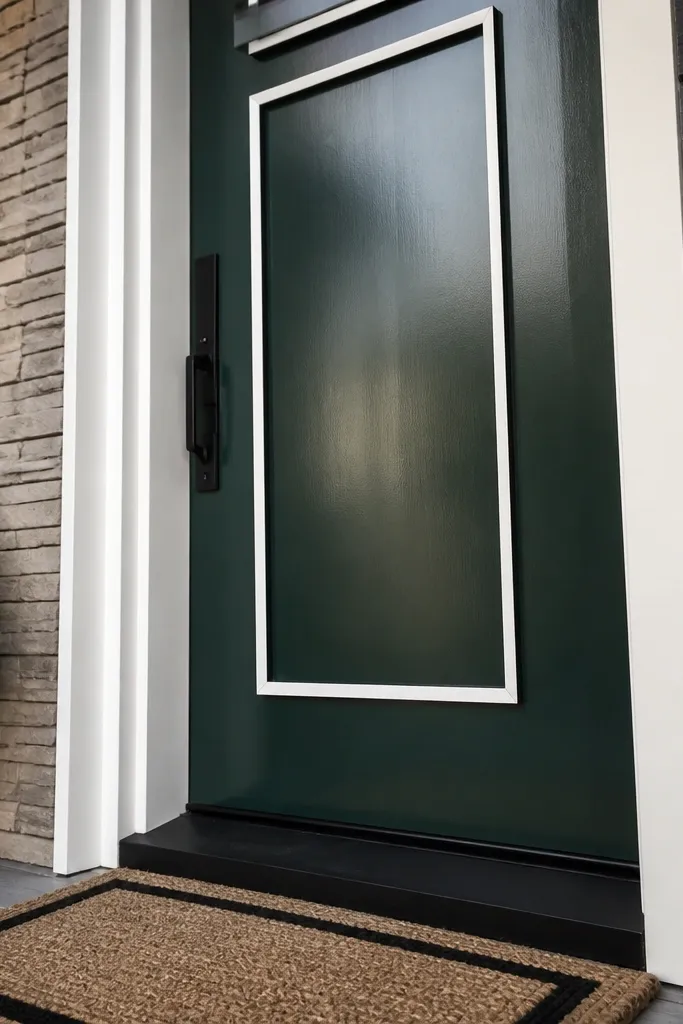
A picture-frame trim border turns a flat door into a framed centerpiece. The trick is using crisp, straight trim lines that sit slightly proud of the door surface, creating shadow and depth. Choose a bold door color like deep green, then frame it with white or matching trim color so the border pops. This looks great on modern farmhouses and any entry where the door is currently a simple slab. It’s beginner-friendly because you’re attaching pre-primed trim pieces with basic tools and measuring carefully.
Remove hardware and place painter’s tape around the door perimeter where you want the frame to sit. Measure the interior opening and cut trim pieces to form a rectangle, with miters at corners for a clean look. Dry-fit the frame pieces and adjust until the border spacing is even. Apply exterior wood glue and fasten with brad nails or trim screws, then caulk the seams. Paint the door and trim in your chosen colors, letting each coat cure fully before touching the frame.
Use a 1/4-inch consistent reveal from the door edge so the frame looks intentional, not random.
Don’t skip caulk at trim seams — tiny gaps show up immediately in daylight.
6. Board-and-batten door overlay (pre-primed panels)
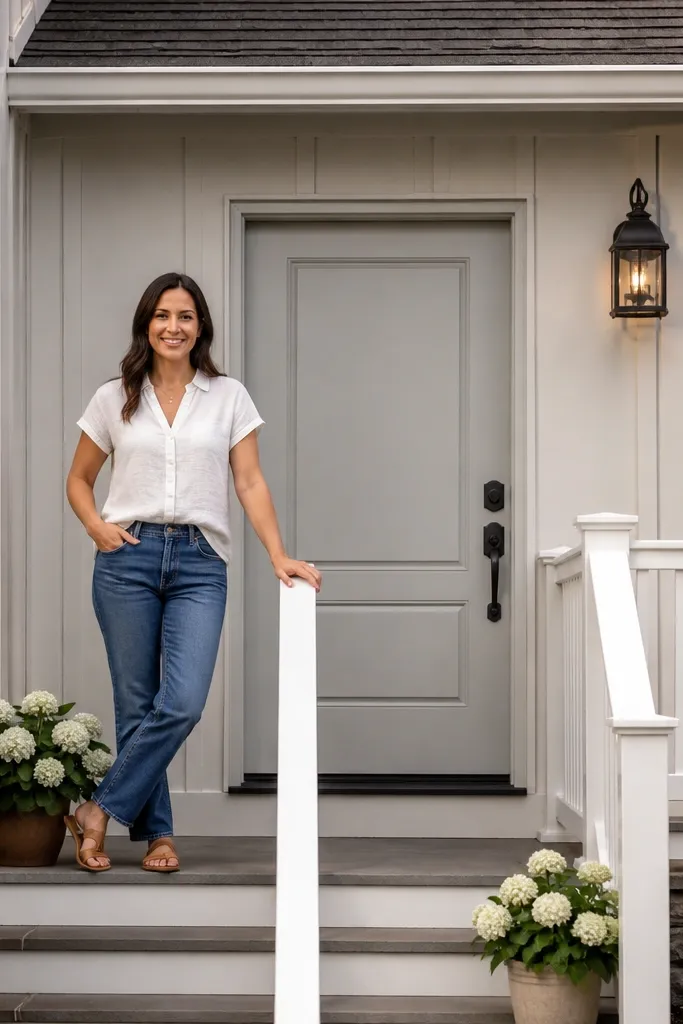
Board-and-batten overlay is the fastest way to make a builder-grade door look custom. Vertical battens create height, and the raised panel texture reads well from across the street. Use pre-primed exterior-ready boards so you’re not fighting raw wood swelling. This design works with almost any entry style, especially when paired with matte black hardware and matching house numbers. Time-wise, it’s a weekend project if you’re comfortable with a few straight cuts and careful measuring.
Editor's noteIf your door has a window, plan battens to avoid cutting too close — keep at least 1 inch of clear edge around glass trim.
Measure the door width and decide your batten spacing, usually 8 to 10 inches between batten centers for a balanced look. Cut the batten strips to length and mark their locations on the door with a pencil and level. Apply exterior construction adhesive on the back of each strip, then fasten with brad nails or trim screws for extra hold. Add a simple top and bottom rail if you want a more solid panel look, then fill nail holes and sand smooth. Prime and paint the whole door and overlay, using two coats for even coverage.
Skip thisDon’t rely on adhesive alone; the nails keep the battens aligned while glue cures.
7. Two vertical accent stripes on a plain door
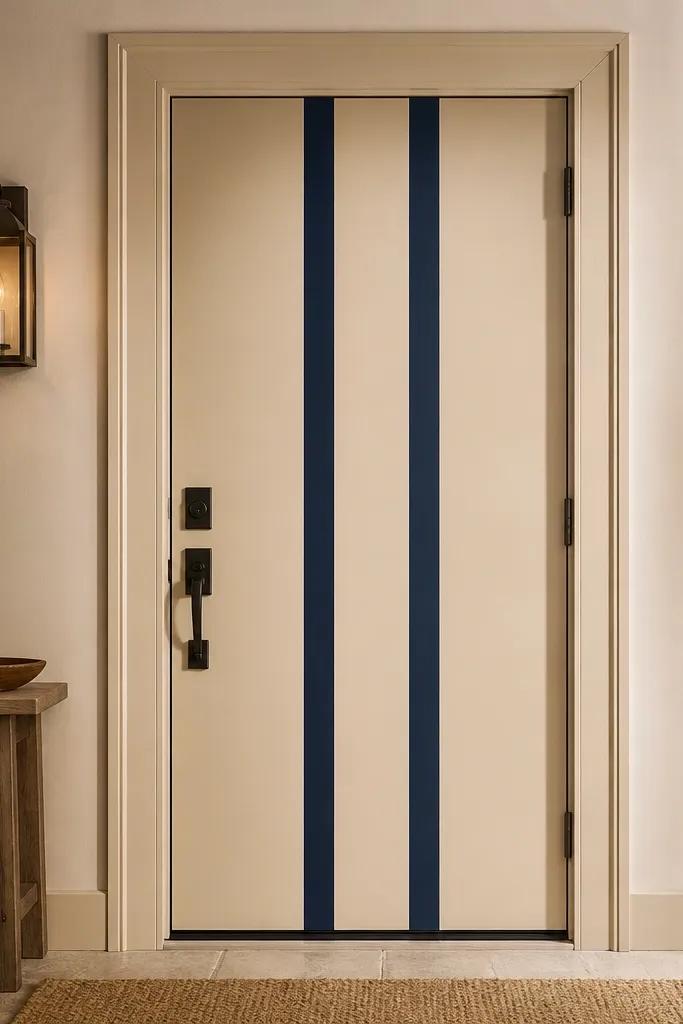
If you want a subtle but noticeable upgrade, two vertical stripes give you a graphic focal point without building panels. The stripes can be thin (about 1.5 to 2 inches wide) for a sleek look or wider for a bolder design. Choose a neutral door color like warm beige, then paint stripes in black or a deep navy to add contrast. This design is beginner-friendly because it’s basically paint and masking, and it looks clean in photos because the lines are straight. It works best on smooth doors where the surface is already even and ready for crisp tape lines.
Clean and scuff-sand the door, then prime any scuffed or bare spots. Use painter’s tape to map the stripe positions, measuring from the door center so both stripes are symmetrical. Paint the stripes first using a narrow brush for edges and a small foam roller for fill, then remove tape while the paint is slightly tacky. Let everything cure, then decide if you need a second coat for full opacity. Finish by swapping hardware to a warm metal like brass if your door color is cool or a cool metal like chrome if your door is warm.
Press tape edges firmly with a plastic putty knife so paint doesn’t creep under.
Don’t paint stripes over unprimed areas; uneven absorption makes one stripe look darker.
8. Deep blue door with warm oak trim detail
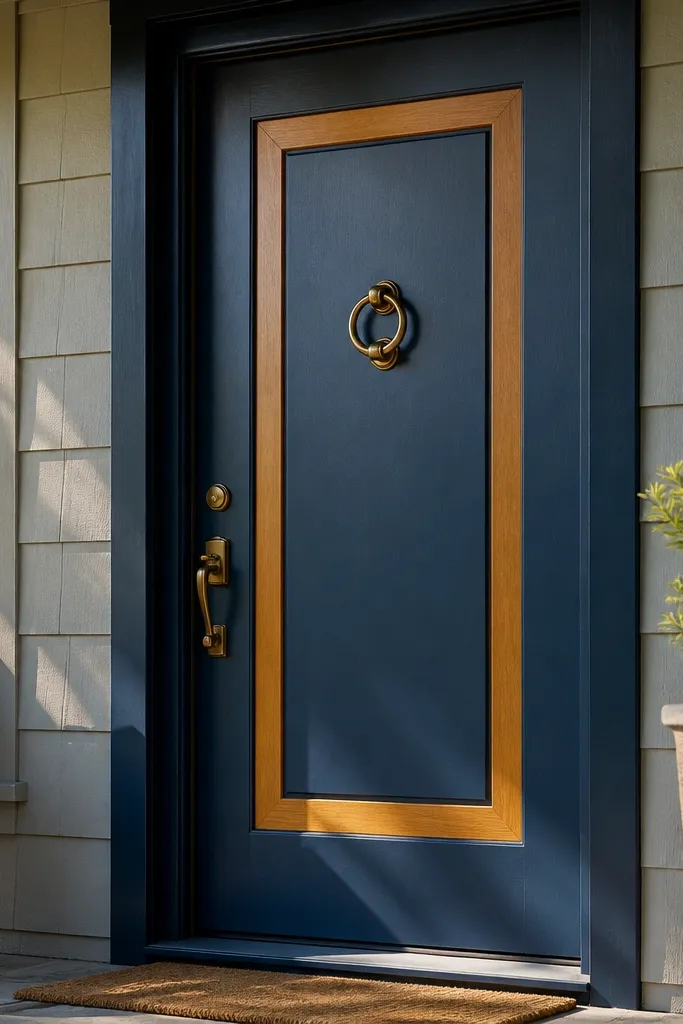
Warm oak trim next to a deep blue door looks like a designer picked it, even when the build is simple. The contrast between cool paint and warm wood tone creates an eye-catching frame around the door. You can keep the oak detail limited to a border or a small rail-and-stile arrangement so it doesn’t overwhelm the entry. This design is great for homes with light siding, stucco, or brick where you want a warm touch without going full rustic. It’s beginner-friendly because you’re staining trim pieces rather than trying to stain the entire door slab.
Editor's noteMatch the trim thickness to your existing casing so the border doesn’t look like an add-on.
Sand and clean the existing casing, then cut exterior trim boards to frame the door opening in a simple rectangle. Prime the trim boards, then stain in warm oak tone and seal with an exterior satin topcoat. Paint the door deep blue in two coats after scuff-sanding and priming. Install the stained trim with exterior wood glue and nails or screws, then caulk the seams. Add black hardware and centered house numbers to keep the look cohesive.
Skip thisAvoid staining trim that isn’t primed; it soaks unevenly and looks blotchy in daylight.
9. Matte black door with faux panel rectangles
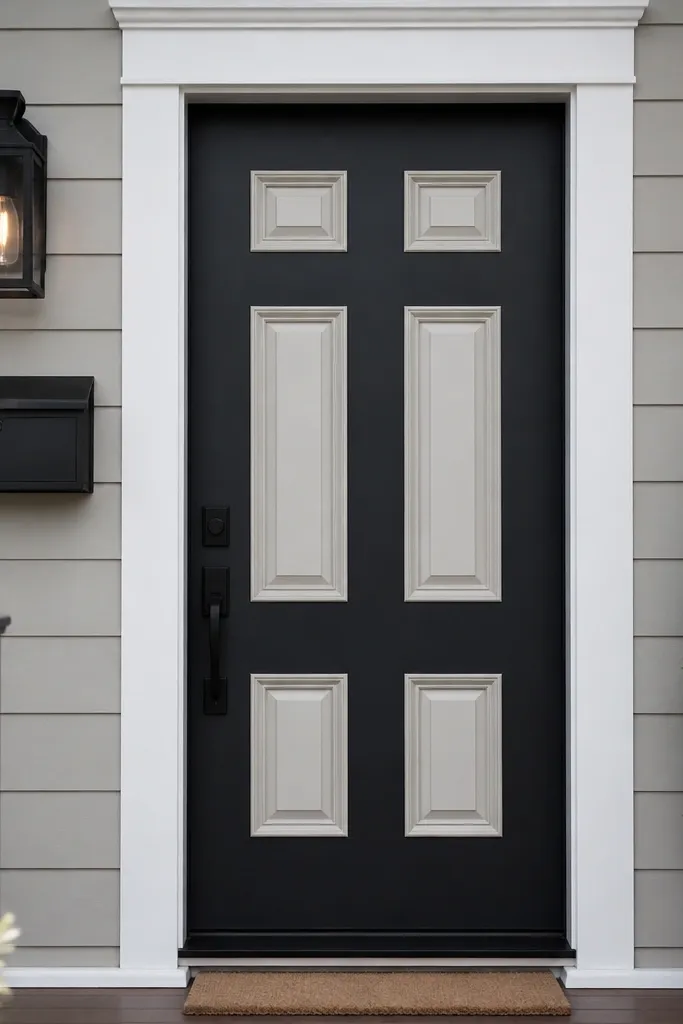
Matte black makes a door look bold and modern, and faux panel rectangles add detail without heavy construction. The contrast between matte black and a light panel color makes the door look dimensional. This is one of the best beginner-friendly main entrance door design ideas for entries that already have strong trim or siding patterns, because the door becomes the focal point. Keep the number of panel rectangles limited — two or three large rectangles look cleaner than a busy grid. Finish with matte black hardware so everything stays consistent.
Start by cleaning, deglossing, and sanding the door, then prime with exterior primer. Paint the entire door matte black in two coats, allowing full dry time. Once cured, use tape to outline two or three large rectangle areas, then paint those rectangles in a contrasting off-white or light gray. Remove tape carefully and let the panel paint cure. Add hardware and house numbers, and seal any edges where the panel paint meets the door surface.
Use a small angled brush for the inside corners of the rectangles so the edges stay sharp.
Avoid glossy black — it shows every roller mark and small dents.
10. Classic red door with brass hardware and simple wreath hook rail
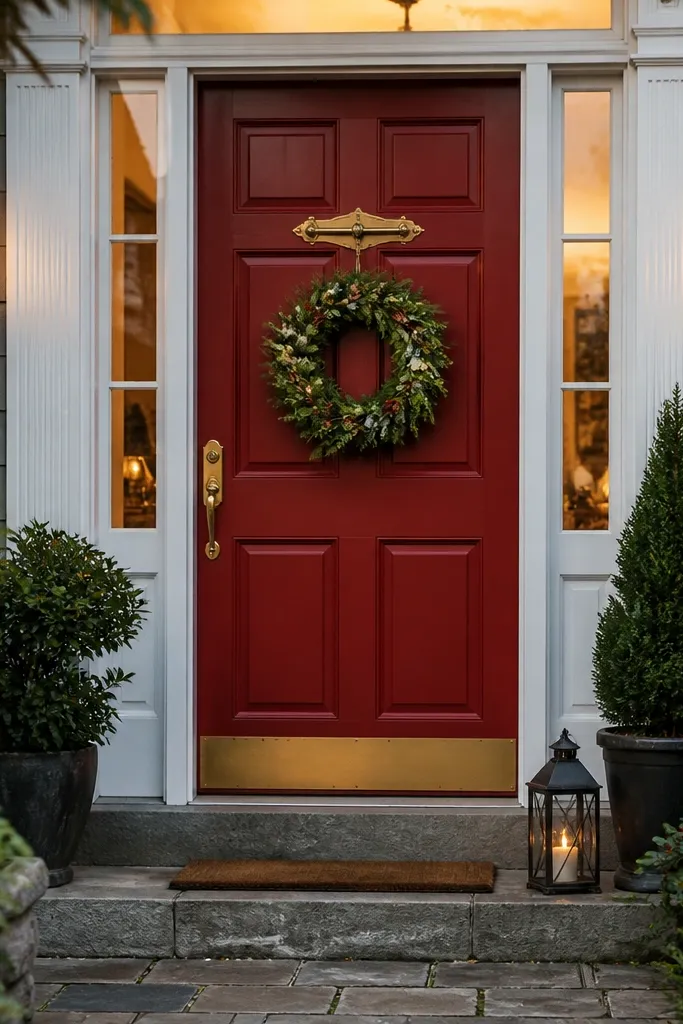
A classic red door is the fastest way to make a main entrance look cheerful and intentional. Add warm brass hardware and a small hook rail so seasonal decor looks tidy instead of hanging from random screws. This design photographs well because the red color pops and brass catches light softly. It works on nearly every facade color — siding, brick, and stucco all look better with a strong red anchor. Beginner-friendly because it’s mostly paint plus hardware placement and a small rail you can mount with two screws.
Remove hardware and clean the door, then scuff-sand and prime. Paint the door exterior red in two coats, using an even roller for large sections and a brush for edges. Install brass knob and deadbolt at standard heights, usually 36 inches to the center of the knob and 48 inches to the center of the deadbolt. Add a small exterior hook rail or narrow shelf near the top third of the door frame, centered, and pre-drill into studs if possible. Use outdoor-rated hooks for wreaths or seasonal signage.
Use painter’s tape to protect the casing; red paint loves to sneak under edges.
Avoid mounting hooks without checking stud location — you want solid bite, not just drywall anchors.
11. White door with black diagonal brace panel
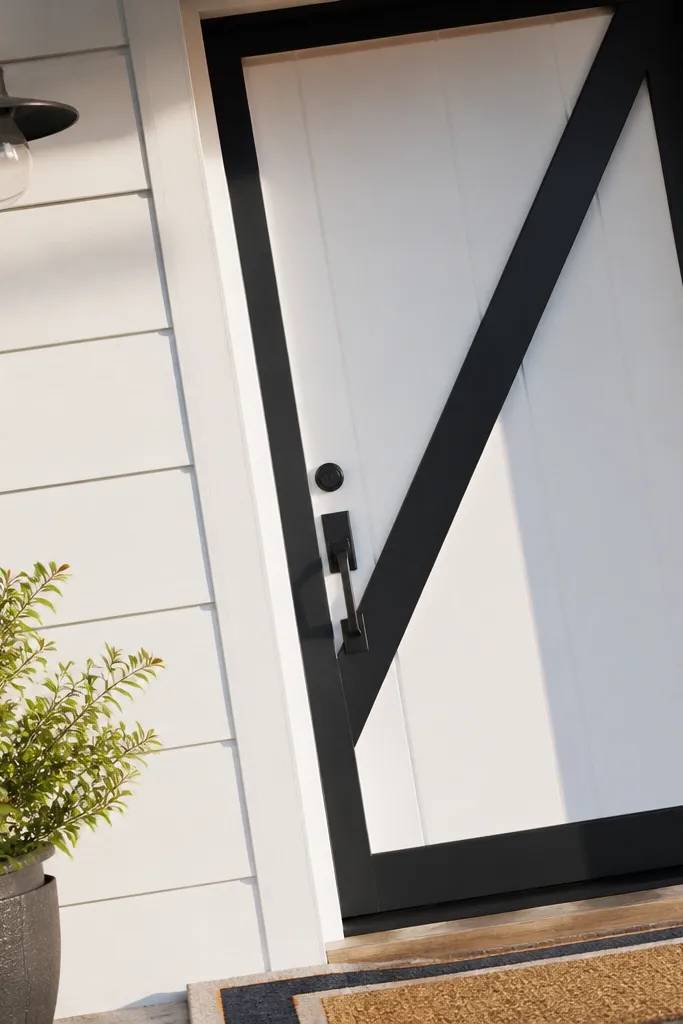
A diagonal brace turns a plain door into a graphic, modern farmhouse piece. It’s bold enough to impress from the street, but it’s still beginner-friendly because the “build” is just one diagonal trim strip (plus optional small corner blocks). Choose a bright white door so the black diagonal reads crisp. This works especially well on entries with simple siding patterns that need one strong design move. Keep it clean — one diagonal is plenty.
Editor's noteDry-fit the diagonal strip before glue — small angle errors show up immediately.
Prime and paint the door white, then let it cure fully. Mark the diagonal line from the top hinge side corner area to the bottom latch side area, using a level and measuring from the door edges. Cut a trim strip to match the diagonal length, then miter the ends if you want tight corners. Glue and nail the strip in place, caulk the edges, and paint the trim black. Mount hardware and house numbers in black to keep the palette limited.
Skip thisDon’t place the diagonal too close to the door edges; leave at least 1 inch so it doesn’t look cramped.
12. Faux arched top with removable trim stencil
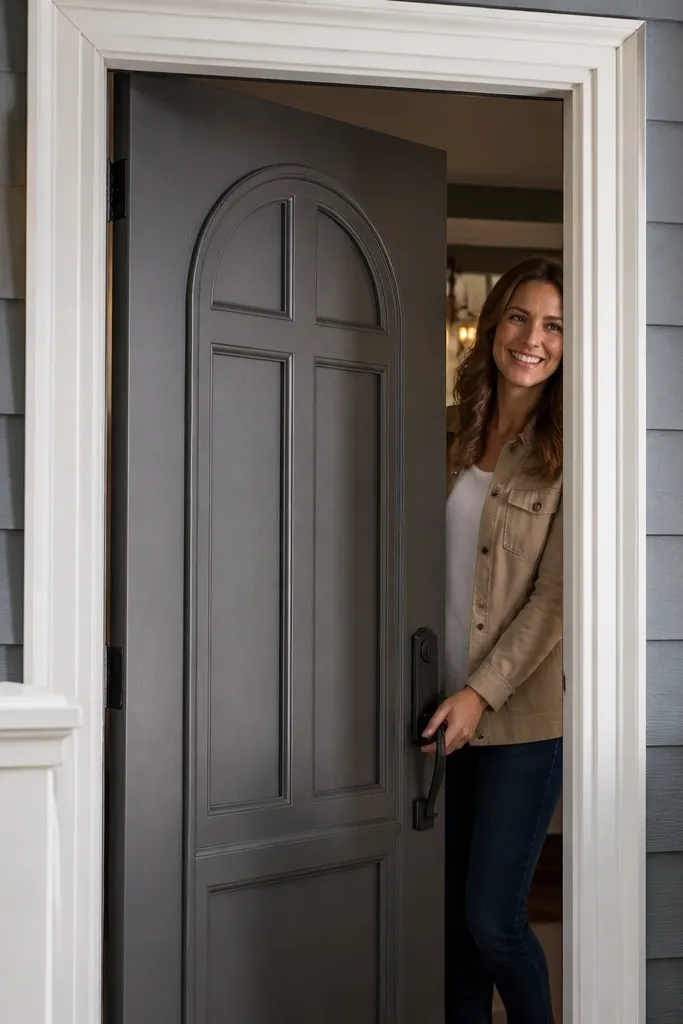
If your door opening has a hint of arch or you want that classic look, a faux arched top panel gives you the vibe without replacing the door. You create a raised arch using flexible trim or small pre-cut segments, then paint it to match or contrast with the door. This is a great beginner-friendly main entrance door design for people who want “character” but don’t want to rebuild the door slab. It also photographs well because the arch shape frames the top glass area and directs attention upward.
Choose the arch size first: typically 8 to 12 inches tall depending on your door height. Create a paper stencil or use a flexible batten to mark the curve on the door surface. Prime the surface and paint the door base color. Apply small trim pieces along the marked arch line using exterior glue and brad nails, then fill nail holes and caulk seams. Paint the arch trim in a contrasting cream or white, then reinstall hardware.
Use a thin trim profile so it curves cleanly without gaps.
Avoid wide, stiff trim on curves; it leaves visible gaps that are hard to hide.
13. Stained glass-look film with matching door paint
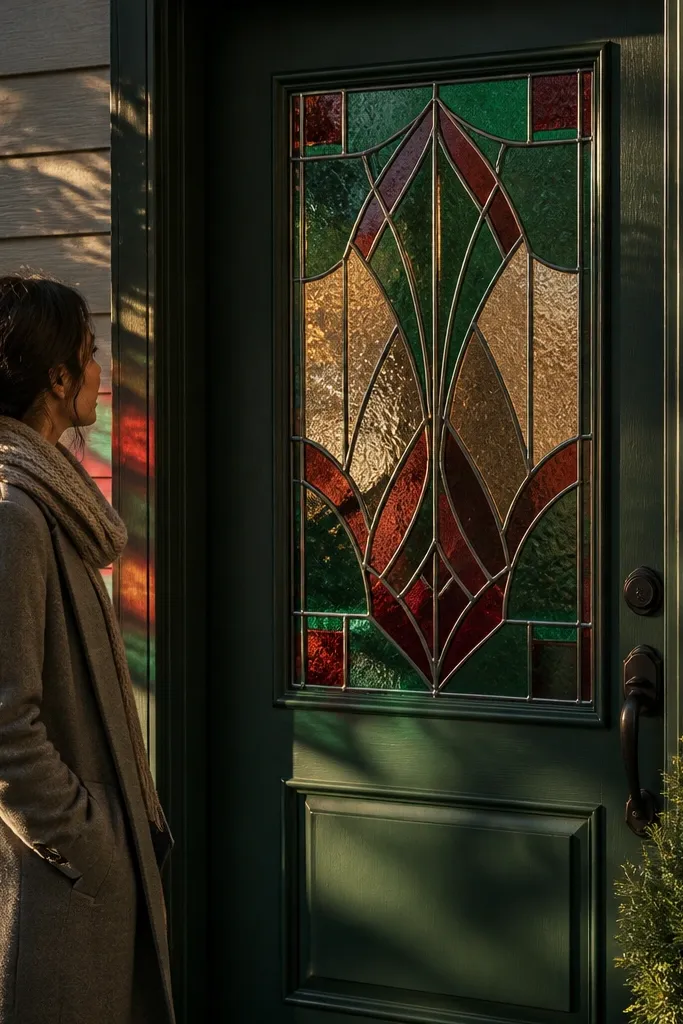
Stained glass-look film is one of the most photogenic upgrades because it changes the light coming through the door glass. Pair the film with a door paint color that matches the dominant tones in the film — deep green, navy, or warm burgundy. The result reads like a custom entry, even though the build is mostly prep and careful application. This is beginner-friendly when you have a door with sidelights or a glass panel, because you can work one section at a time. It’s also practical: the film adds privacy at the same time it looks decorative.
Editor's noteDo the film on a cool day; heat makes adhesives flash too fast and increases alignment mistakes.
Clean the glass with a glass cleaner and wipe with a lint-free cloth. Measure the glass pane and cut the film with a sharp utility knife, leaving a tiny margin for trimming. Apply the film using the provided application method (usually water + a squeegee), smoothing from center outward to push out bubbles. Once positioned, trim excess with a blade and wipe edges clean. Paint the door in two coats after you protect surrounding trim, and let everything cure before closing the door.
Skip thisAvoid stretching the film; it distorts patterns and can create gaps at corners.
14. Exterior board trim surround with shadow gap
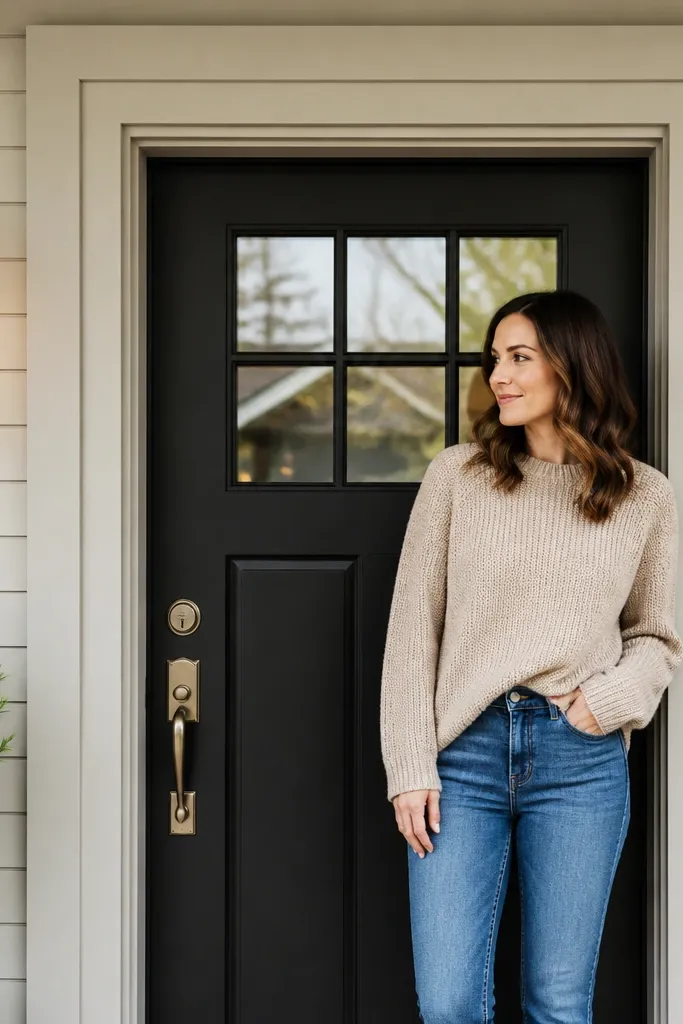
A thicker surround with a small shadow gap turns the doorway into a framed “picture” in your facade. You build a simple outer frame of exterior boards around the existing casing, leaving a consistent gap so you get real shadow depth. This makes the entrance look layered and intentional, even if your door is plain. It works on entries where the existing casing is thin or flat. Beginner-friendly because the frame is just straight boards — no fancy profiles required.
Editor's noteUse the same spacer thickness for every side so the shadow gap stays even in photos.
Measure the door opening and decide your outer frame width, usually 2 to 3 inches wider than the existing casing on each side. Cut exterior boards to length and pre-drill to prevent splitting. Dry-fit the frame and set a consistent gap (about 1/4 inch) from the existing casing using spacers. Glue and fasten the boards with exterior screws into solid framing, then caulk the inside edges. Paint the frame in a contrasting color and paint the door separately so both tones look clean.
Skip thisDon’t fasten only into trim; you need screws into structure so the frame doesn’t loosen.
15. Modern slat panel door using vertical PVC slats
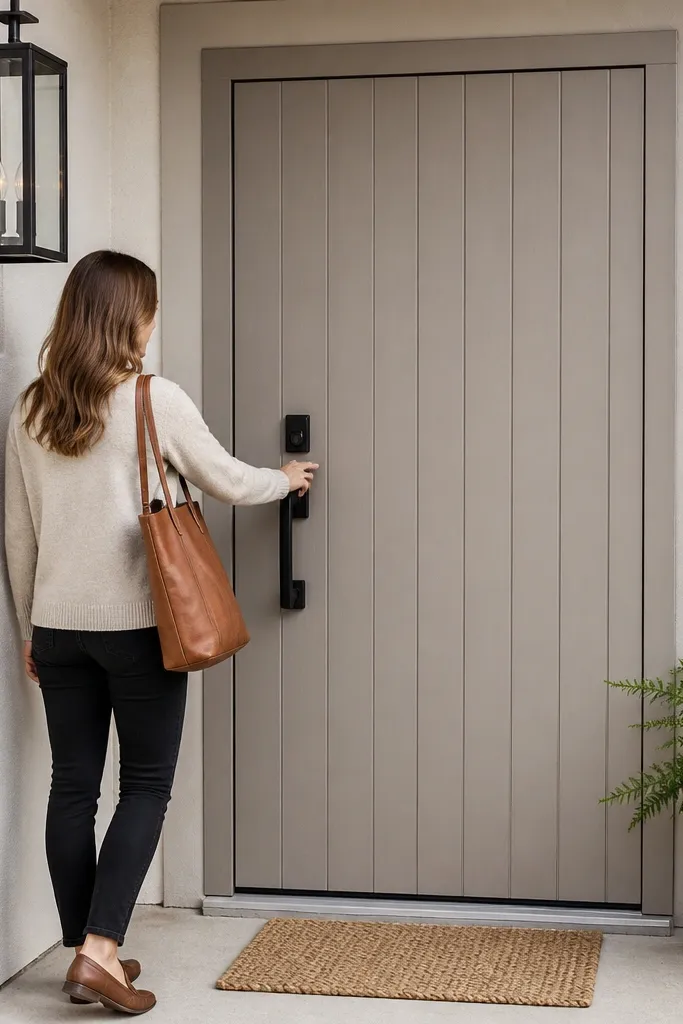
Vertical slats add a modern, airy look and hide minor surface imperfections. Using PVC slats is a smart beginner-friendly move because they resist moisture and don’t warp like thin wood. Paint the slats and door together for a clean monochrome, then use black hardware for contrast. This design is especially good for contemporary exteriors and for people who want texture without complicated carpentry. It photographs well because the slats create repeating lines and strong shadows.
Editor's noteUse a spacer comb or a scrap strip as a spacing gauge so every slat gap matches.
Clean and scuff-sand the door surface, then prime. Lay out slat spacing on the door so the pattern looks even from the street, usually 2 to 3 inches between slats. Cut PVC slats to match the door height and attach with exterior-rated construction adhesive plus small fasteners if needed. Fill seams lightly with exterior filler where required, then sand and prime the slats. Finish with two coats of exterior paint, and reinstall hardware and house numbers.
Skip thisAvoid cheap thin slats that flex; they look wavy after painting.
16. Cedar plank accent panel on the door center
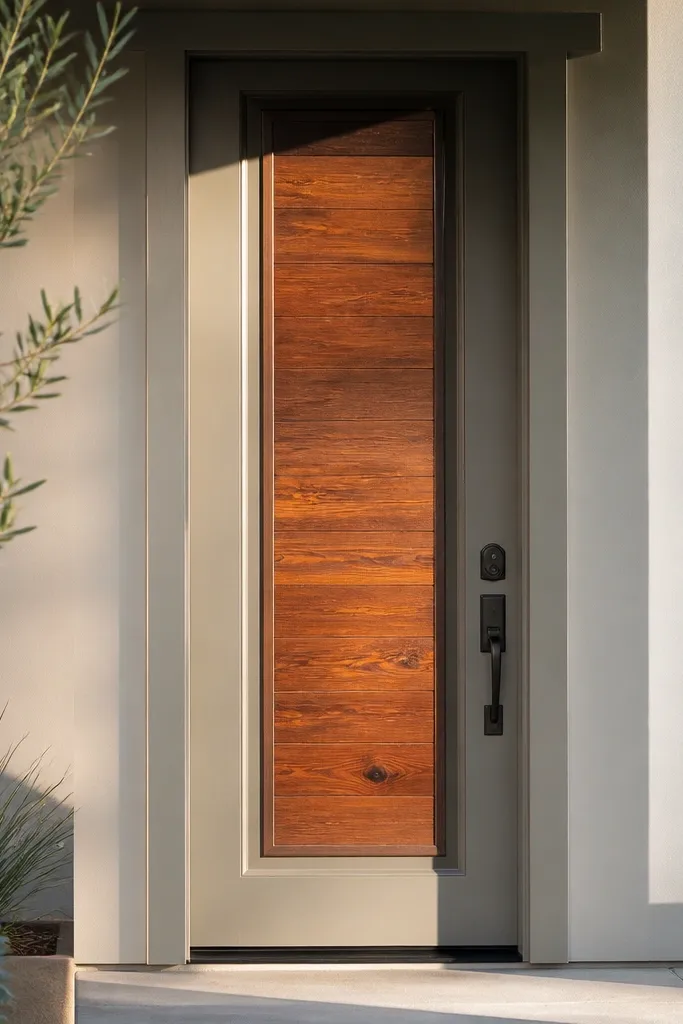
A single cedar plank accent panel makes the entrance feel warm and handcrafted. You keep the rest of the door simple, then add a textured center area that catches light and reads like real wood. Cedar also looks great when it’s sealed with a clear satin — it keeps the color from turning gray too fast. This design works on plain doors and on facades that need one natural texture. Beginner-friendly because you’re adding one panel section, not building a full board-and-batten overlay across the whole door.
Measure the door center area and decide the panel size, typically 10 to 14 inches wide depending on door width. Cut exterior cedar planks to length and arrange them with small gaps for a plank effect. Seal the cedar with an exterior clear satin compatible with outdoor use, then let it dry. Prime and paint the door base color, then glue the cedar panel onto the door using exterior construction adhesive. Nail lightly for alignment, caulk the edges, and reinstall hardware once everything is dry.
Pre-seal cedar before attaching — it’s harder to coat evenly once it’s mounted.
Avoid trapping raw cedar edges with thick paint; seal the edges for even aging.
17. Matte sage door with white faux raised panels
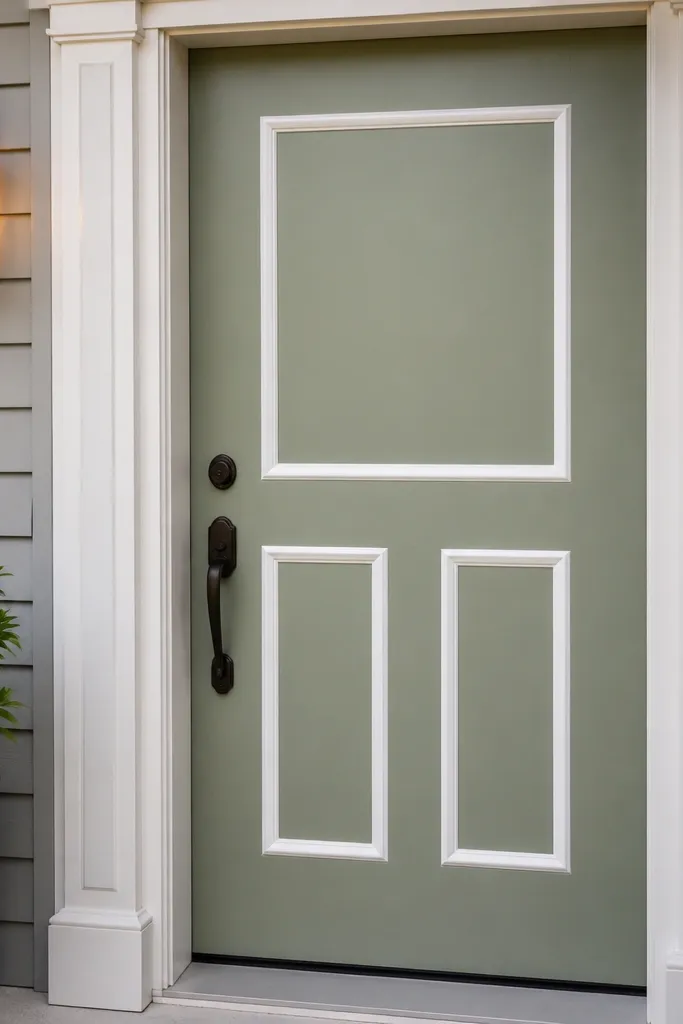
Sage is a calm color that still looks modern, and matte finish keeps it from looking flashy. Faux raised panels in white give you dimensional lines without needing to replace the door slab. This makes the door look tailored even if your entry has plain siding. It’s beginner-friendly because the “panels” are just trim strips or panel inserts you attach and paint. This design also hides tiny unevenness better than high gloss, so it’s forgiving for first-timers.
Editor's noteChoose a matte door paint that dries hard; soft matte finishes can scuff during installation.
Clean, scuff-sand, and prime the door, then paint it matte sage in two coats. Mark two to four panel rectangles on the door using measurements from the door edges so the spacing is symmetrical. Cut trim strips for those rectangles, then attach with exterior glue and brad nails. Fill nail holes, sand smooth, and caulk trim edges. Paint the trim panels white, let cure fully, then mount hardware and house numbers.
Skip thisDon’t use glossy paint for the panels if your door is matte; the shine mismatch looks off.
18. Black grid glass panel with matching door paint
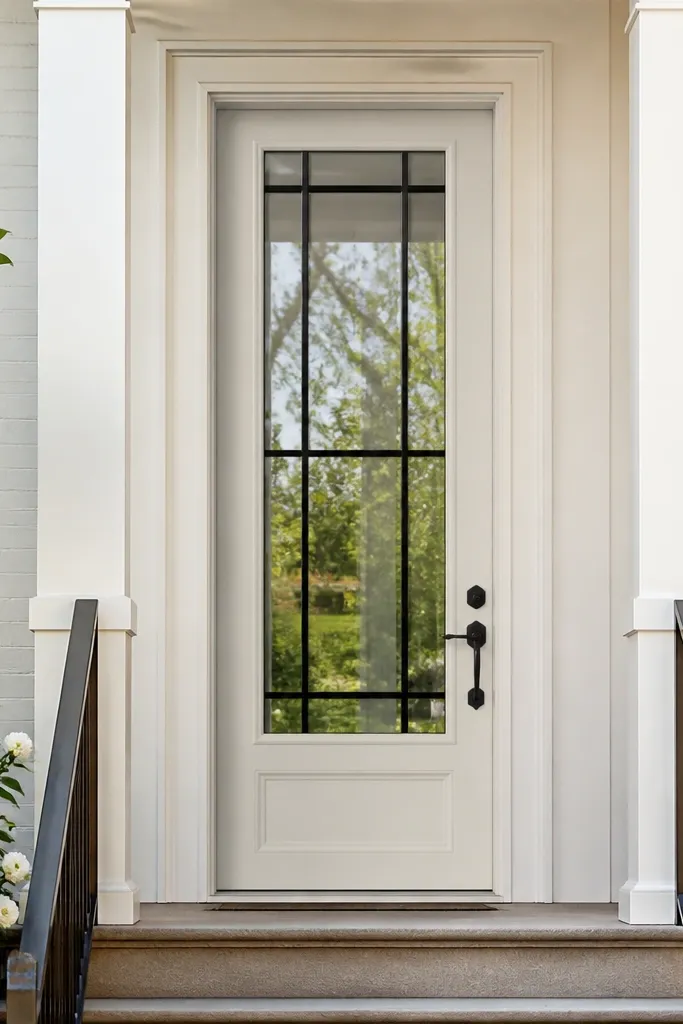
A black grid on a glass panel makes the entry look crisp and architectural. You get a built-in “design detail” that reads clearly in photos because the lines frame the light. Pair it with a solid door color like white, cream, or deep gray so the grid stays the main feature. This is beginner-friendly because you apply grid film or paint-safe grid inserts depending on your door glass type. It’s also a good option if your door already has a plain glass insert and you want it to look intentional without replacing the door.
Clean the glass thoroughly and check if it’s tempered or has a specific coating that needs gentle cleaners. Measure the glass panel and plan your grid spacing, usually 3 to 5 inches between lines for a balanced look. Apply grid film using water or the included adhesive method, smoothing with a squeegee to prevent bubbles. Paint or re-paint the door in a solid color if needed, then let it cure. Install hardware and confirm the door closes without scraping the film edges.
Use a tape-and-ruler layout before applying film — alignment mistakes are hard to fix once the adhesive grabs.
Skip thorough glass cleaning; dust shows up as specks in the grid.
19. Framed sidelights with painted trim and matching inner border
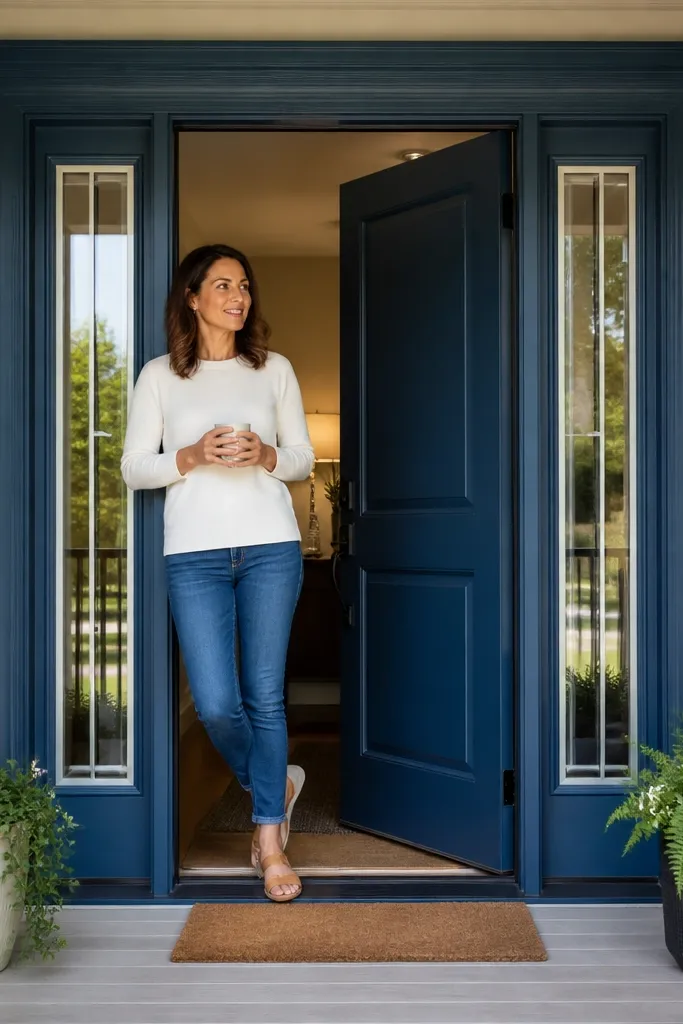
If you have sidelights, you can make the whole entry look custom by framing them with paint and a second border line. The look is clean: painted trim around the sidelights, then a thin inner border that creates a “window within a window” effect. Pair it with a door color that matches the trim — not the siding — so the entry reads cohesive. This design is beginner-friendly because paint and simple trim lines are straightforward, and you don’t need to replace windows. It’s a strong choice when your sidelights are there already but visually blend in.
Editor's noteKeep the inner border width consistent on both sides; measure from the glass edge, not the casing edge.
Mask the glass and remove any loose caulk around the casing if needed. Scuff-sand and prime the trim, then paint the outer casing first in your main trim color. After that cures, measure the inner border line and apply painter’s tape to create an even gap from the glass edge. Paint the inner border in a contrasting color, then remove tape carefully. Caulk around edges once dry and reinstall any trim pieces you removed.
Skip thisDon’t paint over cracked caulk — remove loose material first or your lines will look messy.
20. Monogram-style house numbers on a matching door panel
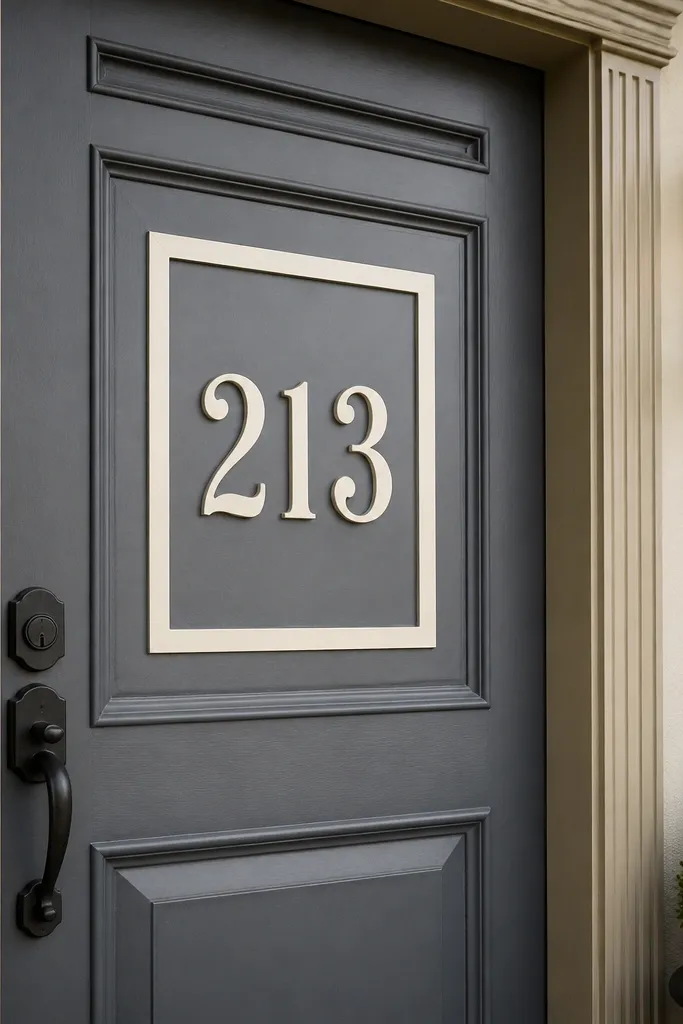
House numbers are part of the design, not a random accessory. When you mount them on a dedicated panel area — a small rectangle of contrasting paint or trim — the entrance looks finished and intentional. This works with any door color because the numbers become a focal point, and the panel creates a clean backdrop. It’s beginner-friendly because you’re doing layout, paint, and mounting hardware at the right height. It also helps your home read clearly at night when reflective or backlit numbers are used.
Choose a number size that fits your door: for most entries, 4 to 6 inches tall looks readable without dominating the door. Decide the placement: typically centered horizontally and about 60 inches from the ground to the number baseline. Create a small panel area by taping a rectangle and painting it in a contrasting color or by attaching a trim rectangle. Mount the numbers using the template from the product or by marking screw holes carefully, then pre-drill to prevent splitting. Seal around fasteners if the numbers are exterior-rated and weather-exposed.
Use a level and a printed template for the screw locations; crooked numbers ruin the whole look fast.
Avoid placing numbers too low; they look decorative but aren’t readable from the driveway.
21. Trimmed porch step landing with matching door color pop
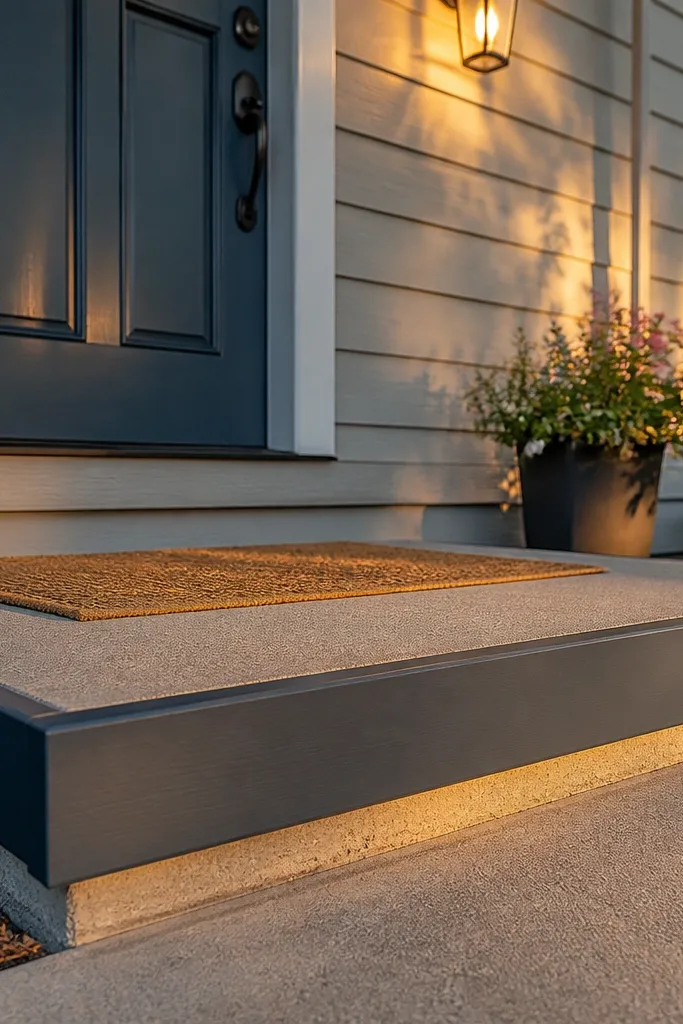
Your main entrance reads as one system: door, trim, and the landing in front of it. If your porch step landing is plain, the door can still look “off” because the ground area has no design cue. This idea adds a clean trim border around the landing (simple board frame) and ties it back to the door color with a small accent. The result looks more polished because the eye has a consistent visual boundary leading to the door. Beginner-friendly because you’re building a frame on flat surfaces with exterior boards, not cutting custom stair parts.
Measure the landing area and cut exterior boards to frame it, keeping corners square and using a miter box for cleaner edges. Dry-fit and adjust so the frame sits evenly with a small gap for expansion. Pre-drill into the landing structure and fasten with exterior screws, then caulk the seams. Paint the frame in the same color as your door accent or trim, and paint the door in a matching tone. Add a simple doormat with a solid color that complements the palette so the whole entrance looks styled.
Leave a small expansion gap at the ends so the frame doesn’t buckle when temperatures change.
Don’t glue boards directly onto damp surfaces; install over dry, sealed bases.
22. Sunburst trim fan above the door (budget-friendly version)
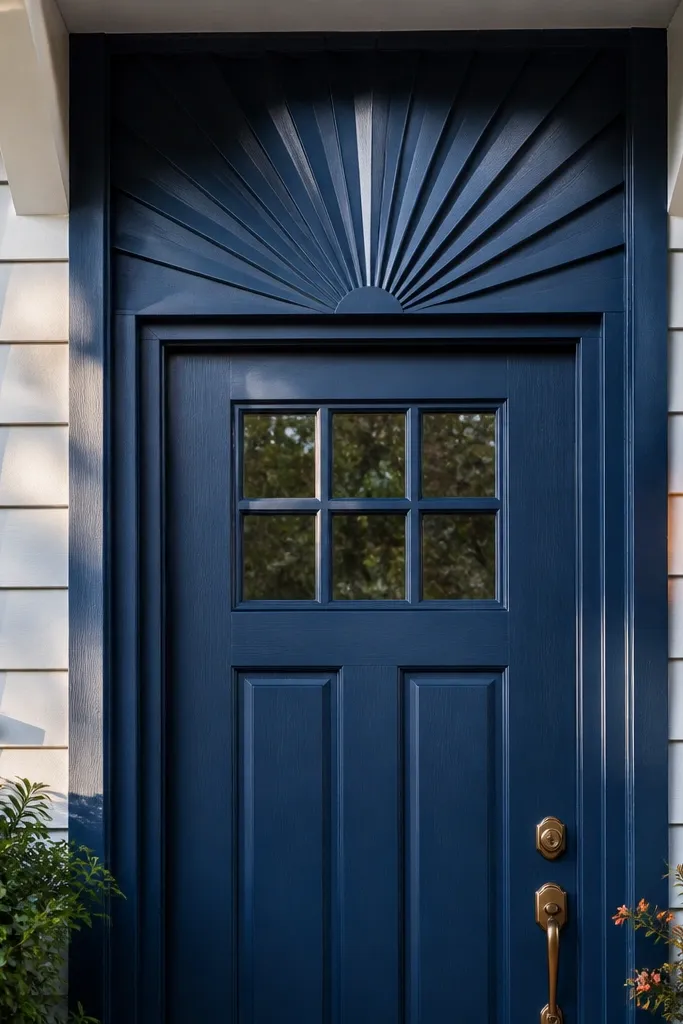
A sunburst fan above the door adds instant wow because it creates a starburst focal point that catches light. You don’t need fancy carved wood to get the effect — you can build a budget-friendly version with multiple narrow trim strips radiating from a center point. Pair it with a strong door color like red, navy, or black and keep the casing simple so the fan stays the hero. This works for entries with a blank transom area or a wide header space above the door. Beginner-friendly if you’re patient with layout — the rays need even spacing for it to look crisp.
Editor's noteUse a string and a pencil for the circle layout so your center point stays dead-on.
Decide the fan size and mark the center point above the door. Cut a set of narrow trim strips to equal length, then sand the edges smooth. Lay them out on the floor to check spacing, then transfer the layout to painter’s tape on the mounting surface. Glue and nail the rays in order from the outside in, then add a small rosette or square center block. Prime and paint the entire fan the accent color, then paint the door and reinstall hardware.
Skip thisAvoid uneven ray lengths; the fan looks lopsided even if the door paint is perfect.
23. Crisp white door with warm wood ladder trim sides

Ladder trim sides create a tall, framed look that’s different from standard casing while staying beginner-friendly. The idea is to add two vertical ladder-like trim sections on each side of the door or centered around the sidelights. Use warm wood tone or stained trim so the entry has warmth against white paint. This is especially good when your house has gray siding or brick — the wood adds balance. It looks great in photos because the repeating ladder lines create texture and depth without covering the entire door.
Editor's noteStain and seal before installation — it’s cleaner and you avoid missing spots where trim meets casing.
Paint the door white first, then cut your ladder trim pieces from exterior-rated boards. Build each side section by attaching short horizontal rungs between two vertical rails, keeping rung spacing consistent (about 6 to 8 inches). Prime and stain the ladder trim, then seal with an exterior satin topcoat. Mount the ladder trim on the door casing sides using exterior construction adhesive and nails, then caulk where it meets the casing. Finish by adding black or bronze hardware and aligned house numbers.
Skip thisDon’t mount ladders too close to the door edge; leave at least 3/4 inch so the frame doesn’t crowd the opening.
24. Oversized wreath-ready top rail with exterior hooks
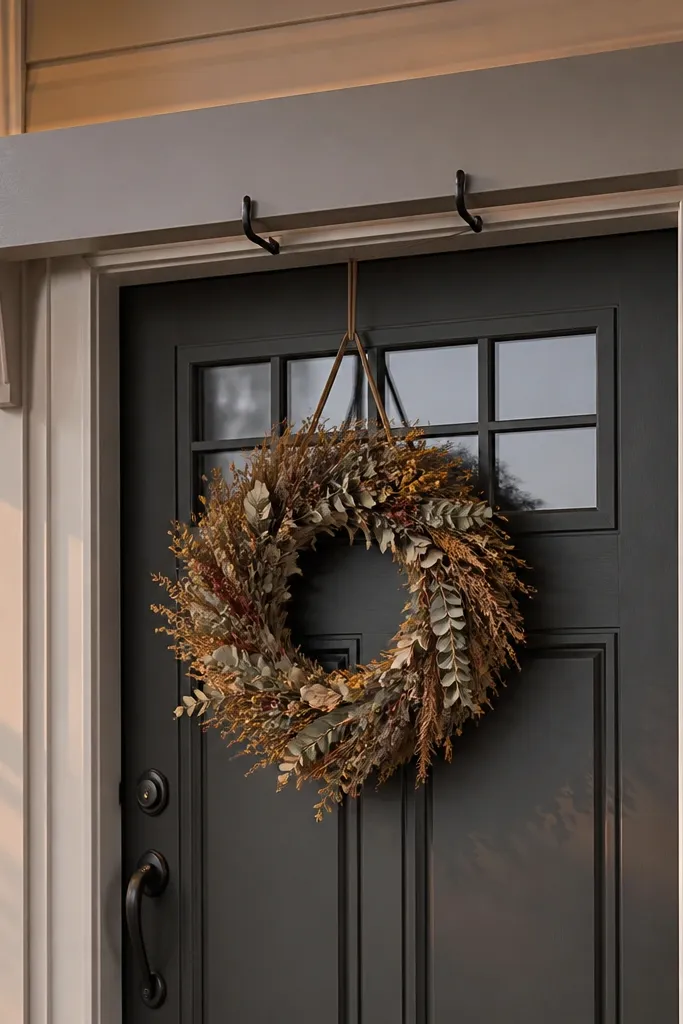
This is the “always looks styled” entry move. A long top rail across the upper portion of the doorway gives you a clean place to hang wreaths, signs, or seasonal decor without drilling into the door itself. It also frames the top of the door visually, which helps when your entry is tall or narrow. Paint the rail the same color as your casing for a seamless look, or choose a contrasting color if you want the rail to be a feature. Beginner-friendly because the rail is just a straight board or two, secured into structure.
Measure the width across the door frame and cut a rail board to length, keeping it centered. Sand edges smooth, then prime and paint to match your trim. Mark hook positions evenly, then pre-drill into the rail for the hooks so you don’t split the wood. Locate studs or solid framing behind the casing and mount the rail with exterior screws through the trim into structure. Attach hooks rated for outdoor use, then step back and check the rail alignment before final caulk.
Use a long level to mount the rail; small tilt differences show up fast in doorway photos.
Avoid mounting into hollow trim with only small screws; it pulls loose after weather swings.
25. Storm door with matching interior frame color
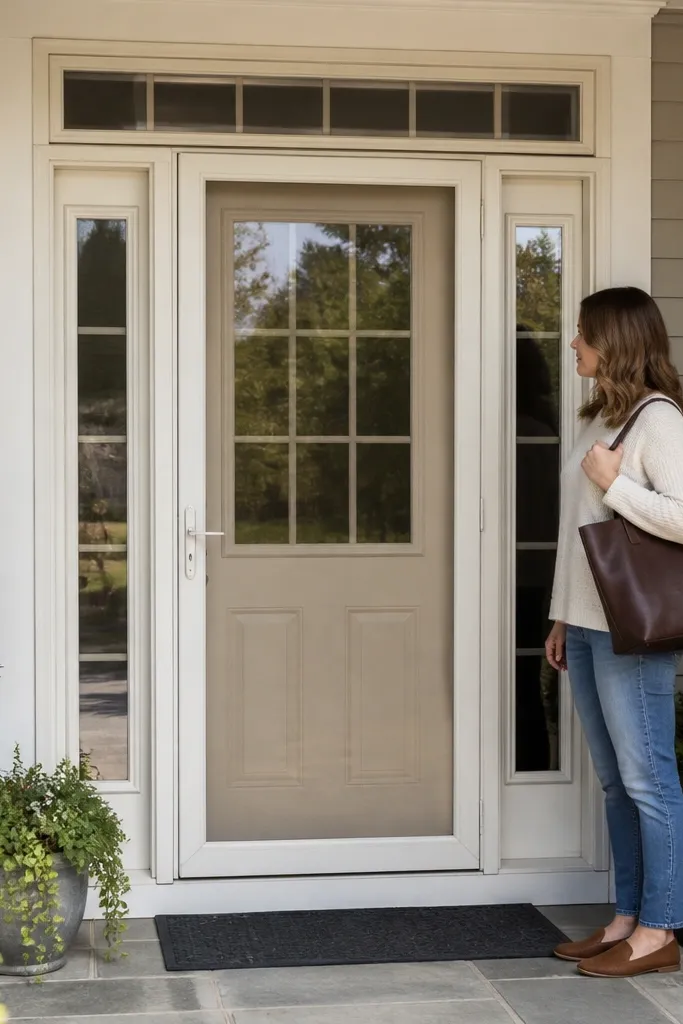
A storm door can make your main entrance look less intentional if its frame is a different color than your trim. Fix that by painting or selecting a storm door with an interior frame color that matches your casing, and paint the main door to match the rest of the palette. This makes the layered glass look designed instead of mismatched hardware. It’s beginner-friendly because you can focus on color correction and hardware alignment rather than replacing the entire door system. It also improves curb appeal because the glass area becomes a clean, consistent frame.
Clean the storm door frame and scuff-sand it for paint adhesion, then prime with exterior metal primer if the frame is metal. Paint the storm door frame in your casing color using an exterior enamel, two coats for durability. Paint the main entrance door in your chosen anchor color, keeping the sheen consistent with the casing. Reinstall the storm door and make sure the latch aligns smoothly with the frame. Add matching house numbers so the visual hierarchy stays on the entry.
Choose an enamel labeled for metal or exterior use so it doesn’t chalk or peel quickly.
Avoid painting over rust or peeling spots without scraping to solid metal first.



