
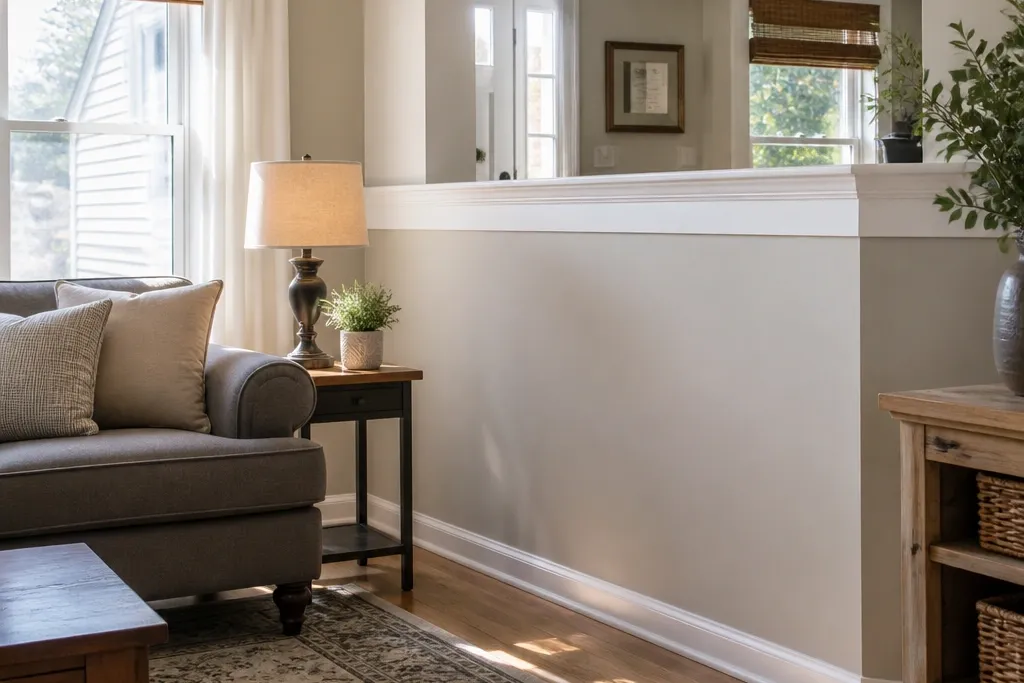
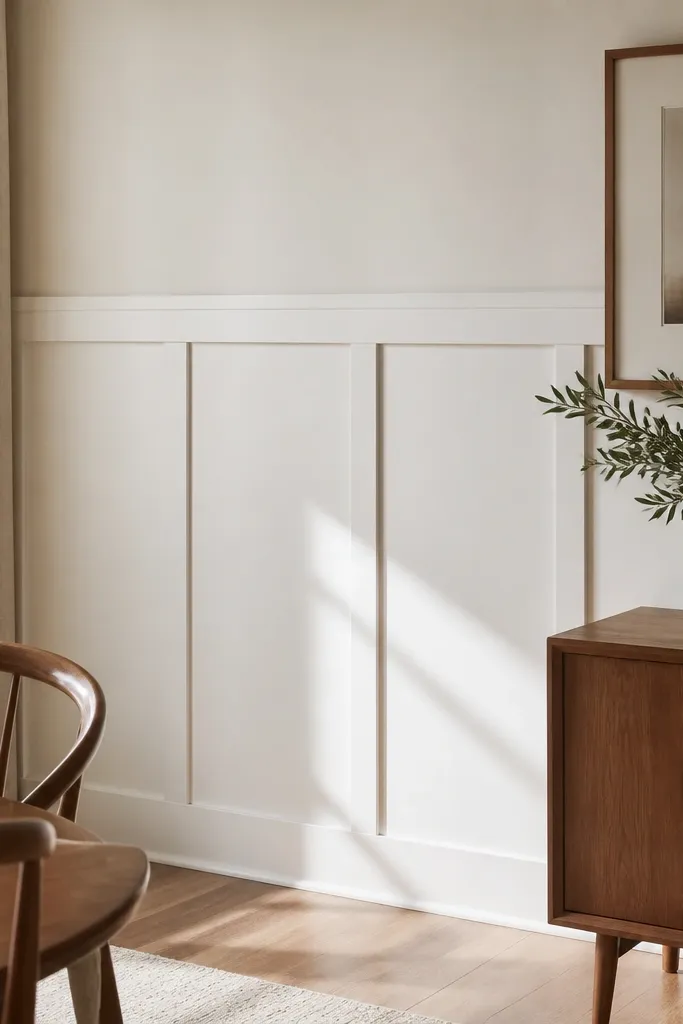
1. Classic chair rail cap with a clean top edge
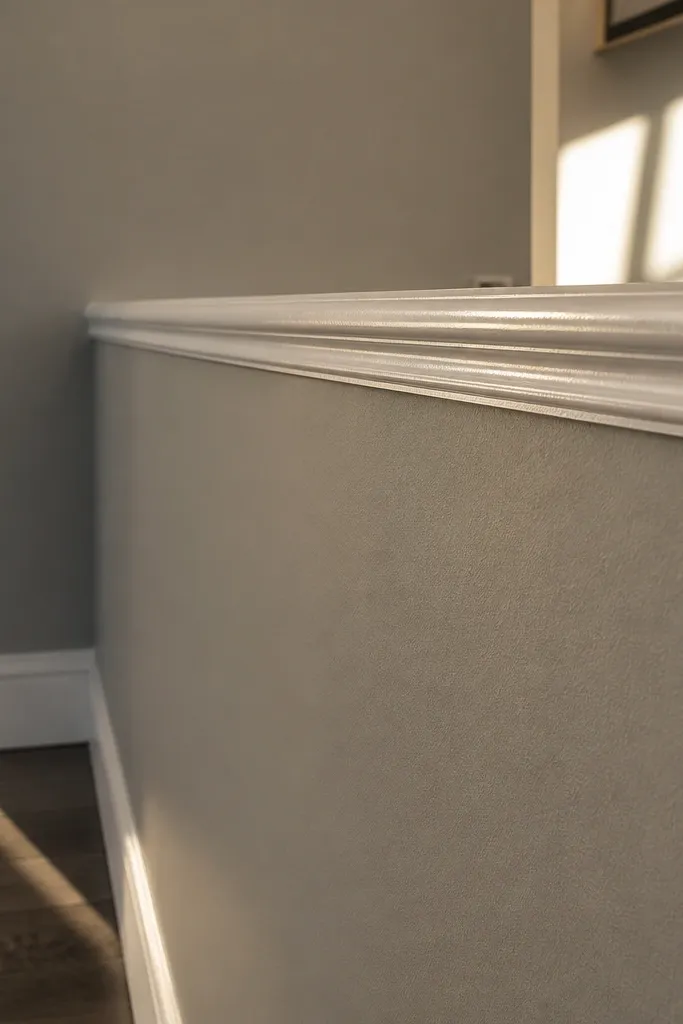
This look is the easiest way to make a half wall feel finished because it adds one strong horizontal line. Use a chair rail profile on the top edge only, then keep the rest of the wall simple so the trim reads clearly. Paint the trim semi-gloss white and the wall a matte warm gray so the moulding catches light instead of blending in. It’s beginner-friendly because you don’t have to build panels — just nail a straight run and keep your level line consistent. In photos, the single rail creates a “designed” frame effect without clutter.
Editor's noteUse painter’s tape as a temporary guide along your level line; it keeps the trim from drifting while you nail.
Start by marking your half wall height and drawing a level line where the chair rail top will sit. Cut the chair rail pieces with a miter saw for corners, then dry-fit along the wall before you fasten. Nail with 18-gauge brads into studs where possible, then fill nail holes with wood filler and caulk the seams. Finish by sanding lightly, then paint trim with semi-gloss and the wall with a matte finish.
Skip thisDon’t skip dry-fitting at corners — a tiny miter gap shows in every photo.
2. Two-tone half wall with crown-style top moulding
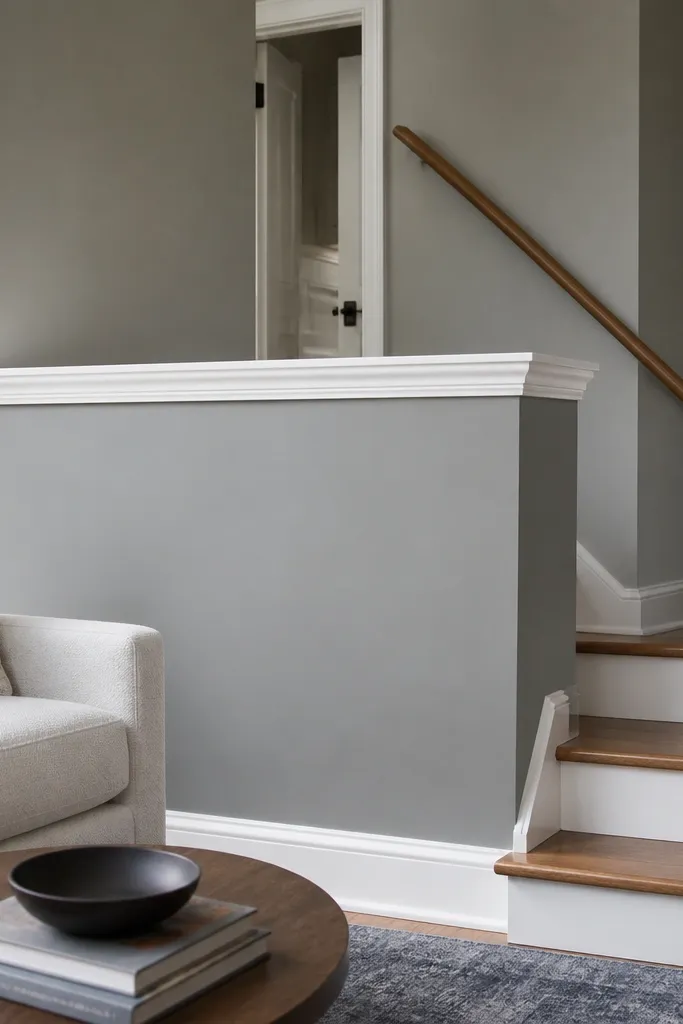
Crown-style moulding on a half wall top edge gives you a finished, built-in feel that reads high-end in pictures. The secret is contrast: keep the wall color softer and let the crown moulding be brighter so the profile shadow lines show. This works well in living rooms, dining nooks, and stair landings where you want the wall to look architectural without raising it to full height. Choose a crown profile with a moderate depth — too deep can look heavy and harder to align. Beginner builders like this because it still stays a simple “top-only” install.
Editor's noteDo two thin coats on crown moulding; thick paint fills the profile and kills the shadow detail.
Measure the top perimeter and decide how much crown height you want above the half wall cap — keep it between 3-5 in for a balanced look. Cut the crown moulding using the correct spring angle settings for your saw (or use a miter box if you’re new, with test cuts). Dry-fit each section, then fasten with brads along the back edge into solid backing. Fill seams with caulk, sand after it cures, and paint: wall first, then crown moulding in semi-gloss.
Skip thisDon’t paint the moulding before the caulk cures — you’ll get pinholes in the seams.
3. Picture-frame panels using flat trim grids
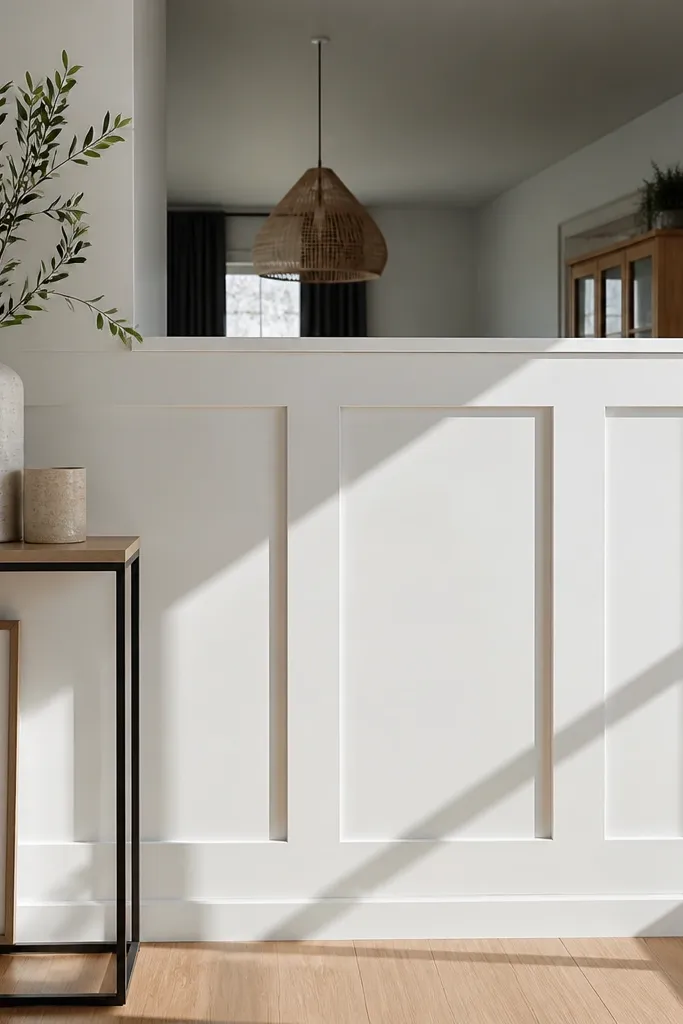
Panel moulding turns a plain half wall into something that looks like custom cabinetry. This design uses flat trim to build a grid of rectangles, which is photogenic because each inset creates a crisp edge and a shadow. You can keep the wall color light and paint the trim white for a bright, clean frame effect. This is beginner-friendly if you use pre-printed spacing math and keep the rectangles consistent. It suits hallways and dining areas where you want visual interest without using wallpaper.
Editor's noteClamp a straightedge to the wall while you nail the first horizontal frame line; everything else becomes easier to align.
Pick a panel size you can repeat, like 12-16 in wide rectangles. Mark a top rail line and then sketch your grid with painter’s tape so you can see the spacing. Cut vertical and horizontal trim pieces, miter corners at the frame intersections, and dry-fit on the floor first. Install by nailing into the half wall surface, then caulk every joint and fill nail holes. Paint after sanding smooth to remove tiny miter ridges.
Skip thisDon’t make panels random sizes — uneven rectangles look messy fast.
4. Modern vertical slat moulding on the half wall face
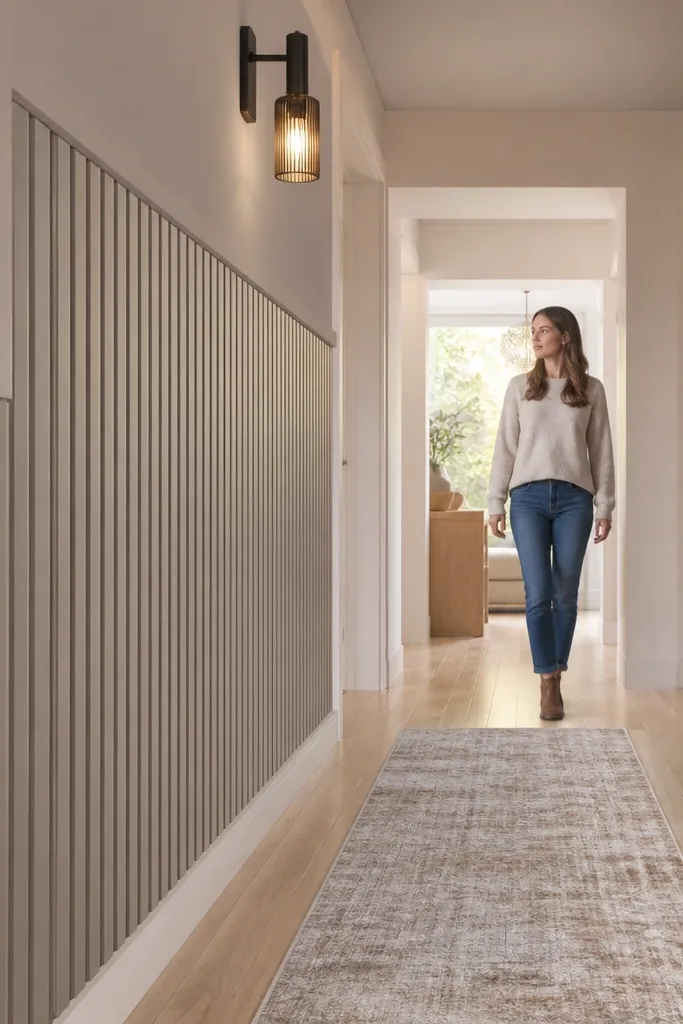
Vertical slats give your half wall movement and height without raising it. The look is modern and clean, and it photographs well because the shadows run down the wall. This style is great if you want texture but don’t want chunky chair-rail profiles. Use thin boards or MDF strips spaced evenly, then finish in a single paint color or a warm stain with a topcoat. Beginners can pull this off by using spacers and working one strip at a time, keeping everything parallel.
Editor's noteMake a spacer block out of scrap MDF so every gap is identical even if you pause mid-project.
Decide on slat width and spacing — a common beginner pattern is 1 in wide slats with 1/4 in gaps. Mark the centerline of the wall, then measure out left and right so the spacing stays symmetrical. Cut all slats to the same height and pre-sand edges so they don’t snag paint. Install with construction adhesive plus brad nails, using a spacer block between strips for consistent gaps. Caulk the edges, then paint or stain and seal.
Skip thisDon’t eyeball the first gap — every strip will drift if the starting spacing is off.
5. Simple beadboard half wall with a top rail
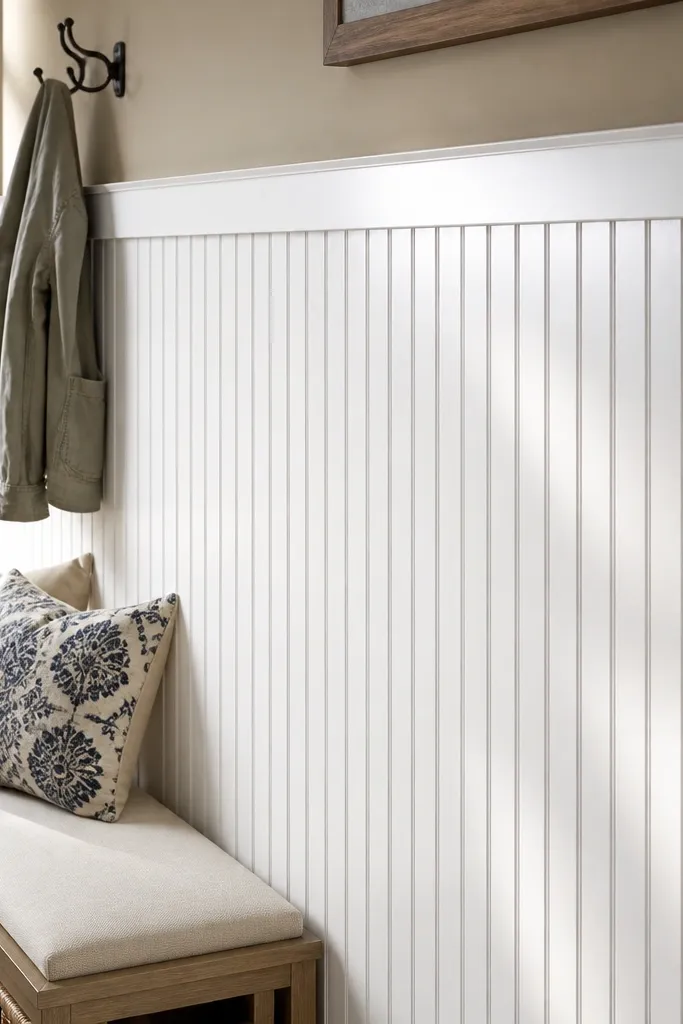
Beadboard reads classic and cozy, but you can keep it clean and modern by using a simple top rail and white paint. The small groove texture catches light in a way that looks intentional in photos. This is a good choice for beginners because beadboard panels install in repeatable sections, and the groove lines hide minor wall imperfections. It fits kitchens, breakfast nooks, and entryways where you want a tidy, cottage-leaning finish. Add a thin chair rail cap to make the top edge crisp.
Editor's noteUse a laser level or long level to set the first panel; the rest locks in from that line.
Choose pre-primed beadboard panels sized to your half wall sections, then cut to fit around outlets or openings. Install starting from a level reference line at the top so panel edges stay straight. Nail into studs or wall backing, then fill seams with wood filler and caulk at the edges. Add a thin top rail by measuring and mitering corners, then fasten with brads and caulk seams. Sand, then paint with semi-gloss on the trim and satin or semi-gloss on the beadboard if you want extra wipeability.
Skip thisDon’t force panels into out-of-square corners — trim the last section cleanly instead.
6. Staggered half wall panels with stepped trim edges
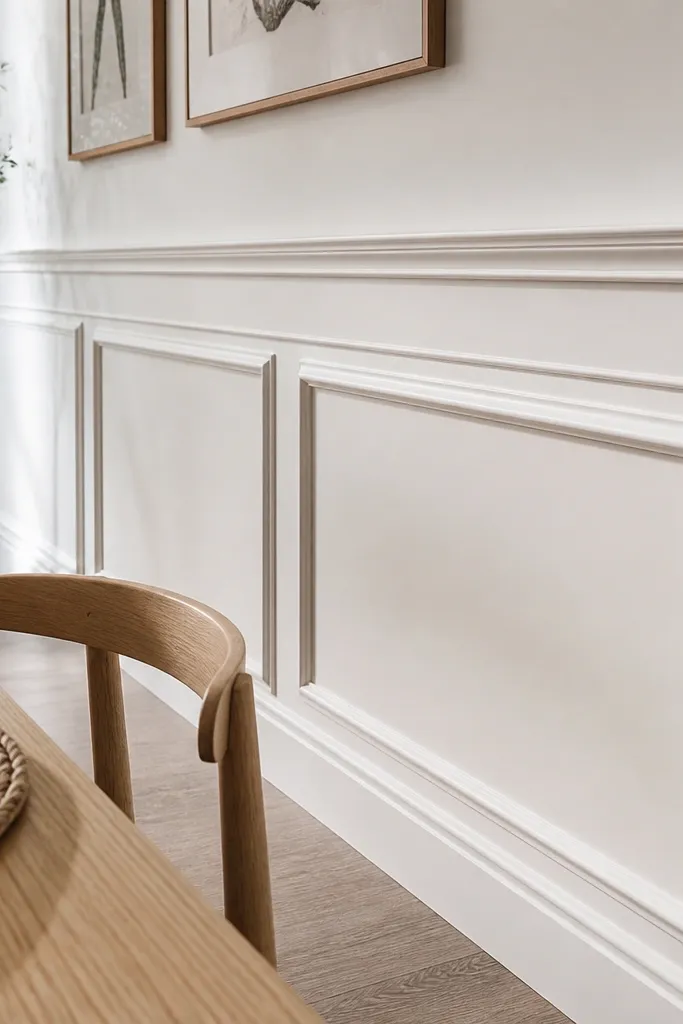
Stepped edges make a half wall look like built-in shelving without adding shelves. The staggered trim creates multiple shadow lines, which makes the wall look dimensional in daylight. It’s a great option if you want more visual interest than a single rail but don’t want a full grid. Beginners can do it by building two “levels” of trim — think shallow ledges stacked vertically. This suits modern living rooms and offices where you want clean geometry.
Plan two horizontal trim ledges at set heights, keeping each ledge about 1-1.5 in tall. Mark the ledge lines with a level, then cut trim pieces to run continuously around the half wall. Install the lower ledge first, then add the upper ledge on top so the step reads clearly. Caulk the top and side seams where the trim meets the wall, and fill nail holes. Paint after sanding smooth so the step edges look sharp.
Use painter’s tape to mask the wall edge where the step shadow should land; it keeps the caulk line thin.
Avoid adding too many steps — two levels look clean, three can start to look busy.
7. Herringbone trim pattern on the half wall face
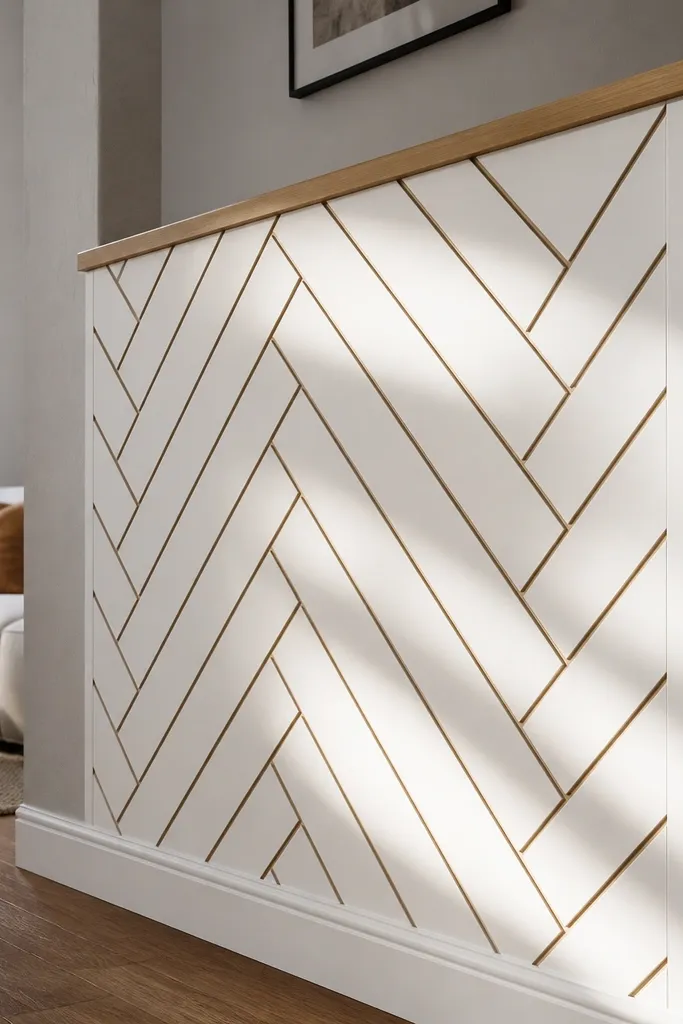
Herringbone makes a half wall feel like a design feature instead of a divider. The angled trim creates strong photo-ready shadows, and the pattern disguises slight unevenness because your eye follows the lines. This is more work than a top rail, but it’s still beginner-manageable if you build it as a repeatable strip system. Keep the trim narrow (about 1/2 to 3/4 in) so the pattern stays crisp and doesn’t overpower the room. It looks great in entryways and dining spaces where you want one wall to steal attention.
Pick a consistent angle, like 45 degrees, and test a small section on the floor to confirm your miter cuts. Install the first “spine” strip straight, then add matching angled strips left and right using a jig or spacer template. Nail each strip into backing, then caulk seams after everything is aligned. Work in sections so you can correct drift early. Sand the whole surface lightly, then paint with semi-gloss for sharp shadow edges.
Make a cardboard angle template so every strip angle matches even if you’re cutting in batches.
Don’t start from both ends — start from the most visible corner and build inward.
8. Arch-top half wall with curved moulding accents
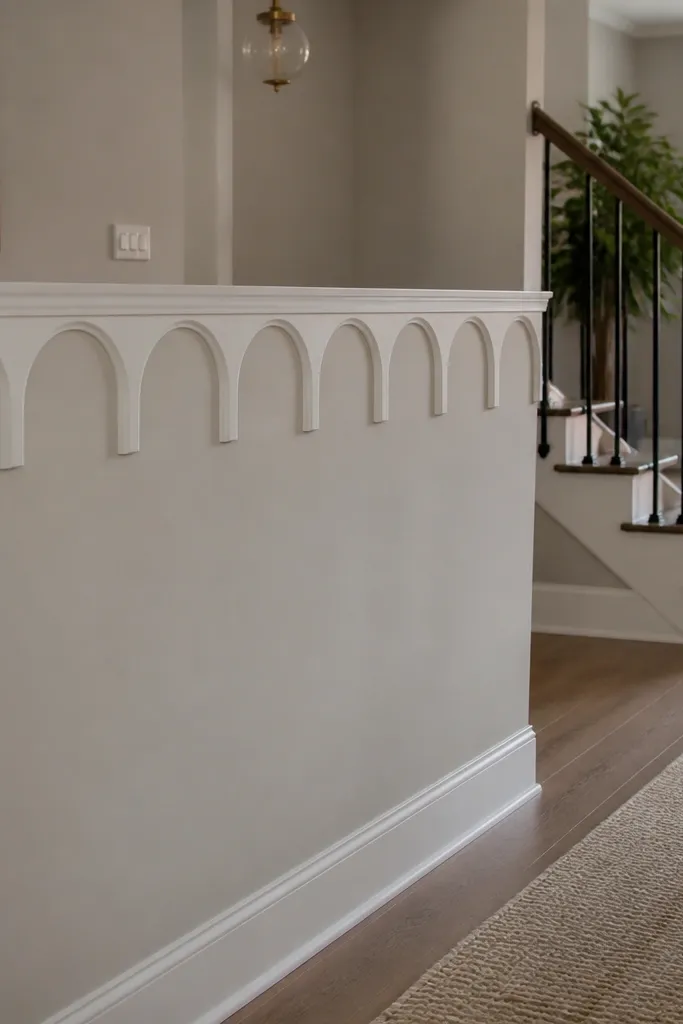
Curved accents soften the look of a half wall and make it feel custom. Instead of running straight moulding the whole way, you create a repeating arch shape along the top line. This is photogenic because the curves cast different shadows as you move around the room. It’s beginner-friendly if you keep the arches small and use flexible MDF or pre-made curved trim pieces. This style fits bathrooms, reading nooks, and breakfast areas where you want something gentle but still stylish.
Editor's noteUse flexible moulding pieces only if you plan to keep the curve gentle; tight curves need careful fitting.
Choose arch spacing you can repeat, like every 18-24 in, and decide the arch height (about 3-4 in is a good range). Mark the arch centers on the top rail line, then trace and cut using a template for consistent curves. Install the straight base/top rail first, then fasten curved arch pieces on top with brads and small finishing nails. Caulk all edges, fill nail holes, and sand ridges before painting. Paint the base and curves as one system so the curves look crisp, not patchy.
Skip thisDon’t make arches too tall — they start to look like a signboard instead of trim.
9. Board-and-batten half wall with a wide top rail
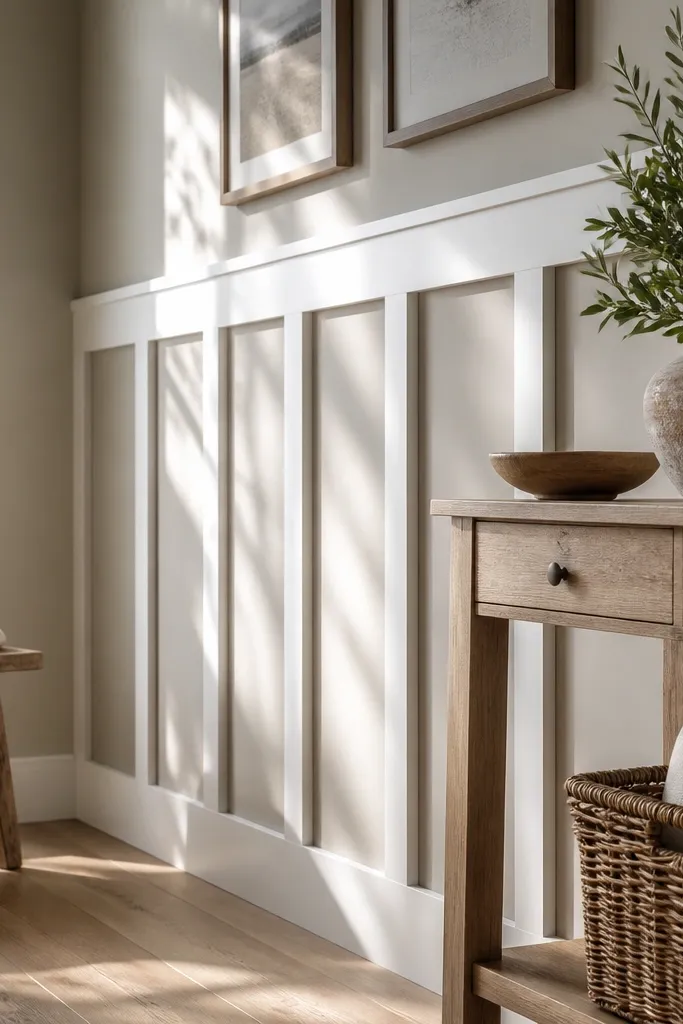
Board-and-batten is one of the best ways to get a high-contrast, architectural look on a half wall. Wide battens create bold shadows and make the wall look intentional even from across the room. This style works especially well in farmhouse-leaning spaces, but you can make it modern by keeping the boards and battens the same color and using a matte wall with semi-gloss trim. Beginner builders like it because the layout is mostly straight lines with repeatable spacing. Add a wide top rail so the proportions feel balanced.
Editor's noteDry-fit one batten between two boards and measure the gap you like before cutting the rest.
Choose board width and batten thickness, such as 4 in boards with 1 in battens. Mark evenly spaced vertical lines and install boards first to a level reference. Then install battens over the seams, aligning them carefully with your marks. Use brad nails through battens into backing, then caulk along edges. Finish by sanding smooth and painting: satin or matte on the boards and semi-gloss on the battens and top rail.
Skip thisAvoid mixing thicknesses — one off-slight batten stands out immediately.
10. Fluted column-style half wall panels
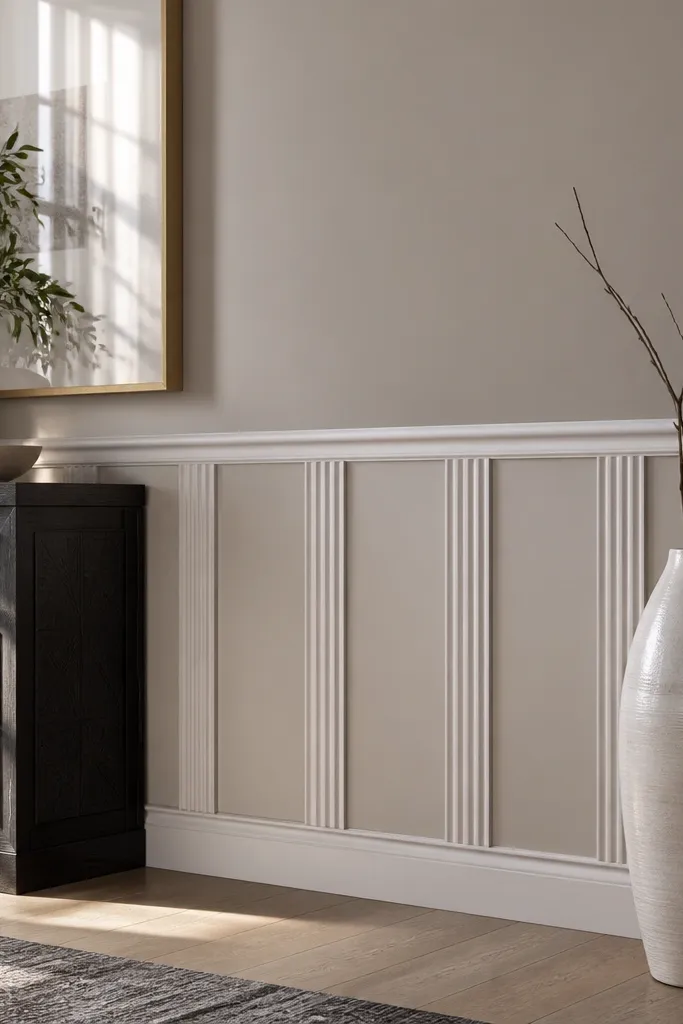
Fluted trim makes even a small half wall feel like a refined feature wall. The vertical grooves read like columns, and the shadows look crisp in natural light. This is a great pick if you want “fancy” without building a full wall of millwork. Keep the fluting moderate (not ultra-deep) so it stays beginner-friendly to paint and caulk. It suits living rooms, powder rooms, and spaces where you want a little drama at eye level.
Buy or cut fluted trim pieces sized to your half wall panel sections, then plan how many columns you want across the width. Mark a centerline and spacing guides, then install the fluted pieces first so their edges line up cleanly. Add a simple top cap rail across the top, mitering corners with test cuts. Caulk every seam where flutes meet the wall and fill nail holes. Sand after caulk cures, then paint with a smooth roller and angled brush for groove edges.
Use a small angled brush for groove paint; it prevents dried paint ridges that show in photos.
Don’t skip sanding after caulk — raised caulk edges ruin the fluted look.
11. Rope-mould look with a twist detail border
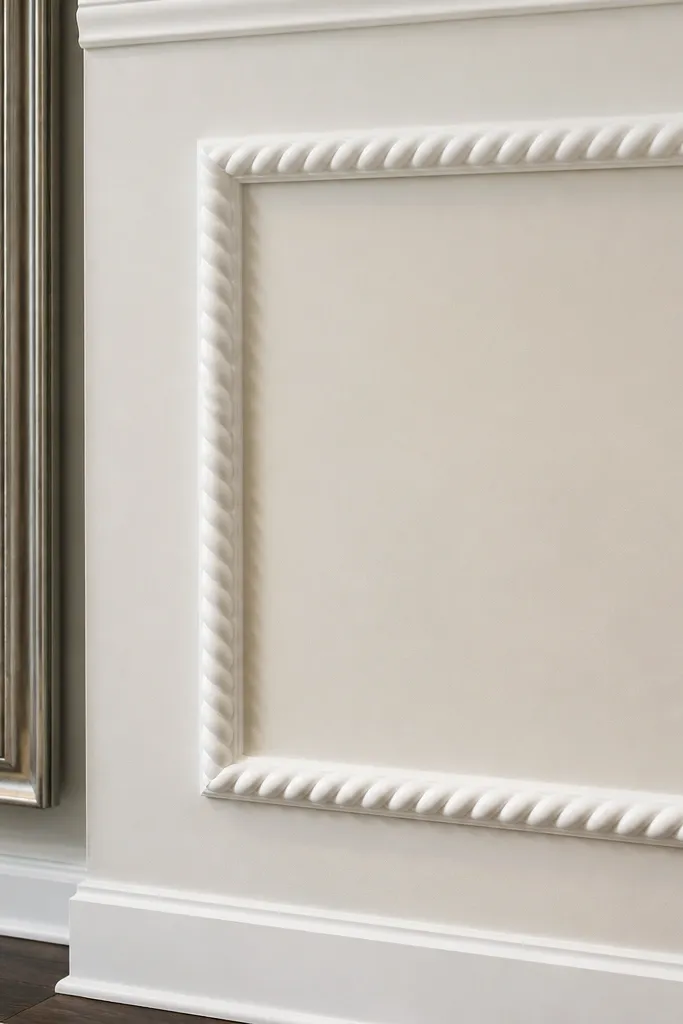
This is the “small detail, big impact” idea. A rope-style twist moulding border around an inset panel makes the half wall look like a decorative frame without doing a full grid. The twist casts a distinct shadow line that reads well on camera and in side lighting. It’s beginner-friendly because you build one main border run plus a flat filler area. Use it when you want something more interesting than plain trim but not as time-consuming as herringbone.
Editor's notePractice miter corners on scrap before cutting the actual rope moulding; twist profiles need clean angles.
Choose a flat inset area size first, like 2-3 ft sections, and mark the rectangle on the half wall face. Install a flat border trim around the inset perimeter, then fit the rope twist moulding on top of that border using miter cuts at corners. Fasten with brads along the back edge and caulk the seams so the twist line stays continuous. Fill nail holes, sand, then paint the entire frame in semi-gloss white. Keep the inset panel wall color slightly different so the frame reads clearly.
Skip thisAvoid leaving gaps at corners — rope profiles exaggerate even tiny breaks.
12. Beveled panel edges for a sharper modern look
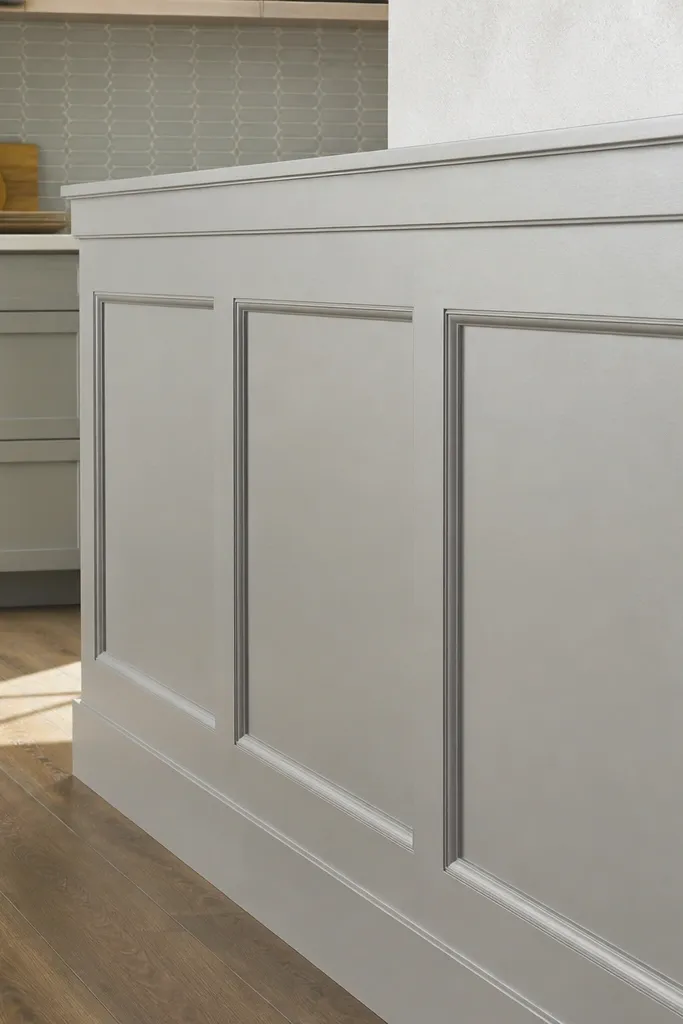
If you like modern, go with beveled trim edges. The bevel catches light along its angled face, giving your half wall a sharper outline than flat trim. This works great in rooms with clean lines like modern kitchens, offices, and scandi entryways. It’s beginner-friendly because you can keep the layout simple — just a few large rectangles instead of a dense grid. In photos, the bevel makes each panel look like it’s floating.
Plan for 2-3 large rectangles per half wall section, then mark panel boundaries using a level and tape. Cut beveled trim to size, miter corners, and dry-fit so the bevel faces align consistently. Install the rectangles first, then cap the top with a straight rail trim for a finished edge. Caulk all panel seams and fill fastener holes. Sand lightly after the caulk cures, then paint with semi-gloss to highlight the bevel.
Keep panel widths consistent; even a small mismatch looks worse with beveled edges because the light reveals everything.
Don’t use high-gloss paint on beveled trim — it shows brush marks and caulk ridges.
13. Octagon corner blocks for a decorative twist
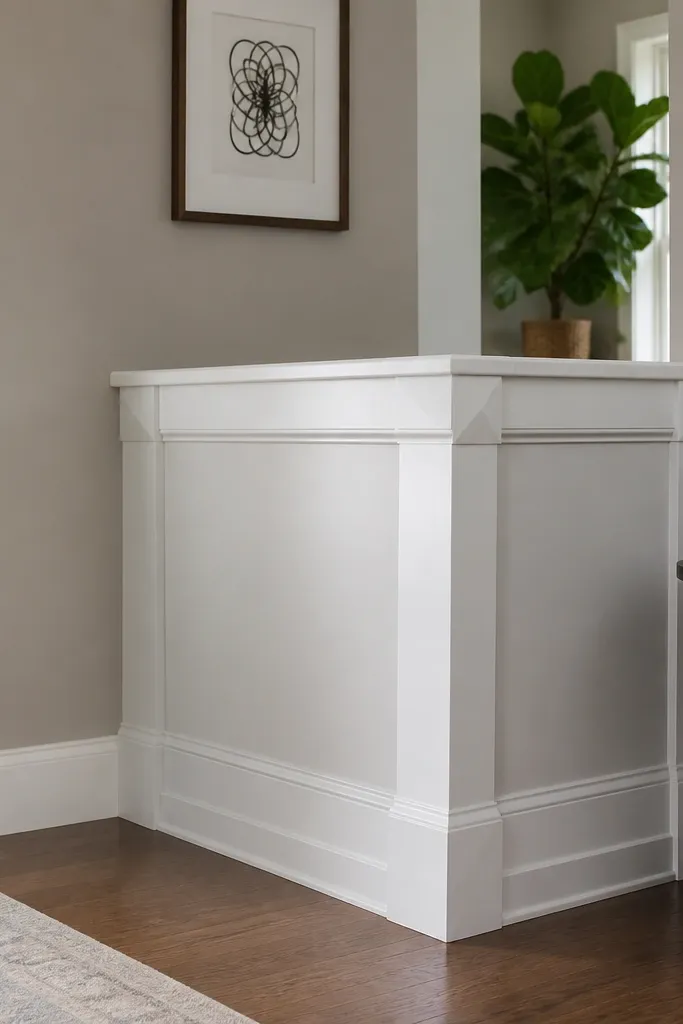
Corner blocks add personality without turning the whole wall into a complicated project. This idea uses octagon-style corner blocks at each corner intersection, paired with a simple straight top rail. It looks like custom millwork because the blocks create a focal point exactly where your eye lands. Beginner builders can manage it since you’re not building a full panel system — you’re adding a few decorative elements. It’s a great match for painted trim styles in living rooms and dining areas.
Editor's noteUse a thin bead of caulk, not a thick one — blocks look sharp when the seam line is tight.
Pick octagon corner blocks that match your trim size, then dry-fit them at each corner to confirm scale. Install a straight top rail first, keeping it level across the wall. Then fasten each corner block over the rail and wall meeting point using adhesive plus brads. Caulk around the blocks so seams disappear, then fill nail holes. Paint: wall color first, then semi-gloss for the rail and blocks.
Skip thisDon’t choose blocks that are too large; oversized blocks make a half wall feel crowded.
14. Shadow-box half wall with open central panel
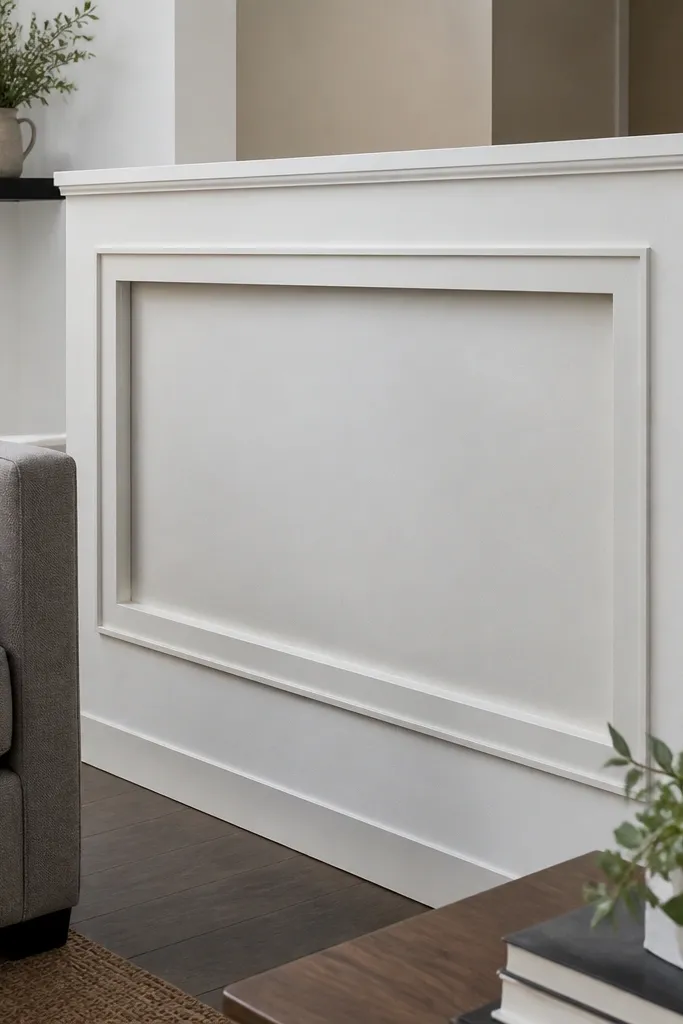
A shadow-box style half wall looks like it has depth even when you keep materials simple. You build a recessed central panel area, then frame it with trim so the center sits back and creates a dark line. This is one of the most photogenic options because the shadow gap reads clearly in most lighting. It suits modern homes, especially when you paint the recess area a slightly darker shade than the trim. Beginner-friendly part: you only need one big rectangle or two stacked rectangles.
Decide your recessed panel size, like 24-36 in wide and 16-24 in tall, and mark its outline on the half wall face. Install thin spacer strips or battens around the outline to create a recess depth of about 1/2 in. Add a flat panel in the recessed area, then cap the edges with trim that frames the opening. Nail and caulk along edges carefully so the recess line stays clean. Paint in two tones: recess and wall in one color, trim in a brighter semi-gloss.
Measure recess depth using scrap spacers; 1/2 in is enough for a visible shadow without making the wall feel hollow.
Don’t rush caulking inside corners — messy caulk makes the recessed shadow line look dirty.
15. Top rail + bottom skirt moulding for a framed silhouette
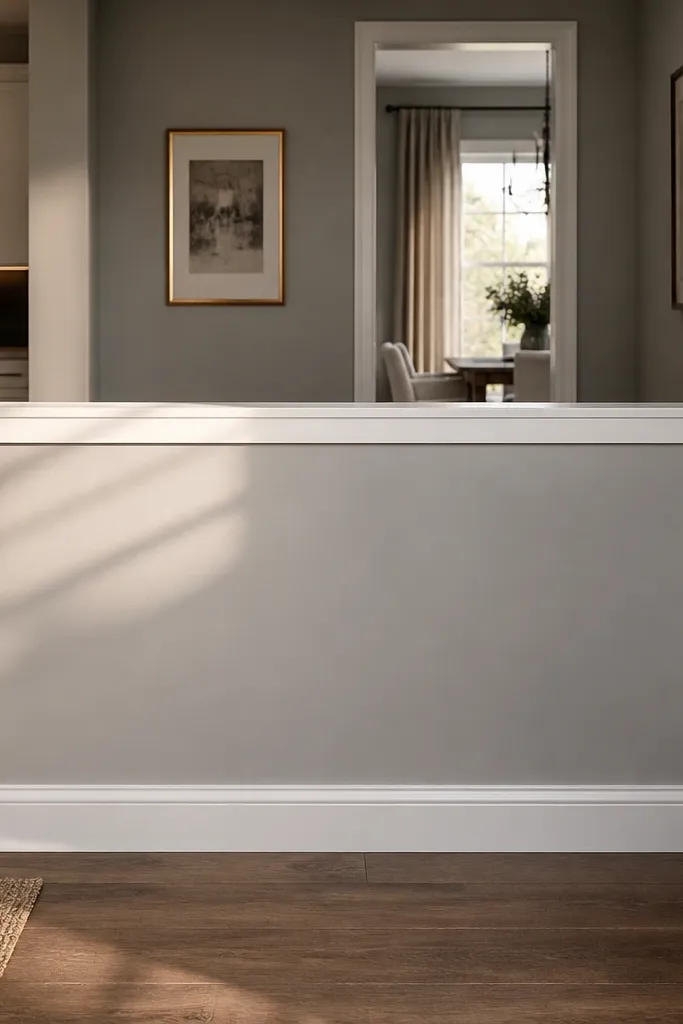
This design makes the half wall look like it’s sitting inside a frame. Adding a bottom skirt moulding gives you a second strong line, which makes the whole wall feel intentional and balanced. It’s also great for hiding small gaps where the half wall meets the floor or base material. In photos, the two horizontal trims create a clean rectangle that reads well even when the wall is partially obscured. Beginners like it because it’s mostly straight lines and repeatable corners.
Editor's noteIf your floor is uneven, use a flexible caulk line at the skirt bottom so small gaps don’t show.
Mark a level top rail line at your chosen height and install the top moulding first. Then measure up from the floor for the bottom skirt height, usually 3-5 in, and mark a level line for the skirt. Cut and install skirt moulding with miters at corners, then fill nail holes. Caulk the top and bottom seam lines where moulding meets the wall and where it meets the floor transition. Sand and paint: trim in semi-gloss, wall in matte or satin.
Skip thisDon’t ignore the bottom line level — one crooked skirt ruins the whole silhouette.
16. Architrave border with inner flat panel
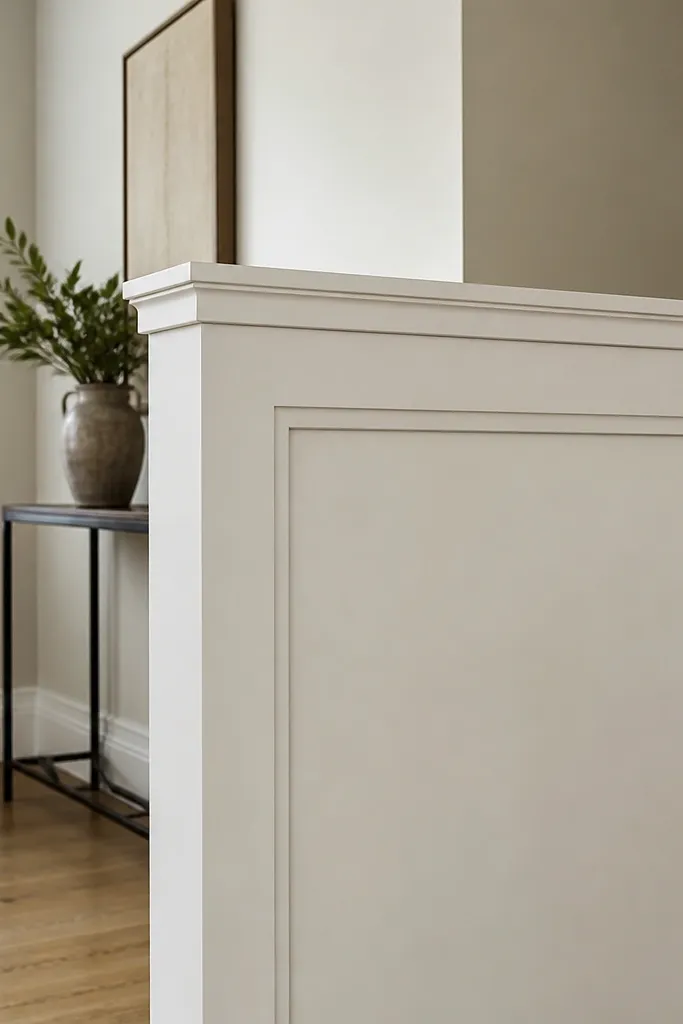
Architrave-style borders look like classic framing, and they make a half wall look custom even when the interior is plain. The thicker border gives a strong edge that reads well in close-up and wide shots. This is a good option if you want a clean, tailored look rather than busy patterns. Beginner-friendly because the layout is simple: one border run around a flat inner surface. It works especially well in entryways and living rooms with neutral paint colors.
Editor's noteUse a foam roller on the inner panel area to keep sheen consistent so the border pops.
Choose an architrave profile with a width that feels right for your half wall height, roughly 2-3 in wide. Mark the border rectangle on the wall and cut the architrave pieces with miter corners. Install the border first, then fill the inner area as needed with a smooth panel or leave it as the base wall surface if it’s already clean. Caulk the border joints and corners so the frame looks continuous. Paint the border semi-gloss and keep the inner panel matte for contrast.
Skip thisAvoid thin architrave profiles — they disappear on camera and look like leftover trim.
17. Horizontal ribbed moulding lines for a clean modern texture
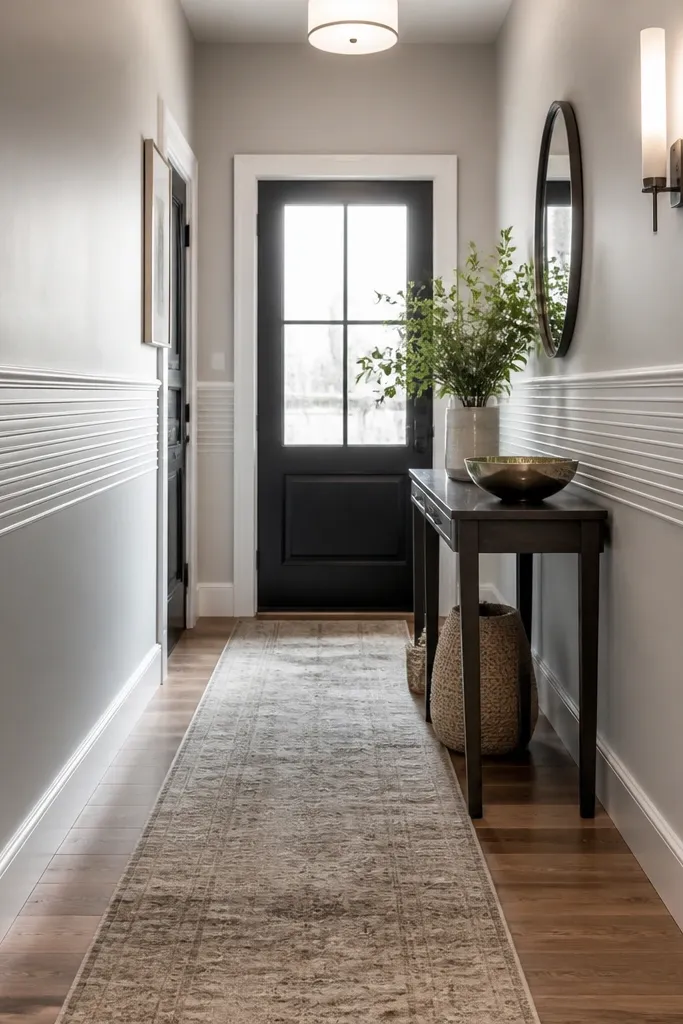
Horizontal ribs add texture without making the wall busy or heavy. They also make the space feel wider, which is helpful in tight hallways. This idea looks modern and crisp when you keep the ribs thin and evenly spaced. It’s beginner-friendly because you’re repeating identical strips across a horizontal band. For best photos, paint everything the same color but use semi-gloss on the ribs and satin on the wall so the ribs catch light.
Editor's noteMake a simple spacing ruler with marks at your chosen intervals; it speeds up installs and prevents drift.
Decide the number of ribs, like 5-7 lines across the half wall face, and measure the spacing precisely. Mark a top rib line and bottom rib line, then calculate spacing for even intervals. Cut thin strips, like 1/2 in MDF or finger-jointed trim, and install them using construction adhesive plus brad nails. Caulk the edges so the ribs look like one continuous surface. Prime and paint, using a small angled brush for clean edges.
Skip thisDon’t let ribs vary in thickness — tiny differences show once paint dries.
18. French-inspired half wall with symmetrical panel blocks
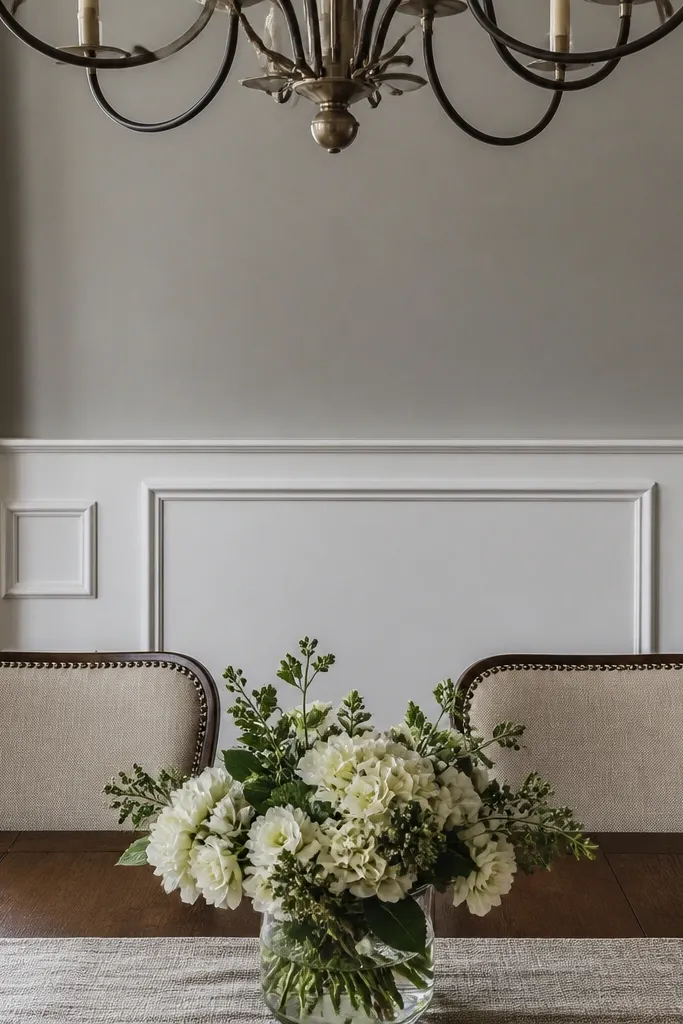
This style adds classic symmetry to a half wall by combining a main panel with small decorative blocks. It reads “French-inspired” because of the balanced placement and the way the moulding creates a framed look at eye level. It’s visually striking without requiring complex carving. Beginners can do this by using flat trim plus pre-made decorative corner or center blocks. It suits dining rooms and living rooms where you want the wall to look like it belongs in a magazine spread.
Choose a layout: one central rectangle panel with smaller side panels, or one rectangle with corner blocks. Mark the panel boundaries and block positions using painter’s tape, then cut flat trim pieces for the panel frames. Install the larger frame first, then fasten decorative blocks at the corners or center points. Caulk and fill all seams, then sand. Paint with semi-gloss on trim and satin or matte on the wall for a clean contrast.
Dry-fit blocks before installing so you can confirm spacing looks centered from standing height.
Avoid placing blocks off-center; symmetry is the whole point here.
19. Wainscot-style half wall with raised center panel
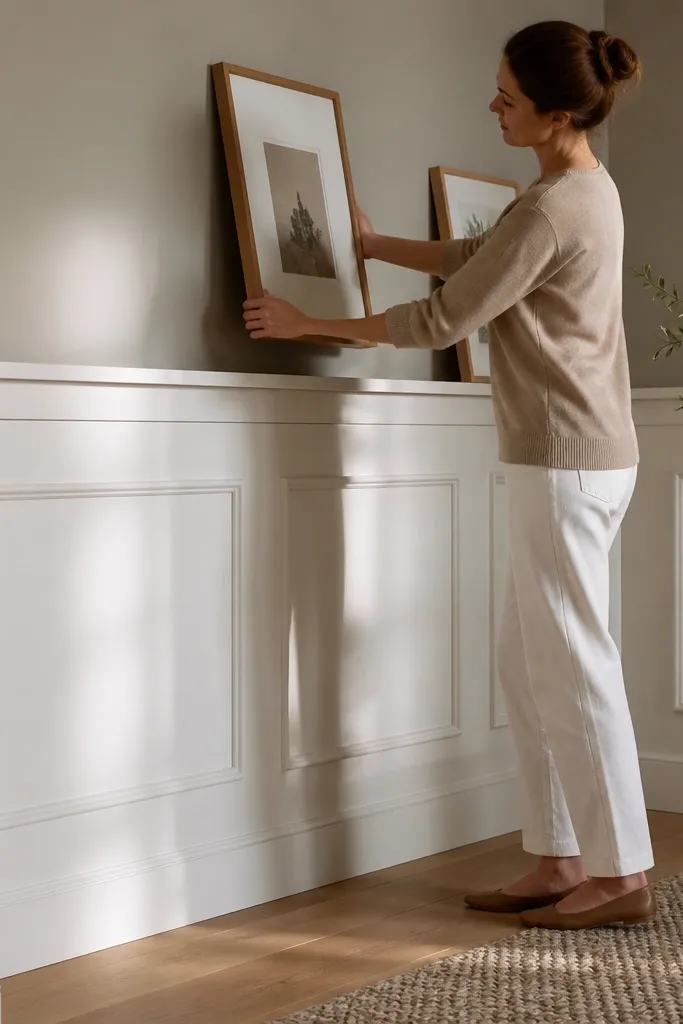
Wainscot-style half walls look right because they create a raised center and strong top rail. The raised section adds depth without needing a full height wall. It’s photogenic because the center panel catches light differently than the surrounding flat wall. Beginners can handle it by using a single raised panel made from plywood or MDF and framing it with trim. This works well in dining areas, bedrooms, and entry spaces.
Editor's noteUse a straightedge to check the raised panel sits flat; even a small hump shows under paint.
Build a raised center panel by cutting a piece of MDF or plywood to your chosen size, then mounting it to the half wall face with adhesive and screws into backing. Frame the panel with trim using mitered corners, then install a top rail above the frame for a finished edge. Fill nail holes and seams, then caulk where the raised panel meets the wall. Sand smooth, prime if needed, and paint trim semi-gloss with the panel in satin or semi-gloss depending on the look you want.
Skip thisDon’t skip priming raw MDF edges — they drink paint and look blotchy.
20. Moulded window-style half wall with faux sashes
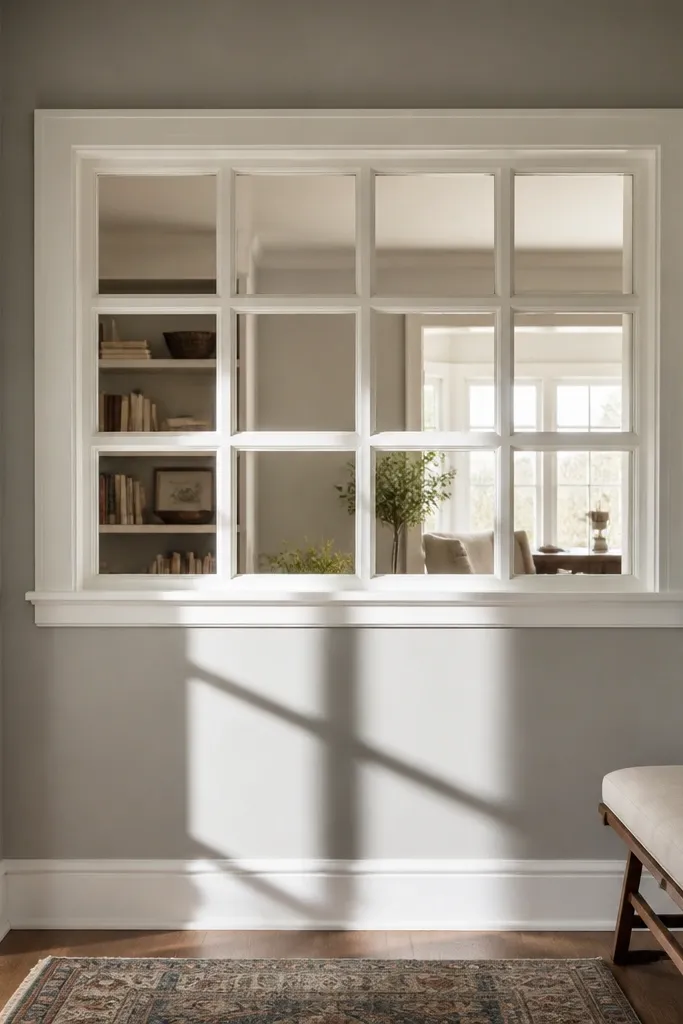
Faux window moulding is a clever way to make a half wall feel architectural. By framing the face like a window with sashes and muntins, you add structure and a focal point. It’s photogenic because the grid creates strong lines and shadows, and it works even in small spaces like hallways. Beginner-friendly approach: keep it to one “window” section so your measurements stay manageable. Paint the “glass” area a slightly different shade for extra depth.
Measure the half wall width and choose one window frame width, like 2/3 of the wall so it feels centered. Mark the outer frame rectangle, then install flat trim for the outer border. Add muntins by installing horizontal and vertical trim bars inside the frame at equal spacing. Add a top rail cap above for a clean finish line. Caulk seams, fill nail holes, sand, then paint: outer trim semi-gloss and inner area matte or satin.
If you want the “glass” to look recessed, paint it a darker shade and add a thin 1/4 in reveal behind the inner panel.
Avoid uneven muntin spacing — a small error makes the whole window frame look crooked.
21. Corner-to-corner diagonal trim for a bold look
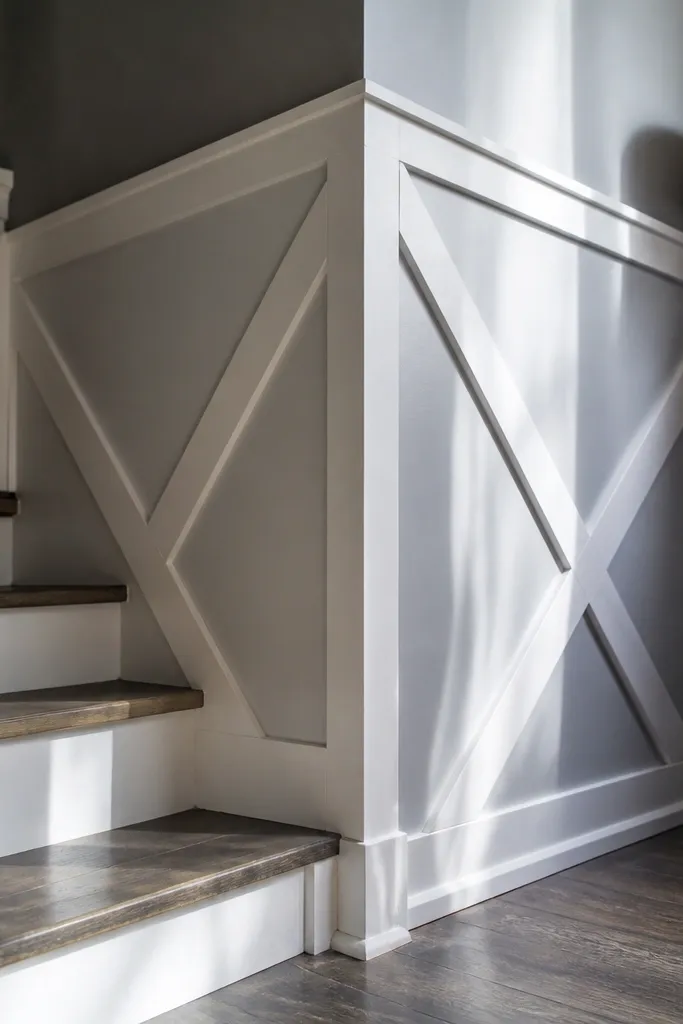
Diagonal trim gives a half wall energy and makes it feel like a design feature. You build a simple X or stripe pattern using trim strips, and the angled shadows look great in natural light. It’s a strong choice for modern spaces because it breaks up the usual straight-line moulding look. Beginners should keep the number of diagonals low, like one X, so cutting and aligning stays under control. This one photographs well because the pattern reads clearly from a few steps away.
Decide on an X pattern: two diagonals crossing at the center, using strips about 1/2 to 3/4 in wide. Mark the center point and measure the strip endpoints so the diagonals hit corners at consistent distances. Cut miters or use accurate end angles based on your strip widths, then dry-fit. Install diagonals first, then add a top rail to keep the wall looking framed. Caulk seams, fill nail holes, sand, and paint with semi-gloss on the trim.
Use a laser line or chalk line to mark diagonal endpoints; it removes guesswork from the angles.
Don’t use wide trim for diagonals — it magnifies alignment mistakes.
22. Simple radius bullnose top edge with matching trim
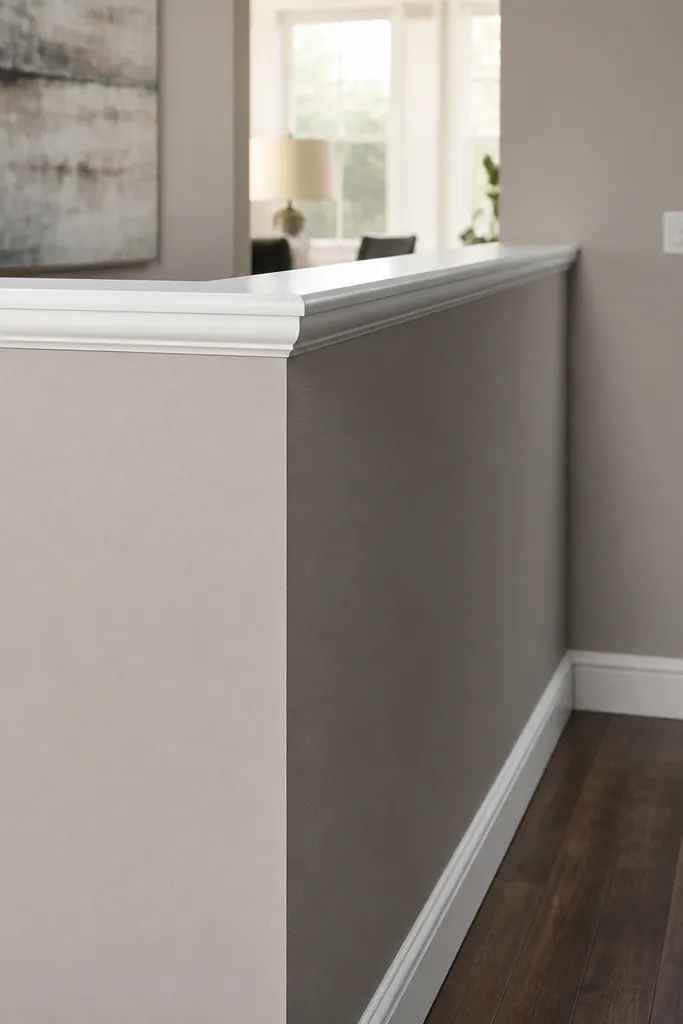
A rounded top edge feels softer and looks expensive because it creates a gentle highlight line. This is a smart alternative if you hate sharp corners or if your half wall is in a traffic area. You get a clean, photogenic profile with minimal pattern work — just one standout top moulding. This style is beginner-friendly because you’re focusing on a single continuous element. Pair it with a matte wall and semi-gloss bullnose trim so the curve stands out.
Editor's noteDo a quick test fit on one corner piece; bullnose profiles show gaps more than flat trim.
Choose a bullnose or rounded coping trim sized to your half wall thickness and top edge width. Measure the perimeter and cut pieces to fit corners with careful mitering or butt joints if the trim is pre-shaped. Install starting at the longest straight run, keeping it level and aligned to your marked height. Nail into backing and caulk the seam lines so the curve looks continuous. Sand any rough paint edges, then paint the trim semi-gloss and the wall matte.
Skip thisAvoid skipping caulk — tiny voids along the curve show as shadows.
23. Half wall moulded with a continuous picture ledge line
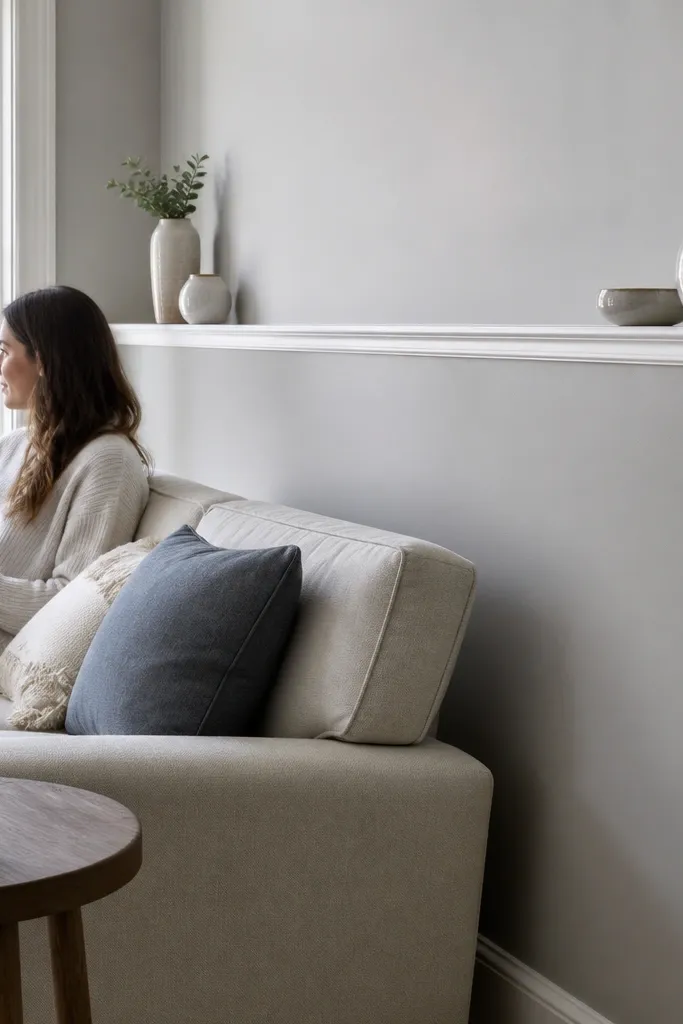
A continuous picture ledge line is a practical half wall moulding idea that also looks sleek. It gives you a crisp “shelf line” even if you don’t add actual decor, and it frames the wall visually. This design looks clean in modern rooms because it’s thin, straight, and consistent. Beginner-friendly because it’s basically one long trim run with simple corner miters. It also helps hide small top edge imperfections since you’re covering and finishing the top.
Pick a ledge moulding profile that sits nicely on the half wall top, usually 1-2 in wide. Mark your level install line at the top edge and dry-fit lengths around corners. Cut miters carefully, then nail into studs or backing for solid hold. Caulk along the top edge and where the ledge meets the wall so the line looks continuous. Prime and paint, using semi-gloss for the ledge and satin or matte for the wall.
Use a long level to check the ledge line every 3-4 ft so you catch drift early.
Don’t rely on nails alone at the ends — caulk helps the ledge stay tight and clean.
24. Tall panel moulding segments with vertical framing
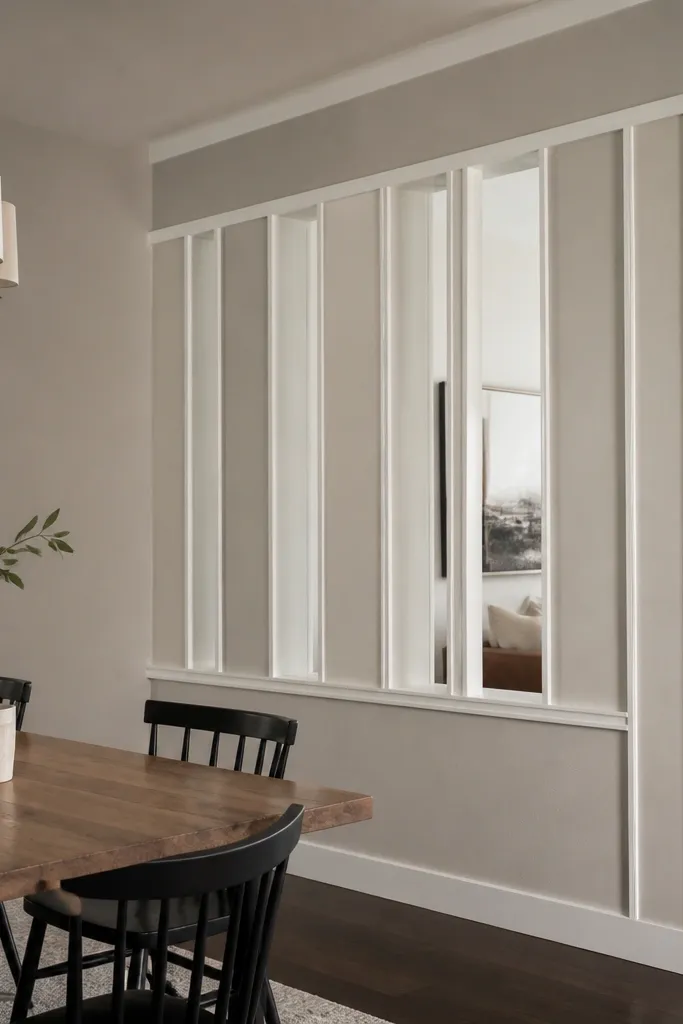
If your half wall is in a larger room and you want it to feel more substantial, go with tall vertical panel segments. This design uses vertical framing strips to create long rectangles, which reads bold and architectural. It’s photogenic because the vertical lines pull the eye up and the shadows look crisp. Beginner-friendly if you keep the number of segments low, like 3-5 panels across the width. Add a thin top rail to finish the top edge cleanly.
Choose the number of vertical panels across the half wall width, then calculate equal spacing. Mark vertical guides with a level, then install the vertical trim strips first. Add a top rail across the top to unify everything, then caulk around each vertical strip. Sand, fill nail holes, and prime if you’re using raw wood. Paint the trim semi-gloss and the panels wall color matte for clear separation.
Keep the vertical strips the same length and use a stop block on your saw so every piece matches.
Don’t use random panel widths — uneven segments look accidental.
25. Two-level picture frame with stacked rectangles
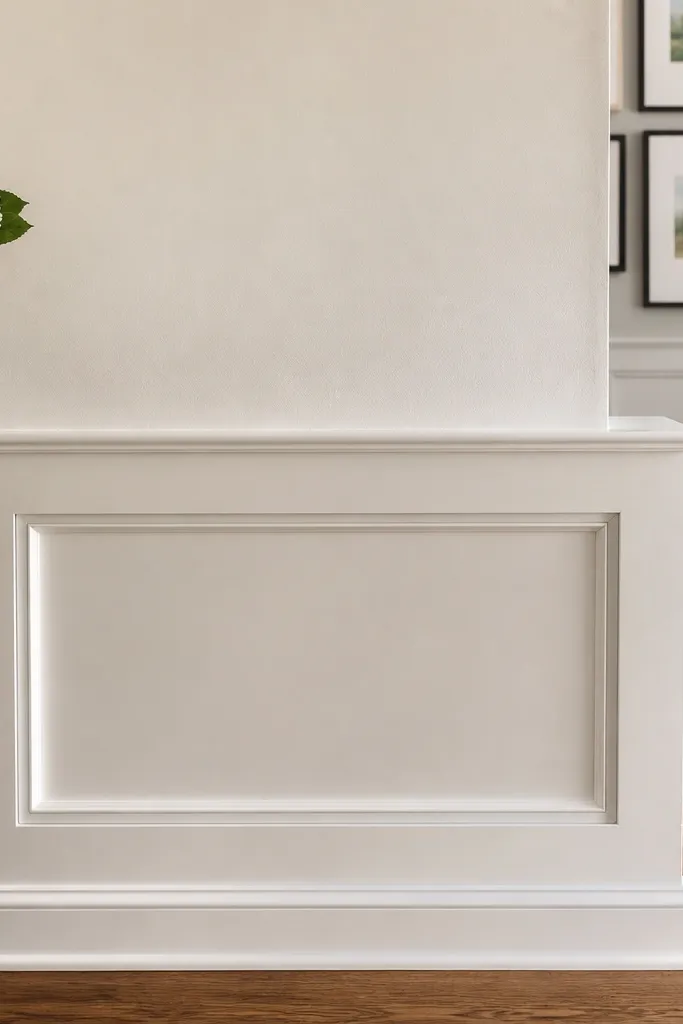
Stacked rectangle framing makes a half wall look like it has built-in art display space, even when it’s just trim. The two-level design is more interesting than a single grid but still manageable for beginners. It’s photogenic because you get two shadow bands and a clear horizontal rhythm. Use a medium-width trim so the frame edges are visible in photos without looking chunky. This style works in living rooms and bedrooms where you want a clean, structured wall.
Mark two rectangle areas stacked vertically, keeping the spacing between them even, like 6-10 in between frames. Cut outer frame pieces with miter corners, then install each rectangle frame one at a time. Add inner trim lines if you want a double border, but keep it consistent. Caulk seams and fill nail holes, then sand smooth. Paint trim semi-gloss and the inner wall matte or satin so the frames pop.
Dry-fit both rectangles before installing so you can confirm the spacing looks centered from standing height.
Avoid wide gaps inside the frames — tight, consistent spacing looks intentional.



