
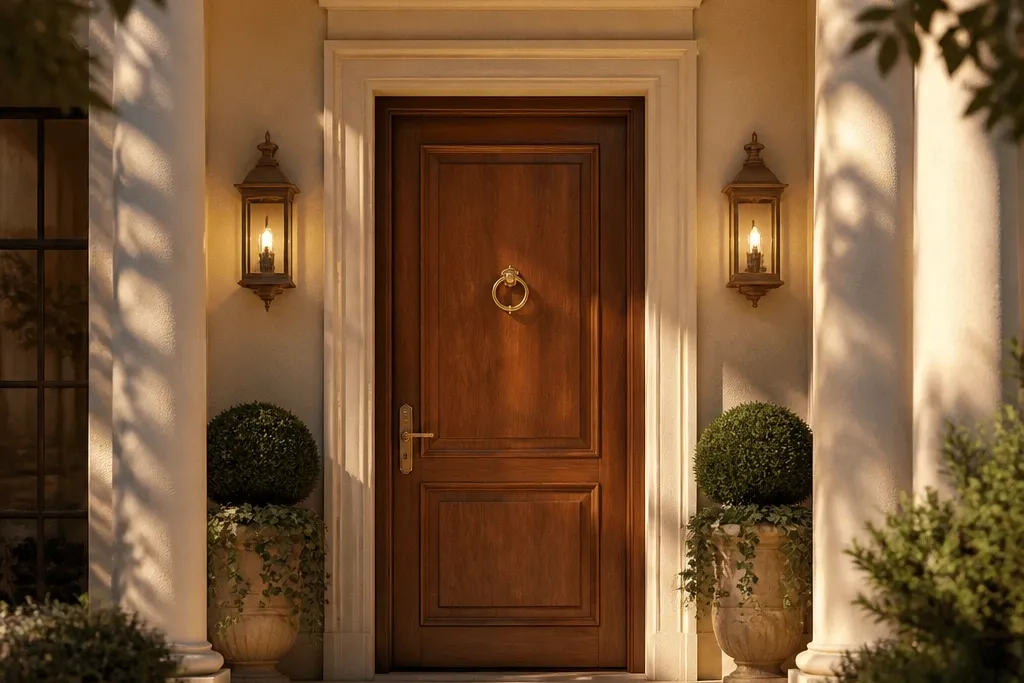
1. Tall Shaker Door with 5-Inch Casing and Simple Crown Header
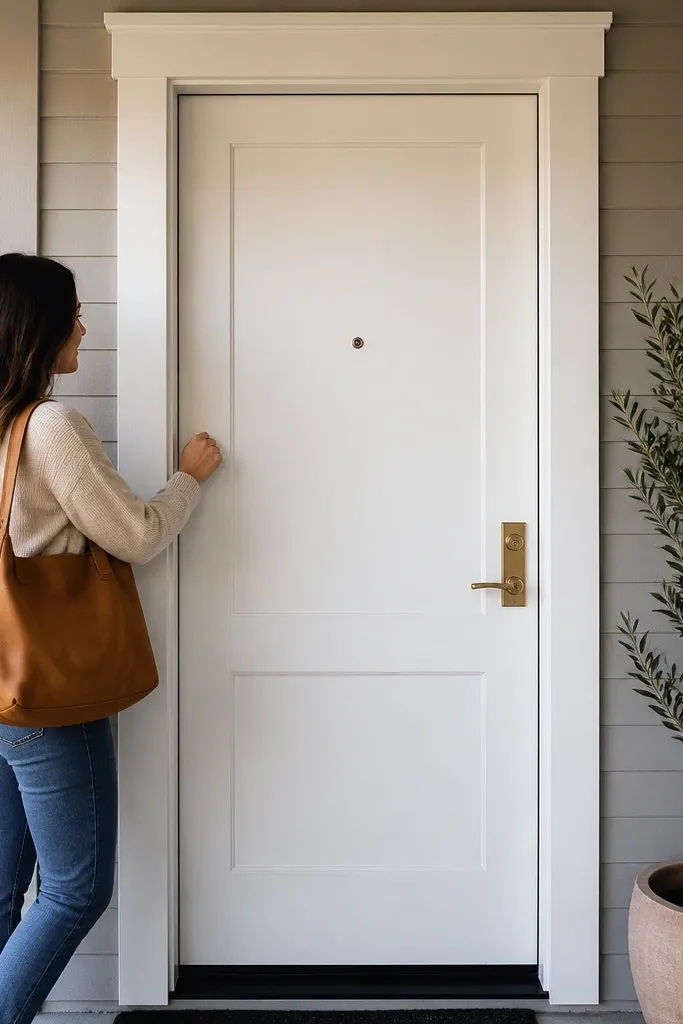
This look makes a villa entry read taller without needing a complex frame. The Shaker panel lines are clean and forgiving, and the 5-inch casing gives you that “built-in” custom feel. A small crown header at the top creates a shadow line that photographs well in daylight. Keep the door centered and the casing widths consistent on both sides so the entrance feels balanced even if your opening is modest. This is a beginner-friendly main entrance door design for villas because it relies on straightforward trim cuts and repeatable panel geometry.
Start by buying a pre-hung or pre-made slab door with a tall Shaker panel layout, then confirm your rough opening size. Build the surround using straight casing boards sized to project about 3/4 inch from the wall, with the casing width set to 5 inches on both sides. Add a crown header strip across the top, cut it with a simple miter at the corners, and leave a 1/8 inch gap so caulk seals cleanly. Prime, paint, and reinstall hardware last so you don’t scuff the finish while fitting trim.
Editor's noteUse a 1/8-inch reveal spacer while installing casing so the gaps look intentional instead of hand-measured.
Skip thisDon’t skip a consistent reveal; uneven gaps make the whole door area look DIY even with great trim.
2. Walnut Veneer Door with Raised Architrave Frame
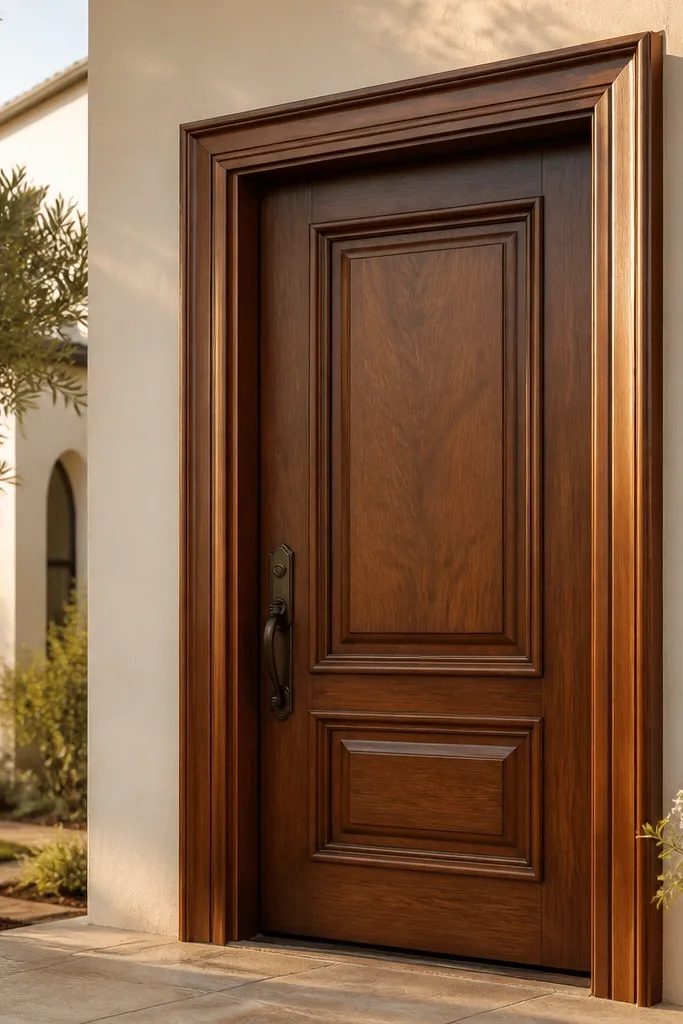
If your villa facade is light stone or pale stucco, walnut veneer reads warm and premium fast. The raised architrave border creates a dimensional “picture frame” effect around the door, so it doesn’t look flat against the wall. This design is photogenic because the frame edge catches light and shows depth even when the door is closed. It also fixes a common problem: a plain door slab can disappear into the surround, especially in bright sun. With the right clear finish, this is a clean, modern-grand look that still feels classic.
Choose a walnut veneer or solid walnut door slab, then plan a surround frame using 1x stock ripped into two widths: a wide outer casing and a narrower inner bead. Cut the architrave pieces to match your door height, then assemble the frame on a flat surface before installing to the wall. Use small finish nails or screws from the back edge, then fill nail holes with matching wood filler. Finish with a satin clear topcoat to protect against glare and fingerprints.
Editor's noteSatin clear coat looks better than gloss on entry doors because it hides minor scuffs and reduces harsh reflections.
Skip thisDon’t use thick glossy varnish; it makes the door look plasticky and highlights imperfections in the veneer.
3. Double Door with Center Mullion and Stone-Style Casing
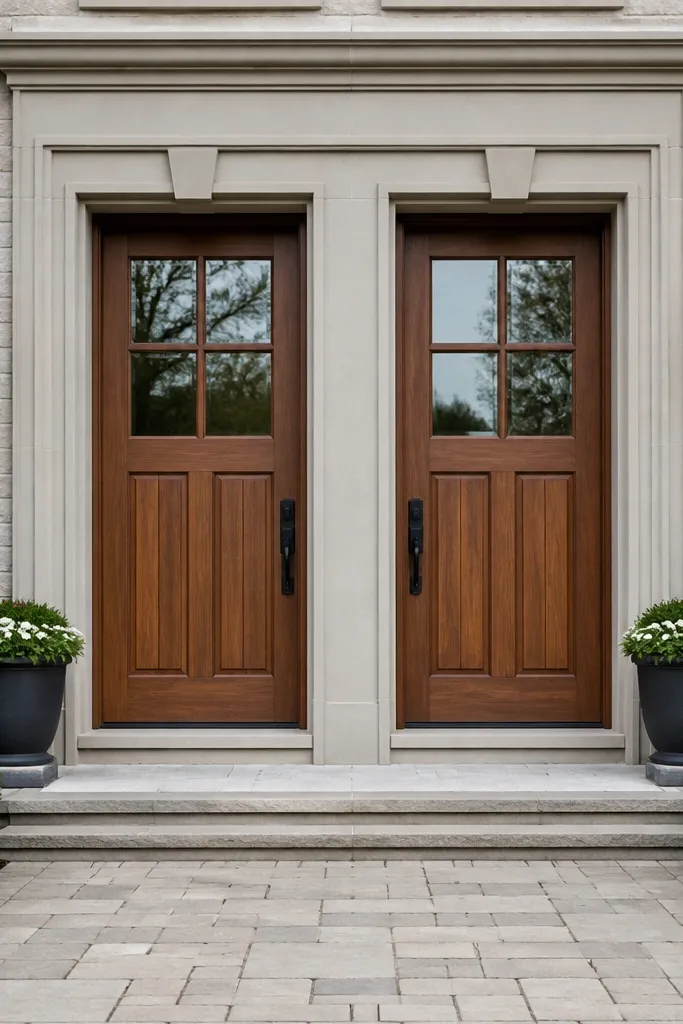
Double doors instantly read grand on villas because the facade has a clear focal point. The center mullion keeps the pair from looking like two unrelated panels, and it gives you a strong vertical line in photos. Wide casing around both doors adds the stone-entry feel even if you’re using wood trim. This works best when your opening is around 5 ft or more, where single doors can look narrow. If you want a beginner-friendly main entrance door design for villas that still looks high-end, symmetry is your cheat code.
Measure the total opening width and choose matching door slabs that leave a consistent gap at the center for the mullion. Install a double-door frame or two pre-hung units, then add a shared casing system that wraps both doors. Build the casing with two layers: a wide outer border and a thinner inner band that sits flush to the door edge. Finish by adding a simple header piece across the top and matching metal hardware on both doors.
Editor's noteMatch the hinge side gaps on both doors using the same spacer block so the center mullion looks straight.
Skip thisDon’t pick mismatched panel patterns on the two doors; it kills the symmetry that sells the whole look.
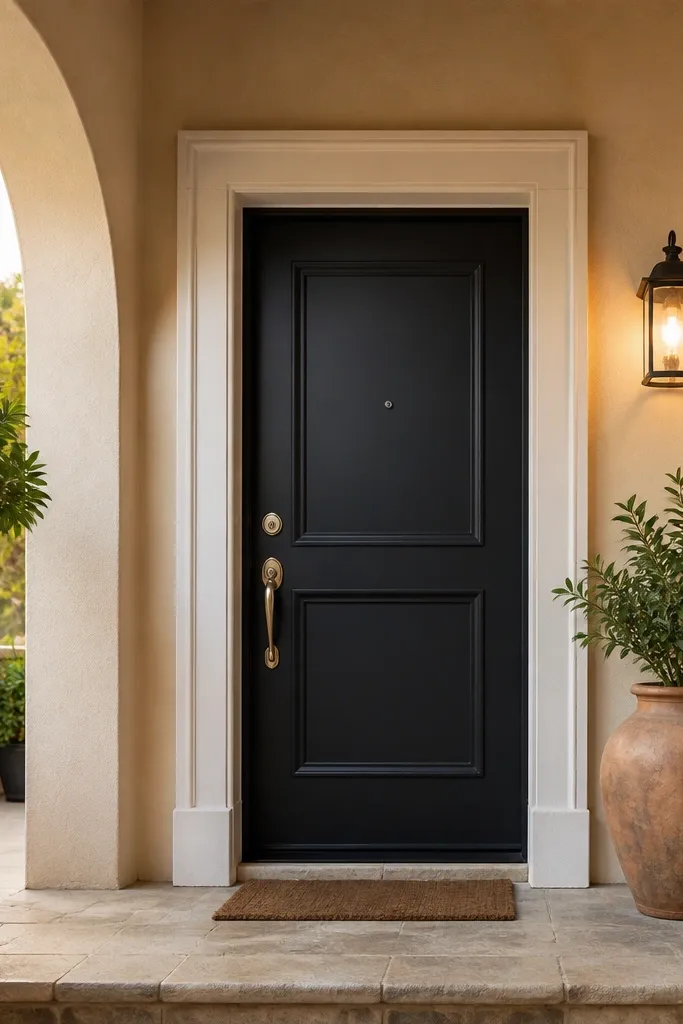
4. Black Painted Door with Brass Knocker and 4-Inch Side Pilasters
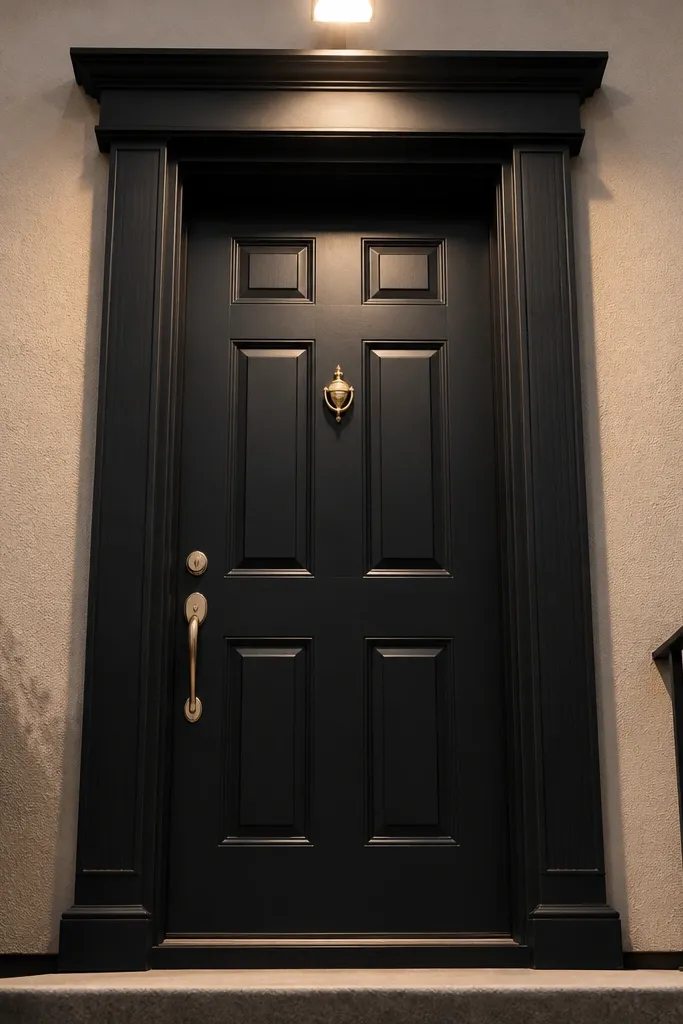
A matte black door is the fastest way to make a villa entrance feel designed, especially when the wall is warm light beige or cream. Side pilasters create vertical structure and make the door area look taller and more architectural. Brass hardware pops without needing any fancy glasswork. This design also solves the “busy facade” problem: if your exterior has lots of texture, a solid painted door keeps the focal point clean. It’s beginner-friendly because you’re painting and adding trim, not inventing complex joinery.
Choose a solid-core door slab and sand it, then apply a primer made for wood or MDF depending on your slab. Paint with matte exterior paint, then let it cure before mounting hardware. Create two side pilasters using 1x boards cut to the door height, set them so they line up with the inner edge of your casing, and fasten with screws through the back edge. Add a simple top cap board across the header line to finish the look with clean geometry.
Editor's noteUse painter’s tape as a guide for pilaster alignment; remove it while paint is slightly tacky for crisp edges.
Skip thisDon’t use glossy black; it shows every fingerprint and small wipe mark.
5. Full-Height Frosted Glass Inserts in a Vertical Grid
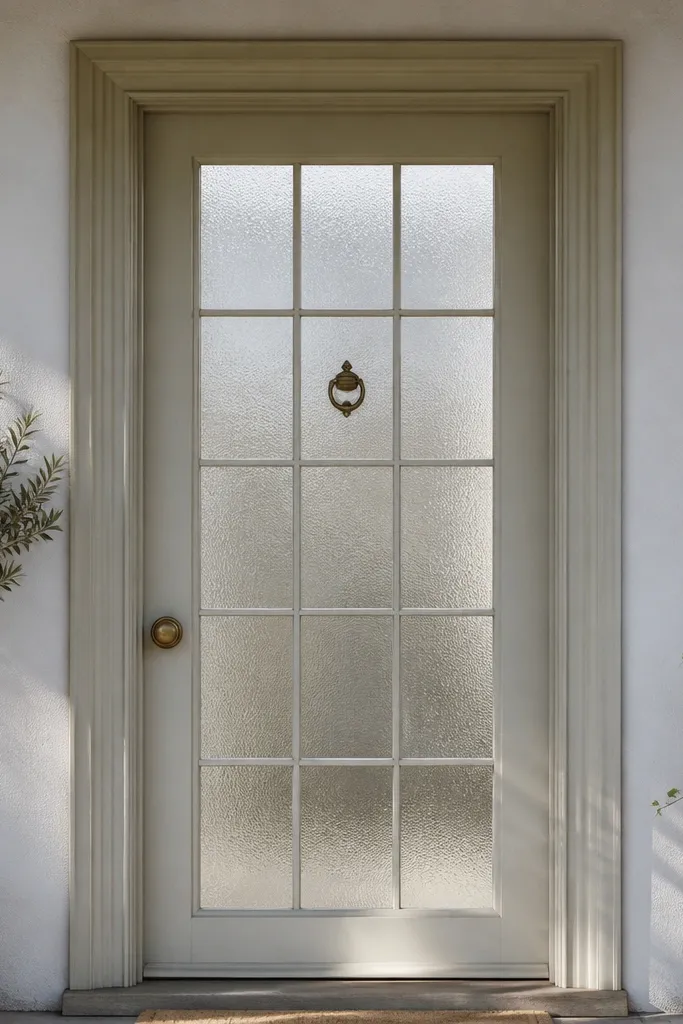
Full-height frosted inserts add elegance without turning your entry into a fishbowl. A vertical grid gives you that “tall villa” look even if the door opening is average. Frosted glass also hides the interior, so you get privacy while still letting light wash into the foyer. This design is great when your entrance is dim, because the frosted light reads soft and expensive. It’s also beginner-friendly because you can use pre-made glass door inserts or a door slab with grid panels already cut.
Pick a door slab with a vertical glass grid layout or order a custom insert panel with tempered glass. Install glazing beads around the glass and use glazing tape to prevent rattling. Build a surround casing that frames the door and keeps the glass grid centered visually, then paint the door edges carefully so you don’t get drips on the glass. Seal all exterior edges with exterior-rated caulk and check that the door closes without glass contact.
Tempered glass plus proper glazing tape prevents vibration noise and keeps the glass from loosening over time.
Don’t use acrylic or non-tempered glass for exterior doors; it warps and chips faster.
6. Recessed Door with Shadow-Gap Surround (Modern Villa Look)
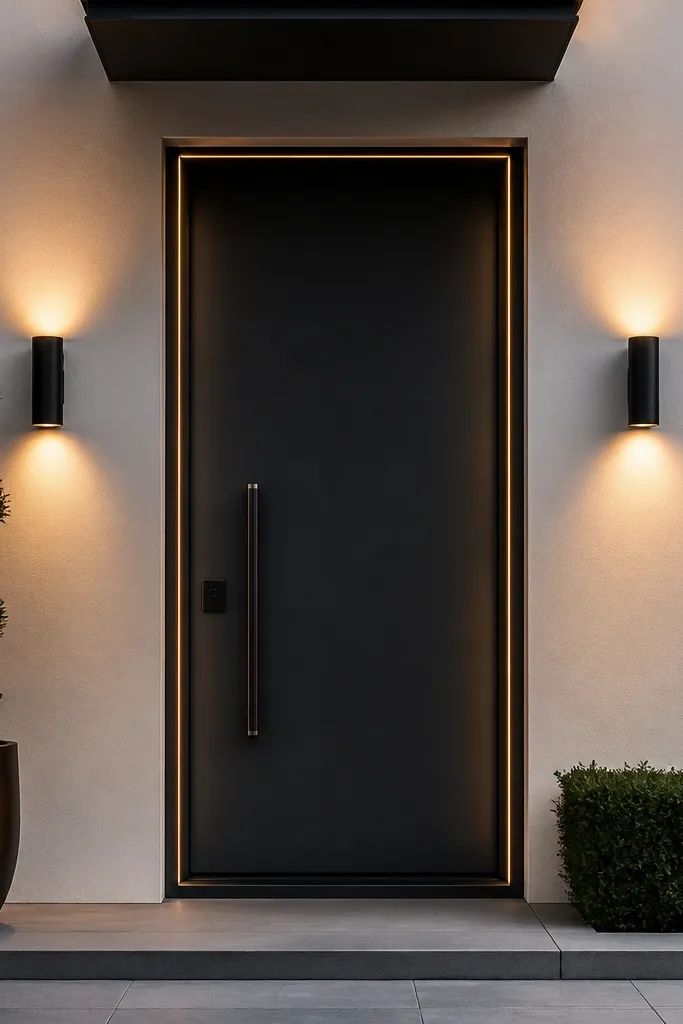
A recessed door reads designer because it creates a deliberate shadow line. The key is the shadow gap — a thin, consistent reveal around the door that makes the wall and door feel layered. This is one of the best beginner-friendly main entrance door design for villas if you’re doing a renovation, because you can keep the door slab simple and let the install detail do the heavy lifting. It also hides minor wall unevenness better than a surface-mounted casing. Photos look clean because the edge line stays crisp from corner to corner.
Plan for a recessed opening so the door sits about 1 to 1-1/2 inches back from the exterior wall face. Build a flat surround frame that matches the recess depth, then maintain a 1/4 inch shadow gap between door edge and surround. Install the door and frame, then add a thin trim cover that stops at the shadow line so it doesn’t look bulky. Finish by caulking the outer edge only, leaving the shadow gap visually clean and free of smeared caulk.
Editor's noteUse a single spacer shim thickness during installation and keep it consistent on all sides to avoid a wavy shadow gap.
Skip thisDon’t overfill the shadow gap with caulk; it turns a modern line into a thick, messy seam.
7. Arched Top Door with Slim Glass Transom
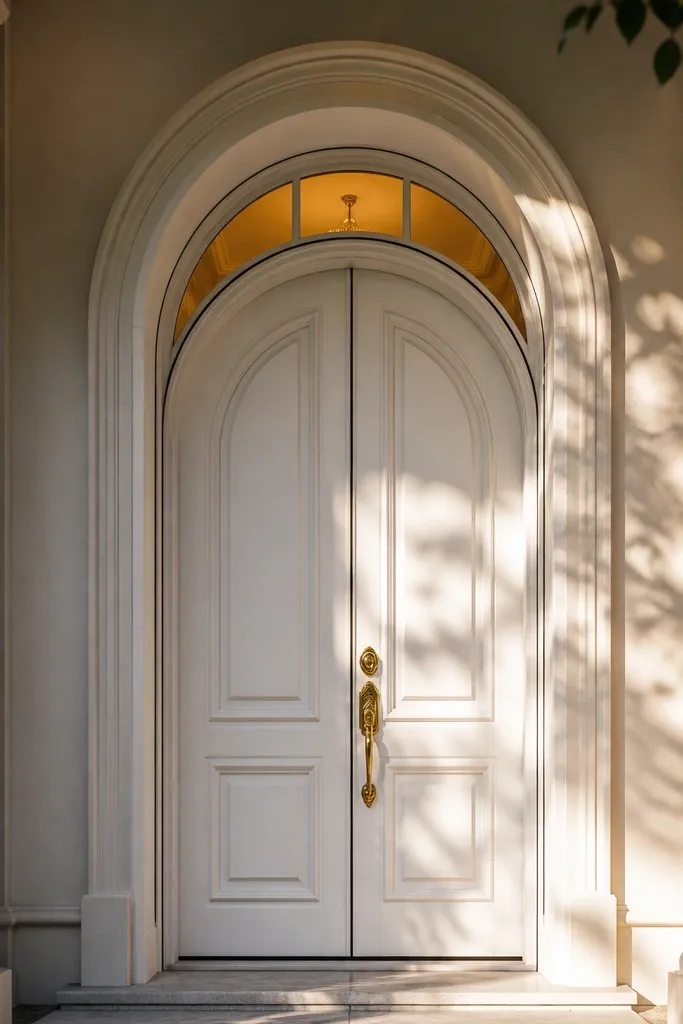
An arched top makes a villa entrance feel instantly formal, and the slim transom keeps it from looking heavy. The transom also brings in light, which helps your entry look bright in the evening with warm lighting. This design is especially photogenic when your facade has tall columns or a porch ceiling, because the arch echoes the architecture. It’s beginner-friendly when you use a pre-built arched door slab and a matching transom kit, rather than trying to route complex curves yourself. The result is grand without turning into a carpentry nightmare.
Choose a pre-made arched door slab with an arched top rail and a matching transom frame size. Install the door frame first, then fit the transom glass panel with glazing beads and gasket tape for a tight seal. Build casing with a consistent profile that follows the arch shape, and miter or template-cut the curved pieces so the seams disappear. Paint or stain the door and surround as one system so the tone matches across the arch and transom.
Use a flexible caulk in the arch corners; rigid caulk cracks as the wood moves.
Don’t skip weather stripping at the transom; drafts are common there and ruin the comfort.
8. Tall Slat Door with Horizontal Double-Shadow Lines (Minimal, Grand)
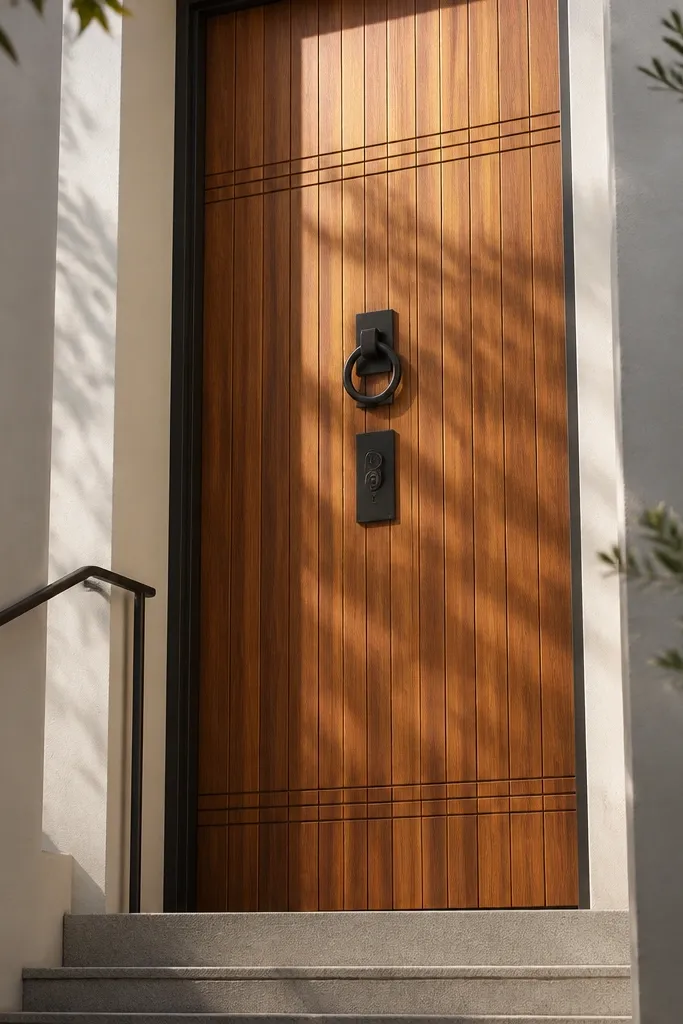
Vertical slats make the entrance feel taller and slimmer, which looks great on narrow villa gates. The double-shadow line effect is the trick: two thin inset grooves create a layered look without needing bulky molding. This style is photogenic because light grazes the grooves and makes the door look dimensional. It also works with modern and Mediterranean villa exteriors, as long as your hardware is clean. Beginner-friendly main entrance door design for villas here means you use a slatted door slab kit or prefabricated slat panel door.
Select a slat door slab with evenly spaced vertical slats and a flat inset panel area for the double-shadow line. Add two thin trim rails around the slab edges using 1/2-inch wide strips, set back so they create a consistent groove line. Install the door using a standard pre-hung unit, then add side casings that are slightly wider than usual — around 4 inches — so the slats read as part of the architecture. Finish with exterior paint in a solid tone and use black hinges for contrast.
Editor's noteIf you’re staining wood slats, finish the grooved areas with a brush first so the recesses don’t soak unevenly.
Skip thisDon’t mix slat spacing; uneven rhythm reads cheap in photos.
9. Classic Panel Door with 6-Inch Center Casing and Fluted Side Columns
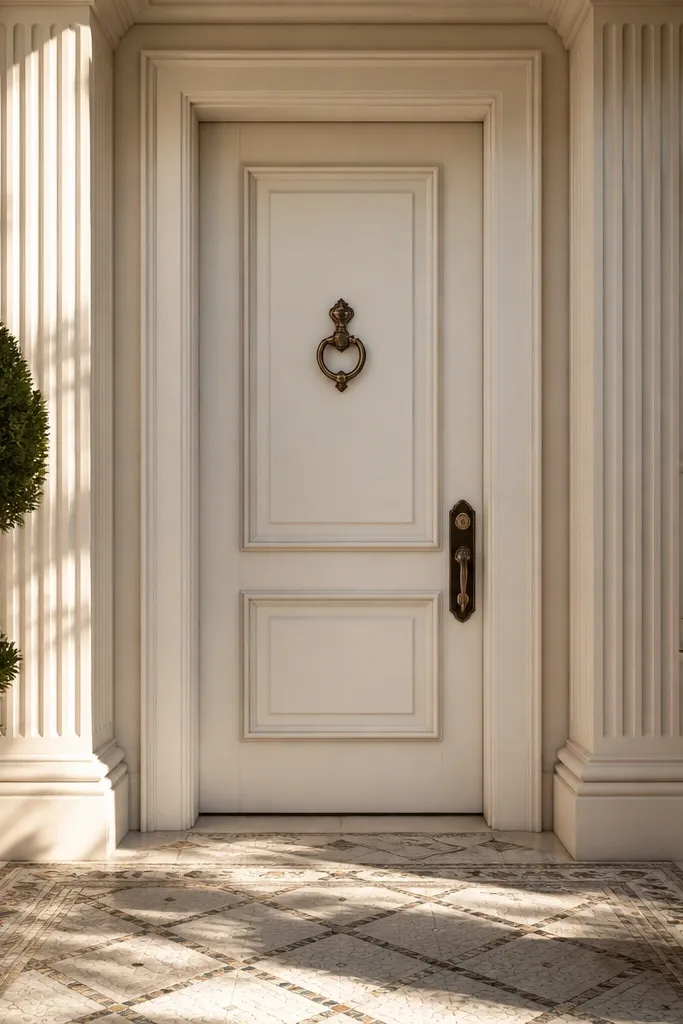
Fluted side columns add instant “villa hotel” vibes, and the 6-inch center casing makes the door look framed and important. This is a strong choice if your exterior is already ornate — think carved stone, decorative balustrades, or patterned tile. The flutes catch light in stripes, so the entrance looks detailed even from a distance. Beginner-friendly main entrance door design for villas works here because fluted columns can be bought as pre-turned trim pieces, then installed around a standard door slab. You get the grandeur without carving flutes from scratch.
Buy fluted column trim sections sized for your door height, plus a standard panel door slab. Install the door first, then build a center casing rectangle using 6-inch wide boards with an inner trim band. Position the fluted columns at the outer sides of the casing, keeping the columns plumb and centered relative to the door. Finish by painting the trim and door in the same color system and sealing all joints with exterior caulk.
Pre-sand pre-turned trim and apply primer before installation; it prevents blotchy paint where pieces overlap.
Don’t place columns too close to the door edge; leave enough space for a clean casing reveal.
10. Oak Door with Herringbone Inset on the Lower Third
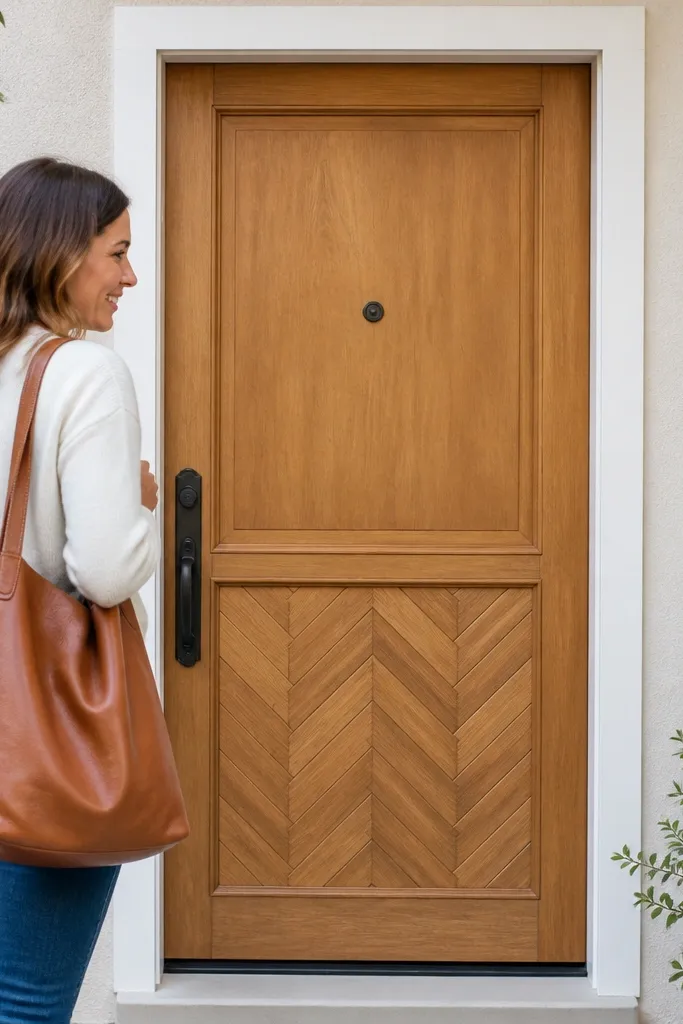
This design adds a signature detail without turning the whole door into a busy pattern. A herringbone inset on the lower third looks expensive because the diagonal wood grain catches light differently than flat panels. It also hides wear better than fully smooth doors since the pattern breaks up scuffs. If your villa entrance is simple, this gives you a focal point that still feels classic. Beginner-friendly main entrance door design for villas works because the herringbone can be done as a separate inset panel added to the door face.
Start with an oak veneer or oak-faced door slab with a flat lower panel area. Build a separate inset frame sized to the lower third, using thin strips for the herringbone pattern and glue them to a backing board. Sand the inset flush, then attach it with wood glue and small brads through the back edge. Seal the wood grain with a satin clear finish and install hardware after the finish cures.
Editor's noteUse a jig or spacer grid for the herringbone so the angles match across the whole inset.
Skip thisDon’t skip flush sanding; raised edges around the inset look sloppy from across the street.
11. White Door with Recessed Rectangle Glass and Black Grid
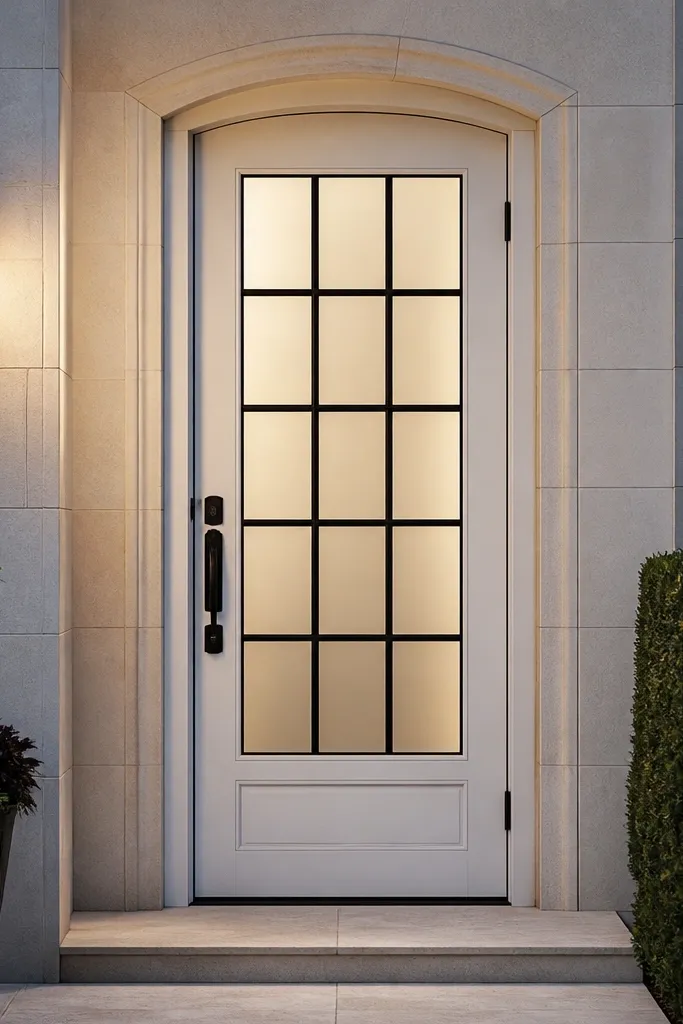
Recessed rectangle glass keeps a door looking tailored instead of “metal security door” looking. The black grid gives you a crisp geometry that works with both modern and classic villas. White paint reflects light and makes dark foyers feel brighter, even with privacy glass. This style photographs well because the glass recess creates depth around the grid. It’s beginner-friendly main entrance door design for villas since you can buy a door slab with the glass panel layout already done, then focus on casing and hardware.
Choose a pre-made door slab with recessed glass rectangles or order one with a grid pattern. Install the slab into a pre-hung frame, then check that the glass sits evenly in the recess. Build a simple surround casing with a consistent 3-1/2 to 4-inch width, and add a flat top cap instead of a complex crown. Prime and paint everything except the glass, then finish by installing black hinges, a matching deadbolt, and a black knocker plate.
Editor's noteMask the glass edges with painter’s tape before painting to keep paint lines razor straight.
Skip thisDon’t paint over weather seals; it can glue the seal to the frame and cause sticking.
12. Terracotta Stained Door with Brass Hardware and Wide Shadow Casing
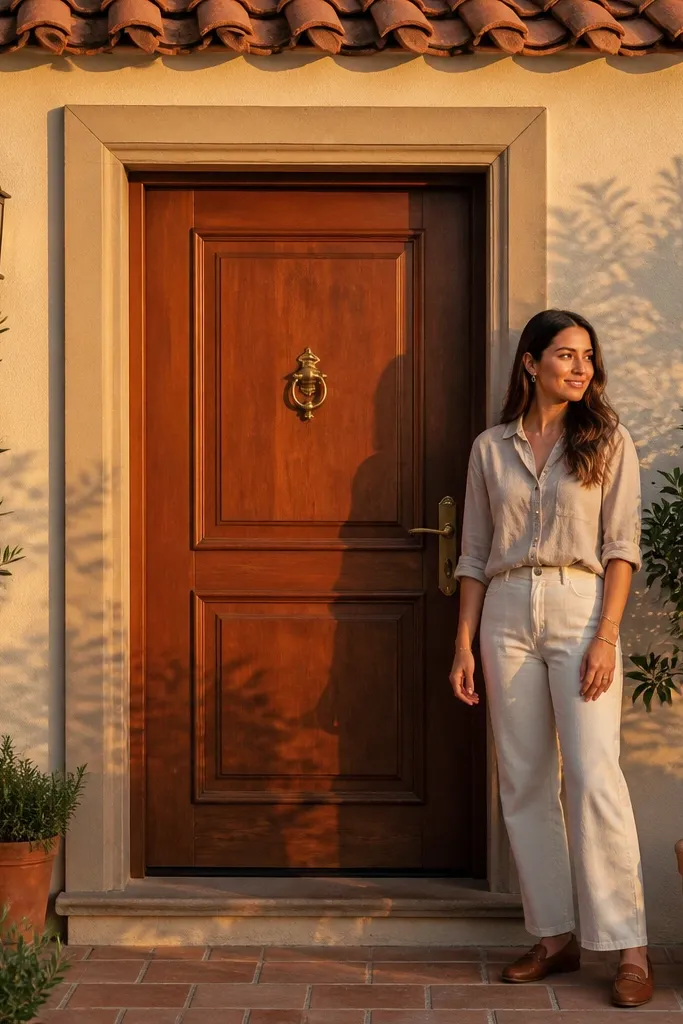
Terracotta tones look incredible on villas with warm plaster and terracotta roof tiles. The stain gives depth without needing full paint coverage, and brass hardware ties the entry together. A wide shadow casing around the door makes the stain look richer because the edge line creates contrast. This is the kind of beginner-friendly main entrance door design for villas that looks “custom” even when you use a standard door slab. It’s also forgiving: small wall imperfections are less obvious behind a shadow line.
Pick a stain tone closer to clay or terracotta than orange — then test on a scrap of the same wood species or veneer. Apply a pre-stain conditioner if your wood is porous, then stain in thin coats until you hit the right tone. Install a wide casing surround with a 1/4 inch shadow gap — use spacers during installation. Seal with an exterior matte or satin clear coat, then mount brass hardware and seal around the screw holes.
Editor's noteStain looks uneven until the final clear coat — don’t judge tone after the first coat.
Skip thisDon’t rush the clear coat; trapped solvents can make the finish tacky and attract dust.
13. Graphite Grey Door with White Double-Layer Trim Frame
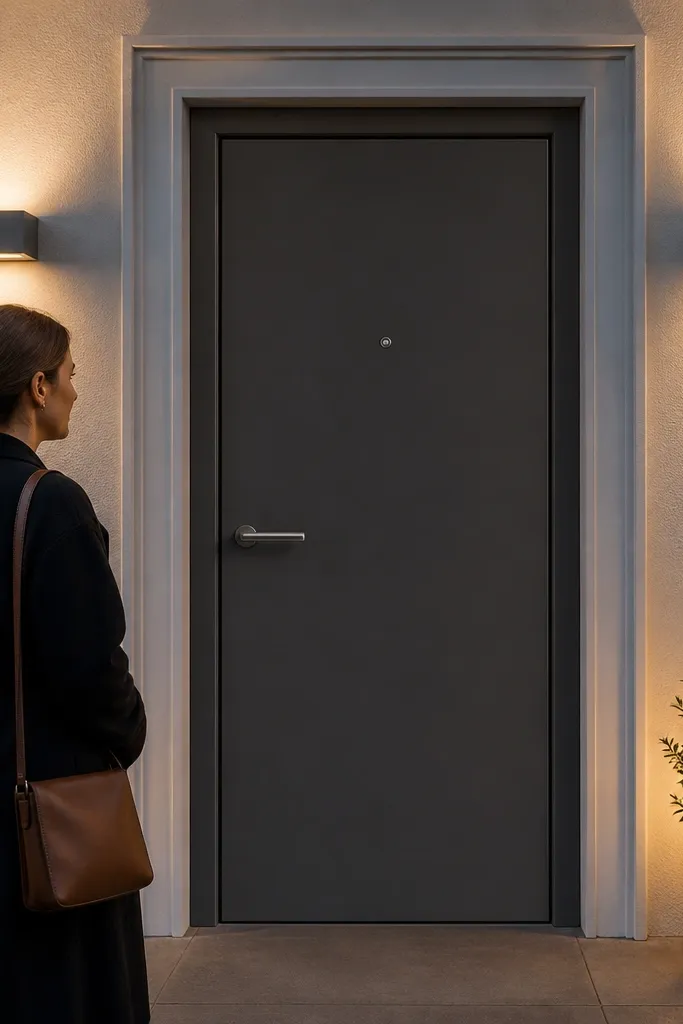
This is a high-contrast design that makes your entry read premium even on plain walls. The graphite door is modern, and the white double-layer trim creates a crisp edge that looks like a built-in cabinet. It’s especially photogenic at dusk when exterior lights hit the trim edges. The double-layer approach also hides small gaps between door frame and wall because one layer can cover the other. Beginner-friendly main entrance door design for villas wins here because trim layers are easy to cut straight and you don’t need fancy routing.
Choose a graphite exterior paint for the door slab and prime it well so the color stays even. Build the trim in two layers: an inner frame that sits close to the door edge and an outer frame that’s 1 to 1-1/2 inches wider. Maintain a consistent reveal between inner and outer layers using spacers. Paint the trim white, caulk the outer seams, and install hardware in a matching dark metal so the look stays clean.
Editor's noteUse a foam roller for the door paint to avoid brush marks on the flat panels.
Skip thisDon’t make the inner and outer frames different heights; mismatched edges show in every photo.
14. Natural Wood Door with Vertical Reeded Overlay Panels
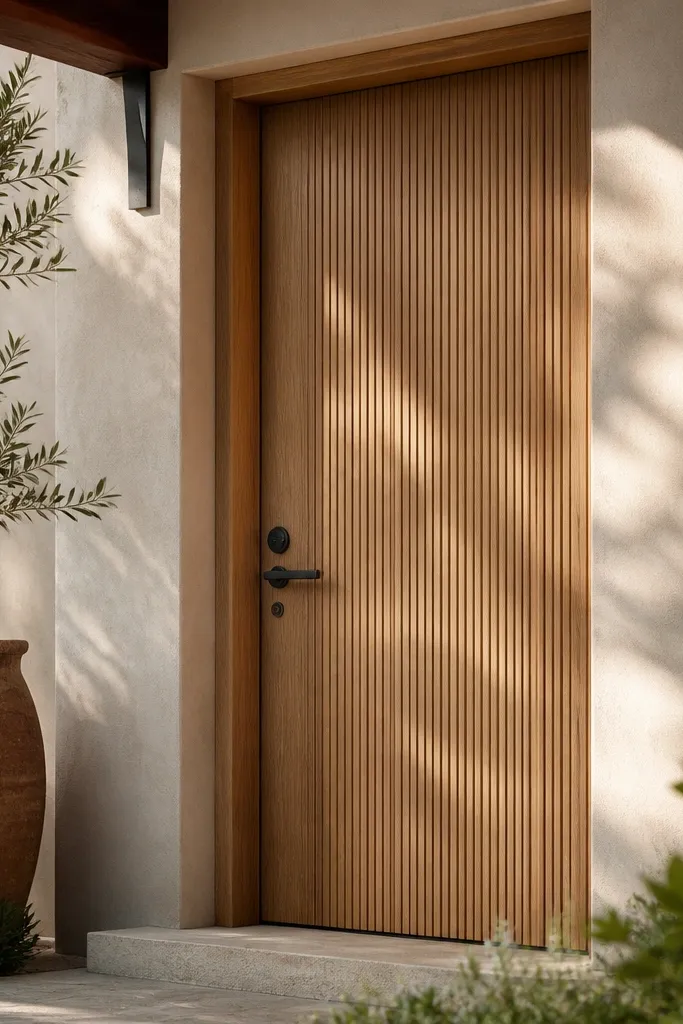
Reeded textures add a sculpted look without needing glass. Vertical reeded overlays create a light-and-shadow pattern that feels handcrafted, even if you’re using off-the-shelf reeded boards. This works well for villas with neutral walls because the door becomes the texture focal point. It’s also a great beginner-friendly main entrance door design for villas because the overlay panels can be installed on top of a flat door slab. Finish it with a clear matte to keep the wood tone warm and reduce glare.
Start with a flat door slab, then cut reeded overlay strips to cover the front face in a simple grid — for example, 3 vertical columns with even spacing. Glue and brad the overlays in place, then sand the edges flush to avoid visible steps. Install the door into the frame, then add simple casing around it with a 3-1/2 to 4-inch width. Apply a matte exterior clear coat in two thin layers, sanding lightly between coats.
Seal the back edges of reeded strips too; moisture warps texture overlays over time.
Don’t leave gaps between overlay strips and the door face — they collect dirt and look messy up close.
15. Wrought Iron Look Door with Solid Panels and Narrow Glass Sidelights
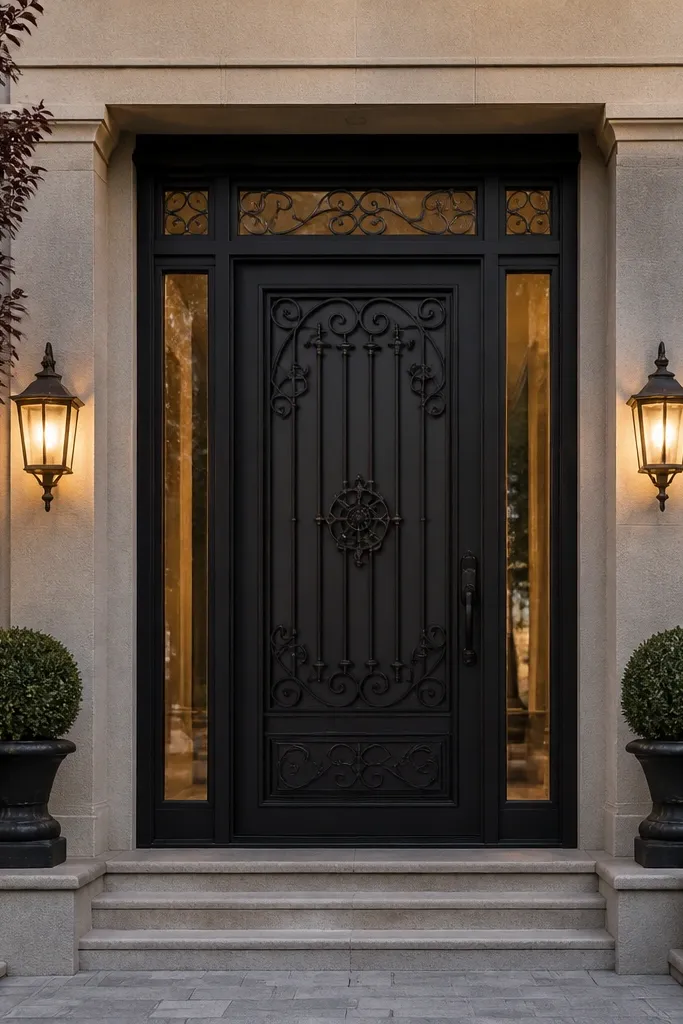
If your villa has a fence line or wrought iron balcony details, echo that with a door that has a grille pattern. Narrow glass sidelights on both sides add width and light, making the entry feel larger. Even though it’s “iron-inspired,” you can keep the build beginner-friendly by using a door slab with a printed or applied iron-style grille overlay. The photo payoff is strong because the sidelights create symmetry and the grille pattern adds detail without cluttering the door face.
Choose a door slab with a flat panel surface and an iron-style grille overlay, then install it into a pre-hung frame. Add two sidelights panels using tempered glass and slim frames, keeping the glass centered relative to the door. Build the surround casing as a continuous frame that wraps door and sidelights so it reads as one architectural unit. Seal glazing edges with exterior silicone or gasket tape and paint or stain the surround to match the door tone.
Editor's noteUse slimmer frames for sidelights — 1 to 1-1/4 inch — so they don’t look like bulky windows.
Skip thisDon’t make the sidelights asymmetrical; even 1/2 inch off looks wrong in photos.
16. Stone-Color Painted Door with Faux Mortar Lines Around Panels
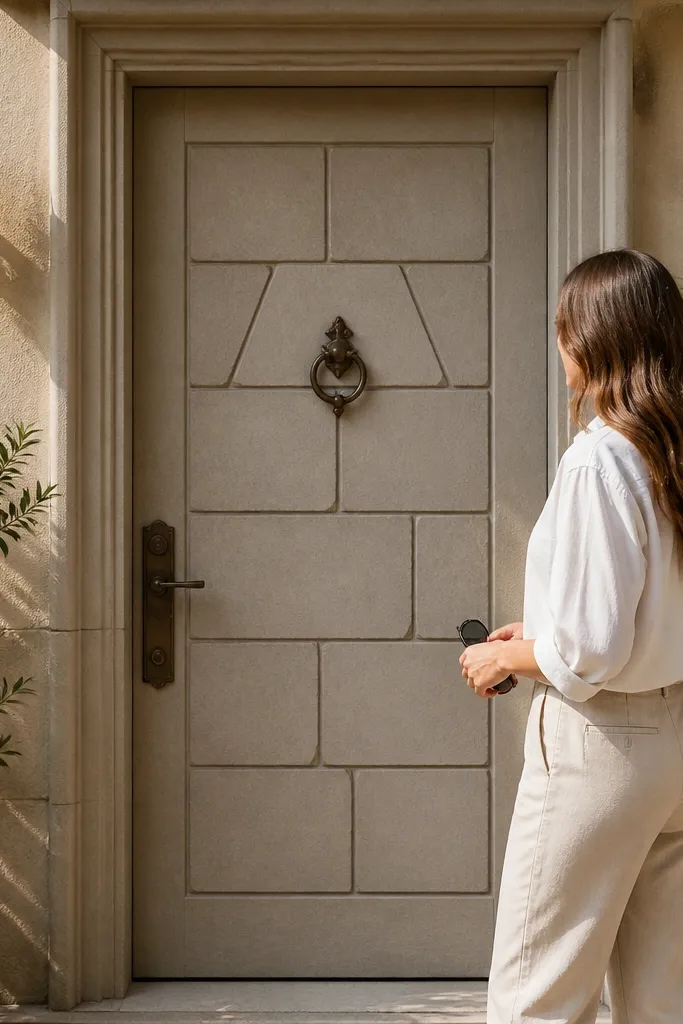
This design uses paint to create the look of carved stone panelwork. A stone-color base (warm greige or light taupe) makes the door blend with exterior plaster, but faux mortar lines keep it from looking boring. The recessed panel outline gives depth, and it photographs like a handcrafted facade element. It’s beginner-friendly main entrance door design for villas because you’re not relying on custom wood carving — you’re creating lines with trim strips or painters tape and then sealing. The result feels architectural without advanced carpentry.
Pick a stone-tone exterior paint and prime the door thoroughly so the color is consistent. Create panel borders using thin trim strips (or tape guides) to define recessed areas about 1/4 to 3/8 inch deep visually. Paint the panel recess slightly darker than the main field so the lines read clearly in photos. Seal the whole door with an exterior clear topcoat, then add a simple brushed metal knocker to finish.
Editor's noteUse a small angled brush for the mortar-line edges so the line thickness stays uniform.
Skip thisDon’t go too dark on the recess color; heavy contrast can look like a stencil instead of stone.
17. Honey Oak Door with Geometric Crossbars and Black Backplate
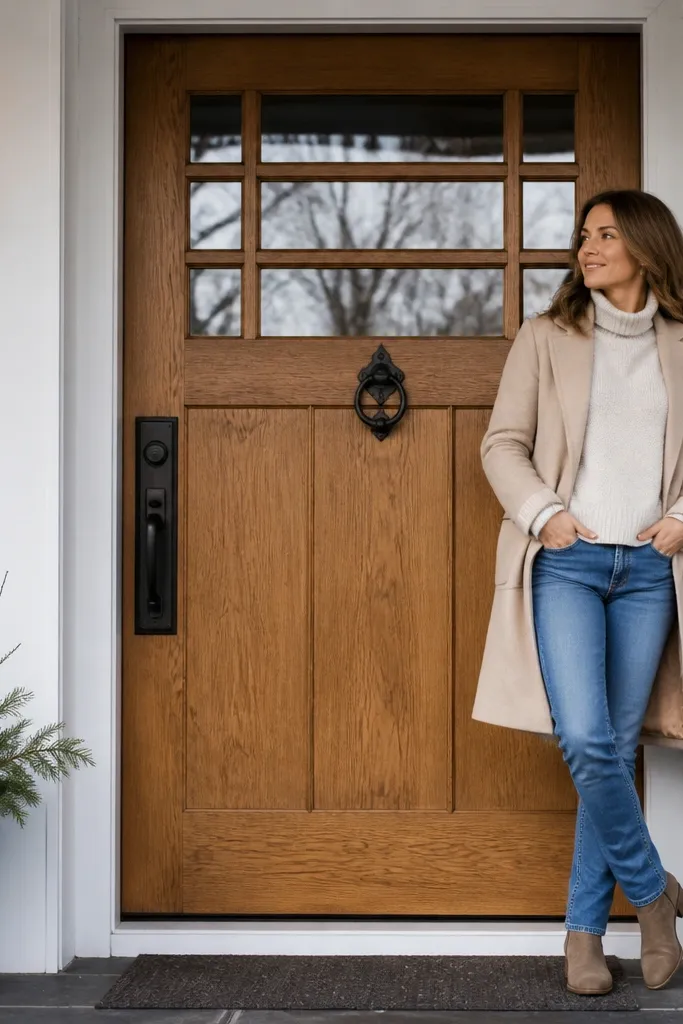
Crossbars give you structure and movement, and honey oak warms up the entrance. The black backplate under the knocker and lock hardware makes the door look intentional and “designed,” not random. This is a great option for villas where the facade has straight lines like window frames and balcony rails. Beginner-friendly main entrance door design for villas works because you can install decorative crossbars as surface-mounted elements on a solid door slab. It looks sharp in photos because the crossbars create strong horizontal bands against vertical door grain.
Start with a honey oak tone door slab and sand it smooth for clean adhesion. Install two or three decorative crossbars using pre-made metal or wood trim strips, keeping spacing even — for example, one at mid-height and one above it. Add a black backplate behind your knocker and deadbolt so the hardware looks like it belongs to the design. Finish with an exterior satin clear coat on the wood and tighten all mounting screws with washers.
Editor's notePre-drill holes for crossbars so you don’t split the wood grain near edges.
Skip thisDon’t overcrowd crossbars; more than three horizontal elements starts to look decorative instead of architectural.
18. Cream Door with Raised Tile-Look Panel Inserts (Mold-Ready Style)
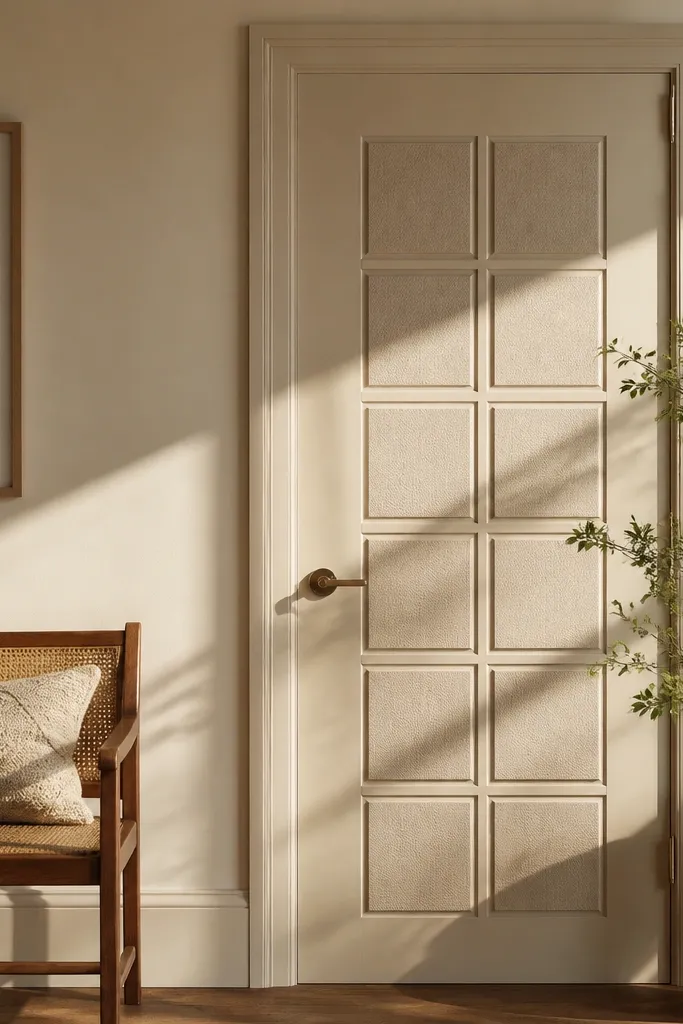
This is a visually rich look that still keeps the door beginner-friendly. Raised tile-look inserts create a patterned surface that reads expensive on cream villas and under porch lighting. The texture also hides minor scuffs better than flat paint. You get the “ceramic” vibe without needing to tile a whole door, which is messy and heavy. The key is choosing a door face that can accept inset panels and sealing the edges so moisture doesn’t creep in.
Choose a cream exterior door slab with a flat face, then plan a grid of raised inserts — for example, 3 columns by 2 rows on the lower half. Use pre-made raised panel inserts or cut thin MDF/wood strips into a tile grid and glue them down, then sand flush. Paint the main door cream and paint the raised grid lines in a slightly darker tone for depth. Seal with exterior topcoat and caulk around the edges of the inset grid.
Seal the underside of inset panels before installation so the edges resist swelling.
Don’t leave inset edges unsealed; moisture gets under the trim and lifts it.
19. Dark Teak Door with Brass Finger Pulls and Two-Tone Casing
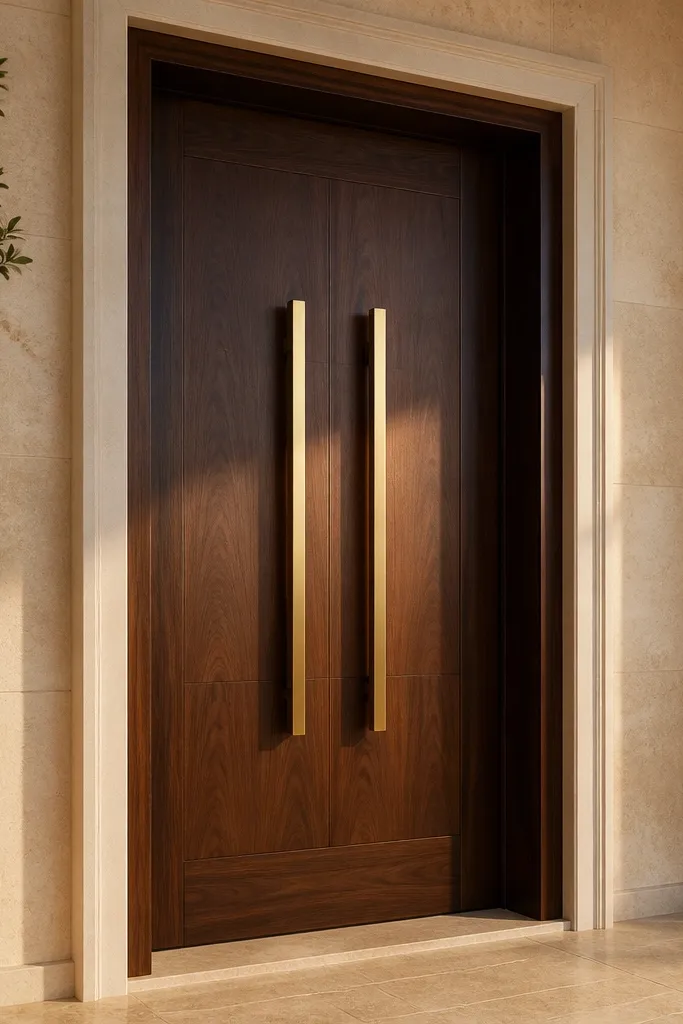
Dark teak tones make an entrance feel grounded and upscale, especially with warm lighting and beige stone. Brass finger pulls add a custom, furniture-like detail that looks great close up and in wide shots. Two-tone casing makes the door area look layered: one color on the outer casing, another on the inner band. This is a strong beginner-friendly main entrance door design for villas because you can keep the door slab simple and focus on trim painting and hardware placement. It’s also a good choice for villas with existing brass accents in lights or railings.
Stain or paint the door in a dark teak tone, then seal with an exterior satin finish. Build casing in two layers: outer casing in a light neutral and inner band in a slightly darker neutral or matching door tone. Keep inner band width around 2 inches so it reads as a frame, not a thin line. Install brass finger pulls at about 36 inches from the floor to the center of the pull, then mount hardware after the finish cures.
Editor's noteMark finger pull height with painter’s tape on the door edge and check symmetry from both sides.
Skip thisDon’t mix warm and cool metals; brass with silver hardware makes the entry look unfinished.
20. White Door with Tall Side Lights and a Matching Header Beam
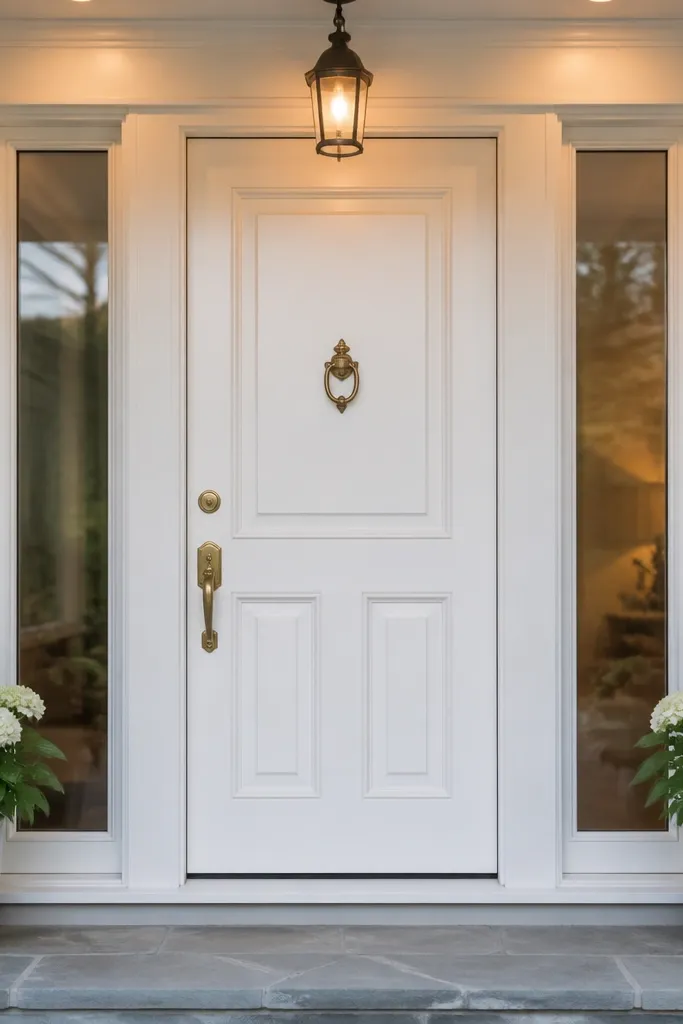
Tall sidelights make the entry feel wider and brighter without touching the main door slab. When the sidelights are the same height as the door casing, the facade reads cohesive and grand. A matching header beam ties it together so it looks built-in rather than “door plus windows.” This is beginner-friendly main entrance door design for villas because you can do it with a pre-designed sidelights frame kit and standard trim boards. The look is clean, bright, and very photogenic in morning light.
Choose a white exterior door slab and a sidelights kit sized to your opening height, then dry-fit the frame components. Install the door frame and sidelights frame together so the top beam aligns and the reveals match on both sides. Build a casing around the whole assembly using boards about 4 inches wide, and add a straight header board that spans door plus sidelights. Paint everything in the same white system and seal exterior joints with caulk.
Editor's noteCheck vertical alignment with a laser level; sidelights show every tilt immediately in photos.
Skip thisDon’t use different mullion styles between sidelights and door; the mismatch screams “added later.”
21. Cedar Door with Vertical Channel Grooves and Black Mail Slot
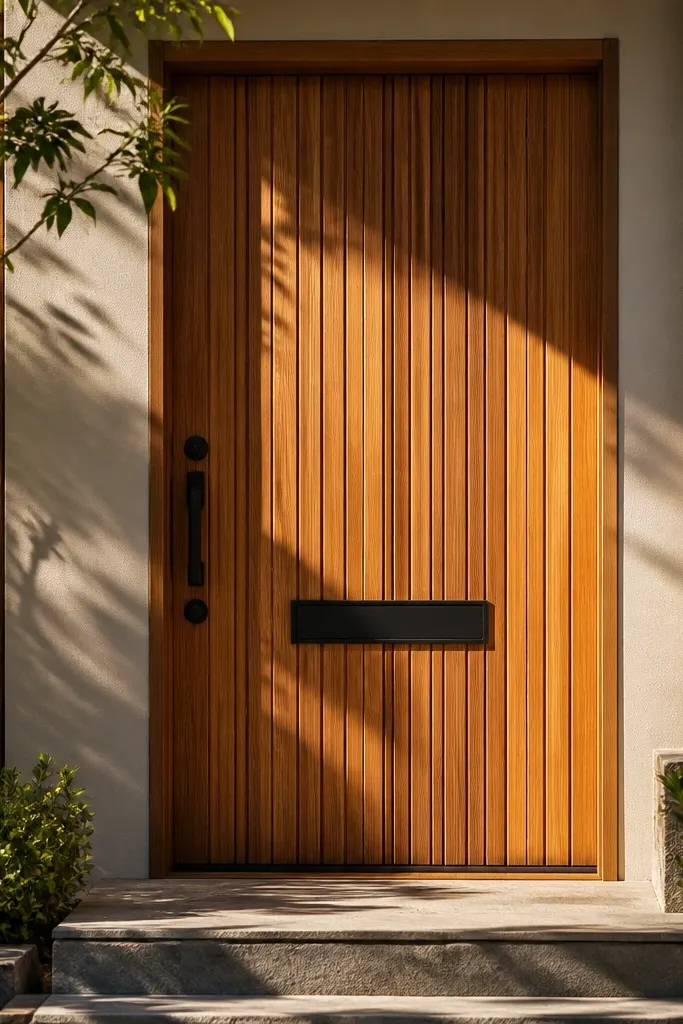
Channel grooves in cedar give you a weather-friendly texture and a natural, villa-craft feel. The black mail slot plate is practical but also looks sharp, especially if your hinges and lock hardware are black too. This design works when your exterior has wood accents or pergolas, because the cedar tone feels like it belongs. It’s beginner-friendly main entrance door design for villas because grooves can be created with simple router channels on a manageable panel or done with pre-grooved trim boards. The end result looks tactile and high-end in close shots.
Start with a cedar or cedar-faced door slab and sand smooth. Create vertical channel grooves with a router using a consistent bit width and spacing, or attach pre-grooved wooden strips onto a flat slab. Install the door, then add simple casing to frame the textured surface, aiming for a 3-1/2 to 4-inch casing width. Mount the black mail slot at a comfortable height around 40 inches from the floor, then seal all hardware penetrations with exterior-rated sealant.
Editor's noteVent the door cavity if your design is fully wood; trapped moisture makes cedar warp over time.
Skip thisDon’t paint over cedar without sealing; it can blotch and look patchy around the grooves.
22. Two-Tone Entry Door with Dark Panel Center and Light Outer Frame
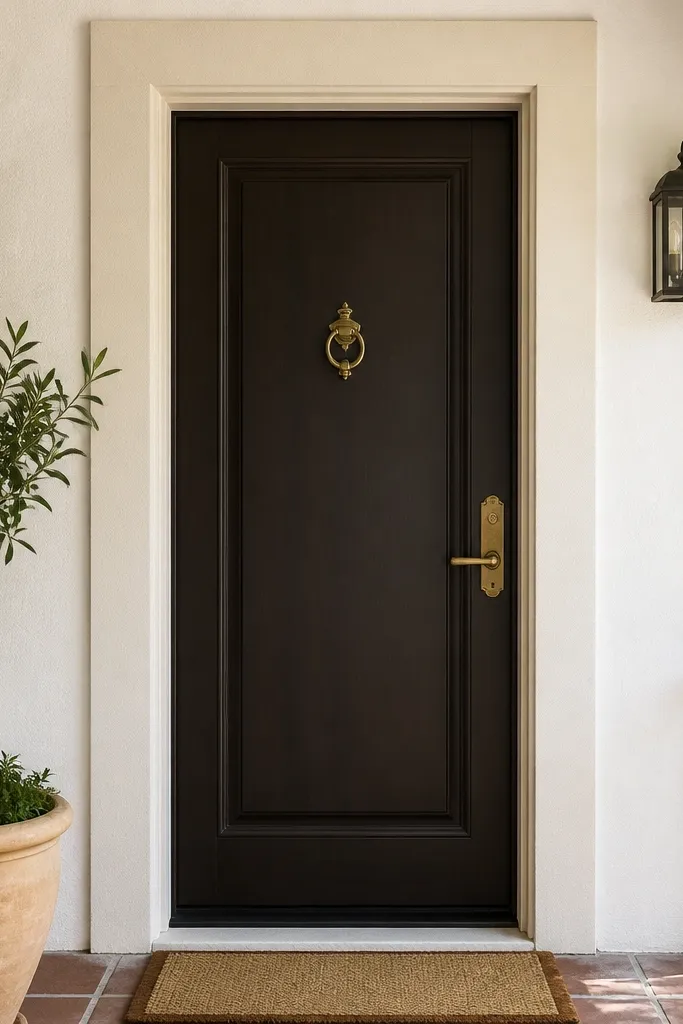
Two-tone doors look designer because they separate the door face into a framed “picture” center. The trick is keeping the outer frame light and the center darker, so the door reads dimensional instead of flat. This style is also great for villas with light facades, because the darker center becomes the focal point. Beginner-friendly main entrance door design for villas works here because you can build the outer frame using trim and paint both layers cleanly. It photographs well because the edges create contrast lines that stand out in sunlight.
Choose a door slab and prime it, then paint the outer frame color on the face first if you’re using a pre-framed slab or apply trim to create the outer border. Add a raised or recessed trim frame around the center panel — about 1-1/2 to 2 inches wide — and keep it centered. Paint the center panel in the darker tone, then remove tape carefully for crisp edges. Finish with exterior clear topcoat on the painted surfaces and install hardware after curing.
Use a high-quality painter’s tape and burnish the edges with a plastic card to prevent paint bleed.
Don’t choose two colors that are too similar; you need visible contrast for the framed look to land.
23. Rusticated Panel Door with Deep Vertical Grooves and Thick Surround
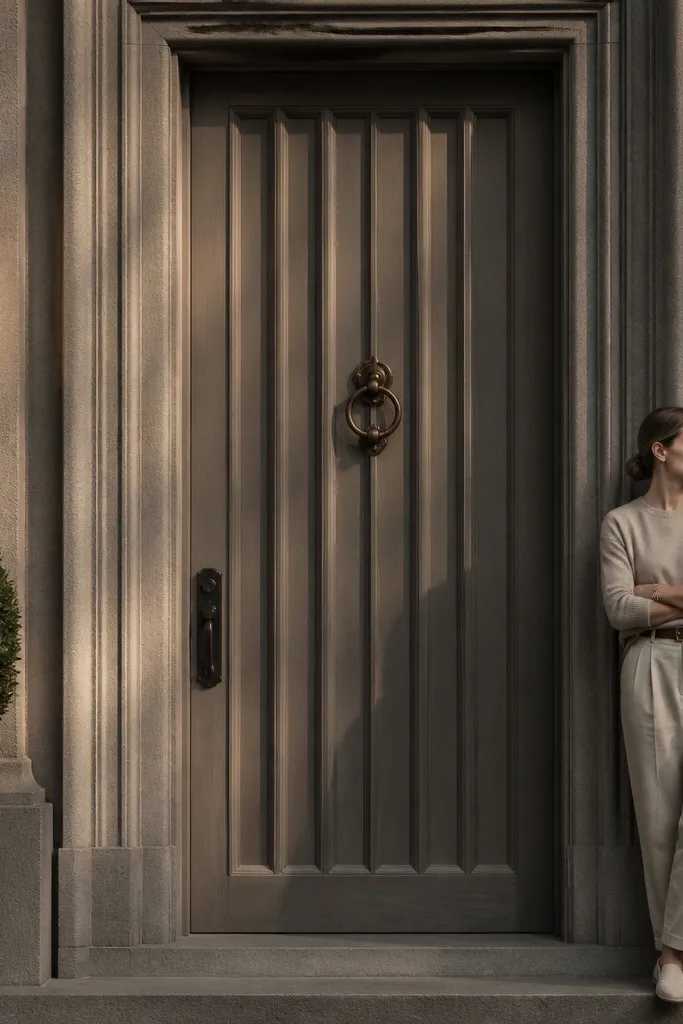
Rusticated texture makes a villa entrance look like it has weight. Deep vertical grooves catch light and cast strong shadows, which reads “architectural” even if your wall is simple. Pair it with a thick surround casing and your door area looks carved into the facade rather than attached to it. This is a bold choice for villas with clean lines, because the texture carries the design. Beginner-friendly main entrance door design for villas stays manageable if you use a pre-textured door slab or a door with molded rusticated panels.
Pick a pre-made rusticated door slab with consistent groove depth and spacing. Install it into a pre-hung frame, then add a thick casing surround using 2x or stacked casing boards to reach about 5-1/2 to 6 inches total width. Keep the outer casing projection around 1 inch so shadows deepen around the door edges. Finish by painting or staining and sealing the grooves, then mount hardware with black or bronze tones depending on your facade metals.
Use a small foam brush to get finish into deep grooves without leaving dry patches.
Don’t paint thick in grooves; it can fill details and flatten the texture.
24. Geometric Glass Door with Diamond Pattern and Matching Side Panels
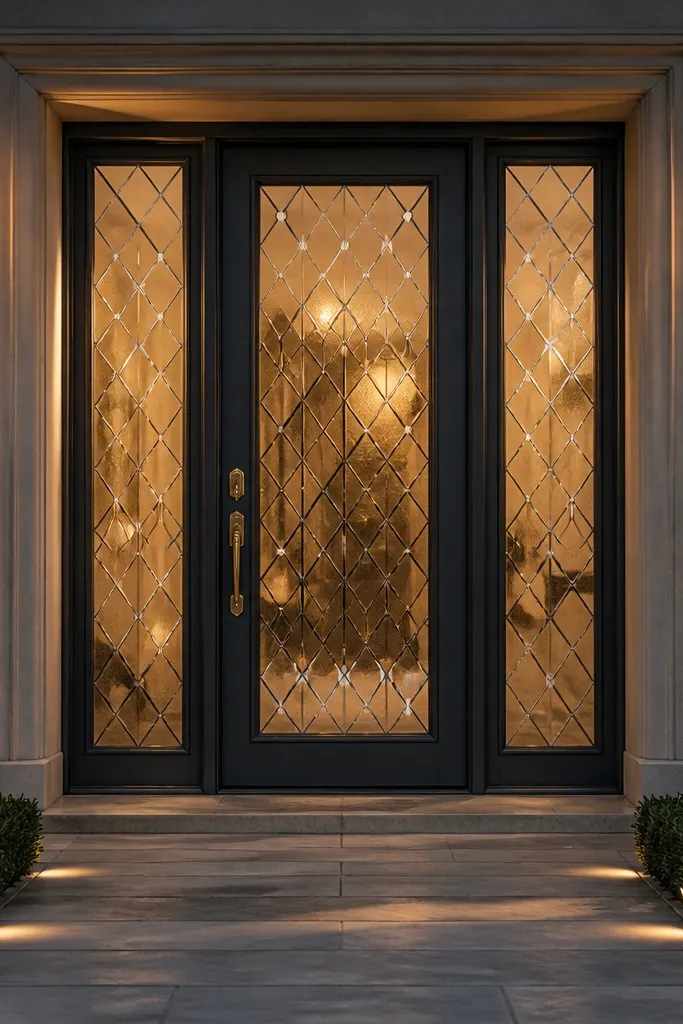
Diamond glass patterns look old-world and modern at the same time, and they give you sparkle without needing clear glass. When you add matching side panels, the entrance reads like one composition instead of a single door with random windows. This is especially good for villas where the front path lighting is warm, because the diamond pattern catches highlights. It’s beginner-friendly main entrance door design for villas when you use a pre-made door slab and a matching side panel frame kit, so you’re not cutting glass yourself. The result is grand and distinct from the usual plain doors.
Choose a door slab with diamond-pattern tempered glass or a glass insert system. Install the door into the frame, then add matching side panels using similar glass thickness and frame style. Build a continuous casing around the door and side panels so the diamonds align visually at the same height. Seal the glass with proper glazing gaskets and finish the casing with exterior paint or stain.
Editor's noteKeep the diamond size consistent across door and side panels; mismatched grids look sloppy.
Skip thisDon’t mix pattern types (diamonds on door, rectangles on sides); it looks accidental.
25. Modern Flush Door with Thin Metal Reveal Trim and Hidden Hardware
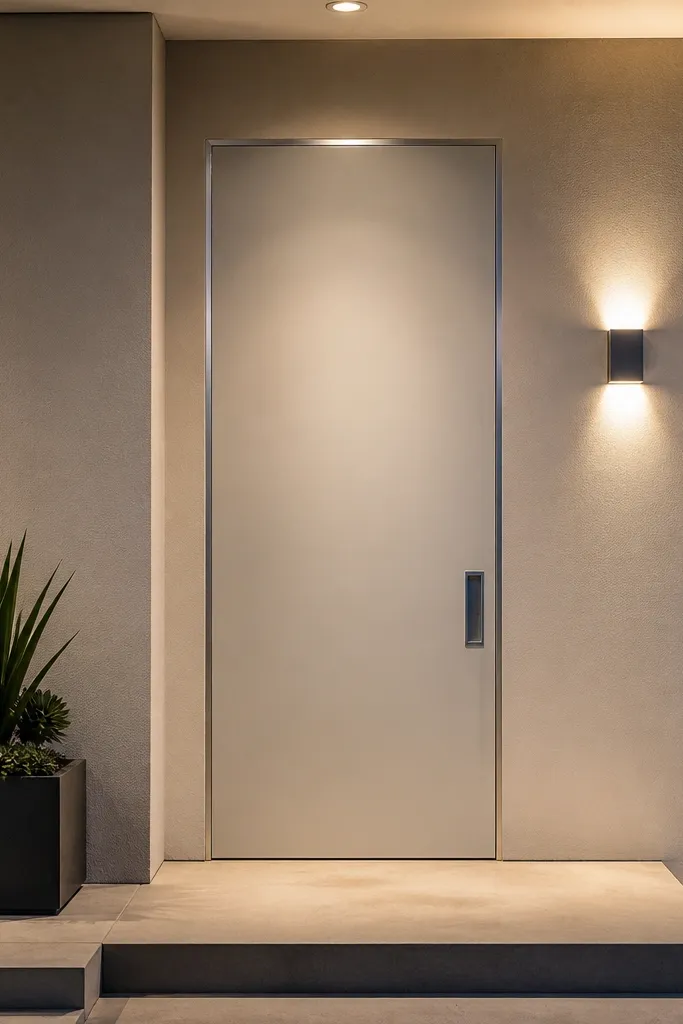
A flush door with a thin metal reveal looks high-end because it hides clutter. The thin metal trim line creates a clean edge that reads like a contemporary storefront, but it still fits a villa entrance when the wall is smooth plaster or stone. Hidden hardware keeps the door face calm, so the facade looks intentional. This style is beginner-friendly main entrance door design for villas if you buy a flush door system and a compatible reveal trim set. You’re focusing on alignment and sealing rather than complex carpentry.
Select a flush exterior door system and matching metal reveal trim kit sized for your door thickness. Install the door frame so the door face sits even with the wall plane if your design calls for a flush look. Attach the metal reveal trim around the edges with the provided fasteners, keeping the corners tight and straight. Finish by installing a concealed hinge system and a concealed or minimal pull, then seal the perimeter with exterior caulk.
Editor's noteUse the kit’s corner pieces if available; mitering metal reveal lines yourself often shows gaps.
Skip thisDon’t attempt this with a warped wall; the flush look makes every uneven surface obvious.



