
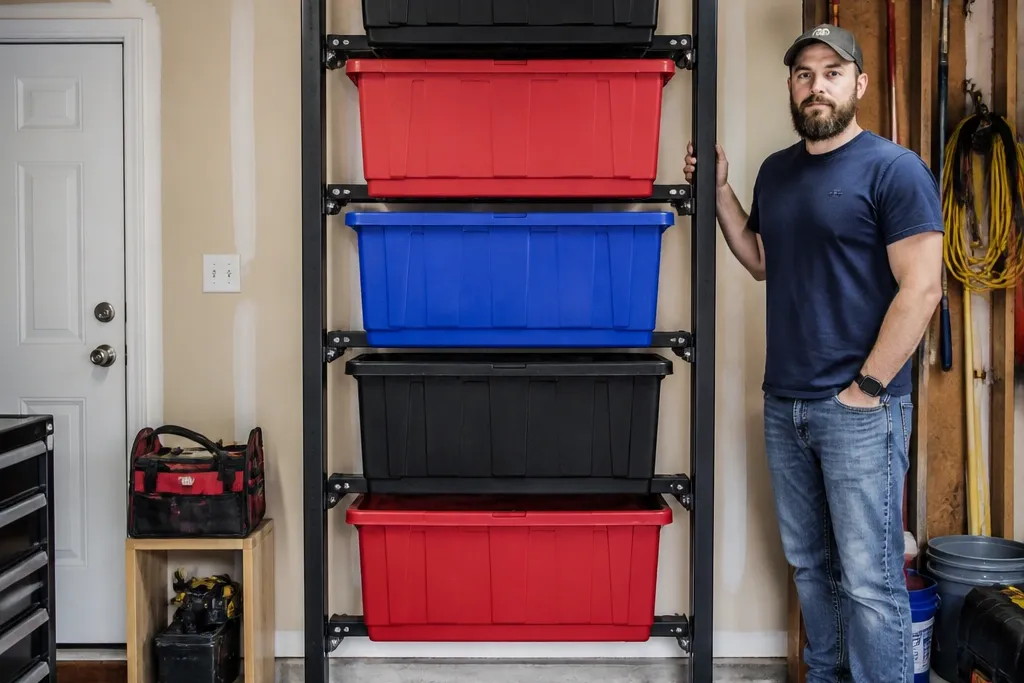
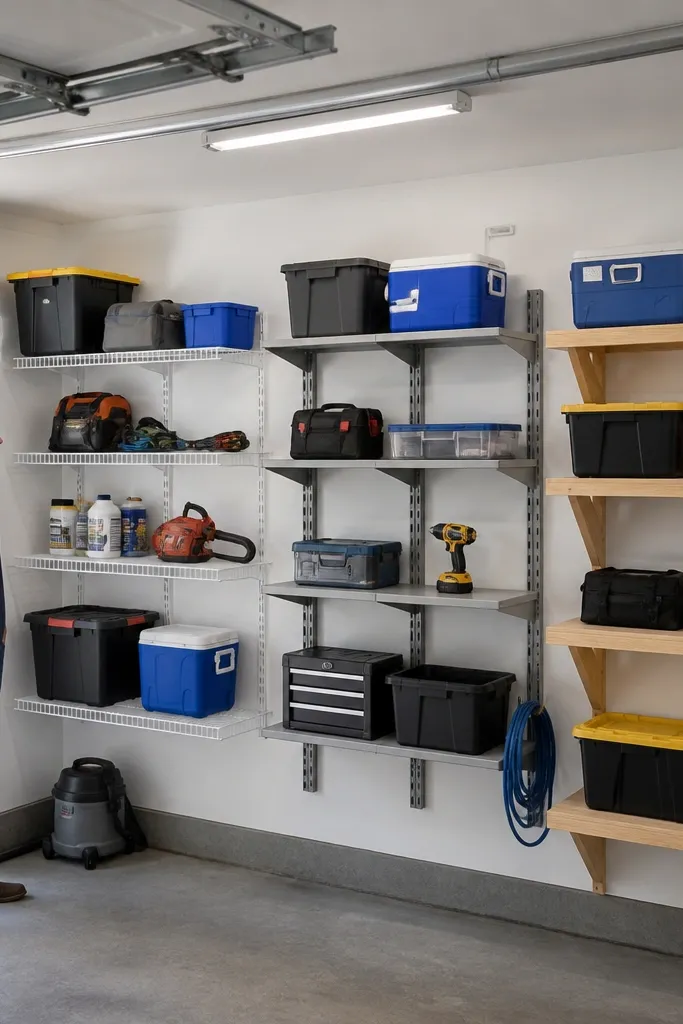
1. 4x8 Adjustable Steel Upright Rack With Bin Levels
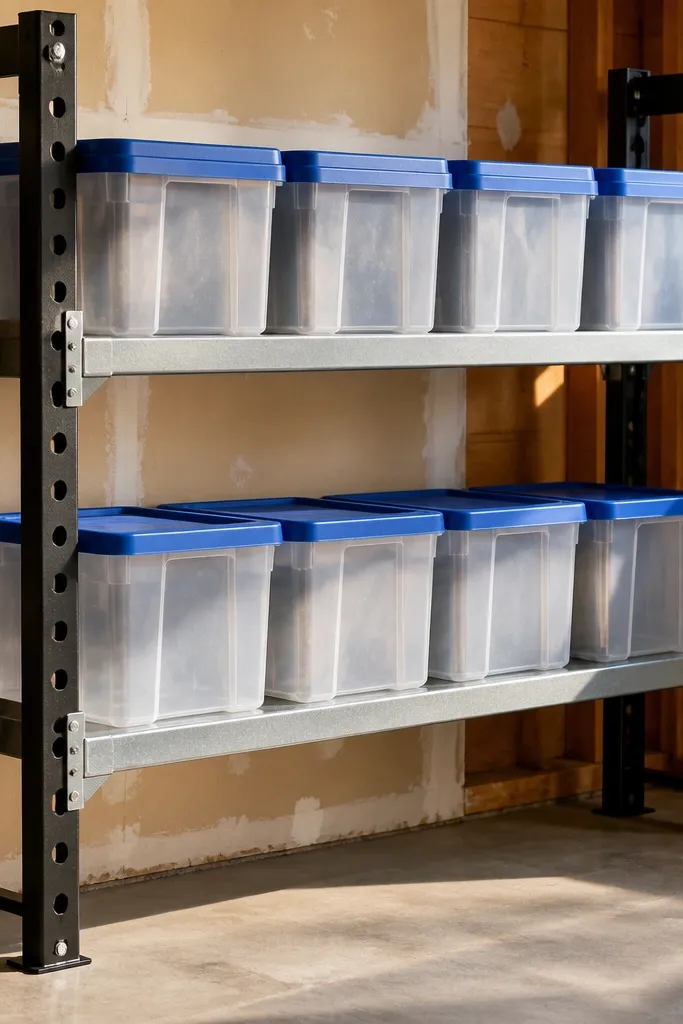
This is the quickest route to stable, beginner-friendly storage because the frame is already engineered and the shelves adjust in small increments. A 4x8 bay gives you enough height control to separate bulky seasonal items from frequently used bins. Adjustable levels matter in garages because your storage doesn’t stay the same — you’ll add a shop vac, swap tool layouts, and change bin sizes. Use it with plastic bins and you get a clean look plus faster scanning, since you can see what’s inside without pulling everything down.
Start by marking a level line on the wall and confirming stud locations behind the drywall. Assemble the rack uprights and back rails on the floor first so you can verify square before lifting anything. Bolt the uprights to studs with structural screws or to a concrete wall with the correct anchors, then install shelf decks at 12- to 16-inch spacing for bins. Finally, add cross-bracing if your kit includes it, and tighten every connection with a wrench, not a hand-tight “good enough.”
Editor's noteSet the bottom shelf 6-8 inches off the floor if you store wet gear or you want to sweep underneath.
Skip thisDon’t mount only the top — racks need multiple solid attachment points to prevent racking.
2. Slotted Wall Rail System With 16-Inch Shelf Spans
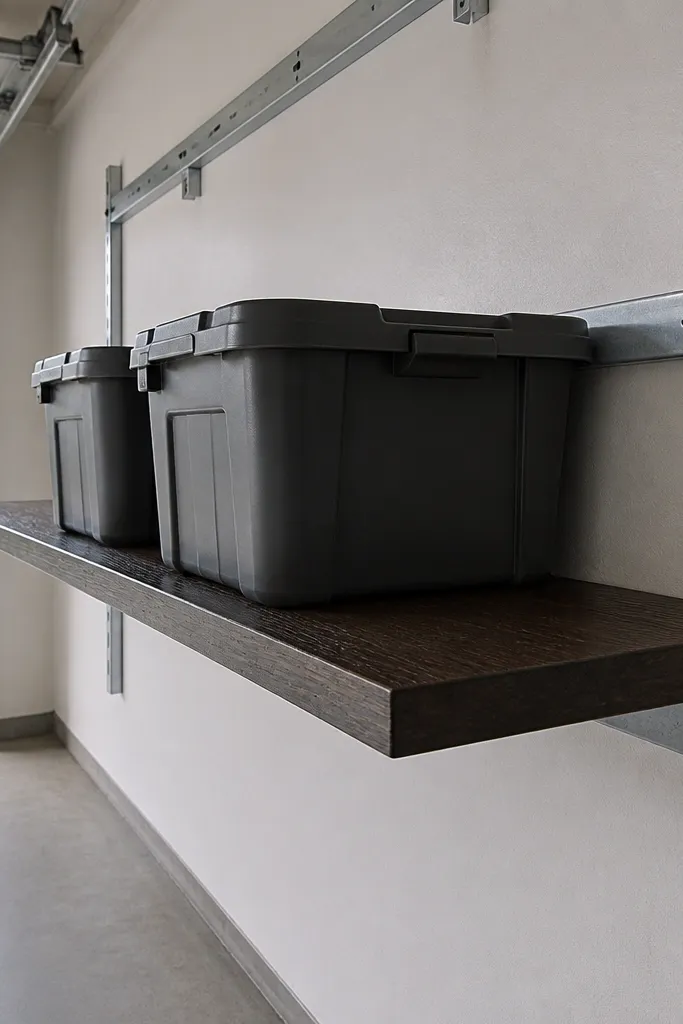
A slotted rail system is the most forgiving option for beginners because you can reconfigure shelf height without rebuilding the whole wall. It’s also cleaner than random brackets because the rails keep everything aligned and level. I like this for garages where you’re still figuring out your tool zones. Put heavy bins on lower shelves and keep lighter items on top shelves so you’re not stressing the hardware.
Begin by finding studs and attaching two rails per shelf run, spaced so your shelf brackets land on solid wood. Use a level and snap a horizontal reference line, then transfer spacing marks from the rail kit to keep the bracket points consistent. Install shelf supports and deck boards or pre-cut plywood so you get about 16-18 inches of usable depth. Finish by checking each shelf for wobble — tighten bracket screws and add a back stop if the kit supports one.
Pre-drill plywood shelves and seal the cut edges with a coat of polyurethane so moisture doesn’t creep in.
Skip the temptation to mount rails to framing guesses — measure stud centers and commit.
3. Ledger Shelves Built From 2x4s and 3/4-Inch Plywood
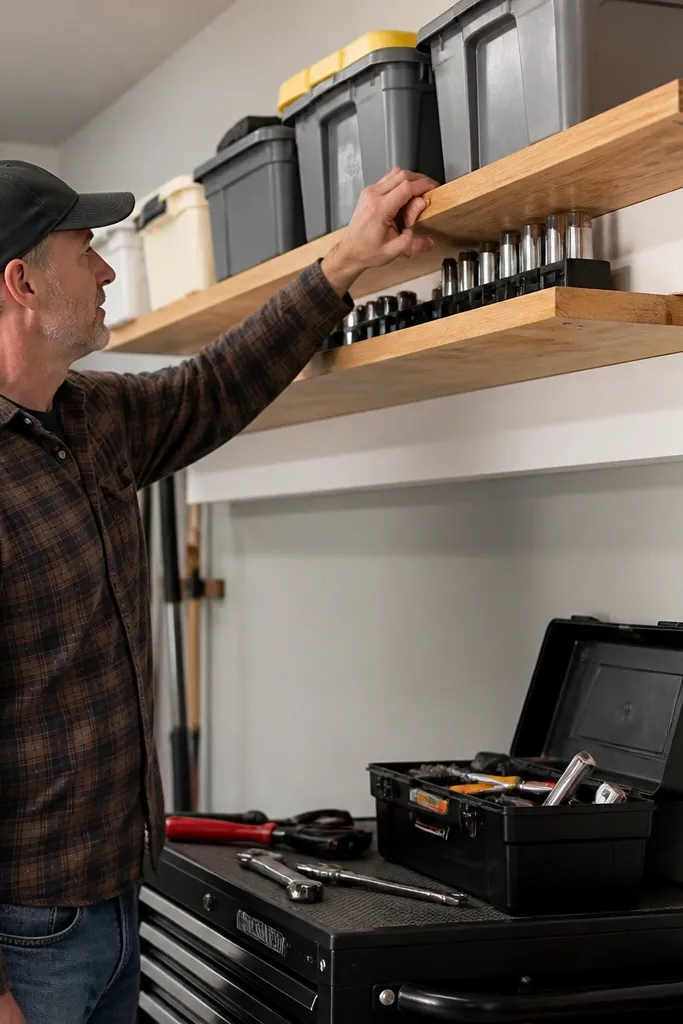
If you want a beginner-friendly build that still feels solid, ledger shelves are a smart move. The ledger board spreads load across studs, and 3/4-inch plywood resists sag better than thin boards. This system suits garages where you know your bin sizes and you want a custom shelf length that matches your wall. It also looks good — wood shelves with a simple finish hide the “DIY” vibe and blend with tool storage.
Cut a ledger from 2x4 lumber and mount it to studs using structural screws, with the top edge perfectly level. Add blocking or cleats under the shelf span every 16 inches so the plywood doesn’t bow. Lay 3/4-inch plywood on top, screw it down into the ledger and cleats, then round edges with a router or sandpaper so bins slide without catching. Seal the underside and cut edges, then add a back lip (a 1x1 strip) if you store bins that might tip forward.
Use a sacrificial guide board when screwing the plywood so you keep the deck flush and square.
Don’t use 1/2-inch plywood for heavy storage — it flexes and you feel it every time you load bins.
4. Concrete Wall Shelf System With Wedge Anchors
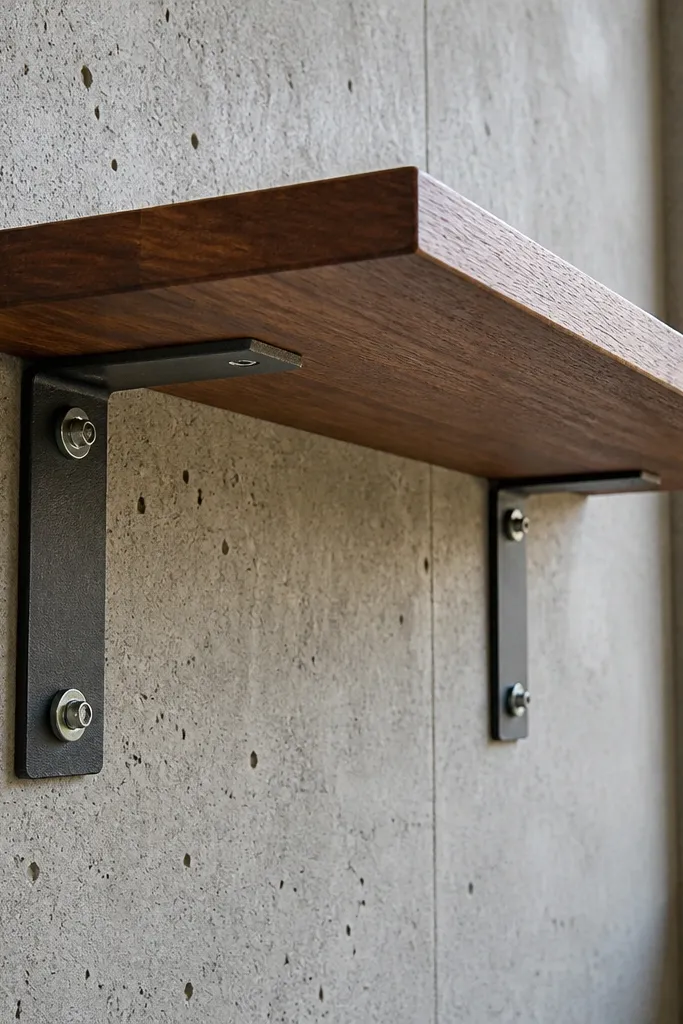
Concrete walls let you build serious storage because you can anchor into solid material, not just framing. This option is best when you have a garage with poured concrete and you want long-term strength for heavy bins, jugs, or stacked tool boxes. The right anchors matter more than the shelf board thickness because the load transfers through the bracket. Expect a sturdier feel than many “easy” kits if you use correct drilling and anchor torque.
Start by choosing a metal bracket system rated for the loads you plan to store, then mark your bracket spacing on the wall. Drill holes to the anchor manufacturer’s depth and diameter, and blow out dust from each hole using compressed air or a shop vacuum. Install wedge anchors with the specified torque — over-tightening can crack concrete, under-tightening reduces holding power. Attach shelf beams to the brackets, add the deck boards, and verify level with a long level before fully tightening everything.
Clamp a straightedge at the exact shelf height while you test-fit brackets so the whole run stays in one plane.
Don’t skip dust removal — concrete anchors lose a lot of holding strength if the hole is gritty.
5. Corner-to-Corner Triangular Shelving Unit
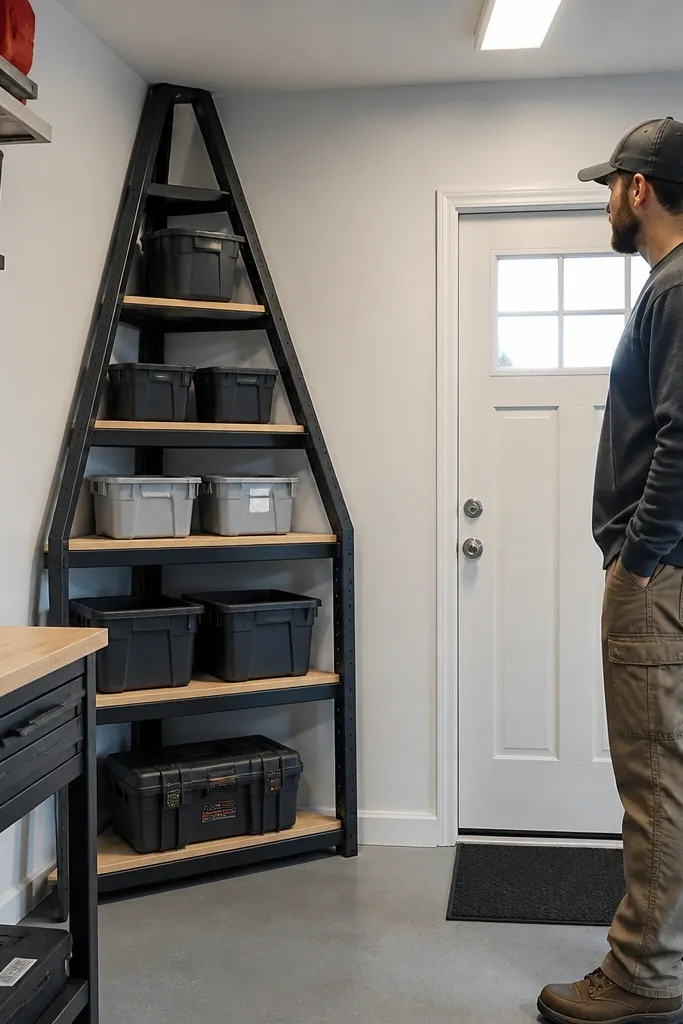
Corners are wasted space unless you fill them with something that fits the footprint. A triangular shelving unit uses that odd angle so you can stash small items without blocking the walkway. I like this for garages with lots of hand tools and smaller accessories because it keeps clutter from creeping along the floor. It also looks tidy when you keep the load light to medium and avoid stacking heavy tool boxes on the corner shelves.
Measure the corner at the floor and at the height you want shelves, because some garage corners aren’t perfectly square. Build the triangular side frames from plywood or 2x material and cut shelf boards to match the angle so they sit flat. Mount the unit to studs or solid blocking behind the wall, using at least two attachment points per side. Install shelves with screws from the side frames and add a thin back stop so bins don’t slide out when you reach in.
Use shallow bins or labeled baskets — corner storage looks messy fast if everything is bulky and loose.
Avoid using deep shelves in corners — the front edge becomes a tipping hazard.
6. Wire Shelving With 18-Inch Depth and Shelf Liners
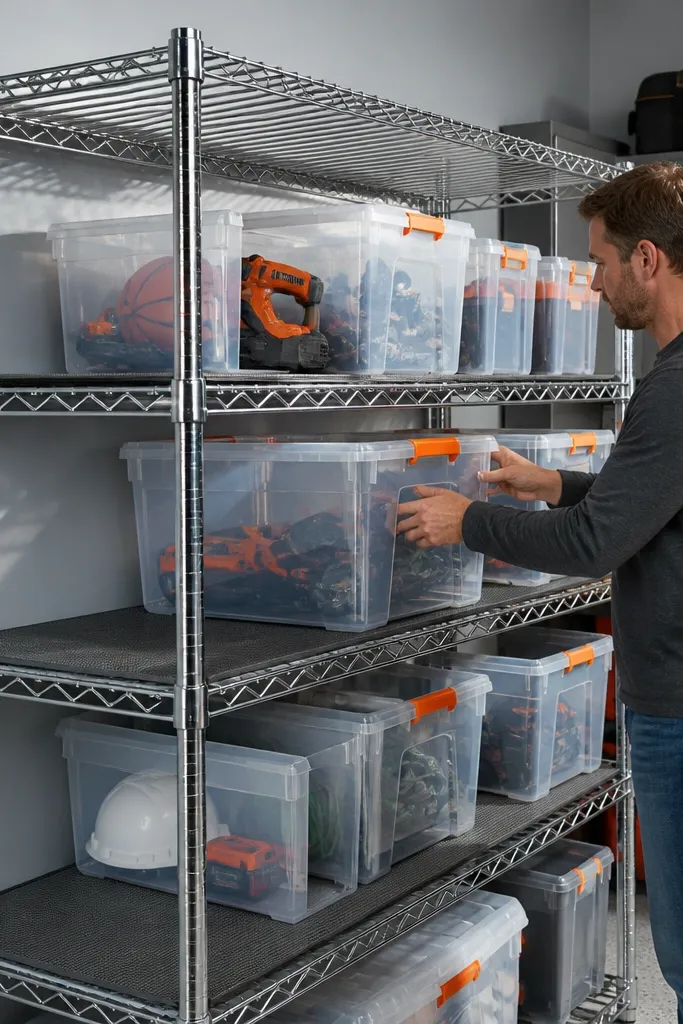
Wire shelving is a practical choice because it doesn’t trap moisture the way solid boards can, and it’s lighter to move during setup. With 18-inch depth, you get enough room for bins without turning the shelf into a lever. This is a great beginner-friendly garage shelving system when you want access to everything at a glance and you don’t want to lift heavy loads onto high solid shelves. It also adapts well — adjust shelf height as you change bin sizes.
Pick a wire shelf kit that has adjustable posts and decks rated for the weight you plan to store. Install the vertical posts to studs or anchored points, keeping them level using a spirit level. Add shelf decks so the spacing works with your bin heights, usually 12-16 inches for common plastic totes. Add shelf liners like thin rubber mat or textured shelf paper so smaller items don’t fall through.
Editor's noteLabel bins before you place them on wire shelves; the “see-through” storage makes labels easier to read.
Skip thisDon’t store small loose parts directly on wire — they fall and you’ll hate the cleanup.
7. Pegboard Wall With Tool Rails and Heavy-Duty Hooks
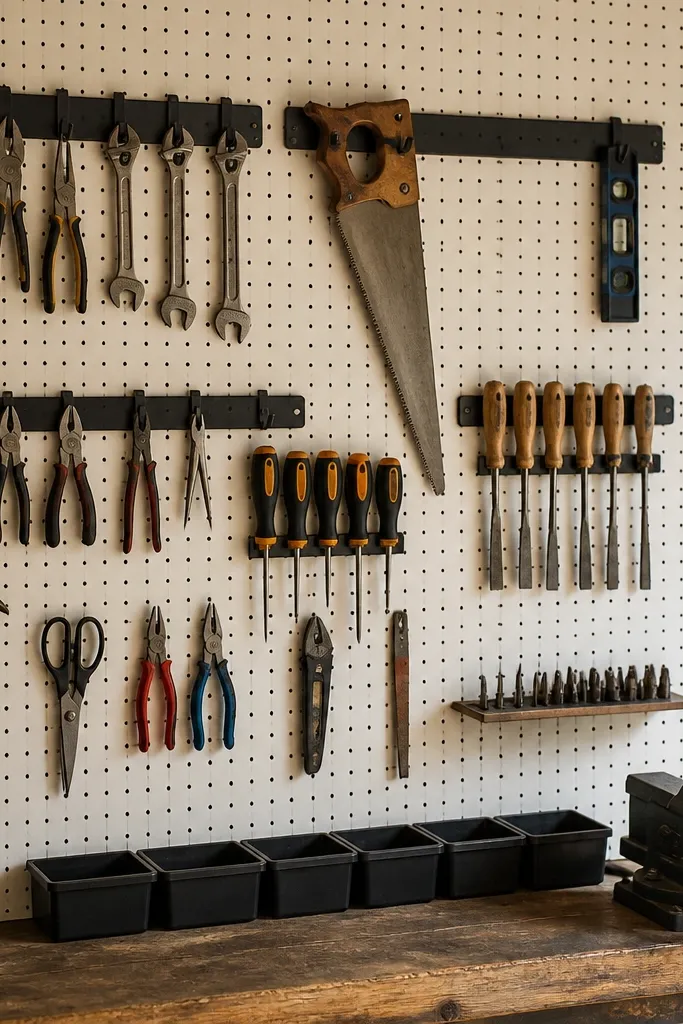
Pegboard isn’t for heavy bins, but it’s excellent for daily grab items because it organizes tools at eye level. For beginners, it’s one of the fastest upgrades: you drill, screw, and you’re done. The real win is the tool layout — a pegboard map reduces time searching and keeps the garage from turning into a junk drawer. Use it alongside shelves, not as the only storage.
Mount pegboard into studs using long screws through the pegboard frame holes, not drywall anchors. Install a tool rail across the top for frequently used items like pliers and wrenches, then use heavy-duty hooks for tools with metal heads. Keep the pegboard area clean by grouping tools by size and weight so you don’t overload individual hooks. Add a small ledge shelf under the pegboard for gloves or small boxes, but keep it shallow and light.
Pre-stage your hook types and test spacing on scrap board so you don’t end up with crooked tool rows.
Avoid cheap pegboard that flexes — if it bows, hooks loosen and tools start falling.
8. Rolling Floor Rack With Wall Tethers
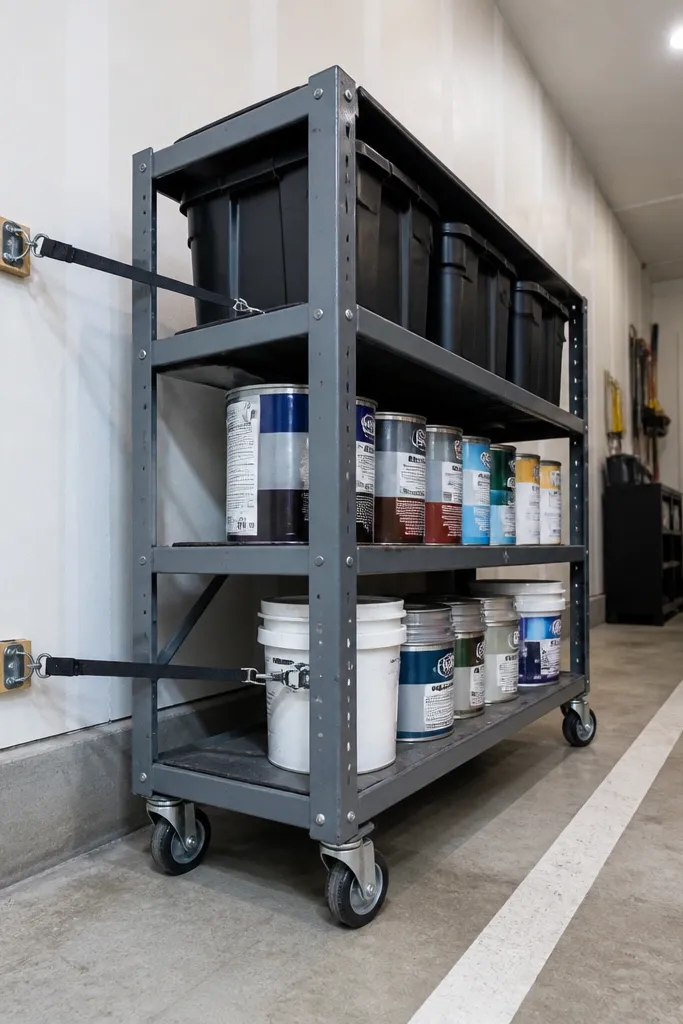
A rolling floor rack is a beginner-friendly storage system when you want flexibility and don’t want to drill into the wall for every shelf. It’s also useful when you’re still learning where things belong in the garage. The trade-off is stability: a rolling rack can shift, so you need a plan to keep it from drifting or tipping when you load it. Add wall tethers and keep heavy bins lower for the best results.
Choose a rack with locking casters and steel uprights, plus adjustable shelves. Place it where you want the storage zone and make sure the casters roll smoothly over your floor texture. Install wall tethers or anti-tip straps to solid anchors so the rack can’t lean forward when you yank a bin. Set shelf levels for your bin heights and load order — heavy items on the bottom, lighter items above, and don’t overload the top shelf.
Use caster locks before loading — it prevents the rack from scooting while you’re tightening shelves.
Don’t rely on friction casters alone; lock them and tether the rack.
9. Stackable Plastic Bin Wall Storage on Rail Legs
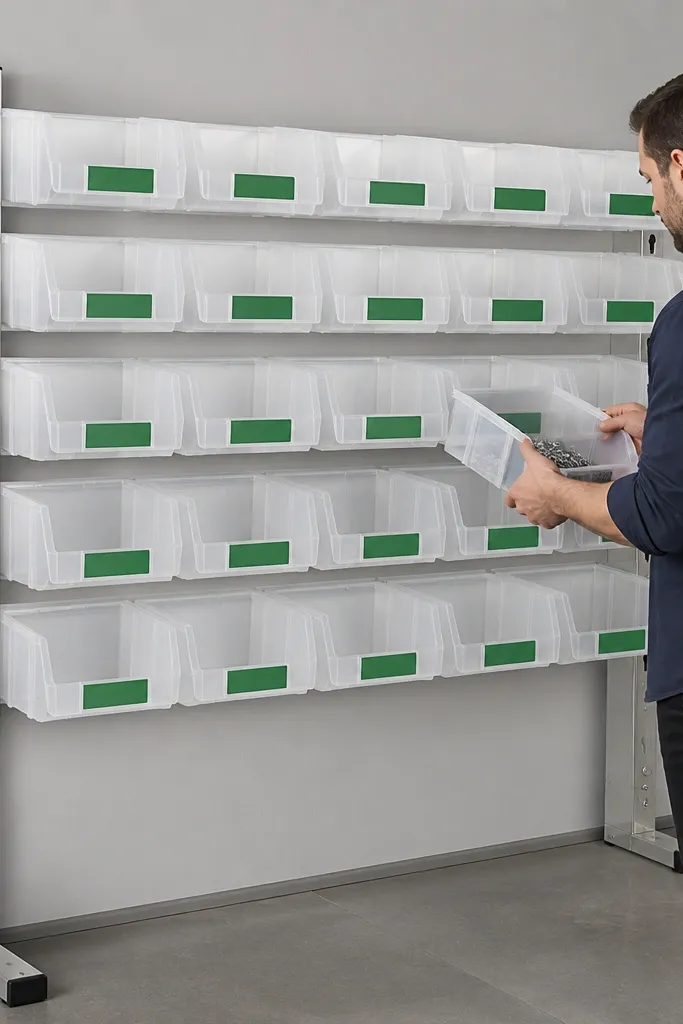
If you want clean garage organization with minimal woodworking, bin rails are the easiest path. This setup uses rails to hold plastic bins so you get consistent spacing and less “bin sprawl.” It’s beginner-friendly because you’re not aligning shelf boards — you’re installing the rail system and letting the bins do the rest. Keep bin types consistent for a neat look and smoother access. This works best for seasonal items, car supplies, and smaller garage categories.
Find studs or install a concrete anchor line, then mount the vertical rails at the spacing required by the bin brackets. Snap or screw the bin supports into the rails and test-fit a bin before tightening everything. Arrange bin heights by category, leaving a little extra clearance above the top shelf so lids open without snagging. Add a simple front lip or stop if your system doesn’t already include one, then check each bin for secure seating.
Editor's noteUse the same bin brand and lid style across the wall so you don’t lose space with mismatched heights.
Skip thisAvoid mixing deep and shallow bins on the same shelf level — the fronts end up at different depths and tip easier.
10. Garage Storage Cabinets With Adjustable Shelves
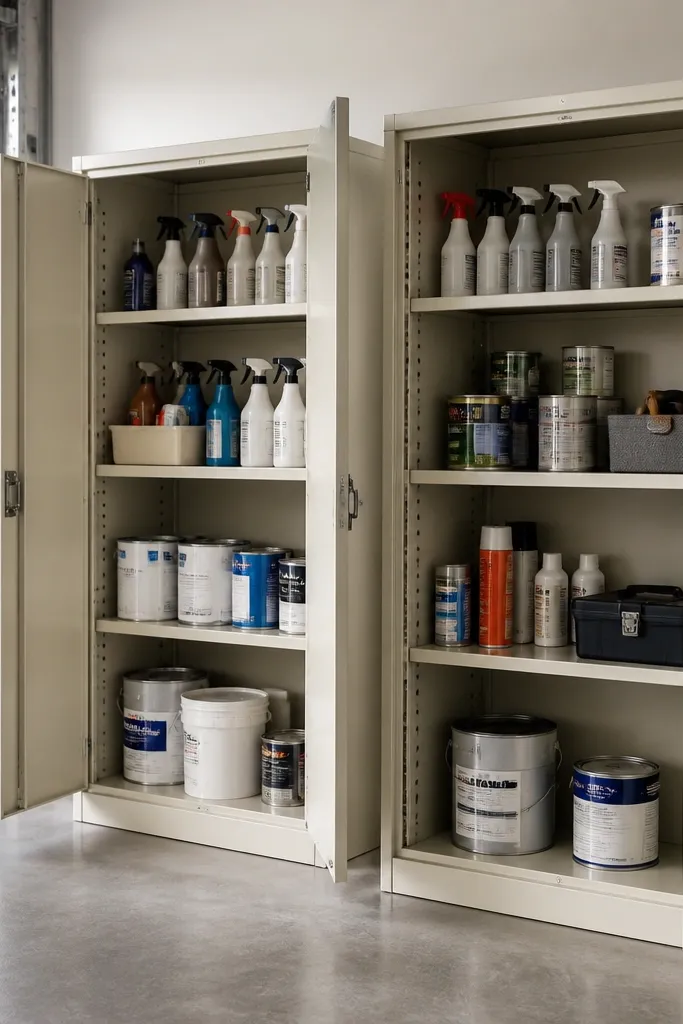
Cabinets are the best option when you want garage storage that hides mess and protects items from dust. For beginners, it’s also easier psychologically: doors mean you’re not looking at clutter every time you walk in. Adjustable shelving inside cabinets helps you handle mixed inventory — spray bottles, paint supplies, and small tools. The trade-off is cost and the need for careful wall mounting so the cabinet stays level.
Pick a cabinet with adjustable shelves and a solid back panel, then locate studs or masonry anchors. Mount the cabinet using a level line and shims so the face stays straight, then anchor it through the cabinet back frame. Install shelf pins or shelf tracks if the cabinet uses them, and set shelf heights for your bin and bottle sizes. Add a magnetic strip inside for small metal tools and a tray at the bottom for caps and lids.
Store chemicals and oily items in the bottom section with a drip tray so leaks don’t ruin other gear.
Don’t mount cabinets to only one stud side — use the full anchor pattern.
11. Overhead Beam Shelving Under the Ceiling Joists
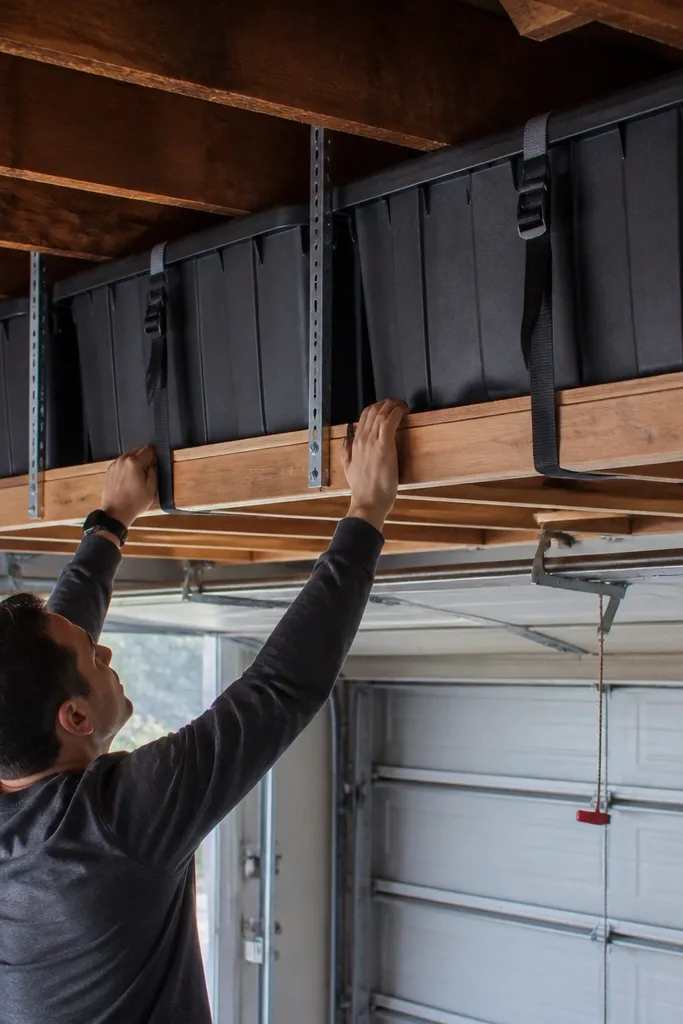
Overhead shelving clears wall and floor space fast, but it’s only worth it for items you don’t need daily. This is a beginner-friendly garage shelving system if your ceiling has accessible joists or beams and you can install with proper hangers. It’s ideal for seasonal bins, holiday decor, and long storage containers. The key is safe clearance — you don’t want a head-bump shelf or bins that scrape the garage door track.
Measure your ceiling joist spacing and choose a shelf width that sits between joists with consistent hanger points. Install heavy-duty ceiling hangers into joists using structural screws or bolts, then attach shelf beams to the hangers. Deck it with 3/4-inch plywood and add side guards so bins can’t slide off when you pull them forward. Confirm clearance to the garage door mechanism and allow at least 12-18 inches of headroom below the lowest moving part.
Use a soft edge on shelf sides, like rubber strip or sanding, so hard bin corners don’t chip paint or wood.
Avoid overhead storage for anything you grab weekly — you’ll resent it.
12. Folding Wall Rack for Seasonal Tools and Bikes
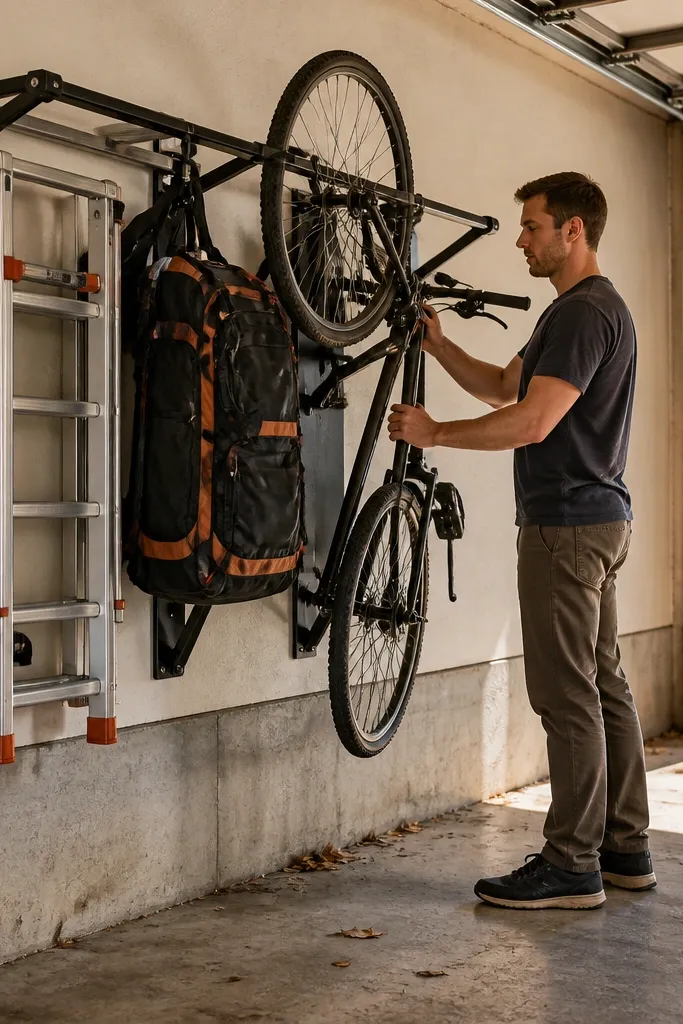
A folding wall rack is a smart solution when you want storage that stays out of the way until you need it. It’s beginner-friendly because it reduces clutter in the main walking zone and keeps items controlled. This works well for bikes, ladders, and bulky seasonal tools that are annoying to store on standard shelves. The trade-off is that it needs solid mounting points and careful alignment so the folding arms don’t stress the wall hardware.
Find studs and mount the bracket plate using structural screws through the manufacturer’s mounting holes. Assemble the folding arms and test the fold action on a workbench first so you know the direction and tension. Position the rack so the stored item clears the floor and doesn’t hit the garage door when it opens. Add support straps or a tie-down point for bikes or long tools to keep them from swinging.
Add a wall stop so the rack folds to the same spot every time and doesn’t drift.
Don’t mount a folding rack to a single stud — the leverage will loosen it over time.
13. DIY Slatwall Panels With Shelf Hooks and Basket Trays
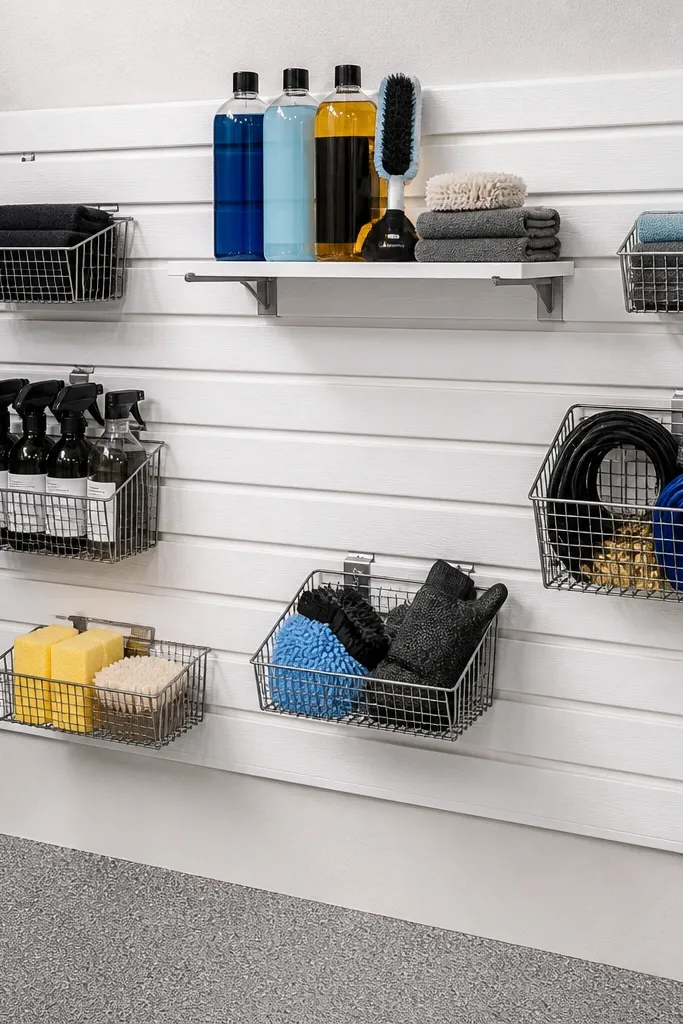
Slatwall is one of the easiest ways to build a flexible system because you can move hooks and trays without re-drilling everything. It’s a good beginner-friendly option for garages that keep changing — yard tools, car supplies, and random hardware collections. Use basket trays for small items and add a small shelf deck for flat gear like gloves and tape. It also keeps things visible, which prevents the “stuff lives somewhere in a bin” problem.
Install slatwall panels into studs using the manufacturer’s screw pattern, then check that the panels sit flat without twist. Add shelf hooks and basket trays at the heights you need, using the panel slots for consistent spacing. For flat storage, attach a small shelf board to a set of slatwall brackets so the load spreads. Finish by tightening all connectors and doing a gentle pull test on each hook before loading it with anything valuable.
Editor's noteGroup items by weight and put heavier baskets lower so the panel hardware stays loaded evenly.
Skip thisAvoid overloading one tray — spread weight across multiple hooks.
14. Rolling Ladder Shelf With Fixed Side Frames
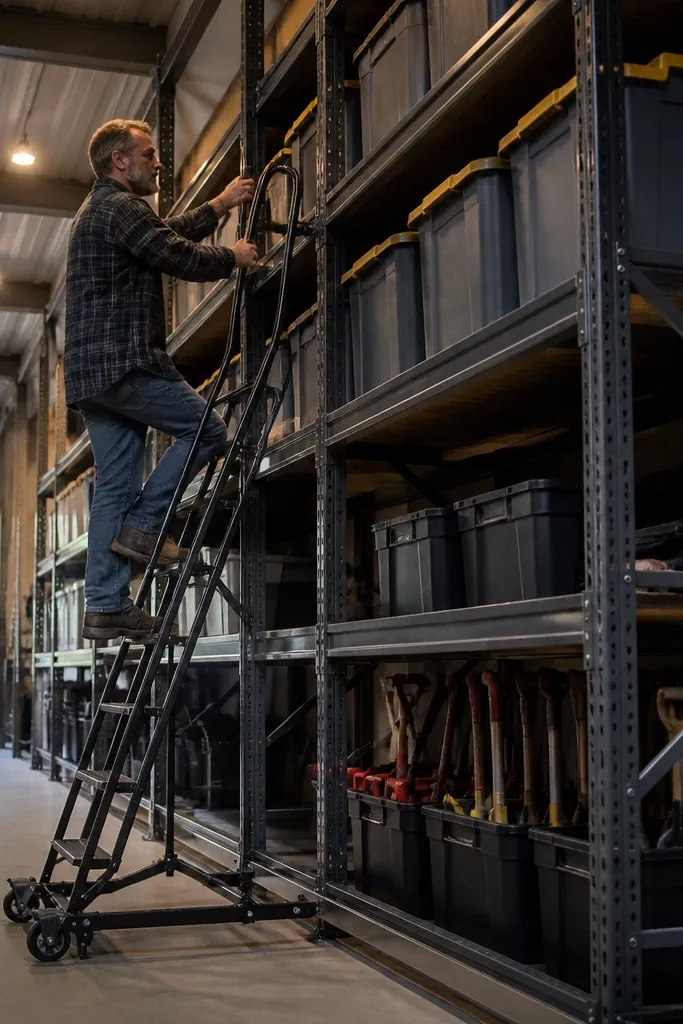
This is for garages where you want serious vertical storage and you’re fine with a more “system” feel. The rolling ladder keeps access safe and controlled, and fixed side frames add stability when shelves go high. I recommend it when you have tall ceilings and you store fewer categories but in bigger volumes. It’s not the fastest install, but it’s a strong solution once it’s in place.
Start by picking a tall shelving kit with a rolling ladder track and side frames rated for the shelf span. Anchor the side frames into studs or concrete with the kit’s hardware, then confirm alignment with a straightedge along the track. Install shelf decks at consistent intervals and add cross members so the frames don’t rack. After the ladder track is installed, test the ladder glide with empty shelves first, then load from bottom to top in small increments.
Add toe-kick clearance at the base so bins don’t catch when you roll the ladder.
Don’t skip track alignment — a crooked track makes the ladder bind and you’ll stop using the system.
15. Reclaimed Wood Shelf Rail With Metal Brackets
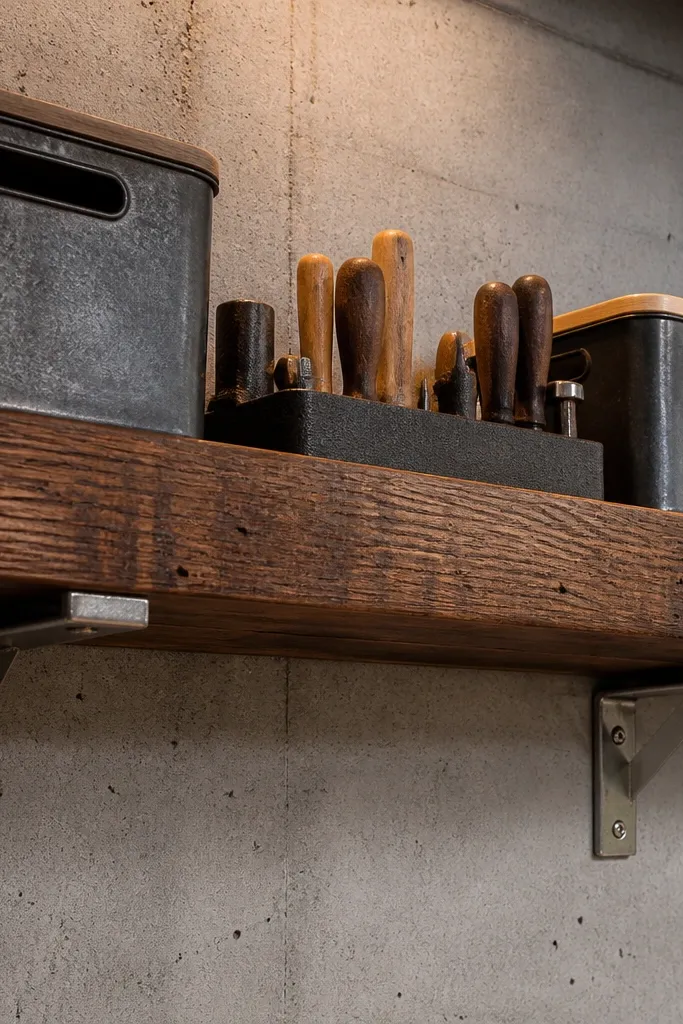
This is the option for people who want a warm look but still need garage-level strength. Reclaimed wood shelves look great when you choose thicker boards and finish them properly, and metal brackets do the heavy lifting. It’s beginner-friendly because you can cut shelves to length and use a bracket layout that matches stud spacing. The result is a system that feels custom without requiring advanced carpentry. Keep storage categories clear and avoid placing heavy tool boxes on the thinest boards.
Pick boards around 1-1/2 to 2 inches thick for stiffness, then sand and seal all surfaces, including underside edges. Mark stud locations and install metal brackets using structural screws, keeping brackets level across the run. Place the wood shelf on top of brackets and screw through shelf into bracket holes. Add end caps or back stops so bins don’t slip off the wood edge, then wipe off excess finish and let it cure fully before loading.
Use a clear matte finish so dust wipes clean and you don’t get that sticky gloss that grabs grime.
Avoid using soft, thin boards — they look good empty and sag when you load bins.



