
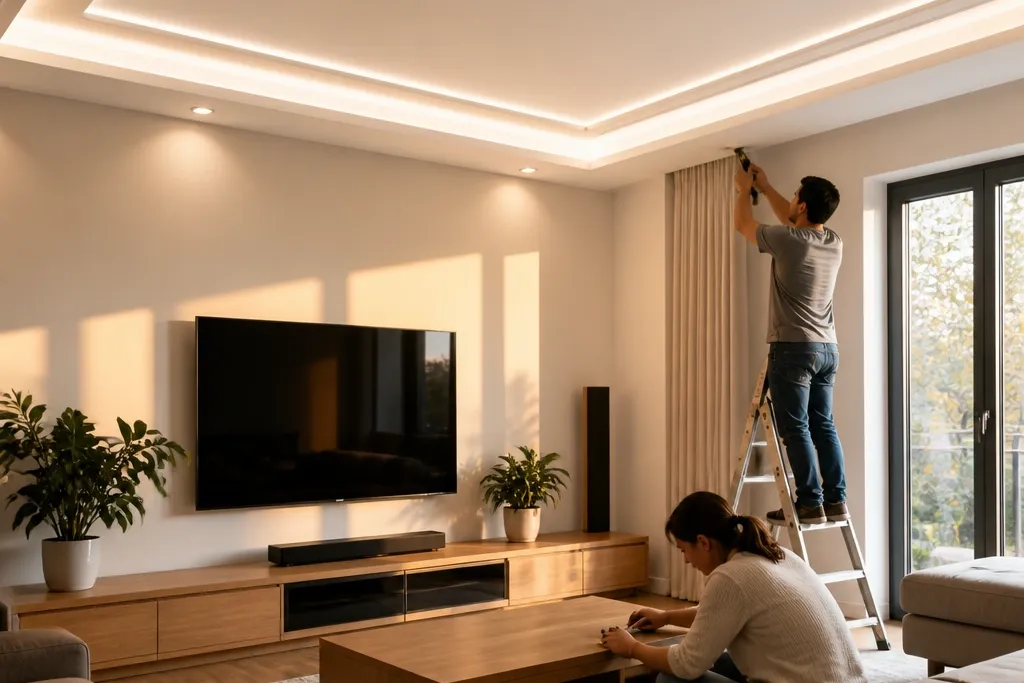
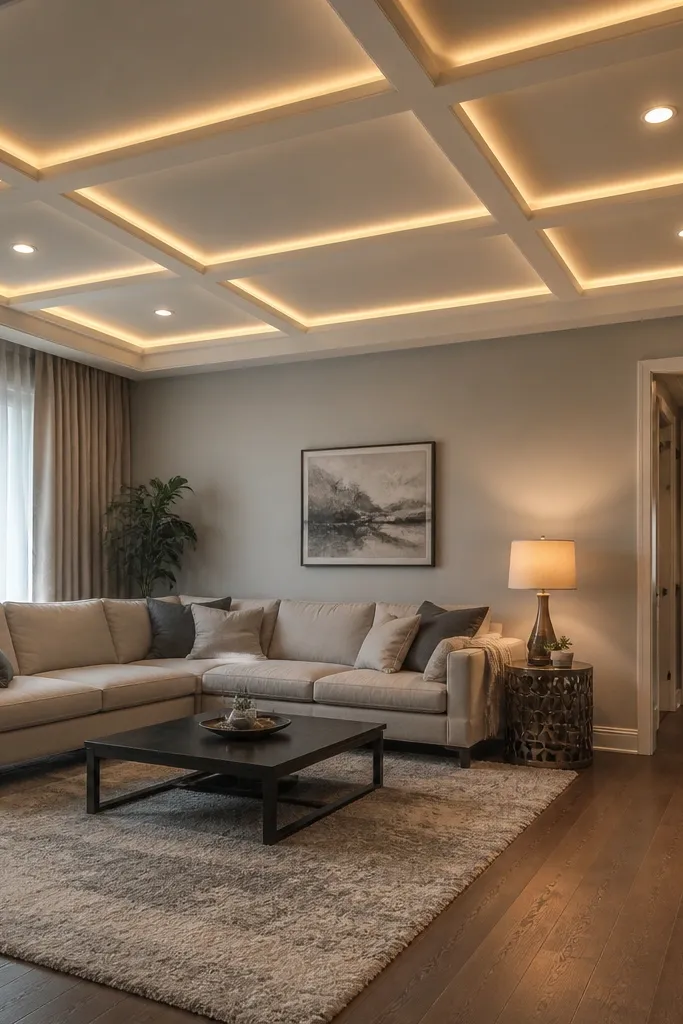
1. Centered TV Wall Tray with Soft LED Cove
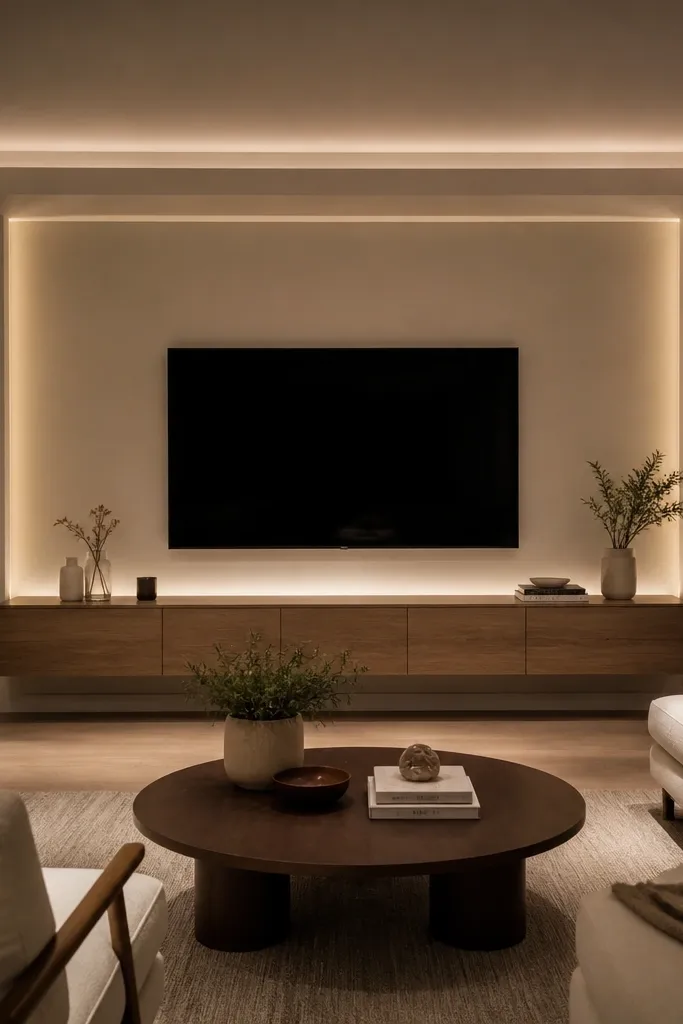
This design makes the living room feel “framed” because the tray sits directly around your TV zone and the LED cove creates a halo effect. The look is clean in daylight because the tray edges are crisp, and it’s gorgeous at night because the light reflects off the painted surfaces without harsh glare. Use it when your main seating faces one wall and you want the ceiling to pull the eye toward that focal point. It’s beginner-friendly because you build one main rectangle, then repeat straight runs for the perimeter and the LED channel placement.
First, mark a rectangle on the ceiling centered on the TV wall, then decide tray depth around 2 inches and perimeter drop around 3 inches. Install the metal grid: hang hangers to the main ceiling, then fix perimeter runners at the drop line and cross tees for the tray opening. Board the tray surfaces with gypsum sheets, leave a consistent recess for the LED channel, and cut the LED opening only after measuring twice. Prime, fill joints, sand smooth, then paint. Finally, mount the LED strip in the channel and cover it with the diffuser so the light looks like a glow, not a line.
Editor's noteUse a diffuser cover for the LED channel — it hides the strip and stops the ceiling from looking “cheap.”
Skip thisDon’t place the LED strip too close to the board edge; you’ll get a visible hot line instead of a soft halo.
2. Perimeter Drop with Four Corner Accent Boxes
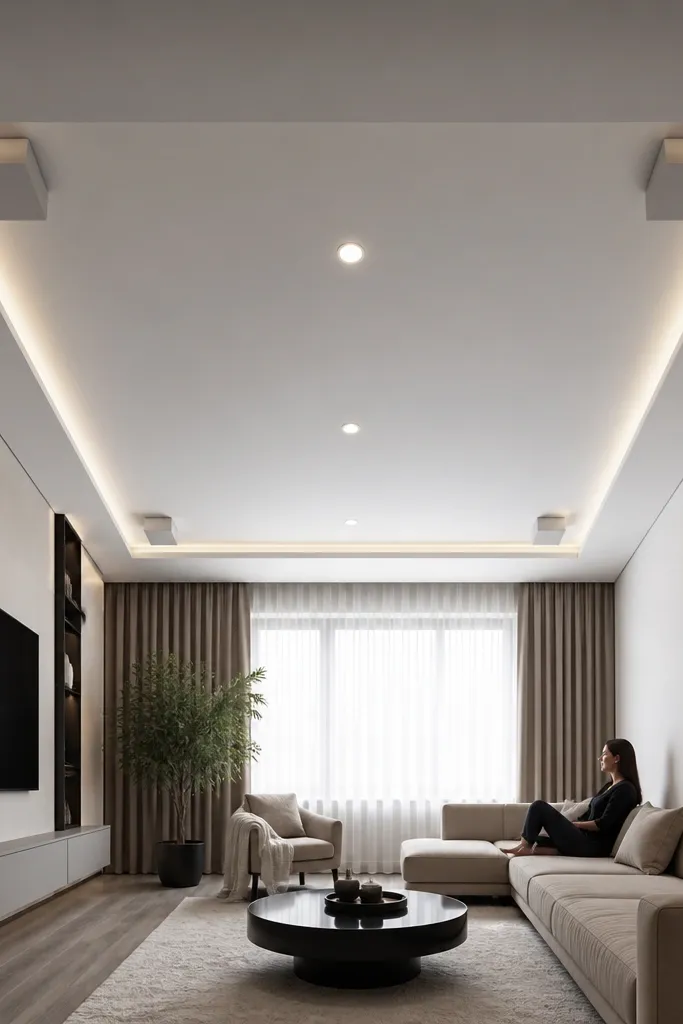
This is the easiest way to make a plain ceiling look intentional without going deep. The perimeter drop gives you the clean frame, while the corner boxes add visual rhythm so photos don’t look flat. It works especially well for square living rooms and rooms where the TV is on one side but you still want balanced ceiling interest. The build is straightforward because each corner box uses the same template and you can keep all lines parallel.
Start by setting a perimeter drop height of 3 inches and snapping chalk lines around the room. Install the suspension grid for the drop, then board the perimeter area first. Next, create four identical corner boxes: measure the box size (start with 12x12 inches or 14x14 inches) and use a simple L-frame inside each corner. Board the boxes, keep the top surface aligned, then finish with joint compound and sanding. Paint everything one tone, then add small recessed downlights inside each box if you want extra sparkle.
Editor's noteMake your corner boxes the same size — symmetry is what makes this look designer, not random.
Skip thisDon’t mix box sizes; even small differences show up immediately in ceiling photos.
3. Double-Wave Border for Soft, Modern Flow
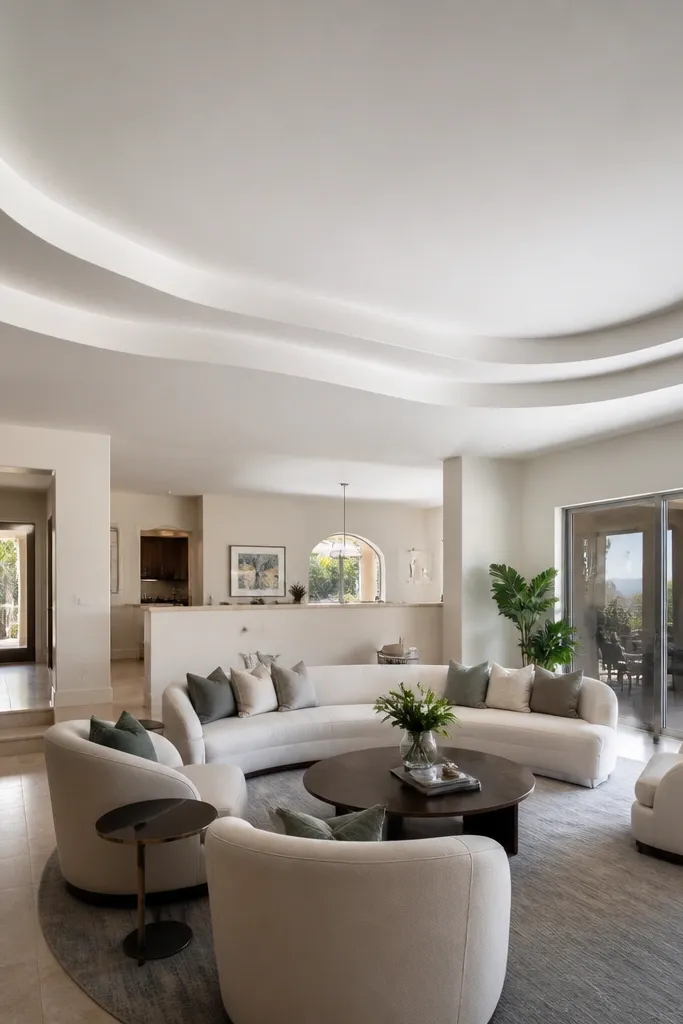
Wave borders look modern and they photograph well because curves catch light differently than straight edges. A double-wave border gives depth without adding a second full ceiling level across the whole room. This is a good option when your living room has curved furniture, rounded decor, or you just want something less boxy than standard trays. It’s still beginner-friendly if you keep the waves in one border band and use a pre-planned template.
First, decide your border width (around 18-24 inches from the wall) and drop height (3-3.5 inches). Create a wave template by drawing a smooth curve on cardboard, then trace it onto the ceiling using a chalk line. Install the perimeter runners and curve the battens to match the template, then build the border frame. Board the border, install an LED channel along the inner wave edge, and keep the diffuser facing down toward the room. Finish with joint compound, sand, prime, and paint.
Editor's noteUse a flexible strip or kerf-cut technique for curves on the frame; it keeps the wave smooth instead of faceted.
Skip thisAvoid making wave curves too tight; sharp bends make the board seams look uneven.
4. Geometric Grid Ceiling with Square Recesses
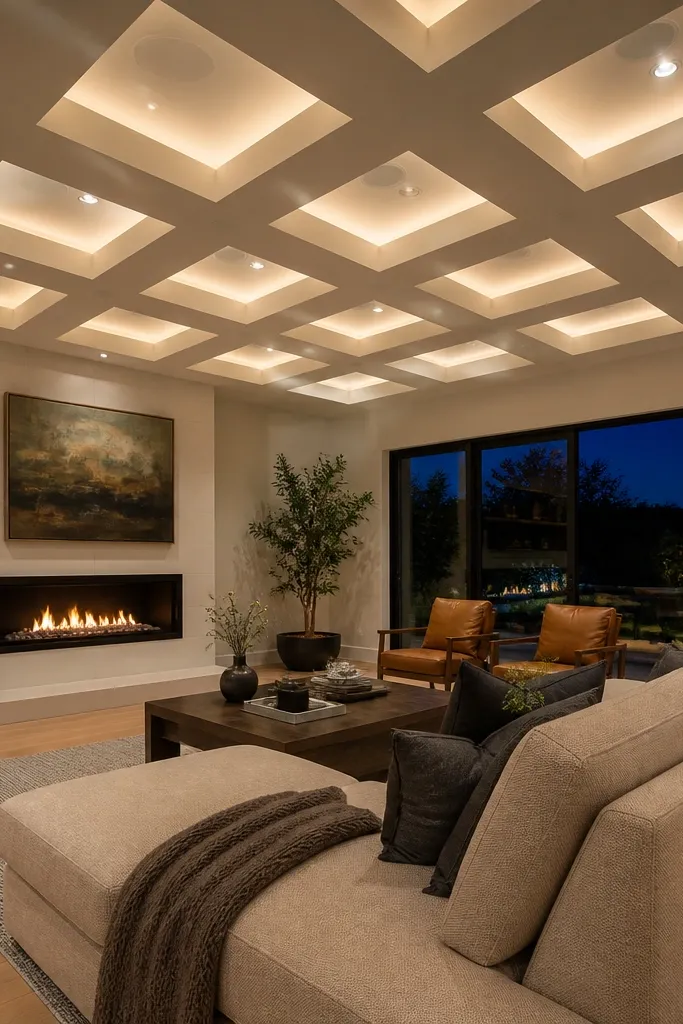
A geometric square recess grid makes your living room look structured and expensive, even with basic materials. Each recessed square catches shadow, so it looks dimensional in both daylight and evening. This works well when you want a bold ceiling without large drops, because you can keep the recess depth around 1.5-2 inches. It’s beginner-friendly if you commit to a strict grid and don’t try to “wing it” around the room shape.
Start by selecting a grid spacing that fits your ceiling — measure your room length and width, then divide into equal squares (common starting point: 20-24 inches). Install a main grid (metal runners and cross tees) at a consistent drop height of about 2.5 inches. Build recessed frames for each square using smaller battens, then board the recessed faces. Cut and install LED strips in selected grid lines or place recessed downlights in every other square for balance. Finish joints, sand smooth, prime, and paint all surfaces one color for a clean look.
Editor's noteUse laser level or a long straight level to keep the grid square; crooked grids read instantly in photos.
Skip thisDon’t vary recess depth from square to square; the ceiling will look uneven even if the paint is perfect.
5. Shallow Tray with Micro-LED Lines (No Big Drops)
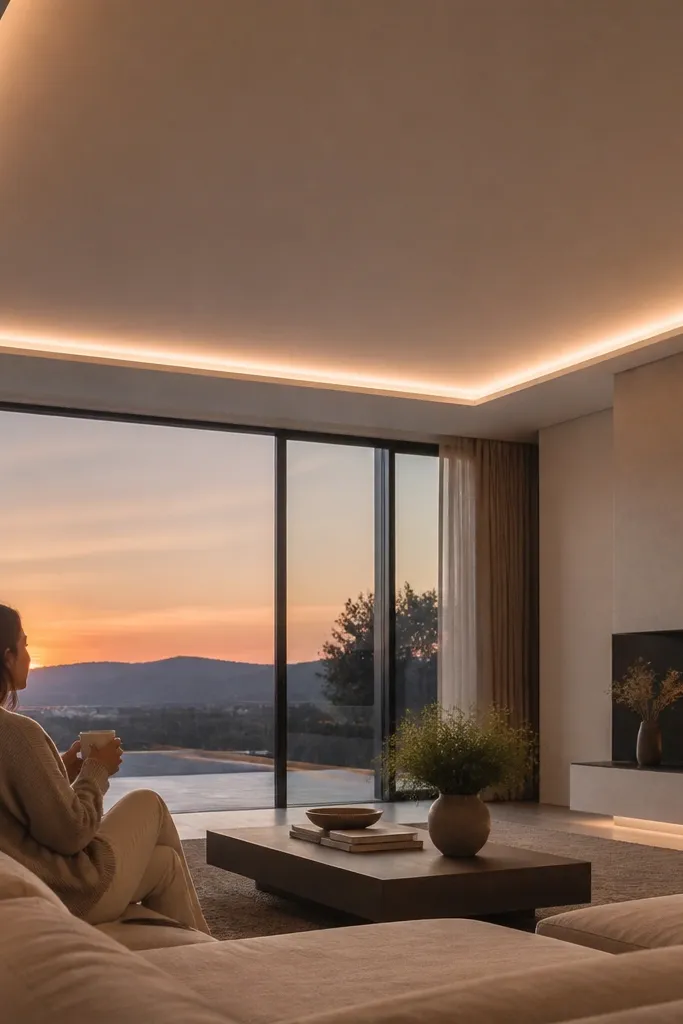
If your living room ceiling is low, this is the cleanest way to get a “wow” look without losing height. A shallow tray (about 1.5-2 inches) keeps the room feeling open, while micro-LED lines add that modern glow. The ceiling looks sharp in wide shots because the light outlines the tray edges. This is a smart pick for small apartments where deep ceiling work would make everything feel cramped.
First, measure the TV wall or center point of the room and outline a tray rectangle with a shallow drop height. Build a single-layer tray using metal grid and gypsum board, keeping the top surfaces perfectly level. Install an LED channel that fits the micro line width and run the strip along one or two tray edges, not the whole border. Prime and sand thoroughly because any joint bumps show on a low-profile design. Paint with a smooth interior ceiling paint and check glow with power on before finalizing any covers.
Choose LED strips with consistent brightness (same batch) so the line doesn’t show uneven spots.
Don’t add multiple LED directions; too many angles create glare and kill the clean outline.
6. L-Shaped Beam Accent Around Seating
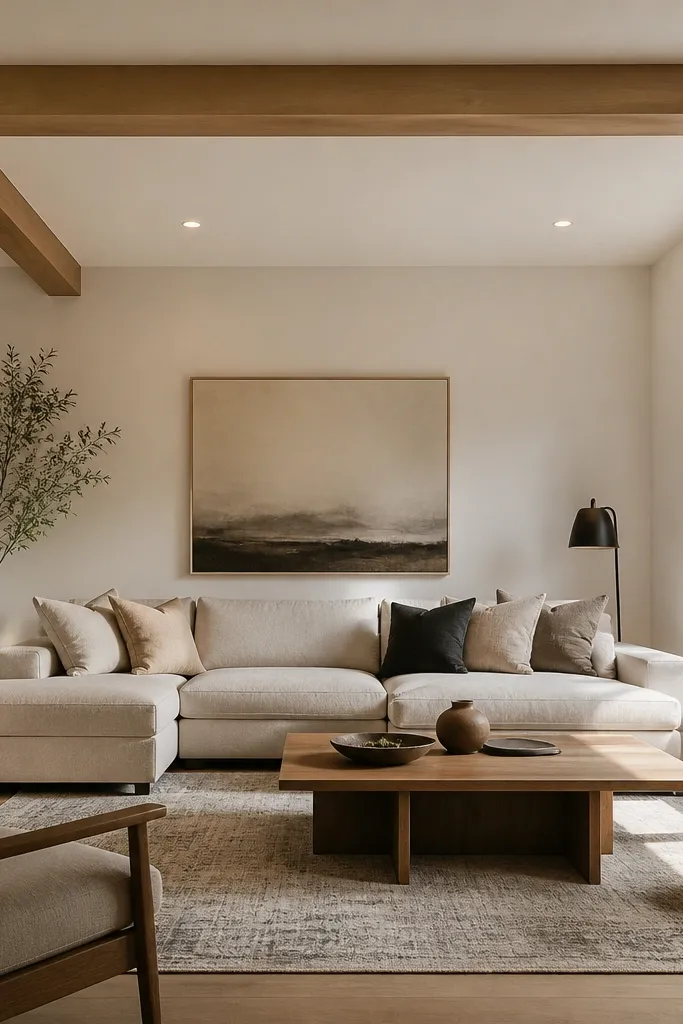
Beam accents look premium because they create strong shadows without requiring a full tray. An L-shaped beam around the seating area makes the ceiling guide your eye toward the conversation zone, especially in open-plan living rooms. It’s beginner-friendly because you build two straight beams plus one corner — fewer angles than a full geometric ceiling. This design works when your furniture sits in an L layout or when you want the ceiling to “anchor” the seating without covering the whole room.
Start by marking the seating zone and placing an L-shaped line on the ceiling where the beam will run. Set beam drop thickness around 4 inches and beam width around 6-8 inches for an easy, sturdy frame. Build the metal grid along the L path, then board the beam top and sides. Add recessed downlights inside the beam face or run a small LED strip along the inner edge. Finish with joint compound, sand, prime, and paint; keep the beam shadow line consistent by aligning edges carefully.
Pre-plan downlight spacing before you board so you don’t end up with awkward cuts near the beam corners.
Avoid placing lights too close to the wall; it makes the beam look “stuck on” instead of integrated.
7. Two-Tier Center Starburst (Beginner Version)
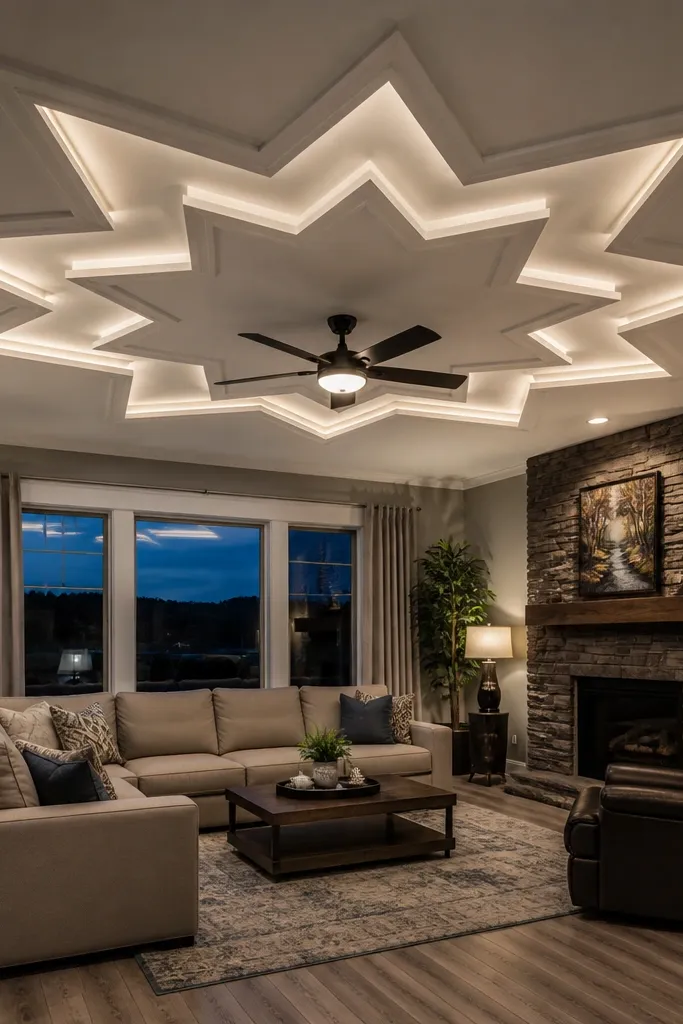
A starburst look is eye-catching in living rooms because it creates a focal point from the center of the room. This beginner version uses two tiers only, with a simple starburst outline instead of a complicated multi-layer rosette. It’s great when you have a chandelier or plan to add one, because the starburst can visually “support” that center. The key is keeping the starburst symmetrical and using LEDs or recessed lights to make the center glow.
First, mark the room center and choose a starburst size that fits comfortably — start with a 48-60 inch span depending on room size. Build a shallow second tier around the starburst outline with a drop of 2-3 inches, while keeping the rest of the ceiling as a single flat layer. Frame the starburst using cut battens or flexible strips, then board both tiers. Install LED strips in the recess between tiers or add recessed downlights along the star points. Finish joints, sand, prime, and paint, then power the LEDs to confirm the glow looks even.
Editor's noteSketch the star points on paper first and tape measurements to the ceiling so you don’t drift during framing.
Skip thisDon’t make the star points too thin; narrow edges crack more easily during finishing.
8. Half-Moon Center Cove for Calm Glow
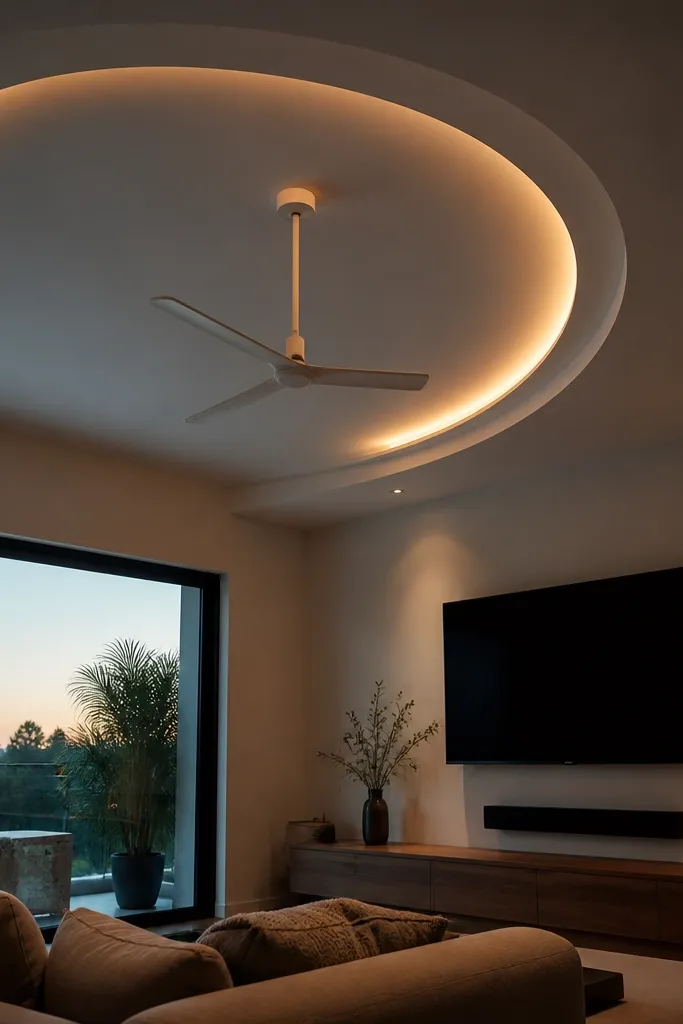
A half-moon cove is softer than a full circle and it photographs beautifully because it creates a gentle arc of light. This works well with ceiling fans, pendant lights, or a central chandelier because the cove frames the fixture instead of competing with it. It’s beginner-friendly because you’re building one arc plus a perimeter drop, not a full complex pattern. Choose this when you want your living room to feel warm and calm rather than sharply geometric.
Start by deciding your perimeter drop height (around 3 inches) and then mark the center point for the half-moon. Create the half-moon radius so it fits around your fixture — leave at least 6 inches clearance from the fixture body. Frame the half-moon cove with metal battens, then board the cove face and the ceiling around it. Install an LED channel along the cove inner edge and use a diffuser so the light spreads smoothly. Prime, fill joints, sand smooth, paint, and test the glow before installing any final trims.
Use a consistent primer coat on the cove — it prevents patchy absorption that shows as darker arcs.
Don’t run the LED too close to the board edge; it creates a bright band instead of a soft arc.
9. Slim Perimeter + Recessed Downlight Star Pattern
This design is all about lighting drama without heavy structure. A slim perimeter drop (around 2 inches) gives the ceiling a defined frame, while a small recessed downlight star pattern creates sparkle in the living room. It’s beginner-friendly because you’re cutting fewer holes and you’re keeping the structure simple. It looks great in evening photos because the downlights create bright points against a smooth white ceiling.
First, set your perimeter drop at about 2 inches and install the metal grid for that border. Board the perimeter drop area and fill joints. Next, plan a star-like downlight layout centered in the room — for example, one central downlight with 6 around it in a hex pattern. Cut holes for the recessed fixtures before final board finishing so wiring is clean. Prime, paint, then install downlight trim and wire to a dimmable switch if you want adjustable mood.
Editor's noteUse a consistent beam angle for all downlights (like 24-36 degrees) so the star looks even.
Skip thisAvoid mixing trim finishes (chrome next to white); it looks messy when lights are on.
10. Wood-Look Accent Panels with White Ceiling Base
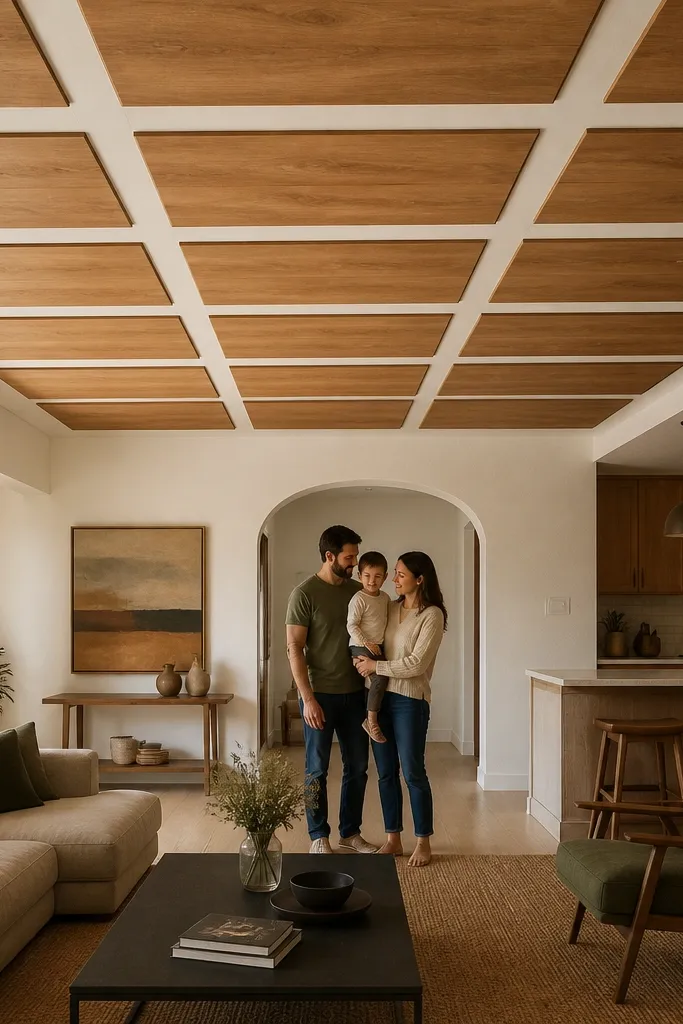
White ceilings look clean, but adding wood-look panels makes the living room feel warmer and more styled. This idea pairs a white false ceiling base with rectangular wood-look strips or veneer panels placed in a grid line pattern. The contrast makes it photogenic, and the panel shadows add depth even without heavy LEDs. It’s best when your living room has wood tones — coffee table, TV console, or flooring — and you want the ceiling to match that warmth.
Start by building a standard white false ceiling base with a perimeter drop of 3 inches and a flat center. Install horizontal battens where the wood-look panels will sit, keeping spacing equal (commonly 12-16 inches between strips). Fix the wood-look panels or slats to the battens with screws and a clean finish edge trim. Add a thin LED strip behind one side of the panel line for a soft glow along the ceiling surface. Prime the white areas, paint, then stain or finish the wood-look panels to your chosen tone and seal for durability.
Use edge trim around panel ends so the line looks crisp from every angle.
Don’t skip sealing on wood-look finishes; unsealed surfaces look dull and scuff during installation.
11. Floating Box Frame Around the Perimeter
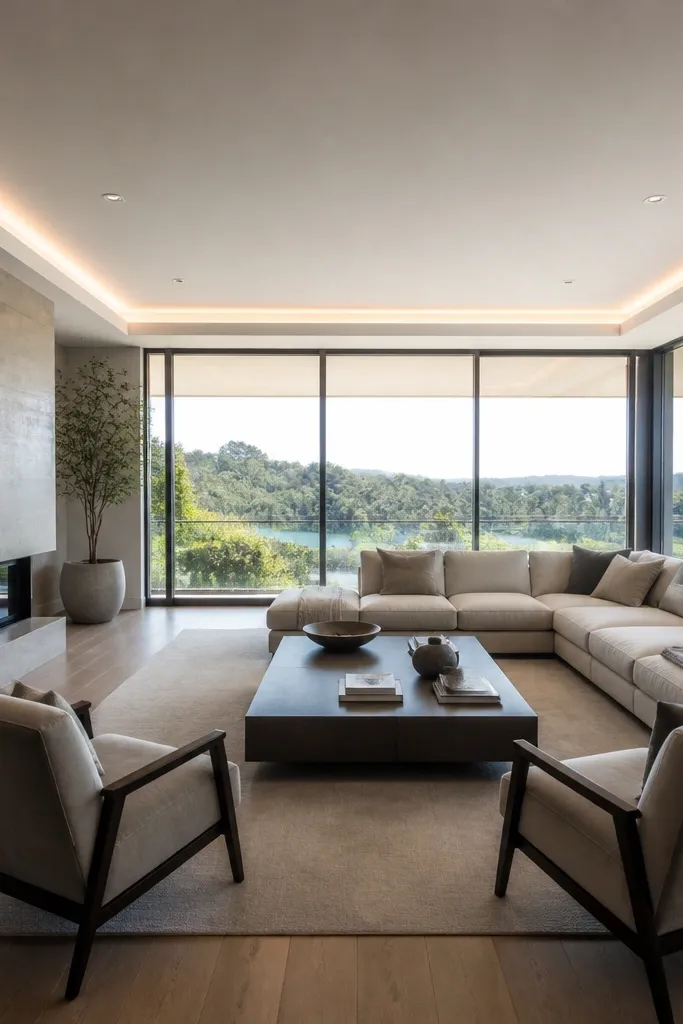
A floating box frame gives a high-end look because it creates a shadow gap around the room perimeter. You keep the ceiling mostly flat, then add a framed border that looks like it’s hovering. This design works in living rooms with big wall-to-wall windows or simple decor because the ceiling adds structure. It’s beginner-friendly because you build one continuous frame line, and the LED gap does the heavy visual lifting.
First, decide a perimeter drop of 3.5-4 inches and a frame depth of about 2-3 inches from the outer edge. Install the metal grid for the main drop, then build a second inner frame line that creates the shadow gap. Board the frame sides, but leave a consistent gap for LED placement along the inner edge. Install LED strips in the gap with a diffuser and wire it to a switch location near your existing electrical point. Prime, sand the joints on the visible faces, paint, and check the floating effect with lights on before you close any access points.
Measure the shadow gap width with a spacer every 2-3 feet so the “floating” line stays even.
Don’t set the inner frame unevenly; the floating effect breaks immediately when one section dips.
12. Recessed Tray with Mirrored Side Bands
Reflective side bands make a living room ceiling look bigger because they bounce light across the space. This design uses a recessed tray and adds mirrored or high-gloss side panels along the tray edges, paired with warm LED lighting. It looks striking in photos because the tray depth shows clearly and the light spreads wider than white paint alone. It’s beginner-friendly if you keep the mirrored area to the sides of a tray, not covering large flat surfaces that are harder to finish.
Start with a recessed tray layout around your TV or center — keep the recess depth about 2-2.5 inches. Build the false ceiling grid and board the tray base, then prime and paint the base white. For the side bands, install a backing surface and mount mirrored panels or glossy PVC sheets to the tray side using proper adhesive and edge trim. Add LED strips behind the side bands so the reflection lights up the room. Finish the front edges with trim and ensure no adhesive squeezes show on visible lines.
Editor's noteUse warm white LEDs (around 2700K-3000K) so the reflection looks inviting, not bluish.
Skip thisDon’t use low-quality mirror panels that warp; ripples show up in ceiling photos.
13. Cross Beam Grid with Two LED Channels
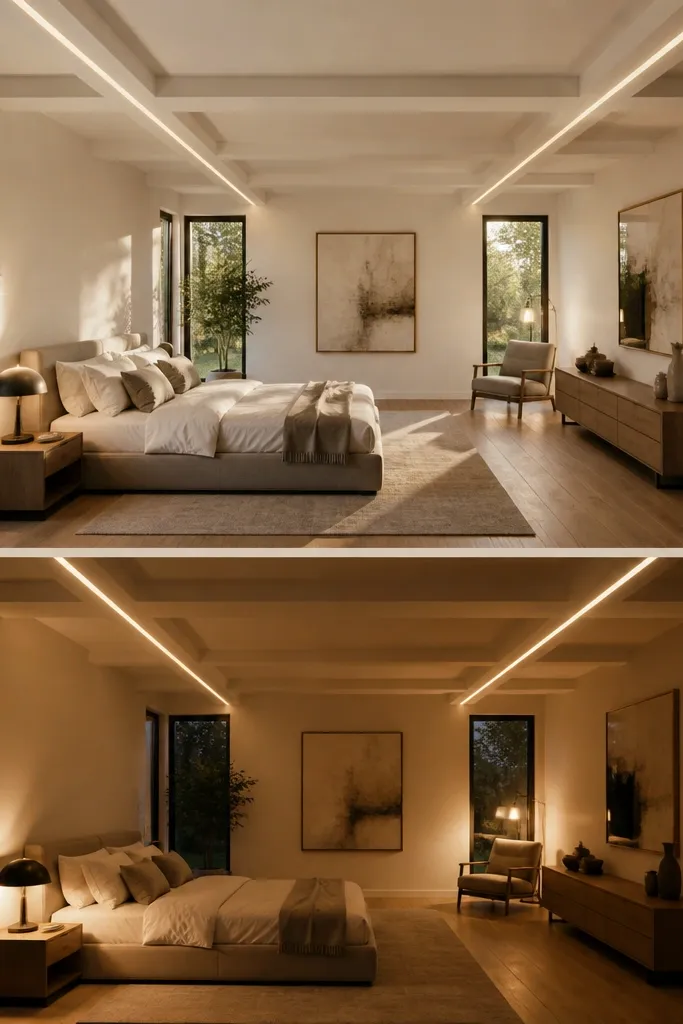
Cross beam grids look structured and modern, especially when you align them with the room’s walls. Two LED channels create a clean, high-contrast glow line that highlights the beams without turning the ceiling into a disco. This is a good choice for rectangular living rooms because the parallel channels emphasize length and make the space feel organized. It’s beginner-friendly when you keep it to beams only — no complicated curves or many tiers.
First, build a flat false ceiling base with a perimeter drop of about 3 inches. Then add two main cross beam lines across the ceiling, spaced evenly (for example, 24-30 inches apart depending on room size). Frame each beam with a consistent width (around 7-9 inches) and board the beam faces. Install LED channels along the inner edge of each beam so light travels across the room. Prime and sand the visible beam faces, paint, and then run LED wiring through conduits to avoid pinching during finishing.
Editor's noteKeep beam widths the same and line them up with wall edges; that alignment is what makes it look intentional.
Skip thisAvoid random LED placement inside the beam; it should sit on a fixed inner edge so the glow line stays clean.
14. Ceiling Coffered Squares with Hidden Light Corners
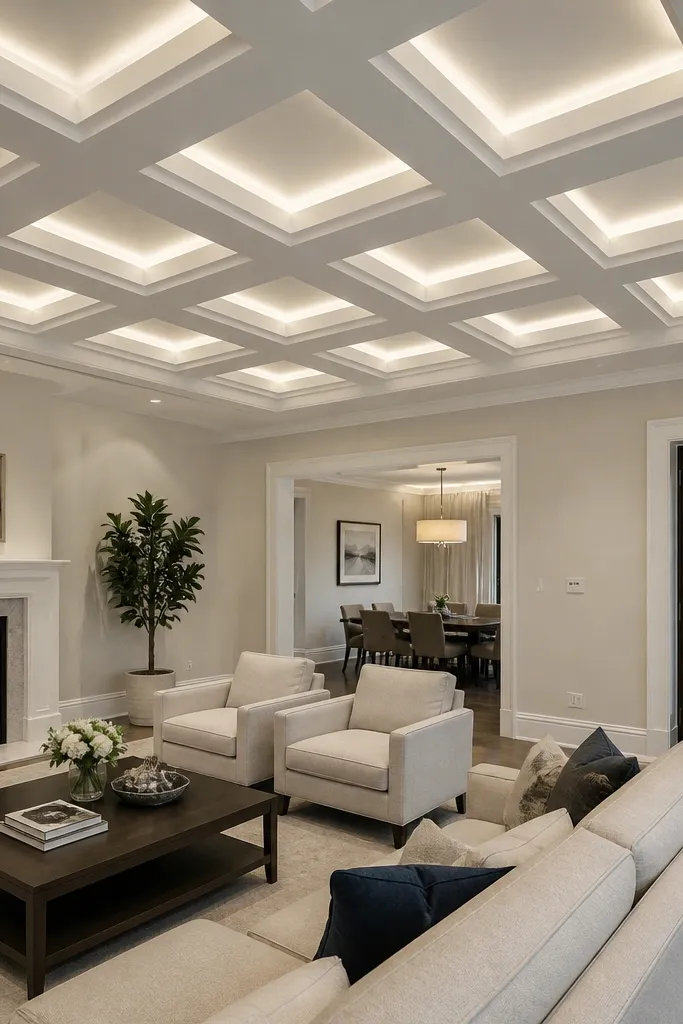
Coffered square recesses create a classic, hotel-style ceiling look. Hidden light corners add a modern twist by making the recesses feel deeper than they are. This design works when you want a timeless ceiling but still want it to look good in night lighting. It’s beginner-friendly because you can build it as a grid of repeatable square frames, then keep the light only in the corners or along one inner edge.
Start by deciding square sizes based on ceiling area — common starting points are 24x24 inches or 20x20 inches. Install the main grid for a flat drop of 3 inches, then build recessed coffer frames with a recess depth of about 2 inches. Board each recess face, ensuring the edges line up and stay level. For lighting, add LED strips in the corner channels of the recess frames or along the top inner edge using a diffuser. Finish joints, sand smooth, prime, paint, and test the glow before closing access panels.
Editor's noteUse the same square size across the whole ceiling; mixed sizes can look like a mistake instead of a design choice.
Skip thisDon’t leave sharp, unpainted metal edges inside recesses; they show through paint and look messy.
15. Inset Border with Floating Recess Ledges
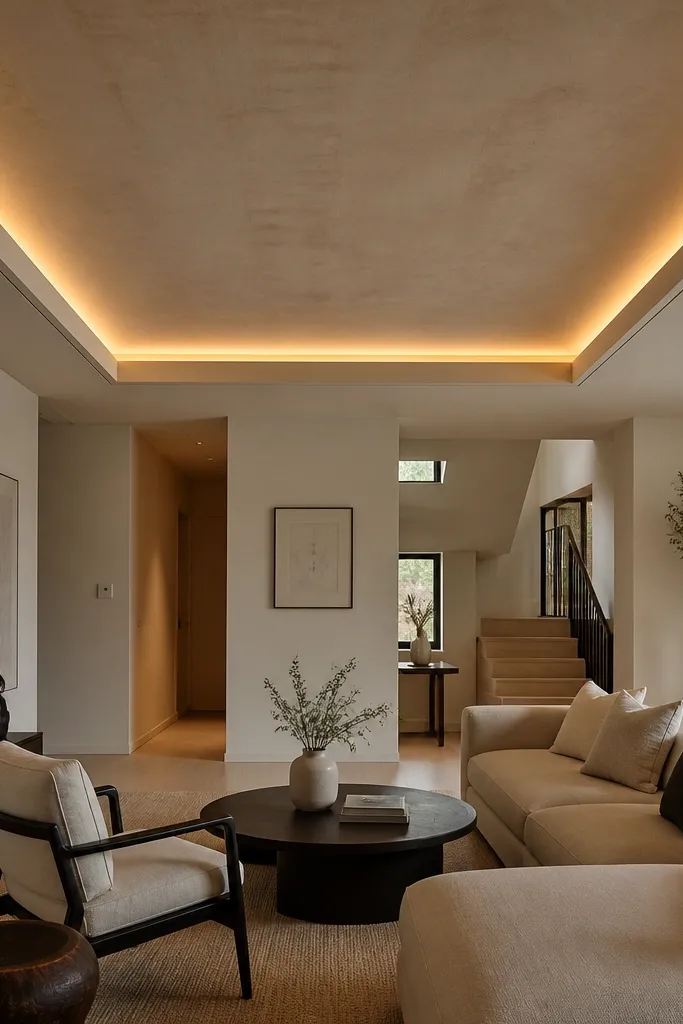
Floating ledges around the ceiling perimeter give you a dimensional look without heavy drops. The inset border makes the edge crisp, and the ledges create shadow lines that look great in photos. This is a strong pick for living rooms with minimal decor — the ceiling adds texture and depth without changing your furniture. It’s beginner-friendly because the build is mostly straight framing around the perimeter plus a consistent ledge depth.
First, set a perimeter drop of around 3 inches and create an inset border by adding a second inner frame line. Board the main drop, then build the floating ledge by fixing small battens at a consistent ledge height (around 2-2.5 inches from the top). Board the ledge faces and keep the edges straight with a straightedge during installation. Add a thin LED strip behind the ledge edge if you want a soft glow along the perimeter. Prime and sand all seams, then paint with a smooth finish so the ledge line looks clean.
Use a straight 6-foot level while attaching the ledge boards so the shadow line doesn’t wobble.
Avoid skipping joint filling on the ledge edges; tiny gaps show as dark lines once lights turn on.
16. Full Flat Ceiling with One Large Center Panel (Designer Minimal)
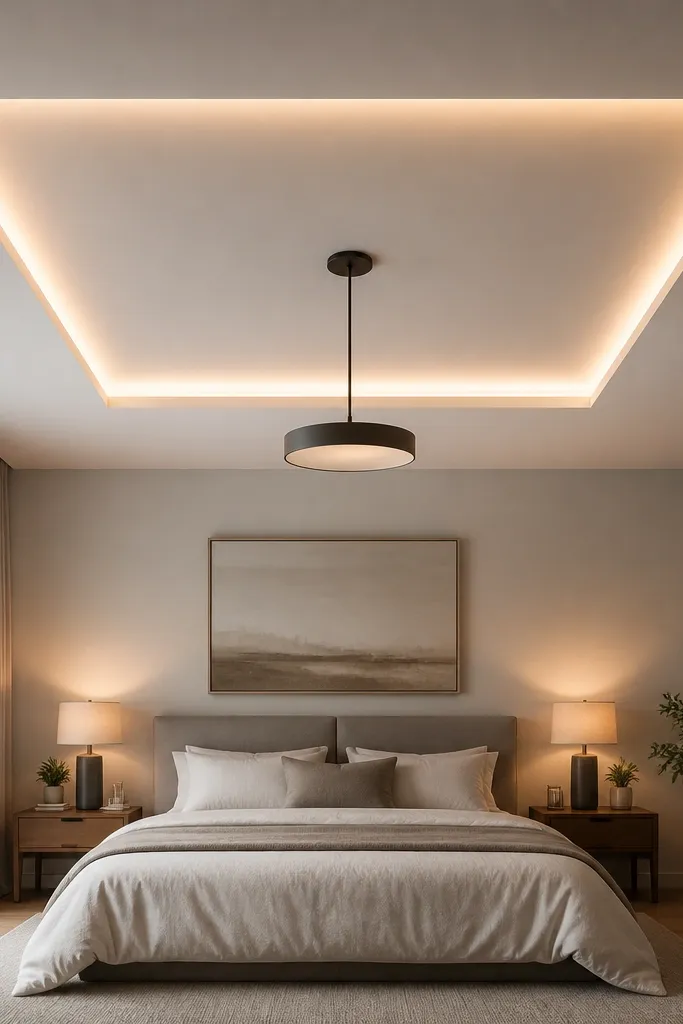
Minimal ceilings can still look stunning when you commit to one bold center feature. This design keeps the ceiling mostly flat, then adds one large recessed panel in the center with LED glow or discreet downlights. It works for modern living rooms and for layouts where you don’t want the ceiling to fight with a lot of wall art. Beginners love it because there’s less framing complexity and fewer cutouts.
Start by building a flat false ceiling with a perimeter drop of 2.5-3 inches. Mark and frame a large center panel — start with 60-72 inches wide depending on room size. Recess the panel by 2 inches and board the panel face and sides. Add LED strip inside the recess perimeter with a diffuser, or install a ring of recessed downlights if you prefer spot light. Prime, sand, paint, then power-test to confirm the glow doesn’t glare into seating.
Editor's noteKeep the center panel perfectly centered over the main seating or TV line; symmetry is the whole look.
Skip thisDon’t choose a panel size that’s too small; tiny centers read as an afterthought.
17. TV-Lined Picture Rail Border with Recessed LEDs
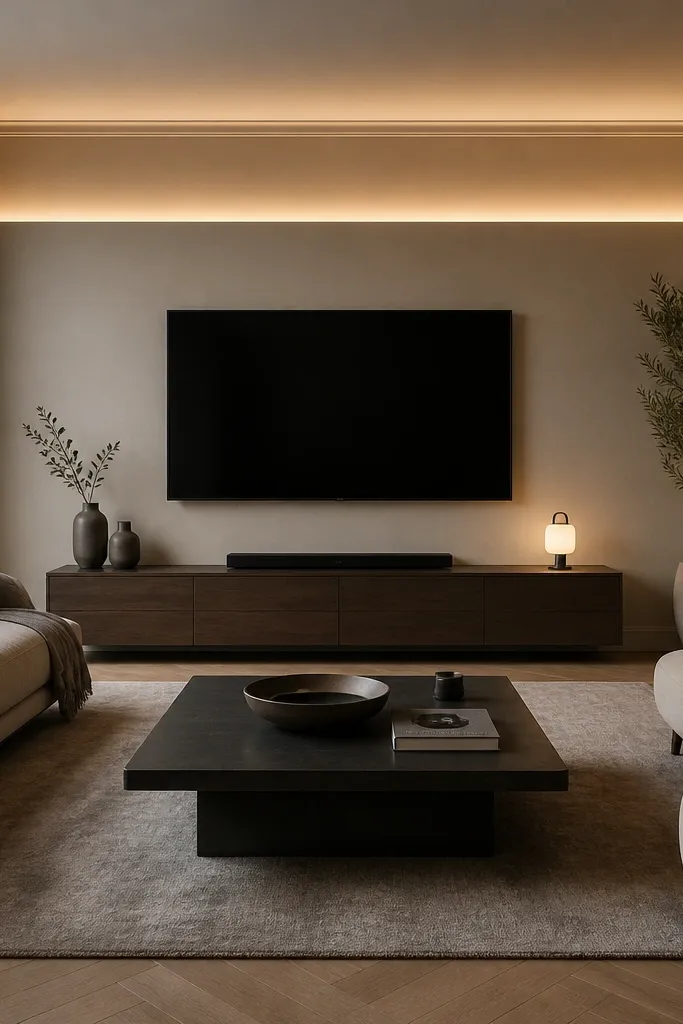
This is a “picture rail” style border that aligns with the TV wall so the ceiling feels like it’s designed around your viewing setup. The border line creates a strong, clean horizon, and recessed LEDs add a warm, controlled glow. It looks especially good when your walls are painted in a single tone and you want the ceiling to add the only contrast. It’s beginner-friendly because you build one long border segment and keep it straight and continuous.
First, decide the border drop height around 3 inches and measure where your TV wall sits so the border lines up visually. Install the metal grid for the border and board the faces. Create an inner recess channel for the LED strip — typically 1.5-2 inches deep — and keep the diffuser facing downward. Wire the LED strip to a concealed driver location with access for maintenance. Prime, sand the border seams, paint, then install the diffuser trim and test brightness at night.
Editor's noteUse warm white LEDs and a dimmer if you want the ceiling to feel cozy instead of bright.
Skip thisAvoid placing the border too low; LED glow looks messy when the ceiling drops are cramped.
18. Raked Illusion Ceiling with Offset Step Panels
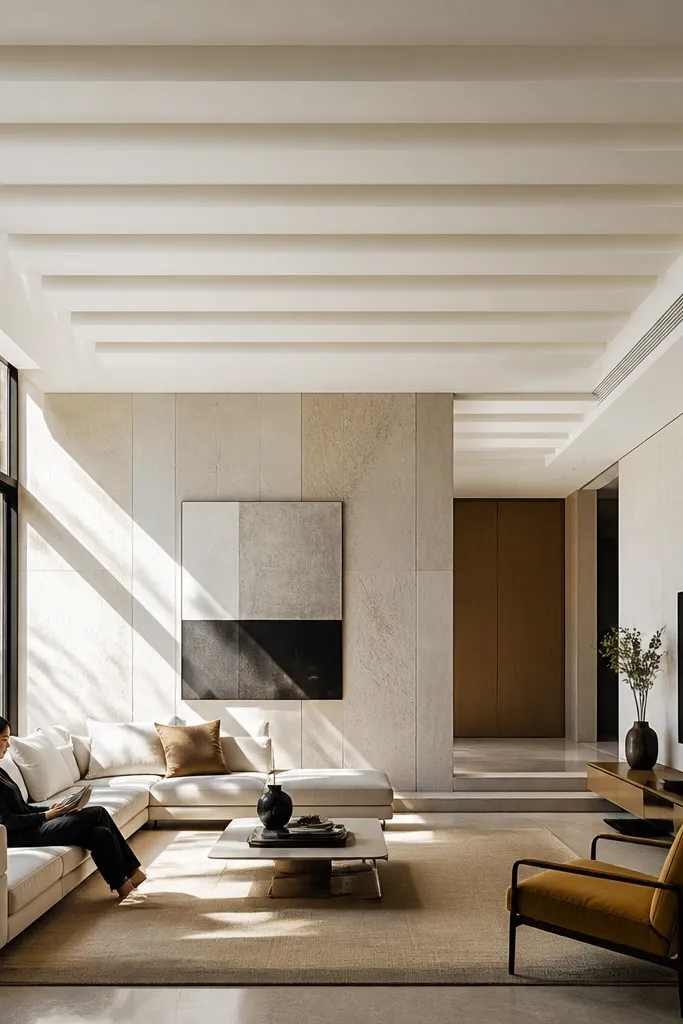
If you want something that looks like a custom architecture detail, offset step panels create a raked illusion without needing to tilt the whole ceiling. The steps cast shadows that shift as the light changes, so it looks alive in photos. This works best in living rooms with strong natural light or large windows because the shadow movement makes the ceiling feel dynamic. It’s beginner-friendly if you keep the steps shallow and use straight framing lines rather than complex angles.
Start by setting a perimeter drop of around 3 inches and planning a single diagonal direction across the ceiling. Frame two or three offset “step” bands, each about 6-10 inches wide, with a drop difference of around 1-1.5 inches between steps. Board each step, keeping alignment consistent along the diagonal line using a laser or chalk guide. Install recessed downlights along one side of the steps or add hidden LEDs behind one step edge. Finish joints and sand smooth, then paint with consistent coverage so the steps read clearly.
Editor's noteMark the diagonal with a chalk line and check it from two directions before you screw anything in.
Skip thisDon’t make too many steps; three bands is enough for the illusion without looking busy.
19. Round Center Medallion with Petal LED Segments
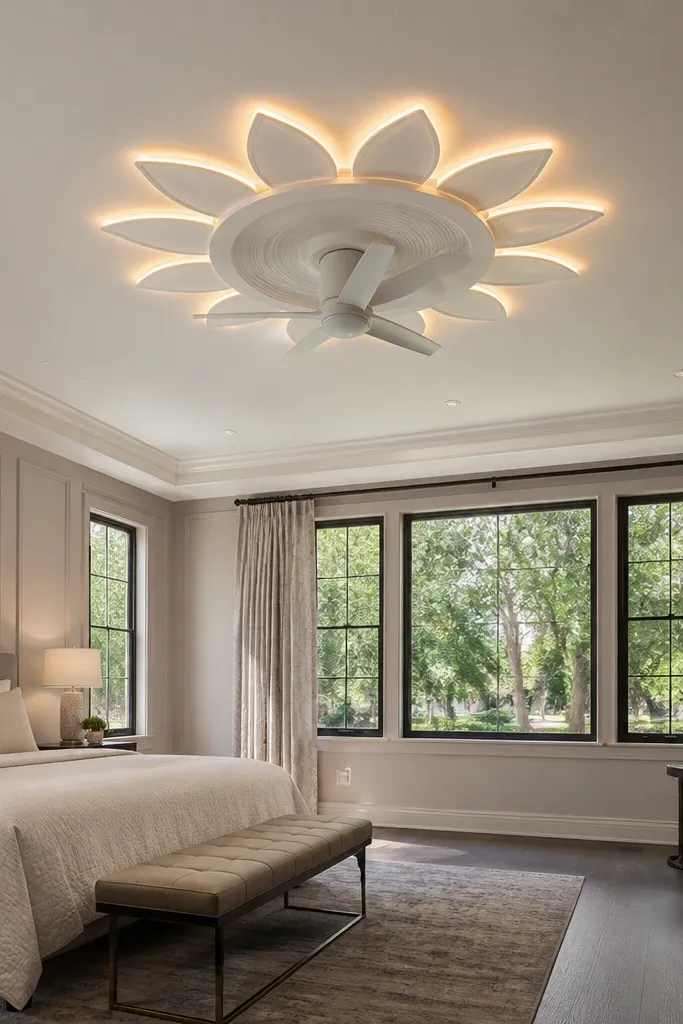
A round medallion is a crowd-pleaser because it draws attention to the center and looks classic. The petal LED segments add an updated, stylish glow without needing a full chandelier. This design works in living rooms where the center light is important — like a ceiling fan or pendant — and you want the ceiling around it to feel intentional. It’s beginner-friendly when the medallion is a single round plus a few evenly spaced segments.
First, choose a medallion diameter around 30-40 inches and mark the room center. Build the medallion using a circular frame with battens, then board the top and sides of the medallion. Add 6-8 petal segments around the medallion edge by framing small wedges and boarding them shallow. Install LEDs behind the petal segments with a diffuser so each segment glows, not the whole surface. Prime, fill joints, sand smooth, paint, and test the glow before final trims.
Editor's noteUse equal spacing for each petal so the symmetry reads clean in overhead photos.
Skip thisAvoid uneven medallion diameter; small differences show up as a lopsided glow.
20. Black Accent Channels with White Ceiling (High Contrast)
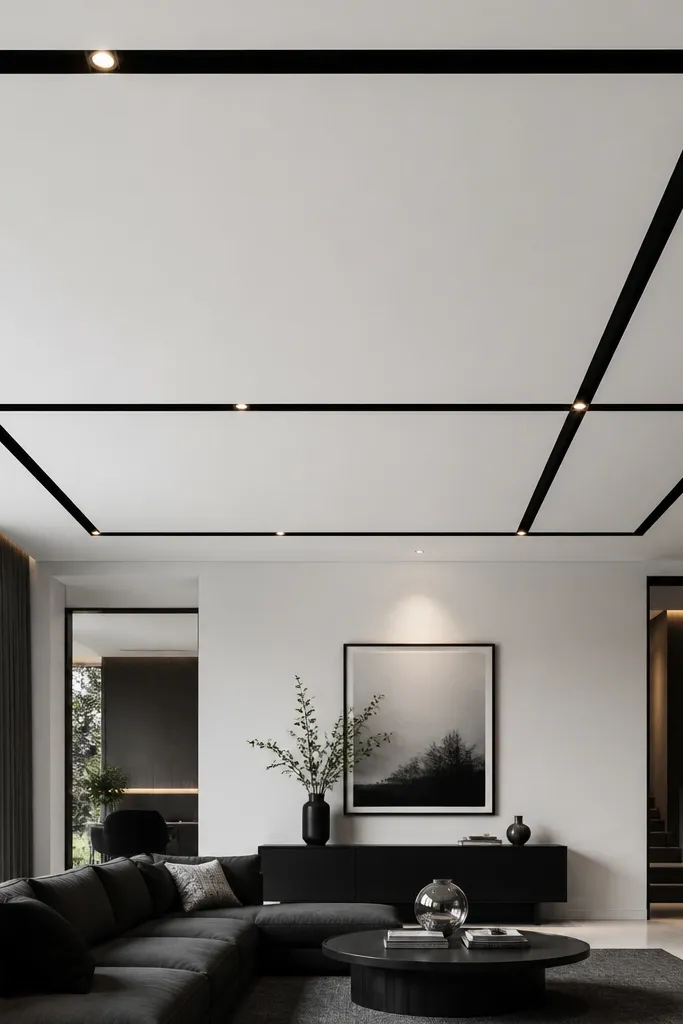
High contrast makes a false ceiling look styled fast. A white base with thin black accent channels creates crisp lines and makes the LED glow feel more intentional. This is a great option for modern living rooms with black frames, dark furniture, or matte decor. It’s beginner-friendly because you can build the structure in white gypsum and add black channels only on top as the finishing layer.
Start with a standard white false ceiling base: perimeter drop around 3 inches, flat center. Frame a simple geometric pattern into the ceiling surface using gypsum board or battens, keeping the structure lines straight. After sanding and priming, paint the ceiling white. Then install black PVC or metal accent channels along the pattern lines, and run LED strips behind one channel edge for glow. Seal the channel edges and do a final paint touch-up so the lines look sharp.
Match the LED color temperature to the black finish; warm white keeps the contrast classy, not harsh.
Don’t use glossy black everywhere; too much shine can look cheap under ceiling light.
21. Hidden LED Perimeter with Fabric-Look Diffuser Panels
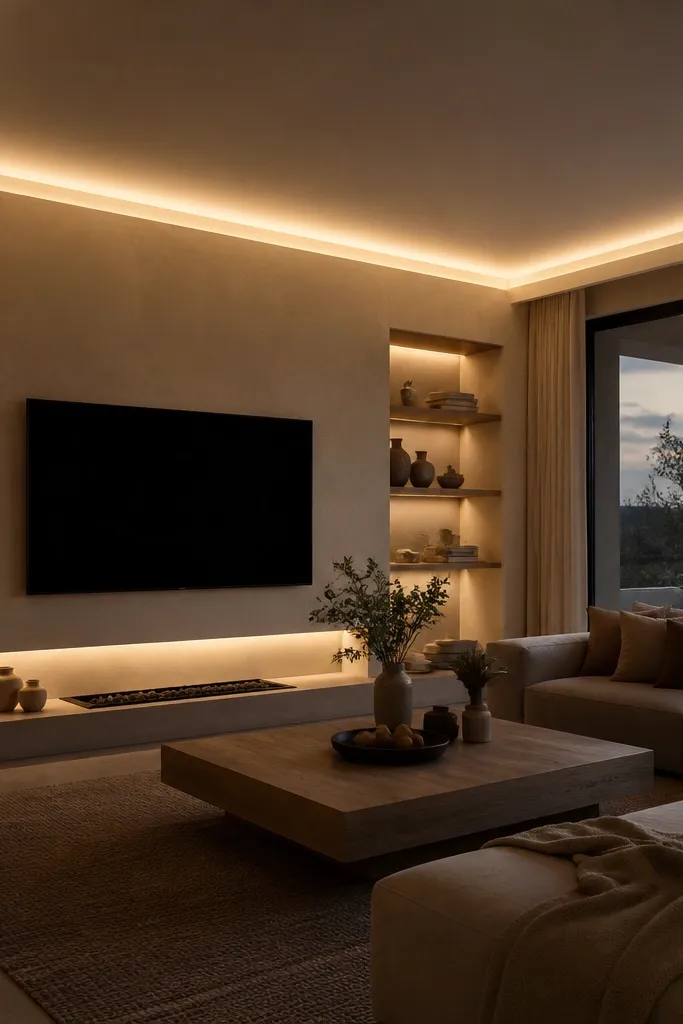
A perimeter glow with a diffuser panel looks expensive because the light spreads evenly and the strip itself stays invisible. Fabric-look diffuser panels soften the brightness and reduce glare, which is a big win for living rooms where people sit and watch TV. This design is beginner-friendly because the structure is mostly a standard perimeter drop; the aesthetic comes from the diffuser choice. It’s perfect when you want cozy lighting without drilling lots of downlight holes.
First, build a perimeter drop of 3-4 inches and install the inner ledge frame where the diffuser will sit. Leave a consistent channel gap for the LED strip, then mount the strip inside with a diffuser spacing that keeps light even. Install the diffuser panel on the inner face so it covers the strip completely. Prime and paint the rest of the ceiling, then test brightness before sealing the diffuser in place. Use a dimmer so you can lower the glow for movie nights.
Use a diffuser material that’s rated for LED heat so it doesn’t yellow over time.
Avoid bare LEDs behind open gaps; you’ll see the strip and it ruins the soft look.
22. Recessed Accent Lines in a Square Corner Layout
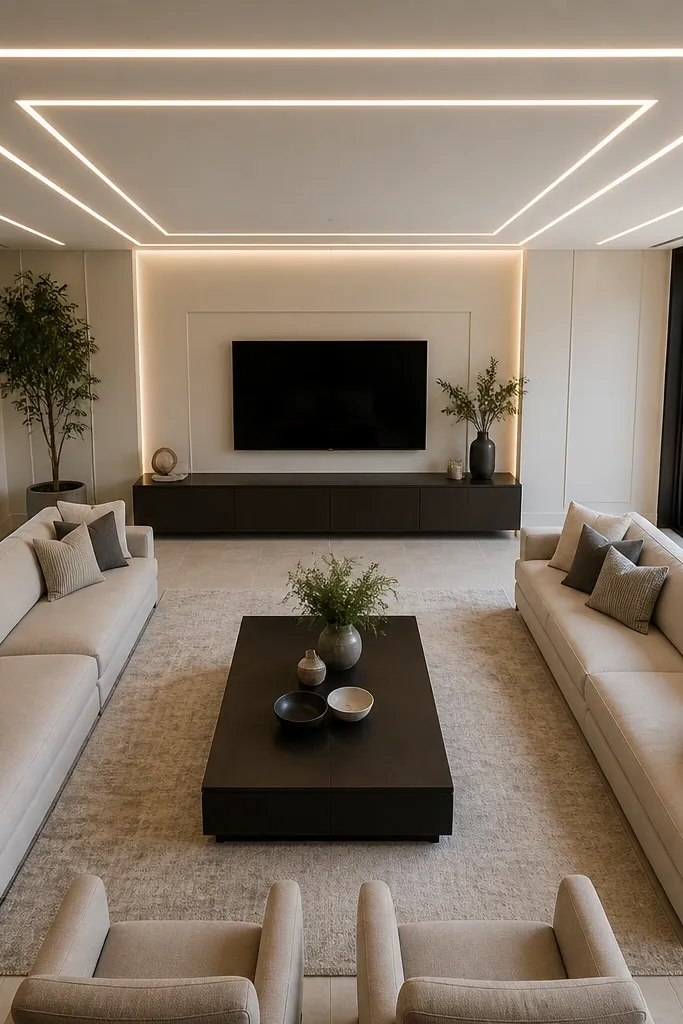
This design adds depth without heavy drops by using recessed accent lines in a square corner pattern. The corner layout makes the ceiling look like it’s guiding the room’s geometry toward the center. It’s beginner-friendly because you’re building a frame and adding channels — no complex trays. It photographs well because the shadows along the recessed lines show clearly when lights are on.
Start by setting a perimeter drop around 2.5-3 inches and boarding the base. Mark a square corner frame inward from each wall by about 16-20 inches, then build a recessed channel line within that marked area. Fix battens along the channel lines, board the channel face, and keep the recess depth around 1.25-1.5 inches. Install a small LED strip inside the recessed channel with a diffuser strip cover. Prime, sand, paint, and verify that the light sits inside the recess rather than spilling onto the ceiling surface.
Editor's noteKeep the recessed lines the same width everywhere; variation looks like a measuring error.
Skip thisDon’t cut LED holes after painting; wire and cut before finishing so you don’t damage the surface.
23. Ceiling Border with Vertical Slat Panels (Modern Warmth)
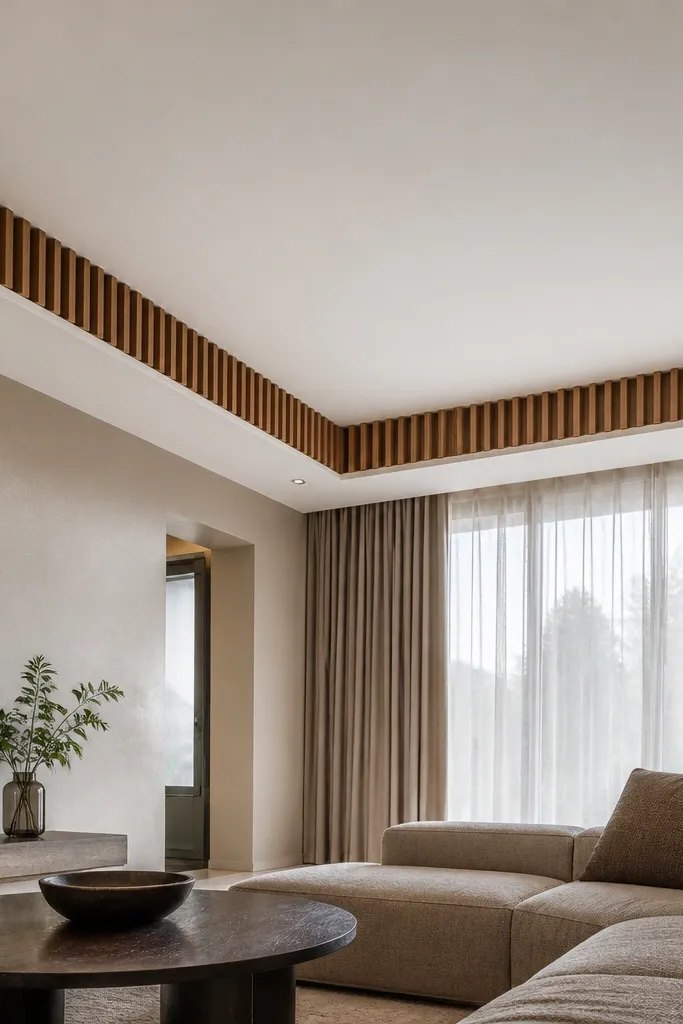
Vertical slat panels add texture and warmth while still reading clean and modern. The key is using slats only in the border area, not across the whole ceiling, so the build stays manageable. This design is great for living rooms with neutral walls and you want the ceiling to bring texture without looking cluttered. It’s beginner-friendly because you can treat the slat area as a separate border zone with repeatable spacing.
First, build a perimeter drop of 3 inches and board the top surface white. Install vertical battens inside the border area at a consistent spacing (around 2-3 inches apart) and mount the slat panels to the battens. Add a hidden LED strip behind the slat panel line using a diffuser so the glow comes through the slats gently. Keep slat height aligned with the border face so it looks intentional. Prime and paint the white parts, then finish the slats with a matte clear coat to reduce glare.
Stagger slat lengths by cutting from one batch — it prevents color mismatch across the border.
Avoid glossy slat finishes; they reflect downlights and create hotspots.
24. Lemon-Chiffon Cove with Recessed "Cloud" Panels
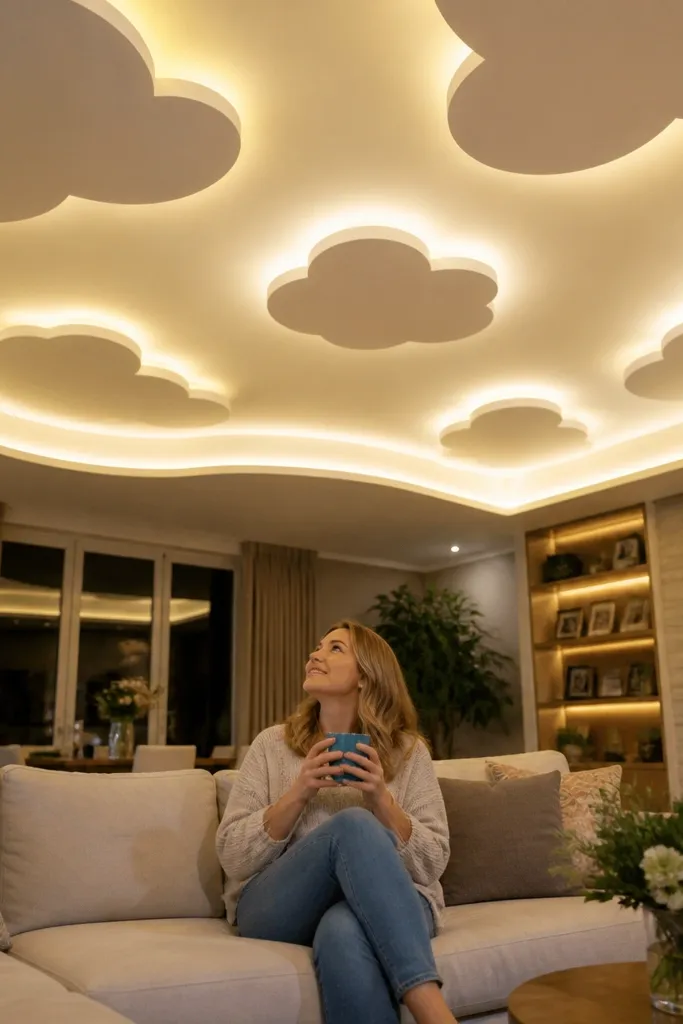
This is the false ceiling idea for a living room that feels too flat right now. You get a gentle, cloud-like pattern without going full “big drop” and it looks expensive in photos because the recesses catch light instead of shadows. The warm LED cove makes the whole ceiling read taller, even in a standard 8 ft room. It’s beginner-friendly because the curves are shallow and you’re building with simple sheet materials, not complex carpentry. Plan for a weekend if you’re careful, and it suits living rooms, reading nooks, and open-plan spaces where you want a soft, calming glow rather than sharp geometry.
Step 1: Mark the cove line on the ceiling using a flexible string or a chalk line and keep it 8-10 cm from the perimeter wall. Build a 10-12 cm deep cove frame with metal ceiling channels, then cut 6-8 cm wide curved strips from 12 mm drywall or 9 mm plywood and screw them to the frame so the curve stays smooth. Step 2: Create the “cloud” panels by installing a second, smaller grid inside the cove — make each panel about 60-70 cm long and 35-45 cm wide, with 6-8 cm spacing between them for light. Screw drywall over the recess faces only, then skim joints with setting-type compound and sand flush. Step 3: Install a warm LED strip (2700K) in the cove using an aluminum LED channel with a diffuser, then paint the ceiling base flat white and paint the cloud recess faces a slightly warmer off-white so the glow looks layered.
Editor's noteUse an aluminum LED channel with a diffuser — bare tape makes the glow look spotty and harsh on curved surfaces.
Skip thisDon’t make the cove depth too shallow; under 10 cm the recess won’t hide the LED and you’ll see bright dots.
25. Stone-Gray Floating Shelf Ribs Across the Ceiling
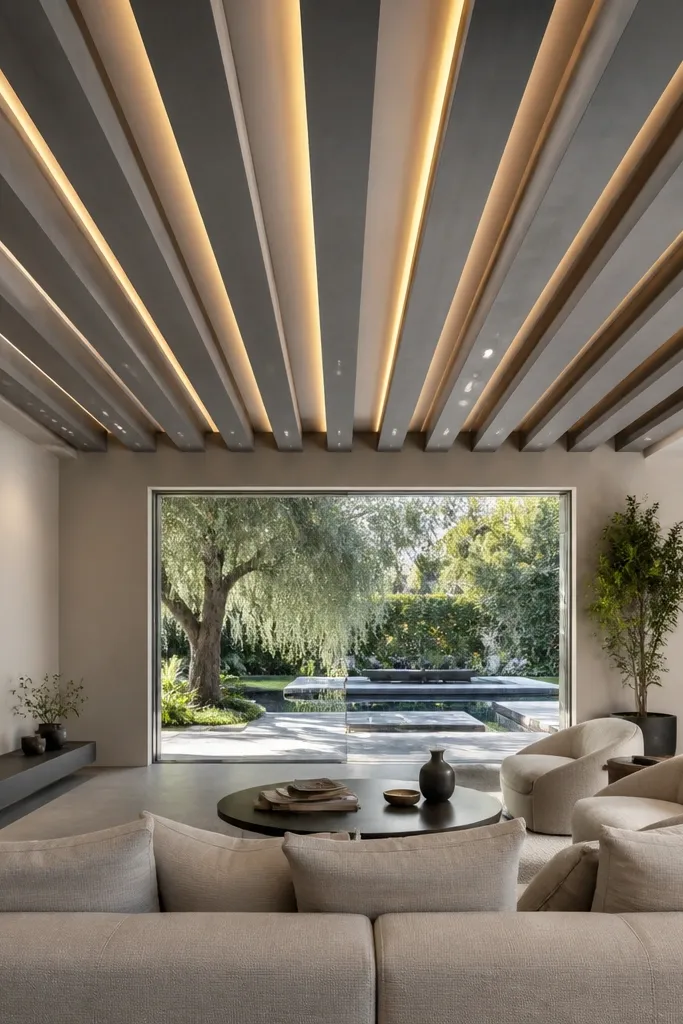
This one fixes the living room ceiling that feels boring, even after paint. Instead of a single border or a grid, you get repeating “shelf ribs” that create rhythm — the kind of pattern that looks good from the couch and in wide-angle photos. It works because the ribs cast narrow shadows and the thin LED lines sit in the channels between them, so the light feels architectural. You’ll want to be comfortable with measuring and cutting sheet material, but the build is still straightforward: it’s mostly straight runs with consistent spacing. This is a strong choice for modern living rooms, TV zones, and dining areas where you want a bold ceiling feature without a heavy center medallion.
Step 1: Decide your rib spacing first. Mark parallel lines on the ceiling with 45-50 cm spacing, and set the ribs so they run perpendicular to the main seating line; build a base drop of 5-7 cm only where you need the LED channels. Step 2: Make each rib from 12 mm drywall over a lightweight frame or from 15 mm plywood wrapped in drywall — keep rib thickness 10-12 cm and rib depth 6-7 cm so it reads as a shelf, not a beam. Install vertical hangers for each rib line, then fix a shallow LED channel between ribs (about 12-15 mm wide opening) and run the warm LED strip (3000K) along the channel. Step 3: Skim the rib faces smooth, then paint the ceiling base flat white and paint the ribs stone-gray (a matte finish like a flat wall paint). Finish with caulk at perimeter gaps so the shadow lines stay crisp.
Editor's notePre-cut rib frames with the same template and label them left-to-right so your spacing stays identical across the room.
Skip thisDon’t use glossy paint on the ribs; it reflects the LED and kills the shadow effect that makes this look high-end.



