
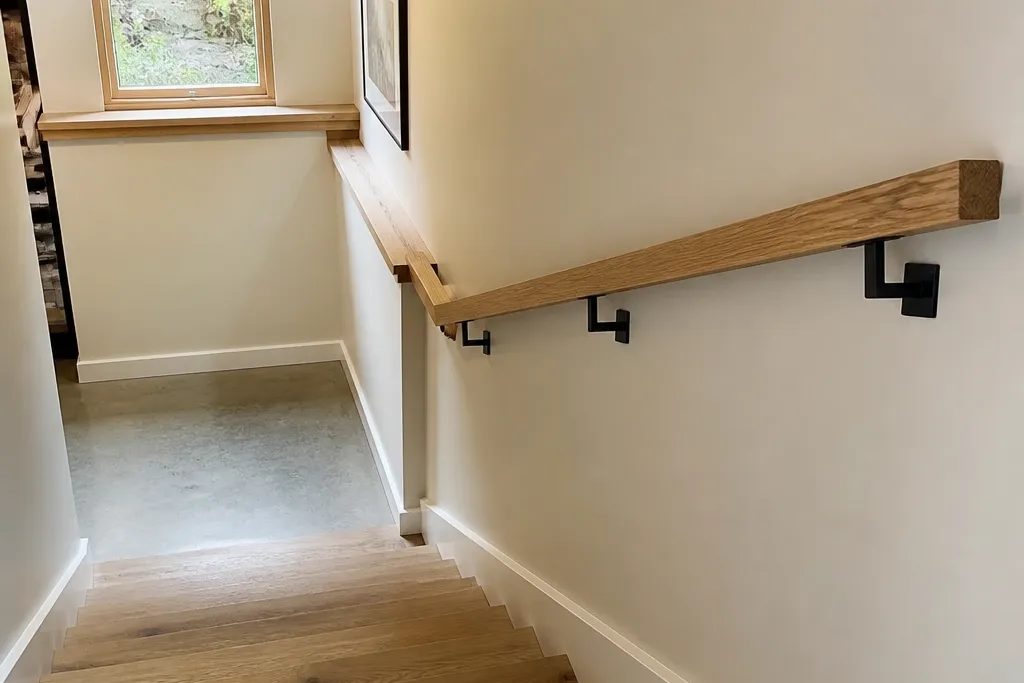
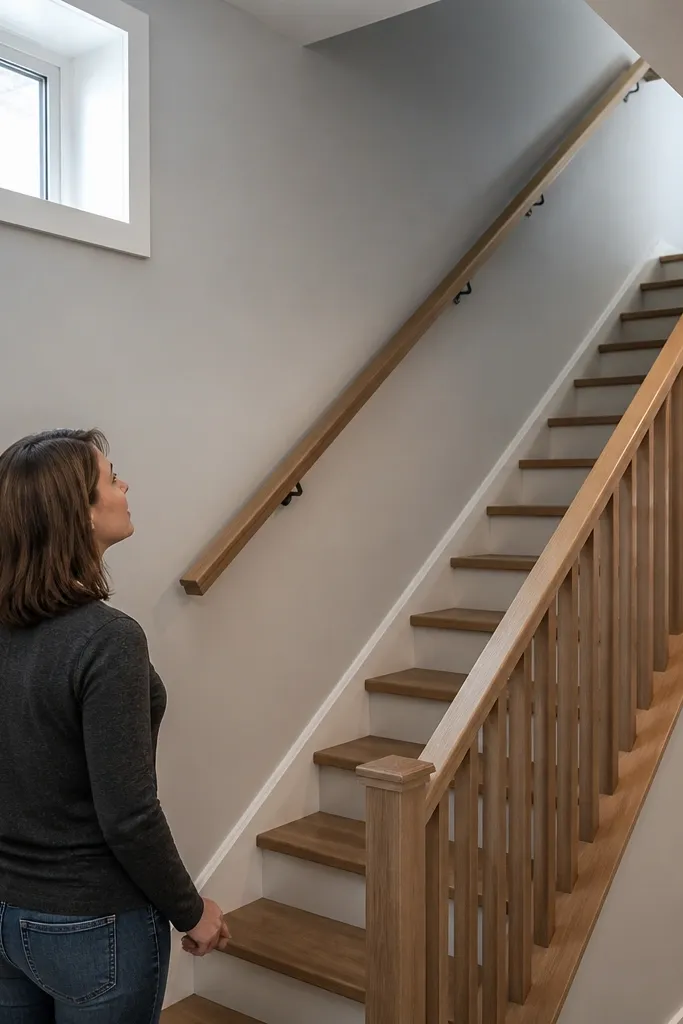
1. Matte Black L-Shaped Wall Rail with Wood Handrail
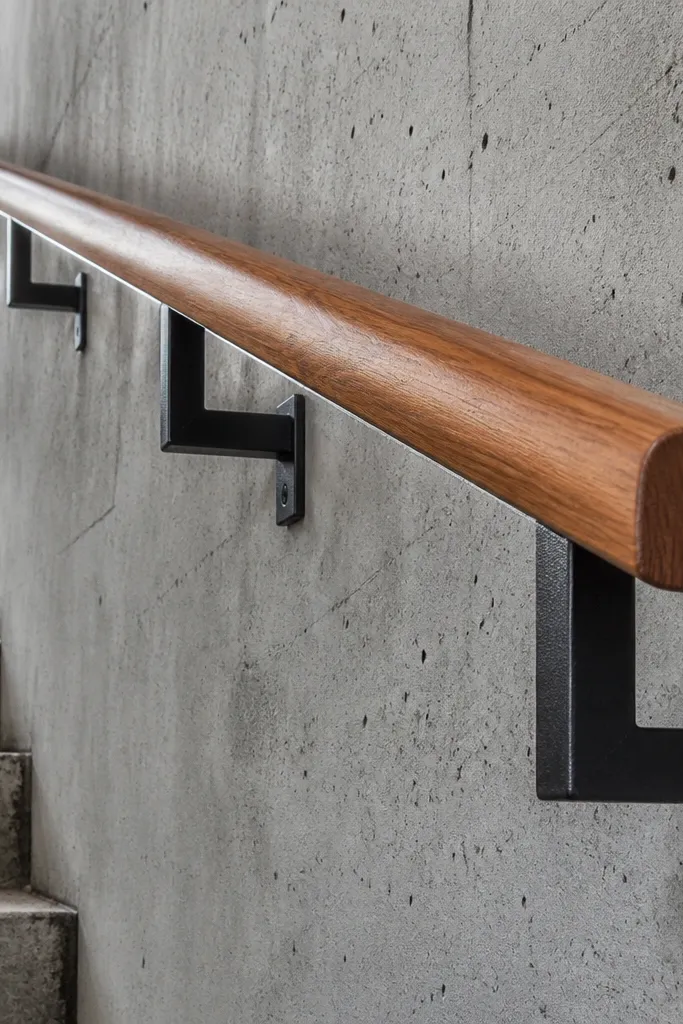
Start by measuring the handrail run along the slope and cut your wood handrail to length, keeping one end square for a clean stop at the top and bottom. Mark bracket locations so the rail stays level along the slope — then pre-drill and install the brackets into studs or solid blocking behind drywall. Dry-fit the rail, then attach with countersunk screws so the top feels smooth. Finish by sanding to 180 grit and applying two thin coats of polyurethane (matte or satin).
This is the quickest way to make basement stairs look intentional because the wall rail frames the whole run. The L-shaped brackets keep the handrail straight and clean, while the wood top gives you grip and warmth against concrete. For an aesthetic win, use matte black powder-coated brackets (or spray to a matte finish) and a handrail in oak-toned stain. It reads modern and tidy even in small, unfinished basements. Build time is usually a weekend, and you only need straight cuts and solid wall mounting.
Skip thisDon’t mount into drywall anchors only; the rail will flex and look loose fast.
Editor's noteUse a long level or a laser line along the stair slope so the rail looks straight in photos.
2. Warm Stained Wood Handrail with Square Spindles
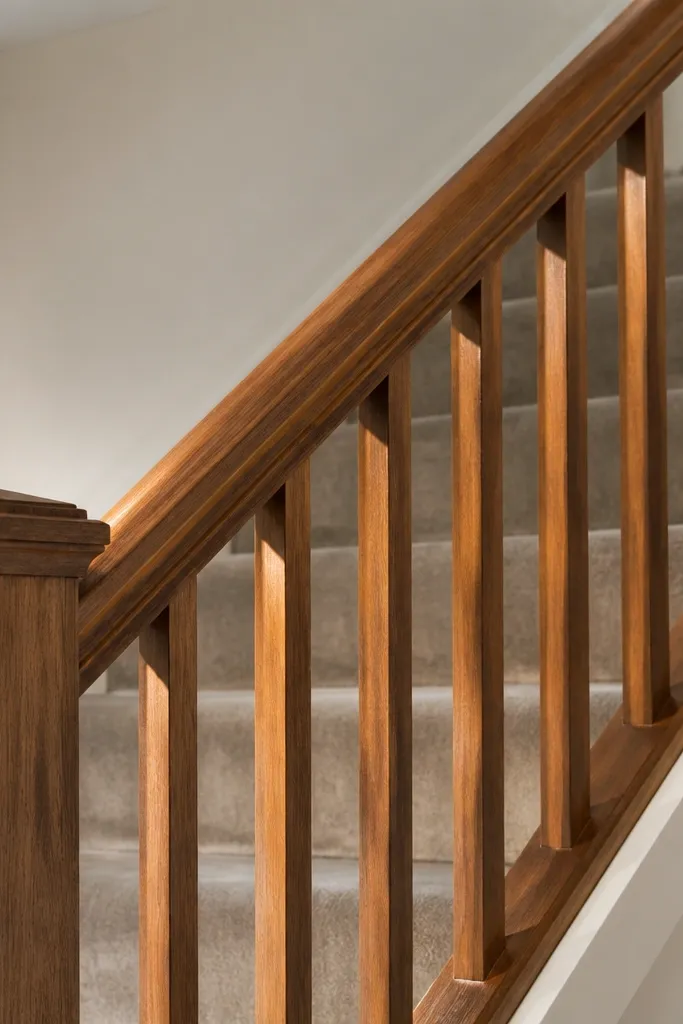
Start by choosing a handrail board (about 2x3 or 1.5-inch thick stock) and cut it to the stair slope length. Install two solid end posts or mount points, then set a string line to mark spindle spacing consistently from top to bottom. Pre-drill the handrail and spindle ends, then screw or dowel-join the spindles so they don’t twist. Sand the whole assembly lightly, then stain and seal with satin polyurethane.
Square spindles look crisp and “built” because the geometry repeats cleanly. This option works especially well if your basement has light-colored walls and you want the railing to soften concrete without going rustic. Use a warm stain like natural oak or medium walnut tone so the wood doesn’t look gray or flat. The handrail profile matters too — a simple rounded-edge top feels better than a sharp 2x4 edge. It’s beginner-friendly because you can buy pre-cut spindles and focus on spacing and secure attachment.
Skip thisSkip “eyeballing” spacing; uneven gaps make the railing look DIY in a bad way.
Editor's noteMake a simple spacing jig from scrap plywood so every spindle lands the same distance.
3. White Board-and-Batten Rail Look (Painted Wood System)
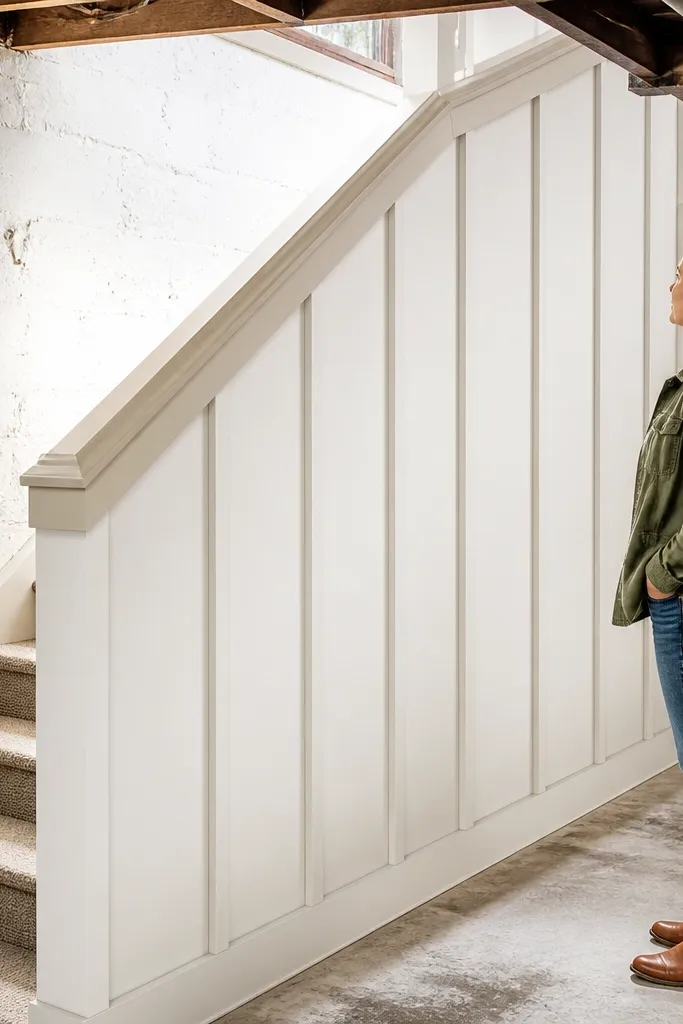
If your basement feels cold or unfinished, a painted white railing reads bright and intentional. This design uses a board-and-batten look in a railing section so you get texture and rhythm without complex metalwork. Keep the handrail slightly darker than the vertical boards for contrast — think white panels with a warm light-wood handrail or a soft gray top. It photographs well because the vertical lines pull the eye upward. It’s also forgiving: small imperfections disappear under paint.
Start by building a simple framed panel section between posts using 1x boards and spacing strips so the vertical lines are even. Cut the handrail to the stair slope length, then attach the panel frame to posts with screws from the inside. Prime all wood surfaces, then paint with a cabinet-grade paint (satin) for a smooth look. After paint cures, seal the handrail top lightly with a clear coat that won’t turn glossy.
Use painter’s tape as a spacer while the boards are drying/positioned so the battens come out straight.
Don’t paint over rough edges; brush marks show badly on white.
4. Cable Railing with One Thick Wood Handrail
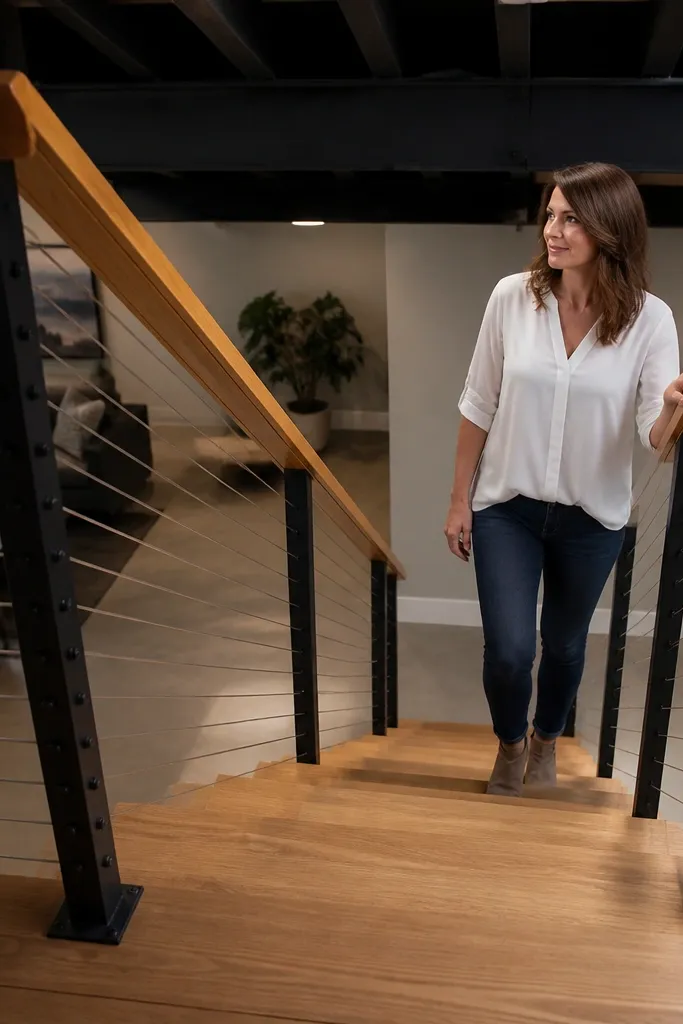
Cable railings look clean and modern because the vertical lines are thin and don’t visually block light. A thick wood handrail keeps it beginner-friendly and comfortable — you’re not relying on cables alone for grip. In a basement, this style makes the space feel less closed-in, especially if you have low ceilings or a narrow stairwell. It also hides small wall imperfections because the posts and cables create a clear structure. If you can drill straight and follow a kit layout, this is a very doable project.
Start by picking a cable railing kit sized for stair applications, including angled posts if needed. Install the posts into studs or masonry with the kit’s mounting plates, then mark cable locations along the handrail line. Cut cables to length and route them through the hardware, then tension and lock the ends per the kit instructions. Finish by sanding and sealing the handrail, then install it on top with the kit’s brackets or standoffs.
Measure cable length using a template board placed on the stair slope — it saves rework.
Don’t overtighten before the handrail is fully aligned; cables can pull the whole line off.
5. Shiplap-Style Railing Panel with Simple Handrail
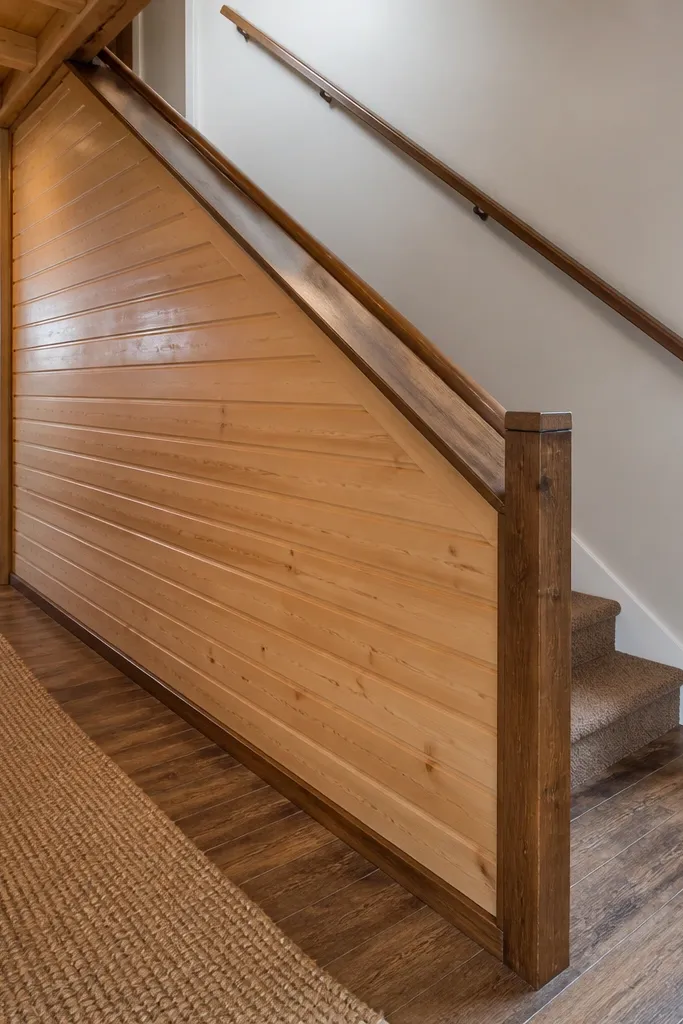
Start by mounting two sturdy end posts (or wall posts) and cut a handrail to the stair slope length. Build a rectangular panel frame, then attach shiplap boards horizontally across it, leaving a small expansion gap at the edges. Install the panel under the handrail with screws through the frame, then sand and paint or stain to match your basement trim. Seal the handrail top so it wipes clean easily.
A shiplap-style panel turns a basement railing into a wall feature, not just a safety bar. This design hides clutter behind the panel, and it looks great when your basement already has wood tones or you’re planning to add them. Use thin, horizontal boards under the handrail so the texture catches light and makes the railing feel intentional. The top rail stays simple and comfortable, while the panel adds visual weight where concrete can feel bare. It’s beginner-friendly because you’re basically building a box panel and attaching it.
Skip thisDon’t nail thin boards without spacing; shiplap warps and the gaps look messy.
Editor's notePre-paint or pre-stain the shiplap boards before assembly; touch-up is faster and the finish looks more even.
6. Natural Oak Handrail with Turned Balusters
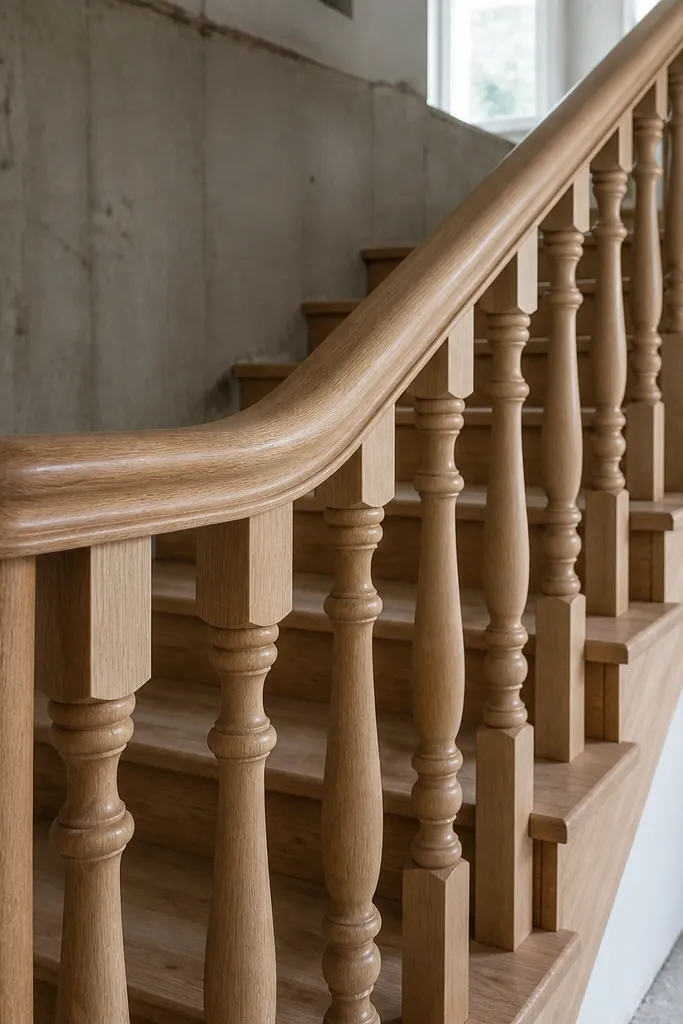
Start by choosing turned balusters that match your desired spacing and height, then measure the vertical run from top rail underside to the stair level you’re filling to. Install end posts or wall brackets, then pre-drill the handrail for baluster mounting points. Attach balusters with screws or dowels, keeping a straight string line so they don’t drift. Sand, stain, and seal everything with satin polyurethane for a warm, low-glare finish.
Turned balusters add a “real house” look fast because the rounded details catch light and soften the stairwell. This is one of the best ways to make a basement feel warmer without going heavy or ornate. Keep the handrail in natural oak stain and choose balusters with a simple profile so it doesn’t look overly Victorian. The result looks clean in photos and feels comfortable in real life because the rail top is smooth and the balusters are rounded. It’s beginner-friendly since you can use pre-made turned pieces and just focus on alignment.
Skip thisAvoid mixing baluster sizes — the mismatch shows immediately.
Editor's noteMark baluster holes using a scrap template board so your spacing stays consistent across the whole run.
7. Two-Tone Rail: Walnut Handrail, Light Gray Posts
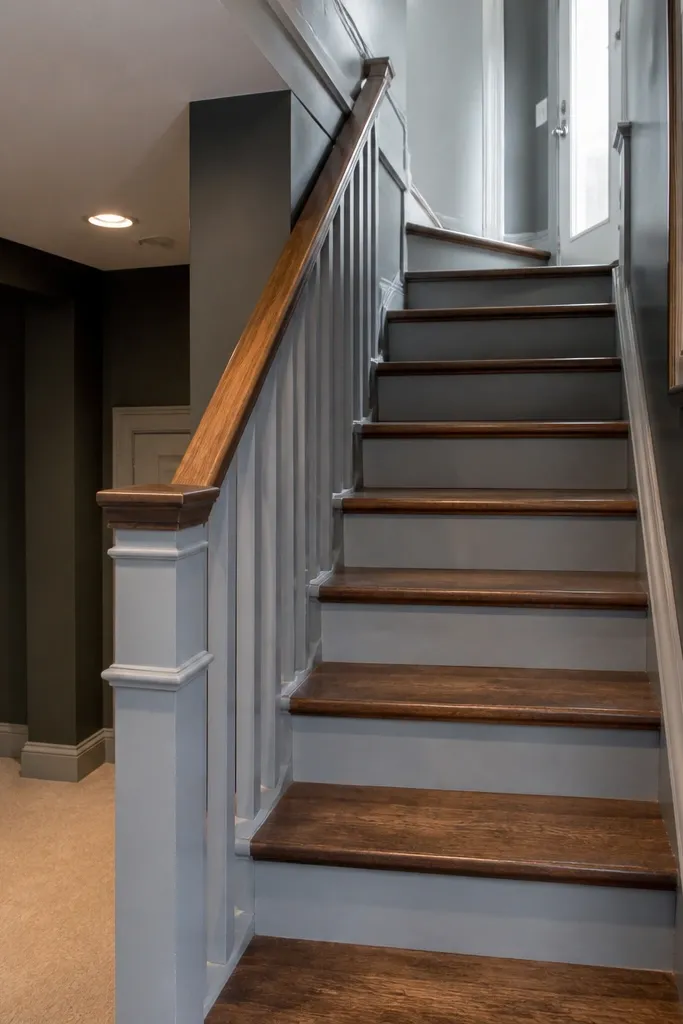
Start by building the rail frame with wood posts and a straight handrail blank cut to the stair slope. Sand both post and handrail pieces thoroughly, then stain the handrail with walnut tone and seal it. Prime the posts, then paint them light gray satin, letting them fully dry before assembly. Finally, attach the handrail on top with hidden screws, then seal the handrail top again for durability.
Two-tone railings look designed because they separate the handrail from the structure. A walnut-toned handrail reads warm and upscale, while light gray posts keep the look modern and calm in basements that already have lots of shadows. This style also helps if your basement floor or wall paint is cool-toned — the gray won’t fight it. Build difficulty is moderate only because you’re doing two finishes, not because the structure is hard. It’s still beginner-friendly if you keep your shapes simple and use straight cuts.
Skip thisDon’t skip primer on posts — unprimed paint soaks unevenly and looks patchy.
Editor's noteTest both stains on scrap wood in the same lighting as your basement; basement light changes how gray reads.
8. Black Iron Look with Wood Handrail (Painted Steel Tubes)
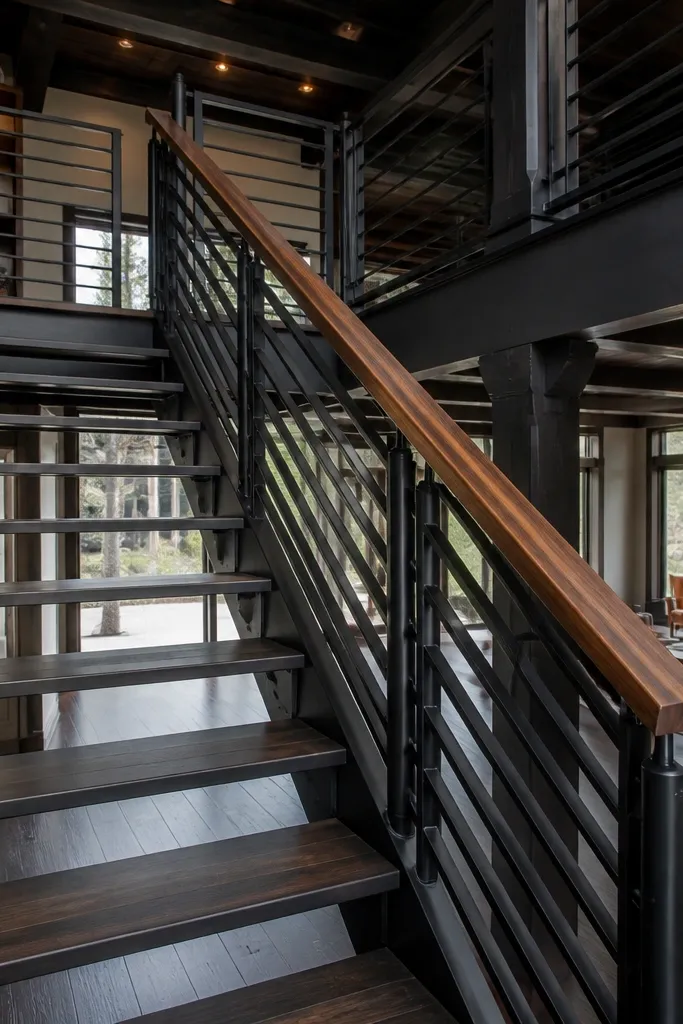
If you want the iron-rail look without true wrought iron, painted steel tubes are the move. They make the railing look sturdy and architectural, and the wood handrail keeps it comfortable. This style works great in basements with exposed beams or dark trim because the black ties everything together. You get a strong visual line that looks sharp in tight stair photos. It’s beginner-friendly because you can buy cut-to-length tubing and use simple clamps and plates.
Start by planning your layout using a straightedge along the stair slope and marking where the top rail will sit. Cut or buy steel tube sections for the uprights and install them to solid mounting points with flange plates and masonry or stud anchors. Attach a wood handrail to the top with brackets so the wood stays aligned and doesn’t shift. Sand and finish the wood, then prime and spray the steel with matte black enamel for a smooth, non-rubbery finish.
Use a foam sanding block on the wood handrail edges so fingers never hit sharp corners.
Don’t skip corrosion primer on steel; basement humidity will show rust spots later.
9. Clear Acrylic Balustrade Panels with Wood Top Rail
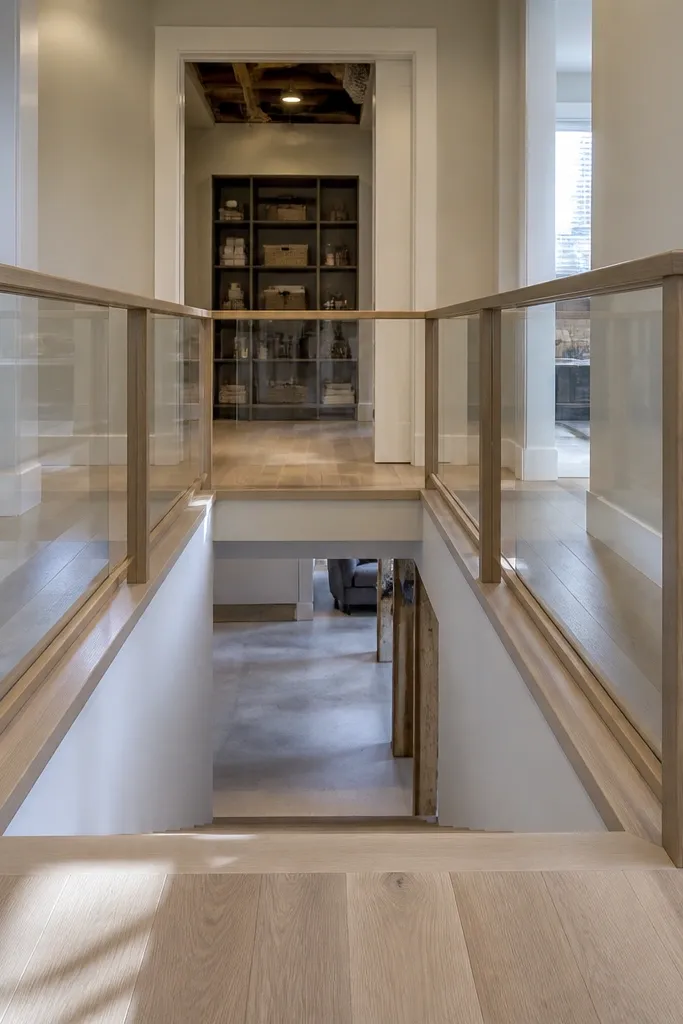
Clear panels are a cheat code for making a basement stairwell look bigger. The openings stay visually open, but you still get a full barrier feel with a modern top rail. Use clear acrylic or polycarbonate panels so they’re lighter than glass and easier to handle. Pair with a warm wood handrail to prevent the whole thing from looking too cold. This style looks clean in photos because there’s less “busy” detail than spindles. It’s beginner-friendly if you can drill accurate holes and handle panels carefully.
Start by choosing panel material and thickness that matches your mounting hardware, then measure each panel bay between posts. Install posts first into solid studs or masonry, then attach panel clips at marked heights. Slide panels into the clips, leaving the manufacturer-recommended gap so they don’t bind as temperature changes. Finish by attaching the wood handrail on top and sealing it with satin polyurethane.
Drill acrylic slowly and use a sharp bit; rushing causes cracks around the holes.
Don’t overtighten panel screws; acrylic stress shows as cracks.
10. Reclaimed Fence Pickets Vertical Rail (Rustic but Clean)
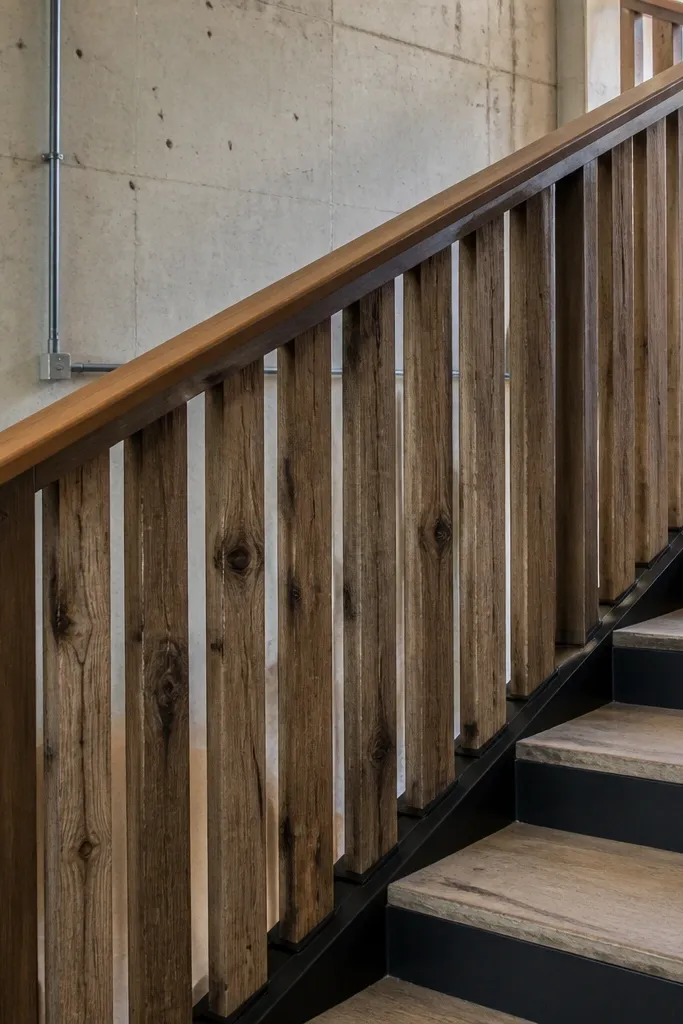
Start by sorting pickets by thickness so the rail infill looks uniform; trim them to the same height for each bay. Install end posts or wall brackets, then mark picket spacing with a spacer strip. Attach pickets using exterior-grade screws, then sand the whole assembly to remove splinters and sharp edges. Finish with a wood stain and a clear sealer made for interior floors and rails so it wipes clean.
Reclaimed pickets look great in basements because they add texture without requiring fancy carving. The trick is keeping the spacing even and sealing the wood so it doesn’t look messy or gray. Use a simple smooth handrail and let the pickets do the visual work. This looks especially good if your basement has a concrete floor and you want to warm it up fast. It’s beginner-friendly since pickets are easy to cut, and you’re building a straightforward vertical infill.
Skip thisDon’t leave rough mill edges; they snag hands and look sloppy up close.
Editor's noteUse a single spacer block and clamp it while you screw the pickets — it keeps every gap consistent.
11. Horizontal Slat Rail with Rounded-Edge Handrail
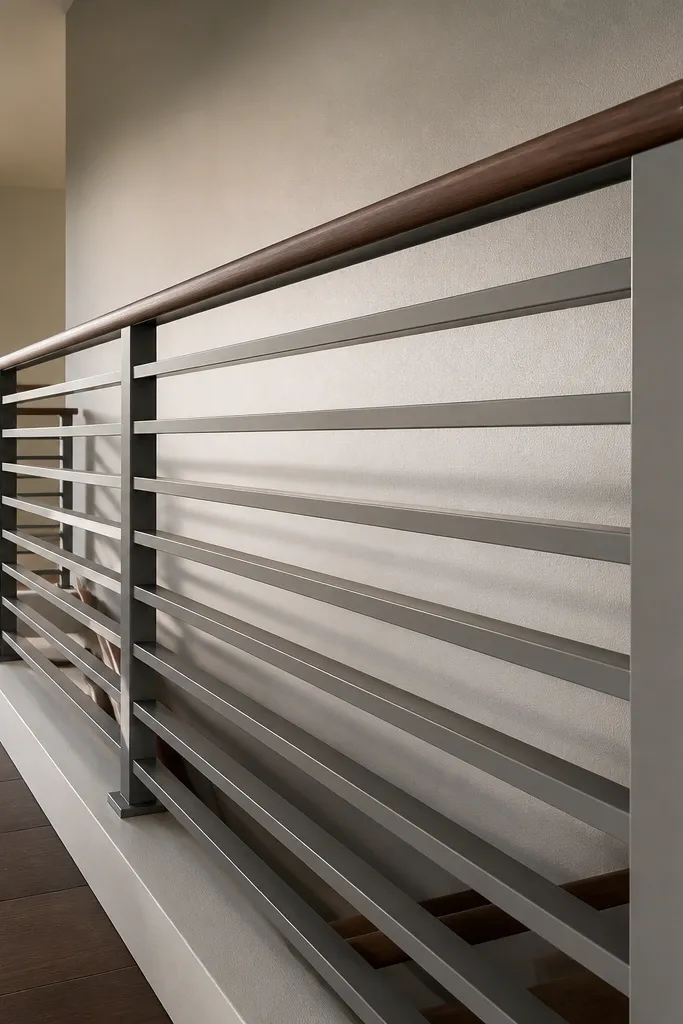
Horizontal slats make a stair railing look modern and architectural, and they photograph well because the lines run across the frame. This design is also great for basements where you want fewer vertical gaps and a more solid visual barrier. Use a rounded-edge handrail so fingers rest comfortably. The slats can be painted or stained; paint gives you crisp lines, stain gives you warmth. Beginner-friendly because you’re building a simple slat frame and attaching it.
Start by cutting slats to length and installing end posts at the correct stair slope height. Build a slat frame or attach slats directly to posts using a spacer jig so gaps stay even. Then cut the handrail to the stair run length and mount it on top with brackets or concealed screws. Sand everything, then paint with a satin finish or stain with a clear topcoat.
If you paint, lightly scuff the slats before priming so the finish sticks and doesn’t chip at the edges.
Avoid slats that vary in thickness; the uneven gaps read as “cheap” in photos.
12. Mitered Wood Post Caps and a Simple Top Rail
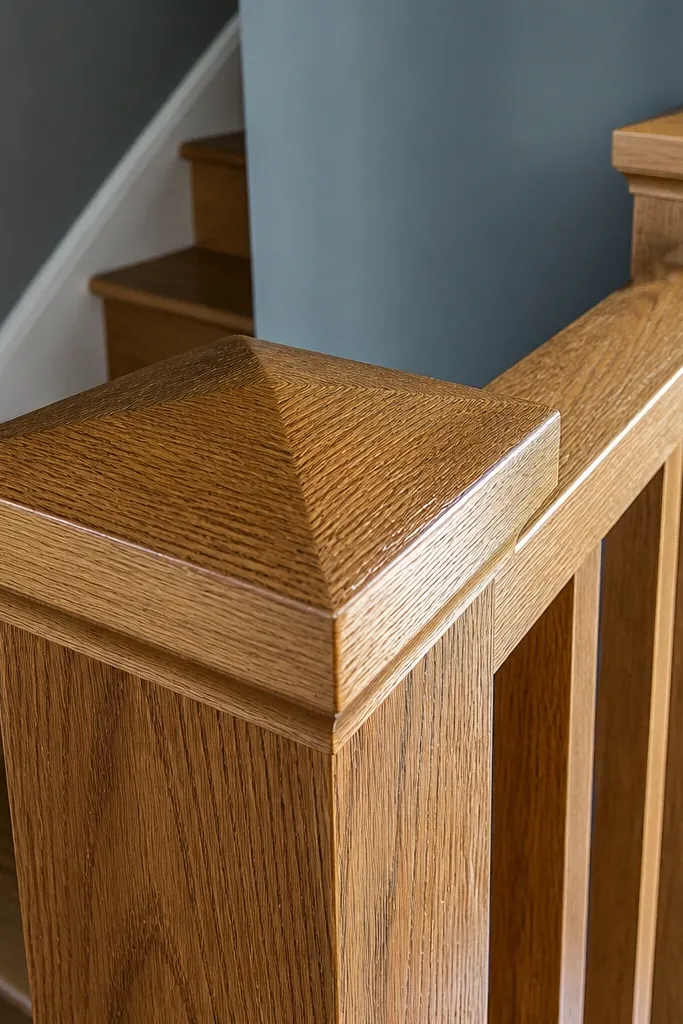
This idea is about making a simple railing look finished using one detail: mitered post caps. A basement railing can look temporary when the posts are just cut straight off; caps make it look like a real trim piece. Keep the structure plain — wood posts and a handrail — and let the caps do the styling. It’s also a beginner-friendly upgrade because miter cuts are straightforward and the rest is standard rail build. The result is crisp and photogenic from the bottom of the stairs.
Start by building or installing your posts and top rail first, then measure the post width to design matching caps. Cut cap pieces with 45-degree miter ends and test-fit on scrap to nail the corners before committing. Attach caps with wood glue and small finish screws from the underside. Sand the cap edges smooth, then stain or paint to match the handrail.
Use painter’s tape around the cap seam before gluing; it keeps the miter tight while the glue sets.
Don’t rush the test-fit; bad miters ruin the look more than simple posts do.
13. Pegboard Infill Under Rail for Utility Look
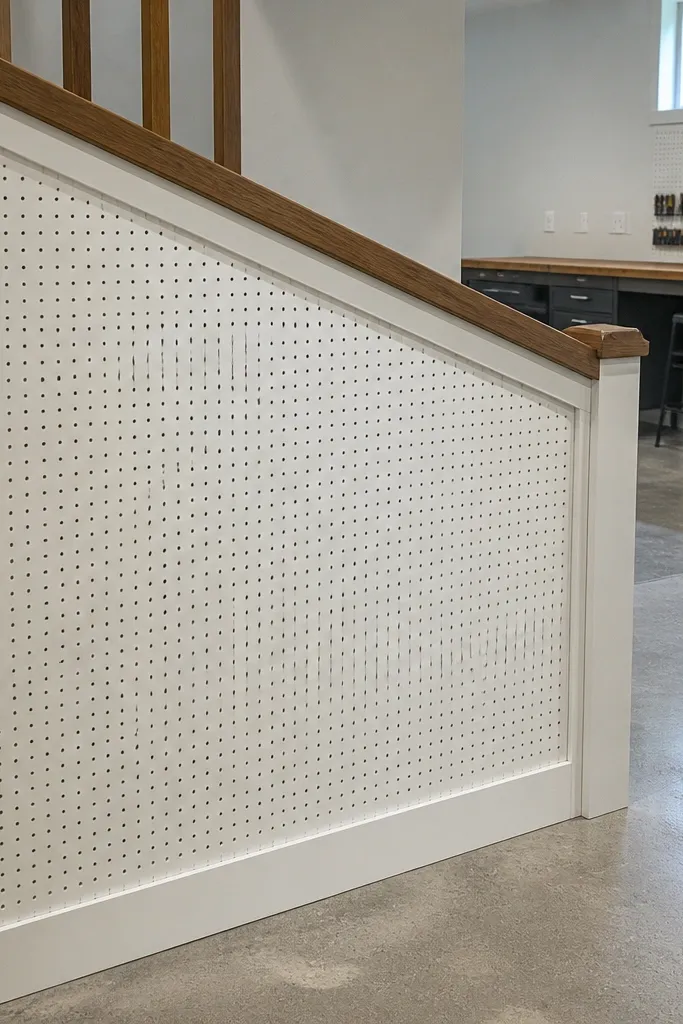
Pegboard under a handrail looks practical and clean, and it gives you a place for small tools or decor without cluttering the basement. The top rail stays the focus, while the pegboard adds a grid pattern that reads tidy in photos. Use painted pegboard for a smooth look and install it with a simple frame so it doesn’t sag. This design is beginner-friendly because pegboard cuts easily and you can mount it with standard screws. It’s best for basements where you want function in a visible spot.
Start by building a simple rectangular backing frame between posts at the height you want the pegboard to sit. Cut pegboard panels to size and pre-drill holes for mounting screws — keep your holes consistent so the panel sits flat. Attach the pegboard to the frame, then mount the handrail on top with brackets. Prime and paint the pegboard with satin paint, then seal the handrail top for wipe-clean use.
Use a scrap template to mark pegboard screw locations so the grid lines stay straight across the panel.
Don’t mount pegboard directly to uneven posts; it will bow and look crooked.
14. Rope Handrail Accent with Wood Base Rail
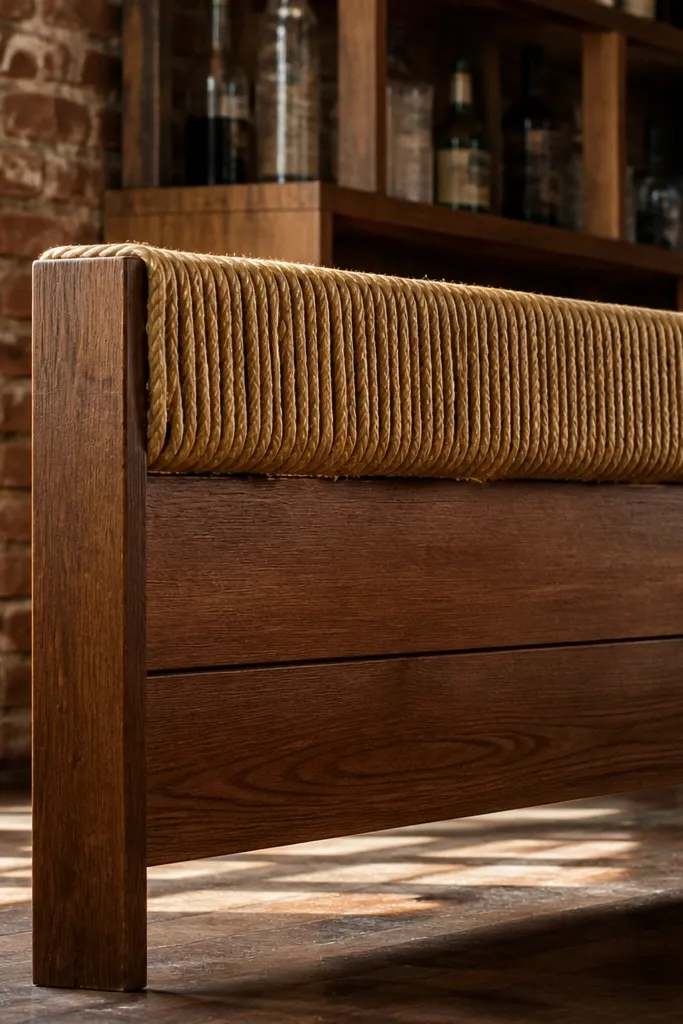
Start by installing a solid wood handrail and posts first, then decide where the rope will sit (usually as an accent line parallel to the handrail). Drill small holes or use rope cleats mounted to the posts, then wrap the rope and tension it evenly. Secure rope ends with screws and a small cover plate so hardware doesn’t show. Finish by staining the wood handrail and sealing it, then tighten the rope after the finish dries.
A rope accent turns a plain basement railing into something that looks intentional and a little nautical-industrial. The base rail stays solid and safe, while the rope adds texture and a warm, handmade vibe. This works best if your basement already has wood shelving, a bar area, or exposed brick, because the rope tone blends naturally. It’s photogenic because the rope catches light and adds a pattern where basements usually look flat. Beginner-friendly if you treat the rope as an accent, not the main safety grip.
Skip thisDon’t use rope as the only gripping surface; it wears quickly and can fray.
Editor's noteChoose a rope thickness that matches your spacing so the rope line looks even, not bunched.
15. Stair Railing with Wood Slab Panels (Chunky Look)
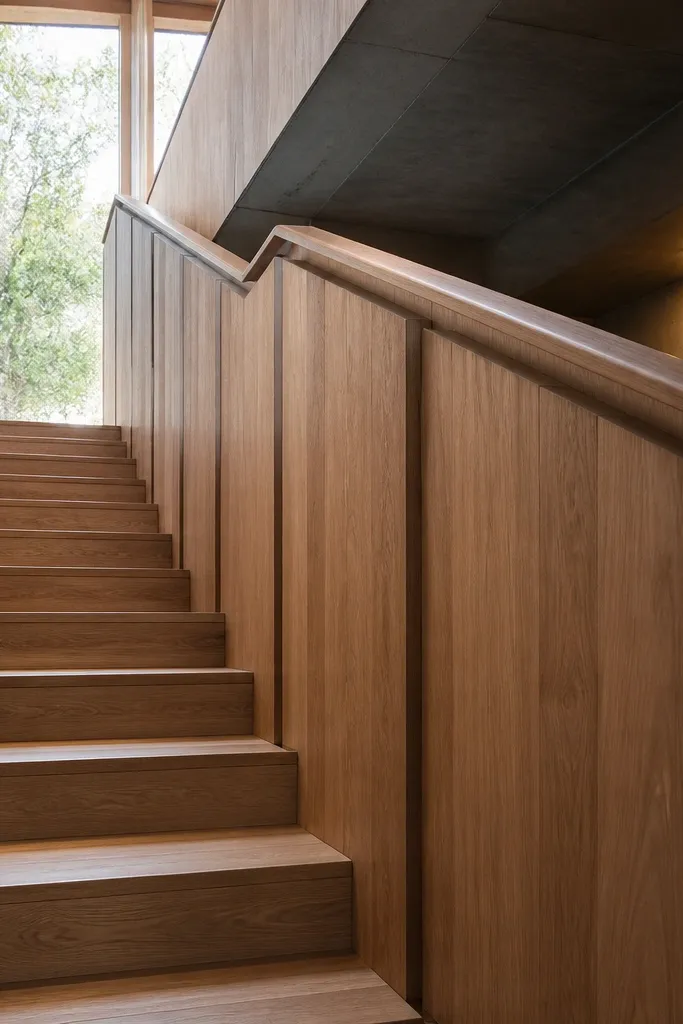
Chunky wood slab panels make a basement stair railing look custom because the material reads substantial. This style is photogenic from the bottom landing: the thick panel edges create strong shadow lines. It’s also a practical way to reduce the visual clutter of spindles. Keep the handrail rounded and smooth so the top feels comfortable. Beginner-friendly because you’re building a framed panel with simple attachments, but you’ll want straight cuts and decent sanding to make it look high-end.
Start by building a framed panel bay between posts with 1x or 2x rails, then cut slab-style boards to fit the bays. Attach the panels to the frame with screws from the backside so the front stays clean. Cut and install the handrail to the stair slope run, then sand all edges to remove splinters and sharp corners. Stain and seal the slabs and handrail with satin polyurethane for a durable, non-gloss look.
Use a random-orientation grain plan: place boards so the darker streaks line up across bays for a calmer look.
Avoid leaving panel edges raw; they look unfinished even with good stain.
16. Two-Board Handrail with Hidden Brackets
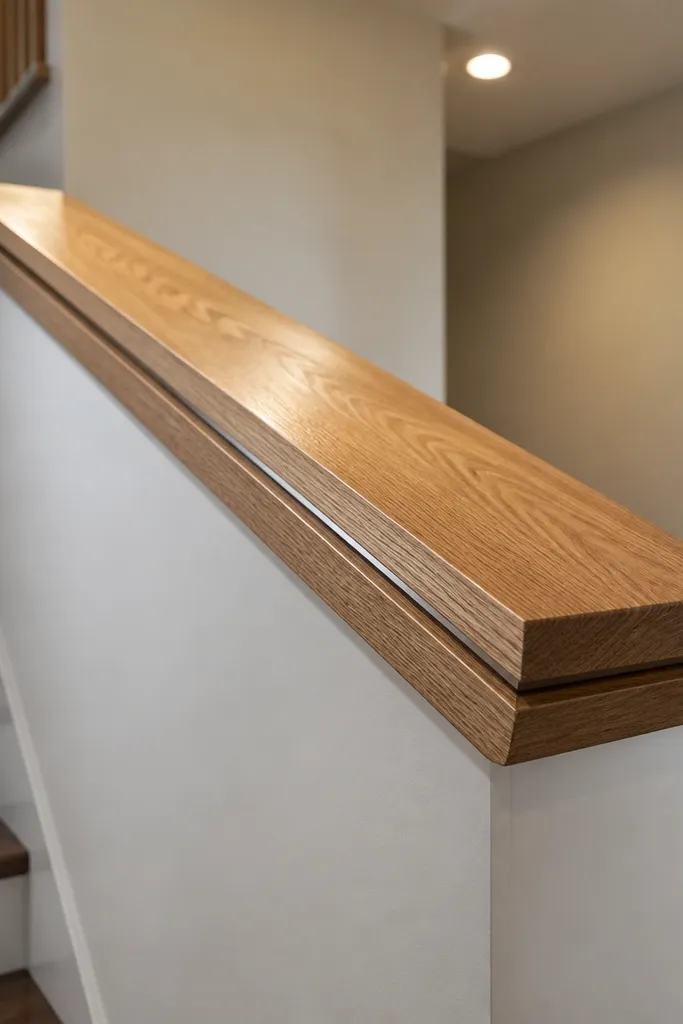
Start by cutting two matching handrail boards to the stair slope length and gluing or screwing them together with staggered screws from underneath. Mark where hidden brackets will attach to the posts or wall mounts, then install the brackets first. Set the handrail on top, fasten through the bracket slots, and confirm it stays straight along the slope. Sand the top edge roundover, then seal with satin polyurethane.
A two-board handrail gives you a chunky, modern top that looks expensive without buying custom millwork. Hidden brackets keep the face clean, so the railing reads sleek instead of hardware-y. This works in basements where you want a crisp, minimal look but still want a comfortable grip. The doubled thickness also helps you sand and round the top edge for a smooth feel. Beginner-friendly because the bracket alignment is the only precision — everything else is straightforward carpentry.
Skip thisDon’t mount brackets after the handrail is finished; you’ll fight alignment and scratch the finish.
Editor's noteRound the top with a consistent radius so fingers land in the same place every time.
17. Painted Galvanized Pipe Rail with Wood Grip
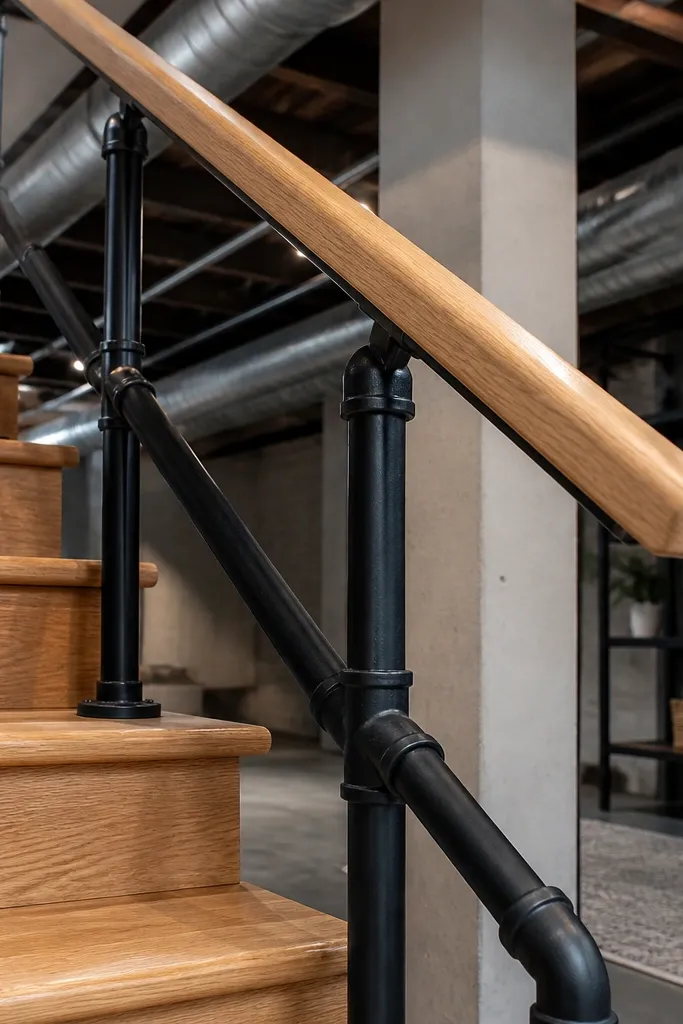
Start by planning a simple post-and-upright layout using pipe fittings you can find easily. Install mounting flanges into studs or masonry, then attach pipe uprights and horizontal sections with connectors. Add a wood hand grip by drilling holes or using brackets that bolt to the pipe. Sand and seal the wood, then prime and spray the pipe with matte black enamel for a uniform finish.
Galvanized pipe railings look industrial in a way that still feels approachable, especially when you paint the pipe matte black and keep the handrail warm wood. This design gives you bold vertical structure, and the wood grip makes it comfortable for daily use. It’s great for basements with exposed ducts, metal shelving, or a darker color scheme. Beginner-friendly if you stick to a simple layout with straight pipe runs and basic fittings. It’s also easy to customize the spacing to your stair geometry.
Skip thisDon’t leave shiny metal — glossy pipe looks cheap against most basement walls.
Editor's noteDry-fit every fitting before paint so you don’t discover a mismatched thread after it’s coated.
18. Stair Railing with Decorative Metal Scrolls in One Panel
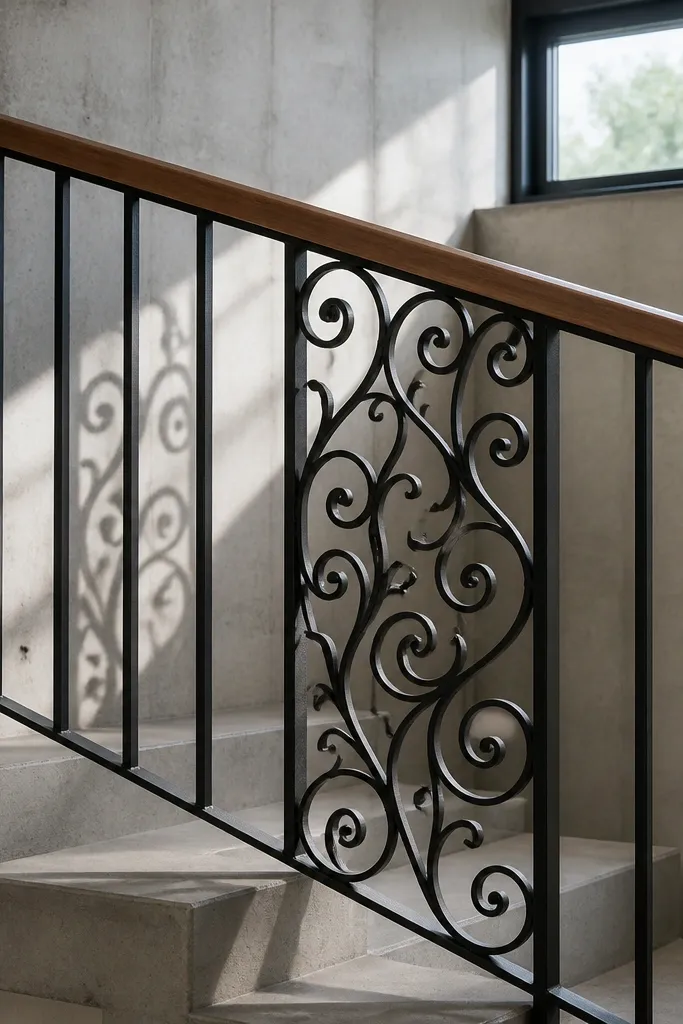
Start by building a simple rail frame with posts and a handrail to the stair slope length. Choose one infill bay where you’ll mount the scroll panel, then cut a backing plate or frame so the scrollwork sits flat. Attach the scroll panel to the frame using screws and washers, then paint the metal if needed. Finish by sanding and sealing the handrail and checking that the scroll section doesn’t wobble.
Putting decorative scrollwork in just one section makes the railing look like a feature without turning the whole stair into a craft project. The rest stays simple, so your build remains beginner-friendly and your spacing stays clean. Scrollwork also photographs well because it creates a lace-like shadow pattern against light walls. Keep the scrolls matte black and pair them with a warm wood handrail for contrast. This is a strong option if you want personality but still want the railing to feel sturdy and not fragile.
Skip thisAvoid placing scrollwork across the entire run; it looks busy and makes alignment harder.
Editor's noteUse a backing frame behind scrolls so the panel doesn’t flex and make the whole railing look loose.
19. Wood Handrail with Hidden Deck-Style Balusters
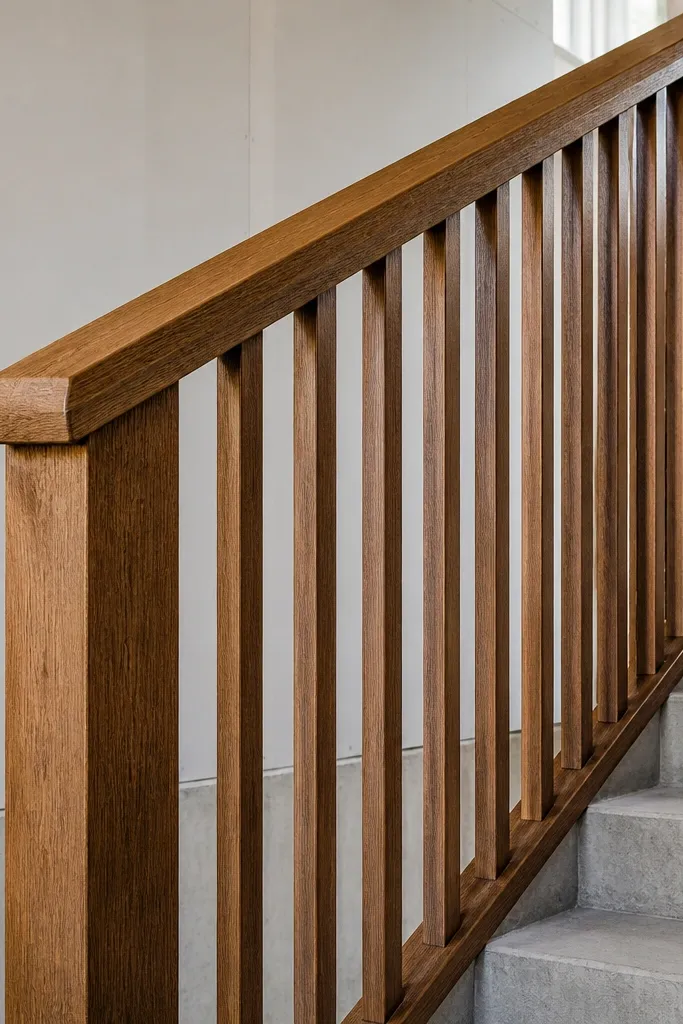
Start by installing posts into solid mounting points and attaching top rail supports. Cut balusters to height for each bay, then mount them using the deck-style brackets or concealed fasteners so the front stays smooth. Attach the wood handrail on top, then sand the top edge to a comfortable radius. Prime and paint balusters (or stain them) and seal the handrail with satin polyurethane.
Deck-style balusters can look surprisingly modern on basement stairs when you mount them cleanly and paint or stain them to match. The hidden-mount approach keeps the front face simple, which is what you want for a good-looking, beginner-friendly build. This design gives you the visual rhythm of vertical lines without the “classic spindle” look. It also feels solid because the balusters are structurally mounted. Pair it with a rounded wood handrail and you get comfort plus a crisp look.
Skip thisDon’t mount balusters randomly; measure the first one perfectly then use a repeatable spacer for the rest.
Editor's noteIf you’re painting, use a spray primer on balusters for a smoother finish than brush-only coats.
20. Stair Railing with Vertical Metal Rods and Wood Top
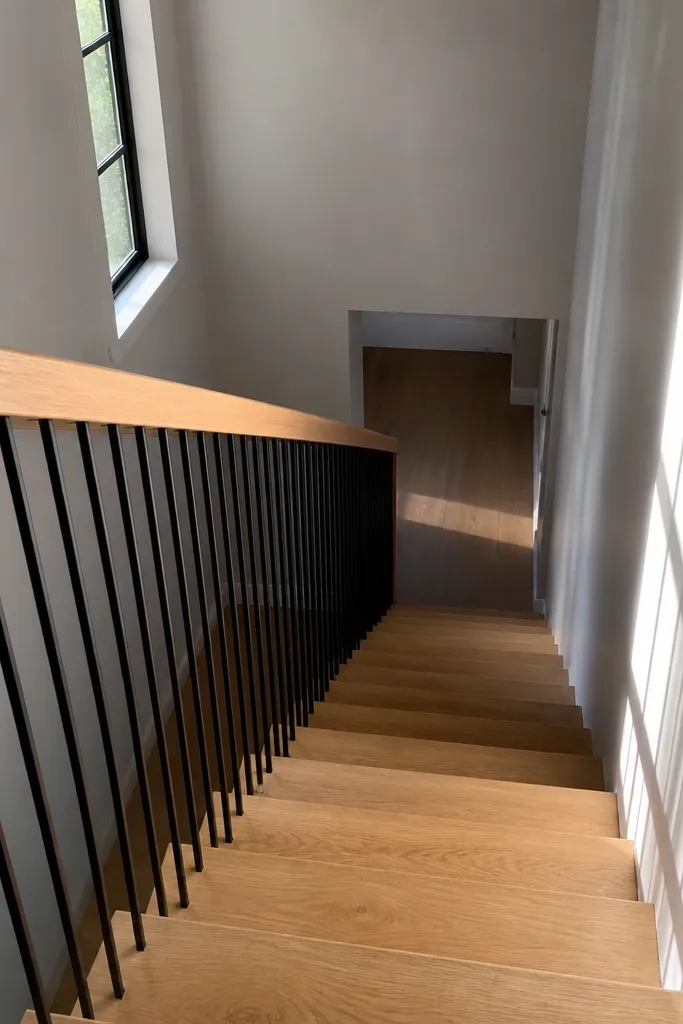
Start by installing posts into studs or masonry and marking a center line for the handrail. Cut metal rods to the vertical height you need and drill matching holes in the mounting brackets or use rod clamps. Attach rods with the same spacing using a spacer bar so every rod is aligned. Install and finish the wood handrail to the stair slope, then sand and seal it for durability.
Vertical metal rods make a basement stair railing look sleek and light, because the lines are straight and thin. Wood on top keeps the feel warm and grippy, so the railing doesn’t look cold or industrial in a harsh way. This is a good option if your basement walls are painted and you want the railing to look crisp against them. It’s beginner-friendly because rods can be cut to length and mounted with simple brackets. The look is clean as long as you keep the rod spacing consistent.
Skip thisAvoid mixing rod diameters; it looks uneven and cheap quickly.
Editor's noteUse a caliper or a fixed spacer thickness so your gaps stay uniform even when cutting rods.
21. Whiteboard-Style Railing Panel with Chalk-Friendly Finish
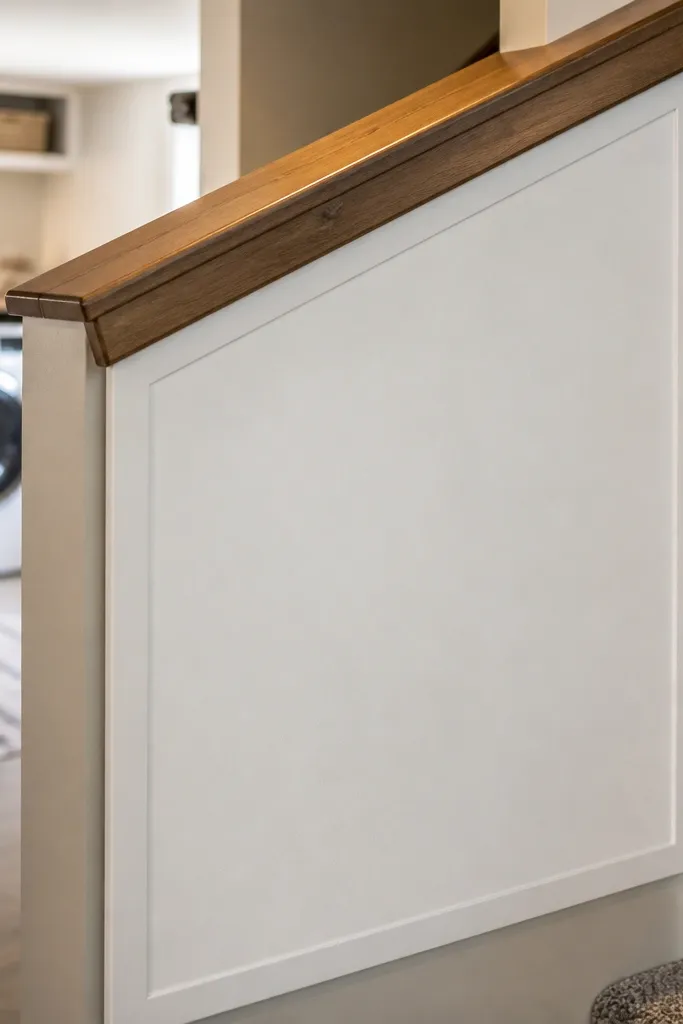
Start by building a flat panel frame between posts at the height you want under the handrail. Cut a backing sheet to fit, prime it, then apply chalkboard paint in two thin coats with a foam roller. Let it cure per the paint instructions, then attach the panel to the frame with screws or panel clips. Finish by sanding and sealing the wood handrail and mounting it on top.
This idea turns the space under the handrail into a functional surface without adding visual clutter. A chalkboard-style or magnetic paint finish on a panel gives you a grid for reminders, kids' notes, or seasonal labels. It looks clean because the panel is flat and matte. Pair it with a simple handrail in stained wood so the top feels warm and the panel stays modern. This is beginner-friendly if you can build a flat panel frame and paint it carefully.
Skip thisDon’t rush curing; chalkboard coatings need full cure before you use them.
Editor's noteUse a foam roller for the panel so you avoid streaks that show in basement lighting.
22. Clear View Cable + Wood Post Skirts (Modern Warm Look)
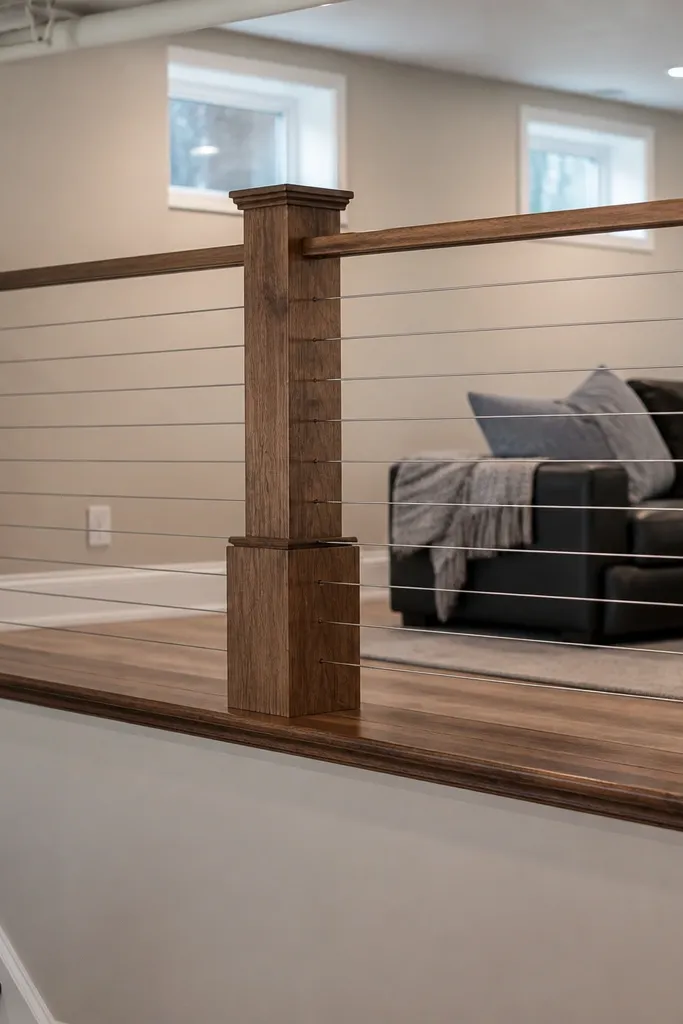
This design combines the openness of cable with a warm, finished look around the posts. Cable keeps the stairwell airy, and the wood skirts hide raw post mounting areas that often look unfinished in basements. The result looks intentional even if the wall behind the posts is imperfect. Use a warm wood tone for the skirts and a matte black cable system so everything stays readable and modern. Beginner-friendly because you’re using a kit for the cables and doing straightforward wood trim work.
Start by installing cable railing posts using the kit’s mounting plates into studs or masonry. Build simple wood skirt covers around each post with straight-sided panels that match the post width and cover the hardware area. Install the cable system per kit instructions, then attach the wood handrail on top. Sand and seal skirts and handrail, and paint any exposed metal parts to match your chosen finish.
Dry-fit skirts before finishing — it’s easier to adjust gaps and screw placement.
Don’t cover the post hardware until cables are fully tensioned; you need access for adjustments.
23. Stair Railing with Built-In Storage Nook Under the Handrail
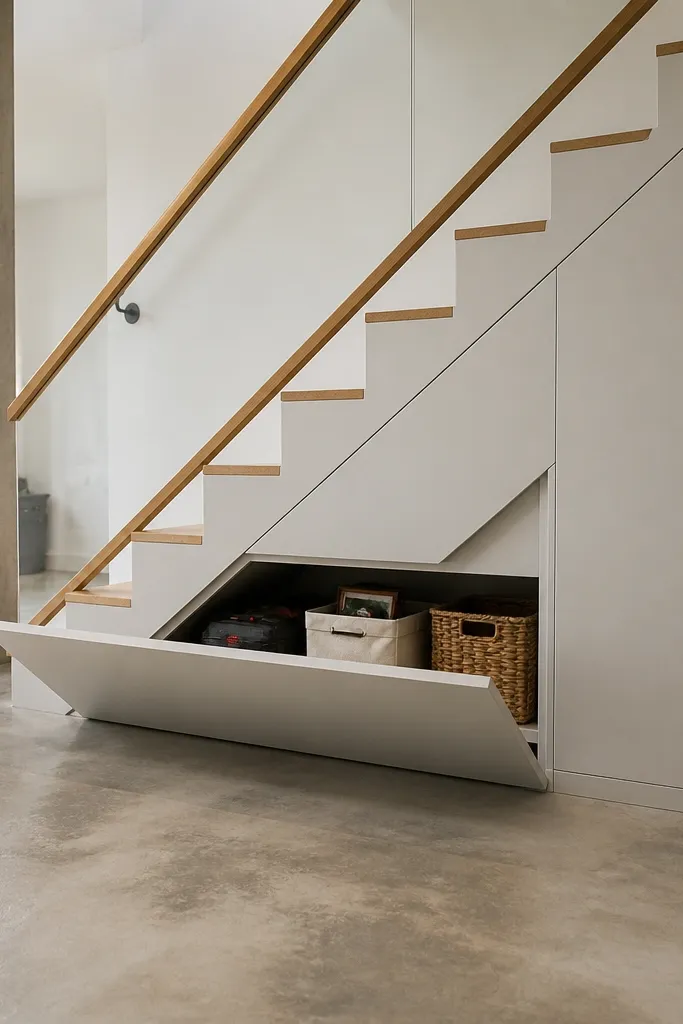
Start by building a small framed cabinet box between posts under the handrail height you want, leaving clearance for feet and safe passage. Install the cabinet frame first, then attach the handrail to the top after the cabinet is square. Add a simple door or lift panel, then sand, prime, and paint or stain the surfaces. Finish with sealed wood handrail and hardware that doesn’t scrape when the door opens.
This is a smart way to make a basement stair railing look better and solve a real problem: wasted space. The storage nook under the handrail turns an awkward area into something useful, and it looks clean because the panel lines match the railing. Choose simple doors or a lift-up panel so the front stays neat. Keep the handrail warm stained and paint the storage surfaces to match your trim. Beginner-friendly if you treat it like a small cabinet — square cuts and solid hinges matter more than fancy railing hardware.
Skip thisAvoid a storage design that interrupts the handrail height — keep the top rail continuous.
Editor's noteUse soft-close hinges or a magnetic catch so the door movement doesn’t rattle the railing.
24. Rattan Wrapped Handrail with Matte Black Wall Mounts
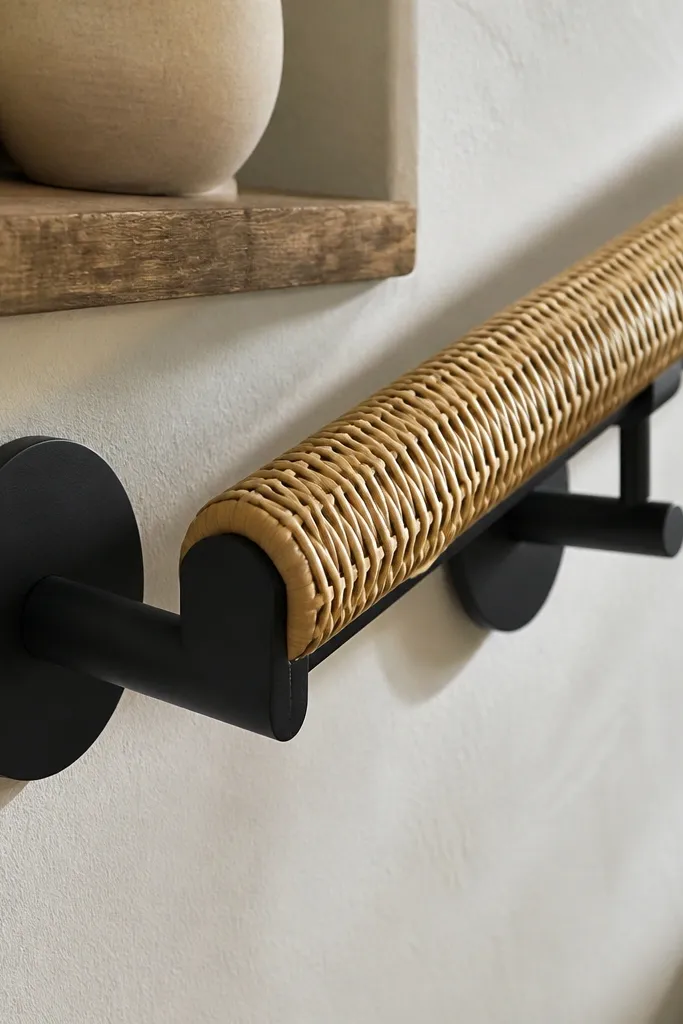
1) Cut a 2x2 or 1.5-inch-thick wood handrail blank to length so it overhangs each end by 1/2 inch. Sand to 120 grit, then seal with two coats of clear satin polyurethane, letting it cure fully before wrapping. 2) Install matte black wall rail brackets on the stringer wall using a level — set the handrail height to match existing code needs in your area and keep spacing consistent (measure from bracket centers, not edges). 3) Wrap rattan cord or flat rattan around the sealed wood starting at the underside, pulling tight with each pass, then tie off and glue the end with a flexible wood glue. 4) Add a thin clear topcoat over the wrap only if you use water-safe rattan and want easier cleaning; otherwise leave it dry and protect it with a satin clear spray made for natural fiber.
This is an easy basement stair railing that looks custom because the handrail texture is the star. The rattan wrap softens the hard lines of matte black hardware and makes the whole staircase feel warmer without changing the room’s paint color. You build it like a normal wall-mounted rail, then add a tight rattan grip over a smooth wood handrail. It suits basements that feel cold or echo-y, and it works great when you want “natural texture” without doing full wood balusters. Skill level is beginner-friendly if you can drive screws straight and keep the wrap taut; the time is mostly cutting, wrapping, and finishing.
Skip thisDon’t wrap rattan on unfinished wood — it grabs unevenly and makes the grip look patchy.
Editor's noteUse a foam pad or thick cloth under the rattan while you wrap so you can keep tension even and avoid gaps at the top edge.
25. Recessed LED Step-Edge Rail Line with White Oak Top Rail
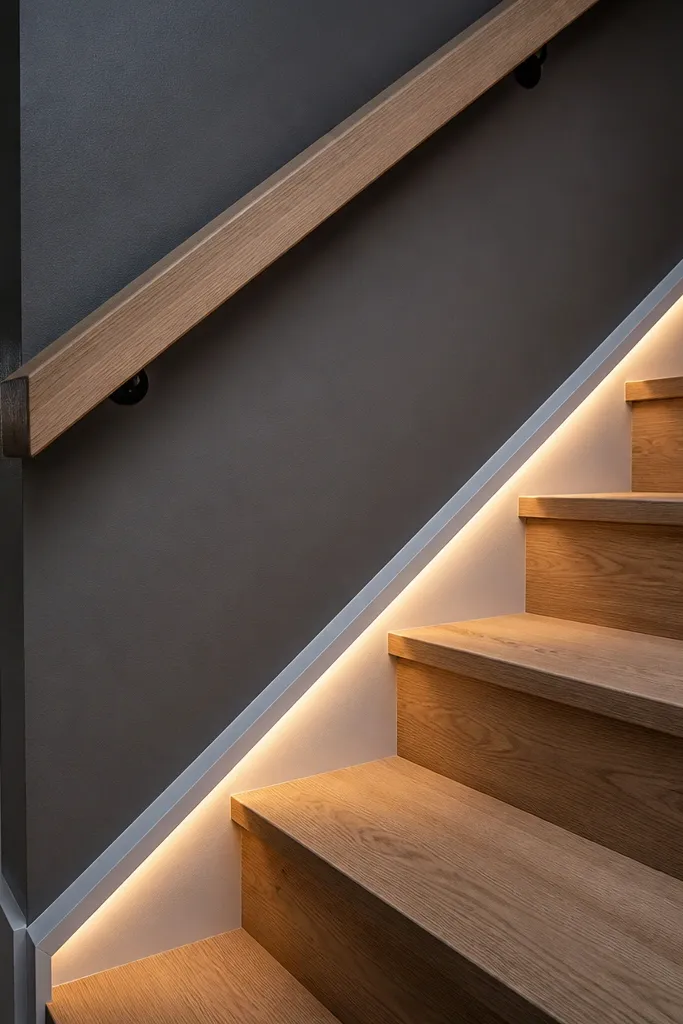
1) Build a simple top rail from 1x3 or 1x4 white oak boards, then cut a shallow channel on the underside for a recessed LED diffuser (use a router with a straight bit or a careful chisel-and-sand method). Sand to 150 grit and apply a hard-wearing finish like satin poly or a water-based floor finish. 2) Mount the rail to the wall or stringer with metal brackets — keep the underside channel aligned so the diffuser sits straight along the stair run. 3) Install a low-voltage LED strip in the diffuser track, then route the wire to a power supply location near the bottom landing; use clips every 12 inches so the strip doesn’t sag. 4) Finish by testing the brightness, then secure the diffuser with small screws or snap-in clips, and cover wiring with a junction box cover if your local code requires it.
This railing idea solves a real basement problem: stairs look flat and dark, especially in the first few steps. A recessed LED line under the handrail creates a clean glow that outlines the stair path without adding bulky fixtures. The top rail stays simple and warm with a white oak finish, so the light reads intentional instead of “random tape.” You also get better visibility for moving up or down, which matters in basements with low overhead lighting. It’s beginner-friendly if you’re comfortable with a drill, basic wiring, and following a low-voltage LED kit manual.
Skip thisDon’t run LED wiring through tight gaps that pinch the insulation — heat and vibration can shorten strip life.
Editor's notePick a diffuser style that blurs the LED dots (opal or frosted) — it makes the glow look like a single continuous line instead of a row of points.



