
1. Long Linen Runner With Two-Tone Napkin Bundles
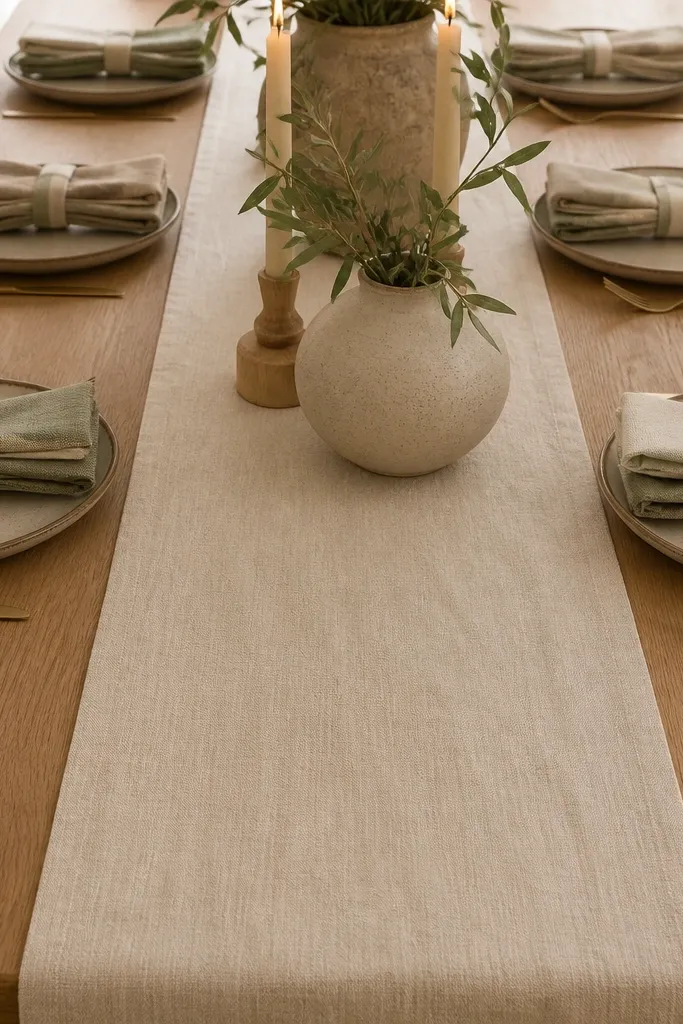
This setup looks styled because the runner creates a clean, continuous line and the napkin bundles add controlled shape. Start with a linen runner in cream or oatmeal so it softens wood grain and doesn’t look “holiday.” Then fold napkins into compact rectangles and bundle them with a thin strip of matching fabric tape or twine. The two-tone combo (tan plus olive or charcoal) makes the table read cohesive from across the room. It’s beginner-friendly dining table decor because it uses simple folds, not complicated crafting, and you can repeat it for every season by swapping one napkin color.
Start by centering a linen runner lengthwise on the table, leaving about 6-10 inches of runner overhang at each end. Fold four napkins into rectangles, stack two together for a two-tone look, and tie each stack with a 10-12 inch strip of fabric tape or twine. Place the bundles in a gentle “V” pattern around the centerline so the runner still feels open. Finish by adding one small item at the runner’s midpoint, like a ceramic bud vase or a short candle holder.
Use fabric tape instead of thick ribbon — it lays flatter and doesn’t snag when guests sit down.
Don’t use stiff, shiny napkins with a linen runner; the contrast makes the whole look feel mismatched.
2. Ceramic Catchall Tray With Layered Faux Stems
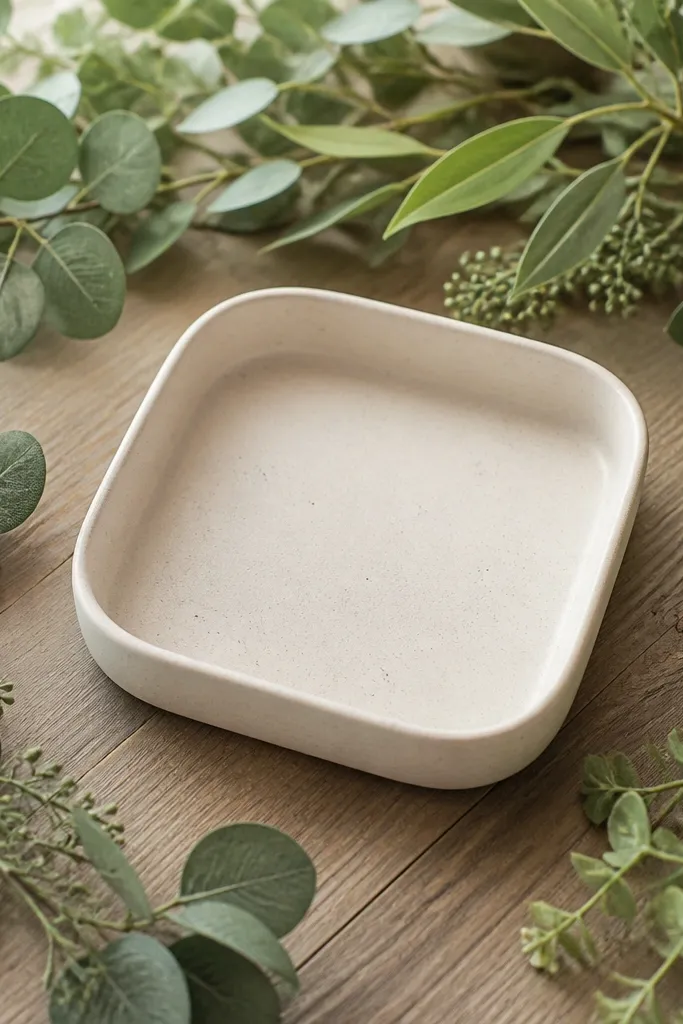
A catchall tray makes everything look intentional because it gives your centerpiece a frame. This idea works especially well if you don’t have a lot of real greenery — faux stems still look good when you layer them correctly. The secret is not the stems themselves; it’s the layering height and the “negative space” inside the tray. Choose a ceramic tray in white, cream, or matte black, then build a base of small stones or wood beads so the stems stand at the right angle. It’s beginner-friendly dining table decor because you can assemble it in 15-25 minutes and it stays tidy between meals.
Place a ceramic tray in the center of your table and add a shallow layer of decorative stones or wood beads (about 1-2 inches deep). Arrange 3-5 stems in a triangle pattern, trimming stems with wire cutters if needed so the tallest reaches about 12-14 inches. Add a second layer of shorter stems behind the front ones, then tuck a single “filler” stem to fill gaps. Finish by sprinkling a few stones around the base so the tray doesn’t look like it’s floating.
If your stems keep sliding, wrap the bottom of each stem bunch with floral tape before pushing into the stones.
Don’t cram the tray full — you want gaps so the colors and shapes read clearly in photos.
3. Cut-Glass Votive Cluster on a Wooden Risor
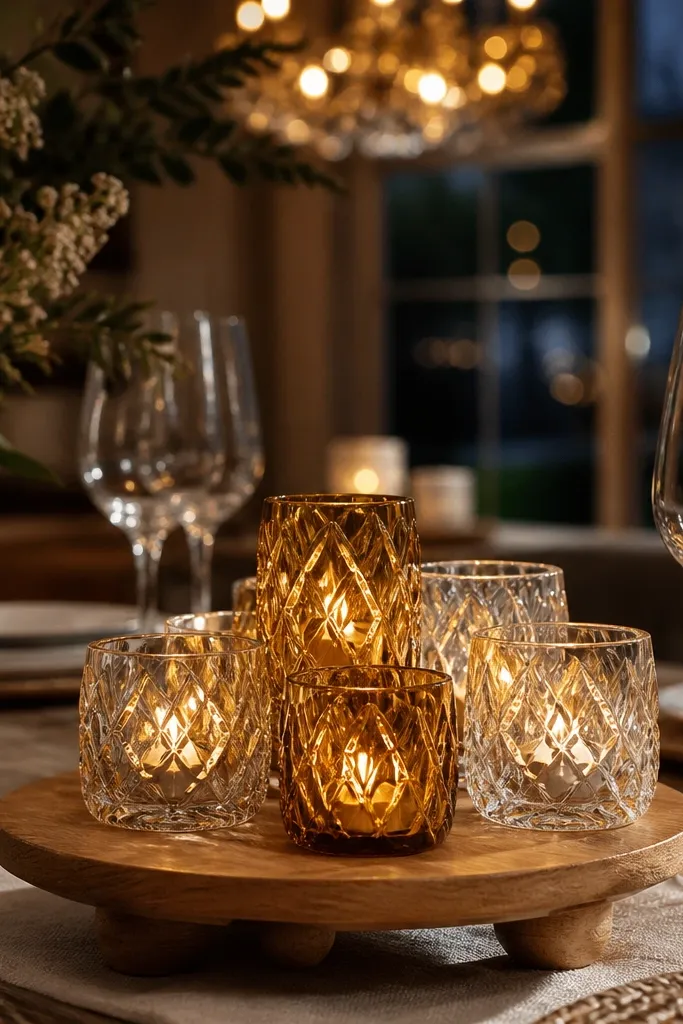
Candles look expensive when they’re grouped and raised slightly. This cluster setup uses cut-glass votives to catch window light and a wooden riser to keep the height controlled. You get a warm glow effect without needing tall centerpieces that block conversation. Choose 5-7 votives in clear or amber glass, and keep them on the same riser so the look is unified. It’s beginner-friendly dining table decor because it’s just placement and spacing, not building. You can also swap candle colors for holidays without changing the structure.
Set a round wooden riser in the center of the table, ideally 10-12 inches across. Arrange 5-7 votives so one sits at the front center and the rest form a loose circle, keeping about 1-2 inches between glasses. If the riser has a flat surface, use a tiny dab of museum wax on the bottom of each votive to stop sliding. Add a thin ring of pebbles or sand around the base if you want a more “styled” edge.
Editor's noteUse LED candles with a timer for daily use; you get the look without the flame management.
Skip thisAvoid tall candles that push above 14 inches — the cluster turns into a barrier fast.
4. Twisted Rope Coaster Bases With a Mini Wood Tray
This is decor that also protects your table. Rope-wrapped coasters give you a handmade texture that reads well on camera, and a mini wood tray ties it together so it looks like a set. Instead of placing random coasters around the table, you create one “landing zone” for small items: a salt dish, a bud vase, or a match holder. The look is warm, coastal, and clean because rope is neutral and the tray keeps everything aligned. It’s beginner-friendly dining table decor because you can make the coasters with basic supplies and finish in a short session.
Cut circles of cork or thick felt as your coaster base, about 4 inches wide. Wrap natural jute rope tightly around each base, using hot glue every 1-2 inches and trimming edges flush with the circle. After the coasters cool, place them on a mini wooden tray (12-14 inches long) with one empty space for a small dish. Add a small ceramic bud vase or a shallow bowl in the center space and fill it with one stem or a few cotton twigs.
Glue the rope seam on the underside so the top looks smooth and symmetrical.
Don’t use super-thin rope; it looks stringy and takes longer to wrap evenly.
5. Book-Stack Centerpiece With a Ceramic Vase on Top
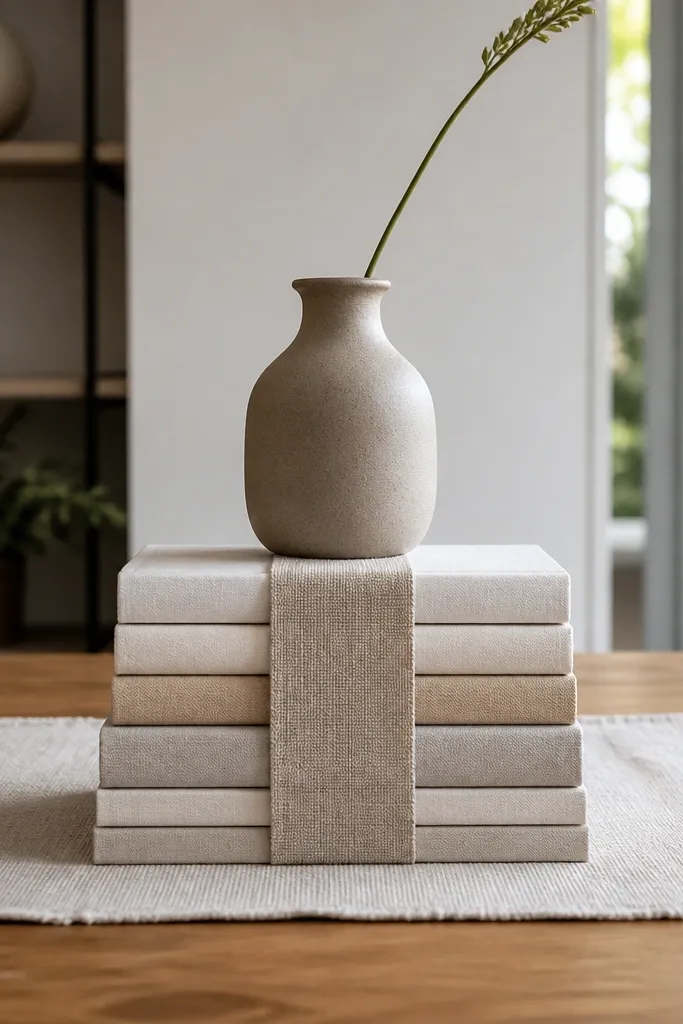
A book stack is a cheat code for height without bulky flowers. When you cover the stack with a neutral fabric wrap (or choose books with matching spines), it turns into a clean sculptural base. Then you add one ceramic vase on top with a single stem or a tight bunch. This looks intentional because the height comes from a stable block, not random clutter. It’s beginner-friendly dining table decor because it uses what you already have and requires no glue gun skills if your books are already in good condition.
Choose two or three books with similar spine colors and stack them in the center of your table. Wrap the stack with a strip of linen or cotton fabric (about 12 inches wide) and secure the underside with tape. Place a small ceramic vase on top of the stack; use a vase with a wide base so it doesn’t wobble. Add one stem or 3-5 stems trimmed so the total height lands around 12-14 inches.
Editor's noteUse matte ceramic, not glossy — matte hides fingerprints and looks better in daylight.
Skip thisDon’t use a tall vase with a tall book stack; you’ll end up with a centerpiece above eye level.
6. Paper Fan Runner Ends With Real Greenery Middle
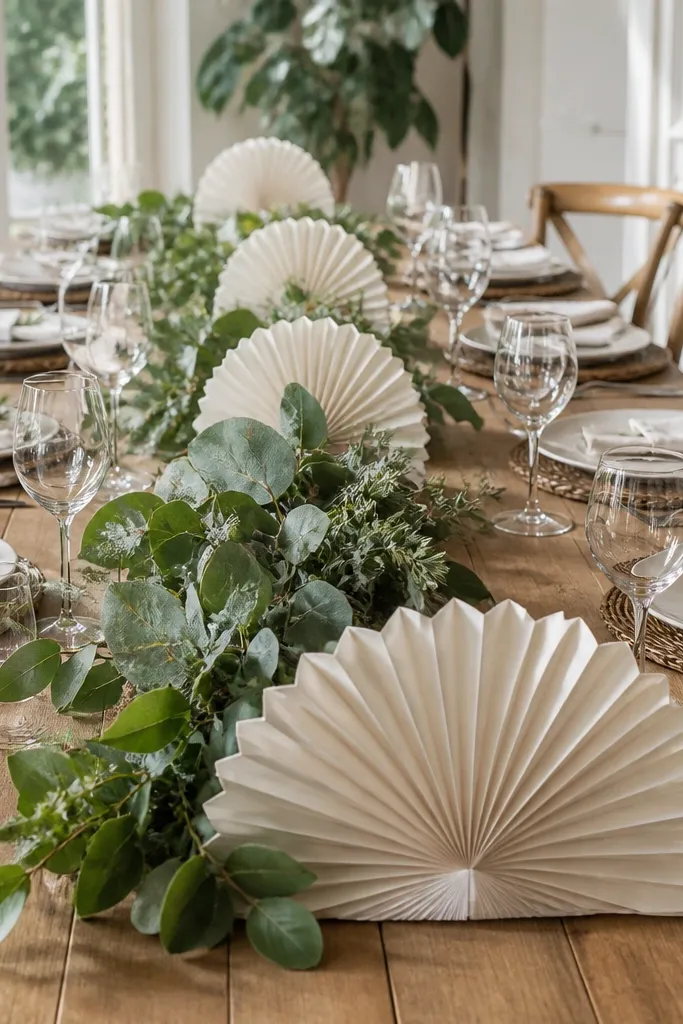
This gives you “event decor” energy with zero expensive supplies. Paper fan ends frame the runner so the table looks styled from edge to edge, and the real greenery middle keeps it grounded and fresh-looking. It’s photogenic because the paper creates a crisp silhouette and the greenery adds organic texture. Keep the fans small and controlled — think 6-8 inches wide — so it doesn’t look like party decor. It’s beginner-friendly dining table decor because you’re assembling, not building: cut, fold, tape, and place.
Lay a long runner (linen or thick cotton) down the center of the table. Make two paper fans from 12x18 inch cardstock: fold accordion-style, then pinch and tape the center. Tape one fan to each runner end, so the widest part faces inward. Place a small greenery bundle in the midpoint of the runner and secure stems with a rubber band covered by a strip of cloth.
Use thick cardstock (100 lb or more) so the fans hold shape without drooping.
Skip tiny fans — they disappear in photos and look like leftover craft paper.
7. Layered Glass Bud Vases in a Straight Line
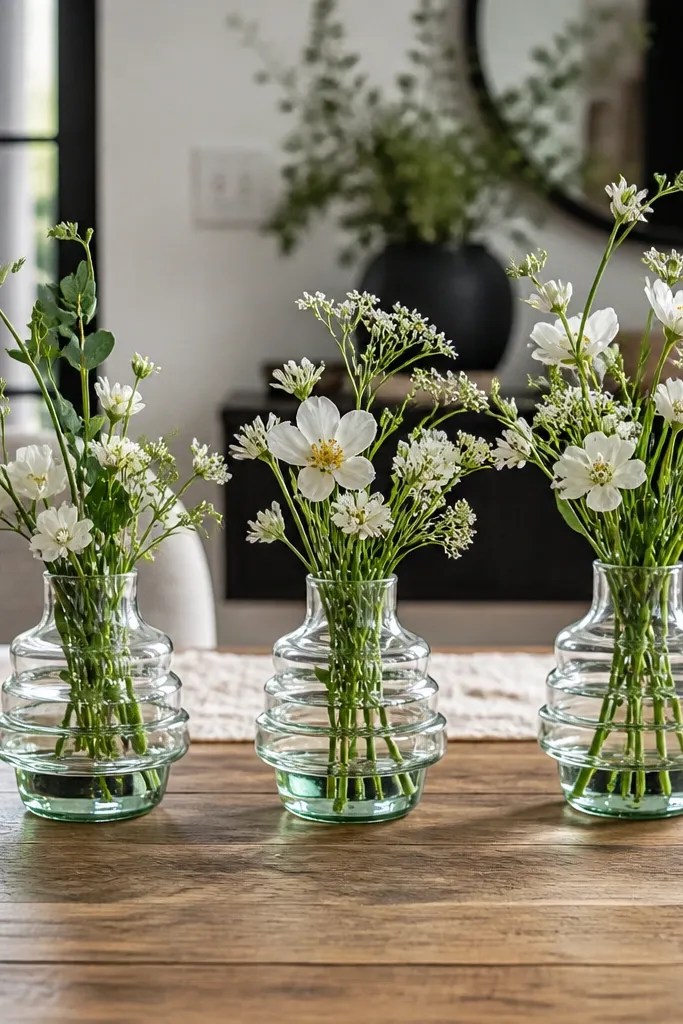
If you like a clean look, this is the one. A straight line of bud vases reads modern and tidy, but it still looks lush because the vases create repeated highlights. The trick is to vary the contents slightly while keeping the layout aligned: one vase with a single long stem, another with shorter blooms, and a third with floating greenery. Clear glass makes the table look airy and lets your table surface stay visible. It’s beginner-friendly dining table decor because assembly is simple and it’s hard to mess up when everything is in one line.
Choose 3-5 clear glass bud vases and place them on a runner or tray so they stay centered. Fill each vase with water and add a different stem length; trim stems so the tallest is about 12-14 inches above the table. Position the vases so the rims line up visually, then adjust spacing to about 3-4 inches between each. Finish by adding a few small pebbles to one vase base so it looks styled even if flowers drop.
Editor's noteUse florist foam only if you need it for stability; otherwise, water + trimming is cleaner and easier.
Skip thisDon’t mix random vase heights in a row; it turns into visual noise fast.
8. Macrame-Look Table Runner Using Cotton Twine and Clips
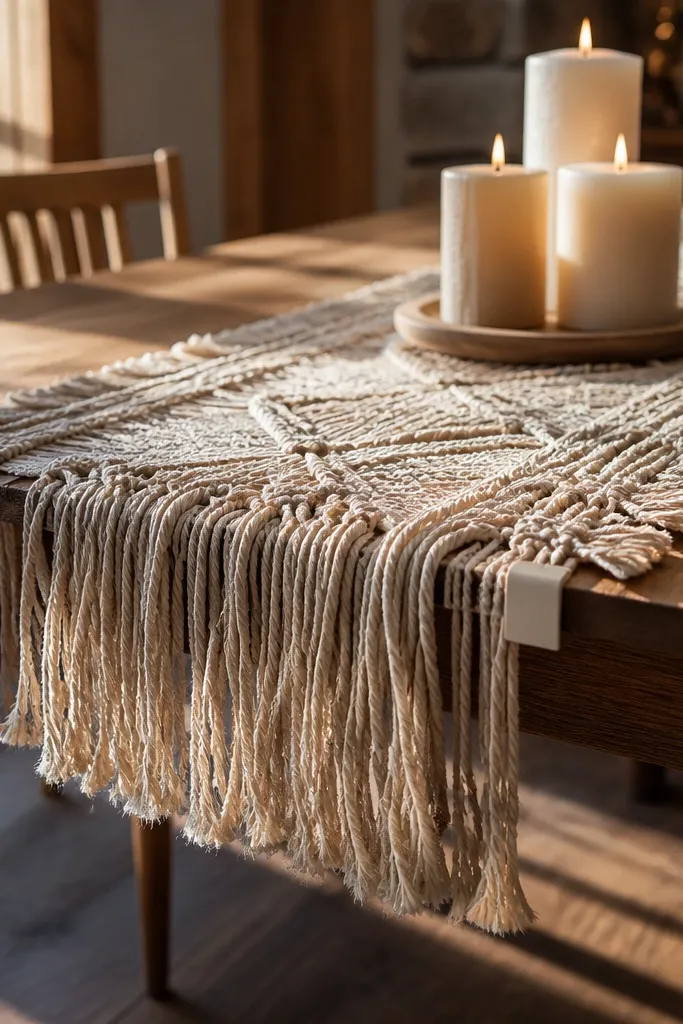
You get a handmade, cozy texture without learning knots. This macrame-look runner uses cotton twine fringe and simple clip attachment so you can remove it later. The look is photogenic because the fringe creates soft shadows and depth, especially in window light. Pair it with simple centerpieces like one candle cluster or a single vase and your table instantly looks “styled.” It’s beginner-friendly dining table decor because you’re not building a full hanging piece — you’re making a removable runner texture.
Get a plain cotton runner or wide fabric strip as your base, about 14-16 inches wide. Cut cotton twine strands to 10-12 inches, fold each strand in half, and loop through the fabric edge using a larkshead-style loop. Space strands 1 inch apart across the length. Clip or tie the finished runner to the table so it lies flat, then add a small centerpiece in the middle to keep it from looking empty.
Press the base fabric with a warm iron before attaching twine so the runner stays smooth.
Don’t hang fringe too long; if it reaches below the table edge, it looks messy and catches crumbs.
9. Monochrome Stone and Candle Center With Tray Border
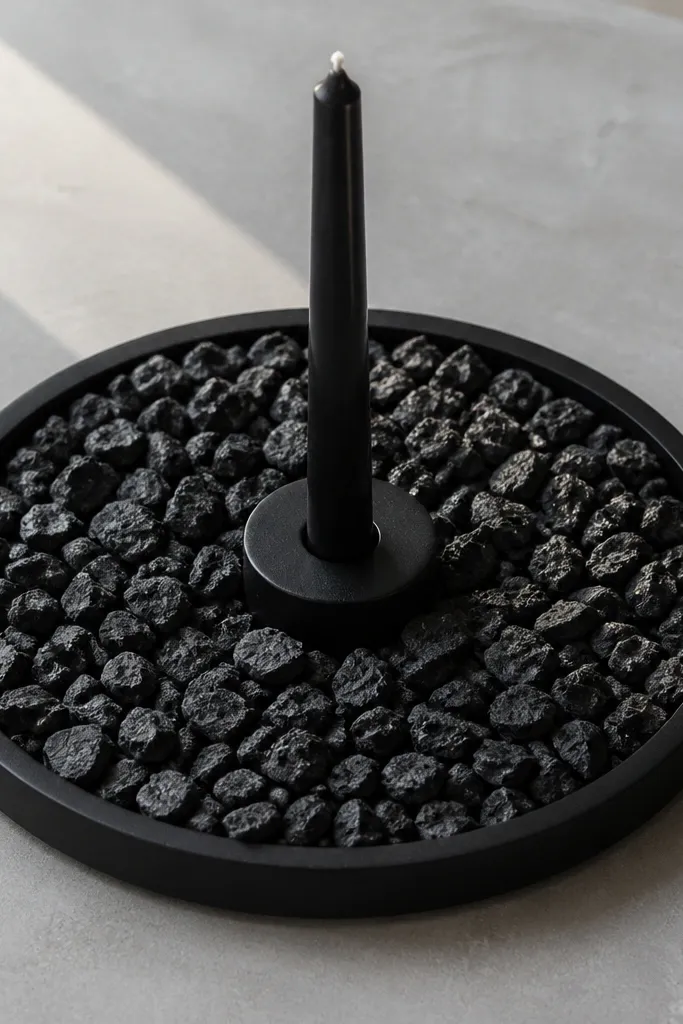
This is the cleanest way to make a table look expensive with cheap materials. A monochrome stone bed gives you texture and weight, while a single candle anchor keeps the center focused. The tray border adds structure so the stones don’t scatter visually. Choose matte black stones or smooth river stones and match them with a black or white candle holder. It’s beginner-friendly dining table decor because you’re assembling a controlled scene that doesn’t require floral arranging skills.
Place a matte black tray (12-16 inches wide) centered on the table. Pour in stones to create a level bed about 1 inch deep. Set one candle holder in the center; keep the candle height around 10-12 inches. Add a second small visual anchor at one edge, like a tiny ceramic dish or a short taper holder, so the tray has balance.
Editor's noteWipe the stones with a damp cloth before styling; dust dulls the look in photos.
Skip thisDon’t mix too many stone colors; two tones max keeps it sharp.
10. Floating Photo Frame Place Card Holders With Mini Florals
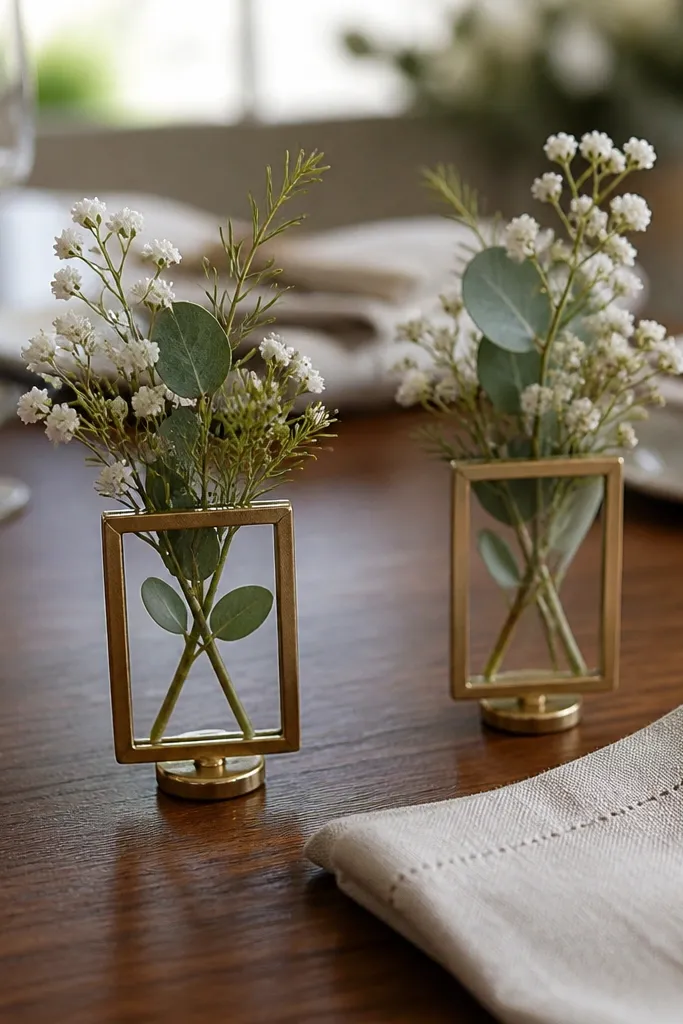
Place cards usually look boring. This version turns them into decor by using small frames as holders for mini florals or greenery. The “floating” look is photogenic because the frame creates a crisp rectangle around the stem. It’s beginner-friendly dining table decor because the frames do the structure for you, and the mini stems are easy to swap. You also get a practical benefit: guests know where to sit, and the table looks styled even before everyone arrives.
Buy small tabletop photo frames with a clip or easel back. Remove any glass if it blocks placement, then insert a small foam plug or folded floral tape to hold stems. Place one frame at each end of the table or near each place setting, depending on your table size. Add a single mini stem bundle (about 6-8 inches tall) and match stem color to your runner or napkins.
Use mini stems with a thick base, like eucalyptus tips or rosemary sprigs, so they stay upright.
Skip tall stems in frames; they tip the frame and look uneven.
11. Faux Olive Branch Garland Across a Low Tray
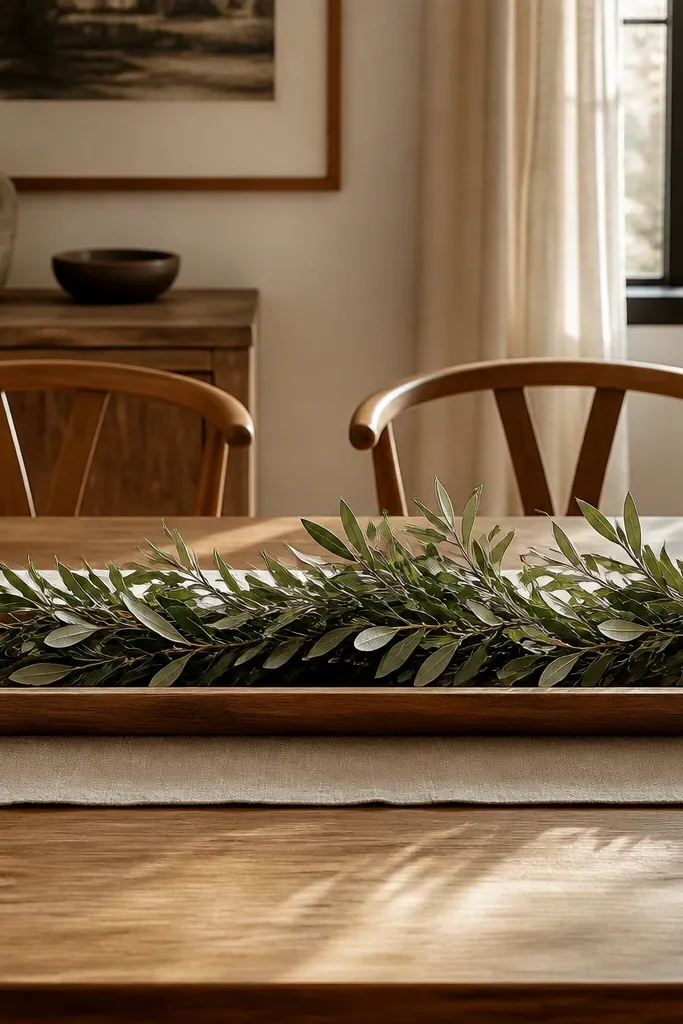
Garlands make a table look styled because they pull the eye across the whole surface. This one stays beginner-friendly because it uses a low tray as the line, so nothing spills or flops. Faux olive branches look good because their leaves have natural color variation without needing real flower care. The tray also lets you add small anchors like pinecones or a cluster of candles. It’s photogenic because the garland creates a diagonal rhythm while staying low enough for meals.
Place a low rectangular tray (about 16-22 inches long) centered on the table. Lay a faux olive garland along the tray length, letting ends curl slightly off the tray edge. Add 1-2 small candle holders at one end and a small bowl at the other for balance. Trim any garland pieces with wire cutters so the highest point stays under 12 inches.
Editor's noteIf your garland is too flat, fluff the leaves with your fingers before placing it on the tray.
Skip thisDon’t use a garland that’s longer than the tray — it looks tangled instead of intentional.
12. Woven Placemat Matched With a Single Brass Candle Holder
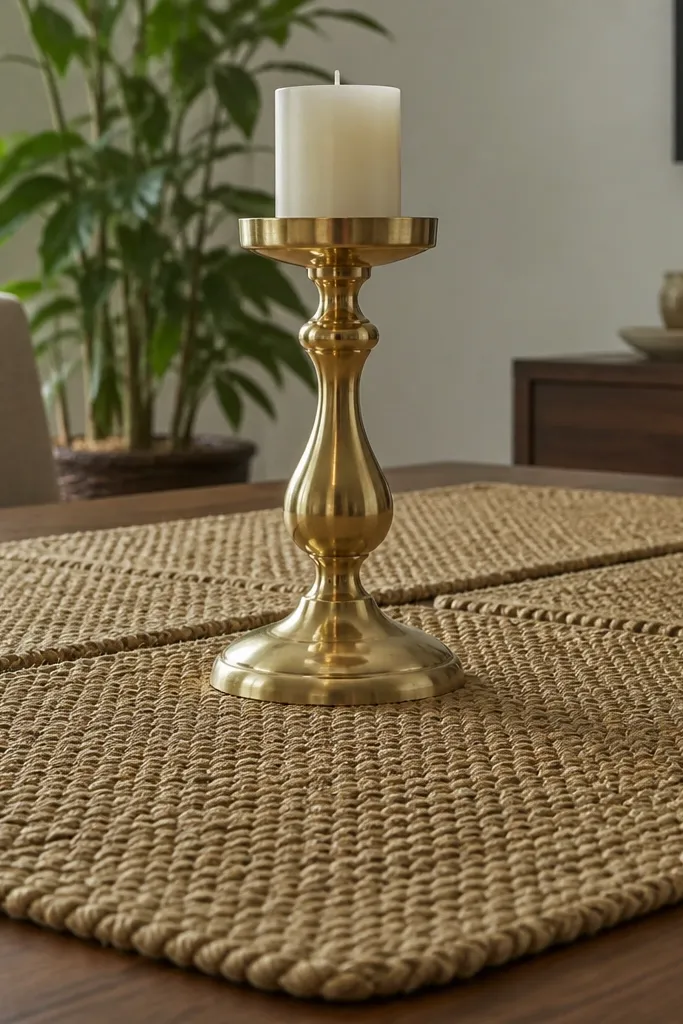
A lot of dining tables look unfinished because the placemats don’t lead anywhere. This setup uses woven placemats as texture and repeats the color in one statement candle holder. The candle becomes the centerpiece without needing a tall arrangement. Choose placemats in natural tan, olive, or charcoal; then pick one brass or gold candle holder to tie the palette together. It’s beginner-friendly dining table decor because it’s mostly shopping and placement, not crafting.
Lay woven placemats down across your table so the pattern runs parallel to the table edge. Place a slim runner or leave the table bare in the center, then set one brass candle holder on a small tray in the middle. Add a short candle or LED candle so the height stays around 10-12 inches. If you want extra polish, add one small stone bowl next to the candle holder.
Editor's noteMatch the brass finish to your room hardware; warm brass looks best with honey or oak tones.
Skip thisDon’t add multiple candle types; one metal finish keeps it clean.
13. Painted Pinecone Cluster in a Clear Bowl
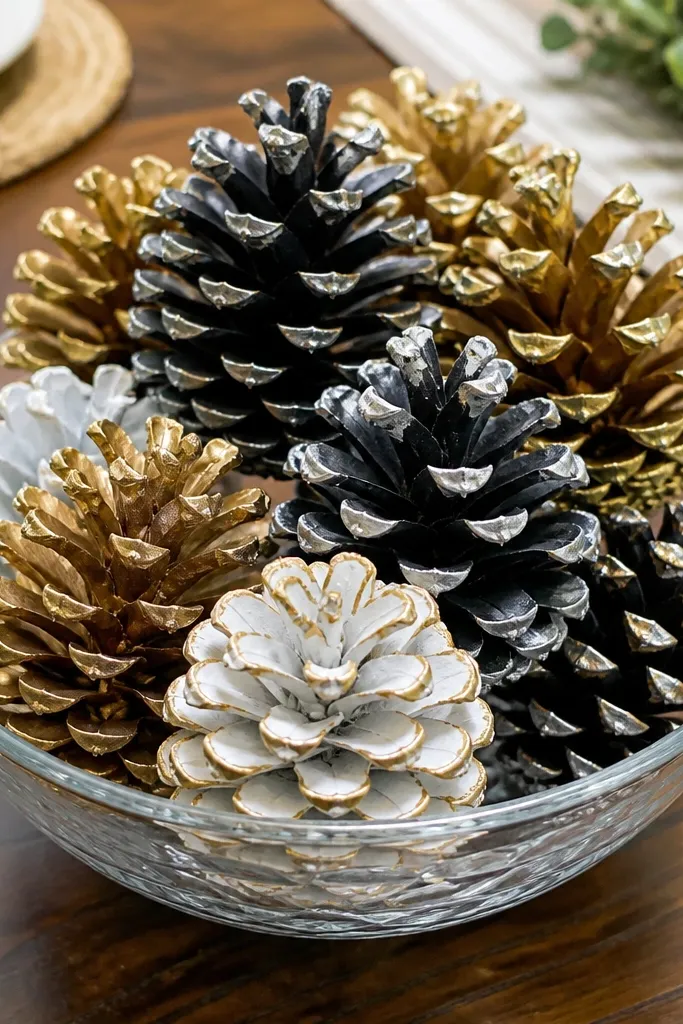
This is seasonal decor that still looks modern in non-holiday months. A clear bowl keeps the scene airy, while painted pinecones give you high-contrast texture that reads well in photos. Keep the palette tight: white plus gold, or black plus silver. It’s beginner-friendly dining table decor because you can paint pinecones in batches and reuse the bowl year after year. The look is also low mess compared to fresh greenery.
Pick a clear glass bowl or acrylic bowl around 10-12 inches wide. Clean pinecones and let them dry completely. Spray paint pinecones in two colors using short passes, then let dry for at least a few hours. Arrange pinecones in the bowl so the largest ones sit slightly behind the center and smaller ones frame the front.
Use a matte top coat on painted pinecones so they don’t look shiny and cheap.
Don’t over-paint every scale; uneven coverage makes the texture disappear.
14. Sliced Citrus Candle Rings in a Shallow Tray
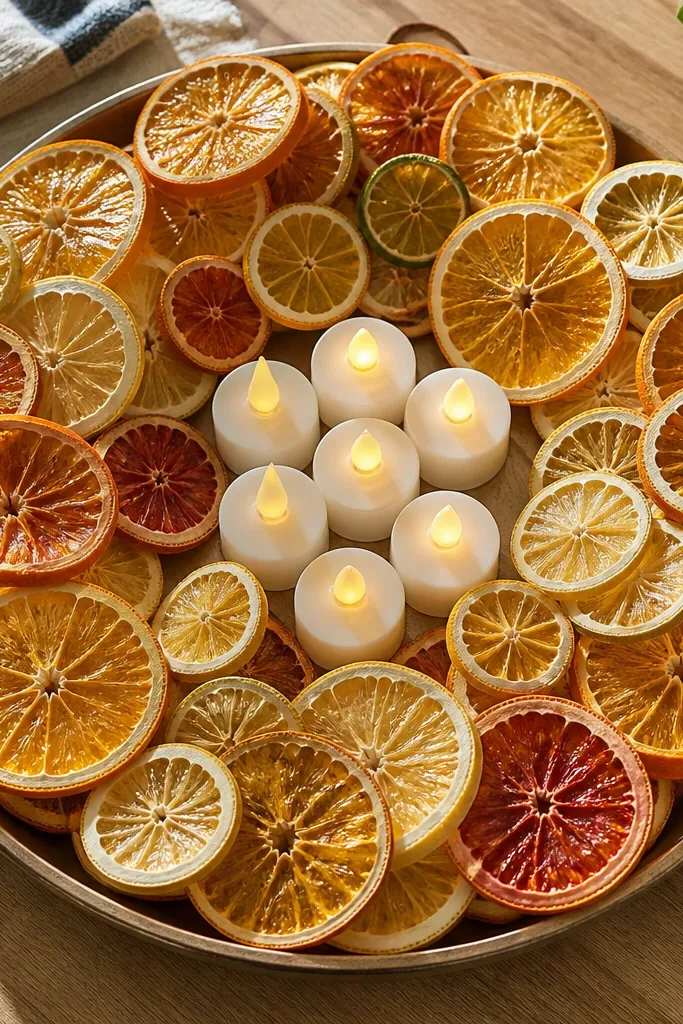
Citrus makes a table look bright because it adds color and a circular pattern. This project uses citrus slices as a visual ring around small candles, so it looks styled even without flowers. For daily use, skip real citrus you’ll replace constantly — instead, use dried citrus slices or store-bought faux slices. The shallow tray catches drips and keeps everything contained. It’s beginner-friendly dining table decor because the layout is simple: ring, candle, and a clean base.
Use a shallow metal or ceramic tray about 14-18 inches wide. Place dried or faux citrus slices in a loose ring, leaving an open center. Set one small candle holder in the center and place LED candles if you want daily setups. Add a thin layer of decorative sand or salt under the slices so they don’t slide.
Editor's noteIf slices are slippery, lightly tack them down with a tiny dot of removable adhesive on the underside.
Skip thisDon’t make the ring too tight; leave small gaps so the candle shape stays visible.
15. Color-Blocked Center With Stacked Books and a Tray of Orbs
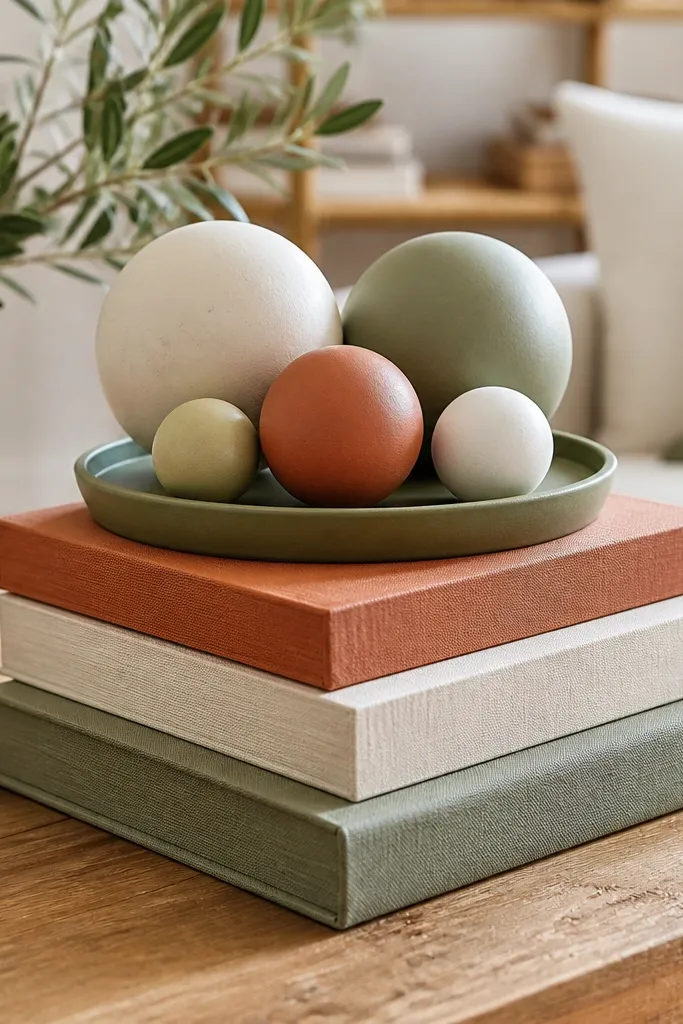
Color-blocking looks intentional because the eye reads blocks, not random items. This centerpiece uses stacked books as a height base and a tray of decorative orbs to add a playful, photogenic texture. Choose orbs in 2-3 matching shades that match your room palette, like sage, cream, and terracotta. It’s beginner-friendly dining table decor because you’re arranging pre-made items; the “work” is getting proportions right.
Stack two books with similar spine colors and place them in the center. Add a small tray on top or slightly in front of the stack so the orbs sit at about 10-14 inches high. Fill the tray with 12-20 decorative orbs, mixing only two sizes for depth. Adjust spacing until you see a clear top “hill” rather than a flat pile.
Use a tray with raised edges so orbs don’t roll when people bump the table.
Don’t use more than three colors; extra shades make it look like a craft bin.
16. Rope-Wrapped Candle Pillars With One Neutral Lantern
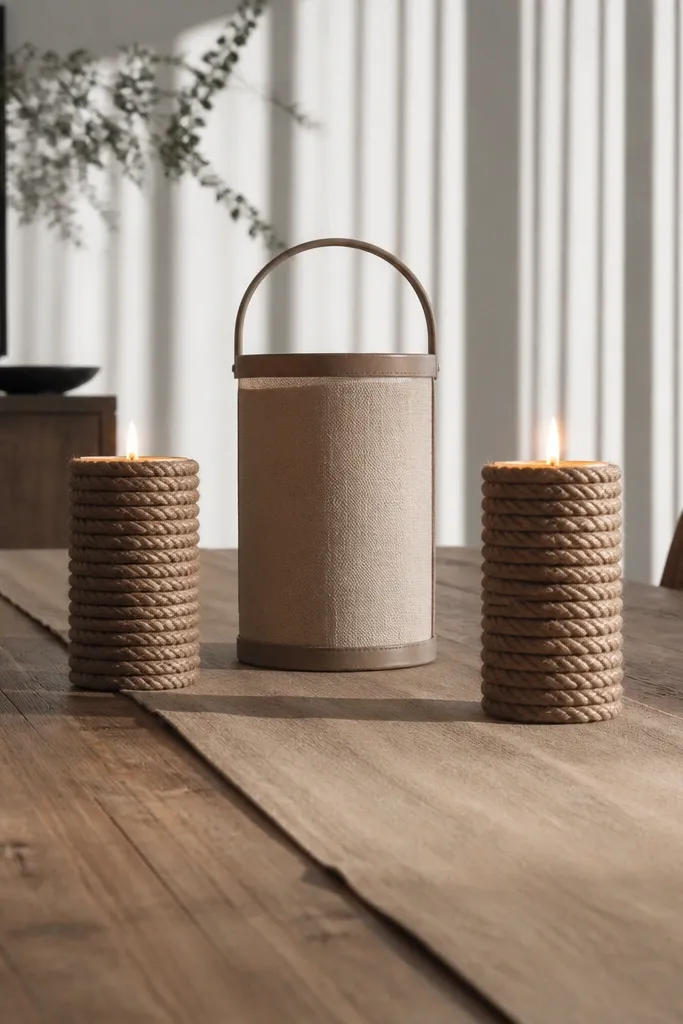
Tall decor can look great on dining tables if it’s controlled. Rope-wrapped candles add texture and a handmade feel without needing stained wood or fancy carpentry. Pair two candles with one neutral lantern so you get a strong vertical anchor in the center. Keep everything in neutrals and one accent color so the table doesn’t feel busy. It’s beginner-friendly dining table decor because it’s wrapping and placing, and it makes a big visual impact.
Choose two pillar candles and wrap them with jute rope from the base upward, securing with hot glue every few inches. Place the candles on a runner or tray in the center, spaced about 4-6 inches apart. Add a neutral lantern behind them so the flame line stays centered and height doesn’t block plates. Use LED candles if you want to keep the lantern consistent for daily use.
Editor's noteWrap rope tightly and keep tension even; loose rope looks sloppy fast.
Skip thisSkip glitter rope; it catches light unevenly and reads cheap.
17. Mini Terracotta Planter With One Long Stem
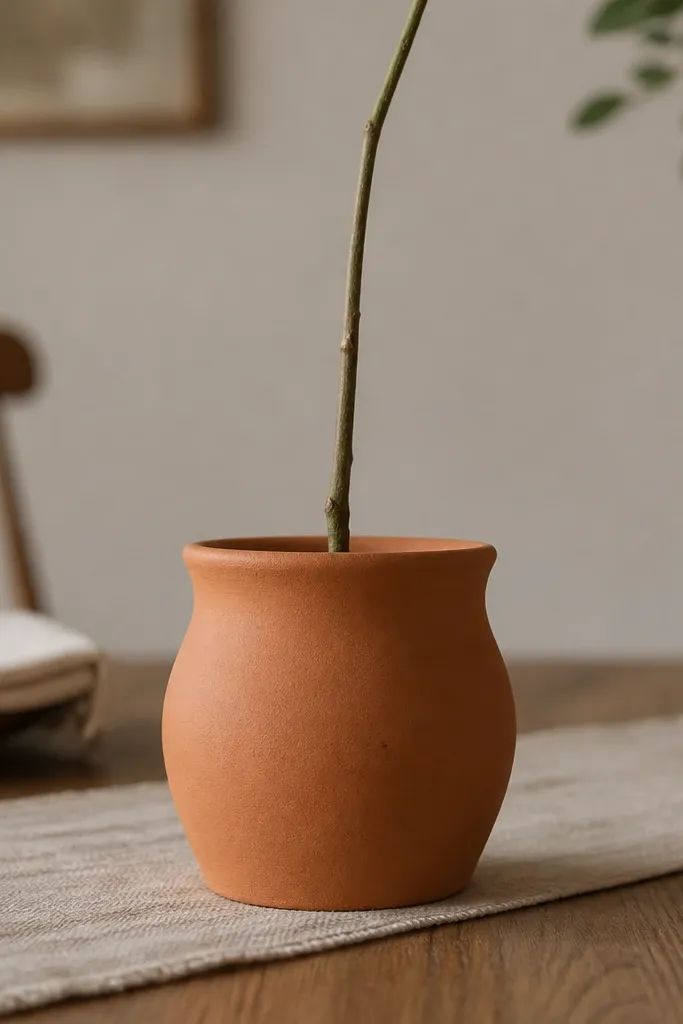
One long stem in a mini terracotta planter is simple, but it photographs beautifully because it creates a clean vertical line and a warm color base. Terracotta also plays nicely with almost every dining room finish, from oak to painted white. This setup is beginner-friendly dining table decor because you’re not arranging multiple branches; you’re focusing on one focal stem with good trimming. It also works year-round: swap the stem type for seasons and the planter stays the same.
Place a mini terracotta planter in the center of a tray or runner. Insert one long stem (about 14-18 inches) into floral foam or a small water vial hidden inside the planter. Trim leaves so the stem looks clean and the foliage sits near the top. Add a small ground layer of pebbles to cover foam and keep the planter from looking empty at the bottom.
Editor's noteKeep the stem slightly off-center by 1-2 inches; it looks more natural than perfect symmetry.
Skip thisDon’t add more stems “to fill it.” One stem with a clean silhouette looks better.
18. Black-and-Ivory Checker Tray With Floating Candle Sleeves
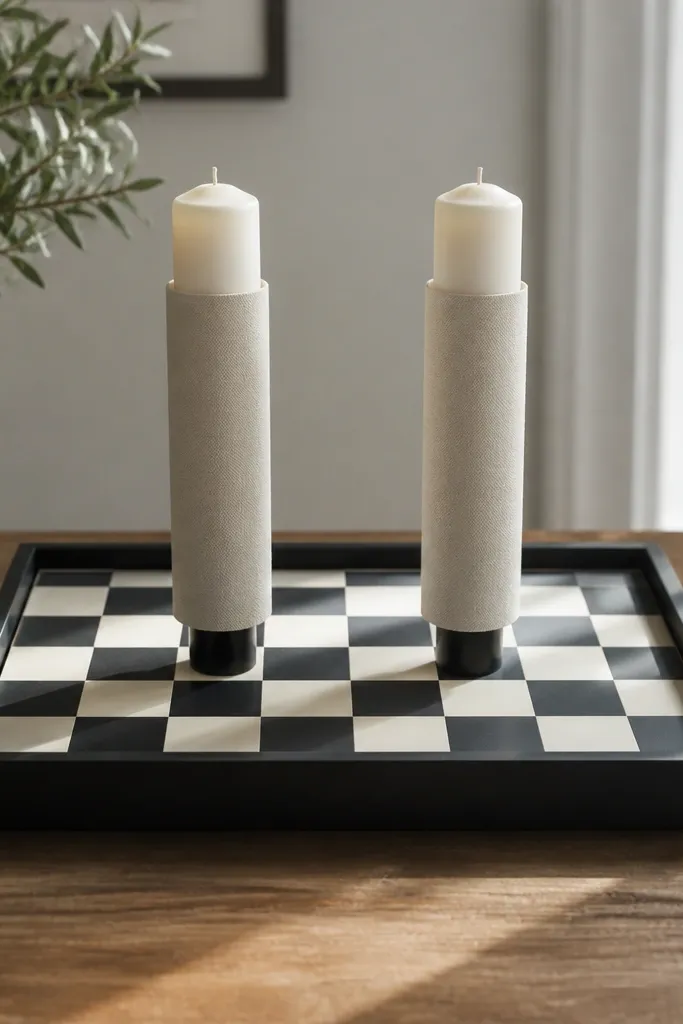
If your dining room feels plain, this brings pattern without clutter. A black-and-ivory checkered tray creates instant contrast, and simple candle sleeves keep the look cohesive. The key is limiting the number of patterned elements: one tray pattern, one candle color family. This setup is photogenic because the tray pattern gives a clear graphic background for the candle glow. It’s beginner-friendly dining table decor because you’re assembling a matched set, not building a centerpiece from scratch.
Set a checkered tray in the center and place two candles on it, spaced about 6-8 inches apart. Add removable candle sleeves or wrap paper around the candle base so the colors match the tray. If the tray has a smooth surface, use a small strip of removable double-sided tape under each candle base. Keep the overall height under 12 inches so it stays comfortable for dining.
Editor's noteUse matte candle sleeves; glossy paper reflects harsh light in photos.
Skip thisDon’t mix another pattern in the same area, like patterned napkins or a patterned runner.
19. Granola Jar Center With Layered Color and One Spoon
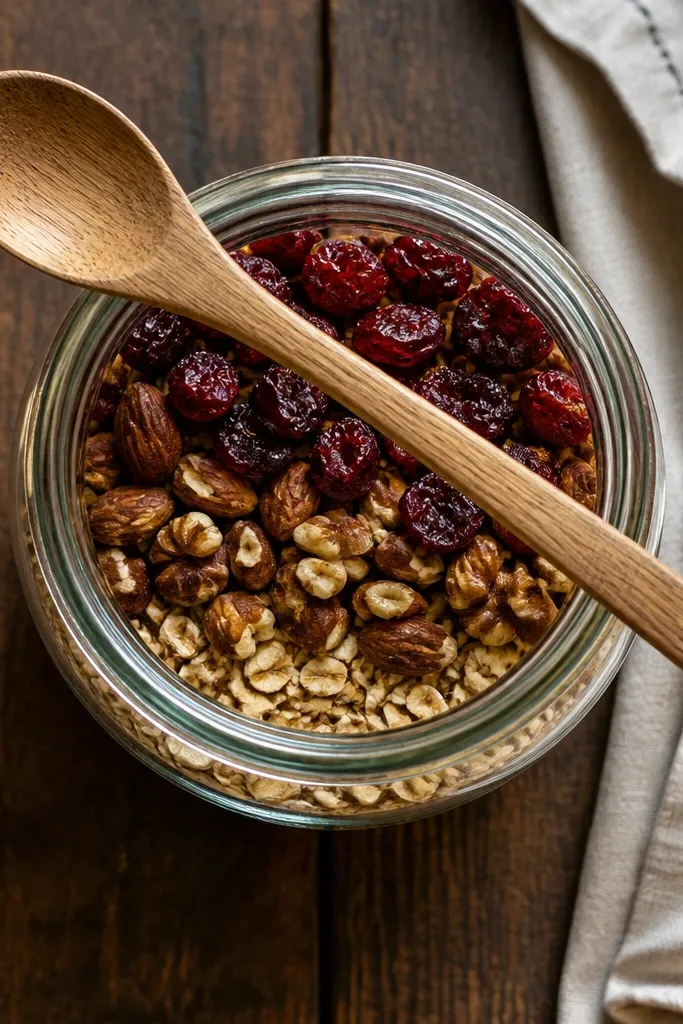
This is decor that looks like it belongs on your table, not in a kitchen cabinet. A clear jar with layered ingredients gives you color depth and a satisfying texture without flowers. Add one wooden spoon or small utensil to make it feel styled rather than accidental. It’s beginner-friendly dining table decor because the materials are edible-friendly and easy to swap out — you can refresh layers anytime. The jar also keeps the center tidy and contained.
Choose a clear jar with a wide mouth and place it on a small tray in the center. Layer ingredients by color: for a warm palette, use oats, brown rice, and dried corn kernels (about 2-3 inches total height). Add a wooden spoon across the jar mouth or resting on the tray edge. Tie a thin strip of fabric around the jar neck if you want a finished look.
Use ingredients that don’t shift; smaller grains settle more evenly and look cleaner in photos.
Don’t overfill the jar — leave 1-2 inches at the top so the layers read clearly.
20. Faux Linen Napkins Rolled With Wooden Chopsticks Wrap
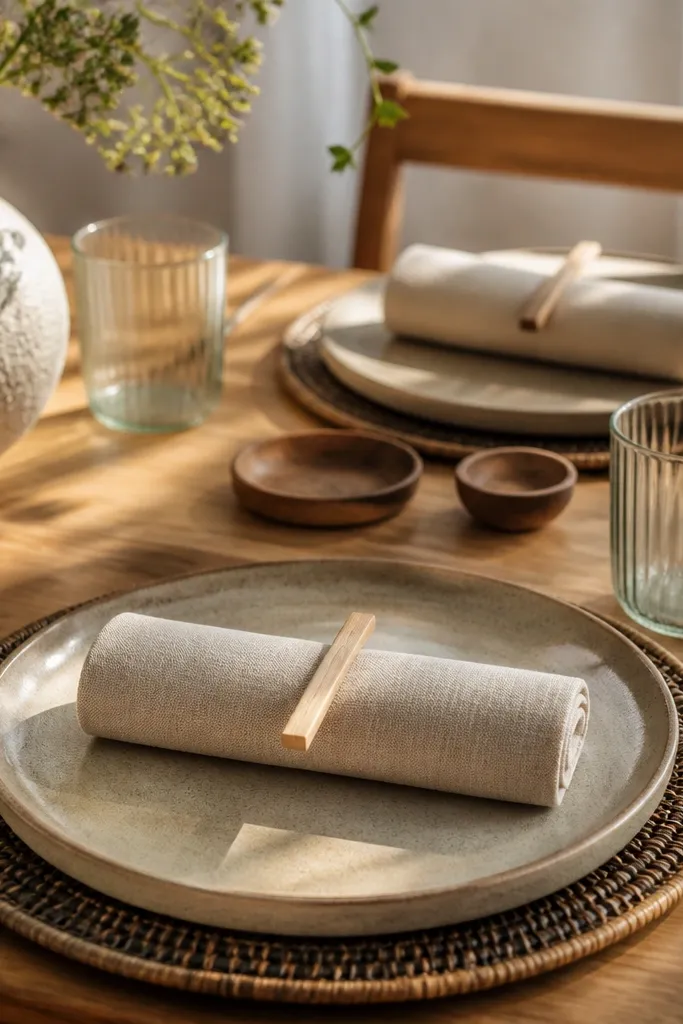
This is a more stylish way to fold napkins that looks intentional and structured. Rolling the napkins keeps them from looking bulky, and wrapping with a wooden chopstick gives you a clean straight edge. The wood tone ties into most dining room finishes, and it looks great against linen or cotton. It’s beginner-friendly dining table decor because the method is repeatable: roll, tie, place. You’ll get a neat centerpiece look even on busy weekdays.
Roll napkins into tight cylinders about 2 inches wide. Slide a wooden chopstick along one side of the roll to create a straight “handle” line. Wrap twine around the chopstick and napkin roll ends, then tie a simple knot on the underside. Place two bundles on either side of a tray centerpiece for balanced symmetry.
Editor's noteUse long twine pieces so you can tie off neatly under the roll without adjusting every time.
Skip thisDon’t tie too high on the roll; it breaks the clean cylinder shape.
21. Floating Candle Tray With Shallow Water and Flower Petals
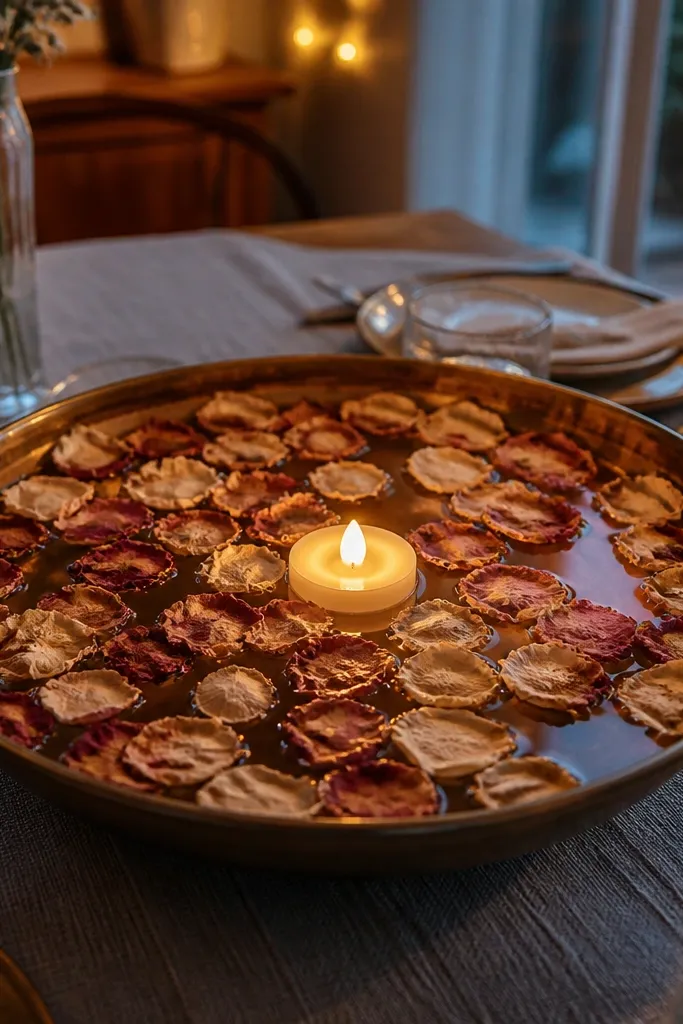
This centerpiece looks romantic without building a full floral arrangement. Shallow water plus petals creates a soft, layered look and makes the table feel special even when you’re not hosting. For safety and daily use, use an LED floating candle and real dried petals or silk petals. It’s beginner-friendly dining table decor because the setup is quick and the “wow” comes from the surface effect, not complicated flower work. The tray also protects your table from spills.
Pick a flat, shallow tray that’s wider than the candle, about 14-18 inches. Pour in a thin layer of shallow water (about 1/4 inch) and place a floating LED candle in the center. Scatter petals around the candle, then add a few petals at the tray edges to frame it. Let petals sit for a minute so they absorb water and look more natural.
Use dried petals for better color stability; fresh petals darken quickly and look uneven.
Don’t use too much water; deep water makes petals sink and the look turns muddy.
22. Single-Color Flower Spike in a Tall Narrow Vase
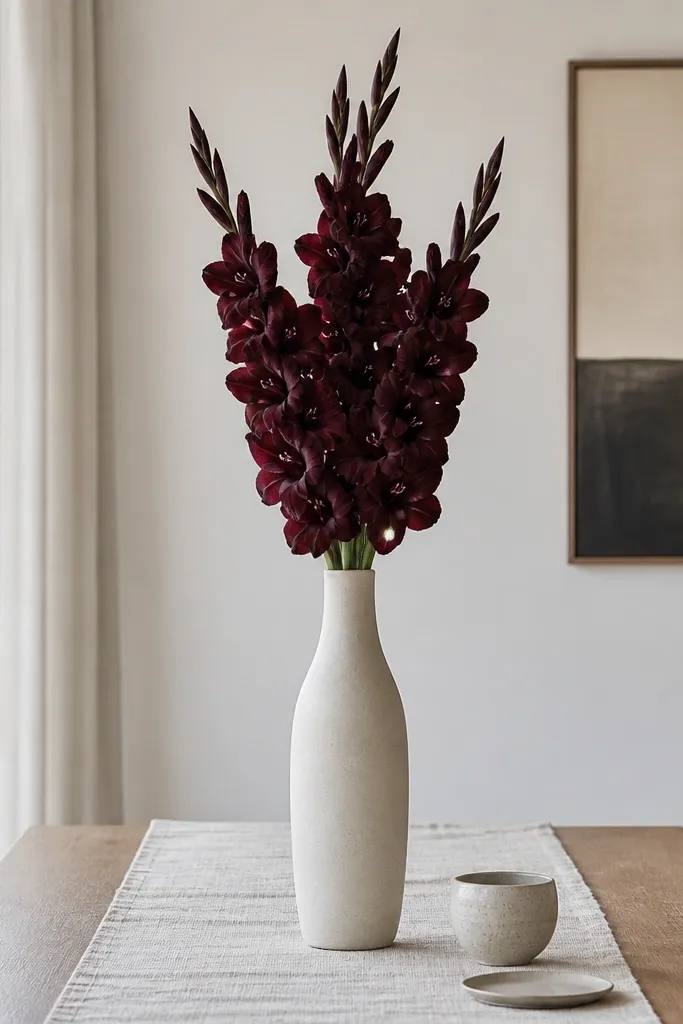
A tall narrow vase with one color is the quickest way to make a dining table look intentional. The spike shape reads as “designed” from far away, and it keeps the table from looking cluttered. Choose a narrow vase in clear glass or matte ceramic, and pick one flower color family like white, blush, or deep burgundy. This is beginner-friendly dining table decor because you’re arranging a few stems to one dominant line, not building a bouquet. It also works when you want a clean photo without lots of small objects.
Fill a tall narrow vase with water and add floral preservative if you have it. Trim stems so the tallest reaches about 16-18 inches above the table, then place them so they form one dominant spike. Remove lower leaves so the waterline looks clean. Add the vase to the center of a tray or runner so it stays visually framed and doesn’t wander.
Editor's noteCut stems at a slight angle and re-trim after 30 minutes if you use real flowers.
Skip thisDon’t mix multiple colors in the same vase; you’ll get a busy look instead of a strong line.
23. Two-Size Lanterns With a Small Tray of Sand
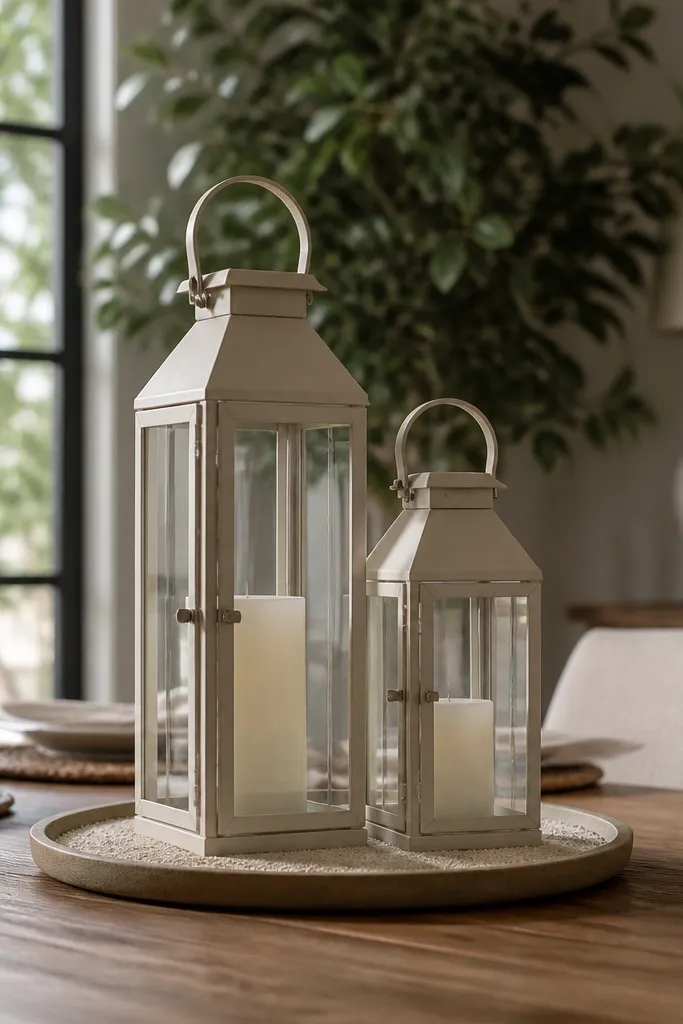
Lanterns add height and shadow texture, which makes tables look styled even when you keep the centerpiece simple. Using two sizes gives you a layered silhouette instead of one flat object. Add a small tray of sand or fine gravel to anchor the lanterns and make the center look finished. This is beginner-friendly dining table decor because it’s placement-driven and doesn’t require floral foam or wiring. It also works year-round with different inserts, like pinecones or faux greenery.
Place a small rectangular tray of sand or fine gravel in the center of your dining table. Set one lantern on the back side of the tray and a shorter lantern in front, keeping 4-6 inches between them. If lanterns are open, use LED candles or a flameless insert. Finish by tucking one small greenery sprig or two pinecones into the sand so the center has a focal point.
Editor's noteUse sand that matches your room tone; beige looks best with warm wood, gray sand looks best with cool palettes.
Skip thisDon’t put lanterns too close together; the shadows overlap and the silhouette looks cramped.
24. Vinyl Record Coaster Rings With a Small Center Bowl
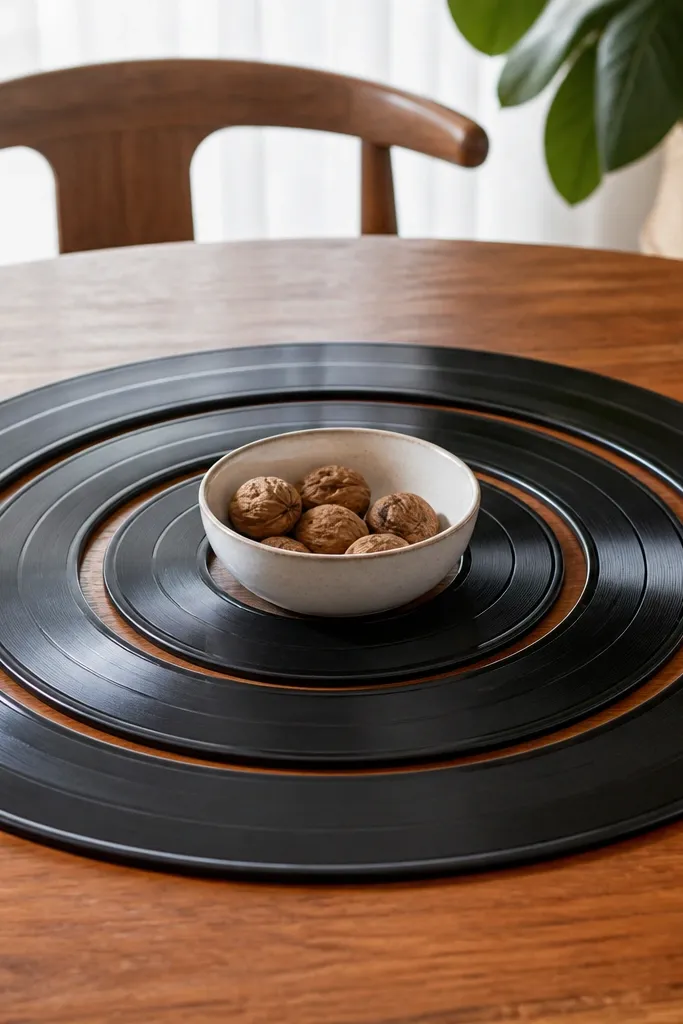
This is for dining rooms that need a little personality. Vinyl record coasters create bold circular shapes, and a small bowl in the center keeps it from looking like random crafts. The look is modern and graphic, and it photographs well because circles repeat. Use this when you want beginner-friendly dining table decor that feels like a theme but still works with everyday meals. Keep the bowl neutral so the record pattern stays the star.
Use old records and cut or punch holes if you want them as coasters; otherwise, buy record coasters. Place 4-6 coasters in a loose circle around the center where you want the centerpiece. Set a small neutral bowl in the center and fill it with decorative items like black and white stones or a few dried stems. Add one matching spoon or small utensil on the bowl rim for a styled touch.
Editor's noteIf records have sharp edges, sand the perimeter lightly and seal with clear varnish.
Skip thisDon’t cover the entire table with coasters; keep it to the center zone so it reads as intentional.
25. Hand-Painted Wood Bead Runner Ends With Plain Center Tray
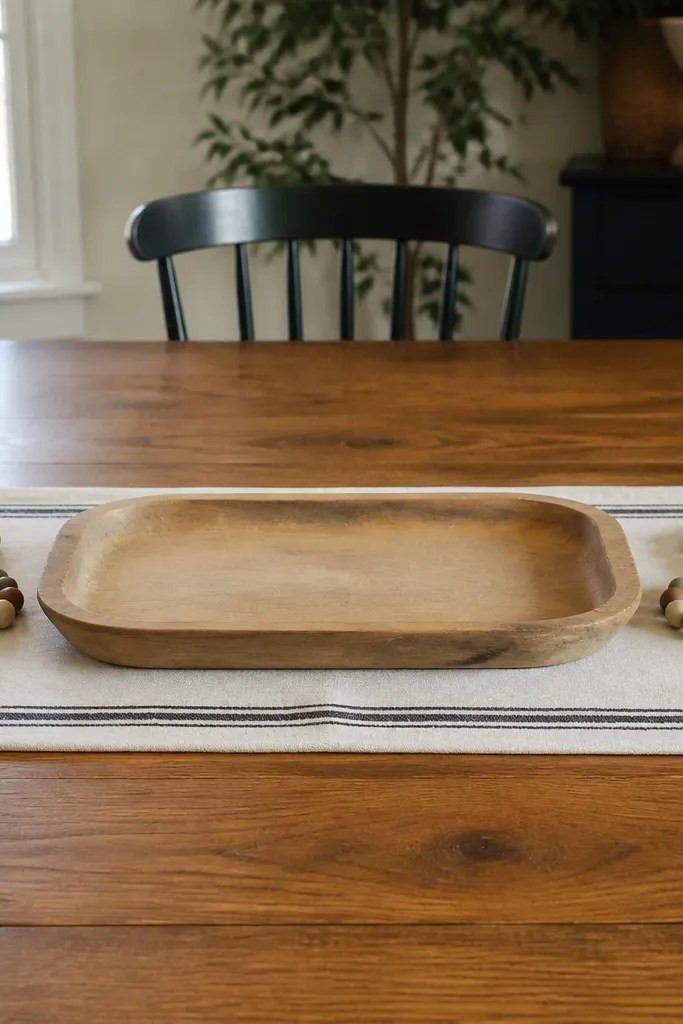
Wood bead accents make a dining table look warm and handmade without taking over. This idea uses bead garland only at the runner ends, so the center stays clean and functional. You get color and texture where you want it for photos, while the middle remains easy to set plates on. It’s beginner-friendly dining table decor because the beads are quick to paint and string, and the runner does most of the layout work. Keep the paint to two colors so it looks cohesive, not craft-store chaotic.
Start with a plain runner in cream, ivory, or natural cotton. Paint 60-80 wood beads in two coordinating colors and let them dry fully. String beads onto twine and tie the garland lengths to each runner end, about 6-10 inches long depending on your table size. Place a simple tray centerpiece in the center, like a single candle or a small vase, so the bead ends frame it.
Editor's noteSeal painted beads with a matte clear coat so they don’t scuff onto the runner.
Skip thisDon’t add bead garlands in the center; that makes the table feel crowded during meals.



