
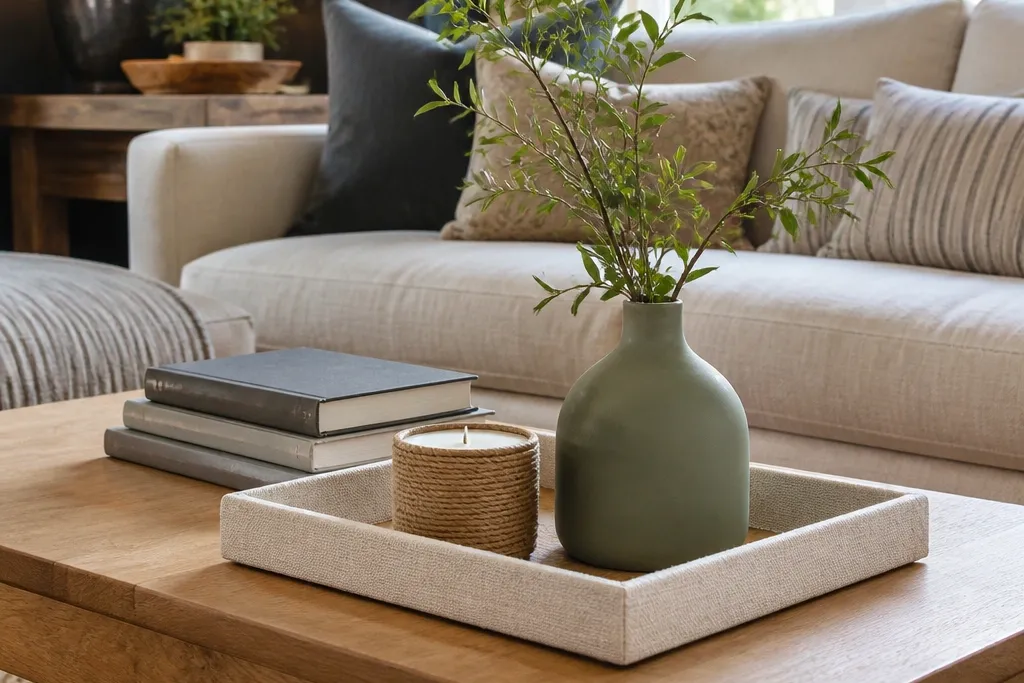
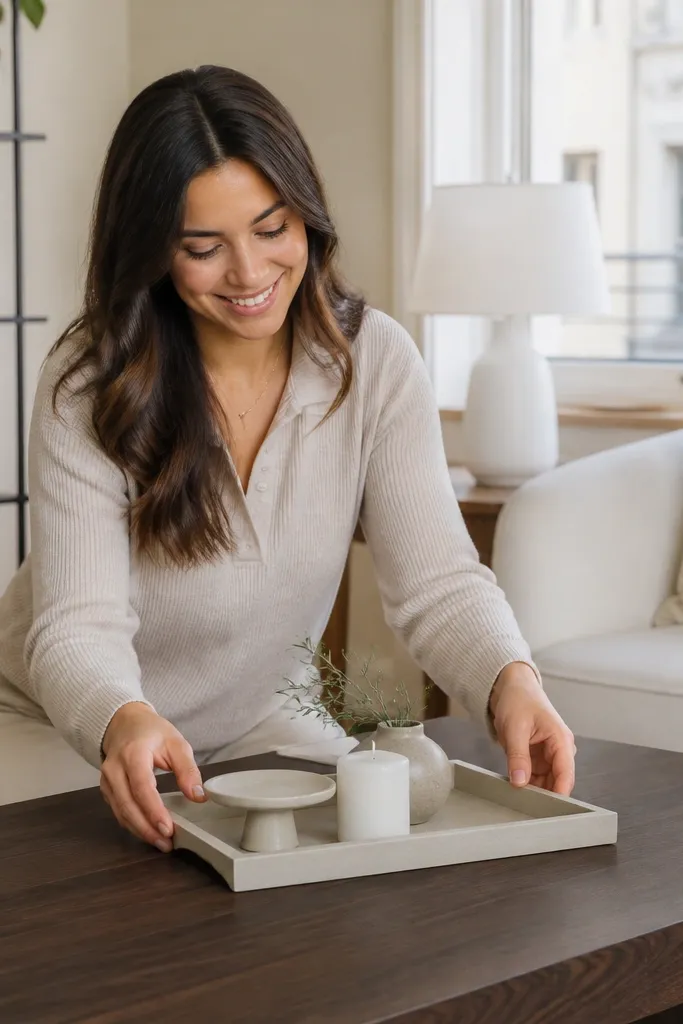
1. Linen-wrapped tray with a "landing strip" centerpiece
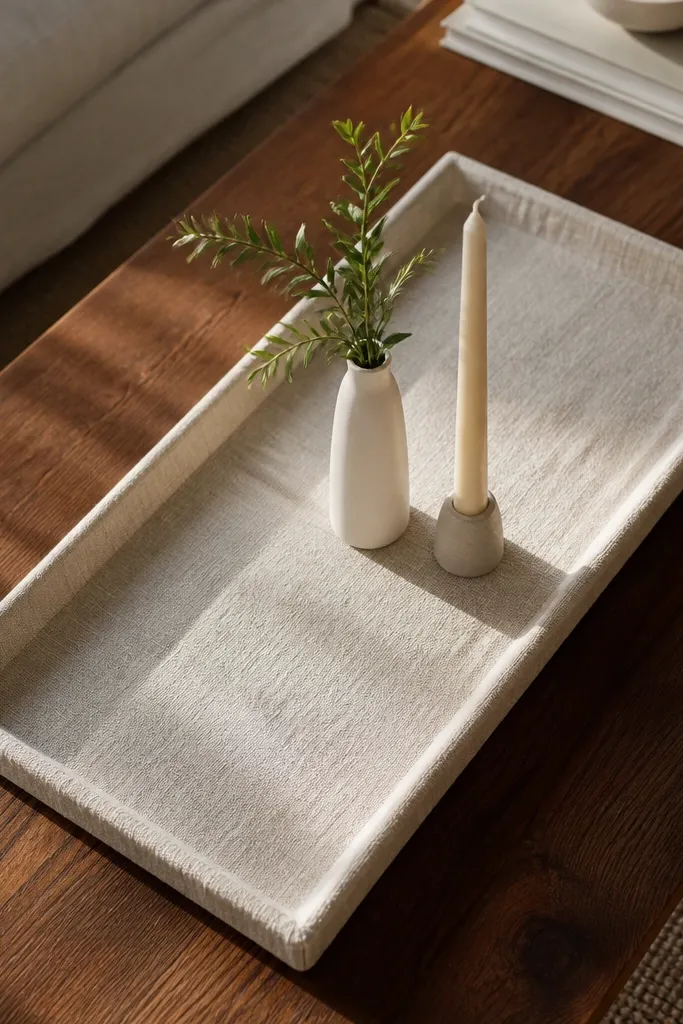
Start with a tray you already own or buy a cheap wood tray. Measure the top perimeter and cut linen strips to wrap the sides; use spray adhesive or a hot glue gun for the edges. Cover the tray base too if it’s bare wood, then add a thin felt layer under the linen to stop sliding. Finally, place a bud vase in the middle and a single candle on one side, then keep the rest of the tray empty so the “landing strip” line is obvious.
A wrapped tray instantly makes beginner-friendly Coffee Table Decor Ideas look styled because it creates one boundary. Linen adds a soft, matte texture that hides small imperfections and fingerprints, unlike shiny wood. The landing strip centerpiece is a narrow runner look: a slim vase or bud vase plus one candle so the layout stays clean and not busy. This works best on rectangular tables where you can center the composition lengthwise. Plan for a tray that’s about 2/3 the width of your table so it reads as intentional without taking over.
Skip thisDon’t wrap too loosely — loose corners make the tray look homemade instead of finished.
Editor's noteUse a foam paint brush to smooth glue so you don’t get hard ridges under the linen.
2. Stacked hardcover books with a ceramic riser and one stem
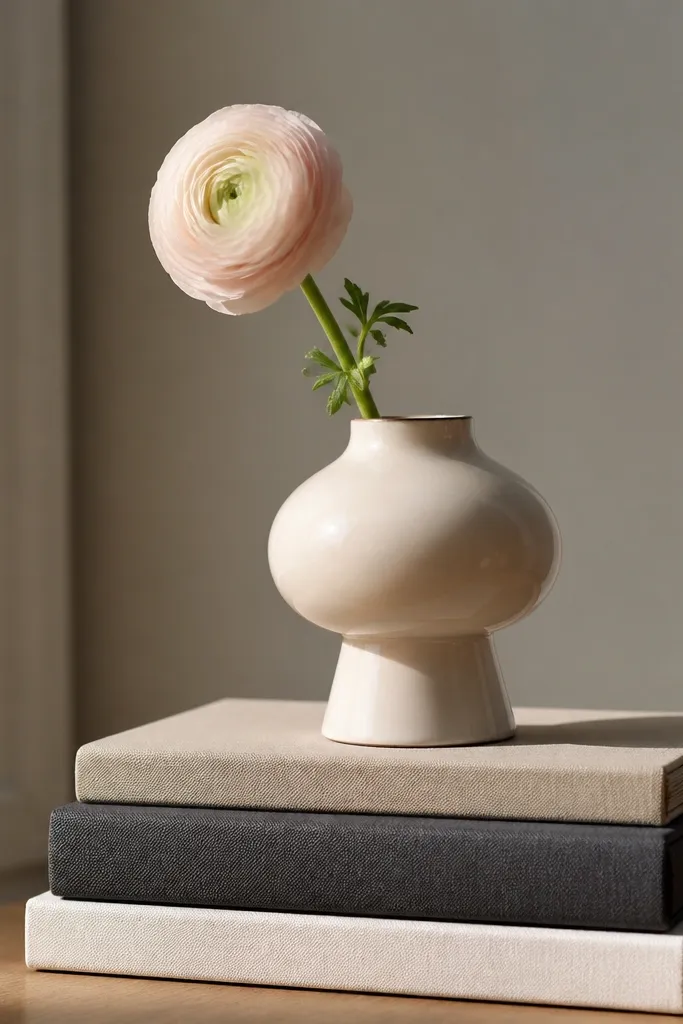
Pick three books that stack to about 5-7 inches tall on your table. Wrap the stack with a thin ribbon or leave spines visible, but keep the color palette tight. Add a ceramic riser or a small planter turned upside down on top of the stack. Place one stem in a tiny bud vase so it sits centered, then rotate the stem slightly so it leans toward the room for a natural look.
This arrangement is the quickest way to add height without clutter. Hardcover books give structure and color blocks, while a ceramic riser makes the top feel deliberate. One stem keeps the centerpiece airy and photogenic, especially in daylight when the petals catch soft highlights. It also hides the “I don’t know what to put here” problem because the books do the heavy lifting. Choose books with muted spines and at least one white or cream cover for contrast.
Skip thisSkip mixed bright spines — too many colors makes the whole thing look like a yard sale.
Editor's noteLay a thin strip of felt under the book stack to prevent scratching and sliding.
3. Concrete-style candle holder risers made from candle cups
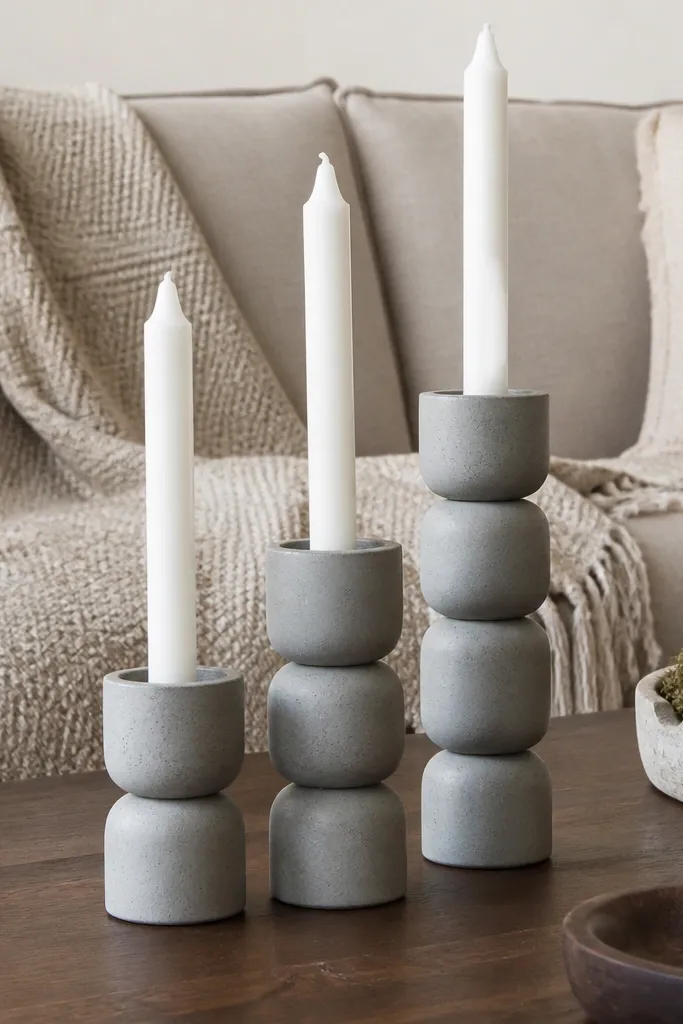
Buy 3-4 small candle cups (metal or plastic) and clean them with rubbing alcohol. Spray them with a matte gray primer, then topcoat with matte gray paint and a second light mist for an even texture. Stack them by gluing the bases together with a strong adhesive so they don’t wobble. Place a pillar candle in the top cup and add a small strip of felt at the bottom if needed to protect your table.
If your coffee table decor looks flat, risers fix it fast. This project gives you a concrete-style look without heavy casting: you build height using small candle cups and a matte finish. The result looks modern and clean in photos because matte surfaces reduce glare. Use these as standalone candle pillars or as a base under a tray centerpiece. The vibe is minimal, so it works in nearly every room style.
Skip thisDon’t seal with glossy clear coat — it kills the concrete look and shows fingerprints.
Editor's noteDust the final coat from farther away to avoid thick drips that look messy.
4. Glass cloche with paper-wrapped "pebble" filler
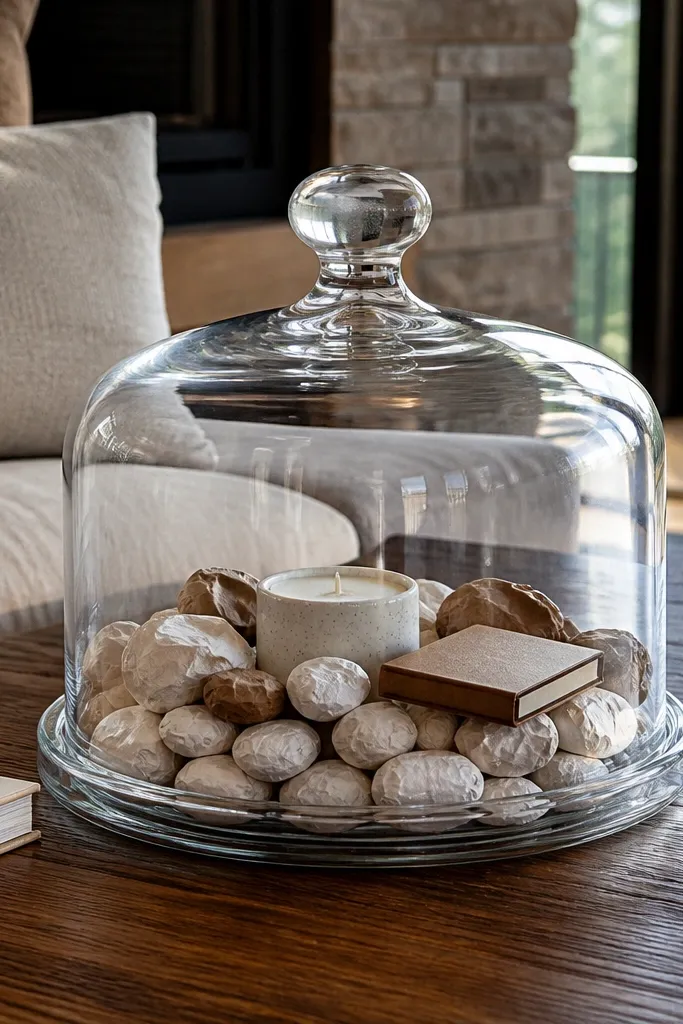
A cloche makes a coffee table look curated because it frames the items like a mini display case. The paper-wrapped pebbles add texture without the weight and mess of real stones. It’s beginner-friendly because the materials are easy, and the shape is forgiving. This is great for small tables where you can’t spare a wide centerpiece. Pick a cloche about the size of a dinner plate so it doesn’t swallow the table.
Cut strips of gray and white paper or scrapbook paper into small rectangles. Wrap each rectangle around the end of a chopstick to form pebble-like shapes, then glue the end shut. Fill the cloche base with the paper pebbles and nestle a small candle or faux stem in the center. Finish by placing a thin layer of tissue or fabric under the candle to keep it stable. Put the cloche on a tray so wax drips don’t touch the table.
Use two paper tones only — too many shades makes the filler look cluttered.
Don’t use loose pebbles without glue — they shift and ruin the centered look.
5. Wood dowel photo-frame style tray divider
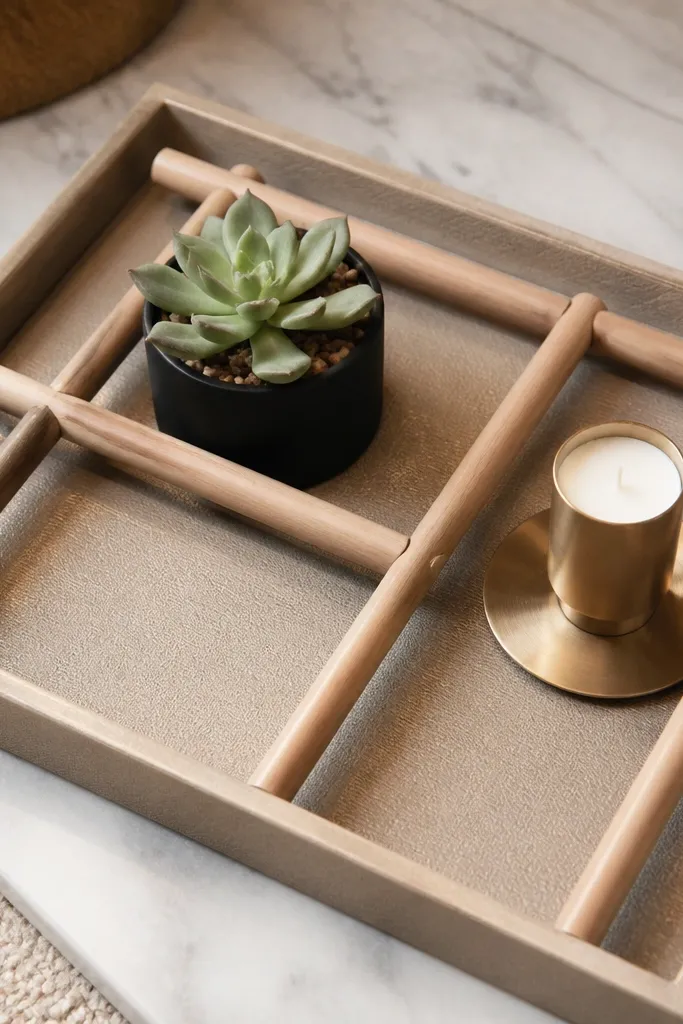
This is for when your coffee table decor spreads out and looks chaotic. A dowel divider gives you built-in structure so you can place small items without them migrating. The frame look reads clean and architectural, especially with a neutral finish. It also helps you build beginner-friendly Coffee Table Decor Ideas even if you don’t have matching sets. Use it with a single vase or small bowl so the divider does the organizing.
Measure your tray and cut two dowels to match the tray length and two to match the width. Sand ends smooth and wipe with alcohol. Glue the dowels to the tray base in a rectangle frame, leaving enough space in the center for a vase. Paint or stain the dowels to match your room metals, then let it cure fully before styling.
Add felt pads under each dowel contact point to stop scratching and noise.
Don’t glue dowels too close to the tray edge — it makes the center feel cramped.
6. Color-blocked fabric runner with a floating candle trio
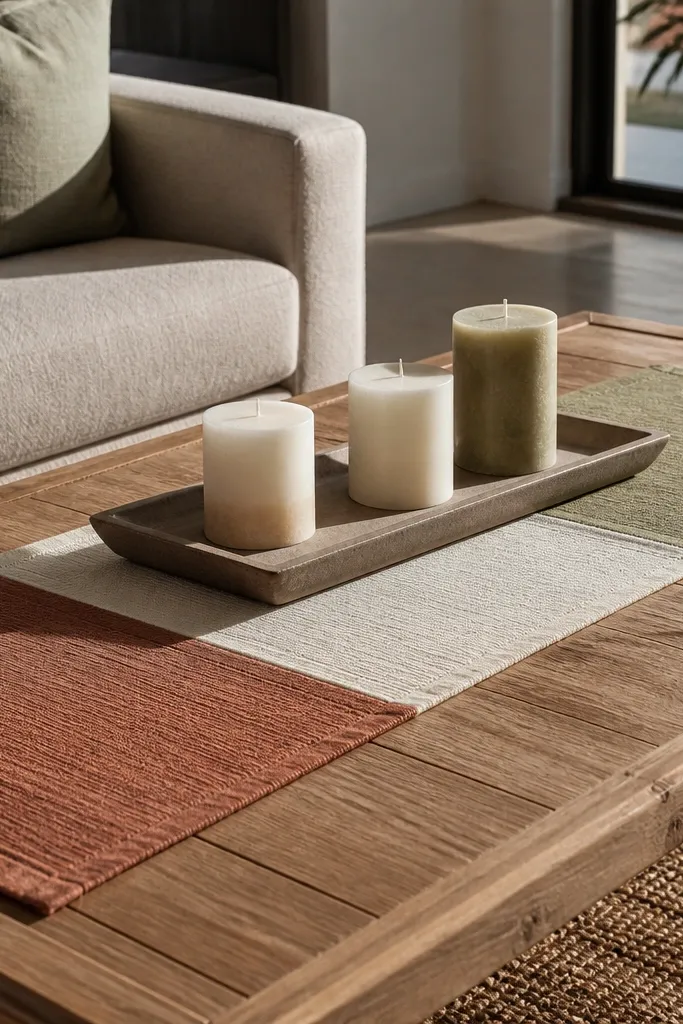
Cut a fabric runner to about 10-14 inches wide and a length that fits your table center. Hem the long sides with a simple iron-on hem tape or a straight stitch. Choose three candles with similar heights; set two at the ends and one in the middle. Place the runner on a tray or directly on the table, then set the candles so their bases touch the runner edges lightly.
Fabric runners make coffee table decor feel intentional because they control how light hits the surface. Color-blocking with two or three tones gives you an easy palette without needing expensive decor. Candle trio spacing is photogenic: you get height and rhythm without crowding. This works especially well on long rectangular tables where a centered line looks balanced. Keep the runner width narrow so it doesn’t flatten the whole table visually.
Skip thisSkip patterned fabric with busy prints — it competes with the candles and looks messy.
Editor's noteIron fabric flat before styling so the folds don’t show in photos.
7. Woven jute coasters arranged like a mini gallery
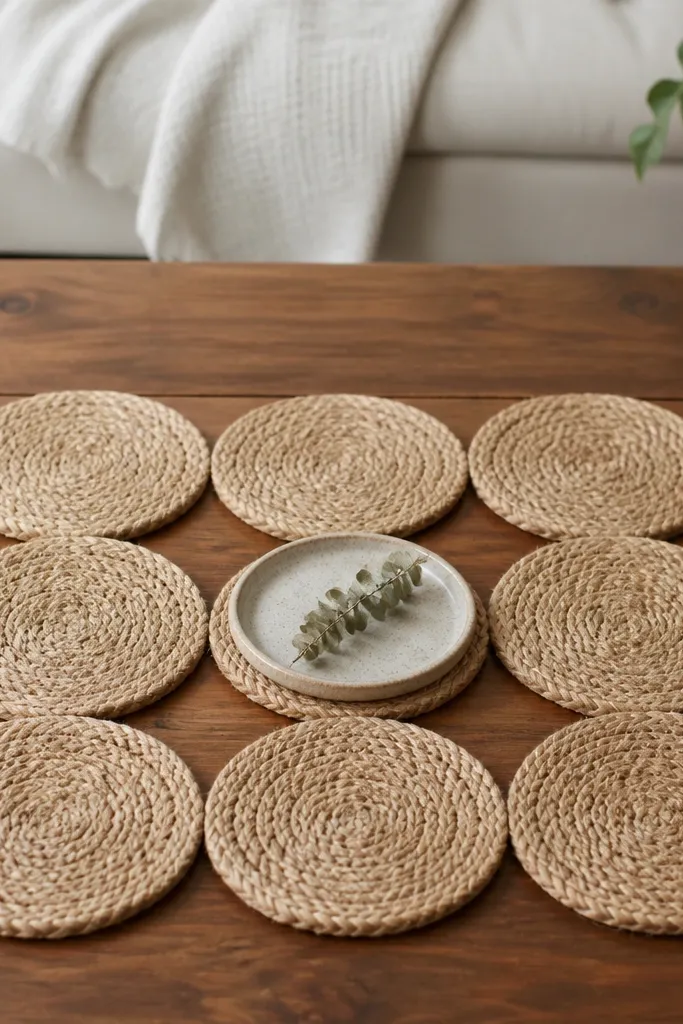
Coasters are the most underrated decor tool because they’re already perfectly sized and repeatable. This arrangement turns coasters into a texture grid that looks calm and intentional. Add a small tray or dish in the center for the “main character” object. It’s beginner-friendly because you don’t need to build anything complicated — just place and repeat. Use neutral jute or natural raffia for a warm, earthy look.
Buy a set of matching woven coasters in natural jute. Arrange four coasters into a square on the coffee table, then center a small ceramic dish or mini tray on top. Place a candle in the dish or a tiny bud vase at the center. Keep the rest of the table clear so the grid reads as deliberate. If your coasters slide, add a thin rubber pad under the dish base.
Stagger coaster textures slightly by choosing two coasters with tighter weave and two with looser weave.
Don’t mix coaster materials like cork, leather, and jute together — it breaks the cohesive look.
8. Painted terra-cotta pot turned into a catch-all bud vase
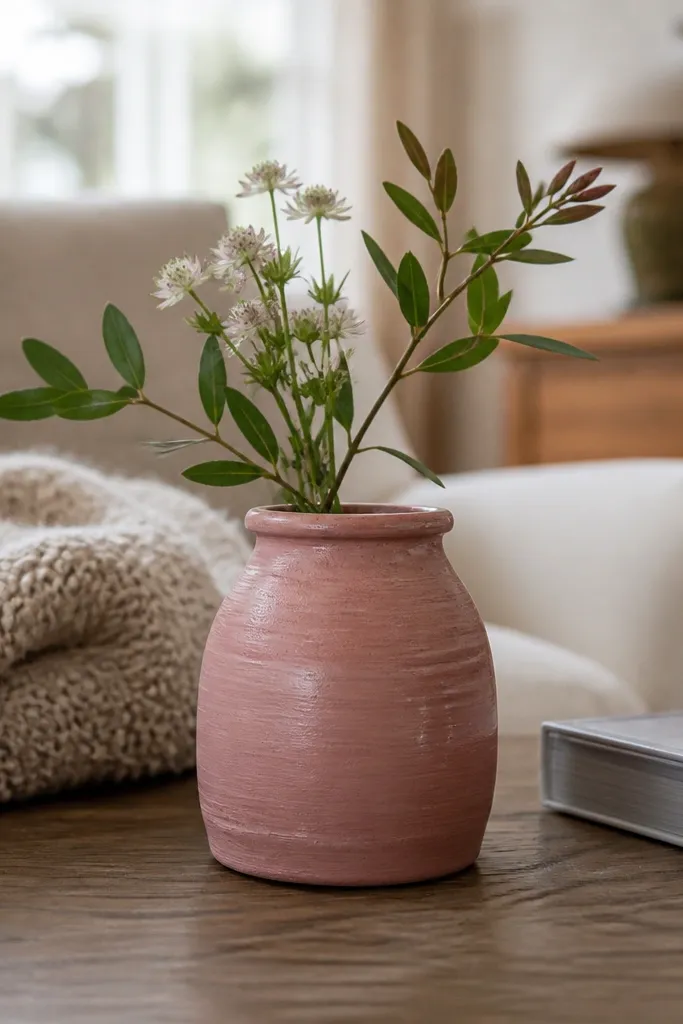
Clean the pot and let it dry completely. Sand lightly if there’s dust, then prime with a bonding primer. Paint with matte acrylic or craft paint in a color that matches your room — terracotta + soft cream is especially photogenic. Seal with a matte clear coat after it dries. Place a small foam insert or a tiny cup inside the pot so the stem stays upright.
A terra-cotta pot is already the right shape for a bud vase, and painting it gives you a custom look. This is a beginner-friendly Coffee Table Decor Ideas pick because it’s forgiving: small paint streaks add character instead of looking “wrong.” It also solves the tiny clutter problem because the pot can hold a stem, matches, or a few decorative sticks. The matte finish looks great under window light with no glare.
Skip thisDon’t paint the inside rim — it chips. Keep the inside bare or use a removable insert.
Editor's noteDry-brush a lighter shade on the edges for a subtle “aged” effect.
9. Mirror tray with DIY paper-folded "accordion" napkin art
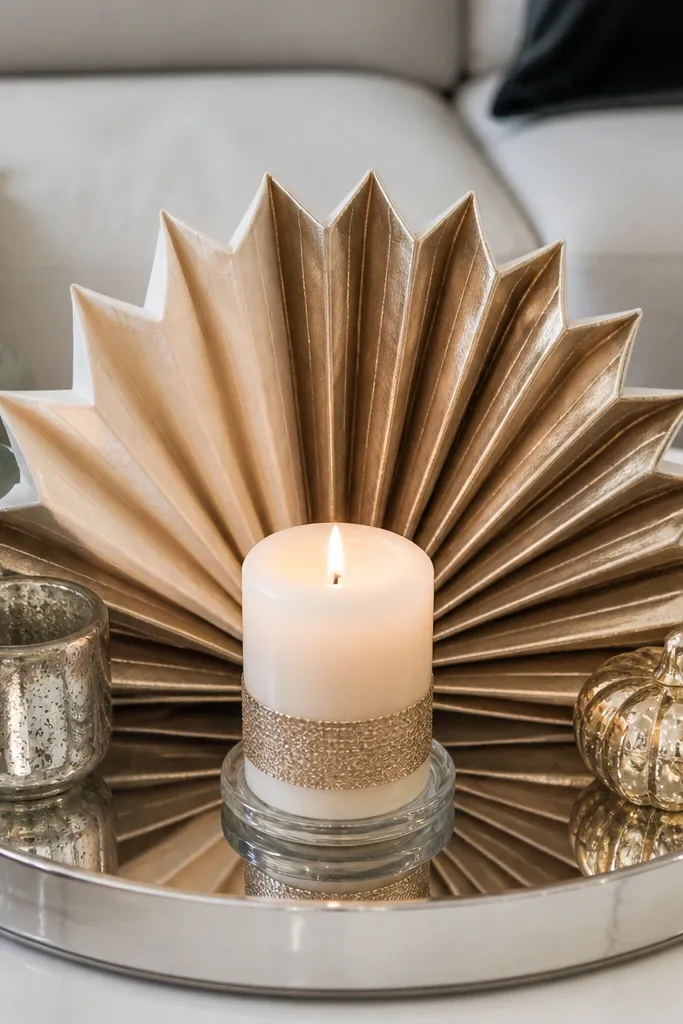
Buy a small mirror tray and wipe it clean so it doesn’t show smudges. Cut thick paper into a strip and fold it accordion-style with 1-inch pleats. Glue or tape the pleats at the ends, then shape it into a gentle arc. Place the accordion piece inside the tray and set a small candle on the opposite side to balance the height.
Mirror trays make everything look sharper because they reflect light and create depth. The accordion napkin art adds height and movement, and it’s cheap to make. This is perfect when your coffee table decor feels too low and flat. Choose metallic paper or thick craft paper so the folds hold shape. Keep the setup minimal: one tray, one candle, and one sculptural paper form.
Skip thisDon’t use thin printer paper — it won’t hold the pleats.
Editor's noteUse double-sided tape to anchor the paper folds so they don’t collapse after a week.
10. Pegboard-style picture frame tray for tiny decor zones
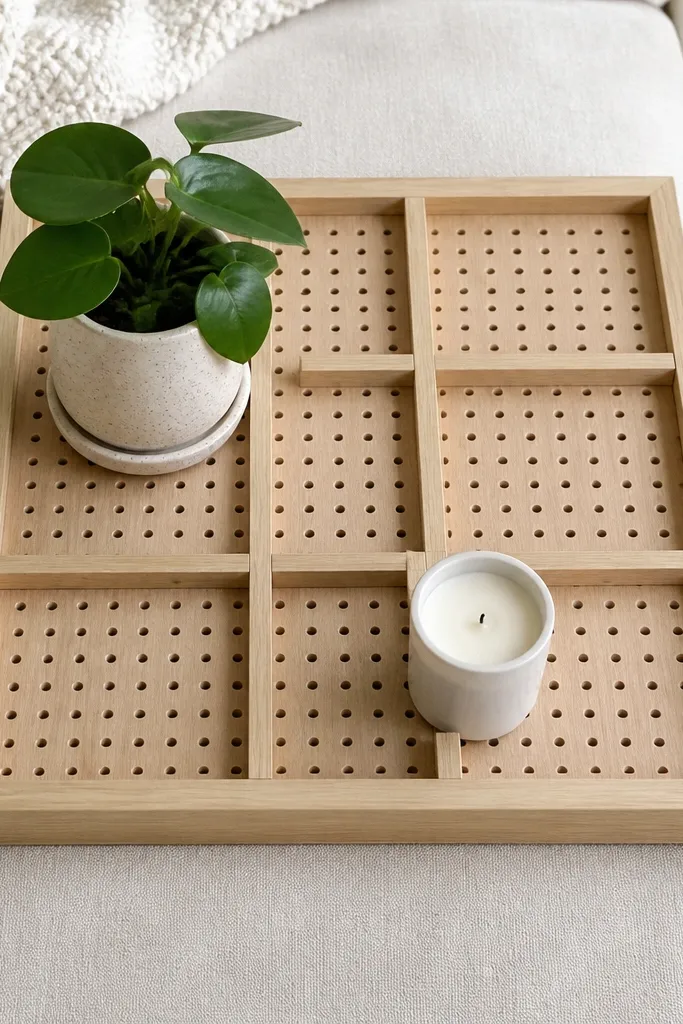
If you struggle to keep small items from looking random, this creates zones you can repeat. The frame-grid look is beginner-friendly because you’re not building complicated shelving — you’re just adding structure to a tray. Put a mini plant in one zone and a candle in another, and the layout stays tidy. The grid also creates a clean visual rhythm that reads well in photos. Use a simple wood frame and a neutral board finish.
Cut pegboard or craft board to the size of your tray, then fit it inside a shallow frame or glue it to a board backing. Paint the board a matte white or black for a modern look. Add small hooks or dowel pegs to hold lightweight decor like mini candles or faux stems. Set the frame on a tray and place a tiny plant at the base. Keep the items light so the board stays stable.
Use command strips or removable adhesive if you want to swap themes seasonally.
Don’t overload — one plant, one candle, and one small object reads clean. Five objects reads cluttered.
11. Monochrome ceramic dish with layered faux stones
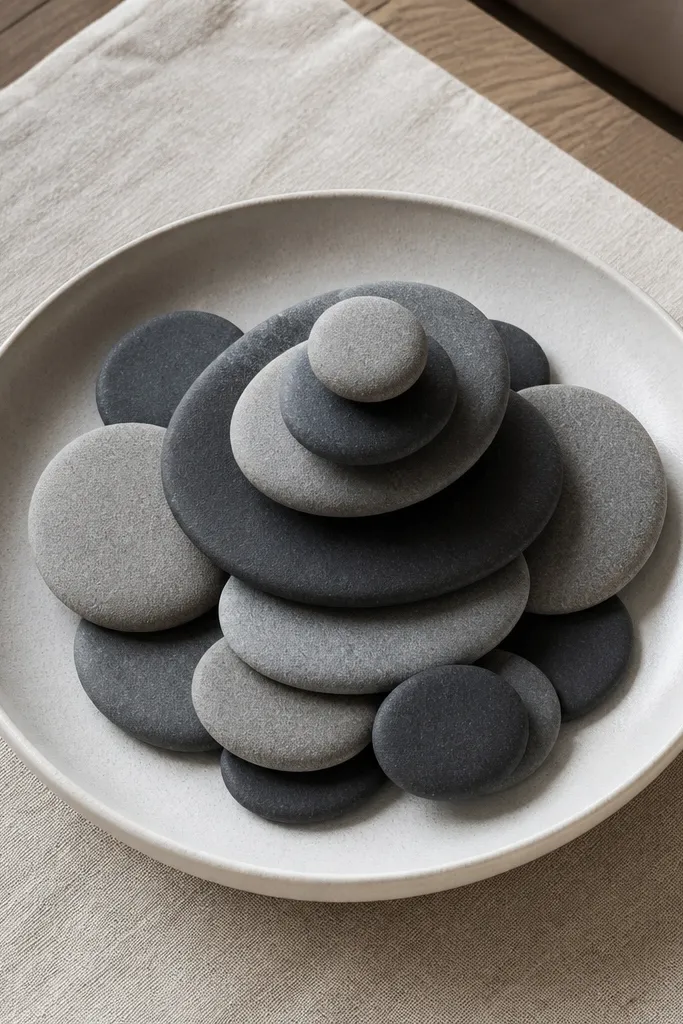
Pick a shallow ceramic dish with a wide rim. Arrange faux stones in layers, starting with the largest pieces around the edges and filling the center with smaller ones. Add a small candle or tealight cup in the middle for height contrast. If your stones slide, lightly mist the base with spray adhesive and press the first layer in place. Let it set and then style around it with empty space.
A single dish arrangement looks expensive when it’s monochrome and layered. Faux stones add weight visually and create a smooth, calming texture that photographs well. This works when you want beginner-friendly Coffee Table Decor Ideas that don’t require plants or candles burning. The dish becomes the “anchor,” and you can add one small element like a match holder or a tiny candle. Choose stones in gray, cream, or black for the cleanest look.
Skip thisDon’t use mixed colors like bright blues and oranges — the dish stops looking cohesive.
Editor's noteUse stones that are similar shine levels. Mixing matte and glossy pieces makes the dish look accidental.
12. Dried-flower bud vase cluster with a wire loop holder
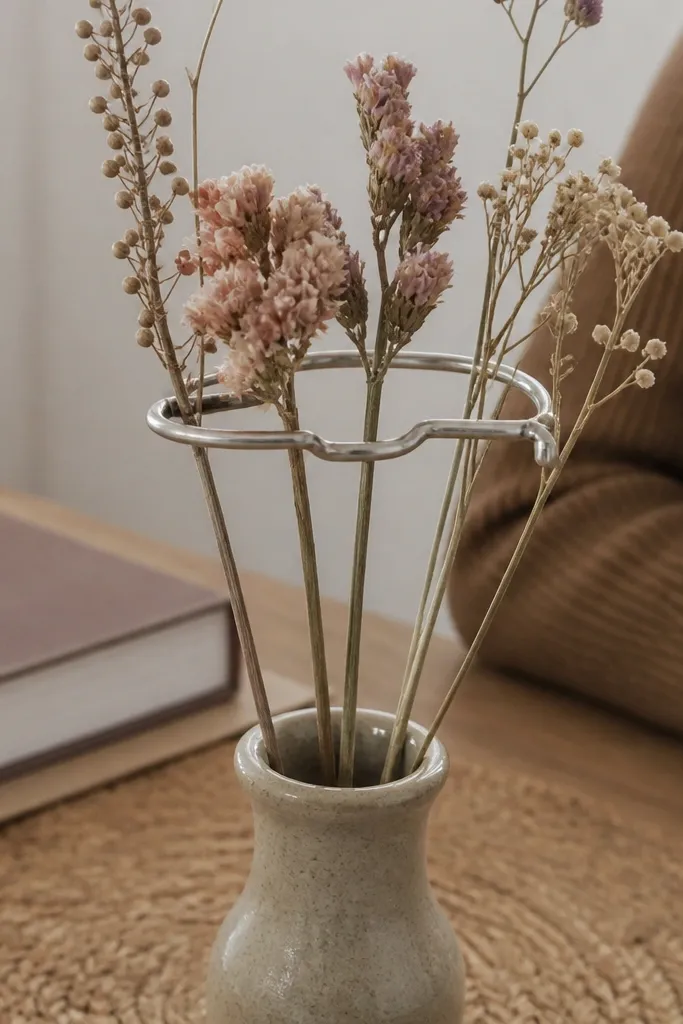
Use three small bud vases and a wire frame made from flexible craft wire. Bend the wire into a loop long enough to sit across the tray and secure it so the vases don’t tip. Place the vases in the loop positions, then add dried stems in each one. Trim stems so two are slightly taller and one is shorter to create a staggered height. Set the whole cluster on a tray for stability.
A wire loop holder turns loose stems into a controlled cluster. Instead of random bunches, you get a neat grouping that looks curated and stays put. Dried flowers are ideal for beginners because they don’t wilt and they hold their shape. The wire loop adds an industrial detail that balances soft petals. This arrangement is photogenic because each vase creates a vertical line.
Skip thisSkip overstuffing — three stems per vase looks intentional. Too many stems turns it into a bundle.
Editor's noteTuck the wire loop ends under the tray edge for a cleaner look.
13. DIY faux marble tray using contact paper and a heat-safe top
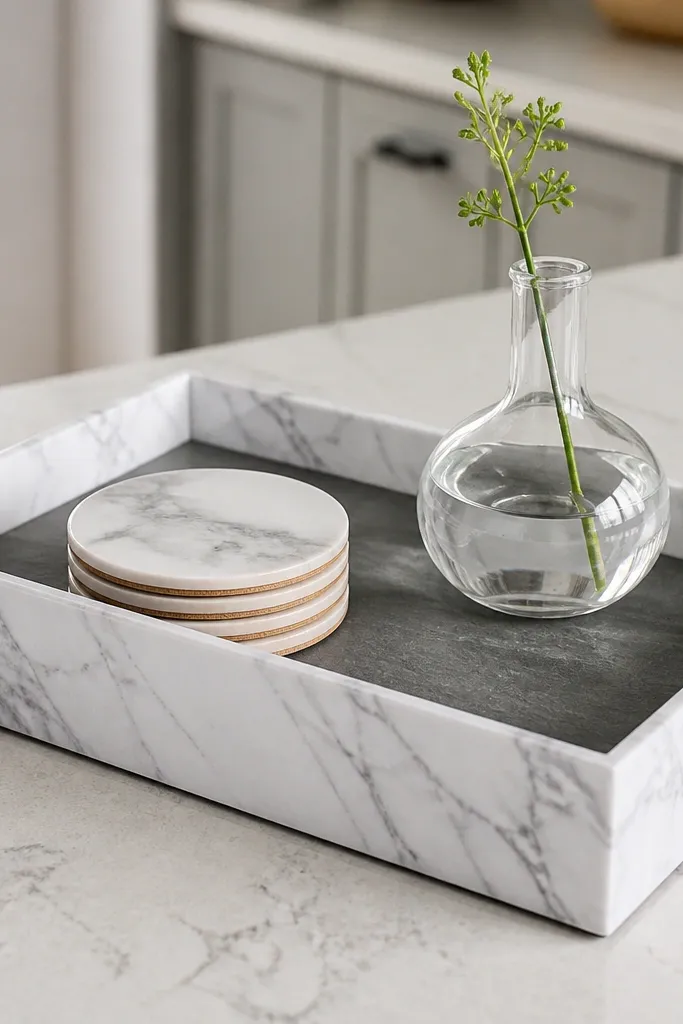
When your coffee table decor feels mismatched, changing the tray changes everything. Faux marble contact paper gives a high-contrast look that reads like real stone in photos. This project is beginner-friendly because you’re applying a film, not building a full object. Use it as the base for any centerpiece, and you instantly get a polished, expensive vibe. Keep the tray small so the pattern doesn’t overwhelm the rest of the room.
Choose a tray with a flat top. Clean thoroughly, then cut contact paper to the top surface with extra for trimming. Apply slowly from one edge, smoothing with a plastic card to avoid bubbles. Trim the edges with a craft knife and seal the edges with clear tape if needed. Let it sit flat for a full day before adding candles or hot items.
Use a craft knife with a fresh blade for clean edges — dull blades snag contact paper.
Don’t apply over dust. Any grit creates bumps that catch light.
14. Rope-wrapped candle sleeves for a warm coastal look
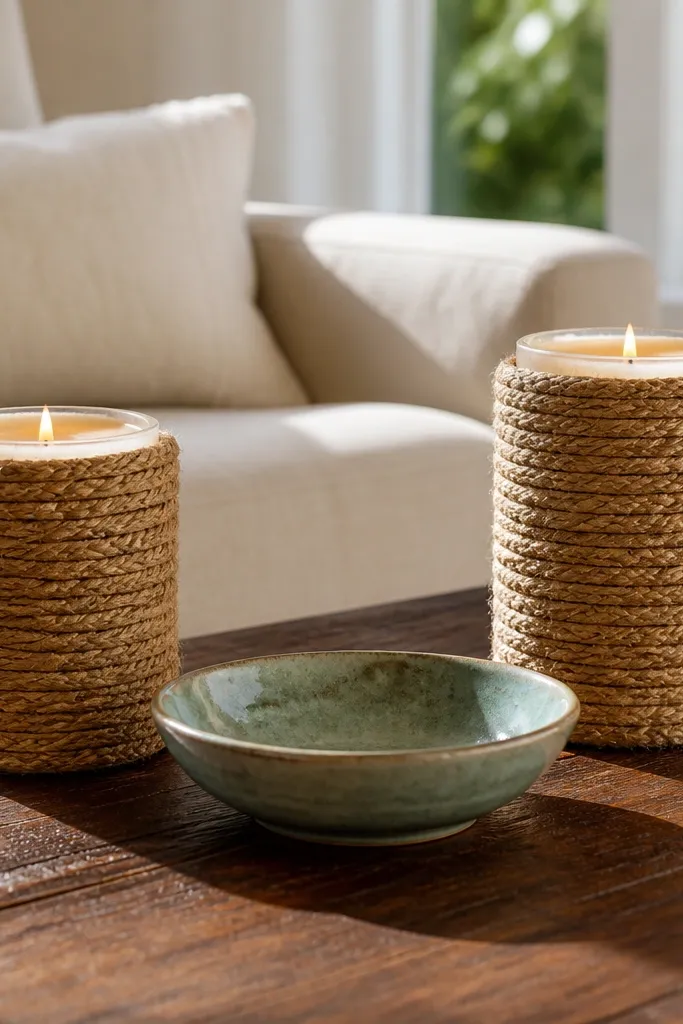
Rope sleeves add texture and warmth without buying new candles. They’re beginner-friendly because rope is forgiving and hides glue lines. This look is photogenic because the fibers create soft shadows that show up even in indoor lighting. Pair two wrapped candles with one simple bowl for a clean centerpiece. Choose rope in natural tan and keep the rest of the palette neutral.
Measure the candle circumference and cut rope lengths with enough overlap for a tight wrap. Wrap the rope around the candle starting at one point and secure with hot glue every few inches. Trim the ends neatly and glue the overlap. Place candles on a tray and add a small bowl or mini vase near them. If you use scented candles, keep the rope away from the flame and never leave it unattended.
Use a thin layer of glue, then press rope firmly so you don’t see thick bumps.
Don’t wrap too close to the top where you need stable candle wicks.
15. Mini terrarium on a shallow tray with a pebbled base
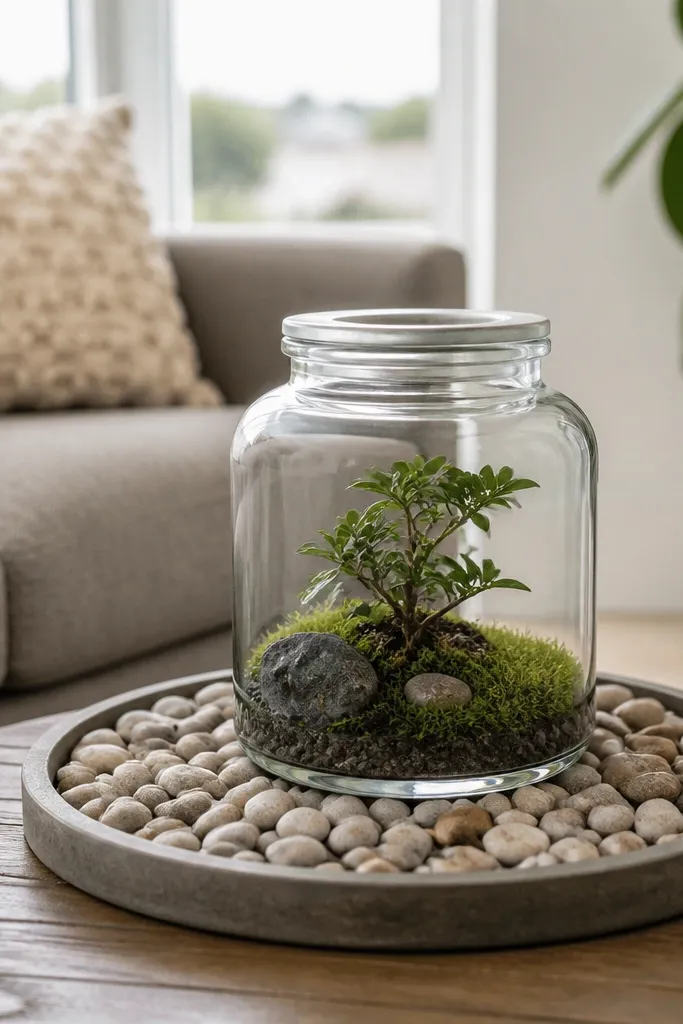
A mini terrarium makes your coffee table decor feel alive, even with small spaces. The pebbled base adds depth and gives the jar a finished, layered look. This is beginner-friendly because you’re using a shallow tray and a jar that’s easy to center. It also solves the “I don’t want to water a big plant” issue because you can keep it small and manageable. Choose a jar with a wide mouth so it looks airy rather than cramped.
Pick a shallow tray and a small glass jar. Add a thin layer of pebbles, then a layer of potting mix inside the jar. Plant one small succulent or hardy greenery and gently press it in. Add a decorative top layer of sand or extra pebbles. Set the jar centered on the tray and keep surrounding decor minimal so the terrarium stays the focal point.
Use a spray bottle for misting — it keeps the soil surface from getting soggy.
Don’t crowd multiple plants in one jar. One plant looks intentional; three makes it look messy.
16. Candle tray with a DIY match-holder and a linen strip
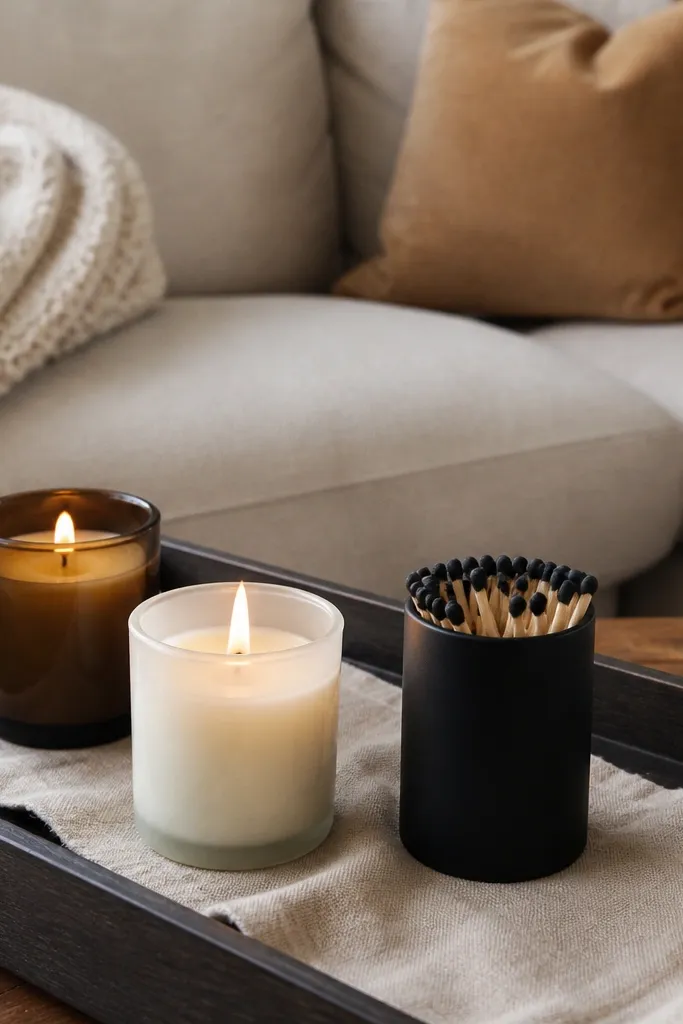
This is decor that also fixes a daily annoyance: matches and lighters clutter. A dedicated match-holder makes the whole setup look designed, not improvised. Linen behind the candles adds a soft background that makes the flame area look clean in photos. It’s beginner-friendly because it’s mostly placement, plus a simple build for the match-holder. Keep the palette tight so the tray looks calm and styled.
Build a match-holder by placing a small tin or wooden block inside a simple fabric sleeve made from a strip of linen. Fold the linen around the tin and glue or stitch the ends. Put the match-holder on a tray and place two candles side by side, leaving space between them. Add a linen strip as a backdrop behind the candles, trimmed to the tray length. Finish by aligning the candle heights so one isn’t noticeably taller.
Use a liner under the tin so it doesn’t scratch and so it slides less.
Skip mismatched candle heights — uneven flames look messy fast.
17. Painted wood bead garland draped over a tray
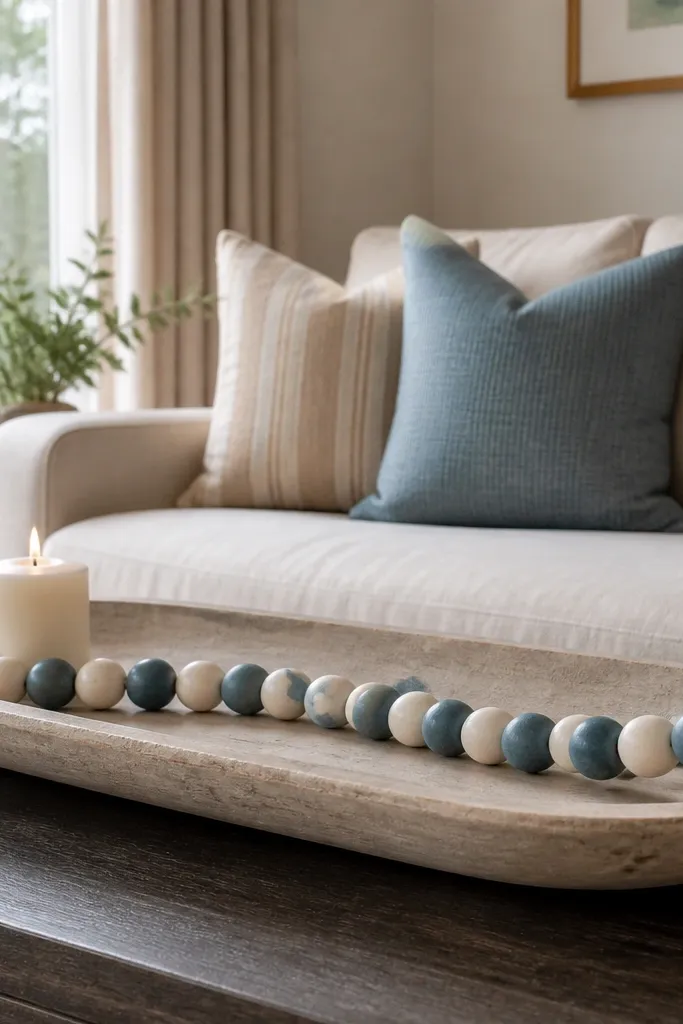
Garlands work on coffee tables when they’re short and controlled. A bead garland draped over a tray adds movement without taking space, and it photographs well because beads catch light at different angles. This is a beginner-friendly Coffee Table Decor Idea because you can make it with stringing beads and a few simple knots. The look is also easy to refresh by changing bead colors seasonally.
Buy wooden beads in a consistent size and sand them lightly. Paint them with matte acrylic in two tones and let fully cure. String beads onto strong twine or thin fishing line and tie off ends securely. Drape the garland over a tray so it falls in a gentle arc. Place a small vase or bowl at one end to keep the composition anchored.
Seal painted beads with a matte clear coat to prevent chipping when you handle them.
Don’t make the garland too long — long strands cover the table and look messy.
18. Modular riser made from stacked picture frames
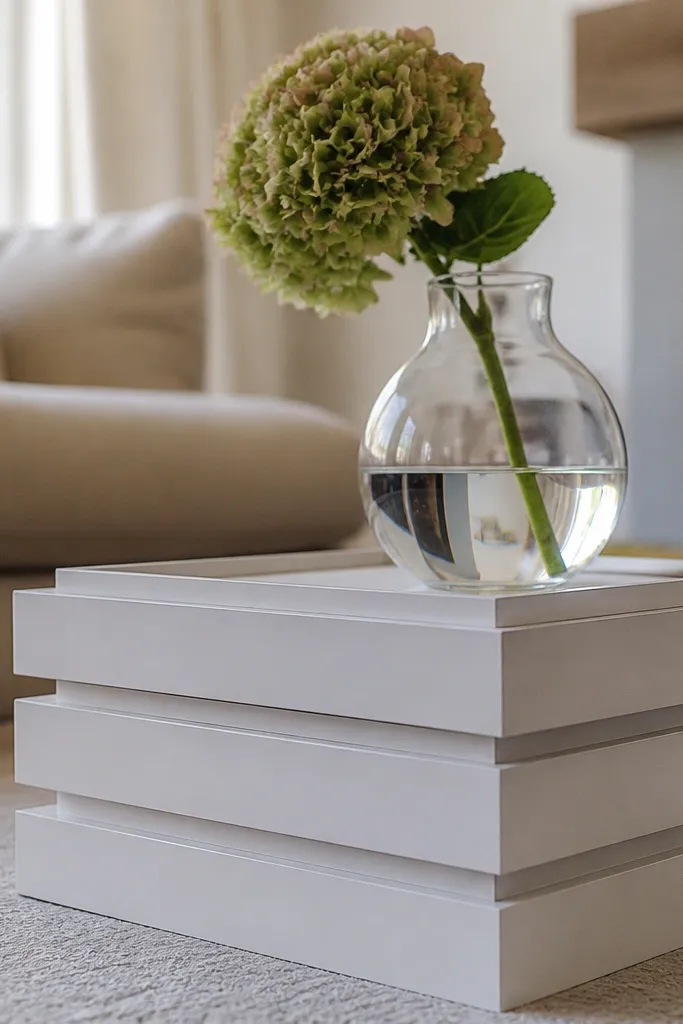
Pick 3-4 small picture frames with the same outer size. Remove glass and backings so you only have the frame. Paint all frames matte black or matte brass and let dry. Stack frames vertically and glue at corner contact points or use screws through drilled holes if you want it sturdy. Place the riser on a tray and set a medium vase on top, centered.
If you want height but hate buying stands, stacked picture frames are the move. Paint them one color and stack them to create a riser that looks intentional and graphic. This arrangement is beginner-friendly because the building blocks are identical and the measurements are forgiving. Use it under a medium vase or a small sculpture to lift it above the table line. In photos, frame edges create clean geometry that makes the decor look “designed.”
Skip thisSkip frames with different thicknesses — the stack looks uneven.
Editor's noteDrill small holes in the corners and use short screws for a stronger stack than glue alone.
19. Color-matched ceramic spoon rest turned into a mini sculptural stand
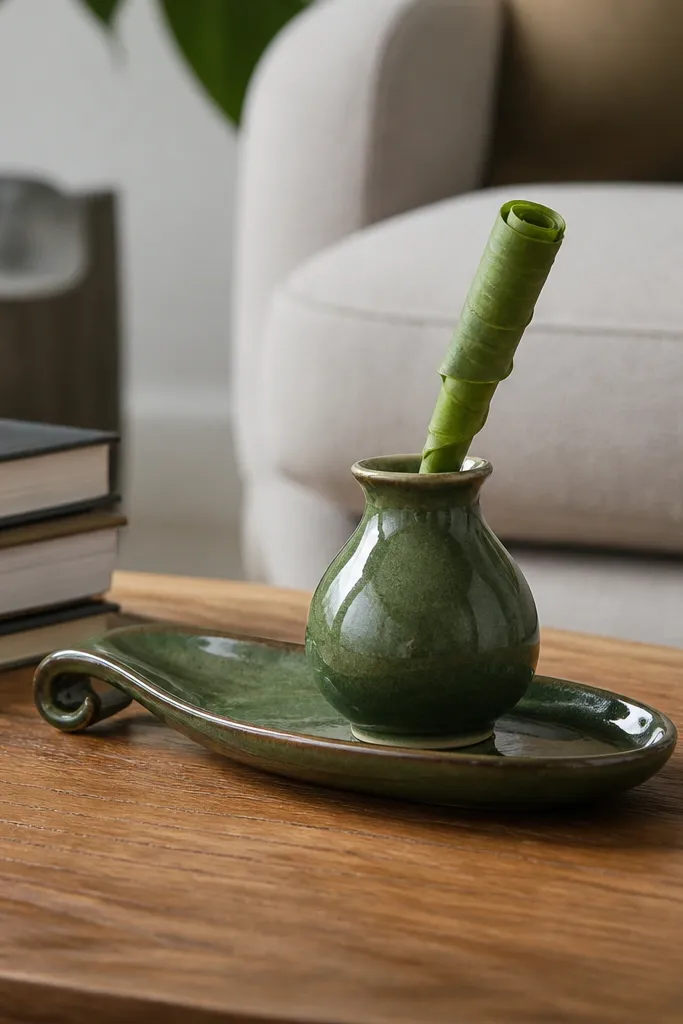
Find a ceramic spoon rest and wash it thoroughly. Place it on a tray and center it. Add a tiny bud vase or a small cylinder cup inside the rest’s bowl area. Insert one dried stem so the top sits above the books or candles around it. Finish by adding one small accent — a single matchbox or a tiny stone — so the look stays intentional.
This is a weirdly good trick: a spoon rest becomes a mini sculptural stand. It’s beginner-friendly because you’re repurposing a functional kitchen item, and ceramic looks polished next to books and candles. The spoon rest’s curve naturally positions a small vase or a rolled stem so it doesn’t topple. It also helps you make a small centerpiece when you don’t want a big tray. Choose a spoon rest in cream, off-white, or matte gray for the cleanest look.
Skip thisDon’t place multiple tiny items on the rest. One stem or one bud vase looks best.
Editor's noteUse museum putty under the spoon rest if it slides on smooth wood.
20. Tray centerpiece with DIY felt "book spine" strips
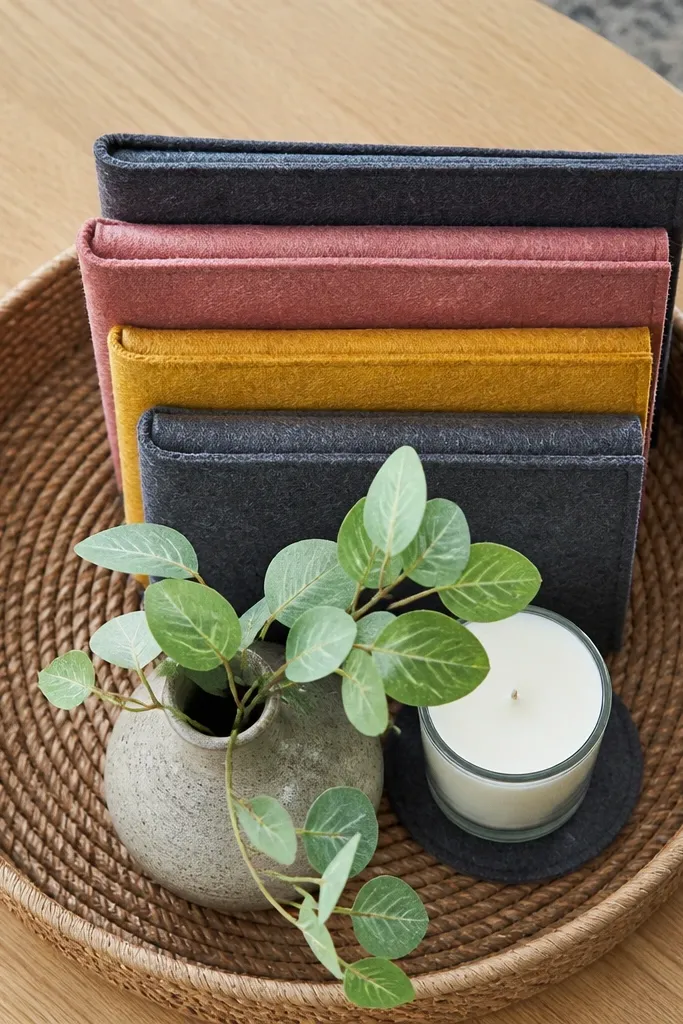
Cut felt strips to mimic book spine sizes, around 1.5 inches wide and 4-6 inches tall depending on your tray. Stack them in a fan or straight line and secure with a few stitches or fabric glue at the base. Place the felt stack on a tray and set a small candle in a holder or a bud vase on top. Add one low element like a small dish near the base to anchor the composition. Keep spacing even so the “spines” look aligned.
Felt strips create the look of a book stack without needing actual heavy books. This works when your coffee table decor needs color blocks but you don’t want clutter. The felt texture adds softness and prevents glare, so it looks good in both bright and dim rooms. It’s beginner-friendly because you cut and stack fabric, then tuck in a candle or vase on top. Keep the colors muted and limited to two or three shades.
Skip thisSkip neon felt. Bright colors read like craft supplies instead of decor.
Editor's noteUse a fabric glue that dries flexible so the felt doesn’t stiffen and curl.
21. Floating shelf style wall art turned into a coffee table mini sculpture
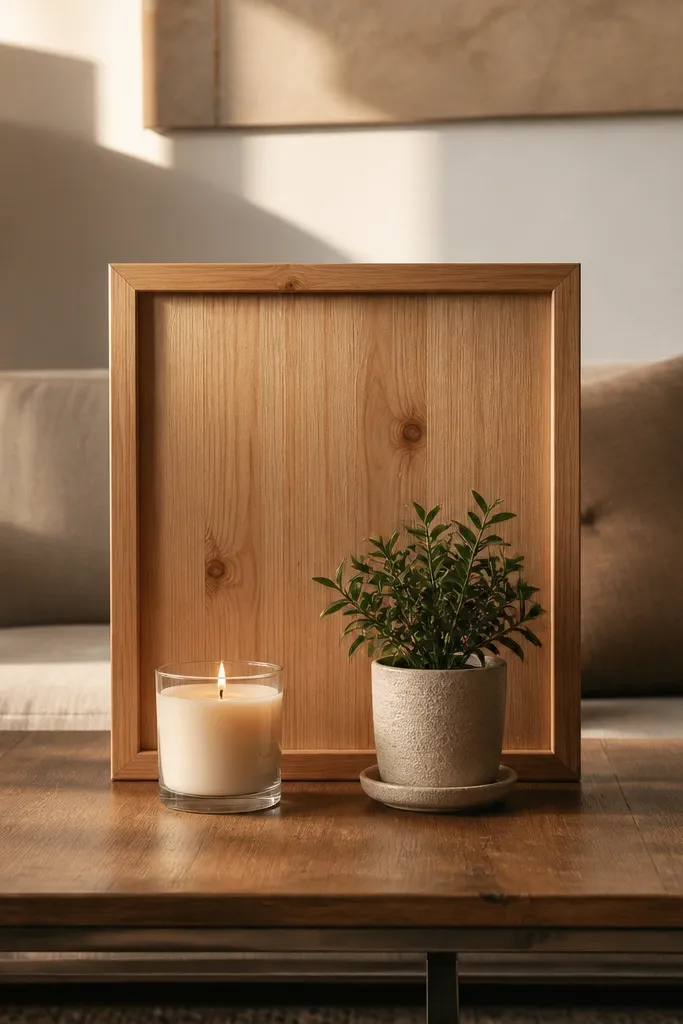
This is a smart way to add “depth” without adding more objects. A small framed wood panel placed behind a candle and plant creates a background like a mini shelf display. It’s beginner-friendly because you’re using an existing frame or a small wood board and arranging around it. The panel also hides the mess you’d normally see behind low decor. Choose wood finishes that match your room — light oak or walnut looks best with neutral candles.
Get a small picture frame or cut a wood board to about 10-14 inches wide. Paint or stain it to match your decor and let it dry fully. Lean it against the back edge of a tray on your coffee table. Place a candle in front and a small plant or bud vase slightly to one side. Adjust the angle so the framed panel is visible behind the centerpiece, then keep the rest of the table empty.
Add a thin rubber backing strip to the frame so it doesn’t slide on smooth tabletops.
Don’t pick a panel with a busy print. Solid wood or simple color blocks look cleaner.
22. Seasonal faux-branch bundle in a glass cylinder base
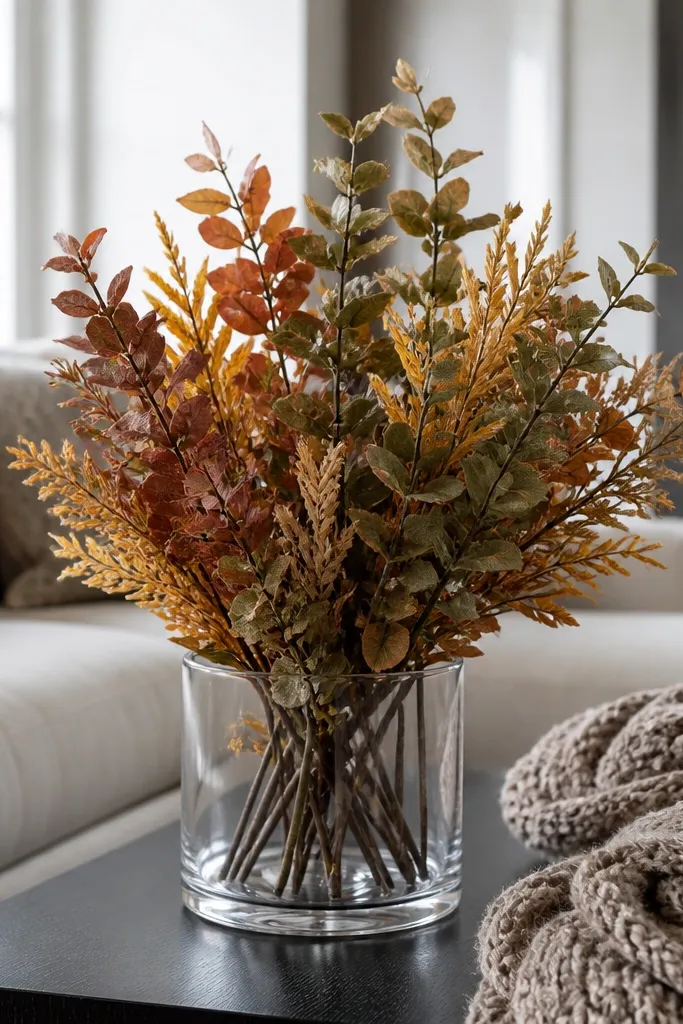
Pick a clear glass cylinder or vase and place it centered on a tray. Trim faux branches so the tallest stems sit about 8-10 inches above the tray surface. Insert the branches into the cylinder and use floral foam or sand inside to hold them upright. Add one small accent color with a ribbon or a few faux berries. Rotate the bundle so the thicker twigs face toward the room for a natural silhouette.
Branch bundles look effortless but still styled because they create height and organic shapes. A glass cylinder keeps the bundle clean and contained, so it doesn’t spill across the table. This is beginner-friendly because faux branches are easy to trim and arrange, and you can switch colors seasonally without changing the base. It also works if you want a centerpiece that doesn’t require constant watering. Choose branches with thin stems and a few thicker twigs for visual interest.
Skip thisDon’t let stems touch the glass all the way around — it looks like a clump.
Editor's noteUse sand instead of foam when the cylinder is narrow; it looks cleaner and is easier to adjust.
23. DIY ceramic pebble tray with a hidden coaster mat
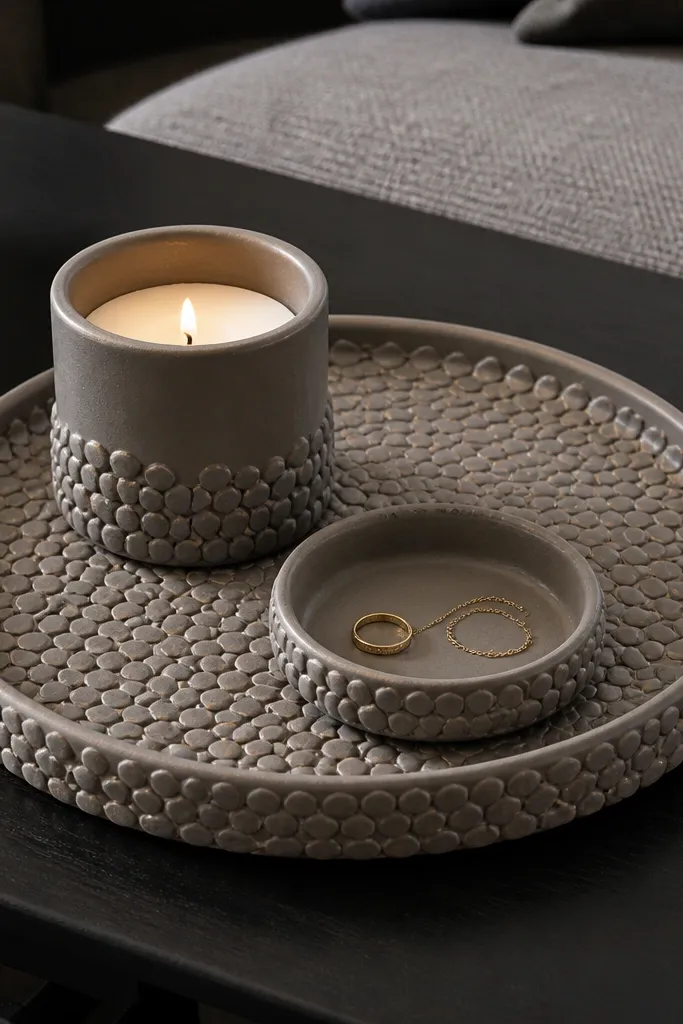
This one is for people who want decor that also protects the table. A pebble-texture tray look hides water rings and gives you a stable base for candles and small dishes. The hidden coaster mat under the tray makes it practical, so you don’t worry about sweating glasses or candle warmth. It’s beginner-friendly because you’re assembling layers, not building a full object from scratch. The pebble texture adds visual depth that flat trays don’t.
Buy a shallow tray or use a flat wooden base. Cut a coaster mat or felt square to the exact size of the base and glue it down. Create a pebble texture by pressing small decorative stones or textured tiles onto the top surface with strong adhesive. Let cure fully, then wipe off any residue. Place a candle or mini vase in the center and keep surrounding items minimal.
Seal decorative stones with a thin matte sealant so they don’t shed grit onto your table.
Don’t skip the coaster mat — pebble-textured tops still scratch and transfer moisture.
24. Tall taper candle lantern with DIY paper-wrapped base
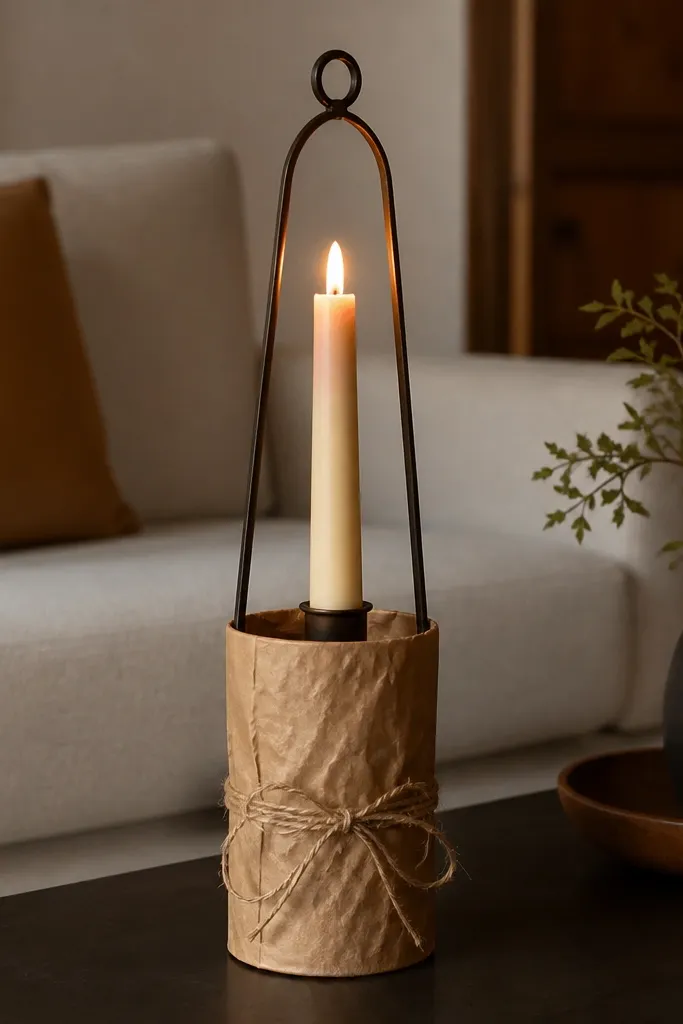
Wrap a small jar or lantern base with craft paper strips and glue the seams so it looks like a tight spiral wrap. Insert a small candle holder inside or use a lantern that can hold the taper safely. Place the lantern on a tray and add a low accent like a small stone dish next to it. Keep the candle as the tallest element and don’t add extra height objects. Trim the paper edges cleanly so the lantern looks crisp.
Lantern-style candle looks add drama without needing a big centerpiece. A paper-wrapped base gives you the warm, handmade texture that makes beginner-friendly Coffee Table Decor Ideas look intentional. The lantern shape creates vertical lines that hold your arrangement together even when you only add one candle. This works best in living rooms with neutral walls or light wood floors because the lantern silhouette stands out. Use a single candle and let the shape do the decorating.
Skip thisDon’t use paper that can sag near heat — keep a safe distance between flame and wrap.
Editor's noteUse double-sided tape under the paper wrap for cleaner seams than glue alone.
25. One-color floral foam-free arrangement using a bud vase grid
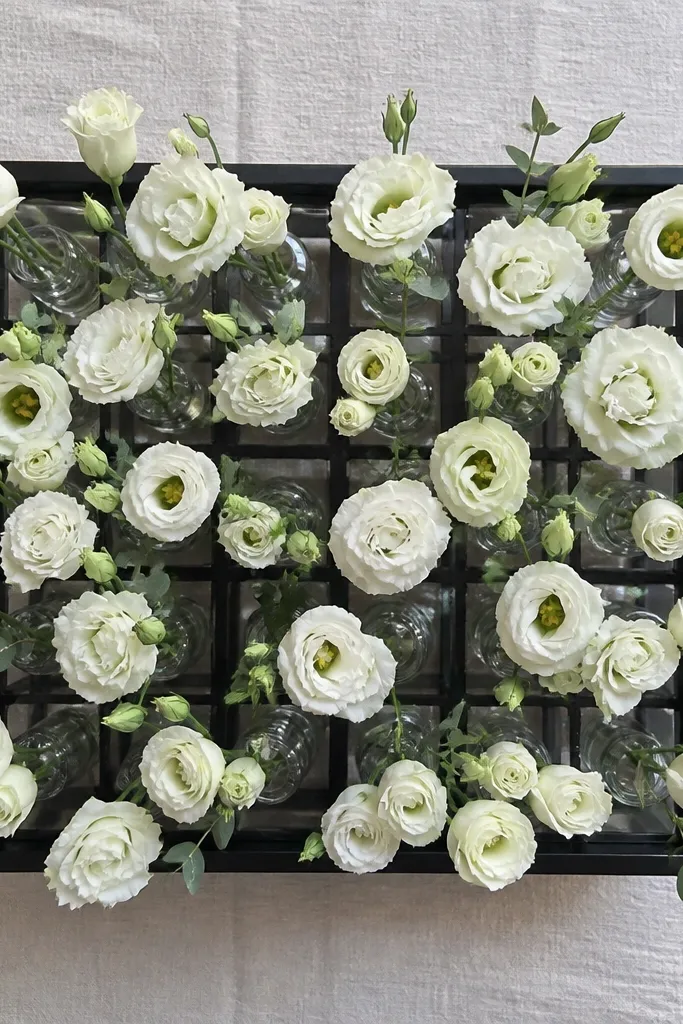
Choose a tray and place three bud vases across it with equal spacing. Cut stems to different heights — one tall, one medium, one low. Place each stem into its vase and adjust angle so heads face upward. Add a small filler like greenery in the background only, not in every vase. Keep the tray surface clear except for the vases so the grid reads instantly.
This is the cleanest way to do flowers without the messy center. Instead of one big bouquet, you use a bud vase grid with the same flower color so the arrangement looks cohesive. It’s beginner-friendly because you just trim stems and place them, no foam required. The grid also creates repetition, which makes it look designed even if the flowers are inexpensive. Choose one color like cream, blush, or deep burgundy and repeat it across all vases.
Skip thisAvoid mixing more than one flower color. Two colors usually looks accidental for beginners.
Editor's noteUse floral tape around the stem base if a stem slips — it’s fast and invisible inside the vase.



