
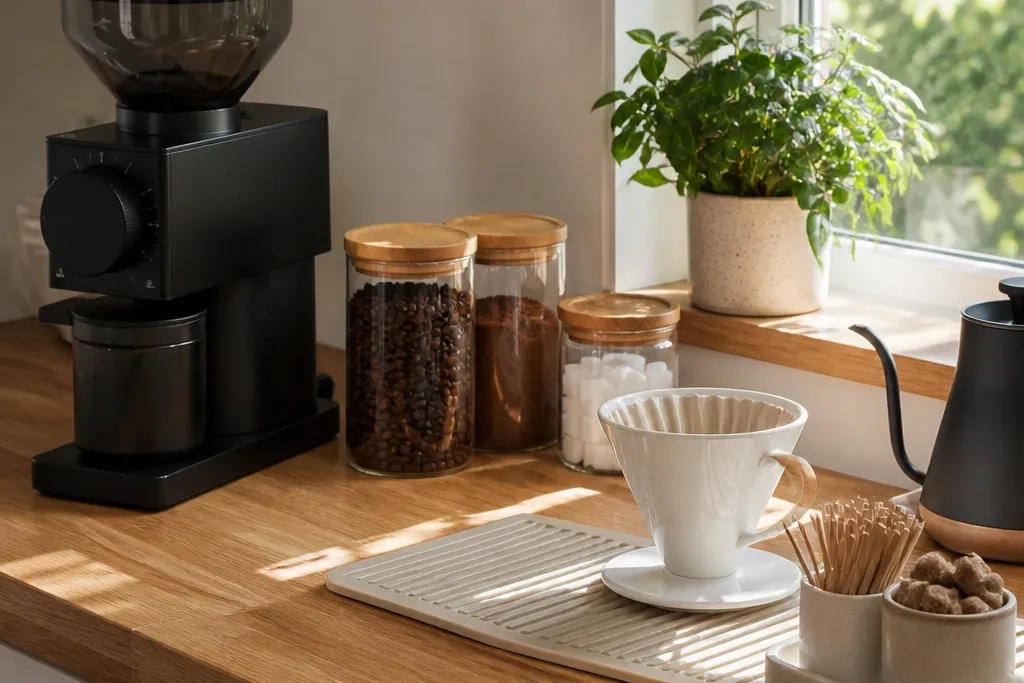
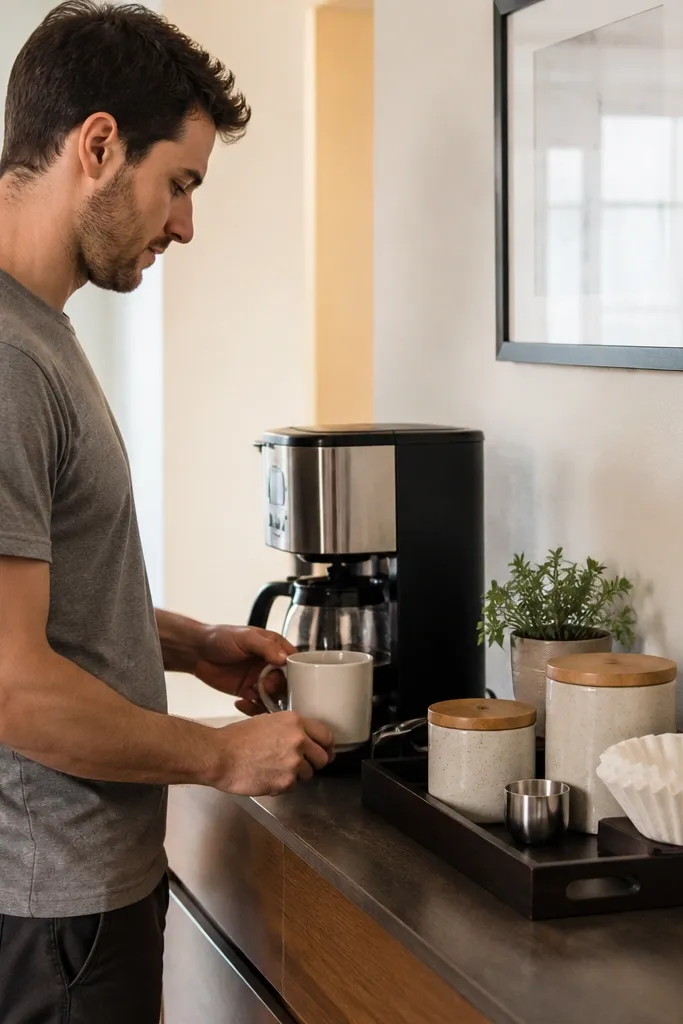
1. Pegboard Coffee Bar with Matching Hooks
This fixes the clutter problem by turning your tools into a visual system. A pegboard coffee bar makes your grinder, scoop, whisk, and pour-over dripper look like part of the decor instead of random items on the counter. The look is clean because hooks repeat in a grid and the canisters bring a consistent color line. It’s beginner-friendly because pegboard cuts down on measuring complexity — you hang, step back, and adjust. Plan on about 2-3 hours for mounting and styling, plus a little time for labels.
Start by buying a pre-cut pegboard sheet sized to your wall space, then pick a simple layout: center for mugs, sides for tools. Mount the pegboard on studs if possible, or use heavy-duty wall anchors and level it before you drill anything. Add hooks, then mount a small shelf for cups or a shallow tray for drippers. Finish by grouping canisters on the ledge or shelf and label them with masking tape so the station stays tidy.
Editor's noteUse stainless hooks and wipe them with a dry cloth after you prep drinks so fingerprints don’t show.
Skip thisDon’t put the kettle landing area right under dangling tools — steam and splashes ruin the look fast.
2. Rolling Cart Coffee Station with a Two-Tier Workflow
A rolling cart is the fastest way to make coffee feel organized without remodeling. You get a dedicated prep zone up top and hidden storage below, so the station looks good even when you’re in the middle of making drinks. The cart also solves awkward counter layouts because you can roll it to where you actually stand. For beginners, it’s low-risk: assemble the cart, add trays, and stop. Styling matters here — keep the top tray monochrome and the bins matching so it photographs clean.
Choose a cart with at least two shelves and a flat top, ideally 18-24 inches wide so it fits tight kitchens. Assemble it, then place a heat-safe tray or silicone mat on the top for kettle and dripper use. Add a small bin for filters and a separate bin for backups like extra cups or stir sticks. On the lower shelf, use two matching storage boxes so the station stays hidden and doesn’t look messy.
Editor's noteAdd one “landing tray” for your cup and dripper so you never set things directly on the cart surface.
Skip thisAvoid mixed-size bins on the lower shelf — the visual clutter makes the cart look busier than it is.
3. Door-Mounted Coffee Supply Shelf System
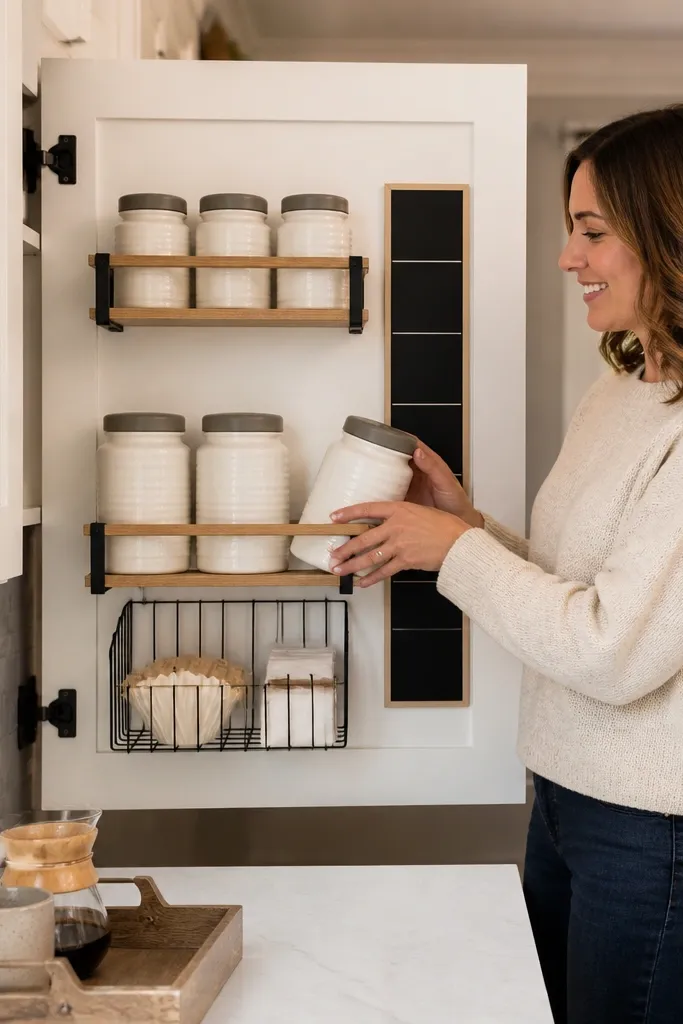
If your counter is tiny, the door-mount approach keeps your coffee station from eating your workspace. The look is tidy because supplies are contained behind a door, but the station still feels accessible. This is ideal for people who make coffee daily and want everything in reach without building a whole wall bar. Beginner-friendly coffee station ideas like this work because the install is straightforward and you can adjust shelf spacing as your routine changes.
Measure the inside of your cabinet door opening and buy two to three narrow shelves or a tension-free rack system that fits that width. Install the brackets so the shelves clear the door hinges and open fully without scraping. Place your daily items at eye level inside the door: filters, scoop, and a small canister for sugar or creamer. Store less-used items lower or higher, then add a small hook for a towel or brush.
Editor's noteUse clear bins with a labeled paper insert so you get the hidden-storage look without losing visibility.
Skip thisDon’t mount shelves so they sit where the door closes on the first attempt — gaps and rubbing will look sloppy and wear the brackets.
4. Countertop Wood Tray with Canister Grid
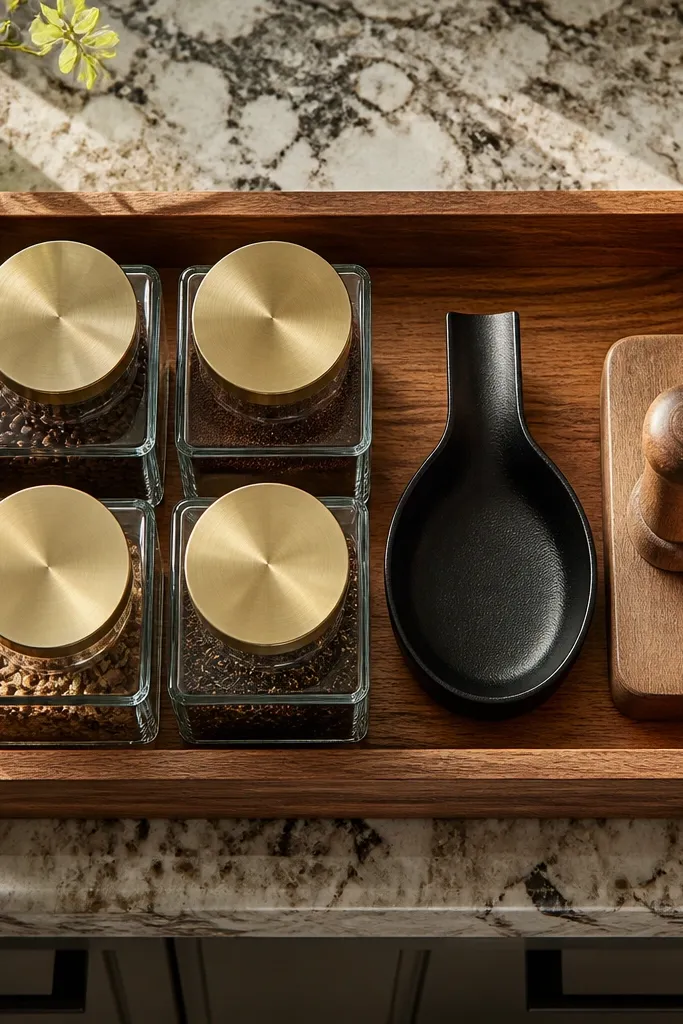
This is the easiest “it looks styled” upgrade because it gives your coffee items a boundary. A wood tray creates that magazine look instantly: everything has a place, and you can lift the tray away if you need counter space. The grid layout makes it feel intentional, not random — canisters line up, tools sit in one corner, and your daily sugar and stir sticks have a visible home. It’s beginner-friendly because you’re not drilling anything and the total cost stays low.
Pick a tray size that covers the coffee-making zone you use most, usually 18-24 inches long. Add a heat-safe liner or silicone mat if the tray will sit near the kettle or pour-over dripper. Arrange four canisters in a tight grid: beans (or grounds), filters, sugar, and something like cinnamon or cocoa if you use it. Put a small cup or jar for scoops and stir sticks in one corner so you don’t scatter small items.
Match canister heights within 1 inch so the grid looks crisp in photos and in real life.
Don’t mix tall and short containers without a plan — the tray becomes visually uneven and messy.
5. Heat-Safe Pour-Over Landing Station with Drip Mat
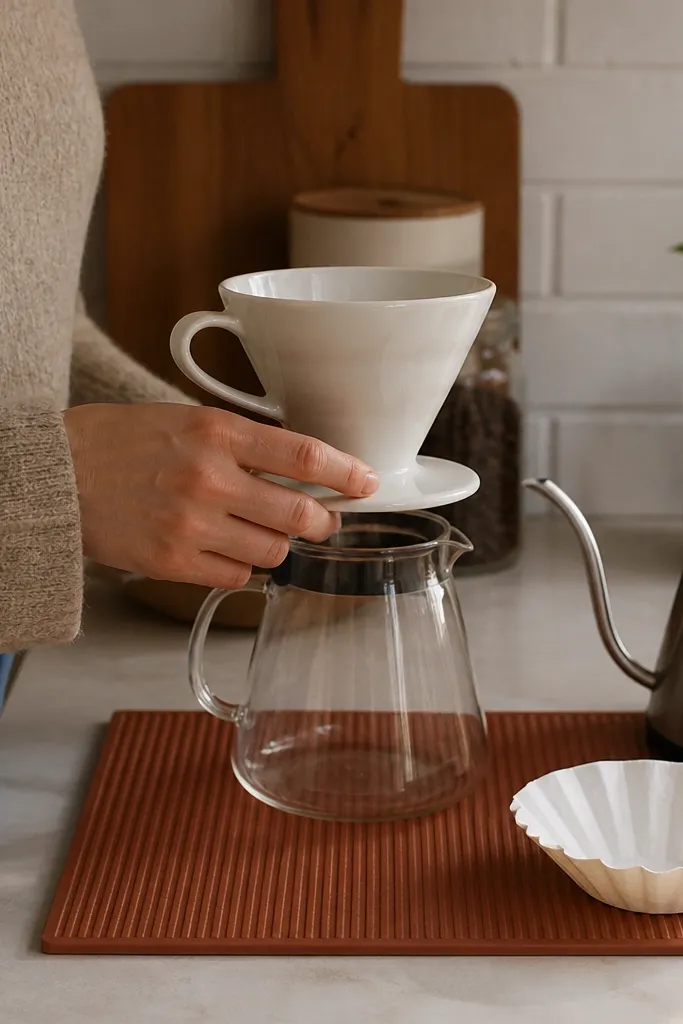
Pour-over coffee looks better when the “mess zone” is contained. A dedicated heat-safe landing station keeps water rings and drips off your counter and makes your setup look deliberate. This works especially well for beginner-friendly coffee station ideas because pour-over tools are easy to display: dripper, server, filters, and a kettle. You get a clean visual story when everything sits on one mat and you store filters in a matching container.
Choose a heat-safe mat or stone-style tray sized to fit your dripper and server footprint, usually 10x16 inches or larger. Put a small filter container to one side and a tool holder to the other. Use a slim stand or small shelf to keep the dripper off the counter surface while you brew. Finish by adding a towel clip or small hook so you can hang your cloth right where you work.
Use a dark mat under light wood counters — the contrast hides water spots better over time.
Don’t place the dripper directly on a decorative surface that can stain — the look will degrade after a few weeks.
6. Mason Jar Wall Shelf for Sugar, Cinnamon, and Extras
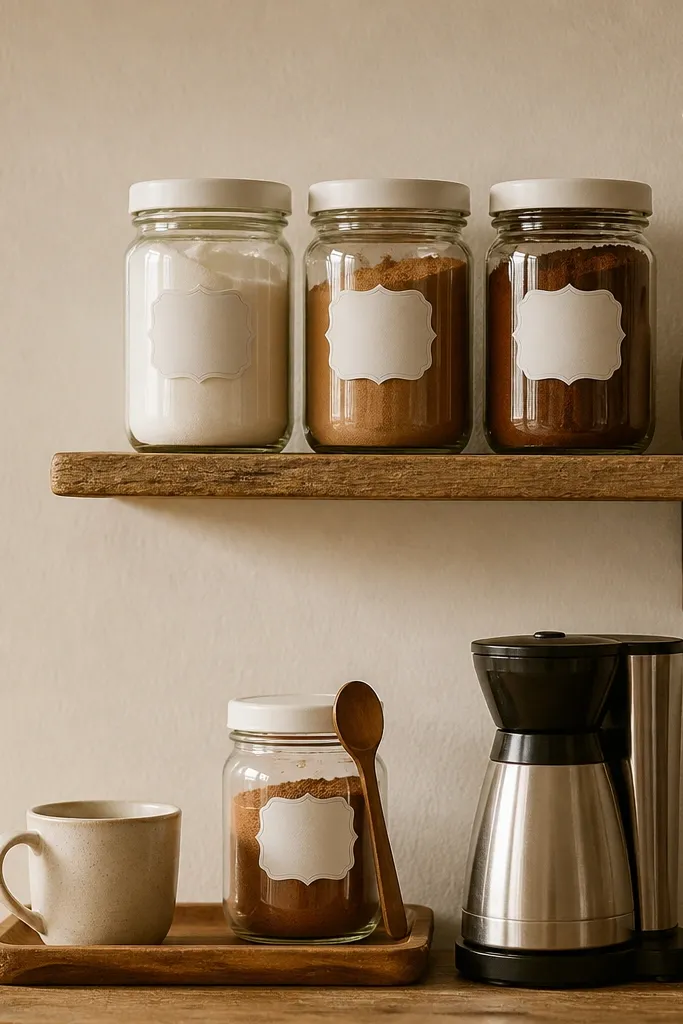
This is a cute, photo-friendly add-on that makes your station feel complete. Mason jars give you that warm, handmade look without fancy tools, and labeling keeps it functional. The shelf style turns your add-ins into decor while keeping them dry and easy to grab. Beginner-friendly coffee station ideas love small wall shelves because they make use of vertical space and reduce counter clutter.
Pick a narrow wall shelf with a lip or bracket so jars don’t slide forward. Mount it at a comfortable reach height, usually 48-60 inches from the floor depending on your counters. Fill jars with sugar, cinnamon, cocoa, or instant creamer, and add a label strip on the jar lid or front. Place one matching hook below the shelf for a small spoon or frother so the whole area looks coordinated.
Editor's noteUse jar lids in one finish (black, brass-tone, or clear) so the shelf looks intentional instead of random.
Skip thisDon’t overfill jars — leave a little headspace so lids sit clean and the shelf doesn’t look crowded.
7. Vinyl Label Station for Every Container (No Guessing)
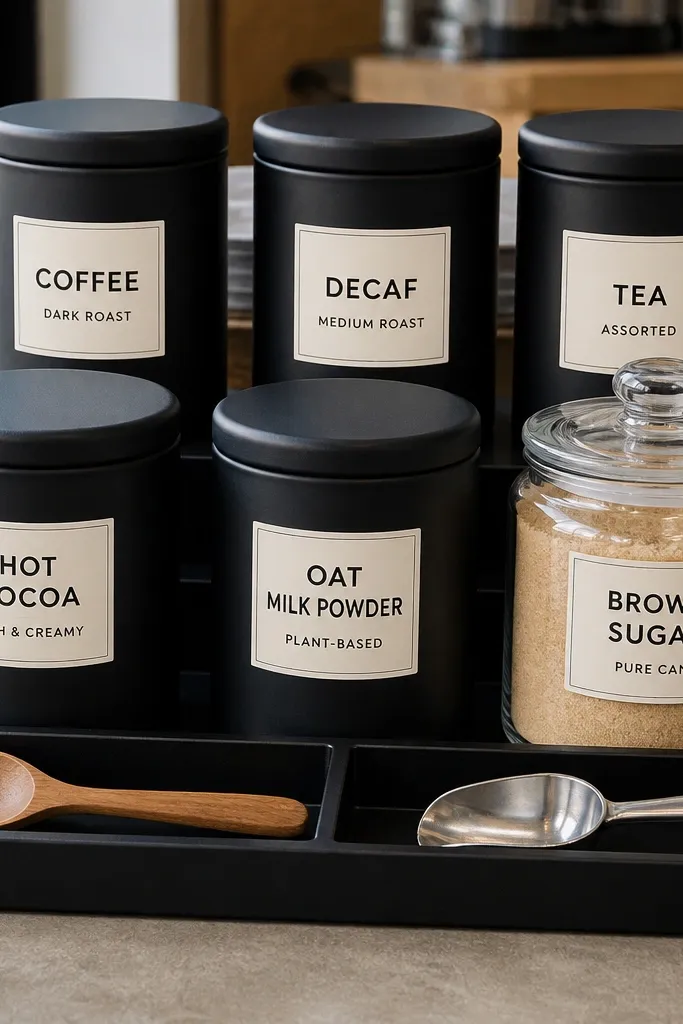
This idea fixes the “where is the thing” problem that ruins aesthetics. When containers are unlabeled, your station looks chaotic after two days because everything ends up mixed. A label system makes your station look styled because the typography is consistent and the colors repeat. It’s beginner-friendly because you don’t need fancy design skills — just consistent labels on the same surfaces.
Choose containers that have flat fronts or lids you can label, then decide on a simple color code: one color for beans/grounds, one for sweeteners, one for filters. Print or cut vinyl labels with big, readable text, and apply them straight with a ruler. Add labels in the same order on every container so your eye knows where to look. Finally, label the tool jar and the backup bin so everything stays part of the system.
Use matte labels on clear canisters so glare doesn’t kill readability in photos.
Don’t label with tiny handwriting — it looks messy and you’ll stop updating it.
8. Under-Cabinet Rail for Mugs and Spoons
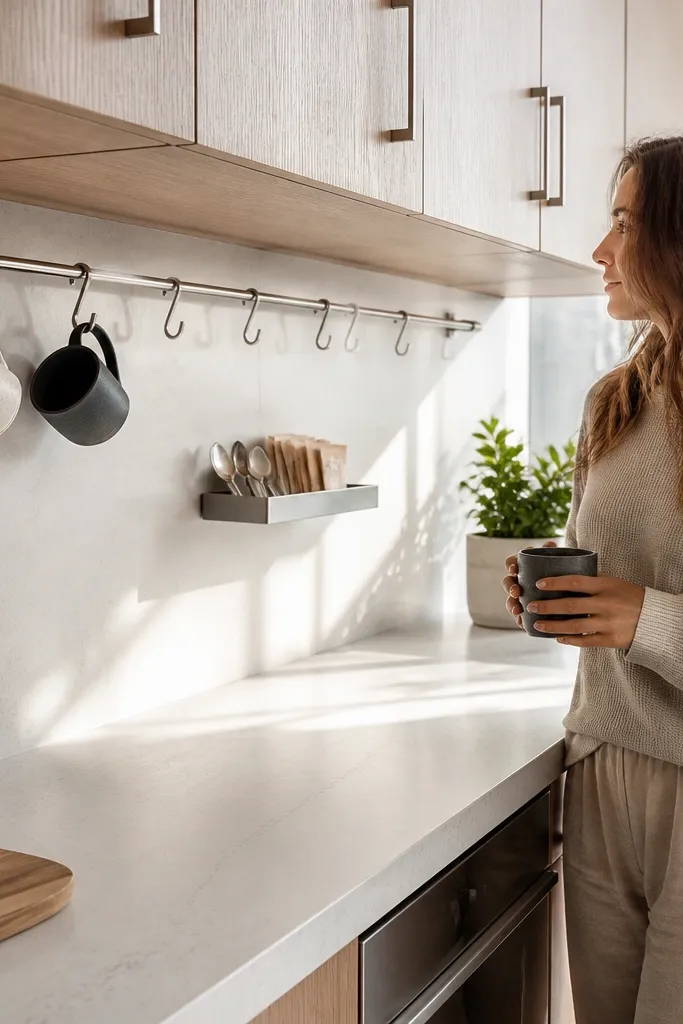
Hanging mugs under a cabinet makes your coffee station look airy and intentional. It also frees counter space, which is where most kitchens fall apart visually. The rail method is beginner-friendly because it’s a simple hardware install and you can adjust mug spacing as you collect cups. Your station looks good because the mugs become part of the design — a controlled display instead of a cup pile.
Find the underside of your cabinet above your counter prep zone, then install a sturdy rail with screws into studs when possible. Hang mugs evenly with hooks sized to their handle width. Add one small hook line for spoons, and keep it to one tool type so it doesn’t look scattered. Finish by placing a small tray nearby for sugar and stir sticks.
Use a rail height that keeps mug bottoms above the counter by at least 2-3 inches so they don’t swing into the prep area.
Don’t hang heavier mugs too close to the door hinge side — the motion makes the rail look uneven.
9. Slim Marble-Look Shelf + Wire Baskets for Filters
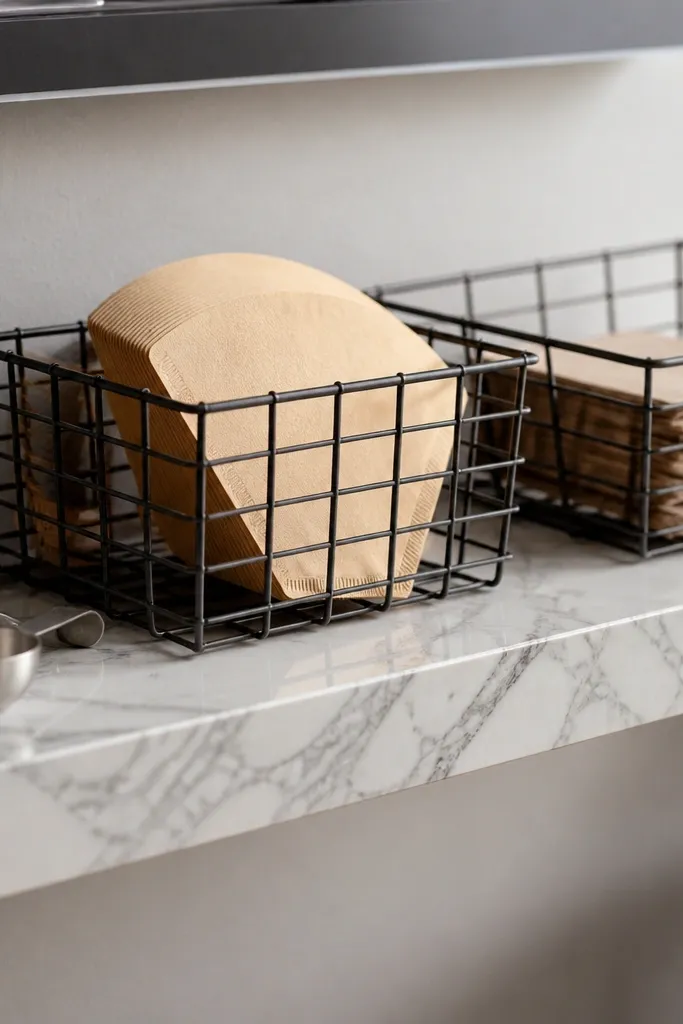
A slim shelf gives you a high-end look without needing a full countertop makeover. Pairing it with wire baskets keeps filters visible and breathable, which helps the station stay functional. The marble-look shelf finish reads clean and modern, and the wire basket texture adds contrast. Beginner-friendly coffee station ideas like this work because it’s quick to install and the styling is simple: one shelf, repeating containers, and baskets for bulk.
Install a narrow shelf above your coffee prep spot, usually 8-12 inches deep so it doesn’t overwhelm the space. Place wire baskets on the shelf for filters and extra pods, then set canisters behind them so the shelf looks layered. Use a small tray at the bottom for daily tools like scoop and tongs. Keep all canisters the same finish and color so the shelf reads cohesive.
Editor's noteLine wire baskets with kraft paper or a thin neutral liner so filters don’t snag and the shelf looks softer.
Skip thisDon’t use too many different basket shapes — two sizes max looks intentional.
10. Coffee Corner with Two Matching Trays and a Canister Stack
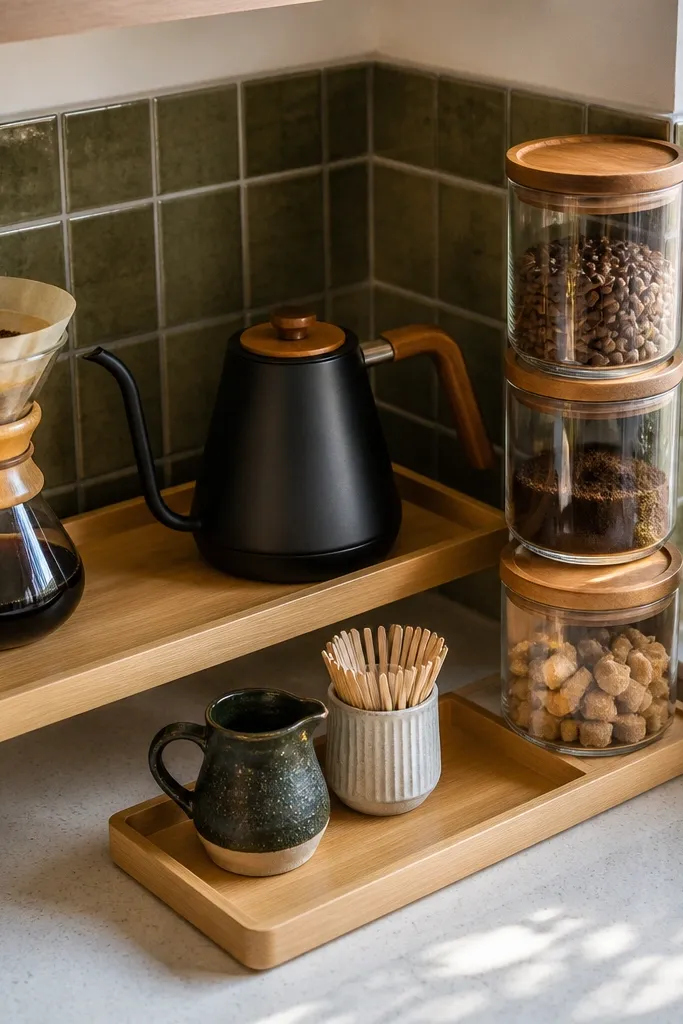
Corners are where coffee stations look messy because items spill in every direction. This setup uses two trays to define the prep area and the storage area, so the corner stays clean even when you’re mid-routine. The canister stack is the visual anchor: beans and grounds sit tall, sweeteners sit mid, and tools sit low. Beginner-friendly coffee station ideas like this are great because you can build it with what you already own — trays and bins are easy upgrades.
Choose two trays that match in color and material, then place one directly where you brew and one slightly to the side for storage. Stack canisters by height: tall for beans, medium for sweeteners, short for stir sticks. Put your tools in a small jar and set it inside the storage tray so it never wanders. Add a small towel or napkin in the same color palette as your canisters.
Editor's noteUse a matching napkin roll or folded cloth under the trays so the corner looks finished, not temporary.
Skip thisAvoid leaving the corner floor cluttered — a clean station reads as intentional only when the surrounding space is calm.
11. Slim Drawer Insert for Coffee Tools and Filters
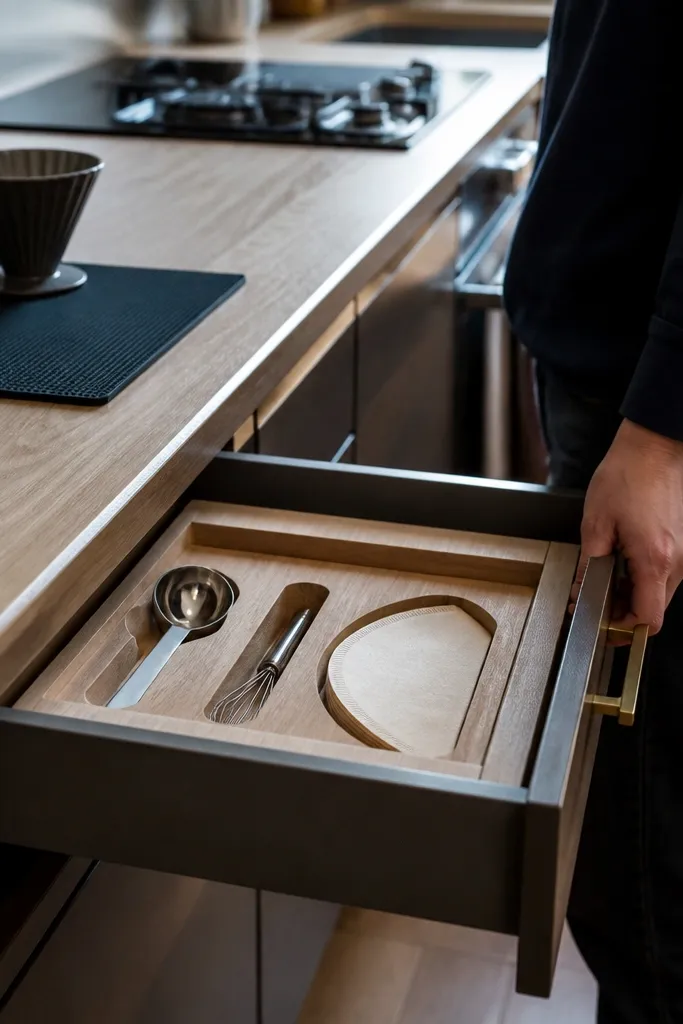
A coffee station doesn’t have to be only on the counter. When your tools live in a drawer insert, the counter stays photogenic and empty until you’re actually brewing. This idea fixes the “I leave the scoop out” habit because everything has a slot that looks neat. Beginner-friendly coffee station ideas like this work well for people who prefer minimal counter clutter and a clean kitchen look.
Measure your drawer interior width and buy a modular organizer insert system that fits snugly. Create compartments: one for filters, one for scoops and stir sticks, and a narrow slot for a small brush or thermometer. Put your daily items in the front-most compartments so they’re easy to grab. Keep backup supplies in a separate container in the back so the drawer doesn’t look crowded.
Editor's noteUse a small divider for the dripper or kettle accessories so they don’t rattle and look messy when you open the drawer.
Skip thisDon’t store wet cleaning cloths in the same drawer compartment — it makes the station look worn.
12. Towel-Plus-Tool Holder Bar on the Side of a Cabinet
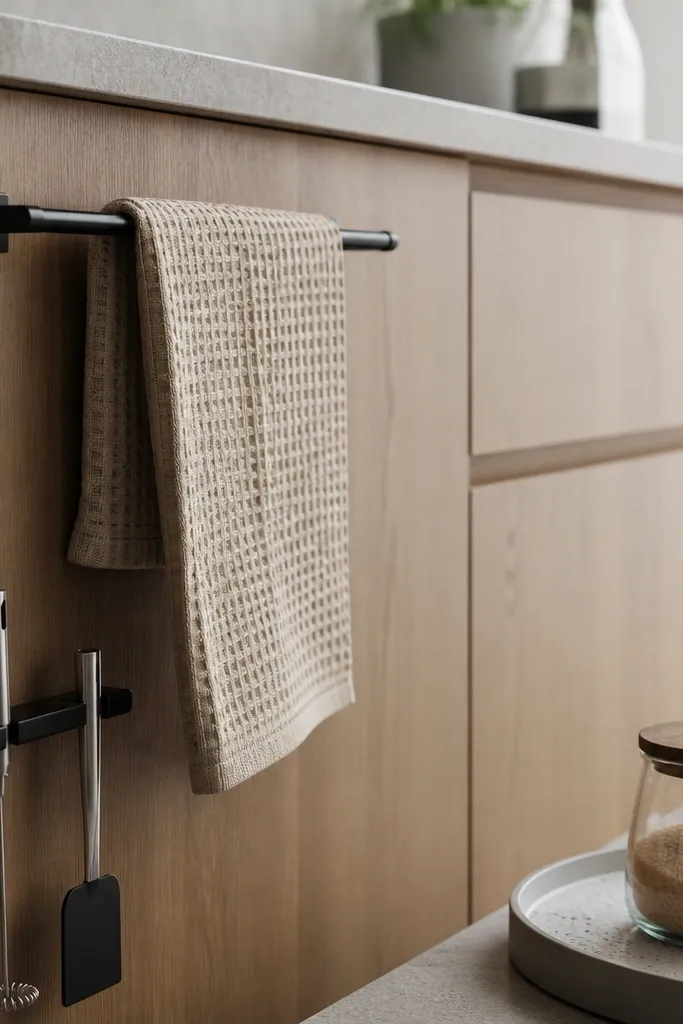
This is a smart aesthetic trick: you turn a boring cabinet side into a styling surface. A towel holder with a short tool bar makes your coffee routine look intentional and keeps wipes close to the drink-making spot. It’s beginner-friendly because side mounting is simpler than building shelves, and you can use existing jars or small containers. The look is clean because the towel gives a soft color block and the tools stay aligned.
Attach a towel bar or adhesive towel holder to the cabinet side at comfortable reach height. Add one small magnetic strip or mini rail for metal tools like a frother or spoon. Place your scoop and stir sticks in one matching jar set, and keep the jars on the counter right next to the bar. Use a neutral towel color that matches your canisters to keep the palette consistent.
Editor's noteChoose a towel with a textured weave so it hides coffee splashes better than smooth fabric.
Skip thisDon’t mount the bar too low — you’ll end up leaving cleaning tools on the counter and it ruins the look.
13. Coffee Machine Side Tray with Wipeable Liner
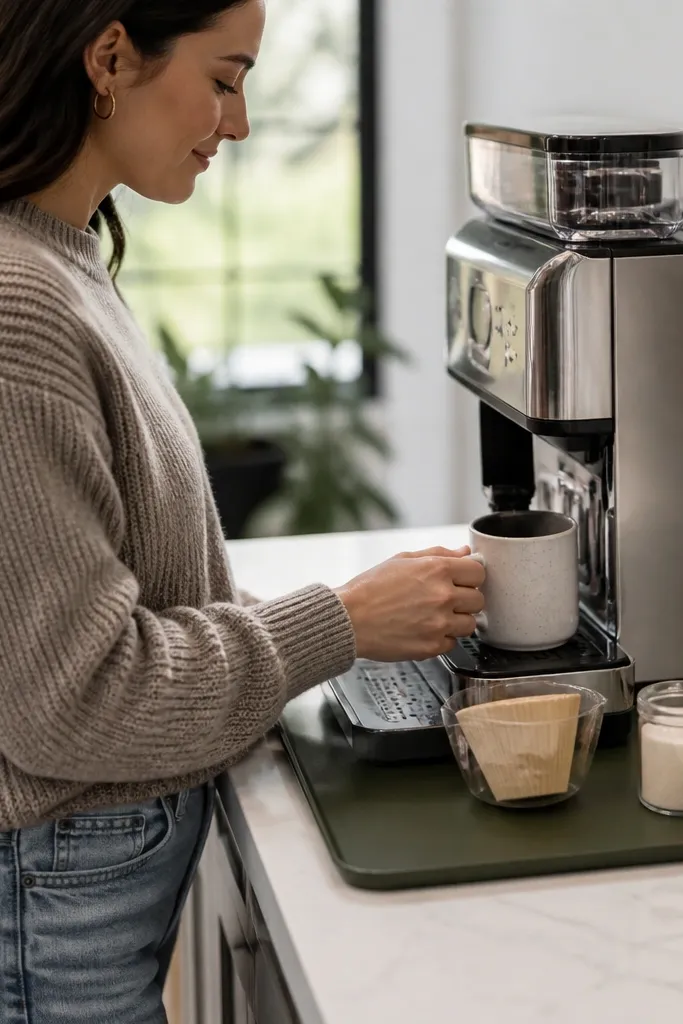
If you have a countertop machine, the side zone usually becomes a dumping ground. A dedicated side tray fixes that by giving you a wipeable landing for cups, filters, and add-ins. The look is crisp because the tray border frames the items, and the liner keeps spills from staining. Beginner-friendly coffee station ideas shine here because the build is basically a tray upgrade plus a liner and a few containers.
Pick a tray that matches the machine color — stainless, matte black, or light wood — and set it right next to the machine where you place cups. Add a wipeable liner like silicone or a heat-resistant mat so drips don’t soak in. Place two canisters max on the tray: one for sweetener and one for add-ins, plus a small jar for stir sticks. Keep the cup stack just off the tray edge so it doesn’t look crowded.
Editor's noteUse a tray with a lip so items don’t slide when you bump it while brewing.
Skip thisAvoid using an absorbent fabric liner — coffee oil stains show up fast.
14. Wall-Mounted Shelf with a Blackboard Label Strip
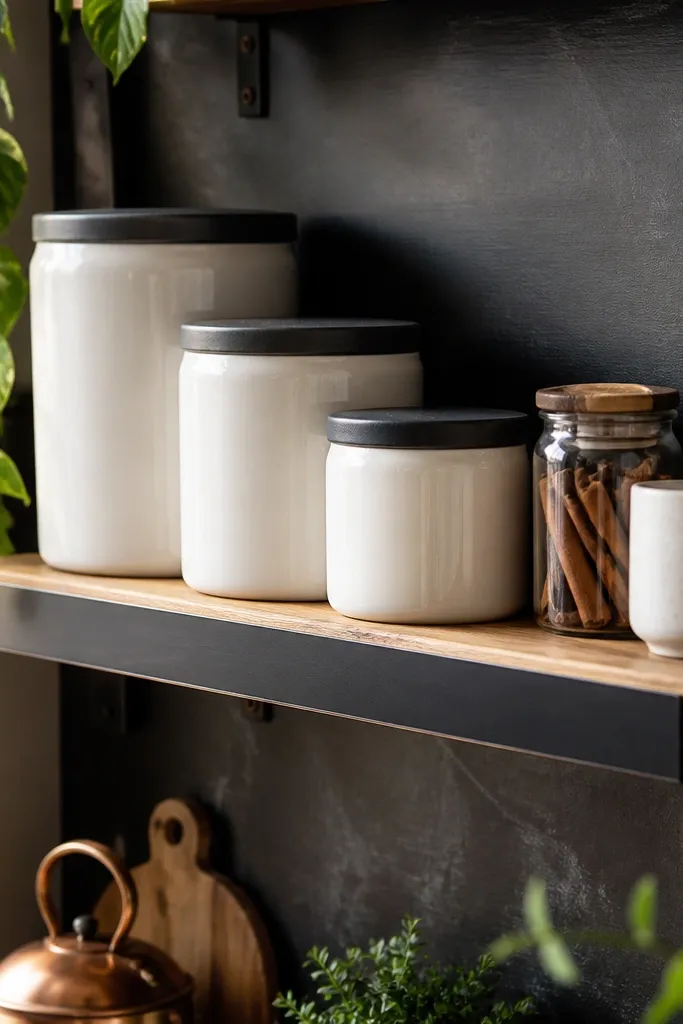
This gives you a functional label system with a cozy look. A blackboard strip lets you write daily notes like “decaf” or “today’s beans” without reprinting stickers, and it stays photogenic because it’s one consistent surface. Pair it with a simple shelf and matching canisters, and your station looks styled even when you change products. Beginner-friendly coffee station ideas like this are forgiving because you can adjust the wording as you go.
Mount a small wood shelf at counter reach height, then add a blackboard label strip across the front edge using a frame or strong adhesive that won’t peel. Align canisters under the shelf so their labels sit visually in a row. Write your categories in big, readable chalk text: beans, filters, sugar, and add-ins. Finish by adding one small tool holder so the shelf isn’t just containers.
Seal chalk with a light mist of fixative so your writing doesn’t smear when you wipe the shelf.
Don’t cram too many lines — three categories max reads clean and looks good in photos.
15. Ladder-Style Mug Rack with a Shelf for Pour-Over
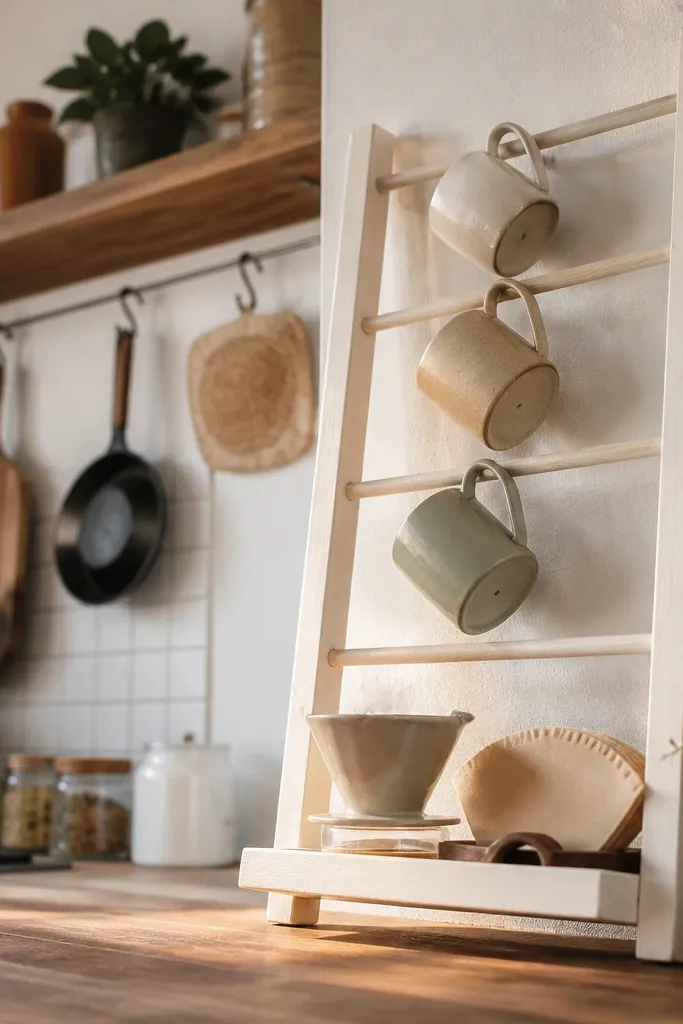
A ladder-style rack turns your mugs into a vertical display and makes the coffee station look intentional from across the room. Add a small shelf near the bottom for a pour-over dripper and filters, and you get both storage and a brewing focal point. This setup is photogenic because the mugs create a repeating pattern and the shelf adds depth. Beginner-friendly coffee station ideas like this work when you keep the shelf area minimal and use matching containers for add-ins.
Choose a compact ladder rack that fits your wall or corner, then anchor it securely with wall screws. Hang mugs by handle size so spacing stays even across rungs. Mount a small shelf or ledge on the lower section using brackets that can handle weight. Place a filter container and a dripper stand on the ledge, then keep tools in one jar so the rack doesn’t become a catch-all.
Editor's noteUse two mug colors max so the ladder looks like a coordinated display, not a mixed thrift pile.
Skip thisAvoid racks with wobbly feet — wobble makes the whole station feel messy when you walk by.
16. Acrylic Cup Display Organizer for One-Drink-At-A-Time
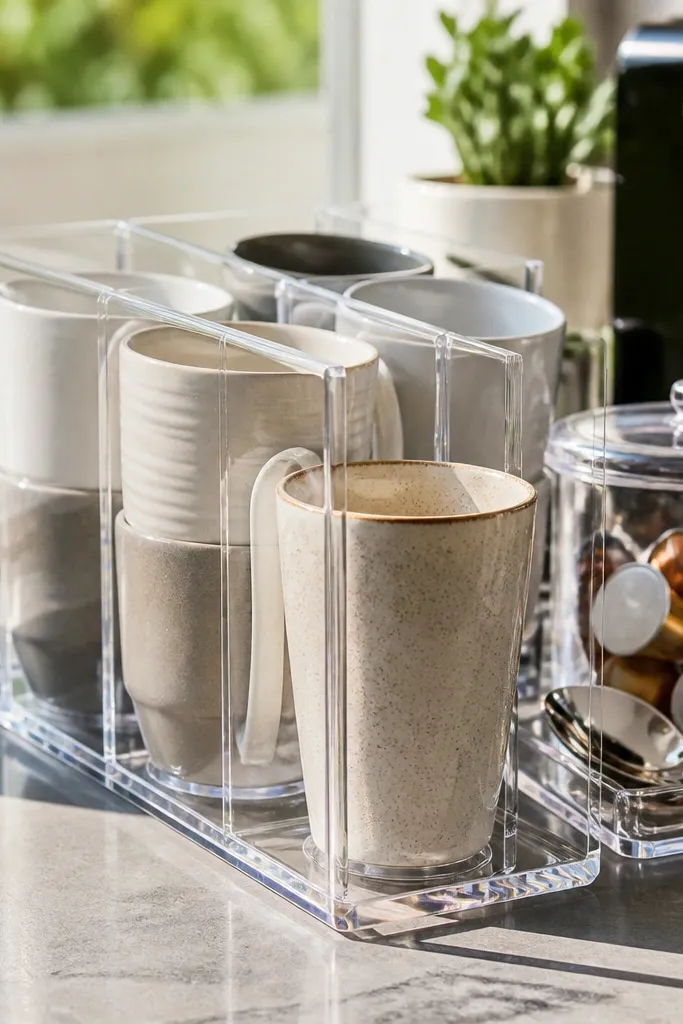
If your problem is that cups multiply and the counter gets cluttered, a cup organizer fixes the visual mess. Clear acrylic lets you see cup shapes, and that makes the station look curated. The best part is control: you store only what you actually use, so the display stays tidy. Beginner-friendly coffee station ideas like this work well for small households because it’s a simple swap that instantly improves the look.
Pick an organizer sized for your mug width, usually 6-10 cups capacity. Place it on a tray or on a shelf so the base doesn’t slide around. Add a small spoon cup next to it and store stir sticks inside a matching jar. Keep the organizer stocked with only your daily mugs, and move extras to a cabinet so the display stays clean.
Editor's noteWipe acrylic with a microfiber cloth and a tiny bit of glass cleaner so fingerprints don’t ruin the clear look.
Skip thisDon’t overfill — acrylic displays look messy when cups touch and stack too high.
17. Fabric Pocket Organizer on a Pantry Wall for Filters and Pods
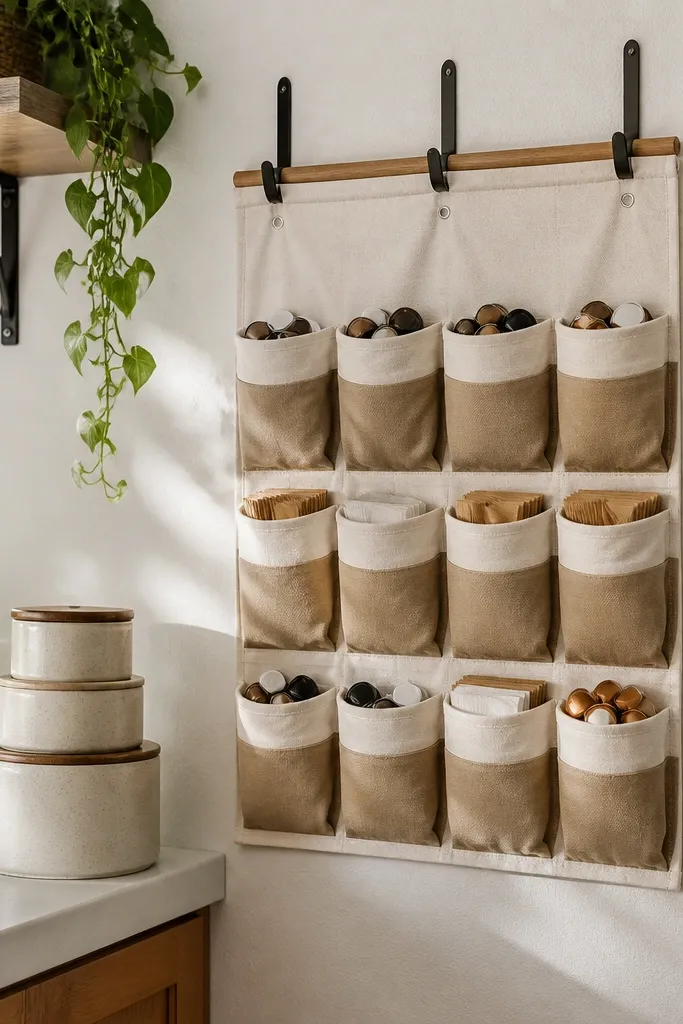
This makes coffee storage look soft and intentional, not like a pile of supplies. Fabric pockets are easy for beginners because you hang it with simple hooks and you can rearrange pockets as your routine changes. The visual payoff comes from consistent pocket fill: one product per pocket, labels aligned, and a calm color palette. It’s perfect for people who use paper filters, pods, or flavored syrups and want everything visible without a cabinet rummage.
Pick a fabric organizer with pocket sizes that match your filters or pods, then hang it on the pantry wall near where you brew. Use labels on the top edge of each pocket so you can find things quickly. Place filters in one pocket and pods in another, then keep small items like stir sticks in a separate bin so they don’t fall. Add a small tray below for anything that spills during refills.
Editor's noteChoose a neutral fabric color and use matching label tape so the pockets look designed, not temporary.
Skip thisDon’t hang it in direct steam paths — fabric can pick up odors and stains.
18. Mini Spice Rack Turned Coffee Add-In Station
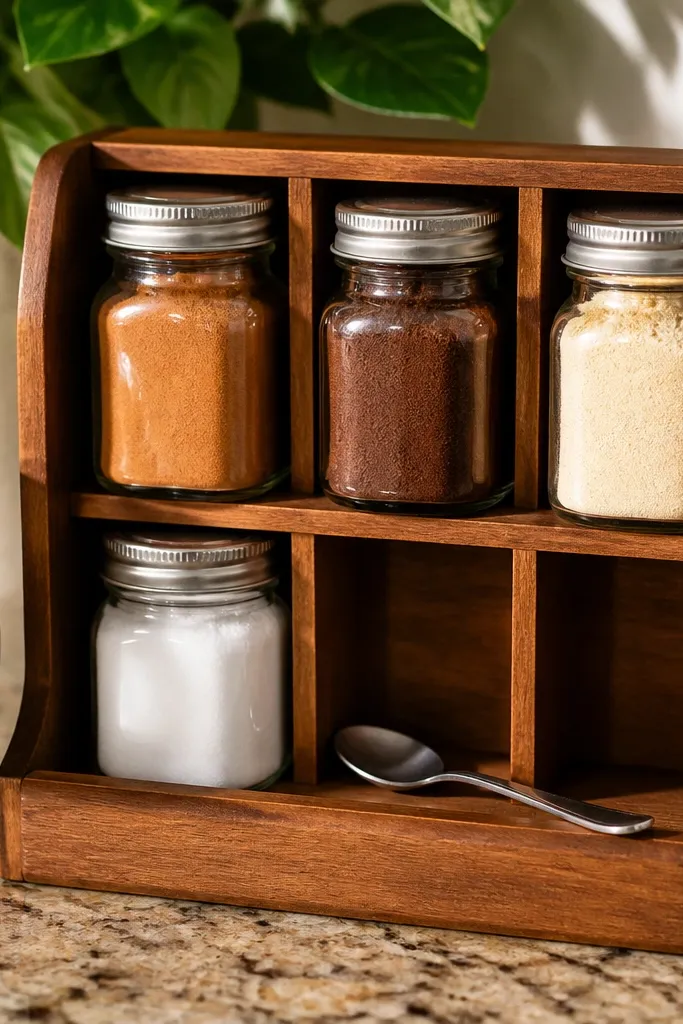
A spice rack is a cheat code for coffee add-ins because it already has compartments and a tidy visual structure. Swap spice jars for coffee add-ins like cinnamon, cocoa, instant creamer, and sugar — then label each one. This looks clean because the compartments create natural spacing, and the rack shape frames the station. Beginner-friendly coffee station ideas like this are great when you want a compact setup that doesn’t require drilling.
Buy a compact spice rack with removable shelves or compartments and measure it against your counter space. Fill each compartment with a matching jar size, then label the front with bold tape or vinyl. Place the rack on a tray if you want it to match other station elements. Add a small scoop or spoon next to the rack inside a matching holder so the station doesn’t look incomplete.
Editor's noteUse jars with tight lids so the station doesn’t smell like cinnamon all day.
Skip thisDon’t mix jar shapes — mismatched jars break the organized look instantly.
19. Built-In Look with a Reclaimed Wood Backboard and Small Shelf
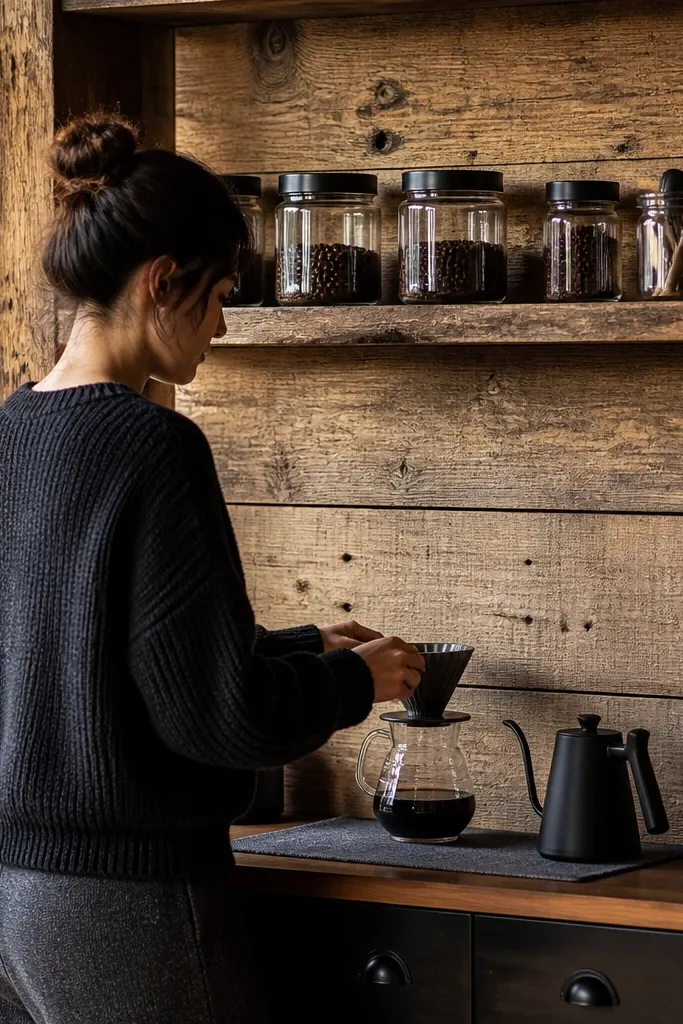
This is how you get that built-in look without actually building. A backboard adds depth and makes your coffee station look like it belongs there, especially if your counter area feels plain. Pair a small shelf on top with matching canisters and one tool jar, and the whole setup reads as intentional. Beginner-friendly coffee station ideas benefit here because reclaimed wood backboards are easy to mount and you can keep the rest of the styling simple.
Cut or buy a backboard sized to your wall space, then sand it lightly and wipe off dust. Mount the board to the wall with screws or heavy-duty anchors, keeping it level. Add a small shelf above or centered on the board using brackets. Style with canisters aligned in one row and a single tool jar so the backboard doesn’t turn into a clutter backdrop.
Seal the wood with matte clear coat so it handles occasional splashes and still looks warm.
Avoid glossy finish — it reflects light and makes labels hard to read.
20. Small Bench-Top Shelf with Under-Shelf Bins for Backups
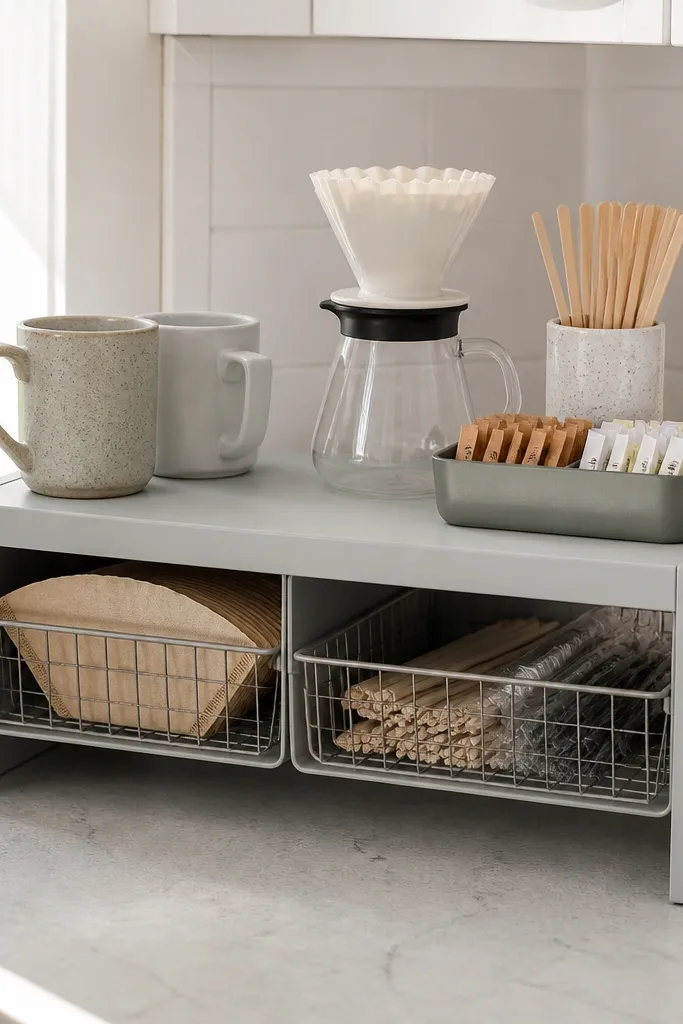
A two-level shelf unit makes your coffee station look designed because it has height and separation. Put daily items on top and backups underneath, so the shelf looks clean even when you refill. This helps beginner-friendly coffee station ideas because it’s a simple structure: shelf plus bins, no complex joinery. The aesthetic payoff is strong: the top stays photogenic, and the bottom hides the extra bags you don’t want on display.
Choose a compact counter shelf unit with an open base and add bins that fit underneath. Place it so it doesn’t block your cabinet doors or your reach to the coffee machine. Put daily items on top: canisters, filters, and a tool jar, keeping the number of items tight. Add matching bins under the shelf for backups like extra filters and stir sticks, then label the bins so refills are quick.
Use two bin colors max, and keep them matte so they don’t look shiny and plastic-y in daylight.
Don’t crowd the top shelf — a clean top shelf is what makes the build look expensive.
21. Dried-Flower-Free Fresh Herb Accent for Coffee Station (Parsley Jar Look)
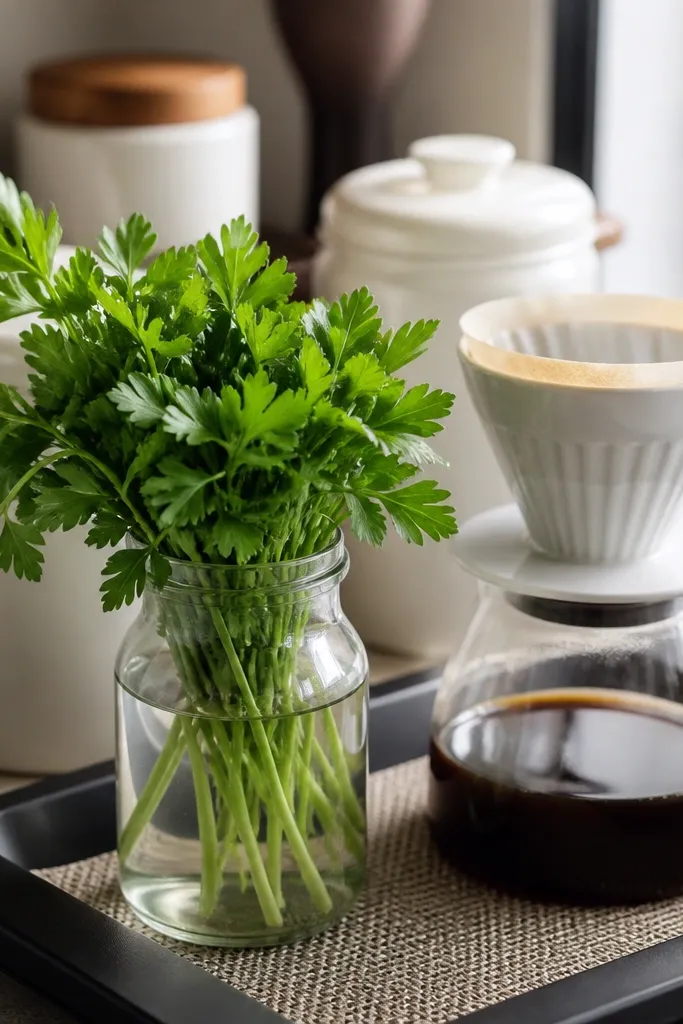
If your coffee station feels pretty but still unfinished, a small fresh accent fixes that. A jar of fresh herb like parsley or mint gives a living pop of green that makes the station look styled and not like storage. This is beginner-friendly because you’re not building anything — just adding a single focal element to a tray or shelf. Keep it simple: one jar, one color palette, and remove it when it wilts so the station stays crisp.
Use a small glass jar that matches your canister style and set it on the station tray as a focal point. Add fresh herbs with trimmed stems, and keep a paper towel under the jar to catch condensation. Place your canisters and tools in a tidy row so the green jar doesn’t compete with labels. Swap the herb jar for a new one when it starts to droop so the station doesn’t look tired.
Editor's notePick a jar size that doesn’t block the labels on your canisters so your station stays readable.
Skip thisAvoid dried arrangements — they look dusty and can make the station feel old fast.
22. Magnetic Spice Strip for Metal Tools on the Side of a Fridge
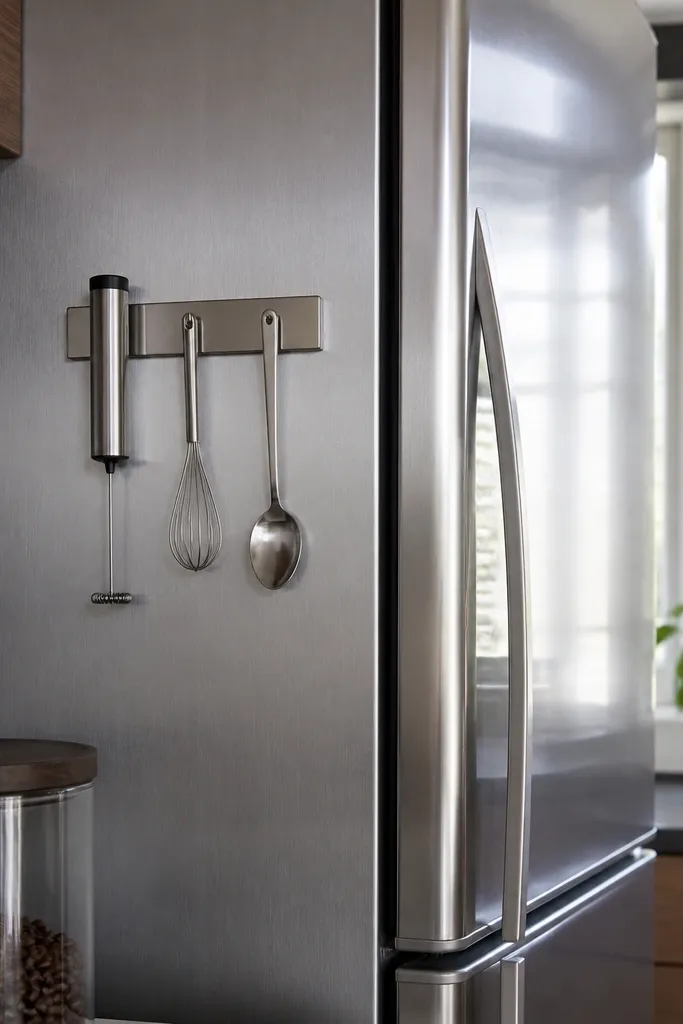
This is a clever place to steal counter space: the side of your fridge. A magnetic strip holds metal tools like a frother, spoon, or small whisk, keeping them visible and easy to grab. The look is modern because the tools line up in a clean strip and the nearby canister anchors the color palette. Beginner-friendly coffee station ideas work here because you’re using hardware you can install quickly, no carpentry required.
Attach a magnetic strip to the fridge side at comfortable reach height, keeping it level. Hang only metal tools so they actually stick and don’t fall off. Place one small canister or jar next to the strip for daily add-ins so the area reads as a single station. Keep the rest of the counter clear so this station becomes the visual anchor.
Editor's noteUse a strip with rounded edges so it doesn’t snag towels or sleeves when you walk past.
Skip thisDon’t overload the strip — too many tools turn it into a clutter line instead of a clean display.
23. Caddy Organizer with a Removable Filter Drawer
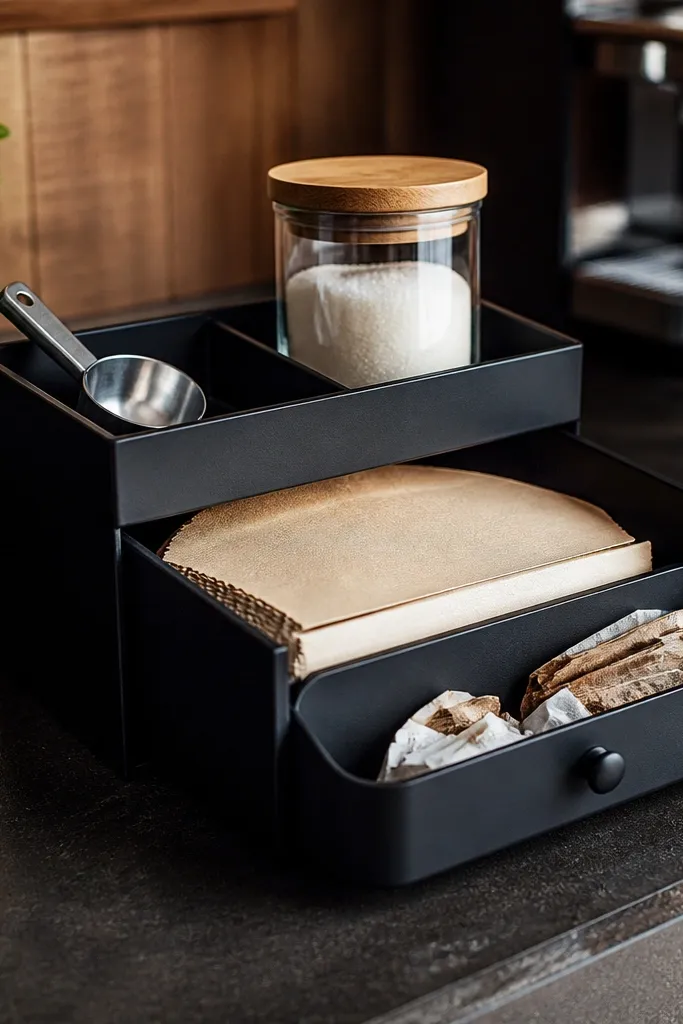
A caddy with a pull-out filter drawer keeps the most-used items in one place and makes refilling fast. The look is strong because the caddy creates a single block of organized items, not scattered containers. Pull-out storage also hides mess — wet filter wrappers and used papers don’t end up on the counter. Beginner-friendly coffee station ideas like this are great when you want everything in one container footprint and you don’t want to mount anything to the wall.
Buy a countertop caddy with compartments or build one using a shallow organizer with a small drawer insert. Add a pull-out tray for filters so you can grab them without disturbing other items. Place your dripper, scoop, and stir sticks in fixed compartments, then add a small trash liner inside the caddy base for quick cleanup. Finish by labeling compartments with a consistent set of labels.
Line the pull-out tray with a thin mat so filters stay dry and the drawer slides smoothly.
Avoid caddies with soft fabric compartments — they stain and look worn quickly near coffee.
24. One-Board Coffee Station with Pegboard Front (No Drilling Cabinet)
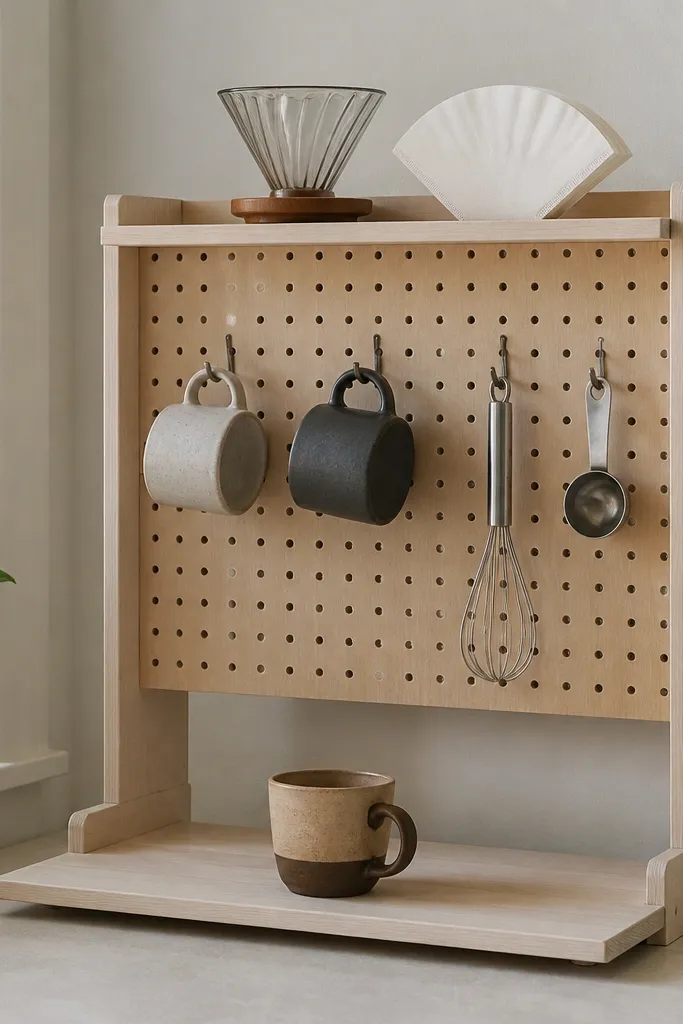
This fixes the “my coffee stuff is scattered” problem by giving you one landing zone that still looks designed. The trick is a single freestanding board with a pegboard front — hooks hold mugs and tools, and a narrow top shelf keeps the pour-over and filters visible. It looks clean because everything is on one plane, not spread across counter corners. Use it in a small kitchen where drilling into cabinets feels like too much, or in a renter-friendly setup. Beginner-friendly means you only need basic wood glue, a drill, and a couple of screws, and it finishes fast with a hard-wearing top coat.
Cut a 3/4-inch plywood base to 18 inches wide by 30 inches tall. Add a pegboard panel centered on the front — use 1/4-inch pegboard cut to 18 inches wide by 22 inches tall, then screw it onto the plywood with 1-inch screws every 6 inches around the perimeter. Install a 16-inch-long top shelf from 1x6 board (or 1x4 if you want it slimmer) with two side cleats so it sits 6 inches below the top edge of the pegboard. Mark hook locations first — place 3 mug hooks across the top third and 2 tool hooks lower down, then add a small 6-inch-wide bin shelf under the pour-over spot using a pair of L-brackets. Sand, fill screw holes, and seal with two coats of water-based polyurethane so the board wipes clean after spills.
Editor's notePre-drill every screw hole in the plywood and pegboard to stop splitting and to keep the hooks straight.
Skip thisDon’t rely on tiny brads or glue-only mounting — the pegboard needs mechanical fasteners so it stays square.
25. Steam-Proof Counter Coffee Sinkside Caddy with Pull-Out Tray
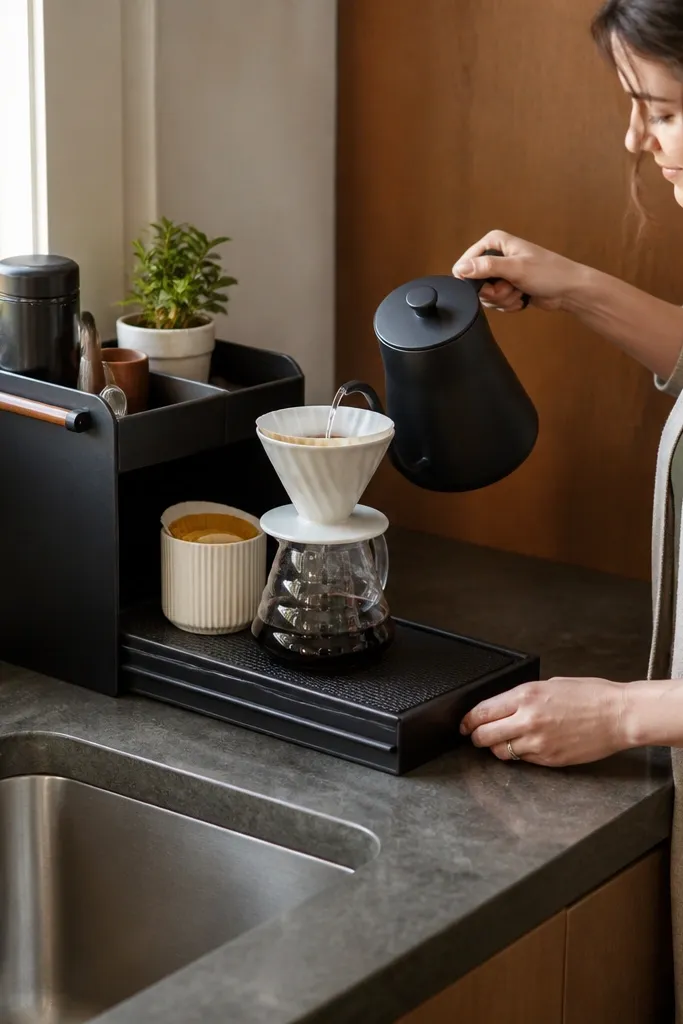
This fixes the “steam and water ruin my coffee station” problem by placing your coffee workflow right where you already use hot water, without letting mess spread across the counter. The build is a compact caddy with a pull-out tray for filters and a heat-safe mat surface where you set the kettle or pour-over. It looks intentional because the front panel hides clutter while the tray stays organized and neatly aligned. Go for this if your coffee routine starts near the sink and you hate reaching across a messy counter. It’s beginner-friendly because the structure is simple plywood boxes, and the materials are forgiving to cut and assemble.
Build a 14-inch-wide by 12-inch-deep base box from 3/4-inch plywood, with a front face that reaches 20 inches tall so it fits next to most counters. Add a pull-out tray made from 1/2-inch plywood sized to 12 inches deep by 13 inches wide, then mount it on 12-inch side-mount drawer slides. Cut a 14-inch-wide heat-safe landing top insert from a silicone mat or cork sheet with a sealed edge, and set it into a shallow rabbet so it doesn’t shift when you wipe it. Line the pull-out tray with a thin wipeable material like vinyl or laminated shelf liner so coffee drips wipe up without staining. Finish with two coats of polyurethane on the wood surfaces and avoid coating the silicone/cork landing area.
Editor's noteUse drawer slides rated for at least 25 lb and mount them with the included screws — the tray needs smooth motion when your hands are wet or messy.
Skip thisDon’t put bare wood anywhere the kettle base or wet drips land — steam and spills will darken it fast.



