
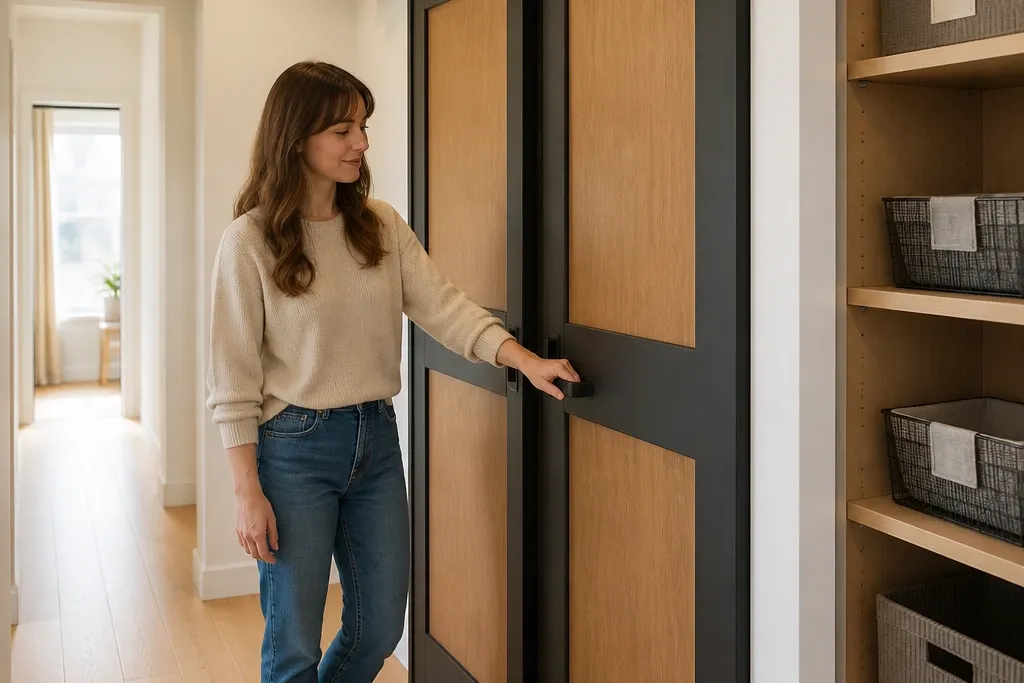
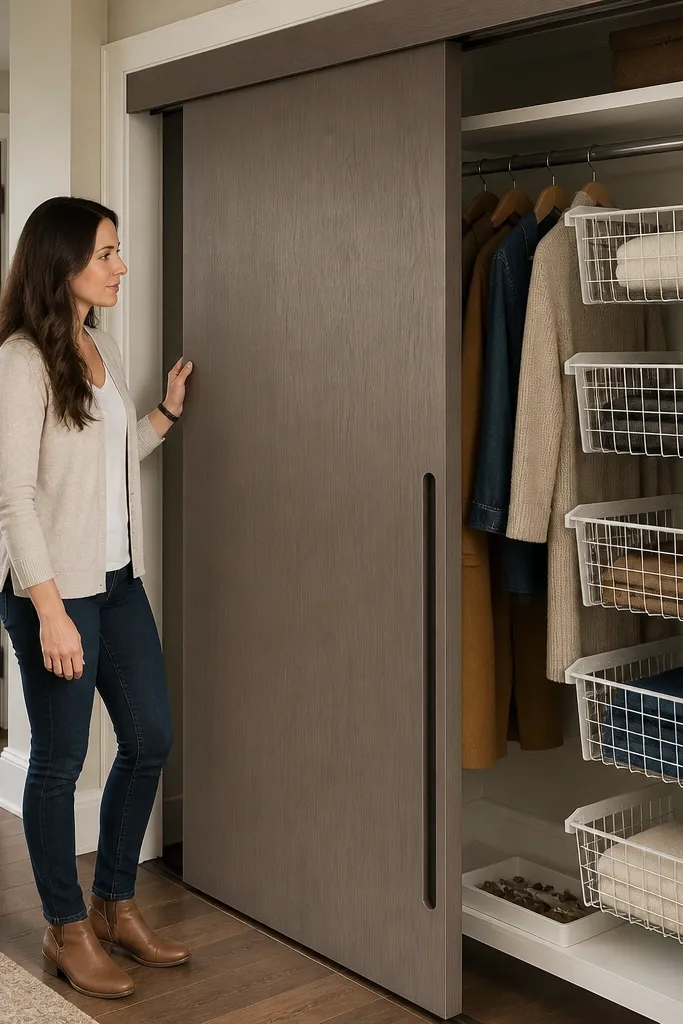
1. Matte Black Frame with Oak Veneer Panels
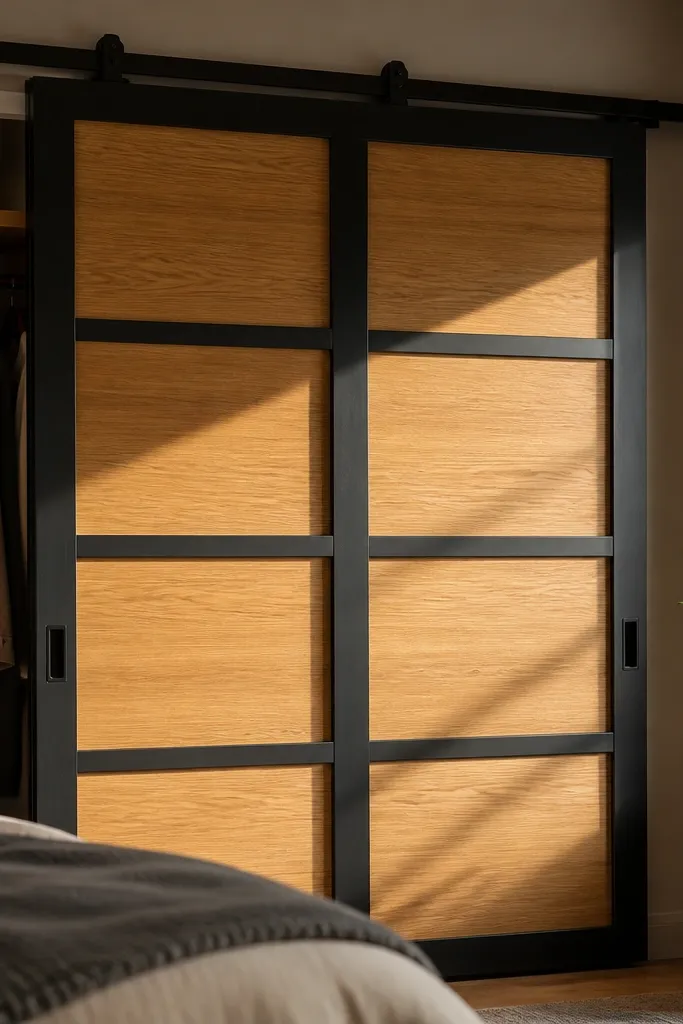
This look is the easiest way to make a closet door look store-bought. The matte black frame gives you a crisp border that reads “intentional,” while oak veneer panels add warmth without needing full solid wood thickness. Use a simple shaker-style frame so the shadows stay tight and consistent when the door slides. It works in bedrooms, hall closets, and any space where you want the closet to blend while still looking high-end.
Cut two horizontal and two vertical frame members to match your panel size, then route a shallow rabbet so the veneer sits flush. Sand the frame to 180 grit, then spray or roll matte black paint and let it cure fully. Install the veneer panel into the rabbet with wood glue and brad nails, then seal the veneer with a satin clear coat. Hang the door on a top-mount track, then adjust the roller height so the panel sits level.
Let the black paint cure overnight before you mount — it resists scuffs when you handle the panel.
Don’t skip a satin clear coat on veneer; unsealed veneer looks blotchy and scuffs fast.
2. Smoked Acrylic Glass with Black Track and Pull
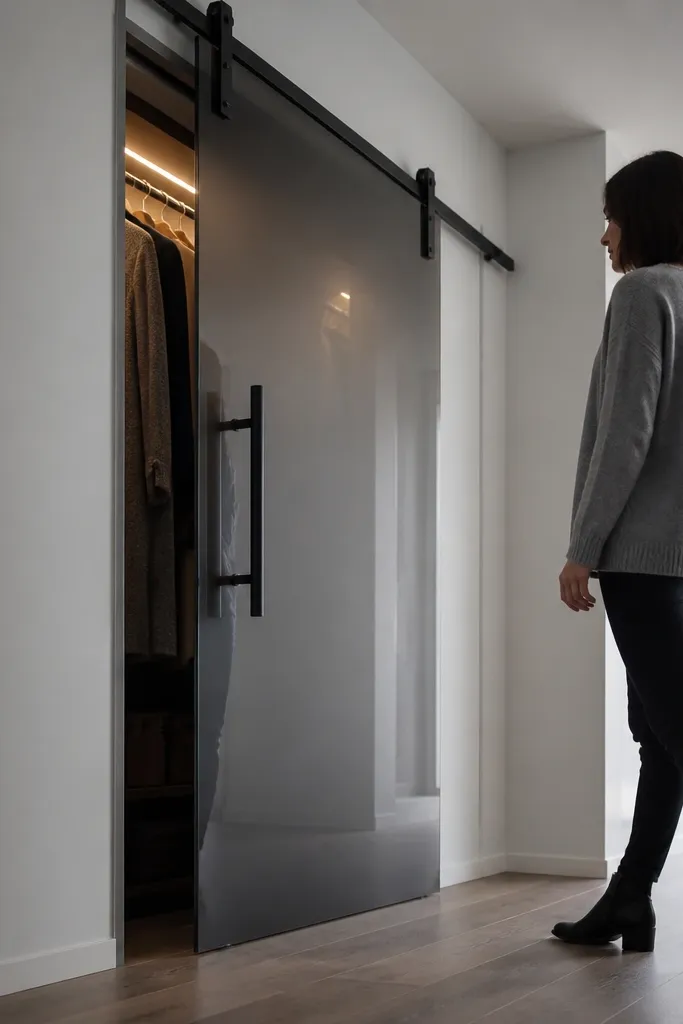
Smoked acrylic glass gives you that modern, airy look without the privacy headache of clear glass. Because it’s opaque enough, your closet stays visually calm while still letting light bounce into the hall. The black track and a simple bar pull keep the look cohesive and photo-friendly. This is a great option for small rooms where you want the closet to feel lighter.
Build a framed door where the acrylic sits inside a rabbet, leaving a 1/8 inch gap all around for movement. Use 3/4 inch tall spacers and acrylic-safe silicone to hold the panel in place without cracking. Mount the top track to blocking behind drywall or to studs so the hardware doesn’t loosen. Finally, add a soft-close guide if your kit includes one, then tune the rollers so the door doesn’t scrape the frame.
Use acrylic-safe silicone, not construction adhesive; it prevents stress cracks around the edges.
Don’t size acrylic tight to the frame; acrylic needs room to expand or it will pop out or crack.
3. Vertical Slat Door with Warm Walnut Stain
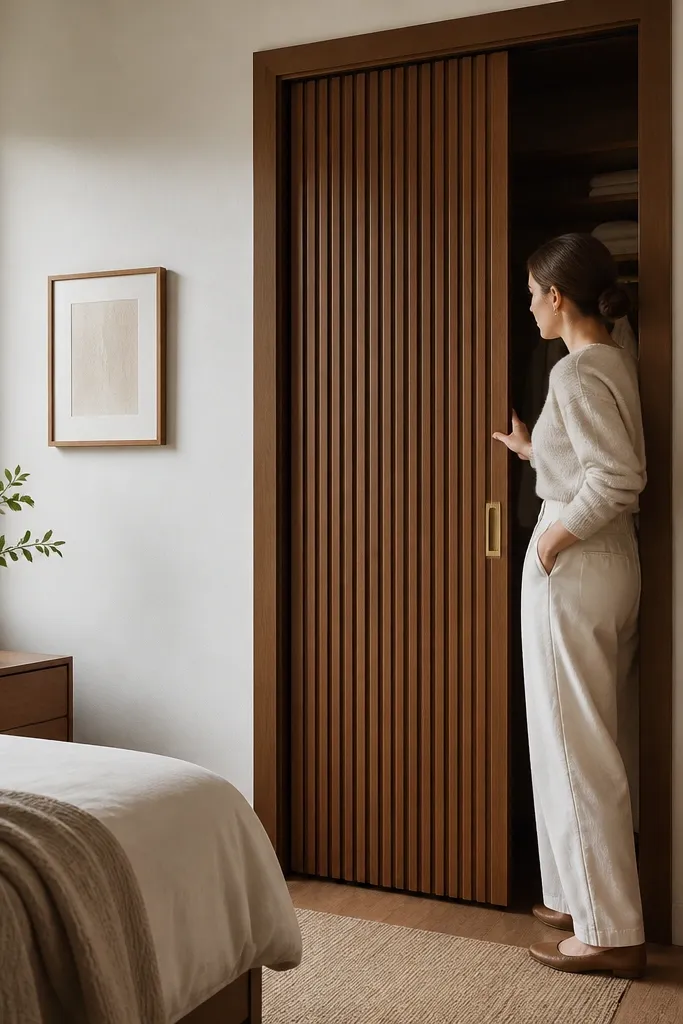
Vertical slats make a closet door look architectural. The alternating slat shadows create depth, so even a basic closet reads styled. Walnut stain gives you that warm, slightly dark tone that pairs with both black and brass hardware. This design is also forgiving — small wall unevenness is less obvious because the slats break up the surface.
Rip slats to a consistent width (for example, 1 1/2 inches) and keep gaps even (about 1/4 inch) for a clean shadow line. Build a simple rectangle frame and attach slats with glue and brad nails, then sand the edges so the slats don’t snag. Stain the whole door evenly, then wipe back within the stain’s recommended window and seal with a matte or satin topcoat. Install a top-mount track and add a bottom guide to stop sway.
Sand slat edges by hand after assembly; it’s the difference between smooth and scratchy when you slide past the door.
Don’t eyeball slat spacing; measure once with a spacer strip so the shadows line up across the whole door.
4. Shiplap Panel Door in Soft White
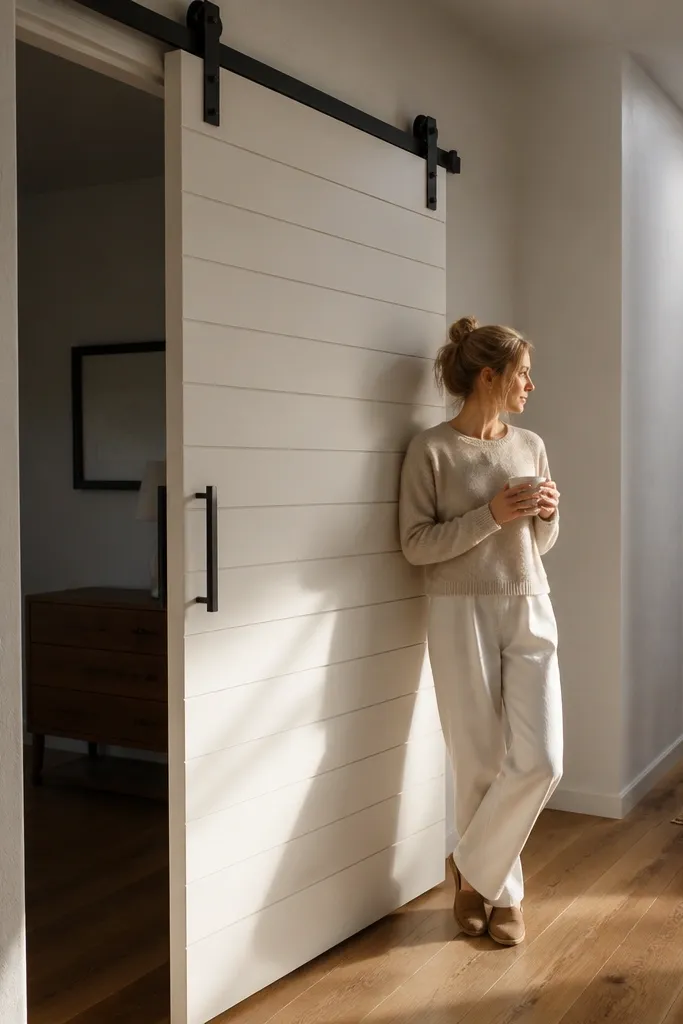
Shiplap looks cozy and intentional, especially in entryways and older homes. Painting it soft white keeps the door bright without looking stark, and the horizontal lines visually widen a hallway. This style works great if you want the closet to disappear visually while still looking textured. It’s also beginner-friendly because shiplap boards help you maintain straight lines.
Cut a door frame, then attach shiplap planks horizontally with small gaps (about 1/8 inch) so expansion doesn’t split paint. Use wood glue plus brad nails at each plank end and along the edges. Fill nail holes with lightweight spackle and sand smooth after it dries. Prime, then paint with a durable trim paint (semi-gloss or satin) and let it cure before hanging.
Editor's noteUse painter’s tape as a spacing guide between planks; it makes the gaps look even fast.
Skip thisDon’t use glossy paint; it highlights brush marks and makes the texture look messy.
5. Rattan-Inspired Woven Panels with Clear Finish
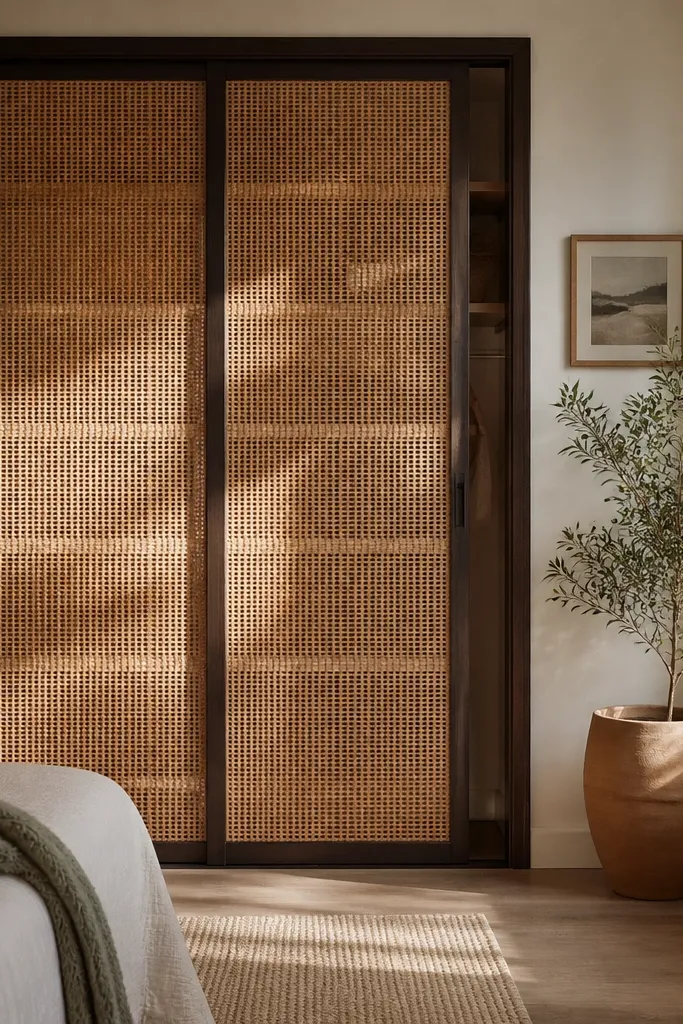
A woven look adds texture that reads premium in photos, especially with warm lighting. For DIY, you can get the rattan vibe using woven panel material mounted to a framed door, then finish it so it doesn’t fray or sag. Keep the frame slim and the weave tight for a clean, modern result. This choice works best for bedrooms, bathrooms with ventilation, and cozy living spaces.
Cut a door frame and back it with a thin plywood or hardboard panel so the woven material has something flat to attach to. Stretch the woven panel across the face and staple or glue it to the backing, pulling taut so it doesn’t ripple. Trim edges neatly and seal the weave with a clear matte sealer made for fabrics or porous materials. Hang using a top-mount track and a bottom guide so the woven door doesn’t swing.
Editor's noteSeal the woven edges first; it prevents fraying before you seal the whole face.
Skip thisDon’t skip a backing panel; stapling directly to framing makes the weave sag over time.
6. Two-Tone Color-Block Door (Stone + Charcoal)
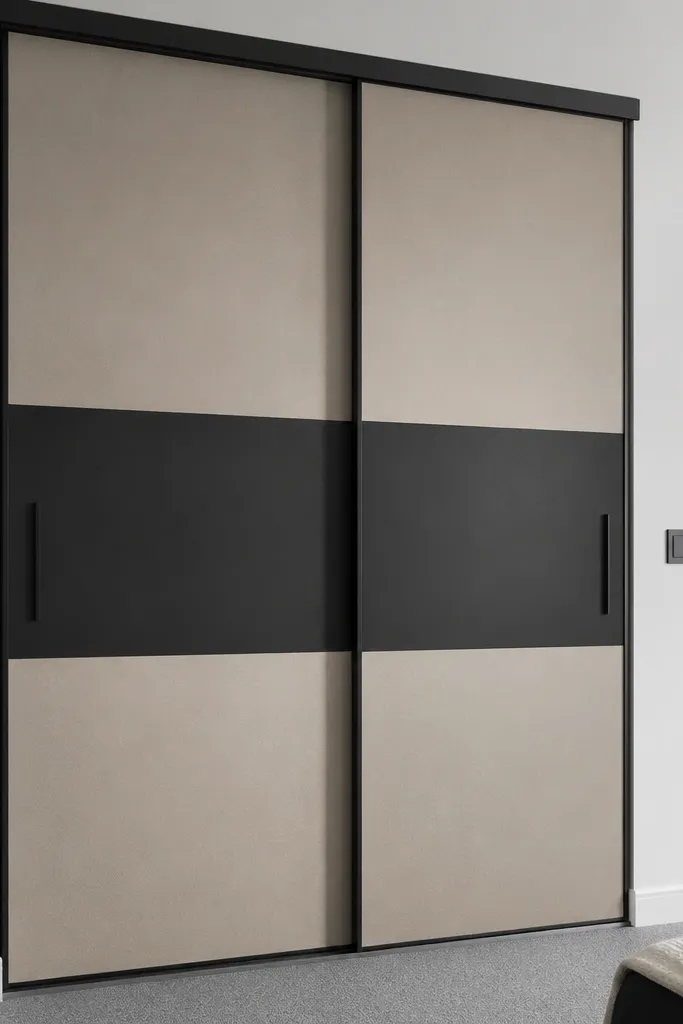
Color-blocking makes a closet door look like a design feature instead of a utility panel. The trick is crisp separation: one neutral tone (stone) for the main area and charcoal for a framed band or inset. This style looks sharp even when your closet opening is awkward because the color boundary creates a strong visual reference. It’s perfect if you want contrast with light walls and simple trim.
Build a framed door with an inset panel area for your stone color and a raised or recessed band for charcoal. Sand and prime everything, then tape the color boundary with fine painter’s tape and burnish the tape edge. Paint stone first, let it dry, then remove tape and paint charcoal in a second pass. After full cure, install the door on a top track and add a recessed pull or small edge pull for a clean look.
Use a foam roller for paint on the flat areas; it keeps the finish even and photo-smooth.
Don’t paint over dusty tape edges; you’ll get a jagged line that ruins the whole color-block effect.
7. Vertical Channel Panels with Natural Birch
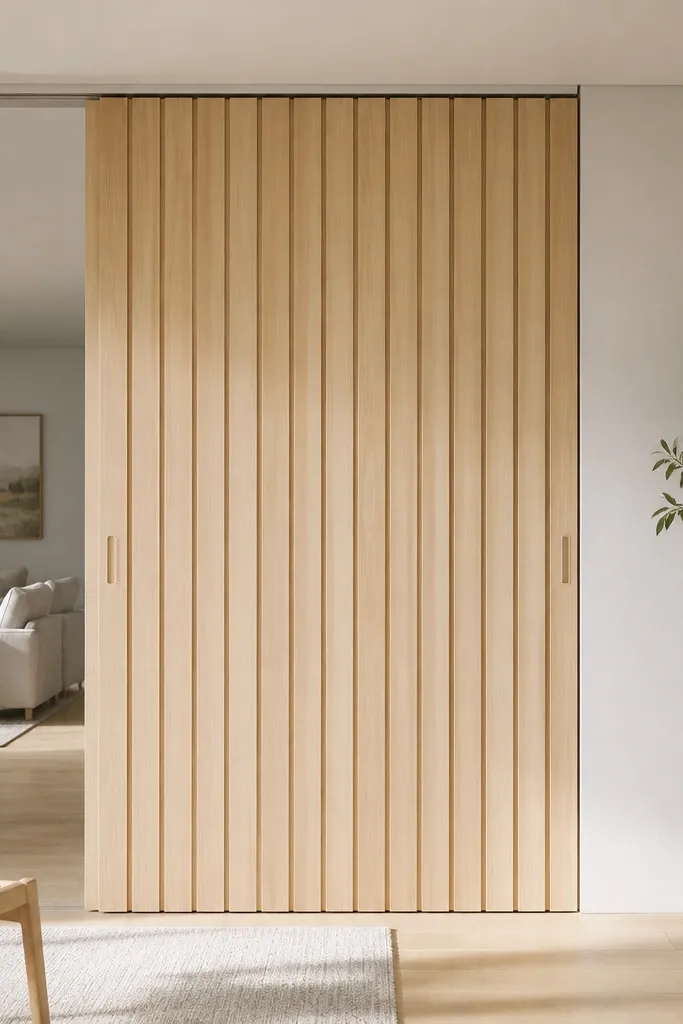
Channel panels look modern without needing fancy materials. The channels create consistent shadow lines, and birch keeps the door bright and warm. If your home has light floors or Scandinavian-style furniture, this will match the vibe quickly. It’s also a good beginner-friendly closet sliding door choice because the face pattern hides small surface dents.
Rip strips and build a frame, then add vertical channels using thinner battens spaced evenly across the door face. Sand the whole face, then stain lightly or leave birch natural and seal with a clear matte topcoat. Install edge banding on any exposed plywood so the door looks finished. Mount the top track, then align the rollers so the door closes evenly across the overlap.
Editor's noteSeal birch with a matte clear coat; it keeps the wood grain looking clean instead of plastic.
Skip thisDon’t rush the seal coat; thin coats take longer but prevent streaks in channels.
8. Barn-Style Sliding Door with Faux Hinge Detail
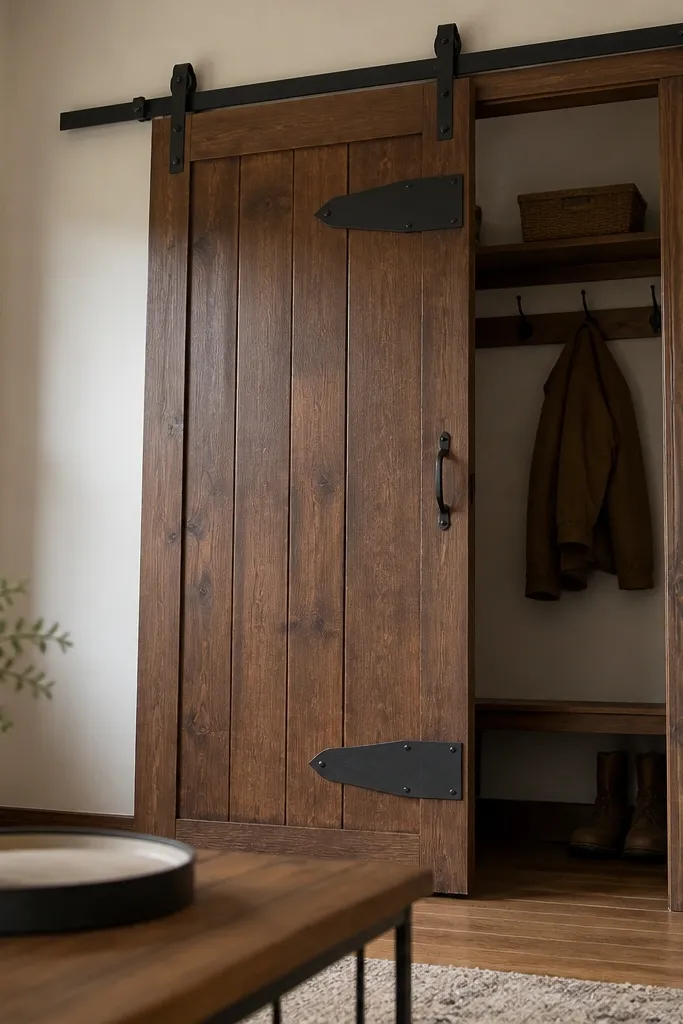
Barn-style hardware makes a closet door look like part of the room’s personality, not a closet add-on. You can get the look without heavy rustic construction by adding faux hinge plates to a simple framed door. Pair a warm stain or painted base with black plates and a matching track. This style is photogenic because metal plates catch light and create little highlights as the door moves.
Build a flat framed door with solid wood stiles and a plywood panel inside for stability. Stain or paint the door, then attach faux hinge plates where a traditional barn door would show them. Install a heavy-duty top track and use proper anchors into studs or blocking. Add a bottom guide to prevent the door from swinging and then test the slide with the door fully loaded by hand.
Use matching screws for plates and pre-drill — it keeps the plates from pulling the wood and looking crooked.
Don’t mount plates on unfinished plywood edges; seal those edges so screws don’t chew the surface.
9. Matte Sage Door with Brass Edge Pull
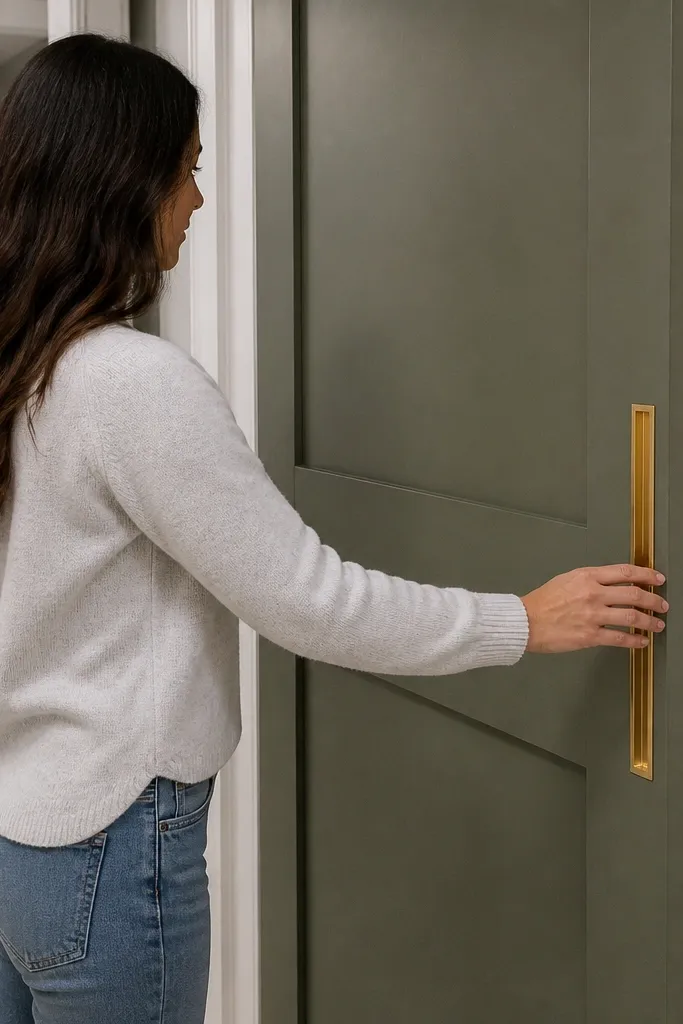
Sage paint looks soft and modern, and it photographs better than you’d think because it absorbs harsh light. Use a simple recessed panel design so the sage color has shadows to play with. A brass edge pull adds a warm accent without clutter. This works in kitchens, bedrooms, and laundry-adjacent closets where you want the door to feel calm rather than industrial.
Build a recessed panel door with a shallow inset around the perimeter so you get a defined border. Sand to 220 grit, prime with a bonding primer, then paint matte sage with two thin coats. Install a brass edge pull at about 36 inches from the floor so it’s reachable without stretching. Hang with a top-mount track and adjust roller height until the door sits level and doesn’t rub.
Paint in thin coats and let each coat dry fully; matte colors show lap marks if you rush.
Don’t choose a satin paint — it can look patchy on recessed panel edges under overhead lighting.
10. Reeded Panel Door in Deep Navy
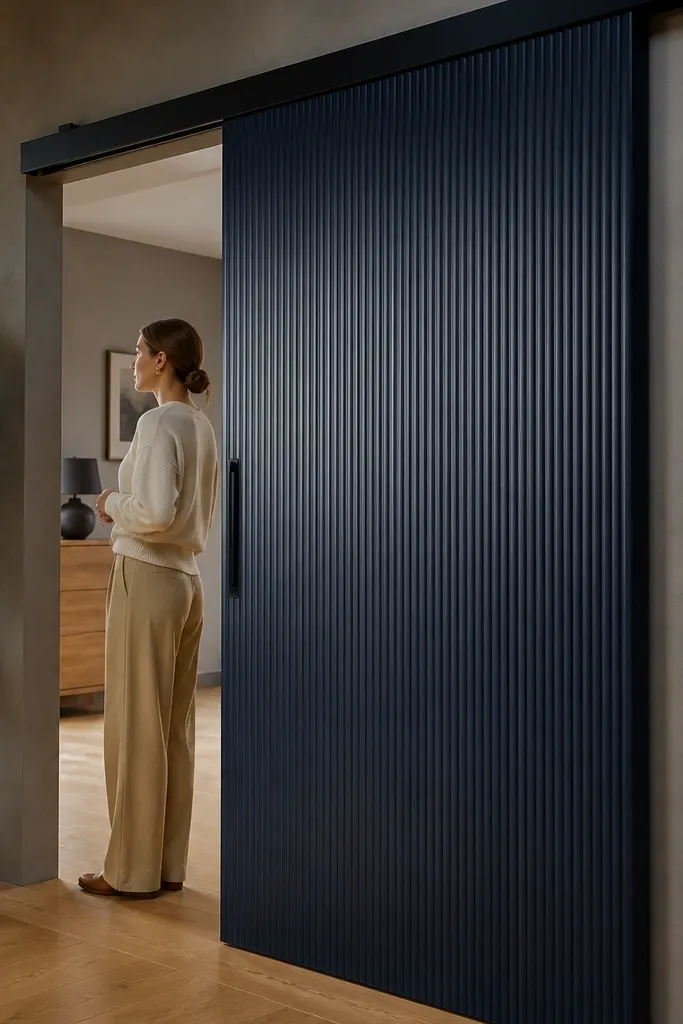
Reeded panels add texture that looks expensive because the light catches the ridges as the door slides. Deep navy is dramatic without being flashy, and it pairs with both warm wood floors and cool gray walls. This is a great “statement closet” option when you want the door to look like furniture. It’s also a strong choice for beginner-friendly closet sliding door builds because the pattern hides minor sanding lines.
Create reeded channels using a router jig or pre-made reeded panel boards mounted to a frame. Sand the ridges lightly so they feel smooth, then wipe dust thoroughly before priming. Paint deep navy and use a foam roller for ridged areas so coverage stays even. Seal with a clear matte topcoat if the paint system recommends it, then install the door on a top track and set the stops so it closes without banging.
Editor's noteUse a router template for reed spacing; consistent ridges look clean in photos.
Skip thisDon’t skip dust removal between primer and paint; reeded surfaces collect grit and cause bumps.
11. Woven Fabric Backing with Tight Frame
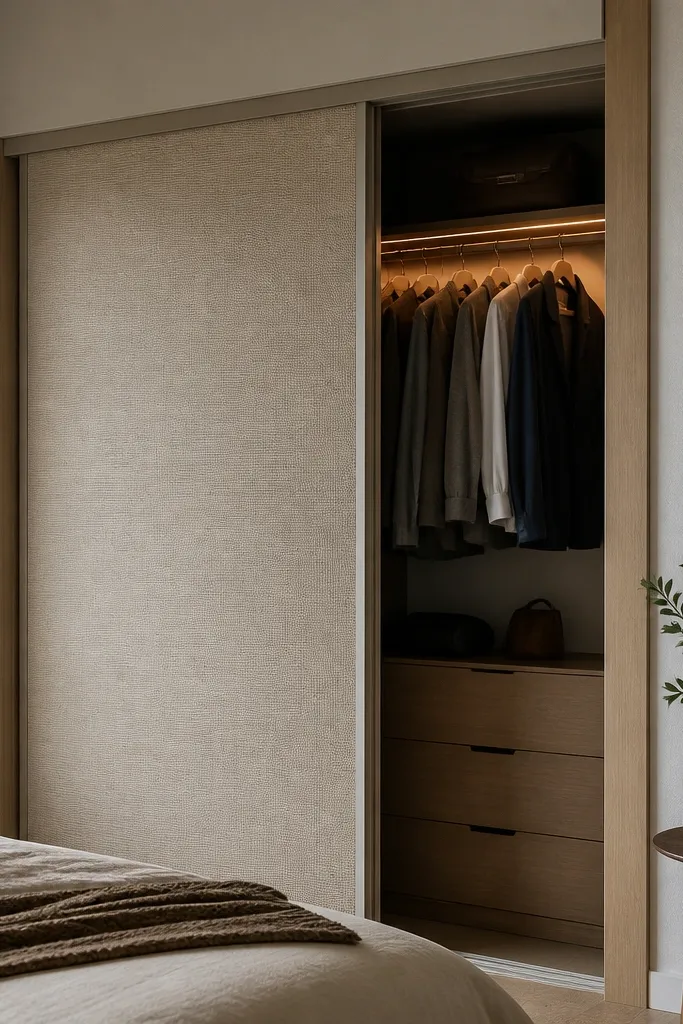
Fabric-backed doors look soft and custom, and they’re a great option when you want privacy without glass. The key is tension and edge finishing — the fabric should be pulled tight and framed so it reads like a panel artwork. Choose a durable upholstery fabric with a tight weave so it doesn’t show wrinkles. This style looks best in bedrooms and hall closets where the door gets gentle daily use.
Build a rigid frame from 1x2 or 2x2 lumber, then add a thin backing sheet so the fabric has a flat surface. Stretch the fabric across the face and staple it on the back, then trim any excess. Add a second thin frame strip to cover staples and create a clean edge. Seal the fabric edge with fabric-safe glue and then hang the door on a top track with a bottom guide.
Editor's noteSpray-mist the fabric lightly before pulling tight; it helps reduce wrinkles as it dries.
Skip thisDon’t use stretchy knit fabric; it sags after a few weeks and looks uneven.
12. White Oak Veneer with Vertical Finger Pulls
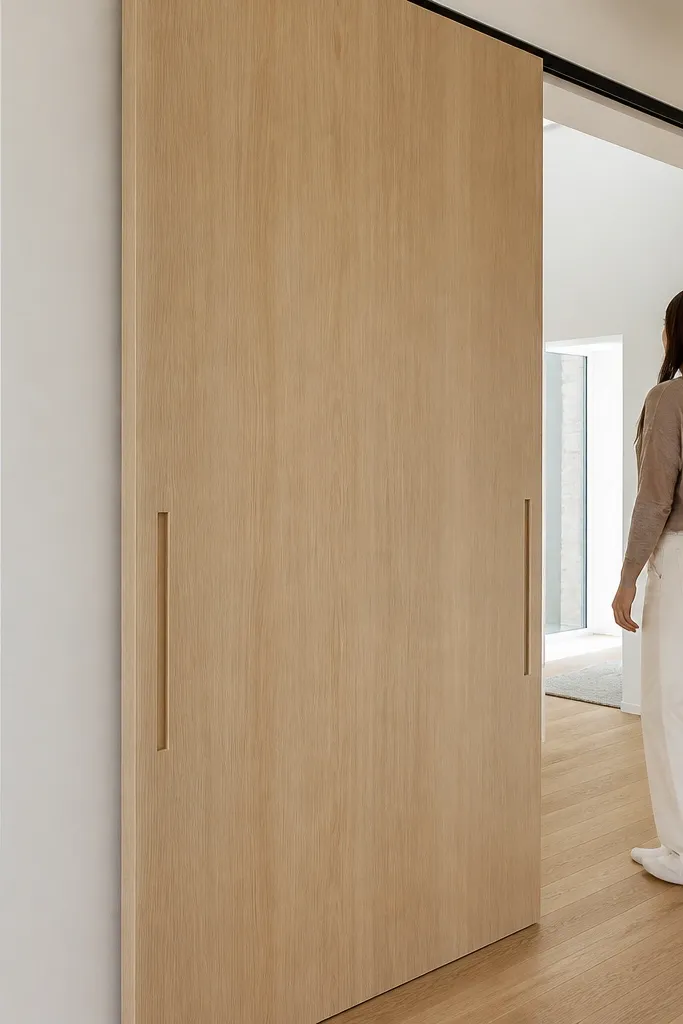
Finger pulls look sleek and let the door feel like built-in furniture. When you pair them with white oak veneer, the door looks bright and modern without being cold. The vertical pulls create a subtle rhythm that makes the door read taller and more expensive. This is a strong pick for a beginner-friendly closet sliding door because the hardware is simple and the panel face stays clean.
Build a framed door and apply white oak veneer to the panel area, then trim the edges with veneer tape and sand flush. Install vertical finger pull strips (wood or metal) centered on the door face so your hand has a clear grip. Finish with a clear satin topcoat that doesn’t amber too much. Mount the top track and tune the rollers so the door closes flush across the overlap.
Editor's noteUse a straightedge to mark finger pull placement; alignment matters a lot on vertical hardware.
Skip thisDon’t skip sealing veneer edges; they drink finish and can look darker than the center.
13. Black-and-White Herringbone Accent Door
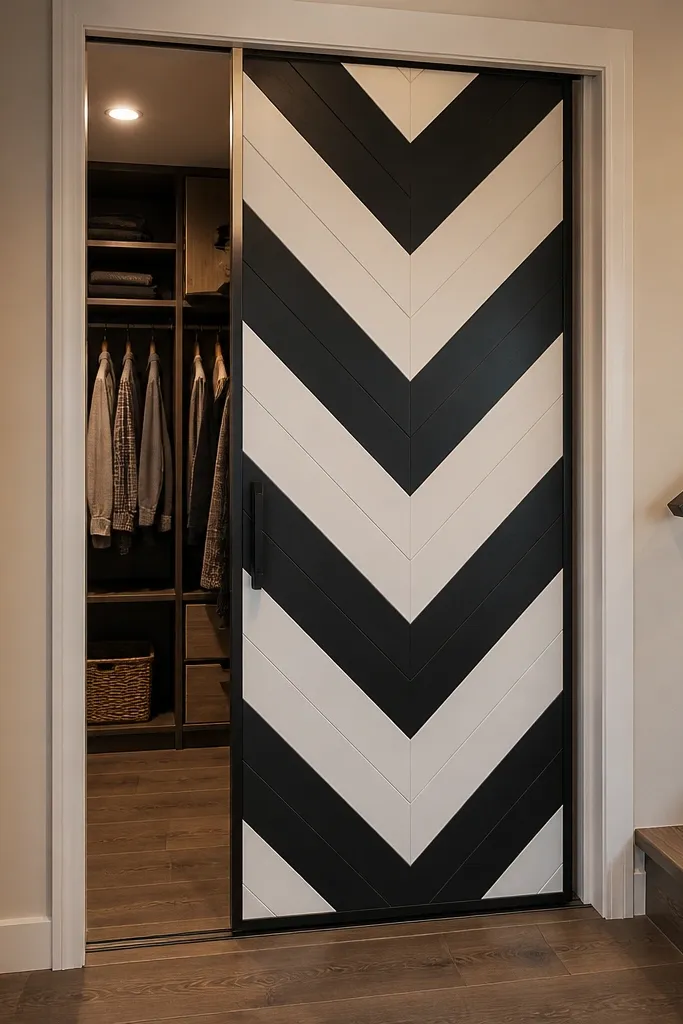
Herringbone is the fastest way to make a closet door look like a crafted panel. The repeating pattern creates motion and depth, so the door looks good even when you’re not staring at it. Keep the palette simple — black and white — and use a framed border so it reads clean instead of busy. This works in modern homes, apartments, and any space where you want a bold, photogenic detail.
Build a door frame, then create the herringbone by cutting small strips at 45 degrees and gluing them to a backing panel in a grid. Sand the surface flat, then paint or stain the accent colors before sealing. Add a border frame around the patterned panel for a crisp edge. Install a top-mount track and bottom guide, then adjust the door so it slides smoothly without scraping the patterned face.
Pre-plan your strip widths so the pattern lines up with the frame edges — misalignment shows immediately.
Don’t use too much glue squeeze-out in the pattern; it creates lumps that show after painting.
14. Terracotta Tile Inlay with White Grout Look
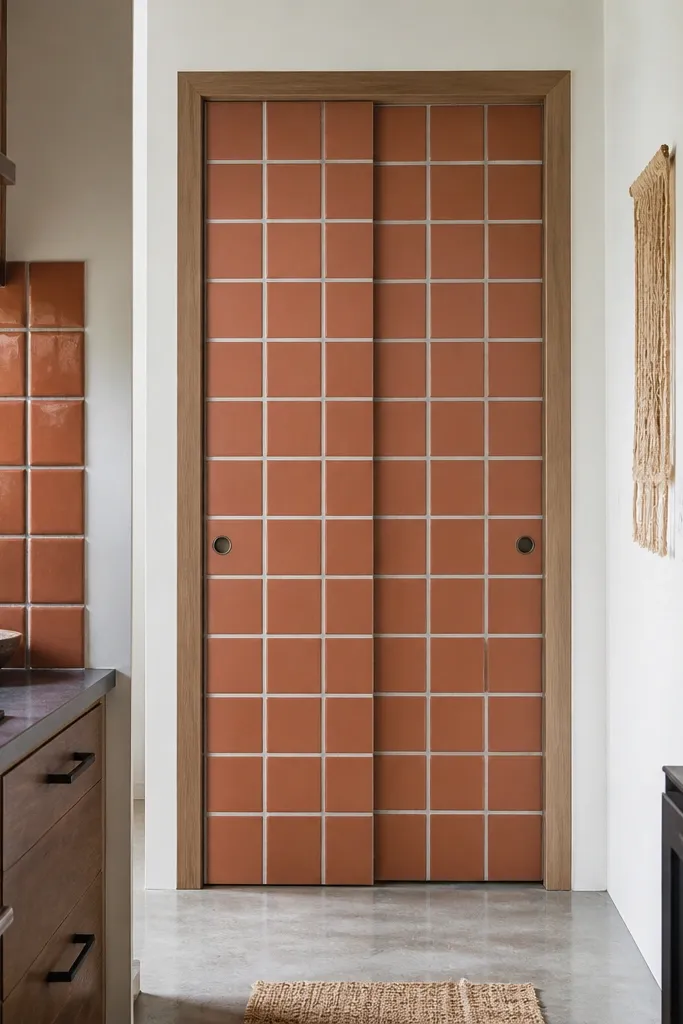
A tile inlay door is dramatic and totally different from wood-only builds. The terracotta color warms up a room, and the grout lines create a grid that reads clean and intentional. Use smaller tiles or tile-pattern panels so the door stays manageable and doesn’t warp from moisture. This is best for closets near kitchens or entryways where you want a textured, durable surface.
Build a framed door and add a rigid backer panel like cement board or plywood sealed with epoxy primer. Thinset small tiles onto the face, then grout with a grout mix that matches your grout look (light, near-white). Seal the grout after curing, then attach the finished door to a top track. Add a bottom guide to keep the tile face from shifting under sliding friction.
Use tile spacers and dry-fit the pattern before thinset; a single crooked line ruins the whole look.
Don’t install tile directly on bare plywood; it cracks as the door flexes.
15. Mirror-Panel Door with Beveled Edges
A mirror-panel sliding door makes a closet feel bigger and brighter, which is exactly what you want when closets are in tight hallways. Beveled edges look more expensive than flat mirror sheets because they catch light and add depth. Choose a slim black track so the mirror stays the star. This option is photogenic from both inside the room and from the hallway.
Build a framed door with a continuous rabbet for the mirror so the mirror sits supported on all sides. Use mirror clips or protective glazing tape to hold the mirror without stress points. Add a bottom guide to prevent the mirror panel from shifting during sliding. Install on a top-mount track and test alignment with a level across the mirror face.
Editor's noteUse protective edging tape at the mirror corners; it helps reduce chipping over time.
Skip thisDon’t use clear silicone blobs — they create uneven pressure and can stress the mirror.
16. Wood Slat Door with Alternating Wide and Narrow Spacing
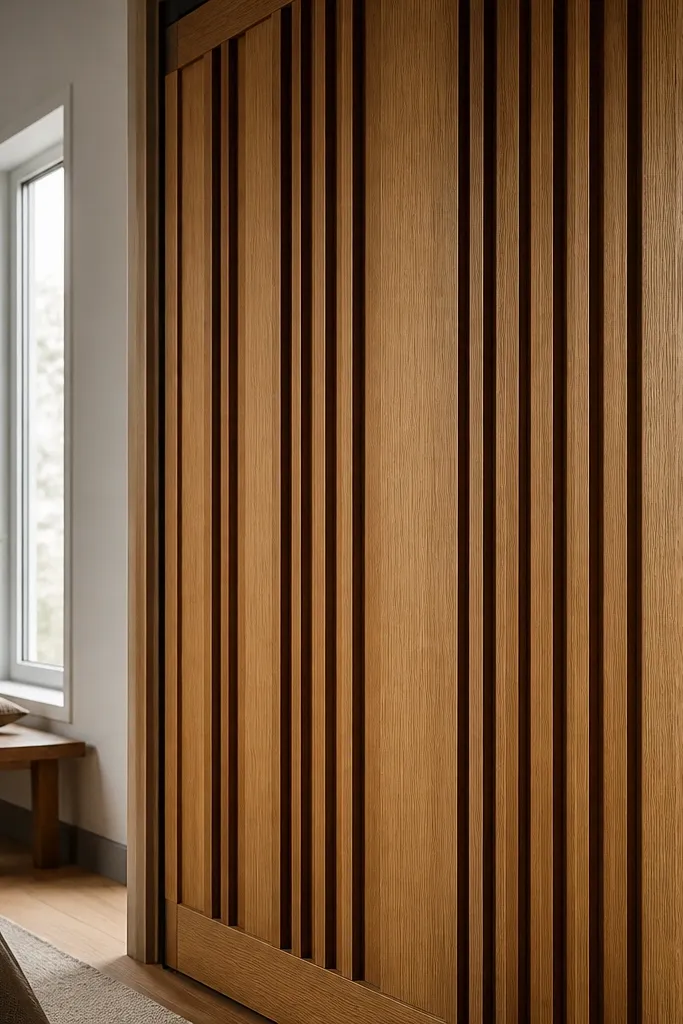
Alternating spacing looks custom because it breaks the “regular vent” look. The wide gaps create breathing room and the narrow gaps add rhythm, so the door reads like a design panel instead of basic slats. Stain it a medium tone like natural oak or walnut so the shadows look warm. This design works well in modern homes and hall closets where you want texture without a loud color.
Cut slats and spacer blocks so your wide gap and narrow gap are consistent (for example, 1/2 inch wide gap and 1/4 inch narrow gap). Glue and nail slats to a frame, using the spacer blocks for every line so spacing stays even across the door. Sand, then stain with a medium tone and wipe back thoroughly. Seal with a satin topcoat and hang using a top track plus a bottom guide.
Mark the slat edges with a pencil before assembly; it helps you keep wide-gap and narrow-gap positions consistent.
Don’t mix slat thickness; even small differences make the pattern look sloppy.
17. Whiteboard-Coated Panel Sliding Door
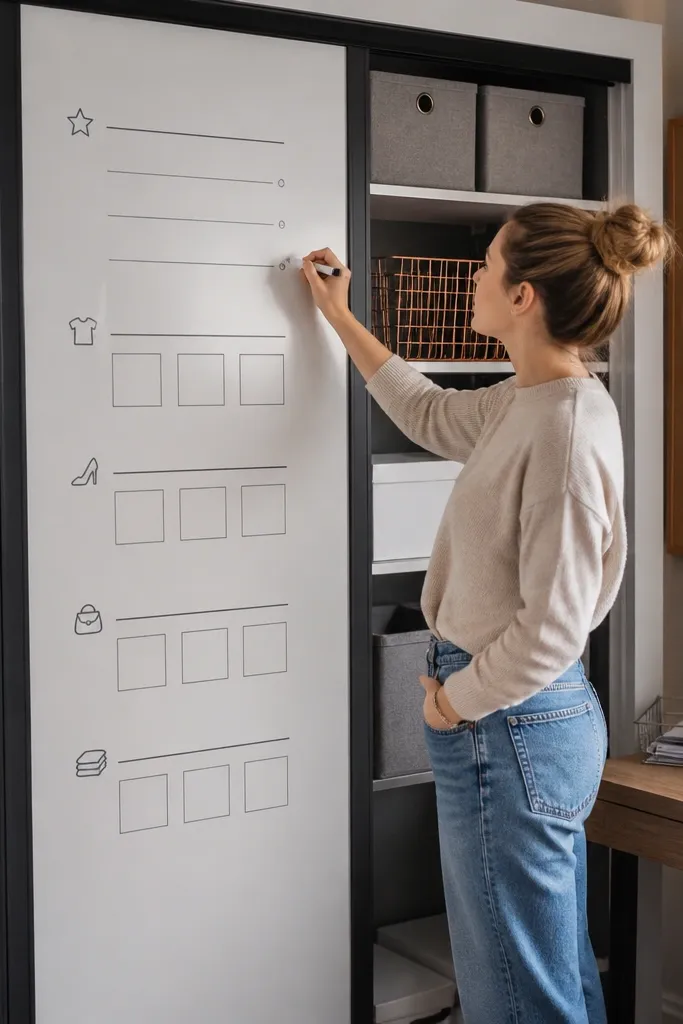
This is the most practical “style” option: a closet door that also writes on. A whiteboard-coated panel looks clean and modern, and it lets you label shelves without sticky notes. Choose a smooth, dark trim frame so the white writing area looks crisp. It’s beginner-friendly because the surface is forgiving and you don’t need complex joinery beyond a basic framed door.
Build a simple frame and attach a smooth panel substrate like hardboard or a dedicated whiteboard sheet. Prime and apply whiteboard coating in thin coats, following the cure time in the product instructions. Let it fully cure before using markers. Install on a top-mount track and add a soft-close guide so the door doesn’t slam.
Editor's noteLabel your shelf zones with a test marker first; some coatings ghost if you use the wrong marker early.
Skip thisDon’t rush the cure; using it too soon makes the finish streak.
18. Reclaimed Wood Look with Clear Matte Sealer
Reclaimed wood look makes a closet door feel like it belongs in the room, not tacked on. The beauty comes from variation, but you still need a controlled layout so it looks intentional. Use a clear matte sealer so the surface doesn’t glare under overhead lights. This style works in living rooms, basements, and entry closets where you want warmth and texture.
Use uniform-thickness boards cut to match your door frame, then arrange them in a repeating pattern so the knots and grain don’t bunch. Sand to 150-180 grit and remove dust thoroughly. Apply a wood stain glaze or tint if you want consistent tone, then seal with a matte clear coat in two coats. Install with a top track and a bottom guide, then add a simple pull or recessed handle.
Lay the boards out on the floor first and take a quick photo; it helps you spot a too-dark section before assembly.
Don’t use a glossy topcoat; it makes knots look shiny and messy instead of rustic.
19. Linen-Finish Panel Door with Hidden Edge Pull
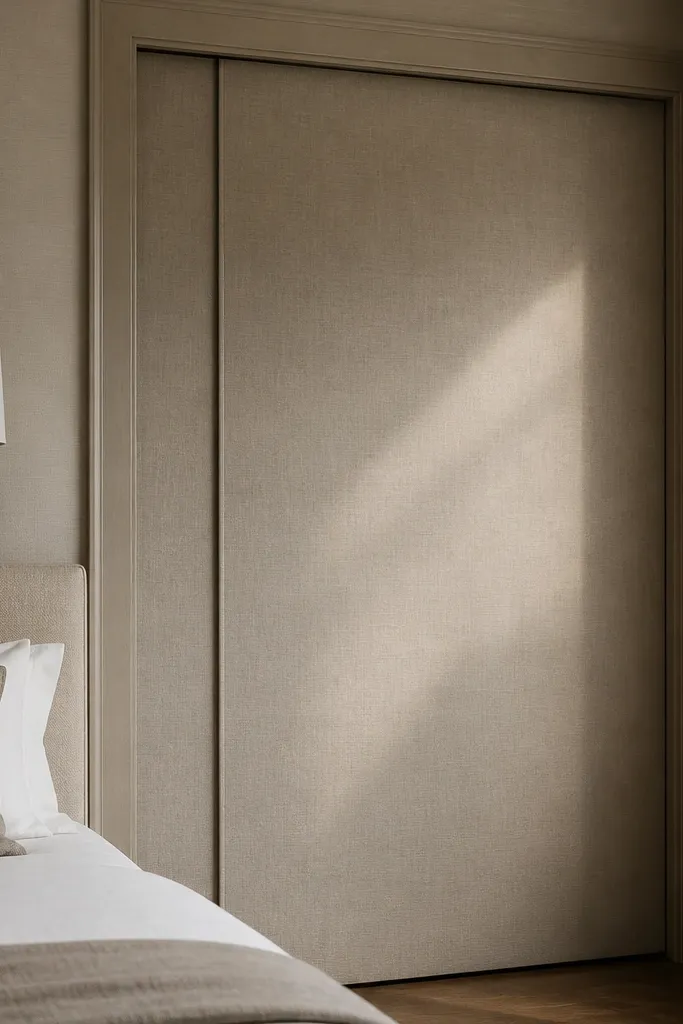
A linen-finish door reads soft and high-end without being fragile. The texture hides minor scuffs and looks good in natural light, which is why it photographs well. Pair it with a hidden edge pull so the door face stays clean and uninterrupted. This is a strong option for bedrooms and closets where you want calm, not industrial.
Build a framed door and attach a linen-finish board or textured panel to the face. If you’re using fabric, stretch it tight over a backing and cover the staples with a thin frame strip. Apply a clear protective topcoat made for the material so it resists fingerprints and light scuffs. Mount the door on a top track and install a hidden edge pull using a recessed pull hardware template.
Editor's noteUse a recessed pull template; it keeps the pull centered and prevents a crooked grip.
Skip thisDon’t skip the protective coat; linen textures pick up grime and look dull fast.
20. Two Sliding Panels with Center Divider for a Wide Closet
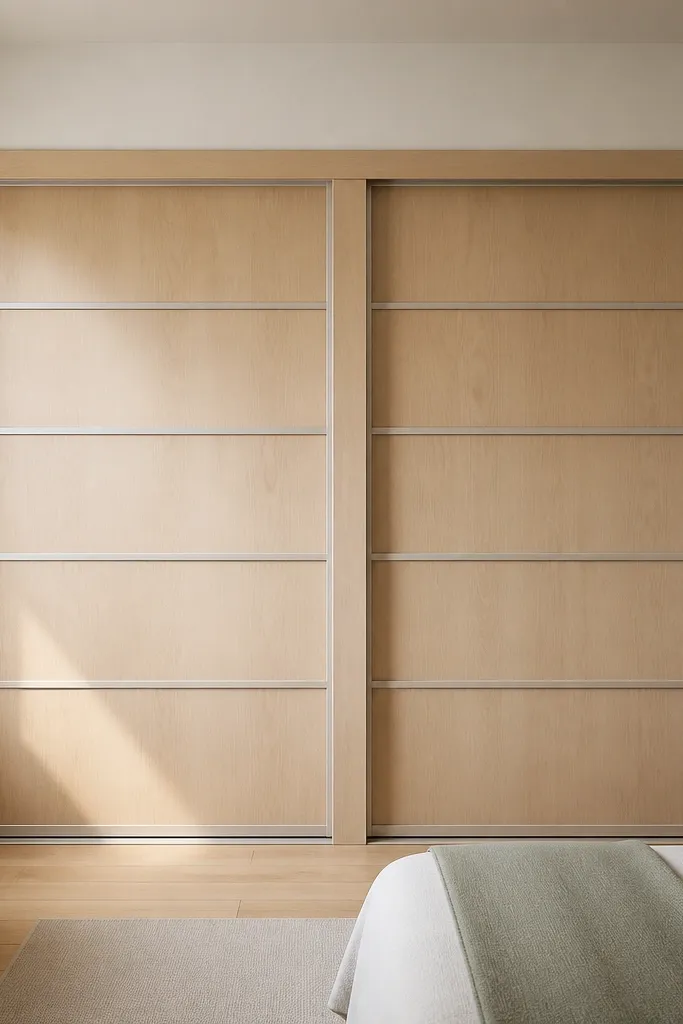
If your closet opening is wide, one big door can look heavy and hard to align. Two sliding panels with a center divider keeps the look balanced and makes the closet feel more custom. You still get the same clean track line, but the panels are lighter and easier to tune for smooth travel. This idea is photogenic because the divider creates a strong vertical reference.
Measure the opening width and plan two panels that each overlap the center divider by about 1/2 to 1 inch. Build both panels as framed doors with matching face styles so the symmetry looks intentional. Install a top track system designed for two-panel bypass or center-divider setups, then add bottom guides for each panel. Adjust roller height and check the overlap at both the top and bottom before finishing.
Dry-fit everything with shims before you tighten the final screws; you only get one chance to make the overlap look even.
Don’t install one side first and assume the other will match; overlap needs tuning panel by panel.
21. Slim Aluminum Track Cover with Matching Wood Wrap
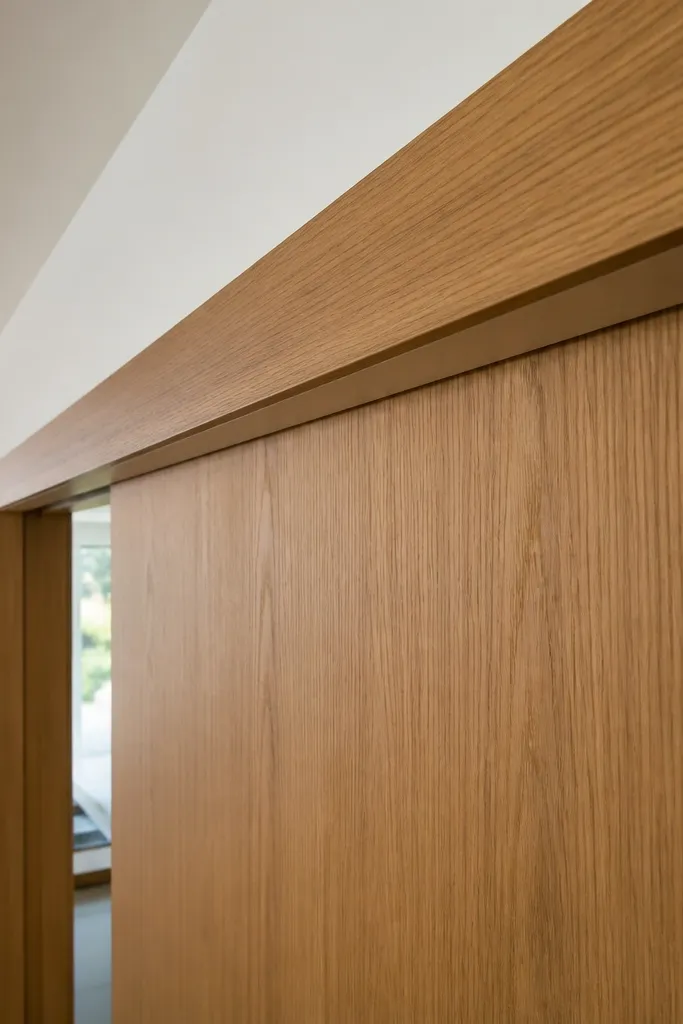
A track cover is the difference between “DIY sliding door” and “built-in furniture.” When you wrap the track housing in matching wood or paint it the same color as the frame, the hardware disappears and the door reads cleaner. This project is mostly about finishing and alignment, but it changes the look dramatically in photos. It’s beginner-friendly because you can use a standard top-mount kit and just dress it up.
Mount the top track first at the correct height, then measure the track housing length and depth. Build a cover box from thin plywood or MDF and wrap it with veneer or paint it to match your door frame. Leave an access strip if your kit needs adjustment screws. Install the cover so it hides the hardware line, then hang the door and set the stops.
Editor's noteMake the cover 1/4 inch deeper than you think so it doesn’t reveal the screws as the door moves.
Skip thisDon’t glue the cover directly to drywall; it needs to attach to studs or blocking for a straight line.
22. Clear Acrylic + Fabric Border Frame (Modern Soft Look)
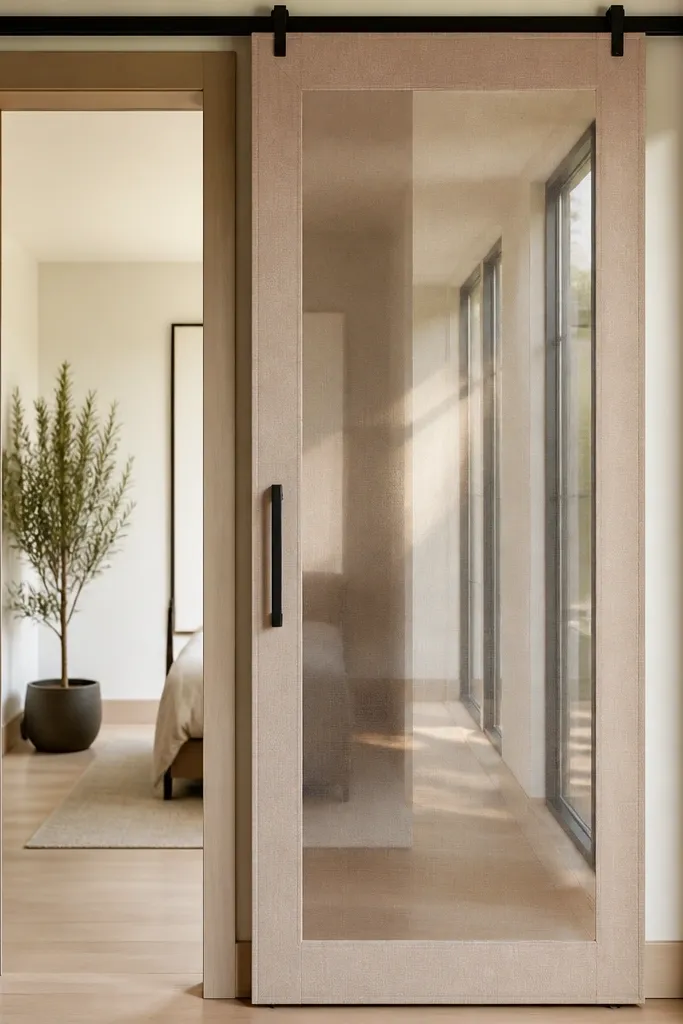
This design mixes modern and soft: clear acrylic face with a fabric border that adds color without covering everything. It looks light and gallery-like, but you can keep privacy by using a semi-opaque fabric border or placing the fabric behind a frosted acrylic panel. The result is photogenic because you get layered materials and clean edges. It’s a good option when your closet contents are neat and you want the door to feel decorative.
Build a framed door where acrylic sits inside a rabbet, then add a fabric layer behind the acrylic using a thin backing sheet. Use frosted or lightly smoked acrylic so the closet contents don’t show clearly. Seal the fabric edges and keep the fabric taut so it doesn’t ripple. Install on a top track and add bottom guides so the door slides without wobble.
Choose fabric in a textured weave; flat fabric shows wrinkles through clear panels.
Don’t use fully clear acrylic unless you want the closet to look open; it reads messy quickly.
23. Matte White Door with Black Crossbuck Detail
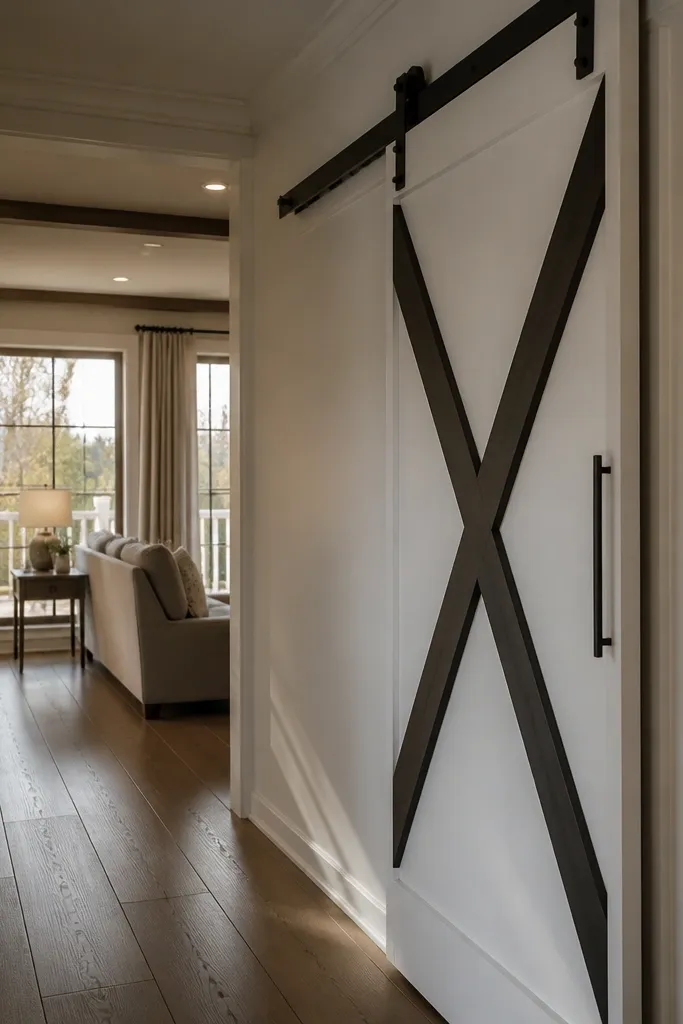
Crossbuck detail brings a farm-modern vibe that still looks clean. The matte white base keeps it bright, and black diagonal pieces create a strong graphic pattern. This is especially photogenic when your closet is visible from a hallway because the diagonals read instantly. It’s also beginner-friendly because you’re adding detail on top of a simple framed door.
Build a basic framed door with a flat panel face. Paint the door matte white and let it cure. Then attach black crossbuck pieces made from thin boards or trim, cutting diagonals so they meet at the center point. Hang the door on a top track and adjust rollers so the door closes evenly and the crossbuck stays centered.
Editor's noteUse a miter saw stop or jig for the diagonal cuts; identical angles make the pattern look intentional.
Skip thisDon’t attach diagonals before the paint cures; screws and tape can chip the finish.
24. Smoked Oak Veneer with Hidden Soft-Close Stop
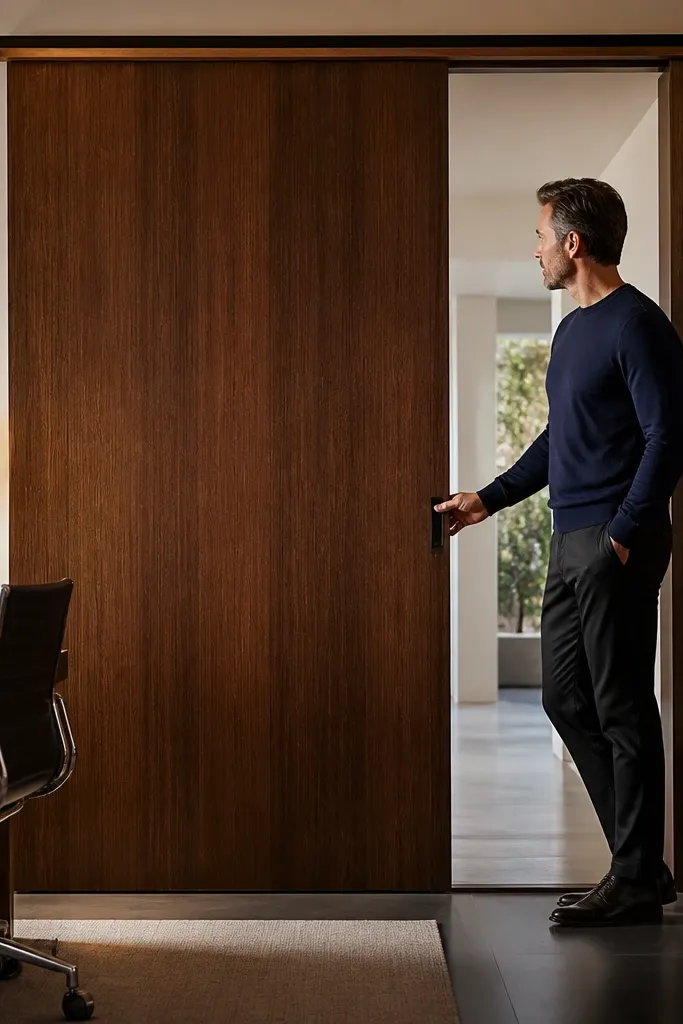
Smoked oak veneer looks rich but stays beginner-friendly because you’re not building heavy solid-wood doors. The key aesthetic move here is hiding the stop hardware so the door line stays uninterrupted. Soft-close stops also make the door feel furniture-like instead of noisy. This option fits bedrooms and offices where you want smooth, quiet sliding and a darker, moody tone.
Build a framed door and apply smoked oak veneer to the panel area, then seal with a satin clear coat. Install the top track and rollers, then mount a soft-close stop mechanism on the inside edge where it won’t show. Use a bottom guide to prevent the door from swinging. Test the closing speed and adjust the stop position so it catches gently without banging.
Editor's noteMark the stop position with painter’s tape after the first test; it prevents rework when you tune the closing.
Skip thisDon’t mount the stop on thin trim; it needs solid backing so it holds adjustment.
25. Grid Panel Door with Brass Inset Squares
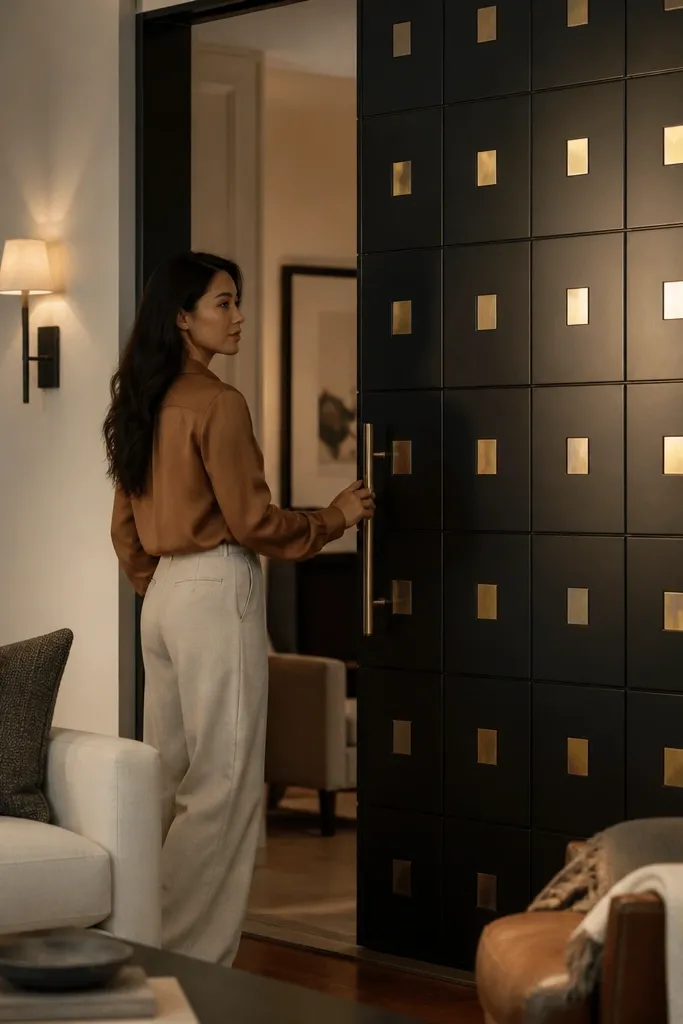
Brass inset squares make a grid panel door look like modern cabinetry. The grid gives structure and the brass adds highlights that pop under warm light. If your closet door is visible from a living room, this is the kind of detail people notice without you telling them what it is. It’s also a good beginner-friendly closet sliding door because the grid can be built from straight strips and consistent spacing.
Build a framed door and add a grid of thin wood strips across the face, keeping spacing consistent (for example, 2 inches). Prime and paint the base color, then attach small brass square insets at each intersection. Seal the brass and paint around it cleanly so edges look sharp. Install on a top track and tune the rollers so the door stays level during travel.
Editor's noteUse a scrap spacer strip to mark every grid line; it keeps the grid square across the door width.
Skip thisDon’t rush brass inset placement; crooked squares are the fastest way to make the door look homemade.



