
1. Photo-Ready Shelf Dividers for Folded Tops
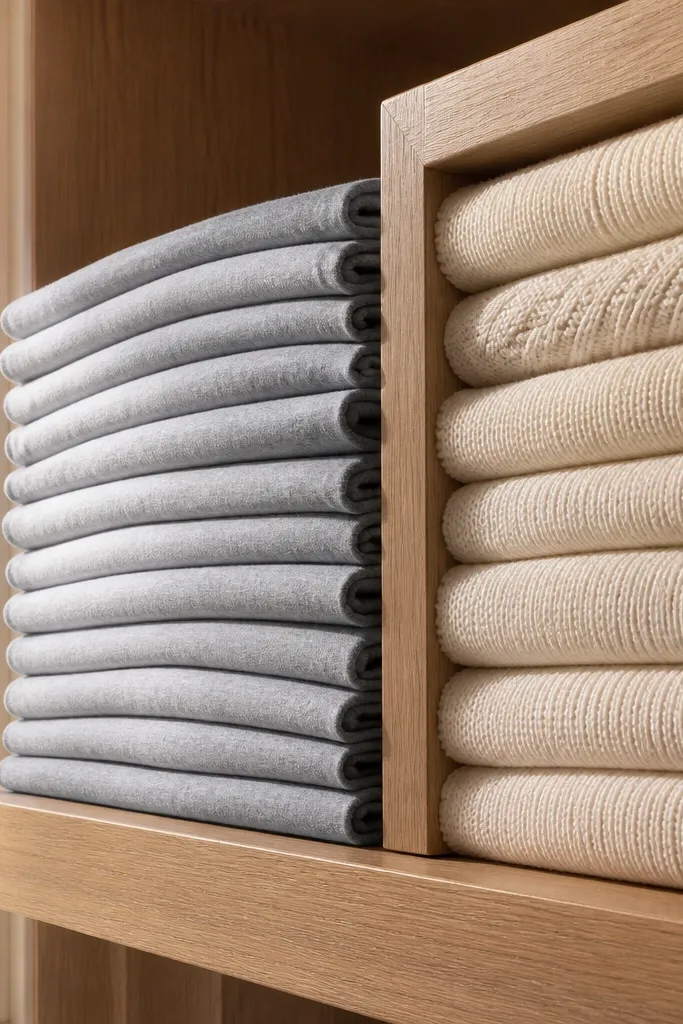
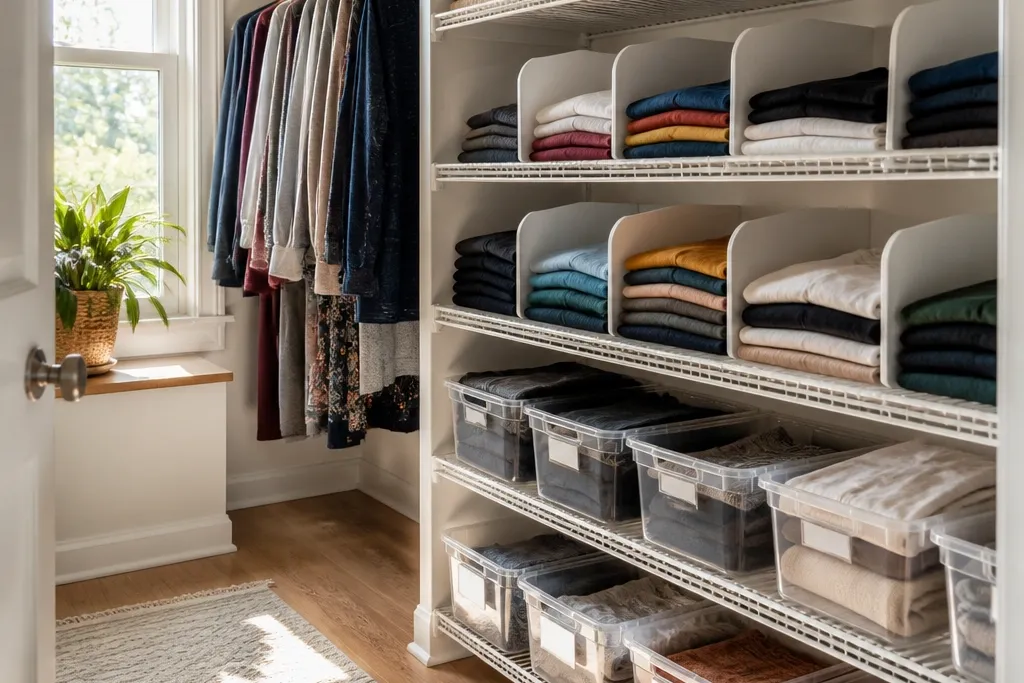
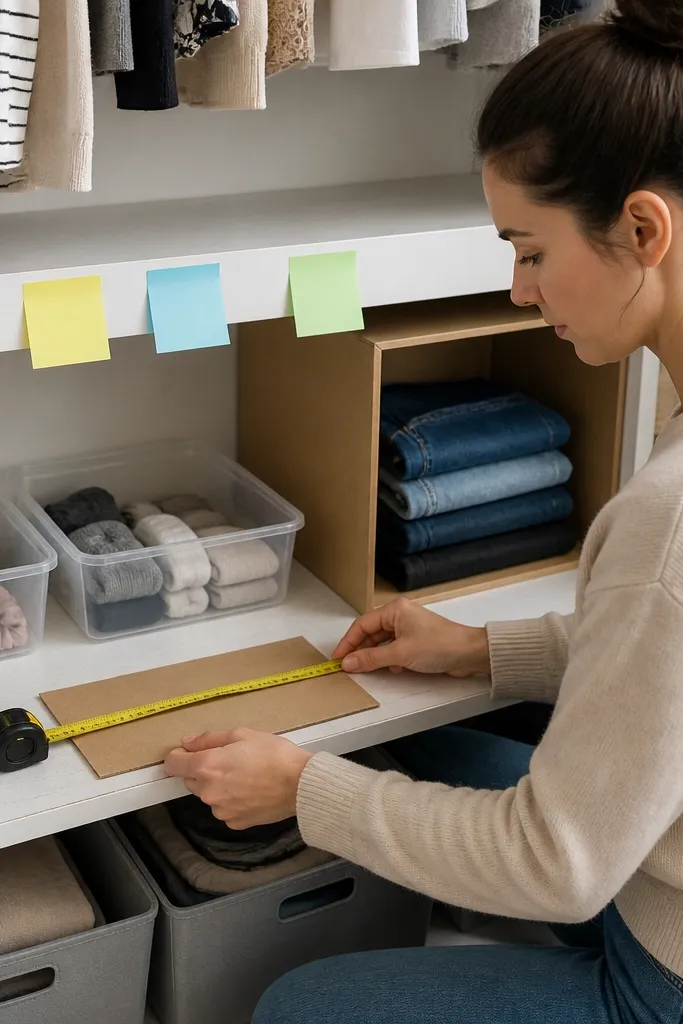
Start by measuring your shelf width and depth. Cut thin plywood or MDF strips to run front-to-back as dividers, then sand the edges so they don’t snag fabric. Install with a small L-bracket at each end or use a heavy-duty shelf adhesive if drilling isn’t an option. Place dividers 10-12 inches apart for folded tops so the stack can breathe. Finish by adding a single label at the front edge of each section.
This is the fastest way to stop folded clothes from collapsing into one gray pile. Shelf dividers create crisp boundaries, so each stack stays upright and visible. The look is clean because the folded edges align against the divider face, which makes the shelf look “styled” instead of stuffed. For morning calm, you’re also reducing the time you spend searching for a specific top. Use this on shelves that hold knits, tees, sweaters, and pajama sets.
Skip thisSkipping edge sanding — sharp corners catch lint and make the shelf feel messy.
Editor's notePaint the divider face the same color as your shelf back for a smoother, more “designed” look.
2. Clear Label Bars Above Every Shelf Zone
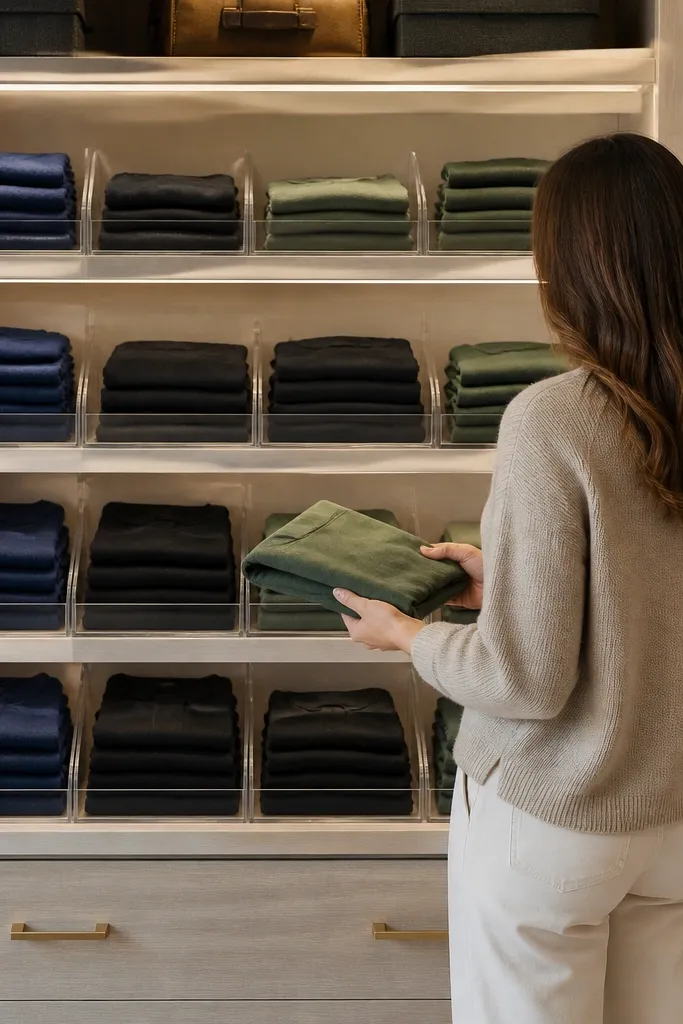
Pick a label system that you can repeat: either printed label cards in a clear plastic strip or vinyl labels on a thin wood bar. Cut the bar to the width of the shelf and attach with two small screws or command strips rated for the surface. Write labels in short categories like “Tees,” “Sweaters,” “Workout,” and “Pajamas.” Place the bar centered above each shelf zone, then match font size across the closet. Let the labels dry fully if you use adhesive before loading bins.
Labels that sit above the storage area are easier to read while you’re standing in front of the closet. This project turns an ordinary shelf into a guided map, so you don’t have to rummage to remember where things go. It’s beginner-friendly because you can do it without taking anything apart. The aesthetic is crisp: consistent label placement and aligned text make the whole closet look intentional. Put labels on shelves for folded items, drawers for accessories, and baskets for seasonal pieces.
Skip thisUsing tiny labels — if you need to lean in, you’ll stop following the system.
Editor's noteUse category labels only, not individual item lists — you’ll change contents without redoing the closet.
3. Matching Hanger Wall With Color-Coded Clips
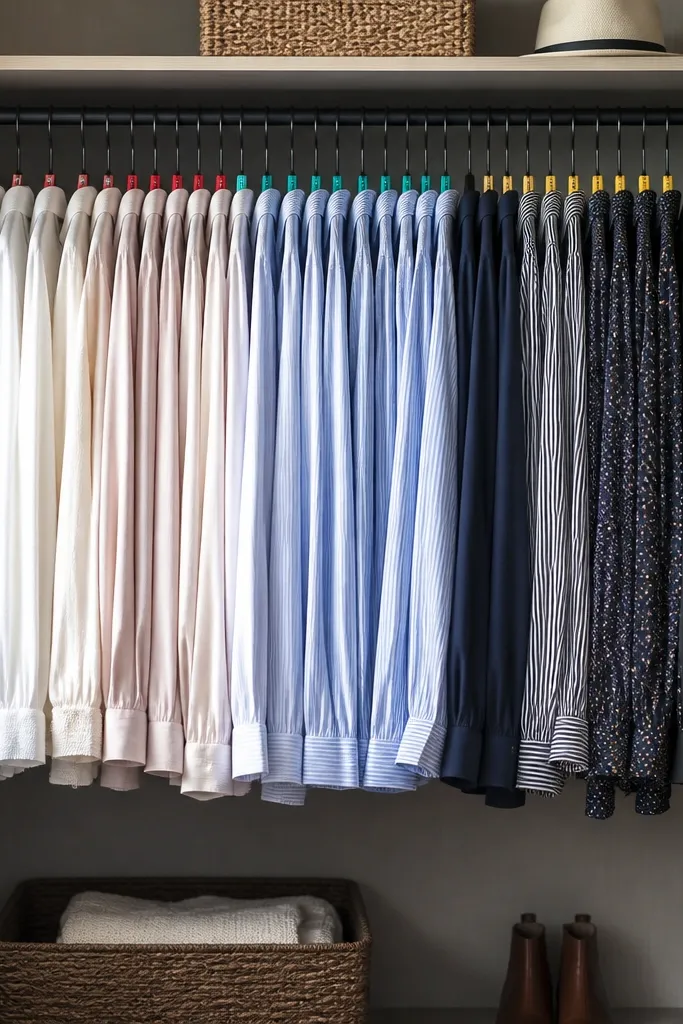
Choose one hanger type (thin velvet or smooth plastic) and buy enough for your top layer. Install color-coded clips by category: red for work shirts, blue for casual tops, green for workout. Slide the clip onto the hanger hook before you hang the garment, then group items by clip color. Keep clip colors consistent across the closet and avoid adding more than 4 categories. Finish by aligning hanger hooks evenly so the “line” looks straight.
The quickest aesthetic upgrade is getting rid of mixed hangers. When every hanger matches, the closet instantly looks calmer, and your clothes hang straighter. Add color-coded clips at the shoulder area so you can sort by category without re-hanging everything later. It’s great for button-downs, blouses, and lightweight knits because the clip placement stays visible. Morning calm comes from seeing the whole lineup clearly and grabbing the right category fast.
Skip thisMixing hanger types again — once you start, the closet never looks as clean.
Editor's noteUse velvet hangers if your closet is prone to slipping — they keep blouses from sliding down.
4. Pull-Out Shoe Drawer With Pegboard Back
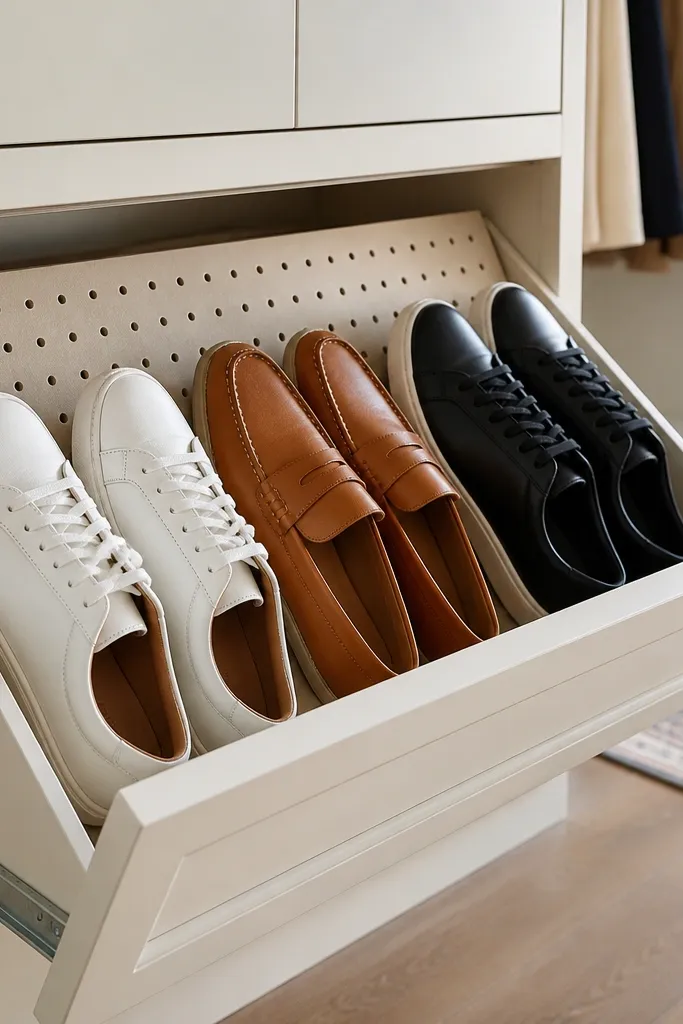
Build a shallow drawer frame using 1x2 wood rails and a plywood bottom. Attach pegboard to the back panel and drill small guide holes where shoe heels will rest. Mount drawer slides to the closet side walls, then install the drawer frame on the slides. For shoes, leave 2-3 inches between pairs so laces and straps don’t tangle. Seal the wood with matte clear coat so it wipes clean.
Instead of stacking shoes on a shelf, a pull-out drawer keeps pairs upright and visible. The pegboard back gives each pair a stable angle so they don’t collapse into a messy pile. This is photogenic because you can see the shoe shapes and it looks orderly even when you’re not perfectly color-coordinating. It also reduces morning friction: you open the drawer and scan. Use it for sneakers, flats, and boots that don’t need long hanging space.
Skip thisMaking the drawer too shallow — if you can’t slide shoes in without bending them, you’ll stop using it.
Editor's noteAdd a small rubber mat inside the drawer bottom to stop shoe soles from scuffing and sliding.
5. Rod-Under Shelf for Bags and Hats
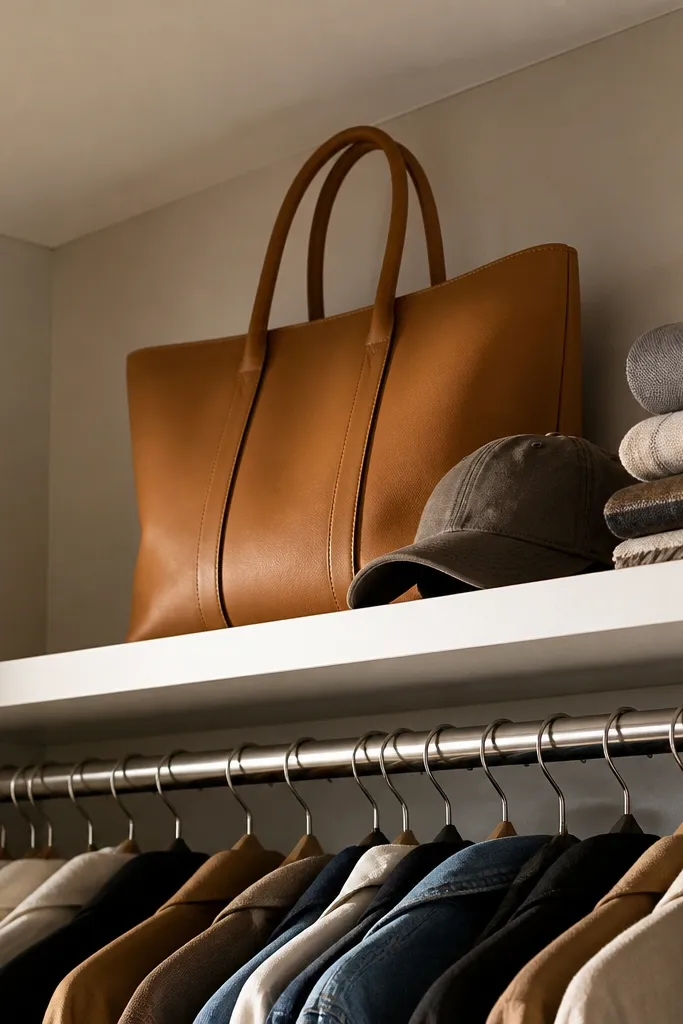
Measure the clearance under the rod and decide your shelf depth (8-10 inches is a good start for bags and hats). Use two side supports like angle brackets or wall cleats mounted into studs. Cut a shelf board to fit and add a lip or small front rail so items don’t slide forward. Install the shelf level across both sides. Finish by adding a simple tray on top for small accessories like sunglasses or hair ties.
Most closet rods waste vertical space. A slim shelf under the rod lets you store bags, hats, and folded scarves where you can see them. It looks tidy because those items become part of the organized “top zone” instead of living on the floor. For morning calm, it keeps your go-to bag in reach, not buried behind coats. This works best if you have enough clearance between the rod and the shelf so hanging items don’t rub.
Skip thisInstalling it too low — bags will bump your hanging clothes and the shelf will feel annoying.
Editor's noteIf your closet is shallow, go narrower and store fewer bags — visual calm beats packed storage.
6. Clear Bins With Front-Only Labels for Seasonal Piles
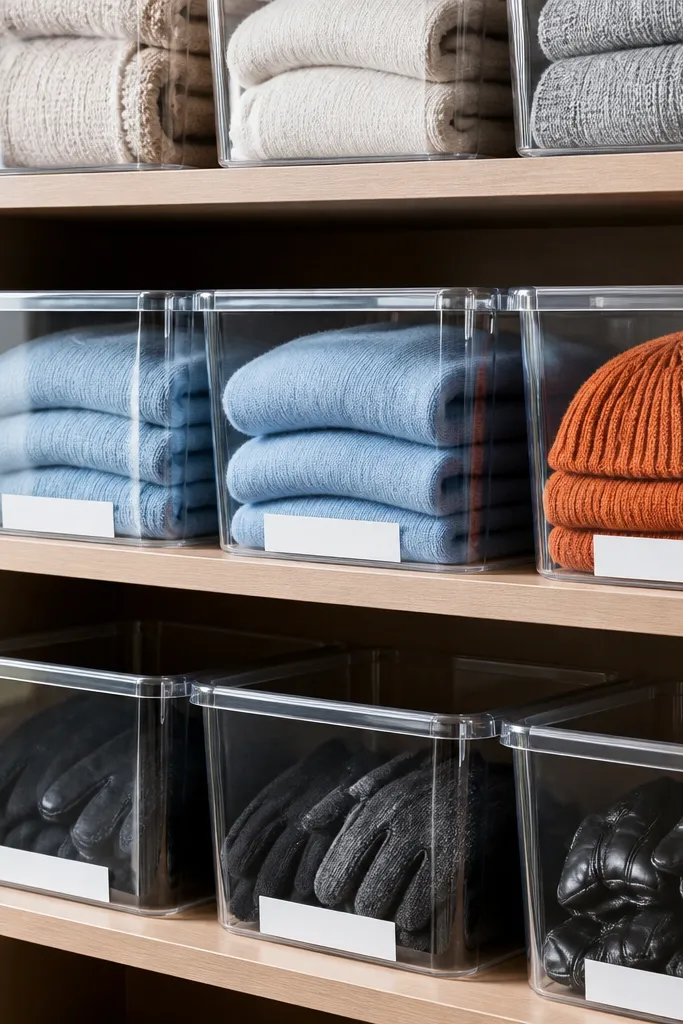
Clear bins keep you from guessing what’s inside, while front-only labels keep the look clean. This is a beginner-friendly way to create “season zones” without building custom shelving. The aesthetic is strong because the bins align in size and the labels create a tidy rhythm across the shelf. Morning calm happens when the closet floor stays clear and you’re not digging for winter gloves in July. Use this for seasonal scarves, gloves, holiday items, and spare bedding.
Choose bins with the same height so stacks look uniform. Put labels only on the front face, using a label maker or printed cardstock under clear tape. Use lightweight dividers or tissue paper to separate categories inside the bin so items don’t mix. Stack bins by season: “Current” at eye level, “Next” above, “Off-season” higher. Keep one bin for “misc small” and label it clearly to stop random clutter.
Use color-coded label dots for seasons: yellow for spring/summer, blue for fall/winter.
Using mixed bin heights — that’s where the closet starts looking chaotic again.
7. Folded Stack Carousel on a Narrow Shelf
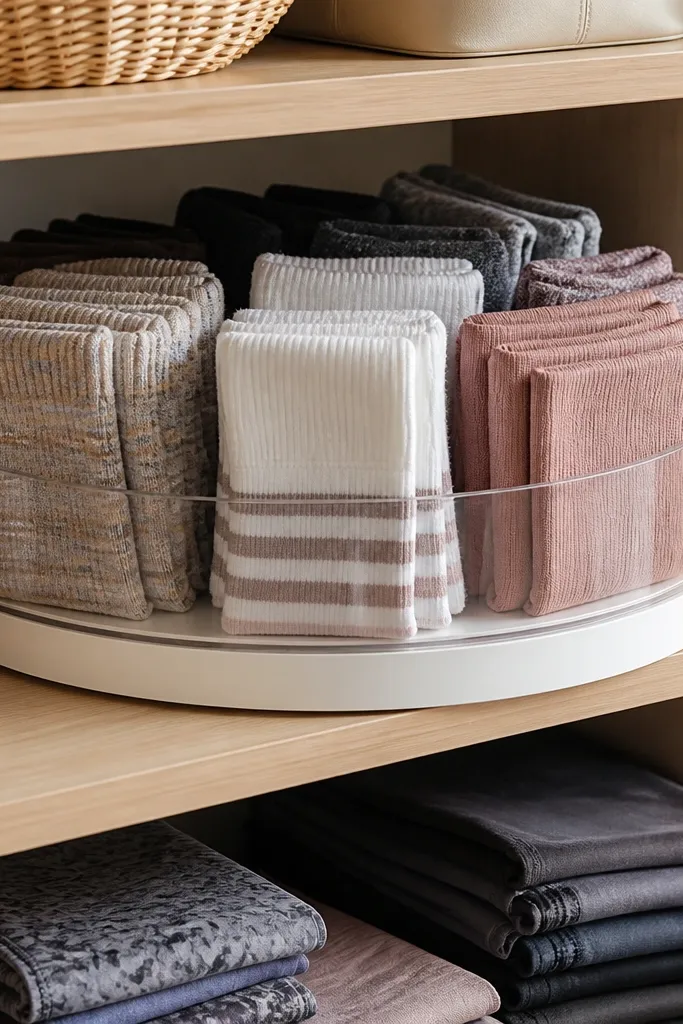
Buy a turntable tray with a smooth bearing and a diameter that fits your shelf. Place it centered so you can reach the edge easily. Stack items in shallow piles that sit flat — aim for 2-4 folds deep depending on fabric thickness. Add a label sticker to the turntable base so you know what’s inside each quadrant. Wipe the tray surface before loading to prevent slipping.
A carousel-style turntable makes folded items feel like a tidy display. You spin to find what you want instead of pulling everything out. It’s visually satisfying because the stacks stay arranged and you see the tops of the folds. This works best for small categories like socks, leggings, and workout sets. If your closet has narrow shelves, this is a smart way to add function without adding a lot of extra storage volume.
Skip thisOverstuffing — if stacks are too tall, they topple when you spin.
Editor's noteUse fabric bands (thin elastic or ribbon) on thicker items so stacks don’t spread when you rotate.
8. Drawer Insert Grid for Socks and Underwear
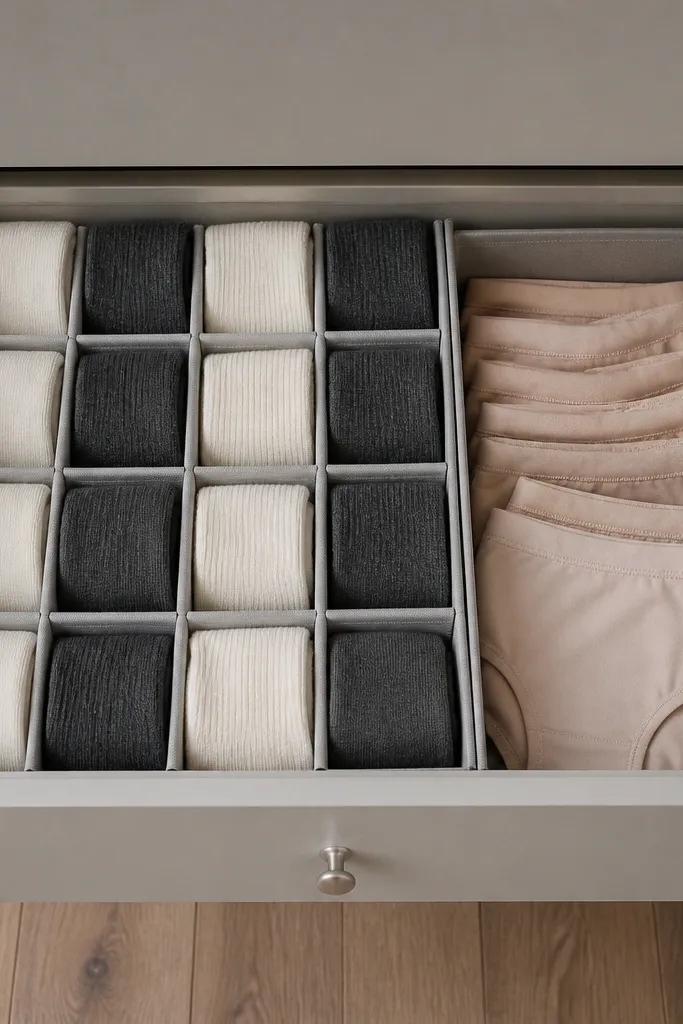
Measure drawer interior width and depth, then decide your compartment size (2.5-3.5 inches for socks is a good starting point). Cut wood strips or use adjustable plastic dividers and create a grid with glue or small screws. Sand edges so fabric doesn’t catch. Place compartments so the drawer front edge aligns with your folded items. Finish by adding a small label on the drawer front for each category.
A grid insert turns a messy sock drawer into a clean, scan-friendly layout. You get visual order because each compartment holds one category, and the drawer stops becoming a dump zone. This project looks good because the dividers create straight lines and consistent spacing. It also reduces morning stress: you grab one compartment, not a handful of tangled fabric. Use it in shallow drawers for socks, underwear, bras, and camisoles.
Skip thisUsing compartments that are too wide — you end up stuffing anyway and the drawer loses its shape.
Editor's noteStore socks in pairs folded in thirds so they sit flat and don’t lean into other sections.
9. Corner Hook Ladder for Robes and Lightweight Jackets
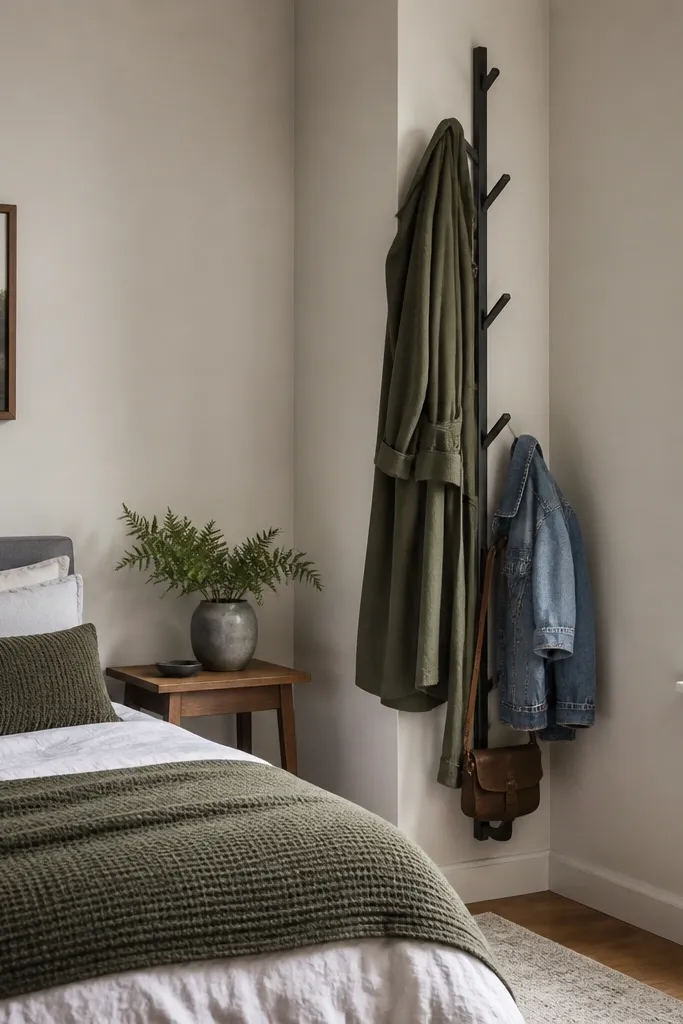
A ladder of hooks in the corner keeps long robes, light jackets, and bags off the floor while staying visually neat. The vertical layout looks intentional, and it uses space you normally ignore. It’s beginner-friendly because you can mount it with a few screws into studs or heavy-duty anchors on solid wall framing. For morning calm, it puts your “grab layer” where you can reach it without digging. This also stops door-hanging clutter from spreading across the closet.
Choose a pre-made ladder hook rack or build one from two side rails and evenly spaced rungs. Mark the studs and mount the rack at a height where the top hooks are reachable without a step stool. Use at least 4 mounting points for stability. Hang items by weight: heavier robes on the lower hooks, lighter jackets higher. Add a small fabric bin on the floor of the corner for scarves so the base stays clean.
Match hook color to your closet hardware — brushed nickel with nickel, black with black.
Mounting on drywall without checking stud placement — the rack will loosen and look crooked fast.
10. Two-Tier Hanging Organizer for Everyday Accessories
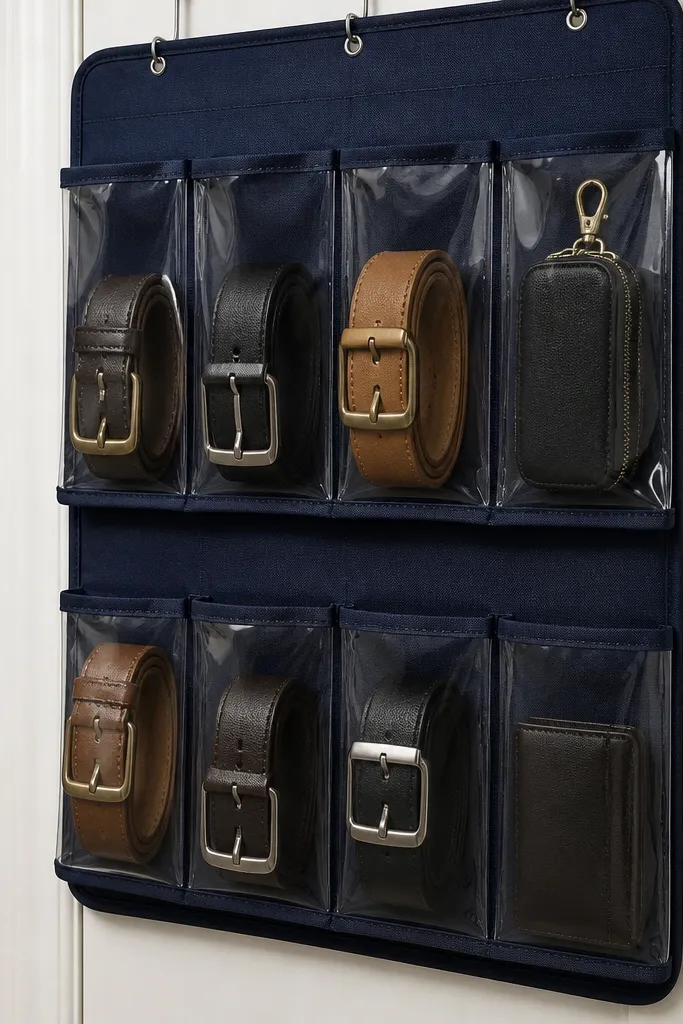
Pick an organizer with rigid edges or a structured frame so the pockets keep their shape. Hang it from the inside of the closet door or on a dedicated rod using the included hangers. Sort accessories by how you grab them: belts on the top tier, scarves and small pouches on the bottom tier. Use clear small bags inside pockets for items that shift. Press the organizer flat once installed so it doesn’t sag.
A two-tier hanging organizer makes accessories visible and prevents the “belt pile” from creeping into your drawers. It’s a good choice when you don’t have room for more shelves. The look is tidy because each pocket sits in a consistent row and you can align pouches by size. Morning calm comes from grabbing the right belt or scarf without searching through a drawer. This works especially well for belts, scarves, hats, and small travel essentials.
Skip thisOverstuffing pockets — stretched pockets look messy and tear sooner.
Editor's noteUse paper label tabs on the pocket fronts so you can swap labels when seasons change.
11. Shoe Shelf With Adjustable Angle Inserts
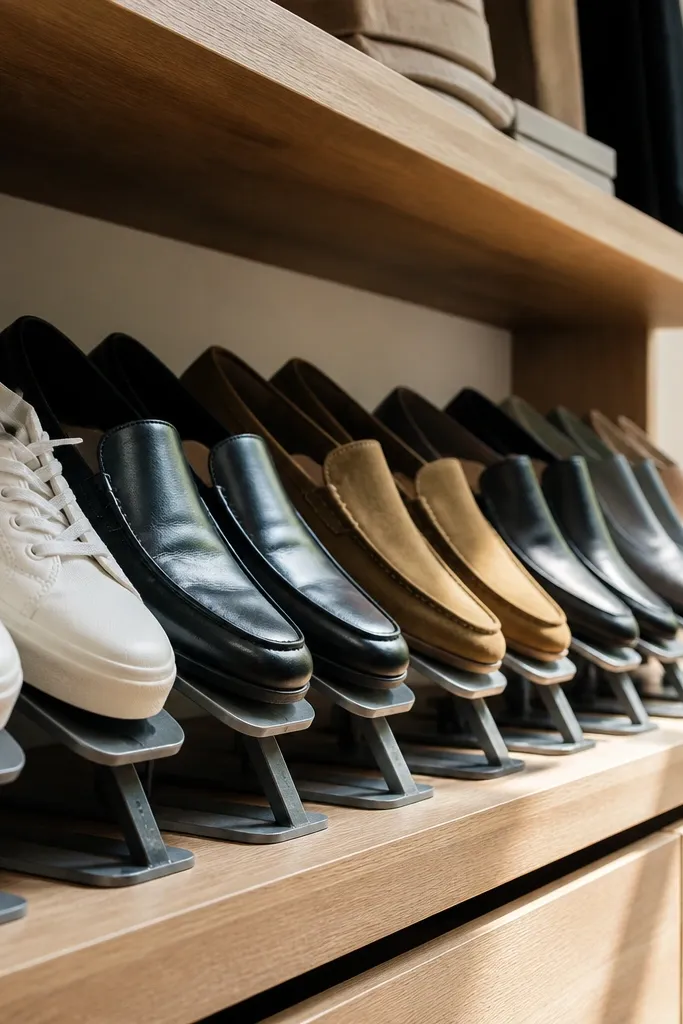
Measure your shoe shelf depth and choose inserts that create a 20-30 degree angle. You can build inserts from plywood triangles or buy adjustable angle boards and cut them to fit. Install small supports on each side so the inserts don’t shift. Space inserts so each pair has 1-2 inches of clearance. Sand edges and seal with a wipe-on polyurethane so it’s easy to clean.
Angle inserts stop shoes from sliding and make the shelf look intentional instead of stacked. This is especially good for sneakers and flats because it keeps the toe line consistent. The shelf looks photogenic because the shoe tops form a repeating pattern. For morning calm, you can scan pairs without moving other shoes. It also protects shoes from getting crushed under heavier pairs.
Skip thisUsing flat dividers only — shoes still slide and the shelf loses the neat look.
Editor's notePlace the most-used shoes at the center of the shelf where you see them first.
12. Under-Shelf Basket Rail for Small Stuff
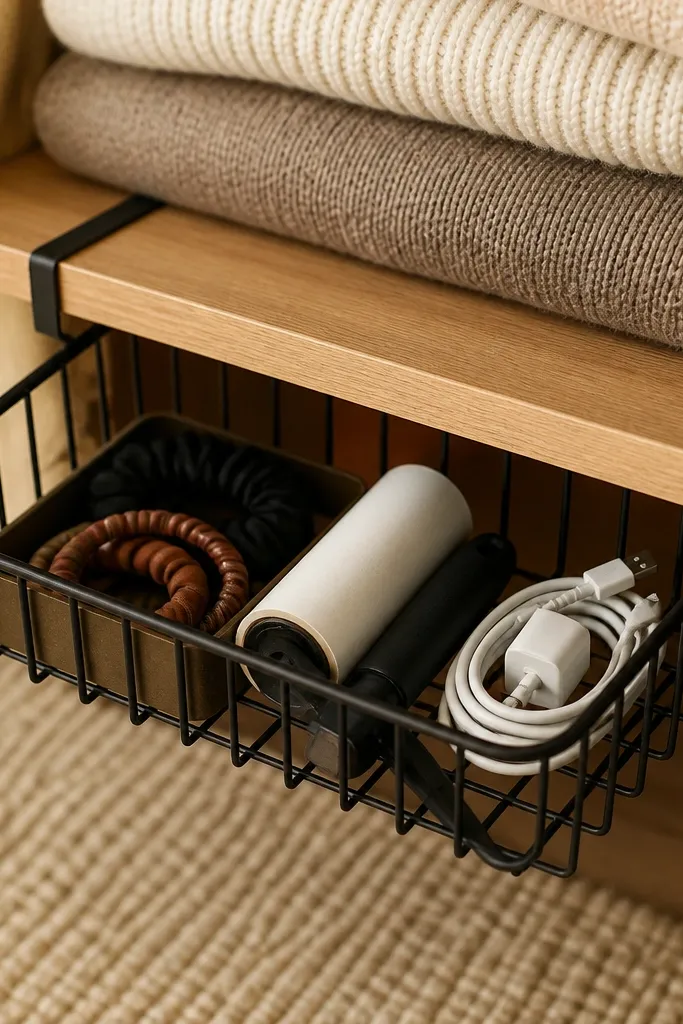
This solves the “small clutter that spreads” problem by putting tiny items in a dedicated container under a shelf. It looks clean because the basket is tucked out of the way, and the rail keeps it aligned. You’ll stop seeing random hair ties, chargers, and gloves on the shelf edge. Morning calm comes from knowing that small essentials live in one spot. Use it for gloves, hats, socks you’re rotating, and grooming basics.
Find shelf clearance under a shelf or rod so the basket won’t hit hanging clothes. Mount a simple metal rail (or two side brackets) to the underside using screws into studs. Attach a wire basket to the rail with included hooks or small bolts. Add a small divider inside the basket so items don’t mix — a thin plastic tray works well. Label the basket with a small tag at the front edge.
Use a matte finish basket so it doesn’t reflect light and look messy in photos.
Mounting too low — you’ll bump your head or scrape clothes every time you open the door.
13. Fabric Tie-Back System for Curtains or Garment Bags
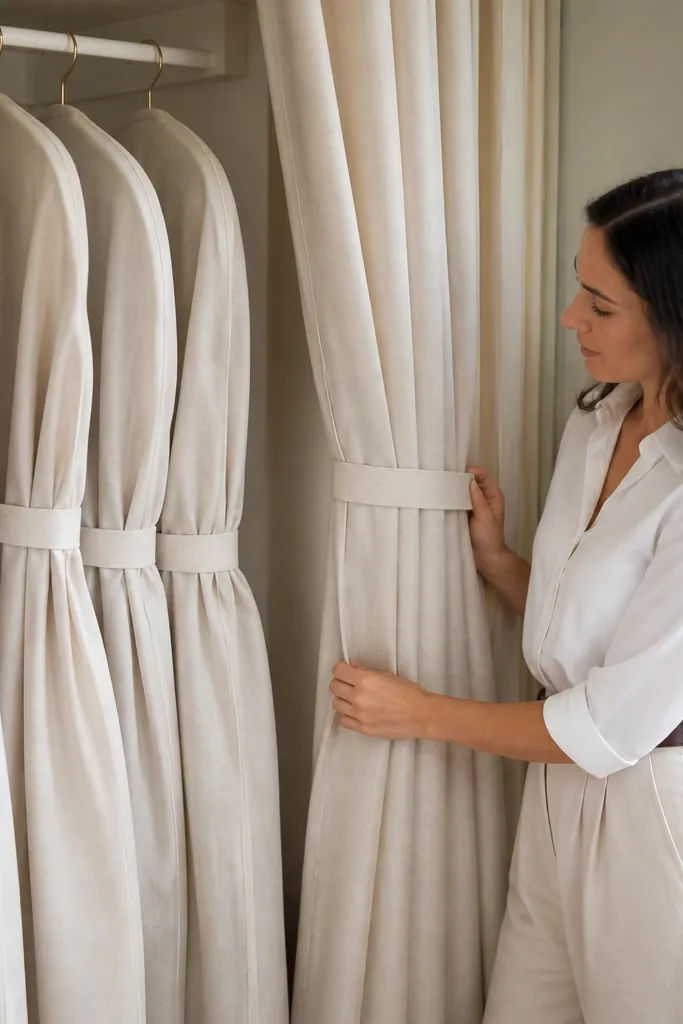
Garment bags and curtain-style covers look neat when they’re controlled instead of flopping forward. A tie-back system keeps them tucked and creates a clean visual line. This is a beginner-friendly add-on that doesn’t require building shelves. Morning calm comes when your “special items” are easy to access without pulling the whole bag down. Use it for dress shirts, suits you rotate seasonally, and stored coats you don’t want crushed.
Install two small hooks at the back or side of the closet where the garment bag naturally folds. Use fabric ties or thin cotton straps attached to the bag handles. Tie the bag back once it hangs — keep the tie length short so the bag doesn’t sag. If you store multiple bags, label each bag with a tag on the tie. Make sure the bag hangs from a hanger hook that can support the weight without bending.
Use matching fabric ties in one color so the closet looks designed, not patched together.
Ties that are too long — floppy bags kill the clean look.
14. Pegboard Panel With Color-Coded Tool Trays for Accessories
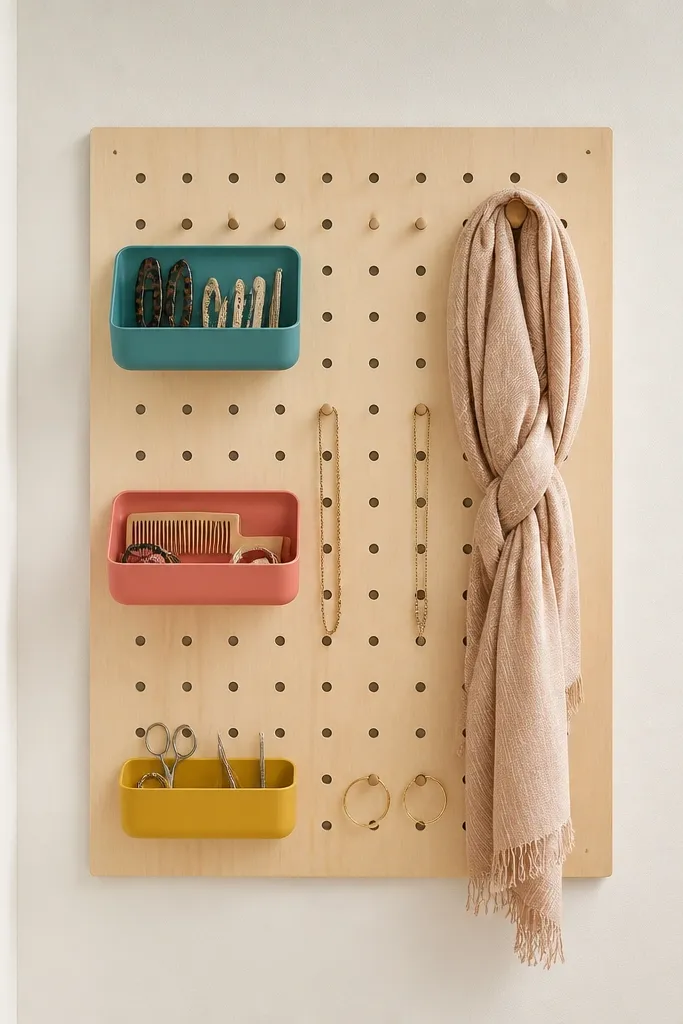
Measure the available back wall and install pegboard securely into studs if possible. Paint or seal the pegboard so it wipes clean. Add small hooks for necklaces and a few shallow trays for hair tools and jewelry. Use color-coded trays by category: one color for jewelry, one for hair accessories, one for small travel items. Label each tray with a tiny tag on the front lip.
Pegboard turns the back wall into a functional display. With small trays and hooks, you can store jewelry, hair tools, and everyday accessories without using drawer space. It’s visually strong because pegboard creates a grid, and trays line up neatly. Morning calm comes from seeing your essentials at a glance instead of hunting through a bag. This works best in closets with enough back-wall space and a door you open daily.
Skip thisHanging heavy items only on pegboard — use hooks rated for the weight and spread load.
Editor's noteKeep tray depth shallow for small items — deep trays make jewelry disappear and look messy.
15. Matte-Finish Closet Floor Tray for "Daily Grab"
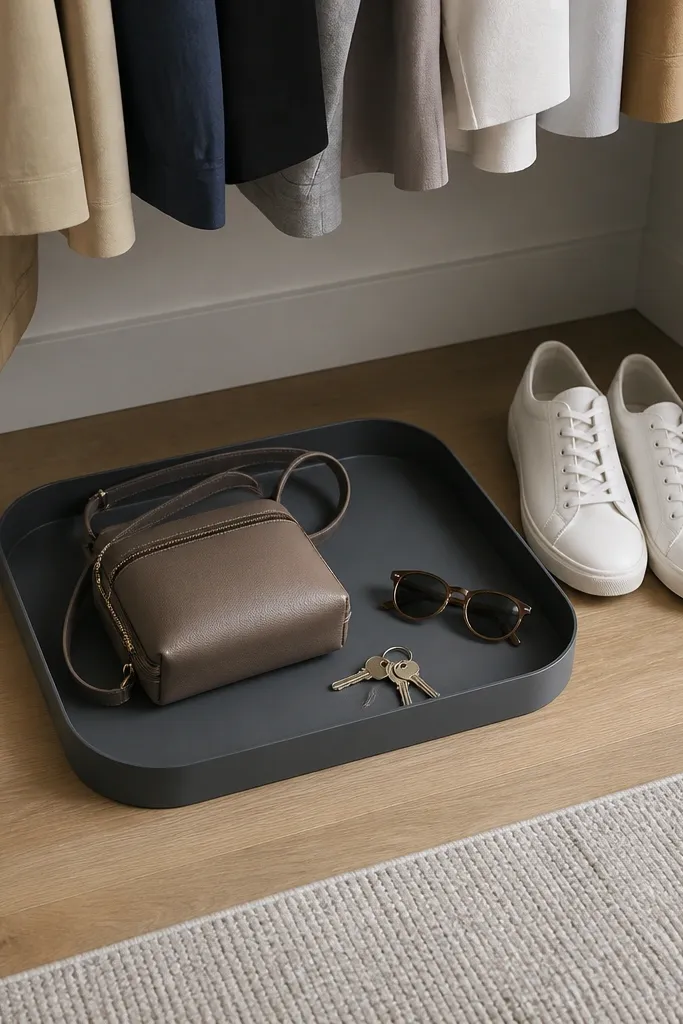
Choose a tray with low sides and matte finish so it doesn’t look glossy or messy. Place it on the closet floor near the door or next to your most-used shoes. Add a small organizer insert inside the tray for keys or sunglasses so items don’t slide. If you want extra neatness, add a label on the tray underside or a small tag on the front. Wipe the tray weekly so dust doesn’t build up.
A floor tray is the clean answer to the “stuff that lands on the floor” problem. When keys, sunglasses, and a small daily bag have one landing spot, the closet looks better immediately. The look is minimalist: one tray, consistent items, and no scattered piles. Morning calm comes from a predictable ritual, and the tray prevents the clutter spiral. Use it in entry closets, bedrooms with closets near the door, or any closet that acts like a drop zone.
Skip thisLetting the tray become a second drawer — if it grows, the closet goes back to chaos.
Editor's noteUse one small catch-all for “today only” items and remove it nightly so it doesn’t become storage.
16. Hanging Belt Organizer With Clear Pocket Strips
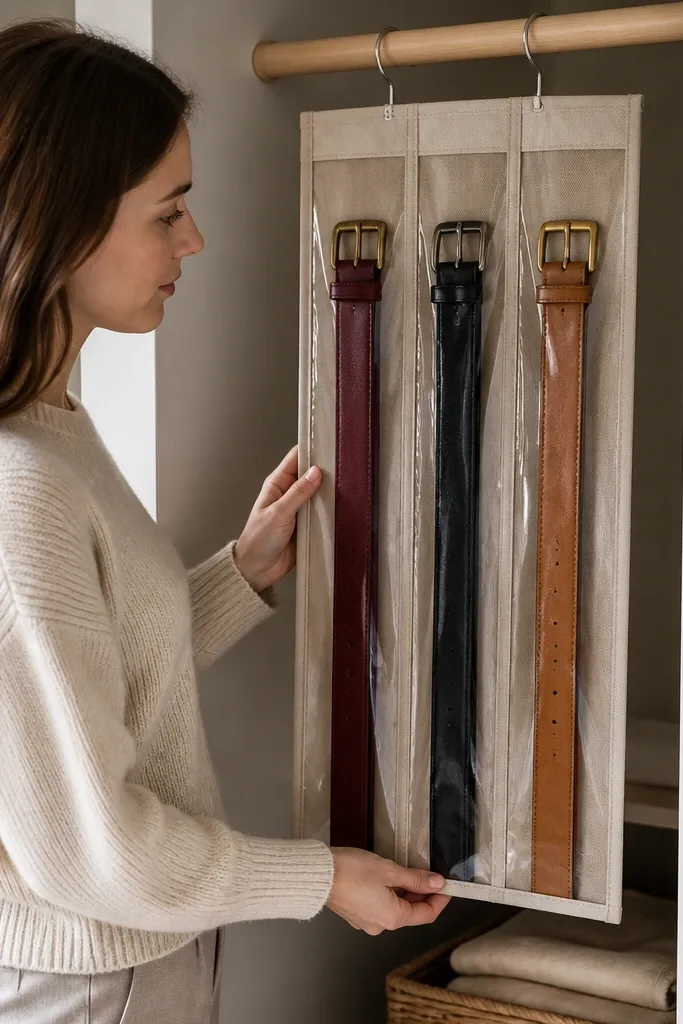
Belts are the fastest way a closet looks messy because they tangle and sprawl. A hanging belt organizer with clear pocket strips shows every belt at once and keeps them from twisting. The aesthetic is clean because the pockets line up vertically and the belts keep their shape. Morning calm happens when you pick a belt without digging. This also protects belt finishes because they aren’t constantly getting bent and re-folded.
Choose an organizer with individual pockets that are wide enough for your buckle size. Hang it inside the closet on a rod or door hook system. Insert belts one by one so the buckle faces the same direction for a consistent look. For long belts, keep the loop size the same each time so pockets don’t bulge. Label the top pocket with “Belts” and keep the rest unlabelled to avoid clutter.
Add a small strip of fabric between belts if they scratch each other inside clear pockets.
Pockets that are too tight — belts bow and the organizer looks stretched.
17. Color Zoning With Paint-Stick Shelf Markers
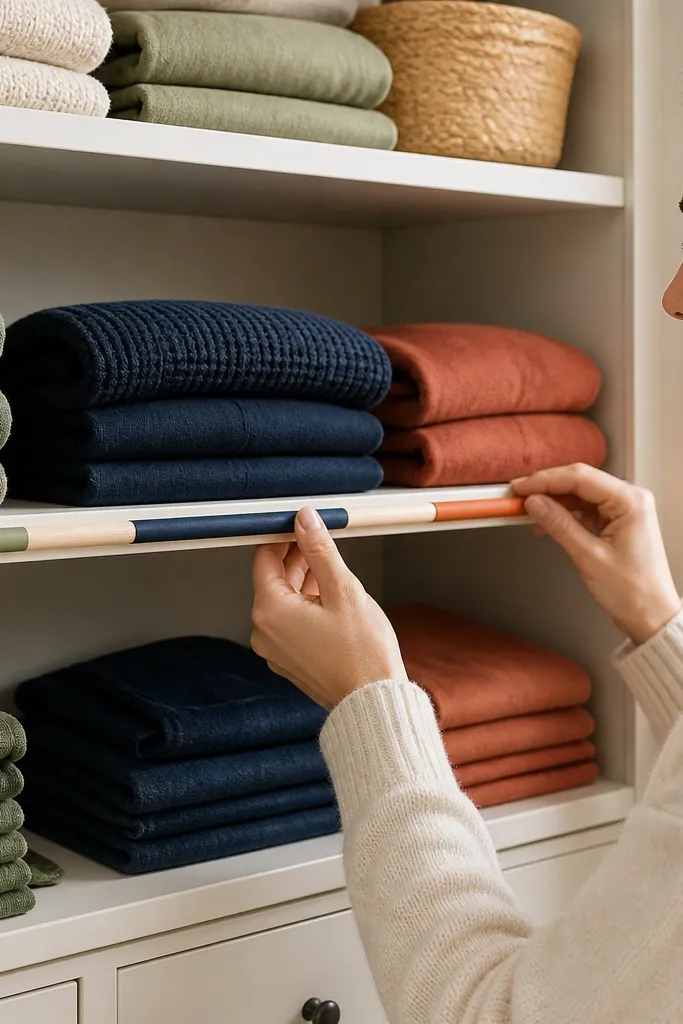
Pick 3-4 colors max and assign each to a category like “Work,” “Casual,” “Workout,” and “Sleep.” Apply short, straight strips to the front edge of each shelf using paint markers or craft paint pens. Keep spacing consistent so the colors form a clean rhythm. Put matching label stickers on bins or folded stacks so the color matches. Replace the color zones only if you truly change your closet use.
Color zoning is how you make a closet look styled without building a whole custom system. Paint-stick markers on the shelf front create clear zones that guide where items go. It looks good because the colors are small and repeat across shelves, not scattered everywhere. Morning calm comes from quick scanning — you see the zone color and grab the item. Use it for shelves holding folded clothes, bins, or drawer stacks.
Skip thisUsing too many colors — the closet becomes a rainbow and scanning gets harder.
Editor's noteUse matte craft paint so it doesn’t glare under daylight or overhead bulbs.
18. Pegboard Jewelry Display With Mini Dowel Bars
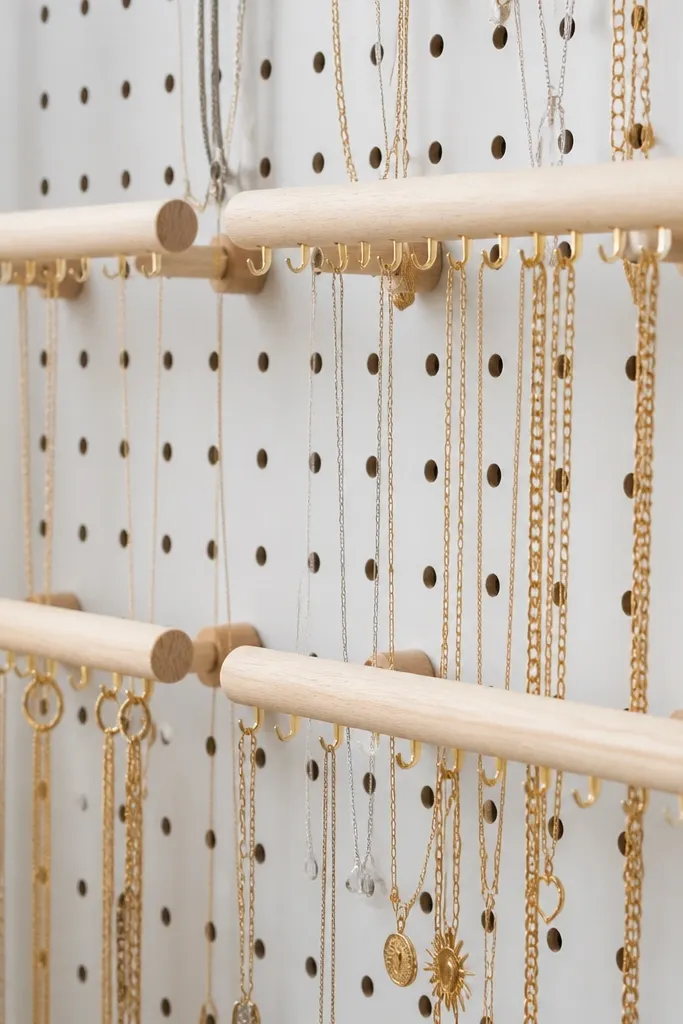
Mount pegboard to the closet wall or use a freestanding pegboard panel. Install a row of small dowels (thin wood rods) by adding pegs or hooks that hold the dowel ends. Hang necklaces by looping the chain over the dowel so each necklace has its own spot. Space dowels 2-3 inches apart so pieces don’t overlap. Add tiny number labels on the pegboard if you wear necklaces in rotation.
Necklaces look messy when they tangle. Mini dowel bars on a pegboard let you hang necklaces in parallel so they stay untangled and visible. The look is clean because each piece hangs straight and creates a repeating pattern. For morning calm, you can grab the right necklace without digging through a drawer. This works best for short to medium-length necklaces and pendant chains that hang nicely.
Skip thisHanging too many necklaces on one dowel — they tangle again fast.
Editor's noteUse felt pads on dowel contact points if your necklaces scratch easily.
19. Drawer Dividers for Bras and Camis With Soft Edge Stops
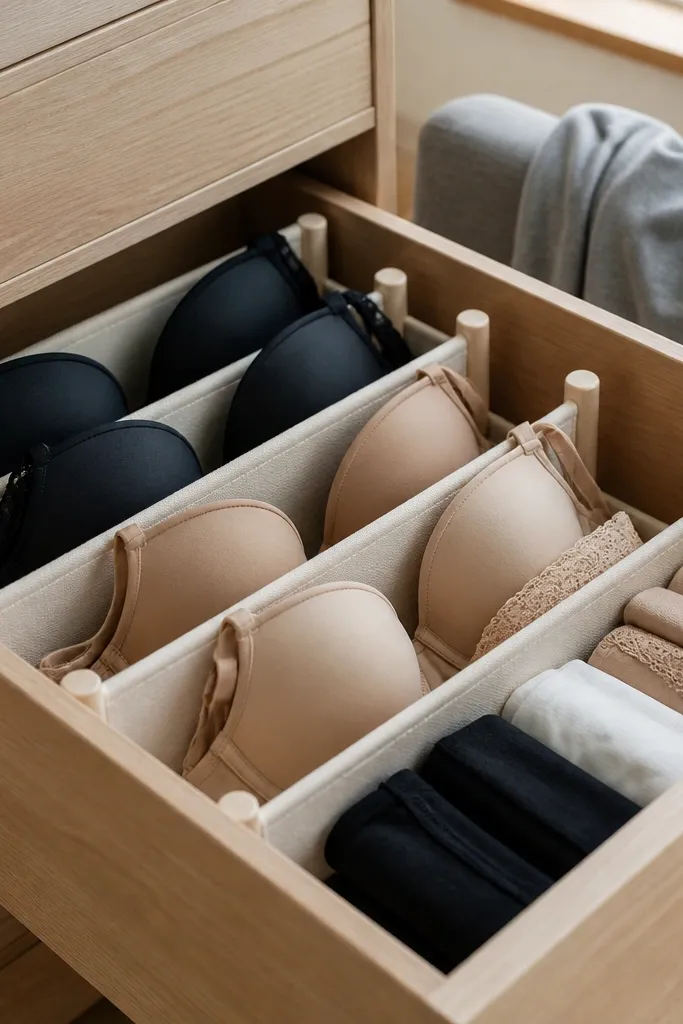
Measure your drawer depth and choose divider thickness so it doesn’t eat all the storage space. Use foam-covered strips or add felt edging to wood dividers so fabric doesn’t snag. Build two to three sections: bras in one, camis and tanks in another, and a small pocket for strapless or bralettes. Install dividers with adhesive or small screws, then test fit with your folded items. Label the drawer front with simple categories.
Bras and camis are the two items that turn a drawer into a wrinkled mess. Soft-edged dividers hold them upright and separated so you don’t spend mornings wrestling fabric. The look is smooth because each section has a clean border and the drawer opens neatly. Morning calm comes from grabbing without searching for the right cup or matching strap. This project works great in shallow drawers where you can’t fit bulky organizers.
Skip thisUsing hard plastic dividers without padding — they create snag points and frayed fabric.
Editor's noteFold bras by stacking cups flat and placing straps behind — it keeps them from bulging into other sections.
20. Under-Rod Hanging Pouch for Workout Items
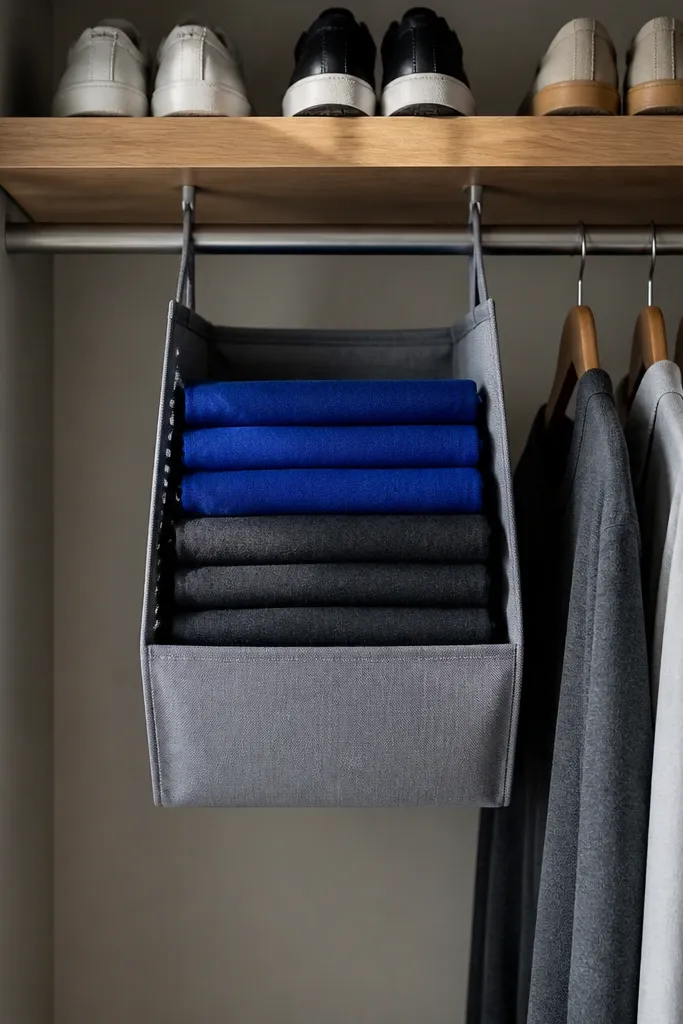
Choose a structured fabric pouch with a flat bottom so it doesn’t collapse. Attach it under the rod using S-hooks or the pouch’s own hangers. Fold workout clothes into consistent thirds so they stack evenly in the pouch. Add a small zipper pocket insert for small items like hair ties and deodorant. Place the pouch so it doesn’t rub against hanging coats or dresses when you open the closet.
A hanging pouch under the rod gives you a dedicated home for workout clothes without eating shelf space. It looks neat because the pouch hangs straight and the folded items sit at a consistent height. Morning calm comes from knowing your gym set is always in the same place, even when you toss it back in after a shower. This is especially helpful if your closet has limited drawers. Use it for leggings, sports bras, and spare socks you want ready for tomorrow.
Skip thisLetting the pouch get mixed with everyday underwear — it turns into a grab pile.
Editor's noteUse a waterproof liner inside the pouch for damp items so the fabric stays clean.
21. Bench-Style Coat Fold Station on the Shelf
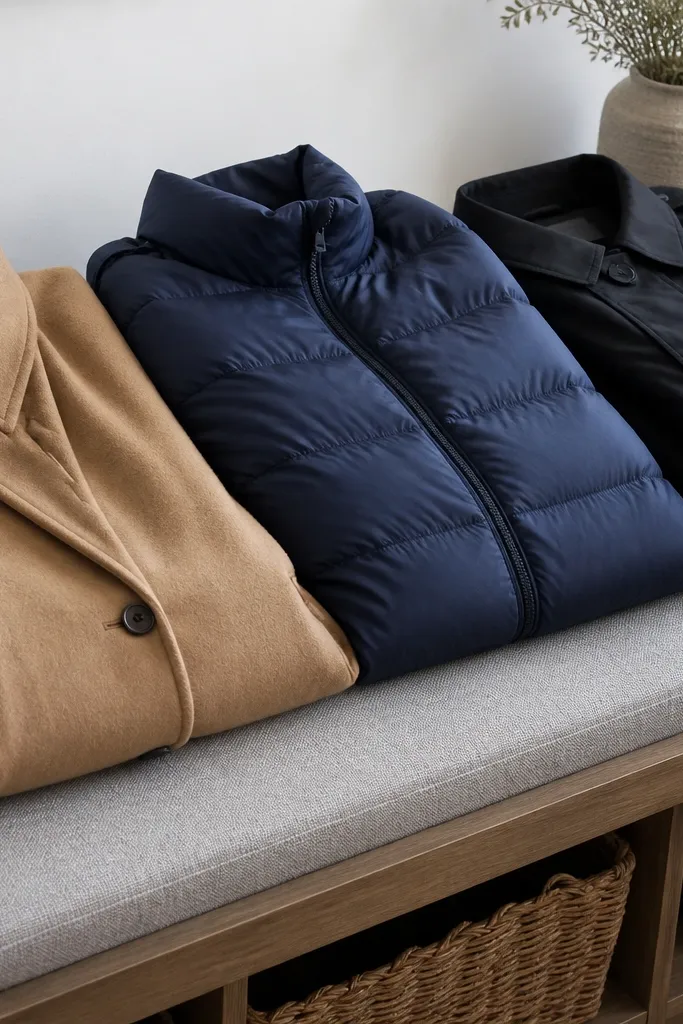
If your closet includes outerwear, a fold station keeps coats from slouching and taking over the space. The look is better because you stack coats in a consistent direction with a runner that hides dust and creates a soft, uniform surface. Morning calm comes from quick access to the coat you want without lifting everything. This works for lightweight coats, hoodies, and cardigans — anything that folds cleanly. It’s also a great alternative if you don’t want more hanging hardware.
Lay a fabric runner or washable mat on the shelf where you want the fold station. Add two small fabric straps or shelf-edge stops so coats don’t slide forward. Fold coats using a consistent method: sleeves tucked, then roll or fold into a rectangular stack. Stack by weight — heavier items on the bottom, lighter above. Add a label strip above the shelf so you know what stack goes where.
Choose a runner color close to your closet wall so it looks intentional, not like a random mat.
Stacking coats too high — you lose the “grab fast” benefit and it becomes a tower.
22. Clear Acrylic Bin Lids With Matching Stacking System
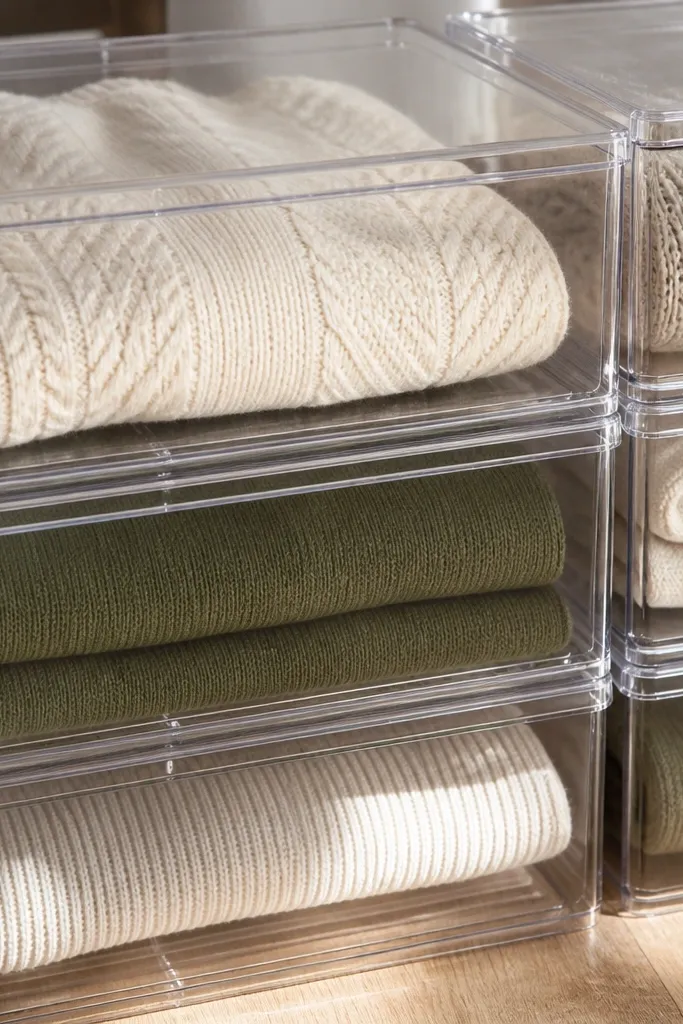
Pick bins that stack and have compatible lid sizes, then measure your shelf height for the total stacked height. Install shelf brackets if needed for stability. Place bins in a single line or grid so the labels line up. Use label cards on the front edge and keep the same label size across every bin. Wipe bin surfaces before loading so they don’t look cloudy.
Matching clear bins with lids make closets look like a tidy store display. The lids keep dust off folded items and make the bins feel more “finished” than open baskets. This project is beginner-friendly because it’s mostly measuring, stacking, and labeling — not carpentry. Morning calm comes from seeing what’s inside while still having a clean closed look. Use it for sweaters, spare sets, and accessories you rotate seasonally.
Skip thisUsing loose lids that shift — shifting lids make the whole shelf look sloppy.
Editor's noteStore only categories that fold to the same height so the stacks stay level.
23. Closet Door Pocket Organizer for Morning Essentials
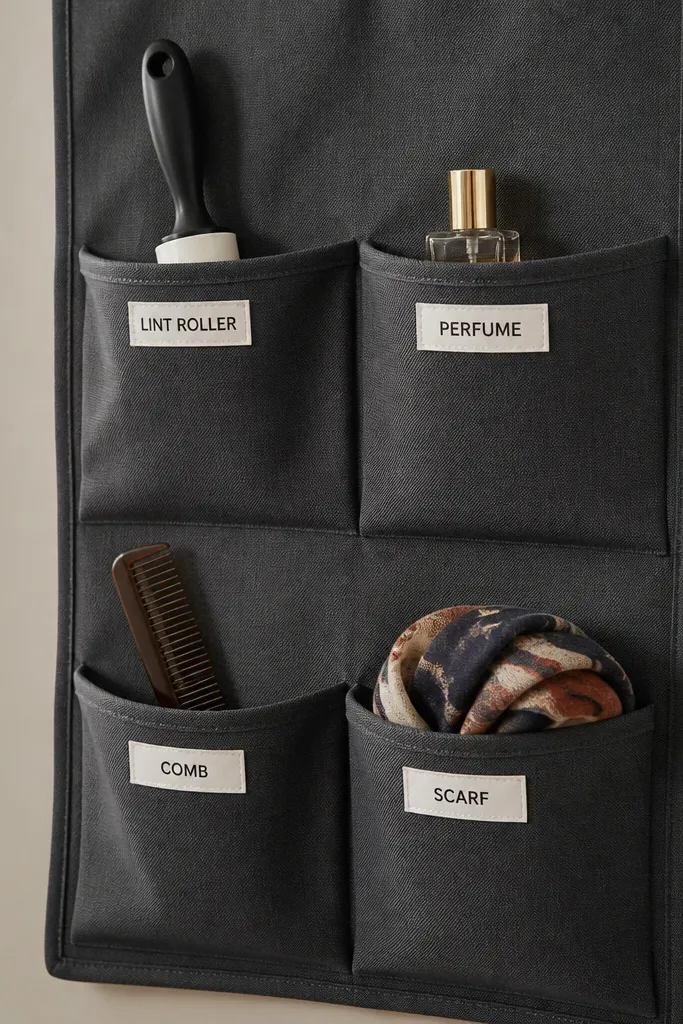
Choose a fabric or clear pocket organizer that fits your door height. Hang it using the included straps or adhesive hooks on the door interior. Sort items by size: larger items in lower pockets, small items in upper pockets. Put a label on each pocket with a short word like “Hair,” “Lips,” “Skin,” and “Tools.” Keep the number of pockets you use limited so the organizer doesn’t become clutter.
A door pocket organizer keeps your morning essentials from spreading across shelves and countertops. It looks good because the pockets form neat rows, and you can label each pocket so the system stays consistent. Morning calm is immediate: you open the door and grab what you need before you leave. This works best for small items you use daily, like hair tools, lip products, and hand lotion. If you’ve got a closet near your exit, this is the most practical “aesthetic” fix.
Skip thisOverloading pockets — stretched fabric looks messy and items fall out.
Editor's noteUse small zip pouches inside pockets for items that leak or leave residue.
24. Hanging File Folders for Clean Laundry Sets
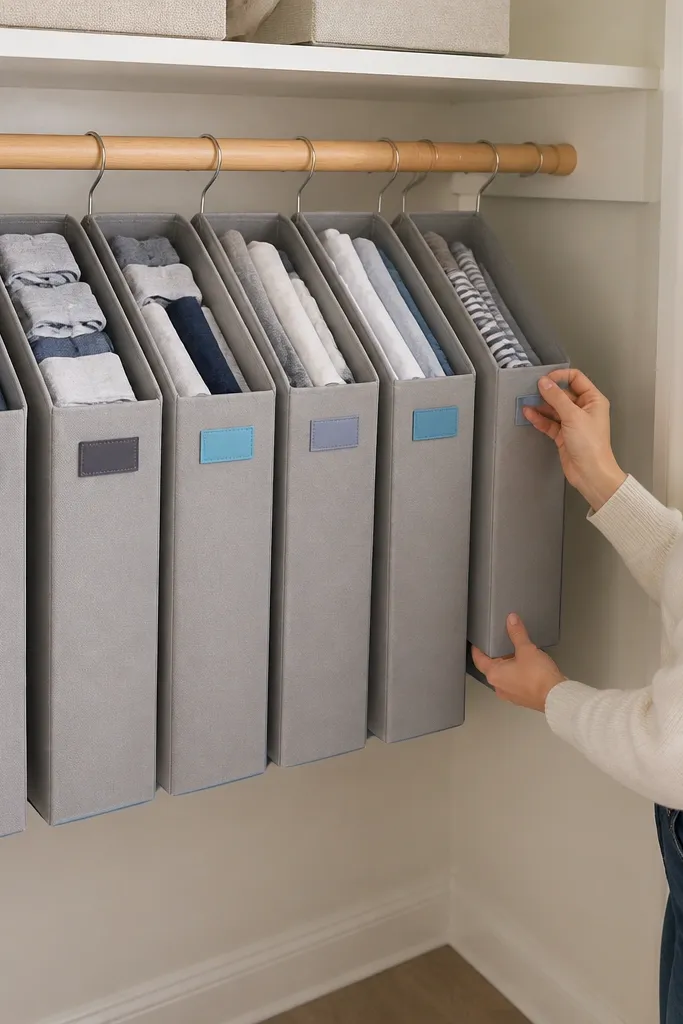
Buy an accordion-style hanging organizer with multiple vertical sections. Hang it on a closet rod using the included hook or hangers. Fold shirts and pants to a consistent size so they slide into the organizer without bulging. Label each section with a short set name like “Mon-Thu” or “Weekend,” or use categories like “Work” and “Casual.” Keep one section for “overflow” so you don’t shove everything into one place.
Hanging file folders are a clever way to keep clean laundry organized by set, not by random pile. The accordion structure holds folds upright and keeps them from crushing. It looks tidy because each section has a vertical edge and you can label the tabs clearly. Morning calm comes from grabbing a complete set for the day without mixing items. This is best for people who fold laundry immediately and want it to stay that way.
Skip thisUsing inconsistent fold sizes — the organizer stops looking neat when items don’t fit.
Editor's noteUse a fabric stiffener spray lightly on organizer sections if they sag — it keeps the look crisp.
25. Magnetic Morning Receipt and Keys Landing Strip
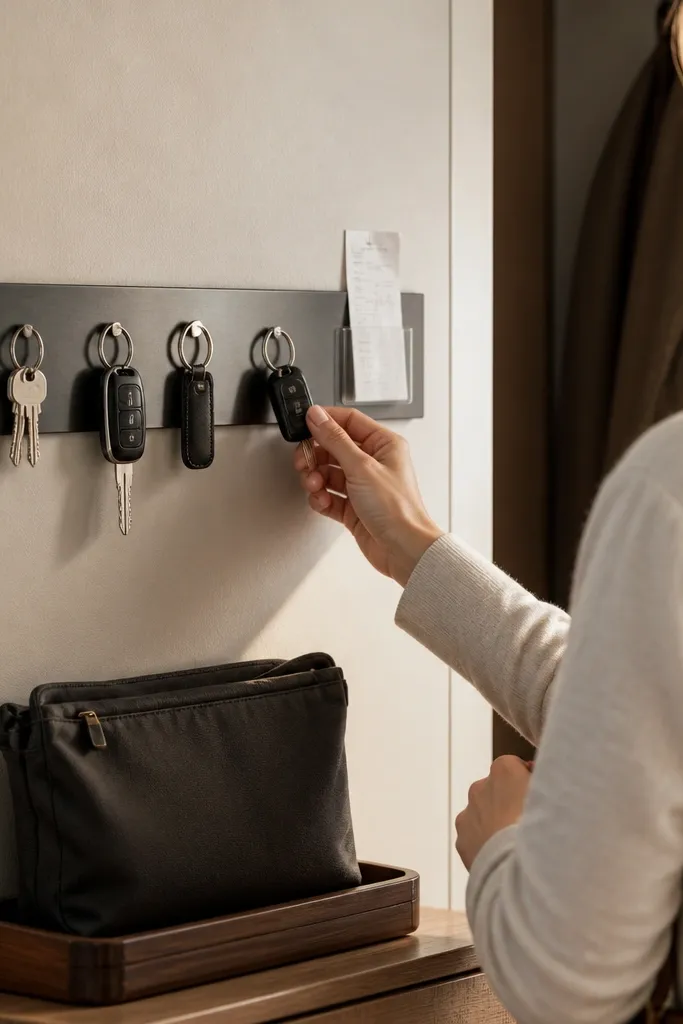
This is the fix for the tiny morning mess that ruins your calm — keys, receipts, and a couple of random pieces of mail that end up on the dresser. A magnetic landing strip gives everything one exact spot you can hit without thinking. It looks clean because the keys hang in a neat line and the paper stays in a clear pocket with crisp edges. Use a warm wood base and a matte hardware finish so it doesn’t look like office junk. It’s beginner-friendly: you’re basically assembling a small board, mounting magnets, and screwing in a clear holder. Plan for 60-90 minutes total, and it’s perfect for entry closets, the inside of a bedroom closet door, or any spot you reach right before leaving.
Cut a 3/4 in thick board to 18 in long and 4 in deep. Sand all edges to 120 grit then 220 grit, and wipe with a tack cloth. Stain or paint it in a closet-friendly neutral (walnut stain or matte off-white both photograph well).,Mark a centerline and install a magnetic key bar across the top third of the board using the manufacturer’s screws, or mount 6-8 round neodymium magnets in a line if you’re using loose magnets. If you use loose magnets, drill shallow pilot holes, epoxy each magnet flush, and keep the polarity consistent so keys don’t repel. Add a small felt strip behind the bar area so metal doesn’t rattle.,Attach a clear acrylic document holder or a DIY pocket made from a clear poly sheet to the bottom half using standoffs or a simple back plate. Keep the pocket opening facing up so you can slide in receipts and a single mail piece fast. Finish by sealing the wood with a matte clear coat and letting it cure fully before loading keys.
Use neodymium magnets with a steel backing plate if your keys feel weak — it holds better and looks tighter because the bar sits flatter.
Skip super-gloss clear coat; it shows fingerprints and glare every time you open the closet.



