
1. Tall Book Nook With Two Wide Center Shelves
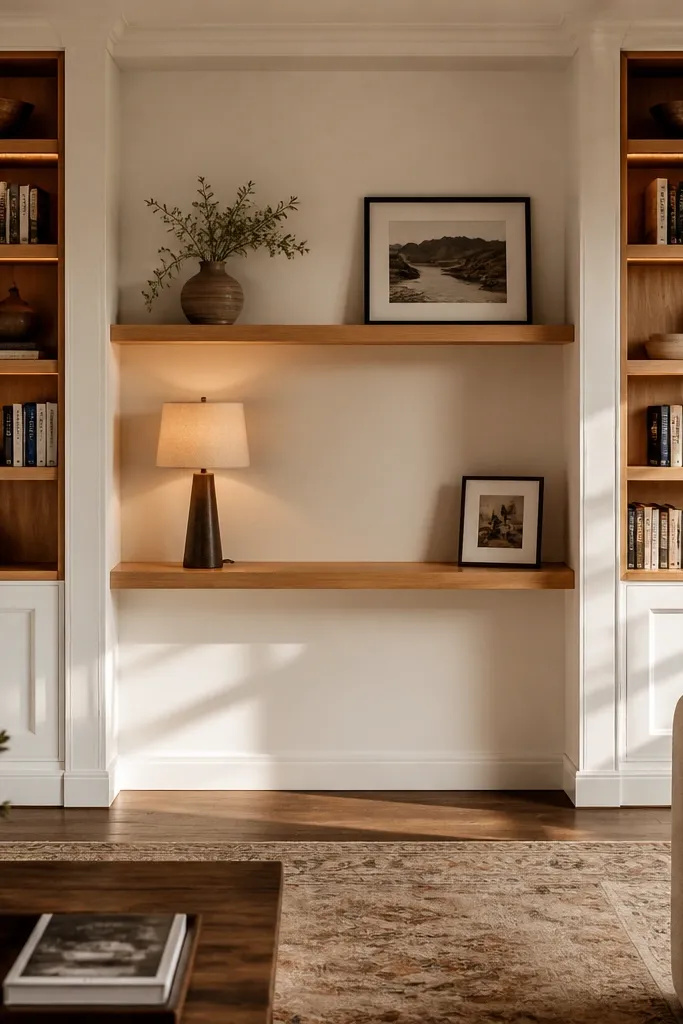
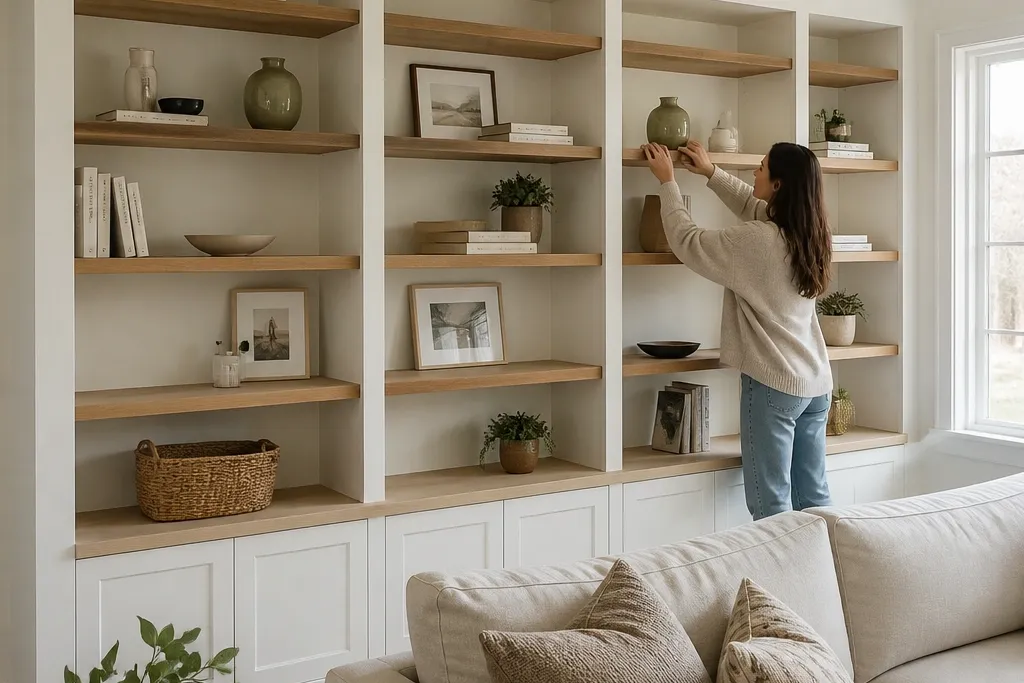
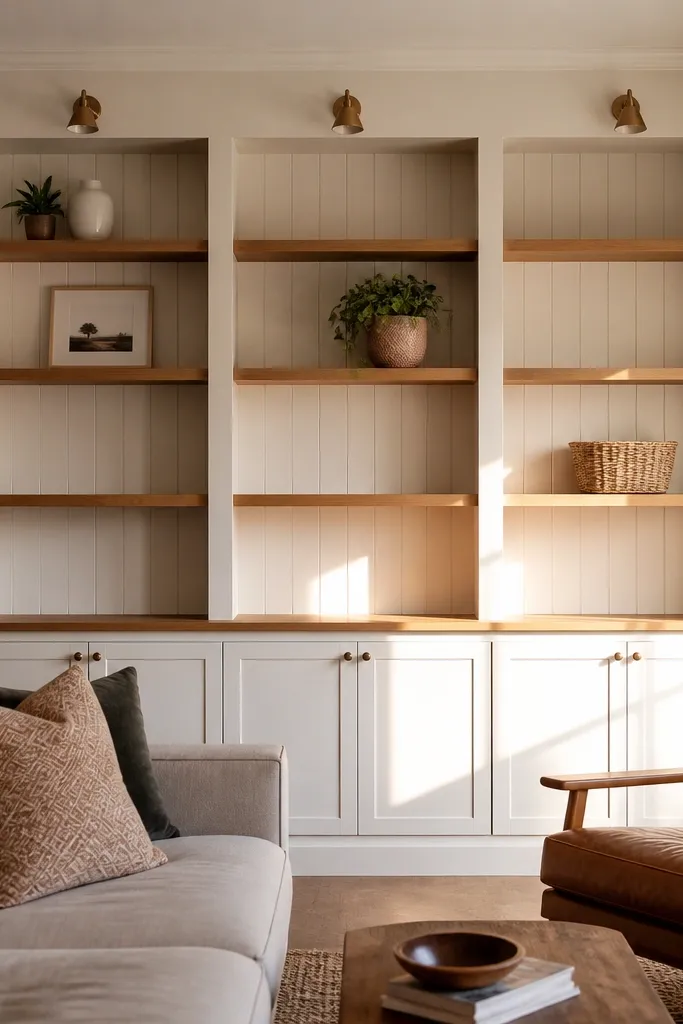
This layout gives you the “wow” look without requiring cabinets. The tall side stacks frame the wall like bookends, while two wider center shelves create breathing room for a lamp, framed art, or a small plant. It reads clean from the couch because the shelves align into a simple grid instead of scattered heights. Build it when you want most of the wall to be functional storage, but still look styled. It’s beginner-friendly because it’s basically repeatable box bays — measure once, then copy the spacing across.
Start by marking a center line on the wall and deciding your overall width for the shelf run. Use 3/4 in plywood shelves, and plan two center shelves 12-14 in wide each side of the middle bay, with side bays sized for your book collection. Frame the bays with 1x2 or 1x3 cleats screwed into studs, then install the shelves on the cleats using wood screws from below. Finish with painted MDF trim around the perimeter and sand the edges smooth so it looks built, not boxed.
Cut shelf boards from one sheet so the grain and color match across every level.
Don’t guess shelf height from the floor — measure from your couch-side sightline so the top shelf doesn’t feel too high.
2. Kitchen-Style Open Shelves With Shiplap-Back Panels
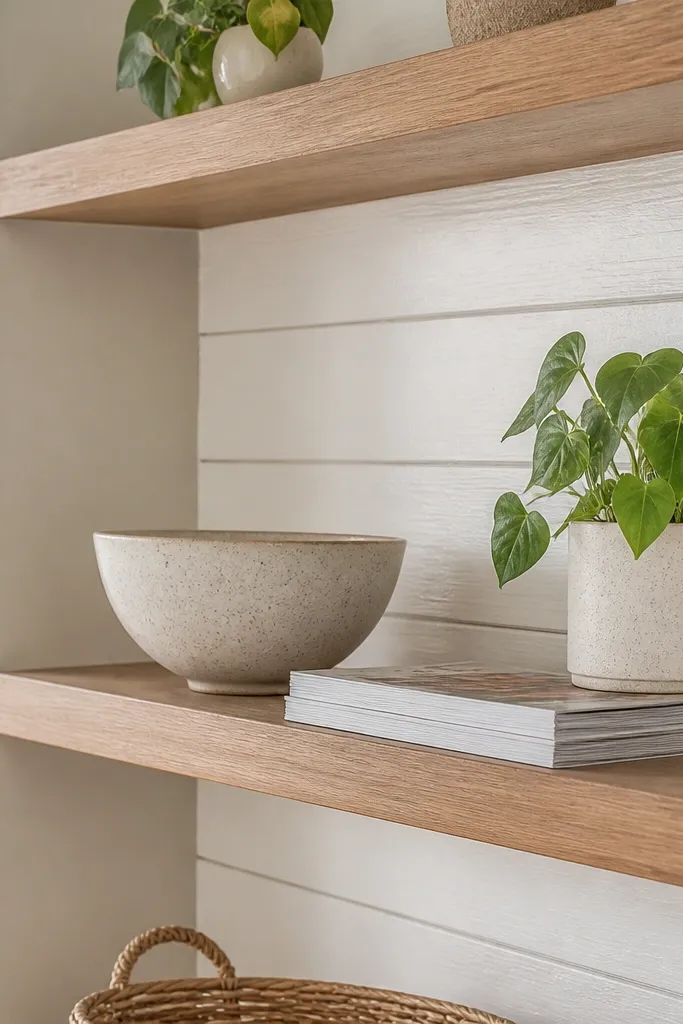
A shiplap back makes open shelves look intentional even when everything isn’t perfectly styled. The texture sits behind the objects, so photos look layered instead of flat. This is the easiest way to upgrade a basic shelf grid because the shiplap does the visual work. It’s also practical: you still get full visibility for books and decor, but the background hides wall imperfections. Pick this when your living room feels too plain and you want that cozy, built-in look without doors or complex framing.
Install a flat plywood backer first so the wall is even, then cut shiplap boards to fit the inside area of the shelf opening. Screw shiplap into the backer with small finish nails, keeping seams tight and lines level. Build the shelf structure with cleats or a face frame, then mount the shelves so they sit 1/2 to 3/4 in proud of the shiplap plane for clean shadow lines. Prime and paint the trim white, then stain or seal the shiplap if you want it warm and natural.
Use a level laser or long level for shiplap lines — crooked seams show up in every photo.
Skip thin shiplap that bends — it looks wavy once the shelves are loaded.
3. Picture-Frame Trim Around Each Shelf Bay
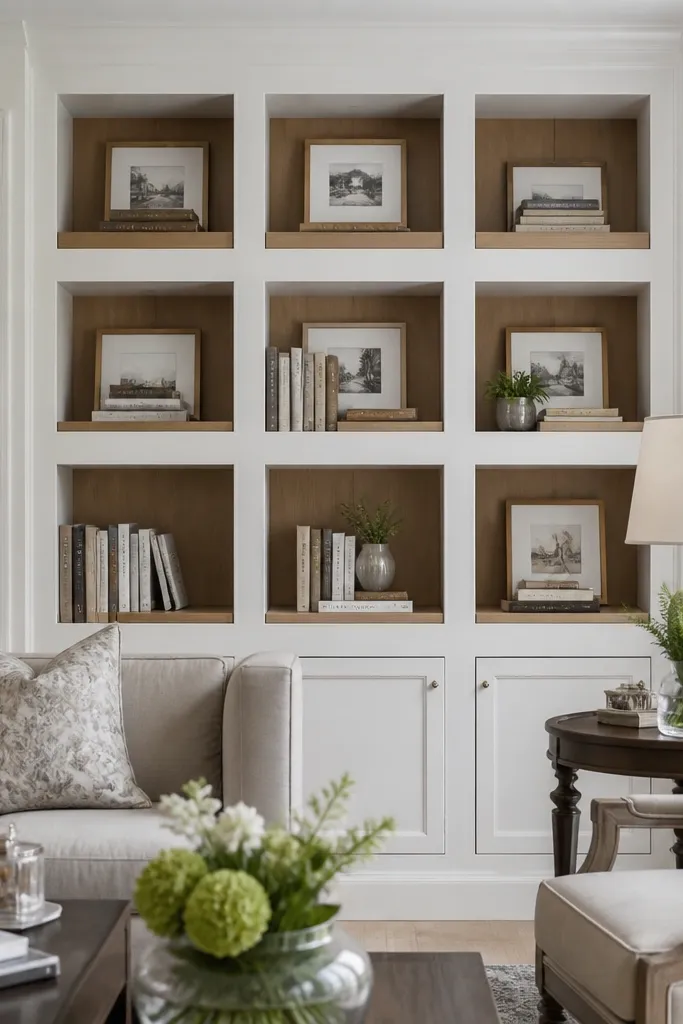
This idea makes simple shelves look custom because every opening has a “picture frame” border. The trim creates crisp edges and shadows that photograph well, even if your decor changes over time. It also helps visually align everything — if your shelves are slightly off, the framing draws the eye to the correct geometry. Build it when you want a modern, tailored look with minimal woodworking beyond trim and straight cuts. Beginner-friendly comes from using pre-primed MDF trim and basic face-frame construction.
Plan your bay sizes first, then build the main shelf box with plywood and cleats into studs. Install MDF trim strips around each opening using wood glue and brad nails, keeping the inside edges flush to the shelf face. Add a perimeter border at the top and bottom so the whole run reads as one piece. Caulk every trim seam, sand lightly, then prime and paint for a smooth finish.
Dry-fit trim pieces on the floor and label them by bay so you don’t lose track mid-project.
Don’t leave raw MDF edges unsealed — they soak up paint and look blotchy.
4. Low Media Base With Open Shelves Above
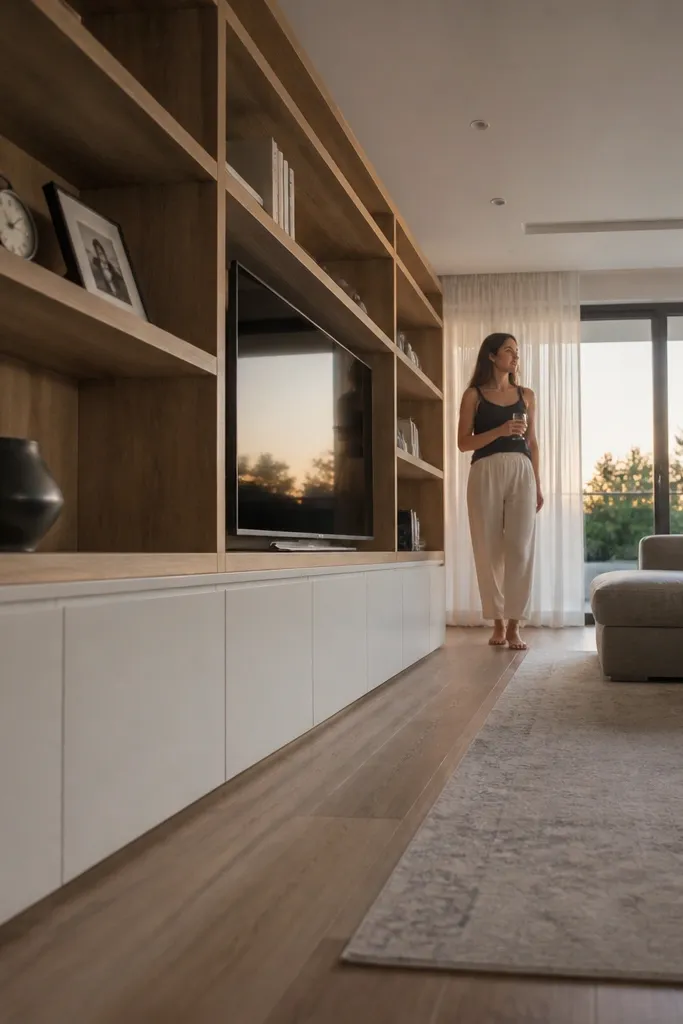
If your living room is missing a focal point, this combo does it fast. The low base hides clutter and gives your TV or media gear a home, while the open shelves above keep the wall from looking heavy. The height split also makes the room feel balanced — shelves start where your eyes naturally scan. This is beginner-friendly because you’re building a straightforward box: base framing, shelf framing, then finishing trim. It looks polished because the open shelves line up with the base in one continuous run.
Frame the base first using 2x2 or 1x3 lumber screwed into studs, then add a flat plywood top if you’re using it like a console. Leave a dedicated opening for cords and ventilation, and install a back panel or partial back to hide wiring. Build the upper shelf section on top of the base frame so vertical lines match. Finish with MDF trim around the openings, then paint everything the same color for a clean, built-in look.
Plan a cord chase before you close the back — a small rectangular cutout saves hours later.
Don’t trap heat behind a solid back panel — leave airflow around electronics.
5. Staggered Floating-Look Shelves With a Solid Upper Rail
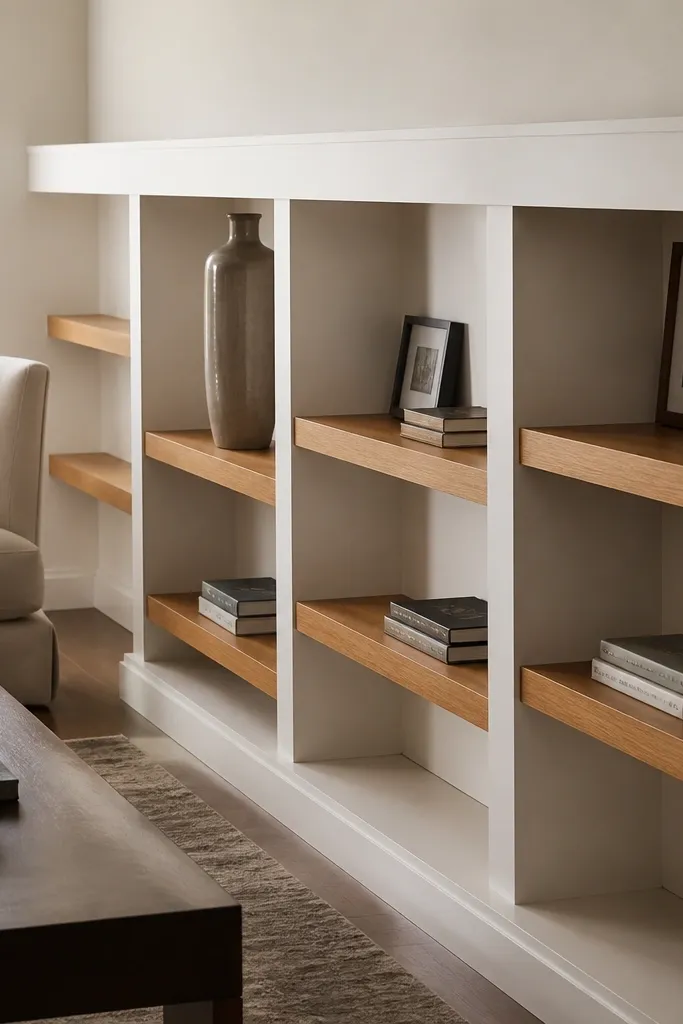
Floating shelves look great in photos, but they can look messy if they’re all the same height. This design adds a solid upper rail to anchor the eye, then staggers the shelves beneath for a styled, editorial feel. You get a modern look without building deep cabinets, and it works well in living rooms with lighter walls. Beginner-friendly comes from using hidden shelf brackets and a single straight rail that hides bracket placement. It also keeps the build simpler than a full grid.
Mark your rail height and level it across the wall, then secure a 2x3 or ledger board into studs. Cut shelf boards to your chosen lengths, then install hidden brackets at each shelf location using the stud spacing as your guide. Attach shelves to brackets and confirm each one is level before moving to the next. Finish by adding trim to the rail so it looks like part of the built-in, then paint or stain the shelves to match your living room palette.
Editor's noteUse spacers to set shelf-to-shelf gaps consistently so the stagger looks intentional.
Skip thisDon’t rely on drywall anchors for brackets — use studs or add a backing strip.
6. Symmetrical Corner Built-Ins With a Clean Inside Return
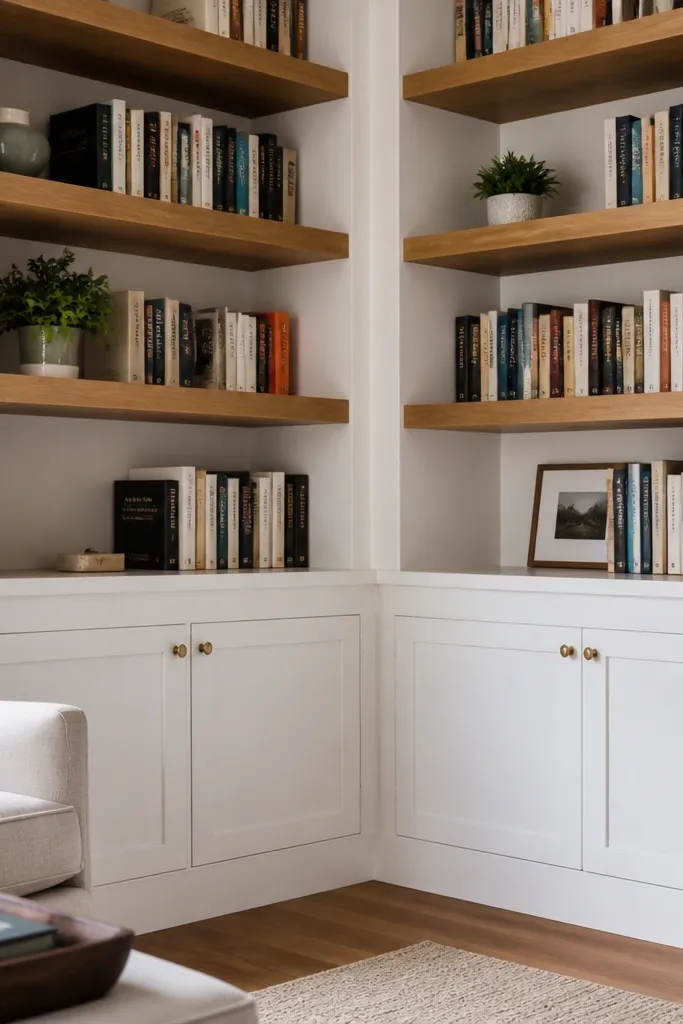
Corners are where many living rooms feel unfinished. A symmetrical corner built-in frames the space and makes the whole wall feel planned, not improvised. The key aesthetic move is the inside return — a clean edge where the shelves wrap into the corner so it looks custom. This is beginner-friendly if you keep the design simple: two vertical shelf runs with a consistent shelf depth and matching trim. It’s photogenic because the corner creates natural depth, making shelves look deeper and more expensive.
Decide your shelf depth based on what you’re displaying, then build a backer panel for each wall side using plywood screwed into studs. Create an inside return by using a continuous trim piece or a boxed corner frame so the seam isn’t jagged. Install shelf supports with cleats on each wall, then cut shelves to fit the corner angles cleanly. Finish with matching trim and paint so the corner seam looks like a single piece.
Editor's noteUse a speed square to mark angles on shelf ends so the fit stays tight in the corner.
Skip thisDon’t leave the inside corner raw — a visible gap ruins the custom look.
7. Tall Cabinets With Glass Inserts and a Shelf Band
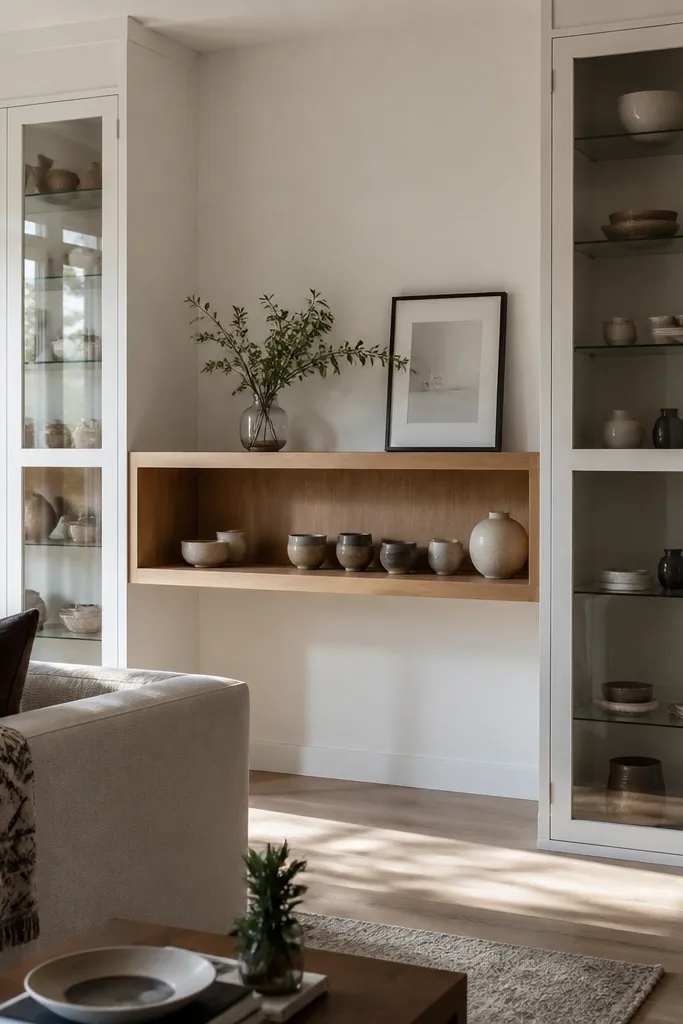
Glass-front doors make shelves feel lighter and more decorative, especially if you have a few nice items you actually want to show. This layout also creates a clear storage split: closed cabinets for clutter and open space for styling. The shelf band in the middle adds horizontal balance so the tall cabinets don’t look top-heavy. It’s beginner-friendly if you buy pre-made door fronts or use simple slab doors and focus on accurate framing. Photos look good because reflections add depth and because the open shelf band gives you an intentional “design line.”
Frame the tall cabinet openings with plywood and cleats into studs, then install face frames so door edges line up. Use simple slab doors with glass inserts set into rabbeted frames, or buy ready-to-install glass door panels if you want less cutting. Add a middle shelf band using 3/4 in plywood supported by cleats. Finish with primer and paint for the cabinet frame, then seal the shelf band with a durable clear coat.
Editor's noteSet glass door spacing with shims during installation so the reveals stay even.
Skip thisDon’t skip a back panel behind glass — it hides wall texture and makes items look cleaner.
8. Built-In Fireplace Surround Shelves (No Mantel Clutter)
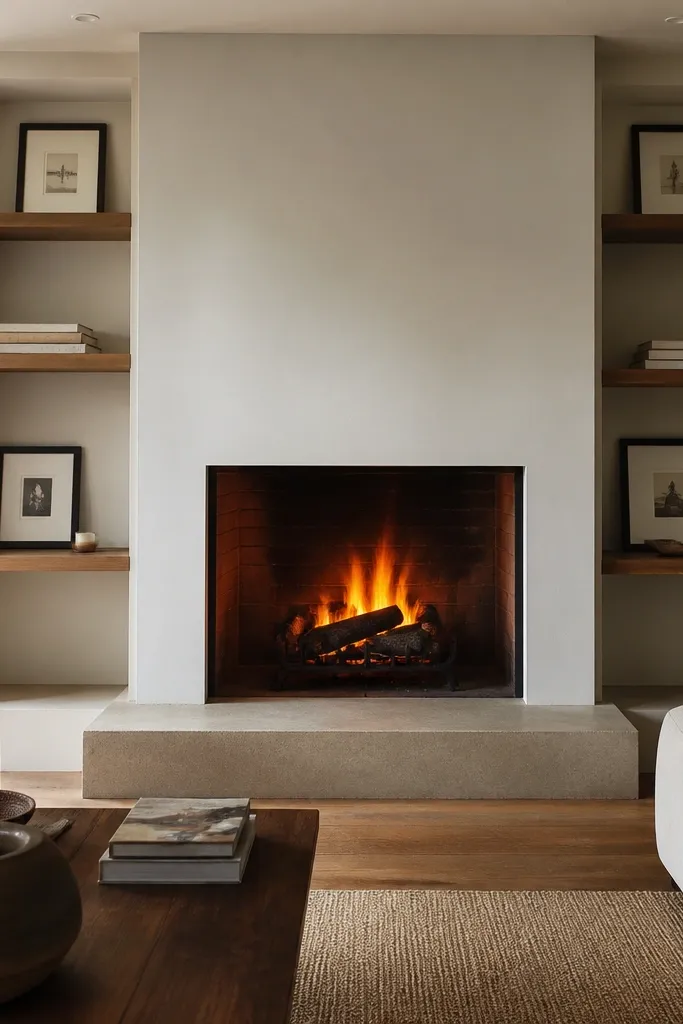
If you have a fireplace, shelves flanking it can look built-in from across the room when the trim is restrained. The best version uses a tight shelf profile and keeps the mantel area clean so your fireplace remains the anchor. This design is great for beginner DIY because it’s basically two vertical shelf runs with a consistent top line. The look is photogenic because the fireplace glow gives natural contrast, and the shelves add storage without turning the whole wall into a clutter shelf. Choose this when you want the built-ins to frame the focal point, not compete with it.
Use heat-safe planning for clearances and keep shelves away from direct heat zones based on your fireplace type and manual. Build two side shelf units with plywood backs, then mount them to studs with proper anchors. Add shelves with cleats, keeping shelf depth consistent so the lines stay straight. Finish with painted trim and a durable topcoat on shelves, and use heat-rated caulk where needed around any fireplace-adjacent trim.
Editor's noteUse a matte paint finish for the trim so reflections from the fire don’t glare in photos.
Skip thisDon’t add deep shelves right next to heat — it warps finishes and makes the wall look careless.
9. Sofa-Height Reading Nooks With Bottom Drawers

This is a practical built-in look that still photographs well. The shelves are at sofa-height so books and decor sit right where your eye lands, and the drawers below hide remotes, blankets, and small clutter. The visual payoff is the drawer line — it breaks up the wall and makes the built-ins feel grounded. Beginner-friendly comes from building two drawer boxes and a simple shelf frame above. It’s a strong choice for living rooms that feel busy because closed storage calms the whole wall.
Frame the shelf openings into studs and install 3/4 in shelf boards supported by cleats. For drawers, use a basic plywood drawer box with full-extension slides, mounted to side frames. Keep drawer fronts aligned with the shelf trim so the whole run looks uniform. Finish by painting the unit and installing drawer pulls at the same height on both sides.
Editor's noteMeasure drawer front height using the opening after you install slides, not before.
Skip thisDon’t mount slides to thin trim — anchor into solid framing so drawers don’t sag.
10. Oversized Floating Shelf With Side Return Blocks
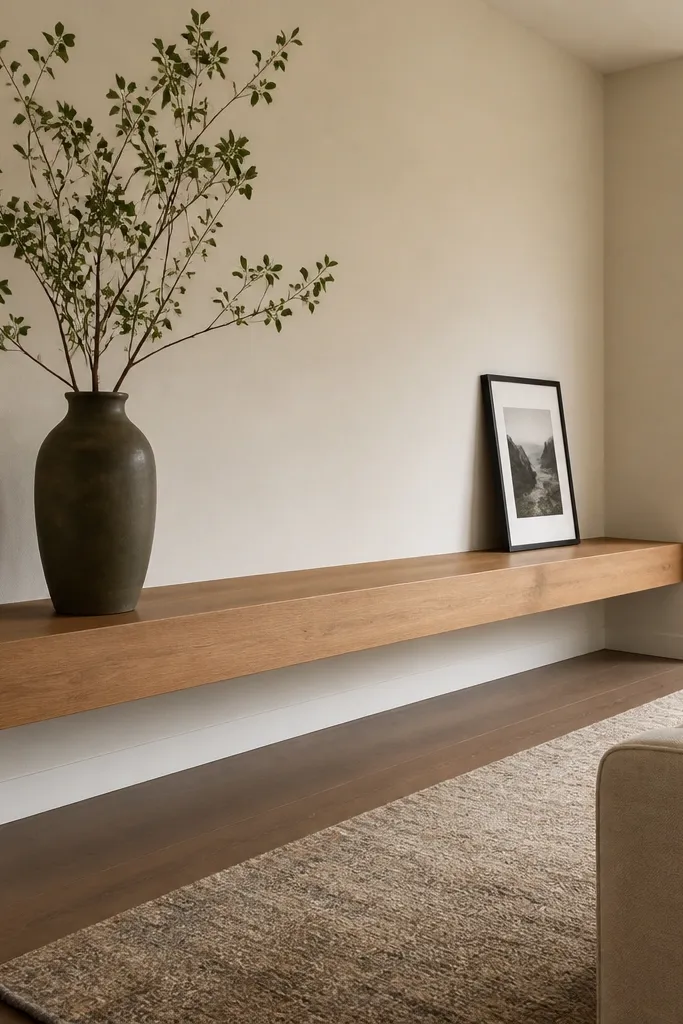
This is the “one big statement” approach. Instead of many shelves, you build one oversized shelf that stretches across the wall, then add side return blocks to make it look like it’s part of a custom system. The return blocks hide bracket hardware and create strong vertical edges that photograph cleanly. It’s beginner-friendly because it reduces the number of components you have to align. Pick this when your living room has a lot going on and you want the built-in to feel intentional, not busy.
Find studs and install a continuous ledger or mounting strip at your shelf height, then cut a thick shelf board (1-1/4 in or laminated layers for stiffness). Add side return blocks from plywood and trim so the ends look finished and the shelf looks anchored. Mount the shelf with hidden brackets or a cleat under the board, then attach return blocks to studs. Sand, fill nail holes, and finish with paint or stain plus a clear topcoat.
Editor's noteUse a thick shelf board or glue layers — thin boards sag under decor weight.
Skip thisDon’t place the shelf too high — keep it around eye level for balanced styling.
11. Shallow Open Shelves With a Wide Bottom Cabinet Band
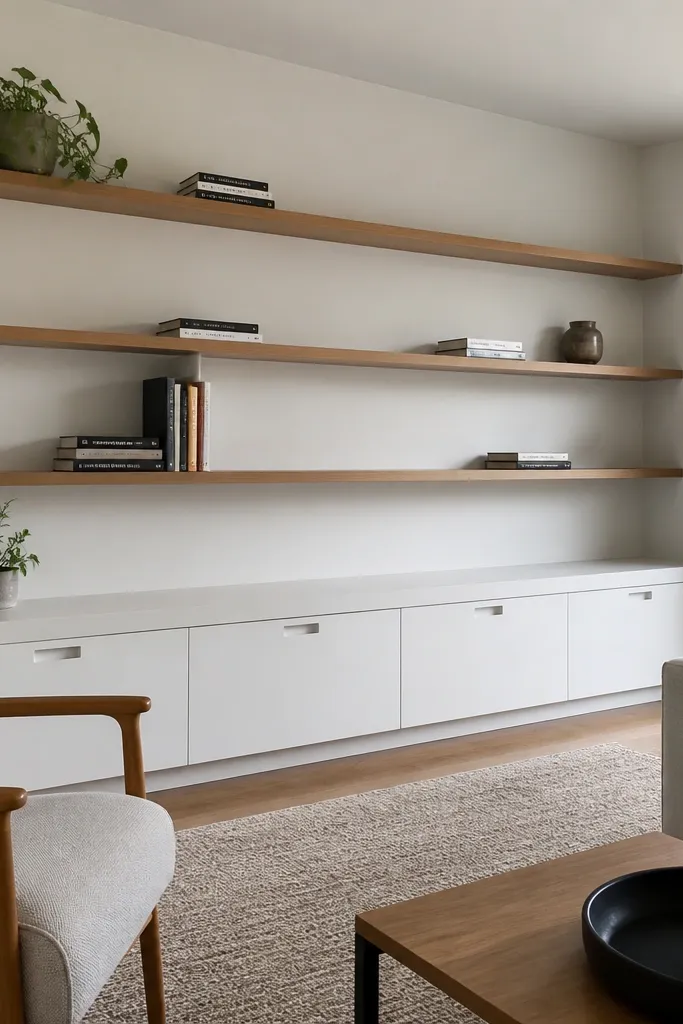
Shallow shelves keep the wall from feeling heavy, and the wide bottom cabinet band gives you storage without needing tall cabinets. This style is a lifesaver in smaller living rooms because it keeps the shelf depth from eating visual space. The wide cabinet band also gives your trim lines something substantial to anchor to. Beginner-friendly because you build one big, simple cabinet section and shallow shelf boxes above. Photos look good because the open top shows your decor, while the closed bottom hides clutter.
Build the bottom cabinet with a plywood back and a face frame, then install doors using simple hinges and magnetic catches. Make the top shelves shallow by using 1/2 to 3/4 in depth shelf boards and cleats, then set shelf spacing for smaller decor. Add a continuous trim molding between cabinet band and shelves so it reads like one unit. Prime, paint, and seal shelves for durability.
Editor's noteUse a matte paint on cabinet doors to reduce glare from windows.
Skip thisDon’t stack tall vases on shallow shelves — keep decor low and wide.
12. Two-Tone Built-Ins With Painted Frames and Stained Shelves
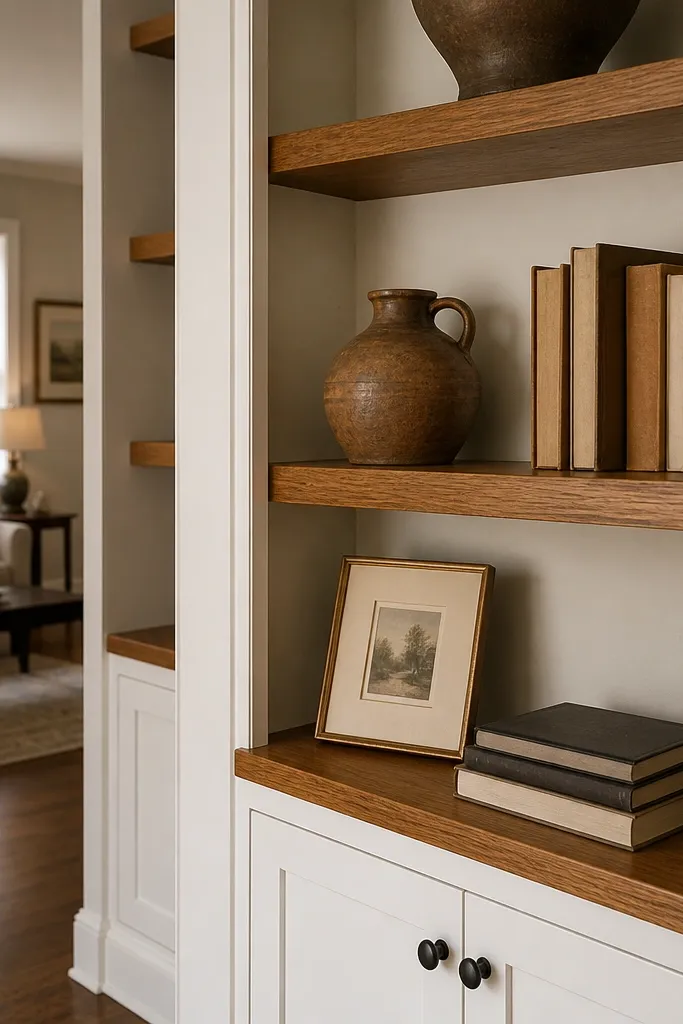
Two-tone built-ins look expensive because the eye separates structure from display. Paint the frame and trim, then stain only the shelf surfaces — you get warm wood in the areas you touch most visually. This works especially well if your living room has warm floors or wood furniture. It’s beginner-friendly because the build is still a basic frame and shelf system; the “hard part” is finishing, and you can keep it controlled with painter’s tape and foam rollers. Photos pop because contrast creates clear boundaries between shelves.
Build the shelf openings using plywood shelves and face-frame trim, then mask off the shelf faces before priming the trim. Prime and paint the frame and trim with a durable cabinet paint, then stain the shelf boards after the paint cures. Seal stained shelves with a clear protective topcoat so spills and dust wipe clean. Reassemble and caulk trim seams last for a crisp edge.
Editor's noteStain a test scrap board for 10 minutes, then wipe — match the exact look before you commit.
Skip thisDon’t stain over dust — wipe boards with a tack cloth right before staining.
13. Open Shelves With Hidden Cable Channel Behind Back Panel
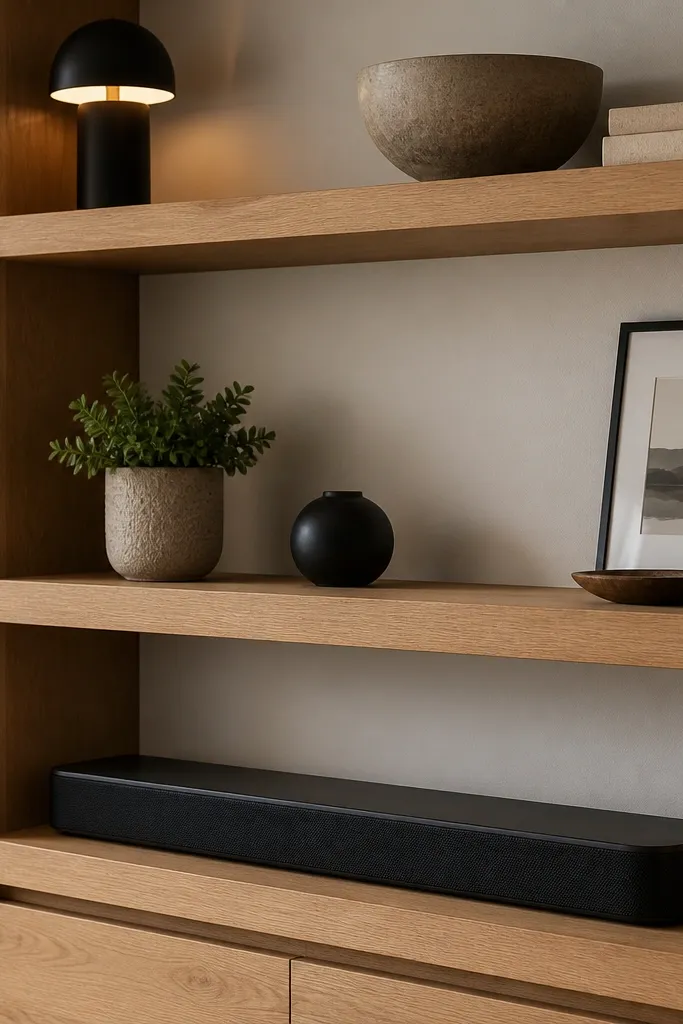
This is the “looks neat even when you use it” build. Open shelves can look chaotic once cords appear, so adding a hidden cable channel behind the shelf back panel keeps everything tidy. The aesthetic win is simple: you don’t see black cords crossing the wall, and your decor sits on a clean background. Beginner-friendly because the cable channel is just a routed or boxed chase inside the back panel. Choose this when you have a TV, gaming console, or charging station near your living room built-ins.
Build your shelf structure with a plywood back panel that you can remove later, then create a cable chase behind the panel using a shallow box section or routed channel. Plan outlets and run cords before you mount the back panel fully. Install shelves as usual on cleats, leaving space for the cable chase. Finish with trim and caulk, then add a removable access panel behind one shelf bay if you want future upgrades.
Use a 6 ft power strip inside the chase and strap cords to the channel with Velcro so nothing droops.
Don’t run cords through sharp wood edges — add grommets where they pass through.
14. Built-In Gallery Wall With Ledged Shelves for Frames
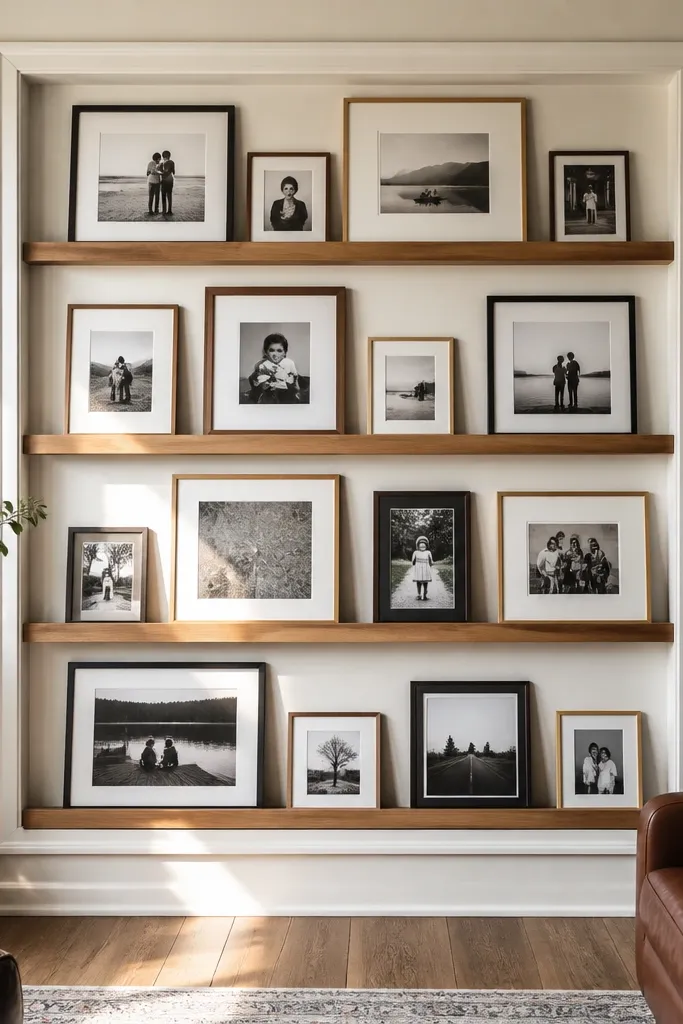
If your living room is full of frames, this setup makes them look curated instead of scattered. Ledged shelves tilt the display surface just slightly so frames don’t slide forward and your art reads clean in photos. The built-in feel comes from consistent shelf height and a continuous trim border around the gallery area. Beginner-friendly because you can build a simple grid and use a ledge lip on each shelf board. It’s photogenic because frames create a repeating pattern, and the shelves keep spacing uniform.
Mark your grid on the wall and frame with cleats into studs, then cut shelf boards with a small ledge lip (about 3/4 in high) on the front edge. Install shelves so ledges face forward, then add a perimeter trim frame to make the gallery area look built-in. Use consistent gaps between shelves, like 14 in for frames and 12 in for smaller pieces. Prime and paint the trim, then seal shelf surfaces with a clear coat that resists scuffs.
Dry-stack frames on the shelf lip before you mount — adjust ledge height so frames sit snugly without wobble.
Don’t use flat shelves for frame-heavy displays — frames creep and look messy fast.
15. Corner-To-Wall Stretch With a Single Continuous Shelf Line
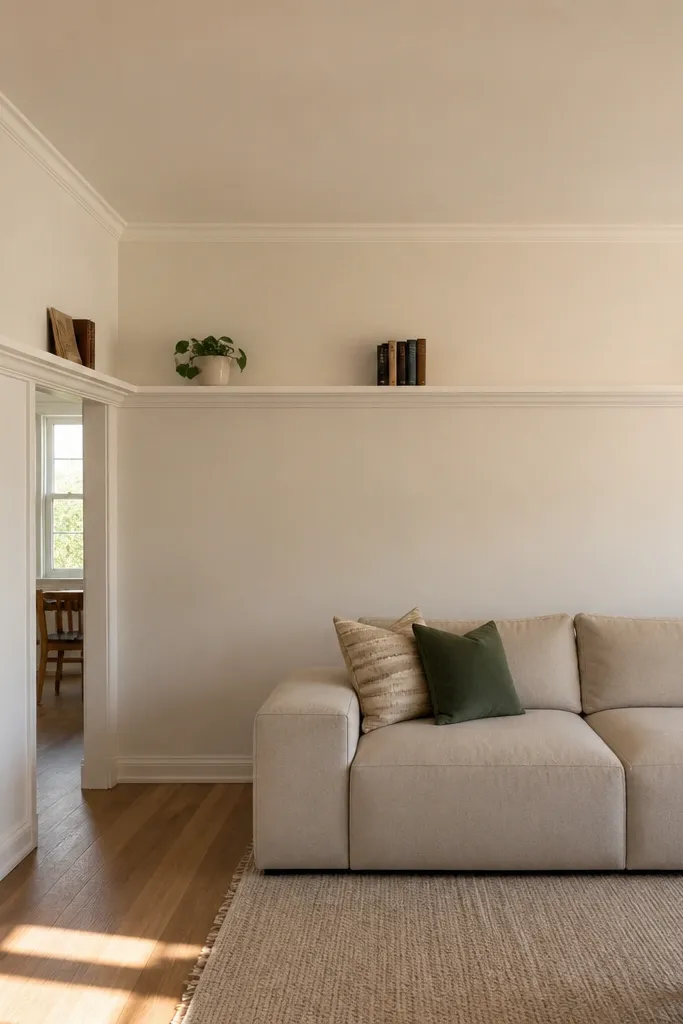
This layout makes a living room look larger because it creates one long, continuous visual line. Instead of separate built-in sections that feel chopped up, you build a shelf run that follows the room’s corner and continues onto the next wall. The photos look clean because the shelf edges align perfectly across the transition. Beginner-friendly because you’re repeating the same shelf depth and using a consistent face trim profile. It works well in open-plan living rooms where the wall is visible from multiple angles.
Start by measuring the full run from the corner, then choose a consistent shelf depth and trim thickness. Build a backer or face frame on each wall side, then connect them at the corner with a boxed seam so it looks finished. Use a single level reference line so every shelf edge aligns across both walls. Install shelves on cleats, then caulk and paint the trim so the seam disappears.
Use one long straightedge to check the shelf line at eye level before fastening the last shelf.
Don’t switch shelf depth at the corner — it creates a visible step that reads unfinished.
16. LED-Backed Upper Shelves for Nighttime Glow
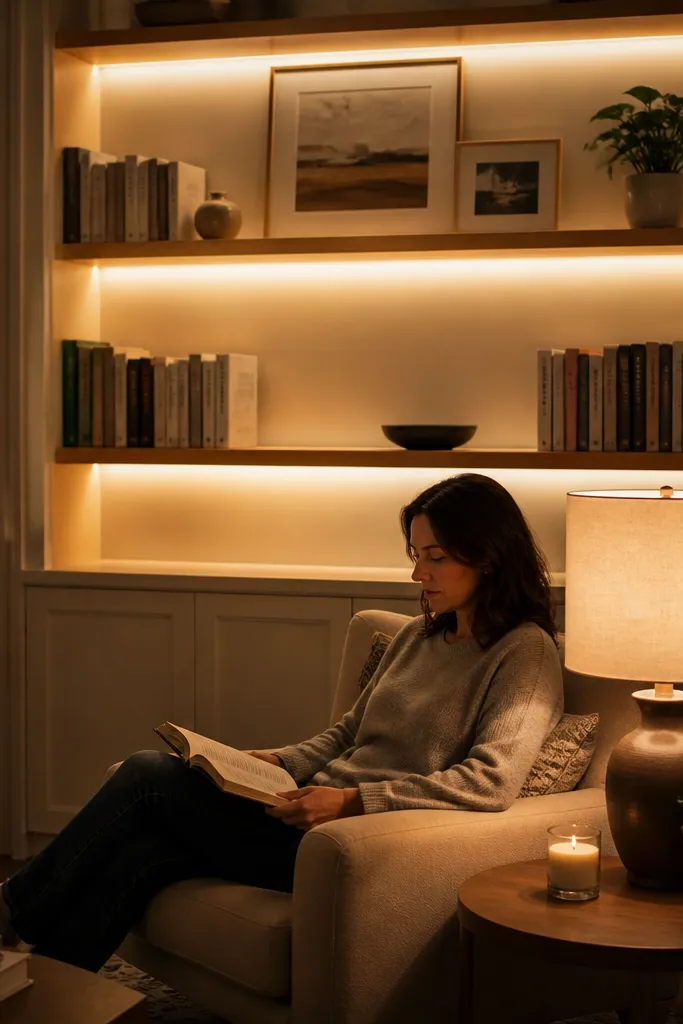
Light changes everything for built-ins. Put LED strips behind the upper shelves so the items look like they’re floating, especially at night. The glow also makes the wall feel intentional even when the living room is dim. Beginner-friendly because LED channels are straightforward and low-voltage. This is a great choice if you care about aesthetics in real life, not just daylight photos.
Build the shelf openings and install a back panel with a shallow recess where the LED channel sits. Route the low-voltage wire through a hidden path to an outlet and add an inline switch if you want manual control. Install the LED strip in the channel, then mount the shelf so the light shines upward and doesn’t glare in the room. Finish trim and paint the recess area with a flat white so the light spreads evenly.
Use warm white LEDs around 2700K for a cozy living room glow, not a blue office look.
Don’t point LEDs straight at eyes — angle the channel so light washes the shelf surface.
17. Built-In Pantry-Style Doors for Hidden Clutter
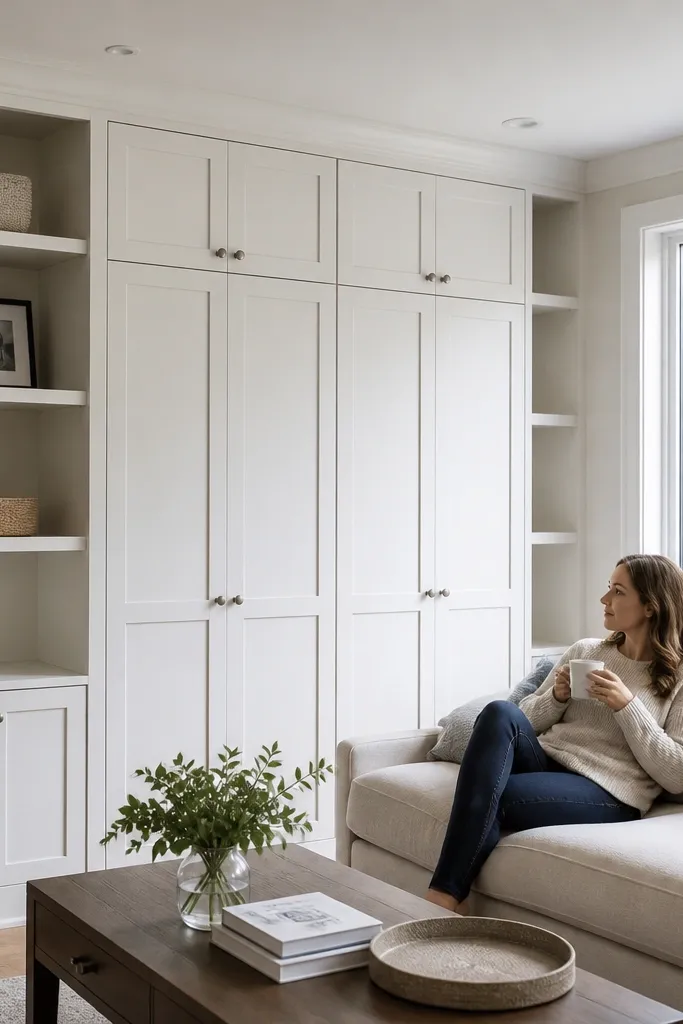
If your living room storage is always messy, doors fix the problem faster than any organization hack. This design mixes open shelves for display with paneled doors for closed storage, so the wall stays photogenic even when you’re living in it. The paneled door look reads architectural and blends into the trim. Beginner-friendly because you can build the frame and install door slabs without complex interior shelving. Choose this when you want a built-in that still looks good on random days, not just after styling.
Frame the bays with openings for doors and shelves, then install plywood shelves on cleats for the open section. For the door section, build a simple face frame and mount slab doors with concealed hinges or surface hinges. Add a bottom toe-kick or skirt trim so the base looks intentional. Prime and paint the whole unit, then install matching knobs or pulls at the same height across doors.
Editor's noteUse soft-close hinges so door movement stays quiet and smooth.
Skip thisDon’t skip consistent reveal gaps around doors — uneven gaps make the whole project look handmade.
18. Narrow Vertical Slots for Displaying Tall Decor
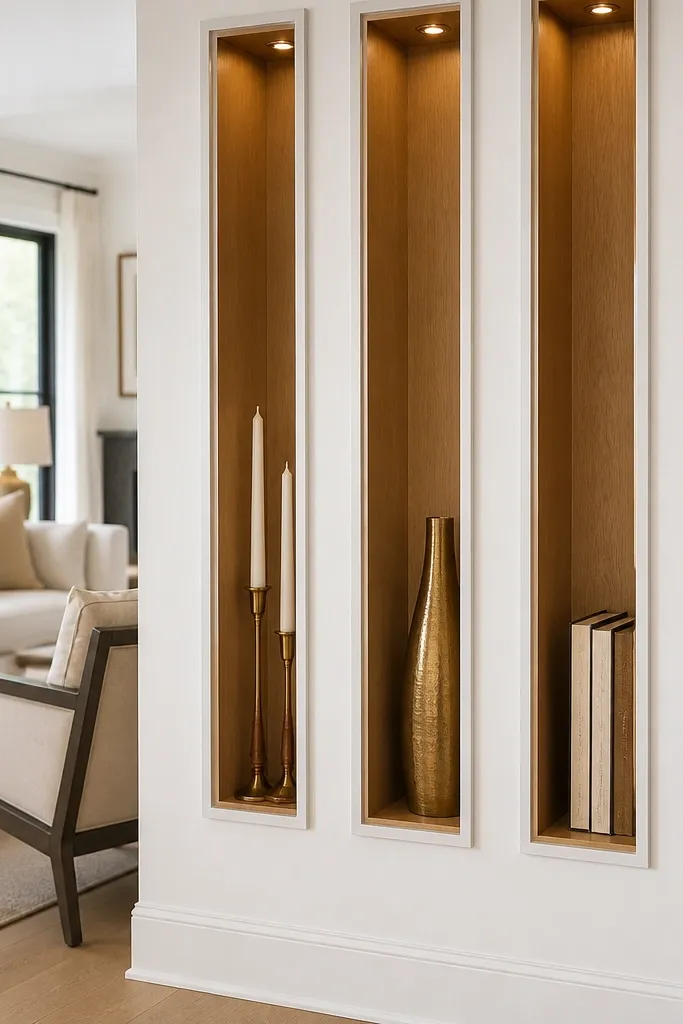
Narrow vertical slots make built-ins look styled because they restrict what goes in each section. You can display tall vases, candlesticks, or stacked books without crowding the whole shelf surface. Visually, the vertical compartments create a pattern that looks intentional in photos. Beginner-friendly because you’re cutting fewer wide shelves and building more repeatable vertical frames. It’s ideal for living rooms where you want the built-in to feel modern and less like a standard bookcase.
Decide slot width first, like 6 to 8 in for most tall decor, and mark vertical stud-aligned positions. Build a frame with vertical dividers using plywood strips, then install a top and bottom shelf platform for the whole run. Add a back panel so the wall stays clean behind objects. Finish by painting the frame and sealing the compartment surfaces so they wipe clean.
Use removable dividers if you want to swap decor sizes later.
Don’t make slots too narrow for your tallest pieces — account for vase bases and book spine thickness.
19. Full Wall Built-In With a Center Window Seat
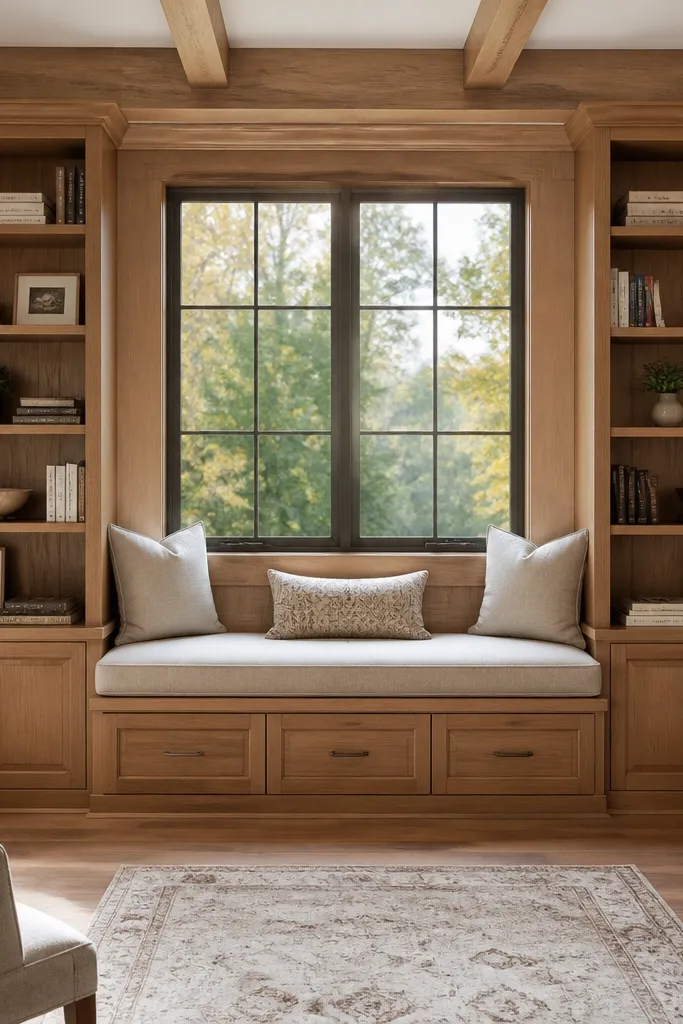
If you want the built-ins to feel like the room’s design, add a window seat in the middle. The seat gives you a place to relax and also hides the transition between shelf sections so the wall looks cohesive. Open shelves on both sides keep storage visible and make the center feel like an intentional focal point. Beginner-friendly is still possible if you keep the seat simple: a framed platform with a cushion and a storage lid. Photos look great because you get both structure and softness in one view.
Frame the shelf sections on the sides first, then build a platform for the window seat using plywood on a lumber frame secured into studs. Add storage below the seat with a hinged lid if you want hidden blankets or throws. Install shelves above the seat so vertical lines align with side bays. Finish trim to match the shelves, then seal seat wood and install a cushion with removable washable cover.
Use a fabric cushion cover with a zipper so you can wash it without replacing the whole seat.
Don’t forget clearance for window operation — keep the seat trim out of the sash path.
20. Built-In Shelves With a Hidden Storage Lift-Up Panel
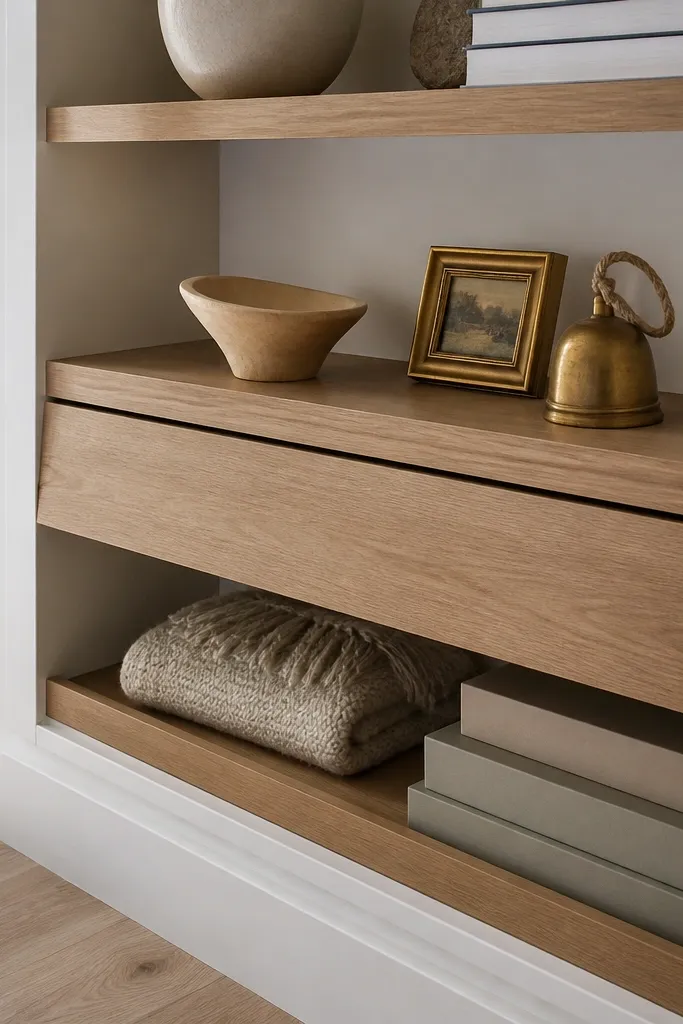
This design keeps a clean surface while giving you real storage. Put a lift-up panel behind one shelf section so you can store seasonal items, extra blankets, or board game parts out of sight. The look stays minimal because only shelves show on the front. Beginner-friendly depends on using a simple lift mechanism and building a solid frame so the panel doesn’t sag. This is a great choice when your living room needs storage but you hate visible clutter.
Build the shelf run with a standard frame, then choose one bay for the lift panel. Install a solid plywood panel on hinges or a lift-up hardware kit, and add a latch so it closes flush. Reinforce the opening with extra cleats so the panel edges align with the shelf face. Finish with trim around the panel so it blends into the shelf grid, then paint and caulk carefully.
Use gas struts or a quality lift hinge kit so the panel stays up without slamming.
Don’t make the panel too large without reinforcement — sagging makes the seam obvious.
21. Two-Deep Display Shelves With a Back Lip
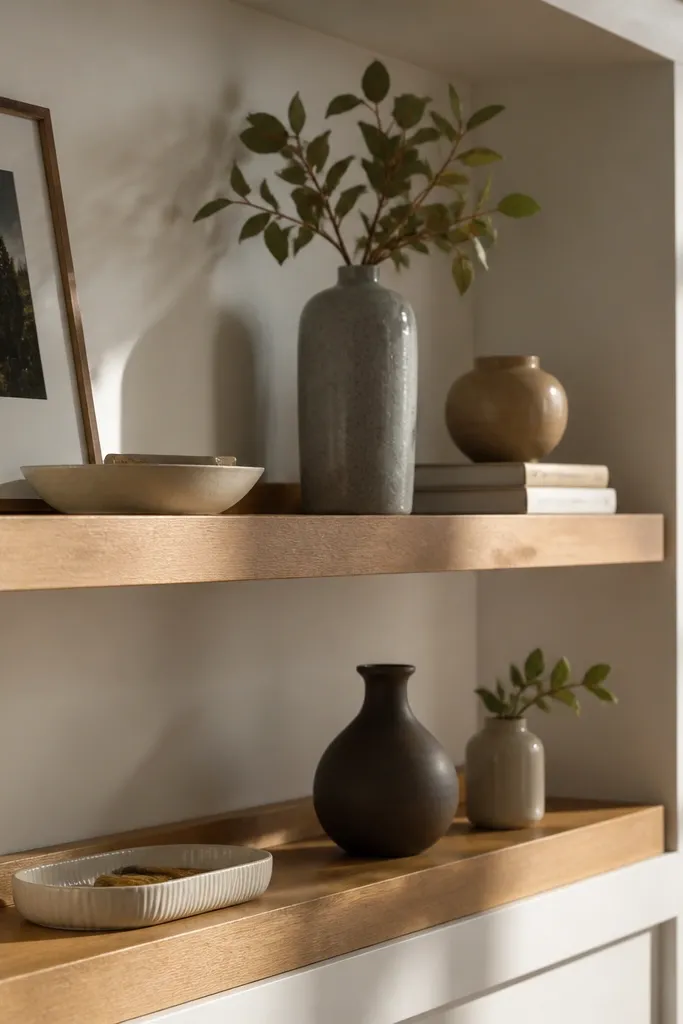
Two-deep shelving lets you style like a boutique shelf. The front area holds smaller items, while the back lip keeps taller decor from sliding forward and keeps everything in a tidy zone. It looks layered in photos because you see depth without clutter. This is beginner-friendly because the build is still a shelf box; you’re adding a simple back stop lip. Choose this when you have decor you want to display but you don’t want it constantly rearranged to look right.
Build the shelf structure using cleats into studs and install 3/4 in plywood shelves at your chosen heights. Add a back lip piece (about 1 in high) screwed and glued to the back edge of each shelf board. Keep the shelf depth consistent, like 10 to 12 in deep, so your items don’t look cramped. Seal the shelf boards with a clear topcoat and paint the trim for a clean built-in finish.
Editor's noteTest one shelf with your tallest decor — set lip height so items sit snug without tipping.
Skip thisDon’t skip the back lip — deep shelves without a stop look messy fast.
22. Built-In Shelves With a Curved Soft Edge Trim
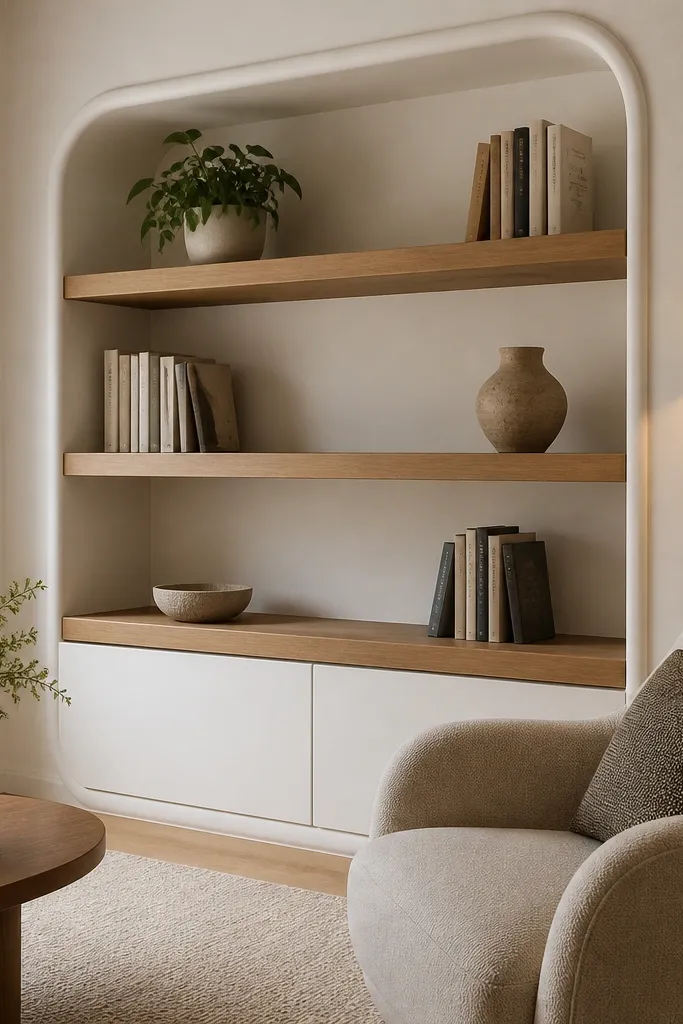
Hard corners can make built-ins look harsh. A soft edge trim profile makes the whole wall feel friendlier and more custom, especially in living rooms with rounded furniture or warm lighting. The curved trim also hides tiny gaps where boards meet, so it’s forgiving if your wall isn’t perfectly flat. Beginner-friendly because you can use pre-shaped trim molding instead of building complex curved cabinetry. Photos look better because the curves catch light and create a gentle shadow line.
Install your shelf frames and plywood shelves first so the structure is straight and strong. Choose a pre-shaped MDF trim profile with a radius that fits the scale of your bays, then cut miters carefully for each opening. Glue and nail trim to the face frame, then caulk seams and sand flush. Prime and paint the trim until the curve looks smooth, then seal shelves with a durable finish.
Editor's noteCut curved trim miters slowly and test fit each piece — rushing makes visible gaps at corners.
Skip thisDon’t use thin caulk as a seam filler — it shrinks and cracks on painted trim.
23. Wraparound Window-Ledge Shelves With a Seat-Back Rail
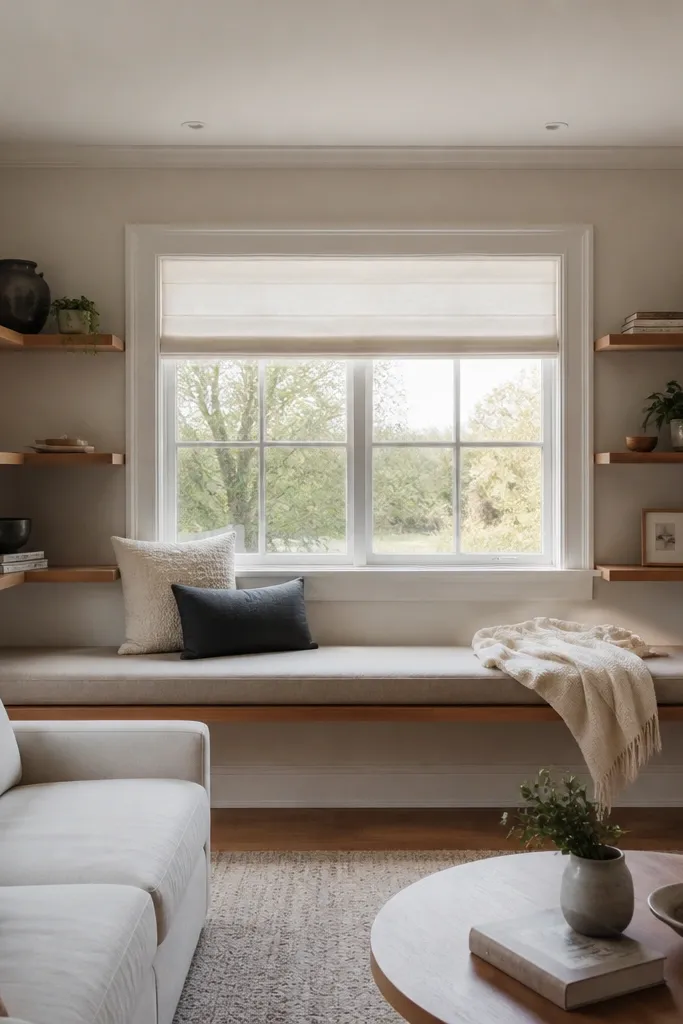
This is the built-in look that makes a living room feel custom without turning the whole wall into a cabinet maze. You wrap shelves around a window opening and add a thin “seat-back” rail that visually ties everything together, so the shelves read as one built-in piece, not separate boxes. The shelf lip is shallow enough for books and decor, but deep enough that candle jars and framed photos don’t look like they’re floating. It’s beginner-friendly because the structure is basically a standard casework build with simple mitered trim around the window. Time-wise, plan on 2-3 weekends: one for framing and base cabinets, one for shelves and trim, and one for paint and caulk.
1) Measure the window recess and decide your shelf depth first — 7.5 in deep looks right for books and decor, with a 1 in front lip. Build two side “cases” that reach from the floor (or baseboard height) up to just below the window sill, then add a top shelf run that stops at the other side case. Use 3/4 in plywood for the case boxes and shelves, and rip shelf bottoms to 6.5 in if you want a 1 in lip using a front strip. 2) Frame the openings with 2x2s or 2x3s, screw into studs on 16 in centers, then add plywood panels behind the shelf run so the window area doesn’t look hollow. 3) Finish by installing 1x2 face trim around the window return, then caulk all seams with paintable latex and prime before painting. Use a semi-gloss cabinet paint for the shelves so they wipe clean and light reflects nicely.
Dry-fit the window trim pieces and mark each return line with painter’s tape before you cut — it saves you from tiny gaps that show up under daylight.
Don’t set shelf depth by eye — pick a depth (like 7.5 in) and cut everything from the same measurement so the lip lines up across the whole window.
24. Shaker-Style Open Shelves With Hidden Cleat Lighting Channel
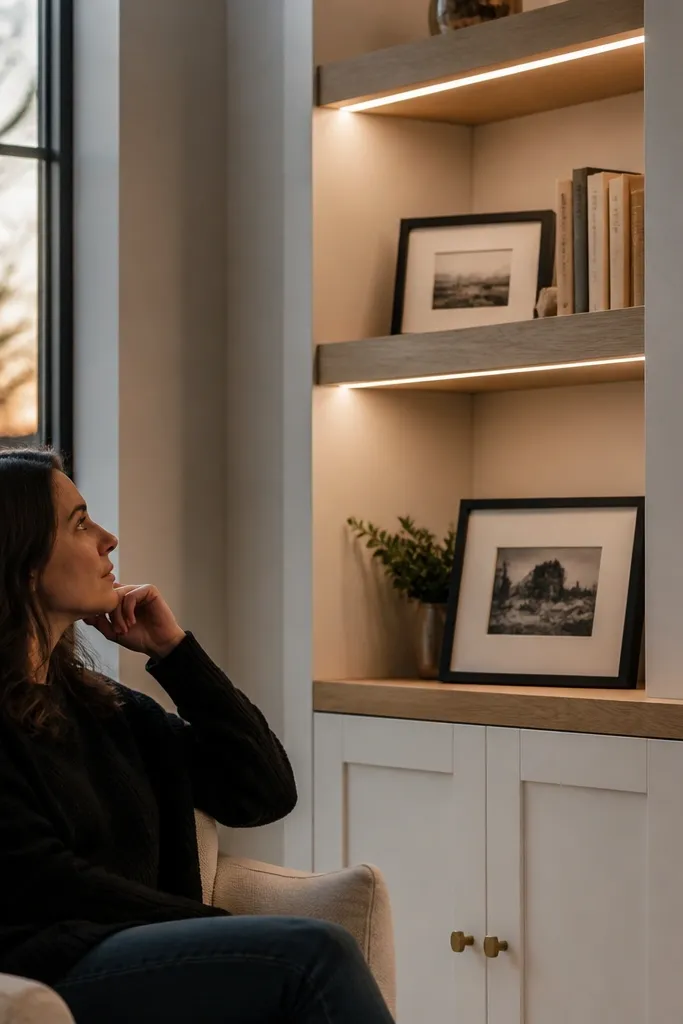
This build gives you the crisp, farmhouse-clean look of Shaker trim while still reading modern because the light comes from a hidden channel, not an exposed strip. The shelves stay open for the “living room gallery” feel, but the shaker frames make each bay look intentional and framed in photos. It fixes the common problem where open shelves look messy fast — the trim creates boundaries, so decor sits inside a defined grid. It’s a solid DIY project for beginners who can cut straight and use a pocket hole jig, and it’s photogenic because the light makes the shelves look deeper. Expect 3 weekends if you’re painting — one for cases, one for shelves and trim, and one for wiring and finish.
1) Build shelf bays as simple frames: 3/4 in plywood for the backer and adjustable shelf supports, then 1x2 or 1x3 Shaker-style rails and stiles for the bay openings. Use a pocket hole jig on the rails/stiles so you don’t need visible fasteners on the front. Set the shelf face frame opening to 12-14 in wide per bay for a clean rhythm, and keep the shelf depth around 9 in for decor. 2) Install a hidden lighting channel by screwing a small cleat under the top of each bay — use a 3/4 in thick cleat positioned so the LED strip sits behind the front frame edge. Run low-voltage LED strips (24V is easier to wire neatly in series) and route the wire through the back panel with a drill bit and grommet. 3) Prime and paint everything in the same finish, then test the lights before final caulk and touch-up.
Editor's noteUse a frosted LED strip cover or diffuser — it prevents bright hot spots that look cheap on camera.
Skip thisDon’t wire the LEDs after the trim is fully installed — you’ll fight access and end up with messy wire paths behind the front frames.
25. Floor-to-Ceiling Reading Nook Bookcases With Ladder-Track Rails
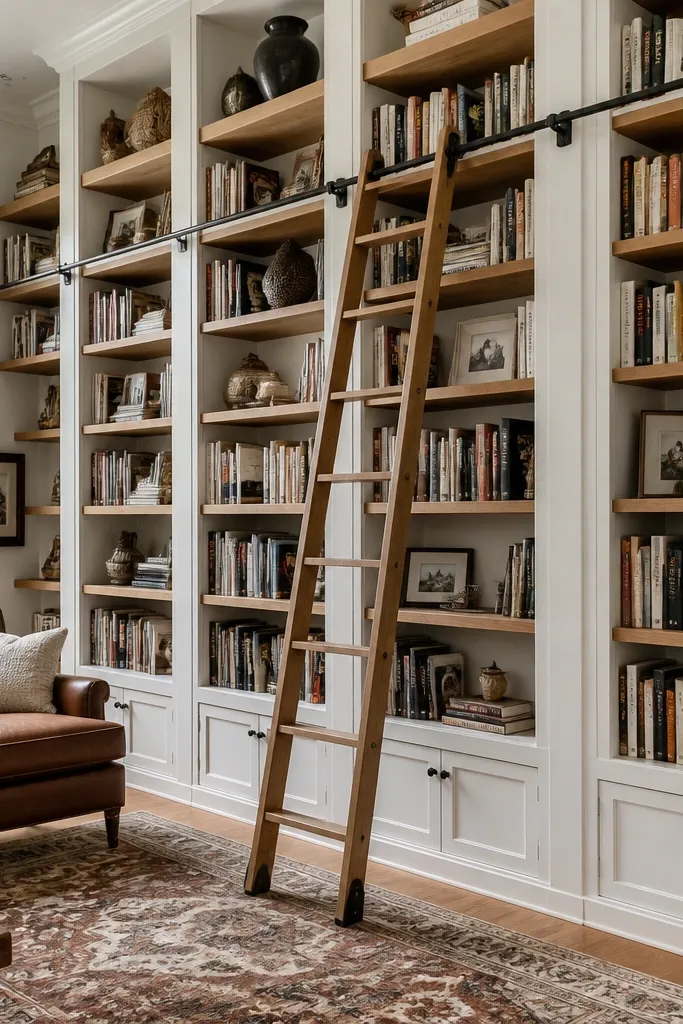
If you want built-ins that look like a library without building a whole custom wall of cabinets, this is the move. You install floor-to-ceiling bookcases on one wall and add ladder-track rails that let a ladder glide smoothly, which instantly makes the room feel designed. The key is that the ladder hardware creates a strong vertical focal point, so even empty shelves look styled. It’s beginner-friendly in the sense that the woodworking is straightforward case building, but you should treat the rail alignment like a precision job. Plan about 4 weekends: framing, case build, rail installation, then paint and ladder fit.
1) Mark the wall for stud locations and decide on case width — 30 in wide sections look balanced in most living rooms. Build each case from 3/4 in plywood with a top and bottom frame, and add fixed shelves for the bottom 24-30 in so books sit solidly. For the rest, use shelf pins or add adjustable shelf holes every 2 in. 2) Install the ladder-track rails by leveling the track along the top and bottom — use a laser level and shim until the track reads dead straight. Screw the rail brackets into studs, not drywall, and keep the ladder track centered so the ladder doesn’t rub the bookcase face. 3) Add a continuous face frame across the front edges, then paint with cabinet paint and finish with a clear coat only on the ladder if you want it more durable.
Before you mount the ladder track, dry-fit the ladder on the floor and check clearance to the shelf faces — adjust the track position before paint so you don’t have to rework trim later.
Don’t skip shimming — if the track is even slightly off, the ladder will drift and you’ll hate using it.



