
1. Matte Black Box Frame With 5-Inch Grid
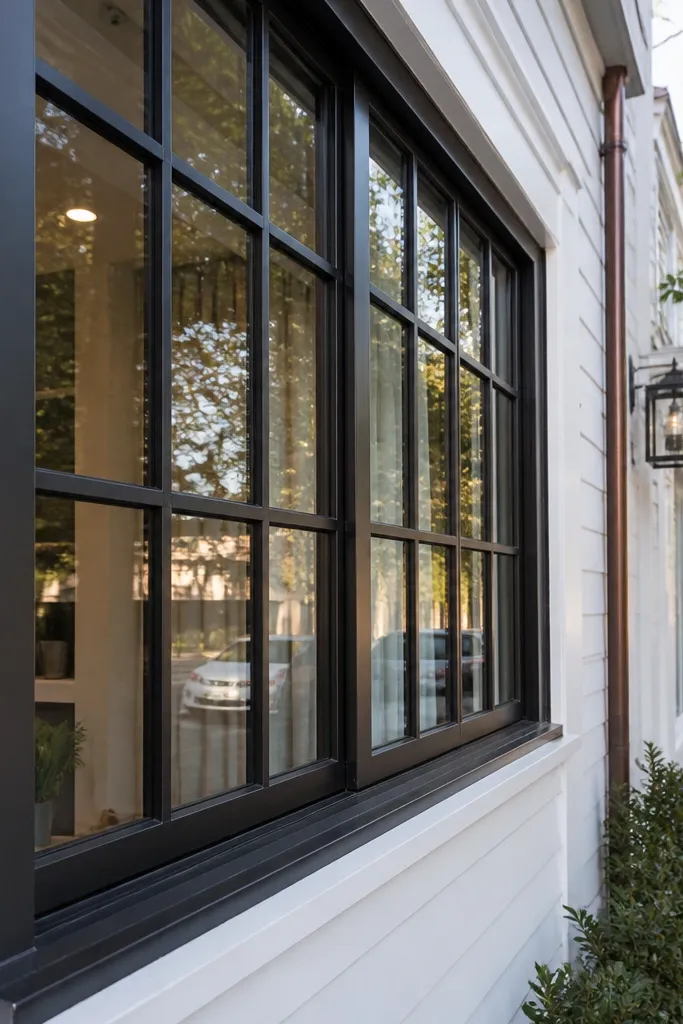
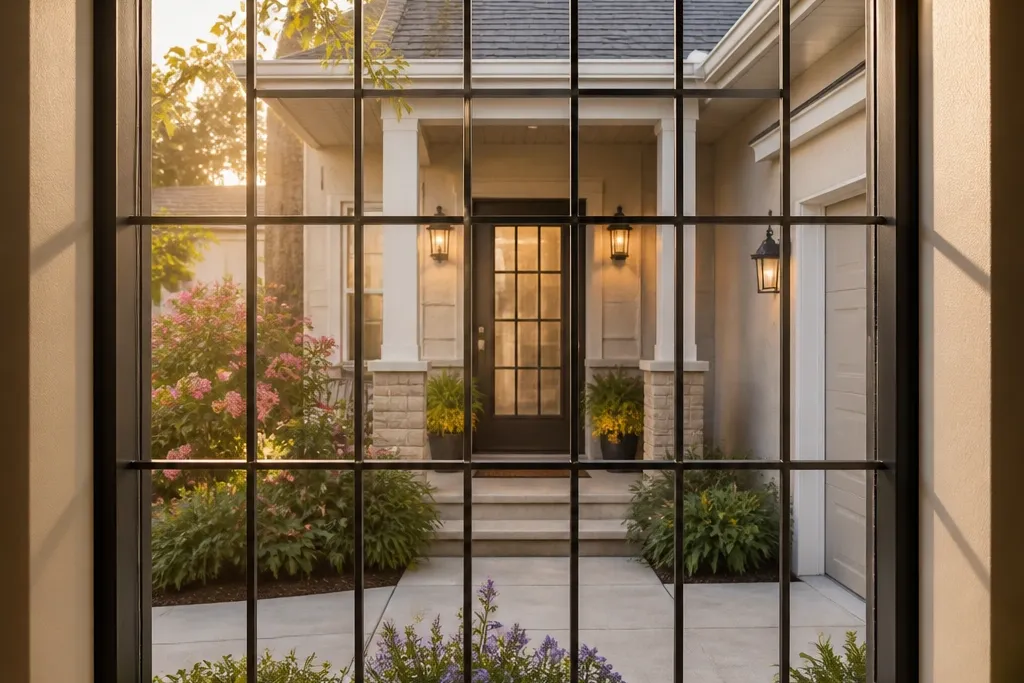
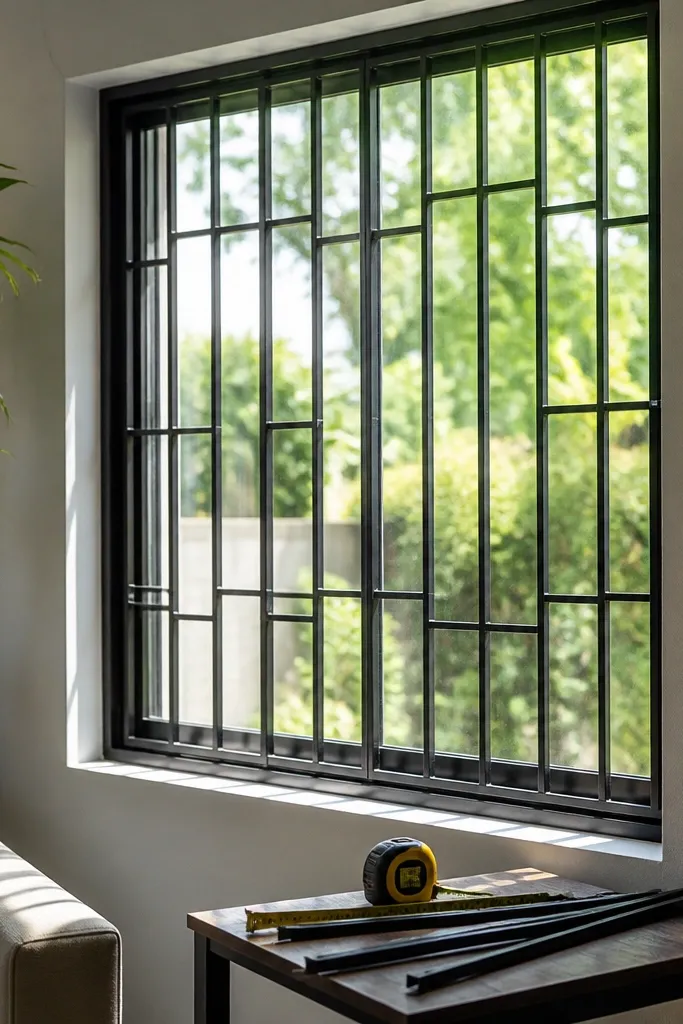
This is the easiest way to get the “extra light” look without sacrificing structure. The box frame gives you that built-in feel, while the 5-inch grid spacing keeps the openings wide enough to let daylight through cleanly. Use medium-width bars so the grill reads modern instead of heavy. Finish it in matte black so the bars don’t reflect sunlight harshly and wash out the window view. It’s beginner-friendly because the pattern is repeatable and the geometry stays consistent across the whole window.
Start by measuring the window opening and deciding your clear bar gaps. Build a rectangular box frame from square tubing sized to match your window border (commonly 1x1 inch to 1.5x1.5 inch stock), then mark vertical bar positions for a 5-inch rhythm. Cut and tack the bars in place, check for square with a corner measurement (diagonal-to-diagonal should match), then weld or fasten. Prime and coat with exterior metal epoxy enamel in matte black, and let it cure fully before mounting.
Editor's noteMake a cardboard spacing template for your vertical bars — it keeps the gaps identical when you’re working alone.
Skip thisDon’t cram bars close together; it kills the “extra light” effect and makes the window feel smaller.
2. Oil-Rubbed Bronze Box Grill With Thin Verticals
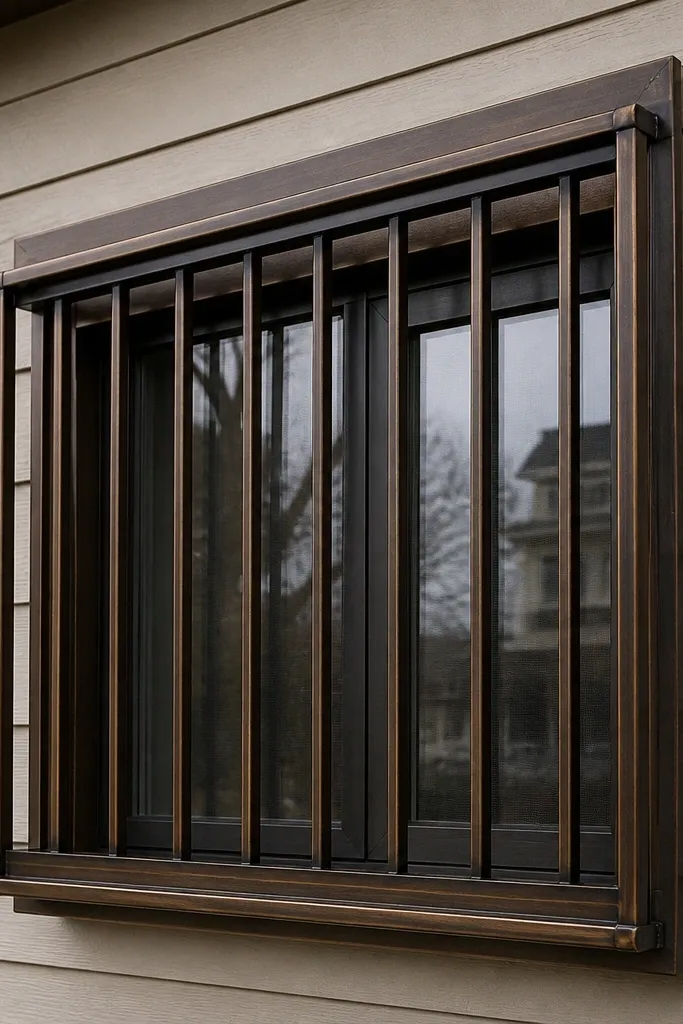
Oil-rubbed bronze looks expensive and softens the look of metal near glass. Thin vertical bars keep the visual weight low, so the window still feels open while the box border frames the daylight. This design is great if you want curb appeal without thick, industrial bars. The box frame also helps hide any uneven edges around the window trim. Beginners can nail this because the bar pattern is simple and the color finish hides small alignment issues.
Use a metal stock that’s thin enough to feel airy — around 3/8 inch to 1/2 inch width for the verticals works well visually. Build the outer box frame first, then lay it flat and clamp it so it doesn’t twist. Mark vertical bar positions for consistent spacing (aim for 4-6 inches clear openings), and attach the bars evenly across the height. Coat with an exterior bronze-finish paint or epoxy enamel in oil-rubbed tones, then mount using exterior-rated anchors.
Editor's noteDo a dry fit against the trim before coating so you can adjust bar height for perfect symmetry.
Skip thisSkip glossy finishes; they can glare in direct sun and make the grill look harsher than you want.
3. White Box Frame Grill With 4-Inch Clear Openings
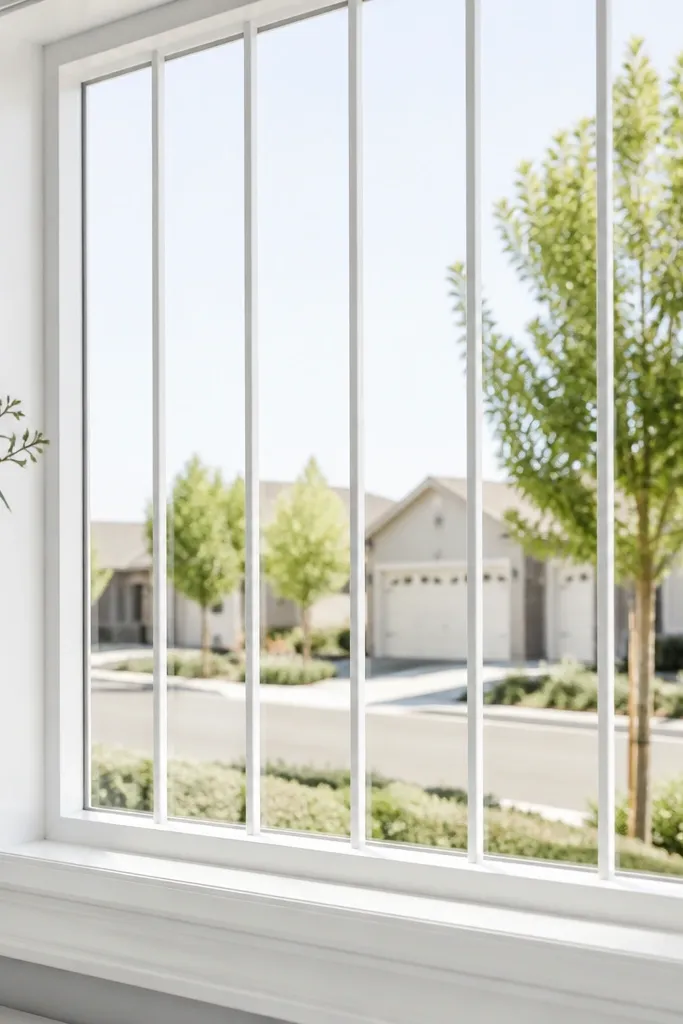
If your window trim is white, a white box grill makes the metal disappear visually and keeps the window bright. The design goal here is 4-inch clear openings so daylight passes through without the “bars everywhere” feel. The box frame reads clean because it matches the trim, and the thin vertical bars keep the lines light. This is a strong choice for kitchens, bathrooms, and rooms where you want a crisp, modern look. Beginners like it because the color is forgiving and the pattern is consistent.
Measure the window opening and build an outer box frame that sits flush against the trim line. Use thin vertical bars and set spacing to produce 4-inch clear openings between bars — don’t guess, mark it. Clamp and tack the bars to the box frame, then confirm the whole grid is level and square. Prime bare metal, then spray or brush an exterior-grade white enamel designed for metal, and let it cure before hanging.
Use a foam brush for edges and corners — it reduces brush marks on the box frame.
Don’t use indoor-only paint; it will yellow or chip around the mounting points.
4. Natural Wood-Trim Box Grill With Black Infill
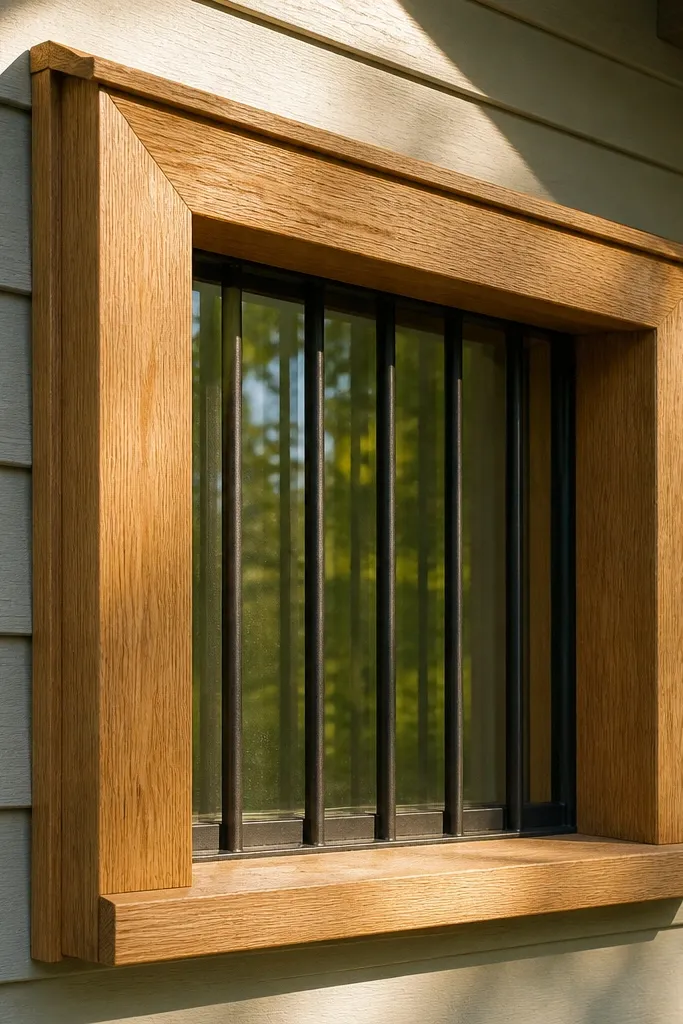
This one looks like a custom built-in because you’re mixing warmth from wood with sleek black bars. The extra light comes from the black infill bars being thin and spaced, while the wood trim creates a softer border than metal alone. It’s photogenic because the wood grain adds texture and the black grid stays graphic. This is ideal for covered porches and cottages where you want the grill to blend with exterior finishes. Beginners can do it with pre-finished exterior wood strips and a simple metal bar grid.
Cut exterior-rated wood trim strips to frame the window, then attach a metal box frame behind it so the structure stays rigid. Build the metal grid with thin vertical bars set to leave wide clear openings (4-6 inches). Mount the metal box to the wall or trim first, then screw the wood border on top as a visual frame. Seal the wood with exterior clear coat or stain-seal system, and touch up all cut ends so water can’t soak in.
Stagger the wood corner joints so the grain lines up cleanly at eye level.
Don’t skip sealing the underside of the wood trim; that’s where water starts the failure.
5. Grid-Plus-Top-Band Box Grill
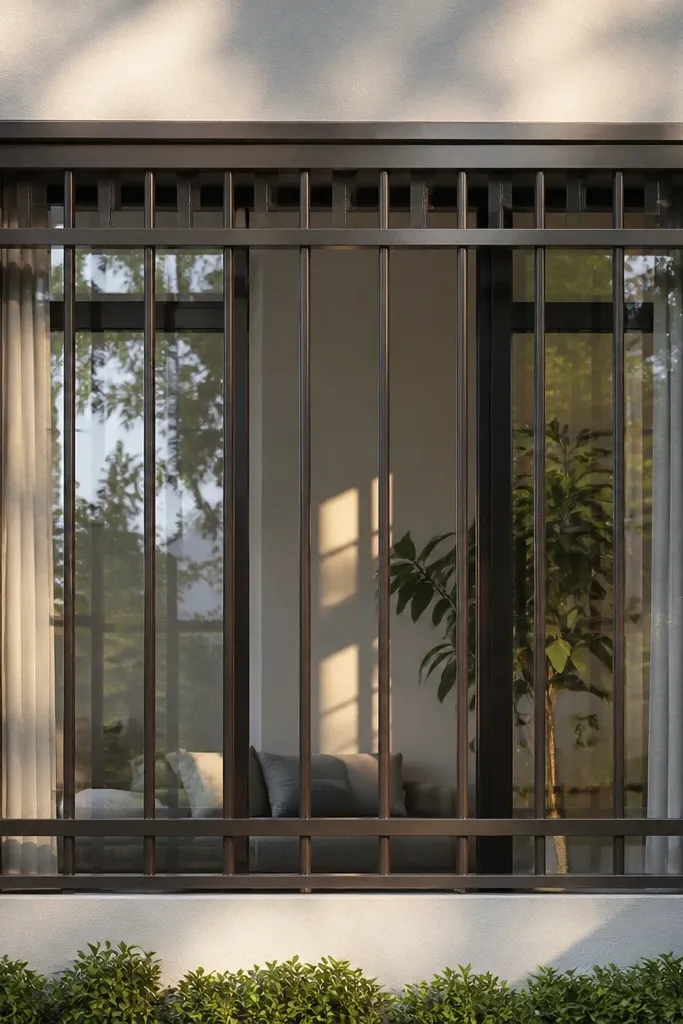
This design makes the top of the window look intentionally designed, which is exactly what makes a grill look “good” instead of temporary. You get extra light because the vertical bars below keep the openings wide, while the top band adds structure and visual weight. It’s also easier to align because you can treat the top band as your reference line. This works well on tall windows where the grill needs a visual anchor. Beginners can handle it because it’s basically the same grid pattern with one extra horizontal element.
Build your outer box frame and then add a thicker top horizontal bar band across the width. Mark vertical bar positions below the top band so the clear openings stay consistent — aim for 4-5 inches. Attach bars to the inner face of the frame so the grid lines look crisp from the outside. Prime and coat the entire piece together so the top band and verticals match in texture and color.
Editor's noteUse a thicker top band that’s 1.5-2x the width of the vertical bars for a clean visual hierarchy.
Skip thisDon’t put the top band too low; it makes the window feel like it has a “ceiling” that blocks light.
6. Diamond-Accent Box Grill With Wide Center Gaps
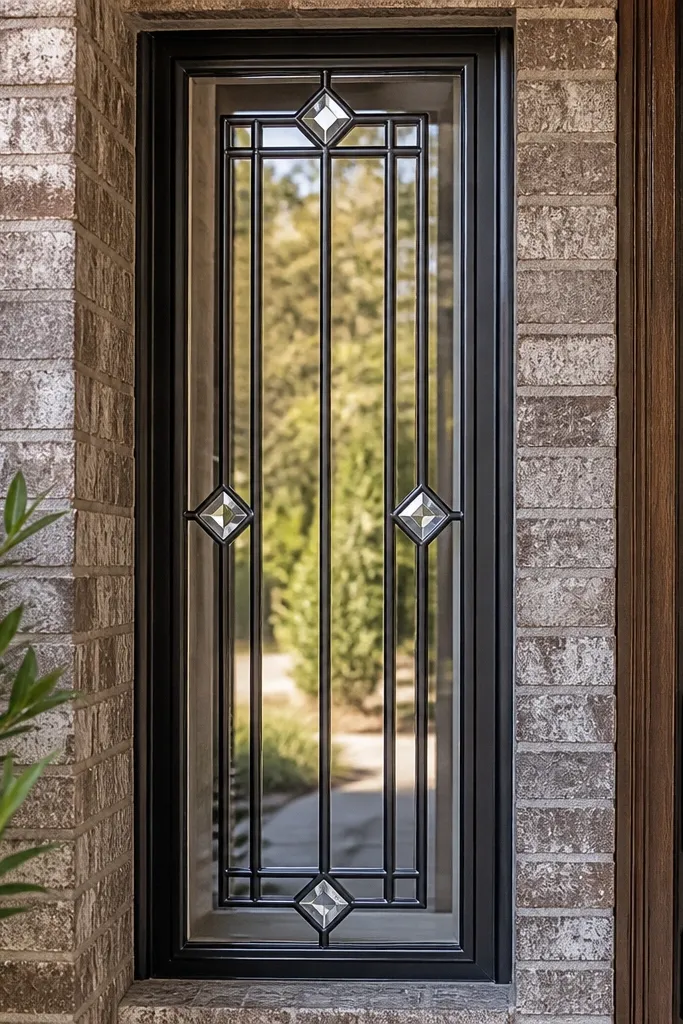
The diamond accent gives the grill a decorative feel without choking the light. The trick is to keep the diamonds as a small framing detail and keep the main bar grid airy. This looks great on entryways because it reads like a design element, not just security bars. It’s beginner-friendly if you use pre-cut diamond-shaped pieces or simple geometry from flat stock. The box border makes the whole piece feel cohesive.
Start with a standard box frame and vertical bars spaced for wide clear openings (4-6 inches). Add diamond accents only in the upper half or as a small central motif by cutting short diagonal sections from flat bar. Weld or fasten the diamonds to the vertical bars at matching intervals so the pattern stays symmetrical. Coat with a single finish system so the diamonds and bars have the same sheen and don’t look patched.
Make one diamond template and repeat it; symmetry is what makes the design look intentional.
Don’t turn the whole grill into dense diamonds; that kills the “extra light” promise fast.
7. Two-Tone Box Frame With Black Verticals
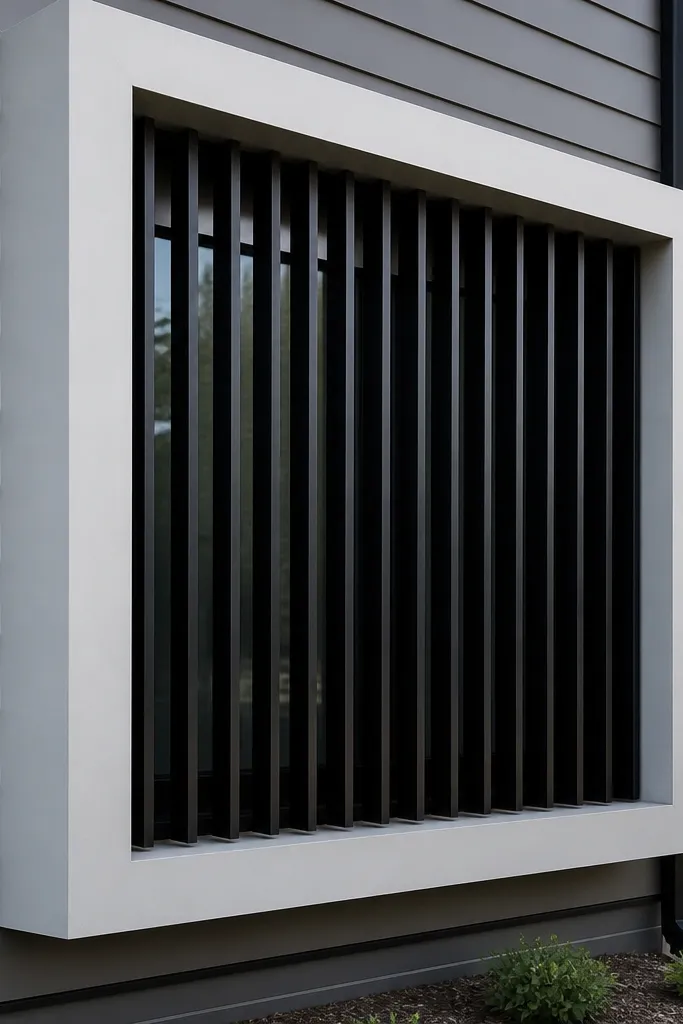
Two-tone grills look modern because they separate the frame from the grid. Keep the box frame a light gray or off-white and use black vertical bars for contrast. This design improves perceived brightness because the light frame reflects daylight softly while the black bars stay crisp. It’s a strong option for modern siding and trim because the grill doesn’t visually “sink” into the wall. Beginners can pull it off by painting in two stages and masking carefully.
Build the box frame and attach vertical bars spaced for clear openings (4-5 inches). Sand and prime everything, then spray the frame color first — off-white or light gray. Mask the frame edges and spray the vertical bars in matte black. After cure time, remove masking and inspect for bleed; touch up any spots with a small foam roller before mounting.
Editor's noteUse painter’s tape with a clean edge and press it down with a plastic card to prevent paint creep.
Skip thisDon’t rush the masking removal; remove tape after the top coat is tacky so edges stay sharp.
8. Matte Charcoal Box Grill With 3-Bar Rhythm
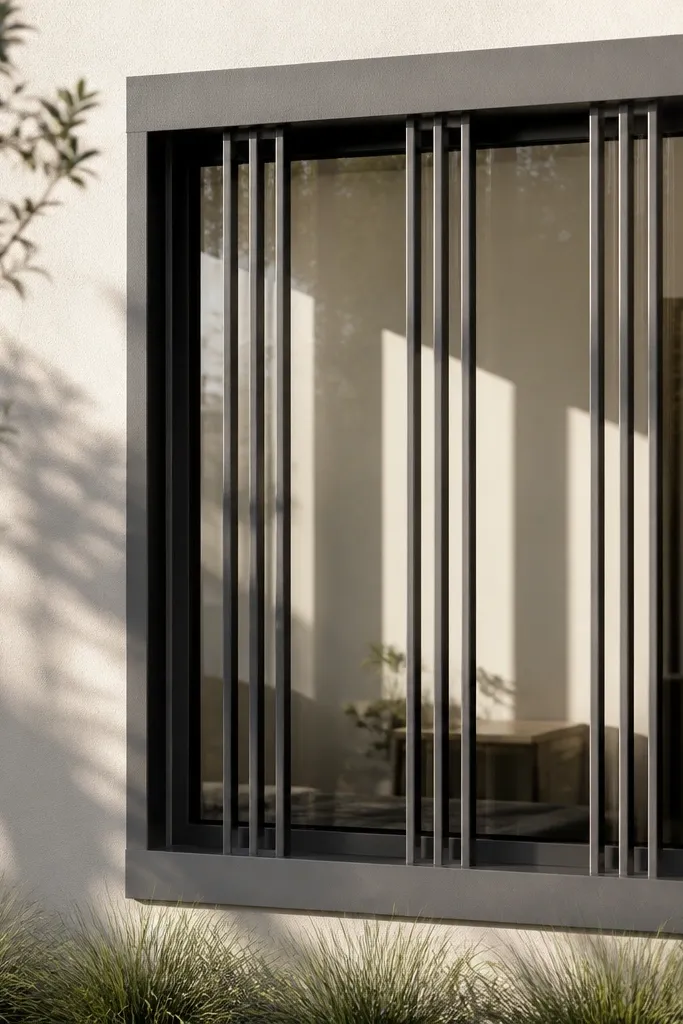
This is a clean, modern pattern that looks designed without needing fancy scrollwork. The “3-bar rhythm” means your visible bars repeat in a way that lines up with how people naturally scan windows from the sidewalk. Extra light comes from the wider gaps between the bars — you’re not filling the space. Matte charcoal hides minor weld marks better than pure black and looks great with warm wood and stone. Beginners like it because you can plan the rhythm before you cut anything.
Decide how many vertical bars you want across the window width, then calculate spacing so clear openings stay between 4 and 6 inches. Build a box frame sized to match the window trim and tack the verticals in at equal distances. Use a jig or a spacer block to keep bar spacing consistent — measure from bar face to bar face. Finish with matte charcoal exterior paint or powder coat, and mount with level shims so the grill reads straight.
Do a quick chalk-outline check on the wall after mounting to confirm the grill doesn’t look tilted from curb distance.
Don’t let the bar faces drift during tacking; once one bar is off, the whole rhythm looks wrong.
9. Slim Bar Box Grill With No Horizontal Bars
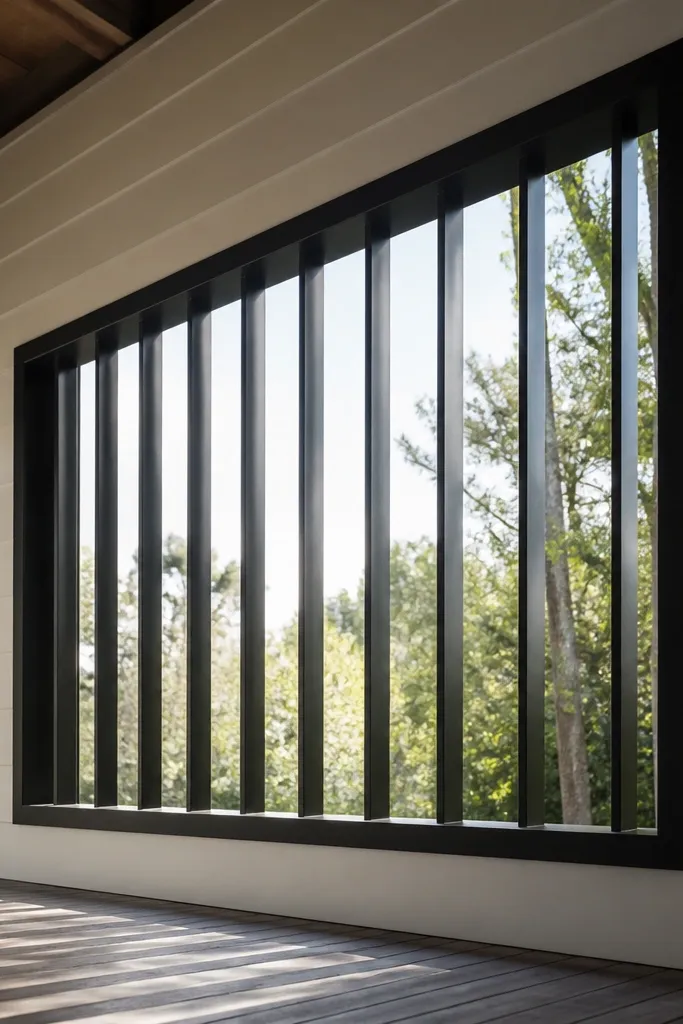
If your top priority is maximum light, remove the extra visual clutter of horizontal bars. A slim-bar box grill keeps daylight moving straight through, and the box frame still gives you a finished look. This design also works with large windows where horizontal bars would feel heavy. It’s beginner-friendly because the build is straightforward: outer frame plus verticals. The look is modern and minimal, which makes it photogenic in bright daylight.
Build the outer box frame first and mount it or clamp it firmly so it stays square. Attach only vertical bars inside the frame, spaced for 4-6 inches clear openings. Keep bar width slim (around 1/4 to 3/8 inch) so the openings feel wide. Prime and coat the whole assembly, then install with exterior anchors through the box frame corners.
Use spacers cut from scrap metal tubing to keep the verticals aligned while you tack.
Don’t skip a solid outer frame; without it, the grill looks like a random rack.
10. Open-View Box Grill With Offset Vertical Bars
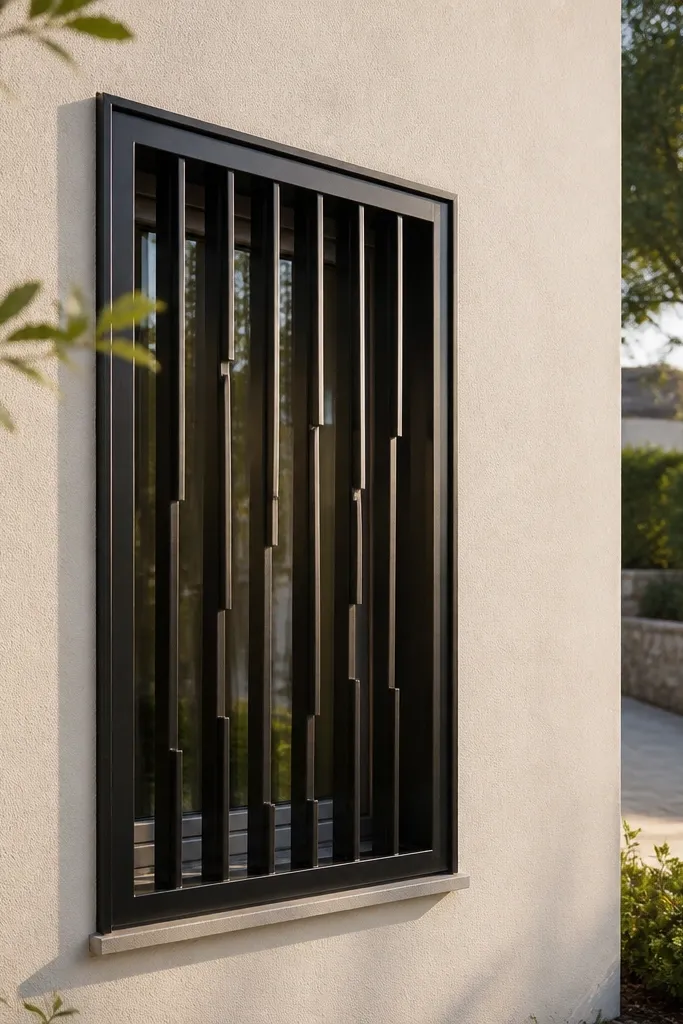
This design keeps the window feeling open by staggering vertical bars in a subtle offset while still staying inside a box frame. The stagger breaks up the straight-line feel that can make grills look dense. You still get extra light because the clear openings are not reduced — they just look more dynamic. It’s photogenic because it catches light at different angles and creates a pattern on the wall. Beginners can do it with careful marking and a spacer jig.
Start with a standard box frame and mark two sets of vertical bar positions: one set for the left half of the grid and another set offset by a small amount (1/2 to 1 inch). Ensure the overall clear openings remain 4 inches or more by recalculating spacing rather than eyeballing. Tack the bars to the frame with the offset pattern consistent from top to bottom. Coat with matte black or matte bronze so the stagger reads as intentional geometry.
Editor's noteMark your bars on painter’s tape on the bench — it keeps offsets from getting confused during tacking.
Skip thisDon’t use big offsets; if the stagger is too dramatic, the grill starts to look irregular.
11. Square-Tube Box Grill With Clean Corner Weld Lines
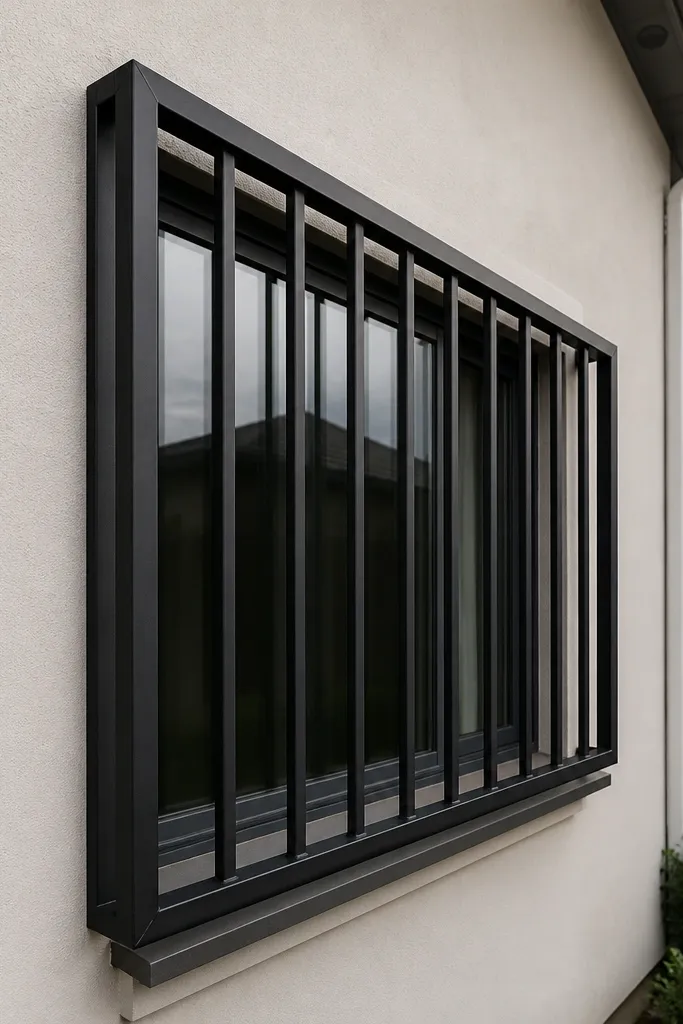
This is the “builder clean” look: square tubing frames the window and the corners read crisp. It’s extra light because the design focuses on strong structure with minimal visual bulk — the bars can stay thin. The square-tube look is also forgiving if your window trim isn’t perfectly even, since the frame hides edge gaps. Beginners can aim for this because the geometry is simple and the welding or fastening points are easy to align. The clean corners make it look custom even when you keep the pattern basic.
Use square tubing for the outer box frame and cut it to match the window border size. Set the frame on a flat surface and clamp the corners so the diagonals match. Add vertical bars inside and weld or mechanically fasten them, keeping spacing consistent (target 4-5 inches clear openings). Grind any sharp edges, then prime and coat with exterior enamel; if you weld, treat the metal properly so rust doesn’t creep under paint.
After grinding, wipe with acetone or a metal cleaner before primer — adhesion matters for long-term color.
Don’t leave grinder marks across the face; they show through paint and make the finish look messy.
12. Arch-Top Box Grill With Vertical Radiating Lines
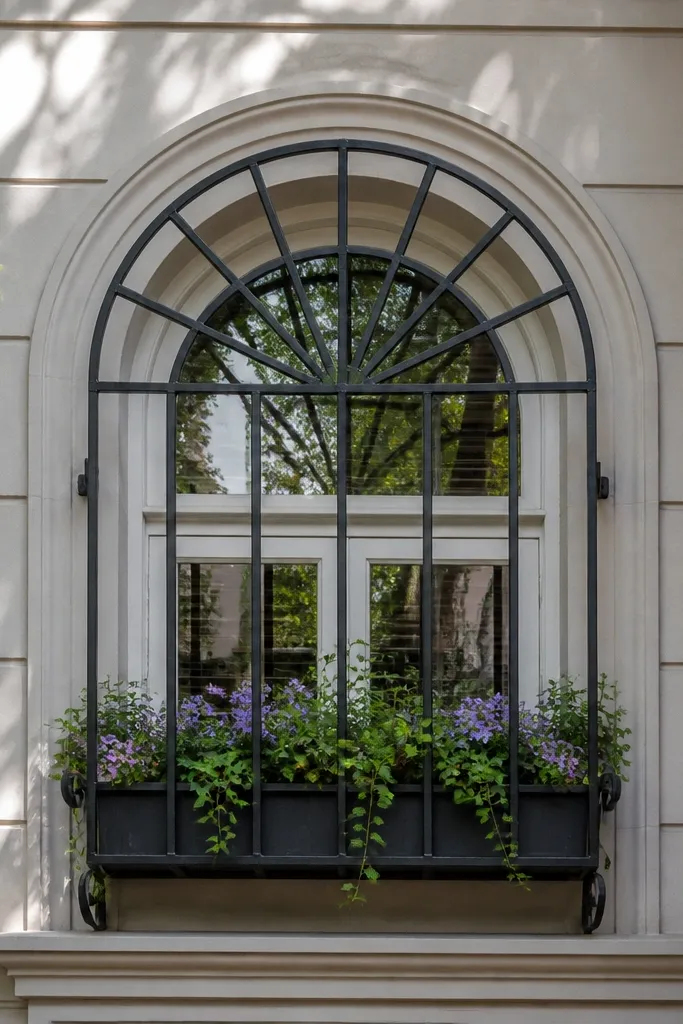
An arch top makes even a basic grill look like it belongs on a real house, and it’s one of the fastest ways to make the design photogenic. Keep the vertical bars spaced wide so daylight still pours through. The arch shape also helps the grill visually “fit” around windows with rounded trim or older home styles. Beginners can do it by cutting the arch frame from metal sheet or using a pre-bent arch frame section. The box border keeps everything neat and symmetrical.
Measure the window width and decide the arch height so it doesn’t block the top light — leave at least 2-3 inches of open space above the highest bar. Build a box base frame and add an arch top rail, then attach vertical bars spaced for 4-6 inches clear openings. Keep the vertical bars aligned from the bottom rail up to the arch so the radiating look stays straight. Prime and coat, and use mounting points that match the wall studs or solid framing.
Editor's noteUse a template for the arch curve so both sides match exactly.
Skip thisDon’t let the arch rail sit too low; it makes the window feel top-heavy and darker.
13. Horizontal-Slat Box Grill With Vertical Safety Frame
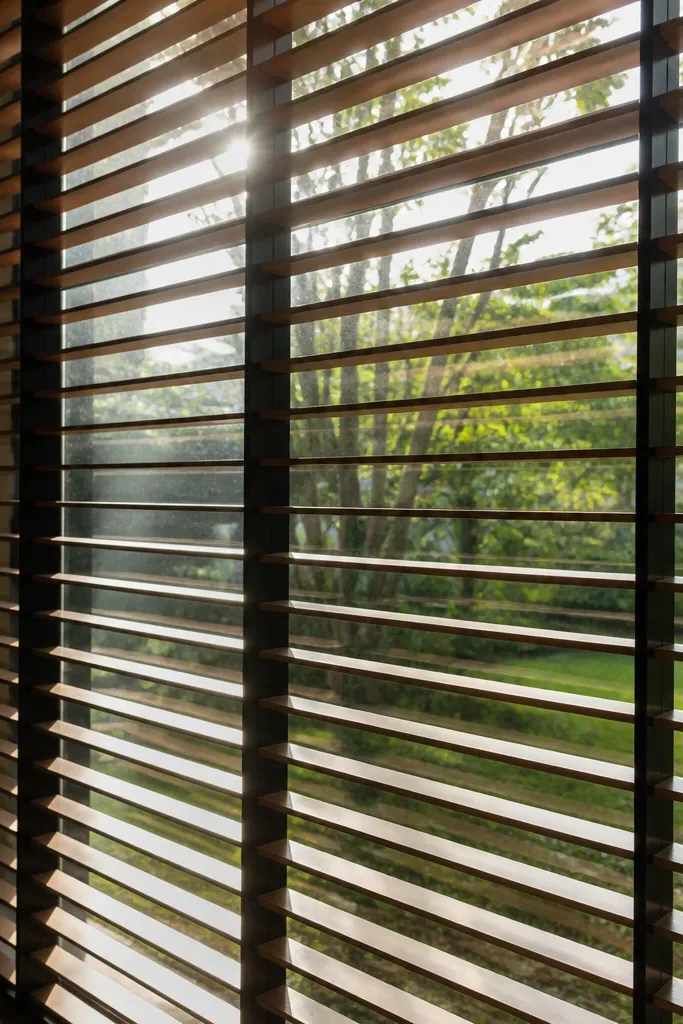
Horizontal slats can look sleek because they create a soft stripe pattern of light and shadow. The box frame gives you the clean border, while the vertical safety frame bars keep the structure stable. For extra light, keep slats thin and spaced so you still get clear view lines through the window. This looks great on patios and modern facades where horizontal accents already exist. Beginners can handle it by building the outer frame first, then adding slats with a spacer.
Build the outer box frame and add a couple of vertical support bars inside if you need extra rigidity. Cut horizontal slats and attach them across the frame, spacing them for clear openings of 3-4 inches. Use a spacer block between slats so the gaps stay uniform from left to right. Prime and coat in matte black or bronze so the slat edges don’t look shiny and cheap.
Editor's noteUse the same spacer for every gap — it’s the difference between “designed” and “wobbly.”
Skip thisDon’t make slats too thick; thick slats reduce light and make the grill look heavy.
14. Corner-Post Box Grill With Center Open Panel
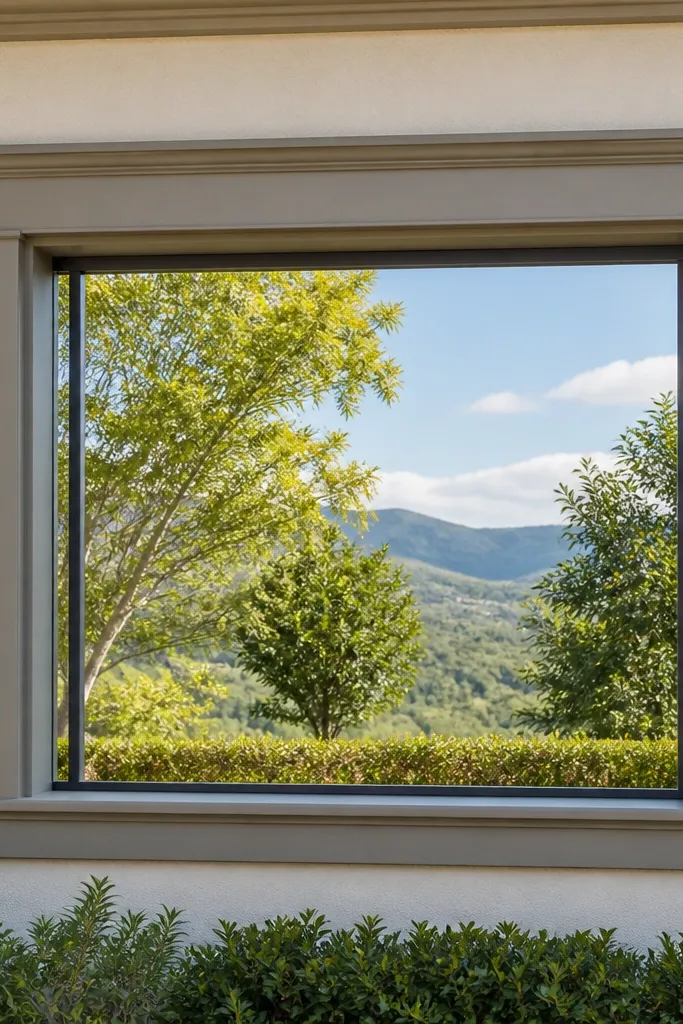
This is the “maximum brightness” approach: fewer bars, more open view. You get a strong box border and corner posts, but the center stays open with minimal interior bars. It looks modern because the structure reads as a frame instead of a cage. This design is great for windows where you want airflow and light first, then security second. Beginners can build it with a simple outer box frame and only a few vertical supports.
Build an outer box frame that matches the window trim and add corner posts at the inner corners. Decide where you’ll place the minimal internal supports — typically two to four vertical posts depending on window width. Leave the center panel open and use diagonal or small internal braces only if you need extra rigidity. Coat the frame and posts, then mount with solid anchors through the frame corners.
If your window is wide, add one vertical brace near the center so the frame doesn’t flex.
Don’t skip braces entirely; a too-minimal frame can bow and look sloppy once installed.
15. Brick-Mold Style Box Grill With Recessed Frame
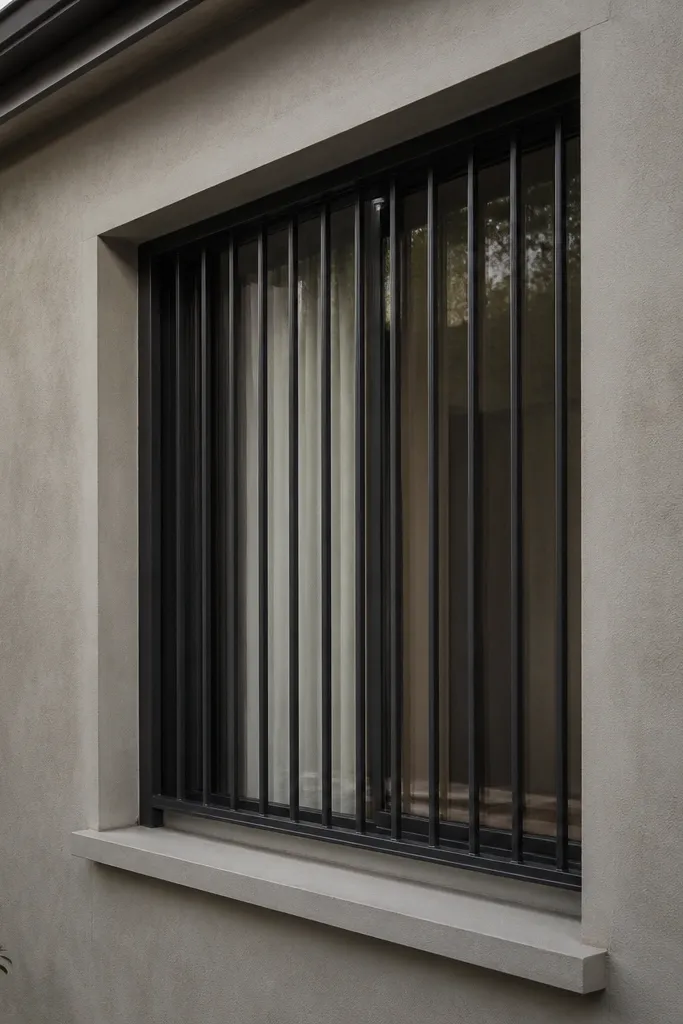
Recessing the box frame makes the grill look like it was installed during construction. This style boosts the “extra light” feeling because the bars sit slightly back, reducing glare and making the window view look cleaner. It also hides surface imperfections around the window trim. Beginners can replicate it by using spacers and a thicker frame profile so the grill sits off the wall plane. The look is architectural and very photogenic in morning light.
Build your box frame and bar grid normally, then plan a recessed mount using spacers or standoffs behind the frame. Attach the grill to the wall through the standoffs so there’s a small gap between the grill and siding/trim. Mark and drill mounting holes through the frame corners and midpoints for stability. Prime and coat the metal, then install so the frame sits evenly recessed on all sides.
Editor's noteUse the same standoff thickness on all four sides so the grill doesn’t read crooked in photos.
Skip thisDon’t recess unevenly; a slight tilt shows immediately because light catches the gap.
16. Crossbar Box Grill With Big Clear Center
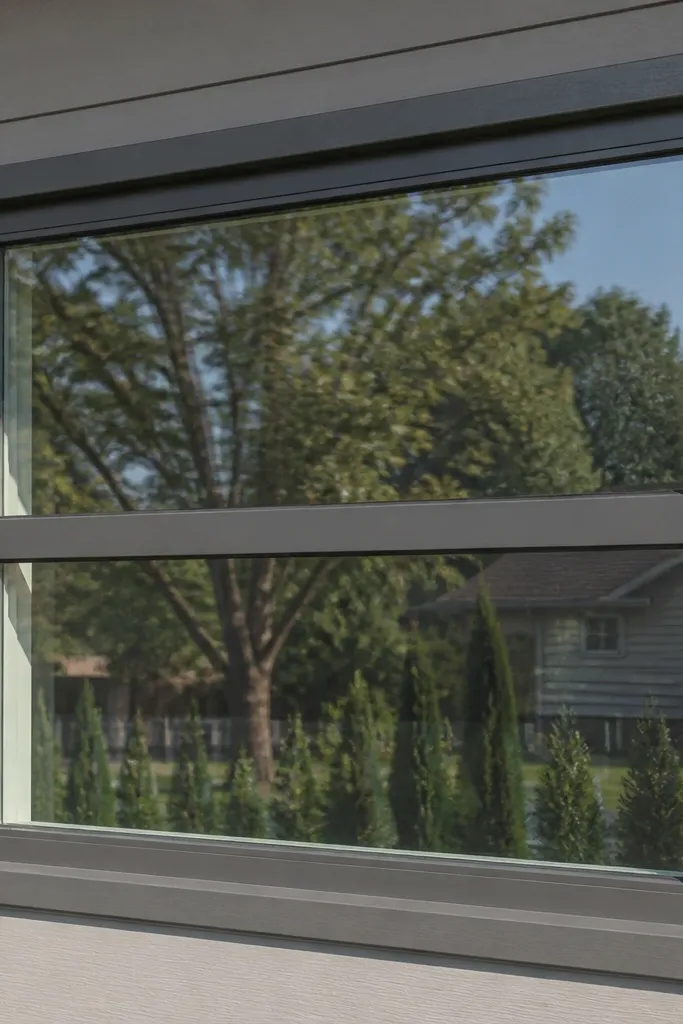
This design uses just enough horizontal structure to create a strong look while keeping the center open for light. One crossbar across the middle (plus top and bottom frame rails) gives you a graphic, modern line that reads well from the curb. The clear center openings stay wide, so the window doesn’t feel blocked. It’s a smart choice for long windows or sidelight panels where you want the grill to look intentional, not busy. Beginners can build this with standard materials and a simple measuring plan.
Build the outer box frame and install vertical bars spaced for 4-6 inches clear openings. Add a single horizontal crossbar at the center height, and make sure it’s centered by measuring from both ends of the frame. Weld or fasten the crossbar so it connects cleanly to the vertical bars or frame. Prime and coat with matte finish to keep the lines crisp and reduce glare.
Use a laser level or a tight measuring tape to place the middle crossbar — center alignment is what makes it look designer.
Don’t add multiple horizontal bars; more bars shrink the clear openings and defeat the “extra light” goal.
17. Vertical Wave Box Grill Using Curved Bar Segments
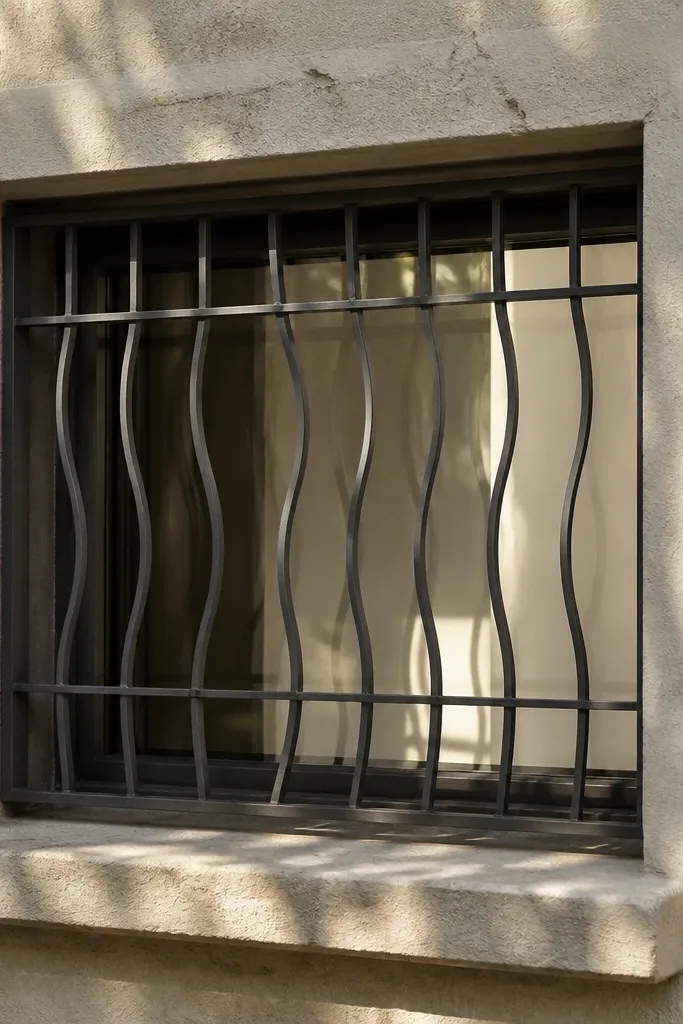
Curved vertical segments add motion to the grid without turning it into heavy decoration. The wave effect breaks up the rigid look of straight bars and creates interesting light patterns on the interior wall. Extra light still comes from keeping the spacing wide and the bars relatively thin. This looks especially good on windows with simple trim because the wave becomes the focal point. Beginners can do this by using pre-shaped curved bar sections or by bending straight stock carefully with a jig.
Start with a square box frame and plan your clear openings at 4-5 inches. For each vertical bar, use short curved segments so the overall grid still fits inside the frame. Clamp each bar segment in place and keep the curvature consistent across the width — a spacer jig helps. Coat with a durable exterior finish; curved bars reveal coating flaws, so apply evenly and inspect before mounting.
Practice bending one bar on scrap and measure the curve before doing the final pieces.
Don’t bend without a jig; uneven curves make the whole grill look handmade-in-a-bad-way.
18. Black Box Frame With Light Gray Inset Grid
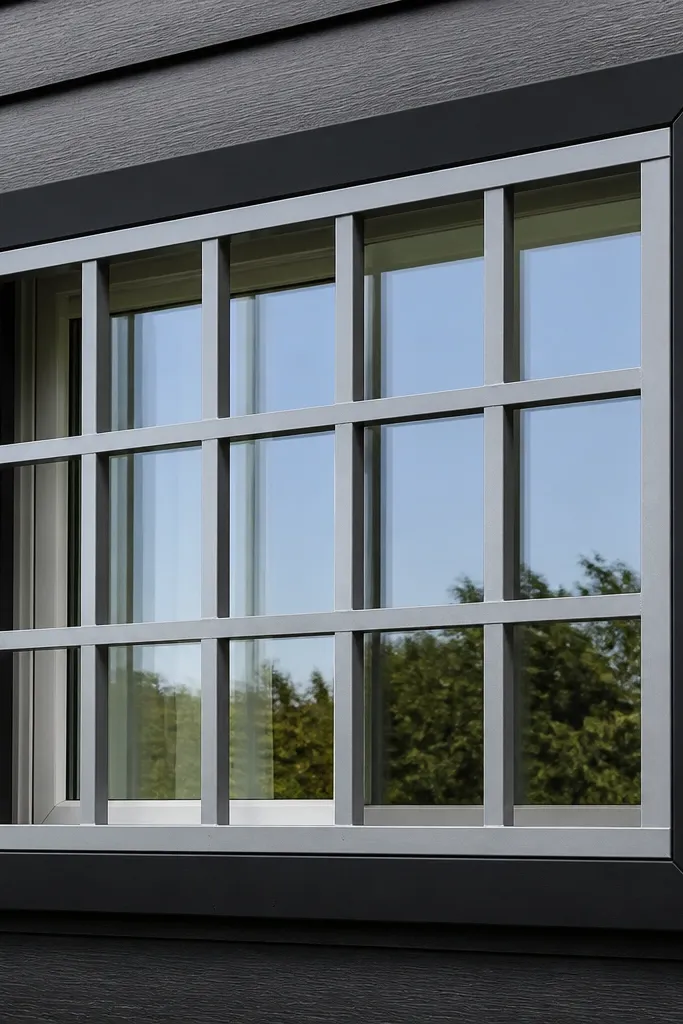
This is a high-contrast look that reads clean in photos and bright daylight. The outer box frame is black, while the inset grid is light gray, so the openings feel brighter even though the bars still block direct view. It’s great for homes with dark siding and light trim because the grill ties the palette together. Beginners can build it with the same basic frame and bar pattern, then paint in two passes. The inset layer gives you depth, which is what makes it look more custom.
Build an outer box frame and then create an inset inner frame that sits a bit behind the front face, leaving a small border thickness. Install vertical bars between the inner frame edges with 4-6 inches clear openings. Mask off the inner grid and spray the light gray color first, then mask again and finish the outer box frame in black matte. After cure, install so the inset border lines up evenly around the window.
Add a small chamfer to the inner frame edges so the inset line looks intentional instead of flat.
Don’t skip masking; two-tone looks sloppy when paint bleeds into the border seam.
19. Bronze Box Grill With 45-Degree Corner Braces
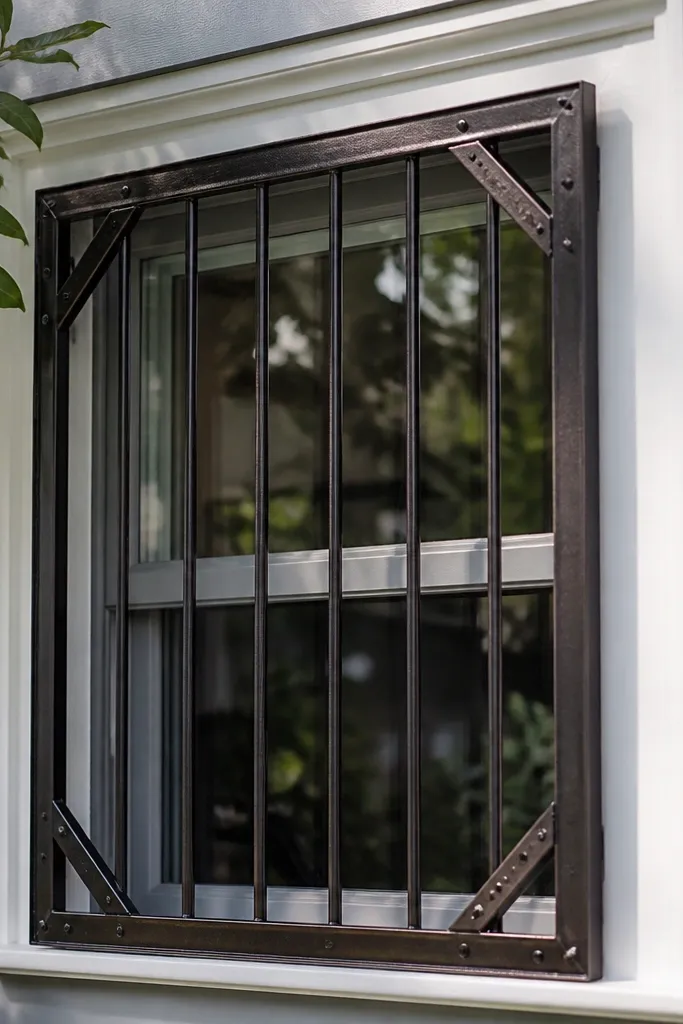
Corner braces make the grill look engineered, not decorative filler. The 45-degree braces add diagonal structure while the vertical bars keep the view open. This design is extra light because the diagonals are limited to corners or small areas, not the whole grid. It’s photogenic because diagonals catch light and create depth. Beginners can handle it with flat bar braces cut to length and welded or fastened at the corners.
Build the outer box frame and set vertical bars with wide clear openings (4-6 inches). Cut flat bar braces for each corner at 45 degrees and attach them between the frame and the nearest vertical bar. Keep the brace length short enough that it doesn’t crowd the center view. Coat everything in bronze exterior paint or epoxy enamel, then mount using anchors that grip the frame firmly.
Dry-fit braces before welding/fastening — corner angles need to match the frame square or they’ll look off.
Don’t place braces in the middle of the panel; it makes the grill feel dense and blocks light.
20. Clearview Box Grill With Side-Frame Only
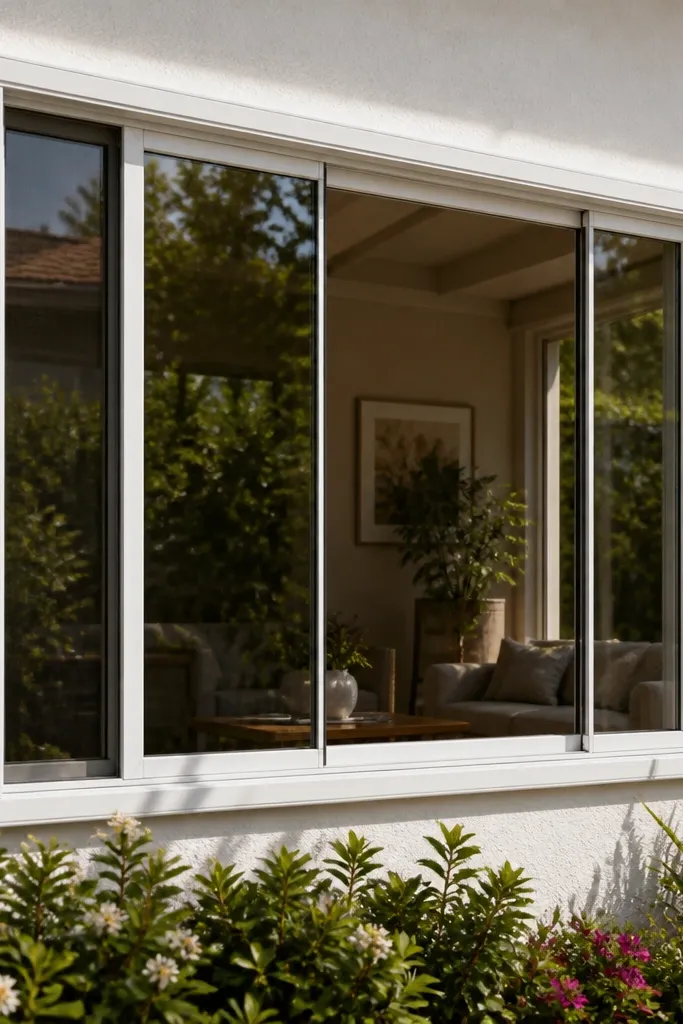
This is the “frame-only” look that still reads as a box window grill design. The side frames and top/bottom rails do the visual framing, while the center stays more open than a normal grid. It’s a good option for windows where you want the light feel first and you’re okay with a slightly lighter interior bar count. Beginners like it because it reduces cutting and welding steps. It’s also very photogenic because it keeps the window view clean and uncluttered.
Build a box frame from square tubing and add side rails that sit inside the opening edges. Use only a few vertical supports — for wide windows, place two supports roughly at one-third and two-thirds positions. Keep the center opening large and consistent by measuring from frame interior edges before cutting vertical supports. Prime and coat, then mount with solid anchors so the frame doesn’t flex.
Editor's noteIf the window is tall, add one vertical support closer to the top half to prevent sag.
Skip thisDon’t remove too many supports; a flimsy frame looks cheap even if it’s bright.
21. Matte Sage Box Grill With Black Bars
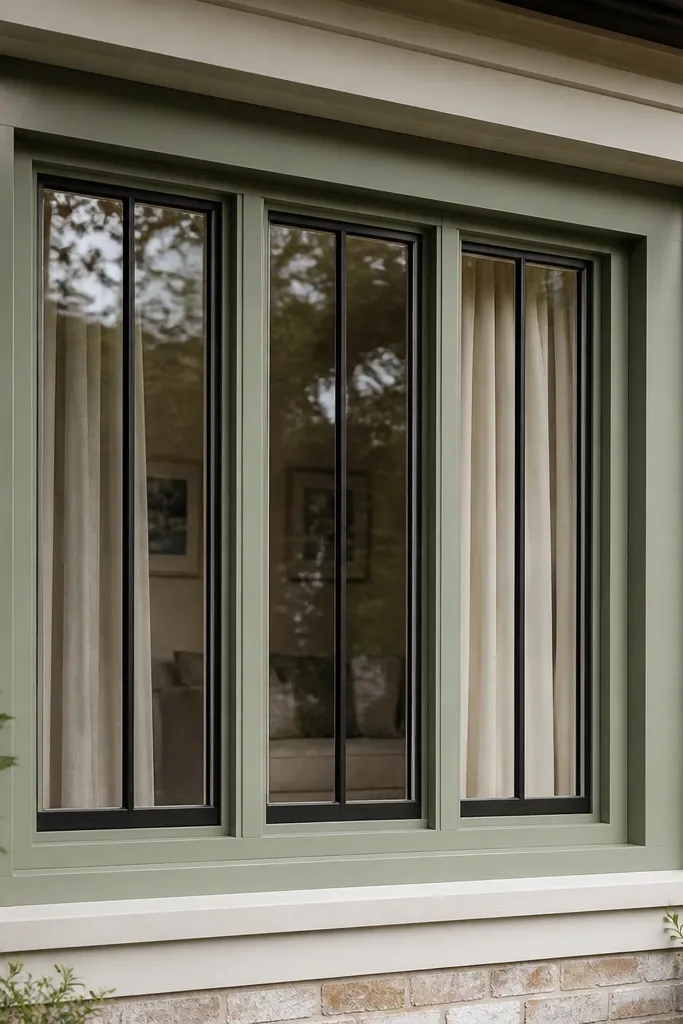
Sage on the box frame makes the grill feel softer than black while still looking modern. Pair it with black bars for contrast so the grid stays crisp and the openings still read open. Extra light comes from the thin bars and wide spacing, while the sage border reflects light without looking glossy. This is a great choice for exterior colors like beige, tan, and light stone. Beginners can nail it by painting the frame a color first and keeping the bars matte black.
Build the outer box frame and attach vertical bars spaced for 4-5 inches clear openings. Sand and prime all metal, then spray the box frame matte sage and allow it to cure. Mask the frame edges and paint the bars matte black in a separate pass. Install with level shims so the border line stays straight across the window trim.
Editor's noteUse matte paint on the sage frame; satin can look shiny and cheap in direct sun.
Skip thisDon’t mix two finishes (satin frame plus matte bars); the mismatch reads messy in daylight.
22. Minimalist Box Grill With One Vertical Accent Column
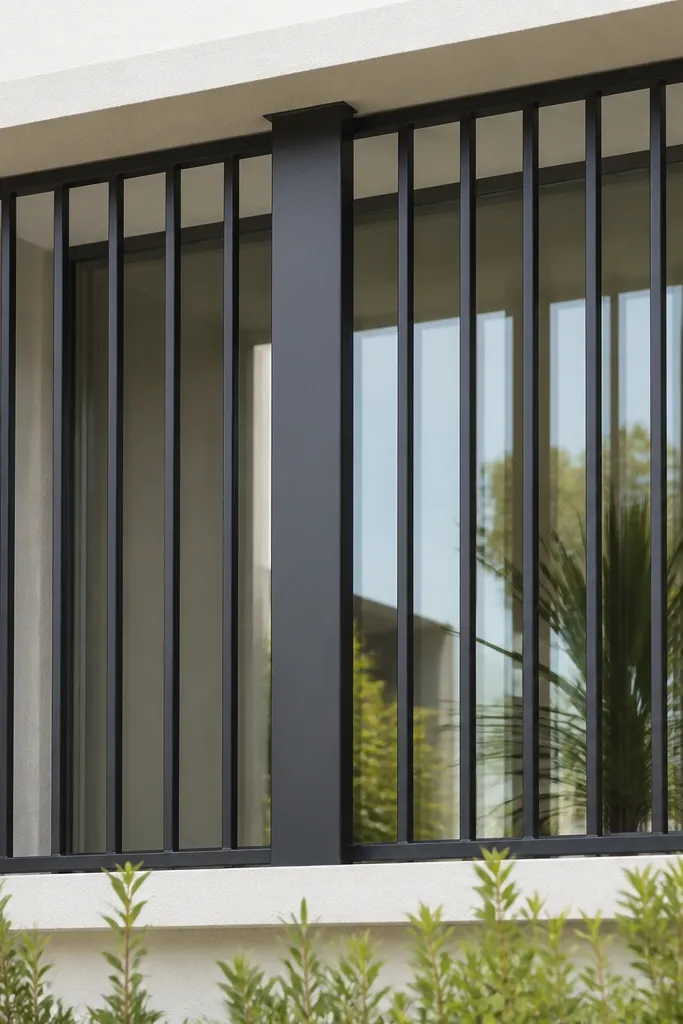
This design is for people who want a grill that looks like “a design,” not a fence. You keep wide clear openings with mostly thin vertical bars, then add one thicker accent column to give the eye a focal point. The box frame makes it feel finished, and the single accent keeps the pattern from becoming boring. Extra light stays high because you’re not adding more bars — you’re changing one bar’s weight. Beginners can build it with a simple measurement plan and a single thicker piece cut to size.
Build the outer box frame and install thin vertical bars spaced for 4-6 inches clear openings. Choose one column position, then replace that bar with a thicker piece sized about 1.5-2x the width of the others. Weld or fasten the thicker accent so it connects flush at the frame edges. Coat everything in matte black or matte bronze for a clean, modern look.
Editor's notePlace the accent column slightly off-center if you want a more natural, designy balance — measure it so it’s intentional.
Skip thisDon’t add multiple thick accents; one column is what keeps it minimal and bright.
23. Box Grill With Side Scroll Corners (No Full Scrolls)
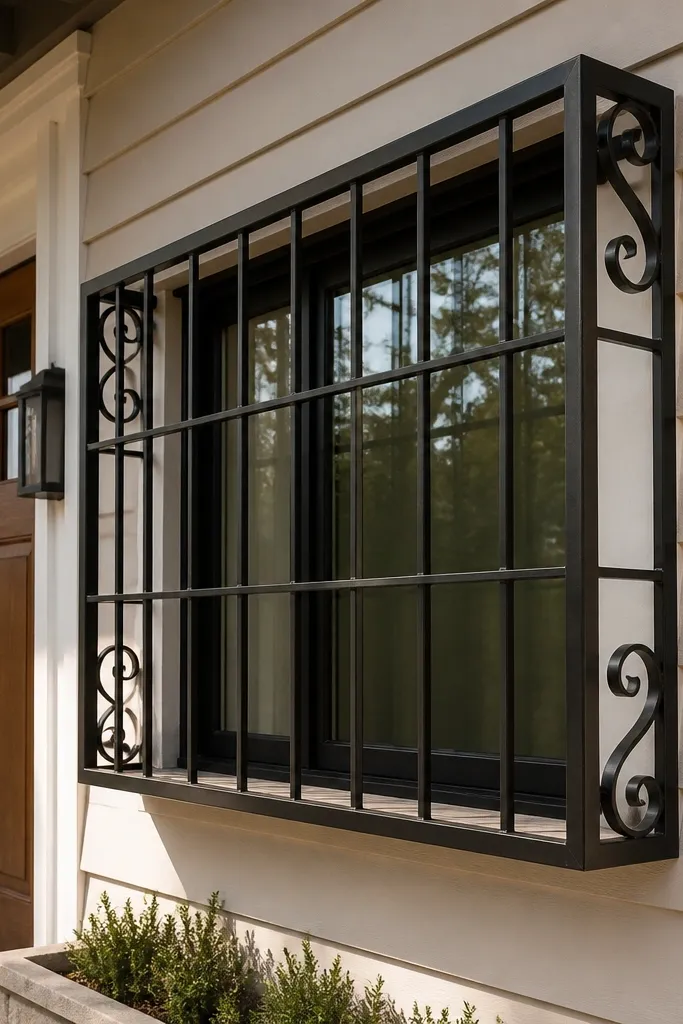
Full scrollwork makes grills look heavy fast, but small scroll corners add character without blocking light. This design keeps the main grid open with wide clear openings, while the corners get a decorative touch. It’s photogenic because the scroll edges catch highlights and frame the window corners. Beginners can do it by using short scroll end pieces or cutting simple curls from flat bar. The outer box frame keeps the whole piece looking aligned and modern.
Build the box frame and install vertical bars spaced for 4-6 inches clear openings. Add scroll corner accents only at the top corners or both top corners and bottom corners, depending on your preference. Attach the scroll pieces to the frame and nearby vertical bars so they don’t float. Prime and coat the entire grill; scrolls show uneven coating, so apply evenly and inspect after the first coat.
Editor's noteUse scroll end pieces with matching thickness to your bars so the decorative parts don’t look pasted on.
Skip thisDon’t wrap scrolls around the whole window; that reduces light and makes the grill feel bulky.
24. Reeded Texture Box Frame With Clean Vertical Grid
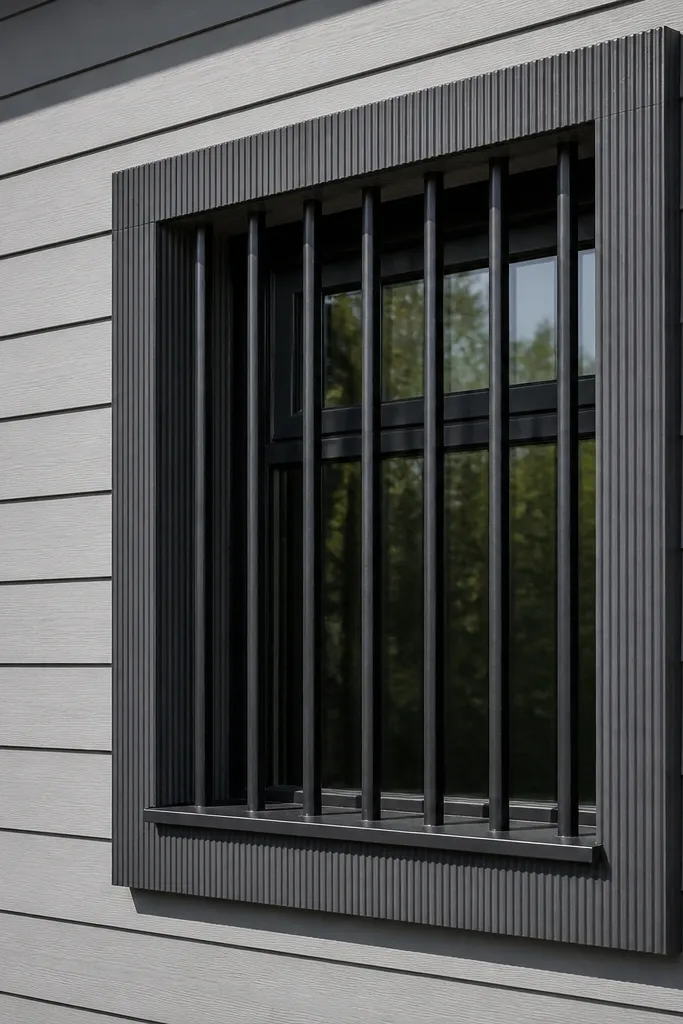
Texture on the frame makes the grill look high-end even if the interior grid stays simple. A reeded box frame adds subtle shadow lines that show up in photos and in real daylight. The vertical bar grid stays spaced for extra light, so the window doesn’t get darker. This design suits modern and traditional homes because the texture reads as craftsmanship. Beginners can build it by using textured metal channel or adding reeded trim strips to the box frame edges.
Build your interior grid first: outer box frame plus vertical bars spaced for 4-5 inches clear openings. For the reeded look, attach reeded metal trim strips or textured frame inserts to the front face of the box frame. Clamp and align the textured pieces so the reeding runs straight and doesn’t wobble at corners. Prime and coat all surfaces together so texture and smooth bars share the same finish color and sheen.
Seal textured inserts carefully; rough surfaces trap moisture and can cause paint failure if you don’t prep well.
Don’t use texture on the bars themselves; it makes cleaning harder and makes the grill look cluttered.
25. Checker Shadow Box Grill With Alternating Bar Widths
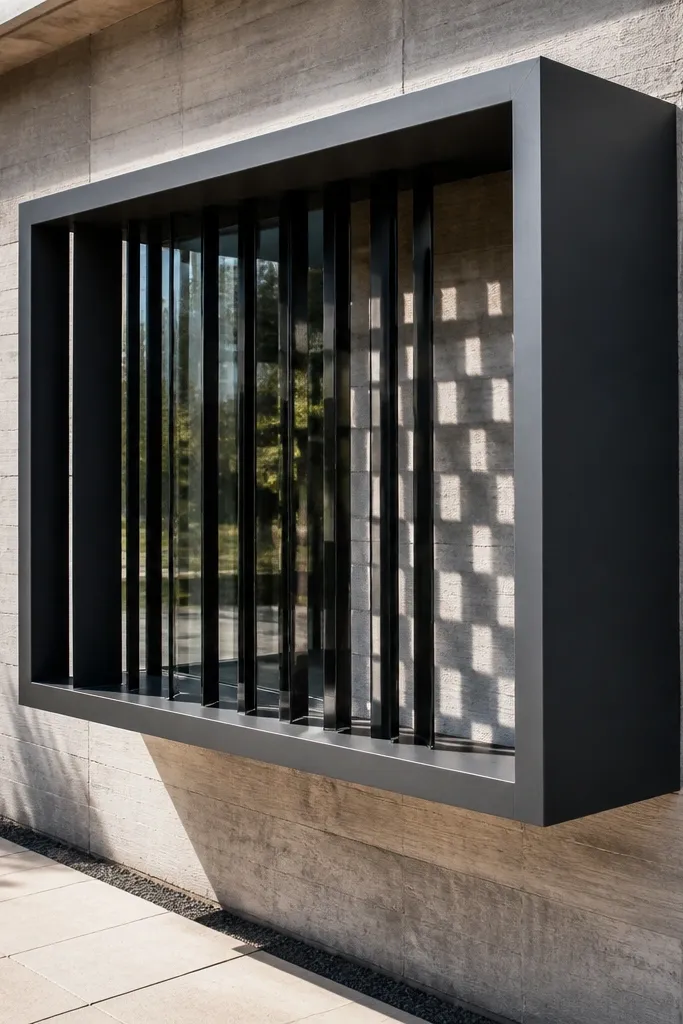
Alternating bar widths create a “checker” rhythm that looks designed and creates interesting shadow patterns. You get extra light because the gaps remain wide — the pattern comes from thickness variation, not from adding more bars. This design looks especially good in bright sun because the thick bars cast deeper shadows. It’s beginner-friendly as long as you measure thickness and spacing carefully before cutting. The box frame keeps everything aligned so it doesn’t read random.
Choose two bar widths: for example, thin bars at 1/4 to 3/8 inch and thick bars at 1/2 to 5/8 inch. Keep clear openings consistent at 4-5 inches by calculating spacing based on bar faces, not center points. Install bars in an alternating sequence across the width, then tack and verify square alignment. Coat with matte black so the shadow contrast stays crisp and doesn’t glare.
Label your cut bars as thin or thick before you start assembly so you don’t flip the pattern halfway through.
Don’t let clear gaps vary; the checker effect depends on uniform openings, not random spacing.



